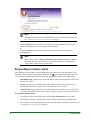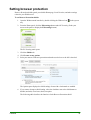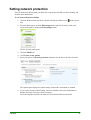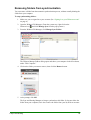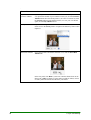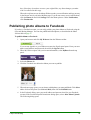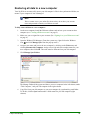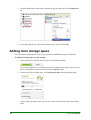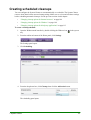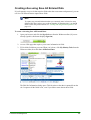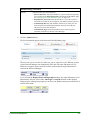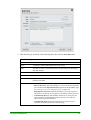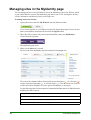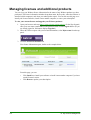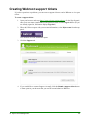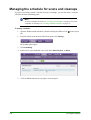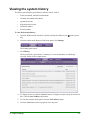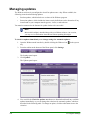
1
Internet Security Complete
2011
User Guide
Webroot Software, Inc.
PO Box 19816
Boulder, CO 80308
www.webroot.com
Version 7.0.9
Webroot Internet Security Complete User Guide
Version 7.0.9; March 31, 2011
© 2003 – 2011 Webroot Software, Inc. All rights reserved. Webroot, Spy Sweeper, Webroot AntiVirus with
AntiSpyware, and the Webroot and Spy Sweeper icons are trademarks or registered trademarks of Webroot Software,
Inc.
Included antivirus software © 2000 – 2011 Sophos Group. All rights reserved. Sophos and Sophos Anti-Virus are
registered trademarks of Sophos Plc and Sophos Group.
All other product and company names mentioned may be trademarks or registered trademarks of their respective
owners.
Contents
1: Getting Started . . . . . . . . . . . . . . . . . . . . . . . . . . . . . . . . . . . . . . . . . . . . . . . . . . . . .1
Creating a Webroot account. . . . . . . . . . . . . . . . . . . . . . . . . . . . . . . . . . . . . . . . . . . . . . . . . . . . . . . . . .2
Signing in to your Webroot account . . . . . . . . . . . . . . . . . . . . . . . . . . . . . . . . . . . . . . . . . . . . . . . . . . . .4
Using the main interface. . . . . . . . . . . . . . . . . . . . . . . . . . . . . . . . . . . . . . . . . . . . . . . . . . . . . . . . . . . . .5
Using the Webroot system tray menu . . . . . . . . . . . . . . . . . . . . . . . . . . . . . . . . . . . . . . . . . . . . . . . . . .7
Viewing protection status . . . . . . . . . . . . . . . . . . . . . . . . . . . . . . . . . . . . . . . . . . . . . . . . . . . . . . . . . . .8
Responding to alerts . . . . . . . . . . . . . . . . . . . . . . . . . . . . . . . . . . . . . . . . . . . . . . . . . . . . . . . . . . . . . . .9
Responding to pop-up alerts . . . . . . . . . . . . . . . . . . . . . . . . . . . . . . . . . . . . . . . . . . . . . . . . . . . . . .9
Responding to balloon alerts . . . . . . . . . . . . . . . . . . . . . . . . . . . . . . . . . . . . . . . . . . . . . . . . . . . . .10
Responding to notifications . . . . . . . . . . . . . . . . . . . . . . . . . . . . . . . . . . . . . . . . . . . . . . . . . . . . . . . . .11
Using My Webroot . . . . . . . . . . . . . . . . . . . . . . . . . . . . . . . . . . . . . . . . . . . . . . . . . . . . . . . . . . . . . . . .12
Using the Webroot toolbar in your browser . . . . . . . . . . . . . . . . . . . . . . . . . . . . . . . . . . . . . . . . . . . . .14
2: Security Scans . . . . . . . . . . . . . . . . . . . . . . . . . . . . . . . . . . . . . . . . . . . . . . . . . . . .15
Scanning for threats . . . . . . . . . . . . . . . . . . . . . . . . . . . . . . . . . . . . . . . . . . . . . . . . . . . . . . . . . . . . . . .16
Viewing scan details. . . . . . . . . . . . . . . . . . . . . . . . . . . . . . . . . . . . . . . . . . . . . . . . . . . . . . . . . . . . . . .18
Customizing scan options . . . . . . . . . . . . . . . . . . . . . . . . . . . . . . . . . . . . . . . . . . . . . . . . . . . . . . . . . .21
Creating a scan schedule. . . . . . . . . . . . . . . . . . . . . . . . . . . . . . . . . . . . . . . . . . . . . . . . . . . . . . . . . . .23
3: Quarantine . . . . . . . . . . . . . . . . . . . . . . . . . . . . . . . . . . . . . . . . . . . . . . . . . . . . . . . .25
Viewing quarantined items . . . . . . . . . . . . . . . . . . . . . . . . . . . . . . . . . . . . . . . . . . . . . . . . . . . . . . . . . .26
Deleting quarantined items. . . . . . . . . . . . . . . . . . . . . . . . . . . . . . . . . . . . . . . . . . . . . . . . . . . . . . . . . .27
Restoring quarantined items . . . . . . . . . . . . . . . . . . . . . . . . . . . . . . . . . . . . . . . . . . . . . . . . . . . . . . . .28
4: Shields . . . . . . . . . . . . . . . . . . . . . . . . . . . . . . . . . . . . . . . . . . . . . . . . . . . . . . . . . . .31
Setting real-time active protection . . . . . . . . . . . . . . . . . . . . . . . . . . . . . . . . . . . . . . . . . . . . . . . . . . . .32
Setting browser protection . . . . . . . . . . . . . . . . . . . . . . . . . . . . . . . . . . . . . . . . . . . . . . . . . . . . . . . . . .35
Setting network protection . . . . . . . . . . . . . . . . . . . . . . . . . . . . . . . . . . . . . . . . . . . . . . . . . . . . . . . . . .37
5: Firewall. . . . . . . . . . . . . . . . . . . . . . . . . . . . . . . . . . . . . . . . . . . . . . . . . . . . . . . . . . .41
Enabling or disabling firewall filtering . . . . . . . . . . . . . . . . . . . . . . . . . . . . . . . . . . . . . . . . . . . . . . . . . .42
Adjusting security levels . . . . . . . . . . . . . . . . . . . . . . . . . . . . . . . . . . . . . . . . . . . . . . . . . . . . . . . . . . . .43
Adjusting network security settings . . . . . . . . . . . . . . . . . . . . . . . . . . . . . . . . . . . . . . . . . . . . . . . .43
Creating a trusted and untrusted global sites list . . . . . . . . . . . . . . . . . . . . . . . . . . . . . . . . . . . . . .47
Monitoring the processes for applications . . . . . . . . . . . . . . . . . . . . . . . . . . . . . . . . . . . . . . . . . . . . . .49
Managing application traffic . . . . . . . . . . . . . . . . . . . . . . . . . . . . . . . . . . . . . . . . . . . . . . . . . . . . . . . . .50
Managing firewall alert notifications . . . . . . . . . . . . . . . . . . . . . . . . . . . . . . . . . . . . . . . . . . . . . . . . . . .53
6: Sync and Sharing . . . . . . . . . . . . . . . . . . . . . . . . . . . . . . . . . . . . . . . . . . . . . . . . . .57
Creating a data protection plan . . . . . . . . . . . . . . . . . . . . . . . . . . . . . . . . . . . . . . . . . . . . . . . . . . . . . .58
Decide what files to protect . . . . . . . . . . . . . . . . . . . . . . . . . . . . . . . . . . . . . . . . . . . . . . . . . . . . . .58
Locate and organize important files . . . . . . . . . . . . . . . . . . . . . . . . . . . . . . . . . . . . . . . . . . . . . . . .58
Setting up synchronized folders . . . . . . . . . . . . . . . . . . . . . . . . . . . . . . . . . . . . . . . . . . . . . . . . . . . . . .60
Configuring synchronized folders (first-time setup) . . . . . . . . . . . . . . . . . . . . . . . . . . . . . . . . . . . .60
Adding synchronized folders . . . . . . . . . . . . . . . . . . . . . . . . . . . . . . . . . . . . . . . . . . . . . . . . . . . . .63
Removing folders from synchronization. . . . . . . . . . . . . . . . . . . . . . . . . . . . . . . . . . . . . . . . . . . . .65
Contents
iii
Synchronizing data on multiple computers. . . . . . . . . . . . . . . . . . . . . . . . . . . . . . . . . . . . . . . . . . . . . .66
Synchronizing data between two computers . . . . . . . . . . . . . . . . . . . . . . . . . . . . . . . . . . . . . . . . .66
Synchronizing data between three or more computers . . . . . . . . . . . . . . . . . . . . . . . . . . . . . . . . .70
Using the Magic Briefcase . . . . . . . . . . . . . . . . . . . . . . . . . . . . . . . . . . . . . . . . . . . . . . . . . . . . . . . . . .71
Using the Webroot File Manager . . . . . . . . . . . . . . . . . . . . . . . . . . . . . . . . . . . . . . . . . . . . . . . . . . . . .72
Menus . . . . . . . . . . . . . . . . . . . . . . . . . . . . . . . . . . . . . . . . . . . . . . . . . . . . . . . . . . . . . . . . . . . . . .74
Toolbar. . . . . . . . . . . . . . . . . . . . . . . . . . . . . . . . . . . . . . . . . . . . . . . . . . . . . . . . . . . . . . . . . . . . . .74
Left panel (folder tree) . . . . . . . . . . . . . . . . . . . . . . . . . . . . . . . . . . . . . . . . . . . . . . . . . . . . . . . . . .74
Middle panel . . . . . . . . . . . . . . . . . . . . . . . . . . . . . . . . . . . . . . . . . . . . . . . . . . . . . . . . . . . . . . . . .75
Status bar (bottom taskbar) . . . . . . . . . . . . . . . . . . . . . . . . . . . . . . . . . . . . . . . . . . . . . . . . . . . . . .75
Commands . . . . . . . . . . . . . . . . . . . . . . . . . . . . . . . . . . . . . . . . . . . . . . . . . . . . . . . . . . . . . . . . . .76
Copying files to the Web Archive . . . . . . . . . . . . . . . . . . . . . . . . . . . . . . . . . . . . . . . . . . . . . . . . . . . . .79
Managing files in the MyData page . . . . . . . . . . . . . . . . . . . . . . . . . . . . . . . . . . . . . . . . . . . . . . . . . . .80
My Folders and Files . . . . . . . . . . . . . . . . . . . . . . . . . . . . . . . . . . . . . . . . . . . . . . . . . . . . . . . . . . .81
Recent Events . . . . . . . . . . . . . . . . . . . . . . . . . . . . . . . . . . . . . . . . . . . . . . . . . . . . . . . . . . . . . . . .83
Photos . . . . . . . . . . . . . . . . . . . . . . . . . . . . . . . . . . . . . . . . . . . . . . . . . . . . . . . . . . . . . . . . . . . . . .83
Accessing files remotely. . . . . . . . . . . . . . . . . . . . . . . . . . . . . . . . . . . . . . . . . . . . . . . . . . . . . . . . . . . .84
Downloading files. . . . . . . . . . . . . . . . . . . . . . . . . . . . . . . . . . . . . . . . . . . . . . . . . . . . . . . . . . . . . .85
Downloading photo albums . . . . . . . . . . . . . . . . . . . . . . . . . . . . . . . . . . . . . . . . . . . . . . . . . . . . . .86
Editing files remotely . . . . . . . . . . . . . . . . . . . . . . . . . . . . . . . . . . . . . . . . . . . . . . . . . . . . . . . . . . .87
Managing photo albums . . . . . . . . . . . . . . . . . . . . . . . . . . . . . . . . . . . . . . . . . . . . . . . . . . . . . . . . . . . .89
Sharing photo albums with others . . . . . . . . . . . . . . . . . . . . . . . . . . . . . . . . . . . . . . . . . . . . . . . . . . . .93
Publishing photo albums to Facebook . . . . . . . . . . . . . . . . . . . . . . . . . . . . . . . . . . . . . . . . . . . . . . . . .95
Sending files to others . . . . . . . . . . . . . . . . . . . . . . . . . . . . . . . . . . . . . . . . . . . . . . . . . . . . . . . . . . . . .96
Restoring data . . . . . . . . . . . . . . . . . . . . . . . . . . . . . . . . . . . . . . . . . . . . . . . . . . . . . . . . . . . . . . . . . . .98
Restoring all data to a new computer . . . . . . . . . . . . . . . . . . . . . . . . . . . . . . . . . . . . . . . . . . . . . .99
Retrieving an older version of a file . . . . . . . . . . . . . . . . . . . . . . . . . . . . . . . . . . . . . . . . . . . . . . .102
Retrieving a file or folder you accidentally deleted . . . . . . . . . . . . . . . . . . . . . . . . . . . . . . . . . . .103
Restoring files from the Web Archive . . . . . . . . . . . . . . . . . . . . . . . . . . . . . . . . . . . . . . . . . . . . .103
Adding more storage space . . . . . . . . . . . . . . . . . . . . . . . . . . . . . . . . . . . . . . . . . . . . . . . . . . . . . . . .104
7: System Cleaner . . . . . . . . . . . . . . . . . . . . . . . . . . . . . . . . . . . . . . . . . . . . . . . . . . .105
Changing cleanup options for Internet browsers . . . . . . . . . . . . . . . . . . . . . . . . . . . . . . . . . . . . . . . .106
Changing cleanup options for Windows . . . . . . . . . . . . . . . . . . . . . . . . . . . . . . . . . . . . . . . . . . . . . . .109
Changing cleanup options for third-party applications . . . . . . . . . . . . . . . . . . . . . . . . . . . . . . . . . . . .113
Making deleted items unrecoverable . . . . . . . . . . . . . . . . . . . . . . . . . . . . . . . . . . . . . . . . . . . . . . . . .114
Running an on-demand cleanup . . . . . . . . . . . . . . . . . . . . . . . . . . . . . . . . . . . . . . . . . . . . . . . . . . . .116
Creating scheduled cleanups . . . . . . . . . . . . . . . . . . . . . . . . . . . . . . . . . . . . . . . . . . . . . . . . . . . . . . .117
8: Password Management . . . . . . . . . . . . . . . . . . . . . . . . . . . . . . . . . . . . . . . . . . . .119
Creating sites for password management . . . . . . . . . . . . . . . . . . . . . . . . . . . . . . . . . . . . . . . . . . . . .120
Creating sites from your browser . . . . . . . . . . . . . . . . . . . . . . . . . . . . . . . . . . . . . . . . . . . . . . . . .120
Creating sites using Save All Entered Data . . . . . . . . . . . . . . . . . . . . . . . . . . . . . . . . . . . . . . . . .123
Creating sites from My Webroot . . . . . . . . . . . . . . . . . . . . . . . . . . . . . . . . . . . . . . . . . . . . . . . . .125
Defining multiple logins for a single Web site . . . . . . . . . . . . . . . . . . . . . . . . . . . . . . . . . . . . . . .128
Updating sites . . . . . . . . . . . . . . . . . . . . . . . . . . . . . . . . . . . . . . . . . . . . . . . . . . . . . . . . . . . . . . .128
Using password management . . . . . . . . . . . . . . . . . . . . . . . . . . . . . . . . . . . . . . . . . . . . . . . . . . . . . .132
Logging in to a site. . . . . . . . . . . . . . . . . . . . . . . . . . . . . . . . . . . . . . . . . . . . . . . . . . . . . . . . . . . .132
Logging in to a Web page with multiple site definitions . . . . . . . . . . . . . . . . . . . . . . . . . . . . . . . .133
Creating and using Form Fill profiles . . . . . . . . . . . . . . . . . . . . . . . . . . . . . . . . . . . . . . . . . . . . . . . . .134
Creating profiles from your browser. . . . . . . . . . . . . . . . . . . . . . . . . . . . . . . . . . . . . . . . . . . . . . .134
Creating profiles from My Webroot . . . . . . . . . . . . . . . . . . . . . . . . . . . . . . . . . . . . . . . . . . . . . . .136
Using Form Fill profiles . . . . . . . . . . . . . . . . . . . . . . . . . . . . . . . . . . . . . . . . . . . . . . . . . . . . . . . .138
Updating Form Fill profiles . . . . . . . . . . . . . . . . . . . . . . . . . . . . . . . . . . . . . . . . . . . . . . . . . . . . . .139
Generating a secure password . . . . . . . . . . . . . . . . . . . . . . . . . . . . . . . . . . . . . . . . . . . . . . . . . . . . .140
iv
Contents
Importing passwords from other applications. . . . . . . . . . . . . . . . . . . . . . . . . . . . . . . . . . . . . . . . . . .142
Importing passwords using My Webroot . . . . . . . . . . . . . . . . . . . . . . . . . . . . . . . . . . . . . . . . . . .142
Importing passwords using the Webroot toolbar . . . . . . . . . . . . . . . . . . . . . . . . . . . . . . . . . . . . .143
Managing sites in the MyIdentity page . . . . . . . . . . . . . . . . . . . . . . . . . . . . . . . . . . . . . . . . . . . . . . . .144
Setting Password Manager preferences . . . . . . . . . . . . . . . . . . . . . . . . . . . . . . . . . . . . . . . . . . . . . .146
Creating Bookmarklets . . . . . . . . . . . . . . . . . . . . . . . . . . . . . . . . . . . . . . . . . . . . . . . . . . . . . . . . . . . .148
Exporting user names and passwords . . . . . . . . . . . . . . . . . . . . . . . . . . . . . . . . . . . . . . . . . . . . . . . .150
Exporting data by using My Webroot . . . . . . . . . . . . . . . . . . . . . . . . . . . . . . . . . . . . . . . . . . . . . .150
Exporting data by using the Webroot toolbar. . . . . . . . . . . . . . . . . . . . . . . . . . . . . . . . . . . . . . . .151
9: Secure Browsing. . . . . . . . . . . . . . . . . . . . . . . . . . . . . . . . . . . . . . . . . . . . . . . . . .153
Enabling or disabling secure browsing. . . . . . . . . . . . . . . . . . . . . . . . . . . . . . . . . . . . . . . . . . . . . . . .154
Using the Secure Browsing Manager. . . . . . . . . . . . . . . . . . . . . . . . . . . . . . . . . . . . . . . . . . . . . . . . .155
Using the Secure Browsing Manager while surfing . . . . . . . . . . . . . . . . . . . . . . . . . . . . . . . . . . .155
Using the Secure Browsing Manager while searching . . . . . . . . . . . . . . . . . . . . . . . . . . . . . . . .156
10:Anti-Spam Protection . . . . . . . . . . . . . . . . . . . . . . . . . . . . . . . . . . . . . . . . . . . . . .159
Enabling or disabling anti-spam protection . . . . . . . . . . . . . . . . . . . . . . . . . . . . . . . . . . . . . . . . . . . .160
Approving or blocking email messages . . . . . . . . . . . . . . . . . . . . . . . . . . . . . . . . . . . . . . . . . . . . . . .162
Viewing spam-blocking statistics . . . . . . . . . . . . . . . . . . . . . . . . . . . . . . . . . . . . . . . . . . . . . . . . . . . .163
11:Anti-Phishing Protection . . . . . . . . . . . . . . . . . . . . . . . . . . . . . . . . . . . . . . . . . . .165
Enabling or disabling anti-phishing protection . . . . . . . . . . . . . . . . . . . . . . . . . . . . . . . . . . . . . . . . . .166
Using anti-phishing protection . . . . . . . . . . . . . . . . . . . . . . . . . . . . . . . . . . . . . . . . . . . . . . . . . . . . . .167
Using the Anti-Phishing Manager while browsing . . . . . . . . . . . . . . . . . . . . . . . . . . . . . . . . . . . .167
Using the Anti-Phishing Manager while searching. . . . . . . . . . . . . . . . . . . . . . . . . . . . . . . . . . . .168
12:My Account Management. . . . . . . . . . . . . . . . . . . . . . . . . . . . . . . . . . . . . . . . . . .169
Viewing account details . . . . . . . . . . . . . . . . . . . . . . . . . . . . . . . . . . . . . . . . . . . . . . . . . . . . . . . . . . .170
Editing your contact information and password . . . . . . . . . . . . . . . . . . . . . . . . . . . . . . . . . . . . . . . . .171
Managing licenses and additional products . . . . . . . . . . . . . . . . . . . . . . . . . . . . . . . . . . . . . . . . . . . .172
Creating Webroot support tickets . . . . . . . . . . . . . . . . . . . . . . . . . . . . . . . . . . . . . . . . . . . . . . . . . . . .173
13:Program Settings . . . . . . . . . . . . . . . . . . . . . . . . . . . . . . . . . . . . . . . . . . . . . . . . .175
Managing the schedule for scans and cleanups . . . . . . . . . . . . . . . . . . . . . . . . . . . . . . . . . . . . . . . .176
Viewing the system history . . . . . . . . . . . . . . . . . . . . . . . . . . . . . . . . . . . . . . . . . . . . . . . . . . . . . . . .177
Managing updates . . . . . . . . . . . . . . . . . . . . . . . . . . . . . . . . . . . . . . . . . . . . . . . . . . . . . . . . . . . . . . .178
Setting Gamer mode . . . . . . . . . . . . . . . . . . . . . . . . . . . . . . . . . . . . . . . . . . . . . . . . . . . . . . . . . . . . .180
Using a proxy server . . . . . . . . . . . . . . . . . . . . . . . . . . . . . . . . . . . . . . . . . . . . . . . . . . . . . . . . . . . . .182
Changing the language setting. . . . . . . . . . . . . . . . . . . . . . . . . . . . . . . . . . . . . . . . . . . . . . . . . . . . . .184
A: Webroot Support. . . . . . . . . . . . . . . . . . . . . . . . . . . . . . . . . . . . . . . . . . . . . . . . . .185
B: Uninstalling the program . . . . . . . . . . . . . . . . . . . . . . . . . . . . . . . . . . . . . . . . . . .187
C: Frequently Asked Questions . . . . . . . . . . . . . . . . . . . . . . . . . . . . . . . . . . . . . . . .189
Threat protection FAQs . . . . . . . . . . . . . . . . . . . . . . . . . . . . . . . . . . . . . . . . . . . . . . . . . . . . . . . . . . .190
What is malware and how does it get in my computer? . . . . . . . . . . . . . . . . . . . . . . . . . . . .190
How do I know if my computer is infected? . . . . . . . . . . . . . . . . . . . . . . . . . . . . . . . . . . . . . .190
Why does the Windows Security Center say that the Webroot software is turned off? . . . .191
Scan and Quarantine FAQs . . . . . . . . . . . . . . . . . . . . . . . . . . . . . . . . . . . . . . . . . . . . . . . . . . . . . . . .191
How do I know if the System Scanner found any threats? . . . . . . . . . . . . . . . . . . . . . . . . . .191
How does Webroot know the difference between malware and legitimate programs?. . . . .191
Contents
v
Can I work on my computer during a scan? . . . . . . . . . . . . . . . . . . . . . . . . . . . . . . . . . . . . .191
Can I quickly scan a USB or CD? . . . . . . . . . . . . . . . . . . . . . . . . . . . . . . . . . . . . . . . . . . . . .192
Are there times when I should run a scan myself? . . . . . . . . . . . . . . . . . . . . . . . . . . . . . . . .192
What should I do with items in Quarantine? . . . . . . . . . . . . . . . . . . . . . . . . . . . . . . . . . . . . .192
What are cookies and why does it find so many? . . . . . . . . . . . . . . . . . . . . . . . . . . . . . . . . .192
Shield FAQs . . . . . . . . . . . . . . . . . . . . . . . . . . . . . . . . . . . . . . . . . . . . . . . . . . . . . . . . . . . . . . . . . . . .193
How do I know if I should block or allow a download? . . . . . . . . . . . . . . . . . . . . . . . . . . . . .193
A Windows dialog says it found spyware, but no Webroot alert appeared. What do I do? . .193
Do I need shields if a firewall is running? . . . . . . . . . . . . . . . . . . . . . . . . . . . . . . . . . . . . . . .194
Firewall FAQs. . . . . . . . . . . . . . . . . . . . . . . . . . . . . . . . . . . . . . . . . . . . . . . . . . . . . . . . . . . . . . . . . . .194
How do I know if I should block or allow traffic? . . . . . . . . . . . . . . . . . . . . . . . . . . . . . . . . . .194
What are computer ports?. . . . . . . . . . . . . . . . . . . . . . . . . . . . . . . . . . . . . . . . . . . . . . . . . . .194
How is the Webroot Firewall different from the Webroot Shields? . . . . . . . . . . . . . . . . . . . .195
Sync and Sharing FAQs. . . . . . . . . . . . . . . . . . . . . . . . . . . . . . . . . . . . . . . . . . . . . . . . . . . . . . . . . . .196
Should I put my files in synchronized folders, the Magic Briefcase, or the Web Archive? . .196
How do I know if my data is safe?. . . . . . . . . . . . . . . . . . . . . . . . . . . . . . . . . . . . . . . . . . . . .196
What’s the difference between synchronization and backup? . . . . . . . . . . . . . . . . . . . . . . .196
Are modified files overwritten or saved as new versions?. . . . . . . . . . . . . . . . . . . . . . . . . . .196
Can I access my files from another computer? . . . . . . . . . . . . . . . . . . . . . . . . . . . . . . . . . . .196
Can I work on my computer during a synchronization job?. . . . . . . . . . . . . . . . . . . . . . . . . .197
Why are there green checkmarks next to my folders? . . . . . . . . . . . . . . . . . . . . . . . . . . . . .197
How do I create a photo album? . . . . . . . . . . . . . . . . . . . . . . . . . . . . . . . . . . . . . . . . . . . . . .197
System Cleaner FAQs . . . . . . . . . . . . . . . . . . . . . . . . . . . . . . . . . . . . . . . . . . . . . . . . . . . . . . . . . . . .197
Why should I use the System Cleaner? . . . . . . . . . . . . . . . . . . . . . . . . . . . . . . . . . . . . . . . .197
How are cleanups different from scans? . . . . . . . . . . . . . . . . . . . . . . . . . . . . . . . . . . . . . . . .197
Can files deleted during a cleanup ever be recovered? . . . . . . . . . . . . . . . . . . . . . . . . . . . .197
Password Manager FAQs . . . . . . . . . . . . . . . . . . . . . . . . . . . . . . . . . . . . . . . . . . . . . . . . . . . . . . . . .198
How do I use the Password Manager to store passwords? . . . . . . . . . . . . . . . . . . . . . . . . .198
How do I use the Password Manager to automatically fill in Web forms?. . . . . . . . . . . . . . .199
Can I use different passwords for different Web sites?. . . . . . . . . . . . . . . . . . . . . . . . . . . . .199
Can I use different passwords for the same Web site?. . . . . . . . . . . . . . . . . . . . . . . . . . . . .200
What if I don’t want the Password Manager to automatically fill in my password? . . . . . . . .200
What browsers work with the Password Manager? . . . . . . . . . . . . . . . . . . . . . . . . . . . . . . .200
Are my passwords and other personal data safe from hackers? . . . . . . . . . . . . . . . . . . . . .200
Secure Browsing and Anti-Phishing FAQs. . . . . . . . . . . . . . . . . . . . . . . . . . . . . . . . . . . . . . . . . . . . .201
How does Secure Browsing and Anti-Phishing work? . . . . . . . . . . . . . . . . . . . . . . . . . . . . .201
Can I still access a site that was blocked? . . . . . . . . . . . . . . . . . . . . . . . . . . . . . . . . . . . . . .201
What does “Unclassified Site” mean? . . . . . . . . . . . . . . . . . . . . . . . . . . . . . . . . . . . . . . . . . .201
What is phishing? . . . . . . . . . . . . . . . . . . . . . . . . . . . . . . . . . . . . . . . . . . . . . . . . . . . . . . . . .201
Anti-Spam FAQs . . . . . . . . . . . . . . . . . . . . . . . . . . . . . . . . . . . . . . . . . . . . . . . . . . . . . . . . . . . . . . . .202
What if a legitimate message gets classified as spam? . . . . . . . . . . . . . . . . . . . . . . . . . . . .202
What if spam gets through the filters?. . . . . . . . . . . . . . . . . . . . . . . . . . . . . . . . . . . . . . . . . .202
How do spammers get my email address? . . . . . . . . . . . . . . . . . . . . . . . . . . . . . . . . . . . . . .202
What’s the difference between spam and phishing?. . . . . . . . . . . . . . . . . . . . . . . . . . . . . . .203
How do I know if I’ve received a legitimate email or a phishing attempt? . . . . . . . . . . . . . . .203
What’s the difference between the Email Attachments shield and anti-spam protection? . .203
MyAccount FAQs . . . . . . . . . . . . . . . . . . . . . . . . . . . . . . . . . . . . . . . . . . . . . . . . . . . . . . . . . . . . . . . .203
Can I install the Webroot software on another computer? . . . . . . . . . . . . . . . . . . . . . . . . . .203
What should I do if I forget my account password?. . . . . . . . . . . . . . . . . . . . . . . . . . . . . . . .204
How do I find my keycode? . . . . . . . . . . . . . . . . . . . . . . . . . . . . . . . . . . . . . . . . . . . . . . . . . .204
Can other users access my online account?. . . . . . . . . . . . . . . . . . . . . . . . . . . . . . . . . . . . .205
Can multiple users access the Webroot software from one computer? . . . . . . . . . . . . . . . .205
Glossary . . . . . . . . . . . . . . . . . . . . . . . . . . . . . . . . . . . . . . . . . . . . . . . . . . . . . . . . . . 207
Index . . . . . . . . . . . . . . . . . . . . . . . . . . . . . . . . . . . . . . . . . . . . . . . . . . . . . . . . . . . . . 215
vi
Contents
1: Getting Started
This guide describes how to use the Webroot® Internet Security Complete software. This
integrated suite delivers complete protection against viruses, spyware, hackers, spam, and other
online threats. Multi-layered identity protection encrypts your passwords and private information
so you can shop and bank safely. A unique online account enables you to securely access your
passwords, personal files, and photos.
To get started using the Webroot software, see the following topics:
•
“Creating a Webroot account” on page 2
•
“Signing in to your Webroot account” on page 4
•
“Using the main interface” on page 5
•
“Using the Webroot system tray menu” on page 7
•
“Viewing protection status” on page 8
•
“Responding to alerts” on page 9
•
“Responding to notifications” on page 11
•
“Using My Webroot” on page 12
•
“Using the Webroot toolbar in your browser” on page 14
1: Getting Started
1
Creating a Webroot account
Your Webroot account includes your software license status and provides access to certain tasks,
such as upgrading your software and installing it on another computer (if you purchased a multiuser license). The account is available online through My Webroot, which is your personalized
Web site available 24 hours a day, every day of the year. You must create an account to access
functions for the Sync and Sharing Manager and the Password Manager.
To create a Webroot account:
1. Make sure you are connected to the Internet.
2. Open the Webroot main interface by double-clicking the Webroot icon
tray.
in the system
3. From the taskbar at bottom of the Home panel, click My Account.
The My Account panel opens and shows your keycode, version number, and other
information about your subscription.
4. Click the Manage My Account button at the bottom of the panel.
If you have not previously created an account, an account creation dialog opens, as shown
in the following example. (If you have previously created an account, the My Webroot site
opens in a browser and you do not need to follow these instructions.)
2
1: Getting Started
5. Click the Create account button and follow the on-screen instructions.
Note
The Webroot software blocks certain terms in user names, such as obscene words.
If you use a term on our “blocked” list, your account creation may be rejected. If
you experience problems creating an account, contact Webroot Support.
When you complete the account creation process, your account information is provided
online through My Webroot, which is your personalized Web site available 24 hours a day,
every day of the year.
6. To access My Webroot, you can click the Manage My Account button again. You can
also open a Web browser and enter https://www.webroot.com/mywebroot in the address
bar. When the Sign In dialog opens, enter your user name and password.
Note
If you did not complete all the steps above or if you did not enter a valid email
address, account creation will fail. If this happens, you can complete the process by
following steps 1-4 above. When a dialog opens that says your account has not
been activated, click the Activate account button and follow the on-screen
instructions that open in your Web browser.
1: Getting Started
3
Signing in to your Webroot account
You can log in to your Webroot account to access software license information and perform
certain tasks, such as upgrading your software and installing it on another computer (if you
purchased a multi-user license). The account is available online 24 hours a day, every day of the
year from My Webroot (see “Using My Webroot” on page 12).
You must sign in to your account to access functions for the Sync and Sharing Manager and the
Password Manager. If you have not yet created an account, see “Creating a Webroot account” on
page 2.
To sign in to your Webroot account:
1. Right-click the Webroot icon
menu.
in the system tray and click Sign In from the pop-up
The Sign In dialog opens.
2. Enter your user name (your email address) and password, then click the Sign In button.
You can now access your online account (see “Using My Webroot” on page 12).
Note
If you cannot remember your account password, click Forgot Your Password?. In
the dialog that opens, enter your email address and click Send Email. Webroot
sends a message to your email address with instructions for resetting your
password.
4
1: Getting Started
Using the main interface
If you want to check on system status or change some settings, you can open the Webroot
software’s main interface by doing either of the following:
•
Double-click the Webroot icon
in the system tray. The system tray is located in the
lower right corner of your computer screen desktop.
•
Open the Windows Start menu, click All Programs (or Programs), click Webroot, then
click the name of your Webroot software version.
•
Double-click the Webroot icon on your Windows desktop:
The main interface opens and displays the Home panel, which provides access to all functions and
notifications for the Webroot software.
Home panel
Status color
(green, yellow, or red)
Green: Your computer is secure.
Yellow: A message requires your attention.
Red: A critical item requires your intervention.
See how button
Opens another panel that shows a status of your computer’s security.
1: Getting Started
5
Home panel (continued)
6
PC Security
When you point your mouse to PC Security, the Edit settings button
appears. Click this button to change scanning options, change shield
settings, manage quarantined items, and manage firewall settings. For
more information, see Chapter 2, “Security Scans” on page 15; Chapter
3, “Quarantine” on page 25; Chapter 4, “Shields” on page 31; and
Chapter 5, “Firewall” on page 41.
When you click Scan now, the program launches a system scan for
malware. See “Scanning for threats” on page 16.
Sync & Sharing
When you click Manage files, another panel opens where you can
access Sync and Sharing functions. For more information, see Chapter
6, “Sync and Sharing” on page 57.
Note: If you have not yet created an account or configured
synchronized files, the Sync & Sharing panel is displayed in yellow
with a Set up now button. Click this button to begin. For instructions,
see “Configuring synchronized folders (first-time setup)” on page 60.
System Cleaner
When you point your mouse to System Cleaner, the Edit settings
button appears. Click this button to access System Cleaner functions.
See Chapter 7, “System Cleaner” on page 105.
When you click Clean system, the Webroot software removes Internet
traces and unnecessary files. See “Running an on-demand cleanup” on
page 116.
Identity & Privacy
When you click Manage now, another panel opens where you can
enable the Secure Browsing Manager, the Anti-Spam Manager, the
Anti-Phishing Manager, and the Password Manager.
See Chapter 8, “Password Management” on page 119; Chapter 9,
“Secure Browsing” on page 153; Chapter 10, “Anti-Spam Protection”
on page 159; and Chapter 11, “Anti-Phishing Protection” on page 165.
Note: If you have not yet created an account, the Identity & Privacy
panel is displayed in yellow with a Set up now button.
Help
Opens the main Help file.
My Account
Opens the My Account panel, where you can view subscription
information and access a link for managing your account in My
Webroot. See Chapter 12, “My Account Management” on page 169.
Settings
Opens the Settings panel, where you can modify scanning schedules,
view the system history, set program update options, set Gamer mode,
and specify settings for a proxy server. See Chapter 13, “Program
Settings” on page 175.
Support
Opens the Support panel, which provides Webroot Technical Support
numbers and links.
Notifications
Opens the Notifications panel, which provides a list of status alerts. See
“Responding to notifications” on page 11.
1: Getting Started
Using the Webroot system tray menu
After you install the Webroot software, a Webroot icon opens in the Windows system tray, located
in the bottom right of your computer desktop. This icon provides access to Webroot’s system tray
menu and some common Webroot functions.
To open the system tray menu, right-click on the Webroot icon
.
The menu provides the following selections:
System Tray Menu
Home
Launches the main interface.
Scan Now
Launches the System Scanner. The icon changes to a Busy state
“Scanning for threats” on page 16.
Cleanup Now
Deletes Internet traces and unnecessary files. The icon changes to a Busy
state . See “Running an on-demand cleanup” on page 116.
Manage Sync
Opens the Webroot File Manager. See “Using the Webroot File Manager”
on page 72.
Access Sync Files
Online
Launches an Internet browser and opens the MyData page in My Webroot.
See “Managing files in the MyData page” on page 80.
Manage Passwords
Launches an Internet browser and opens the MyIdentity page in My
Webroot. See “Managing sites in the MyIdentity page” on page 144.
Turn ON/OFF
Gamer Mode
Turns Gamer mode on or off. See “Setting Gamer mode” on page 180.
Help
Launches the main Help file.
. See
Launch My Account Launches an Internet browser and opens My Webroot. See “Using My
Webroot” on page 12.
Sign In/Sign Out
If you are not signed in to your Webroot account, this selection displays
“Sign In” and launches a dialog window for you to enter your name and
password to access your account.
If you are signed in already, this selection displays “Sign Out” and logs out
of your account.
Close
Closes the Webroot software main interface.
Note: Selecting “Close” does not stop currently active or scheduled tasks,
such as scans.
1: Getting Started
7
Viewing protection status
To show your computer’s overall protection status, areas of the Webroot user interface change
colors, as follows:
Main Interface Color
Icon
Description
Green
Your computer is secure.
Yellow
One or more messages require your attention.
Red
One or more critical items require your intervention.
To view protection status:
1. Open the Home panel of the Webroot software’s main interface by double-clicking the
Webroot icon
in the system tray.
2. From the Home panel, you can read a short description about the issue.
The panel may also provide buttons for how to fix the issue or how to view more detailed
information:
8
•
Fix it now. The Webroot software will resolve the situation. The action it takes depends
on the issue. For example, if you turned off an important shield, it will turn it back on.
•
View Details. The Webroot software opens a panel where you can view more information
and fix the issue.
1: Getting Started
Responding to alerts
If the Webroot software needs to inform you about an important system status, it opens a pop-up
alert in the middle of your computer screen or a balloon alert from the system tray, as follows:
Alert methods
Pop-up alerts
Appear in the middle of the
computer screen and require
immediate action.
See “Responding to pop-up
alerts” after this table.
Balloon alerts
Open from the system tray and
may be informational or require
action.
See “Responding to balloon
alerts” on page 10.
Responding to pop-up alerts
The Webroot software opens a pop-up alert when it detects an item trying to download to your
computer and it cannot determine whether this item is a threat or a legitimate program. For
example, the Webroot Shields may open an alert if you are downloading a new toolbar for your
browser. Toolbars are classified as Browser Helper Objects (BHOs), and although most BHOs are
legitimate, some are part of spyware that can download without your knowledge. Because
Webroot cannot determine if you want this toolbar, you need to respond by selecting Allow or
Block. If you do not respond within the allotted time shown in the alert counter (usually 60
seconds), the Webroot Shields automatically block the activity.
Note
If a pop-up alert opens and you aren’t certain whether to allow or block the detected
item, your safest action is to block it. The name of the file trying to download is
displayed in the alert box. Click Show Details for more information or contact
Webroot Support.
To respond to pop-up alerts:
1. Read the alert text to determine what type of program is attempting to download to your
computer. You can click the arrow next to Show Details to view the name, file name,
company, and copyright of the program.
The following example shows an alert detected by the Webroot Shields.
1: Getting Started
9
Note
The Webroot Firewall may occasionally display alerts, which look a little different.
See “Managing firewall alert notifications” on page 53.
2. Click the Block button if you do not recognize the program and were not trying to
download anything as you viewed pages on the Internet.
or
Click the Allow button if you do recognize the program and you are purposely
downloading it.
Note
Some alerts provide an Always perform the selected action checkbox. If Webroot
frequently detects the same item, you can select this checkbox so Webroot will
always allow or block the item in the future.
Responding to balloon alerts
If the Webroot software needs to report important system status or an issue that requires your
attention, it opens a balloon alert near the Webroot icon
in the system tray. These alerts are
only visible for a short time (maximum 30 seconds) depending on the level of importance:
•
Information only: Appears for 10 seconds and provides status information. You do not
need to take action.
•
Action: Appears for 15 seconds and provides a link for you to click and view more
information. These alerts require you to take action to resolve an issue.
•
Critical action: Appears for 20 to 30 seconds and provides a link for you to click and
view more information. These alerts require you to take action to resolve a critical issue.
To respond to balloon alerts:
1. If you notice a link in the balloon alert, such as View Notifications, click the link.
The Webroot software’s main interface opens with the Notifications panel displayed.
2. Take action for each alert displayed in the Notifications panel. For further instructions, see
“Responding to notifications” on page 11.
10
1: Getting Started
Note
If the alert disappears before you can click on the link, open the main interface
(double-click the Webroot icon
in the system tray), then click Notifications at
the bottom taskbar. The Notifications panel shows all alerts that require your
attention.
Responding to notifications
The Notifications panel shows alerts that may require you to take an action. Depending on the
issue, the notification includes instructions and buttons that guide you to managing and resolving
the issue.
To respond to notifications:
1. Open the Notifications panel by doing either of the following:
•
From the system tray, click the View Notifications link from an alert balloon.
-or •
From the main interface’s Home panel, click Notifications in the bottom taskbar.
The Notifications panel opens.
2. Click on an item in the Summary pane to display more information at the right.
1: Getting Started
11
3. Read the details description and respond by clicking links or buttons for your desired
action.
For some types of notifications, you can select the checkbox for Always perform the
selected action, so you do not need to respond to the same alert again.
Once you respond to a notification, it no longer appears in the Notifications panel and is
moved to the History panel (under Settings). See “Viewing the system history” on
page 177.
Using My Webroot
My Webroot is your personalized Webroot Web site that is available 24 hours a day, every day of
the year. From My Webroot, you can log in to your Webroot account to access your software
license status and certain tasks, such as upgrading your software and installing it on another
computer (if you purchased a multi-user license). You can access My Webroot from any computer.
My Webroot provides 24x7 access to functions for the Sync and Sharing Manager and the
Password Manager.
Note
You must create an account to access My Webroot. If you have not yet created an
account, see “Creating a Webroot account” on page 2.
You can open My Webroot by doing either of the following:
•
12
Open your browser and enter https://www.webroot.com/mywebroot.
1: Getting Started
•
Open the main interface (double-click the Webroot icon
in the system tray). From the
taskbar at bottom of the Home panel, click My Account. When the My Account panel
opens, click the Manage My Account button.
•
Open your browser and click My Webroot from the Webroot toolbar.
If you are not signed in already, My Webroot opens with a Sign In panel on the right, as shown
below. Enter your user name (email address) and password, then click the Sign in button.
If you are signed in, Webroot bypasses this screen and goes directly to your account.
The following table describes the pages available in My Webroot.
My Webroot pages
Home
Serves as the main dashboard to all My Webroot functions available with
your subscription and license.
MyAccount
Shows your account details and software license information. See Chapter
12, “My Account Management” on page 169.
MyData
Allows you to manage files and photos in the Sync and Sharing Manager.
See Chapter 6, “Sync and Sharing” on page 57.
1: Getting Started
13
My Webroot pages
MyIdentity
Allows you to manage passwords and form-fill information in the
Password Manager. See Chapter 8, “Password Management” on page 119.
Using the Webroot toolbar in your browser
After you install the Webroot software, a Webroot toolbar appears in Internet Explorer or Firefox
browsers.
Caution
Do not disable or uninstall the Webroot toolbar. This may result in unexpected
behavior and will disable access to some Webroot software functionality.
The toolbar is shown in the following example.
Note
If you install a new browser later (after installing the Webroot program), the
Webroot toolbar will not appear in that browser until the next program update. If
you want to install the Webroot toolbar right away, close your browser, then go to
the Windows Start menu, select All Programs (or Programs), Webroot, Tools,
Install Webroot Toolbar. Webroot will download and install the toolbar.
The following table describes the items in the toolbar.
Webroot toolbar selections
14
Saved Sites
Opens your list of password-managed Web sites. See Chapter 8,
“Password Management” on page 119.
My Identity Tools
Opens a menu of Password Manager functions. See Chapter 8, “Password
Management” on page 119.
My Webroot
Launches My Webroot, where you can manage your Webroot account.
See Chapter 12, “My Account Management” on page 169.
Sign in/Sign out
Logs in to or out of your Webroot account. See “Signing in to your
Webroot account” on page 4.
1: Getting Started
2: Security Scans
The System Scanner searches all areas of your computer where potential threats can hide,
including drives, files, the Windows registry, and system memory. It looks for any files or other
items that match our security definitions (a set of fingerprints that characterize potential threats).
When it detects items, it takes one of the following actions:
•
For definite threats (positive matches with security definitions), the System Scanner
removes the items from their current locations and sends them to a holding area, called
Quarantine, where they are rendered inoperable and cannot cause any harm.
•
For programs that are classified as “potentially unwanted applications,” the System
Scanner opens a notification about what it found. You can decide whether to send the item
to Quarantine or ignore it.
•
For viruses, the System Scanner removes the infected portions of the file during a cleaning
process. It keeps the cleaned file in its original location and sends a copy of the corrupted
file to Quarantine.
The System Scanner is preconfigured to scan your computer automatically at optimal times,
without disrupting your work. You can also disable automated scanning and run the System
Scanner manually.
To use the System Scanner, see the following topics:
•
“Scanning for threats” on page 16
•
“Viewing scan details” on page 18
•
“Customizing scan options” on page 21
•
“Creating a scan schedule” on page 23
2: Security Scans
15
Scanning for threats
Although the System Scanner is preconfigured for automated scanning, you can run an immediate
scan yourself at any time. You can start a scan from the Webroot software’s main interface, from
the system tray menu, or from Windows Explorer.
Methods for launching a manual scan
Main interface
To run a scan from the main interface:
1. Open the Webroot main interface by doubleclicking the Webroot icon
in the system tray.
2. Click the Scan now button in the PC Security
panel.
To view its progress or to stop the scan:
The PC Security panel turns black and shows the
scan progress.
To stop or pause the scan, click View details to open
the Scan in Progress panel and select either the Stop
Scan or Pause Scan buttons.
System tray
menu
To run a scan from the system tray:
1. Open the Webroot main interface by doubleclicking the Webroot icon
in the system tray.
2. Click Scan Now.
The Webroot icon displays a turning dial to
indicate it’s busy scanning: .
During the scan, the system tray menu provides
additional options for pausing or stopping the
scan.
If you want to see scan details, click Home. The
Scan in Progress panel opens (see the illustration
below this table).
16
2: Security Scans
Methods for launching a manual scan (continued)
Windows
Explorer
To run a scan from Windows Explorer:
1. Open Windows Explorer.
2. Right-click the file, folder, or drive you want to
scan.
From the pop-up menu, select Perform Secure
Scan. The system tray icon displays a turning dial
to indicate it's busy scanning: .
During the scan, the system tray menu provides
additional options for pausing or stopping the
scan.
If you want to see scan details, click Home. The
Scan in Progress panel opens (see the illustration
below this table).
The Scan in Progress panel shows the items as they are detected.
When the scan completes, the Webroot software takes one of the following actions:
•
For definite threats (positive matches with security definitions), the System Scanner
removes the items from their current locations and sends them to a holding area, called
Quarantine, where they are rendered inoperable and cannot cause any harm. The Status
changes to “Quarantined.” For more information, see Chapter 3, “Quarantine” on page 25.
•
For viruses, the System Scanner removes the infected portions of the file during a cleaning
process. It keeps the cleaned file in its original location and sends a copy of the corrupted
file to Quarantine. The status changes to “Cleaned.”
•
For programs that are classified as “potentially unwanted applications,” the System
Scanner does not automatically quarantine the items. Instead, it marks the status as
“Suspect,” as shown in the following example. You must take action yourself by selecting
the item in the panel and choosing either the Quarantine selected items or Ignore
selected items button.
2: Security Scans
17
After the Webroot software manages the items, it opens a notification in the system tray. You can
click View Details to see more information about what items were quarantined. (If the alert closes
before you have a chance to click the link, point your mouse to the PC Security panel, click the
Edit settings button, then click View scan details in the Scan tab.)
See the next section, “Viewing scan details,” for more information.
Viewing scan details
You can view results of the last scan from the Scan panel.
To view scan details:
1. Open the Webroot main interface by double-clicking the Webroot icon
tray.
in the system
2. From the Home panel, click the Edit settings button under PC Security. (Point your
mouse to the panel to display the Edit settings button.)
The PC Security panel opens.
18
2: Security Scans
3. Make sure the Scan tab is selected.
4. Under Last scan, click View scan details.
Another panel opens and provides details about detected items.
See the following table for a description of the Scan Complete panel.
Scan details
What we found
Name and description of the item. You can click the plus sign to the left of the
item to view the directory where it was found.
Risk
The red-orange bars show the risk level of the selected item. Multiple bars
indicate a higher risk, as follows:
(low)
(moderate)
(high)
(very high)
(critical)
2: Security Scans
19
Scan details (continued)
20
Status
This column shows how the System Scanner managed the item:
• Quarantined. The item was moved to Quarantine, where it was rendered
inoperable and cannot harm your computer. For more information, see
Chapter 3, “Quarantine” on page 25.
If you see a “Quarantined Error” status, contact Webroot Support.
• Suspect. The item is classified as a “potentially unwanted application” and
was not moved to Quarantine. You can decide to quarantine the item or keep
it. If the scan launched while the main interface was closed, Webroot opens a
notification that it completed the scan and found a potentially unwanted
application. In this case, go to the Notifications panel to quarantine or keep the
item. See “Responding to notifications” on page 11.
• Removed. The item was deleted before the System Scanner quarantined it.
This might happen if you are running another security program that removed it
or if you manually deleted the file yourself during the scan. Any removed
items are no longer a threat to your computer.
• Cleaned. The item was managed by a virus-cleaning process that removed
infected portions of the file and restored the cleaned file to your computer in
its original location. A copy of the corrupted file is now in Quarantine. The
cleaned file is safe to use; the file in Quarantine is not safe to use.
In addition, the following status types can also appear if you managed an item
yourself:
• Deleted. You deleted the item from the Quarantine panel. See “Deleting
quarantined items” on page 27.
• Restored. You restored the item from the Quarantine panel. See “Restoring
quarantined items” on page 28.
• Ignored. You ignored a “Suspect” item in the Scan Complete panel. See
“Scanning for threats” on page 16.
Details
If you don’t recognize an item and want to know more about it, click View
details to the right for a pop-up description.
2: Security Scans
Customizing scan options
You can change the scan settings to customize the locations where the System Scanner searches
for threats and the types of threats it locates.
To customize scan settings:
1. Open the Webroot main interface by double-clicking the Webroot icon
tray.
in the system
2. From the Home panel, click the Edit settings button under PC Security. (Point your
mouse to the panel to display the Edit settings button.)
The PC Security panel opens.
3. Make sure the Scan tab is selected.
4. Select the Use custom scan settings checkbox and click Edit.
The Advanced Scan Settings panel opens. Items with a checkmark are enabled and
included in the next scan.
2: Security Scans
21
5. Select or deselect options by clicking the checkboxes.
The following table describes each setting.
6. When you’re done, click Save.
The System Scanner uses these settings for all future scans.
Advanced scan settings
Scan registry items
Scans the computer’s registry, where spyware and other unwanted programs
commonly create entries.
Scan memory
Scans the computer’s random access memory (RAM), where spyware and
other unwanted programs commonly load into memory.
Scan cookies
Scans for third-party cookies that are included in the security definitions.
Scan files
Scans specific drives, directories, or files. Click the Choose button to open a
pop-up dialog where you can specify areas to scan or ignore. Click in the
checkboxes to deselect areas you don’t want to scan. Items with a checkmark
are included in the scan; items without a checkmark are ignored. Click OK
when you’re done.
Only new files or files that Scans only the files that are new or modified from the last scan. Enabling this
have been changed
option decreases scan time significantly.
Include compressed files
Scans compressed files such as .zip, .rar, .lzh, and .cab files, where malware
can hide. You may want to use this option after you have found spyware
programs and you want to be sure that you have removed them.
Enabling this option increases scan time significantly. (After the first scan
with this option, the System Scanner skips compressed files that have not
changed, thereby saving time.) If you download a compressed file in the
future, you can scan just that file from Windows Explorer by right-clicking on
the file and selecting Perform Secure Scan from the pop-up menu.
Skip file types
Scans specified file types only. Enter the extensions of file types you want the
scan to ignore. For multiple entries, use a comma or semicolon to separate
entries (for example: .mp3, .wma).
Do not skip .dll, .exe, or .com file types, because malware typically hides in
these types of files.
Enable direct disk
Scans for strains of spyware that hide themselves from the Windows
scanning including rootkits operating system.
22
2: Security Scans
Creating a scan schedule
The System Scanner is preconfigured to run a scan at optimal times. If desired, you can disable
automated scanning and set your own schedule.
To create your own scan schedule:
1. Open the Webroot main interface by double-clicking the Webroot icon
tray.
in the system
2. From the bottom of the Home panel, click Settings in the taskbar.
The Settings panel opens.
3. Click Scheduling.
4. Turn off scheduled scans by clicking the ON/OFF button, so the button changes to OFF.
5. In the drop-down box, make sure Scan is displayed, then click the Add action button.
The Scheduling panel opens.
2: Security Scans
23
6. Under Perform action every, determine the scan schedule as follows:
•
In the first field, click the drop-down arrow to select hour, day, week, month, or when
you log in.
•
Click in the checkboxes to select one or more days of the week.
•
In the At field, click the drop-down arrow to select a time of day.
7. Under Options, you can select a radio button to keep the Webroot recommended settings
or choose custom settings. For a description of the custom settings, see “Customizing scan
options” on page 21.
8. Click the Schedule button.
The panel shows details of your scheduled scan.
9. If desired, you can edit, delete, or run the schedules from the Scheduling panel by clicking
either Edit, Run Now, or Delete.
24
2: Security Scans
3: Quarantine
The Webroot Quarantine is a holding area for potential threats. Items in Quarantine are rendered
inoperable and cannot harm your computer.
In the quarantine process, the System Scanner removes all traces and items associated with threats
from their current locations. It then disables their operation by scrambling and compressing all
associated items, so the threats can no longer harm your computer or steal your information. Once
the items are rendered inoperable, the System Scanner moves them to Quarantine. If the System
Scanner detects a virus, it removes infected portions of a file during a virus cleaning process. If the
System Scanner can remove the virus successfully, it restores the cleaned file to your computer in
its original location and places a copy of the corrupted file in Quarantine. The cleaned file is safe
to use; the file in Quarantine is not safe to use.
Once items are moved to Quarantine, your safest action is to simply keep them there. Items in
Quarantine are disabled and cannot harm your computer. Keeping items in Quarantine also allows
you to test your computer and determine if all your programs still work properly. If you discover
that some legitimate programs cannot function after an item was moved to Quarantine, Webroot
allows you to restore it.
To manage the Quarantine, see the following topics:
•
“Viewing quarantined items” on page 26
•
“Deleting quarantined items” on page 27
•
“Restoring quarantined items” on page 28
3: Quarantine
25
Viewing quarantined items
Once items are quarantined, you can view more information about them in the Quarantine panel.
To view quarantined items:
1. Open the Webroot main interface by double-clicking the Webroot icon
tray.
in the system
2. From the Home panel, click the Edit settings button under PC Security. (Point your
mouse to the panel to display the Edit settings button.)
The PC Security panel opens.
3. Click the Quarantine tab.
The Quarantine panel displays items that were previously detected during scans and
moved to Quarantine.
You can select an item to see more details in the right pane. The following table describes
the item details.
Item Details
Name
Name of the item currently selected in the list.
Category
Type of item currently selected in the list. For more information about
types of threats, see the “Glossary” on page 207.
Risk rating
The red-orange bars show the risk level of the selected item. The more
bars shown, the higher the risk.
Description
Description of the item.
You can view more information about a selected item by clicking View more details
online. (You must be connected to the Internet.)
Once items are stored in Quarantine, you can keep them there (the recommended action) or do one
of the following:
26
•
Delete quarantined items permanently. If the Quarantine area gets too full, Webroot
alerts you to remove some items. You can permanently delete an item if you’re sure it’s
unwanted spyware or another type of threat. For instructions, see the next section,
“Deleting quarantined items.”
•
Restore quarantined items. If you discover that a legitimate program won’t work
properly when an item was moved to Quarantine, you can restore that item to its original
location on the computer. For instructions, see “Restoring quarantined items” on page 28.
3: Quarantine
Deleting quarantined items
If desired, you can permanently delete items in Quarantine. Be aware that once you delete an item,
it cannot be restored.
Note
Before deleting items in Quarantine, we recommend that you test your computer by
opening and closing all your programs and performing a few tasks. In rare cases,
programs classified as “spyware” may be an integral part of a legitimate
application.
To permanently delete quarantined items:
1. Open the Webroot main interface by double-clicking the Webroot icon
tray.
in the system
2. From the Home panel, click the Edit settings button under PC Security. (Point your
mouse to the panel to display the Edit settings button.)
The PC Security panel opens.
3. Click the Quarantine tab.
The Quarantine panel opens with a list of quarantined items.
4. Select each item that you want to permanently delete or click Select All at the bottom of
the panel.
A checkmark next to the item shows that it is selected and will be deleted.
5. Click the Delete selected items button.
3: Quarantine
27
The item is removed from the Quarantine panel. If you check the last scan details (see
“Viewing scan details” on page 18), the item is still listed, but with “Deleted” as its status.
Restoring quarantined items
You may need to restore a quarantined item if you discover that a program is not working correctly
without it. In rare cases, a piece of spyware is an integral part of a legitimate program and is
required to run that program. (Some components with copy protection may not restore from
Quarantine properly. You must reinstall these programs from the original media or installation
file.)
Note
Never restore a file with a detected virus. If the Webroot software was able to clean
the file (remove the virus safely), it keeps the cleaned file in its original location
and places a copy of the corrupted file in Quarantine. The cleaned file is safe to use;
the file in Quarantine is not safe to use.
To restore quarantined items:
1. Open the Webroot main interface by double-clicking the Webroot icon
tray.
in the system
2. From the Home panel, click the Edit settings button under PC Security. (Point your
mouse to the panel to display the Edit settings button.)
28
3: Quarantine
The PC Security panel opens.
3. Click the Quarantine tab.
The Quarantine panel opens with a list of quarantined items.
4. Select each item that you want to restore.
A checkmark next to the item shows that it is selected and will be restored.
5. Click the Restore selected items button.
The Webroot software restores the selected items to their original locations and shows the
restore status at the bottom of the panel.
Note
If a selected item is part of an email attachment, the Webroot software saves it to
the location specified in the Always save to option of the Email Attachments shield
or prompts you to select the location to restore the attachment (if you selected the
Ask me where to save every file option).
The item is removed from the Quarantine panel. If you check the last scan details (see
“Viewing scan details” on page 18), the item is still listed, but with “Restored” as its
status.
3: Quarantine
29
30
3: Quarantine
4: Shields
Webroot Shields monitor functions related to your Web browser settings, network
communications between your computer and the Internet, Windows system settings, Windows
Startup programs, and email attachments. If a suspicious item tries downloading or running on
your computer, Webroot Shields automatically block and quarantine the item. For some types of
shields, an alert asks if you want to continue the download or block it. If you don’t respond to the
alert within one minute, Webroot Shields automatically block the download.
Webroot has already preconfigured the Webroot Shields for you, based on our recommended
settings. You do not need to do anything. However, if you would like to modify the type of
protection shields provide, you can change the settings as described in this chapter.
To manage shield settings, see the following topics:
4: Shields
•
“Setting real-time active protection” on page 32
•
“Setting browser protection” on page 35
•
“Setting network protection” on page 37
31
Setting real-time active protection
The Real-time Active Protection shields monitor your computer settings and activity. If these
shields detect malware or viruses attempting to launch, they block these threats before they can
damage your system.
To set Real-time Active Protection shields:
1. Open the Webroot main interface by double-clicking the Webroot icon
tray.
in the system
2. From the Home panel, click the Edit settings button under PC Security. (Point your
mouse to the panel to display the Edit settings button.)
The PC Security panel opens.
3. Click the Shields tab.
4. Click Let me set my options.
5. Point your mouse to Real-time active protection and make sure the box to the left is
checked.
The Options pane displays the shield settings. Items with a checkmark are enabled.
6. If you want to change a shield setting, select the checkbox next to the shield name to
disable (uncheck) or activate (check) an option.
The following table describes the function of each Real-time Active Protection shield.
32
4: Shields
Real-time Active Protection shield options
File System shield
If this shield detects a threat attempting to launch during write and read
operations, it sends the item to Quarantine.
Note: For read operations, the Webroot software can detect most, but not
all file types.
Execution shield
If this shield detects a suspicious file trying to install or start, it sends the
item to Quarantine.
Startup Items shield
If this shield detects malware or a virus attempting to add itself to the
Windows startup list, it opens an alert where you can block or allow the
file. (See “Responding to pop-up alerts” on page 9.)
If you want to change the list of programs that start with Windows, click
Edit options.
The following dialog opens.
To see more information about a program, click the executable name. (Not
all programs provide additional details.) If you do not want a program to
start with Windows, deselect its checkbox and click OK.
Caution: Editing Startup Items is for advanced users. Windows and other
programs may require some listed items, and if you remove them, your
computer may not start properly.
4: Shields
ActiveX shield
If this shield detects ActiveX controls attempting to install on your
computer, it opens an alert where you can block or allow the installation.
(See “Responding to pop-up alerts” on page 9.)
ADS shield
If this shield detects programs or viruses that attempt to start from an
Alternate Data Stream (ADS), it opens an alert where you can block or
allow the installation.
(See “Responding to pop-up alerts” on page 9.)
33
Real-time Active Protection shield options (continued)
BHO shield
If a Browser Helper Object (BHO) tries to install itself, it opens an alert
where you can block or allow the installation. (See “Responding to pop-up
alerts” on page 9.)
If you want to change the BHOs that start with Internet Explorer, click
Edit options.
A dialog opens and shows a list of the installed BHOs. Items with a
checkmark start whenever Internet Explorer starts.
To see more information about an item, click the executable name. (Not all
programs provide additional details.) Deselect any BHOs you do not want
to start, then click OK.
Caution: Editing BHOs is for advanced users. Deselecting BHOs could
cause your browser to not work properly or cause your computer to be
unstable.
Do not attempt to disable the Webroot toolbar. This may result in
unexpected behavior and will disable access to some Webroot software
functionality.
34
4: Shields
Setting browser protection
Browser Protection shields guard your default Home page, list of favorites, and other settings
related to your Web browser.
To set Browser Protection shields:
1. Open the Webroot main interface by double-clicking the Webroot icon
tray.
in the system
2. From the Home panel, click the Edit settings button under PC Security. (Point your
mouse to the panel to display the Edit settings button.)
The PC Security panel opens.
3. Click the Shields tab.
4. Click Let me set my options.
5. Point your mouse to Browser protection and make sure the box to the left is checked.
The Options pane displays the shield settings. Items with a checkmark are enabled.
6. If you want to change a shield setting, select the checkbox next to the shield name to
disable (uncheck) or activate (check) an option.
The following table describes the function of each Browser Protection shield.
4: Shields
35
Browser Protection shield options
IE Hijack shield
If this shield detects a spyware program trying to change the default pages
that open in Internet Explorer, such as your set Home page, it opens an
alert where you can allow or block the change.
To check or change the default pages for Internet Explorer, click Edit
options. The following dialog opens.
You can edit the following addresses:
• IE Home Page shield: In the field, you can enter a new Web site
address for your Home page. The address must be in the following
format: http://www.webroot.com.
• IE Search Page shield: In the field, you can enter a new Web address
for the informational page that opens when you attempt to access a nonexistent Web site. The address must be in the following format:
http://www.microsoft.com.
If you want to return to the Internet Explorer default pages, select the
Reset IE page settings to defaults button.
36
IE Security shield
If a program tries to change your Internet Explorer security settings, this
shield opens an alert where you can allow or block the change.
Favorites shield
If a spyware program tries to change your Internet Explorer or Firefox list
of favorite Web sites, this shield opens an alert where you can allow or
block the change.
Tracking Cookies
shield
If third-party cookies attempt to download to your computer, this shield
blocks them.
4: Shields
Setting network protection
Network Protection shields guard your Hosts file, stop unexpected Web sites from loading, and
monitor email attachments.
To set Network Protection shields:
1. Open the Webroot main interface by double-clicking the Webroot icon
tray.
in the system
2. From the Home panel, click the Edit settings button under PC Security. (Point your
mouse to the panel to display the Edit settings button.)
The PC Security panel opens.
3. Click the Shields tab.
4. Click Let me set my options.
5. Point your mouse to Network protection and make sure the box to the left is checked.
The Options pane displays the shield settings. Items with a checkmark are enabled.
6. If you want to change a shield setting, select the checkbox next to the shield name to
disable (uncheck) or activate (check) an option.
The following table describes the function of each Network Protection shield.
4: Shields
37
Network Protection shield options
Hosts File shield
If this shield detects spyware programs attempting to add or change the IP
address for a Web site in the Hosts file, it opens an alert where you can
block or allow the changes. (See “Responding to pop-up alerts” on
page 9.)
The Hosts file is a Windows file that helps direct your computer to a Web
site using Internet Protocol (IP) addresses. Your Web browser uses the IP
address to actually connect to a site. When you enter a Web address in a
browser, your computer first looks in the Hosts file to see if it already
knows where to go. If the domain is listed (for example, webroot.com),
your computer goes directly to the IP address.
If the domain is not listed, your computer looks up the information from
the Internet, which is a slightly slower process.
If you suspect that spyware tampered with the entries in your Hosts file,
click Edit options. The Hosts File Shield Options dialog shows entries
that you, your IT department, or potential spyware programs have added to
your Hosts file.
If any entries appear to be spyware related, select the checkbox next to the
address and click Remove selected. If you aren’t sure whether the entries
are valid, contact Webroot Support.
Caution: Editing the Hosts file is for advanced users.
Internet
Communication
shield
38
This shield monitors communication from your computer to known Web
sites that are related to spyware or potential threats. Webroot includes a list
of known sites with its security definitions. If the shield detects an attempt
to communicate with a site on the list, it opens an alert. (See “Responding
to pop-up alerts” on page 9.)
4: Shields
Network Protection shield options (continued)
Email Attachments
shield
(Does not support
email clients that use
SSL)
This shield monitors file attachments for incoming email (through POP3
protocol) and outgoing email (through SMTP protocol). If it detects that an
attachment or its contents match a security definition, it replaces the
content of the attachment with an alert message that describes what it
found. This shield then moves the original attachment to Quarantine,
where you can decide whether to save it to your computer or delete it. You
can also direct the shield to always restore quarantined email attachments
to a specific directory.
By default, Webroot monitors port 110 (POP3) for incoming mail and port
25 (SMTP) for outgoing mail, but you can change the port numbers in the
Email Attachments settings, if necessary.
Note: Some firewall configurations might prevent the Email Attachments
shield from monitoring email. For more information, see the note on
page 40.
For Email Attachments Shield options, click Edit options. The following
dialog opens:
Set the options as follows:
• Restoring attachments: Select Ask me where to save every file if you
want to be prompted when it restores quarantined attachments. Select
Always save to if you want to create a default location for restored
email attachments. You can enter a file location in the field or click
Select location to browse directories from Windows Explorer.
• Email port settings: Enter the POP3 port number for incoming mail
and the SMTP port number for outgoing mail. This dialog automatically
displays port numbers that most computers use for email
communications. If necessary, change the port numbers or contact your
ISP (Internet Service Provider) for the port numbers.
4: Shields
39
Note
Communication errors with the Email Attachments shield:
Some firewall applications from other vendors might prevent the Webroot software
from intercepting email traffic. If this is the case, Webroot opens an alert every
time an email is sent or received. If an alert appears because a firewall application
is blocking the Webroot software, you need to configure your firewall application
to allow the program to monitor the port traffic. For more information about
resolving communication issues between your firewall application and the Webroot
software, you can contact Webroot Support or enter the following address into your
browser for instructions:
http://www.webroot.com/land/
personal_firewall_config.php?pc=64150&rc=1&oc=110&mjv=5&mnv=5&la
ng=en&loc=USA&opi=2&omj=5&omn=1
If the alert appears only once or just periodically, the problem may be due to an
inactive network configuration or a non-responsive SMTP or POP server at the ISP
(Internet Service Provider). This is a temporary situation. The Email Attachments
shield should be able to function normally once communication is restored. If the
message appears frequently when these types of communication errors occur, you
can select Do not show this message again.
40
4: Shields
5: Firewall
The Webroot Firewall monitors data traffic traveling through your computer’s ports and prevents
threats from traveling into or out of your computer. The firewall can stop an outside program that
attempts to enter your computer system and steal your personal data. It also stops a program that
may have been installed without your knowledge, such as a Trojan horse, from attempting to send
your personal information out to the Internet. Without a firewall, your system is completely open
to many types of threats whenever you connect to the Internet or to a network. The Webroot
Firewall can block malware, hacking attempts, and other online threats before they can enter and
cause damage to your system or compromise your security.
The firewall examines all packets traveling through your computer ports. Each packet carries
information that helps it locate its destination, including the sender’s IP address, the intended
receiver’s IP address, the number of packets linked to it, and a part of the text. Packets are carried
over the protocols that the Internet uses, such as the Transmission Control Protocol/Internet
Protocol (TCP/IP). To analyze which packets are safe and which might contain threats, the firewall
checks both incoming and outgoing packets against filters and lists, which contain the rules for
which packets to allow or deny.
The Webroot Firewall is already preconfigured to filter traffic on your computer. It works in the
background without disrupting your normal activities. If the firewall detects any unrecognized
traffic, it opens an alert where you can block the traffic or allow it to proceed.
To adjust the Webroot Firewall settings, see the following topics:
5: Firewall
•
“Enabling or disabling firewall filtering” on page 42
•
“Adjusting security levels” on page 43
•
“Monitoring the processes for applications” on page 49
•
“Managing application traffic” on page 50
•
“Managing firewall alert notifications” on page 53
41
Enabling or disabling firewall filtering
The Webroot Firewall is already enabled and configured to filter traffic on your computer.
Normally, you should keep filtering enabled, so the firewall can monitor traffic for potentially
unsafe activity. But if you want, you can disable filtering by allowing all traffic (offers no
protection) or blocking all traffic (shuts down communications).
To modify the firewall setting:
1. Open the Webroot main interface by double-clicking the Webroot icon
tray.
in the system
2. From the Home panel, click the Edit settings button under PC Security. (Point your
mouse to the panel to display the Edit settings button.)
The PC Security panel opens.
3. Click the Firewall tab.
4. Click the radio button next to the desired filter setting.
The three settings are described in the following table.
Traffic filter settings
42
Filter traffic
Recommended setting. Turns on the firewall. Filters incoming and outgoing
traffic, so that the firewall guards against intrusion attempts while you
connect to the Internet or to another network.
Allow all traffic
Turns off the firewall. Allows all incoming and outgoing traffic. Provides no
protection.
Note: System status changes to a “vulnerable” state.If you do not want to be
warned about this state, select the following box at the bottom of the panel:
Do not show other warnings related to allowing all firewall traffic.
Block all traffic
Blocks all incoming and outgoing traffic. Use this setting if you have a
broadband connection and need to leave the computer unattended.
5: Firewall
Adjusting security levels
The Webroot Firewall is preconfigured with custom filtering levels for the different locations you
might use your computer: either at home, in a networked office environment, or from a remote
location:
•
Home: Home-networked environment, where there is no other firewall protection.
•
Work: Office environment where your computer is connected in a network and the
company has a firewall already in place.
•
Remote: Environments where you are connected to a company network with no firewall
in place or to a local network where you do not know what security is in place, such as
from an Internet café.
Note
The Webroot Firewall automatically detects your computer’s network connection
(either a home, office, or remote network).
If you have a good understanding of network and Internet security, you may want to adjust some of
the filter settings for each of the locations. You can adjust settings, as follows:
•
Internet security: The default setting (high) allows for basic Internet and network traffic
while still guarding your system against potential security breaches. You can adjust this
setting to low, if you are using the computer to connect to a local network and won’t be
surfing the Internet or you are in an office environment where a company firewall is
already in place.
•
Local network security: The default setting (low) allows you to access shared drives and
printers within a network. You can adjust this setting to high, if your computer is operating
in a remote or third-party network and you need maximum security or you don’t know
what network security is in place.
•
Trusted/untrusted sites: Add sites that you trust (always allow through the filters) or sites
that you do not trust (always block through the filters).
Adjusting network security settings
To adjust security for a home, office, or remote location:
1. Open the Webroot main interface by double-clicking the Webroot icon
tray.
in the system
2. From the Home panel, click the Edit settings button under PC Security. (Point your
mouse to the panel to display the Edit settings button.)
5: Firewall
43
The PC Security panel opens.
3. Click the Firewall tab.
4. In the Settings pane on the left, point the mouse to Security location.
5. In the Options pane on the right, click the drop-down arrow in the field for Security
settings location, then select the location you want to modify: Home location, Work
location, or Remote location.
6. In the Options pane, select the Let me set my options radio button.
Additional options appear below it.
7. Next to the Internet network security field, click the drop-down arrow for the desired
setting (described in the following table).
Internet Network Security
44
High
Recommended. Allows for basic Internet access, while guarding against
unwanted intrusions into your system. It filters for suspicious traffic traveling
through the processes, services, and communication methods used by your
computer.
Low
Not recommended. Appropriate only for the most trusted environments.
Only use the Low setting if you are using the computer to connect to a local
network and won’t be surfing the Internet or you are in an office environment
where a company firewall is already in place.
5: Firewall
8. Next to the Local network security field, click the drop-down arrow for the desired
setting (described in the following table).
Local Network Security
High
Not recommended. Appropriate for remote or third-party networks. Blocks
the ability to share files, drives, and printers within a network. You may want
to use this setting if you need maximum security or your network security is
unknown.
Low
Recommended. Allows for the ability to share files, drives, and printers
within a secure local network.
In addition, you can create a list of trusted or untrusted local sites. The “High” and “Low” security
settings will apply to any single computer, network, or Web site that you add to this list.
To create a local networks list:
1. Display the firewall security options, as described in the previous steps 1-6.
2. Click the link for Edit local networks.
The Local Networks panel opens. The Webroot Firewall displays any networks that it
previously detected.
3. If you want to add a site, select Click to add site from the bottom of the panel.
5: Firewall
45
4. Enter information in the fields as described in the following table.
Local networks fields
Trusted
Double-click in the Trusted field to display a drop-down menu. Select
Trusted or Untrusted, depending on what you want to specify for the site
you will define here.
Type
Double-click in the Type field to display a drop-down menu.
Select one of the following:
• Single computer. If you want to enter a trusted or untrusted standalone
home computer (not networked), select Single computer. You will also
need to enter its IP address in the next field.
• Network. If you want to enter a trusted or untrusted computer that is
connected with other computers, select Network. You will also need to
enter its IP address and the subnet mask address in the next two fields.
• Web site URL. If you want to enter a trusted or untrusted Web site, or a
location by a full host name instead of an IP address, select Web site URL.
URL or IP Address If you selected Single computer or Network for the Type, enter its IP
address.
If you selected Web site URL for the Type, enter its URL or domain name
Note: The program automatically adds “http://www” to the site you enter. If
the site you want to add does not include “www” in its host name (such as
support.webroot.com), enter “http://” before the host name (for example,
http://support.webroot.com).
Subnet mask
If you selected Network, enter its subnet mask. (The subnet mask does not
apply if you selected Single computer or Web site URL.)
5. To add another site, select Click to add site again and repeat the steps above.
6. Click the Save button.
If you need to remove a site from the list later, click Delete at the far right.
46
5: Firewall
Creating a trusted and untrusted global sites list
For additional security and to reduce the number of firewall alerts that may open, you can create a
list of global sites that you consider safe and want to always allow through the filters (trusted) and
sites that you consider unsafe and want to always block with the filters (untrusted).
Note
The sites you add to this list will not apply to the “High” and “Low” settings for
Internet or local network security.
To create lists of trusted or untrusted global sites:
1. Display the firewall security options, as described in steps 1-6 in “Adjusting security
levels” on page 43.
2. Next to Trusted/untrusted sites, click the Edit sites link.
The Global Trusted/Untrusted Sites dialog opens.
3. From the bottom of the dialog, select Click to add site.
5: Firewall
47
4. Enter information in the fields as described in the following table.
Global sites fields
Trusted
Double-click in the Trusted field to display a drop-down menu. Select
Trusted or Untrusted, depending on what you want to specify for the site
you will define here.
Type
Double-click in the Type field to display a drop-down menu.
Select one of the following:
• Single computer. If you want to enter a trusted or untrusted standalone
home computer (not networked), select Single computer. You will also
need to enter its IP address in the next field.
• Network. If you want to enter a trusted or untrusted computer that is
connected with other computers, select Network. You will also need to
enter its root IP address and the subnet mask address in the next two fields.
• Web site URL. If you want to enter a trusted or untrusted Web site, or a
location by a full host name instead of an IP address, select Web site URL.
URL or IP Address If you selected Single computer or Network for the Type, enter its IP
address.
If you selected Web site URL for the Type, enter its URL or domain name.
Leave the Subnet mask field empty.
Note: The program automatically adds “http://www” to the site you enter. If
the site you want to add does not include “www” in its host name (such as
support.webroot.com), enter “http://” before the host name (for example,
http://support.webroot.com).
Subnet mask
If you selected Network, enter its subnet mask. (The subnet mask does not
apply if you selected Single computer or Web site URL.)
5. To add another site, select Click to add site again and repeat the steps above.
6. Click the Save button.
If you need to remove a site from the list later, click Delete at the far right.
48
5: Firewall
Monitoring the processes for applications
The Webroot Firewall monitors the processes related to commonly used applications. When the
Process Monitor is enabled, the firewall looks for malicious system API calls used by hackers to
launch executable files. If it detects any suspicious activities related to system processes, the
firewall opens an alert similar to the following example.
You can view a list of running processes in the Windows Task Manager by pressing Ctrl-AltDelete, then clicking Task Manager.
Note
If your computer is running the 64-bit Edition of Windows Vista or Windows 7, the
Process Monitor is disabled and is not displayed in the Firewall panel.
To enable or disable the Process Monitor:
1. Open the Webroot main interface by double-clicking the Webroot icon
tray.
in the system
2. From the Home panel, click the Edit settings button under PC Security. (Point your
mouse to the panel to display the Edit settings button.)
The PC Security panel opens.
3. Click the Firewall tab.
4. In the Settings pane on the left, point the mouse to Process monitor.
5: Firewall
49
5. In the Options pane on the right, select the Enable Process Monitor checkbox to remove
the checkmark (disables the Process Monitor) or display the checkmark (enables the
Process Monitor).
Managing application traffic
To protect your computer from hackers and other threats, the Webroot Firewall monitors
applications that attempt to access the Internet. It analyzes which traffic could be a potential threat
by checking both incoming and outgoing packets of information against preconfigured rules,
called filters. When the firewall detects an incoming or outgoing packet, it compares the packet to
the filters and either accepts or denies the packet. The filter rules may be based on an IP address,
protocols, ports, packet direction, and so on. For your convenience, the Webroot Firewall already
has filters in place for many applications. In general, you should keep the predefined filtering
rules. However, if you have a thorough understanding of protocols, you can adjust some of the
rules.
You can change an application’s filtering mode so that traffic associated with a parent application
is always filtered, allowed, or blocked. You can also allow or block traffic for an application’s
subprocess (or child process). For some applications, a child process can access the Internet
through its parent process.
If the firewall detects any suspicious activities related to applications, it opens an alert similar to
the following example.
To change the filtering mode for an application:
50
5: Firewall
1. Open the Webroot main interface by double-clicking the Webroot icon
tray.
in the system
2. From the Home panel, click the Edit settings button under PC Security. (Point your
mouse to the panel to display the Edit settings button.)
The PC Security panel opens.
3. Click the Firewall tab.
4. Point the mouse to Applications.
The right panel lists applications that have attempted to access the Internet. The list shows
the application name, its executable name, its version number, the mode applied (allowed,
filtered, or blocked), and whether its subprocesses are allowed or blocked. You can see the
additional information by dragging the scroll bar to the right.
5. If desired, you can change the Allowed Parent setting to allow or block a child process
from launching. First, drag the scroll bar to the right.
5: Firewall
51
Then click in the Allowed Parent column. From the drop-down menu, select Yes to allow
subprocesses or No to block subprocesses.
6. To change the filtering mode for an application, click in the Mode column.
7. From the drop-down menu, select either:
•
Allow. Allows for all incoming and outgoing Internet traffic associated with the
application. This setting provides no protection.
•
Filter. Filters incoming and outgoing traffic associated with the application.
•
Block. Blocks all incoming and outgoing Internet traffic associated with the
application.This setting locks down the application’s traffic.
8. If desired, you can also edit the list as follows:
52
•
To remove an application, select it from the list and click the Remove button at the
bottom of the panel.
•
To add a new application, select the Add button at the bottom of the panel. When the
Explorer window opens, locate and select the executable filename of the application
and click Open. The application name appears in the list panel.
5: Firewall
Managing firewall alert notifications
When the Webroot Firewall detects traffic activity that it does not recognize, it blocks the activity
and displays a pop-up alert for 60 seconds, similar to the example below. You can respond to an
alert by clicking Allow or Block. If you don’t respond to the alert within 60 seconds, the firewall
automatically blocks the traffic.
Note
If an alert appeared when you were not trying to perform any sort of
communication over the Internet or network, and you have no idea why this alert
appeared, prevent the communication by clicking the Block button. If an alert
appeared after you were purposely running an application from the Internet or
communicating over a network port, look at the application name displayed in the
alert. If you do not recognize the application, you should block it. If you do
recognize the application, you can proceed by clicking the Allow button. However,
to be safe, you should run a scan even if you believe the traffic is legitimate (see
“Scanning for threats” on page 16).
By default, the Remember this setting option is checked, so that Webroot will always remember
how you managed this item and will not alert you again.
If you want to know more about the item that is attempting to access the network, click the Show
Details arrow. The panel expands to show a more detailed description. Click Hide Details to
collapse the description.
5: Firewall
53
If desired, you can change how and when alerts are opened.
To change the mode of displaying firewall alerts:
1. Open the Webroot main interface by double-clicking the Webroot icon
tray.
in the system
2. From the Home panel, click the Edit settings button under PC Security. (Point your
mouse to the panel to display the Edit settings button.)
The PC Security panel opens.
3. Click the Firewall tab.
4. Point your mouse to Custom security alert handling.
54
5: Firewall
5. In the Options pane on the right, select one of the following alert methods:
Custom security alert handling
5: Firewall
Standard control
Recommended setting. If selected, the firewall stops traffic it does not
recognize and opens an alert. When you select Block or Allow in the alert,
the firewall learns what traffic you consider acceptable and does not prompt
you again. If you do not respond within the allotted time shown in the counter
at the bottom of the alert, the firewall blocks the activity.
Manual control:
Control Firewall
and Process
monitor alerts
If selected, the firewall requires you to respond to all alerts. The sub-options
work as follows:
• If both Display alerts for outgoing suspicious communications and
Display alerts for suspicious applications are selected (checked),
firewall and process monitor alerts open.
• If Display alerts for outgoing suspicious communications is selected
and Display alerts for suspicious applications is not selected, firewall
alerts do not open, but process monitor alerts do open.
• If Display alerts for outgoing suspicious communications is not selected
and Display alerts for suspicious applications is selected, firewall alerts
open and will time out, but process monitor alerts are blocked
automatically.
• If both Display alerts for outgoing suspicious communications and
Display alerts for suspicious applications are not selected, firewall and
process monitor alerts do not open and are blocked automatically.
In manual mode, when you allow or block an application in an alert dialog,
the application is added to the application list. See “Managing application
traffic” on page 50.
55
56
5: Firewall
6: Sync and Sharing
The Sync and Sharing Manager automatically uploads files from designated folders on your
computer to Webroot’s online repository in a process called synchronization. This repository is a
collection of secure servers where your data is safely encrypted and stored. You can access your
synchronized data from any computer with Internet capabilities. You simply log into My Webroot
(https://www.webroot.com/mywebroot), a personalized Web interface that is available 24 hours a
day, every day of the year. You can also use My Webroot to share files with friends and family.
For synchronization, you can designate folders yourself or you can use the preconfigured folder,
called the Magic Briefcase. Any files you place in the Magic Briefcase are automatically
synchronized with your Webroot account and any other computers with the Webroot software
installed. If you only want to back up files, and not synchronize them, you can upload data to the
Web Archive, which is a folder that resides only in your online account.
After the initial upload, the Sync and Sharing Manager monitors synchronized folders for updates
made to the files (adding, editing, or deleting), then automatically uploads those changes to your
My Webroot account. Conversely, if you modify files from within your My Webroot account,
changes are synchronized back to your computer. The content between your computer and online
account is always kept synchronized. You never need to manually synchronize files yourself.
If you have another computer with the Webroot software installed, you can create shared folders
between these computers or use the Magic Briefcase. When you make changes in a shared folder
on one computer, the other computer automatically detects the changes and synchronizes the files,
as long as that computer is connected to the Internet and logged in to your account. The changes
are also propagated to your online account.
To use the Sync and Sharing Manager, see the following topics:
•
“Creating a data protection plan” on page 58
•
“Setting up synchronized folders” on page 60
•
“Synchronizing data on multiple computers” on page 66
•
“Using the Magic Briefcase” on page 71
•
“Using the Webroot File Manager” on page 72
•
“Copying files to the Web Archive” on page 79
•
“Managing files in the MyData page” on page 80
•
“Accessing files remotely” on page 84
•
“Managing photo albums” on page 89
•
“Sharing photo albums with others” on page 93
•
“Publishing photo albums to Facebook” on page 95
•
“Sending files to others” on page 96
•
“Restoring data” on page 98
•
“Adding more storage space” on page 104
6: Sync and Sharing
57
Creating a data protection plan
Before you begin synchronizing files, we recommend that you take a few minutes to determine
what files you want to protect, then organize them into folders for the Sync and Sharing Manager
(see “Setting up synchronized folders” on page 60).
Decide what files to protect
Your computer holds a massive amount of information — data files, program files, system files —
an overwhelming number might be stored on your hard drive. While some files are crucial (photos,
financial records, and so on), others can be ignored. If you need help deciding what files to protect,
follow the recommendations below.
Files you should definitely protect:
• Photos and videos transferred from your digital cameras.
• Documents generated from your financial software, tax returns, home-business documents, bank
records, and other financial records.
• Personal files and legal documents, including wills, deeds, and licenses.
• Files you consider irreplaceable or difficult to reproduce, such as special projects or school
assignments.
• Music files downloaded from the Internet.
• Installers for software programs downloaded from the Internet (not purchased on a separate CD),
plus any registration keys (serial numbers).
Files you may want to protect:
•
•
•
•
•
Some Windows settings, such as Windows Favorites.
Any configuration files or templates used by your programs, such as the .DOT template
files used by Microsoft Word.
Preferences or bookmarks from Web browsers.
Email address books.
Files you don’t need to protect:
•
•
•
•
Operating system files.
Software program files, as long as you have the original disks.
Temporary files, automatically generated when you open a Web page or a Windows program.
Files sitting in the Recycle Bin.
Locate and organize important files
Before you begin using the Sync and Sharing Manager, take some time to browse through your
folders for important files. Once you have located all important files, move them or make copies of
them into folders that you plan to use as the synchronized folders. For example, move all your
digital photos to a Pictures folder and all your financial records to a Documents folder. When
you’re done, see “Setting up synchronized folders” on page 60.
58
6: Sync and Sharing
Note
The purpose of the synchronized folders is not only for protection if your computer
crashes or is stolen, but also for accessing files remotely or from other computers.
You must remember that if you delete files or folders from the synchronized area,
you are also deleting them from the online servers and from other synchronized
computers. If you want to simply back up files for safety (for example, accidental
deletion or corruption of a single file), place them in the Web Archive. See
“Copying files to the Web Archive” on page 79.
If you are unfamiliar with Windows folders, see the following table.
Explore your personal folder structure
Your personal folder resides under “Documents and Settings” for Windows XP or under “Users” for
Windows Vista or Windows 7. The folder name will match your login name. To help you keep
organized, Windows programs often direct you to store important files in this central location. For
example:
• If you are using Windows XP, many programs automatically prompt you to store data files in the
“My Documents” folder, which contains other subfolders such as “My Music” and “My Personal
Stuff.” To view these folders, go to the Windows Start menu and click on My Computer, then
My Documents.
• If you are using Windows Vista or Windows 7, many programs automatically prompt you to store
data files in folders such as “Documents” and “Music.” To view these folders, go to the Windows
Start menu and click on Computer. You can see many of the common folders under “Favorite
Links.”
As long as you did not redirect Save operations to other folders on your drive, most of your important
files should be stored in the locations mentioned above. Also be aware that if you configured your
computer for multiple users (each person logs in with a different name and password), then each
person has their own personal subfolders. You must be logged into an account with administratorlevel privileges to view all the personal user folders.
While your personal folder includes subfolders for preferences that you might want to protect, such
as “Desktop” and “Favorites,” be aware that your personal folder also contains lots of files that are
not necessary to protect or even keep, such as temporary files (stored in the Temp directory) or
cookie files (stored in the Cookies directory).
Explore your hard drive
Some programs do not automatically prompt you to save files under your personal folder. To
determine where a program is storing files, open the program, then select Save As from the
program’s File menu. Look for the folder location that automatically appears in the “Save as” dialog
box.
You should also use the Windows Search function to locate any files you may have accidentally
saved to unintended folders. For example, you can locate digital photos by using the Windows
Search function to locate all “Pictures and Photos.” You can also search for file types by entering an
extension in the search box (for example, locate all spreadsheets by entering *.XLS*). An extension
consists of the letters that appear after the period in the file name, which Windows uses to identify
the file’s type. Most programs use standard extensions for their files (for example, Word uses a
.DOC or .DOCX extension).
6: Sync and Sharing
59
Setting up synchronized folders
To begin using the Sync and Sharing Manager, you must first designate the folders on your
computer that you want synchronized. Before you begin, make sure you have moved or copied
your important files to those folders (see “Creating a data protection plan” on page 58).
The following instructions describe how to initially configure synchronized folders after you
installed the Webroot software, how to add synchronized folders after initial configuration, and
how to stop synchronizing folders. Once folders are configured, be aware that any changes,
deletions, or additions you make in the synchronized folders are also propagated to your online
account and to other synchronized computers. For example, if you delete a file in one
synchronized folder, it will be deleted across all synchronized computers that share that
synchronized folder and deleted in the online account.
The following instructions describe:
•
Configuring synchronized folders (first-time setup)
•
Adding synchronized folders
•
Removing folders from synchronization
Note
The Sync and Sharing Manager provides one preconfigured folder called the Magic
Briefcase. If desired, you can use that folder instead of configuring synchronized
folders yourself. For more information about that folder, see “Using the Magic
Briefcase” on page 71. If you only want to back up files, use the Web Archive. For
more information, see “Copying files to the Web Archive” on page 79.
Configuring synchronized folders (first-time setup)
To create folders that will be synchronized automatically with your online account, follow the
instructions in this section. (Before you begin, make sure you are connected to the Internet.)
To set up synchronized folders:
1. Make sure you are signed in to your account. (See “Signing in to your Webroot account”
on page 4.)
2. From the Home panel, click the Set up now button under Sync & Sharing. (If
synchronized folders have already been configured, this panel does not show “Set up
now.” Instead, it shows “Manage files” and you can skip these instructions.)
The Sync & Sharing panel opens.
60
6: Sync and Sharing
If you have not yet created synchronized folders, the Setup dialog opens as shown below.
3. Click Next.
4. When the Select Sync Folders dialog box opens, select the checkbox next to the folders
you want synchronized with the online servers, then click Next.
Any files residing in these folders will be copied to My Webroot, your online Webroot
account. If there are more folders that you would like to synchronize, but are not listed in
the Setup dialog, see “Adding synchronized folders” on page 63.
You can manage these files in the Webroot File Manager or in the MyData page. For more
information, see “Using the Webroot File Manager” on page 72 and “Managing files in
the MyData page” on page 80.
5. At the final dialog, click Finish.
6: Sync and Sharing
61
Note
If you have installed the Webroot software on additional computers in your
household and you want to include their folders in synchronization, see
“Synchronizing data on multiple computers” on page 66.
The Sync and Sharing Manager immediately begins an upload to the online repository.
Depending on the number and size of the synchronized folders, the initial upload may take
several minutes, but you can still work on your computer during this process.
6. If you want to see the upload progress, open the Webroot File Manager by returning to the
Sync & Sharing panel and clicking Open File Manager. When the Webroot File Manager
opens, click the View menu, and select File Transfer Status.
A File Transfer Status panel opens, similar to the following example.
62
6: Sync and Sharing
7. If you want to check that your folders and files were successfully synchronized, open
Windows Explorer and access the folders you selected in the setup process. A green
checkmark appears next to a file or folder to indicate that it is synchronized.
You can also check your online account by opening the MyData page. See “Managing
files in the MyData page” on page 80.
Adding synchronized folders
If you want to add more synchronized folders after first-time configuration, you can open the
Webroot File Manager and create as many synchronized folders as you like. If you want to
configure multiple computers for synchronization, see “Synchronizing data on multiple
computers” on page 66.
To add synchronized folders:
1. Make sure you are signed in to your account. (See “Signing in to your Webroot account”
on page 4.)
2. Open the Webroot File Manager. (From the system tray, right-click on the Webroot
icon
and click Manage Sync from the pop-up menu.)
3. From the Webroot File Manager, click Manage Sync Folders.
6: Sync and Sharing
63
The Webroot Manage Folders dialog opens and shows your computer in the left column,
under “This Computer,” as shown in the following example.
4. Click Add Folders from this Computer.
5. When the Select New Folders dialog opens, click in the box next to the folders you want
included in synchronization, then click OK.
The Manage Folders panel shows your selected folders under “This Computer.”
6. When you’re done selecting folders, click the OK button at the bottom of the Webroot
Manage Folders dialog. You must click the OK button for the synchronization to begin.
The Sync and Sharing Manager begins synchronizing and shows its status at the bottom of
the Webroot File Manager.
64
6: Sync and Sharing
Removing folders from synchronization
You can remove a folder from the automatic synchronization process, without actually deleting the
folder from your computer.
To stop synchronizing folders:
1. Make sure you are signed in to your account. (See “Signing in to your Webroot account”
on page 4.)
2. Open the Webroot File Manager. (From the system tray, right-click on the
Webroot icon
and click Manage Sync from the pop-up menu.)
3. From the Webroot File Manager, click Manage Sync Folders.
The Webroot Manage Folders dialog opens and shows your computer in the left column,
under “This Computer.”
4. Click on the folder you want to remove, then click the Remove button.
5. At the prompt, click OK.
The Sync and Sharing Manager no longer synchronizes this folder. It does not delete the
folder from your computer, but it does remove the folder from your My Webroot account.
6: Sync and Sharing
65
Synchronizing data on multiple computers
If you installed the Webroot software on multiple computers, you can create shared, synchronized
folders between these computers. Whenever you update data in one of these shared folders
(adding, editing, moving, or deleting files), the Sync and Sharing Manager automatically makes
the same changes to the online servers and to shared folders on the other computers. This
automatic synchronization can be beneficial when you frequently use two computers, one at home
and one at work, and need to access the most recent files.
The following instructions describe how to synchronize data between two computers and how to
synchronize more than two computers.
Note
The Sync and Sharing Manager provides one preconfigured folder called the Magic
Briefcase that you can use for sharing files between computers, instead of
configuring shared folders yourself. (For more information, see “Using the Magic
Briefcase” on page 71.) Be aware that the Magic Briefcase is preconfigured to
synchronize all your computers and could consume lots of disk space.
Synchronizing data between two computers
If you have two computers with the Webroot software installed on each one, you can synchronize
data between them by creating shared folders. (Before you begin, make sure you are connected to
the Internet.)
To synchronize data between two computers:
1. Install the Webroot software on each computer. You can install the software on an
additional computer from My Webroot (see “Managing licenses and additional products”
on page 172).
2. Make sure you are signed in to your account. (See “Signing in to your Webroot account”
on page 4.)
3. Open the Webroot File Manager. (From the system tray, right-click on the Webroot
icon
and click Manage Sync from the pop-up menu.)
4. The Webroot File Manager assigns a name to your computer, but you can assign a new
name if you like. To do this, click on the Tools menu and click Rename this Computer.
Do the same for each of your computers with the Webroot software installed. The new
name and icon appear in the left panel, similar to the following example:
5. For each computer, create at least one synchronized folder that you plan to use as a shared
folder (see “Setting up synchronized folders” on page 60).
66
6: Sync and Sharing
6. From the Webroot File Manager on either computer, click Manage Sync Folders.
The Webroot Manage Folders dialog opens and shows the computer you are currently
using in the left column, under “This Computer,” and your other computers in the right
column.
7. From the right column, under “Other Computers,” select a folder that you want to
synchronize between the two computers. Click the Sync button under the folder name.
A dialog displays the folder name and location where the folder from the old computer
will be copied to your new computer.
6: Sync and Sharing
67
8. If you want to specify a new location, click the Choose Another Location button and
select a folder from the Browse dialog. Otherwise, you can just click OK to copy the
folder.
Note
If you select a folder with a name that is identical to a folder on the other computer,
a dialog opens and asks if you want to merge the two. During a merge, the Sync and
Sharing Manager copies the contents in each folder to the other, so they each
contain the same files. If the folders contain files with identical names, the Sync
and Sharing Manager first determines if the contents of the files are identical or
different. If the content is identical, it links the files and later synchronizes them if
you make a change to one. If the content is different, it keeps both versions and
suffixes filenames with the following text: (from computer_name).
The folder from the second computer appears in the left column. An arrow is shown
between the two folders to indicate they will be synchronized. (The Magic Briefcase
folder is synchronized automatically.) If you have additional folders to synchronize for
this computer or other computers, follow the previous steps.
9. When you’re done selecting folders, click OK at the bottom of the Manage Sync Folders
dialog. You must click the OK button for the synchronization to begin.
68
6: Sync and Sharing
Depending on the size and number of files, synchronization may take awhile. When the
process is complete, the status bar at the bottom of the Webroot File Manager shows “All
files are backed up and in sync” and shows the synchronized folders under each computer.
From now on, whenever you place a file in one of these synchronized folders, the Sync
and Sharing Manager uploads it to your online account and to the other computers. Be
aware that any editing changes you make to these files (additions, modifications, or
deletions) are also propagated to the other computers and to your My Webroot account.
6: Sync and Sharing
69
Synchronizing data between three or more computers
If you have three or more computers with the Webroot software installed on each one, you can
synchronize data between them by creating shared folders.
To synchronize data between more than two computers:
1. Follow steps 1 through 5 in the previous section, “Synchronizing data between two
computers.”
2. From any computer, open the Webroot Manage Folders dialog and select the Sync button
under the folder you want to share.
3. Click OK.
An arrow is shown between the two folders to indicate they are synchronized.
4. Go to the next computer, open the Webroot Manage Folders dialog, select the Sync button
for the folder you want to share, then click OK.
5. Repeat the previous steps for all folders you want to share.
70
6: Sync and Sharing
Using the Magic Briefcase
The Magic Briefcase is a synchronized folder that Webroot has configured for your convenience
under your personal Documents folder in Windows. Any files you put in the Magic Briefcase are
automatically synchronized with your online account and with any other computers in your
account.
We recommend that you use the Magic Briefcase to load files that you may want to access from
other computers, as when you are traveling and want to access certain documents remotely. If you
have multiple computers that share a Webroot account, you should not load a large amount of files
in the Magic Briefcase. The Sync and Sharing Manager copies all files placed in the Magic
Briefcase to all your other computers with the Webroot software installed.
To use the Magic Briefcase:
1. Make sure you are signed in to your account. (See “Signing in to your Webroot account”
on page 4.)
2. Open Windows Explorer and select a folder or file you want to copy. Right-click to open
the pop-up menu and select Copy, as shown in the following example.
3. Open the Magic Briefcase folder, located in your personal Documents folder in Windows
Explorer.
This folder is in “Documents and Settings” for Windows XP or under “Users” for
Windows Vista and Windows 7.
4. Paste the file into the Magic Briefcase folder.
When you copy the file to the Magic Briefcase, the file is instantly synchronized to your
online account and to your other computers with a Webroot account. A green checkmark
next to a file or folder indicates that it is synchronized.
6: Sync and Sharing
71
If you want to verify that the file or folder was loaded into your online account, open the
MyData page. See “Managing files in the MyData page” on page 80.
Using the Webroot File Manager
You can manage synchronized folders and files through the Webroot File Manager, which is an
Explorer-type interface available on your computer. The Webroot File Manager enables you to
open, copy, move, and delete files in your synchronized folders.
You do not need to connect to the Internet to view the Webroot File Manager. However, when you
are connected, you can manage files online and across all your computers that have the Webroot
software installed. For example, if you want to access a document that resides on your computer at
home and edit the document on your laptop while you’re traveling, you can use the Webroot File
Manager to open and edit the file.
To open the Webroot File Manager, you can either:
•
72
Right-click the Webroot icon
up menu.
in the system tray and click Manage Sync from the pop-
6: Sync and Sharing
or
•
From the Home panel of the main interface, click the Manage files button under Sync &
Sharing.
The Webroot File Manager opens, similar to the following example. The left panel shows
synchronized folders, the Magic Briefcase, the Web Archive, and Deleted Files. If you
installed the Webroot software on multiple computers, the left panel lists each computer.
The right panel shows more detail about whatever you select in the left panel.
See the following sections for details about the Webroot File Manager and available
commands.
6: Sync and Sharing
73
Menus
The File, Edit, View, and Tools menus provide access to Webroot File Manager commands (see
the table, “Commands in the Webroot File Manager” on page 76). The Help menu provides access
to complete online Help, some FAQs, and the ability to send an error report to Webroot.
Toolbar
The toolbar provides commands for reconfiguring synchronized folders and sending emails to
friends with links to files or albums (see the table, “Commands in the Webroot File Manager” on
page 76).
Left panel (folder tree)
The left panel shows the following:
•
Your computers and folders. This is a folder tree that shows your computer and its
synchronized folders, as well as any other computers shared in your account.
•
Magic Briefcase. This is a preconfigured, synchronized folder that resides under your
personal Documents folder. It also resides in your My Webroot account. Any files you put
in the Magic Briefcase are automatically synchronized with your online account and with
other computers where you installed the Webroot software. For more information, see
“Using the Magic Briefcase” on page 71.
•
Web Archive. This is a folder that only resides on the Webroot servers, not on your home
computer. You should store files here that you need backed up, but not synchronized (for
example: scanned copies of passports, old tax returns, and music files). For more
information, see “Copying files to the Web Archive” on page 79.
•
Deleted Files. This is a recycle bin for files deleted from your account. You can retrieve
files from here, if necessary.
At the bottom of the panel are two additional buttons, which open to My Webroot: My Online
Homepage and Photo Gallery.
74
6: Sync and Sharing
Middle panel
The middle panel shows more detail about an item selected in the folder tree on the left. You can
click on a file to open it or right-click to open a pop-up menu of commands (see the table,
“Commands in the Webroot File Manager” on page 76).
Status bar (bottom taskbar)
The status bar at the bottom of the panel shows the amount of storage used and free, the status of
synchronized files, a link to your personal account, and the connection status to the Internet.
6: Sync and Sharing
75
Commands
The Webroot File Manager includes many commands, which are available from either the menu
bar at the top of the panel or from a pop-up menu that opens when you right-click on an item.
(Some commands require that you connect to the Internet.) For a complete list of commands, see
the following table.
Commands in the Webroot File Manager
76
New Folder
Creates a new subfolder in your synchronized folders.
To create a subfolder:
1. Select a “parent” folder from the left panel.
2. Select New Folder either from the File menu or from the pop-up menu
when you right-click on the folder name.
3. When “New Folder” appears, enter your own name and press Enter.
You can then load files into this folder by using the Import Files
command.
Manage Sync
Folders
Opens the Webroot Manage Folders dialog where you can add or remove
folders from synchronization.
For further instructions, see “Setting up synchronized folders” on page 60.
Send File
Sends an email to friends with a link to your files. For further instructions,
see “Sending files to others” on page 96.
Share
Sends an email to friends with a link to your photo albums. For further
instructions, see “Sending files to others” on page 96.
Import Files
Imports files into a synchronized folder.
To import files:
1. Select a folder from the left panel.
2. Click Import Files either from the File menu or from the pop-up menu
when you right-click on the folder name.
3. When the Import dialog opens, select the files (use Ctrl or Shift to pick
multiple files) and click Open.
The files appear in the Webroot File Manager and are immediately
uploaded to the online servers.
Import Folder
Imports subfolders into a synchronized folder.
To import a folder:
1. Select a “parent” folder from the left panel.
2. Click Import Folder either from the File menu or from the pop-up
menu when you right-click on the folder name.
3. When the Browse dialog opens, select the folder and click OK.
The subfolder appears in the left panel.
Export/Save As
Saves a synchronized file or folder to a different location on your
computer.
To export or save:
1. Select a file or folder.
2. Click Export/Save As either from the File menu or from the pop-up
menu when you right-click on the file or folder name.
3. When the Browse dialog opens, select the folder location and click OK.
The file or folder is saved to that other location.
6: Sync and Sharing
Commands in the Webroot File Manager (continued)
Restore
Restores a deleted file. For instructions, see “Restoring data” on page 98.
Edit commands (Cut,
Copy, Paste,
Rename, Select All,
and Delete)
Allows you to perform editing tasks, similar to the Edit menu in Windows
Explorer and other Windows programs.
Note: Deleted files are moved to the Deleted Files recycle bin, where you
can permanently delete them or restore them.
Show in Windows
Explorer
Opens Windows Explorer and shows the location of the file on your
computer.
To show the file location in Explorer:
1. Select a file in the middle panel.
2. Click Show in Windows Explorer either from the View menu or from
the pop-up menu when you right-click on the file name.
Explorer opens to the file’s location.
View in my Online
Homepage
Opens the MyData page and shows the location of the file in your My
Webroot account.
To show the file location in MyData:
1. Select a file in the middle panel.
2. Click View in My Online Homepage from the pop-up menu when you
right-click on the file name.
The MyData page opens in your Internet browser and shows the file’s
location in your online account.
Versions
Allows you to see up to five previous versions of a file that have been
uploaded to the online servers.
To see file versions:
1. Select a file in the middle panel.
2. Click Versions either from the View menu or from the pop-up menu
when you right-click on the file name.
File transfer status
Allows you to check the status of file uploads during synchronizations.
To see the file transfer status:
1. Select the View menu.
2. Click File Transfer Status.
Another panel opens where you can view the progress of uploads and
downloads. If necessary, you can move files up in the priority list.
Preferences
Provides the following options:
• Show file status icons in Windows Explorer.
• Adjust the file upload speed from low to high.
To access these preferences, select the Tools menu, then click
Preferences.
6: Sync and Sharing
77
Commands in the Webroot File Manager (continued)
Rename this
Computer
Allows you to enter a more descriptive name and icon for the computers
listed in the left panel.
To rename a computer:
1. Select one of the computers in the left panel.
2. Select the Tools menu.
3. Click Rename this Computer.
4. In the Name Your Computer dialog, enter a new name and click on an
icon.
The new name and icon appear in the left panel, similar to the following
example:
Remove a Computer Stops synchronizing folders on this computer. (It does not remove the
actual folders on your computer.)
To remove a computer from synchronization:
1. Select the computer in the left panel.
2. Select the Tools menu.
3. Click Remove a Computer.
4. In the next dialog, click the Remove button.
Any files that were synchronized on this computer are moved from your
online account to the Web Archive. If you don’t want the files stored there,
go to the Web Archive and delete them.
Reclaim Storage
78
If you notice that the total size of the files in the Webroot File Manager
does not match how much overall storage space you are using, go to the
Tools menu and click Reclaim Storage to make sure all your files are
properly accounted for.
6: Sync and Sharing
Copying files to the Web Archive
If you have important documents or photos that you want backed up, but not synchronized, you
should upload them to the Web Archive. For example, you may want to back up tax returns, old
photos, and a scanned copy of your passport. These types of documents won’t change and don’t
need to be kept in synchronization with other computers.
Although you can view the contents of the Web Archive folder from the Webroot File Manager,
this folder does not reside on your home computer and you cannot view it from Windows
Explorer. The contents of the Web Archive physically reside on the Webroot servers, accessible
from your My Webroot account.
Note
To restore files from the Web Archive, see “Restoring data” on page 98.
To copy files to the Web Archive:
1. Make sure you are signed in to your account. (See “Signing in to your Webroot account”
on page 4.)
2. Open the Webroot File Manager. (From the system tray, right-click on the Webroot
icon
and click Manage Sync from the pop-up menu.)
3. When the Webroot File Manager opens, right-click Web Archive to display the pop-up
menu. Select either Import Files or Import Folder.
4. From the dialog that opens, select the files or folders you want archived.
The files are instantly copied to the Web Archive in your online account. The Webroot
File Manager shows the folders or files under the Web Archive folder. The Status column
in the middle panel shows “Backed Up” next to each file that uploaded successfully.
Note
Your files remain in their original location. The Sync and Sharing Manager does
not move the files, only copies them.
6: Sync and Sharing
79
5. If you want to double-check that the files were successfully uploaded to your online
account, right-click on Web Archive and select View in My Online Homepage.
Managing files in the MyData page
All your uploaded files are available online in the MyData page of My Webroot, your personalized
Web interface that is available 24 hours a day, every day of the year. The MyData page allows you
to open, copy, move, delete, and share files in your synchronized folders. You can access these
files from any computer with an Internet connection and browser.
To manage files in the MyData page:
1. Open your browser and click My Webroot from the Webroot toolbar.
If you are not signed in to your Webroot account, the Sign In panel opens. Enter your user
name (email address) and password, then click the Sign in button.
2. When My Webroot opens with your account information, select MyData from the top
panel.
The MyData page opens, similar to the following example.
80
6: Sync and Sharing
The MyData page includes three tabs across the top of the main panel: My Folders and
Files, Recent Events, and Photos. These tabs are described in the following sections.
My Folders and Files
The My Folders and Files tab lists all files that have been uploaded, as shown in the example
above. For a complete list of commands available from the My Folders and Files tab, see the
following table.
My Folders and Files
New Folder
Create a subfolder within one of your synchronized folders.
To create a new subfolder:
1. Select a parent folder in the left panel.
2. Click New Folder.
When the New Folder dialog opens, enter a name and a location, then click
OK.
Upload
Upload files from your computer to your synchronized folders.
To upload files:
1. Select a destination folder in the left panel.
2. Click Upload.
3. When the Upload Files dialog opens, click Browse to select a file to
upload from your computer. You can use the additional fields to upload
multiple files.
4. When you’re done, click OK.
6: Sync and Sharing
81
My Folders and Files (continued)
Send Files
Send an email to friends with a link to your files. For further instructions,
see “Sending files to others” on page 96.
Download
Access a file from another computer by opening it or by downloading it to
a Downloads folder. To download files, see “Accessing files remotely” on
page 84.
Copy, Move, Delete
Copy, move, or delete files.
1. Select one or more files in the middle panel by clicking in the checkbox
next to the file name.
2. Click Copy, Move, or Delete.
For Move and Copy, another dialog opens where you select the destination
folder. For Delete, files are moved to the Deleted folder, which serves as a
recycle bin.
Edit with WebSync
Edit files from any Internet-connected computer and have the changes
immediately synchronized. For instructions, see “Accessing files
remotely” on page 84.
Versions
View previous versions of an uploaded file (five maximum) and restore
them if necessary.
To see file versions:
1. Click on a file name in the middle panel to display the pop-up menu.
2. Click Versions.
A dialog opens with more information about the file and previous versions
that were uploaded. For more information about restoring previous
versions, see “Retrieving an older version of a file” on page 102.
Rename
82
Rename a file in your synchronized folders.
To rename a file:
1. Click on a file name in the middle panel to display the pop-up menu.
2. Click Rename.
Enter a new name and press Enter.
6: Sync and Sharing
Recent Events
In the Recent Events tab, you can view the ten most recent activities performed with the Sync and
Sharing Manager, which may include sharing an album, updating a file, or sending a file.
Photos
The Photos tab shows all the synchronized folders that contain at least one JPG file, then displays
those folders as “photo albums.”
For a complete list of commands available from the Photos tab, see the following table.
Photos
My Albums/
Contact’s Albums
View your own albums or albums sent to you by friends. See “Managing
photo albums” on page 89.
Share Album
Send an email to friends with a link to your photo albums. For instructions,
see “Sharing photo albums with others” on page 93.
Publish to Facebook
Publish your photo albums on your Facebook page. For instructions, see
“Publishing photo albums to Facebook” on page 95.
6: Sync and Sharing
83
Photos (continued)
Properties
Specify who can see the album, rename an album, and view other
properties.
To set properties:
1. Select the down arrow next to the Actions field beneath the album.
2. Click Properties.
From the Properties dialog, you can change the name of the album, view
the folder location of the album, or specify whether this album can be
viewed by only you, everyone on the Internet, or only selected contacts.
Download Album
Access an album from another computer by opening it or by downloading
it to a Downloads folder. For instructions, see “Accessing files remotely”
on page 84.
Accessing files remotely
You can access synchronized files or photo albums from any computer with an Internet connection
and browser. Simply access your My Webroot account, then download files or albums to your
current computer. You can also edit files with WebSync, a program that provides access to some
editing applications.
To access files remotely:
1. Open your browser and access My Webroot (https://www.webroot.com/mywebroot/).
2. In the Sign In panel, enter your user name (email address) and password, then click the
Sign in button.
3. When My Webroot opens with your account information, select MyData from the top
panel.
The MyData page opens.
84
6: Sync and Sharing
The following sections describe:
•
Downloading files
•
Downloading photo albums
•
Editing files remotely
Downloading files
You can download files residing in any of your synchronized folders from any location. For
example, if you are traveling and need access to a file located on your home computer, you can
download the file from any computer with an Internet connection.
To download files:
1. Access the MyData page as described previously in this section.
2. Make sure the My Folders and Files tab is selected.
3. Do one of the following:
•
Click on a file to display the pop-up menu and select Download.
or
•
6: Sync and Sharing
Select one or more files in the middle panel and click the Download button.
85
A dialog prompts you to open the file or save it to your current computer.
4. Select either:
•
Open with and an application from the drop-down box. If you chose to open the file,
the Sync and Sharing Manager opens the selected application and loads the file in it.
•
Save File. If you chose to save the file, it creates a Downloads folder (if not already
created) and places your files there.
Downloading photo albums
The MyData page allows you to download photo albums residing in any of your synchronized
folders from any location. For example, if you are traveling and want access to a photo album
located on your home computer, you can download the album from any computer with an Internet
connection.
To download photo albums:
1. Access the MyData page as described previously in this section.
2. Click the Photos tab.
3. Beneath the album you want to download, click the down arrow next to the Actions field,
then click Download Album from the menu.
86
6: Sync and Sharing
A dialog prompts you to open the file or save it to your current computer.
4. Select either:
•
Open with and an application for viewing photos from the Browse button. If you
chose to open the album, the Sync and Sharing Manager opens the application you
selected and loads the album.
•
Save File. If you chose to save the album, the Sync and Sharing Manager creates a
Downloads folder (if not already created) and places your album there.
Editing files remotely
You can open and edit files residing in any of your synchronized folders from any location. For
example, if you are traveling and need access to a file located on your home computer, you can
open the file from any computer with an Internet connection. You can then edit the file and save it.
The changes are immediately synchronized.
To edit files remotely:
1. Access the MyData page as described previously in this section.
2. Make sure the My Folders and Files tab is selected.
3. Click on a file to display the pop-up menu and select Edit with WebSync.
6: Sync and Sharing
87
Note
If a dialog opens that instructs you to install Java, click on the install Java link and
follow the on-screen instructions.
A dialog prompts you to open the file or save it to your current computer.
4. To edit your file, select Java Web Start Launcher.
Your document opens in Microsoft Word, along with a Webroot - WebSync dialog.
5. Edit your file, then click Done with All so your changes are immediately synchronized.
88
6: Sync and Sharing
Managing photo albums
When you place photos in your synchronized folders, the Sync and Sharing Manager uploads them
to your online account and creates an album for every folder that contains at least one JPG file.
You can access and manage all your uploaded photo albums from the Photos page.
To manage photo albums:
1. Open your browser and click My Webroot from the Webroot toolbar.
If you are not signed in to your Webroot account, the Sign In panel opens. Enter your user
name (email address) and password, then click the Sign in button.
2. When My Webroot opens with your account information, select MyData from the top
panel.
The MyData page opens.
3. Click the Photos tab.
The folders containing JPG files are organized into photo albums.
You can perform a number of tasks from the Photos tab, as described in the following
table
6: Sync and Sharing
89
.
Photo Album commands
My Albums/
Contact’s Albums
By default, your own albums are shown in the Photos tab. If you want to
view photos that friends in your Contacts list sent you, click the Contacts’
Albums button above the album pictures. (To create a Contacts list, click
the Contacts link below the album pictures.) To view your own albums
again, click the My Albums button.
Sort by
If you want to reorganize the albums shown in the Photos tab, click the
down arrow in the Sort by field to reorganize the albums by name or date
imported.
Show/Hide Albums
If you want to hide some albums from this view, click the Show/Hide
Albums link.
In the next panel, click Hide if you do not want this album shown in the
Photos tab or Show to display it again. When you hide an album, its files
are still synchronized and accessible from your folders.
90
6: Sync and Sharing
Photo Album commands (continued)
Actions
Click the drop-down arrow in the Actions field to access the drop-down
menu.
The menu items are described below.
• Share Album. Sends an email to friends with a link to your photo
albums. For further instructions, see “Sharing photo albums with
others” on page 93.
• Publish to Facebook. Publishes your photo albums on your Facebook
page. For instructions, see “Publishing photo albums to Facebook” on
page 95.
• Properties. Opens the Properties dialog, where you can change the
name of the album, view the folder location of the album, or specify
whether this album can be viewed by only you, everyone on the
Internet, or only selected contacts.
• Download Album. Accesses an album from another computer by
opening it or by downloading it to a Downloads folder. To download an
album, see “Accessing files remotely” on page 84.
Settings
6: Sync and Sharing
If you do not want to receive notifications when someone opens the email
with your album attached, click the Settings link below the album
pictures. Under Notifications, click Unsubscribe.
91
Photo Album commands (continued)
Contacts
If you frequently send albums to the same people, you can create an
address list. Click the Contacts link below the album pictures. The
Contacts panel opens, similar to the example below.
From this panel, you can create contacts as follows:
• Add Contact. Click to manually enter a list of friends and family.
• Add Group. Click to create a group and assign contacts to the group.
For example, you may want to create one group that includes only your
family and another that includes all your friends.
• Import Contacts. Click to upload your address book from Gmail,
Yahoo, Hotmail, or AOL.
To view all photos within the album, click on the album picture. Another page opens with
thumbnail views of your photos. From there, you can click on a thumbnail to view a larger
image and access Photo Actions, similar to the example below.
The right panel displays a list of commands for album actions (described in the previous
table) and for individual photo actions, described in the following table.
92
6: Sync and Sharing
Photo Actions
View in My Folders
and Files
Opens the My Folders and Files page and displays the location of the
selected photo.
Download Photo
Downloads the selected photo (if it resides on another computer). To
download a photo, see “Accessing files remotely” on page 84.
Rotate Left/
Rotate Right
Rotates the picture’s orientation.
Publish to Facebook
Publishes the selected photo on your Facebook page. For instructions, see
“Publishing photo albums to Facebook” on page 95.
You can add descriptions of each photo by selecting Click to add a caption below the
photo. The caption appears in the individual photo view and when you click Slideshow in
the upper right of the picture.
Sharing photo albums with others
If you want to share photo albums with friends, you can use the Send Folders function to send
them an email with a link to copies of your albums. Using the Send Folders function has several
advantages: it preserves space because you are not attaching albums directly to an email and it
protects your original files because you are not providing others with direct access to your albums.
Recipients are given access to a copy of your photos for 21 days. Be aware that since they do not
have access to your original files, any future changes you make won’t be reflected in their copy.
The recipients of your email do not need to have a Webroot account to access the albums.
However, if they do have a Webroot account, they can view any albums you make public or share
with them.
To share your photo albums with others:
1. Open your browser and click My Webroot from the Webroot toolbar.
If you are not signed in to your Webroot account, the Sign In panel opens. Enter your user
name (email address) and password, then click the Sign in button.
2. When My Webroot opens with your account information, select MyData from the top
panel.
3. Select the Photos tab.
4. Select the drop-down arrow next to Actions, then click Share Album.
6: Sync and Sharing
93
The Share Album dialog opens.
In the To: field, enter the email addresses of the recipients, separated by commas. You can
also import email contacts you previously created by selecting Import Contacts in the
upper right of the panel. (To create a Contacts list, see Contacts in the table for “Photo
Album commands” on page 90.)
5. In the Message: field, enter a short message for the invite. (If you select the Make
Public... checkbox, your photo album is accessible to anyone on the Internet.)
6. When you’re done, click the Share Album button.
A status message opens when your file is sent.
Your recipients receive a message with a link to your photos. When they click on the link,
a Web page opens where they can download the files to their computers. (They do not
need a Webroot account.) Recipients are given access to a copy of your photos for 21
94
6: Sync and Sharing
days. Since they do not have access to your original files, any future changes you make
won’t be reflected in their copy.
When the recipients access the album, Webroot sends you a notification and logs an entry
in the Recent Activity tab in the MyData page. If you do not want to receive notifications,
click the Photos tab and click Settings below the album pictures. Under Notifications,
click Unsubscribe.
Publishing photo albums to Facebook
If you have a Facebook account, you can easily publish your photo albums to Facebook using the
Sync and Sharing Manager. You can also publish individual photos, as described in the Photo
Actions table on page 93.
To publish albums to Facebook:
1. Open your browser and click My Webroot from the Webroot toolbar.
If you are not signed in to your Webroot account, the Sign In panel opens. Enter your user
name (email address) and password, then click the Sign in button.
2. When My Webroot opens with your account information, select MyData from the top
panel.
3. Select the Photos tab.
4. Click the Facebook icon below the album you want to publish.
5. When the next page opens, you can choose which photos you want published. Click Select
All or click on each photo (use Ctrl and Shift), then click the Publish button.
6. In the Facebook dialog, enter your email address and password used for your Facebook
account. If the Facebook Special Permissions dialog opens, select Allow Photo Uploads.
The following dialog opens.
6: Sync and Sharing
95
7. Enter a name for the new album or click Existing Album and select one of your current
Facebook albums to load the photos into an existing album. Click OK.
A message displays in My Webroot that your pictures are uploading to Facebook.
8. Open your Facebook account and check that your photos are posted on your profile.
Sending files to others
If you would like to share files with others, you can use the Send Folders function to send them an
email that provides a link to copies of your files. Using the Send Files function has several
advantages: it preserves space because you are not attaching files directly to an email and it
protects your original files because you are not providing others with direct access to your files.
Recipients are given access to a copy of your files for 21 days. Be aware that since they do not
have access to your original files, any future changes you make won’t be reflected in their copy.
The recipients of your email do not need to have a Webroot account to access the files.
To send file links:
1. Open your browser and click My Webroot from the Webroot toolbar.
If you are not signed in to your Webroot account, the Sign In panel opens. Enter your user
name (email address) and password, then click the Sign in button.
2. When My Webroot opens with your account information, select MyData from the top
panel.
3. Click the My Folders and Files tab.
4. Select a file by clicking on its checkbox, then click Send Files from the toolbar or Send
from the right-click pop-up menu.
96
6: Sync and Sharing
The Send Files dialog opens.
5. In the To: field, enter the email addresses of the recipients, separated by commas. In the
Message: field, enter a short message for the invite. Then click Send.
A status message opens when your file is sent.
Your recipients receive a message that looks similar to the following example. When they
click on the link, a Web page opens where they can download the files to their computers.
(They do not need a Webroot account.) Recipients are given access to a copy of your files
for 21 days. Since they do not have access to your original files, any future changes you
make won’t be reflected in their copy.
6: Sync and Sharing
97
When the recipients access the files, Webroot sends you a notification and logs an entry in
the Recent Activity tab in the MyData page. If you do not want to receive notifications,
click the Photos tab and click Settings below the album pictures. Under Notifications,
click Unsubscribe.
Restoring data
You may need to restore data in the following situations:
98
•
You need to fully restore all data to a new computer. For example, your old computer
crashed, your computer was stolen, or you purchased a new computer and want to quickly
load all your old files. See “Restoring all data to a new computer” on page 99.
•
You need to retrieve an older version of a file. For example, you accidentally overwrote
an important file or you want to revert to an older version of it. See “Retrieving an older
version of a file” on page 102.
•
You need to retrieve a file or folder you deleted. For example, you accidentally deleted
a synchronized folder from your computer (which also deleted it from your online
account) and you want to restore it. See “Retrieving a file or folder you accidentally
deleted” on page 103.
•
You need to restore data from the Web Archive. For example, you accidentally deleted
an important document from your computer, but it was copied to the Web Archive and you
want to restore it. See “Restoring files from the Web Archive” on page 103.
6: Sync and Sharing
Restoring all data to a new computer
Your My Webroot account safely stores your old computer’s files in the synchronized folders, no
matter if your computer is lost or damaged.
Note
Thieves cannot access your online files because they do not have your account
name and password to launch your Webroot account.
To fully restore all data to a new computer:
1. On the new computer, install the Webroot software and activate your account on that
computer (see “Creating a Webroot account” on page 2).
2. Make sure you are signed in to your account. (See “Signing in to your Webroot account”
on page 4.)
3. Open the Webroot File Manager. (From the system tray, right-click on the Webroot
icon
and click Manage Sync from the pop-up menu.)
4. Assign a new name and icon to the new computer by clicking on the Tools menu and
selecting Rename this Computer. Assign a new icon and enter a unique name for your
new computer, then click OK. The name must be different from your old computer.
5. Click Manage Sync Folders.
The Manage Folders dialog opens and shows your new computer in the left column, under
“This Computer,” and your old computer in the right column.
6. Copy files from your old computer to your new computer by synchronizing each folder.
To do this, click the Sync button under a folder name for your old computer (right
column).
6: Sync and Sharing
99
A dialog displays the folder name and location where the folder from the old computer
will be copied to your new computer.
7. If you want to specify a new location, click Choose Another Location and select a folder
from the Browse dialog. Otherwise, you can just click OK to copy the folder to the
location displayed at the top of the dialog.
The folder from the old computer appears in the column for your new computer. An arrow
is shown between the two computers to indicate they are synchronized. (The Magic
Briefcase is synchronized automatically.) Synchronized folders are shown on a white
background. Unsynchronized folders are shown on a gray background. If you have
additional folders to synchronize, follow the previous steps.
8. When you’re done selecting folders, click OK at the bottom of the Manage Sync Folders
dialog. You must click the OK button for the synchronization to begin.
100
6: Sync and Sharing
Depending on the size and number of files, the synchronization may take awhile. When
the process is complete, the status bar at the bottom of the Webroot File Manager shows
“All files are backed up and in sync” and shows the synchronized folders under your new
computer.
6: Sync and Sharing
101
Retrieving an older version of a file
You can save up to five previous versions of a file and can restore any of those saved versions. (If
you save changes a sixth time, your most recent versions are saved and the oldest version is
removed.)
To retrieve an older version of a file:
1. Open your browser and click My Webroot from the Webroot toolbar.
If you are not signed in to your Webroot account, the Sign In panel opens. Enter your user
name (email address) and password, then click the Sign in button.
2. When My Webroot opens with your account information, select MyData from the top
panel.
3. Select the file you want restored from the middle panel (click in its checkbox).
4. Click on the file name to display the pop-up menu, then click Versions.
A dialog opens with more information about the file and previous versions that were
uploaded.
5. Locate an older version and click Save As.
The dialog prompts you to save a copy of the file and give it a new name.
6. Enter a new name or use the Webroot-generated name and click Save.
A copy of the file is added to your synchronized folder and is automatically synchronized
(copied to both the online folder and your computer). You can access it locally or online.
102
6: Sync and Sharing
Retrieving a file or folder you accidentally deleted
The Deleted Files folder acts like a recycle bin for files you deleted from your account. You can
retrieve deleted files from this folder.
To retrieve a file or folder you accidentally deleted:
1. Open your browser and click My Webroot from the Webroot toolbar.
If you are not signed in to your Webroot account, the Sign In panel opens. Enter your user
name (email address) and password, then click the Sign in button.
2. When My Webroot opens with your account information, select MyData from the top
panel.
3. Click on the Deleted Files folder.
All previously deleted files or folders reside in the Deleted Files folder.
4. Select the file you want restored from the middle panel (click in its checkbox) and click
Restore.
5. In the dialog that opens, select a destination folder and click Restore.
The file is moved to the selected folder and synchronized on your computer.
Restoring files from the Web Archive
If you copied files to the Web Archive folder, you can retrieve them from your online account.
To restore files from the Web Archive:
1. Make sure you are signed in to your account. (See “Signing in to your Webroot account”
on page 4.)
2. Open the Webroot File Manager. (From the system tray, right-click on the Webroot
icon
and click Manage Sync from the pop-up menu.)
3. Click the Web Archive folder.
4. Select the folder or files you want to restore (use Ctrl or Alt to select multiple files).
6: Sync and Sharing
103
5. From the middle panel, right-click to display the pop-up menu, then select Export/Save
As.
6. In the dialog that opens, select the destination for the files and click OK.
Adding more storage space
If you need more synchronization space, you can purchase additional storage from Webroot.
To add more storage space to your account:
1. Open your browser and click My Webroot from the Webroot toolbar.
If you are not signed in to your Webroot account, the Sign In panel opens. Enter your user
name (email address) and password, then click the Sign in button.
2. From the My Webroot Home page, click Add storage space from the MyData panel.
Another Web page opens where you can use a credit card to purchase more data storage
space.
104
6: Sync and Sharing
7: System Cleaner
The System Cleaner removes all traces of your Web browsing history, files that show your
computer use, and other files that reveal your activity. By removing these items, you can protect
your privacy. No one else who has access to your computer can see what Web sites you have
visited or what search terms you have used. The System Cleaner also removes unnecessary files
that consume valuable disk space, such as files in the Recycle Bin or Windows temporary files.
The System Cleaner does not run automatically. You need to run a cleanup manually or set a
schedule.
To use the System Cleaner, see the following topics:
•
“Changing cleanup options for Internet browsers” on page 106
•
“Changing cleanup options for Windows” on page 109
•
“Changing cleanup options for third-party applications” on page 113
•
“Making deleted items unrecoverable” on page 114
•
“Running an on-demand cleanup” on page 116
•
“Creating scheduled cleanups” on page 117
7: System Cleaner
105
Changing cleanup options for Internet
browsers
The System Cleaner includes recommended settings for both Internet Explorer and Firefox
browsers. Before you run a cleanup, review which items you want deleted or ignored, then change
the options if desired.
To change cleanup options for Internet Explorer or Firefox:
1. Open the Webroot main interface by double-clicking the Webroot icon
tray.
in the system
2. From the Home panel, click the Edit settings button under System Cleaner. (Point your
mouse to the panel to display the Edit settings button.)
The System Cleaner panel opens.
3. Click the Cleanup options tab.
4. Point the mouse to Clean up Internet items.
Options appear in the right pane.
5. Click Edit options to the right of Firefox or Internet Explorer.
106
7: System Cleaner
A dialog opens with a list of cleanup options for your browser.
Firefox:
Internet Explorer:
6. Select or deselect options by clicking in the checkbox, then click OK. Items with a
checkmark are deleted in the next cleanup.
The cleanup options are described in the following tables.
Firefox Cleanup Options
Browser cache
Deletes copies of stored Web pages that you visited recently. This cache
improves performance by helping Web pages open faster the next time
you visit them, but also reveals your visited sites to other people using
your computer and can consume a lot of space on your hard drive.
Cookies
Deletes cookie entries from the Firefox cookie file. Cookies are small bits
of text generated by a Web server and then stored on your computer for
future use.
Be aware that if you remove all cookie entries, some Web sites will not
“remember” you. This means that you may need to re-enter passwords,
shopping cart items, and other entries that these cookies stored.
Also be aware that the System Scanner searches for and quarantines thirdparty cookies. These types of cookies may pose a security risk.
Form data
Deletes data that Firefox stores when you enter information into fields on
Web sites (if you previously selected a privacy option to save form data).
You see this data automatically appear as you type information into a field
(for example, your email address or password). While this feature can be
helpful, it also reveals information you entered in forms to other people
using your computer.
URL history
Deletes the list of Web sites that you visited recently. You see this URL
list when you select History from the Go menu. While this history can be
helpful, it also reveals your visited sites to other people using your
computer.
7: System Cleaner
107
Internet Explorer Cleanup Options
Address bar history
Removes the list of recently visited Web sites, which is stored as part of
Internet Explorer’s AutoComplete feature. You see this list when you
click the arrow on the right side of the Address drop-down list at the top of
the Internet Explorer browser.
While this list can be helpful, it also reveals your visited sites to other
people using your computer.
Cookies
Deletes all cookies from your computer. Cookies are small files that store
information about your interaction with a Web site and may reveal what
sites you visited.
Be aware that if you remove all cookie files, some Web sites will not
“remember” you. This means that you may need to re-enter passwords,
shopping cart items, and other entries that these cookies stored.
Also be aware that the System Scanner searches for and quarantines thirdparty cookies. These types of cookies may pose a security risk.
Temporary Internet
files
Deletes copies of stored Web pages that you visited recently. This cache
improves performance by helping Web pages open faster the next time
you visit them, but also reveals your visited sites to other people using
your computer and can consume a lot of space on your hard drive.
URL history
Deletes the list of recently visited Web sites. You see this list when you
click History on the Internet Explorer toolbar. While this history can be
helpful, it also reveals your visited sites to other people using your
computer.
Setup log
Deletes log files created when you update Internet Explorer. After you
install the updates, you no longer need these files.
MS download folder Deletes the contents in the folder that stores files you last downloaded
using Internet Explorer. After downloading, you no longer need these files.
108
IE MediaPlayer bar
Removes the list of audio and video files recently opened with the media
player in Internet Explorer, which plays audio and video files that you
access on Web sites. While this list can be helpful, it also reveals the
names of videos and audio files you are loading.
Autocomplete form
data
Deletes data that Internet Explorer stores when you enter information into
fields on Web sites. This is part of Internet Explorer’s AutoComplete
feature, which predicts a word or phrase based on the characters you begin
to type (for example, your email address or password). While this feature
can be helpful, it also reveals information you entered in forms to other
people using your computer.
Cleanup index.dat
databases on
Windows startup
Marks files in the index.dat file for deletion, then clears those files after
you reboot the system. The index.dat file is a growing Windows repository
of Web addresses, search queries, and recently opened files. This option
works when you also select one or more of the following options: Cookies,
Temporary Internet Files, or URL History.
Note: Index.dat functions like an active database. It is only cleaned after
Windows startup.
7: System Cleaner
Changing cleanup options for Windows
The System Cleaner includes recommended cleanup settings for Windows. Before you run a
cleanup, review which items you want deleted or ignored, then change the options if desired.
To change cleanup options for Windows:
1. Open the Webroot main interface by double-clicking the Webroot icon
tray.
in the system
2. From the Home panel, click the Edit settings button under System Cleaner. (Point your
mouse to the panel to display the Edit settings button.)
The System Cleaner panel opens.
3. Click the Cleanup options tab.
4. Point the mouse to Clean up Windows items.
Options appear in the right pane.
5. Click Edit options to the right of Desktop, Microsoft Office, or Windows System,
depending on what options you want to change.
7: System Cleaner
109
A dialog opens with a list of cleanup options.
Desktop:
Microsoft Office:
Windows System:
6. Select or deselect options by clicking in the checkbox, then click OK. Items with a
checkmark are deleted in the next cleanup.
110
7: System Cleaner
The cleanup options are described in the following tables.
Desktop
Recycle Bin
Removes all files from your Recycle Bin, which contains files you have
deleted using Windows Explorer. When you delete a file, it is stored in the
Recycle Bin until you empty it. You should periodically empty the
Recycle Bin to preserve valuable disk space on your computer.
Recent document
history
Clears the history of recently opened files, which is accessible from the
Windows Start menu. (This option does not delete the files themselves.)
While this list can be helpful, it also reveals your activity to other people
using your computer.
Start Menu click
history
Clears the history of shortcuts to programs that you recently opened using
the Start menu. (This option does not delete the programs themselves.)
While this list can be helpful, it also reveals your activity to other people
using your computer.
Run history
Clears the history of commands that you recently entered into the Run
dialog, which is accessible from the Start menu. While this list can be
helpful, it also reveals your activity to other people using your computer.
Note: After the cleanup, you may need to restart your computer to
completely remove items from the Run dialog.
Search history
Clears the history of files or other information that you searched for on
your computer. Your computer stores recent searches and displays them
when you start entering a new search that starts with the same characters.
You access the search (also called “find”) from Windows Explorer or from
your Start button. (This option does not delete the files themselves.) While
this list can be helpful, it also reveals your activity to other people using
your computer.
Start Menu order
history
Reverts the list of programs and documents in the Start menu back to
alphabetical order, which is the default setting. (This option does not
delete any of the programs or files themselves.)
After you run the cleanup, you must reboot your system for the list to
revert back to alphabetical order.
Microsoft Office
Microsoft Access
Microsoft Excel
Microsoft Paint
Microsoft Powerpoint
Microsoft Word
Clears the list of files that you recently opened in these programs. (These
options do not delete the files themselves.) While these lists can be
helpful, they also reveal your activity to other people using your
computer.
Microsoft Outlook
Removes most recently used lists that store filenames and the path to the
registry that includes attachment saving, loading paths, and email
content saved to a file.
7: System Cleaner
111
Windows System
112
Clipboard contents
Clears the contents from the Clipboard, where Windows stores data when
you use either the Copy or Cut function from any Windows program.
Windows temp
folder
Deletes all files and folders in the Windows temporary folder, but not files
that are in use by an open program. This folder is usually:
C:\Windows\Temp.
You should not put any files here that you need to keep. The files in this
folder can consume a lot of space on your hard drive.
System temp folder
Deletes all files and folders in the system temporary folder, but not files
that are in use by an open program. This folder is usually in C:\Documents
and Settings\[username]\Local Settings\Temp.
You should not put any files here that you need to keep. The files in this
folder can consume a lot of space on your hard drive.
Windows update
temp folder
Deletes all files and subfolders in this folder, but not files that are in use by
an open program. Windows uses these files when you run Windows
Update. After you install the updates, you no longer need these files. These
files are normally in C:\Windows\Software\Distribution\Download. You
should not put any files here that you need to keep. The files in this folder
can consume a lot of space on your hard drive.
Registry streams
Clears the history of recent changes you made to the Windows registry.
(This option does not delete the registry changes themselves.)
Default logon user
history
Deletes the Windows registry entry that stores the last name used to log on
to your computer. When the registry entry is deleted, you must enter your
user name each time you turn on or restart your computer.
This cleanup option does not affect computers that use the default
Welcome screen.
Memory dump files
Deletes the memory dump file (memory.dmp) that Windows creates when
you receive certain Windows errors. The file contains information about
what happened when the error occurred.
CD burning storage
folder
Deletes the Windows project files, created when you use the Windows
built-in function to copy files to a CD. These project files are typically
stored in one of the following directories:
C:\Documents and Settings\[username]\Local Settings\Application
Data\Microsoft\CDBurning
C:\Users\[username]\AppData\Local\Microsoft\Windows\Burn\Burn
7: System Cleaner
Changing cleanup options for third-party
applications
The System Cleaner can detect and clean programs other than Microsoft Office (third-party
applications) that store information about your activity, such as Adobe Photoshop and Paint Shop
Pro. When you select these programs for cleaning, the System Cleaner removes evidence of the
pictures you view, files you have loaded, and media you play using these applications.
To select applications to be included in the cleanup:
1. Open the Webroot main interface by double-clicking the Webroot icon
tray.
in the system
2. From the Home panel, click the Edit settings button under System Cleaner. (Point your
mouse to the panel to display the Edit settings button.)
The System Cleaner panel opens.
3. Click the Cleanup options tab.
4. Click the 3rd party applications tab.
5. If no items appear in this panel, click the Redetect all button in the bottom right.
6. Click the checkboxes next to the names of applications you want cleaned. (Do not click
Redetect all again; if you do, this panel redisplays its default settings and you will lose
your selections.)
Items with a checkmark are cleaned in the next cleanup.
7: System Cleaner
113
7. Click the Cleanup options tab. Make sure Clean up third-party applications is selected
(checked).
The next time the System Cleaner runs, it removes the list of pictures, files, and media you
loaded in these applications. It does not remove the files themselves, just the history of
what you viewed.
Note
After you uninstall or upgrade third-party applications, this list reverts to its default
setting.
Making deleted items unrecoverable
The System Cleaner can permanently remove files in a “shredding” process, which overwrites
them with random characters. To shred files, you must select the “Make deleted files
unrecoverable” option before you run a cleanup.
This shredding feature is a convenient way to make sure no one can ever access your files with a
recovery tool. (Although you may think that you are permanently deleting files when you empty
the Recycle Bin or when you use Shift-Delete, in actuality, you are only removing the operating
system’s record of the files, not the physical files themselves.)
To shred files during a cleanup:
1. Open the Webroot main interface by double-clicking the Webroot icon
tray.
in the system
2. From the Home panel, click the Edit settings button under System Cleaner. (Point your
mouse to the panel to display the Edit settings button.)
114
7: System Cleaner
The System Cleaner panel opens.
3. Click the Cleanup options tab.
4. Select the checkbox next to Make deleted files unrecoverable.
Caution
Make sure you want to permanently remove files. You can never recover them by
using a data recovery utility.
5. Run an on-demand cleanup or schedule a cleanup.
During cleanup, the System Cleaner deletes the files and overwrites them with random
characters.
Note
The Webroot software will not shred critical operating system folders, such as
Windows, System32, or Program Files, or a file that is in use by the system.
7: System Cleaner
115
Running an on-demand cleanup
The System Cleaner removes all traces of your Web browsing history, files that show your
computer use, and other files that reveal your activity. It also removes unnecessary files that
consume valuable disk space, such as files in the Recycle Bin or Windows temporary files.
Before you run the System Cleaner, make sure you review the current cleanup settings. See the
previous sections in this chapter:
•
“Changing cleanup options for Internet browsers” on page 106
•
“Changing cleanup options for Windows” on page 109
•
“Changing cleanup options for third-party applications” on page 113
You can start a cleanup from the Webroot software’s main interface or from the system tray menu,
as described in the following table.
Methods for launching a manual cleanup
Main interface
To run a cleanup from the main interface:
1. Open the Home panel of the main interface
by double-clicking the Webroot icon
in
the system tray.
2. Click the Clean system button in the
System Cleaner panel.
System tray
menu
To run a cleanup from the system tray:
1. Open the system tray menu by rightclicking the Webroot icon
in the
system tray.
2. Click Cleanup Now.
When the cleanup is done, the Cleanup panel shows a summary of files removed and disk space
recovered. If you want further details, click the View Log button.
Note
The log only shows items removed since the last cleanup. It does not show a history
of cleaned items.
116
7: System Cleaner
Creating scheduled cleanups
You can configure the System Cleaner to run automatically on a schedule. The System Cleaner
removes items based on the current cleanup settings. Make sure to review and edit these settings
before scheduling automatic cleanups. See the previous sections in this chapter:
•
“Changing cleanup options for Internet browsers” on page 106
•
“Changing cleanup options for Windows” on page 109
•
“Changing cleanup options for third-party applications” on page 113
To create a cleanup schedule:
1. Open the Webroot main interface by double-clicking the Webroot icon
tray.
in the system
2. From the taskbar at bottom of the Home panel, click Settings.
The Settings panel opens.
3. Click Scheduling.
4. From the drop-down box, click Cleanup, then click the Add action button.
The scheduling panel opens.
7: System Cleaner
117
5. Under the Perform action every column, select the interval in days, weeks, months, or
when you log in. Then select a day and time.
6. Click the Schedule button.
The panel shows details of your scheduled cleanup.
118
7: System Cleaner
8: Password Management
The Password Manager allows you to create a secure password for all your Web site transactions,
automatically remember your user names and passwords, and automatically fill in Web forms. By
using the Password Manager, you never need to remember multiple login names and passwords
again.
The Password Manager encrypts all your login and password data on your local computer to
ensure that it is completely safe from hackers. Your personal data is never sent over the Internet
and is never stored on Webroot servers.
The Password Manager works mainly with Internet Explorer and Firefox browsers. However, you
can use some limited functions with other browsers by using Password Manager’s Bookmarklets.
To use the Password Manager, see the following topics:
•
“Creating sites for password management” on page 120
•
“Using password management” on page 132
•
“Creating Bookmarklets” on page 148
•
“Creating and using Form Fill profiles” on page 134
•
“Importing passwords from other applications” on page 142
•
“Managing sites in the MyIdentity page” on page 144
•
“Setting Password Manager preferences” on page 146
•
“Creating Bookmarklets” on page 148
•
“Exporting user names and passwords” on page 150
8: Password Management
119
Creating sites for password management
The Password Manager can automatically fill in fields for Web pages that require a login, such as
banking, shopping, and networking sites. To enable this function, you must first capture and define
a “site” that includes your login information for a Web page.
There are several methods for defining sites and using password management:
•
Creating sites from your browser. This is the easiest method. When you access a Web
page and fill in the fields, the Password Manager captures the information you entered.
Use the Webroot toolbar to save the captured information and define a site.
•
Creating sites using Save All Entered Data. If you frequently access a Web page that
requires fields other than a user name and password, you can use Save All Entered Data
to capture those fields.
•
Creating sites from My Webroot. If the Password Manager is unable to capture
information while the Web page is displayed, you can manually create sites from My
Webroot.
•
Defining multiple logins for a single Web site. If you use several different logins for a
particular Web page (for example, you and your spouse have different accounts at the
same online bank), you can define different sites with different login information.
Once you capture site information in the Password Manager, you simply log into your Webroot
account and open the Web page. The Password Manager remembers the user name, password, and
other fields for you. To edit site information, see “Updating sites” on page 128.
Creating sites from your browser
The quickest method for creating a site is to allow the Password Manager to capture the login
information when you load the Web page in your browser.
To create a site from your browser:
1. Open your browser and click the Sign In button from the Webroot toolbar. (If you are
already signed in, this button displays Sign Out.)
2. Open a Web site that requires a login. Access your account with your user name and
password.
The Password Manager detects the user name, password, and URL, then prompts you to
save the login information from a green toolbar near the top of the browser.
3. From the Webroot prompt, click Save Site. (You can also choose Never For This... if you
don’t want to capture password information for this site or Not Now if you want to capture
password information another time.)
120
8: Password Management
Note
If you are not signed in to your Webroot account after you enter data in a Web page
that requires user-input fields, the Password Manager opens a yellow toolbar. In
this toolbar, it prompts you to sign in to your Webroot account and capture the
login information. Click either Webroot Master Login to sign in to Webroot or
click Never Ask Again if you don’t want to capture the information:
For some types of Web pages, the Password Manager may not be able to
automatically detect the fields and does not open the green prompt. If this is the
case, you can manually add site information from the Webroot toolbar.
Click the down arrow next to Saved Sites in the Webroot toolbar and click Add
Site.
When you click Save Site from the prompt, the Add Webroot Site dialog opens with the
Web address already displayed in the Name field, such as “my.bank.com.” (The user
name, password, and URL have been saved automatically and do not appear on this
dialog.)
4. You can modify some of the site information in this dialog, as described in the following
table.
8: Password Management
121
Add Webroot Site dialog
Name
The Web address will be used for the site name displayed in the
MyIdentity page and in Webroot prompts, unless you want to change it to
something simple, such as “My Credit Union.”
Group
You can define a name for a group or select one from the list (if you
already defined groups). By defining a group, you can organize sites by
categories in the MyIdentity page of My Webroot, such as Banking and
Shopping. If you do not enter a group, the site is categorized in a Default
group. To learn more about groups, see “Managing sites in the MyIdentity
page” on page 144.
Make This a Favorite If you access this site frequently, select the checkbox. You can then use the
Open all Favorites option from the MyIdentity page. See “Managing sites
in the MyIdentity page” on page 144.
Require Password
Reprompt
If you want to protect a particular site so that any access requires you to
enter your Webroot master password first, click this checkbox. This can be
helpful for Web sites containing confidential information, such as your
banking sites, which you want to ensure that no one else can access.
AutoLogin
If you want to bypass the password prompt and log in automatically, select
the checkbox.
5. Click the Save Site button to create the Webroot site.
The next time you access this Web page, make sure you are signed in to your Webroot
account so the Password Manager can automatically fill in the user name and password for
you. The Webroot icon appears at the end of the fields to indicate that the login
information is stored in the Password Manager.
If you selected the Require Password Reprompt checkbox, the login information is not
automatically filled in. Select either AutoLogin or AutoFill from the toolbar prompt.
Webroot opens a dialog that prompts you to enter your Webroot master password before it
will fill in the fields.
122
8: Password Management
Creating sites using Save All Entered Data
If you frequently access a site that requires fields other than a user name and password, you can
use Save All Entered Data to capture those fields.
Note
To capture any personal information that you commonly enter in forms for many
different Web sites (such as your credit card number for shopping sites), you should
define a Form Fill profile instead. See “Creating and using Form Fill profiles” on
page 134.
To create a site using Save All Entered Data:
1. Open your browser and click the Sign In button from the Webroot toolbar. (If you are
already signed in, this button displays Sign Out.)
2. Access a Web page that requires you to enter information in fields.
3. Fill in all the fields that you want. When you’re done, click My Identity Tools from the
Webroot toolbar, then click Save All Entered Data.
The Edit Site Information dialog opens. This form shows data that it captured from the
site. It captures all the fields it can, even if you did not enter data in those fields.
8: Password Management
123
4. Make any changes that you want, then click OK. For more information about this dialog,
see “Updating sites” on page 128.
The next time you access this site, make sure you are signed in to your Webroot account
so the Password Manager can automatically fill in the fields for you. The Webroot icon
appears at the end of the fields to indicate that the login information is stored in the
Password Manager. (For drop-down fields, the icon is not shown.)
If you selected the Require Password Reprompt checkbox, the login information is not
automatically filled in. Select either AutoLogin or AutoFill from the toolbar prompt.
Webroot opens a dialog that prompts you to enter your Webroot master password before it
will fill in the fields.
124
8: Password Management
Creating sites from My Webroot
If the Password Manager is unable to capture password information while the Web page is open in
your browser, you can manually create sites from My Webroot.
To create sites from My Webroot:
1. Open your browser and click My Webroot from the Webroot toolbar.
If you are not signed in to your Webroot account, the Sign In panel opens. Enter your user
name (email address) and password, then click the Sign in button.
2. When My Webroot opens with your account information, make sure MyIdentity is selected
from the top panel.
The MyIdentity page looks similar to the following example:
3. Under MyIdentity Actions, click Add site.
4. At the prompt, click Yes, let me manually add a site.
8: Password Management
125
The Add Site dialog opens.
5. Fill in the Add Site dialog as described in the following table.
Add Site dialog
126
Name
Enter a name for this site (for example: My Credit Union).
Group
Enter a name for a group or select one from the list (if you already defined
groups). By entering a group, you can organize your sites by categories, such
as Banking and Shopping. If you do not enter a group, the site will be
categorized in a Default group. To learn more about groups, see “Managing
sites in the MyIdentity page” on page 144.
URL
Enter the Web site’s URL (for example: http://www.website.com).
User name
Enter your login name for the site.
Password
Enter your password for the site.
Notes
Optionally, enter any extra information that might be helpful, such as your
PIN number for a bank account.
8: Password Management
Add Site dialog (continued)
Options
If desired, select any of the following:
• Show in Favorites. Select this checkbox if you access this site frequently.
You can then use the Open all Favorites option from the MyIdentity page.
See “Managing sites in the MyIdentity page” on page 144.
• Reprompt for password. Select this checkbox if you want to protect a
particular site so that any access requires your Webroot master password.
• Automatically fill. Keep this checkbox selected if you want your user
name and password automatically filled in when you access the site.
Otherwise, de-select this checkbox.
• Automatically log in. Select this checkbox if you want to bypass a
password prompt and go directly to the Web page.
6. Click the Add site button.
The Site information appears in the Sites tab of the MyIdentity page.
The next time you access this site, make sure you are signed in to your Webroot account
so the Password Manager can automatically fill in the user name and password. The
Webroot icon appears at the end of the fields to indicate that the login information is
stored in the Password Manager.
If you selected the Require Password Reprompt checkbox, the login information is not
automatically filled in. Select either AutoLogin or AutoFill from the toolbar prompt.
Webroot opens a dialog that prompts you to enter your Webroot master password before it
will fill in the fields.
8: Password Management
127
Defining multiple logins for a single Web site
If you use different logins for the same Web page (for example, you and your spouse both use the
same online bank, but have separate accounts), you can define a separate Webroot site for each
unique login, using one of the methods described in the previous sections.
If you choose to define the sites in your browser while the Web page is open, the Password
Manager recognizes when you enter a new username/password combination and prompts you to
save a new site.
Once you define these sites, see “Logging in to a Web page with multiple site definitions” on
page 133.
Updating sites
Once you have defined sites for password management, you can modify site information from a
Web browser or from the MyIdentity page.
To edit site information while that site is displayed in your browser:
1. Open your browser and click the Sign In button from the Webroot toolbar. (If you are
already signed in, this button displays Sign Out.)
2. Access the site you want to edit.
3. Click My Identity Tools, select the site name at the bottom, and click Edit.
128
8: Password Management
The Edit Site Information dialog opens. Depending on what information you originally
defined for the site, this dialog displays different fields. The examples below show several
different Edit Site Information dialogs.
4. Make any desired changes, as described in the following table.
5. When you’re done, click OK.
Edit Site Information dialog
URL
The URL for the site, which should not be modified unless the Web page’s
URL has changed.
Name
The site name.
Group
A group you defined and assigned to this site (if any).
User name
Your login name for the site.
8: Password Management
129
Edit Site Information dialog (continued)
Password
Your password for the site. Click Show if you want to see the actual
password characters.
Notes
Any extra information about this site, such as a PIN number for your ATM
machine at the bank.
Options
If desired, select any of the following:
• Favorite. Select this checkbox if you access this site frequently.You can
then use the Open all Favorites option from the MyIdentity page. See
“Managing sites in the MyIdentity page” on page 144.
• Require Password Reprompt. Select this checkbox if you want to protect
a particular site so that any access requires your Webroot master password.
• Never AutoFill. Select this checkbox if you do not want the fields in the
Web site automatically filled when you access the site.
• AutoLogin. Select this checkbox if you want to bypass a password prompt
and go directly to the Web page.
Fields/Edit Form
Fields
If this site includes fields that were captured with Save All Entered Data, the
fields appear in this form. (There may also be a link to Edit Form Fields.)
To edit site information from My Webroot:
1. Open your browser and click My Webroot from the Webroot toolbar.
If you are not signed in to your Webroot account, the Sign In panel opens. Enter your user
name (email address) and password, then click the Sign in button.
2. When My Webroot opens with your account information, make sure MyIdentity is selected
from the top panel.
3. Locate the row for the site you want to change, then click Edit.
The Edit Site dialog opens.
130
8: Password Management
4. Edit this dialog as described in the following table, then click the Save Site button.
Edit Site dialog
Name
The site name.
Group
A group you defined and assigned to this site (if any).
URL
The URL for the site, which should not be modified unless the Web page’s
URL has changed.
User name
Your login name for the site.
Password
Your password for the site.
Notes
Any extra information about this site, such as a PIN number for your ATM
machine at the bank.
Options
If desired, select any of the following:
• Show in Favorites. Select this checkbox if you access this site frequently.
You can then use the Open all Favorites option from the MyIdentity page.
See “Managing sites in the MyIdentity page” on page 144.
• Reprompt for password. Select this checkbox if you want to protect a
particular site so that any access requires your Webroot master password.
• Automatically fill. Keep this checkbox selected if you want your user
name and password automatically filled in when you access the site.
Otherwise, de-select this checkbox.
• Automatically log in. Select this checkbox if you want to bypass a
password prompt and go directly to the Web page.
8: Password Management
131
Edit Site dialog (continued)
Edit Fields
If this site includes fields that were captured with Save All Entered Data, an
Edit Fields button also appears. If you want to modify the information
displayed in these fields, click that button to display another dialog:
Modify or enter new information in the fields and click Update Fields.
Also, if this Web site has added more fields since you first saved the site
information, click Add Field to create and define information for those new
fields.
Using password management
After you define a site, you can use the Password Manager to automatically log into the Web page
for that site.
Logging in to a site
To log into a Web page using password management:
1. Open your browser and click the Sign In button from the Webroot toolbar. (If you are
already signed in, this button displays Sign Out.)
2. Open the Web page for a site you previously defined. (If you have not yet defined a site,
you can define it from the Web site’s login page. See “Creating sites from your browser”
on page 120.)
The Password Manager remembers the login information for you. The Webroot icon
appears at the end of the fields to indicate that the login information is stored in the
Password Manager. The user name and password fields are automatically filled in, unless
you selected Require Password Reprompt in the Add Webroot Site dialog.
132
8: Password Management
If you selected the Require Password Reprompt checkbox, the login information is not
automatically filled in. Select either AutoLogin or AutoFill from the toolbar prompt.
Webroot opens a dialog that prompts you to enter your Webroot master password before it
will fill in the fields.
Logging in to a Web page with multiple site definitions
To use password management when multiple sites are defined:
1. Open your browser and click the Sign In button from the Webroot toolbar. (If you are
already signed in, this button displays Sign Out.)
2. Open the Web page that includes multiple site definitions. (See “Defining multiple logins
for a single Web site” on page 128.)
The Password Manager detects the different site definitions and opens a notification bar
with the following buttons:
•
AutoLogin. If you specified “automatic login” when you defined the sites, click on
the AutoLogin button to display the different site names and select from one of them.
If only one of these sites was defined for automatic login, click on the AutoLogin
button to log in for that site.
•
AutoFill. Click this button to display the different site names and select from one of
them to fill in the fields.
The number displayed in each button indicates the number of different logins you have
saved for this site.
The Password Manager may automatically fill in the fields with its best guess for which
login to use. If you would like to log in using a different username/password than the one
displayed, click on the AutoFill or AutoLogin button to get a list of all your saved sites.
8: Password Management
133
Creating and using Form Fill profiles
You can create profiles of any personal information that you commonly enter in forms, including
your name, address, and credit card information. For example, you may want to create a personal
profile with all your contact information and then several different profiles for each credit card you
use for Internet shopping. When you access an Internet site, you can use a personal profile to
automatically fill in your name and address in the fields, and then use another profile to
automatically fill in your credit card information.
Note
Your personal Form Fill data is encrypted locally on your computer using the same
method the US Government uses for Top Secret data. Your data is never sent over
the Internet and is never stored on Webroot servers. No one can access this
information but you.
You can define Form Fill profiles either from your browser or from My Webroot. When you’re
done, you can use the profile to automatically fill in forms and can update profiles in the
MyIdentity page or from a Web browser. See the following sections:
•
Creating profiles from your browser
•
Creating profiles from My Webroot
•
Using Form Fill profiles
•
Updating Form Fill profiles
Creating profiles from your browser
To create a Form Fill profile from your Internet browser:
1. Open your browser and click the Sign In button from the Webroot toolbar. (If you are
already signed in, this button displays Sign Out.)
2. Access a Web page that requires you to enter personal information (name, address, credit
card, etc.).
3. Click the drop-down arrow next to My Identity Tools, then select Fill Forms > Add
Profile.
The Edit Form Fill Profile dialog opens. (If you selected Add Credit Card, only the
Credit Card and Notes tabs appear in this dialog.)
134
8: Password Management
4. In the Profile Name field, enter a name that defines this profile, such as Personal Info or
My Visa.
5. If you want to be prompted for your Webroot master password each time you enter this
profile, click in the box for Require Password Reprompt (lower left).
6. Enter as much information as you want in each field. (Click on the tabs for Personal
Information, Contact Information, Credit Card Information, Bank Account
Information, Custom Fields, and Notes to move between panels.)
Note
The Custom Fields tab can be used to create fields that aren’t listed in this Form
Fill dialog. In Text to find, enter the text from a field on a Web page. In Value to
fill, enter the information you want automatically filled into that field. (Multiple
lines are allowed, but keep in mind that multiple lines can only be filled into a
multi-line text box, not a single-line text box.)
7. When you’re done, click OK.
You can now use the profile to automatically fill your personal data in Web fields. See
“Using Form Fill profiles” on page 138.
8: Password Management
135
Creating profiles from My Webroot
To create a Form Fill profile from My Webroot:
1. Open your browser and click My Webroot from the Webroot toolbar.
If you are not signed in to your Webroot account, the Sign In panel opens. Enter your user
name (email address) and password, then click the Sign in button.
2. When My Webroot opens with your account information, make sure MyIdentity is
selected from the top panel.
3. From the MyIdentity actions panel, click Add Form Fill profile.
The following dialog opens.
4. Select either Add Full profile to define all personal information including a credit card or
click Add Credit Card profile to only create a profile for credit card information.
The Add Form Fill Profile dialog opens. If you selected Add Credit Card profile, only
the Credit Card and Notes tabs appear in this dialog.
136
8: Password Management
5. In the Profile name field, enter a name that describes this profile, such as “My Visa.”
6. In the Profile language field, select the language to be used for form filling.
If you want to be prompted for your Webroot master password each time you enter this
profile, select the checkbox for Require password reprompt (upper right).
Enter as much information as you want in each field. (Click on the tabs for Personal,
Address, Contact, Credit card, Bank account, Custom fields, and Notes to move
between panels.)
Note
The Custom Fields tab can be used to create fields that aren’t listed in this Form
Fill dialog. In Text to find, enter the text from a field on a Web page. In Value to
fill, enter the information you want automatically filled into that field. (Multiple
lines are allowed, but keep in mind that multiple lines can only be filled into a
multi-line text box, not a single-line text box.)
7. When you’re done, click the Add Form Fill profile button at the bottom.
The new profile appears in the Form Fill Profiles panel, similar to the following example.
8: Password Management
137
Using Form Fill profiles
To use Form Fill profiles:
1. Open your browser and click the Sign In button from the Webroot toolbar. (If you are
already signed in, this button displays Sign Out.)
2. Access a Web page that requires you to enter personal information (name, address, credit
card, etc.).
When you access a Web page that includes fields for personal data, the Password Manager
toolbar displays a Fill Form button.
3. Click the Fill Form button and select the profile from the pop-up menu.
If this toolbar doesn’t appear, you can also click the drop-down arrow next to My Identity
Tools, then select Fill Forms. Select the name of the profile, then click Fill Form.
The Password Manager transfers any information that applies to the fields in the Web
form. If you defined other profiles, you can select another one to fill in fields.
If you want to fill in only specific fields, use your mouse to highlight the fields before you
select the Form Fill profile. In the example below, the Primary telephone number field is
highlighted, which means only the phone number will be filled in to the form.
138
8: Password Management
Updating Form Fill profiles
You can modify information in the Form Fill profiles from a Web browser or from the MyIdentity
page.
To edit a Form Fill profile from your browser:
1. Open your browser and click the Sign In button from the Webroot toolbar. (If you are
already signed in, this button displays Sign Out.)
2. Click the drop-down arrow next to My Identity Tools, select Fill Forms, the name of the
profile, then Edit.
The Edit Form Fill Profile dialog opens.
3. Make the desired changes and click OK.
To edit a Form Fill profile from the MyIdentity page:
1. Open your browser and click My Webroot from the Webroot toolbar.
If you are not signed in to your Webroot account, the Sign In panel opens. Enter your user
name (email address) and password, then click the Sign in button.
2. When My Webroot opens with your account information, make sure MyIdentity is
selected from the top panel.
3. From the MyIdentity page, click the Form Fill profiles tab.
4. In the row for the profile you want to modify, click Edit.
8: Password Management
139
The Edit Form Fill Profile dialog opens.
5. Make the desired changes and click the Save button.
Generating a secure password
You can use the Password Manager to generate a strong, hack-resistant password for any Web site.
A strong password is difficult to guess and helps protect you from identity theft.
You don’t need to remember these automatically generated passwords. When you access this Web
page again, the Password Manager automatically fills in the password field for you. If you want to
view your password in the future, go to the MyIdentity page (see “Managing sites in the
MyIdentity page” on page 144) and click Show in the Password column.
To use the password generator:
1. Open your browser and click the Sign In button from the Webroot toolbar. (If you are
already signed in, this button displays Sign Out.)
2. Access a password-protected Web page and click inside the password field.
The Password Manager toolbar opens and displays a yellow toolbar.
3. Click Generate from the toolbar. (If this toolbar doesn’t appear, you can click the dropdown arrow next to My Identity Tools, then select Generate Secure Password.)
The Generate Secure Password dialog opens.
4. Click the Accept button to use the randomly generated password shown in the field.
140
8: Password Management
Note
If you are not logged in or are not accessing a Web page with a password field, a
Copy button appears instead of the Accept button. Click Copy to copy the
password to your clipboard. You can then paste the password into a password field.
5. Once you click Accept, the new password is filled into the Password and Confirm
Password fields in your Web page.
If you want a different password than the one shown, you have several options:
•
Click Generate to create another password, then click Accept. You can keep clicking
Generate until you are satisfied with the password displayed in the field.
•
Click in the Show Advanced Options checkbox to display more options for password
generation, select the items you want, then click Generate. You can keep clicking
Generate until you are satisfied with the password displayed in the field, then click
the Accept button.
8: Password Management
141
Importing passwords from other applications
If you are currently using another password-management application, you can import data from
that application into the Webroot Password Manager. The password-import function is available
from My Webroot or from the Webroot toolbar.
Importing passwords using My Webroot
To import passwords by using My Webroot:
1. Open your browser and click My Webroot from the Webroot toolbar.
If you are not signed in to your Webroot account, the Sign In panel opens. Enter your user
name (email address) and password, then click the Sign in button.
2. When My Webroot opens with your account information, make sure MyIdentity is selected
from the top panel.
3. Under MyIdentity actions, click Import data.
4. From the dialog, click the arrow next to the Import data from field and select a password
management application. Click Continue.
5. Follow the on-screen instructions for importing passwords from that application. (Since
every password application is unique, the instructions for importing data from each one is
also unique.)
142
8: Password Management
Importing passwords using the Webroot toolbar
To import passwords by using the toolbar:
1. Open your browser and click the Sign In button from the Webroot toolbar. (If you are
already signed in, this button displays Sign Out.)
2. Click the drop-down arrow next to My Identity Tools, then select Import From.
A list of applications appears in a submenu.
3. In the submenu, select from the list of password-management applications.
4. Follow the on-screen instructions for importing passwords from that application. (Since
every password application is unique, the instructions for importing data from each one is
also unique.)
8: Password Management
143
Managing sites in the MyIdentity page
You can manage and access all your Webroot sites in the MyIdentity page of My Webroot, which
is your online Webroot account. The MyIdentity page allows you to view and organize all sites,
edit site information, and delete old sites you no longer use.
To manage and access all sites:
1. Open your browser and click My Webroot from the Webroot toolbar.
If you are not signed in to your Webroot account, the Sign In panel opens. Enter your user
name (email address) and password, then click the Sign in button.
2. When My Webroot opens with your account information, make sure MyIdentity is
selected from the top panel.
The MyIdentity page opens.
3. Make sure the Sites tab is selected.
The Sites tab of the MyIdentity page lists all password-managed sites.
The icons in the columns indicate if the site has an associated note ( ), is a Favorite ( ),
requires a password reprompt ( ), or will auto-login ( ). Click Edit next to a site name
to add a note and to designate a Favorite, password reprompt, or auto-login.
See the following table for a description of commands and links that are available from the
middle panel (shown above).
Main panel
144
Site name
Opens the site in a new browser tab.
Show
Opens a dialog that displays your password for the site.
Open all
Opens all Web sites in the group.
8: Password Management
Main panel (continued)
Edit
If you select Edit for a group, it opens the Edit Group dialog that allows you
to change the group name.
If you select Edit for a site, it opens the Edit Site dialog that allows you to
enter notes about the site and change the name, group assignment, URL, your
user name or password. For instructions, see “Updating sites” on page 128.
Delete
If you select Delete for a group, it allows you to delete the entire group and
associated sites from the MyIdentity page.
If you select Delete for a site, it allows you to delete the site from the
MyIdentity page.
If you need to restore a group or site later, select View deleted items from the
right (under MyIdentity actions) and select the sites you want to restore.
See the following table for a description of commands that are available from the
MyIdentity Actions panel (shown below).
MyIdentity actions panel
Add site
Add a new password-managed site. For more information, see “Creating sites
from My Webroot” on page 125.
Add group
Define a group for password-managed sites. Groups help you organize all
sites into categories for easier viewing.
Note: To assign an existing site to this new group, select Edit in the row for
the site and select the group from the drop-down field.
Add a Form Fill
profile
Define a profile for automatic form-fill. A profile includes such personal
information as your name, address, and credit card numbers for populating
fields in Web site forms. This feature saves you from manually typing your
personal data into Web forms every time you make an online purchase,
complete a survey, and so on.
For instructions, see “Creating and using Form Fill profiles” on page 134.
Open all
Favorites
Open sites that you specified as Favorites when you created sites (see
“Creating sites for password management” on page 120). All the sites open at
once in separate tabs of your Web browser, which can be convenient if you
use the MyIdentity page as your browser’s home page.
8: Password Management
145
MyIdentity actions panel (continued)
View deleted
items
View and recover any groups or sites you previously deleted.
View history
View a list of tasks you performed with the Password Manager.
View Never list
Suppress the toolbar prompts for specific Web sites. In the dialog, select the
type of prompts to suppress and enter the Web sites where you do not want to
see those prompts.
Install
Bookmarklets
Create Bookmarklets, which help you access your data if you are traveling,
have a mobile browser, or are not using Internet Explorer or Firefox. For
instructions, see “Creating Bookmarklets” on page 148.
Import data
Import data from another password-management application. For
instructions, see “Importing passwords from other applications” on page 142.
Export data
Copy your user names and passwords into an Excel spreadsheet. For
instructions, see “Exporting user names and passwords” on page 150.
Setting Password Manager preferences
You can set several preferences for your Password Management tools, such as how notifications
appear and what hotkeys you can use for shortcuts to tasks.
To set Password Management preferences:
1. Open your browser and click the Sign In button from the Webroot toolbar. (If you are
already signed in, this button displays Sign Out.)
2. Click the drop-down arrow next to My Identity Tools, then select Preferences.
The following dialog opens.
146
8: Password Management
The following table describes Password Manager preferences.
Password Manager preferences
General
Select whether you want to:
• Disable Insecure Firefox Password Manager. When selected, the
Firefox Password Manager does not prompt you to save passwords.
• Open New Pages in... Select the current tab, Tabs, or new Windows.
• Highlight Input boxes. When selected, the Password Manager displays
fields in a different color.
• Automatically Fill Login Information. When selected, the Password
Manager fills in login fields with your user name and password.
• Default Form Fill Profile. Select the Form Fill profile you want to use
automatically and select the checkbox if you do not want to overwrite
fields that are already filled.
Notifications
Select Notifications in the left panel, then click in the checkboxes for each
type of notification you want the Password Manager to open.
Hotkeys
Select Hotkeys in the left panel, then enter key combinations you want to use
for common Password Management tasks.
Advanced
Select Advanced in the left panel, then select any of these advanced
functions:
• Enter the number of seconds to automatically log in to sites.
• Display a warning before filling insecure forms.
• Allow Web sites to disable AutoFill (keep the rule for AutoComplete=off).
• Select number of minutes until the Clipboard is cleared after use.
• Open a login dialog when you start the browser.
• Create new Form Fill Profiles automatically.
• Share the login state with other browsers.
• Change the language displayed in all dialog boxes, menus, and prompts.
(You must restart the browser.)
8: Password Management
147
Creating Bookmarklets
If you are not using Internet Explorer or Firefox, you can still use some Password Manager
features in other browsers by creating Bookmarklets from the MyIdentity tab. Bookmarklets are
links that you drag and drop into another browser so you can use automatic logins and form filling.
For example, to use Bookmarklets with Chrome, you would drag Bookmarklet links to Chrome’s
Bookmarks Bar, then click on the bookmark to use automatic login.
Bookmarklets can be used with Safari, Chrome, Opera, Konqueror, and other browsers.
To create Bookmarklets:
1. Open your browser and click My Webroot from the Webroot toolbar.
If you are not signed in to your Webroot account, the Sign In panel opens. Enter your user
name (email address) and password, then click the Sign in button.
2. When My Webroot opens with your account information, make sure MyIdentity is
selected from the top panel.
3. From the MyIdentity actions panel, click Install Bookmarklets.
The Bookmarklets dialog opens.
148
8: Password Management
4. Click on a tab for the browser you want to use.
Instructions for that browser appear in the lower panel. Each browser requires a different
set of steps.
5. Follow the instructions to create the Bookmarklets, then click OK.
6. To use the Bookmarklet, go to your browser and click on the bookmark for the Password
Manager.
The Password Manager either performs the function immediately or opens a dialog with
more information.
8: Password Management
149
Exporting user names and passwords
You can use the Export feature to transfer all your Password Manager information into an HTML
file, XML file, or a CSV file that can be imported into Microsoft Excel. The Export function is
available from My Webroot or from the Webroot toolbar.
Exporting data by using My Webroot
To export data by using My Webroot:
1. Open your browser and click My Webroot from the Webroot toolbar.
If you are not signed in to your Webroot account, the Sign In panel opens. Enter your user
name (email address) and password, then click the Sign in button.
2. When My Webroot opens with your account information, make sure MyIdentity is
selected from the top panel.
3. From the MyIdentity actions panel, click Export data.
4. From the dialog, enter your Webroot master password and click OK.
The Export Data dialog opens, similar to the example below. In this dialog, you can see all
the information for your sites, passwords, and Form Fill profiles.
150
8: Password Management
5. Click Save to File or Send to Printer.
•
If you are saving a file, another dialog opens that allows you to select a file format,
then click Export Data.
•
If you are printing, your data is saved to an HTML page and another dialog opens
where you can select a printer and click OK.
Exporting data by using the Webroot toolbar
To export data by using the Webroot toolbar:
1. Open your browser and click the Sign In button from the Webroot toolbar. (If you are
already signed in, this button displays Sign Out.)
2. Click the drop-down arrow next to My Identity Tools, select Export To.
3. Select either Webroot CSV File or the name of your browser.
A dialog opens that asks for your master password.
4. Enter your Webroot account password and click Sign In.
If you previously selected Webroot CSV File, you are prompted to enter a file name and a
directory to store that file. If you selected Firefox, your password data will be exported
into the browser’s built-in password manager. We do not recommend exporting data to
Internet Explorer.
8: Password Management
151
152
8: Password Management
9: Secure Browsing
The Secure Browsing Manager allows you to safely surf the Internet by blocking malicious Web
sites from loading before you access them. It also alerts you to unsafe Web sites when you use a
search engine. The Secure Browsing Manager works with the following browsers: Internet
Explorer (versions 6.0 and above) or Firefox (versions 3.5 and above). It also works with the
following search engines: Google, Yahoo, Bing, Lycos, and Ask.
To determine the risk level of Web sites, the Secure Browsing Manager analyzes the URLs that
you enter in the browser’s address bar, the URL links displayed in Web pages you are viewing,
and the links displayed in search-results pages. (A URL is a unique address for a Web site or file
that is accessible on the Internet.)
To use the Secure Browsing Manager, see the following topics:
•
“Enabling or disabling secure browsing” on page 154
•
“Using the Secure Browsing Manager” on page 155
9: Secure Browsing
153
Enabling or disabling secure browsing
The Secure Browsing Manager is automatically enabled when you install the Webroot software.
You can disable it or enable it from the Identity & Privacy panel.
To turn the Secure Browsing Manager on or off:
1. Open the Webroot main interface by double-clicking the Webroot icon
tray.
in the system
2. From the Home panel, click the Manage now button from the Identity & Privacy panel.
3. Click the Secure Browsing tab.
4. Click the button next to Turn secure browsing protection ON to enable filtering or Turn
secure browsing protection OFF to disable filtering.
If you do not want the safety rating icons to appear next to search results, click the
checkbox next to Preview link safety in search engine results, so the box is unchecked.
(For an illustration of the safety ratings, see “Using the Secure Browsing Manager while
searching” on page 156.)
154
9: Secure Browsing
Using the Secure Browsing Manager
To detect Web sites associated with potential threats, the Secure Browsing Manager analyzes
URLs (Web addresses), as follows:
•
When you enter the URL for a Web site in your browser’s address bar or click on a link to
a site, the Secure Browsing Manager runs the URL through its malware-identification
engine. If the site is associated with malware, the Secure Browsing Manager blocks the
site from loading in your browser.
•
When you use a search engine, the Secure Browsing Manager analyzes all links displayed
on the search results page by running the URLs through its malware-identification engine.
It then displays an image next to each link that signifies its risk level. For example, if a site
is known for spreading malware infections, the Secure Browsing Manager displays a
“Known Threat” image next to the link to warn you.
The following sections describe how to use the Secure Browsing Manager while you are surfing
the Internet or while you are using a search engine to locate Web sites.
Using the Secure Browsing Manager while surfing
The Secure Browsing Manager is automatically enabled when you install the Webroot software. If
you disabled it, you must enable it again as described in “Enabling or disabling secure browsing”
on page 154.
To use the Secure Browsing Manager while surfing the Internet:
1. Open your browser (Internet Explorer versions 6.0 and above, or Firefox versions 3.5 and
above).
2. Access a Web site by entering its URL in the address bar or by clicking on a link for a
URL.
If you attempt to access a Web site that is associated with a known threat or phishing
attempts, the Secure Browsing Manager displays an alert similar to the following:
If you attempt to access a Web site that has previously exhibited some questionable
behavior or content, the Secure Browsing Manager displays an alert similar to the
following example.
9: Secure Browsing
155
3. We recommend that you navigate away from this page (close the browser tab or click your
browser’s Back button). However, you can click Proceed to blocked site if you still want
to access it.
If you access this site frequently and don’t want this alert to appear again, click the
checkbox at the bottom: I know this site, don’t warn me again. The Secure Browsing
Manager adds the Web site to a trusted whitelist and loads the page directly the next time
you attempt to access it.
Using the Secure Browsing Manager while searching
The Secure Browsing Manager is automatically enabled when you install the Webroot software. If
you disabled it, you must enable it again as described in “Enabling or disabling secure browsing”
on page 154.
To use the Secure Browsing Manager while performing Web searches:
1. Open your browser (Internet Explorer versions 6.0 and above, or Firefox versions 3.5 and
above) and access one of the following search engines: Google, Yahoo, Bing, Lycos, or
Ask.
2. Use the search engine to search for Web sites.
After the search results appear, the Secure Browsing Manager displays a rating next to the
link for each site, similar to the example below.
156
9: Secure Browsing
The following table describes the ratings that may appear:
Web site ratings
This site is safe to access. It does not contain any malware or phishing content.
This site has previously exhibited some questionable behavior or content. We
recommend that you do not access this site.
This site has been associated with malware. We recommend that you do not
access this site.
Webroot has not yet classified this site’s content.
This site includes content that has been associated with phishing attempts. We
recommend that you do not access this site.
Phishing is a fraudulent method used by criminals to steal personal information.
Typical scams might include Web sites designed to resemble legitimate sites that
trick you into entering your credit card information. For more information, see
Chapter 11, “Anti-Phishing Protection” on page 165.
You can still access any of the Web sites, despite their ratings.
9: Secure Browsing
157
158
9: Secure Browsing
10: Anti-Spam Protection
The Anti-Spam Manager filters all your email messages in Outlook or Outlook Express to
determine if any messages can be classified as spam (unwanted junk mail) or phishing attempts
(fraudulent tricks to steal your information). If it finds spam or phishing attempts, the Anti-Spam
Manager places the messages into separate folders in your mail client (either Outlook or Outlook
Express). You can also manually block or approve email messages to train the Anti-spam filters
how to manage future messages from an email address or domain.
The Anti-Spam Manager works with Outlook (2003, 2007, or 2010 32-bit) or Outlook Express. It
is automatically enabled when you install the Webroot software. To switch anti-spam protection
on or off, you must go to the Webroot software’s main interface. You cannot enable or disable the
Anti-Spam Manager from your mail client.
To use the Anti-Spam Manager, see the following topics:
•
“Enabling or disabling anti-spam protection” on page 160
•
“Approving or blocking email messages” on page 162
•
“Viewing spam-blocking statistics” on page 163
10: Anti-Spam Protection
159
Enabling or disabling anti-spam protection
The Anti-Spam Manager filters all your email to determine if any messages can be classified as
spam or as phishing attempts, then places those messages into separate folders in Outlook (2003,
2007, or 2010 32-bit) or Outlook Express.
To switch anti-spam protection on or off, go to the Webroot software’s main interface. You should
not attempt to enable or disable the Anti-Spam Manager from your mail client.
To enable or disable anti-spam protection:
1. Open the Webroot main interface by double-clicking the Webroot icon
tray.
in the system
2. From the Home panel, click the Manage now button from the Identity & Privacy panel.
3. Click the Anti-Spam tab.
4. Click the button next to Turn anti-spam protection ON to enable spam filtering or Turn
anti-spam protection OFF to disable spam filtering.
160
10: Anti-Spam Protection
When anti-spam protection is enabled, your mail client displays a Webroot Anti-Spam
toolbar and folders for Spam and Phishing. The toolbar shows if the Anti-Spam Manager
is On or Off. If it’s off, all the Anti-Spam toolbar selections are grayed out (disabled).
The following table describes the selections available from the toolbar.
Anti-Spam toolbar
Approve
Click the down arrow and select either:
• Approve message. Allows you to manually approve all future emails from
this address, which were sent to a Phishing or Spam folder.
• Approve domain. Allows you to manually approve all future emails from
this domain, which were sent to a Phishing or Spam folder. For more
information, see “Approving or blocking email messages” on page 162.
Block
Click the down arrow and select either:
• Block message. Allows you to manually block all future emails sent from
this email address.
• Block domain. Allows you to manually block all future emails sent from
this domain.
For more information, see “Approving or blocking email messages” on
page 162.
Anti-Spam
Click the down arrow and select either:
• Scan folder. Scans a selected folder for any email messages classified as
spam or phishing.
• View statistics. Displays statistics for spam messages that have been
blocked and approved.
10: Anti-Spam Protection
161
Approving or blocking email messages
To improve the accuracy of spam filtering, you can manually approve email messages that you
want to receive in your Inbox or block email messages that you don’t want to receive in your
Inbox, so that the spam-identification engines know how to manage messages from that sender in
the future.
To approve and block email messages, anti-spam protection must be turned on, as described in
“Enabling or disabling anti-spam protection” on page 160.
To approve email messages (de-classify as spam):
1. From your mail client (Outlook or Outlook Express), select the message from the Spam or
Phishing folder. You can select multiple messages by pressing either the Shift or Ctrl
keys, then using the mouse to click on the desired messages.
2. From the Webroot Anti-Spam toolbar, click Approve, then select either:
162
•
Approve message: In the future, the sender of this message will pass through the
spam filters.
•
Approve domain: In the future, any messages from this domain will pass through the
spam filters. A domain identifies the server that sent the message. For example, if you
approve the domain “@SomeServer.com,” all email messages originating from
SomeServer.com will pass through the spam filters. Be careful when approving a
domain. If you approve a domain that might be associated with spam, all email
messages that originate from that domain will pass through the filters.
10: Anti-Spam Protection
To block email messages (classify as spam):
1. From your mail client (Outlook or Outlook Express), select the message from your Inbox.
You can select multiple messages by pressing either the Shift or Ctrl keys, then using the
mouse to click on the desired messages.
2. From the Webroot Anti-Spam toolbar, click Block, then select either:
•
Block message: In the future, the filters will classify any messages from this sender as
spam.
•
Block domain: In the future, the filters will classify any messages from this domain as
spam. A domain identifies the server that sent the message. For example, if you block
the domain “@SomeServer.com,” all email messages originating from
SomeServer.com will be classified as spam. Be careful when blocking a domain. If
you block a widely used domain such as yahoo.com, all email messages that originate
from a yahoo account will be classified as spam.
Viewing spam-blocking statistics
You can view spam-blocking statistics from either your mail client (Outlook or Outlook Express)
or from the Webroot main interface, which provide slightly different information:
•
Mail client. Displays statistics from the time you first installed the Webroot software,
including the total number of email messages processed, the number of messages caught
by the filters, and the percentage of completion for the filter training.
•
Webroot main interface. Shows the number of spam messages blocked in the last week.
To view statistics from Outlook or Outlook Express:
1. From the Webroot Anti-Spam toolbar, click the drop-down arrow to the right of AntiSpam.
2. Select View Statistics.
A panel opens that shows spam-blocking statistics from the time you installed the Webroot
software.
To view statistics from the Webroot main interface:
1. Open the Webroot main interface by double-clicking the Webroot icon
tray.
in the system
2. From the Home panel, click the Manage now button from the Identity & Privacy panel.
10: Anti-Spam Protection
163
3. Click the Anti-Spam tab.
The right panel shows statistics under Anti-spam details, which include how many spam
and phishing messages were caught for the last seven days. Statistics are updated every
day.
164
10: Anti-Spam Protection
11: Anti-Phishing Protection
The Anti-Phishing Manager allows you to safely browse the Internet by blocking Web sites
associated with phishing scams before you access them. It also alerts you to phishing sites when
you use a search engine.
Phishing is a fraudulent attempt to gather personal or financial information from you, such as your
user name, password, and credit card numbers. Web sites associated with phishing scams are often
legitimate-looking sites that appear to originate from trustworthy sources, such as eBay or even
your own bank. Some phishing sites are designed to look exactly like popular Web sites, such as
PayPal, and can easily trick you into entering your personal information. (Often these phishing
sites are abandoned within a day or two.) Once you provide your personal information and submit
it, it goes directly into a database maintained by online identity thieves who use it to make
purchases, set up new accounts in your name, or sell your personal information to other thieves.
You may never know your identity has been stolen unless you monitor your credit rating or apply
for a loan.
The Anti-Phishing Manager works with the following browsers: Internet Explorer (versions 6.0
and above) or Firefox (versions 3.5 and above). It also works with the following search engines:
Google, Yahoo, Bing, Lycos, and Ask.
The Webroot software also protects you from email phishing scams. See “Chapter 10, Anti-Spam
Protection” on page 159.
To use the Anti-Phishing Manager, see the following topics:
•
“Enabling or disabling anti-phishing protection” on page 166
•
“Using anti-phishing protection” on page 167
11: Anti-Phishing Protection
165
Enabling or disabling anti-phishing protection
The Anti-Phishing Manager is automatically enabled when you install the Webroot software. You
can disable it or enable it from the Identity & Privacy panel.
To turn the Anti-Phishing Manager on or off:
1. Open the Webroot main interface by double-clicking the Webroot icon
tray.
in the system
2. From the Home panel, click the Manage now button from the Identity & Privacy panel.
3. Click the Anti-Phishing tab.
4. Click the button next to Turn anti-phishing protection ON to enable filtering or Turn
anti-phishing protection OFF to disable filtering.
166
11: Anti-Phishing Protection
Using anti-phishing protection
To detect Web sites associated with phishing, the Anti-Phishing Manager analyzes URLs (Web
addresses), as follows:
•
When you enter the URL for a Web site in your browser’s address bar or click on a link to
a site, the Anti-Phishing Manager runs the URL through its phishing-identification engine.
If the site is associated with phishing, the Anti-Phishing Manager blocks the site from
loading in your browser.
•
When you use a search engine, the Anti-Phishing Manager analyzes all links displayed on
the search results page by running the URLs through its phishing-identification engine.
The following sections describe how to use the Anti-Phishing Manager while you are surfing or
while you are searching.
Using the Anti-Phishing Manager while browsing
The Anti-Phishing Manager is automatically enabled when you install the Webroot software. If
you disabled it, you must enable it again as described in “Enabling or disabling anti-phishing
protection” on page 166.
To use the Anti-Phishing Manager while browsing the Internet:
1. Open your browser (Internet Explorer versions 6.0 and above, or Firefox versions 3.5 and
above).
2. Access a Web site by entering its URLs in the address bar or by clicking on a link for a
URL.
If you attempt to access a Web site that is associated with phishing, the Anti-Phishing
Manager displays an alert similar to the example below.
We recommend that you navigate away from this page (close the browser tab or click your
browser’s Back button). However, you can click Proceed to blocked site if you still want
to access it.
If you access this site frequently and don’t want this alert to appear again, click the
checkbox at the bottom: I know this site, don’t warn me again. The Anti-Phishing
Manager adds the Web site to a trusted whitelist and loads the page directly the next time
you attempt to access it.
11: Anti-Phishing Protection
167
Using the Anti-Phishing Manager while searching
The Anti-Phishing Manager is automatically enabled when you install the Webroot software. If
you disabled it, you must enable it again as described in “Enabling or disabling anti-phishing
protection” on page 166.
To use the Anti-Phishing Manager while performing Web searches:
1. Open your browser (Internet Explorer versions 6.0 and above, or Firefox versions 3.5 and
above) and access one of the following search engines: Google, Yahoo, Bing, Lycos, or
Ask.
2. Use the search engine to search for Web sites.
When the search results appear, the Anti-Phishing Manager displays a rating next to the
link for each site. If the site is known for employing phishing scams, the rating says
“Phishing Site.”
For a description of other ratings, see “Using the Secure Browsing Manager while
searching” on page 156.
You can still click on a link for a Web site, despite its classification.
168
11: Anti-Phishing Protection
12: My Account Management
Your Webroot account allows you to access some helpful information about your software
licenses and other details. Your account information is available from My Webroot, an online Web
area that is accessible at any time. For more information, see “Using My Webroot” on page 12.
If you have not created an account, see “Creating a Webroot account” on page 2.
To manage your Webroot account, see the following topics:
•
“Viewing account details” on page 170
•
“Editing your contact information and password” on page 171
•
“Managing licenses and additional products” on page 172
•
“Creating Webroot support tickets” on page 173
12: My Account Management
169
Viewing account details
Your account details are available from the My Account panel in the main interface and in My
Webroot. These details show your expiration date and your keycode.
To view account details from the main interface:
1. Open the Webroot main interface by double-clicking the Webroot icon
tray.
in the system
2. From the taskbar at bottom of the Home panel, click My Account.
The My Account panel opens and shows your keycode, version number, and other
information about your subscription.
3. To modify account details from My Webroot, click the Manage My Account button.
To view account details from My Webroot:
1. Open your browser and enter https://www.webroot.com/mywebroot. In the Sign In panel,
enter your user name (email address) and password, then click the Sign in button.
2. When My Webroot opens with your account information, select MyAccount from the top
panel.
The MyAccount page opens. It includes all your account information and available tasks.
For more information, see the following sections:
170
•
“Editing your contact information and password” on page 171
•
“Managing licenses and additional products” on page 172
•
“Creating Webroot support tickets” on page 173
12: My Account Management
Editing your contact information and password
From the Contact Information tab, you can enter or change your personal contact information so
Webroot can contact you for product update announcements. You can also change your Webroot
master password from this tab.
Note
If you cannot remember your account password, open the Sign in screen and click
Forgot Your Password?. In the dialog that opens, enter your email address and
click Send Email. Webroot sends a message to your email address with
instructions for resetting your password.
To edit contact information or change your password:
1. Open your browser and enter https://www.webroot.com/mywebroot. In the Sign In panel,
enter your user name (email address) and password, then click the Sign in button. (If you
are already signed in, this button displays Sign Out.)
2. When My Webroot opens with your account information, select MyAccount from the top
panel.
3. Click the Contact Information tab.
4. Enter your personal information in the fields. If you want to change your password, click
the Edit Password link and follow the on-screen instructions.
5. When you’re done, click Update info.
12: My Account Management
171
Managing licenses and additional products
You can view your Webroot license information for the status of any Webroot products you have
purchased. The license information includes the product name, the keycode, where the software is
installed (which computer), and when your subscription expires. You can also use this page to reinstall your licensed software, install it onto another computer, or renew your subscription.
To view your current licenses and upgrade your Webroot products:
1. Open your browser and enter https://www.webroot.com/mywebroot. In the Sign In panel,
enter your user name (email address) and password, then click the Sign in button. (If you
are already signed in, this button displays Sign Out.)
2. When My Webroot opens with your account information, select MyAccount from the top
panel.
3. Click the Licenses & Products tab.
Your license information opens, similar to the example below.
From this page, you can:
172
•
Click Install to re-install your software or install it onto another computer if you have
a multi-licensed version.
•
Click Renew to update your subscription.
12: My Account Management
Creating Webroot support tickets
If you have questions or problems, you can create a support ticket to send to Webroot or view past
tickets.
To create a support ticket:
1. Open your browser and enter https://www.webroot.com/mywebroot. In the Sign In panel,
enter your user name (email address) and password, then click the Sign in button. (If you
are already signed in, this button displays Sign Out.)
2. When My Webroot opens with your account information, select MyAccount from the top
panel.
Your Webroot account information opens.
3. Click the Support tab.
4. If you would like to contact Support via email, click the Submit a support ticket button.
A form opens in your browser that you can fill out and submit to Webroot.
12: My Account Management
173
174
12: My Account Management
13: Program Settings
The Webroot software includes options that allow you to control sweep schedules, view history
logs, and other items related to program activity.
To manage program settings, see the following topics:
•
“Managing the schedule for scans and cleanups” on page 176
•
“Viewing the system history” on page 177
•
“Managing updates” on page 178
•
“Setting Gamer mode” on page 180
•
“Using a proxy server” on page 182
13: Program Settings
175
Managing the schedule for scans and cleanups
If you have previously created a schedule for scans or cleanups, you can edit, delete, or run the
schedules from the Scheduling panel.
Note
To create a schedule for scans, see “Creating a scan schedule” on page 23. To create
a schedule for cleanups, see “Creating scheduled cleanups” on page 117.
To manage schedules:
1. Open the Webroot main interface by double-clicking the Webroot icon
tray.
in the system
2. From the taskbar at the bottom of the Home panel, click Settings.
The Settings panel opens.
3. Click Scheduling.
4. In the row for your scheduled event, click either Edit, Run Now, or Delete.
5.
176
Click the Close button at the top right to close the panel.
13: Program Settings
Viewing the system history
The History panel displays past Webroot software actions, such as:
•
Scans (automated, scheduled, and manual)
•
Cleanups (scheduled and manual)
•
Quarantine actions
•
Individual shield events
•
Definition updates
•
Product updates
To view the detection history:
1. Open the Webroot main interface by double-clicking the Webroot icon
tray.
in the system
2. From the taskbar at the bottom of the Home panel, click Settings.
The Settings panel opens.
3. Click History.
The System History panel shows a summary of events and the dates on which they
occurred, similar to the example below.
4. To display all activity, click the All radio button. To display only the activity for the last 30
days, click the Last 30 Days radio button.
5. To clear the contents of this panel, click the Clear history button.
6. Click the Close button at the top right to close the panel.
13: Program Settings
177
Managing updates
The Webroot software is preconfigured to check for updates once a day. When available, the
following items download during updates:
•
Product updates, which include new versions of the Webroot program.
•
Protection updates, which include the latest security definitions used to determine if any
items found on your computer match spyware, viruses, or other threats.
You must be connected to the Internet for update checks to be successful.
Note
Microsoft Silverlight is installed along with your Webroot software. On occasion,
you may receive notifications from Microsoft about updating Silverlight.
To check for updates immediately or to change settings for automatic updates:
1. Open the Webroot main interface by double-clicking the Webroot icon
tray.
in the system
2. From the taskbar at the bottom of the Home panel, click Settings.
The Settings panel opens.
3. Click Updates.
The Updates panel opens.
4. You can click the Check for updates now button to download and install any available
updates immediately or you can change the selections for automatic updates, which are
described in the following table. To change an option, click the radio button next to the
selection.
178
13: Program Settings
Product update options
Automatically download and
install product updates
(recommended)
If selected, updates to the Webroot software download and install to
your computer automatically (if available) when your computer is
connected to the Internet.
Notify me before downloading If selected, updates do not download and install to your computer
and installing product updates automatically. Instead, a notification panel opens and allows you to
determine if you want to download and install updates to the
Webroot software (when available).
Protection update options
Automatically download and
install security protection
updates (recommended)
If selected, updates to the security definitions download and install
to your computer automatically (if available) when your computer is
connected to the Internet.
Notify me before downloading If selected, updates do not download and install to your computer
and installing security
automatically. Instead, a notification panel opens and allows you to
determine if you want to download and install updates to the security
protection updates
definitions (when available).
WARN (Webroot Automated Research Network) program
Allow malware data to be sent
to Webroot anonymously
13: Program Settings
If selected, allows the software to gather information during scans
and shielding activities, including spyware, viruses, and potential
threats that are not yet classified, then send the data to Webroot.
WARN is a global community of individuals and businesses who
provide Webroot with sample items detected on their computer to
help us identify and fight emerging threats.
Note: The Webroot software does not gather personal information
with the WARN program.
179
Setting Gamer mode
If the Webroot software’s communications over the Internet interfere when you play online games
or view movies, you can set the program to a silent Gamer mode. While in this mode, the program
does not perform the following activities:
•
Scheduled scans and cleanups. The software does not run scheduled scans or cleanups
when Gamer mode is on. When you return the Webroot software to regular operations
(Gamer mode is switched off), it may open an alert that indicates a scheduled scan or
cleanup was missed. The missed event does not run automatically.
•
Shield functions. All shields will be turned off, except for the Execution shield, which
stops executable programs from launching a suspicious process on your computer. If the
Execution shield detects a potential threat, it moves the item to Quarantine without
alerting you.
•
Balloon alerts in the system tray.
•
Communications with the Webroot server to check for updates.
•
Firewall functions that block Internet or network traffic and open alerts.
To set Gamer mode:
Do either of the following:
•
From the system tray, right-click on the Webroot icon
ON.
and select Turn Gamer Mode
- or •
From the main interface, click Settings in the bottom taskbar, click the Gamer Mode tab,
then click the button next to Gamer Mode so it displays “ON.”
By default, Gamer mode automatically turns off after four hours, but you can change that
amount of time in the Options settings.
180
13: Program Settings
To manually turn off Gamer mode:
Do either of the following:
•
From the system tray, right-click on the Webroot icon
OFF.
and select Turn Gamer Mode
- or •
From the main interface, click Settings in the bottom taskbar, click the Gamer Mode tab,
then click the button next to Gamer Mode so it displays “OFF.”
All program activities are re-enabled, including the previously set shields. The Webroot
software also contacts the Webroot server and checks for any updates.
Note
If you shut down and restart the Webroot software, it disables Gamer mode on startup.
To change Gamer mode options:
1. From the main interface, click Settings in the bottom taskbar, then click Gamer Mode.
The Gamer mode options appear in the middle panel.
You can set the following options:
•
Turn Execution Shield OFF when entering Gamer Mode. When you set the
program to Gamer mode, all shields are turned off except for the Execution shield.
(The Execution shield is important because it can stop potentially harmful executable
files from launching on your computer.) If desired, you can specify that the Execution
shield is turned off along with all other shields.
•
Automatically turn Gamer Mode OFF after ... You can specify how long you want
to run the program in Gamer mode before it automatically switches back to regular
operations.
2. Enter the number of hours you want to use Gamer mode before it turns off and switches to
regular program operations. If you do not want Gamer mode to automatically switch off,
deselect the checkbox.
13: Program Settings
181
Using a proxy server
If you use a proxy server to connect to the Internet, you must specify information about the proxy
connection; otherwise, Webroot cannot send updates to your computer. (A proxy server is a
computer system or router that acts as a relay between your computer and another server.)
By default, the Webroot software is set to communicate directly with your computer (and not use a
proxy server).
To specify proxy server settings:
1. Open the Webroot main interface by double-clicking the Webroot icon
tray.
in the system
2. From the taskbar at the bottom of the Home panel, click Settings.
The Settings panel opens.
3. Click Proxy Settings.
The Proxy Settings panel opens.
4. Select the radio button next to Use custom proxy settings.
182
13: Program Settings
5. Define custom settings using one of the following methods.
Methods for defining proxy settings
Use Internet Explorer
settings
If you want to use values already defined in Internet Explorer, click the
Import from Internet Explorer button.
Use your own settings
You can enter the proxy information, as follows:
• Proxy server: Enter the fully qualified domain name of the server (for
example, proxy.company.com).
• Port: Enter the port number the server uses.
• Username and Password: Enter the username and password for the
server, if used.
• Basic authentication: If the server uses another form of authentication
besides basic Windows authentication, deselect the checkbox.
Note: For further information about your proxy environment, contact your
proxy server’s administrator.
6. When you’re done, click the Save button.
13: Program Settings
183
Changing the language setting
When you install the Webroot software, it automatically detects the language of your operating
system and will use the same language for its own interface. If desired, you can change the
language of the Webroot interface.
To change the language setting:
1. Open the Webroot main interface by double-clicking the Webroot icon
tray.
in the system
2. From the taskbar at the bottom of the Home panel, click Settings.
The Settings panel opens.
3. Click Languages.
4. Click the radio button for the desired language and click the Apply button.
The program begins updating to the new language, a process that may take a few minutes.
184
13: Program Settings
A: Webroot Support
Webroot provides the following technical support services:
•
Web Site. To submit a trouble ticket to our service representatives, access the Support
Web site at support.webroot.com.
We make every effort to respond to your request on the same day you send it in, but please
allow up to 48 hours.
•
Phone. For contact information, access the Support Web site at support.webroot.com.
To access technical support options:
1. Open the Webroot main interface by double-clicking the Webroot icon
tray.
in the system
2. From the taskbar in the bottom of the Home panel, click Support.
3. Click the Visit now button to open the Webroot Support site in your browser. (You must
be connected to the Internet.) Or call the number listed to speak to a representative.
A: Webroot Support
185
186
A: Webroot Support
B: Uninstalling the program
To uninstall the Webroot software:
1. From the Start menu (click Start in the system tray), point to All Programs, then
Webroot, then Tools, then Uninstall Webroot Internet Security Complete.
A Webroot dialog opens and begins removing the Webroot software files.
2. When the final dialog opens, click Finish to restart your computer.
B: Uninstalling the program
187
188
B: Uninstalling the program
C: Frequently Asked Questions
This appendix provides a list of frequently asked questions (FAQs), which are organized by the
following topics:
•
“Threat protection FAQs” on page 190
•
“Scan and Quarantine FAQs” on page 191
•
“Shield FAQs” on page 193
•
“Firewall FAQs” on page 194
•
“Sync and Sharing FAQs” on page 196
•
“System Cleaner FAQs” on page 197
•
“Password Manager FAQs” on page 198
•
“Secure Browsing and Anti-Phishing FAQs” on page 201
•
“Anti-Spam FAQs” on page 202
•
“MyAccount FAQs” on page 203
C: Frequently Asked Questions
189
Threat protection FAQs
What is malware and how does it get in my computer?
Malware is malicious software that is designed to harm your computer or compromise your
privacy. If you do not have the Webroot software actively protecting your computer, malware can
enter your computer through Internet connections, open computer ports, compromised disks, and
email attachments. Internet connections are the primary source of entry. Whenever you connect to
the Internet, you could provide the outside world with access to your computer and potentially
allow in snoops, thieves, and virus outbreaks. Fortunately, Webroot blocks any threats before they
can enter.
Note
The Webroot software acts like a personal security guard for your computer,
blocking bad guys from entry and searching the premises for any others that may
have slipped through the cracks. If it finds threats, it disables them and ejects them
into Quarantine before they cause any harm.
The first time the System Scanner searches your computer, it may locate and quarantine many
different types of threats that were previously running on your computer, probably without your
knowledge. For detailed descriptions of the various types of malware, see the Glossary.
How do I know if my computer is infected?
The Webroot software actively protects your computer from malware infections at all times.
However, even with the best security protection, you can accidentally allow malware to gain
access to your computer. This could happen if you clicked Allow in an alert screen for a program
that you didn’t realize was associated with malware.
If you notice any of the behaviors listed below, run a scan immediately (see “Scanning for threats”
on page 16).
190
•
If you see pornographic images or advertisements unexpectedly appear on your screen,
you probably have a malware infection. Certain Web sites contain traps that take control
of your browser and cause pornographic or advertising sites to open when you try to exit.
•
Your computer is slow to boot, slow to process, crashes frequently, or behaves in erratic
ways.
•
You hear your hard disk actively working when you are not touching your computer.
•
Numerous pop-up ads open even when you are not connected to the Internet.
•
A different home page loads in your browser or strange entries appear in your Favorites
and History.
•
Strange results appear when you perform an Internet search.
•
You can’t access certain drives, programs, Web sites, or the printer.
•
Strange messages or images open on your screen or music plays that you did not
download.
•
Strange icons appear on your desktop or strange programs appear in your start-up list.
C: Frequently Asked Questions
Why does the Windows Security Center say that the Webroot software is
turned off?
When you start your computer, you may see a pop-up alert from the Windows Security Center that
says your computer is at risk and the Webroot software is turned off, similar to the example below.
Typically, this alert appears at Windows startup (and occasionally on shutdown) due to an
overtaxed processor, low available system memory, or a high number of other startup items present
on the system. Once the Webroot software has notified the Windows Security Center that it is up
and running on your system, this alert should automatically close and you can ignore it. If the
message persists longer than a few minutes, contact Webroot Support.
Scan and Quarantine FAQs
How do I know if the System Scanner found any threats?
In most cases, the Webroot software automatically manages threats for you by disabling them and
moving them to Quarantine, where they can no longer harm your computer. You can view the
Quarantine by opening the main interface, clicking Edit settings in the PC Security panel, and
clicking the Quarantine tab.
If the software detects an item that it classifies as a potential threat or it does not recognize, it
opens a pop-up alert and asks whether you want to accept the item or prevent it from installing on
your computer.
You can also access a summary of Webroot software activity by clicking the arrow
how on the Home panel.
next to See
How does Webroot know the difference between malware and legitimate
programs?
When the System Scanner searches your computer, it checks installed programs and other items it
finds against our database of security definitions. These definitions are a set of fingerprints that
characterize viruses, spyware, adware, and other types of unwanted items. The Webroot Threat
Research team constantly updates these definitions to protect your computer from ever-changing
spyware and other potential threats. Webroot automatically downloads these definitions to your
computer so you are always protected.
Can I work on my computer during a scan?
Yes, the System Scanner runs in the background without disrupting your work. If automated
scanning is enabled, the System Scanner runs only when your computer is inactive. If you start
working on your computer while a scan is in progress, it pauses and waits until the computer has
been inactive again for 15 minutes, then resumes scanning where it left off.
C: Frequently Asked Questions
191
Can I quickly scan a USB or CD?
Yes, even though the Webroot software is configured to automatically scan all areas of the
computer, you can run a quick scan yourself for a selected area, such as a USB drive or CD. You
can run a quick scan by doing either of the following:
•
Targeting a specific file or folder in Windows Explorer. Right-click on the file or folder to
open the pop-up menu, then select Perform Secure Scan. This is the quickest method.
•
Customizing the scan options to search specific drives or file types. See “Customizing
scan options” on page 21.
Are there times when I should run a scan myself?
In most cases, you should not need to launch a scan because the Webroot software is configured to
run scans automatically and to actively block threats with shields. However, you may want to run a
scan yourself in the following circumstances:
•
Even if you don’t surf high-risk sites, keep in mind that connecting to the Internet is like
opening the front door to your computer. In most situations no one will walk through, but
if you are not protected with the Webroot software, you are leaving your computer
vulnerable to bad guys who might enter unannounced, snoop around your files, and wreck
havoc on your applications.
•
After you have surfed networking sites, adult-entertainment sites, free lyrics and music
download sites, and other high-traffic sites. Malware writers are constantly re-engineering
methods to infect computers. They commonly target popular Web sites by creating pop-up
ads that can trick you into clicking on a link or by targeting you for a “drive-by
download,” where an infection will attempt to silently install on your computer as you
view pages.
•
If you accidentally clicked on a suspicious looking pop-up advertisement. Malware
writers use all kinds of tricks to lure you into clicking a link and launching their spyware
application.
•
If you frequently download screen savers, music, games, movies, or pictures. Any time
you download items on your computer, even legitimate ones, you could download
malware along with it. Spyware commonly piggybacks on downloads and can install on
your computer without your knowledge.
For scanning instructions, see “Scanning for threats” on page 16.
What should I do with items in Quarantine?
Once items are moved to Quarantine, your safest action is to simply keep them there. Items in
Quarantine are disabled and cannot harm your computer. Keeping items in Quarantine also allows
you to test your computer and determine if all your programs still work properly after the scan. If
you discover that some legitimate programs cannot function after an item was moved to
Quarantine, Webroot allows you to restore it.
What are cookies and why does it find so many?
Every time you access an Internet site, the server for that site may place small bits of text called
cookies on your computer to store information about your interaction with it. If you have accessed
many different sites, the System Scanner locates many different cookies. You should not be
alarmed if the System Scanner finds a large number of cookies. Cookies do not pose a high risk for
your computer’s security, because they cannot harm your computer or steal information. However,
while some cookies can be helpful to your Internet browsing experience, some third-party cookies
192
C: Frequently Asked Questions
can be a privacy concern because they are placed on your computer by a different Web site other
than the one you accessed. Usually associated with on-line advertising, third-party cookies can be
used to track your movements as you surf the Internet and to create a profile of your viewing
habits.
Note
For Internet Explorer, cookies are stored as separate files. For Firefox, cookies are
stored in one file.
Cookies are simple text files that store information about a Web site you visited. They do not
create pop-up ads, nor can they launch viruses. In most cases, cookie files do not contain any
private information such as credit card numbers.
The System Scanner mainly sweeps for third-party cookies associated with advertising, not the
helpful first-party cookies that store your personal preferences for a particular Web site, such as
login information and shopping cart items. If you want the System Scanner to ignore all cookies
during scans, see “Customizing scan options” on page 21.
Shield FAQs
How do I know if I should block or allow a download?
If the Webroot Shields detect a potential threat, an alert opens and asks whether you want to allow
the file to launch or block the file from launching. Information about the item is shown in the alert
dialog. If you recognize the file name and you are purposely downloading it (for example, you
were in the process of downloading a new toolbar for your browser), click Allow to continue.
However, we recommend that you run an on-demand scan after downloading even legitimate
items, since malware can piggy-back on any type of download. See “Scanning for threats” on
page 16.
If you were not trying to download anything and were just viewing pages on the Internet, you
should block the file. As you surf Internet sites, you could be targeted for a drive-by download,
where an unwanted program launches and silently installs on your computer as you view pages.
A Windows dialog says it found spyware, but no Webroot alert appeared.
What do I do?
Don’t click on it. Unfortunately, pop-up windows from an Internet site can be designed to look like
legitimate messages from Windows with the sole purpose of trying to trick you. They display
scary messages, such as “Warning! A Virus was Found on your Computer! Buy SomeSoftware
now!” and have buttons and icons that look like actual Windows graphics.
Some of these fake messages are trying to lure you to another Web site where they will ask for
your credit card number or other personal information. Others are advertisements designed to look
like fake Windows dialogs (look for grayed-out text that says “advertisement” displayed in a
bottom corner). The most evil aspect of these fake messages is that if you click anywhere in the
dialog box, even on the No or Close button, you will execute its intended actions, such as
launching malware or sending you to a rogue Internet site. The best way to remove a fake message
from your screen is to press Alt-F4 (hold down the Alt button while pressing the F4 key).
C: Frequently Asked Questions
193
But rest assured, even if you accidentally click on a fake dialog, the Webroot software blocks any
malware, disables it, and sends it to Quarantine.
Do I need shields if a firewall is running?
Yes, you should keep both the firewall and the Webroot Shields enabled, since they are using
different methods to locate different types of threats. The firewall looks for unrecognized
communications over the computer ports, such as activity that may indicate hacking attempts.
Shields look for specific programs and files that match Webroot’s threat definitions, such as
spyware and viruses, and stop them before they launch.
Firewall FAQs
How do I know if I should block or allow traffic?
If an alert appeared when you were not trying to perform any sort of communication over the
Internet or network, and you have no idea why this alert appeared, prevent the communication by
clicking the Block button.
If an alert appeared after you were purposely running an application from the Internet or
communicating over a network port, look at the application name displayed in the alert. The name
appears in the alert description, similar to the example below. If you do not recognize the
application, you should block it. For more information, you can perform an Internet search for the
application name. If you do recognize the application, you can proceed by clicking the Allow
button. However, to be safe, you should run a scan even if you believe the traffic is legitimate (see
“Scanning for threats” on page 16).
What are computer ports?
Ports are simply numbers that identify entry and exit points on your computer. Although you may
see only one physical connection between your computer and a network, your computer is actually
divided into thousands of virtual connections (ports). While most of these ports are never used,
others serve as the standard access points for certain protocols. For example, Internet traffic using
HTTP travels over port 80. Hackers know all the standard entry and exit points and can gain access
to your computer through any open ones. The Webroot Firewall cloaks your ports from the outside
world, so hackers cannot find entry points.
194
C: Frequently Asked Questions
If you select Show Details in an alert screen, you will see information about the packets
attempting to travel through the ports. The following example shows details expanded.
How is the Webroot Firewall different from the Webroot Shields?
The Webroot Firewall and the Webroot Shields use different methods to locate different types of
threats. The firewall looks for unrecognized communications over the computer ports, such as
activity that may indicate hacking attempts. Shields look for specific programs and files that match
Webroot’s threat definitions, such as spyware and viruses, and stops them before they launch.
Note
The firewall acts like a bouncer at your computer door to stop bad guys who try to
enter. Shields act like a personal security guard to disarm bad guys who may have
already entered.
C: Frequently Asked Questions
195
Sync and Sharing FAQs
Should I put my files in synchronized folders, the Magic Briefcase, or the
Web Archive?
To protect your data, you can place files in synchronized folders, the Magic Briefcase, or the Web
Archive. Use these folders for backup and synchronization in the following circumstances:
•
Synchronized folders. Ideal if you want to back up data and access files remotely. You
must designate synchronized folders yourself and determine whether you want these
folders to be synchronized to other computers. See “Setting up synchronized folders” on
page 60.
•
Magic Briefcase. Ideal for accessing a small number of files remotely. This folder is
already configured for you. Any files you place in this folder are automatically
synchronized with other computers in your Webroot account, so do not place a large
number of files here. See “Using the Magic Briefcase” on page 71.
•
Web Archive. Ideal if you want to back up important documents that typically do not
change, such as financial records and photos. This folder resides only in your online
account. See “Copying files to the Web Archive” on page 79.
How do I know if my data is safe?
Your files are sent over the Internet using SSL (Secure Sockets Layer) encryption, the industry
standard for secure Web communications. Once your files reach our servers, they are encrypted
with 128-bit Advanced Encryption Standard (AES), the same level of hacker-proof protection used
by major banks and the United States Government. Your files are stored and then backed up in two
locations for redundancy. If you need to retrieve your files, the Sync and Sharing Manager
encrypts all data before it leaves our servers, ensuring that you are the only one who can download
and access your files.
What’s the difference between synchronization and backup?
A backup transfers files in one direction, typically from your computer to another source, such as
the online repository. Synchronization transfers files in multiple directions: from your computer to
another source or from the other source back to your computer. Synchronization can occur across
multiple computers with a Webroot account. Changes on one computer will be copied to the online
repository and to the other computers.
For backup operations, you can copy data to the Web Archive. For synchronization operations,
you can use the synchronized folders or the Magic Briefcase.
Are modified files overwritten or saved as new versions?
When the Sync and Sharing Manager detects a file change, it uploads a new version and keeps the
original file intact. This allows you to easily view or revert back to an earlier version of a file. The
Sync and Sharing Manager allows you to save up to five previous versions of a file. If you save
changes a sixth time, your most recent versions are saved and the oldest version is removed.
Can I access my files from another computer?
Yes, you can access your online account from any computer with an Internet connection. You do
not need your original computer to access and make changes to files. If you do make changes to
your files from another computer, the Sync and Sharing Manager propagates the changes back to
the original computer immediately or when that computer is back online. For more information,
see “Synchronizing data on multiple computers” on page 66.
196
C: Frequently Asked Questions
Can I work on my computer during a synchronization job?
Yes, if synchronization starts while you are working, it runs in the background and does not
disrupt your computer activity. If you log off while a synchronization job is running, the process
stops and resumes where it left off when you log back into the computer.
Why are there green checkmarks next to my folders?
A green checkmark appears next to a file or folder to indicate that it is synchronized with your
online account and any other computers.
How do I create a photo album?
Simply place photo files into a synchronized folder. The Sync and Sharing Manager uploads them
to your online account and creates an album for every folder that contains at least one JPG file. All
photos within this folder are organized into an album on your MyData page. See “Managing photo
albums” on page 89.
System Cleaner FAQs
Why should I use the System Cleaner?
As you work on your computer and browse the Internet, you leave behind traces. These traces may
be in the form of temporary files placed on your hard drive, lists of recently used files in programs,
lists of recently visited Web sites, or cookies that Web sites placed on your hard drive. Anyone
who has access to your computer can view what you have done and where you have been. Using
the System Cleaner, you can protect your privacy by removing all traces of your activity, including
the Internet history, address bar history, Internet temporary files (cache), and cookie files.
The System Cleaner can also delete unnecessary files to help improve computer performance.
Windows stores many files on your computer without you being aware of them. Most files are
useful, and even required, for your computer to operate properly. However, other files are not
necessary and consume valuable space on your hard drive. Even with today’s large hard drives,
these unnecessary files can impair your computer’s performance.
How are cleanups different from scans?
Cleanups are designed to remove unnecessary files from your computer that are consuming
valuable disk space or revealing your browsing history that you may want to keep private. Scans
are designed to locate and quarantine threats to your computer’s security, such as spyware and
viruses.
Think of the System Cleaner as the housekeeper for your computer, while the System Scanner
serves as the security guard.
Can files deleted during a cleanup ever be recovered?
If you select the “Make deleted files unrecoverable” option before a cleanup, the files can never be
restored using a data recovery utility. The System Cleaner overwrites files with random characters,
which ensures that they cannot be read again. For instructions, see “Making deleted items
unrecoverable” on page 114.
If you do not select this option, you might be able to restore the files with a recovery utility. This is
because Windows files never actually disappear during normal delete operations. Although you
may think that you are permanently deleting files when you empty the Recycle Bin or when you
use Shift-Delete, in actuality, you are only removing the operating system’s record of the files, not
C: Frequently Asked Questions
197
the physical files themselves. (Think of this record as an entry in a library’s card catalog. If you
removed the catalog entry for a book, it does not remove the book itself from the library stacks,
although it would make the book harder to find.) The deleted files remain on the disk until
Windows needs to make more space available.
Cleaned items are not moved to the Windows Recycle Bin.
Password Manager FAQs
How do I use the Password Manager to store passwords?
1. Open your browser and click the Sign In button from the Webroot toolbar. (If you are
already signed in, this button displays Sign Out.)
2. Open a Web site that requires a login. Access your account with your user name and
password.
3. After logging in, look for a green toolbar near the top of your browser and click Save Site.
The Password Manager automatically captures the user name, password, and URL, then
opens another dialog with the Web address displayed in the Name field.
4. In this dialog, click the Save Site button to define a Webroot site for password
management. If you want to enter a group or select any of the other options, see “Creating
sites for password management” on page 120.
The next time you access this Web page, the Password Manager remembers the login
information for you. The Webroot icon appears at the end of the fields to indicate that the
login information is stored in the Password Manager. The user name and password fields
are automatically filled in, unless you selected Require Password Reprompt in the Add
Webroot Site dialog.
198
C: Frequently Asked Questions
Your password-managed sites are displayed in the MyIdentity page of My Webroot. The
MyIdentity page allows you to view and organize all sites, edit site information, and delete
old sites you no longer use. See “Managing sites in the MyIdentity page” on page 144.
How do I use the Password Manager to automatically fill in Web forms?
1. Open your browser and click the Sign In button from the Webroot toolbar. (If you are
already signed in, this button displays Sign Out.)
2. From the Webroot toolbar, click the drop-down arrow next to My Identity Tools, then
select Fill Forms > Add Profile.
In the dialog that opens, define a profile. Enter as much information as you want in each of
the fields, then click OK.
You now have a Form Fill profile to use for filling in Web forms.
3. Access a Web site that requires you to enter personal information into fields (name,
address, credit card, and so on).
4. If the Password Manager detects the fields on the Web page, it displays another toolbar
where you can click the Fill Form button and select your previously defined Form Fill
profile.
If it does not display this toolbar, select My Identity Tools, then select Fill Forms >
profile name > Fill Form.
The Password Manager transfers any information that applies to the fields into the Web
form. For more information, see “Creating and using Form Fill profiles” on page 134.
Can I use different passwords for different Web sites?
Yes, you can use unique logins (user names and passwords) for each Web site. The Password
Manager remembers all passwords for you — no more writing down passwords on little pieces of
paper! We encourage you to use our password generator to create secure passwords for each site.
See “Generating a secure password” on page 140. A “secure” password is one that is resistant to
guessing and attacks, typically containing random characters.
C: Frequently Asked Questions
199
Can I use different passwords for the same Web site?
Yes, if you use different logins for the same Web page (for example, you and your spouse both use
the same online bank, but have separate accounts), you can define multiple Webroot sites that
contain different login information. Whenever you access that Web page again, the Password
Manager will recognize that you have two different sites defined and will prompt you for the one
you want to use.
What if I don’t want the Password Manager to automatically fill in my
password?
When you define a site, you have the option of requiring the Password Manager to always
reprompt for your Webroot master password when you visit that site again. This can be helpful for
Web sites containing confidential information, such as your banking sites.
If you are in the process of defining a site, select Require Password Reprompt in the Add
Webroot Site dialog,
If you already defined the site, log into My Webroot (https://www.webroot.com/mywebroot), go to
the MyIdentity page, and edit the site information. You can select Reprompt for Password from
the Edit Sites dialog.
When you access the site again, the Password Manager will prompt you for the login information:
Select either AutoLogin or AutoFill. Webroot opens a dialog that prompts you for your master
password (not the password of this Web site).
What browsers work with the Password Manager?
The Password Manager works mainly with Internet Explorer and Firefox browsers. However, you
can use some limited functions with other browsers by using Password Manager’s Bookmarklets.
For more information, see “Creating Bookmarklets” on page 148.
Are my passwords and other personal data safe from hackers?
Yes, we store your sensitive data in an encrypted state using the same method the US Government
uses for Top Secret data. The encrypted data is meaningless to Webroot and to anyone else without
the decryption key. This key is stored on your own computer and is created from your email
address and master password. It is never sent over the Internet and is never stored on Webroot
servers.
200
C: Frequently Asked Questions
Secure Browsing and Anti-Phishing FAQs
How does Secure Browsing and Anti-Phishing work?
To detect Web sites associated with potential threats, the Secure Browsing Manager analyzes
URLs (the unique addresses for Web sites or files that are accessible on the Internet), as follows:
•
When you enter the URL for a Web site in your browser’s address bar or click on a link to
a site, the Secure Browsing Manager runs the URL through its malware-identification
engine. If the site is associated with malware, the Secure Browsing Manager blocks the
site from loading in your browser. For more information, see “Using the Secure Browsing
Manager while surfing” on page 155.
•
When you use a search engine, the Secure Browsing Manager analyzes all links displayed
on the search results page by running the URLs through its malware-identification engine.
It then displays an image next to each link that signifies its risk level. For example, if a site
is known for spreading malware infections, the Secure Browsing Manager displays a
“Known Threat” image next to the link to warn you. For example:
For more information, see “Using the Secure Browsing Manager while searching” on page 156.
Can I still access a site that was blocked?
Yes, you can proceed to any site that the Secure Browsing Manager identified as a potential threat,
but be aware that this site may compromise the security of your computer. For more information,
see “Using the Secure Browsing Manager” on page 155.
What does “Unclassified Site” mean?
If the Secure Browsing Manager indicates that a site is “Unclassified” in search results, it means
that Webroot does not yet have enough information to classify that site as either safe or malicious.
What is phishing?
Phishing is a fraudulent attempt to gather personal or financial information from you, such as your
user name, password, and credit card numbers. Web sites associated with phishing scams are often
legitimate-looking sites that appear to originate from trustworthy sources, such as eBay or even
your own bank. Some phishing sites are designed to look exactly like popular Web sites, such as
PayPal, and can easily trick you into entering your personal information. (Often these phishing
sites are abandoned within a day or two.)
Once you provide your personal information and submit it, it goes directly into a database
maintained by online identity thieves who use it to make purchases, set up new accounts in your
name, or sell your personal information to other thieves. You may never know your identity has
been stolen unless you monitor your credit rating or are denied for a loan.
Note
Web sites are not the only method for phishing scams. Be aware that criminals also
use email messages, instant messaging, cell phone text messages, and chat rooms.
For more information about email phishing scams, see Chapter 10, “Anti-Spam
Protection” on page 159.
C: Frequently Asked Questions
201
Anti-Spam FAQs
What if a legitimate message gets classified as spam?
Your email messages are never lost. You can review the spam messages at any time by opening
the Spam folder in your email client. If you want to make sure email messages from this sender
can bypass spam filters, select the email and click Approve from the Webroot toolbar. See
“Approving or blocking email messages” on page 162.
What if spam gets through the filters?
Select the message in your Inbox and then click Block Message from the Webroot toolbar in your
mail client. See “Approving or blocking email messages” on page 162.
How do spammers get my email address?
Spammers have a number of simple methods to gather your email address, including:
202
•
Dictionary attacks. Automated programs can take common domains like @yahoo.com
and then generate random email addresses using first and last names and other common
terms.
•
Spam-bots. Automated programs can scan Web sites for the @ symbol anywhere in the
text and then pull email addresses from that site.
•
News groups and chat rooms. Many people leave their actual email addresses in
newsgroups and chat rooms. Spammers use pieces of software to extract the screen names
and email addresses automatically.
•
Tricky Web sites. Spammers create special Web sites for the sole purpose of gathering
email addresses. These sites might offer some attractive incentive to win money or “optin” for the special newsletter if you simply enter your email address.
C: Frequently Asked Questions
What’s the difference between spam and phishing?
While spam is unwanted email to lure you into buying a product or service, a phishing email is a
fraudulent attempt to gather personal or financial information from you, such as your user name,
password, and credit card numbers. Phishing emails are often legitimate-looking messages that
appear to originate from trustworthy Web sites, such as eBay, PayPal, or even your own bank.
Note
Email is not the only distribution method for phishing scams. Be aware that
scammers also use instant messaging, cell phone text messages, chat rooms, fake
ads or toolbars in Web sites, message boards, and job search sites. For more
information, see Chapter 11, “Anti-Phishing Protection” on page 165.
How do I know if I’ve received a legitimate email or a phishing attempt?
The Anti-Spam Manager filters out most phishing attempts; however, criminals are always
inventing new methods of bypassing filters. Watch for any email messages that address you
generically as “Dear Customer,” display bad grammar and spelling, display links with very long
text and “@” symbols, include threats demanding that you “act immediately,” and ask for personal
information. Be aware that banks and legitimate organizations will never ask for your personal
information or credit card numbers via email. So if you receive an email asking for sensitive
information, DO NOT reply directly or click on a link within the message. Contact the institution
directly by phone or by entering their Web site address.
What’s the difference between the Email Attachments shield and anti-spam
protection?
The Email Attachments shield and the Anti-Spam Manager use different methods to locate
different types of threats. The Email Attachments shield monitors any files attached to your email
messages, while the Anti-Spam Manager monitors the email messages themselves.
The Email Attachments shield looks for malware and viruses that could infect your computer. The
Anti-Spam Manager looks for unwanted spam or phishing attempts that could trick you into giving
out personal information. For more information about the Email Attachments shield, see “Setting
network protection” on page 37.
MyAccount FAQs
Can I install the Webroot software on another computer?
You can only install the Webroot software on another computer if you purchased a multi-user
license. For more information, see “Managing licenses and additional products” on page 172.
Keep in mind that if you install the Webroot software on additional computers, these installations
will all share a single Webroot account in My Webroot. This means that anyone using the other
computers can sign in to your online account at http://www.webroot.com/mywebroot. If you
have personal information that you do not want to share in your online account, do not provide
others with your user name and master password.
C: Frequently Asked Questions
203
What should I do if I forget my account password?
If you forget your original password, you can create a new one. To reset your password, right-click
the Webroot icon
in the system tray and click Sign In from the pop-up menu. Click the link for
Forgot Your Password?. (You must be connected to the Internet.)
When the Reset Password page appears, enter your email address and click Send Email. Webroot
sends you an email with instructions for resetting your password.
How do I find my keycode?
To view the keycode for your software license, open the Webroot main interface by doubleclicking the Webroot icon
in the system tray. From the taskbar at bottom of the Home panel,
click My Account.
The My Account panel opens and shows your keycode to the right.
204
C: Frequently Asked Questions
Can other users access my online account?
No one can access your account unless they know your Webroot master password. However, if
you installed the Webroot software on additional computers, these installations will all share a
single Webroot account. This means that anyone using these other computers can sign in to your
online account if they know your user name and password. If you have personal information in
your account that you do not want to share, do not provide other members in your household with
your user name and master password.
Can multiple users access the Webroot software from one computer?
Yes, if your computer is configured for multiple Windows user accounts (each person logs in with
a unique name and password), the Webroot software is available to all those users. Each user with
administrative privileges has full access to all areas of the Webroot software, while other users
have limited access. The Webroot software continues its threat protection activities, no matter
which user is logged into the computer.
C: Frequently Asked Questions
205
206
C: Frequently Asked Questions
Glossary
ActiveX
ActiveX technology was developed by Microsoft to allow Web browsers to download and
execute programs on your computer. ActiveX controls have many legitimate uses, such as
running animations, triggering sounds, or downloading Microsoft updates. However, many
spyware programs also use ActiveX to install themselves on your computer. If you see an
ActiveX alert, you should block it from running, unless you trust the source of the ActiveX
technology.
adware
Adware is a type of software that may display advertisements on your system. Some adware
may also hijack Web searches, meaning it may reroute your Web searches through its own
Web page. It may change your default home page to a specific Web site. Adware generally
propagates itself using dialog boxes, various social engineering methods, or through scripting
errors.
Alternate Data Stream (ADS)
An Alternate Data Stream is a highly technical way to hide images, data, or code in a file and can
be used to hide malicious code. The hidden content is impossible to detect using regularly
available tools, such as Windows Explorer.
API
Application Program Interface (API) is a language and message format used by an application
program to communicate with the operating system, a program, or a communications protocol.
The Windows API, also called WinAPI, is the core set of APIs available in the Microsoft
Windows operating systems.
applications
An application is a set of files that work together to make a software program. Some
applications, like Internet Explorer, access the Internet and allow traffic to flow in and out of
your computer.
backdoors
A backdoor is a method of accessing a computer that bypasses security mechanisms. Some
backdoors are legitimate. For example, a software developer might install a backdoor to a
program for troubleshooting. But some backdoors can also be used for malicious purposes to
gain access to a computer's personal data.
Browser Helper Objects (BHOs)
Browser Helper Objects are add-on programs that work with Internet Explorer. BHOs have
many legitimate uses, such as allowing you to display a PDF file within your browser or to
install a search box for your toolbar. However, many spyware programs also use BHOs to
display ads, track your Internet activity, or hijack your home page. If a BHO alert opens while
you are intentionally downloading a new toolbar or other plug-in, you can allow the
installation. Otherwise, block it.
Glossary
207
cache
The cache (pronounced “cash”) is a temporary storage area within your computer, which is
used to display data that you access frequently. Its main purpose is to help your computer
perform tasks quickly.
certificate
A digital certificate identifies an entity and verifies its credentials so that information it sends
can be trusted. Certificates are issued by a Certificate Authority (CA), who attest that the
public key contained in the certificate belongs to the person, organization, server, or other
entity noted in the certificate.
child process
A child process is linked to a parent process and inherits most of the parent's attributes.
Malware writers can sometimes create a child process and attach it to a legitimate parent
application. For example, Internet Explorer is used quite often by malicious processes to
circumvent security. Since Internet Explorer is usually “allowed” in security products, a
malicious process can spawn a child process and instruct it to perform some malicious task.
cookies
Cookies are small text files generated by a Web server and then stored on your computer for
future use. (For Internet Explorer, cookies are stored as separate files. For Firefox, cookies are
stored in one file.) Cookies can contain everything from tracking information about sites you
visited to your personal preferences. Cookies cannot steal information off your machine, but
some do store personal information that you may not want outside parties to gather. The
System Scanner only searches for third-party cookies associated with advertising sites that
may be gathering information about your surfing habits.
definitions
A security definition is a set of fingerprints that characterize viruses, spyware, adware, or other
types of unwanted items. Webroot regularly updates these definitions to provide better
protection against the latest versions of these security threats.
dialer
Dialers are software packages that connect your computer to the Internet via a modem hooked
to a phone jack. Malicious dialers may disconnect your computer from your Internet Service
Provider (ISP) and reconnect you to the Internet using an expensive toll or international phone
number. They can accrue significant phone charges and can run in the background, hiding their
presence. They generally propagate themselves using dialog boxes, various social engineering
methods, through scripting errors, or may be delivered with a Trojan horse.
domain name
A domain name identifies a Web site (for example, webroot.com). You can use either the
domain name or an IP address to access a Web site; in most cases, the domain name and the IP
address are interchangeable. Other times, a server can host several different Web sites (each
with unique domain names).
encryption
Encryption is a process of encoding information in such a way that only the person (or
computer) with the key can decode it.
208
Glossary
executable files
An executable file contains a program that can be launched when you double-click the file
name in Windows Explorer. Typically, executable files have an .exe file extension, but they
can also have other extensions, such as .bat or .com.
firewall
A firewall monitors data traffic traveling in and out of your computer’s ports. It can eliminate
unauthorized access to your computer at home, at the office, or on the road. Using a multilayered approach to defense, Webroot's firewall can block malware, hacking attempts, and
other online threats before they can enter and cause damage to your system.
FTP
File Transfer Protocol is a method used to download and upload files. FTP is the simplest way
to exchange files between computers on the Internet and is commonly used to transfer Web
page files and programs.
host name
A host name identifies a device connected in the Internet. Computers on the Internet are often
named WWW. Computers on a network are usually single names that describe the computer,
such as “accounting1.” Host names can be part of a fully qualified domain name (FQDN). For
example, in “www.webroot.com,” the “www” is the host name and “webroot.com” is the
domain name.
hosts file
The Hosts file is a Windows file that helps direct your computer to a Web site using Internet
Protocol (IP) addresses. Your Web browser uses the IP address to actually connect to a site.
When you enter a Web address in a browser, your computer first looks in the Hosts file to see
if it already knows where to go. If the domain is listed (for example, webroot.com), your
computer goes directly to the IP address. If the domain is not listed, your computer looks up
the information from the Internet (a slightly slower process).
HTML
HyperText Markup Language is a method used to display content in Web pages.
HTTP
Hyper Text Transfer Protocol is a set of rules for transferring files (text, graphics, sound, etc.)
on the World Wide Web. As soon as you open a Web browser, you are indirectly using HTTP.
IP address
An Internet Protocol address identifies a machine (computer or server) on the Internet. The
address is a series of four numbers separated by periods (for example, 64.78.182.210). Your
own computer’s IP address may be the same address during every Internet connection (called
a static IP, used in most T1/DSL connections) or it may change for each Internet connection
(called a dynamic IP, used in most cable/dial-up connections).
keylogger
A keylogger is a type of system monitor that has the ability to record all keystrokes on your
computer. It may monitor keystrokes, emails, chat room dialogue, instant message dialogue,
Web sites visited, usernames, passwords, programs run, and any other typed material. They
have the ability to run in the background, hiding their presence. Keyloggers and system
Glossary
209
monitors may be used for legitimate purposes, but can also be installed by a user to record
sensitive information for malicious purposes.
malware
Malware is short for “malicious software,” which is designed to destroy or harm your
computer system, such as a virus.
packets
Packets are chunks of data that travel between machines on the Internet. When you send or
receive data over the Internet, the Transmission Control Protocol (TCP) divides the message
into manageable packets, which are efficient for routing. When the packets arrive on the
receiving end, TCP reassembles the message into its original form. The Webroot firewall
monitors the packets moving in and out of the computer's ports.
parent process
A parent process is a computer process that has subprocesses (or “children”) associated with it.
phishing
Phishing is a fraudulent method used by criminals to steal personal information via Web sites
or email messages. The messages or Web sites can appear to originate from trustworthy
sources, such as eBay, PayPal, or even your own bank. Typical scams can trick you into
entering your user names, passwords, and credit card information.
POP3
Post Office Protocol 3 is a standard protocol that allows you to receive email and store it in an
Internet server. Most email applications use POP3.
ports
Ports are numbers that identify the entry and exit points of your computer. Computers divide
one physical port connection into thousands of virtual port connections, most of which are
never used. All communications protocols have designated entrance ports to your computer.
For example, traffic sent using HTTP for Web pages generally travels through port 80. Your
computer’s ports are either open or closed. An open port allows any information to flow
through it and can make your computer vulnerable to hackers. A closed port blocks incoming
traffic.
processes
A process refers to the actual running of a program module. When a computer is booted,
numerous processes are started. Some are parts of the operating system, while others are
applications that have been designated to run at startup. Several processes may be associated
with the same application. In Windows, you can view a list of running processes in the Task
Manager (press Ctrl-Alt-Delete, then click Task Manager).
protocols
Protocols are rules that govern the way information is transmitted from one device to another.
For example, the standard communications protocol for the Internet is TCP/IP and the
standard protocol for local networks is Ethernet.
proxy server
A proxy server is a computer system or router that acts as a relay between a client and server.
Proxy servers are used to help prevent an attacker from invading the private network and are
often used in building a firewall.
210
Glossary
Quarantine
Quarantine is a holding area for spyware, viruses, and other potentially unwanted applications
during a sweep. The quarantine process does not delete items from your computer. Rather, it
renders them inoperable and stores them in a safe place where they cannot cause any harm to
your computer. Items in quarantine can be deleted or restored to their original locations.
random access memory (RAM)
RAM is the main memory that acts as the computer’s workspace for running programs.
Spyware and other unwanted programs can steal the computer’s memory resources, which can
lead to system crashes, slower performance, or instability.
registry
A registry is a database of hardware and software settings about your computer’s
configuration, such as the types of programs that are installed. Spyware can create entries in
the Windows registry, which can ultimately slow down your computer and cause problems in
your system.
rootkit
A rootkit is a collection of tools that enable administrator-level access to a computer or
network. By using file-obfuscation techniques, rootkits can hide logins, processes, files and
logs, and may include software to capture information from desktops or a network. Spyware
developers often use rootkits to avoid detection and removal.
scan
A scan is the process of searching for potential threats on your computer, such as spyware and
viruses, then moving those items to Quarantine.
shields
Webroot shields continuously monitor activity related to your Web browser settings, network
communications between your computer and Web sites, Windows system settings, Windows
Startup programs, and email attachments. If the shields detect spyware or any other potential
threats attempting to download, they will either move the item to quarantine or open an alert
message that asks you to take action.
signed service
A signed service is a certificate from an authorized certificate verification service (such as
from VeriSign), which ensures that an application, service, or driver is from a trusted source
and has not been tampered with.
SMTP
Simple Mail Transport Protocol is a method used for sending text-based information (email).
Because SMTP is limited in its receiving functions, it is often used with two other protocols,
POP3 or IMAP. These protocols let you save messages in a server mailbox and download them
periodically from the server.
spam
Spam is unsolicited junk mail sent to your email address. Its sole purpose is to lure you into
buying their product or service. The term “spam” originated with a Monty Python sketch and
song, the lyrics of which kept repeating the words, “SPAM, SPAM, SPAM...”, much like
endless, unwanted email.
Glossary
211
spy cookie
A spy cookie is a Webroot term for a third-party cookie associated with advertising sites that
may be gathering information about your surfing habits.
spyware
Spyware is a program that may either monitor your online activities or possibly install
programs without your consent. Information about online activities may be subsequently sent
to a third party for malicious purposes without your knowledge. Spyware may arrive bundled
with freeware or shareware, through email or instant messenger, may propagate itself using
dialog boxes, various social engineering methods, scripting errors, or by someone with access
to your computer.
subnet mask
A subnet mask is the part of an IP address that identifies the host by filtering out (masking) the
network address. (An IP address has two components: the host address and the network
address.)
system monitors
System monitors, typically non-commercial, may monitor and capture your computer activity,
including recording all keystrokes, emails, chat room dialogue, instant message dialogue, Web
sites visited, usernames, passwords, and programs run. These programs are capable of taking
screen shots of your desktop at scheduled intervals and storing the information on your
computer in an encrypted log file for later retrieval. A system monitor can run in the
background, hiding its presence. These programs typically install via other threats, such as
music downloads and Trojan downloaders.
traces
Traces are individual elements that make up the security definition database. The more traces
found and put into the definitions, the more complete the removal of the potential threats.
Trojan horses
A Trojan horse may take control of your computer files by using a program manager that
allows a hacker to install, execute, open, or close programs. It can run in the background,
hiding its presence. A Trojan is usually disguised as a harmless software program and may
also be distributed as an email attachment. Opening the program or attachment may cause an
auto-installation process that loads the downloader onto your computer and download thirdparty programs on your computer, resulting in the installation of unwanted programs without
your knowledge or consent. Trojans can also open a port on your computer that enable a
hacker to gain remote control of your computer.
URL
Uniform Resource Locator (URL) is the unique address for a file that is accessible on the
Internet. To access the home page of a Web site, you can enter the URL of the home page (for
example: http://www.webroot.com) in the browser’s address line. You can also access specific
files using URLs (for example: ftp://www.webroot.com/sample.txt). The URL contains the
name of the protocol to be used to access the file resource, a domain name that identifies a
specific computer on the Internet, and a pathname for a specific file.
212
Glossary
virus
A virus is a self-replicating program that can infest computer code, documents, or
applications. While some viruses are purposefully malignant, others are more of a nuisance,
replicating uncontrollably and inhibiting system performance.
virus cleaning
Virus cleaning is a Webroot procedure that removes infected portions of a file, when a virus is
detected during a sweep. If the Webroot software can remove the virus successfully, it restores
the cleaned file to your computer in its original location and places a copy of the corrupted file
in Quarantine. The cleaned file is safe to use; the file in Quarantine is not safe to use.
Glossary
213
214
Glossary
Index
A
account
changing password 171
creating 2
launching in browser 7
other users accessing 205
problems creating 3
resetting email address 3
signing in 4
viewing 170
viewing keycode 172
viewing subscription information 172
ActiveX shield 33
Add storage space 104
Add Webroot Site dialog 121
address bar history, removing with System Cleaner 108
ADS shield 33
Advanced Scan Settings panel 21
alerts
Always perform the selected action 10
blocking or allowing items 10
changing alert methods for firewall alerts 55
determining how to respond 9, 53
firewall alerts 53
pop-up in the middle of your screen 9
pop-up in the system tray 10
responding to 9
Secure Browsing alerts 155
stopping with Gamer mode 180
turning off firewall alerts 55
viewing more details after it closes 11
viewing more details in pop-up alerts 9
Anti-Phishing Manager 165
description of protection 165
enabling or disabling 166
using when performing Web searches 168
using while browsing 167
Anti-Spam Manager 159
approving or blocking email messages 162
description of protection 159
difference from Email Attachments shield 203
enabling or disabling 160
supported clients 159
toolbar and folders in Outlook 161
viewing statistics for 163
API calls, monitoring with firewall 49
applications, monitoring with firewall 50
autocomplete form data, clearing with System
Index
Cleaner 108
AutoLogin and AutoFill prompts 133
automated scans
about 15
turning off 23
B
backing up files 79
backup vs. synchronization 196
BHO shield 34
Bookmarklets, creating 148
browser cache, clearing from Firefox 107
Browser Helper Objects 34
Browser Protection shields 35
browsers, removing traces 106
C
CD burning storage folder, clearing with System
Cleaner 112
Clean System 116
Cleaned status (virus cleaning) 20
cleanup 105
clipboard contents, clearing with System Cleaner 112
colors on home panel 5, 8
compressed files, scanning 22
cookies
removing for Firefox browsers 107
removing for Internet Explorer browsers 108
scanning for 22
shield for 36
why it detects so many 192
creating your account 2
D
definitions updates 179
Detected status during scans 17
document history, clearing with System Cleaner 111
drives, scanning 22
E
Edit with WebSync 87
email address, resetting for account 3
Email Attachments shield 39
email, anti-spam protection 159
Execution shield 33
F
Facebook, publishing albums to 95
fake dialogs 193
215
FAQs 189
Favorites
creating for Password Manager 122
opening Password Manager sites 145
Favorites shield 36
file manager for synchronization 72
File System shield 33
Fill Forms 138
filtering traffic with the firewall 42
firewall 41
adjusting filtering levels 43
adjusting Internet network security 44
adjusting local network security 43
alerts 53
changing alert controls 55
description of protection 41
determining how to respond to alerts 53
determining whether to block or allow 194
difference from Webroot Shields 195
enabling or disabling 42
managing application traffic 50
monitoring processes 49
operating in different environments 43
stopping alerts with Gamer mode 180
traffic filter settings 42
turning off alerts 55
viewing more details in alerts 53
Forgot Your Password? dialog 4
Form data, clearing with System Cleaner 107
Form Fill profiles
creating and using 134
creating from My Webroot 136
creating from your browser 134
custom fields 135
updating 139
using 138
using to fill in specific fields 138
G
Gamer mode
changing timer 181
enabling from system tray 7
turning on and off 180
Generate password 140
global sites list for firewall 47
H
Help
launching from Home panel 6
launching from system tray 7
history, viewing 177
home panel
description 5
opening 5
216
protection status 8
Hosts File shield 38
I
IE Hijack shield 36
IE MediaPlayer bar, clearing with System Cleaner 108
IE Security shield 36
Ignore selected items 17
index.dat databases, clearing with System Cleaner 108
installing the software on another computer 172, 203
Internet Communication shield 38
Internet Network security, firewall 44
J
Java Web Start Launcher 88
K
keycode, viewing 170, 172, 204
Known Threat site 157
L
language, changing for interface 184
Licenses and Products 172
local network security, adjusting for firewall 43
Local Network security, firewall 45
logon user history, clearing with System Cleaner 112
M
Magic Briefcase
folder in Webroot File Manager 74
using 71
main interface
description 5
opening 5
protection status 8
Make deleted files unrecoverable 114
malware
firewall for 41
how it gets on your computer 190
scanning for 16
shields for 31
signs of infection 190
Manage Sync 72
memory dump files, clearing with System Cleaner 112
memory, scanning 22
Microsoft Office, clearing with System Cleaner 111
MS download folder, clearing with System Cleaner 108
multiple installations 203
My Account
changing password 171
creating support tickets 173
editing contact information 171
managing 169
viewing details 170
Index
My Account creation dialog 3
My Webroot
creating a Webroot account 2
creating password-managed sites 125
description of pages 13
launching in browser 7
managing synchronization files 80
opening 12
signing in 4
MyData page 80
adding a new folder 81
changing photo album properties 84
editing files 82
My Folders and Files 81
Photos 83
recent events 83
renaming files 82
uploading files from your computer 81
viewing previous versions 82
MyIdentity page
Add Site dialog 126
Edit Fields 132
Edit Site dialog 130
managing sites in 144
opening Favorites 145
viewing deleted items 146
viewing history 146
viewing Never list 146
N
Network Protection shields 37
notifications
removing from panel 12
responding to 11
viewing more information 11
O
Outlook, enabling spam protection 160
P
password
changing Webroot master password 171
creating Webroot master password 2
forgotten Webroot master password 4
generating a secure password for a Web site 140
importing into Webroot Password Manager 142
Password Manager 119
Add Webroot Site dialog 122
creating and using Form Fill profiles 134
creating Bookmarklets 148
creating Form Fill profiles from My Webroot 136
creating Form Fill profiles from your browser 134
creating managed sites from My Webroot 125
creating managed sites from your browser 120
Index
defining multiple logins for a site 128
deleting sites 145
description of password management 119
Edit Fields dialog 132
Edit Form Fill profile 134
Edit Site dialog 129
editing sites 145
encryption and security 134, 200
exporting site information to a spreadsheet 150
generating a secure password 140
hotkeys for 147
importing from other applications 142
managing sites in MyIdentity page 144
modifying notifications for 147
opening all favorites 145
Save All Entered Data 123
setting preferences 146
stopping autofill of your password 200
updating Form Fill profiles 139
updating managed sites 128
using different passwords for the same site 200
using Form Fill profiles 138
using to automatically log in to Web sites 132
using with multiple logins 133
using with other browsers 148
Perform Secure Scan 17
phishing
difference between legitimate email and phishing 203
difference from spam 203
explanation of 201
protection 165
Phishing site 157
photo albums
actions for 91
adding captions to pictures 93
changing properties 84
commands for managing 90
contact’s albums 90
creating albums 89
creating contacts 92
downloading 86
making public 94
publishing to Facebook 95
sharing with others 93
showing and hiding 90
turning off Send notifications 91
viewing all photos 92
viewing in MyData page 83
ports 194
Process Monitor in firewall 49
proxy server, settings 182
Q
Quarantine 25
217
about the process 25
deleting items from 27
determining what to do with items 25
restoring items to original locations 28
viewing items stored in 26
what to do with items 192
Quarantine selected items 17
Quarantined status 20
R
real-time active protection shields 32
recovery tools 114
Recycle Bin, clearing with System Cleaner 111
registry items, scanning 22
registry streams, clearing with System Cleaner 112
Removed status 20
renewing your subscription 172
Require Password Reprompt 122
restoring data using the Sync and Sharing Manager 98
risk levels in scans 19
rootkits, scanning for 22
Run dialog history, clearing with System Cleaner 111
S
Save All Entered Data 123
Save Site prompt 120
Scan in Progress panel 17
scanning 15
actions against threats 17
creating schedule 23
customizing 21
description of process 15
launching from home panel 16
launching from system tray 16
launching from Windows 17
malware vs. legitimate programs 191
only new or changed files 22
operation in background 191
risk levels of items found 19
skipping file types 22
turning off automated 23
USB or CD 192
viewing automated results 191
viewing details 18
when to run an immediate scan 192
schedules
editing and deleting 176
for cleanups 117
for scans 23
stopping with Gamer mode 180
search history, clearing with System Cleaner 111
Secure Browsing 153
blocked access alerts 155
description of protection 153
218
enabling or disabling 154
Preview link safety in search engine results 154
safety ratings 157
supported browsers and search engines 153
using while performing Web searches 156
using while surfing the Internet 155
security definitions
about 191
updates 179
See how button 5
setup log, clearing with System Cleaner 108
shields 31
ActiveX shield 33
ADS shield 33
BHO shield 34
Browser Protection shields 35
description of shield protection 31
determining whether to block or allow 193
Email Attachments shield 39
Execution shield 33
Favorites shield 36
File System shield 33
Hosts file shield 38
IE Hijack shield 36
IE Security shield 36
Internet Communication shield 38
Network Protection shield 37
real-time active protection 32
responding to alerts 9
Startup Items shield 33
stopping with Gamer mode 180
Tracking Cookies shield 36
using with a firewall 194
shredding files in the cleaning process 114
Sign In dialog 4
signing in to your account 4
Silverlight updates 178
software updates 179
spam
difference from phishing 203
how spammers get your address 202
protection from 159
Start Menu click history, clearing with System
Cleaner 111
Start Menu order history, clearing with System
Cleaner 111
Startup Items shield 33
status indicator in system tray 8
subscription expiration 170, 172
Support 185
Support tickets, creating 173
Suspect status 20
Suspicious Site 157
sweeps 15
Index
Sync and Sharing Manager 57
accessing files remotely 84
accessing from another computer 196
adding more storage space 104
adding more sync folders 63
backing up files to the Web Archive 79
configuring multiple computers 66
configuring sync folders for the first time 60
description of process 57
determining what files to protect 58
determining which folders to synchronize 196
downloading files from any location 85
downloading photo albums from any location 86
editing files remotely 87
encryption and safety 196
File Transfer Status panel 62
first-time setup 60
green checkmarks 197
managing photo albums 89
merging files and folders 68
opening the MyData page 80
organizing files for synchronization 58
publishing photos to Facebook 95
removing a computer from synchronization 78
restoring data 98
restoring data to a new computer 99
restoring files from the Web Archive 103
retrieving an accidental deletion 103
retrieving an older version of a file 102
sharing files with others 96
sharing photo albums 93
stopping synchronization 65
using the Magic Briefcase 71
using the Webroot File Manager 72
versions saved 196
viewing old versions of files 77
viewing the upload in progress 62
synchronization 57
synchronization vs. backup 196
System Cleaner 105
Address bar history 108
Autocomplete form data 108
Browser cache 107
CD burning storage folder 112
changing Internet options 106
Clipboard contents 112
creating cleaning scheduling 117
Default logon user history 112
description of process 105
difference from scans 197
Firefox URL history 107
Form data 107
IE MediaPlayer bar 108
IE URL history 108
Index
index.dat databases 108
making cleaned items unrecoverable 114
Memory dump files 112
Microsoft Office 111
MS download folder 108
Recent document history 111
recovery of deleted files 197
Recycle Bin 111
Registry streams 112
removing Firefox cookies 107
removing IE cookies 108
Run history 111
running a cleanup 116
Search history 111
Setup log 108
Start Menu click history 111
Start Menu order history 111
System temp folder 112
Temporary Internet files 108
third-party applications 113
viewing cleaning log 116
why you should use it 197
Windows items 109
Windows temp folder 112
Windows update temp folder 112
system history, viewing 177
System Scanner 15
actions against threats 17
creating scan schedule 23
customizing scans 21
description of scan process 15
launching from home panel 16
launching from system tray 16
launching from Windows 17
risk levels of items found 19
turning off automated scans 23
viewing details of scan 18
system temp folder, clearing with System Cleaner 112
system tray menu 7
T
Technical Support 185
temporary Internet files, clearing with System
Cleaner 108
third-party applications, cleaning 113
third-party cookies 193
threats
firewall for 41
scanning for 16
shields for 31
signs of infection 190
toolbar
Anti-Spam Manager 161
using the Webroot toolbar 14
219
using with Password Manager 119
Tracking Cookies shield 36
tray menu 7
trusted/untrusted lists
global sites in firewall 47
networks in firewall 45
U
Unclassified Site 201
uninstalling the program 187
updates
changing update preferences 178
stopping with Gamer mode 180
URL history
clearing for Firefox 107
clearing for Internet Explorer 108
Use custom scan settings 21
V
View scan details 19
viruses
firewall for 41
scanning for 16
shields for 31
signs of infection 190
vulnerable status 8
W
WARN program 179
Web Archive
copying files to 79
folder in Webroot File Manager 74
restoring files from 103
Webroot account
creating 2
launching in browser 7
220
problems creating 3
signing in 4
Webroot File Manager 72
adding or removing folders 76
adjusting upload speed 77
commands 76
creating a new folder 76
exporting files to a new location 76
folder tree 74
importing files and folders 76
menus 74
reclaiming storage 78
removing a computer 78
renaming your computer 78
status bar 75
toolbar 74
viewing a file’s location in My Webroot 77
viewing a file’s location in Windows 77
viewing file transfer status 77
viewing old versions of files 77
Webroot Firewall 41
Webroot icon in Internet browser fields 132
Webroot Master Login prompt 121
Webroot master password, creating 2
Webroot Shields 31
Webroot support 185
Webroot toolbar, using 14
WebSync, using to edit remote files 87
Window Washer 105
Windows Security Center message 191
Windows temp folder, clearing with System
Cleaner 112
Windows update temp folder, clearing with System
Cleaner 112
Windows, removing traces 109
Index