1
User Manual
PAM - Production Recording Software
Part 1
Copyright © 2004 FTI (1997) Pty Ltd
ALL RIGHTS RESERVED
Table of contents
A
Table of contents
Chapter 1
1
Introduction
1
Welcome to PAM
Acknowledgments
Licence and warranty information
Software licence
Update Policy
Warranty
Trademark Acknowledgments
Registering your copy of PAM
About this manual
How can we help you get the best from PAM?
What you need to run PAM
Data file compatibility
Program operating speed
Installing PAM
How to start PAM
How to access the demonstration data
Where to from here?
2
3
4
4
5
5
7
8
9
10
11
11
11
13
13
13
14
Chapter 2
15
Menus, lists and function-keys
15
Menus : What they are and how to operate them
Pull-down menus
Pop-up menus
Dialog boxes
Pick-lists and Multiselect-lists
Pick-lists
PAM's Main Menu system
Data Entry
Reports
16
17
17
18
18
18
20
20
21
B
Table of contents
Utilities
Configuration
MultiClient
Help
Things you will need to know before getting started
21
21
21
22
23
Chapter 3
27
Steps for setting up PAM
27
Quick start:
Quick start:
Configuration
Menu Options
Screen Settings
Setting up your list of Crops and Varieties
Varieties
Setting up your Farms and Paddocks list
Paddock Sort Order
Paddock fields explained
Perennial Crop Layout Details
Modifying an existing Paddock record
Entering Paddock Notes
Customise your PAM software
Settings 1
User Defined Production Unit Names
Comparative Analysis Codes (CA Codes)
Settings 2
Cropping
Season Start Month
Season or “Season”
Units Of Measure
Pack Sizes
Special Harvest Units
Configuration : General information
Crop Types and Associated Lists and Settings
Consumables List
General Information
Chemicals List - special considerations
Fertiliser List – special considerations
Customising your nutrients list
29
29
30
30
30
31
32
34
35
36
37
37
38
39
39
39
39
40
40
40
40
40
41
42
43
45
49
49
49
50
51
Table of contents
Sundry Consumables List
Machinery List - special considerations
Machinery Costs Calculator
Costing machinery by hour, area, application units
or harvest units
Manual Tasks List
Staff and Contractors List
Notes boxes in lists screens
Setting up the soil, leaf, water and nutrient tests
systems
Irrigation Pumps and Water Sources List
Storage Locations, Harvested Produce Destinations and
Suppliers List
Weeds and Pasture Species List
Rainfall Stations List
Pest Growth Stages
Email Connection Settings
C
51
52
53
53
54
54
55
55
57
58
59
59
60
60
Chapter 4
61
The Add Activities Wizard
61
General information
The “Add Activities Wizard”
Page One : Selecting the Operation
Page Two : Selecting the Areas
Page Three and Beyond
Finished the operation?
Closing the wizard
Adding Plans and Recommendations
Editing Records
Advanced use of the edit wizard.
61
62
63
64
64
66
66
66
68
69
Chapter 5
71
The Paddock Activities Diary
71
General information
The screen layout
Activity Planning Reports
What is a JOB?
72
73
76
76
D
Table of contents
An “Add” Session?
The “Add Activities Wizard”
Page One : Selecting the Operation
Page Two : Selecting the Areas
Page Three and Beyond
Creating Management Groups
What data can you enter here?
Adding a Paddock Activity
Area Selection Page – Important Options and Special
Features
Dates and Seasons
Seeding or Planting operations : Special cases
Main Crops, Secondary crops
Case 1 : How to handle growing two or more crops in
the same area in the one season
Case 2 : How to handle re-seeding
Case 3 : How to handle under-sowing
Perennial Horticultural Crops
Non-Horticultural Perennial Crops
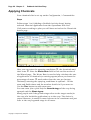
Applying Chemicals
Chemical Targets
Chemical Tank mixes, Fertiliser mixes, Machinery
combinations
Chemical Batch Numbers
Applying Fertilisers
Fertiliser Blends
Entering machinery details
Entering harvest deliveries
Sundry Consumables
Hay and Fodder production
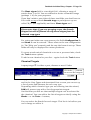
Diary Screen Buttons : More information
Using “…to Season”
Using the Paddock Activities Diary Filter
The Paddock Activities Diary Report
Paddock Activities Diary and the Farm Filter
Weird or missing data
The Copy option
77
77
77
77
79
79
80
81
82
86
86
86
87
87
87
87
88
89
90
92
92
93
94
95
95
96
97
98
98
99
99
99
99
100
Chapter 6
99
The Paddock-Season Screen
99
Table of contents
General information
The Screen Layout
Adding a Paddock-Season record
Paddock notes and Paddock Season Notes
Printing the Paddock-Season report
Total income and costs
Deleting a Paddock-Season record
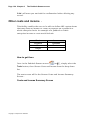
Other costs and income .
How to get there
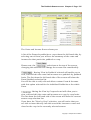
Costs and Income Summary Screen
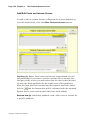
Add/Edit Costs and Income Screen
Paddock-Season Budgeting
Special Features of the Budget Screen.
Costs of consumables in PAM Budgets
Harvest Income in PAM Budgets
Converting Budget Records to Plans or Actuals
Special Budget Reports
E
100
100
102
103
103
103
103
104
104
104
106
107
107
109
110
111
111
Chapter 7
113
Laboratory Test Results
113
Setting up
Entering data
Crop
Site number
Growth stage
Reports
114
114
115
115
116
116
Chapter 8
117
Rainfall
117
Getting started with the rainfall database
Entering rainfall data
Tools options
Long term averages rainfall data
Decile ranges
Rainfall system reports and graphs
Chapter 9
118
118
120
122
123
124
125
F
Table of contents
General Purpose Diary
Using your mouse to move around
Adding diary notes
Reminders
Numeric data
Diary Reports
125
126
127
127
127
128
Chapter 10
131
Generating reports and graphs
131
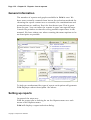
General information
Setting up reports
Report output menu options
Buttons
Export options
Setting up your list of Favourite Reports
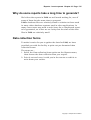
Why do some reports take a long time to generate?
Data collection forms
132
132
133
133
134
134
135
135
Chapter 11
137
The Inventory Systems
137
The Inventory of Consumables
Purchases
Adjust Inventory Levels
Delete
Transfer Location
Batch Numbers and Stock Levels
Inventory of Harvested Produce
Selling or Using Stored Produce
Adjust Inventory Levels
138
139
140
140
141
142
142
142
143
Chapter 12
145
Quality Assurance Records
145
QA Records
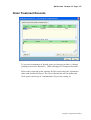
Grain Treatment Records
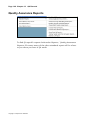
Quality Assurance Reports
146
147
148
Table of contents
G
Chapter 13
149
The Browse System and User Defined Reports
149
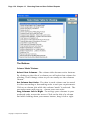
Browse any dataset…
The Buttons
Why – Browse any dataset?
To Create a User Defined Report
The filter dialog features
Export Data
149
150
151
151
152
154
Chapter 14
155
Utilities
155
General purpose diary
Numeric Calculator
Browse Any Dataset
Farm Filter
Machinery Costs Calculator
Back up and restore and Transfer data files
Backing up
Restoring specific files
Import Configuration Lists
Export Configuration Lists
Export Crop QA Data
Data Merging
Database Maintenance
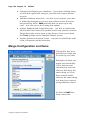
Merge Configuration List Items
Import Data from an External Source
Exchange Inventory Records with Accounting Software
156
156
156
157
158
159
160
161
162
163
163
163
163
164
165
165
Chapter 15
167
Trouble shooting
167
Trouble !
Trouble !
Data trouble
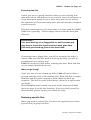
Software trouble - The error trapping system
PAM can't find or open a file
168
168
168
168
169
H
Table of contents
PAM Serial Number problems
What if you overrun your 20 run times?
What if you want to change your trading name?
Checking data files for possible structure changes
I want a fresh start!
.
169
169
170
170
170
Introduction
Chapter 1 Page 1
Chapter 1
Introduction
Chapter Contents
Welcome to PAM
Acknowledgments
Software licence
Update Policy
Warranty
Trademark Acknowledgments
Registering your copy of PAM
About this manual
Symbols and conventions used in this manual
How can we help you get the best from PAM?
The program error trapping system
What you need to run PAM
Data file compatibility
Program operating speed
How to start PAM
How to access the demonstration data
Where to from here?
If you're familiar with Windows 95 ....
If you're relatively new to computers...
2
3
4
5
5
7
8
9
9
10
10
11
11
11
13
13
14
14
14
Copyright © Fairport Farm Software
Page 2 Chapter 1
Introduction
Welcome to PAM
Thank you for choosing PAM.
This program was written to fill the requirements of those who
need a powerful computerised recording system for agricultural
production information. As margins are squeezed and management
efficiency is increasingly put to the test, better and timely
information becomes vital. PAM helps provide a better
understanding of your farming operation.
Modern technologies have been incorporated into this program to
give you a genuine management information system. You can make
INFORMED decisions. You simply enter your daily events and PAM
uses that data to deliver useful information in the form of reports
and graphs.
We expect you will find some parts of the program are superfluous
to your requirements. This is common in all "off-the-shelf"
software. We hope however, you find everything you were hoping
for in this program. If there is anything you think would help
enhance the program, please don't hesitate to let us know. The
program has reached its current state as a result of the input of
many people in the past making suggestions.
Although PAM can be operated very simply using the mouse, we
have written it to also be used with a keyboard. If you are used to
using software that operates under Microsoft Windows®, you
should find PAM quite easy to follow.
We hope you enjoy using PAM and that you gain pleasure and
benefit from it.
Program registration instructions are on page 8.
Copyright © Fairport Farm Software
Introduction
Chapter 1 Page 3
Acknowledgments
Many people have contributed to this program. PAM began its life
in 1988 and in the early years Dave Panell, Bruce Mattinson, Jim
Fortune and Chris Oldham gave a great deal of assistance to me.
I am indebted to Alan Moir and Colin Booth of Country Soft Pty Ltd
and then Dalgety Essex Technologies Pty Ltd for giving PAM
exposure and for giving me assistance in the early stages. Since the
formation of Fairport Technologies, much help has been
forthcoming from many of you out there using PAM 1.0 through to
version you have today. The process of developing software is very
much a cooperative effort and depends on feedback.
The version of PAM (PAM 3.x) which was superseded by the
Windows version in 1998 laid a very sound foundation for the
layout and functionality of this version. I am eternally indebted to
Dairmuid Pigott for his tireless efforts and his skills in helping me
build that final “DOS” series of PAM.
And finally … I would especially like to thank the development
team of this Windows version series of PAM who work "beyond the
call" on this project, sometimes under duress!
Laurie Smithdale, Ben Gooch, Darren McGlenchy, John Wan and
Paul Olsen. I also thanks those who contributed but who are no
longer with Fairport: Dianne Zacher, Mark Niski, Bruce Hearder,
Jones Daniel, Shah Ping Teng, Brendan Barker and John Breen.
Thank you all
Roger Wiese
Copyright © Fairport Farm Software
Page 4 Chapter 1
Introduction
Licence and warranty information
Software licence
FTI (1997) Pty Ltd, C/- PO Box 1046, South Perth, Western Australia ("Licensor" which
expression includes its subsidiaries, agents, successors and assigns) is authorised to
license this PAM software and related documentation (collectively "the Software").
Upon opening the sealed package and by using the Software, the end user ("You") accepts
a non-exclusive, non-transferable Licence to use the Software on a single computer with
a single CPU in accordance with the terms of this Licence. You may not sub-license the
Software.
You may not use (or cause to be used) the Software for rental, as part of a service bureau
(unless you have purchased the "MultiClient" version) or for any similar purpose. You
may not modify, network, loan, distribute or create derivative works based upon the
Software in whole or in part. You may not electronically transfer the Software from one
computer to another over a network.
Restrictions on Use
You may not distribute unauthorised copies of the Software or accompanying written
materials to others. You may not modify, adapt, translate, reverse engineer, decompile,
disassemble, or create derivative works based on the Software. You may not modify,
adapt, translate, or create derivative works based on the written materials without the
prior written consent of Licensor.
Backup Copies
You are allowed to make one backup copy of the Software. You must reproduce the
copyright notice on the backup copy.
Licence Fee
You must pay the Licence fee as determined at the time of entering into this Licence to
Licensor or to one of Licensor's nominated dealers or distributors.
Title
Licensor retains title and ownership of the Software recorded on the original disks and all
subsequent copies of the Software, regardless of the form or media in or on which the
Copyright © Fairport Farm Software
Introduction
Chapter 1 Page 5
original and other copies may exist. The Licence is not a sale of the original Software or
any copy.
Industrial and Intellectual Property Rights
You acknowledge that any and all of the trademarks, trade names, trade secrets,
copyright, and all other intellectual property rights used or embodied in connection with
the Software are the sole property of Licensor. You will not during or at any time after
the expiry or termination of the Licence in any way question or dispute the ownership by
Licensor of any such rights.
Termination
The Licence continues in effect until terminated. The Licence will terminate
automatically without notice from Licensor if You fail to comply with any provision of this
Licence or if Licensor refunds the Licence fee to You. If the Licence is terminated, You
must return to Licensor the written materials and all copies of the Software, including
backup copies, if any.
Update Policy
Licensor may create, from time to time, updated versions of the Software. At its absolute
discretion, Licensor may make such updates available to You if You have paid the update
fee and returned the Registration Form to Licensor. Any update provided by Licensor to
You will be governed by the terms and conditions of this Licence and a reference to
Software in this Licence means and includes any such update.
Warranty
Licensor warrants to You that the disks upon which the Software is recorded are free
from defects in materials and workmanship under normal use and service for a period of
ninety (90) days from the date of delivery as evidenced by a copy of the receipt.
If within ninety (90) days You notify Licensor of a defect in the Software, which is not
caused by use, abuse, accident or misapplication, then Licensor will at its discretion
either:
(a)
return the Licence fee; or
(b)
replace the Software.
In the event that the Software is replaced pursuant to this clause, then the replacement
will be warranted for the remainder of the original warranty period or thirty (30) days,
whichever is longer.
Copyright © Fairport Farm Software
Page 6 Chapter 1
Introduction
Licensor does not warrant that the Software is error free or that use of the Software shall
be uninterrupted.
Liability of Licensor
Except as expressly provided to the contrary in this Agreement, all terms, conditions,
warranties, undertakings, inducements or representations whether express, implied,
statutory or otherwise relating in any way to this Agreement, are excluded. Without
limiting the generality of the preceding sentence, Licensor is not under any liability to You
in respect of any loss or damage (including consequential loss or damage) however
caused (whether by negligence or otherwise and whether as a result of loss of, damage to
or corruption of data or otherwise) which may be suffered or incurred or which may arise
directly or indirectly in respect of the Software or the failure or omission on the part of
Licensor to comply with its obligations under this Agreement.
Where any Act or Parliament implies in this Agreement any term, condition or warranty,
and that Act avoids or prohibits provisions in a contract excluding or modifying the
application of or exercise of, or liability under such term, condition or warranty, such
term, condition or warranty will be deemed to be included in this Agreement, but the
liability of Licensor for any breach of such term, condition or warranty will be limited, at
the option of Licensor, to any one or more of the following:
(a) if the breach relates to goods;
(i) the replacement of the goods or the supply of equivalent goods;
(ii) the repair of such goods;
(iii) the payment of the cost of replacing the goods or of acquiring equivalent goods; or
(iv) the payment of the cost of having the goods repaired; and
(b) if the breach relates to services:
(i) the supplying of the services again; or
(ii) the payment of the cost of having the services supplied again.
You warrant that You have not relied on any representation made by Licensor, which has
not been stated expressly in this Agreement, or on any descriptions or illustrations or
specifications contained in any document including any catalogues or publicity material
produced by Licensor.
Waiver
Subject to this clause, any failure by Licensor to enforce any clause of this Licence, or
any forbearance, delay or indulgence granted by Licensor to You, will not be construed as
a waiver of Licensor's rights under this Licence.
Copyright © Fairport Farm Software
Introduction
Chapter 1 Page 7
Entire Agreement
This Licence constitutes the entire agreement between the parties for the subject matter
referred to herein. Any prior arrangements, agreements, representations or undertakings
are superseded. No modification or alteration of any clause of this Licence will be valid
except in writing signed by each party.
Severability
If any provision of this Licence is held invalid, unenforceable or illegal for any reason, this
Licence shall remain otherwise in full force apart from such provision, which shall be
deemed, deleted.
Governing Law
This Licence will be governed by and construed according to the laws of the State of
Western Australia. You hereby consent to the jurisdiction of the courts of Western
Australia.
Rights Reserved
All rights not expressly granted in this Licence are reserved by Licensor.
Trademark Acknowledgments
MS-DOS, Windows, Access, Works and Excel are registered trademarks of Microsoft
Other products and marks mentioned in this documentation are trademarks or registered
trademarks of the respective owners.
Copyright © Fairport Farm Software
Page 8 Chapter 1
Introduction
Registering your copy of PAM
When you first install the program, you will be requested to enter
your trading name, address and other details. Please take the time
to fill in all of the fields on this screen. If you have an e-mail
address, please enter that too. The program requires this
information before it can operate. The program will also need a
customer serial number entered into it before it is completely
"unlocked".
Although you need a serial number to "unlock" PAM, you will be
able to run the program 20 times. After the 20th run, you will still
be able to print a registration form and unlock your program but
you no longer are able gain access to the program properly.
A special program registration form must be printed from the
program. This form has on it a 9-digit number, which Fairport
Technologies will use to generate your customer serial number.
You can only obtain access to registration form when you start the
program, so if you are using the program and then decide to
register, you will need to exit then re-start PAM to print the form.
By registering PAM you will help us to know your hardware
configuration and you will be entitled to the following benefits:
•
•
Information on upgrades or revisions to PAM
Free support "help notes" (which are mailed out from time to
time to all registered users).
If you are unfamiliar with the meaning of the terms "menu option"
and "pull-down menu", these will be described in the following
chapter.
In most cases, your dealer will either have already organised the
registration job for you or will assist you with the task.
Copyright © Fairport Farm Software
Introduction
Chapter 1 Page 9
About this manual
This user's manual for PAM is a comprehensive guide that
contains all of the procedures you need to operate the program
efficiently and effectively.
This manual may become superseded by changes within the
software. From time to time the manual is revised without notice.
Generally, if substantial new features are added to the software we
published special purpose Help Notes on the Fairport web site /
Support pages.
The program has "on-line" help which can be accessed by pressing
the ! function key while operating PAM. You will find that the
on-line help is more comprehensive than the manual and is
updated regularly by the Fairport team. Any updates of the help
file can be obtained from our web site or with a program update.
Symbols and conventions used in this manual
To make reference to the keys on your keyboard we have used
small pictures of keys like :
E to represent the ENTER or RETURN key
!,)
to represent the function keys F1 and F10.
If you have a mouse, the mouse symbol
attention to mouse operations.
[ is used to draw your
Program menu items are written in Bold Italics and if we are
referring to a sub-menu item or a sub-sub-menu item, we write it
thus ... Main menu item/Sub-menu item/Sub-sub-menu item.
When we refer to the ARROW keys or the CURSOR keys we are
talking about the keys used to move the cursor or menu selection
highlight bar. These keys are :
ZNQRYO
Copyright © Fairport Farm Software
Page 10 Chapter 1
Introduction
How can we help you get the best from PAM?
Fairport Technologies has the following support strategy. For the
first six months you have free access to Fairport’s 1800 help line.
Thereafter you will be invited to pay a fee for this service. The fee
also entitles you to Fairport Club membership, which has other
benefits like automatic software updates.
Before you call either Fairport or your dealer, check in the printed
material that comes with the program for answers to your
questions. Use the index table and the table of contents to locate
the area in the manual most likely to cover the problem. You
should also check the on-line help system in the program for
possible clues. Access this everywhere with !. There is also a
FAQ help file, access this through the Help/Frequently Asked
Questions.
If the answer can't be found your next step is to contact Fairport or
the dealer who sold you the program.
Fairport Technologies offers a back-up help service to all dealers.
If they can't solve your problem, they will contact Fairport
Technologies and we will do our best to help you as soon as
possible.
When using this service please bear in mind that the more
information you can give us, the more able we will be to answer the
problem. If at all possible a fax is preferable to a phone call. A fax
will give us “hard copy” of your query and we can then prepare a
written response.
Fairport Technologies can be contacted on the Internet... our email address : [email protected]
We also have a web site .... http://www.fairport.com.au
The program error trapping system
The program has an error trapping system to catch any program
errors that may have missed our testing processes.
If you should ever see the error trapping system-warning message
you will see that you are given a range of choices.
In general it is advisable to select “Abort”.
A file is maintained behind the scenes and the information that is
contained in this file is s very handy to us when attempting to
locate and fix the problem. So, please take a moment to print the
error messages, where you have to option to “Print Fax” should you
Copyright © Fairport Farm Software
Introduction
Chapter 1 Page 11
see one on your screen. You can then either fax or post the
printout to Fairport Technologies and we will act on the problem as
quickly as possible. Error messages can also be attached to an email.
What you need to run PAM
PAM will work with most IBM and compatible computers available
today. Although in theory PAM will operate on any IBM PC that is
capable of running Microsoft Windows® 95, 98, NT, 2000 or XP it
does require a reasonably powerful computer to run well... but, as
a general rule of thumb, if your computer is able to run Microsoft
Windows® 95, it is powerful enough to run PAM.
The minimum requirements are :
• A computer with one hard disk a CD ROM drive or one floppy
disk drive and 640k of RAM, 16 megabytes of Upper memory
and the Windows 95 operating system.
• Screen type : a SVGA screen or better is recommended
operating at a resolution of 800 X 600 or better.
• Printer requirements: PAM will print out on any printer
supported by Windows.
Data file compatibility
The data files used by this program are 100% Microsoft Access 97
compatible (Microsoft SQL Server in the PAM Enterprise Series).
The text output files created by this program are in ASCII text
format. Any word processing program can edit them. Most reports
can also be created as spreadsheet files in the "CSV" format. These
files can be read into Microsoft Excel. For other spreadsheet
programs, check your spreadsheet software for details.
Program operating speed
This program is a true "relational" database system and the
operation involves a lot of disk reading and writing. The speed of
operation will depend greatly upon the speed of your hardware (ie.
the "clock" speed of your processor and the disk drive access
speed). As the data files grow in size, the time needed to access
Copyright © Fairport Farm Software
Page 12 Chapter 1
Introduction
that data will increase. This should be more obvious in reporting
than in other areas of program operation.
This is a fact of life in large database systems. Much effort has
been and will continue to be devoted to reducing the processing
time throughout the program wherever possible.
PAM will run much faster on more modern computers especially
those which have extra memory installed.
Copyright © Fairport Farm Software
Introduction
Chapter 1 Page 13
Installing PAM
1. Once you place your Fairport CD in your CD-Rom drive, the
browser screen for installing PAM should automatically appear.
If not, select Start/Run.
2. Type
(CD Drive Letter):\SETUP.EXE in the Open box, (eg
D:\setup.exe
3. Click
“OK”
The installation procedure creates the directory PAM on your hard
disk, then copies the files into that directory. The program files will
then be "unpacked" - a process which may take several minutes.
How to start PAM
Double-click the PAM icon on your desktop, or select
Start/Programs/PAM/PAM
How to access the demonstration data
At the main menu
1. Go to the Utilities pull-down menu
2. Select Switch to Demonstration data
Or... If you want to use the "Hot Key" press
A+&
To switch back to your data set, repeat the above sequence.
Copyright © Fairport Farm Software
Page 14 Chapter 1
Introduction
Where to from here?
The next chapter is a general reference chapter, which tells you in
detail how to use the menus and the pick lists and other facilities
general to the whole program.
We recommend that you read the whole of this manual (or at least
skim through it) before running the program. This is not essential
but it is recommended for one important reason. As you skim
through the manual, your mind will be remembering where in the
manual certain topics are discussed. You will be aware that the
manual covers those topics and that they are there, should you
need to come back to them some day.
However if you want to get on with running PAM do as follows:
If you're familiar with Windows 95 ....
As PAM is written to comply with the "Windows Standard", you
might like to skip the next chapter and get on with running the
program. You can always come back and refer to chapter 2 later if
you are unsure about something.
You can go directly to chapter 3 - Program set up.
If you're relatively new to computers...
Please read the next chapter before going on to set things up in
PAM. A quick read might save you some frustration.
Copyright © Fairport Farm Software
Menus, Lists etc. Chapter 2 Page 15
Chapter 2
Menus, lists and function-keys
Chapter contents
Menus : What they are and how to operate them
Pull-down menus
Pop-up menus
Horizontal separator lines in menus
Unavailable menu options
Dialog boxes
Pick-lists and Multiselect-lists
Pick-lists
What if an item is missing from the pick-list?
PAM's Main Menu system
The Toolbar Buttons and Hot Keys
Data Entry
Reports
Utilities
Configuration
MultiClient
Help
Things you will need to know before getting started
16
17
17
17
17
18
18
18
18
20
20
20
21
21
21
21
22
23
Copyright © Fairport Farm Software
Page 16 Chapter 2
Menus, Lists etc.
Menus : What they are and how to operate them
Menus are used in computer software to display a list of options to
the user; just like a menu in a restaurant.
Like your restaurant menu the options are (as much as possible)
arranged in groups.
The menu options are usually ordered in a sequence so that the
most frequently accessed option is listed first. These minor details
are all designed to make software easier to use.
But what happens when you access one of these options?
Usually accessing a menu option will cause a part of the program
to operate or "run". For example if you select an option called
Customise your PAM program you will "run" the special part of
the program which deals with setting general program options.
Some options only take you as far as another menu of options!
(These are called sub-menus).
In this program menus are always either on your screen or just one
keystroke (press of one key on your keyboard) away.
So, menus consist of a list of options. But in software only one can
be selected at a time. No ordering sweets and coffee together!
The currently selected option can be distinguished from the rest
because it is "highlighted" by the menu highlight bar.
In this program there are several ways to select menu options.
1. Move the highlight bar up or down the list of options with the
cursor keys or arrow keys. Z and Y and when the required
option is highlighted press E
2. Press the "Hot letter" key associated with the required menu
option. The hot letter is the underlined letter in the menu
caption.
3. Click your left mouse button on the required menu option. [
This will have the same effect as both moving the highlight bar
Z Y to the option AND pressing E .
To exit out of any menu press X or click the left mouse button
on the screen outside the menu border.
Copyright © Fairport Farm Software
[
Menus, Lists etc. Chapter 2 Page 17
Pull-down menus
The main menu system in this program is called a "pull down
menu" system. The pull down menu system consists of a bar
menu, which is spread horizontally across the top of the screen
and the pull-down menus which "hang down" from the options on
the bar menu. These pull-down menus can be "closed" by pressing
X or by clicking your left mouse button while the mouse cursor
is not on the menu bar or the pull-down menu. (ie. Click your
mouse on the background area.).
If you either intentionally or accidentally, "close" a pull down menu
you must press E or click [ on a menu option on the menu
bar to display the pull down menu again.
Pop-up menus
Pop-up menus look much the same and are operated in the same
way as the pull-down menus.
Pop-up menus are usually sub menus of pull-down menus.
Confused? Don't worry, this will make more sense when you're
actually using them!
You will notice small arrowheads or triangles at the end of some of
menu options. These indicate that a pop-up (sub-menu) will be
displayed when that menu option is selected.
Horizontal separator lines in menus
You will also notice horizontal lines across some menus. These are
to help separate menu options into related groups. These
horizontal separators are not menu options and can not be
selected.
Unavailable menu options
At times you may see menu options which are not available. They
are visible on the list options but you can not select them. This is
not a mistake! This has been done for internal reasons where it is
inappropriate for a particular option to be selected.
Copyright © Fairport Farm Software
Page 18 Chapter 2
Menus, Lists etc.
Dialog boxes
Dialog boxes are used throughout PAM to provide feedback and
take guidance from you as you operate the program. There are
dialog boxes, which allow you to make choices, and there are
others, which just provide information.
Pick-lists and Multiselect-lists
Pick-lists are designed to make your life easier when it comes to
getting data in and information out.
Pick-lists
Pick-lists are lists of items. Paddock names, farm names or rainfall
recording stations and many other things are put in pick-lists to
speed up data entry.
Selections are made by highlighting the required list item and
pressing E
or by clicking on the item with the mouse [
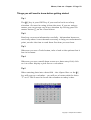
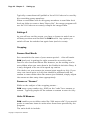
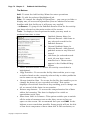
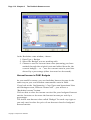
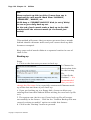
What if an item is missing from the pick-list?
Take the following case ....
You are about to use a pick-list to enter data. You notice that the
item has not yet been entered into the list.
For example ...
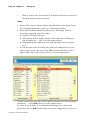
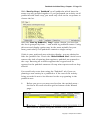
You are about to set up a new record for rainfall data. You get to
the rainfall station field as shown below.
So in PAM it is a simple matter to update lists on the fly!
To add a new rainfall
station, simply click on
the New... button.
You will notice "New..."
buttons alongside many
pick-lists... in other cases
you will find Tools
buttons with Add...
options.
Copyright © Fairport Farm Software
Menus, Lists etc. Chapter 2 Page 19
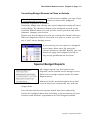
Multiselect-lists
Multiselect-lists are used to select more than one item from a list.
You will find them used mostly in the reporting sections of the
program where a range of items may be selected. The Multiselectlist system allows you to select ALL items, ONE item or SEVERAL
items.
• To select a single item click on that item with the LEFT mouse
button.
• To DE-SELECT a single item click on it AGAIN with the left
mouse button.
• To select a series of items simply click on each item
•
•
•
To select ALL items you will find a Select All button for that
purpose in most cases.
To DE-SELECT ALL items you will find a De-Select All button for
that purpose in most cases.
To INVERT the selected items you will find an Invert All button
for that purpose in most cases.
•
•
To select a SINGLE item, highlight it then press the SPACE BAR
To DE-SELECT a single item press SPACE BAR on it AGAIN.
Copyright © Fairport Farm Software
Page 20 Chapter 2
Menus, Lists etc.
PAM's Main Menu system
By the time you get to read this, you have probably already
found your way around the main screen and worked it out
for yourself! Because we have provided you with button
“hints” and menu option hints and lots of on-line help on
each of the menu options, this will be a brief summary only.
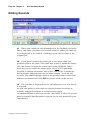
The Toolbar Buttons and Hot Keys
Moving your mouse across the toolbar buttons will reveal to you
the action for each button… the leftmost button activates the
Paddock Activities Diary, the rightmost button activates the help
system.
You will notice that these buttons all have matching menu options
on the main menu and most of them also have “Hot Keys”.
We have made much effort to enable multiple access to the main
data entry systems in PAM. We are also aware that as people grow
familiar with the software, they tend to look for shortcuts… hence
the “Hot Key” access to the most commonly used parts.
Look for the hot keys listed on the menu options… eg
@
activates the General Purpose Diary
&
activates the Paddock Activities Diary
*
activates the Paddock Season View
(
activates the Livestock Activities Diary
_
activates the Rainfall Recording System
Data Entry
This menu has on it the options for accessing the data entry
sections of PAM.
The number of options displayed on this pull-down menu will
depend on the modules you have purchased.
The bottom option is your EXIT option. However you can leave
PAM immediately from anywhere by pressing H+$ or by
clicking the [X] button in the top right corner of the main screen.
Copyright © Fairport Farm Software
Menus, Lists etc. Chapter 2 Page 21
Reports
The reports menu has on it the options for accessing the reporting
and graphing sections of PAM.
The number of options displayed on this pull-down menu will
depend on the version you have purchased. When you have a
report selection panel on your screen you will see a small
paragraph of explanation for each report in the bottom right corner
of each panel.
Utilities
The utilities menu has on it the options for accessing the systemwide utilities like the farm filter, machinery costs calculator system
and also for accessing the database maintenance systems and
back-up and restore facility.
Configuration
The configuration menu has on it the options for setting up your
program.
You will find special program configuration options such as the
soil, leaf and water tests system settings and the livestock system
settings.
The number of options displayed on this pull-down menu will
depend on the version you have purchased. Use on-line help to
gain a better understanding of any of the options on this menu.
MultiClient
If you are running the PAM MultiClient version, you will have this
extra option on your main menu. The options are self-explanatory.
As new clients come on stream, you use Add a client and
thereafter you use Select a client to view and update it.
Copyright © Fairport Farm Software
Page 22 Chapter 2
Menus, Lists etc.
Help
The help menu provides you another way of accessing the on-line
help system.
The About option will display a panel that tells you
• The version number and build data of the copy of PAM that your
are running.
• A button to access your user details information... that enables
you to alter your trading name if required.
Copyright © Fairport Farm Software
Menus, Lists etc. Chapter 2 Page 23
Things you will need to know before getting started
Tip 1
The X key is your EXIT key if you need to back out of any
situation. Get used to using it from the start. If you are using a
mouse you can escape out of any situation by clicking your left
mouse button [ on the Close button.
Tip 2
Read any on-screen information carefully. Information boxes are
used only where it was deemed necessary to help you understand a
point, so take the time to read them first time you see them.
Tip 3
Wherever you see a Tools button, take a look at the options that it
has in its menu.
Tip 4
Wherever you see a small down arrow on a data entry field, click
on it to either display a pick-list or a calculator.
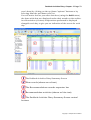
Tip 5
When entering data into a date field - the <Space Bar> or the @
key will pop-up a calendar... you will see a button with the letter
"T" on it. This is used to locate the calendar on today's date.
Copyright © Fairport Farm Software
Page 24 Chapter 2
Menus, Lists etc.
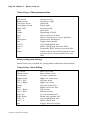
Table of Keys : Editing database fields
Key
Left Arrow
Right Arrow
Ctrl+Left Arrow
Ctrl+Right Arrow
Shift TAB
TAB
Home
End
Del
Backspace
Ins
Ctrl+C
Ctrl+V
F10
Enter
Action
Character left.
Character right.
Word left.
Word right.
Previous field.
Next field.
Beginning of field.
Last character of field.
Delete character at cursor position.
Destructive backspace.
Toggle insert mode.
Copy highlighted text
Paste copied text into new field
Terminate EDIT saving current fields.
Finish edit of current field and/or save
and exit if the current field is the last
field.
Notes (entering and viewing)
Notes boxes are provided for jotting down additional information.
Table of Keys : Notes Editing
Up arrow
Down arrow
Left arrow
Right arrow
Ctrl + Left
Ctrl + Right
Home
End
Ctrl + Home
Ctrl + End
Page Up
Page Down
Ctrl + C
Ctrl + V
Ins
Copyright © Fairport Farm Software
Move up a line.
Move down a line.
Left one character.
Right one character.
Left one word.
Right one word.
Left end of the line.
Right end of the line.
Top of text.
Bottom of text.
Up one window full.
Down one window full.
Copy highlighted text.
Paste copied text.
Toggle insert/overtype.
Menus, Lists etc. Chapter 2 Page 25
Error traps (validation checks)
The program has many "error traps" or validation checks
throughout. Some data entry errors will cause a message to be
displayed explaining the problem, some will just stop you from
continuing with the process.
Eg. You will not be able to enter an arable area greater than the
total area.
You will not be allowed to enter a non-valid date in a date field.
You must enter a zero to "pad" out a date when the day or month
number is less than 10.
Eg. January the 8th 2006 must be entered as:
08/01/06
(depending on the date "Regional Settings" that you
have in your Windows / Control Panel set up)
Copyright © Fairport Farm Software
Page 26 Chapter 2
Menus, Lists etc.
(this page left intentionally blank)
Copyright © Fairport Farm Software
Setting up
Chapter 3 Page 27
Chapter 3
Steps for setting up PAM
Chapter contents
Quick start:
Configuration
Menu Options
Screen Settings
Setting up your list of Crops and Varieties
Varieties
Setting up your Farms and Paddocks list
Paddock Sort Order
Paddock fields explained
Areas Information :
General Details Tab
Perennial Crop Layout Details
Modifying an existing Paddock record
Move current Paddock to another Farm
Deleting a Farm or a Paddock
Entering Paddock Notes
Customise your PAM software
Settings 1
User Defined Production Unit Names
Comparative Analysis Codes (CA Codes)
Settings 2
Cropping
Season Start Month
Season or “Season”
Units Of Measure
Pack Sizes
29
30
30
30
31
32
34
35
36
36
36
37
37
37
38
38
39
39
39
39
40
40
40
40
40
41
Copyright © Fairport Farm Software
Page 28 Chapter 3
Setting up
Special Harvest Units
Configuration : General information
Crop Types and Associated Lists and Settings
Setting up crops… continued:
Crop Monitoring Warning System
Crop Varieties : Monitoring Guides
Crop Varieties : Leaf Test Guides
Consumables List
General Information
Chemicals List - special considerations
Chemical types
Fertiliser List – special considerations
Nutrients that can be applied as a liquid
Nutrient audit report and nutrient information
Special Fertiliser Blends
Customising your nutrients list
Sundry Consumables List
Machinery List - special considerations
Machinery Costs Calculator
Costing machinery by hour, area, application units
or harvest units
Manual Tasks List
Staff and Contractors List
Notes boxes in lists screens
Setting up the soil, leaf, water and nutrient tests
systems
Steps
Irrigation Pumps and Water Sources List
Storage Locations, Harvested Produce Destinations and
Suppliers List
Weeds and Pasture Species List
Rainfall Stations List
Pest Growth Stages
Email Connection Settings
Copyright © Fairport Farm Software
42
43
45
46
47
48
48
49
49
49
50
50
50
51
51
51
51
52
53
53
54
54
55
55
56
57
58
59
59
60
60
Setting up
Chapter 3 Page 29
Quick start:
A
Enter a list of all Crops and Varieties used in your enterprise(s).
B
Enter your list of Farms and Paddocks
Select the Configuration option from the main menu; - go to Farms
and Paddocks List menu option
1. Enter your list of Farms by clicking on the New Farm button
Enter your Paddock information into the database; Paddock by
Paddock using the New Paddock button until all Paddocks are
entered. In each paddock you must enter your farm layout details.
Click on the “Farm Layout” tab … then click the Add button
See a more detailed explanation later in this section on setting up
this section.
C
Create your fertiliser, chemicals, machinery lists
You will have now done enough to start entering data into your
Paddock Activities Diary.
Did you know…?
If you know someone who is running PAM in your
area, you can import their lists of crop types,
chemicals, fertilizers, machinery operations etc.
into your PAM … saving you hours of time.
Under Utilities / Backup, Restore and Transfer
data … Look for Import and Export Configuration
Lists.
Maybe ask your dealer to help you with this
facility when you are first setting up PAM.
Copyright © Fairport Farm Software
Page 30 Chapter 3
Setting up
Configuration
The pick-lists that you set up in the program configuration section
are used throughout the program for data entry. PAM also allows
you to add to these lists at the time of data entry. We call this
"updating pick-lists on the fly".
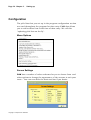
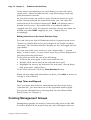
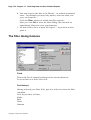
Menu Options
Screen Settings
PAM has a number of colour schemes for you to choose from and
other options to change the appearance of the screens to suit your
taste… You can even hide the main tool bar if you desire.
Copyright © Fairport Farm Software
Setting up
Chapter 3 Page 31
PAM works best with your screen set to a high resolution…
To gain a better understanding of the term screen resolution look
in your windows help system…
In Windows do this :
♦ Click on the Start button
♦ Select Help from the menu
♦ Click on the Index tab and type in… resolution and then click
Display. Follow the help instruction from there.
You can also get to the screen settings by right clicking your mouse
on your Windows “Desktop” area… then select Properties from the
little pop-up menu.
The higher the resolution the greater the number of pixels you will
display on your screen.
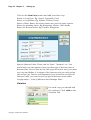
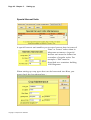
Setting up your list of Crops and Varieties
Select Configuration / Crop Types & Associated Lists & Settings
Copyright © Fairport Farm Software
Page 32 Chapter 3
Setting up
Click on the New Crop button and add your first crop.
Select a Crop Type: Eg. Cereal, Vegetable, Fruit
Select a Crop Name: Eg. Wheat, Carrots, Pears
Enter a Short Name: the short names are used in some reports.
Enter the planting units: Eg. Kilograms, Plants, 1000 Seeds
Enter the harvest units: Eg. Tonnes, Kilograms
Special Harvest Units: These can be “bins”, “baskets” etc. You
would only use this option if you use that type of harvest unit at
harvest time. Even if you do use this type of harvest unit, you must
set it up and define it in terms of the harvest unit you selected on
this screen (eg. Tonnes or Kilograms) If you intend to use Special
Harvest Units, you need to set up special harvest units under
Configuration / Units of Measure and Package Sizes
Varieties
For each crop you should add
the varieties. Click Add on the
Varieties Tab.
Copyright © Fairport Farm Software
Setting up
Chapter 3 Page 33
Enter the Crop Variety: In some cases you will find a list of
varieties has been provided so you can pick a name from the list.
Eg. there are many Wheat varieties provided. However, even if PAM
is giving you a pick list to select a variety name, you can still type a
name into the space provided (if the name you are entering is not
included in the list).
Some crops are planted by seed, some are planted with seedlings
or plants. Enter the cost per unit as appropriate.
Then select the unit you are using for this particular crop type. Eg.
Kilograms, Plants, 1000 Seeds etc.
Notice the “Include in current pick lists?” option: After some time
you may find that some of the items (varieties, fertilizers, chemicals
etc.) that you set up at the start become redundant and you no
longer use them. You will see this option in many places
throughout the configuration area of PAM. To hide items from your
data entry pick lists, simply “un-tick” these options.
Click OK to leave this Variety maintenance dialog. Continue to add
your varieties for each crop as required.
For now we are concentrating on setting up the “bare essentials”
so we’ll leave the rest of the setting up of this section (Crops and
Varieties) until later in this chapter.
Copyright © Fairport Farm Software
Page 34 Chapter 3
Setting up
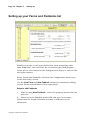
Setting up your Farms and Paddocks list
Would you prefer to call your production units something other
than Paddocks? You can! Visit the Customise your PAM program …
menu (at the very bottom of the Configuration menu) to look at this
and other options.
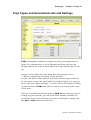
Select Farms and Paddocks List from the Configuration menu to go
to the data entry screen.
Use the New Farm and New Paddock buttons to commence adding
to your Farms and Paddocks lists respectively.
Steps to add Paddocks
1
After clicking New Paddock... select the property name from the
pick-list.
2
Move on to the Paddock name field and type in its name...
Please note the length of Paddock names is restricted to 20
characters.
Copyright © Fairport Farm Software
Setting up
3
Chapter 3 Page 35
Enter the total and arable (or planted) Paddock area then click
OK.
You may then add the rest of the Paddock information on the
various tabs on the Paddock screen.
Paddock Sort Order
Please note :
Wherever you see your Paddock’s list throughout
PAM it is sorted alphabetically. If this order is
inappropriate, you should prefix the names to
enforce your preferred order.
If you want Paddocks to appear on your lists in a certain order, you
must devise a method to force PAM to sort in your preferred order.
Eg.
A - House Paddock
B – Front Paddock
C - Back Paddock
If you use a number system for your Paddocks, you must use
numbers as follows :
01, 02, 03, 04, 05, 06, 07, 08, 09, 10, 11 etc ...
or if prefixing names with numbers
01 - House, 02 - Front, 03 - Back etc ...
otherwise you'll find the Paddock list will sort like this
1, 10, 11, 12, 13, 14, 15, 16, 17, 18, 19, 2, 20, 21, 22 etc
^
^
To sort the entire Paddock listing so that the Paddocks of your
preferred Farm is at the top of the list, you will need to prefix your
Farm names with letters or numbers as well.
Copyright © Fairport Farm Software
Page 36 Chapter 3
Setting up
Paddock fields explained
Areas Information :
Total area... the whole paddock including areas which are not
planted (if any).
Arable area... the area of the total that can be cropped. This area
is used by the Paddock Activities Diary as its default area.
Maximum Workable area... The maximum area that the Paddock
Activities Diary will accept.
Tree Plantation area... area of tree plantations in a Paddock
Remnant Vegetation area... area of uncleared land (bush)
Water or Salt Effected area...
These areas are totaled in the Paddock Areas report.
General Details Tab
Paddock Number : Optional identifier – used only by the Fairport
comparative analysis software (“CADataExport”) to ensure
anonymity of data when data is merged for comparative analysis.
Value : This is an optional field. If you choose to use it you can
generate the Paddock Values report.
Date established and Date retired : These dates are used to help
PAM generate better map-based reports. As Paddocks become noncurrent they are removed from Paddock pick-lists but historical
reports and maps still need to know when the Paddock was either
established or retired or both.
Current ? : If a Paddock is re-arranged in some way, you can make
a Paddock non-current by checking this field. It will then be left off
the Paddock pick-list.
Use this in conjunction with the Established and Retired Dates.
Rainfall station - this field is required if you want to generate
water use efficiency reports in PAM.
Location - this field is to store your property location numbers
(section, portion, lot numbers), however it can be used for whatever
purpose you wish. This is an optional field. If you choose to use it
you can generate the Paddock Locations report.
Copyright © Fairport Farm Software
Setting up
Chapter 3 Page 37
Soil information - these fields enable you to keep a record of top
soil and at-depth soil data.
Perennial Crop Layout Details
This tab sheet enables tree and vine crop growers to keep a record
of the layout of their production units. This is also the place to
record perennial crops like Lucerne.
The information on this tab is vital to the automation of the
Paddock Activities Diary system.
The layout of the Perennial Crop Details dialog differs in PAM
Ultracrop. PAM Ultracrop has fields for row spacing and plant
spacing… It also calculates the number of plants (trees, vines etc)
in the paddock or block.
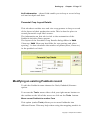
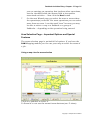
Modifying an existing Paddock record
To edit the Paddock name choose the Tools/Paddock/Rename
option.
To access the Tools menu either click you right mouse button on
the outline on the left of the screen or click on the Tools button.
Move current Paddock to another Farm
This option (under Tools) allows you to move Paddocks into
different Farms. This may help when using the mapping module in
Copyright © Fairport Farm Software
Page 38 Chapter 3
Setting up
conjunction with PAM or for those of you who have used earlier
versions of PAM which had certain restrictions and idiosyncrasies.
Deleting a Farm or a Paddock
These options (under Tools) allow you to remove Paddocks and
Farms. You will be warned that deleting a Farm or a Paddock will
remove all records relating to the item being deleted. Only do this if
you are sure that it needs to be done.
If you want to exclude a Paddock from the pick-lists you can use
the "Current" field... a non-current Paddock won't be seen on your
data entry and report pick-lists.
To edit other information on the Farm and Paddocks screen, simply
click on the information and change it as required.
Please Note: The paddock arable areas are used as the default
area of the cropped area within the paddock during any data entry
session … for example, when entering spray records.
If you change the arable area in the Paddock setup screen after
records have been entered, you will be asked if you want to update
the area treated in all past records.
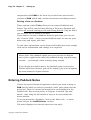
Entering Paddock Notes
If there are special items of importance which you need to keep in
PAM but for which we haven’t provided a field, enter them into the
notes box. There is a notes box attached to each Paddock in the
Paddock file. See section earlier in Chapter 2 entitled Tips and
advice - data entry for full details of keys to be used within the
notes window.
To access notes for a Paddock, click on the Notes tab... to enter
notes click on the Add/Edit Notes button.
The notes displayed on the tab sheet are view only!
Copyright © Fairport Farm Software
Setting up
Chapter 3 Page 39
For help on how to use the notes boxes See “Notes and Memo Edit”
in on-line help.
Customise your PAM software
Getting data into PAM is done through the Paddock Activities Diary
or the Paddock-Season view. We have anticipated that there will be
many people with many different requirements and expectations
from the PAM program. As a result you can customise the
program to suit your needs.
Settings 1
User Defined Production Unit Names
PAM enables you to use a name other than “Paddock” to describe
your production unit.
If you refer to your production unit as a patch or a field then
simply type in “patch” or “field” into the space provided on the
Settings (1) tab. The next time you start PAM you will notice that
all your menu options, report titles, screen labels and captions that
formerly appeared as “Paddock” will be replaced by the words of
your choice. You can also change the name of Farm to the word of
your choice, you may wish to use “property” or “station” instead of
the word “Farm”.
Comparative Analysis Codes (CA Codes)
The comparative analysis code is designed to be used in
conjunction with the MultiClient version of PAM.
MultiClient users can download from the Fairport website a special
add-on program that enables them to create data “Super-Sets”…
combining two or more of their client’s data sets into a merged data
set for comparative analysis purposes.
One of the problems with creating a data “Super-Set” is that every
grower can set up lists using different names for inputs and
produce. The comparative analysis code is designed to overcome
these differences.
Copyright © Fairport Farm Software
Page 40 Chapter 3
Setting up
Typically a consultant will publish a list of CA Codes to be used by
his consulting group members.
When a consultant calls for his group members to send him their
back up disks to create a data “Super-Set”, the merge program will
use the CA Codes to accurately compile the merged data.
Settings 2
As you will see on this screen, you have a chance to switch on or
off many sections and facilities in PAM AusVit. Any option you
switch off can be switched on again later (and vice versa).
Cropping
Season Start Month
Set a month for the start of your season period... this will assist
PAM (and you) in getting the right season for an activity date.
Don’t be too concerned about this however, as the setting can be
over-ridden when you enter data in the Paddock Activities Diary. It
is only designed to be an aid to speed up entries.
If in doubt, set your season (or season) start month to July. If you
carry out events prior to July that should be affiliated with the
season to come rather than the season just finished, simply adjust
the season at data entry time appropriately.
Season or “Season”
While on the subject of the cropping season…
PAM uses a year number (eg. 2005) as the “code” for a season or
season. Typically people set the season or season to start in July.
Units Of Measure
PAM enables you to define units like “200 metre rolls” if you would
prefer to consume items in units other than those provided by the
program.
The units built-in include:
Copyright © Fairport Farm Software
Setting up
Chapter 3 Page 41
Millilitres, Litres, Kilolitres, Megalitres, Grams, Kilograms,
Tonnes, Hectares, Metres, Each, Plants, Head, Sq. Metres.
To add your user defined units to this list… choose
Configuration/Customise your PAM Program/Units of Measure
The simply click Add and enter the details.
PAM needs to know the type of unit (area, mass etc) and its
equivalent.
Eg. “200 metre rolls” will be a “Distance” type and will be 200
Metres.
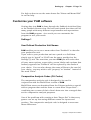
Pack Sizes
When using the inventory system, PAM makes thing easier for you
by allowing purchases to be entered in “Pack Sizes” rather than in
units. Confused?… to explain…
Let’s say you use a chemical called XYZ. It’s purchase units are
Litres and its application units are also Litres.
When you purchase XYZ you usually buy it in 20 Litre cans (so you
set up a Pack Size called “20 Litre can”)… but sometimes you buy
it in 200 litre drums (so you set up a Pack Size called 200 Litre
Drum).
When entering the purchases in the inventory, you simply pick the
Pack Size, PAM will give you a default cost (based on your last cost
price) and derive for you the cost per litre. If you have to, you
simply type in the true cost of the Pack Size and PAM will do the
rest.
To set up your list of Packages in Use… choose
Configuration/Units of Measure and Package Sizes
The simply click Add and enter the details.
1. You enter a name for the package…
“20 Litre can”
2. You then select the units…
“Litres”
3. And finally the number of those units…
“20”
You can add/edit and delete these
packages any time you like. They
have no bearing on the data
stored in any other table in PAM,
they are used simply to help you
calculate the unit costs of things.
Copyright © Fairport Farm Software
Page 42 Chapter 3
Setting up
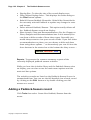
Special Harvest Units
A special harvest unit enables you to enter harvest data in terms of
“bins” or “boxes” rather than in
kilograms or tonnes. A special
harvest unit must be defined as
a number of regular units. For
example a “Bin” must be
described as a container holding
100 Kilograms.
When setting up crop types that can be harvested into Bins, you
must check the box shown here ..
Copyright © Fairport Farm Software
Setting up
Chapter 3 Page 43
Configuration : General information
The pick-lists that you set up in the program configuration section
are used throughout the program for data entry. PAM also allows
you to add to these lists at the time of data entry. We call this
"updating pick-lists on the fly".
For some tips on data entry in these screens, please refer to "Data
entry screen menus" and "Data entry - Tips and advice", Chapter 2.
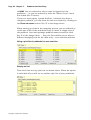
You will notice that there is a Tools button on the menu in most of
the screens in this section of the program. Click Tools to display a
sub-menu. Typical options under Tools menus are…
Delete :
• to delete an item from your lists… This is not advisable if
you have already used an item in your activity diary
entries. If you choose to delete an item PAM will remove all
cases of the item from your production records.
• PAM has an option on most setup screens which gives you
the option of including or excluding items from current
pick-lists. Always use this in preference to deleting an item.
Edit :
• to edit an item's name. This can be done at any time and
will be useful to correct spelling errors.
Backdate Costs :
• to backdate the costs (or income in the case of harvest) in
the records you have already entered to smooth out
fluctuations is costs (or income) over a season or to simply
record the correct costs (where a guess was used at data
entry time).
Costs
PAM uses your costs entered into these lists to calculate the costs
per hectare of your farming operations.
Copyright © Fairport Farm Software
Page 44 Chapter 3
Setting up
PAM has an inventory system which enables you record purchases
of inputs. As the use of inventory system is not required for PAM to
operate, it’s your choice. One of the benefits of using the inventory
system is that you can enter purchases of consumables and record
the purchase price. Those prices can be used to cost your
production inputs. If you want to use an average cost for your
input costs you can use the backdate costs facilities and opt to use
an average inventory price.
The purchase costs per unit of these items will obviously change
from time to time… Using PAM's backdating costs system will
smooth out these price fluctuations for you… if you want that to
happen!
Please note:
The prices entered in the lists are not intended to be
permanent. You will probably need to return to the lists each
Season to alter them.
However, if you choose not to enter the prices in the list, that will
not matter. The prices can still be entered into the Paddock
Activities Diary or Paddock-Season screen later.
Copyright © Fairport Farm Software
Setting up
Chapter 3 Page 45
Crop Types and Associated Lists and Settings
PAM is designed to handle virtually any crop you might want to
grow! As a consequence a lot of thought has been put into the
design and layout of the screen where all crop related lists are set
up.
I guess at the outset the only thing that may interest you is
“…What is absolutely necessary to get started?…”
As you can add to and enhance your lists and settings on-the-fly
as you enter events into the Paddock Activities Diary, you can get
away with just about nothing!… but let’s follow the steps of setting
up this section of PAM from start to end so you can see the scope
of the task.
We have entered many items into the PAM Master Lists as you are
setting up your system, you will find items already available on
pick-lists. If you can’t find the item you’re looking for, simply use
the Add or New buttons to add it in.
Copyright © Fairport Farm Software
Page 46 Chapter 3
Setting up
Please Note: Harvest Units, Planting Units
To cater for crops of various types we have enabled the
setting of units of measure for these items.
Planting Units: For tree or vine type crops you will find
that PAM defaults the planting units to plants,
otherwise you can select from a list of “mass” type
units (Kilograms, Tonnes etc).
The implication of this setting is that your seed or
plant costs must use the same unit of measure.
Special harvest units can be created to cater for produce harvested
into bins, boxes etc.
See Page 42.
Set up the list of crop types that you grow… As mentioned above,
you’ll find that we have included a comprehensive list of crop types
for many crops in the PAM Master Lists.
To set up a new crop type, click New Crop… click on the Help
button to display on-line help for the steps to adding the new crop
name.
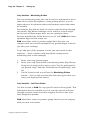
Setting up crops… continued:
1. Set up the varieties of those crops… again many varieties are
available from the PAM Master Lists.
2. Set up a list of growth stages for each crop type.
3. Set up a list of common pests and diseases for each crop type.
4. Set up a list of crop monitoring items (eg. Plant densities, pod
counts, fruit counts, head counts, flowering date) for each crop
type (these will not include weed densities or pests and diseases
as we cater for those already).
5. Set up a list of harvest monitoring items… this list will most
likely include things like: % protein, % moisture, % damaged, %
bruised, specific gravity, % oil content… any measurements that
are taken at harvest time that are influence by the
management practices used in growing the crop.
Copyright © Fairport Farm Software
Setting up
Chapter 3 Page 47
6. Set up a list of nutrients removed by the crop and the amount
removed (in Kg/Tonne). This is used in the formulation of the
nutrient audit reports.
7. Growing Season Information : click on this button to view the
form where you set up the month of harvest (or last effective
rainfall) and other settings to enable PAM to calculate water use
efficiency reports and graphs. Check the on-line help in there
for explanations on the various items on that form.
Please Note : Growth Stages, Days from Origin
Growth stages are by default milestones along the
growth path of a plant. In the case of perennial crops
(especially trees or vines), growth stages will refer to
milestones within a season.
Crop Monitoring Warning System
Using information from the crop monitoring tab (“Performed at
Growth Stage”) and from the Growth Stages tab (“Days from
Origin”), PAM constructs a warning list of items that need
attention within the next 7 days and displays this on your screen
at program start-up.
Please Note : Nutrient Removal
PAM enables you to record the nutrients removed from
the soil by a crop under the Data Entry section… Soil,
Leaf, Water and Nutrient Tests/Nutrient Tests. You can
have your harvested produce tested for this
information. In the absence of such test results, PAM
will look to the data you enter in this section of the
program to generate the Nutrient Audit reports.
Copyright © Fairport Farm Software
Page 48 Chapter 3
Setting up
Crop Varieties : Monitoring Guides
For crop monitoring items that can be and are performed on more
than one occasion throughout a crops growing period, you can
expect there to be optimum values and perhaps values that must
be avoided!
For example, Sap Nitrate levels in certain crops fluctuate through
the season. Sap Nitrate readings can be taken at several stages
and at each of those stages there may be optimum values.
We have provided the facility here for you to “tell” PAM what those
optimum high and low values are.
PAM uses those value to produce graph lines that you can
compare with your actual readings for the growth stages at which
you take your readings.
To get this part of the program to work you must work in this
sequence… (Let’s continue with Sap Nitrate testing as our
monitoring item in this example)
1
2
3
Enter your crop growth stages
Enter your crop observation or monitoring items (Sap Nitrate
being one of those) and be sure to pick “Can be performed at
any growth stage” from the “Performed at Growth Stage” picklist.
On the Varieties tab you will see the Monitoring Guides
button… click on this to reveal the data entry grid where you
enter your high and low values.
Crop Varieties : Leaf Test Guides
Use this section in PAM for crop specific leaf test item guides. This
information may be valuable to you if you take several leaf tests
through a season. Some intensive croppers do this to fine-tune
their fertigation systems.
PAM uses these values to produce graph lines for you to compare
with your leaf test results.
Copyright © Fairport Farm Software
Setting up
Chapter 3 Page 49
To get this part of the program to work you must work in this
sequence…
1
2
3
Set up a list of leaf tests under Configuration/Soil, Leaf, Water
and Nutrient Tests Setup
Enter your crop growth stages in the crop set up screen.
On the Varieties tab you will see the Leaf Test Guides button…
click on this to reveal the data entry grid where you enter your
high and low values for each leaf test item and each growth
stage.
Consumables List
General Information
All consumables maintained in these lists have the following
common properties :
♦ Application Units : Units in which you intend to consume
them.
♦ Purchase Units : Units in which you by them.
♦ They can be included or excluded from the current data entry
pick-lists.
♦ They can be purchased using the Data Entry / Inventory of
Consumables system. (The inventory system can also be
accessed via the Tools button on the consumables tab pages).
♦ Their costs can be backdated using the Tools button option
Back date costs.
♦ Their back dated costs can be averaged using the average
purchase price in the inventory system.
Chemicals List - special considerations
•
PAM has built-in herbicide resistance monitoring and allows
you to select the herbicide resistance group for each herbicide
as you enter them. You will only gain access to the herbicide
resistance fields if you are entering a Herbicide
Copyright © Fairport Farm Software
Page 50 Chapter 3
•
Setting up
When entering spraying data in PAM, you can quickly enter
tank-mixes of chemicals (and save them for re-use). You are not
advised to create "composite chemicals" or tank-mixes in your
chemicals list.
For example, don't create chemical names like "S/Seed & Oil", or
"Roundup/Simazine/Oil".
The program will not be able to separate these "composite"
chemicals in reports or in the herbicide resistance reports.
Use a single record in the chemical list for each chemical, wetter,
oil etc., then use the tank-mix entry technique in the Paddock
Activities Diary.
Chemical types
The Chemical types field is used by PAM to generate the Chemical
Types report and also to segregate chemical types in the Annual
Paddock Summary report... giving you totals of ...
• Herbicides
• Insecticides
• Fungicides
• Defoliants
• Regulators
• Wetters
• Spraying oils
• Adjuvants
• Seed dressings
• Organics
• Attractants
Fertiliser List – special considerations
Nutrients that can be applied as a liquid
To enter nutrients applied by spraying, you must set these up as
fertilisers and indicate that they can be applied as a liquid. You will
see the “Can be applied as liquid” check box when you add a new
fertiliser or edit an existing one.
Copyright © Fairport Farm Software
Setting up
Chapter 3 Page 51
Nutrient audit report and nutrient information
In order to use the nutrient audit report and to generate other
“nutrient-wise” reports, you will need to enter the percentages of
N, P, K, S, Cu etc in your fertilizer list and the amounts in
Kg/Tonne of these elements which are removed by harvesting your
crops. The fertilizer nutrient information is available from your
fertilizer manufacturer, and the crop nutrient information can be
obtained by laboratory testing or through your respective
Departments of Agriculture. You can if you want to, add to this list
of nutrients and indeed delete some of them.
Special Fertiliser Blends
Some fertiliser manufacturers can supply special prescriptions for
a single purpose use. We call these fertiliser “Special Blends”. Don’t
confuse these with fertiliser mixes (mixtures of fertilisers on your
fertiliser list… eg. DAP + Superphosphate)
Special Blends can be created in PAM while in the process of data
entry… look under the Tools button while entering fertiliser data in
the Add Data Wizard.
You can choose to either keep a special blend for future use or use
it as a once off fertiliser blend. If you choose to save it for future
use, it will show up on your fertiliser list in the consumables
screen.
Customising your nutrients list
You can keep a watch over the nutrients applied and the nutrients
removed from your paddocks via fertiliser applications and
cropping.
When entering the nutrient make up of fertilisers or crop nutrient
depletion amounts, you will see a button… Add/Remove Nutrients
To add more nutrients to your list, simply click on the Add button
on the “Dual List” form that is used to select the nutrients.
Sundry Consumables List
This list is used to cater for those consumables you use that are
not fertilisers or chemicals.
Copyright © Fairport Farm Software
Page 52 Chapter 3
Setting up
Often the units of measure for these consumables will not be either
of type “mass” or type “volume” so you may need to either use the
units “each”. If you want to create your own units, use the
Configuration/Units of Measure and Package Sizes option.
For more information see on-line help.
If you have the livestock module, you will see the veterinary
treatments list and supplementary feeds list tabs.
These lists can be entered here or via the Configuration / Livestock
Activities and Treatments option.
For more information on these items see the Livestock Chapters.
Machinery List - special considerations
Machines can be set up in the Machinery/Manual Tasks/Staff &
Contractors List under Configuration.
In there, as you add new machines you will see that you can tell
PAM the operation that a machine is to perform… (Chemical
Application, Fertiliser Application, Harvesting, Planting/Seeding
etc.). You can also set up a machine to perform “Any operation”.
Typically tractors will be set up in this way. Take at look at the
Tools options on this screen. You will see a facility to calculate
machinery costs and also the place where new machinery
operations can be added.
Please Note : You can use this machinery list as a list
of individual machines or you can simply enter
operations. In earlier versions of PAM, users were
encouraged to use the simple approach rather than
create a list of individual machines… The choice is now
yours.
If you choose to enter just operations you will most likely have a
scenario like this :
Operation : Chemical Application
Machine : Spraying
Operation : Seeding / Planting
Copyright © Fairport Farm Software
Setting up
Chapter 3 Page 53
Machine : Planting
PAM can generate machinery operation reports by both operations
and machines, so by using the simple approach you will not be
able to get reports on the use of an individual machine. This may
not concern you… if not perhaps you should keep your list simple
and use the operation rather than the machine approach.
See on-line help for the steps when adding data in the machinery
list.
Machinery Costs Calculator
You can use the on-line machinery cost calculator to work out the
costs of operating tractors and machinery. See the section
“Machinery List - special considerations” later this chapter.
Access the cost calculator via the Tools button when in the
Machinery/Manual Tasks/Staff & Contractors List under the
Configuration menu.
You can also access this calculator from the Utilities menu or by
pressing the key combination A+#.
On the Machinery tab sheet, when entering or updating the costs,
take care not to cause a double charging of costs. You may like to
use only the "Machinery" field or only the "Contract" field.
Costing machinery by hour, area, application units or
harvest units
Some machinery operations are typically costed by area and others
by time and others by harvest units or application units. In PAM
you can set up your costing method to handle either one or the
other or a combination of both.
If you use a Cost Per Hour basis for machinery costing, it’s a good
idea to enter a default Hectares Per Hour value. This will enable
PAM to automatically calculate the number of hours worked based
on the area worked. For example, if you estimate that a spraying
Copyright © Fairport Farm Software
Page 54 Chapter 3
Setting up
machine can cover 2 Hectares per hour and while entering the
Chemical Application operation in the Paddock Activities Diary you
select 3 Hectares, then PAM will calculate 1.5 hours for you… of
course this value can be altered at data entry time should it be
incorrect. If you chose to calculate your operating costs for that
machine based on an hourly rate, PAM will use the number of
hours (1.5) for its maths.
Please note : Although PAM provides costs per hour (and harvest
units or application units) to calculate the cost of machinery
operations (if that’s the way you chose) it stores the costs on a per
hectare basis. Obviously if you have a combination of machines
that are using a combination of costing methods, things will get
messy if some data is stored in costs per hour and some in costs
per hectare.
Manual Tasks List
Manual tasks are those that don’t involve machinery. Crop
observations, chipping (hand weeding in cotton crops), fence
repairs, pruning etc.
As these tasks are applied to paddocks and crops, you can enter a
default Hectares per Hour. In the Paddock Activities Diary, PAM
will automatically calculate the hours taken by using the area(s) of
the paddocks or crops selected.
Note that like machinery, you can cost manual tasks on a Cost Per
Hour, Cost per Harvest Unit and a Cost Per Spray Volume basis.
Staff and Contractors List
A list of both staff and contractors can be maintained here. As you
enter machinery operations or manual tasks in the Add Data
Wizard in either the Paddock Activities Diary or the PaddockSeason screens you are able to select the people involved in the
task, their costs and the time taken. This is optional.
Copyright © Fairport Farm Software
Setting up
Chapter 3 Page 55
In the process of setting up this list of staff/contractors you can
enter a cost per hour. This is used as a default value in the Add
Data Wizard and may be overridden as you enter the data if it
should vary.
By using this section of PAM you will be able to generate the “Who
did what?” reports and other under the option Reports/Staff and
Labour Reports…
Notes boxes in lists screens
There are notes boxes in the following list set-up screens...
fertilizers, chemicals, crop types and varieties, weeds and crop
monitoring items. Use these notes to record any relevant
information about the item displayed on the screen. For example,
in the chemicals notes boxes some people have recorded
recommended rates, safety precautions and application details.
The notes entered here can be printed via the Reports menu where
options allowing you to search these notes for “key words” are also
provided.
Setting up the soil, leaf, water and nutrient tests
systems
The steps involved in setting up these systems are identical so it is
sufficient to use one of the three to describe the method. Let's use
the soil tests system as our model.
This system enables you to...
•
Select an unlimited number of different test items to form
your own soil tests system.
•
Set up a specific order in which these test items will appear
both on your screen and in your reports.
•
Enter guideline levels to keep you on track with your
recorded test results.
Copyright © Fairport Farm Software
Page 56 Chapter 3
•
Setting up
Edit or add to the list of tests if you find that one you need is
missing from the list provided.
Steps
1. Select Soil, Leaf or Tissue, Water and Nutrient Tests Setup from
the Configuration menu (See (1) in the image above)
2. From the Available Items List (See (2) in the image above),
select the required items by either
♦ Double Clicking the item
♦ Selecting it with a single mouse click and then clicking on
the > button or… (See 4 in the image above)
♦ Highlighting the required item and pressing on your space
bar.
3. To change the order in which the items are displayed on your
data entry screen, use the Up & Down arrow buttons on the
right hand side of the screen. See (7) in the image above.
To add a new item into any of the master lists (that is the Available
Items list) … Click Add. See (5) in the image above.
To enter a guide (that is a recommended target for a given test
item) click on the Edit button (See (6) in the image above). You can
Copyright © Fairport Farm Software
Setting up
Chapter 3 Page 57
then enter a high and low value and also notes about the selected
test item.
For example, for Total Nitrogen you might enter 6000 for a Low
Guide value and 8000 for a High Guide value. These guides are
simply for your own use and reference.
See on-line help for more details on setting up these systems.
Irrigation Pumps and Water Sources List
In this screen you set up your list of water sources used for
irrigation. A water source can be any type you may have.
It may be a bore, a lake, a river, a dam, or a scheme water
supply… it doesn’t matter.
Details like Make, Purchase date, pressure, output per hour are all
optional.
If you enter an output per hour value, PAM uses this to calculate
the total output when you record an irrigation event in the
Paddock Activities Diary.
You can attribute a cost per hour or a cost per unit of output to
irrigation events. To let PAM know which of these calculations to
use... select either “per Hour” or “per Unit” from the pick list.
If you enter a operation cost, PAM uses that in conjunction with
the costing method (ie, Per Hour or per unit of output) to work out
costs for you.
Please Note: the only essential items that PAM needs to
work with in the Paddock Activities Dairy are the Name
and the Units.
For example, if you know the total output of a water source for an
irrigation event PAM allows you to enter just that. It will calculate
the application rate in mm/Ha.
So, if you only know the total output of water and the total cost of
the event, that’s fine. PAM can cope with that.
You can choose output units of :
Mm/Ha, millilitres, Litres, Kilolitres and Megalitres.
Copyright © Fairport Farm Software
Page 58 Chapter 3
Setting up
Please Note: PAM generates Water Use Efficiency reports
and graphs and it can incorporate the applied water as
well as the rainfall into those reports and graphs.
Storage Locations, Harvested Produce Destinations
and Suppliers List
These lists are grouped together for your convenience. PAM can
share locations between your harvest destinations and your
inventory locations. Some locations can be both. For example a silo
on your farm can be a harvest destination but also an inventory
storage location for crop seed.
Harvest delivery destinations are used at harvest time. When you
record a harvest delivery you can choose a delivery destination
from a pick-list.
Some of your delivery points may be “on-farm” storage or storage
centres that you pay a fee to store your produce form late sale.
Copyright © Fairport Farm Software
Setting up
Chapter 3 Page 59
Set this using the: Is this an “on farm” storage facility? Field when
you click Add to add a new item or Edit to edit an existing item. ..
The suppliers list doubles as a list of manufacturers. Some
members of your list of inventory item manufacturers may be both
suppliers and manufacturers.
Weeds and Pasture Species List
This list is used in various places:
1
2
3
When entering pasture composition and quality records under
the Data Entry menu.
When entering chemical application records… you can select
the spray targets for a chemical. If the chemical is a herbicide,
you are presented with the list of weeds and pasture species.
When entering Crop Weed Densities records in the Paddock
Activities Diary.
See on-line help for the steps involved in creating and maintaining
this list.
Rainfall Stations List
This list is used in the rainfall system and when you are setting up
your list of paddocks.
PAM allows you to keep data for an unlimited number of rainfall
stations. Most farms will have at least one rain gauge, some may
have many.
You can nominate a rainfall station for each paddock in the Farms
and Paddocks List screen.
PAM enables you to add a new rainfall station in various places.
When you are:
• Entering details for a new paddock,
• Adding a new rainfall year in the rainfall recording system,
• Importing rainfall data from an external source and
Copyright © Fairport Farm Software
Page 60 Chapter 3
Setting up
• From the Configuration menu option Rainfall Stations.
Pest Growth Stages
When entering pest monitoring records you can enter the growth
stages of your insect pests. This option was added primarily for the
cotton industry. If you don’t want to use it, switch it off under
Configuration / Customise your PAM program.
Email Connection Settings
Within PAM there are several places where you can email attached
reports and backup files directly from the program.
PAM needs to know your email settings.
If you are in need of help for these settings, start by looking into
your Account settings within your normal email software. Your
dealer or the Fairport Help Desk can also help you with these
settings.
Copyright © Fairport Farm Software
Add Activities Wizard Chapter 4 Page 61
Chapter 4
The Add Activities Wizard
Chapter contents
General information
What is a JOB?
…An “Add” Session?
The “Add Activities Wizard”
Page One : Selecting the Operation
Page Two : Selecting the Areas
Page Three and Beyond
Finished the operation?
Closing the wizard
Adding Plans and Recommendations
Editing Records
Advanced use of the edit wizard.
61
62
62
62
63
64
64
66
66
66
68
69
General information
This chapter will give you a brief overview of the main data entry
“engines” in PAM. The main data entry screens are the Paddock
and Livestock Activities Diaries. They are the main "nerve centres"
of the paddock (cropping) and the livestock database systems.
In both systems, the daily activities are listed, in summary form,
on the screen as they are entered, building up a daily logbook of all
your activities. Although the data appears in summary form the
full data records are viewable via the edit facility and of course
through reports and the “View any Data Table” facility (See Utilities)
Copyright © Fairport Farm Software
Page 62 Chapter 4
Add Activities Wizard
Please Note :
As you enter and save records in the diary screen, you
will see your summarised records are coloured using an
alternating colour scheme… one “job” will be coloured
one colour, the next job will be coloured another. These
colour bands indicate the jobs as they were entered in
the wizard.
What is a JOB?
In the Paddock Activities Diary a job could be :
A tank mix of chemicals and the machinery used on 5 areas (crops
or paddocks).
In the Livestock Activities Diary a job could be:
Several veterinary treatments in conjunction with the marking of
new mobs of offspring from one or mobs of females.
Therefore, a job is defined in PAM as the records you enter as a
group in one pass through the Add Activity Wizard… where a pass
is terminated when you click the Finish button!
You will find that you can add as many jobs (passes) in the Wizard
in one session as you like.
…An “Add” Session?
A session starts when you click the Add button on the main diary
screen and ends when you finally click the Close button on the
Wizard.
Confused? Believe me… it makes a lot more sense when you’re
doing it than when you’re trying to describe it! You will get familiar
with these concepts very quickly.
The “Add Activities Wizard”
Before we launch into the details of adding specific operations (in
the next Chapter and in Chapter 10) let’s spend a moment looking
at the Add Wizard itself…
Copyright © Fairport Farm Software
Add Activities Wizard Chapter 4 Page 63
The wizard consists of wizard pages and buttons. On each page
you are required to select options or enter data. You will have
access to the wizard buttons at all times, although under some
circumstances you will be denied access to some buttons. For
example, PAM won’t let you save your operation entry until you
have entered all required data (ie. Data that can’t be left out) for a
page.
Page One : Selecting the Operation
Page 1 of the wizard is where you
1 select the operation you are adding,
2 select the record type (See Plans and Recommendations, page
66 later in this Chapter for more information)
3 select the operation date
4 select the Season that this activity will be associated with
5 select the associated operations (if applicable).
Associated operations can be added into any activity. Above you
can see that Machinery Operation and Sundries Consumed can be
selected. Using the Config… button, other activities can also be
added into the Chemical Application operation.
Copyright © Fairport Farm Software
Page 64 Chapter 4
Add Activities Wizard
These extra (associated) operations simply add extra Wizard pages.
When you have made the required choices on page one, click Next
to move to the Areas selection page… Page 2.
Page Two : Selecting the Areas
The layout of Page 2 will differ from time to time depending on
several things: The type of operation you are entering and the
timing of the operation in the season. A more detailed explanation
on how to operate the Areas Selection Wizard page can be found in
the next chapter where adding a chemical application is described.
When all selections and alterations are done, click Next to move on
to Page 3 of the Wizard.
Page Three and Beyond
Once you have selected your operation(s) and the areas (or mobs)
being “operated on”, you now move on to the operation details
pages.
Copyright © Fairport Farm Software
Add Activities Wizard Chapter 4 Page 65
Most of the operation details pages employ data entry grids to
enable multiple entries. You will find certain consistencies when
using these data entry grids. A grid consists of rows and columns…
similar to a spreadsheet. Let’s look at some of the consistencies
now :
• In each row, a pick-list is used in the leftmost column to select
the key information for the record. (A record is represented by a
single row in the grid).
• To move from cell to cell (column to column) you can use any of
the following methods:
• Press E (Moves right)
• Press Q R (Move left or right)
• Press T (Moves Right)
• Press B+T (Moves left)
•
•
•
Click your mouse
[
To add a new record (row) simply press your
Y key or click on
the PLUS button
To delete a record while you are still in the process of entering
data into it, press your Z key or click the MINUS button or
press the X key.
•
While entering chemicals, machinery operations, manual tasks,
crop monitoring and harvest deliveries you can pop-up data
entry dialog boxes for specific details… the chemical targets
selection list, the staff/labour selection list and the harvest
monitoring items selection list. You will see a small button with
three dots on it […] in the relevant cells. To activate the pop-up
dialog boxes :
• Click on these buttons with your mouse or
• Press <Space bar> or
• Press A+Y
•
To pull down a pick-list (including the one in the first column) :
• Start typing the name of the entry you are selecting
• Press A+Y
•
Click on the small down arrow of the pick-list with your
mouse
Copyright © Fairport Farm Software
Page 66 Chapter 4
Add Activities Wizard
Finished the operation?
When you have entered all your details for the selected
operation(s), click the Finish button. Notice that ) will also save
your entry.
If you have accidentally selected associated operations (pages) on
Page One, simply save when you have recorded the details you
intended to enter and avoid going to the next page(s).
Closing the wizard
You don’t have to close the wizard after entering an operation if
you have more operations to enter in the current data entry
session. You can add data for a many operations, on as many days
as you like in the one wizard session.
When you are finally through, click the Close button to return to
the Activities Diary screen. Pressing A+$ will close the wizard
using the keyboard.
Adding Plans and Recommendations
On the first screen of the Add Activity wizard you will see the
record type choices as follows:
Copyright © Fairport Farm Software
Add Activities Wizard Chapter 4 Page 67
Actuals: Select “Actual” to record historical data … that is, for
activities once they have been completed, both plans and
recommendations can be converted to actuals at any time.
Plans: Before you set out for the week’s or day’s work, you can set
up the jobs in advance with the plans option in the PAM Add
Activity Wizard. The data entry steps are the same as for entering
an actual record apart from selecting the plan option on the first
screen of the Add Activity Wizard.
The plans are displayed in the Paddock Activities Diary in red text
for easy identification. At any stage you may convert the plans to
actuals by highlighting (clicking) the plan record in the Paddock
diary and
clicking the button,
this will open the edit record screen where you can ‘fine tune’ the
details of the records before committing it to an Actual record.
Recommendations (MultiClient Only): These records occupy a
separate part of the Paddock Diary screen for easy identification,
these records can be entered directly into your copy of PAM (in the
case of a MultiClient user) or they can be imported within a backup
file from a consultant’s MultiClient version of PAM . After a record
has been added as a recommendation, it can be converted to an
Actual or a Plan using the Convert button that can be found in the
top set of buttons on the Paddock Diary Screen.
Once the recommendation record has been converted to either a
Plan or an Actual, the record will appear in the Paddock Activities
Diary Screen as an Actual (black text) or a Plan (red text). The
record will also remain in the Recommendation partition, but it will
have a
in the “Applied” column indicating that the
recommendation has been converted to either a Plan or an Actual.
Copyright © Fairport Farm Software
Page 68 Chapter 4
Add Activities Wizard
Editing Records
#1 When you choose to edit information in the Paddock Activities
Dairy, the whole job (that is all records with the same job number)
is re-displayed in the wizard, enabling you to edit any part of the
original job.
#2 If you have recorded the same job across more than one
paddock (like in the case of the tank mix across 5 paddocks above)
you can choose to separate or disconnect the paddocks. Why? –
Let’s say you recorded the above spray job as if all 5 paddocks
received a uniform treatment, but in fact, one of the 5 paddocks
had a slightly different tank mix for some reason. To rectify the
records, you would highlight (select) the paddock that received the
different treatment and click Edit or double click on the record.
#3 The job date is displayed on the edit wizard so you can alter it
if required.
As this edit wizard is also used to convert planned activities to
actuals, budgeted activities to actuals and to apply
recommendations to plans or actuals, the ability to alter the record
date is essential and therefore is placed on the edit wizard for your
convenience.
Copyright © Fairport Farm Software
Add Activities Wizard Chapter 4 Page 69
Advanced use of the edit wizard.
By clicking on the Areas button, you can make changes to the
paddocks or areas that were originally selected when the original
record was made.
This has special significance when you are converting budgets (see
a section on Budgets later in this manual) or recommendations to
plans or actuals…
Take a recommendation for example. Let’s say you have a
recommendation that was supplied to you for a particular problem
in a particular crop in a particular paddock.
Eg. Rust in the Wheat in the Back Paddock.
You can use this recommendation record and apply it to as many
other Wheat paddocks as you want to… on whatever dates you
choose.
You could convert (or apply) the recommendation to a Plan, print
out the Spray Order for the corrective measures, print out the
special “Map Report for Selected Plan…” under Reports.
Copyright © Fairport Farm Software
Page 70 Chapter 4
Add Activities Wizard
(this page is intentionally left blank)
Copyright © Fairport Farm Software
Paddock Activities Diary Chapter 5 Page 71
Chapter 5
The Paddock Activities Diary
Chapter contents
General information
72
The screen layout
72
The Buttons
74
Activity Planning Reports
76
What is a JOB?
76
A job can consist of : A tank mix of chemicals and the
machinery used on 5 areas or paddocks.
76
An “Add” Session?
76
The “Add Activities Wizard”
77
Page One : Selecting the Operation
77
Page Two : Selecting the Areas
77
Making selections on the Areas Selection Page 78
Page Three and Beyond
78
Creating Management Groups
78
What data can you enter here?
79
Adding a Paddock Activity
80
Area Selection Page – Important Options and Special
Features
81
Using a map view for area selection
81
Using a pick list of paddocks for area selection 82
Dates and Seasons
85
Seeding or Planting operations : Special cases
85
Main Crops, Secondary crops
85
Case 1 : How to handle growing two or more crops in
the same area in the one season
85
Case 2 : How to handle re-seeding
86
Case 3 : How to handle under-sowing
86
Perennial Horticultural Crops
86
Copyright © Fairport Farm Software
Page 72 Chapter 5
Paddock Activities Diary
What if you pull out a tree or vine crop and replant?
86
Non-Horticultural Perennial Crops
87
Applying Chemicals
88
Steps
88
Chemical Targets
89
Chemical Tank mixes, Fertiliser mixes, Machinery
combinations
91
Chemical Batch Numbers
91
Entering Chemicals in Total Units or Water
Percentages
92
Applying Fertilisers
92
Steps for entering fertiliser applications
92
Fertiliser Blends
93
Entering machinery details
93
Entering harvest deliveries
94
Sundry Consumables
94
User Defined Units
95
Hay and Fodder production
95
Diary Screen Buttons : More information
97
Using “…to Season”
97
Using the Paddock Activities Diary Filter
97
The Paddock Activities Diary Report
97
Paddock Activities Diary and the Farm Filter
97
Weird or missing data
98
The Copy option
98
General information
The activities diary is the main "nerve centre" of the paddock
database system. This is your main screen for entering cropping
and related data. The daily activities are listed on the screen as
they are entered, building up a daily logbook of all your paddock
activities.
The screen layout
The outline on the left side of the screen shows months (in
descending order) of the selected year, which is displayed above the
outline. You can skip between years (when you have more than one
Copyright © Fairport Farm Software
Paddock Activities Diary Chapter 5 Page 73
year’s data) by clicking on the up/down “spinner” buttons or by
selecting from the pull-down year list.
You will notice that as you enter data here (using the Add button)
the dates with data are displayed under their month on the outline.
An abbreviation (4 letters) of operations performed is displayed
alongside each day to give you an indication of the events for each
day.
The Paddock Activities Diary Summary Screen
Plan records (shown as red text)
The Recommendations records separator bar
Recommendation activities (shown as blue text)
The Paddock Activities Diary Summary Screen control
buttons
Copyright © Fairport Farm Software
Page 74 Chapter 5
Paddock Activities Diary
The Buttons
Add : To start the Add Activity Wizard to enter operations
Edit : To edit the selected (highlighted) job.
Filter : To control the display of operations… you can opt to hide or
display one, all or several operations (You are advised to become
familiar with this facility as it will prove very useful).
…to Season : To jump to the Paddock-Season View for the activity
you have selected on the main section of the screen.
Tools : To display a list of options for tasks you may need to
perform from time to time
• Paddock Season Notes for
Selected Record : Add notes to
any selected record for the
Paddock Season.
• General Paddock Notes for
Selected Record : Add general
paddock notes to any selected
record.
• Job Notes for selected record:
each job can have a note
attached to it. These notes
appear in the Paddock Diary
Report.
• Delete selected record : To delete the activity record that is
highlighted.
• Copy Activities : To access the facility that enables you to copy
activities listed on the currently selected day to other paddocks
on the same or any other day.
• Change Activities Date : To access the facility that enables you to
change the dates of your recorded activities. This option
displays all activities listed for a day enabling you to change one
all, or several of the dates in one session.
• Browse any dataset : To access the comprehensive list of data
tables for browsing. The data is displayed in a table or
spreadsheet style view.
• Show Area Units in Columns : This option enables you to switch
off the units of measure text on the diary screen to free up
space on the screen. We recommend that you run PAM at the
highest screen resolution possible. Some people will not be able
to run their computers at more than 640 X 480 resolution, so
Copyright © Fairport Farm Software
Paddock Activities Diary Chapter 5 Page 75
•
•
•
•
the amount of space available to display information will be
greatly reduced. If you can’t run your computer at 800 X 600
resolution (or better) then please check “Screen settings” in
Chapter 3.
Show Plan Numbers: If you use PAM to enter plans, it will
automatically generate a new and unique plan number for each
plan. This plan number will be shown on the planned jobs
reports and can be displayed on the right hand side of the diary
screen by ticking this option.
Show Costs and Income information : This option shows the $ /
Ha for a paddock record and total $ for a selected paddock.
Rebuild Diary : This is a trouble shooting option to be used in
the event of a suspected missing record. The program will
traverse through all records in all data tables that supply
information to the diary screen and rebuild the daily records
table.
Show Actuals, Plans and Recommendations: (See the Chapter on
Plans, Budgets and Recommendations later in this manual) You
can show or hide records of these three types. Generally you
would always want to view your actual records. If you use either
recommendations or plans, you can choose to hide and show
them using these options … or alternatively you can click on the
three buttons in the status bar at the bottom the diary screen …
Report : To
generate the
report version of the currently displayed day’s activities, select
Paddock Diary Reports (Actuals Only). Please note that the diary
filter is taken into account when generating this report… meaning
that if you’ve used the Activity Filter to only display chemical
application records, then only chemical application records will be
shown on the report as well.
Copyright © Fairport Farm Software
Page 76 Chapter 5
Paddock Activities Diary
Activity Planning Reports
These include a map report showing the areas selected for planned
activities for the day. Of course you will need to have the PAM
Mapping module installed.
All Paddock Plans for the Current Date
Chemical Spraying Plans
Chemical Spray Order Form
What is a JOB?
A job can consist of : A tank mix of chemicals and the machinery
used on 5 areas or paddocks.
A job is defined in PAM as the records you enter as a group in one
pass through the Add Activity Wizard… where a pass is terminated
when you click the Finish button!
You will find that you can add as many jobs (passes) in the Wizard
in one session as you like.
The activities records (jobs) are listed on the Paddock Activities
Diary screen in summarised form. You can see the full detailed
view of a record by clicking on the Edit button or by double
clicking your left mouse on a record.
Please Note :
As you enter and save records in this diary screen, you
will see your summarised records are coloured using an
alternating colour scheme… one “job” will be coloured
one colour, the next job will be coloured another. These
colour bands indicate the jobs as they were entered in
the wizard.
An “Add” Session?
A session starts when you click the Add button on the main diary
screen and ends when you finally click the Close button on the
Wizard.
Copyright © Fairport Farm Software
Paddock Activities Diary Chapter 5 Page 77
Confused? Believe me… it makes a lot more sense when you’re
doing it than when you’re trying to describe it! You will get familiar
with these concepts very quickly.
The “Add Activities Wizard”
See general information about the Add Wizard in Chapter 4.
Page One : Selecting the Operation
Page 1 of the wizard is where you select the operation, select the
operation date and season and choose associated operations (if
applicable).
When you have made the required choices on page one, click Next
to move to the Areas selection page… Page 2.
Page Two : Selecting the Areas
The layout of Page 2 will differ from time to time depending on
several things: The type of operation you are entering and the
timing of the operation.
You will see one or more area lists… Paddocks, Cropped Areas,
Groups, and Map (If you have the mapping module).
Please Note : The only tasks you can perform on this page (Page 2)
are 1) Select the areas, (paddocks or cropped areas) that you are
working on and… 2) Alter the area worked The Activities details
are entered in the next and subsequent pages
When you have established cropped areas within paddocks for a
season, the Cropped Areas list will appear! You are encouraged to
use this list when entering operations on cropped areas.
For your convenience, you can create Management Groups…(see
“Creating Management Groups” later this chapter) these might
consist of all areas that have a common variety.
If you are entering operations like : Crop monitoring and harvest,
you can only select from your Cropped Areas list.
For most operations you can select multiple areas (paddocks or
crops)… or you can select your area groups (Clicking on the parent
item of an area group will automatically select the entire group).
Copyright © Fairport Farm Software
Page 78 Chapter 5
Paddock Activities Diary
Under some circumstances (or operations) you can only select
single areas. These include harvest, crop monitoring, weed and
pest observation records.
As you select areas, you will see your selections listed in a grid
below. Having selected the required area(s), you can enter the
worked area in the selected areas grid. PAM will always enter a
default area for you… the arable area of a paddock and the
cropped area of a crop. You may be treating a lesser area than the
default area that PAM supplies for you… simply alter it
accordingly.
Making selections on the Areas Selection Page
You can view your lists of Paddocks and/or Cropped Areas as an
Outline or a Multi-Select List (see Chapter 2 for details on these
concepts). The checkbox labeled “Display as list” will toggle the list
type modes.
You can use either your mouse or your <Space Bar> + <Arrow
Keys> to select areas. As you select areas they will be displayed in
the selected areas grid below.
To de-select an area, do one of the following :
• Click on the area again in the areas selection list
• Double Click on the area in the selected areas grid
• Highlight the area in the selection list with your <Arrow Keys>
and press your <Space Bar> .
To de-select all areas, click the Clear Selected button.
When all selections and alterations are done, click Next to move on
to Page 3 of the Wizard.
Page Three and Beyond
Once you have selected your operation(s) and the areas being
“operated on”, you now move on to the operation details pages.
For general information on entering data into the Wizard Data
Entry Grids, see Chapter 4.
Creating Management Groups
Management groups are made by first selecting areas in the Add
Activities Wizard in the normal way (see the techniques above in
Copyright © Fairport Farm Software
Paddock Activities Diary Chapter 5 Page 79
the “Page Two” section) and then clicking the Save as Group…
button.
You then name the group so you can use it in the future.
Management Groups are tied to a Season. Meaning, when you
move on to a new Season the management groups for past Seasons
are not available. If you ever return to a past Season to enter more
data the management groups for that Season will re-appear.
Please Note :
When you select a management group from the list, you can
click on the parent item (that is the Group Name) in the
outline… that will select all members of the group. If you
don’t want to select all members simply use the de-select
options to de-select an unwanted area or two.
What data can you enter here?
All data relating to the cropping process and the costs associated
with those tasks are entered here.
...applying chemicals, applying fertilisers, planting, harvesting, all
machinery usage records, manual tasks, sundry consumable
consumption, crop monitoring records (weed inspections,
pathology, entomology inspections and any crop observation you
want) and irrigation records.
Please note :
PAM does not mind if you choose not to enter a lot of the
details into these records. All fields have been put in this
section at the request of growers and are considered worthy
of inclusion. You may find some are superfluous to your
requirements. Simply SAVE & EXIT from the data entry
wizard when you have entered the information, which you
require. Press F10 or click on the Finish button to SAVE &
EXIT
Copyright © Fairport Farm Software
Page 80 Chapter 5
Paddock Activities Diary
To assist you to gather data for this diary system, you can print
out the "Paddock Activities Diary" data collection form. To do this,
look for Data collection forms on the Reports menu.
Please Note :
When you look at the list of operations on the Add
Activity Wizard, you may think we have forgotten some
important operations. In fact you can set up any
operations that are missing by adding to the list of
Machinery Operations or the list of Manual Tasks. To
enter an operation like “Cultivating”, choose Machinery
operation then when you get to the details page of the
wizard, choose “Cultivating” from the list of operations.
If the operation you’re recording is missing from the
list… add it!
Before dealing with the specific tasks involved in entering spraying,
fertilising, irrigating, crop monitoring, harvest delivery and
machinery usage let's first look at the points, which are common to
all activities:
Adding a Paddock Activity
1
2
3
4
Click the Add button
The Add Activity Wizard will appear on your screen.
Select the job (eg "Chemical Application") from the
operation pick-list. (Note that you have a Config… button
alongside the operations list. You can filter out unwanted
activities from this pick-list via this button).
Check the date and edit it if required.
Please note : If your diary is completely empty, the date
will default to today's date, after that it will default to
the currently displayed diary date.
5
6
Check the Season. Correct it if you have to. See “Dates and
Seasons” later this Chapter.
Many operations have associated activities… for example
applying chemicals generally involves machinery usage. If
Copyright © Fairport Farm Software
Paddock Activities Diary Chapter 5 Page 81
7
you are entering an operation that involves other operations,
use the checklist below the Season field to incorporate
associated activities…. Now click the Next button
On the next Wizard page you select the area or areas where
the operation(s) occurred. For most operations you can select
more than one area. I use the word “area” because you may
be able to select a crop or a Paddock or a group of
Paddocks… depending on the operation being entered.
Area Selection Page – Important Options and Special
Features
The areas selection page is packed full of options. If you have the
PAM Mapping module you can use your map to select the areas of
a job.
Using a map view for area selection
Click on a paddock to select it.
To Zoom in or out use the normal zoom buttons (see 1 above)
Copyright © Fairport Farm Software
Page 82 Chapter 5
Paddock Activities Diary
In PAM You are advised to select crops as opposed to the
paddocks ... so you are advised to leave the “Show Crops” check
box ticked (See 2 above).
If you ever treat (spray, spread fertiliser, cultivate) less than a
complete paddock, you can draw the sub are treated by clicking on
the Draw sub areas button. See 3 in the image above.
When setting up views in the mapping system, you are advised to
create one of the views with data entry in mind. A simple view of
the paddock layer and perhaps paddock names would be ideal.
See 4 in the image above … this pick list enables you to select a
different mapping view for the data entry – area selection window.
Using a pick list of paddocks for area selection
Display as List
This check box sets up your list as shown above. When the option
is switched off you will see an outline style list of your paddocks..
Copyright © Fairport Farm Software
Paddock Activities Diary Chapter 5 Page 83
With “Sort by Crop / Paddock” on all paddocks which have the
same crop are grouped together. If you performed an activity on all
paddocks with same crop, you need only click on the crop name to
choose the lot.
With the “Sort by Paddock / Crop” option chosen, you see that
the list is grouped by farm … and sorted by paddock names. Using
this sort and display option may be the most suitable for your
farm, particularly if all paddocks contain a single variety.
If this is your preferred area selection display, you are advised to
hide the paddock list. Check the “Hide Paddock List” check box to
remove the risk of entering data against a paddock as opposed to
the crop. Entering all activities against the cropped area as
opposed to the paddock ensures all crop-wise reports work as they
should.
You would only enter data using the “Paddock” tab if you are
planting a new variety in a paddock or if the cost of the activity
being recorded is not to be allocated to the crop growing in the
paddock area.
8
Before you go on you may need to alter the worked areas…
do this in the area selection grid at bottom of the Wizard
page…
Note also the options along the bottom of this panel…
Copyright © Fairport Farm Software
Page 84 Chapter 5
Paddock Activities Diary
”Link all areas as one job” – As you can add records for
many paddocks or areas at a time, so too can you edit those
“linked” records. All records for each paddock are linked
together by a common job number. If you want to keep this
link, simply leave the check box ticked. If you will need to
edit the records for individual paddocks, un-tick the check
box.
When would you need to Un-Tick this check box? When you
enter bulk data for many paddocks for speed, but intend to
edit one or more of those records because the paddocks
received slightly different treatment.
Clear Selected – Deselect all areas
Management Groups – Management groups are used to speed
data entry when you have a group of paddocks that are
generally treated with uniform management. Clicking on the
Management Groups button will display a dialog where you
name your chosen list of areas.
Having saved a management group, it can be viewed by
clicking on the Management Groups button in the future…
New management groups are set up each season. They are
designed to be a single season data entry aid. It is quite
likely that you may not find a need to use them. However, if
you use them, you will find a special report has been
designed to report on management group activities.
9
Click Next … Now you will see the details page for the main
operation (if you selected associated operations you will see
Copyright © Fairport Farm Software
Paddock Activities Diary Chapter 5 Page 85
their details pages next or subsequently).
Enter all relevant and required data.
If you chose to enter several operations in the one pass, clicking
the Next button will take you to subsequent data entry pages for
the selected operations.
Each operation has its specific details page and specific
requirements… see the special cases detailed on the following
pages.
Dates and Seasons
In some cases, the date may not line up exactly with the YEAR. The
year we're talking about here is the "Paddock-Season” or SEASON.
The details entered in this diary find their way to the PaddockSeason screens and Paddock-Season reports. To ensure that the
details being entered are displayed in the right place it is important
that they be entered correctly.
Seeding or Planting operations : Special cases
Main Crops, Secondary crops
If you ever grow multiple crop types in the one area in a season you
may be doing one of several things…
1. You may be growing one crop, harvesting it and then growing
another to follow (eg. A Winter crop then a summer crop) or...
2. You may be planting a main crop and “under sowing” it with
other crop types. This is a case of a Main Crop and one or more
Secondary crops in the one planting.
3. You may be re-planting a failed crop. In this case we are
planting a secondary crop… all costs will be entered against the
original crop.
Case 1 : How to handle growing two or more crops in the
same area in the one season
PAM will allow you to keep adding more than one “main crop” for
the same area...
Copyright © Fairport Farm Software
Page 86 Chapter 5
Paddock Activities Diary
Case 2 : How to handle re-seeding
If you are re-seeding with the same crop type and variety, enter an
extra seeding entry - Make sure you don’t tick the Main Crop
check box. See the on-line help for more details.
Case 3 : How to handle under-sowing
When entering the crop/variety planting details, simply keep
adding more crop/varieties after you have added the main crop.
Be sure to only nominate the main crop as the Main Crop!!
Actually PAM won’t let you have more than one main crop for a
mix or combination of crops entered in the one job.
Perennial Horticultural Crops
For perennial horticultural crops you must be aware of the need to
tell PAM the crop locations and layouts. This is done in the
Paddock setup area… Configuration / Farms and Paddocks list…
When there check the Perennial Crop Layout Details tab sheet.
Use the Add button to enter the crops. As in the “real world”, any
number of crop/variety combinations can co-exist in an area.
Remember also that you can refer to your areas (production units)
as paddocks, fields, farms, orchards, paddocks or whatever you
like. See Customise your PAM QA Plus Program in Chapter 3.
What if you pull out a tree or vine crop and replant?
Steps to record the “pull out” part of the operation.
You will most likely need to record machinery and other events in
the Paddock Activities Dairy but to let PAM know that the crop is
no longer part of the current layout, do the following in the Farms
and Paddocks set up screen.
1. Click on the Edit button on the Tree/Vine Crop Layout Details
tab sheet.
2. A dialog box will pop up…in the “Year retired” field enter the
year that you pull the crop out
3. Check the “Is this the current crop?” field “Off”.
If you have re-planted the area with another crop, click Add and
enter the new crop details.
Copyright © Fairport Farm Software
Paddock Activities Diary Chapter 5 Page 87
You will no doubt want to record the planting in your Paddock
Activities Diary as well.
Non-Horticultural Perennial Crops
Crops like sugar cane, lucerne, evening primrose and others, fall
into the category of non-horticultural perennial crops.
There is no reason why these crops shouldn’t be entered in the
Perennial Crop Layout tab sheet .
Why?… PAM uses the information that you enter into the
Perennial Crop list on this tab sheet to prepare itself for each new
season. As you enter the first event for a new season, PAM checks
your list of perennial crops and sets up a cropping record for
them… so that you can select these perennial crops from the
Cropped Areas pick-list to perform operations on them.
So, the general rule is that any crop that will not need to be replanted every season should be entered as a perennial crop in this
screen. It is a very simple matter to make these records noncurrent as soon as they do, indeed become non-current!
Copyright © Fairport Farm Software
Page 88 Chapter 5
Paddock Activities Diary
Applying Chemicals
Your chemicals list is set up under Configuration / Consumables.
Steps
Follow steps 1 to 8 (Adding a Paddock Activity above) having
selected Chemical Application from the Operations Pick-List.
If all went according to plan you will have arrived at the Chemicals
details page…
Here you can enter the spraying conditions 1, the chemicals and
their rates 2. Note the Water Rate field is first on this section of
the Wizard page. The Water Rate is used to help calculate the rate
of application of chemicals (or wetting agents) when you know the
percentage of water 3 used rather than the rate per hectare.
Obviously entering the spraying conditions is optional… fill the
start and finish times and the weather details in if you want to.
Use the Plus button to add extra rows.
You can enter (via a pick-list) the Growth stage of the crop being
sprayed and the Plant vigour.
Many people ask if the growth stage refers to the target weeds (in
the case of a herbicide application) or to the crop. The choice is
yours! However, it would be more relevant to be consistent and just
refer to the crop’s growth stage in all cases.
Copyright © Fairport Farm Software
Paddock Activities Diary Chapter 5 Page 89
The Plant vigour field is a two-digit field - allowing a range of
entries from -9 to 99. You are advised to devise a standard range
(perhaps 1-10) for your purposes.
If you don’t wish to use either of these two fields you don’t have to.
You could set up a blank Growth stage or perhaps set up one
called “N/A” (not applicable) and leave Plant vigour as 0.
Please note that if you are spraying crops, the Growth
Stages list will be filtered to only show stages from the
selected crop types.
For cotton and other row crop growers, the fields Configuration %
and Band % can be entered… these relate to the row configuration
(ie. The “Skip row” scenario) and the way the boom is set up. These
fields will only be displayed for cotton producers.
To create a tank mix of chemicals or to use a pre-saved mix, check
the Tools button options.
To add a new chemical to your list… again check the Tools button
Chemical Targets
A spray target
4 is either a pest, disease or weed. Under
Click the […] button
to access the targets
Configuration you can establish a list of weeds or pasture species
and in the Crop Types and Associated Lists screen you can set up
a list of pests and diseases for each crop type.
Depending which chemical type you are entering into the wizard,
PAM will present you with a list of appropriate targets.
On this form you will see that multiple targets can be selected for
the chemical. You can add to the list of targets on the fly using the
Weeds… or the Pests… buttons,
You can select the Result for each target. This list is in-built so you
can’t change or add to it.
Copyright © Fairport Farm Software
Page 90 Chapter 5
Paddock Activities Diary
If you use your keyboard to enter data here, use <Alt+Down Arrow>
to pull down the pick-list of targets or results. Use the down arrow
key to add a new line (or record) in the grid.
These buttons can be used to Add,
Delete, Save and Cancel a row or
record in the grid
Copyright © Fairport Farm Software
Use these buttons
to add new items
Paddock Activities Diary Chapter 5 Page 91
Chemical Tank mixes, Fertiliser mixes, Machinery
combinations
To create a mix
of any of these
crop inputs,
simply select
each mix
member and
the rates (if
applicable)
while entering
data in the Add
Activities
Wizard. When
you have all the
items selected click on the Tools button 6
on the Add Activities Wizard and select the
Save selected … As A Mix option. The
form displayed here enables you to name
the mix (and delete and rename existing
ones) for future use.
Chemical Batch Numbers
See 5 on the Chemical Details Wizard Page. Click on the […]
button to access the data entry dialog.
If you use the inventory system fully, a list of current batch
numbers will be available in a pick list for you to select. If you are
not using the inventory of consumables, you can type a batch
number into the cell(s) under the column titled “Batch Number”.
Copyright © Fairport Farm Software
Page 92 Chapter 5
Paddock Activities Diary
The system caters for situations where you have used more than
one batch number in a job. Enter in the quantities of each batch
number used to keep your inventory in order.
Using the inventory system enables you to keep a record of
chemical batch numbers. PAM will look up your list of batch
numbers for the chemicals you select in the Add Activities Wizard.
When a batch number is no longer current, you will need to
manually inform PAM that it has been used up (ie. No longer
current). The inventory system is not a “live” system due to the
problems involved in maintaining such a system in a farming
situation. See more information on this subject in the Inventories
Chapter (13). Batch numbers can be recorded for fertilisers as well.
Entering Chemicals in Total Units or Water Percentages
If you know the total units of a chemical that were applied in a job
you can enter that value and PAM will calculate the rate for you.
If you know the amount of chemical (or wetting agent) in terms of
its percentage of the water rate… enter it in that form, PAM will
calculate its rate and the total units for you.
Applying Fertilisers
Your fertilisers list is set up under Configuration / Consumables.
Steps for entering fertiliser applications
Follow steps 1 to 8 (Adding a Paddock Activity above) having
selected Fertiliser Application from the Operations Pick-List.
On the fertilisers details page…
Check the Tools button options for possibilities… You can add to
the list of fertilisers “on the fly”, create special blends, create and
use existing fertiliser mixes… You can also display “Tips”. We
suggest that you leave the tips on display at all times.
If you know the total units of a fertiliser that were applied in a job
rather then the application rate you can enter that value and PAM
will calculate the rate for you.
Copyright © Fairport Farm Software
Paddock Activities Diary Chapter 5 Page 93
Fertiliser Blends
As farming becomes more and more sophisticated, some are opting
for special blends of fertilisers. To create a special blend in PAM,
start entering a Fertiliser Application operation as normal… on the
Fertiliser details page of the Add Activity Wizard click on the Tools
button and select the option New Special Blend.
You will then see the Fertiliser Special Blends Wizard…
On the first page a Dual List Box is provided for you to choose the
nutrients… and enter the percentages. Simply click each element
of the fertiliser blend and enter their percentages on the right hand
column of the selected items box.
When done, click Next…
On page 2 you can select the purchase units, application units and
purchase price of the special blend.
If this special blend is to become a regularly used blend on your
farm, you can choose to name it and it will become a member of
your fertiliser list… the one you set up under the Configuration
menu. You will notice that PAM provides a default name…
constructed from the nutrient percentages. (eg. P12:S10:N40)
If you don’t intend to use this special blend again (or even if you
are unsure) choose not to save it. It will be used for your reports
but it won’t be available from a pick-list of fertilisers.
Entering machinery details
Machines can be set up in the Machinery/Manual Tasks/Staff &
Contractors List under Configuration.
In there, as you add new machines you will see that you can tell
PAM the operation that a machine is to perform… (Chemical
Application, Fertiliser Application, Harvesting, Planting/Seeding
etc.). You can also set a machine up to perform “Any operation” .
Typically tractors will be set up in this way.
Copyright © Fairport Farm Software
Page 94 Chapter 5
Paddock Activities Diary
As you will be aware PAM enables you to enter machinery usage
records immediately after (or as part of) entering a spraying,
planting or fertilising job.
On those occasions the operation will default to the initial
operation that you chose…
For example, if you chose Chemical Application, the operation for
the machinery event will be “Chemical Application”. Only machines
that you have set up as Chemical application machines and those
that you have set up as “Any operation” machines will be included
on the machinery pick-list.
There will be occasions when you will be performing machinery
operations in isolation…. Then you will select Machinery Operation
from the operations list.
Entering harvest deliveries
The harvest records can be entered on a load by load basis or as a
total amount at the end of harvest.
PAM will continually add up total yields and automatically
calculate average yields and prices. These averages and totals will
be transferred to the Crop-Season records automatically.
Although PAM enables you to enter numerous harvest delivery
records for a crop, you may only want to enter the harvest
machinery event and costs once.
Please Note :
If you use harvest machinery costing by Harvest Unit,
you should leave the machinery entry until all harvest
deliveries have been entered so that PAM can use the
total harvested quantity to accurately calculate the
costs of the machinery operations.
Sundry Consumables
You can set up a list of sundry consumables under Configuration/
Consumables. This list might include any consumable that you use
while performing paddock activities. For example, one PAM user
Copyright © Fairport Farm Software
Paddock Activities Diary Chapter 5 Page 95
has set up “Kilometres” as a sundry consumable. He enters the
Km’s traveled when doing crop monitoring... charging his paddocks
12 Km @ $0.55 / Km. To enter sundries consumed simply select
the activity “Sundries consumed”, enter the date, select the
paddock and enter the details.
Any consumable item that does fit into the category fertiliser or
should go into the sundries list.
User Defined Units
When setting up a list of sundry consumables you may find our list
of units of measure does not cater for all your needs… no
problems, just add your new units under Configuration/Customise
your PAM QA Plus program/Units of Measure. For example, if you
want consume wire in “Rolls” then you could add a unit called “200
Metre Roll”.
Hay and Fodder production
Hay production
Hay production is defined (for PAM’s purposes) as the cutting of a
previously established crop. So... before you attempt to record hay
production from an oat or oat-pea mix crop or similar, you must
have previously recorded the seeding or planting operation for the
crop.
CASE 1 : Just a “section” of a cropped area is cut for hay...
PAM will want to know if you are cutting the entire crop or just a
section of it.
Sometimes people cut a few laps around the outside of a paddock
for hay. This is a typical case of a section of an established crop
being cut for hay.
In this case enter the area cut for hay in the worked area field.
PAM will establish this hay area as a new main crop section in the
paddock. All operations (and their costs) that you have carried out
on this cropped area up to this point will be allocated pro-rata to
each area.
Copyright © Fairport Farm Software
Page 96 Chapter 5
Paddock Activities Diary
CASE 2 : The whole cropped area is cut for hay...
This case is a simpler one and requires no “behind the scenes”
processing.
Fodder production
By PAM’s definition, no previous seeding operation has been
entered for the area being cut. It is assumed to be pasture or a
perennial crop that is being cut. There is tie-up between the
Paddock and Livestock system in this area. You are asked to
supply a “Locked-Up” date (that is the date the paddock was locked
up for the fodder to grow) and a “Stocking Rate Forgone” value.
These are optional.
CASE 1 :
You choose a paddock that has no recorded cropped area for the
current season, PAM will assume you are cutting pasture, lucerne
or some other fodder crop. If you have chosen the paddock in
error... escape out.
CASE 2 :
You choose a paddock that has a cropped area and you are cutting
another section of that paddock for fodder, you can choose to do
that. PAM will treat this slightly differently to CASE 1.
1. In both cases you will be asked for the area of the fodder crop.
2. Then select the fodder crop from the list. If it’s not on the list you
can add it here.
3. Now enter the date the paddock was “locked up” to produce the
fodder growth.
If you are dealing with CASE 1, you will be asked to enter the
stocking rate forgone while the paddock was locked up for fodder
production. The number of days the paddock was locked up
multiplied by the stocking rate forgone will give us the number of
Livestock Unit (eg. DSE) grazing days per Hectare lost. This value
can be used (optionally) later to credit the paddock with stockgrazing days in the annual paddock stocking rate summary
reports. If you have sold or intend to sell the conserved fodder,
enter the price/tonne.
Copyright © Fairport Farm Software
Paddock Activities Diary Chapter 5 Page 97
Diary Screen Buttons : More information
Using “…to Season”
If you have a single paddock activity on the Paddock Activities
Diary screen and you click …to Season, you will go straight to the
Paddock-Season screen for that paddock.
If there are several entries for the day, first highlight the required
activity from the list and PAM will transfer you to the PaddockSeason screen for the selected paddock.
To find out what you can do in the Paddock-Season screen, see the
next chapter.
Using the Paddock Activities Diary Filter
The Filter button enables you to exclude all data from your current
focus except a specified activity. To operate the filter, click Filter
then select the activities from the pick-list. Thereafter, until you
click Filter again, only the specified activities will be seen on your
diary screen.
The Paddock Activities Diary Report
This report can be found at the top of the Reports/Paddock-Season
Reports menu. It allows you to print out in a chronological order,
all events in one or more selected paddocks between two chosen
dates. The Report button on the Paddock Activities Diary screen
will produce a report for the currently displayed day only.
Paddock Activities Diary and the Farm Filter
If you have the Farm Filter ON, the Paddock Activities Diary will
only show records for the currently "active" farms. You will see the
list of farms that are currently “IN” along the bottom of your screen
in the status bar (that is, if you have it on display… you can hide
the status bar via the Configuration /Screen option)
If you have a date on your screen with no data displayed this
indicates that there were no paddock activities performed on the
current farms for the date on display.
Copyright © Fairport Farm Software
Page 98 Chapter 5
Paddock Activities Diary
Weird or missing data
If you suspect that some data has gone missing from your
Paddock Activities Diary, the steps to follow are these
1. Go to the Tools menu
2. Select Rebuild Diary
If the problem still exists, you should check in the Paddock-Season
screen for any record that you think is missing. It could be that an
incorrect date was used when the "missing" record was first
entered. You may have to delete the record if you find that the date
is incorrect, and re-enter it.
The Copy option
To copy activities that appear on your Paddock Activities Diary
screen...
1. Select Copy on the Tools menu
2. A list of copy-able jobs is displayed... select those jobs you
want to copy
3. Select the paddocks or areas to copy to (see the Areas
button)
4. Enter the date and season for new activities
5. PAM proceeds to copy those selected tasks and their details
A typical use for this option would be to enter repetitive tasks that
involve complex details. For example, a complex chemical tank-mix
and its associated machinery details. Once you have used and
entered it once, you can go back to that date and copy all the
details to any other paddock(s) or cropped areas on any other date.
Copyright © Fairport Farm Software
The Paddock-Season screen Chapter 6 Page 99
Chapter 6
The Paddock-Season Screen
Chapter contents
General information
The Screen Layout
The Buttons
Adding a Paddock-Season record
Paddock notes and Paddock Season Notes
Printing the Paddock-Season report
Total income and costs
Deleting a Paddock-Season record
Other costs and income .
How to get there
Costs and Income Summary Screen
Add/Edit Costs and Income Screen
Paddock-Season Budgeting
Special Features of the Budget Screen.
Costs of consumables in PAM Budgets
Harvest Income in PAM Budgets
Converting Budget Records to Plans or Actuals
Special Budget Reports
100
100
101
102
103
103
103
103
104
104
104
106
107
107
109
110
111
111
Copyright © Fairport Farm Software
Page 100 Chapter 6
The Paddock-Season screen
General information
The Paddock-Season screen is best described as a screen of review,
where all the activities carried out in a Paddock in a single Season
are displayed.
The data entered in the Paddock Activities Diary is transferred to
the records displayed in this screen. Data can be entered in this
screen as well. The steps are the same as those for the Paddock
Activities Dairy Add Wizard. Please refer to the section… Adding a
Paddock Activity in Chapter 4 and 5 for details.
The total Paddock costs and income are collected together in this
part of the program and can be displayed by clicking on the Tools
button and selecting Season Costs.
The Screen Layout
The outline on the left side of the screen shows Farms and
Paddocks that have data recorded in the selected Season. The
Season is displayed above the outline. You can skip between
Seasons (when you have more than one Season’s data!) by clicking
on the up/down “spinner” buttons or by selecting a Season from
the pull-down list.
Please Note : The data displayed on this screen is
collated by Season rather than a calendar Year…
unlike the Paddock Activities Diary where the outline
lists months for a calendar year.
The data is collected together on this screen by record type. Crop
harvesting records, chemicals, fertilisers, irrigation records and so
on.
You can control the order in which these records are displayed…
check the Filter button for this option. You can also view the
records in three different modes (see under Tools)… to give
optimum viewing for various screen resolutions (see details on
Screen Settings in Chapter 3).
Copyright © Fairport Farm Software
The Paddock-Season screen Chapter 6 Page 101
The Buttons
Add : To start the Add Activity Wizard to enter operations. This will
operate in the same as the Add Wizard in the Paddock Activities
Diary (in fact it is the same wizard!).
Edit : To edit the job you are highlighting on the list on the main
section of the screen.
Filter : To control the display of operations… you can opt to hide or
display one, all or several operations (You should become familiar
with this as it will prove very useful) and you can re-arrange the
order of display of the records.
…to Diary : To jump to the Paddock Activities Diary View for the
activity you are currently highlighting on the main section of the
screen.
Tools : To display a list of options for tasks you may need to
perform from time to time
•
•
•
•
•
•
•
•
•
•
Paddock Season Notes : Add notes to the Paddock Season for the
selected year.
General Paddock Notes : Add general notes to the Paddock for
the selected year.
Job Notes for Selected Record : Add notes to a selected record.
Copy Activities : To access the facility that enables you to copy
activities listed on the currently selected Paddock-Season to
other Paddocks or cropped areas on the same or any other
Season.
Copy Actuals to Budget: To make budgeting (Season planning) a
bit easier, you can copy an entire Season’s list of events to one
or more selected paddocks for a budgeted Season.
Change Activities Date/Season : To access the facility that
enables you to change the dates of recorded activities. This
option displays all activities listed for a Season enabling you to
change one all or several of the dates in one session.
Create New Paddock/Season : To create a new record.
Assign Project for Job: This option will only be showing if you
have purchased the special project costing add-on module.
Season Costs and Income : To display the Paddock-Season or
crop-Season costs and income summary screen.
Browse any dataset : To access the list of data tables for
browsing in a table or spreadsheet style view.
Copyright © Fairport Farm Software
Page 102 Chapter 6
•
•
•
•
•
The Paddock-Season screen
Display Size : To alter the size of the record display area.
Filter/Adjust Display Order : This displays the same dialog as
the Filter button options.
Rebuild Current Paddock Financials : Rebuild the financials for
the currently selected Paddock to update any changes in costs
and income.
Delete selected Paddock/Season : This option totally deletes all
the Paddock-Season records on display.
Show Actuals, Plans and Recommendations: (See the Chapter on
Plans, Budgets and Recommendations later in this manual) You
can show or hide records of these three types. Generally you
would always want to view your actual records. If you use either
recommendations or plans, you can choose to hide and show
them using these options … or alternatively you can click on the
three buttons in the status bar at the bottom the diary screen …
Reports : To generate the common summary reports of the
currently displayed paddock-season activities.
While you have the Activities Diary and the Paddock-Season view
on display you can also access the main menu options and the
main tool bar options.
The activities records are listed on the Paddock-Season Screen in
summarised form. You can see the full detailed view of each record
by clicking on the Edit button or by double clicking your left
mouse on a record.
Adding a Paddock-Season record
Click Tools then select Create New Paddock/Season from the
menu.
Copyright © Fairport Farm Software
The Paddock-Season screen Chapter 6 Page 103
Please note : If you enter your Paddock-Season data in
the Paddock Activities Diary, this task (Setting up a
new Paddock-Season record) is done for you
automatically.
Select the Paddock from the list.
Enter the year (the year must be a proper year showing the century
as well as the year, ie. Not 05 but 2005)
That's it!
Paddock notes and Paddock Season Notes
Paddock Season notes can be added via Tools.
Printing the Paddock-Season report
To generate a full summary of all records on the Paddock-Season
screen, use the Report button.
Total income and costs
To view the total costs for the Paddock-Season click on the Tools
button and select Season Costs.
You will see on that screen that you can view Paddock-Season
income and expenditure for all Paddocks all Seasons. You will also
notice that you can view crop-Season income and expenditure.
If you want to enter a crop insurance type and the insurance costs,
this is the place to do that.
Deleting a Paddock-Season record
To delete the entire screen-full of records (all fertiliser, chemical,
working methods and cropping records) select Delete from the
menu .
To delete individual records from the Paddock-Season details you
will need to use Edit, then select the record to delete.
Copyright © Fairport Farm Software
Page 104 Chapter 6
The Paddock-Season screen
PAM will warn you and ask for confirmation before deleting any
record.
Other costs and income .
This facility enables the user to be able to define ANY custom items
that may draw an income or cause an expense on a paddock or
whole enterprise basis. An example of a paddock or whole
enterprise income or costs would include:
Costs
Insurance
Tax
Freight
Income
Subsidies
Tourism
How to get there
Once in the Paddock Season screen
or
*, simply select the
Tools button, then Season Costs and Income from the drop down
list.
The next screen will be the Season Costs and Income Summary
Screen…
Costs and Income Summary Screen
Copyright © Fairport Farm Software
The Paddock-Season screen Chapter 6 Page 105
The Costs and Income Screen shows you:
A list of the Farms & paddocks or crops down the left hand side, by
selecting one of these you will see the summary of the costs and
incomes for that particular paddock or crop.
Please note: the
selections at the top of the screen,
changing this selection will change the screen view considerably.
: Having ‘View by Paddock’ selected will enable you to
view, add and edit the costs and incomes on a paddock by paddock
basis. The list down the left hand side of the screen will show the
Farm/Paddock selection list.
You will be able to add, edit and delete custom Costs & Incomes
with this option selected for the individual Paddocks or the whole
Farm.
: Having the View by Crops selected will allow you to
view, add and edit the costs and incomes on a crop by crop basis.
The list down the left hand side of the screen will show the current
season crop selection list.
If you have the “View by Crop” selection, you will notice that you
are able to insert directly into this screen the insurance costs and
class for the crop in the currently selected season.
Copyright © Fairport Farm Software
Page 106 Chapter 6
The Paddock-Season screen
Add/Edit Costs and Income Screen
To add or edit a custom Income or Expense for a given Paddock or
over the whole Farm, click the Other Costs and Income button.
Top box (1): Entire Farm costs and income (apportioned over all
the paddocks). If you enter a cost for custom cost or income into
this part of the screen you will notice that the cost is then divided
up over the Farm paddocks by the arable area of the paddocks.
After the item has been selected and the amount has been added
(hit the
and the bottom box will be refreshed with the updated
figures for the costs and incomes that have been added).
Bottom box (2): Individual paddock costs. Add a cost or income for
a specific paddock.
Copyright © Fairport Farm Software
The Paddock-Season screen Chapter 6 Page 107
Paddock-Season Budgeting
The budget window looks very much like the Paddock Activities
Diary screen and the Paddock Season Summary Screen…
Figure 1
Special Features of the Budget Screen.
The “Budgets” menu …
Add a new Budget. Click on this
budget:
and see how we create a new
As you can see the steps are
a) Name it,
b) Select the Season
Copyright © Fairport Farm Software
Page 108 Chapter 6
The Paddock-Season screen
c) Nominate whether you want the records to be entered on a
weekly basis or a monthly basis… then
d) set up the start and ending months or weeks.
Monthly Budgeting: If you choose to enter records on a monthly
basis the first page of the “Add Wizard” looks like this:
Weekly Budgeting: If you choose to enter records on a weekly basis
the first page of the “Add Wizard” looks like this:
The Budget Name is displayed at the top left of the budget window
(see 2 in Figure 1) . Other budgets can be easily retrieved using
this pick-list.
1. You see in Figure 1 above that we have used “Months” as our
budget record intervals. By doing so, we get a listing of
months down the left side of the screen. If we chose weekly
intervals, we would see weeks listed down the left of the
screen. (see 3 in Figure 1)
2. When your budget is completed you can come back to it at
any time and convert the budgeted activities to actuals or to
plans.
3. When a budgeted record or job is converted to a plan or
actual, you will see a red “tick” in the Applied column. (see 5
in Figure 1)
4. PAM has several useful reports (see 6 in Figure 1) for budget
data and several others that may be convenient at budgeting
time. Of course all the reports from your historical records
are also available via the Report menu.
Copyright © Fairport Farm Software
The Paddock-Season screen Chapter 6 Page 109
Costs of consumables in PAM Budgets
The list of consumables and their associated costs are shared
between the Budget data and the Actual data. Therefore you need
to be a little careful when you make any changes to the costs per
unit of your consumables.
Suggestion 1
In Configuration / Consumables … You could print out your current
costs per unit by clicking on the Browse button and then:
1. Select the consumable items column and the cost column for
printing then…
2. Print the report so you have a hard copy of the list prices,
then
3. Alter the prices to suit your budgeting session
Suggestion 2
Enter your budget records using the costs that are in the
configuration lists and use the “Backdate Costs” facilities under
the Tools menus where you set up your lists …
Copyright © Fairport Farm Software
Page 110 Chapter 6
The Paddock-Season screen
In the Backdate costs window, choose :
1. Data Type = Budget
2. Select the Budget you are working with
3. Choose to use the current item costs (assuming you have
worked through the original costs and edited them for the
current budget) … or … use the current costs in your lists
altered by a percentage (either increased or decreased).
Harvest Income in PAM Budgets
As you would be aware, you can backdate harvest income in the
same way as you can backdate consumable costs in PAM .
If you look at the Configuration / Crop Types and Associated Lists
and Settings screen, Harvest Classes tab … you will see a
“Backdate Income” button.
Click on this to alter the income received for your budgeted harvest
entries. Increase or decrease the harvest income per unit by a
percentage.
TIP: Add a new harvest class called “Budget” for each crop type so
you only need to alter the price of one harvest class for budgeted
harvest entries.
Copyright © Fairport Farm Software
The Paddock-Season screen Chapter 6 Page 111
Converting Budget Records to Plans or Actuals
As the Season unfolds, you can (if you
want to) convert the budgeted
activities to plans or to actuals
Obviously things may change and your budgeted records will need
some editing. We therefore display your budgeted records in the
new Edit Wizard where you can set the correct job date and make
whatever changes you need to.
Please note that budgeted records are retained for future reference.
When a budgeted record is converted to a plan or actual, you will
see a “tick” on the budget screen.
If you want to you can convert a budgeted
record more than once! By using the
“Areas” button on the Edit Wizard, you can
choose to apply the budgeted activity to
any area(s) (paddocks) on the farm.
Special Budget Reports
All budget reports can be found on the
“Reports” menu button on the budget screen.
There are no budget reports under the main
Reports menu.
Almost all of the standard reports for actual
records have been adapted for use with the
budget data.
You will also find several reports which have been especially
written for budgeted data only including a report showing all your
chemical and fertiliser requirements for the budgeted season.
Copyright © Fairport Farm Software
Page 112 Chapter 6
The Paddock-Season screen
(this page is left intentionally blank)
Copyright © Fairport Farm Software
Laboratory Test Results Chapter 7 Page 113
Chapter 7
Laboratory Test Results
Chapter contents
General information
Water Tests
Nutrient Tests
Pasture Composition and Quality
Setting up
Entering data
Crop
Site number
Growth stage
Reports
113
113
114
114
114
114
115
115
116
116
General information
The "tests" systems in PAM are designed to provide as much
flexibility as possible. Due to the number of laboratories being used
and the many different elements being analysed, we have provided
you with a completely "user-configurable" system.
Water Tests
This section is intended to be used for people who need to get
water analysed for irrigation or stock water purposes.
Copyright © Fairport Farm Software
Page 114 Chapter 7
Laboratory Test Results
Nutrient Tests
PAM can generate nutrient audit reports, which take into account
the nutrients applied (via applied fertilisers) and nutrients removed
(by harvesting crops) from areas. You can have your harvested
produce laboratory tested for its nutrient content… hence the
screen in PAM to enable these results to be entered.
If you use this system to record the nutrients removed by your
crops, PAM will look to these results to generate the nutrient
removal part of the nutrient audit report.
Pasture Composition and Quality
The pasture monitoring system is part of the Livestock system but
it operates in a similar way to the laboratory tests data entry
screens. The only difference is that instead of setting a list of test
items in advance, you must select the pasture species that make
up the composition of the pasture from a list each time you enter
results.
If you refer to pasture quantity as “Feed on offer” … that is the
same as Kg/Ha dry matter.
See on-line help for the data entry steps.
Setting up
The tests systems in PAM can be configured to suit almost any
laboratory analysis results imaginable.
You can select the test items you require and also the order in
which you want them displayed on your screen.
Because the setting up and use of all the tests systems is virtually
the same, there is no point in describing each of them.
To select the elements of your choice and their order of
appearance, and the guideline levels, see how in Chapter 3. See
also on-line help for the setup steps.
Entering data
Click Add to add a record.
Copyright © Fairport Farm Software
Laboratory Test Results Chapter 7 Page 115
Select the area, the date, the site number and in the case of soil
tests, the depth from which the soil was taken.
Once this position data has been entered, click OK.
You can now enter the test results in the data entry grid.
If you need to add more test items into your data entry grid, check
the Tools button… you’ll see the Soil Test Setup option (in Leaf
Tests, Water Tests, Nutrient Tests you will see the appropriate
Add… option).
If you add more test items in the setup system after you entered
the records in the data entry screens, you can add in the extra
items… use the Generate Test Items option. This is designed to
populate the data entry grid with any “missing” items… or items
that have been added into the list since you first entered the
records.
Special fields, which need further explanation :
Crop
This field on the soil and leaf test screens is put there so you can
associate the test results with crop being grown on the area tests
were carried out.
Site number
The site number field is provided to distinguish between test sites
in a single paddock. PAM will not allow you to enter the results of
more than one site for a single paddock on the same date.
ie. The Paddock-Date-Site relationship must be unique.
In the reports, the results for all sites for a single paddock are
averaged. So, to get an average value of your Phosphate levels for
all sites for all paddocks for a year, simply generate a report,
selecting "Phosphate", nominating the period and choosing "All
paddocks".
Copyright © Fairport Farm Software
Page 116 Chapter 7
Laboratory Test Results
Growth stage
This field is only available in the leaf test system. Growth stages
are entered via a pick-list. If you need to you can add to the list
"on-the-fly".
A graph of leaf test results vs. growth stages is available. This
graph can show up to four different results plotted together. If you
need to plot "macro" and "micro" elements together, you are
advised to plot just two at a time.
Reports
When generating soil, leaf or water test reports, you have the
choice of selecting one, all or several elements to list.
You may find, that the number of elements selected for printing,
may exceed the width of your printer, even in landscape print
mode. There is nothing we can do about this. Your solution to this
problem is to create more than one report. However, in most cases
this should not be a problem.
If you choose any items that you have not used (ie. There are no
records for the selected items) you will be informed before the
report is generated.
Copyright © Fairport Farm Software
Rainfall system Chapter 8 Page 117
Chapter 8
Rainfall
Chapter Contents
Getting started with the rainfall database
118
Entering rainfall data
118
Tools options
120
Points to millimetres conversion facility
120
Generate 'Long Term Averages' for the current station
121
Generate 'DECILE' ranges for current station
121
Set Growing Season Months
122
Importing rainfall data
122
Exporting rainfall data
122
Long term averages rainfall data
122
Decile ranges
123
Rainfall system reports and graphs
124
Relative frequency graph.
124
Decile ranges (versus selected year) graph
124
Rainfall system - overview
The rainfall database system is as versatile as it is powerful. Up-todate technology has been used to make your rainfall records come
to life for you in the graphical reports. Automatic calculations and
conversion facilities have been built in to make your task easier.
As you will find throughout PAM, this subject is well covered in the
on-line help system.
For step by step help while using PAM… use your on-line help.
Copyright © Fairport Farm Software
Page 118 Chapter 8 Rainfall system
Getting started with the rainfall database
Configuring your rainfall database
To set up your list of rainfall stations (if you have not done this
already)
1. Select Rainfall Stations on the main Configuration menu
2. Click Add.
3. Type in your rainfall station name
Entering rainfall data
Rainfall may be entered into this program as monthly totals or on a
daily totals basis.
In general, people will enter any existing records they have in old
rainfall charts or diaries into PAM as monthly totals and enter
current records on a daily basis. So you might start by setting up
the current year in the "Daily totals" tab, then when you get time
later, set up all your old records in the "Monthly totals" tab. All
graphs and statistical analysis of rainfall is done on a monthly
totals basis, so don’t think you need to enter all your historical
records on a daily basis to suit the program’s requirements.
To add a new rainfall station/year record
1. Click Add
2. Select either Daily totals or Monthly totals
3. Select your required Station by selecting from your list
4. Now enter the year from the keyboard - EG. type 1999.
If the station/year combination has already been set up before, you
are warned by the message
This Station/Year setup already exists!
Copyright © Fairport Farm Software
Rainfall system Chapter 8 Page 119
To enter or update daily rainfall data
1. Make sure you have the correct month on the screen
2. Move the cursor to the required date using the cursor keys
-ORjust click on the date with the left mouse button
4. Type in the value
To Delete a station/year record
Select Delete from the Tools menu.
Please note that ALL TWELVE MONTHS will be deleted if the year
is entered as daily totals. You can not delete a single month from
the system.
To move through the monthly records
Use the buttons either side the month name or click on the
required month on small month totals graph.
Monthly totals rainfall records
Rainfall may be entered into this program as monthly totals or on a
daily basis as the rainfall is measured.
In general people will enter any old rainfall records they have on
paper into PAM as monthly totals and enter current records on a
daily basis. So you might start by setting up the current year in the
"Daily totals rainfall records" screen, then when you get time later,
set up all your old records in the "Monthly totals" screen.
Please note
Rainfall entered as monthly totals can not be updated
in the daily totals data entry screen nor can data
entered on a daily totals basis be updated in the
monthly totals screen.
If data has been entered on a daily totals basis the following
message is displayed...
Copyright © Fairport Farm Software
Page 120 Chapter 8 Rainfall system
Data for this station/year combination has been entered
in the daily totals tab.
Tools options
Points to millimetres conversion facility
Use this to convert records entered in points to millimetres..
If you select Proceed the conversion will take place immediately.
Please note :
Only the currently displayed data will be converted. If
you are viewing a record, which was created by entering
the information in the daily totals screen, then ALL
DAILY recordings will be converted as well.
Millimetres to points conversion facility
This is identical to the Points to millimetres conversion facility
but in reverse. Please take care when using this facility. PAM does
not remember what units your rainfall is displayed in. All
calculations in PAM assume millimetres are in use.
Copyright © Fairport Farm Software
Rainfall system Chapter 8 Page 121
Generate 'Long Term Averages' for the current station
The long term averages for any rainfall station may be entered
directly into the Long Term Averages screen from either the Bureau
of Meteorology records for your area or from your own calculations.
However, if you consider that you have sufficient data in your
database you can generate the monthly averages and have them
automatically inserted into the Long-Term Averages screen for you.
Please Note : Only average monthly rainfall totals are
calculated. The average number of wet days is only
calculated if this information has been entered in the
monthly totals tab or if all data has been entered via
the Daily Totals tab.
Generate 'DECILE' ranges for current station
The decile ranges for any rainfall station may be entered directly
into the Decile Ranges tab. The data can be obtained from the
Bureau of Meteorology records for most areas.
However, if you consider that you have sufficient data in your
database you can generate the decile ranges and have them
automatically inserted into the Deciles screen for you. Sufficient
data is considered to be 65 years or more. The value of the results
of the calculation is determined by the number of years data you
have and also the accuracy of that data.
Please note : The current year will be excluded from the
calculations if the year is still in progress.
Please Note : The Decile Ranges system is of no use to
you unless you have a winter rainfall type season. The
Deciles tab will not be available to PAM users who have
set their Season to anything but a Winter Rainfall
(calendar year season) under Configuration / Customise
your PAM program…
Copyright © Fairport Farm Software
Page 122 Chapter 8 Rainfall system
Set Growing Season Months
As a result of PAM’s history, many users operate in the “dryland”
cropping regions of southern Australia. In those areas, the concept
of potential yield is used as a guide to management. The growing
season for winter crops is usually April – October. The potential
yield we are seeking here is traditionally the potential Wheat Yield
for the district (around 11 – 15 Kg/Ha/mm rainfall). The loss to
runoff or evaporation is usually in the order of 100mm and the
amount of included summer rainfall is around 30%. You need only
concern yourself with this feature if you are aware of its worth to
you as a guide. The calculated potential yield (in T/Ha) is displayed
in various places in PAM… the Paddock-Season View and on the
monthly totals and Deciles tab in the rainfall system.
Importing rainfall data
The rainfall data obtained from the Australian Bureau of
Meteorology for a rainfall recording station can be imported into
PAM using this option. You can also import Rainman data
For a detailed explanation of the data layout for generic rainfall
data importing, visit the Fairport web site / Support pages.
Exporting rainfall data
If you would like to export your data for someone else to use… this
is the way to do it. The data is exported in a slightly different
format to The Australian Bureau of Meteorology but can be
imported into PAM using the Import option described above.
Long term averages rainfall data
The long term averages for any rainfall station may be entered
directly into this screen from either the Bureau of Meteorology
records for your area or from your own calculations.
However, if you consider that you have sufficient data in your
database you can generate the monthly averages and have them
automatically inserted into the screen for you.
This facility is available under the Tools menu option when at the
Monthly totals rainfall records screen or at the Long-term averages
screen.
Copyright © Fairport Farm Software
Rainfall system Chapter 8 Page 123
To update an existing long term averages data record
Simply type the values directly into the fields displayed on the
Long-Term Averages tab.
Decile ranges
What are deciles or decile ranges?
McKeague & Perry (WA Department of Agriculture) state :
"Deciles are a method of describing rainfall probabilities for a
month, group of months or a year. Deciles, as the name
suggests, are obtained by dividing the historical rainfalls for the
period in question into tenths. The deciles so derived range from
1 to 9 and each has a corresponding rainfall total expressed in
millimetres. For example if a monthly or annual rainfall total of
"x" mm has a decile rating of 3 then less than "x" mm will be
received in 3 years out of ten.
Deciles can be summarised as follows :
Decile 9
9 in 10 seasons receive less than this amount
Decile 8
Decile 7
Decile 6
Decile 5
5 in 10 seasons receive less than (and more than) this
amount
Decile 4
Decile 3
Decile 2
Decile 1 1 in 10 seasons receive less than this amount.
The decile ranges for any rainfall station may be entered directly
into this screen from either the Bureau of Meteorology records for
your area or from your own calculations.
However, if you consider that you have sufficient data (65 years is
a recommended minimum) in your rainfall records database you
can generate the information and have it automatically inserted
into the screen for you.
This facility is available under the Tools menu option.
Copyright © Fairport Farm Software
Page 124 Chapter 8 Rainfall system
Rainfall system reports and graphs
Relative frequency graph.
The relative frequencies graphs show the relative chance or
probabilities of specific rainfall outcomes.
Using the historical data stored in your rainfall files, PAM
calculates the chances of getting various amounts of annual or
monthly rainfall.
The graphs available for plotting relative frequencies are
1. Annual totals
An example of this graph is shown above. The percentage
relative chances of nine annual rainfall ranges
2. Monthly totals for a selected month
Decile ranges (versus selected year) graph
This graph is a line graph showing the decile ranges 1,5 and 9 for a
selected rainfall recording station plotted against a selected year for
the same station.
The graph shows cumulative rainfall for the months April to
October.
The decile 1 line indicates the cumulative rainfall recorded for the
decile 1 range. In nine out of ten years, there's been more rain
than that.
The decile 9 line indicates the amount of cumulative rainfall for the
decile 9 range. In nine out of ten years there's been less than that
amount of rain.
Copyright © Fairport Farm Software
General Purpose Diary
Chapter 9 Page 125
Chapter 9
General Purpose Diary
Chapter Contents
Overview
Using your mouse to move around
Adding diary notes
Reminders
Setting up your list of reminder tags
Numeric data
Diary Reports
Search diary notes
Print selected day's notes
Reminder dates
Generate a monthly calendar
Graphing numeric data
126
126
127
127
127
127
128
128
128
128
128
129
Copyright © Fairport Farm Software
Page 126 Chapter 9 General Purpose Diary
Overview
The general purpose and reminder diary is a convenient place to
store notes for future reference and to remind you of future
appointments.
For your convenience the diary can be accessed while operating
any other part of the PAM program.
The diary has a reporting section allowing the searching of notes
for key words and even the graphing of numeric data.
Please note : You’ll find plenty of on-line help on how to work the
diary.
Figure 1
Using your mouse to move around
To move from day to day within a month simply click in the
box of required day.
•
To move up and down a month click on the spinner alongside
the month name at the top of the screen.
•
Copyright © Fairport Farm Software
General Purpose Diary
Chapter 9 Page 127
To move up and down a year, click on the spinner alongside
the year at the top of the screen.
•
•
•
TODAY can be selected by clicking on the Today button
To enter your diary text entry for the selected day simply click
anywhere in the diary notes box.
Adding diary notes
To add a diary note for a specific day (See c in Figure 1)
1.
2.
3.
Select the day on the calendar with the cursor keys or mouse
Click the mouse in the text box
Click Save to save your notes when done.
Reminders
Reminders (see d in figure 1) can be used to either forward plan or
to quickly look back in time for specific events. A typical use might
be to mark all public holidays.
Setting up your list of reminder tags
You can add reminders to your reminders list as you need them…
see the New… button or you can select lists maintenance options
on the menu.
Numeric data
You can enter a numeric value for a selected purpose on a day. See
e in figure 1. This data can be subsequently graphed.
Any data that can be recorded against a date can be recorded here.
For example you could set all or any of the following…. "Wheat
prices", “BHP Share prices”, “Maximum Temperature”, “Average
Humidity”
Copyright © Fairport Farm Software
Page 128 Chapter 9 General Purpose Diary
See on-line help for more details on the setting up of these lists.
Diary Reports
The diary has some very useful reporting features Search diary notes
You can search your diary notes between two selected dates for
any phrase. The report will display a list of all the dates where the
phrase was found.
To search diary notes
1. Enter the word or words to be searched into the box
2. Enter the start and ending dates for the search.
If there are any entries containing the searched words, they will be
displayed.
Print selected day's notes
You can print out any notes you may have entered between two
selected dates.
Enter the start and finish dates for the period required. You may
only want to print out one day. Just make the start and finish date
the same in this case.
Reminder dates
This report will list all dates that have reminders of your choice.
Steps
1. Select the reminders you want searched and listed.
2. Enter the start and finish date parameters.
- the report will be generated
Generate a monthly calendar
A calendar for the currently selected month can be printed out on
to an A4 sized sheet of paper. These are useful for monthly
planners as plenty of space is available in each day's box for
writing reminders.
Copyright © Fairport Farm Software
General Purpose Diary
Chapter 9 Page 129
Graphing numeric data
This allows you to plot numeric data graphs VS Dates. More than
one data type can be selected.
Steps
1.
2.
3.
4.
Select Graph numeric data
Select one or two numeric data items
Enter your start and ending dates for the period required.
The graph is plotted.
Copyright © Fairport Farm Software
Page 130 Chapter 9 General Purpose Diary
(this page is intentionally left blank)
Copyright © Fairport Farm Software
Reports - how to operate Chapter 10 Page 131
Chapter 10
Generating reports and graphs
Chapter contents
General information
Setting up reports
Report output menu options
Screen - print preview
Buttons
Zoom buttons
Page Navigation buttons
Printer Settings button
Print button
Export button
Export options
File - (text file)
CSV - (Comma Delimited File)
Setting up your list of Favourite Reports
Why do some reports take a long time to generate?
Data collection forms
132
132
133
133
133
133
133
133
133
133
134
134
134
134
135
135
Copyright © Fairport Farm Software
Page 132 Chapter 10 Reports - how to operate
General information
The number of reports and graphs available in PAM is vast. We
have never actually counted them but as the selection methods for
choosing the report content are so versatile, the combinations and
permutations are endless. Don't let that daunt you. This is great
news for you. You can tailor the reports in your own special ways.
It would be pointless to describe every possible report here in the
manual. We have taken care when creating the menu options to be
as descriptive as possible.
To help you understand the type of report each option will generate
PAM displays a short description. See above.
Setting up reports
In general the steps are :
Find the report you're looking for on the Reports menu or a sub
menu of the Reports menu.
PAM will display a report selection dialog.
Copyright © Fairport Farm Software
Reports - how to operate Chapter 10 Page 133
For help on operating the report selection dialogs, check on-line
help.
Each report has a small description about it in the bottom right
hand corner of the dialog box. To see the description for each
report, choose each report from the pick-list in the top left corner
of the dialog.
Report output menu options
Screen - print preview
Reports are always first displayed in the print preview screen.
To view your report prior to printing, or to save paper, or to just
check a report without intending to print it.
Buttons
Zoom buttons
These are used to zoom in and out on the report in the preview
screen to suit your needs.
Page Navigation buttons
To skip from page to page.
Printer Settings button
To change your printer or its settings.
Print button
You can print the report after it is previewed by clicking on the
printer button.
Export button
To send the report to a text file or to a “CSV” (Comma Delimited
File) click on the “Export” button…
Copyright © Fairport Farm Software
Page 134 Chapter 10 Reports - how to operate
Export options
File - (text file)
This option allows you to create a text file that can be later printed,
imported into a word processing program or sent on a floppy disk
to your consultant.
CSV - (Comma Delimited File)
This option allows you to create a file that can be read directly into
Microsoft Excel.
You will be asked to enter a filename. You will see a typical
Windows file save dialog. You can send your file to any folder or to
a floppy disk. PAM will give your filename an extension of "CSV".
To create a file on a floppy disk in drive A:, select drive A: from the
drive list.
Setting up your list of Favourite Reports
Having generated a report, if you would like to save the selected
report style to a list of favourites, simple click the Star button on
the report preview screen.
On saving the Favourite report, you have a chance to give it a
name of your choosing. Your list of favourite reports can be
accessed via Reports /Favourites.
Copyright © Fairport Farm Software
Reports - how to operate Chapter 10 Page 135
Why do some reports take a long time to generate?
We believe the reports in PAM are well worth waiting for, even if
some of them do take some time to generate!
PAM's database files are relatively small in relation to those used
in many other database systems used in other applications. In
many cases users may need to wait hours for a complicated report
to be generated, so in fact we are lucky that the sizes of the data
files in PAM are relatively small.
Data collection forms
To make it easier for you to gather the data for PAM, we have
provided you with the facility to print out pre-formatted data
collection forms.
The steps are :
1. Select the Data collection forms option on the Reports menu,
then choose the data collection form you require.
2. Print it out and carry it with you in the tractor or vehicle to
write down your events.
Copyright © Fairport Farm Software
Page 136 Chapter 10 Reports - how to operate
(this page left blank intentionally)
Copyright © Fairport Farm Software
Inventory Systems Chapter 11 Page 137
Chapter 11
The Inventory Systems
Chapter Contents
The Inventory of Consumables
Overview
Purchases
Pack Sizes
Using the purchase price as your default cost
Back-Date Costs
Adjust Inventory Levels
Delete
Transfer Location
Edit
Stock on hand
Transactions Report
Browse
Batch Numbers and Stock Levels
Inventory of Harvested Produce
Selling or Using Stored Produce
Sold Commercially
On Farm Crop Seed
On Farm Stock Feed
Adjust Inventory Levels
Stock on hand
Transactions Report
138
138
139
139
140
140
140
140
141
141
141
141
142
142
142
142
143
143
143
143
143
143
Copyright © Fairport Farm Software
Page 138 Chapter 11
Inventory Systems
The Inventory of Consumables
This system can accessed from the Data entry menu and also from
the Tools button menus on the Configuration/Consumables tab
pages for each consumable type.
Overview
Using the inventory is optional. You can begin to use it at any time
in the future if you choose. Furthermore, you may use it for some
consumables and not for others… the choice is yours.
You do not need maintain re-order points and you will not be
warned or denied access to data entry of consumables if your stock
levels run out.
Before you can use the stock on hand report for any consumable
you must record your first purchase or stock adjustment for that
consumable.
Copyright © Fairport Farm Software
Inventory Systems Chapter 11 Page 139
Purchases
To record a purchase, click Add Stock Item…
Select the item you’re purchasing from the list… or click New… to
add a new item on the fly
Now select a package size.
Pack Sizes
Pack sizes help you enter purchases and help PAM calculate the
price per purchase unit of consumables. PAM is only concerned
with the cost per purchase unit, not the pack sizes. It won’t matter
if you delete and re-create these pack sizes as they are not used in
reports or for any other purpose than making it easier for you enter
purchases of consumables.
If you purchase items in 20 Kg. Bags or 200 Litre drums, then you
can create these “pack sizes” in the pack sizes list. (You can set
this list up in advance via Configuration/Units of Measure and Pack
Sizes
Copyright © Fairport Farm Software
Page 140 Chapter 11
Inventory Systems
Having selected the pack size, select the number of packs you
purchased.
The price you used last for the consumable will be displayed… alter
this price accordingly if necessary.
The date will default to today… alter this if necessary.
If the consumable has a “Batch Number”… enter it
To keep track of the whereabouts of your consumables… pick the
location from the list (or create a new location on the fly).
Using the purchase price as your default cost
If you want PAM to use the purchase price of the inventory items
for costing applications on paddocks or mobs then make sure you
check that check box option. You may think this will create an
uneven cost situation between paddocks or mobs for gross margin
comparisons… Don’t worry! You can use the… average inventory
purchase costs option in the backdate costs facilities which you’ll
find under the Tools buttons on the various consumables tab
pages under Configuration/Consumables.
Back-Date Costs
…dialog under the Tools buttons on the various consumables tab
pages under Configuration/Consumables. This enables you to enter
your prices “as they come” during a season and allow PAM to level
them out later when you’ve finished the season!
Adjust Inventory Levels
If you do a physical stock take and discover that your stock levels
do not match those in PAM, use this option to correct the program.
Use a negative number to lower the stock level, a positive number
to increase it.
Use the price to alter the price if applicable.
Delete
You can delete an inventory entry whenever you like. Highlight the
entry you want to delete and click Delete.
Copyright © Fairport Farm Software
Inventory Systems Chapter 11 Page 141
Transfer Location
You can move an inventory item from one location to another.
Highlight the entry you want to move and click Transfer Location.
You can move all or some of the inventory.
Edit
This can be used to adjust stock levels and prices. Highlight an
entry, click Edit, make the changes.
Stock on hand
This is a report that can be generated as at any date… click the
Stock on Hand button, choose the date… view the report.
Stock on hand by batch number reporting will assist you in
knowing which batches are totally consumed. There is a special
“Tools” option that you can use to adjust the stock levels of batches
to zero when they are totally consumed.
Transactions Report
This report will list all stock movements between the two dates you
select. Like the stock on hand report, it will also produce a stock
balance report.
Copyright © Fairport Farm Software
Page 142 Chapter 11
Inventory Systems
Browse
This button will access the browse or spreadsheet view of the stock
on hand situation.
Batch Numbers and Stock Levels
Using the special facility under the “Tools” button you can
automatically zero the stock level of a Batch Number. This facility
is extremely useful when you know that a particular Batch has
run out but the inventory is still showing a stock on hand value
(even perhaps a negative stock on hand value).
To reduce the inventory of a Batch to zero, select the purchase
record on the main inventory screen and choose the special “Tools”
option.
This facility will also remove the zero-ed Batch Numbers from the
pick list of Batch Numbers when you are entering activies.
Inventory of Harvested Produce
You don’t need to anything to get this data system to work apart
from telling PAM which of your harvest delivery points are “on
farm” facilities. See Chapter 3, page 49.
As you deliver your harvested produce to your on farm delivery
points they will be displayed in this inventory.
Selling or Using Stored Produce
Select the stored produce on the grid and click this button when
you want to record the selling or use or any of the stored harvest.
PAM will allow you to enter the quantity sold or used, the price and
the date.
You then choose one of the following :
Copyright © Fairport Farm Software
Inventory Systems Chapter 11 Page 143
Sold Commercially
If you choose this item, you’ll be asked to supply the harvest
destination from the list of those harvest destinations that are not
“on-farm”.
On Farm Crop Seed
The price you enter will be inserted into the Seed/Plant price field
in the Crop Types and Associated lists screen. The price will be
used as the cost to your cropping enterprise the next time you use
that seed for planting.
On Farm Stock Feed
If you choose this item, you will then need to select the name used
for this crop type and variety in the Supplementary Feeds
consumables list. For example, you may be calling the Crop Type /
Variety : “Oats” / “McIntyre” a name like “Feed Oats” in the
consumables table.
The stock feed will then be inserted into the Inventory of
Consumables as a stock feed purchase.
Adjust Inventory Levels
If you do a physical stock take and discover that your stock levels
do not match those in PAM, use this option to correct the program.
Use a negative number to lower the stock level, a positive number
to increase it.
Use the price to alter the price if applicable. PAM will always show
the maximum price of all transactions.
Stock on hand
This is a report that can be generated as at today’s date only and
will be a report version of the data displayed on the grid… click the
Stock on Hand button … view the report.
Transactions Report
This report will list all stock movements between the two dates you
select. Like the stock on hand report, it will also produce a stock
balance report.
Copyright © Fairport Farm Software
Page 144 Chapter 11
Inventory Systems
(this page is intentionally blank)
Copyright © Fairport Farm Software
QA Records Chapter 12 Page 145
Chapter 12
Quality Assurance Records
Chapter Contents
QA Records
Overview
Grain Treatment Records
Quality Assurance Reports
146
146
147
148
Copyright © Fairport Farm Software
Page 146 Chapter 12
QA Records
QA Records
This system can accessed from the Data entry / Quality Assurance
Records …
Overview
PAM’s production recording systems enable you to keep good
production records for your QA compliance. The inventory system
enables you to keep track of chemicals and other consumables and
their batch numbers, manufacturers, expiry dates etc.
In addition to these records PAM QA Plus and PAM Ultracrop
enable you to maintain other QA compliance records like Corrective
Action Records, Training Records and Approved Supplier Records.
Using these data entry forms is quite simple. Select the required
option. Start entering a new record by either clicking the
Or pressing the Down Arrow on your keyboard.
You will notice that on each these QA Records data entry screens is
a Report button. The reports can be filtered by date span and for
other parameters.
Copyright © Fairport Farm Software
QA Records Chapter 12 Page 147
Grain Treatment Records
To record treatments of stored grain or harvest produce, choose
Quality Assurance Records / Grain Storage & Treatment Records …
Select the required grain storage facility and enter the treatment
date and chemicals used. The used chemicals will be deducted
from your inventory of consumables (if you are using it).
Copyright © Fairport Farm Software
Page 148 Chapter 12
QA Records
Quality Assurance Reports
To find QA specific reports look under Reports / Quality Assurance
Reports. Of course many of the other standard report will be of use
to you when you have a QA audit.
Copyright © Fairport Farm Software
Browsing Data and User Defined Reports Chapter 13 Page 149
Chapter 13
The Browse System and User Defined
Reports
Chapter Contents
Browse any dataset…
The Buttons
Column “Mode” Buttons
Other Buttons
Why – Browse any dataset?
To Create a User Defined Report
The filter dialog features
Fields
Field Value(s)
Search Type
By Value / By Range
View Summary
All / Searched
Export Data
149
150
150
151
151
151
152
152
152
153
153
153
153
154
Browse any dataset…
At any time you can access any file in the PAM system via the
<F4> hot key facility Utilities / Browse any dataset. Or … the
toolbar button shown above
To select a table for viewing
Simply click on the table you require and click Browse
Browsing a data table means allows you to view the data in a
spreadsheet layout. All fields and all records are available.
Copyright © Fairport Farm Software
Page 150 Chapter 13
Browsing Data and User Defined Reports
The Buttons
Column “Mode” Buttons
Select Print Columns : The column titles become active buttons.
By clicking on the title of a column you will select that column for
printing. It will change colour so you can easily see the columns
chosen.
Set Column Sort Order : The data in each column can be sorted
in either ascending or descending order to suit you requirements.
Click on a column title while this column “mode” is selected. The
sort order menu will pop up… choose your sort order.
Drag Columns Left or Right : To arrange your columns in your
preferred order across the screen. Click on the title of a column
and while holding down your mouse button, drag it left or right.
Copyright © Fairport Farm Software
Browsing Data and User Defined Reports Chapter 13 Page 151
Other Buttons
Freeze Columns : Will lock the left most column and thereafter the
next leftmost column. This enables you to hold those locked
columns in view while panning to the right.
UnFreeze Columns : Unlocks the frozen columns.
Filter : Will display the filter dialog which enables you to filter out
unwanted records … more on this later.
Print Preview : To preview the selected columns in the print
previewer.
Print : To Print selected columns.
Why – Browse any dataset?
When you become familiar with this option it will become very
useful to you.
To be able to view all the records in your database in a spreadsheet
or browse type view is very revealing and is a good way of picking
up any mistakes you may have made when entering the data. In
some datasets you will see fields that can be edited whilst in this
system.
Editable fields are shown in bold type.
See the previous Chapter… User Defined Reports for more
information on options available to you in the Browse system.
To Create a User Defined Report
1. Select the Browse any dataset option from the Utilities menu or
from any of the Paddock or Livestock Activities Diaries or the
Paddock Season screen.
2. Select the data view you require to construct your report.
3. When it is displayed on your screen…
4. Select the columns for printing by choosing that “Column Mode”
You may need to move some columns right or left to suit your
needs… choose the “Move Columns” mode to do that, then
holding down your left mouse button, drag the columns to your
preferred position
5. To sort your listing into your preferred order, select the “Sort
Columns” mode and click on the column titles with your left
mouse… a pop-up menu will appear giving you the sort options.
Copyright © Fairport Farm Software
Page 152 Chapter 13
Browsing Data and User Defined Reports
6. You may require the data to be filtered… to exclude unwanted
rows… for example you may only want to view one farm, one
year, on chemical….
Click the Filter button to enable the filter system…
After you click OK to leave the filter dialog, the data will be
immediately filtered to your requirements.
7. All that’s left to do is to print the report…. Or preview it then
print it.
The filter dialog features
Fields
This is the list of column headings in the current data set.
To set a filter on a field, click on it.
Field Value(s)
Having selected your filter field, type in a value to create the filter
condition.
Let’s say we have 4 farms,
Alpha
Beta
Delta
Gamma
Copyright © Fairport Farm Software
Browsing Data and User Defined Reports Chapter 13 Page 153
We only want to look at data from the Delta farm… so we type “D”
in the field value. Just “D” is enough because our farms all start
with unique letters… if they didn’t we would need to type more
than “D”.
Search Type
If we can get away with using the first or the first few letters of our
farm name, then the option “Partial match at Beginning” will work
well.
If we need to type the whole word to ensure the program gets the
right filter condition… use “Exact match”
If the letters we type occur somewhere other than the beginning of
the text in the field values… use “Partial match anywhere”
By Value / By Range
If we want to set a range for our filter condition, use the “By Range”
option : We then see the “Starting Range”, “Ending Range”
options… type in your low and high range values.
Eg. If you want your data set to span from 1997 to 1999, type
those seasons in the boxes.
View Summary
When you have set up one or more field conditions, click View
Summary to see the conditions you have set.
All / Searched
As you select fields for setting filter conditions, they become
members of the “Searched” list.
The “All” list will always display all fields (column headings) in the
data set list.
Copyright © Fairport Farm Software
Page 154 Chapter 13
Browsing Data and User Defined Reports
Export Data
The Export button will display the dialog shown above. Use this
facility to export PAM data to a spreadsheet program or another
database program.
The steps:
1
2
3
4
5
Select the data export style… comma separated (which is
ideal for Microsoft Excel), space or tab delimited. It is a
recommended that you include column headings and if
there is a chance that your data might contain commas,
use the ”Wrap text values in quotes” option.
Choose names for your column headings … do nothing if
you are satisfied with PAM’s default names.
Choose the file name and folder for your exported file
Tick the “Email Export File?” if that is your requirement.
Click on the Export button.
Copyright © Fairport Farm Software
Utilities
Chapter 14 Page 155
Chapter 14
Utilities
Chapter contents
General purpose diary
Numeric Calculator
Importing a value
Exporting the result
Browse Any Dataset
Farm Filter
What does the farm filter do?
How to set the farm filter
When is the farm filter active?
Farm Filter status
Machinery Costs Calculator
Back up and restore and Transfer data files
Backing up
Restoring data files
What can go wrong?
Restoring specific files
Import Configuration Lists
Export Configuration Lists
Export Crop QA Data
Data Merging
Database Maintenance
Merge Configuration List Items
Import Data from an External Source
Exchange Inventory Records with Accounting Software
156
156
156
156
156
157
157
157
157
158
158
159
160
161
161
161
162
163
163
163
163
164
165
165
Copyright © Fairport Farm Software
Page 156 Chapter 14
Utilities
General purpose diary
See Chapter 9.
We thought the General Purpose Diary was worthy of a chapter of
its own!
Numeric Calculator
Overview
The numeric calculator is used like your normal desktop
calculator. It can be called from the main menu in PAM using
<F3>. When you want to get it off your screen, minimise it… you
can then call it up whenever you want.
How to access and operate the numeric calculator
The calculator is operated by using the number keys either on your
numeric keypad or across the top of your keyboard.
It is recommended that you use the numeric keypad, as all the
"operator" keys are located there as well.
Importing a value
If you were editing a numeric field when you accessed the
calculator, you can import the value from that field by highlighting
the value in the field, pressing Ctrl+C (that is the standard
Windows Copy technique) then click on the calculator and press
Ctrl+V.
Exporting the result
To copy the value from the calculator to your data, follow the same
steps as above… Ctrl+C to copy, Ctrl+V to paste.
Browse Any Dataset
See Chapter 12.
Copyright © Fairport Farm Software
Utilities
Chapter 14 Page 157
Farm Filter
If you are running more than one farm, the farm filter can be used
to run PAM in single farm mode.
You can set up as many farms as you like in PAM, however all the
data is stored in one set of data files. Therefore, if you want to run
reports for a single property, or have your pick list of paddocks
only display the paddocks of a single farm, you will need to use the
farm filter.
What does the farm filter do?
The farm filter is used when pick-lists are created to filter out any
paddocks, which do not belong to the currently active farm.
In the Paddock-Year screen and in the Paddock Activities Diary,
paddocks that do not belong to the active farm are not displayed.
Whenever reports are generated, paddocks that do not belong to
the active farm are not included in the selected reports.
How to set the farm filter
The farm filter system can be used to select one or more farms and
exclude one or more farms from the current focus. This provides an
extremely flexible filtering system for those who have more than
two properties.
At most times you can see which farm is currently "active" as it will
be displayed in the top right hand corner of your screen.
When is the farm filter active?
Once set, the farm filter is active throughout the program with the
exception of the rainfall system and the General Purpose Diary.
Should I use the farm filter if I only have one farm?
No. There is no point in setting the farm filter if you only have one
farm.
Copyright © Fairport Farm Software
Page 158 Chapter 14
Utilities
Farm Filter status
The status bar of your main screen will display the farms that in
the current filter list… those that are excluded from the current
filter won’t be shown
If I have more than one farm, when should I and when shouldn't I set
the farm filter?
There is no requirement for the farm filter to be set to make the
program run correctly. It is provided for the convenience of those
who want it.
Machinery Costs Calculator
Overview
The machinery costs calculation screen is provided to help you
more accurately calculate the operating costs of your machinery.
The machinery cost calculator can be used to determine the costs
of each machine and tractor independently.
How to access and operate the machinery costs screen
This calculator screen can be called up from the main menu at any
time using <Alt+F3>.
Each machine you add (or have added) in the machinery list is
represented in the list here
To edit information, simply click on the fields with your mouse and
start typing. If you want to use the calculated costs on this screen
to update your machinery operating costs, use the appropriate
radio buttons on the top section of the screen.
To Print a record
Click on the Print button
Printing all records
Click on the Browse button and use the print facilities on that
screen.
Copyright © Fairport Farm Software
Utilities
Chapter 14 Page 159
This machinery cost calculator can also be view via the Tools
button menu options under Configuration / Machinery, Manual
Tasks and Staff…
Back up and restore and Transfer data files
It is absolutely imperative that you regularly back-up your
database files to a floppy disk.
PAM will ask you if you want to back-up the data files each time
you exit out of the program even if you have already backed up
using the Utilities menu.
PAM has an "intelligent" back-up and restore procedure, which will
inform you as to the number of disks needed.
You may back-up (and restore) data files to (or from) a floppy disk
and/or your hard disk. Please back up to floppy disks AT LEAST.
The hard disk back-up is recommended as well, as it gives you a
fast restore facility should you make a bad mistake or should a
data file become corrupted and not easily recoverable.
It is also advisable to make a series of floppy disk back-ups.
Copyright © Fairport Farm Software
Page 160 Chapter 14
Utilities
TIP
Have one back-up disk (or disks if more than one is
required) for each month. Mark them "JANUARY",
"FEBRUARY", "MARCH", etc.
ALSO keep a "CURRENT BACK-UP" disk (or set of disks)
to use as your daily back-up set.
At the end of each month make a back up to the disk
marked with the relevant month (ie. the month just
ended).
This method will ensure that you never get more than a month
behind should a disaster strike and your current back-up disk
becomes corrupted.
Keep your end-of-month disks at a separate location in case of
theft or fire.
Backing up
Steps
1. Click on the data sets you want to back up.
2. Choose the
destination drive
for the backup
file.
3. Specify the
filename ... It is
recommended
that you don't
change the file name. It is a specially constructed filename made
up of the date and time of your back up.
4. If you are backing up to a floppy disk, choose to delete any
existing files from that diskette before writing the new back up file
to it.
5. The system can check to see if your back up file will restore
successfully in the future... Click on the "Confirm Backup File was
correctly written to media?" option to enable this feature.
6. Click on the "Backup" button to proceed.
Copyright © Fairport Farm Software
Utilities
Chapter 14 Page 161
Restoring data files
Unless you are in a group situation where you are sharing your
data with others, this process is used only in cases of emergency or
if you have made major errors in data entry and can not recover
the situation or if for some reason your data has become corrupted
beyond recovery.
The most convenient way to restore data is to have used the HARD
DISK back-up facility - and to simply restore from the hard disk
directory.
Please note :
You must back up to a floppy disk as well because you
may have a hard disk crash and lose both your data
files and your back-up files on the hard disk.
If restoring from a floppy disk, you will be prompted for disk #1.
If more than one disk was used to back up the data, you will be
prompted for each disk in turn.
PAM will check each disk before restoring the data. Each disk has
on it a unique identification code.
What can go wrong?
If you lose one of a set of back-up disks, PAM will not be able to
proceed past the point of the missing disk. Each disk has a unique
identifier and the restore sequence must follow the back-up
sequence. This will be quite critical when a data file is split across
two disks.
Should PAM for some reason lose track of the sequence of disks
there are ways to rectify the situation. If you ever find yourself in
this situation, please contact your dealer for help.
Restoring specific files
When you need to restore files, you have the opportunity to select
specific files (or groups of files).
Copyright © Fairport Farm Software
Page 162 Chapter 14
Utilities
Why?
There are two reasons why we have provided this facility in PAM.
1. For those people who have a site license and are sharing the
data between two or more computers. In some cases one
partner enters the livestock data while another enters cropping
data. By restoring specific data, they avoid overwriting their
work.
2. In the circumstance when you discover belatedly that a file has
become corrupted and you have in the meantime done
considerable amounts of data entry in another area of the
program. You can avoid overwriting the work you have been
doing by restoring (and overwriting) just the data that has
become corrupted.
To restore specific data, select the data set(s) with your mouse or
<Space bar>.
Import Configuration Lists
Use this option to set up your lists using the PAM lists that have
been set up by another PAM user. Setting up lists can be very time
consuming. This facility can save you that time. Use an exported
lists file from a friend or from your dealer.
Copyright © Fairport Farm Software
Utilities
Chapter 14 Page 163
Step 1, locate the List file.
Step 2, choose the lists to import.
Step 3, Choose the import options…
Import missing list items (This will update your lists to include
those items you don’t have)
Update costs on existing items (This will update items other than
the main list item … Eg. prices and associated information)
So … if you only want to update the prices and associated
information in your lists from the incoming data file, tick only the
bottom option.
Export Configuration Lists
Use this option to export your lists (crops, varieties, chemicals,
fertilisers etc) to another PAM user.
Export Crop QA Data
Use this option to export data related to your cropping activities for
user selected Season / Farm / Paddock / Crops. Special PAM
MultiClient programs exist which can store cropping QA data for
crop QA and traceability purposes.
Data Merging
You can purchase a special add-on facility for your PAM program
to enable you to merge data with one or more other PAM user. The
situations where this is applicable are where 2 or more households
run the farming operation and want to enter data simultaneously
on separate computers which are not networked. There are special
help notes available for these facilities which can be downloaded
from the Fairport web site / Support pages.
Database Maintenance
Use these options to
Copyright © Fairport Farm Software
Page 164 Chapter 14
Utilities
♦ Compact and Repair your database… If you have deleted many
records this option will compact your file and remove deleted
records
♦ Validate database structure…use this if you suspect your data
is behaving strangely or you see data related errors that were
not previously there. PAM performs this on start-up in any
case… but you can re-do it using this option!
♦ Update Paddock and Crop Financials… use this to rebuild the
total income and costs of all paddock and crop related activities.
These financials can be seen in the Season Costs screen from
the Tools options on the Paddock-Season screen.
♦ Update Livestock Activities Costs… use this to rebuild the total
costs of livestock related activities.
Merge Configuration List Items
This facility has been
provided to enable you
to clean up your lists.
Examples of when you
might use this facility:
If you have several
chemicals in your list
that are effectively the
same thing, or if you
have several weeds
that are the same thing
but have been entered
using different names.
All lists in PAM have
been catered for.
Copyright © Fairport Farm Software
Utilities
Chapter 14 Page 165
Import Data from an External Source
This menu option at the time of writing has only one sub menu
option … Harvest Deliveries.
Harvest deliveries data for your crops can be imported from harvest
acquirers. At the time of writing this can be done in Western
Australia via CBH’s Loadnet system. South Australia’s bulk
handling authority (Ausbulk) is also working on an data export
system that will feed into PAM.
Cotton Ginning Results can be imported into PAM via the Cotton
Ginning Results screen which appears automatically when you
choose cotton as one of your crop types.
Exchange Inventory Records with Accounting
Software
Fairport has been working with AgData to facilitate the exchange of
consumables inventory data. This will enable you to enter your
purchases records once (either in PAM Or Phoenix) and the data
will be exchanged between the two programs.
Our advice is that you should always enter
purchase records in PAM if you are using Batch
Numbers as Phoenix doesn’t support Batch
Numbers in its inventory system (at the time of
writing)).
Special help notes for this facility will be available from the
Fairport web site / Support pages.
Copyright © Fairport Farm Software
Page 166 Chapter 14
Utilities
(this page is intentionally blank)
Copyright © Fairport Farm Software
Trouble shooting
Chapter 15 Page 167
Chapter 15
Trouble shooting
Chapter contents
Trouble !
Data trouble
Software trouble - The error trapping system
PAM can't find or open a file
PAM Serial Number problems
What if you overrun your 20 run times?
What if you want to change your trading name?
Checking data files for possible structure changes
I want a fresh start!
168
168
168
169
169
169
170
170
170
Copyright © Fairport Farm Software
Page 168 Chapter 15
Trouble shooting
Trouble !
Trouble can happen (and according to Murphy's Law it will!). In
computing trouble can occur on three fronts.
• Hardware
• Software
• Data
Often it is difficult to tell where the fault lies. Software depends on
the hardware to be suitable and capable of performing the tasks
demanded of it. The data (your data files) depend on both the
software (PAM) and the hardware (your computer and printer) to
perform the tasks demanded of them.
Data trouble
On the data front, your best defense against trouble is to have a
good backing up strategy in place. Follow the suggested system in
the previous Chapter.
PAM provides you with a backing-up system to make this possible.
Read the section in the previous Chapter regarding "Database
Maintenance”… These are trouble-shooting facilities.
If for any reason PAM refuses to run due to perhaps corrupt
tables, you can try running the first option on the Database
Maintenance menu.
Software trouble - The error trapping system
Although this program has been extensively tested, there may still
be some bugs lurking in dark corners, which may cause you
problems. As this system was put together by humans (and "to err
is human") it is quite possible we may have missed some problems.
The error trapping system built into this software is designed to
trap any errors we have missed and to allow you to proceed with
your work as much as possible without impeding you. However, if
you find an error in the program that causes the error trapping
Copyright © Fairport Farm Software
Trouble shooting
Chapter 15 Page 169
screen to appear, it is advisable to firstly, print the error message
out on your printer (there is a "Print" option on the error trapping
system dialog box) and send it via your dealer to Fairport
Technologies, then choose "Retry" to see if PAM can recover from
the error. If not select "Ignore" to restart PAM from the top.
Depending upon circumstances, the error trapping system may
have an option - "Default"; try that first if it is an option.
Selecting "Quit" will drop you straight out of the program.
When an error occurs it (the error) can cause memory problems
and consequently further error reports. If you are experiencing
multiple errors, it is advisable not to proceed, but to exit from PAM
and re-start it.
PAM can't find or open a file
If PAM reports that it can't find a file or create a file during the
running of the program, you may need to go out of the program
and re-start. If this happens again and you are unsure of either
a) which file it can't find or can't create or ....
b) how to locate files on your hard disk
you should contact your dealer and seek assistance.
PAM Serial Number problems
The customer serial number is a 9-digit number, which is
generated by a mathematical formula, based on your trading name
and a special unique number generated by your computer. If you
ever upgrade the Windows version on your computer, a new serial
number may be required.
What if you overrun your 20 run times?
You will still be able to access the program registration system. The
options to Print your registration form and to Enter your serial
number are always available to you when you start PAM regardless
if you can no longer run the program due to the 20 runtimes
having expired.
Copyright © Fairport Farm Software
Page 170 Chapter 15
Trouble shooting
What if you want to change your trading name?
You can change your trading name by clicking on User details
when you display the “About” dialog…. You’ll find this under the
Help menu on the main APM screen.
Checking data files for possible structure changes
PAM performs this check every time it starts and every time you
access a budget database or restore an old database.
If you want to perform this task manually, use Utilities / Database
Maintenance / Validate database structure.
I want a fresh start!
If you delete the file PAM.MDB from the PAM folder via Windows
Explorer, PAM will not be able to run. However, this is the best
way to have a fresh start.
You will need to re-install the program from the CD or disks.
Copyright © Fairport Farm Software
Index
20 Kg. Bags 139
200 Litre drums 139
Activity Filter
76
Paddock Activities Diary 74
Paddock Season Screen 101
Add Activities Wizard
Areas Selection
78
Creating Area (Paddock)
Groups
79
Dates and Seasons
86
Paddock Activties Diary 62
Add Activity Wizard
81
Filter out unwanted activities
81
Adding a new rainfall
station/year
118
Adding a Paddock-Year record
102
Adding diary notes
127
Adding Paddock Activities
Dates and Seasons
86
Adjuvants 50
Any operation
Machinery 95
Application Units 49
Applying chemicals
80
Applying fertilisers
80
arable area 38
changing
38
Arable area 36
Area Selection
Paddock Activities Diary 78
Area Selection Page
82
Areas Selection Wizard page
64
ARROW keys
9
ASCII text format 11
associated operations 81
averaging input costs
44
Back-date Costs 43
Back-Date Costs 140
Backdate income 43
Back-up
159
Band %
Chemical applications 90
Block Activities Diary
Data entry grids 65
Budgeting 158
CA Codes 40
Calculator
Importing a value 156
Change Activities
Date/Season
Paddock Activities Diary 75
Paddock-Season Screen 101
Changing a Paddock's name
37
changing the arable area
38
Chemical Application
89
Chemical applications
Band %
90
Configuration % 90
Chemical Applications
Entering Total Units
93
Water Percentage 93
Chemical Spray Order Form
76
Chemical Spraying Plans
76
Chemical types
50
Chemicals
Copyright © Fairport Farm Software
Growth stages
90
Growth stages, spraying entry
90
Plant vigour 90
Plant vigour, spraying entry
90
Spraying conditions
89
To create a mix
92
Water Rate 89
Chemicals List
Special considrations
49
Clear Selected
85
Close Button
Add Activities Wizard
64,
79
Comparative Analysis Codes
(CA Codes) 39
Configuration
Backdating costs 43
General information
43
Configuration Menu Options
30
consulting group members
40
Consumable costs
backdating 43
Consumables
Adjust Inventory Levels 140
Application units 49
Back-Date Costs 140
Include/Excluse in current
lists
49
Inventory 49
Purchase units
49
Stock on hand
141
Copy Activities
Paddock Activities Diary 74
Paddock-Season Screen 101
Copy option
Paddock Activities Diary 100
Cost fluctuations
Smooth using back-date costs
44
Cost Per Hour
Machinery costing 53
Costing machinery
53
Costs
backdating 43
General Overheads
104
Non-Production Costs 104
Creating Management Groups
78
Crop
Harvest Units
32
Insurance 103
Name
32
Planting Units
32
Special Harvest Units 32
Type
32
Crop insurance 103
Crop locations and layouts
Tree and Vine crops
87
crop monitoring records 80
Crop Seed 143
Crop Types and Associated
Lists and Settings 45
Crop Varieties
Leaf Test Guides 48
Monitoring Guides
48
Cropped Areas list
Add Paddock Activities 78
Cropping “Season”
40
Cropping Season Start Month
40
Crops
Planting Units
46
Re-seeding or Re-planting
87
Undersowing
87
CURSOR keys
9
Copyright © Fairport Farm Software
Customising your nutrients
list
51
Data
Back-uo and restore
159
Data collection form
80
Data collection forms
135
Data entry - Tips and advice
23
Data entry grids
Block Activities Diary
65
Data entry using a map view
82
Data Export 154
Data file compatibility 11
Data trouble
168
Database Maintenance 163
Compact and repair database
163
Update paddock and crop
financials 163
Validate data structures 163
Date field 25
Deciles
123
default Hectares Per Hour
53
Defoliants 50
Delete a Paddock-Season
Record
102
delete an item from your lists
43
Deleting a Paddock-Season
record
103
Deleting a station/year record
119
Deselect all areas 85
Dialog boxes
18
Diary
125–26
Adding diary notes
127
Generate a monthly calendar
128
Print selected day's notes
128
Search diary notes
128
Using the mouse to move
around
126
Display as List
83
Draw sub areas 83
DSE grazing days 98
Edit
Paddock Activities Diary 74
Edit a Paddock's name 37
Email Connection Settings
60
Entering harvest deliveries
95
Entering machinery details
95
Entering rainfall data
119
Entering Total Units
Chemical Applications 93
Error trapping system 10
Error traps 25
excluding items from lists
43
Exit from PAM with Alt+F4
20
Export Data for a Consultant’s
MuliClient Version
162,
163
Export Data to Spreadsheet
154
Fairport Club membership
10
Farm filter
How to set the farm filter
157
What does the farm filter do?
157
When is the farm filter active?
157
Copyright © Fairport Farm Software
Farm Filter 157
Paddock Activities Diary 99
Farms and Paddock list 34
Favourite Reports 134
Fertiliser Application
93
Fertiliser Applications
Steps
93
Fertiliser mixes 92
Fertiliser Special Blends
Wizard
94
Fertilisers
Special Blends Wizard 94
To create a mix
92
To create a special blend
94
Fertliser Blends 94
Files (Menu)20
Filter Option
Paddock Activities Diary 99
Filter out unwanted activities
81
Finished operations?
Add Activities Wizard
64,
79
Fodder production
97
Fodder Production
Locked-Up Date 97
Stocking Rate Forgone 97
Food on offer
114
Fungicides 50
General overheads
104
General Paddock Notes 74
General Program Settings
39
General Purpose Diary See
Diary, See Diary
Generate Test Items
Laboratory Tests 115
Growth stage
Spraying entry
90
Growth stages
90
Hard disk directory
13
Hardware 11
Printers
11
Screens
11
Harvest
How to enter
95
Harvest Deliveries
On farm storage 59
Harvest Destinations List
58
Harvest Income
Backdating 43
Harvest units
How to use 96
Harvest Units
46
Harvested Produce
Selling or Using Stored
Produce
142
Harvesting 80
Hay and Fodder production
Hay production 97
Hay production
Paddock Activities Diary 97
Hectares Per Hour
Default setting
53
Herbicide resistance
monitoring 49
Herbicides 50
Hide Paddock List 84
Horticultural crops
Perennials 87
Horticutural crops
crop locations and layouts
87
How to enter
Spray Targets
91
input costs
price fluctuations 44
Input costs
Copyright © Fairport Farm Software
backdating 43
Smooth costs using back-date
costs
44
Insecticides 50
Installation 13
Introduction
1
In-valid date
25
inventory
purchase costs
44
Inventory
Adjust Inventory Levels 140
Back-Date Costs 140
Crop Seed 143
Locations or storage
59
On Farm Crop Seed
143
Purchases 139
Selling or Using Stored
Produce
142
Stock Feed 143
Stock on hand
141
Stock on Hand
139
Suppliers and Manufacturers
59
Trasnactions Report
141
inventory system 41, 44
Irrigation
Dams, Lakes, RIvers, Bores...
57
from bores, lakes, rivers,
dams
57
Output per Hour 57
Setting up water sources
57
What PAM needs to work with
57
Job Notes 74
Laboratory test results 114
laboratory tests 55
Laboratory Tests
Generate Test Items
115
Site Number
115
Leaf Test Guides 48
leaf tests
55
Leaf tests
Growth stage
116
Link all areas as one job 85
Locked-Up Date 97
Paddock Activities Diary 97
Lucerne
88
Machinery
Any operation
95
Associating with operations
95
Calculating costs 158
To create a mix
92
Machinery combinations
92
Machinery Costs Calculator
158
Machinery usage 80
Main Crop 87
Main menu system
Configuration
21
Files
20
Help
22
MultiClient 21
Reports
21
Utilities
21
Main screen
Status bar 99
Management Groups
78,
79, 85
Manual tasks
54
map view for area selection
82
Master Lists45
Maximum Workable area
36
Memory problems 169
Menus
Copyright © Fairport Farm Software
Horizontal separator lines in
menus
17
Hot letter 16
Menu highlight bar
16
Menu options
16
Pop-up menus
17
Pull-down menus 17
Selecting menu options 16
Unavailable menu options
17
What they are and how to
operate them
16
Millimetres to points
conversion facility 120
Monitoring
Pasture
114
Monitoring Guides
Crop setup 48
Monthly calendar 128
Monthly totals rainfall records
119
Move current Paddock to
another farm
37
Moving through the monthly
records
119
MultiClient 39
Murphy's Law
168
New Special Blend
94
No data displayed
Paddock Activities Diary 99
Non-Horticutural Perennial
Crops
88
Non-Production costs and
income
104
Notes (entering and viewing)
24
Notes boxes 24, 38, 55
In lists screens
55
Notes Editing
24
Numeric Calculator
156
Nutrient Audit report and
nutrient information
51
Nutrient Tests
113
Nutrients in chemical tank
mixes
50
nutrients that can be applied
as a liquid 50
On Farm Crop Seed
143
On farm storage of harvest
59
on-line help 10
Operations
Associating Machinery 95
Other costs and income 104
Output files 11
Overheads
Non-Production Costs 104
Pack Sizes 41
Packages In Use
User Defined
41
Paddock
Income and costs data 103
Paddock Activities
Dates and Seasons
86
Paddock Activities Dairy
What is a JOB
62, 76
Paddock Activities Diary
Copy option 100
Paddock Activities Diary
…to Season option
98
Activity Filter
74
Change Activities
Date/Season
75
Copy Activities
74
Creating Area Groups 79
Farm Filter 99
Filter option99
Filter out unwanted activities
81
Harvest, how to enter
95
Copyright © Fairport Farm Software
Hay production 97
Locked-Up Date 97
Management Groups
79
No data displayed 99
Paddock Groups 79
Problems with the data.. 99
Rebuild diary
75
Screen layout
73
Show areas units columns
75
Show Plan Numbers
75
paddock arable area
38
Paddock Diary Report. 74
Paddock names
Changing 37
Sort order 37
Paddock notes
103
Paddock Number 36
Paddock Plans for the Current
Date Report 76
Paddock record 37
Paddock Season
Activity Filter
101
Paddock Season Notes 74
Paddock Sort Order
35
Paddock statistics fields
explained 36
Paddocks
Deleting Paddocks
38
Entering notes
38
Rainfall stations 59
Paddock-Season
Change Activities
Date/Season
101
Copy Activities
101
Paddock-Season screen
Deleting a record 103
Printing a Paddock summary
report
103
Total costs 103
Paddock-Season Screen
Browse records
101
Delete the record 102
Season Costs
101
Show Graph of Season 101
Paddock-Year screen
Set up new 102
Page One
Add Activities Wizard
62
Page Three and Beyond
Add Activities Wizard
64,
79
Page Two
Add Activities Wizard
62
PAM can't find or open a file
169
Pasture
Monitoring 114
Pasture Composition and
Quality
114
Perennial Crops 87
Lucerne
88
Non-Horticultural 88
Pulling out, replanting 88
Sugar Cane 88
Pest Growth Stages
60
Pests…
Button (Targets) 91
petiole tests 55
Pick lists
18
Plant vigour 90
Spraying entry
90
Planting
80
Planting Units
46
Points to millimetres
conversion facility 120
Pop-up menus
17
Price fluctuations
Smooth using back-date costs
44
Copyright © Fairport Farm Software
Printer
11
Printing the Paddock-Season
details
103
Problems with the data
Paddock Activities Diary 99
Program operating speed
11
Pull-down menus 17
Pumps and water sources list
57
Purchase Units
49
Purchasing items
Inventory 139
Rainfall
118
Points
120
Tools
120
Rainfall reports
Decile ranges (versus selected
year) graph 124
Rainfall stations 59
Rebuild Diary
Paddock Activities Diary 75
Regulators 50
Reminder tagged dates 128
Reminder Tags
Numeric entries with
127
Reminders 127
report on management group
activities
86
Reports
Favourites 134
Re-Seeding 87
Save as Group
79
Screen - print preview 133
Screen layout
Paddock Activities Diary 73
Screen settings
31
Schemes
31
Screen Settings 30
Screen type 11
Search diary notes
128
Season Costs
101
Season Start Month
40
Secondary Crops 87
Seed dressings
50
Selling or Using Stored
Produce
142
Setting up
Laboratory test results 114
Leaf test results 114
Lists for Weed Densities 59
Nutrient test results
114
Rainfall stations 59
Soil test results 114
Water test results 114
Setting up reports 132
Sharing PAM data 162
Show Actuals, Plans and
Recommendations
75,
102
Show Area Units in Columns
Paddock Activities Diary 75
Show Plan Numbers
75
site licenses 162
Site number
115
Software trouble 168
Soil and leaf tests
Area code 115
Site number
115
Soil information 37
soil tests
55
Soil, leaf and water tests
system
113
Soilt test results 114
Special Harvest Units 32
Spray Targets
Paddock Activities Diary 91
Spray Targets
How to enter
91
Spraying
Copyright © Fairport Farm Software
Growth stage
90
Plant vigour 90
Spraying conditions
89
Spraying oils
50
Spreadsheet
154
Staff and Contractors List
54
Status bar
Main screen 99
Steps for setting up PAM
27
Stock Feed 143
Stock on hand
141
Stock on Hand
Inventory 139
Sugar cane 88
Summer Crops, Winter crops
86
Sundry Consumables 96
Units of measure 96
User Defined Units
96
Super-Sets of Data
39
Symbols and conventions
used in this manual
9
Table of Keys
Editing database fields 24
Tag lists
18, 19
Tank mixes 92
Tank-mixes of chemicals
50
Tests system
Setting up 114
The error trapping system
168
To create a special blend
94
to Diary
Paddock-Season Screen 101
Tools option 43
Total Paddock costs
103
Tree/Vine Crop Layout Details
87, 88
Trouble !
168
Under sowing
How to handle
87
Units
User Defined
40
Units of measure
Sundry consumables
96
Units of Measure and Package
Sizes
32
Updating pick lists
18
Updating pick-lists on the fly
30, 43
User Defined Packages In Use
41
User Defined Paddocks
Changing Paddocks to
Paddocks/Fields etc
39
User Defined Production Unit
Names
39
User defined reports
Create a new report
151
User Defined Units
40
Sundry consumables
96
Using the Season Switch in
the Paddock Activities Diary
98
validation checks 25
Varieties
Setting up your list
31
View any database file 138,
146, 149
Water Percentage
Chemical entries 93
Water Rate 89
Water Tests 113
Water Use Efficiency
58
Weed Densities
59
Weed inspections 80
Copyright © Fairport Farm Software
Wetters
50
What if you pull out a tree or
vine crop and replant? 88
What is a JOB
Paddock Activities Dairy 62,
76
Winter crops, Summer Crops
86
Year retired 88
.
Copyright © Fairport Farm Software