1
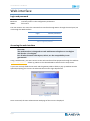
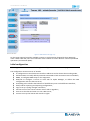
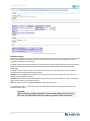
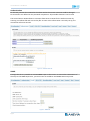
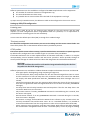
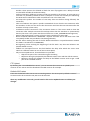
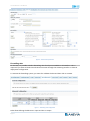
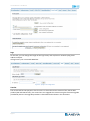
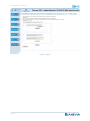
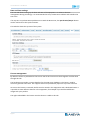
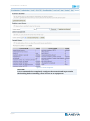
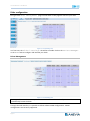
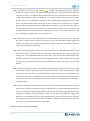
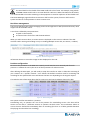
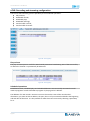
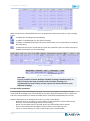
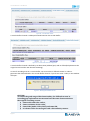
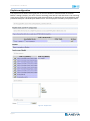
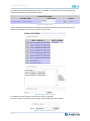
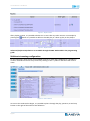
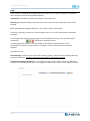
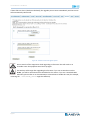
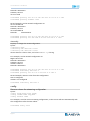
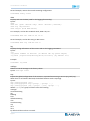
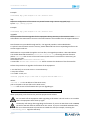
User Manual
Toucan x00 series
Professional Video Servers
ANEVIA web site : http://www.anevia.com
This document may neither be reproduced or communicated to a third party without written authorization from ANEVIA
Toucan X00 series – User Manual
Summary
SUMMARY ................................................................................................................................... 2
REVISION HISTORY ....................................................................................................................... 3
USING A TOUCAN ......................................................................................................................... 4
Limitations ............................................................................................................................................................ 4
Connecting to a Toucan ......................................................................................................................................... 4
RS 232..................................................................................................................................................................................... 4
Ethernet Interface .................................................................................................................................................................. 4
WEB INTERFACE ........................................................................................................................... 5
Login and password ............................................................................................................................................... 5
Accessing the web interface .................................................................................................................................. 5
Initial configuration ............................................................................................................................................... 6
Ethernet settings ..................................................................................................................................................................... 7
Authentication......................................................................................................................................................................... 8
SNMP ....................................................................................................................................................................................... 8
Setting up RTSP/FTP configuration .................................................................................................................................... 9
Firewalling rules .................................................................................................................................................................. 11
NFS ......................................................................................................................................................................................... 12
Save/Load ........................................................................................................................................................................... 12
Logs ........................................................................................................................................................................................ 13
Version................................................................................................................................................................................... 13
Date and time settings ....................................................................................................................................................... 15
License management........................................................................................................................................................... 15
Disks configuration .............................................................................................................................................. 17
Drives Management............................................................................................................................................................ 17
Net Drives management .................................................................................................................................................... 19
Partition configuration ........................................................................................................................................................ 19
nPVR: Recording and streaming configuration .................................................................................................... 20
Play on boot ......................................................................................................................................................................... 20
Scheduled operations ......................................................................................................................................................... 20
Circular buffer operations ................................................................................................................................................. 21
Playlists configuration ......................................................................................................................................... 24
Multicast streaming configuration....................................................................................................................... 26
Logs ..................................................................................................................................................................... 27
Upgrade............................................................................................................................................................... 28
COMMAND LINE INTERFACE ........................................................................................................30
Login through SSH ............................................................................................................................................... 30
Enable mode ....................................................................................................................................................... 30
Commands .......................................................................................................................................................... 30
TROUBLESHOOTING AND MAINTENANCE ....................................................................................36
Most Common Problems ..................................................................................................................................... 36
Troubleshooting from the GUI ............................................................................................................................. 36
Diagnostics Interface ........................................................................................................................................... 36
How to Contact Technical Support ...................................................................................................................... 36
Page 2
Toucan X00 series – User Manual
Revision history
Issue
1.0
2.0
2.1
3.0
Date
2007-09-26
2008-11-24
2009-01-07
2009-11-02
Author
DA
DA
SV
DA
HW revisision
1.0
3.0
3.0
3.0
SW revision
1.4.6
2.1.2
2.1.2
2.2.2
3.1
3.2
3.3
2009-11-19
2010-02-16
2010-03-05
DA
DA
DA
3.0
3.0
3.0
2.2.2
2.2.3
2.2.3.4-2.2.5
3.4
3.5
2010-03-22
2010-09-20
DA
DA
3.0
3.0
2.3.0
2.4.2
Table 1 – Revision history
Page 3
Comments
Initial Release
New HW Update
New RAID configuration (4+6)
Add Circular buffer, playlists, session
profile and security options
Update upgrade process
Update RAID configuration section
Update schedule cleaning section and
add warnings about bonding usage
Update web interface captures
Add fallback stream support
Toucan X00 series – User Manual
Using a Toucan
The Toucan product is a video server designed to deploy nPVR, VOD, Catchup TV, and Timeshifting
services.
The Toucan server is able to manage CBR or VBR compression, MPEG-2 or MPEG-4/H.264 encoding
and SD or HD resolutions.
This product is proposed in two configurations the first one the toucan 100 is a software + hardware
appliance, the second one the Toucan 500 is a software appliance for HP, IBM, Dell or Tyan
hardwares.
The Toucan 100 and the Toucan 500 have the same interfaces SSH and web, the main difference
between them is the number of simultaneous streaming or ingests.
All operations made by a Toucan 500 or VM could also be made by a Toucan 100 including the NFS
and the AOE compatibility, Syslog management, the FTP server and so on.
Limitations
The Toucan 100 is limited to 2 Gigabit Ethernet interfaces, the Toucan 500 and VM softwares accepts
to manage up to 10 Ethernet interfaces.
The Toucan video server does not provide transcoding or transrating facilities.
Connecting to a Toucan
Toucan X00 series have two connection interfaces for management: a RS 232 port and Ethernet
ports.
RS 232
To connect to the COM2 port of the equipment, the following configuration for your serial port is
required:
Speed: 38400 bps
Parity: None
Data: 8 bits
Stop bits: 1
After entering all these parameters, the connection is opened as described in the command line
interface section.
Ethernet Interface
All Toucan X00 series are provided with Ethernet connectors on the rear panel. One is specifically
dedicated to the management interfacing: LAN1. Others (LAN2, LAN3, and so on) could be used to
dispatch outgoing streams on them for load balancing or for backup reasons.
Once the Toucan IP address is set, it is possible to connect through the Ethernet port of the machine
either the Web interface or the on-line command prompt (see command line interface section for
more information).
The command line interface through the Ethernet port is only accessible through a SSH connection.
We recommend to use the PuTTY software to connect to a Toucan through this interface:
http://www.chiark.greenend.org.uk/~sgtatham/putty/download.html
Page 4
Toucan X00 series – User Manual
Web interface
Login and password
There are two levels of privileges:
Monitor
read-only access to the configuration parameters
Admin
full control
The user monitor can access the command line interface through SSH or through the serial port, but
not through the Web interface.
Login
Default password
monitor
admin
anevia
paris
Table 2 – Logins and passwords
Accessing the web interface
CAUTION
The web interface is designed to work with Internet Explorer 6.0 or higher
and Firefox 1.5 or higher.
For all other browsers like Opera, Safari, etc. the compatibility is not
guaranteed.
Using a web browser, you must connect to the web interface of the equipment through this address:
http://IP_address/ where IP_address is the selected address entered in the setup menu.
If you have correctly filled the net mask and the gateway address fields, a pop-up window must be
opened prompting you to enter the administration account login & password.
Figure 1 – Login pop-up
Once connected, the main administration web page of the Toucan is displayed.
Page 5
Toucan X00 series – User Manual
Figure 2 – Web interface main page - top
On this main page are listed the available contents in each partition designed by their RTSP path
name. Under each disk, there is an indication of the number of current sessions: internal (scheduled
operations) and external (RTSP).
Initial configuration
All setting parameters are accessible through the configuration icon on the main page.
The configuration section consists of 10 tabs:
IP configuration to set all Ethernet interfaces addresses and to choose their working mode,
Authentication to modify default passwords associated to both accounts monitor and admin,
SNMP, to configure SNMP traps on the equipment,
RTSP/FTP to configure a Toucan to work with an Apalis Manager, to define the RTSP
configuration and start the FTP server,
Firewalling rules to define the behavior of the different ports on the different interfaces,
Save/Load for importing and exporting configurations,
Logs to set up a syslog manager connection,
Version to access the current Toucan version and to upgrade it,
Time to set the date and time or to use a NTP server,
License to set-up the license and consult its rights.
Page 6
Toucan X00 series – User Manual
Figure 3 – Web interface configuration page
Ethernet settings
On the IP configuration tab (see the screen capture above), you can set the IP addresses and the
netmasks of all Ethernet connectors.
Bonding option could be also selected and proposed three usage modes: backup (one interface is the
backup of the other), broadcast (all interfaces stream the same channels) and TLB (traffic load
balancing).
Bonding activation requires one or more other Ethernet ports to be connected. In this case three
configurations are allowed as listed previously:
Backup: Lan2 is configured has a backup interface of Lan1, if this latter breaks out Lan2 takes over
using the bond1 address for both,
Broadcast: All Ethernet interfaces multicast the same streams, if one connection is down, the output
signal can be taken on any other interface,
TLB: the output bit rate is dispatched between all bonded interfaces.
For the Backup mode, you will need to fill the bond1 fields to allow a transparent move from one
interface to the other.
CAUTION
When using the bonding, sometimes a hardware ID modification occurs. In
this case, you will need to ask your vendor to generate you a new license
Page 7
Toucan X00 series – User Manual
Authentication
On this tab, passwords associated to the admin and to the monitor accounts could be changed.
No constraints are defined on the password composition. All printable characters can be used.
The second section HTTPS allows to commute from HTTP to HTTPS for the web connection by
entering a certificate file and a server key file. As soon as this information is correctly set up, the
connection will move secured.
Figure 4 – Authentication tab
SNMP
Through this tab it is possible to activate SNMP traps on the Toucan. To ensure the transmission of
the traps to the SNMP Supervisor, you must enter its IP address and SNMP community name.
Figure 5 – SNMP tab
Page 8
Toucan X00 series – User Manual
Different parameters are also available to configure the SNMP traps behavior on the equipment:
The number of successive emission of a single down trap,
The interval between two down traps,
It is possible also to raise an alarm when the load of the equipment is too high.
Up traps are only emitted one time, this behavior could not be configured in the current version.
Setting up RTSP/FTP configuration
Listening ports
Multiple ports could be set for the listening ports defined for the web services and the RTSP
requests. In some configurations when using different STBs on a platform, it is a requirement to
provide different connecting ports for each STB family.
In most cases the default port value (554) is enough for a standard usage.
Third party controls
For advanced configuration and services you can set the billing and the access control fields. For
these fields please refer to the RTSP API documentation provided by Anevia.
RTSP profiles
The session profile section allows creating a specific RTSP behavior associated to a specific Agent ID.
By default some configurations are available to give an overview of the possibilities.
Each STB manufacturer has its own implementation of the RTSP commands; it results in a complex
interoperability process between vendors and VoD server providers. Anevia provides through its
session profile manager an advanced tool to reduce the integration time with STB manufacturers.
CAUTION
This tool could not be used for trick modes integration but helps for the first
step which is the RTSP integration.
Different parameters are available to validate the RTSP compliance between the server and the STB:
- User Agent prefix: the beginning string composing the Agent ID,
- First TCP keep alive delay: Delay between the last TCP data exchanged from client to server
and the emission of a first TCP keep alive. This parameter needs to be used if the STB does
not comply with RTSP specification with GET_PARAMETER keep alive messages. Set to 0 if
unused,
- Connection maximum Idle Time: the maximum delay before the closing of the connection if
there was no signalization data exchanged. Must be set to 0 if there are no GET_PARAMETER
messages,
- TCP keep alive interval: Delay between two TCP keep alives if the first TCP keep alive is not
successful. Must be set to 0 if unused ,
- Play session timeout: if no GET_PARAMETER command is received during the x seconds, then
the session is dropped,
- Record session timeout: if no GET_PARAMETER command is received during the x seconds,
then the session is dropped,
- No Duration in Range: Some STB like the Motorola one refuses to play contents which are
currently recorded if the total duration varies. As it is a standard behavior, it is possible to
remove the end duration from the range answer in order to be compliant with these STBs,
- Ignore range on setup and Ignore range On state change: Both options have been designed
for circular buffer management when it exists a restrictive policy in term of program viewing
Page 9
Toucan X00 series – User Manual
-
-
-
-
window. These options also allowed to block the view of programs into a delayed channel
circular buffer outside the authorized delay,
Preferred transport: different transport modes are possible in the Toucan, TS, pure RTP or TS
over RTP. It is possible by default to force a transport or to favor one of them; the STB during
the RTSP session initialization could use a different one in this latter case.
TCP keep alive probes: The number of TCP keep alive sent before closing definitely the
connection,
Close on teardown: this option is specific to STB which do not close the TCP connection after
the teardown. In this case the server clear the session and close the TCP connection after the
teardown to keep a clean status,
Teardown at End of connection: If the connection closes or if the server needs to close the
connection after multiple unsuccessful TCP keep alives then the teardown is systematically
done by the server. This option must be used if there is no GET_PARAMETER message used,
Remove URL trailing slash: remove of the last slash (could bug on some STB),
Never send RTSP notifications: ANNOUNCE requests are never sent to the client even if the
x-mayNotify header was provided in the RTSP signalization,
On end: when reaching the end of the file different behaviors are possible STOP or PAUSE.
The STOP is considered as a TEARDOWN,
On beginning: when reaching the beginning of the file with a FR, then two behaviors are
possible PAUSE or PLAY,
Fallback on interrupted source: This field defines the delay after which the server must
switch to a fallback content in case of source interruption,
Play on Interrupted Source: Three behaviors are possible:
o Skip the lost part of the content during the recording
o Replace it during the playback by the fallback content once and then kill the session,
o Replace it during the playback and loop on the fallback content until we get a valid
part of the recorded content.
FTP Upload
By checking the “Use embedded FTP server”, you can activate the FTP server to upload by FTP
contents on the Toucan and also download recorded contents for example.
Default nPVR values
These are the default values use to start a recording session. The server port by default is 1234. If
streams need to be received in RTP, RTP must be selected.
After any modification in this tab, you will need to click on the Update button to validate your
changes.
Page 10
Toucan X00 series – User Manual
Figure 6 – RTSP and FTP parameters
Firewalling rules
On this tab, it is possible to define firewalling rules for all ports available on all interfaces. This is
required if you want to block FTP and HTTP connection through the streaming interface in classical
deployment configuration.
To activate the firewalling system, you must first validate the box and then click on activate.
Figure 7 – firewalling rules configuration
Rules allow defining the behavior in input and also in output.
Page 11
Toucan X00 series – User Manual
NFS
When the system fails and need to be rebooted, it happens that NFS disks could be unreachable
during the reboot. In this case it is possible to configure the auto-remount functionality in order to
check every ‘Interval’ if the disk is accessible.
This interval is in seconds. To reduce the risk of reduced performances on the server we do not
recommend using values under 10 seconds for this parameter.
Figure 8 – NFS configuration
Save/Load
The save/load tab allows saving different configurations for the server but also to import and export
these configurations. This functionality could be used to duplicate a server configuration (except for
the IP configuration) from one server to many.
Page 12
Toucan X00 series – User Manual
Figure 9 – Save/Load configuration
Logs
On this tab, you can change the length of the logs history and set/unset a network Syslog client
address and port.
All logs history can not exceed 5000 lines.
Figure 10 – Syslog server configuration
Version
The version tab has two purposes: the first one is to show the current version of the Toucan X00
product (SW and HW versions), the second one is to upgrade this version using the firmware upgrade
provided by Anevia. The upgrade procedure is described further down in the document.
Page 13
Toucan X00 series – User Manual
Figure 11 – Upgrade
Page 14
Toucan X00 series – User Manual
Date and time settings
The time tab allows setting up the date and time of the equipment. To enhance the time
management during recordings, it is recommended to set up a NTP server address and to define the
time zone.
If at any time a synchronization problem occurs with the NTP server, the Synchronize/Resync button
can be used to force the synchronization.
This tab also shows the up time of the system.
Figure 12 – Time management
License management
By default a license is preloaded on the Toucan 100. If this license must be changed it could be done
through this tab.
The hardware ID provides a unique identifier for the VoD server hardware. This latter is used by
Anevia to generate the license. The support team will systematically require it to provide a license.
As soon as the license is received, the file must be stored in the equipment with a dedicated name. it
is possible to store different licenses in the equipment, for example if you could have different
usages with your product.
The rights embedded in the license are also shown in a table in this tab.
Page 15
Toucan X00 series – User Manual
Figure 13 – License management
CAUTION
It is recommended to completely configure the network and in particular
the bonding before installing a new license on an equipment.
Page 16
Toucan X00 series – User Manual
Disks configuration
First, go to the Disc Management page. You will have on this page the status of your disks.
Figure 14 – Drives Manager tab
In a first time, the Global Settings tab will be unusable. Click on the Drives Manager
or the RAID tabs to configure and initialize your disks.
Drives Management
Figure 15 – Drives Manager tab
The usage of the RAID does not require to format disks before. The RAID build process will
systematically format the disks.
Through the web interface, it is possible to define software RAID configurations. 4 RAID
configurations are currently supported:
Page 17
Toucan X00 series – User Manual
RAID 0: Stripped set (minimum 2 disks) without parity. Provides improved performance and additional
storage but no fault tolerance. Any disk failure destroys the array, which becomes more likely with
more disks in the array. A single disk failure destroys the entire array because when data is written to
a RAID 0 drive, the data is broken into fragments. The number of fragments is dictated by the number
of disks in the drive. The fragments are written to their respective disks simultaneously on the same
sector. This allows smaller sections of the entire chunk of data to be read off the drive in parallel,
giving this type of arrangement huge bandwidth. When one sector on one of the disks fails, however,
the corresponding sector on every other disk is rendered useless because part of the data is now
corrupted. RAID 0 does not implement error checking so any error is unrecoverable. More disks in the
array mean higher bandwidth, but greater risk of data loss.
RAID 1: Mirrored set (minimum 2 disks) without parity. Provides fault tolerance from disk errors and single
disk failure. Increased read performance occurs when using a multi-threaded operating system that
supports split seeks, very small performance reduction when writing. Array continues to operate so
long as at least one drive is functioning.
RAID 4: Block level parity (minimum 3 disks): This mechanism provides an improved performance and fault
tolerance but with a dedicated parity disk rather than rotated parity stripes. With the block-level
striping, files can be distributed between multiple disks. Each disk operates independently which
allows I/O requests to be performed in parallel, though data transfer speeds can suffer due to the type
of parity. The error detection is achieved through dedicated parity and is stored in a separate, single
disk unit.
RAID 5: Stripped set (minimum 3 disks) with distributed parity. Distributed parity requires all but one drive
to be present to operate; drive failure requires replacement, but the array is not destroyed by a single
drive failure. Upon drive failure, any subsequent reads can be calculated from the distributed parity
such that the drive failure is masked from the end user. The array will have data loss in the event of a
second drive failure and is vulnerable until the data that was on the failed drive is rebuilt onto a
replacement drive.
RAID 6: Stripped set with dual distributed parity (minimum 4 disks). Provides fault tolerance from two drive
failures; array continues to operate with up to two failed drives. This makes larger RAID groups more
practical, especially for high availability systems. This becomes increasingly important because largecapacity drives lengthen the time needed to recover from the failure of a single drive. Single parity
RAID levels are vulnerable to data loss until the failed drive is rebuilt: the larger the drive, the longer
the rebuild will take. Dual parity gives time to rebuild the array without the data being at risk if one
drive, but no more, fails before the rebuild is complete.
Automatic rebuild is achieved for RAID5.
Page 18
Toucan X00 series – User Manual
The initial build or the rebuild of the RAID could take a lot of time. For example, using 4 disks
of 500GB in RAID 5 will result in an initial build of 2:30 hours. When the RAID must be rebuilt,
it is recommended to limit the streaming on the equipment to avoid an explosion of the rebuild time.
The Drives Manager page also allows to remove a disk from the system, format a disk from the
system and also to create partitions to store contents on it.
Net Drives management
The Toucan X00 series also allows managing net drives through NFS or AOE (Ata Over Ethernet). iSCSI
support will be available sooner.
A net drive is defined by two parameters:
Its path on the network,
Its internal name for the FTP and the RTSP utilities.
When you add a new net drive, its mount status is displayed on the screen to indicate if the disk
could be used in writing and reading or only on reading (Multiple access disk, one writer, n readers).
Figure 16 – Net drive configuration
Information about its size and its usage are also displayed on this tab.
Partition configuration
As soon as the partitions or the RAID are created, you will need to set an internal path for each
partition to validate the use by the server of these partitions for video services.
After defining the RTSP path, you will need to setup the interface in order to allow the streaming of
your contents on a specific network. “Intf” defines the default interface used for streaming and
recording for the specified disk. Auto will choose the best one depending on the original request.
This tab also gives information about the file system use and some hardware data on the disk.
Figure 17 – Global settings tab
One option could be activated on a partition:
Timeshifting only, to optimize the use of the partition for timeshifting service. The data will be
written on the disk in a different manner to optimize the disk access. This mechanism allows to
access the time shifted file immediately after its recording (less then 1s of delay possible between
the playing record and the live recording).
Page 19
Toucan X00 series – User Manual
nPVR: Recording and streaming configuration
The Toucan web interface gives the possibility to set scheduled operations:
Play on boot,
Scheduled records,
Scheduled plays,
Scheduled cleanings,
Circular buffer records,
Circular buffer channels.
Figure 18 – Boot up plays
Play on boot
The play on boot option is useful for VOD channel permanent broadcasting. Even if the Toucan fails,
at reboot the channel is systematically broadcasted.
Figure 19 – Boot up plays
Scheduled operations
Scheduled records, scheduled plays and scheduled deletions are intrinsically associated: You will
need to program a record to be able to program it’s playing and it’s deletion.
The addition of a new record is intuitive: You must choose the name of the record and it’s
destination, you must set the IP address, the port, the TTL of your network and define the beginning
and end date of the event. It is also possible to make this event recurrent by selecting a periodicity
for it.
Page 20
Toucan X00 series – User Manual
Figure 20 – Scheduled record
When a new record is defined different icons are proposed to define new actions on the recording
event:
To delete the recording event immediately,
To define a scheduled play for this (these) record(s),
To define a scheduled cleaning for this event (useful when you set a periodicity to avoid the
disk saturation),
To duplicate the current record and set it with new parameters (one record for Catchup for
example and another one for timeshifting).
Figure 21 – Scheduled play
Figure 22 – Scheduled cleaning
CAUTION
It is not possible to launch multiple schedule cleanings simultaneously. In
order to ensure the right execution of the schedule cleanings, it is
recommended to keep a delay at least equal to 10 minutes between your
different cleanings.
Circular buffer operations
A circular buffer allows recording permanently a content by specifying a time range. Then the
content will be recorded in the circular buffer for this time range (for example 2 hours). When the
end of the circular buffer is reached, the oldest data is removed and replaced by the new one.
Different parameters must be defined in order to use the circular buffer:
- Disk: like all other recordings, you must define on which disk the content will be stored,
- Duration: this is the time range used for the recording,
- Name: it is the folder name on the disk where the circular buffer will be written,
- Source: the multicast/unicast address of the stream to record plus the port,
- Action: to create, destroy or create a channel play on the circular buffer.
Page 21
Toucan X00 series – User Manual
Figure 23 – Circular buffer record
A circular buffer channel is a delayed channel based on the circular buffer.
Figure 24 – Circular buffer channel configuration
A circular buffer channel is defined by its destination (address/port) and its offset (delay between the
original record and the new channel streaming).
In case of recording issue in a circular buffer, You must select a ‘fallback stream’ in order to
guarantee the offset defined in the circular buffer channel. If you do not enter a value, a new window
will open:
Figure 25 – Warning about fallback stream
CAUTION
To ensure the good usage of this functionality, the ‘fallback stream’ or
recording gap replacement stream must have the same characteristics as
the original recording stream:
Same audio and video codecs,
Same resolution for the video,
Same PIDs (Audio, Video, PMT) and same SID,
It is better if the stream begins with a discontinuity counter.
Page 22
Toucan X00 series – User Manual
Figure 26 – Circular buffer channel configured
The maximum duration allowed through the web interface is 60 minutes.
Page 23
Toucan X00 series – User Manual
Playlists configuration
The playlists menu allows creating playlists of contents based on available media on the disks.
Before creating a playlist, you must create a mounting point like for hard disk drives. The mounting
point (access point in the programming guide documentation) is defined by the associated disk and a
predefine RTSP path. This RTSP path will be used to access all playlists created by the playlists menu.
Figure 27 – Playlists menu
Page 24
Toucan X00 series – User Manual
As soon as the playlist mounting/access point is created, it is possible to create a new playlist by
using the add buttons in front of each content.
Figure 28 – RTSP path created
The up, down and remove buttons could be used to manipulate respectively the position of the
content in the playlist or to remove a content from the list.
Figure 29 – Ordering contents in playlist
To validate the final creation of the playlist, a name is required.
The click on the create button (on the right) will achieved the playlist creation.
Figure 30 – Playlist naming before creation
Page 25
Toucan X00 series – User Manual
Figure 31 – Playlist created
After playlist creation, it is possible to delete it or to use it like any other content. For example by
pressing the
button it is possible to define a schedule play or a boot-up play on the playlist.
Figure 32 – Playlist created
Advanced playlist manipulations are available through the XML API detailed in the programming
guide.
Multicast streaming configuration
On the main page, when the list of all available contents on each disk is displayed, it is possible to
create a multicast stream for every content by clicking on the + symbol on the left of the content
name.
Figure 33 – Start a multicast
As soon as the multicast has began, it is possible to pilot it through the play, pause FF, FR and stop
button on the right of the multicast line definition.
Page 26
Toucan X00 series – User Manual
Logs
In this section is displayed all messages generated by the Toucan. These messages are classified in
three categories and can be displayed separately:
Information: Information messages describing a normal behaviour.
Warning: Messages describing recoverable errors, the system still running but the service can be
stopped.
Error: Messages describing blocking errors, the system needs to be analyzed.
This latter is generally critical errors and you might contact us or your local distributor for deeper
diagnostic.
The wording of the display on the Log page can be modified by clicking on one of these buttons
respectively
information, warning and error.
On the Log page two buttons are also available to download the log information on the
administration computer. This procedure is required in case of system failure to help better
diagnosis.
These buttons are:
Download logs: prompts to save a file called "anevia_logs.bin"; this file contains all displayable logs
stored on the Toucan. This file is required to open ticket on the support web site.
Download full debug information: it is an extension of the previous button, these logs sometimes
can give us more detailed information. This might be useful to open a ticket on the support web site.
Figure 34 – Logs display – Error level
Page 27
Toucan X00 series – User Manual
Figure 35 – Logs display – Warning level
Upgrade
The upgrade menu of a Toucan is accessible through the version tab on the configuration page.
Anevia provides firmware upgrades for this equipment to the customers who subscribed to the
maintenance contract. The new firmwares are available from the support web site.
-
If you use bonding on your equipment, please read carefully these recommendations. Before
upgrading the equipment:
Save your current configuration under another name as ‘boot’,
Deactivate the bonding and save this configuration under ‘boot’,
Proceed with the upgrade,
Reboot the equipment after the upgrade,
Apply the bonding configuration,
Save this configuration again under ‘boot’.
New firmwares are provided through AFI file, the upgrade procedure is described below.
To upload a new firmware onto the Toucan, specify the path to the .afi file and click on the
“Upgrade” button.
Old firmwares are provided through bin and sum files, the upgrade procedure is described below.
You should download the ZIP file Toucan-220-<version>.zip containing the new firmware
(where version is the version of the new firmware) and extract it. Once files are extracted, you
must have two files:
the firmware file Toucan-100-<version>.bin,
a second file Toucan-100-<version>.sum which contains the checksum of the firmware file.
To upload a new firmware onto the Toucan, specify the path to the .sum and .bin and click on the
“Upgrade” button.
Page 28
Toucan X00 series – User Manual
If these files are clean (checksum validated), the upgrade process starts immediately and the Toucan
will automatically reboot itself.
Figure 36 – Firmware version and upgrade options
Do not switch-off the equipment while upgrading its firmware! This will result in an
unusable state: the equipment won't boot up again.
The SSH key will change after upgrading the firmware. If you use an SSH client such as
PuTTY, you will be warned and that should be for this reason. If you use a standard UNIX
SSH client, please refer to its documentation to know how to handle this case (for example,
removing the /.ssh/known_hosts might be sufficient).
Page 29
Toucan X00 series – User Manual
Command line interface
The command line interface gives the administrator the same level of management than by the web
interface. In some cases when the web interface is unreachable for network reasons, this is the only
way to access and to configure the Toucan.
Login through SSH
Connect to the equipment with an SSH client (you can provide any login) and enter the monitor
password when prompted.
Once you are logged in with the monitor password, you have on the screen a prompt like this:
hostname>
When you access the Toucan through the command line you only have read-only access to the
configuration parameters.
Enable mode
In order to have full privileges, you have to enter in enable mode using the administrator password:
hostname> enable
password: [enter the administrator password]
hostname#
If you want to exit the enable mode, use the following command:
hostname# exit
hostname>
Commands
The command line interface provides a limited set of commands. These basic commands allow to
access information about the Toucan status. If the enable mode is activated it also allows
modification of some configuration parameters the same way it can be done with the web interface.
Page 30
Toucan X00 series – User Manual
All commands are listed and described below:
Command name
aoedrive
bonding
date
drives
enable
ethconfig
exit
exp
ftpd
help
hostname
imp
ipconfig
log
netdrive
passwd
portfwd
raidconfig
reboot
reset
route
settings
shutdown
softreset
traceroute
upgrade
uptime
version
vlanconfig
Description
Sets a new AOE drive
Accesses and defines the bonding configuration
Shows or modifies the date and time
Configures drives
Moves to full privileges mode
Shows or modifies the Ethernet cards configuration
Exits from the command line interface
Exports the current configuration in a file
Activates/deactivates the FTP service
Shows the online help
Shows or modifies the hostname
Imports a configuration from a file (linked with import)
Shows or modifies the Ethernet cards addresses
Shows log information
Adds a new Net drive (NFS)
Modifies the passwords
Activates the port forwarding
Defines the RAID configuration
Reboots the Toucan
Reboots the Toucan
Shows and edits the route table
Resets to default factory configuration
Stops the server
Restarts the applications only
Adds new routes for static routing
Upgrades the Toucan with a new firmware
Shows the time passed from the start of the Toucan
Shows the current hardware and software version
Shows and modifies the vlan configuration
Some commands need to be explained in details, so you can find an exhaustive description of these
one below and after:
help
Called without argument, this command displays the list of available commands.
Called with a command as argument, it displays the help available for that command.
Called with a command and a command option as arguments, it displays the help for this command
option.
First example, displays the help for the version command:
hostname> help version
version - display firmware version
usage:
version
Page 31
Toucan X00 series – User Manual
Second example, displays the help for the config command, with clear as an option:
hostname> help config clear
config - configuration management
usage:
config clear
erase the streaming configuration
hostname
Displays or changes the hostname.
Syntax: hostname <new hostname>
Example:
anevia# hostname vod-1
[You get disconnected. Connect again...]
vod-1>
passwd
Changes the monitor password if run in normal mode, and changes the admin password if run in
enable mode.
Example:
hostname# passwd
Password: [enter new password]
Confirm password: [enter new password again]
hostname#
ethconfig
Displays or changes the configuration of the Ethernet interfaces.
Syntax: ethconfig [<lan> <media>]
where <lan> is the interface: lan1 or lan2 and <media> is either 100f (100 Mb full duplex), 100h
(100 Mb half duplex), 10f (10 Mb full duplex), 10h (10 Mb half duplex) or auto (auto negotiation).
First example, force the LAN2 interface to 100 Mb full duplex:
hostname# ethconfig lan2 100f
Second example, put the lan2 interface in auto negotiation:
hostname# ethconfig lan2 auto
ipconfig
Displays or changes the IP configuration.
Syntax:
ipconfig set <address> <netmask> [0|<gateway>] [<device>[.<vlan>]]
ipconfig disable [<device>[.<vlan>]]
ipconfig [show] [<device>[.<vlan>]]
where <device> is lan1 or lan2. and <vlan> is a 802.1Q vlan tag
First example, set the network configuration to:
lan1: IP 10.0.0.125
Page 32
Toucan X00 series – User Manual
Netmask: 255.255.0.0
Gateway: 10.0.0.1
lan2: not used
hostname# ipconfig set 10.0.0.125 255.255.0.0 10.0.0.1 lan1
hostname# ipconfig disable lan2
Second example, set the network configuration to:
lan1: IP 10.0.0.125
Netmask: 255.255.0.0
Gateway: 10.0.0.1
lan2: 192.168.0.32
Netmask:
255.255.255.0
hostname# ipconfig set 10.0.0.125 255.255.0.0 10.0.0.1 lan1
hostname# ipconfig set 192.168.0.32 255.255.255.0 0 lan2
vlanconfig
Displays or changes the VLAN configuration.
Syntax:
vlanconfig show
vlanconfig add <device>.<vlan>
vlanconfig rem <device>.<vlan>
where <device> is lan1 or lan2, and <vlan> is a 802.1Q vlan tag.
First example, set the network configuration to:
Mgmt: 10.0.0.125
Netmask: 255.255.0.0
Gateway: 10.0.0.1
VLAN1.5: 10.0.0.5
Netmask: 255.255.0.0
hostname# ipconfig set 10.0.0.125 255.255.0.0 10.0.0.1 lan1
hostname# vlanconfig add lan1.5
hostname# ipconfig set 10.0.0.5 255.255.0.0 lan1.5
Second example, removes a vlan from the configuration:
LAN 1: configured
VLAN1.5: not configured
hostname# vlanconfig rem lan1.5
config
Saves or cleans the streaming configuration.
Syntax:
config save|clean|load [name]
config rename name new_name
config setboot name
First example, save the current streaming configuration, so the Toucan will start automatically with
this configuration after the next reboot:
hostname# config save
Page 33
Toucan X00 series – User Manual
Second example, remove the stored streaming configuration:
hostname# config clean
date
Displays and sets the date (used for the logging functionality).
Syntax:
date
date set <year> <month> <day> <hour> <minute> [<second>]
date ntp <ntp-server>
date resync (from NTP server)
First example, set the date to March 22nd, 2005 2:15 p.m.:
hostname# date set 2005 03 22 14 15
Second example, set the date using an NTP server:
hostname# date ntp 138.195.130.71
log
Displays the log information of the Toucan and set the logging parameters.
Syntax:
log
log queue <number of entries> (to define the log queue length)
log show [<significant|warning|error|critical>] (by default all)
Example:
hostname> log show
settings
Allows to reset all settings to the factory values.
Syntax: settings clear
exp
Exports the global configuration of the Toucan in a private format using a secure copy path (scp).
When there is no filename declared, the default filename used is expconfig.
Syntax:
exp [user@]ip:path [all]
exp [user@]ip:path only <group> [ <group> ...]
exp [user@]ip:path [not] <group> [ [not] <group> ...]
Where <group> is a group of values to be saved among:
manager
currentstreaming
log
bonding
host
defaultstreaming
vlan
savedstreaming
ntp
lan1
lan2
By default all these values are saved.
Page 34
Toucan X00 series – User Manual
Example:
hostname# exp [email protected]:~/anevia.conf
imp
Imports a configuration of the Toucan in a private format using a secure copy path (scp).
Syntax: imp [user@]ip:path
Example:
hostname# imp [email protected]:~/anevia.conf
upgrade
Anevia provides firmware upgrades for this equipment during warranty to the customers who
subscribed to the maintenance contract. The new firmwares are available from the support Web site.
New firmwares are provided through AFI file, the upgrade procedure is described below.
To upload a new firmware onto the Toucan, please download first the corresponding AFI file on the
Anevai support web site.
Old firmwares are provided through bin and sum files, the upgrade procedure is described below.
You should download the ZIP file Toucan-220-<version>.zip containing the new firmware
(where version is the version of the new firmware) and extract it. Once files are extracted, you
must have two files:
the firmware file Toucan-220-<version>.bin,
a second file Toucan-220-<version>.sum which contains the checksum of the firmware file.
Follow this procedure to upgrade the firmware of the equipment:
1. Put the file(s) on an HTTP server in a same directory.
2. Stop the streams.
3. in enable mode, run:
anevia# upgrade http://192.168.4.10/path/Toucan-XXX-1.6.1
Where:
192.168.4.10 is the IP address of the HTTP server,
path is the path to the two files on the HTTP server,
1.6.1 is the version of the firmware that you are upgrading to.
Note: You should not put any extension (neither .bin nor .sum) in the URL.
When prompted, press the Enter key and the equipment will reboot.
Do not switch-off the equipment while upgrading its firmware! This will result in an unusable
state: the equipment won't boot up again.
The SSH key will change after upgrading the firmware. If you use an SSH client such as PuTTY,
you will be warned and that should be for this reason. If you use a standard UNIX SSH client,
please refer to its documentation to know how to handle this case (for example, removing the
/.ssh/known_hosts might be sufficient).
Page 35
Toucan X00 series – User Manual
Troubleshooting and maintenance
This chapter describes:
Introduction to most common problems
Troubleshooting from the GUI
Diagnostics interface
Contacting Anevia Technical Support
Most Common Problems
Most problems encountered by Anevia Technical Support personnel involve source issues (encrypted
programs, incorrect audio type, etc.), improper Toucan configuration, or channel mapping issues.
Having a working knowledge of the devices and systems involved in the provision of digital services
minimizes the occurrence of problems, as well as time to repair.
One of the best sources for troubleshooting information is the manual provided
by the equipment’s manufacturer.
Some basic rules that apply to all digital system troubleshooting:
Look for any changes that have taken place since the system was last working properly.
Verify that all cabling is installed and connected properly.
It is important to have an understanding of the functions of the various components and systems
that make up a digital head-end.
Troubleshooting from the GUI
Useful troubleshooting information available from the Toucan web interface:
Output bit rate accessible on the main page,
Number of active sessions,
Logs.
Diagnostics Interface
The Ethernet connection is the most flexible; it allows both local and remote troubleshooting.
Firewalls that may be present at your site, however, may restrict access to the network from outside.
If that is the case, a modem connection is used connected to the serial port.
How to Contact Technical Support
Support is available by email and through the web site.
[email protected]
http://support.anevia.com
Page 36