1
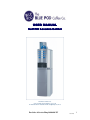
USER MANUAL
Self Fill Lavazza Colibri
The Blue Pod Coffee Co
Unit 1, # Faigh Street, Mulgrave , Vic 3170
P: 1800 800 255 F: 1300 886 216 E: [email protected]
1
For Sales & Service Ring 1800 800 255
Rev 4.02.08
Congratulations on choosing to drink great coffee using the unique Lavazza pod
vending system. The machine is easy to use and if you follow the simple steps
listed below your organization will enjoy great coffee with no hassles. Please do
not hesitate to contact us on 1800 800 255 if you need any assistance
Where are the keys?
Initially when the machine has been shipped to you, you will find the key for the
top section taped to the inside of the glass cover of the cup dispenser area.
Adjacent to the right of the cup dispenser is a small storage drawer. You will find
the round security key for the base door there as well as the yellow plastic service
key. Please note if you lose the bottom draw key you will need to obtain a
second one from Blue Pod as this as a unique security key and cannot be
made at a locksmith
Filling the machine with stock
1. Using the long key, open the top door.
2. When the door is open, the power will go off. Only when the door is open can the
flap/lids on the top of the machine for the coffee, milk and chocolate canisters be
lifted. The canisters cannot be opened with the door closed
3. Lift and open the coffee pod hopper on the top of the machine which takes up to
140 pods. Fill the hopper with coffee pods leaving at least 1 inch clearance from
the top. DO NOT JAM PODS IN as the pods needs some space to move. Also be
careful not to drop any cardboard pieces from the pod box into the hopper as this
will foul the pod mechanism.
4. The milk and chocolate compartments (which are adjacent to the right of the pod
hopper) will take up to a bag of product each. Fill with product and stir with
stirrer to ensure there are no air pockets. DO NOT OVERFILL as the flaps will
not close and the machine will then not operate.
5. Pull sugar /stirrer mechanism outwards, you will then see the sugar container. Lift
the lid; fill using normal sugar and not castor sugar. Stir with a dry spoon or
stirrer before replacing the sugar cover.
6. Remove weight from the stirrer’s mechanism cartridge. Slide a pack of stirrers
into the cartridge. Place index finger on top of the stirrer pack now in the unit and
apply light pressure, carefully remove paper tearing the paper from the bottom
2
For Sales & Service Ring 1800 800 255
Rev 4.02.08
first, then lift paper ,gently remove. Then place weight on top of stirrers. Push
compartment back into its original place.
7. Insert paper cups into cup carousel which is on the inner side of the door. The cup
carousel can be tilted towards you to access all tubes. Fill the cups into the tubes
from the top DO NOT FILL ABOVE THE TOP OF CAROUSEL as this will
damage the cups and the door will not close. Only use cups supplied by Blue Pod
as they are especially made to work smoothly in this machine.
8. Close the top door and the machine will now reset by running a short diagnostic
programme. Once the machine has heated up the boiler to the right temperature
the LCD screen will display “ready for use”
1.
2.
3.
4.
5.
6.
DAILY ROUTINE
Check the level of pods in the pod hopper. If low fill
Open top door and ensure there is sufficient quantity of product in the
milk, chocolate and sugar containers
Check if there is enough cups and stirrers loaded in the machine
Check to see that the drip tray is clean, if not remove and wash and
reinsert
Close door and ensure display reads ready for use (after the machine
warms up)
Wipe down front exterior of machine
Daily Routine Summary
Action
Check if you have
sufficient stock in the
machine of Pods, Milk
Powder , Chocolate
Powder and Sugar
Check if there is sufficient
Cups and Stirrers
Clean Drip Tray
Wipe Down Front Of
Machine
Frequency
As Required
As Required
If required
Should be done Daily
WEEKLY CLEANING CYCLE
1. Open the top door, place the yellow service key into slot at the top center of the
machine, and turn the key 90 degrees clockwise. This will restore power to the
machine and the machine will now operate with the door open
2. It is important to clean the mixing bowl in order to ensure there is no
bacteria build up. To clean the mixing bowl- remove the mixing bowl
3
For Sales & Service Ring 1800 800 255
Rev 4.02.08
components ,first pull down firmly on the lower section then remove the centre
section. Then remove lower section by lifting up slightly.
3. Wash and rinse in warm water making sure all parts are clean and there is no
power remaining on the pieces. Do not clean the mixing bowl in a dish washer as
this will damage it. Replace bottom section first making sure water nozzle is in
place and then replace middle section.
4. On the inside of the door are 2 buttons, the left button is the RINSE BUTTON.
Only use this button as the right hand button is for programming the machine
and should only be used by a technician. Press the Rinse Button once, this will do
a rinse cycle . The cycle will rinse out the mixing bowl and wash out the pipes as
well as rinsing the filters in the coffee brew unit. You should see hot water
pouring out of the water spouts into the waste tray. Once it has stopped press the
Rinse Button once again to repeat this process
5. Remove the drip tray and clean, Lift the tray at the front and pull towards
yourself. The drip tray can be separated for cleaning by pressing the two release
tabs located at the rear of the tray. DO NOT WASH IN A DISHWASHER as
this will damage the tray! Refit and replace drip tray making sure the waste hole
aligns with the waste pipe.
6. Open the bottom cabinet using the round security key.
7. Empty the white plastic used pod container which sits in the upper section of the
bottom cabinet, clean and replace.
8. Empty waste bucket, clean and replace making sure that the float and the drain
hose from the drip tray are both inside the waste bucket. It is important to ensure
that the float and drain hose are correctly placed within the waste bucket
9. Remove yellow service key and store inside top cabinet small storage drawer,
close both top and bottom cabinets. Once again the machine will take a few
minutes to reset and be ready to dispense drinks. Please wait for the LCD to show
“ ready for use”
Weekly Routine
Clean Mixing Bowls
Must Be Done Weekly
Do Rinse Cycle
Must Be Done Weekly
Remove and Clean Drip Tray
Must Be Done Weekly
Remove Pods and Clean Waste Pod
Must Be Done Weekly
Drawer
Remove and Clean Water Bucket
Must De Done Weekly
4
For Sales & Service Ring 1800 800 255
Rev 4.02.08
Problem Solving
LCD display shows “out of order. Press any button on the front of the machine
and it will display a “failure list “. Note what the problem is before opening the
machine cabinet. If the error is not reflected on the list below call the service
number 1800 800 255 for service help .
No cups dropping - Check for presence of cups in the cup carousel if there are
no cups then replenish, if cups are present then remove all cups, check for
damaged or irregular shaped cups removing any faulty cups, then carefully
restack cups.
Machine display reads "Coffee Sel Out" - Ensure there are pods in the pod
hopper. If it is empty replenish as necessary, if pods are present in hopper then
remove all pods and ensure white round plastic pod rotator at bottom of hopper is
engaged with drive spindle.
Chocolate tastes weak - Chocolate powder canister empty - Replenish as
necessary. Possible blockage in mixing bowl Check / Clean as per the instructions
listed above.
No Milk in drink - Milk powder canister empty - Replenish as necessary.
Possible blockage in mixing bowl Check / Clean as per the instructions listed
above.
LCD Display Blank - Ensure machine is plugged into wall socket, ensure wall
socket is operating by trying another appliance.
Machine display reads "Filling" - Ensure water stop cock supplying machine is
on and that water has not been shut off to building.
Stirrers not dropping - Check level of stirrers replenish if empty, if stirrers
present then remove any broken stirrers from the bottom of the stirrer dispenser
that may be causing a jam.
Water leaking from the machine - Open lower cabinet door and ensure waste
water hose is correctly inserted in waste bucket. Ensure drip tray is fitted
correctly. Ensure water fill hose is fully tightened. If water still continues to leak
then close of water stop cock near machine and call service
Bad smell emanating from the machine - Open lower cabinet, Empty and clean
bowl containing used pods, Empty and clean waste bucket, Open upper cabinet,
clean mixing bowl and drip tray.
5
For Sales & Service Ring 1800 800 255
Rev 4.02.08
Machine not dispensing sugar - Sugar canister empty - Replenish. If there is
sugar in the canister then lift canister lid and stir using spoon. Possible blockage
in sugar dispensing nozzle - Clear blockage.
Machine not Level or wobbling? - Adjust the 4 leveling feet upon which the
machine stands.
Important note for bench or table mounted machines – When the machine
displays “Waste container full” follow the steps listed below:
1.
2.
3.
4.
5.
6.
Open door and insert yellow key.
Wait for “waste container full” message to re appear.
Remove drip tray to gain access to waster container.
Remove and empty the waste container.
Wait for 30 seconds then refit the waste container.
Refit the drip tray remove the yellow key and close the door.
6
For Sales & Service Ring 1800 800 255
Rev 4.02.08
Notes
7
For Sales & Service Ring 1800 800 255
Rev 4.02.08