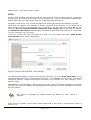
1
security
IPSec-VPN Router + Print Server
User’s Guide
Version 1.4
IPSec Router + Print Server User’s Guide
Contents
CONTENTS ................................................................................................................................................................. I
LIST OF FIGURES...................................................................................................................................................III
ABOUT THIS MANUAL .........................................................................................................................................V
NOTATIONAL CONVENTIONS..........................................................................................................................V
CHAPTER 1 INTRODUCTION............................................................................................................................. 1
Introduction ......................................................................................................................................................... 1
Features................................................................................................................................................................ 1
LANs and WANs................................................................................................................................................. 2
Static & Dynamic IP Addresses .......................................................................................................................... 3
Firewall – Its need................................................................................................................................................ 3
VPN – Its need..................................................................................................................................................... 4
CHAPTER 2 GETTING TO KNOW YOUR GATEWAY................................................................................... 5
The Gateway's Back Panel ................................................................................................................................... 5
The Gateway's Front Panel ................................................................................................................................. 5
CHAPTER 3 CONNECTING YOUR GATEWAY............................................................................................... 6
Overview.............................................................................................................................................................. 6
Connecting Hardware together and booting up................................................................................................... 6
CHAPTER 4 CONFIGURING YOUR PCS .......................................................................................................... 7
Configuring Windows 95, 98 and Millennium PCs............................................................................................ 8
Configuring Windows 2000 PCs....................................................................................................................... 10
Configuring Windows XP PCs.......................................................................................................................... 12
Configuring Windows 2003 PCs....................................................................................................................... 14
CHAPTER 5 CONFIGURING YOUR GATEWAY........................................................................................... 16
Accessing the Gateway configuration................................................................................................................ 16
Quick setup wizard ............................................................................................................................................ 18
Login settings ....................................................................................................................................................................... 19
Date and Time Settings .................................................................................................................................................... 20
MAC cloning settings ....................................................................................................................................................... 22
Internet access settings ..................................................................................................................................................... 23
DHCP client .......................................................................................................................................................................... 24
Static IP ................................................................................................................................................................................... 25
PPPoE ...................................................................................................................................................................................... 26
PPTP ........................................................................................................................................................................................ 27
General Configuration ....................................................................................................................................... 29
Changing Username/Password .................................................................................................................................... 29
Logging out .......................................................................................................................................................................... 30
Changing System Time .................................................................................................................................................... 30
Firmware Upgrade ............................................................................................................................................................ 31
Restoring Factory settings .............................................................................................................................................. 33
Saving Configuration for next reboot ........................................................................................................................ 34
Backup Configuration ...................................................................................................................................................... 35
-i-
IPSec Router + Print Server User’s Guide
Rebooting Gateway ........................................................................................................................................................... 36
Diagnostic Tools ................................................................................................................................................................. 37
Changing your Internet Connection .......................................................................................................................... 38
Uplink Bandwidth Settings ............................................................................................................................................ 39
Advanced Configuration.....................................................................................................................................40
DHCP Server ........................................................................................................................................................................ 40
DHCP Relay ......................................................................................................................................................................... 41
Firewall ................................................................................................................................................................................... 42
Access Schedule ............................................................................................................................................................ 42
Access Policies ............................................................................................................................................................... 44
Remote Box Access Policies...................................................................................................................................... 47
Port Forwarding ............................................................................................................................................................ 48
Port Triggering .............................................................................................................................................................. 50
URL keyword filtering ..................................................................................................................................................... 52
VPN.......................................................................................................................................................................................... 53
Data Security Policy Configuration ...................................................................................................................... 54
Modifying a Data Security Policy .......................................................................................................................... 57
Deleting a Data Security Policy .............................................................................................................................. 58
Internet Key Exchange Policy .................................................................................................................................. 60
Remote Host Configuration ..................................................................................................................................... 62
Dynamic DNS ...................................................................................................................................................................... 63
Multicasting .......................................................................................................................................................................... 65
Universal Plug-n-Play ...................................................................................................................................................... 66
MAC Cloning....................................................................................................................................................................... 67
Print Server settings .......................................................................................................................................................... 68
APPENDIX A: Troubleshooting…………….…………………………………………….…………………...69
Common Problems and Solutions............................................................................................................................... 69
Frequently Asked Questions ......................................................................................................................................... 69
APPENDIX B: PRINT SERVER SETTINGS........................................................................................................72
APPENDIX C: IPSEC VPN SETTINGS………………………………………………………………………….80
APPENDIX D: GLOSSARY……………………………………………………………………………………….92
APPENDIX E: VPN ROUTER WITH PRINT SERVER DATASHEET ...........................................................97
- ii -
IPSec Router + Print Server User’s Guide
List of Figures
Figure 1-1 IPSec Router + Print Server 's placement in the home network. ......................... 2
Figure 4-1 Network Window on Windows '95, '98. ................................................................. 8
Figure 4-2 TCP/IP Properties window on Windows '95, '98................................................... 8
Figure 4-3 TCP/IP Gateway configuration on Windows '95, '98............................................ 9
Figure 4-4 Local Area Connection Status Window on Windows 2000 PC......................... 10
Figure 4-5 Local Area Connection Properties on Windows 2000 PC. ................................. 10
Figure4-6 Internet Protocol (TCP/IP) Properties on Windows 2000 PC. ............................ 11
Figure 4-7 Local Area Connection Status on Windows XP PC. ........................................... 12
Figure 4-8 Local Area Connection Properties on Windows XP PC..................................... 12
Figure 4-9 Internet Protocol (TCP/IP) properties on Windows XP PC. .............................. 13
Figure 4-10 Local Area Connection Status on Windows 2003 PC. ...................................... 14
Figure 4-11 Internet Protocol (TCP/IP) Properties on Windows 2003 PC .......................... 14
Figure 5-1 Accessing the Gateway configuration................................................................... 16
Figure 5-2 IPSec Router + Print Server Login page. ............................................................. 16
Figure 5-3 IPSec Router + Print Server welcome page......................................................... 17
Figure 5-4 Quick Setup wizard welcome page....................................................................... 18
Figure 5-5 Quick Setup Wizard - Administration Settings .................................................. 19
Figure 5-6 Quick Setup Wizard - Date and Time Settings ................................................... 20
Figure 5-7 Time zone selection.................................................................................................. 20
Figure 5-8 Changing current time manually........................................................................... 20
Figure 5-9 Choosing Standard Internet Time server ............................................................. 21
Figure 5-10 Manual configuration of Internet Time Server .................................................. 21
Figure 5-11 MAC cloning settings ............................................................................................ 22
Figure 5-12 Quick Setup Wizard - Selecting mode of Internet Connection ....................... 23
Figure 5-13 Quick Setup Wizard - DHCP client .................................................................... 24
Figure 5-14 Quick Setup Wizard - Static IP settings .............................................................. 25
Figure 5-15 Quick Setup Wizard - PPPoE Settings ................................................................ 26
Figure 5-16 Quick Setup Wizard - PPTP Settings................................................................... 27
Figure 5-17 Quick Setup Wizard - completion ....................................................................... 28
Figure 5-18 Changing Username/ Password........................................................................... 29
Figure 5-19 IPSec Router + Print Server Logout Page.......................................................... 30
Figure 5-20 Upgrade firmware.................................................................................................. 31
Figure 5-21 Upgrading firmware - progress ........................................................................... 31
Figure 5-22 Upgrading firmware - completion ...................................................................... 32
Figure 5-23 Restoring Factory Settings .................................................................................... 33
Figure 5-24 Save Current Configuration ................................................................................. 34
- iii -
IPSec Router + Print Server User’s Guide
Figure 5-25 Backup configuration ............................................................................................ 35
Figure 5-26 Backup Configuration - progress ........................................................................ 35
Figure 5-27 Rebooting the Gateway......................................................................................... 36
Figure 5-28 Diagnostic Tools..................................................................................................... 37
Figure 5-29 Diagnostic tools - ping results.............................................................................. 37
Figure 5-30 Diagnostic Tools - Trace route results................................................................. 38
Figure 5-31 Uplink Bandwidth Settings ................................................................................ 39
Figure 5-32 Local Area Network Settings ............................................................................... 40
Figure 5-33 List of DHCP users ................................................................................................ 41
Figure 5-34 DHCP Relay Settings............................................................................................. 41
Figure 5-35 Access Schedule entries ........................................................................................ 42
Figure 5-36 Configuring new Time Window.......................................................................... 43
Figure 5-37 List of firewall Access policies ............................................................................. 44
Figure 5-38 Adding a new custom firewall access policy..................................................... 45
Figure 5-39 Newly added custom firewall policy.................................................................. 46
Figure 5-40 Remote Box Access Policies.................................................................................. 47
Figure 5-41 Port Forwarding..................................................................................................... 48
Figure 5-42 Add a new port forwarding policy ..................................................................... 49
Figure 5-43 Port Triggering ....................................................................................................... 50
Figure 5-44 Adding new Port Triggering entry ..................................................................... 51
Figure 5-45 URL keyword filtering .......................................................................................... 52
Figure 5-46 VPN configuration policies .................................................................................. 53
Figure 5-47 Data Security Policy............................................................................................... 54
Figure 5-48 New Data Security (IPsec) policy ........................................................................ 56
Figure 5-49 new entry in inbound firewall policies for IPsec policy created..................... 56
Figure 5-50 Modifying the Data security policy..................................................................... 57
Figure 5-51 Deleting a data security policy............................................................................. 58
Figure 5-52 Deleting the related firewall policy for the VPN data security policy........... 58
Figure 5-53 Internet Key Exchange Policy ............................................................................. 60
Figure 5-54 Remote Host configuration .................................................................................. 62
Figure 5-55 List of DynDNS entries ......................................................................................... 63
Figure 5-56 Adding a new Dynamic DNS record .................................................................. 64
Figure 5-57 Multicast Proxy ...................................................................................................... 65
Figure 5-58 Universal Plug n Play............................................................................................ 66
Figure 5-59 MAC Cloning ......................................................................................................... 67
- iv -
IPSec Router + Print Server User’s Guide
About This Manual
This manual describes the setup and usage steps you should perform to use RGS Pro.
Notational Conventions
This guide uses the following notational conventions:
Notation
Menu options
Italics
Meaning
Bold.
Example, Select the Settings option on the screen.
Text in italics is used for emphasis.
Warning. Follow the instructions provided to avoid this situation.
Important note or instruction to read.
-v-
IPSec Router + Print Server User’s Guide
1.
Chapter 1 Introduction
Introduction
The RGS Pro Residential Gateway with LAN/WAN ports is the perfect solution for connecting a PC
(or small group of PCs) through a switch or a hub to a high-speed broadband Internet connection.
The Gateway can be configured to limit the Internet access to the internal users based on URLs
and/or time periods. The Gateway also features an ICSA certified, advanced Stateful Packet
Inspection Firewall, and acts as Virtual Private Network (VPN) endpoint.
With the performance and security features of the IPSec Router + Print Server, your network will
take advantage of the Internet while keeping its data secure.
Features
▪
The V1.0 of IPSec Router + Print Server supports five users.
▪
Protects your PCs from 50 kinds of attacks known in the Internet world like Ping of Death, SYN Flood,
Land Attacks, IP spoofing, and other Denial of Service Attacks.
▪
Encrypt your Internet traffic and keep your data secure in the public Internet using VPN technology.
▪
Supports URL keyword Filtering.
▪
Facilitates web-hosting or any such service from a PC onto the Internet.
▪
Supports Universal Plug-n-Play.
▪
Easy configuration through a Web Browser from any PC connected to Local Area Network
▪
Administer and Upgrade your Gateway Firmware remotely over the Internet.
▪
Provide various Diagnostic tools such as ping – to find connectivity to particular computer on the
Internet, Trace Route – utility to record route between Gateway and specified destination computer on
the Internet and Name Resolution – Find the IP address of the given domain name.
▪
Configure your Gateway as DHCP server to serve your internal network.
▪
Supports synchronization of time with Internet real-time servers.
▪
Supports event Logging, statistics.
▪
Gateway User can block specific internal user's Internet access with filtering
▪
Supports DHCP, PPPoE and PPTP Internet connections.
▪
Facilitates QoS support that guarantees quality for high priority traffic like voice.
▪
Supports multicasting.
▪
Supports soft-reboot.
Page 1 of 98
IPSec Router + Print Server User’s Guide
▪
Factory-set firewall policies to allow commonly used applications.
▪
Provides comprehensive security wireless access point based on IEEE 802.1x standard. It provides
robust wireless security by protecting wireless users against rogue access points..
▪
Acts as DNS server to the internal network.
▪
Allows hosting of Web and other server’s and supports Dynamic Domain Name Service (DDNS) using
dyndns protocol.
▪
Port forwarding and default host configuration
LANs and WANs
Your Gateway is a network device that connects two networks; Local Area Network (LAN) (the
group of PCs in your home or office) and the Wide Area Network (WAN), that is, the Internet. The
Gateway processes and regulates the data that travels between these two networks.
Figure
IPSec
router +
Print
Server's
1-1
VPN
placement in the home network.
Your Gateway is "equipped" with firewall software that protects your local area network of PCs so
that users on the Internet cannot hack into your PCs, hence keeps your local PCs secure. The
Gateway protects your network by inspecting the first packet coming in through the WAN
connection before delivery to the final destination on Local PCs. The Gateway inspects Internet
port services like the web server, ftp server, or other Internet applications, and, if allowed, it will
forward the packet to the appropriate PC on the LAN side.
Gateway's ports connect to two sides: your 10/100 LAN ports and the Internet WAN port. The
WAN and LAN ports transmit data at 10 Mbps or 100 Mbps.
Page 2 of 97
IPSec Router + Print Server User’s Guide
Static & Dynamic IP Addresses
IP stands for Internet Protocol. All IP based network devices like PCs, print servers, Gateways,
routers have IP addresses that are independent of the type of network interface. The IP address
denotes the identity of the device on the IP networks, both LAN and WAN. IP addresses can be
assigned manually to a device, or dynamically through a central server.
Static IP address is a fixed, and manually assigned to a PC or any other device on the network.
They retain their address until you change it. This type of addressing is useful especially for the
hosts/routers/Gateways that offer services (Web, FTP, printer), and you may want to access them
using their known static IP address. If your ISP provides with static IP address, please use the
static IP settings for the Internet Access Connection Mode.
Dynamic IP address is assigned for temporary usage, issued by a server (DHCP Server can be
PC, Gateway or any other network service) in the network. The IP address obtained this way is
not guaranteed to be constant. After a certain time period, they expire and may change. The
DHCP server is notified of the expiry, and may assign the same or different IP address to a
network device. This is used in the cases; where there is a constraint on the number of IP
addresses, or to reduce the configuration on the network devices and keeping the IP addressing
configuration centrally located.
For DSL connections, many ISPs may require you to log on with a user name and password to
have access to the Internet. The technology used is Point-to-Point Protocol over Ethernet (PPPoE),
which is similar to (PPP) dial-up connection, with no telephone number dialling involved, provides
dynamic IP address.
Firewall – Its need
With a rapid growth in the Internet around the world, and because of its open nature of the
Internet Protocol standard, network security has become a major concern to the companies
around the world. Once you are connected to the Internet, you are physically connecting your
network to few thousands of unknown networks and their users. This enables all the Internet
users around the world share the information. But the idea opens up the possibility of confidential
information be leaked out to the Internet users who are involved in unlawful activities.
There are various types of attacks on the Internet; few for example, Denial-of-service
attacks, SMURF, SYN flooding, ping of death attacks, Application layer attacks. To protect a
private network from all these type of attacks, firewall came into existence. Your IPSec Router +
Print Server has firewall that provides a single point of defence between two networks and can
secure your Local Network.
Page 3 of 97
IPSec Router + Print Server User’s Guide
VPN – Its need
When you access the public Internet, the data sent by your host traverses through many
routers/gateways and other network elements. With various tools available, hackers can capture
your data sent by your host and analyze the data. They can modify the data. For example, if you
are accessing the bank account through the Internet, your login and password can easily be
copied by the hackers on the Internet, and can be accessed by them. The hackers can interpret
the data because of its standard format and clarity. VPN technology avoids this type of copying,
modifying the data, thereby protecting your data on the Internet by virtue of encryption and
authentication.
VPN, Virtual Private Network, a connection between two network elements (in this case one of
them being your VPN router), is created over the public Internet, to secure your data moving out
of your network to the destination. More details of configuring VPN can be found in the VPN
section of this document.
Page 4 of 97
IPSec Router + Print Server User’s Guide
Chapter 2 Getting to know your
Gateway
The Gateway's Back Panel
Gateway's Back Panel Image.
WAN Port:
The WAN (Wide Area Network) port is where you connect your cable or DSL modem
through an Ethernet Cable.
Your DSL/Cable modem connection must be connected only to this port.
LAN Port:
The Local Area Network port is where you will connect networked device such as
PC, Laptop, switch, hub and anything other network element you want to put on
your network.
Power:
The port to which you will connect the power adapter.
Reset:
Reset / Load default.
The Gateway’s Front Panel
IPSec Router + Print Server 's Front Panel Image.
Page 5 of 97
IPSec Router + Print Server User’s Guide
Chapter 3 Connecting your Gateway
Overview
Gateway setup requires little more than Hub or Switch setup. PCs on your local network should
be configured to obtain an IP address (or TCP/IP address) from your IPSec Router + Print Server
and your Gateway also needs to get an IP address. Please consult your Internet Service Provider
(ISP) for the method used in getting IP address for the Gateway.
Connecting Hardware together and booting up
1. Make sure you power down all of your hardware including the Gateway, PCs, hubs, switches
and cable or DSL modem.
2. As in figure 3-1, Connect one end of an Ethernet cable to one of the LAN ports
(labelled 1, 2, 3, 4) on the back of the Gateway, and the other end to a standard
port on a network device, e.g., a PC, Laptop, hub or switch.
Figure 3-1
Repeat the above step to connect more PCs or Network devices to the Gateway.
3. Connect the Ethernet Cable from your cable or DSL modem to the WAN port
on the Gateway's back panel, as shown in the figure 3-2. This is the only port
that will work for your cable/DSL modem connection.
Figure 3-2
4. Connect the power adapter to the Power port on the back panel of the Gateway,
and then plug the power adapter into a power outlet as shown in the figure 3-3.
5. Turn on the cable or DSL modem and PC or switch.
The Gateway's hardware installation is now complete.
Page 6 of 97
Figure 3-3
IPSec Router + Print Server User’s Guide
Chapter 4 Configuring your PCs
This chapter helps you configure commonly used Microsoft Windows computer to be able to
communicate with the Gateway. Users with computers with other operating systems can look
through respective user manuals.
Before you try making your PC obtain an IP Address automatically, you need to know the
operating system of your PC. This section covers configuration for PCs running Windows 95, 98,
Millennium, 2000, XP, and 2003.
If you are running Windows 95, 98, Millennium, 2000, XP, or 2003 then you can Click on the
Start button and then go to Settings option (does not exist for Windows XP, 2003). Then click on
Control Panel button to open a window with all the tools.
You may need to do this for each computer you are connecting the Gateway through the switch or
a hub. If a single PC is connected directly to the Gateway, then doing it on the PC is sufficient.
The next few pages take you through step-by-step procedure to configure your network settings
based on the type of operating system. Make sure that Ethernet card or adapter has been
successfully installed in each PC you will configure.
Page 7 of 97
IPSec Router + Print Server User’s Guide
Configuring Windows 95, 98 and Millennium PCs
From the Control Panel window you just opened, double-click Network icon.
Figure 4-1 Network Window on Windows '95, '98.
On the configuration Tab, as shown in Figure 4-1, select the TCP/IP for the applicable Ethernet
adapter. Do not choose the entries with names DUN, PPPoE, Dialup Adapter, VPN, or AOL. If the
word TCP/IP alone appears on a line, select it. Click on Properties button. If no TCP/IP line is
listed, click on Windows Start button, click on Help button to open help pages. In the Index tab,
type TCP/IP in the edit box. Press Enter key to show you the list of options. Select a topic that is
related to installation of TCP/IP and follow the guidelines.
Click on IP Address tab and select Obtain an IP address automatically, as shown in Figure
4-2.
Figure 4-2 TCP/IP Properties window on Windows '95, '98.
Page 8 of 97
IPSec Router + Print Server User’s Guide
Click on Gateway tab to ensure that the installed gateway field is left blank. Click on OK button
as shown in Figure 4-3. This closes the TCP/IP Properties window.
Figure 4-3 TCP/IP Gateway configuration on Windows '95, '98.
5. Click OK on Network window to be closed. Windows may ask you the original Windows
installation disk or CD-ROM. Supply them. Supply them the correct file location, such as
c:\windows\options\cabs, D:\win9x (where x is 5 or 8, and D may be your CD-ROM drive)
6. Windows may ask you restart your PC. Click the Yes button. Even if Windows does not ask you
to restart, restart your computer anyway.
Move on to Next Chapter, "Configuring your Gateway".
Page 9 of 97
IPSec Router + Print Server User’s Guide
Configuring Windows 2000 PCs
From the Control Panel window you just opened, double-click the Network and Dial-up
Connections icon.
Double-click Local Area Connection icon to show Local Area Connection Status Window. Click on
the Properties button as shown in the Figure 4-4.
Figure 4-4 Local Area Connection Status Window on Windows 2000 PC.
Click on Internet Protocol (TCP/IP) tab and click on Properties button. This opens up Internet
Protocol (TCP/IP) Properties window as shown in Figure 4-5.
Figure 4-5 Local Area Connection Properties on Windows 2000 PC.
Page 10 of 97
IPSec Router + Print Server User’s Guide
As shown in the Figure4-6, select the radio button, obtain an IP address automatically. Then
select the button, Obtain DNS server address automatically. Click OK button to close the
window.
Figure4-6 Internet Protocol (TCP/IP) Properties on Windows 2000 PC.
Windows may ask you restart your PC. Click the Yes button.
Move on to Next Chapter, "Configuring your Gateway".
Page 11 of 97
IPSec Router + Print Server User’s Guide
Configuring Windows XP PCs
If your Windows XP has a classic Interface (This has similar user interface as Windows 2000),
then follow "Configuring Windows 2000 PCs". The following details in this section are exclusive to
Windows XP with default Interface.
From the control panel window, double-click Network connections icon to open different window,
where you have to double-click Local Area Connection icon. This opens up the Local Area
Connection Status window as shown in Figure 4-7.
Figure 4-7 Local Area Connection Status on Windows XP PC.
As shown in Figure 4-8, Click on Internet Protocol (TCP/IP) option and click on the Properties
Button.
Figure 4-8 Local Area Connection Properties on Windows XP PC.
Page 12 of 97
IPSec Router + Print Server User’s Guide
As shown in the Figure 4-9, select the radio button, Obtain an IP address automatically. Then
select the button, Obtain DNS server address automatically. Click OK button to close the
window.
Figure 4-9 Internet Protocol (TCP/IP) properties on Windows XP PC.
Windows may ask you restart your PC. Click the Yes button.
Move on to Next Chapter, "Configuring your Gateway".
Page 13 of 97
IPSec Router + Print Server User’s Guide
Configuring Windows 2003 PCs
Click on Windows Start button would open up a menu, click on Control Panel menu to open up
another menu, where Network Connections is found. Click on Local Area Connection to open
Local Area Connection properties window.
Figure 4-10 Local Area Connection Status on Windows 2003 PC.
On the configuration Tab, as shown in Figure 4-10, select the TCP/IP for the applicable
Ethernet adapter. Do not choose the entries with names DUN, PPPoE, Dialup Adapter, VPN, or
AOL. If the word TCP/IP alone appears on a line, select it. Click on Properties button. If no
TCP/IP line is listed, click on Windows Start button, click on Help button to open help pages. In
the Index tab, type TCP/IP in the edit box. Press Enter key to show you the list of options. Select
a topic that is related to installation of TCP/IP and follow the guidelines.
Click on IP Address tab and select Obtain an IP address automatically, as shown in Figure
4-11.
Figure 4-11 Internet Protocol (TCP/IP) Properties on Windows 2003 PC
Page 14 of 97
IPSec Router + Print Server User’s Guide
Click on Gateway tab to ensure that the installed gateway field is left blank. Click on OK button.
This closes the TCP/IP Properties window.
Click OK on Network window to be closed. Windows may ask you the original Windows installation
disk or CD-ROM. Supply them. Supply them the correct file location, such as
c:\windows\options\cabs, D:\win9x (where x is 5 or 8, and D may be your CD-ROM drive)
Windows may ask you restart your PC. Click the Yes button. If Windows does not ask you to
restart, restart your computer anyway.
Move on to Next Chapter, "Configuring your Gateway".
Page 15 of 97
IPSec Router + Print Server User’s Guide
Chapter 5 Configuring your Gateway
This chapter guides you through the configuration of your Gateway to make it function in your
network and gain access to the Internet through your ISP.
Accessing the Gateway configuration
Once connections are made as shown in Section 3 "Connecting your Gateway", the Gateway can
be configured using HTML browser, Internet Explorer 6.0 on your PC. At the address line, enter
HTTP URL, http://192.168.1.1/ as shown in the Figure 5-1 below, where 192.168.1.1 is the
Gateway Internal IP address (You may give different IP address if configured differently, refer to
Local Area Network configuration). Subnet mask for all the machines on the local network is
255.255.255.0. All the PCs connected to the Local Network ports can reach the Gateway device at
the address specified.
Figure 5-1 Accessing the Gateway configuration
The user is prompted for the username, and password for the Gateway. The default user name is
root. The factory setting for the password is admin. The user is expected to change password
(optionally username) to protect the gateway's configuration from an unauthorized manipulation.
Enter the changed password if it was already modified.
If the username, password combination is entered wrongly for three times, the login session will
be locked for a minute. This is for security reasons.
In rest of the document, the term user is used for the person who configures Gateway.
Figure 5-2 IPSec Router + Print Server Login page.
Page 16 of 97
IPSec Router + Print Server User’s Guide
Reset button on this page clears off the password field for the user to re-enter it. Clicking on
Login button leads to the Gateway configuration welcome page as shown in Figure 5-3.
If you entered wrong password 3 times continuously, Gateway configuration page
will be locked for a minute time. Before one minute locking period has been
expired, Gateway can’t allow you to login even if you try to enter again with
correct password. It is strongly advised not to do any operation during oneminute period locking time. Try again login only after one minute locking time
has been expired.
Figure 5-3 IPSec Router + Print Server welcome page.
As shown in Figure 5-3, the welcome page represents the status of the various parameters of the
Gateway. It shows the system status, time, firmware version, Internet Access status, Local
Network attributes, Firewall, VPN & Wireless status.
The left pane shown in the figure provides the sections of Gateway configuration. Each section
gets expanded when clicked to show few hyperlinks. Each hyperlink allows you to configure
certain parameters of the Gateway.
Rest of the user's guide explains you details of the features, technologies and their configuration.
Page 17 of 97
IPSec Router + Print Server User’s Guide
Quick setup wizard
If you are setting up the Gateway for the first time or any time later, Quick setup wizard helps the
novice user to do minimal configuration required for the Gateway.
From the Gateway configuration home page, find the Quick Setup Wizard hyperlink at the bottom
of the home page. Clicking on this should take you through the series of steps for easy
configuration. Figure 5-4 shows the start of the quick setup wizard.
Quick setup wizard has <Previous, Skip> and Next> buttons on every page for easy browsing.
Pressing Skip> button does not make any changes to the current configuration. Pressing Cancel
button during Quick setup wizard terminates it.
Figure 5-4 Quick Setup wizard welcome page
Page 18 of 97
IPSec Router + Print Server User’s Guide
Login settings
As shown in the Figure 5-5, User's password can be set using this, overriding the old password.
You may ignore changing Administrator password by pressing Next> button.
If password is changed for the first time, or if the Gateway has been set with factory defaults,
enter the default password in "Old Password:" field.
The user name can be changed from root to any name you like. This is optional field. There is
only one user to the Gateway.
Your new password should be entered in "New password:" field. Re-type the new password in
"Confirm new password:" field for confirmation. Press Next> button to reflect your password
changes.
Figure 5-5 Quick Setup Wizard - Administration Settings
Page 19 of 97
IPSec Router + Print Server User’s Guide
Date and Time Settings
Date and Time settings for your Gateway will be used for the time-sensitive configuration later.
The configuration of date and time settings is shown in Figure 5-6.
The current time is set in the Gateway in the form of MM/DD/YYYY HH:MM:SS, where MM is
month (01-12), DD is date (01-31), YYYY is year represented in four digits, HH is hours in 24-hour
format (00-23), MM represents minutes (00-59), and SS represents seconds (00-59).
Figure 5-6 Quick Setup Wizard - Date and Time Settings
Based on your geographical location, as shown in
Figure 5-7, you can select the appropriate Time zone information from the drop-down list.
Figure 5-7 Time zone selection
It is important to set the right time for the Gateway in order for it to work as you expect. As
shown in Figure 5-8, the time can be set either manually, or by timeservers available on the
Internet. For manual configuration, select the radio button Manually, and edit the fields against
Time (HH:MM:SS) and Date (MM: DD: YYYY).
Figure 5-8 Changing current time manually
Page 20 of 97
IPSec Router + Print Server User’s Guide
For automatic configuration of the time for your Gateway, select the radio button Using Internet
Time Server. And select the following radio button, Pick Internet Time Server so that you can
choose the timeserver from the drop-down list of standard time servers on the Internet as shown
in Figure 5-9.
Figure 5-9 Choosing Standard Internet Time server
To choose time server other than the standard Internet time server, as shown in
Figure 5-10, select the radio button, Enter Time Server Information and manually enter the
Time Server's IP address that is reachable by your Gateway.
Figure 5-10 Manual configuration of Internet Time Server
Once configured, press Next> button on this page. To ignore the changes, click on Skip> button.
Page 21 of 97
IPSec Router + Print Server User’s Guide
MAC cloning settings
Some times, the Internet Service Provider requires your PC and its hardware address to be
registered with their network. Typically, they provide with an installation CD with software to be
installed on your PC. ISP once registers the MAC address, allows the Internet access only to the
computer with the hardware address (MAC) it registered. To make ISP transparent about your
IPSec Router + Print Server , you have to clone your PC's MAC address on to your Gateway. This
allows the Gateway to use cloned MAC address to communicate to ISP.
Figure 5-11 MAC cloning settings
To find the MAC address on the PC to be cloned, Click on Start button on the Windows PC task
bar.
In Start button menu, click on Run....
It opens a small window, enter cmd to get the console window.
On the console, run ipconfig /all command.
Identify the 12-digit number against "Physical Address . . . . :" separated by hyphens (-).
Copy the MAC address (along with hyphens) information on to the Configuration page.
Page 22 of 97
IPSec Router + Print Server User’s Guide
Internet access settings
Your Gateway allows you to access Internet in four different ways: DHCP, Static IP, PPPoE, PPTP
protocols as shown in Figure 5-12. DHCP is the default protocol for the Gateway to access Internet.
Press Next> button on this page after appropriate selection. Depending on the option you choose,
the Gateway prompts for the necessary information for the Internet access.
Figure 5-12 Quick Setup Wizard - Selecting mode of Internet Connection
Page 23 of 97
IPSec Router + Print Server User’s Guide
DHCP client
If the option selected is DHCP client, the Gateway device tries to get the IP address automatically
from the Internet. This requires a DHCP Server running on the network connected to your
External Network Port. Once successful, your quick setup is complete. You are ready to use the
Gateway. Proceed to Advanced Configuration section in this document for custom control over
the Gateway.
Once DHCP client successfully receives the IP address from the ISP, the HTML configuration
displays IP address information as shown in the Figure 5-13.
In case the Gateway fails to get an IP address, it shows an error on the screen. You may press
<Previous button and try again, or change the mode of the Internet access setting.
Figure 5-13 Quick Setup Wizard - DHCP client
MAC cloning is disabled by default. Please see Section on MAC cloning if
required.
Page 24 of 97
IPSec Router + Print Server User’s Guide
Static IP
User can choose to set the External Network address to be static IP address, when the ISP offers
you static/permanent IP address through a cable modem, DSL or a dial-up connection. The IP
address does not have to change upon the rebooting of the device. As shown in the Figure 5-14,
Fill in the details, IP address, subnet mask and Gateway IP address as given by ISP.
Figure 5-14 Quick Setup Wizard - Static IP settings
MAC cloning is disabled by default. Please see Section on MAC cloning if
required.
Page 25 of 97
IPSec Router + Print Server User’s Guide
PPPoE
Some DSL service providers use PPPoE (Point-to-Point Protocol Over Ethernet) for Internet access
for their end-users. Please check with your ISP whether PPPoE is used for your Internet access.
Provide PPPoE user name, password given by your ISP in the configuration page as shown in
Figure 5-15.
Once setup, by default, your Gateway is always connected to the Internet. If you would like to
have Internet access to be available only on Demand, you can select the option "Connect on
Demand" on this page. By default, the Maximum idle time allowed before the Gateway
disconnects the Internet is 10 seconds. You may configure your own value.
Figure 5-15 Quick Setup Wizard - PPPoE Settings
Your Gateway periodically checks for the Internet connection, for every Keep Alive Time. If your
Gateway finds the Internet connection does not exist, it re-establishes the connection. The default
period the Gateway verifies the Internet connection is 30 seconds. You may configure it to a
different value.
MAC cloning is disabled by default. Please see Section on MAC cloning if
required.
Page 26 of 97
IPSec Router + Print Server User’s Guide
PPTP
As the name indicates PPTP does tunnel the PPP (protocol used for dialup Internet connection)
packets over IP network. Some ISPs use this protocol for a secured connection establishment.
Please check with your ISP whether they are supporting PPTP connections.
As shown in the Figure 5-16, provide the PPTP user name and password provided by your ISP.
Once setup, by default, your Gateway is always connected to the Internet. If you would like to
have Internet access to be available only on Demand, you can select the option No for the
question, Do you want the Internet connection to be always on? on this page. By default,
the Maximum idle timeout allowed before the Gateway disconnects the Internet is 10 seconds.
You may configure your own value.
If you are a home user and connecting to an ISP, you must choose the option PPTP Access
Concentrator for the mode configuration.
Figure 5-16 Quick Setup Wizard - PPTP Settings
Your Gateway periodically checks for the Internet connection, for every Keep Alive Time. If your
Gateway finds the Internet connection does not exist, it re-establishes the connection. The default
period the Gateway verifies the Internet connection is 30 seconds. You may configure it to a
different value.
Administrator of the Gateway is also required get PPTP server IP address information from ISP,
and place it in the field. WAN IP and WAN subnet mask information can be obtained from Internet
Service Provider.
MAC cloning is disabled by default. Please see Section on MAC cloning if
required.
Once setup is complete, Quick setup wizard shows that if the setup is successful as shown in
Figure 5-17.
Page 27 of 97
IPSec Router + Print Server User’s Guide
Click on Finished button to show the home page. <Previous button can be used for any reconfiguration of the earlier configuration items.
Figure 5-17 Quick Setup Wizard - completion
Page 28 of 97
IPSec Router + Print Server User’s Guide
General Configuration
The configuration section focuses on guiding you about general operations like, changing the
administrator password, rebooting the Gateway, saving the configuration for next reboot,
upgrading the firmware on the Gateway device, changing system time, setting factory defaults,
changing Internet connection type and provide information on operation of few diagnostic tools
like ping, trace route.
Changing Username/Password
The default username/password of the Gateway can be overridden with your own for the security
reasons. To change the administrator password, click on System Settings hyperlink, then on
User ID/ Password hyperlink to show the configuration as specified in Figure 5-18. For more
information on password changes, refer to Login Settings in Quick Setup wizard section.
Figure 5-18 Changing Username/ Password
Page 29 of 97
IPSec Router + Print Server User’s Guide
Logging out
You may like to logout once configuration is complete. You will find the Logout button on the topright corner of the configuration page. Clicking on the Logout prompts you with a question on
how it should be logged out. This case is shown in Figure 5-19.
Figure 5-19 IPSec Router + Print Server Logout Page.
You should click on the Save and Logout if you require the current configuration on the Gateway
to be used upon rebooting.
Else, you may click on Logout without Saving if you need this configuration for the time the
Gateway is running, but not for next reboot.
Cancel button cancels the logout operation and allows you to configure more.
Changing System Time
System time can be changed three different ways.
Using Quick Setup Wizard on the configuration home page.
Click on Change System Time hyperlink on the home page.
Click on System Settings, click on System Time hyper link of the shown options.
For more explanation on changing the system time, refer to Date and Time Settings in Quick
Setup Wizard section.
Page 30 of 97
IPSec Router + Print Server User’s Guide
Firmware Upgrade
To upgrade firmware on your Gateway, click on Administration in the left pane, and then click
on Upgrade Firmware hyperlink to show the configuration as in figure 5-20.
You may like to take a backup of the current firmware binary image onto your PC, so that in case
of upgrade failure, you can download the current image again on to the Gateway.
Figure 5-20 Upgrade firmware
Click on Browse... button, select the downloaded image and click on Upgrade button. You would
observe the progress of the firmware upgrade as shown in the following Figure 5-21. Please note
that the operation takes few minutes.
Figure 5-21 Upgrading firmware - progress
Once firmware upgrade is successfully complete, you will see the text on the HTML page as shown
below in Figure 5-22. You must reboot the Gateway in order for the Gateway to reflect the new
image.
Page 31 of 97
IPSec Router + Print Server User’s Guide
Figure 5-22 Upgrading firmware - completion
Page 32 of 97
IPSec Router + Print Server User’s Guide
Restoring Factory settings
This option is useful in a situation when, you are unable to revert configuration changes, or if you
find the configuration saved onto the Gateway is not good to be used.
As shown in Figure 5-23, to set the factory defaults, click on Administration link on left pane,
and click on Factory Defaults hyperlink to show the administrator with the options. The
administrator is asked to respond to a question on whether to restore the factory defaults.
Clicking on Yes button restores the factory default settings onto the Gateway.
Figure 5-23 Restoring Factory Settings
The entire manual configuration done by administrator earlier will be erased
when factory defaults are set including the administrator password.
Page 33 of 97
IPSec Router + Print Server User’s Guide
Saving Configuration for next reboot
Figure 5-24 Save Current Configuration
The administrator can save the current configuration to exist for the next reboots irrespective of
any configuration changes done to the Gateway. This allows the administrator to configure the
Gateway for customized behavior.
After making different configuration changes, once stable configuration exists on the Gateway,
click on Save Configuration shown on the top frame of the HTML configuration page as in Figure
5-19. In the resulting page as shown in Figure 5-24, you will be prompted to press Save or
Cancel buttons for saving the configuration.
By pressing Save button, the configuration will be saved onto the Gateway for next reboot
overriding the configuration saved earlier. Press Cancel button to cancel the operation.
Page 34 of 97
IPSec Router + Print Server User’s Guide
Backup Configuration
As an administrator you may like to take backup of configuration in cases like firmware upgrade,
experimenting with configuration to customize Gateway's behavior.
Before you do such an operation, it is strongly advised to take a backup using Backup
configuration facility. To take a backup of configuration, click on System Settings link, and
then click on Backup Configuration hyperlink to open configuration page as shown in
Figure 5-25. To export current Gateway settings to a file, click on Export Current Settings
hyperlink in the page. This opens a window for you to select the filename in the location you
choose. Once you select OK button on the window, it shows the status of the operation.
Figure 5-25 Backup configuration
To import previously stored Gateway settings in a file, type in the file name in the edit box
provided on this page, or click on Browse... button next to it, to choose the file name. Once done,
click on Import button to import settings to the Gateway. The operation shows the final status as
shown in
Figure 5-26.
Figure 5-26 Backup Configuration - progress
Page 35 of 97
IPSec Router + Print Server User’s Guide
Rebooting Gateway
To reboot the Gateway for some reason, click on Administration on the left pane, and click on
Reboot hyperlink. You will be asked for confirmation of the reboot with Yes or No buttons.
Figure 5-27 represents the HTML page content.
Press Yes button to reboot the box. Though there is a physical reset button on the Gateway,
rebooting the box using HTML configuration is lot easier.
It is recommended to use this operation after firmware upgrade.
useful when the Gateway is not easily reachable physically.
Figure 5-27 Rebooting the Gateway
Press Cancel button if you do not want to reboot the box.
Page 36 of 97
This operation is specifically
IPSec Router + Print Server User’s Guide
Diagnostic Tools
Figure 5-28 Diagnostic Tools
Sometimes, as an administrator of the Gateway, you may like to check whether there is
connectivity to a particular website or a computer on the Internet from your Gateway, or to
evaluate whether there is certain delay in the network to reach your target host. There are two
important diagnostic tools that help you identify and realize the behavior of the network.
To use these diagnostic tools, click on System Settings hyperlink on the left pane, and then click
on Diagnostic Tools hyperlink to open the configuration page as shown in Figure 5-28.
Ping can be used to check whether the host on the Internet can be reached from the Gateway.
Type in IP address (like 202.56.89.78) / domain name (like www.yahoo.com) in the edit box
provided. Click on Ping button, and wait, to see the responses as shown in Figure 5-29.
When Packets sent/received fields are greater than zero, then the connectivity exists. The data in
the figure also shows the packet loss percentage in addition to minimum, maximum and average
round trip times.
Figure 5-29 Diagnostic tools - ping results
Page 37 of 97
IPSec Router + Print Server User’s Guide
Trace Route is used to find the number of hops your data goes through for the specified remote
host. This command can be used once Ping output shows that the connection exists to the remote
host specified. The following Figure 5-30 shows the output format for Trace Route to host
202.125.84.253.
Figure 5-30 Diagnostic Tools - Trace route results
Changing your Internet Connection
Internet connection can be changed by two different ways in the Gateway configuration.
Using Quick Setup Wizard on the configuration home page.
Click on Change Internet Settings hyperlink on the home page.
Click on Network Settings menu on the left pane, click on Internet access hyperlink.
For more explanation on changing the Internet access, refer to Internet Access in Quick Setup
Wizard section.
Page 38 of 97
IPSec Router + Print Server User’s Guide
Uplink Bandwidth Settings
If your Gateway (that sends traffic at 100Mbps on WAN) is connected with low speed Internet
connection, that is usually Cable Modem/DSL, you need to limit the traffic that is sent on the
Internet, otherwise there are chances of Cable Modem/DSL dropping packets. You can limit the
Uplink Bandwidth by setting correct Uplink Bandwidth value.
Click on Network Settings menu on the left pane, click on Bandwidth Reservations hyperlink.
Figure 5-31 shows Uplink Bandwidth Settings page.
Figure 5-31 Uplink Bandwidth Settings
Setting the uplink bandwidth value, limits the speed of the traffic send on the Internet to the
value selected. Check with your ISP the type of connection you bought. Based on the type of
connection selected, outgoing data bandwidth will be limited to the value shown in the bracket of
each connection.
If you want to select different value from the standard uplink bandwidths shown, select other
option that facilitate to enter any value you wish. You can enter any value between 26 Kbps and
102400 Kbps depends on the bandwidth you purchased from the ISP.
If you don't know to enter the exact uplink bandwidth value of your Internet connection, you may
obtain the information using different standard bandwidth meters available on the Internet. You
may test your connection bandwidth and speed from the website, http://reviews.cnet.com/7004-7254_70.html
Default uplink bandwidth is set to 102400Kbps on your Gateway.
Page 39 of 97
IPSec Router + Print Server User’s Guide
Advanced Configuration
DHCP Server
By default, your Gateway is already set to offer IP addresses for machines on the local network
automatically. If you would like to change the configuration of Gateway for DHCP server, click on
Network Settings on the left pane, and click on Local Area Network to show the DHCP server
related configuration as in Figure 5-32.
Figure 5-32 Local Area Network Settings
The default configuration is shown in Figure 5-32 when you open this page for the first time.
Administrator may restrict the range of the IP addresses offered.
Gateway IP address should be specified same as the internal IP address of your IPSec Router +
Print Server (192.168.1.1 by default).
You may specify WINS server IP address, which handles DNS requests on the Local network for
Microsoft PCs. Lease duration, is the time of the IP address to be offered for a PC.
You may view the local PCs that are issued dynamic IP addresses by your Gateway. Click on View
DHCP Users hyperlink that pops up a window showing the details of each machine as shown in
Figure 5-33.
Page 40 of 97
IPSec Router + Print Server User’s Guide
Administrator may disable DHCP server and manually configure IP addresses for machines on the
local network.
Figure 5-33 List of DHCP users
DHCP Relay
Figure 5-34 DHCP Relay Settings
Sometimes, you may require getting IP addresses from a DHCP server on your WAN connection
(may be Internet). To do so, you should enable DHCP relay feature so that your RGS Gateway
provides bridging between your LAN and WAN for DHCP.
To configure the DHCP relay, click on Network Settings hyperlink on your Gateway configuration
pane, and then click on Local Area Network hyperlink. This opens up the configuration for DHCP
relay as shown in the Figure 5-34. Select the radio button, Enable Relay and enter the DHCP
server IP address running on WAN.
Page 41 of 97
IPSec Router + Print Server User’s Guide
Firewall
Time window/Access Schedule concept adds powerful configuration feature to the Firewall. Before
actual firewall policies are explained, it is a prerequisite for the user to understand the concept.
Access Schedule
Time window allows the firewall to add policies for only during the time window. For example,
administrator might want the local network users to access Internet only during certain hours of
the day/week; it can be restricted using these time windows. Time windows are independent
configuration from Firewall, though firewall makes use of time window configuration.
For Time Windows, click on System Settings on the left pane, and then click on Time
Windows hyperlink. This opens up a time window page, where you can view the existing entries
and add a new time window. These time windows can be made use of in the firewall access
policies.
Each entry can be either edited by clicking the
icon or deleted by clicking the
icon on the
same line. As following Figure 5-35 shows, every time window can be each time window entry can
allot three different time slots on different days of the week. More explanation follows on adding
the time window entries.
Figure 5-35 Access Schedule entries
Page 42 of 97
IPSec Router + Print Server User’s Guide
Click on Add opens Access Schedule configuration as shown in the Figure 5-36 below. You may
like to give a meaningful name to the entry, since these names will be used while adding a firewall
policy. The Time window name field accepts single word.
Figure 5-36 Configuring new Time Window
The entries are explained with an example as follows: As an administrator you may like to give
Internet access to the PCs connected to Local network at the following times; 6:00 AM - 8:00 AM
on all Mondays, Tuesdays, Thursdays, Fridays; access is denied on Saturdays and Sundays; 7:00
AM - 8:00 AM on all Wednesdays. Hence there is a continuity loss (Wednesday has different time
period), you should split the time window entry into three different time periods. Add Monday to
Tuesday - 6:00 AM - 8:00 AM in Time period 1, and rest as shown in the Figure 5-36. The entries
are not considered whose periods are conflicting in a time window.
Time period from "Monday to Tuesday - 6:00 AM - 8:00 AM" does not mean
period from Monday 6:00 AM till Tuesday 8:00 AM. It means the time period
between 6:00 AM - 8:00 AM on all Mondays and Tuesdays.
Page 43 of 97
IPSec Router + Print Server User’s Guide
Access Policies
Figure 5-37 List of firewall Access policies
Page 44 of 97
IPSec Router + Print Server User’s Guide
As a factory setting, Firewall allows Internet traffic related to certain commonly used PC
applications that use the following protocols. They are ping, DNS, RIP, DHCP (client and server),
SMTP (e-mail protocol), POP3, FTP (File Transfer Protocol), Telnet, HTTP, HTTPS (for web
browsing), instant messengers like AOL, MSN and Yahoo, IKE (for VPN). Administrator of the
Gateway may choose to deny some protocol traffic by selecting "denied" radio button for that
service, or he can uncheck "Enable" to disable policy.
The traffic not related to any of the above these applications would be allowed to pass through the
Gateway by default.
To add a firewall policy for your own application, click on Add New User Defined Policy hyperlink
close to the top of the page shown in Figure 5-37, to lead to the configuration page as shown in
Figure 5-38 below. The configuration makes the firewall allow/deny the traffic requested from the
internal network to the Internet (outbound traffic). This uses concept of Network Address
Translation (NAT), hence Gateway allows all Local PCs to use same public IP address. All the predefined policies shown in the Figure 5-37 earlier use the same concept.
The configuration requires you to provide,
the remote host domain name/IP address or IP address range (select "Any" radio button if
required for all machines) to which connections will be made,
Local host IP address or range of IP addresses (or select a radio button for "ALL" machines) from
which the connections will be made,
A pre-determined service from the drop-down list or specify port range (if only one port exists,
provide duplicate entry) with transport protocol (TCP/UDP),
Whether policy to allow/deny this traffic,
And access schedule policy to be used (always by default). All the added time windows will
appear in the drop-down list.
Figure 5-38 Adding a new custom firewall access policy
Once the entries are complete, click Add button to add the policy into the list. The added entry is
shown up to the firewall outbound policy list as shown in the Figure 5-39 below.
Page 45 of 97
IPSec Router + Print Server User’s Guide
Figure 5-39 Newly added custom firewall policy
The firewall policy can be changed to allowed/denied, disabled/enabled, modified, or deleted.
Page 46 of 97
IPSec Router + Print Server User’s Guide
Remote Box Access Policies
Figure 5-40 Remote Box Access Policies
Box Access settings are the access policies that are required by firewall running in your Gateway
to support the rest of the services on box. As shown in Figure 5-40, few are Internet Key
Exchange Policy (UDP 500), to access built in HTTP server (TCP 80), DHCP Server & Client (UDP
67 & 68 ports), and ICMP.
Box Access settings can be accessed by clicking System Settings hyperlink on the left pane, then
clicking Box Access hyperlink. The policies created cannot be deleted or modified. They may be
disabled in case you know the respective feature is to be turned off in the Gateway, by Disable
hyperlink against the entry.
Page 47 of 97
IPSec Router + Print Server User’s Guide
Port Forwarding
With this feature, you can setup services like web servers, file servers, e-mail servers, and any
other customized applications to the Internet on internal PCs. To give access from the Internet,
Gateway administrator should give access from the Internet, by adding policy to allow the traffic
initiated from Internet to internal network (inbound traffic). This uses Reverse Network Address
Translation (RNAT) concept.
To add a policy, click on Security Settings on the left pane, and click on Port Forwarding to
open up the page as shown in
Figure 5-41.
Figure 5-41 Port Forwarding
The configuration provides a default host for any traffic initiated on the Internet so that if none of
the port forwarding policies match, the traffic reaches the default host. This is useful for some
applications like games where dynamic transport (TCP/UDP) port numbers are used by the
applications. Administrator may choose from drop-down list against Default Host: field that
shows the list of all local networked PC names (that received dynamic IP addresses from
Gateway). If any local PC is statically configured for its IP address, then "Custom" radio button
and edit box can be used. Press Apply Changes button once done.
To create a new rule for inbound traffic, click on Add New Port Forwarding Policy button on the
page shown in
Figure 5-41, which will lead to the configuration page as shown in figure 5-49.
Page 48 of 97
IPSec Router + Print Server User’s Guide
Figure 5-42 Add a new port forwarding policy
The configuration requires you to provide,
the remote host IP address/domain name or range (select Any radio button if required for all
machines) from which the Internet traffic is generated,
local host IP address or range of IP addresses (or select a radio button for ALL machines) to
which traffic is destined to,
a pre-determined service from the drop-down list or specify port range (if only one port exists,
provide duplicate entry) with transport protocol (TCP/UDP),
whether the local service to use same port as the source port of the packet, provide a custom port
if different,
whether policy to allow/deny this traffic.
Once done, click on Add button, to add to the list of port forwarding policies.
Now, Gateway applies this rule to all the Internet generated traffic, if rule matches, then the
packet is directed to the internal machine specified. If not, default host receives the traffic.
An internal machine with a private IP address such as 10.X.X.X, 172.16.X.X, 192,
168.X.X cannot be accessed directly by a user on the Internet. To access any
internal server on the private network, Internet user should use public IP address
of the IPSec Router + Print Server assigned by the ISP on the specified port.
Page 49 of 97
IPSec Router + Print Server User’s Guide
Port Triggering
Some complex applications exchange the control information on well-known ports and the control
messages may specify some port numbers to be used for the data exchange. For example, FTP
uses TCP port 21 for its control information and uses different ports for the actual data transfer.
There is increase in number of applications that use one control connection and multiple data
connections, where the end user is asked to provide the TCP/UDP port information. To allow all
such traffic, your Gateway must be configured to work with all the connections that will be used.
More detailed explanation of the configuration follows.
Figure 5-43 Port Triggering
To list port-triggering entries for firewall in Gateway, click on Security Settings on the left pane,
click on Port Triggering hyperlink to see the configuration page as shown in Figure 5-43. Each
entry can be either edited by clicking the
icon or deleted by clicking the
icon on the same
line.
To add a new entry, click on Add New Trigger hyperlink, which opens a configuration page as
shown in figure 5-51.
Provide a meaningful name for a port trigger entry against Trigger Name.
Trigger Port is the standard port for the protocol/application at which the service is offered. You
may select the radio button against drop-down list provided and select one from it. Or you may
choose a custom port number for your custom application.
Source IP specifies for what host(s) on the local network, the port-trigger has to be applied. To
choose IP address of a single host, select the radio button IP Address, and enter the IP address in
the edit box. If you don't know the IP address of a host or if it changes dynamically, you may
select Local Computers radio button to select a host name on the local network. If you want the
port-trigger to be activated for any local computer, select the radio button Any.
Incoming ports are the data ports for the application that will be used during the data exchange.
Incoming ports are the port numbers on which the data is received by your Gateway.
Page 50 of 97
IPSec Router + Print Server User’s Guide
Figure 5-44 Adding new Port Triggering entry
Instead of deleting a record when unnecessary, you may preserve the entry with enable/disable
options. If you select the option Yes to enable the record for the question, Do you want the
record to be enabled? Choosing No would disable the record.
Once done, you may choose to click on Apply Changes to add a port-trigger entry.
Page 51 of 97
IPSec Router + Print Server User’s Guide
URL keyword filtering
Figure 5-45 URL keyword filtering
As an administrator, you may like to avoid your local network PCs to access some websites. If you
are aware of such websites, you can add those to the URL keyword filter list so that when http
request is made to a particular website, the Gateway drops the http requests.
This is specifically useful in parental control.
To access this feature, from the left pane click on Security Settings, click on URL keyword
Blocking hyperlink to open up the page as in
Figure 5-45.
Enter the known URL keyword in URL that you may like to block in the edit box as shown. Click on
Add button to add to the URL keyword filter list. The entry can be deleted by clicking on the
delete
icon.
Once http request is made by local network PCs, the Gateway tries to match the keywords in the
URL. If found, the http request will be dropped by the Gateway.
Page 52 of 97
IPSec Router + Print Server User’s Guide
VPN
To encrypt/decrypt, secure your Internet traffic from/to your local PC, all the following
configuration steps are required.
Data Security Policies (IPsec): your IPSec Router + Print Server needs to be configured to define
its policies to encrypt/decrypt the data traffic. This is required before creating any Internet Key
Exchange policies as in step 3.
When a Data security policy is created, a corresponding inbound firewall policy will be added
automatically to allow all the incoming traffic. A user can customize to restrict the traffic allowed.
For example, a user can allow only HTTP traffic into the box, and restrict the rest.
Create Internet Key Exchange (IKE) Policies: Internet Key Exchange policy allows your RGS Pro
to negotiate keys with a remote Gateway that are used to create a tunnel to encrypt/decrypt your
actual data (ex: your bank transaction details) between the Gateways. The keys generated are
dynamic in nature.
Click on Security Settings on the left pane, click on VPN Policies hyperlink to open
configuration as shown in Figure 5-46. You may also set VPN Policies, using Change VPN Settings
hyperlink on the home page.
Figure 5-46 VPN configuration policies
Page 53 of 97
IPSec Router + Print Server User’s Guide
Data Security Policy Configuration
Click on Create new Data Security (IPsec) Policy hyperlink as shown in configuration page in
Figure 5-46. The following
shows the configuration page to create a new data security policy.
Figure 5-47 Data Security Policy
Source Network can be one of IP address, IP address range or ANY. If you have to create
security association from only one host in the LAN, then you may choose IP address, and provide
the same in the edit box. If you have to create security association from internal hosts with IP
addresses in sequence, you can choose the option IP Address Range, and specify the start and
end IP addresses in the LAN. If the policy is to apply to all the hosts on the LAN, choose the radio
button, ANY.
Destination Network can be one of IP address, IP address range or ANY. If you have to create
security association to only one host in the destination network, then you may choose IP address,
and provide the same in the edit box. If you have to create security association to hosts in the
destination with IP addresses in sequence, you can choose the option IP Address Range, and
specify the start and end IP addresses. If the policy is to apply to all the remote hosts, choose the
radio button, ANY.
Page 54 of 97
IPSec Router + Print Server User’s Guide
Source Network & Destination network cannot take value ANY same time.
Data Security policies can operate either in transport mode or in tunnel mode. When transport
mode is used, encryption happens at the end points, and in the network, hackers can identify the
source and destination IP addresses, but they cannot identify the content.
When the tunnel mode is used, the packets sent by internal hosts will be encrypted including the
source/destination IP addresses. The Gateways initiate new packets to destination gateways,
enclosing the original packets generated by internal machines. This protects from any hackers
knowing the private addresses on the Internet, as well as the content.
In tunnel mode, your RGS Pro must know its Remote Gateway to which the tunnel is going to be
established. You may submit either IP address or FQDN of the remote Gateway.
You may choose Security Level for authentication as one of values, None, HMAC-MD5 (weak),
HMAC-SHA-1 (strong), and one of encryption algorithms; None, DES (weak), 3DES (strong), AES
(medium) for IKE negotiation. If you choose encryption algorithm AES, you must choose one of
bit key lengths, 16, 24 or 32. The higher the number, the more the security.
Authentication & Encryption both cannot be “None”.
The life of the policy to be created can be restricted using two factors, time in seconds, and
number of Kilobytes of data. Choose the appropriate value in the drop-down list and provide a
logical value in the edit box. The default value for the life of the policy is 300 seconds.
Once done, click on Add button to create an entry in Data Security Policies.
As mentioned in step 2 in the VPN introduction section, you need to add an inbound firewall policy
to allow the decrypted packets into the local network. The policy is automatically added for you
that allows all the traffic between the hosts. The same is informed to you by a pop-up window.
Page 55 of 97
IPSec Router + Print Server User’s Guide
Figure 5-48 New Data Security (IPsec) policy
You may like to customize the inbound firewall policy by selecting OK button on the pop-up
window. If Cancel button is pressed, the configuration page is shown displaying the newly
entered firewall inbound policy as in Figure 5-49.
Figure 5-49 new entry in inbound firewall policies for IPsec policy created.
Page 56 of 97
IPSec Router + Print Server User’s Guide
Modifying a Data Security Policy
If you like to modify an existing data security policy, click on VPN Policies on the left pane of the
RGS Pro configuration. Once configuration is shown as in Figure 5-46, click on the
image on
the same data security policy entry that you like to modify. As shown below in Figure 5-50 you
may like to modify the policy and click on Apply Changes button. This modification is done in the
related firewall inbound policies automatically. Your RGS Pro pops-up a window asking you
whether to customize the related firewall inbound policies. Click OK to customize it further.
Figure 5-50 Modifying the Data security policy
Page 57 of 97
IPSec Router + Print Server User’s Guide
Deleting a Data Security Policy
If you like to delete an existing data security policy, click on VPN Policies on the left pane of the
RGS Pro configuration. The configuration entries are shown as in Figure 5-46, click on the
image on the same data security policy entry that you like to delete. You are prompted with a
pop-up window for confirmation to delete the entry. Click OK button to delete the entry.
Figure 5-51 Deleting a data security policy
Now you also need to delete the inbound firewall policy related to this data security policy. Before
data security policy is deleted, you will be prompted to find whether the related firewall inbound
policies are also to be deleted automatically.
Figure 5-52 Deleting the related firewall policy for the VPN data security policy
Page 58 of 97
IPSec Router + Print Server User’s Guide
Click OK to automatically delete the firewall policies also. Pressing Cancel button would delete the
data security policy, but not the related firewall inbound policies.
Page 59 of 97
IPSec Router + Print Server User’s Guide
Internet Key Exchange Policy
To add a new IKE policy, click on Create New Internet Key Exchange (IKE) Policy hyperlink from
configuration page shown in Figure 5-46 to lead to IKE configuration page as in figure 5-60.
Figure 5-53 Internet Key Exchange Policy
There are two modes for key exchange type, one main mode, and the other aggressive mode.
If you choose aggressive mode, the identities of local and remote identities are not protected on
the network during the negotiation, but it is faster. The default, main mode, provides identity
protection with additional overhead.
Preshared key field is the agreed secret key between the two end points. Shared key needs to
be kept secret from any third party. The length of the key should be between 12-48 bytes.
Local Identifier field is to be provided for your IPSec Router + Print Server that is used in the
IKE negotiation. It can be one of these entries; IP address, FQDN, user@FQDN. You should
provide the appropriate value in the edit box as per the selection in the drop-down list.
For Local Gateway IP address, Internet (WAN) address should be filled in the edit box.
Remote Identifier field is to be provided for your remote Gateway to which IKE negotiation to
happen. It can be one of these entries; IP address, FQDN, user@FQDN. You should provide the
appropriate value in the edit box as per the selection in the drop-down list.
Remote Gateway IP address should be filled in the edit box provided. It can be either IP
address or domain name.
Page 60 of 97
IPSec Router + Print Server User’s Guide
For the question, Would you like this policy to support remote user? you must choose No in
all normal cases. If you like to allow remote hosts to enter your private network, choose Yes to
the above question.
For the question, Would you like roaming user support?, choose Yes option to allow users
who are roaming and accessing the Internet through dial-up or some other mechanism where the
user does not have fixed IP address. You must create Remote Host Configuration record as
shown in the details provided in the next section. If you have a remote user with a fixed IP
address, then you should choose No to this question. This latter case is especially useful when a
service is provided on your private network, and many hosts would like to access the service
behind your IPSec Router + Print Server .
You may choose Security Level for authentication as one of HMAC-MD5 (weak), HMAC-SHA-1
(strong), and one of encryption algorithms; DES (weak), 3DES (strong), AES (medium) for IKE
negotiation. If you choose encryption algorithm as AES, you may choose 16, 24 or 32 bit key
lengths. The higher the number, the more the security.
Keys generated in IKE negotiation will be renewed for a definite interval of time, which can be
configured in the Life Time field. The default is 300 seconds.
Select the same Diffie-Helman group for both parties for IKE negotiation. Each group specifies
different byte lengths, the more number of bytes, and the higher the security.
Page 61 of 97
IPSec Router + Print Server User’s Guide
Remote Host Configuration
You may like to access the home network running behind the IPSec Router + Print Server from
anywhere on the Internet. This is possible using Remote Host Configuration. You can configure
the same by clicking Add New Remote Host Configuration Record hyperlink from the page as
shown in Figure 5-46 that leads to the configuration page shown in Figure 5-54.
The IP Address Ranges are the IP addresses to be used by the private networks. The Internet
standard list of private IP addresses are 10.0.0.0 - 10.255.255.255, 172.16.0.0 - 172.31.255.255,
192.168.0.0 - 192.168.255.255.
If you have your private network in the subnet
(192.168.XXX.XXX), you may provide IP address ranges with the same network addresses. Make
sure the specified IP addresses ranges do not clash with the IP address range specified for DHCP
server configuration for Local Area Network.
Figure 5-54 Remote Host configuration
You must choose a valid Diffie-Helman Group for secure communication from the remote host.
The same Diffie-Helman Group should be used by the Remote Host to access the home network.
The remote host must also comply with the authentication and encryption algorithms specified
in this configuration page.
Once done, click on Add button to add Remote Host configuration.
Now create an IKE policy for remote user with roaming user support.
Page 62 of 97
IPSec Router + Print Server User’s Guide
Dynamic DNS
Your Gateway is featured with Dynamic Domain Name System (DDNS). The feature lets you
assign a fixed host with a fixed domain name though IP address of the host changes dynamically.
It is useful when you are hosting a website, running FTP service or any other service in your
internal private network connected to the Gateway, and make any useful information accessible
anywhere on the Internet.
You must have Internet connectivity and you need to register with DDNS service provider using
website
http://DynDNS.org/.
Create
an
account
using
URL
https://www.dyndns.org/account/create.html after providing user name, password and domain
name you require for hosting your server. Using the just created account, you can now create the
five free domain names like xxxxx.dyndns.org when connected to http://members.dyndns.org.
Now, this information is to be used in your Gateway configuration in order to make your local PCs
accessible from the Internet using the domain names you created. To configure, click on Network
Settings hyperlink and then Dynamic DNS hyperlink on the left pane, to open up the
configuration page as shown in the
Figure 5-55.
It shows the list of dynamic DNS entries, and their status. To modify an existing record, click on
icon. To delete one, click the
icon on the same line.
Figure 5-55 List of DynDNS entries
To create a new Dynamic DNS record, click on the Add New Dynamic DNS Record, to open a
configuration page as in figure 5-55.
Page 63 of 97
IPSec Router + Print Server User’s Guide
Figure 5-56 Adding a new Dynamic DNS record
Domain Name 1, 2, 3 are the three domain names you registered with the dyndns.org website.
You may like to specify the three domain names out of the domain names that you registered
earlier.
Update information using: should be dyndns protocol only in this product.
Provide the User Name and Password with which the domain name accounts are created.
Choose Service Provider field based on the website you used to create the DNS names. From
the drop-down list against this field, choose members.dyndns.org.
Once done, click on Apply Changes to add a DDNS service record.
To modify the existing record, click on the
icon on the entry from the page as in figure 5-55.
Page 64 of 97
IPSec Router + Print Server User’s Guide
Multicasting
Figure 5-57 Multicast Proxy
Multicasting is an Internet technology that allows data generated by a multicast host gets
transmitted to multiple hosts registered to a multicast address. If any of the local PCs are using
applications that use multicasting, Gateway can be enabled to allow the multicast traffic. This is
specifically useful for multimedia conferences over the Internet.
To enable/disable the Gateway to behave like a proxy for multicasting traffic, as in
Figure 5-57, click on Network Settings and click on Multicast Proxy.
To enable the multicasting proxy behaviour by Gateway, select Enable radio button. Select the
Disable radio button to disable it.
Page 65 of 97
IPSec Router + Print Server User’s Guide
Universal Plug-n-Play
Universal Plug-n-Play (UPnP) architecture allows Windows XP to automatically configure the
Gateway for some applications, MSN messenger service.
MSN Instant Messenger: Microsoft’s website, msn.com offers Instant messenger which is used
by Internet users, called buddies use the software application to chat, send individual files to
other buddy, send video and such services.
To configure the UPnP capabilities offered by your Gateway, as in
Figure 5-58, from the left pane click on Network Settings hyperlink to show options. Click on
UPnP hyperlink to show its configuration.
To enable/disable the UPnP capabilities for the Gateway, you may wish to click on enable or
disable radio buttons based on your choice.
Once UPnP service is enabled, you can select the appropriate checkboxes that correspond to
specific applications that you might want the Windows XP PC to configure in the Gateway. Once
done, click on Submit button to reflect the changes.
Figure 5-58 Universal Plug n Play
Page 66 of 97
IPSec Router + Print Server User’s Guide
MAC Cloning
To find the MAC address on the PC to be cloned,
Click on Start button on the Windows task bar.
In Start button menu, click on Run....
It opens a small window, enter cmd to get the console window.
On the console, run ipconfig /all command.
Identify the 12-digit number against "Physical Address . . . . :" separated by hyphens (-).
Copy the MAC address (along with hyphens) information on to the Configuration page.
Figure 5-59 MAC Cloning
The procedure allows your internal PCs to be secure from the Internet by using the Gateway and
as well as access the Internet using the same MAC address as PC.
Page 67 of 97
IPSec Router + Print Server User’s Guide
Print Server Configuration
In IPSec Router + Print Server site
Your printer USB cable only needs to connect to he back plane USB port of IPSec Router + Print
Server , and then IPSec Router + Print Server will auto enable USB printer device.
So if you wanna use USB printer of IPSec Router + Print Server in desktop or notebook, you only need
to setup O.S site with Appendix B setting procedure.
Page 68 of 97
IPSec Router + Print Server User’s Guide
6.
Appendix A: Troubleshooting
Common Problems and Solutions
I forgot my gateway administrator password, what do I do?
Use the “Reset” button of the router chassis to restore the factory default.
Frequently Asked Questions
Can my Gateway be a DSL modem as well?
No. Your Gateway provides firewall and VPN security to the internal network. Your Gateway
should be connected behind your DSL or Cable modem. Your Gateway acts as a simple host
towards the Internet.
Does the Gateway support protocols other than IP?
No. Your gateway supports only Internet Protocol.
What is the Network Address Translation?
IP Address is translated for two purposes by a Gateway that connects two networks. One reason
is to save number of IP addresses on one side, the other, to hide the internal IP addresses of the
hosts.
What all Microsoft Windows platforms Gateway supports?
It supports Windows 95, 98, Me, 2000, XP, and 2003 versions.
Do I have DHCP address or static IP address?
By default, the Gateway uses DHCP client to connect to the Internet. Please ask your ISP if it is
offering static IP. If static IP is offered, configure static IP using Internet Access hyperlink on the
HTML configuration page.
What is the URL to configure my Gateway?
Open browser, and type in http://192.168.1.1/ as URL.
What are the browsers to be used for Gateway configuration?
Internet Explorer 6.0. Other browsers are not guaranteed to work.
Any reasons why I don’t get the Gateway configuration screens in my browser?
Check the connections and validate the connectivity using “ping” tool. You may like to run “ping
192.168.1.1” from your PC. If successful, check your browser settings; remove if proxy settings
are set.
For Internet Explorer 6.0, click Tools menu, and Internet Options. Click on connection tab.
Make sure it is set to Never Dial a connection. Also, click on LAN settings button to open a
window, and uncheck “Use a proxy server for your LAN ….”
Which modems work with my Gateway?
Your Gateway can work virtually with all standard DSL and Cable modem available in the market.
What are the maximum VPN tunnels supported?
100 tunnels.
How many LAN users can connect to the Gateway? What are the IP addresses assigned to them?
Page 69 of 97
IPSec Router + Print Server User’s Guide
The Gateway provides all the active services to a maximum of 5 users. The IP address range can
be anywhere between 192.168.1.2 to 192.168.1.254.
What are the memory sizes on the Gateway?
8 MB Flash and 64 MB RAM.
How do I know what IP address my PC has?
Click on Start button on the Windows task bar. In Start button menu, click on Run…. In the
window opened, enter cmd to get the console window. On the console, run ipconfig /all command.
This will display the IP address of your PC. If there are multiple interfaces, you may have more
than one.
How do I know whether I can reach a machine from my PC?
Use Diagnostic tools from the configuration.
How can I know what protocol is used currently for Internet?
The home page of the IPSec Router + Print Server can have blocks of data shown. Internet Access
block of data represents the status and type of the Internet access.
What all applications UPnP has knowledge of?
At present, MSN Instant Messenger only.
Page 70 of 97
IPSec Router + Print Server User’s Guide
7.
Appendix B: Print Server Settings
Preparation
The print server supports TCP/IP protocol under Windows-based OS. Please make sure that
the following steps have been completed before proceeding with installation under Windows
PC.
TCP/IP
The TCP/IP Protocol must be installed. For further information, please read “TCP/IP
Protocol Installation” section in this chapter.
TCP/IP Protocol Installation
1. Click Start, point to Settings and select Control Panel.
2. Double click the Network icon.
3. If the TCP/IP Protocol is not already installed, click Add.
4. Select Protocol and click Add.
5. Select Microsoft from the Manufacturers list.
6. Select TCP/IP Protocol from the Network Protocols list.
7. Specify an IP address, Subnet Mask, and Gateway address or specific “Obtain IP
address automatically”, if a DHCP server is available on the LAN.
8. Restart the computer.
9. Done.
Note: Using TCP/IP protocol to access the print server requires well-configured TCP/IP
settings. If you are not familiar with these settings, please consult your network
administrator for details or ask for help.
Page 71 of 97
IPSec Router + Print Server User’s Guide
Windows-based System Installation Procedure
Windows NT LPR Port Installation
1. Click Start, point to Settings, and select Printer.
2. Run Add Printer.
3. The Add Printer Wizard screen will appear, Select My Computer and click Next.
4. Click Add Port.
5. From the Printer Ports box as shown in the following picture, select the LPR Port.
6. The Add LPR compatible printers box will then appear as shown in the following picture.
Type in the router’s IP address in the Name or address of server providing lpd box.
7. In the Name of printer or print queue on that server box, type in a printer name, for
example, lp1. Click OK.
8. In the Printer Ports box, select Close.
9. Click Next.
10. Select the appropriate printer manufacturer and printer type list and click Next.
11. Select Shared. Type in a new Share Name or leave it in default and click Next.
12. A message reading, “After your printer is installed, Windows can print a test page so you
can confirm that the printer is set up properly. Select Yes (Recommended) and click
Finish
13. Done.
Page 72 of 97
IPSec Router + Print Server User’s Guide
Windows 2000/XP Standard TCP/IP Port Installation
1.
Click Start, point to Settings, and select Printer.
2.
Run Add a printer, Click Next.
3.
The Add Printer Wizard screen will appear, Select Local Printer and click Next.
4.
From the type of Create a new port box as shown in the following picture, select the
Standard TCP/IP Port, Click Next and Next.
5.
The Add Standard TCP/IP Printer Port Wizard box will then appear as shown the
picture as below, and type in the router’s IP address in the Printer Name or IP Address
box, and you can change the Port Name (optional). Click Next.
Page 73 of 97
IPSec Router + Print Server User’s Guide
In the Add Standard TCP/IP Printer Port Wizard box as shown in the following picture,
select Custom, Click Settings button.
6.
In the Configure Standard TCP/IP Port Monitor box as shown in the following picture,
select LPR from Protocol, type in a queue name: lp1 for Parallel Port (Port 1) or lp2 for
USB Port (Port 2).
7.
Click OK, and Next.
Note: Please DO NOT type any other name than lp1, lp2 in this step.
8.
Click Finish.
Page 74 of 97
IPSec Router + Print Server User’s Guide
9.
Select the appropriate printer manufacturer and printer type list and click Next.
10. Type in a new Printer name or leave it in default, and click Next button.
11. A message reading, “To confirm that the printer is installed properly, you can print a test
page”. Select Yes (Recommended) and click Next.
12. Click Finish.
13. Done.
Page 75 of 97
IPSec Router + Print Server User’s Guide
Windows SMB Printing
1. Click Print Server Setup in the top column, and the following box will appear.
2. Assume your computers use the “WORKGROUP” as the SMB workgroup name in
Windows. Please assign the same SMB name to your print server. If print server uses the
different SMB name from computers’, the SMB printing won’t active. And you have to
assign a name to the print server’s port, which connects your printer. (EX: OKI_391)
3. Now you can find the print server from the SMB workgroup of Windows. Then, double click
it.
4. Double click it again.
Page 76 of 97
IPSec Router + Print Server User’s Guide
5. Now you have to install the printer’s driver.
6. Choose it from the “Add Printer Wizard”.
Page 77 of 97
IPSec Router + Print Server User’s Guide
7. Install printer successfully.
8. Now, you can find your printer’s icon and use the SMB printing mode.
Page 78 of 97
IPSec Router + Print Server User’s Guide
Page 79 of 97
IPSec Router + Print Server User’s Guide
8.
Appendix C: IPSec VPN settings
IKE setting with IPSec Router + Print Server
1. Select “Would you like this policy to support remote user” ‚Yes.
2. Select “Would you like to support roaming user?“ ‚No.
3. Select “Exchange Type” ‚Main Mode
(Windows 2000/XP supports only Main Mode by default. So, it should be same as Windows.)
4. Enter “Pre-shared Key” value (should be same at the peer end).
5. Select “Local Identifier” type, as “IP Address” and its value would be taken automatically.
6. Select “Remote ID” type, as “IP Address” and enter IP address of remote gateway as value.
(In this case is Remote ID : 172.16.10.1)
NOTE: Windows 2000/XP does NOT support FQDN, so we need to specify Local and
Remote ID type as IP Address only
7. Select “Authentication” and “Encryption” algorithms in “Security Level”.
(This combination should be same at peer end, in this case is Authentication: HMAC-SHA-1,
Encryption: 3DES).
8. Enter “Life Time”. (E.g. 300 Secs)
9. Select “Diffe-Hellman Group”. (It should be same at peer end).
10. Click “Add” button.
Page 80 of 97
IPSec Router + Print Server User’s Guide
IPSec setting with IPSec Router + Print Server
1. Select “Source Network” type and enter corresponding value(s) accordingly.
(In this case is Source network : 192.168.1.3)
2. Select “Destination Network” type and enter corresponding value(s) accordingly.
(In this case is Destination network : 172.16.10.1.)
3. Select “Remote Gateway Type” as “IP Address” and enter Remote Gateway IP Address
as value.
4. Choose “Authentication” and “Encryption” algorithm in “Security Level”.
(This combination should be same at peer end).
5. Enter “Life Time” value. (E.g. 300 Secs)
6. Click “Add” button.
7. Click “OK” for Windows-popup appears after clicking this “Add” button
Page 81 of 97
IPSec Router + Print Server User’s Guide
IPSec client setting with MS Windows 2000
1.Go to “Start ‚ Settings ‚ Control Panel ‚ Administration Tools ‚ Local Security Policy”
2.Select “Security Settings ‚IP Security Policies On local Machines”.
3.In menu, select “Actions ‚Create IP Security Policy”.
4.In IP Security Policy wizard go to "Next"
4.1 Enter the "Name" (E.g. IP Security Policy) and "Description" fields and click “Next”
4.2 Disable the option "Activate the default response rule" and click "Next"
4.3 Select the option "Edit Properties" and click "Finish"
Page 82 of 97
IPSec Router + Print Server User’s Guide
5.In the “Rules” tab of appeared popup click “Add”
5.1 In “Security Rule Wizard” popup window, click "Next".
5.2 To use IPSEC transport encapsulation mode, Select the option "This rule does
not specify the tunnel" and click "Next" OR to use IPSEC tunnel mode, enter the tunnel Peer IP
address (E.g. ADSL server assign, in this case) and go to "Next". And Select the option "All
network connections" and click "Next". (The To Lan tunnel endpoint IP 172.10.10 then From
tunnel end point IP 172.16.10.1)
5.3 For IKE certificates authentication, Select the option "Use Certificates CA " and browse the CA
certificate. Select the appropriate certificate (for SSH CA "Test A1").
5.4 For IKE pre-shared key authentication, Select the option "Use this string to protect the key
exchange (pre-shared key)" and enter the value for the pre-shared key. (Note: This pre-shared
key should be same as you configured with router box). Please choose one between 5.3 and 5.4
to setup.
Page 83 of 97
IPSec Router + Print Server User’s Guide
5.5 Go to "Next".
6. In IP Filter List, add the new IP filter list using the "Add" button
6.1 Provide some "Name" (E.g. To LAN) and “Description” then click "Add".
Page 84 of 97
IPSec Router + Print Server User’s Guide
6.2 In “IP Filter Wizard” popup window, click "Next".
6.3 Select the “Source Address” as “Specific IP Address” and enter the IP address of the win2k
system (E.g. 172.16.10.1, in this case) and click "Next" button.
6.4 Select the “Destination Address” as “Specific IP Address” and enter the IP address of router
box’s external IP Address (E.g ADSL server assign, in this case) and click "Next".
Page 85 of 97
IPSec Router + Print Server User’s Guide
6.5 “Select the protocol type” ‚Any and click "Next"
6.6 Click "Finish"
6.7 In IP Filter list, select the new IP filter list (E.g. "To LAN", in this case) and click “Next”
Page 86 of 97
IPSec Router + Print Server User’s Guide
7.In Filter Actions, Click "Add" to add a new filter action
7.1 In “Filter Actions wizard”, click "Next".
7.2 Enter name field (E.g. " Router Filter") and “Description fields” and click “Next”
7.3 Select "Negotiate security" and click "Next".
Page 87 of 97
IPSec Router + Print Server User’s Guide
7.4 Select "Fall back to unsecured communication" and click "Next"
7.5 Select "Custom" and click "Settings"
7.6 Select the required IPSEC attribute combination which you have configured with RGS box and
click "OK"
7.7 Click "Next"
7.8 Click "Finish"
7.9 Select newly created filter action (E.g. " router Filter", in this case) and click “Next” Click
“Finish”
Page 88 of 97
IPSec Router + Print Server User’s Guide
Page 89 of 97
IPSec Router + Print Server User’s Guide
8.In "General" tab of “New IP Security Policy Properties”, click "Advanced" and give the appropriate
values for time and number of sessions for which a new key is generated.
8.1 Select "Methods" and "Add" the security methods corresponding to the IKE
attributes added in the router box.
8.2 Remove the other combinations for clarity.
8.3 Configure only one set of IKE transform attributes
(e.g. DES-MD5-DH Modp768 or DES-SHA1-Modp1024 but NOT both)
Page 90 of 97
IPSec Router + Print Server User’s Guide
9.To use IPSec tunnel encapsulation mode,
9.1 There Should be two IPSEC security rules
9.2 One is already added for outbound (i.e. To LAN : from Windows to router box) using the above
configuration
9.3 Add the second IPSEC security rule (i.e. From LAN : from router box to Windows).
For this, repeat steps 5 to 9 by reversing Source and Destination Addresses (i.e. Source IP address
as router box’s external IP (ADSL server assigm) and Destination IP Address as Windows IP
(172.16.10.1)).
NOTE:
Changes in IPsec attributes can be done through "Rules" tab in properties. Select the IP security rule
and Click on "Edit". Go to "Filter Action" and select the correct entry and Click on "Edit" and make
any changes required in the IPsec attributes. Changes in IKE attributes can be done through
"General" tab in properties as mentioned in step 8.
10. After adding“Filter List” and “Filter Action” for both inbound and outbound, check that, this policy
(e.g. “IP Security Policy”, in this case) is created. (Locate for “IP Security Policy” under “Name”
of view panel of “ Security Settings ‚IP Security Policies On Local Machines”).
11. Now, assign this “IP Security Policy”;
11.1 Right click “IP Security Policy ‚Assign”.
IMPORTANT:
You should remove any other third party VPN client (e.g. Safenet SoftRemote), if installed before
assigning it.
12. Finally, connect to the RGS box.
12.1 Ping to any internal machine (at the LAN side of RGS Box, e.g. 192.168.1.3 in this case)
< Checks >
1
Check where you are getting reply from internal machine where you pinged.
2
Check that “Bytes Transferred” are increasing with every ping reply from the internal machine.
3
Go to “Reports ‚VPN Reports” in main page after you login to RGS box and check “Bytes
Transferred” Column.
Page 91 of 97
IPSec Router + Print Server User’s Guide
9.
Appendix D: Glossary
Adapter – Electronic circuitry that converts one form of input to a different form of output so that
it fits for your PC or Gateway. Examples are Power Adapter, Ethernet Adapter, DSL Adapter.
Backbone – The part of a network that connects many systems and networks and handles high
volume of data.
Bit – binary digit with values 0 or 1 in the binary numbering system.
Boot – When your Gateway or PC is powered on, the built-in instructions in a ROM chip that are
automatically executed to search and load operating system and pass control to it.
Bridge – A device that provides connectivity between different networks.
Broadband Connection – Media that offers higher bandwidth that has capability to allow voice,
video and data transmission. Now a days, Cable television network and Digital Subscriber Line
(DSL) do offer residential broadband connections.
Browser - A browser is an application program that allows the user to browse through the web
pages on your PC. For example, the browser can be used to look at web (html, shtml, xml) pages
and download files that are available using FTP.
Cable Modem – A device that connects a computer to its Ethernet port and then to Internet
through the Cable TV network. Once connected, cable modem users have a continuous connection
to the Internet. Cable modems support bandwidth of 36 Mbps downstream (from the Internet to
the computer), and from 200 Kbps to 2 Mbps upstream (from the computer to the Internet).
CAT 5 cable – ANSI/EIA (American National Standards Institute/Electronic Industries Association)
Standard 568 is one of standards that specify "CATegories" of twisted pair cabling systems (wires,
junctions, and connectors) in terms of the data rates that they can sustain. CAT 5 cable has a
maximum throughput of 100 Mbps and is usually utilized for 100BaseTX networks.
Data Packet – It is a collection of bits sent over a network at once. For example, an Ethernet
packet can be from 64 to 1518 bytes in length.
DDNS – Dynamic Domain Name System allows a network device with a dynamic Internet IP
address to have a fixed host and domain name, such as abcd.mydomain.com. It is useful when
you are hosting your own website, FTP server, or other server behind a router, so people can find
your site no matter how often the Internet IP address changes. Using DDNS requires registering
with a DDNS service provider on the Internet.
Default Gateway – The routing device used to forward all traffic that is not addressed to a
station within the local subnet.
Denial of Service – When an attacker floods packets continuously to occupy the network
bandwidth, your PC will not be able to respond to any other service requests. This leads to Denial
of Service. The attack is called Denial of Service attack.
DES – Data Encryption Standard, a standard by which sender and receiver use a shared secret
key to encrypt or decrypt the data. The key length used is 56-bits in this standard.
DHCP – Dynamic Host Configuration Protocol. All hosts/gateways that are in the network need to
have an IP address to communicate. Without this protocol, the administrator has to manually
specify the IP address in a host/gateway. This protocol allows all IP address assignments to be
centralized and automate the assignment of Internet Protocol (IP) addresses in an organization’s
network. The administrator of a DHCP server can configure the lease time of an IP address to be
used by a DHCP client. It also supports static IP address assignment for fixed hosts/gateways if
they run application servers.
Page 92 of 97
IPSec Router + Print Server User’s Guide
DMZ (Demilitarized Zone) - Allows one IP address (or computer) to be exposed to the Internet.
Some applications require multiple TCP/IP ports to be open. It is recommended that you set your
computer with a static IP address if you want to use DMZ Hosting.
DNS – Domain Name System maps the domain name against an IP address. People remember
meaningful domain names easily than the IP address that is in the form of numbers.
Domain – A sub network comprised of a group of clients and servers under the control of one
security database. Dividing LANs into domains improves performance and security.
Download – Receive the file from the network.
DSL – Digital Subscriber Line, Your telephone line is used as a digital carrier that can allow both
data and your normal telephone. DSL can be always be powered on. It need not be dialed every
time you are trying to connect to Internet.
Dynamic IP Address - An IP address that is automatically assigned to a client station in a
TCP/IP network, typically by a DHCP server. Network devices that offer services like web, printer
do not generally use DHCP. They are assigned with static IP addresses.
Encryption – A security method that applies a specific algorithm to data in order to alter the
data's appearance and prevent other devices from reading the information.
Ethernet - Supports 10 Mbps speed, this IEEE standard network protocol specifies how data is
placed on and retrieved from a common transmission medium. This is the physical carrier for all
TCP/IP protocol and its application messages.
Fast Ethernet – Same as Ethernet but supports 100 Mbps speed. Fast Ethernet uses CSMA/CD
network access method.
Firewall – A firewall can be a software/hardware device that is located as network gateway to
protect your private network from the attacks that can happen in the public Internet. It examines
each packet to determine whether to forward it towards its destination.
Firmware – Binary code that is written onto read-only memory (ROM) or programmable readonly memory (PROM). Once firmware has been written onto the ROM or PROM, it is retained even
when the device is turned off.
FTP (File Transfer Protocol) – Protocol used to transfer the files across the TCP/IP network. For
example, placing the files on to a web server uses FTP protocol.
Full Duplex – A device is capable of full duplex when it can send data simultaneously in both
directions.
FQDN - A fully qualified domain name consists of a host and domain name, including top-level
domain. For example, www.yahoo.com is a fully qualified domain name. www is the host, yahoo is
the second-level domain, and.com is the top level domain.
Gateway – Device that
communication protocols.
can
connect
two
different
networks
supporting two
different
Half Duplex – A device is capable of half duplex when it can send data in both directions, but not
simultaneously.
Hardware – All electronic component that are visible physically. Example, Electronic circuit
boards in PCs, Gateway.
Hop - The link between two network elements.
HTTP (Hyper Text Transfer Protocol) – Protocol that allows web pages to be transferred
across the Internet.
ISP (Internet Service Provider) - A company that offers internet access, services such as web
site building, virtual hosting to individuals and companies.
Page 93 of 97
IPSec Router + Print Server User’s Guide
LAN (Local Area Network) – A group of computers/gateways/routers connected that can
communicate each other in a small geographic area.
MAC (Media Access Control) – Every Ethernet networking device such as network adapter will
be assigned with a unique number so that they can communicate.
MD5 – A type of one-way authentication scheme that uses passwords. The password is hashed
and sent over the network so that only the sender and authenticator know about it. It is not very
secure authentication mechanism when compared to others like EAP-TLS or EAP/TTLS.
NAT (Network Address Translation) – IP Address is translated for two purposes by a Gateway
that connects two networks. One reason is to save number of IP addresses on one side, the other,
to hide the internal IP addresses of the hosts. In the case of NAT, when the traffic is generated
from your private network to public Internet, the source IP address of the packet generated will
be transformed to the public address of your Gateway. The end user receiving the traffic perceives
the packet to be generated by your Gateway.
Network Mask – Look at Subnet Mask.
Packet – A unit of data routed from an origin to its destination in a network.
Packet Filtering – Discarding unwanted network traffic based on its originating address or range
of addresses or its type (e-mail, file transfer, etc.).
Ping (Packet INternet Groper) – Utility used at the network elements (PCs, routers) to
determine whether a particular IP address is reachable and its delay to reach that network
element.
Plug-n-Play – When a device or an expansion board is attached to a computer system they
should be running without rebooting your computer system.
Port – A physical male or female sockets that can be hooked for plugging in communication lines,
modems and printers.
PPP (Point to Point Protocol) - Protocol that is used by your dial-up modem for your PC to
connect to the Internet. PPP protocol runs between dial-up modem and ISP. Once PPP connection
is established, your PC gets Internet connectivity.
PPPoE (Point to Point Protocol over Ethernet) – It is a method that encapsulates PPP packets
over Ethernet frames from the user to the ISP over the Internet. PPPoE is preferable by ISPs
because it provides authentication (username and password) in addition to data transport. A
PPPoE session can be initiated by either a client application residing on a PC, or by client firmware
residing on a modem or router.
PPTP (Point to Point Tunnelling Protocol) – The protocol defines the tunnelling service in IP
network to carry PPP protocol messages. One example of a tunnelling service is secure access
from a remote small office network to a headquarters corporate intranet via a Virtual Private
Network (VPN) that traverses the Internet. They can also be used for residential purposes.
RJ – 45 (Registered Jack – 45) - A connector used for connecting Ethernet devices that holds
up to eight wires.
Reverse Network Address Translation – When an Internet user tries to access a service at
your Router/Gateway, the request made by the Internet user will be forwarded to an Internal
machine that serves the request. This is achieved by translating the destination IP address of the
packet to private Local IP address of the PC where service is offered. This operation is exactly
reverse of the NAT operation.
Router – Device that routes the packets across various sub networks that are attached to. It
helps in managing the large networks in to smaller ones. They operate at IP layer of TCP/IP
protocol suite.
Page 94 of 97
IPSec Router + Print Server User’s Guide
Security Association – These are the parameters to be set for having a VPN tunnel.
Server – A computer that services the users on the network, may be to access files, web pages,
printing.
Software – It is a series of instructions that control the behavior of the computer and its
hardware.
Stateful Packet Inspection – Firewall that monitors the state of the transaction for the internal
hosts. It looks at the internals of the packet and adjusts the firewall policies automatically based
on the state but specific to the port requested/required. Hence this is more secured than the static
packet filters which are not intelligent of states of transactions.
Static IP Address – Permanent IP address that is assigned to a host/router in an IP or TCP/IP
network.
Switch – Device that connects host computers, large number of devices to share a limited
number of ports. 2. It helps users to make, break, and change the connections physically on an
electric circuit.
Subnet Mask – The method used for dividing IP networks into small networks called subnets.
The division is determined by a binary pattern (called mask). Based on this mask (subnet mask),
IP addresses of the hosts in that subnet can be assigned.
TCP (Transmission Control Protocol) - A setup of rules used to transmit data along with the IP
(Internet Protocol) to split the data to be transmitted into small pieces. TCP creates connections
with its peer to send the data. The protocol offers reliability of the packet transmission and adds
delay in the network. Applications that assume unreliable networks generally use TCP.
TCP/IP – (Transmission Control Protocol / Internet Protocol) Set of protocols for communications
over a network developed specifically for the Internet. TCP/IP defines a suite or group of protocols
that involves many protocols like ICMP, RIP, DHCP, etc.
Throughput – The data sent successfully through the Internet in a given time period.
UDP (User Datagram Protocol) A setup of rules used to transmit data along with the IP
(Internet Protocol) to split the data to be transmitted into small pieces (called datagram’s). UDP
does not create a connection with its peer to send the data. Hence it is “connection-less”,
unreliable, but faster because there is no connection setup delay.
Upgrade – To replace the firmware version of your Gateway with a newer version.
URL (Universal Resource Locator) - It is the address that defines the route to a file on the
Web or any other Internet resource. These can be accessed through typing the URLs in to the
browser, or by clicking the hyperlinks on the existing web pages on the browser.
VPN (Virtual Private Network) - A technology with which hosts communicate over public
communication networks by creating private communication channels called tunnels. This is
mostly achieved through encrypting the traffic at the originating point and decrypting the traffic at
the destination point. Examples of VPN technology are, PPTP (Point to Point Tunnelling Protocol),
L2TP (Layer 2 Tunnelling Protocol), IPsec (Internet Protocol Security).
VPN end point – A host connected to a router (or the router itself for the router related data
traffic) has the ability to establish a VPN tunnel to some other host supporting VPN.
WAN (Wide Area Network) - Networks that cover communication over a large geographic area.
These are through public networks like telephone (DSL) or cable Networks, through leased lines or
satellites. Internet is a Wide Area Network.
Page 95 of 97
IPSec Router + Print Server User’s Guide
Appendix E:IPSec Router Datasheet
10.
Standards:
IEEE 802.3
IEEE 802.3u
Button:
1-Reboot button (Reboot/Reset)
Ports:
1-10/100 WAN Port
4-10/100 LAN Ports
1-USB 2.0 compliant port
Networking:
TCP/IP
DHCP Server / Client
DDNS / DNS
IGMP Proxy (v1/ v2)
PPPoE
PPTP Client
HTTP
FTP
Telnet
SMTP / POP3
VPN:
IPSec
-100 IPSec tunnels
-AH/AH-ESP
-DES-CBC/3DES-CBC/AES
-HMAC-SHA1/MD5
-PMTU support
IKE
-Diffe-Hellman group1/2/5 support
-DES / 3DES / AES
-SHA1 / MD5
Firewall & Security:
NAT traversal V1 / V2 / V5
L2TP
HTTPS
SSL
TLS
SPI(Stateful Packet Inspection Firewall)
Layer 2 Function:
Based on IEEE 802.1d
Runtime bridge
Logging:
Comprehensive network access statistics
Performance:
Hardware-NAT acceleration
Connectivity: Min. 1,2750
Management:
Web based
Firmware reload and backup
Configuration load and backup
QoS
Print Server:
Support TCP/IP Print Server protocols
LPR / RAW protocol
Support network Print Monitor
Support OS:Windows 98,ME,2000,XP
Apple MacOS, Unix,Linux(by LPR)
LEDs & Power:
2x4 LEDs – 10 / 100 LAN Ports (Link/Activate)
2x1 LED – 10 / 100 WAN Port(Link/Activate)
1x1 LED – System Power
1x1 LED – USB port status
Power- AC100~240 Volt, 50~60 Hz
Operating Temperature & Humidity:
0 ~ 45℃ ; 0 ~ 80%
Dimension:
35 x 160 x 100 mm (H x L x D)
Safety & Certification:
FCC
CE
Order Information
Model
SOHO Router ( Excluding VPN )
IPSec-VPN Router ( Including VPN )
IPSec-VPN Router + Print Server ( Including VPN + Print Server)
IPSec-VPN Router + Print Server + 802.11 b/g ( Including VPN + Print Server + 802.11 b/g)
Page 96 of 97
IPSec Router + Print Server User’s Guide
- Hardware specification
Function
Processor
Description
ARM922 like
Specification
Core clock 200MHz
Flash
Built-in 8 MB
DDR
Built-in 64 MB
Note
MAC
1-10/100M – PHY
1-10/100M – Switch
Interface for
1-10/100 WAN
Auto MDI-MDIX
RJ45
4-10/100 LAN
Auto MDI-MDIX
RJ45
Link:
10BaseT-Yellow
100BaseT-Green
Activate:
10BaseT – Flash Yellow
100BaseT-Flash Green
Link: Green
1x2 LED – WAN
4x2 LED – LAN
1- Reboot
System Reboot /
Load default
AC100~240 Voltage
,50~60 Hz Input
Active – Flash Red
1x1 LED
Dimension
W x L x H(mm)
100 x 160 x 35mm
Chassis
Color
- Gray + varnish
1-USB 2.0 compliant port
1-Power JACK
Networking
LED
1-10 / 100 WAN
4-10 / 100 LAN
1- Power
Button
AC Adapter
1x1 LED
DC-5V / 2A /10 W output
PCB: 95x154x1.6mm
- Blue + varnish
Environment
Certification
Expandable
Temperature
Humidity
USB
Wireless
Antenna
0 ~ 45 ℃
0 ~ 80 %
FCC , CE
1-USB 2.0 compliant port
802.11 a/b/g/n
1/3 – SMA ( Vertical )
Page 97 of 97
Operation
Print Server
Mini-PCI slot