1
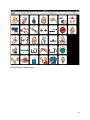
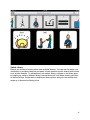
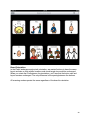
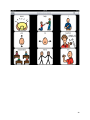
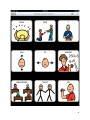
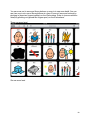
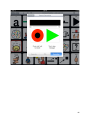
TapSpeak Choice 2.0
User Guide
Getting Started!
5
Starting the App!
5
Communication Boards/Pages and Libraries!
6
Buttons and Messages!
6
Message Window!
7
Layers!
7
Swiping Tips!
7
Adding Buttons to a Board!
8
Editing a Board!
8
Editing a Library/Button!
8
Voices!
9
Folders!
9
Scanning!
9
Scan Feedback!
10
Touch Configuration!
10
Board/Library Layer Navigation!
Swiping Tips!
11
13
Scanning Options!
14
iPad Direct Select!
14
iPad Single Switch Auto-Scan!
16
Single Switch Auto Scan!
17
Two Switch Auto Scan!
18
Two Switch Step Scan!
19
Folders !
20
Create and Modify Folders!
20
Edit Folders!
21
Add a Folder!
22
Moving Items Between Folders!
23
Board/Page Creation and Editing!
28
Add a Board!
28
Add Buttons to a Board!
31
Switch Library!
37
Board Orientation!
39
Moving and Deleting Buttons!
42
Version 2.0 Updates – Grid Sizes and Home Board!
49
Library Creation and Editing!
51
Add a Library!
51
Add Buttons to a Library!
54
Editing a Button!
56
Library Orientation, Scrolling and Zooming!
56
Speech Editor!
Spoken/Scanning Configuration!
61
62
Message Window!
66
Voices!
67
Supported Languages and Voices!
74
Linking and Navigation!
77
Backup and Restore !
80
Restoring a Database!
84
3
Save Backup to Your Computer!
84
4
Getting Started
TapSpeak Choice is an easy-to-use all-in-one Augmentative and Alternative
Communication (AAC) app. It functions as a full-features speech generation device and
as a communication board player. It uses a layer metaphor to separate the
communication board player/editor from the libraries (core vocabulary, nouns, verbs, adjectives, etc.) that the boards use. Navigation between layers is done with vertical
swipes of a finger. Starting from the page layer, swiping up reveals the library layer, and
swiping down from the library layer reveals the page layer.
Starting the App
The first time you run TapSpeak Choice, the app will need about 30 seconds to initialize
the databases. After the initial startup, it will take about 10 seconds to start. If the app is
already running in the background it will start without any delay. Once the app starts
you’ll be on the board layer of the app and you’ll see an initial communication board.
The default scan setting is Direct Select. In this mode you tap a button and a message
plays. When the message plays, the button will “pop”. It will expand, play a message
and contract. If Scan Feedback is set to “on”, you’ll hear a sound just before the
message is played.
5
If your iPad is configured to use one of the languages listed below, the app will
download a voice for your language upon startup. Depending on the language and
internet connection speed this download can take several minutes. The voice files are
from about 50MB to 150MB in size.
•
•
•
•
•
•
•
•
•
•
•
•
•
•
•
•
•
•
•
•
•
•
Arabic
Flemish (Belgian Dutch)
Brazilian
British English
French Canadian
Czech
Danish
Dutch
Finnish
French
German
Greek
Italian
Norwegian
Polish
Portuguese
Russian
Spanish
Swedish
Turkish
US English
US Spanish
Communication Boards/Pages and Libraries
Communication boards, or pages, are collections of messages (buttons) from one or
more libraries. Our board implementation lets you use tried and true board layouts and
lets you quickly create boards that you need right now for an immediate communication
task. Board grids are dynamic – when you add buttons to a board
Libraries are sets of messages grouped by common attributes – core vocabulary,
nouns, verbs, adjectives, etc. Create libraries with your own favorite core vocabulary or
use one of the samples and create libraries of other words that your child or student
use.
Buttons and Messages
A button is what you tap to play a message. Buttons are created on the library layer and
stored in a library. Boards reference buttons that are stored in a library. When you add a
button to a board, you’re adding a reference to a button that’s in a library.
6
You create and edit buttons on the library layer. Button speech and images can be
edited. Since boards reference buttons in libraries, when you edit a button in a library
the change automatically appears on all boards that reference that button.
If you want to quickly edit a button, put the board in edit mode by tapping the board title,
and then double-tap the button. When you double-tap the button you will go to that
button’s library and the button will be pre-selected for editing. Tap either the Speech
editor or the Image editor to edit the button. You can go back to the board at any time
and any changes you’ve made will show up.
Message Window
You can enable the message window from the Settings popover. Turn it on and the
message window will appear. For any button you tap or select via scanning, that button
will be copied to the message window. Tapping the message window plays the message
and double-tapping the message window clears the message window. There’s also a
backspace and a clear button (use when scanning) which you can use the remove the
last button and clear the message window.
If you have some buttons set up for TTS and some for recorded voices, that’s no
problem for TapSpeak Choice. The app will interleave TTS and recordings in the
message window without a problem.
Layers
Communication boards and libraries reside on separate layers. You navigate between
layers using up or down swipes. TapSpeak Choice starts on the board layer. To navigate
to the library layer swipe up. When on the library layer swipe down to go back to the
page layer.
Swiping Tips
Here are some tips on the swipes needed to navigate between board and library layers:
• Make the swipes short – about 1/2 to 1 inch is all that’s needed. Long swipes will work
but there’s a bigger chance of going out of a vertical swipe.
• Make the swipes brisk – they don’t have to be super fast. Slow swipes don’t get
detected as swipes.
• If you see the library picker or library buttons scroll even a bit from left to right, the
iPad didn’t detect a vertical swipe.
• The “Touch” setting with direct select requires that you pay attention to where you start
swipes on the board layer. If you have it set to “Touch” swipe up/down on any black
portion of the screen. You only need to start the swipe in a black portion of the screen
and you need very little black space for swipes to work.
• Practicing a bit will help.
7
Adding Buttons to a Board
You add buttons to a board from the library picker. The library picker is a left/right scroll
view that displays all the buttons in your current library. Whichever library is showing on
the library layer is your current library.
Activate the library picker by swiping down on the board layer. You’ll see it at the top of
the screen. Swipe left or right on the library picker to view the buttons in the library.
Buttons in the library picker are always sorted alphabetically. Swipe down, really more
like a flick, to add a button to your board. You’ll see that the board will automatically
resize if needed.
Finally, dismiss the library picker by swiping up on it.
Editing a Board
You enter the board edit mode by tapping on the board title. When you do so, you’ll see
delete icons appear on the board’s buttons. In edit mode you can move and delete
buttons. Move buttons by dragging a button to its new position. All other buttons on the
board will automatically reposition themselves. You may find as you drag a button that
you’ll bump against other buttons and the buttons will reposition. Don’t worry – keep
dragging your button to where you want it.
The static board grid option lets you set a board size at any time. A static grid lets you
place buttons on a board without disturbing the position of other buttons on a board.
There are 18 different grid sized from 1×1 to 7×8.
Delete a button by tapping the delete icon on a button. The remaining buttons will
reposition themselves.
Tap the board title again to exit edit mode and return to play mode.
Editing a Library/Button
On the library layer you can add and edit buttons. Also, you can delete buttons from a
library in the library edit mode.
Add a button to a library by tapping the “+” on the title bar. You’ll notice that there’s a red
border on this button. The red border indicates that it is the active button and all editing
functions will operate on this active button. The speech and image editors edit,
respectively, the button label/TTS/recording(s) and image.
Buttons in a library are always sorted alphabetically by label. This makes it easier to find
a button especially in the library picker.
Enter the library edit mode by tapping the library title on the title bar. You’ll see delete
icons appear on the buttons. Tap the delete icon to delete the button. If a button is being
used on a board you’ll see a warning message with the names of the affected boards. If
8
you choose to delete a button that’s being used on a board, the button will be removed
from the board.
You can zoom in/out on your library by pinching in our out. Zooming out lets you see
more of your buttons without scrolling left/right. Zooming in lets you see buttons larger
and in more detail but you may need to scroll left/right to see all of the buttons in the
folder.
Voices
You can configure voice speaking rate and volume, select separate speaking and
scanning voices, plus select from any of the voices your language supports. Through
the Settings popover, you can get to the voice configuration and voice downloads. Voice
downloads can take several minutes to complete; the voice file sizes range from 50MB
to 150MB.
Folders
Boards and libraries can be organized using folders. Boards and libraries have separate
folders even though they can have the same name. You can create, reorder, and delete
folders from the settings icon. There is a special folder called the root folder. The root
folder is the parent folder for all other folders and boards/libraries that don’t belong to a
particular folder are in the root folder.
You can move boards and libraries among folders from the “Edit Board Info” or “Edit
Library Info” buttons on the respective board or library tables. Tap the folder field on the
info editor to select a different folder.
Scanning
The default access mode for boards is direct select. Tap a button and it will play a
message. For those who need scanning we provide a wide variety of scanning modes.
Please note that if you choose the 1 Switch or 2 Switch switch configurations and don’t
have a Bluetooth switch interface connected, the iPad keyboard will appear. Change the
switch configuration back to iPad to dismiss the keyboard.
If you have the message window configured, scanning will first scan between the
message window and the board and then through the message window or the buttons
on a board.
Switch Configurations/Scan Type
• iPad – You can do Direct Access or 1 Switch Auto-Scanning
• 1 Switch – 1 Switch Auto-Scanning
• 2 Switch – 2 Switch Auto-Scanning or 2 Switch Step Scan
Scan Type/Scan Order
• 1 Switch Auto – Sequential, Row/Column, Column/Row
• 2 Switch Auto – Row/Column, Column/Row
• 2 Switch Step – Row/Column, Column/Row
9
All scan order settings support left/right and top/bottom settings.
Auditory Feedback when set on plays a button’s message while scanning through
buttons.
Scan Speed can be selected for all scan types.
Scan Timeout sets the inactivity timeout for 2 Switch Step Scan.
Button Pop Duration configures the length of the button message play animation. For
rapid message playing set the value low. For more visual feedback on the image
lengthen the pop duration.
Scan Feedback
This setting turns on/off various sounds that give audible feedback for scanning and
message selection.
Touch Configuration
The touch configuration only applies to the direct select access mode. Touch
configuration allows you to accommodate children/students with varying motor skill
abilities. On the Touch setting, direct select is activated with only very light contact with
the iPad surface. The contact could also be a hit, swipe, fist, etc. It doesn’t matter how
contact is made; the message will activate.
On the Tap Setting you are required to touch and release to play a message. You can
adjust tap dwell time and drift amount to accommodate different abilities. tap dwell time
can be from .1 to 5 seconds and drift amount can be from 10% of button size to 200% of
button size.
10
Board/Library Layer Navigation
Communication boards and libraries reside on separate layers. You navigate between
layers using up or down swipes. TapSpeak Choice starts on the board layer. To navigate
to the library layer swipe up. When on the library layer swipe down to go back to the
board layer.
When you’re on the board layer you can add buttons using the library picker. You get to
the library picker by swiping down on the board layer. To dismiss the library picker swipe
on on the picker. Note that can’t dismiss the library picker if your swipe begins on the
board. Your up swipe must begin on the library picker in order to dismiss it.
Page Layer:
Library Layer:
11
Library Picker on Board Layer:
12
Swiping Tips
• Make the swipes short – about 1/2 to 1 inch is all that’s needed. Long swipes will work
but there’s a bigger chance of going out of a vertical swipe.
• Make the swipes brisk – they don’t have to be super fast. Slow swipes don’t get
detected as swipes.
• If you see the library picker or library buttons scroll even a bit from left to right, the
iPad didn’t detect a vertical swipe.
• The “Touch” setting with direct select requires that you pay attention to where you start
swipes on the board layer. If you have it set to “Touch” swipe up/down on any black
portion of the screen. You only need to start the swipe in a black portion of the screen
and you need very little black space for swipes to work.
• Practicing a bit will help.
13
Scanning Options
TapSpeak Choice supports many scanning variations. You can use the iPad surface as
a switch for direct select and single-switch auto-scan, use a single switch for singleswitch auto-scan, or use two switches for two-switch auto-scan or two-switch step scan.
External switches require the use of AbleNet’s Blue2 switch, RJ Cooper’s iPad Cordless
Super Switch, or iPad Switch Interface.
iPad Direct Select
Direct select mode plays messages immediately after a button is pressed. When a
button is tapped, the button expands and plays the scan feedback sound. The button
contracts when the Button Pop Duration setting expires. The button is also highlighted
in red as the message plays. The scan feedback sound can be disabled in the settings
menu.
The Button Pop Duration setting changes how long the message play animation lasts.
For those who can tap buttons fairly quickly try setting this value to a second or less.
Direct select mode also makes use of the tunable tap/touch. This feature
accommodates those who can touch a device but whose abilities don’t support a quick
touch and release (e.g. a “tap”). You get to the touch configuration screen from the
configuration menu:
14
15
iPad Single Switch Auto-Scan
In iPad Single Switch Auto-Scan mode, you can perform sequential or row/column
scanning. You can scan in any of the available scanning orders: sequential, row/column,
column/row, left/right, right/left, top/bottom or bottom/top.
Auditory feedback, if enabled, plays sounds as switches are pressed and as buttons,
rows or columns are scanned.
Scan speed allows you to configure how fast or slow you scan through a board.
16
Single Switch Auto Scan
Single Switch Auto-Scan mode makes use of a switch interface to support any type of
switch you want to use. You can perform sequential or row/column scanning. You can
scan in any of the available scanning orders: sequential, row/column, column/row, left/
right, right/left, top/bottom or bottom/top.
Auditory feedback, if enabled, plays sounds as switches are pressed and as buttons,
rows or columns are scanned.
Scan speed allows you to configure how fast or slow you scan through a board.
Note: If you select this scanning mode and you don’t have a switch interface connected,
you will see the system keyboard pop up and obscure some of the buttons on your
board. Set your scanning mode to an iPad mode to dismiss the keyboard.
17
Two Switch Auto Scan
Two Switch Auto-Scan mode make use of a switch interface to support any type of
switch you want to use. You can perform row/column scanning in this mode. You can
scan in any of the available scanning orders: row/column, column/row, left/right, right/
left, top/bottom or bottom/top.
Auditory feedback, if enabled, plays sounds as switches are pressed and as buttons,
rows or columns are scanned.
Scan speed allows you to configure how fast or slow you scan through a board.
In this mode, one switch is the scan switch and one switch is the select switch. The
scan switch starts auto scanning from one row/column/button to the next. The select
switch changes from row to column or column to row scanning, or causes a button to
play its message .
Note: If you select this scanning mode and you don’t have a switch interface connected,
you will see the system keyboard pop up and obscure some of the buttons on your
board. Set your scanning mode to an iPad mode to dismiss the keyboard.
18
Two Switch Step Scan
Two Switch Step Scan mode makes use of a switch interface to support any type of
switch you want to use. You can perform two switch row/column scanning in this mode.
You can scan in any of the available scanning orders: row/column, column/row, left/right,
right/left, top/bottom or bottom/top.
Auditory feedback, if enabled, plays sounds as switches are pressed and as buttons,
rows or columns are scanned.
Scan timeout sets how long to wait before canceling the active scanning sequence.
In this scanning mode, one switch is the scan switch and one switch is the select switch.
The scan switch advances scanning from one row/column/button to the next. The select
switch changes from row to column or column to row scanning, or causes a button to
play its message.
Note: If you select this scanning mode and you don’t have a switch interface connected,
you will see the system keyboard pop up and obscure some of the buttons on your
board. Set your scanning mode to an iPad mode to dismiss the keyboard.
19
Folders
Boards and libraries can be stored in folders. You may create as many folders as
needed. You can name folders and sort them as needed and you can delete empty
folders.
To ease folder navigation, there is only one level of folders. That is, a folder may not
contain other folders. There is, however, a “Root” folder that can hold boards and
libraries as well as folders. You can move boards and libraries into the root folder and
you can move them from the root folder to another folder.
Folders are created and modified in the page or library configuration menu. Both page
and library folders are edited the same way. We’ll use the library folders in this example.
Create and Modify Folders
You get to folders through the Configuration menu. Tap the gear icon and then tap
Library Folders to view the library folders.
20
Edit Folders
Tapping the Edit button lets you move and delete folders. When you tap the Edit button
it turns into a blue Done button. When you’re finished editing folders tap the Done
button.
Note that if you try to delete a folder that has items in it, you’ll see a message stating
that the folder cannot be deleted because it isn’t empty. If you want to delete a folder but
not its items, move all the items in that folder to another folder and then you’ll be able to
delete the folder.
21
Add a Folder
Add a folder by tapping the “+” button. When you tap the “+” button you can enter the
title for your new folder and tap the Save button.
22
Moving Items Between Folders
In this example we’ll show you how to move a library from one folder to another. Start by
tapping the library button to show the library list. Let’s move a library from the Home
folder to the Root folder. Tap the Home folder to show its contents.
23
24
Now, tap the Edit Library Info button at the bottom of the folder contents list. Tap the
current folder name, “Home”, and a folder list appears. Tap the new folder which in this
case is “Root Folder”. When you tap the new folder name, the library is moved to the
new library. Navigate back to the root library list to see that the library has been moved
to the root folder.
25
26
27
Board/Page Creation and Editing
Note: As in the rest of our documentation the terms “board” and “page” can be used
interchangeably.
Add a Board
Create a new board by first adding it to the board list. Tap the Board button to display
the board list. Bring up the new board dialog by tapping the “+” button. Enter your new
board name and tap the Save button. You’ll now see the new board in the board list.
Make sure that the Modifiable switch is set to on using the Edit Board Info button.
With version 2.0 you can set a board grid size. See below for more details. Select either
Dynamic or a specific grid size. Dynamic automatically resizes buttons to the largest
size that will fit on a board.
28
29
30
Add Buttons to a Board
You’ll now see a new empty board. Start adding buttons to your new board by selecting
a library. Navigate to the library layer by swiping up on the board layer. Choose your
library from the library list. Navigate back to the board layer by swiping down on the
library layer.
31
32
Swipe down again on the board layer to display the library picker. You’ll see all the items
from your selected library on the library picker. Swipe left or right to navigate the library
items. Swipe down on a library item to place it as a button on the board. This action is
like a quick flick down. Continue adding buttons until you have all you need from that
library. You’ll notice the board reconfiguring itself to show the largest possible button
size for the number of buttons on the board. Finally, dismiss the library picker by swiping
up on the library picker (swiping up on the board itself does nothing while the library
picker is active).
33
34
35
36
Switch Library
Boards can consist of buttons taken from multiple libraries. You can use the same core
vocabulary for multiple situations and easily create situation-specific boards with buttons
from various libraries. To add buttons from another library, navigate to the library layer
by swiping up, select a different library from the library list, and swipe down to get back
to the board layer. Swipe down to display the library picker, add your new buttons and
swipe up to dismiss the library picker.
37
38
Board Orientation
In the iPad’s landscape and portrait orientation, we wanted buttons to have the same
layout and size so that relative locations and visual target size would be unchanged.
When you rotate the iPad between its orientations, you’ll see that the button size and
layout remains unchanged. The only difference is the spacing between the buttons.
All scanning modes operate the same regardless of the board’s orientation.
39
40
41
Moving and Deleting Buttons
Your board cannot be edited while it is in play mode. To move and delete buttons you
need to enter edit mode. Tap the board title to enter edit mode. You’ll see delete icons
on every button while in edit mode.
Move buttons by taping, holding, and dragging a button to another location on the
board. Drag a button to another location, release your touch, and the board will resort
the other buttons for the new arrangement. If you touch another’s button “hot spot” while
dragging, the board will rearrange; if this isn’t your desired location, keep dragging.
Exit edit mode by tapping the board title.
42
43
44
45
Delete a button by tapping the delete icon on a button. The board will rearrange itself to
eliminate the blank space. Exit edit mode by tapping the board title. When you exit edit
mode the board will rearrange itself if needed to achieve the largest possible button
size.
46
47
48
Version 2.0 Updates – Grid Sizes and Home Board
With version 2.0 you can set the board’s grid size and define a board to be the home
board. Boards can still be set to a dynamic grid size as with previous versions. The
home board setting defines which board you go to when you tap a Home navigation
button.
Boards with a set grid size can contain blank buttons. You can place buttons directly
where you want without reordering the whole board as in the dynamic grid size. Blank
buttons are automatically created on a board so you don’t have to do anything with
them.
Set or change the board grid size from the board info screen. Tap the Dimension row to
bring up the grid selection table.
You can select Dynamic or any of the 18 grid sizes in the list. If this is an existing board
you can increase the number of buttons on a page. You can decrease the number of
buttons on a board up to the last button position on a board. E.g, if a board grid is 4 x 5
and your last button is in position 16 you can decrease the board grid to 4 x 4 but no
less.
49
50
Library Creation and Editing
Add a Library
First, navigate to the library layer by swiping up on the board layer. Create a new library
by adding it to the library list. Tap the Library button to display the library list. Bring up
the new library dialog by tapping the “+” button. Enter your new library name and tap the
Save button. You’ll now see the new library in the library list. Make sure that the
Modifiable switch is set to on using the Edit Library Info button.
51
52
53
Add Buttons to a Library
You’ll now see an empty library. Add a new button but tapping the “+” icon on the title
bar. A new button with a red button is inserted. If there are already buttons in the library,
the button is inserted at the end of the list of buttons.
54
55
Editing a Button
On the title bar you’ll see two editors, the speech and image editors. These editors
operate on the active button. There will always be an active button. The active button
will have a red border whereas all other buttons have a grey border. Select an active
button by tapping it. When you tap a button it will momentarily pop and play the buttons
message if a message has been recorded.
Each editor is discussed in detail in each editor section in the user guide.
The title editor lets you modify the label shown above the button’s image. Titles are
automatically saved and the title editor dismissed by tapping outside the title editor.
Library Orientation, Scrolling and Zooming
The library layer supports both landscape and portrait orientations. In either orientation
you can scroll through your library buttons by swiping left or right.
56
57
58
You can zoom out to see more library buttons or zoom in to see more detail. You can
see from one to six rows of library buttons at a time. Zoom out (see more buttons) by
pinching in (draw two fingers together) on the iPad surface. Zoom in (see more button
detail) by pinching out (spread two fingers apart) on the iPad surface.
Three row zoom level
Six row zoom level
59
60
Speech Editor
The Speech Editor, new for TapSpeak Choice 2.0, combines the old Label and
Recording Editors and adds some features to support text to speech and additional
scanning auditory prompts.
Note: The message window can seamlessly interleave generated speech (TTS) and
recordings.
Here’s the an example of the Speech Editor:
The Title is the text that’s shown on the top of the button if the Show Title switch is set to
on. You can edit the title text by tapping the existing title text or the empty field.
The Show Title switch lets you show or hide the button’s title.
The Spoken row shows what kind of speech will be output for the button. You have
three options:
1. Same As Title – The spoken text is the same as the button’s title.
61
2. TTS – The spoken text is different from the button’s title. You’ll see the spoken text
here if the button is set to use TTS.
3. Recording – The speech produced by the button is a recording.
The Scanning row shows what kind of scanning auditory prompt will be output for the
button. If you don’t use scanning you can disregard this row.
1. Same As Speech – The spoken text is the same as the how the Spoken row is
configured. For example, if the Spoken row is set to Same as Title, the auditory
prompt will be the same as the title. If Spoken is set to a recording, the auditory
prompt will be the same as the spoken recording.
2. TTS – The auditory prompt text is different from the spoken text. You’ll see the
auditory prompt text in this row.
3. Recording – The auditory prompt is a recording specific to scanning.
Spoken/Scanning Configuration
You can configure the spoken and scanning/auditory prompt to have one of three
settings.
Same As sets Spoken/Scanning to the same as the button title (for spoken), or same as
the Spoken setting (for scanning). You’ll see the same as text on the screen or a prompt
that it’s a recording. Tap the play button to hear the speech.
62
TTS sets the button to have a specific Spoken/Scanning text string. Tap the text field to
enter/edit the TTS text. Tap the play button to hear the generated speech.
63
Recording lets you record speech (or any sound for that matter) for a button. Tap and
hold the record button to record and release the record button to stop recording. Tap the
play button to review the recording. You can record over the recording as many times as
you want.
64
65
Message Window
The TapSpeak Choice message window lets you build phrases/sentences from button
speech. As you tap buttons, a copy of the button is placed in the message window. You
can tap the message window to play the message or double-tap it to clear the message.
The backspace button removes the right-most button from the message window and the
clear button clears the message window.
The message window is completely scanning-compatible. The iPad surface is divided
into the message window and page scan zones. While the app is waiting for a switch
press, both the message window and page zones are dimmed. The first switch press
starts scanning between the message window and the page zones. The active zone is
highlighted for selection when it’s active.
Once a zone is selected, press the switch to start scanning the message window or
page zone. In the message window, the message, backspace, and clear buttons are
highlighted and expanded as they become active. Press the switch to speak the
message, remove the last-added button, or clear the message.
66
Voices
TapSpeak Choice supports 20 text to speech (TTS) languages and 43 voices. You can
select your spoken voice and scanning/auditory prompt voice from your language’s
available voices (from one to five depending on language).
You get to the Voice Setup through the Settings popover.
67
In Voice Setup you can download additional voices and set up your
speaking and scanning/auditory prompt voice.
Voice Download
You can download any and all available voices for your language. Tap
the Voice Download row (from Voice Setup) to show the Available
Voices list. The list will show which voices are available for download
and which have been downloaded and installed.
68
Tap on an available voice row to show the Voice Download table. This
will show you the voice name, gender, approximate age of the speaker,
a voice install button and a voice download progress bar. Tap the
Install Voice button to begin a download.
69
It will take several minutes to download a new voice. If you happen to
dismiss this screen, that’s ok. The voice will continue to download. Tap
on Settings again and it will show the continued progress of your voice
download. Make sure you keep your device awake by occasionally
tapping the screen. Otherwise, your device will go to sleep and the
download will abort. If the download aborts like this, simply install the
voice again.
You’ll see an alert box when the voice has finished downloading and is
installed.
70
When the voice is installed you’ll now see it in the available voice list
with the label “Installed”.
71
Voice Setup
You can individually set up your speaking and scanning/auditory
prompt voice. Both voices use the same setup screen. Tap either the
Speaking or Scanning row to get to that voice’s setup.
Here you can select a voice from your installed voices, set the
speaking rate and set the speaking volume. The Test Voice button lets
you hear an example of the voice with your chosen settings.
The standard speaking rate setting is 180.
72
When you tap the Voice row, you’ll see a table of the installed
languages. A checkmark indicates the currently selected voice. Tap
another voice to change the selected voice.
73
Supported Languages and Voices
All voices are from Acapela. All high quality voices are available for download. We may
add lower fidelity voices at times to support languages’ default voice download. A high
quality version of the lower fidelity voice will always be available for download.
• Arabic
• Salma
• Youssef
• Flemish/Belgian Dutch (Language = Dutch, Region = Belgium)
• Jeoren
• Sofie
• Brazilian
• Marcia
• British English
• Graham
• Lucy
• Peter
• Rachel
• French Canadian (Language = French, Region = Canada)
74
•
•
•
•
•
•
•
•
•
•
•
•
•
•
•
•
• Louise
Czech
• Eliska
Danish
• Mette
Dutch
• Femke
• Max
Finnish
• Sanna
French
• Alice
• Bruno
• Clair
• Julie
• Margaux
German
• Julia
• Klaus
• Sarah
Greek
• Dimitris
Italian
• Chiara
• Vittorio
Norwegian
• Olav
Polish
• Ania
Portuguese
• Celia
Russian
• Alyona
Spanish
• Antonio
• Maria
Swedish
• Elin
• Emma
• Erik
Turkish
• Ipek
US English
• Heather
• Kenny
• Laura
75
• Nelly
• Ryan
US
Spanish (Language = Spanish, Region = United States)
•
• Rosa
76
Linking and Navigation
You can navigate among boards/pages using link buttons, a home button and a back
button. These navigation buttons are stored and managed in a special Navigation
library. All navigation and linking has full scanning support.
Here’s a list of the navigation buttons:
• Home – The home button takes you to a home board/page. You can have only one
home board and it can be any board you choose. The home board is defined in the
board’s information section accessible in the board list.
• Back – The back button takes you to the last board you viewed.
• Link – Link buttons take you to another board.
The Navigation library is automatically maintained – link buttons to a board are added/
removed as you add/remove boards. Also, you can edit a navigation button’s title,
speech, and image in the Navigation library.
To add a navigation button to a board, set the Navigation library to your current library,
return to the board, and bring up the picker. Swipe down on a button and you’re done!
77
78
You can place a navigation button wherever you want on a board. Scanning fully
supports navigation buttons.
79
Backup and Restore
TapSpeak Choice backups can be used to keep safe copies of your setup and to copy
setups to other devices. The backup is stored as an XML file so you can even make
changes to your setup in the XML file using any XML-friendly editor.
When you’re viewing any board, go to the About menu and at the bottom is the backup/
restore button. Tap that button to bring up the backup/restore screen.
80
81
In the backup/restore screen, you can initiate backups and you can select whether you
want to include photo and recording data. Tap the backup database button to create a
backup. The backup will run for a few moments. When it’s completed you will have a
backup of your data on your iPad.
82
83
The Include Photos and Include Recordings switches let you omit photo and recording
data, which can be quite large, from the backup. You would do this usually only for
testing backups or under the direction of TapSpeak Customer Support.
Restoring a Database
To restore a database, you need to have a backup file. If there are none listed copy a
backup file from your computer using the instructions in the next section.
Select a backup from the list of backups and then tap the Restore Database button. The
restore will run for several moments. When a restore is complete you should restart the
app in order to ensure the data is properly reinitialized.
Save Backup to Your Computer
To really have a safe backup, you need to copy it from your iPad to your computer. If the
backup is only on your iPad and you lose the iPad or you have to restore it, you may not
have a good copy of your setup.
To copy a backup from your iPad to your computer, connect your iPad to your computer.
In iTunes with your device selected, click the Apps tab. Scroll to the bottom of screen to
File Sharing section. Click on TS Choice and you’ll see a list of the backup files that are
on your iPad. You can drag and drop the file to a folder on your computer or use the
Save to… button to save the file.
84
To restore your Choice database from a backup on your computer, drag and drop a
backup file from your computer onto the iTunes document list or use the Add… button.
Connect your iPad to your computer and iTunes will copy the file to your iPad. In the
Choice backup/restore screen, select the backup file and tap restore database. If you
sync all your iPads to the same computer, you’ll need to drag the desired backup file to
each iPad as you go to sync them. You can also send the backup file to anyone using
Choice and they can restore that file to their iPad.
85