1
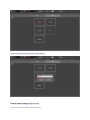
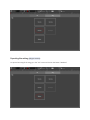
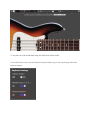
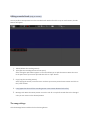
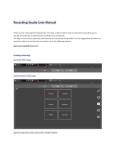
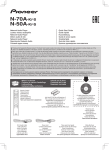
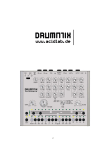
“Bass” and “Bass Pro” User Manual
Thank you for choosing this App.
This software is continuously updated, new features are constantly being added. For any suggestions,
problems or questions please do not hesitate to contact us at the following address:
[email protected]
Creating a new song (only pro version).
Click the button “Settings”
Go to the "File" menu,
click the button "New song"
on the top left corner:
type the song name, then click on the "Create" button:
How to save a song (only pro version).
In the "File" menu click on the button Save song.
Exporting the mixing (only pro version).
To export the mixing of the song, go in the "File" menu and click on the button "Mixdown"
Select the location where you want to save the file, choose a name for the file, then click save.
This will create an audio file in WAV format with the following characteristics:
16-bit stereo 48.0 kHz.
Recording a piece (only pro version).
Click the record button
Click the play button
to start recording.
or return button
or record button
To listen to the recording click on the Return button
play button
to stop recording.
to return to the beginning and then click on the
.
Virtual Bass
You can play the bass in two ways: by viewing the piano keyboard or by using the virtual bass. To
switch between views, click the button
button
to switch from the keyboard to the virtual bass or on the
to switch from the virtual bass to the keyboards.
To vary the size of the virtual Bass using the “Guitar Size” slider control:
To view the letters on the computer keyboard on piano keyboard, go to the song settings and enable
keyboard support:
Editing recorded track (only pro version).
You can perform some operations on the recorded tracks. Make a fast click or tap on track session, the edit
buttons will appear:
1.
2.
Delete (delete the recording session)
Split (split the recording session into two parts)
After clicking the split button appears a cursor that allows you to split the session. Move the cursor
to the point where you want to split and then click on “split” button.
3. Copy (copy the recording session)
After copying the session, move the cursor to where you want to paste the new session and click on
the “paste” button.
4. Loop (append at the end of the recording session a new session identical to the first)
5. Moving track. Move the mouse pointer or touch a track for a couple of seconds after it has changed
color you can move it to the desired position.
The song settings.
Click the Settings button and then click on the Song button.
Metronome settings.
1. Selector. Allows you to activate and deactivate the metronome.
2. Volume. Allows you to adjust the metronome volume.
3. Time. Allows you to adjust the speed of the metronome.
4. Pre-count: activating the pre-count, when you click on the record button, the metronome will sound
for one beat without recording, then start recording.
5. Sound. You can choose from four different sounds Rimshot, Click, Woodblock and Hithat
Adjusting and setting the reverb.
1. Selector. Activate and deactivate the reverb.
2. Volume. Adjusts the master volume of the reverb.
3. Density. Adjusts the density of the reverb. A low density allows to obtain a reverberation with a
smaller number of reflections, a high density a greater amount of reflections.
A higher density allows for a more realistic sound, but may affect the performance of the processor
and the battery life.
4. Duration. This is the duration in seconds of reverb.
5. Early Reflections. Allows you to increase or decrease the level of the early reflections.
Keyboard settings.
1. Show notations. Allows you to view the notations on the keys.
2. Notations type. Allows you to choose the type of notation Do, Re, Mi ... or C, D, E ...
3. Keyboard support. Allows you to display the letters on the keyboard.
Options.
1. Snap to Grid. Snap the cursor to the grid when you edit the tracks using the functions cutting, pasting
and moving track.
2. Driver. Allows you to choose the playback driver.
1. WASAPI: allows to obtain lower latency but may be not compatible with all sound cards.
2. XAudio2: higher latency.
3. Latency. Allows you to adjust delay of the audio device.
A smaller delay allows for a faster response but for low-power devices such as tablets with ARM
processors or Atom can give performance problems especially if there are a large number of tracks
and if the reverb is on.
Sound card settings.
To achieve low latency this app can uses the drivers of your sound card in exclusive mode. The default
settings of windows already allow Apps to take exclusive control of the audio device.
To allow this app to use the sound card in exclusive mode go in the audio settings to change the settings.
How to access sound card settings.
Go to Control Panel, and then click Sounds. Then click the Playback button, then on Speakers button.
The following window appears:
Click on Advanced button and then check the check boxes marked with a circle in the figure.
If your sound card is already playng another audio stream, the app can not obtain the
exclusive control of the sound card. In this case, close all programs and apps that use the
sound card and reopen “Bass Pro” or use the driver XAudio2.