1
DJ CONTROL AIR and DJUCED™ Reference Manual More information (forum, tutorials, videos...) available at www.HERCULESDJMIXROOM.com DJUCED™ and DJ Control AIR A. DJUCED™ overview .............................................................................................. 3 1. Browser area ................................................................................................................................. 4 a) b) c) d) e) f) g) Definition.......................................................................................................................................................................... 4 Organization .................................................................................................................................................................... 4 Folder browser................................................................................................................................................................. 4 Files browser ................................................................................................................................................................... 5 Search area ..................................................................................................................................................................... 8 Optional browser area ..................................................................................................................................................... 8 Browsing controls on DJ Control AIR .............................................................................................................................. 9 2. Deck (A = left or B = right) ........................................................................................................... 10 a) b) c) d) e) f) g) h) i) j) Definition........................................................................................................................................................................ 10 Organization .................................................................................................................................................................. 10 Loop area ...................................................................................................................................................................... 10 Play & Stop area............................................................................................................................................................ 13 Cue point area ............................................................................................................................................................... 13 Pitch area ...................................................................................................................................................................... 15 Platter area .................................................................................................................................................................... 18 Effect rack area ............................................................................................................................................................. 19 Waveform area .............................................................................................................................................................. 24 Text information area..................................................................................................................................................... 25 3. Mixer area ................................................................................................................................... 26 a) b) c) d) e) Definition........................................................................................................................................................................ 26 Organization .................................................................................................................................................................. 26 Headphones commands................................................................................................................................................ 27 EQ commands ............................................................................................................................................................... 27 Volume and crossfader commands ............................................................................................................................... 28 4. Configuration ............................................................................................................................... 28 a) b) c) d) e) f) Audio settings ................................................................................................................................................................ 29 Skin menu...................................................................................................................................................................... 29 Keyboard menu ............................................................................................................................................................. 30 General .......................................................................................................................................................................... 30 Browser ......................................................................................................................................................................... 31 About ............................................................................................................................................................................. 32 B. Mixing in DJUCED with DJ Control AIR ............................................................... 32 1. Preliminary operations................................................................................................................. 32 a) b) c) d) Locating your songs ...................................................................................................................................................... 32 Analyzing the songs ...................................................................................................................................................... 32 Placing cue points (= bookmarks) in your tracks ........................................................................................................... 33 Creating playlists ........................................................................................................................................................... 33 2. Mixing .......................................................................................................................................... 34 a) b) c) d) e) f) g) Finding a track ............................................................................................................................................................... 34 Loading the track ........................................................................................................................................................... 35 Browsing within the track ............................................................................................................................................... 35 Previewing the track ...................................................................................................................................................... 36 Synchronizing the track ................................................................................................................................................. 37 Checking that the tracks are synchronized.................................................................................................................... 39 Playing the track for the audience ................................................................................................................................. 39 3. Scratching and effects ................................................................................................................. 40 a) b) c) d) Scratching...................................................................................................................................................................... 40 Effects............................................................................................................................................................................ 41 Samples......................................................................................................................................................................... 43 Loops ............................................................................................................................................................................. 45 C. Frequently asked questions.................................................................................. 46 1. DJUCED ...................................................................................................................................... 46 a) b) c) d) Is DJUCED for DJ Control AIR a time-limited version? ................................................................................................. 46 Does DJUCED support other DJ controllers than DJ Control AIR? .............................................................................. 46 Can DJUCED support other audio interfaces than DJ Control AIR? ............................................................................. 46 Can DJUCED support both ASIO and WDM (Windows Driver Model) modes in Windows? ........................................ 46 2. DJ Control AIR ............................................................................................................................ 46 a) b) c) d) e) Can DJ Control AIR support other DJ software than DJUCED? ................................................................................... 46 How can I set DJ Control AIR to ASIO mode in Windows? ........................................................................................... 47 Is the AIR sensor compatible with other DJ software? .................................................................................................. 47 How does the AIR sensor function? .............................................................................................................................. 47 Is there a risk that the AIR sensor may sends commands accidentally? ...................................................................... 47 3. Mixing with DJUCED and DJ Control AIR ................................................................................... 47 a) b) c) d) How can I use the jog wheels to browse within a track? ............................................................................................... 47 How can I change the effects assigned to a pad? ......................................................................................................... 47 How can I use the AIR sensor? ..................................................................................................................................... 47 Can I use the AIR sensor for other settings in DJUCED? ............................................................................................. 48 1 DJUCED™ and DJ Control AIR D. DJ Control AIR MIDI messages............................................................................ 48 1. MIDI channel ............................................................................................................................... 48 2. MIDI Input .................................................................................................................................... 48 a) b) Definition........................................................................................................................................................................ 48 Commands .................................................................................................................................................................... 49 3. MIDI Output = control on LEDs ................................................................................................... 51 a) b) Definition........................................................................................................................................................................ 51 Commands .................................................................................................................................................................... 51 E. Technical Support ................................................................................................ 53 F. Warranty information ............................................................................................ 53 G. Additional warranty provisions .............................................................................. 54 H. Trademarks .......................................................................................................... 54 I. Declaration of conformity ...................................................................................... 54 J. Copyright .............................................................................................................. 54 K. Disclaimer............................................................................................................. 55 L. End-user software license Agreement for Hercules software ............................... 55 M. End-user software license Agreement for DJUCED™ software ........................... 55 N. Environmental protection recommendation .......................................................... 55 Manual version 1.0 2 DJUCED™ and DJ Control AIR Introduction DJUCED™ for DJ Control AIR is a DJ tool adding beauty to the power of mixing audio tracks, scratching and recording your music creations. DJUCED™ is designed to make mixing user-friendly, thanks to a unique graphic interface and userfriendly features. A. DJUCED™ overview DJUCED can be split into 4 main sections: - Browser area (bottom area): track library = where tracks are stored - Left deck area = deck A: where you can load a track, play and control playback - Right deck area = deck B: where you can load another track, play and control playback - Mixer area (central area): to mix the left and right decks, with crossfader, volume and equalization controls 3 DJUCED™ and DJ Control AIR 1. Browser area a) Definition The browser is an explorer to browse the drives and select the files to load on decks. b) Organization To the left: folder browser In the middle: files browser To the right: search area c) Folder browser (1) Definition Folder browser = area to explore the folders, playlists and drives tree structure of the computer. 4 DJUCED™ and DJ Control AIR (2) Use Press the DJ Control AIR Folder button to access the folder browser. Press the DJ Control AIR Up & Down arrow buttons to move up and down in the folder tree. Press the DJ Control AIR Folder button again to expand a folder (to see its subfolders). Once you have accessed the target folder, move to the files browser by pressing the DJ Control AIR Files button. (3) See all tracks stored on the computer To see all tracks from folders you have already visited, go to Sound Libraries > All Songs with the folder browser. d) Files browser (1) Definitions (a) Files browser The files folder is the area where you can explore the list of tracks included in a folder or a playlist. (b) BPM (Beats Per Minute) The beat is an audible and short peak in sound, the succession of which creates the rhythm of the music. The beat is generally easier to identify in drums or bass, but can be played by any instrument, including guitar or the human voice, or by a combination of several instruments. Once you hear the beat, counting its repetition per minute gives you the BPM (Beats Per Minute) rate. If you hear no beat in the music, dancers will find it difficult to dance, as dancers naturally align their pace to the beat of the music, in the same was as a jogger naturally aligns his or her pace to the beat of music (that is why so many joggers run with an MP3 player). (2) Use Press the DJ Control AIR Files button to access the files browser. Press the DJ Control AIR Up & Down arrow buttons to move up and down in the files list. 5 DJUCED™ and DJ Control AIR Type the first letter of the track’s title on the computer keyboard to find the track. Once you have accessed the target track, load the track on a deck: - Press the DJ Control AIR Load A or Load B buttons to load the track on deck A or B; or - Drag and drop the track on the platter of the virtual deck. (3) Right-click menu (a) BPM analysis (Beats Per Minute) Before you start mixing with DJUCED™, analyze the BPM of all tracks, since the BPM rate tells you which tracks can be mixed together (mixing tracks whose BPM rates are close is better than mixing tracks with very different BPM rates: for example, mixing tracks within 15% of difference is acceptable; DJUCED lets you mix tracks with larger BPM differences, but the higher the BPM difference, the more you change the original track when synchronizing it with the BPM of another track, and so the lower the audio fidelity). BPM analysis is CPU-intensive: you should analyze all your tracks before mixing, as analyzing BPM while mixing slows down the computer and reduces the audio quality. To analyze the BPM of one or more tracks or a list of tracks: - Select the tracks to be analyzed using your mouse/pad. - In Windows: right-click to display the BPM menu. - On Mac, either right-click, click with 2 fingers, or click+Ctrl to display the BPM menu. Then click Analyze. Analyzing BPM before mixing is necessary to read the BPM of the track(s) in the files browser. (b) File info Editing the file info lets you manually update the tag of an audio file (the tag is the text which lists the name of the track, of the artist, of the album...). 6 DJUCED™ and DJ Control AIR (c) Relocate Relocate is an option to update your tracks’ location if: - You have moved/renamed the folder where the tracks are stored; or - The driver letter of the storage unit has changed. (d) File operations The operations that you perform on a file in an explorer: delete, rename, copy or move the file. (4) Files browser fields Album: album containing the song Artist: artist playing the song (generally the group or singer name) Title: song name Match: how this track matches with the last track loaded BPM: Beats Per Minute rate, a critical piece of info in DJing Genre: music type Length: track duration, in minutes and seconds Rating: your rating for the song In the files browser, you can: - Choose the fields to display, by right-clicking (or Ctrl+click on a Mac touchpad), with fields such as: Title, Artist, Album, BPM, Genre, Length, File size, Year, Comment, File Path, Key... - Drag and drop the fields. - Sort the tracks by field by clicking on the title of any field. - Access a track by clicking inside a field and typing the first letter of the track. 7 DJUCED™ and DJ Control AIR e) Search area In the SEARCH field, type the title of the song or the artist whose track you want to look for. To search files in all folders you have already visited, use the Folder browser to go to Sound Libraries > All Songs, and then enter the string of letters you are looking for. You can reset the search by clicking on the icon. You can select the search criteria by clicking on the icon . f) Optional browser area In both deck areas, clicking on the button (to the left, below the platter in the software interface) calls up a browser area, and clicking on restores the deck display. 8 DJUCED™ and DJ Control AIR You can restore the platter display by clicking on the g) Browsing controls on DJ Control AIR DJ Control AIR has 6 browsing controls: • Folder button sets the pointer on the folder browser. • Files button sets the pointer on the files browser. • Up button moves up in the browser. • Down button moves down in the browser. 9 icon. DJUCED™ and DJ Control AIR • • Load A loads the selected track on deck A. Load B loads the selected deck on deck B. 2. Deck (A = left or B = right) a) Definition The virtual deck gathers the controls of the track’s playback, similar to the controls on a CD player. b) Organization Bottom: the Loop area and the Play/Stop area. Center: platter, pitch and cue points area. Over the platter: effect rack area. Over the effect rack: waveform area. On top: text information area. c) Loop area 10 DJUCED™ and DJ Control AIR (1) Definition Loop: a portion of an audio track that is played repeatedly. Its symbol is . (2) Use Looping, or making a loop, is a way for the DJ to make a rhythm last longer. The DJ can either: - Manually set the start and the end of the loop; or - Set the length of the loop in beats. (3) Commands in the software Loop commands are: - In / Out = Loop In / Loop Out: Loop In places the starting point of the loop, and Loop Out places the end point of the loop (and clicking on Loop Out again exits the loop playback). - 1, 2, 4, 8, 16: number of beats per loop. - Move the loop , - Change the loop length - Loop split function splits the loop into 4 samples: this function is processed by the Magic button, on DJ Control AIR. - Easy loops (EZ) function sets the Loop In/Loop Out function to match a fixed beat number, so that the even if the track plays 4.4 beats (for example) between the moment you enter Loop In and the moment you enter Loop Out, the EZ setting fixes your loop on exactly 4 beats. (4) Loop commands on DJ Control AIR On DJ Control AIR, you can: - Set the 4 pads to Loop mode by pressing the Loops button in the center of DJ Control AIR. - Send a Loop In command on pad 1. - Send a Loop Out command on pad 2. - Reduce the loop length on pad 3. - Increase the loop length on pad 4. 11 DJUCED™ and DJ Control AIR (5) Display If you are in a loop, the loop is visible in 2 areas: - In the waveform display: the part of the track outside of the loop is greyed out. - On the platter: the loop is displayed in pink. Each concentric circle of the platter lasts 1 minute (if the track doesn’t exceed 6 minutes), so the pink area located on this circle shows: - The loop in the first (outer) circle = in the first minute of this track. - The loop in the last quarter, starting at 0:48 and ending at 0:52. (6) Saving loops in the sampler bank To store a loop in the sampler, display the sampler area by clicking on the square SAMPLER button over the platter (and over the SEQUENCER button): - Either drag and drop (with your mouse) the loop from its pink area on the platter to the sampler player on the column of 4 sample players; or - Press the button labeled Magic on DJ Control AIR: it cuts the loop into 4 parts of equal length, and stores these 4 parts on the 4 sample players, to let you control the playback of samples on the platter’s touch pads; or - Click on the Loop split button as the Magic button. in the DJUCED graphic interface, whose action is the same 12 DJUCED™ and DJ Control AIR d) Play & Stop area On each deck: - The Play / Pause button switches between playback and pause on the deck (Pause stops playback at the current position in the track). - The Stop button stops playback and returns to the track’s starting point. The Play/Pause button in DJUCED has the same function as the Play/Pause button on DJ Control AIR. e) Cue point area (1) Definition Cue point: a bookmark that you place in a track, allowing you to instantly access this exact point. 13 DJUCED™ and DJ Control AIR (2) Use Cue points are necessary for DJs, allowing them to: - Instantly access a point in the track where the beat is audible, to avoid a slow start and instantly go to an audible rhythm. - Instantly access different points in the track, if the beat changes. (3) Commands In DJUCED, clicking on Cue buttons 1, 2, 3 : - Sets cue point 1, 2 or 3 at the current position in the track, if there was no such cue point already set in this track. - Moves to cue point 1, 2 or 3, if this cue point is already set (if the cue point is already set, the button is slightly below the buttons of cue points which are not set: in the example , cue points 1 and 2 are already set, while cue point 3 is not set). - Clicking on the button deletes the last cue point you have used. - Clicking on the button (either in the DJUCED graphic interface or on DJ Control AIR) moves playback to cue point 1, or sets cue point 1 at the current position in the track if cue point 1 doesn’t already exist. (4) Display (a) Around the platter The cue points are displayed in the track overview around the platter. The full track length is represented as the ring of small circles around the platter, so: - Cue point 1 in red (close to the first small circle) means that cue point 1 is located at the beginning of the track. - Cue point 2 in red (at around one quarter of the complete ring) means that cue point 2 is set at around ¼ of the track’s length: so for a track of 5:11, this means that the cue point is set at around 1:15. 14 DJUCED™ and DJ Control AIR (b) On the instant waveform The largest waveform display, showing the current position in a track, shows the cue point as a vertical red bar with the cue point’s name (Cue 1, Cue 2 or Cue 3). f) Pitch area (1) Definitions (a) Pitch Pitch is the control of the playback speed: - A -6% pitch means slowing down the track by 6% compared to its default playback speed. - A 0% pitch means that the track is played at its original speed. - A 15% pitch means that the track is played 15% faster than its original speed. (b) BPM The BPM rate is the Beats Per Minute rate, i.e. how many beats you can hear within 60 seconds of music: - 80 BPM is a slow beat. - 100-120 BPM is a standard range for most pop and rock music. - 140 BPM or higher is fast. 15 DJUCED™ and DJ Control AIR The BPM rate measures a track’s rhythm. (c) Pitch fader The pitch fader is a slider that lets you speed up or slow down playback of the track: - You slow down playback by moving the pitch fader up. - You speed up playback by moving the pitch fader down. - You set playback at its default speed by setting pitch fader at the center. The music keeps its latest speed when you stop moving the pitch fader (i.e. it is not automatically reset to its initial value, as is the case when using the pitch bend function described below). The pitch fader amplitude is displayed, in %, over the pitch fader in DJUCED. The pitch fader amplitude can be changed (6%, 8%, 10%, 12%, 16%, 20%, 25%, 50%, 100%): - The larger the pitch fader amplitude, the larger the BPM change you set on the pitch fader. - The smaller the pitch fader amplitude, the more precise the pitch fader is to set a precise BPM. - You can click on the % figure to change the amplitude. (d) Pitch bend The pitch bend buttons are below the pitch fader in DJUCED (and over the pitch fader on DJ Control AIR). The pitch bend – and + buttons are buttons that let you TEMPORARILY slow down or speed up playback: when you release the pitch bend button, the track returns to its previous speed. (e) Pitch reset The pitch reset command lets you set the track’s playback at its original speed, and cancels the previous actions on the pitch fader. You can reset the pitch: - By clicking on the button labeled 0 located close to the center of the pitch fader in DJUCED; or - By moving the DJ Control AIR’s pitch fader gradually to the central position (which you will feel with a click). (f) Sync = Synchronize Sync = Synchronize, which means setting: - 2 audio tracks at the same speed, with the same BPM. - Both tracks with the beat occurring at the same instant. You can manually synchronize with the pitch fader and the pitch bend buttons, or you can synchronize automatically by pressing the Sync button. The Sync buttons are located: - In the DJUCED graphic interface: below the pitch fader and the pitch bend buttons. - On DJ Control AIR: above the pitch fader and the pitch bend buttons. Pressing the Sync button on one deck aligns its BPM with the BPM of the other deck. (2) Use A DJ needs to control the track’s playback speed, to play the track: - at the same speed as the previous track, and - with the beats of both tracks occurring at the same moment, for the dancers to hear both tracks at the same beat during the transition between these 2 tracks: - so that the dancers’ pace fits in one rhythm, with no rhythm conflict between the 2 tracks, and - so that the dancers don’t need to jump one step to adjust to the new track. (3) Commands There are 6 commands related to the pitch. (a) Pitch fader The pitch fader is the vertical slider in DJUCED that lets you change the playback speed. You can move the pitch fader on the controller, or in the graphic user interface with the pointer: - Moving the pitch fader down speeds up the music. - Moving the pitch fader up slows down the music. 16 DJUCED™ and DJ Control AIR (b) Pitch scale The pitch scale is a % value (for example, 6%) displayed on top of the fader in the DJUCED graphic interface. This % is the maximum speed change that you can achieve by moving the pitch fader up or down. For example, a 6% pitch scale means: - Setting the pitch fader at its top position slows down the music by 6%. - Setting the pitch fader at its bottom position speeds up the music by 6%. You can change the pitch scale by clicking on the % figure with your mouse. The smaller the pitch scale, the more precise the pitch fader will be, but the smaller the pitch change you can achieve; and vice versa. (c) Pitch bend - / + (and jog wheels) Once you have set a track at the same speed as the other track with the pitch fader, you still need to fix its beat on the same beat as the other track. There are 2 controls for achieving this: - Pitch bend – or pitch bend + buttons: you press one of them to slow down/speed up the music temporarily, and release it as soon as you hear the beat of both tracks playing at the same time: - Jog wheel: you set the controller’s jog wheel to pitch bend mode by disabling its scratch mode function (Scratch button off). You turn the jog wheel counterclockwise (to slow down playback) or clockwise (to speed up the music), and you release it as soon as you hear the beats of both tracks playing at the same time. (d) Pitch reset You can reset the pitch: - Either by gradually moving the pitch fader to its central position (on the controller); or - By clicking with the pointer on the button labeled 0 close to the pitch fader. Take care to move the pitch fader to the center slowly, as it is a very common mistake for beginner DJs, after a perfectly smooth transition, to reset the track to its original speed too fast so that the dancers really feel it. (e) Keylock The keylock function “locks” the tonality of a music track, to keep the current tonality while the pitch fader or pitch bend controls change the playback speed (without changing the tonality). - To set keylock on (so that the tonality doesn’t change while you change the pitch): set the square area close to the note icon to blue: if it is grey instead of blue, click on the square to set it to blue. - To set keylock off (so that the tonality changes while you change the pitch): set the square area close to the note icon to grey: if it is blue instead of grey, click on the square to set it to grey. (f) Sync The Sync command adjusts: - the BPM of one deck to match the BPM of the other deck. 17 DJUCED™ and DJ Control AIR - The beat of one deck at the same moment as the beat of the other deck. So if you play tracks on decks A and B, and press the Sync button on deck B: 1) It instantly changes the playback speed of deck A to match the playback speed of deck B. 2) It instantly sets the beat of deck A to play at the same moment as the beat of deck B. Synchronizing a music track with another track can be achieved: - Either automatically, by pressing the Sync button (in the DJUCED interface or on DJ Control AIR); or - or Manually, generally via 2 steps: o First, by setting the same BPM as on the reference deck, using the pitch fader. o Then by slowing down or speeding up the track using pitch bend, until the beats play at the same time on both decks (pitch bend can be achieved either by turning the jog wheel, or by pressing the pitch bend buttons). Once the 2 decks are synchronized, you see that they are synchronized in DJUCED, as the background of the beat marks turns to blue. Blue = synchronized = beat marks of both decks on the same columns. Black = not synchronized = beat marks not on the same columns. g) Platter area (1) Definition The platter is, on a turntable, the rotating platform for the record. DJUCED has a platter area for each deck, mainly intended to provide some information for the track loaded on the deck. (2) Use The platter is used to provide 3 types of information: • Time • Loop • Cue points 18 DJUCED™ and DJ Control AIR (a) Time information In its center, the platter shows: - The current position = how far playback is from the track’s start = here, at 0:53. - The remaining time = how for playback is from the track’s end = here, at 4:02. The platter shows, via its concentric circles, how long the track lasts (if it doesn’t exceed 6:00). Each blue concentric circle represents 1 minute, so we see here 4 complete circles, plus 1 circle ending at 0:55, which makes a total length of 4:55 for the track. For tracks over 6:00, the full track length is scaled to the 6 concentric circles (for example, on a 60:00 track, each concentric circle would count for 10:00). (b) Loop The active loop is a pink area on the concentric circles. From its position on the first circle, we can see that the loop starts at 0:48 and finishes at 0:52. (c) Cue points The cue points are the red dots displayed on the ring of small blue dots around the platter. As the 360° ring around the platter represents the full length of the track (4:55), we can see that: - Cue Point number 1, close to the start, is in the first seconds of the track. - Cue Point number 2 is located at slightly over 1/5 of the track, so at around 1 minute. - Cue Point number 3 is located at around ¾ of the track, so close to 3:17. (3) Commands The platter area helps you to process 3 commands with your mouse: - Drag and drop a track on the deck: drag a track from the browser and drop it on the platter to load the track on the deck. - Drag and drop on the sampler: drag a loop (pink area) from the platter and drop it on one of the sample players to load the loop in the sampler. - Browse within the track: click on one of the small blue dots on the ring around the platter to instantly access this position within the track. Note: you cannot scratch in the DJUCED platter area. To scratch with your mouse (without using the controller’s jog wheel), you must left-click on the waveform, keep the mouse button pressed down, and move the mouse. h) Effect rack area (1) Definition (a) Effect An effect is a filter or a combination of filters applied to the music to change the way it sounds. In DJUCED, the effects are: • Echo 19 DJUCED™ and DJ Control AIR • • • • • • Flanger Reverb Chorus Autowah Compressor Rotate (b) Sampler A sampler is a section playing several short sounds, called samples, over the track or instead of the track. If a sample is played once, it is called a jingle. If a sample is played continuously, it is called a looped sample. The DJUCED sampler plays up to 4 samples per deck. (c) Step sequencer A step sequencer is a music creation tool used to define the pattern in which a sample is played and repeated. The DJUCED step sequencer is a 4-track, 16-step sequencer: - 4-track = the sequencer lets you load 4 samples. - 16-step = the pattern lets you choose whether or not to play a sample for 16 steps or 16 beats. The step sequencer is synchronized with the BPM of the deck, with 1 step sequencer of 4 tracks per deck. 20 DJUCED™ and DJ Control AIR (2) Use (a) Effects Effects are added to the music to customize, enhance, or tweak the sound. You can apply an effect temporarily to a track to make it sound nicer, or sound closer to another track that you want to mix with this track. (b) Sampler Samples are played to customize a track and to add a rhythm over the music. (c) Step sequencer The step sequencer is an elaborate tool, allowing you to use the sampler to play samples over the music. (3) Commands (a) Effects DJUCED includes a rack of 4 effects per deck. You can control the effects in the DJUCED graphic interface: - Run or stop an effect by clicking on the effect button. - Load another effect in the slot by clicking on the effect’s blue triangle: this displays a menu in which you can select the effect to load in the slot. - Modulate the last effect loaded with the 2 rotary buttons on the right of the rack of effects. You can also control the effects using the DJ Control AIR’s control surface: - Activate effect mode by pressing the Effects button in the center of the controller. Run or stop an effect by pressing the pad (1 to 4) where the effects are loaded. Modulate the first setting of the effect according to the velocity at which you hit on the pad. 21 DJUCED™ and DJ Control AIR - Modulate the second setting of the effect by keeping your finger on the pad, and moving your hand over the proximity sensor (within 4 inches / 10 cm). Change the effect loaded on the pad by keeping your finger on the pad, while using the (Up) and (Down) buttons (located around the button labeled Effects) to browse through the effects list. (b) Sampler DJUCED includes a sampler of 4 samples per deck. You can load samples in the sampler section by: - Clicking on the title in the sample player to load another sample; or - In loop mode: o By dragging and dropping the loop from the platter to the sample player; or o By using either the button in the loop area, or the button labeled Magic on DJ Control AIR, to split the loop into 4 samples and load 1 sample on each player of the sample player for this deck. To control playback in the sampler area, you can: o Play/Stop the sample with the / buttons. o Set the volume of the sample with the o Record a sample with the o Set the playback in loop mode with the button. button. button. To control playback of samples on the controller, you can: - Set the control to loop mode by switching on the sample mode button . Play/Pause the samples by tapping on pads 1 to 4 for the deck. The velocity of your tapping on the pad (whether you tap soft or hard) controls the volume of the sampler. 22 DJUCED™ and DJ Control AIR - If you find it too difficult to control the sample volume with the velocity, you can disable this sampler velocity function in the DJ Control AIR control panel (in the control panel, go to Advanced, and then switch velocity off for the sampler mode). (c) Step sequencer You control the step sequencer in the DJUCED graphic interface: You can: - Enable/disable the playback of a sample at each step of the sampler by clicking on the button in the matrix: o Columns 1 to 4 represent the samples: 1 sample per column. o The lines represent the steps. o The third square on the fifth line controls the playback of the third sample at the fifth step. o If the square is blue, the sample is played at this step. o If the square is grey, the sample is not played at this step. o If a line is yellow, the step sequencer is currently playing at this step. - Play/Stop the step sequencer by clicking the - Set the volume of the sequencer with the / buttons. button. You can edit the sequence: - With your mouse: by clicking on the grey/blue square representing each step, to play or not to play the sample at this step. - With your keyboard: using the keyboard’s up and down arrows to move the pointer up/down within the steps of the sequencer, and with the keyboard keys 1, 2, 3, 4 to change the event on sample 1, 2, 3 or 4 in the step sequencer. 23 DJUCED™ and DJ Control AIR i) Waveform area (1) Definitions (a) Waveform The waveform is a display of the audio signal as a wave, where: - The signal’s amplitude is the distance from the central line: o The closer to the central line, the weaker the sound. o The further from the central line, the louder the sound. - The waveform length is the time length. - The colors shows the type of sound: o Red = low frequencies. o Orange = medium frequencies. o Yellow = high frequencies. For example, the waveform below shows: - Small yellow waves = short high tones, such as the sound of a triangle. - Larger red waves = lower frequencies, such as a bass guitar. (b) Wave overview The wave overview shows the entire length of the track as a waveform. (c) Beat marks The beat marks are triangles showing the beats: they are displayed separate from the waveform. If the tracks are synchronized, the background of the beat area becomes blue. (d) Beat grid The beat grid is a grid of vertical white lines showing the beats over the waveform. The beat grid shows the same information as the beat marks, but the beat grid shows it over the waveform, while the beat marks are separate from the waveform. (2) Use The waveform area displays the following elements: - The large waveform shows the sound in detail, with its cue points and beat grid. - The waveform overview shows the full track, to display silences or rhythm changes. - The beat marks area shows the beats of both tracks, one below the other: so if the beats of both tracks are on the same column, then both tracks are synchronized, and the background of the beat area becomes blue. (3) Commands (a) Waveform The waveform has 2 commands: 24 DJUCED™ and DJ Control AIR - Zoom In/Out: the +/- buttons zoom in or zoom out on the wave. Scratch: click on the waveform and move the pointer to scratch with your mouse. (b) Wave overview Browse within the track: click on a position of the wave overview to instantly access this position, as you can do with the small blue dots around the platter (in the DJUCED interface). (c) Beat marks The beat marks send no commands: they let you instantly see the beats of the track, and whether they are synchronized with the beats of the other track. j) Text information area (1) Definition (a) Tag The tag in a song is text information stored in the audio file, with data such as: - Song title - Artist name - Album name and track number on the album - Year of release - BPM rate (b) BPM The BPM is the Beats Per Minute rate. This is a measure of the rhythm: it is a key item of information for DJs, since the BPM rate displays the music’s rhythm. It is therefore the information that the DJ looks at to play 2 songs at the same speed: the BPM rate tells you how much you must speed up/slow down a track to reach the appropriate rhythm. (2) Use The text area displays: - The deck letter A for the left deck, B for the right deck. - The song title (here “After the Final Beat”). - The artist name (here “Beatmix Mogul 1”). - The album name (here “Revenge of the Mogul”). - The track length (here 5:11). - The BPM rate (here 123.48 BPM). (3) Commands The text area lets you edit the BPM. You can manually adjust the BPM if you disagree with the software’s BPM analysis: click on the BPM zone (displayed vertically, indicated with a red rectangle, below). By clicking the BPM zone, you access a menu that lets you edit the track’s BPM. Go to first beat: if the track is paused or stopped, this button moves to the first beat. 25 DJUCED™ and DJ Control AIR BPM analysis: analyses the track’s BPM. BPM unit -/+1: removes 1 from the BPM rate (123.48 becomes 122.48). adds 1 to the BPM rate (123.48 becomes 124.48). Double or divide the BPM rate by 2. Beatgrid fine tune: moves the beatgrid left or right. Manually type in the BPM value (replacing the analyzed value). Click on the BPM zone (displayed vertically, indicated with a red rectangle, below) to return to the text display of the song. 3. Mixer area a) Definition The mixer is the area emulating the commands of an analog mixer. In DJUCED On DJ Control AIR b) Organization On top of DJUCED: headphones commands. In the middle: equalization (EQ) and gain area. At the bottom: volume and crossfader, VU-meters. 26 DJUCED™ and DJ Control AIR c) Headphones commands (1) Cue/Mix This setting lets you choose what you play on your headphones. (a) Cue Cue for headphones = PFL (Pre-Fader Listening). You can choose what to play on your headphones: • The preview = next track (the music you will be playing for your audience); or • The mix = the music you are currently playing for your audience. The preview is also called Cue for headphones, but this Cue is not related to the Cue points. - Cue points are bookmarks that you place in an audio track. - Cueing on headphones is previewing a track for the DJ’s ears only, before the DJ plays this track for the audience. You preview deck A and/or B, depending on which deck you have selected. o In DJUCED: select the deck to preview over the volume faders . o On DJ Control AIR: select the deck to preview over volume faders The Preview volume of each deck is not linked to the volume set on the volume fader. (b) Mix The Mix position for headphones means that the DJ hears the same audio track on the headphones as what is being played on the dance floor. On DJ Control AIR, you can control what you are playing on your headphones: - The cue = the preview: the Cue button on the front panel is backlit. - The mix = the same music as what is being played for the audience. (2) Headphones output volume The headphones output volume is controlled: - Via hardware, using the DJ Control AIR’s front buttons (- / +) : the - / + buttons on the DJ Control AIR’s front panel set the volume of the headphones preamplifier. - Via software, in DJUCED : a rotary volume button represents the software volume setting, which is not related to the hardware volume buttons (- / +). d) EQ commands DJUCED and DJ Control AIR include a 3-band equalizer per deck: - Treble, for high frequencies. - Medium, for medium frequencies. 27 DJUCED™ and DJ Control AIR - Bass, for low frequencies. The DJ Control AIR equalizers control the equalization in DJUCED. DJUCED also includes: - One gain volume per deck. The gain sets the maximum output volume: if the tracks loaded on the 2 decks have different recording levels, the gain volume of the deck lets you set the same level on both decks. - A main volume rotary potentiometer. e) Volume and crossfader commands DJUCED and DJ Control AIR include: - 2 volume faders: 1 per deck. - A crossfader. The DJ Control AIR hardware faders (volume and crossfader) control the DJUCED software volume faders and crossfader. DJUCED also includes 2 VU-meters, showing the output level of each deck. 4. Configuration To change the DJUCED presets, click on the Configuration icon This lets you access the following settings: - Audio - Skin - Keyboard - General - Browser - About 28 in the top bar. DJUCED™ and DJ Control AIR a) Audio settings The audio path menu lets you select the audio outputs for the mix and the headphones. - Master is the stereo output where you play the mix, where you connect the active speakers. - Headphones is the stereo output where you play the preview, where you generally connect headphones. The recommended settings are: - Master = Outputs 1&2 on Hercules DJ Control AIR (ASIO). - Headphones = Outputs 3&4 on Hercules DJ Control AIR (ASIO). You can connect other sound cards, but we recommend that you play the master and the headphones on the same audio interface, as playing them on two different audio devices may cause audio artifacts. Once you have selected your audio settings, click OK to exit the panel. b) Skin menu The skin menu lets you load a skin matching your computer’s display resolution. In DJUCED 1.0.12, you have access to the following skins: - 1024x600 - 1024x768 - 1280x800 - 1280x1024 - 1440x900 - 1440x1024 Once you have selected a skin, click OK. Loading the skin may take some time, depending on your system’s graphics card. 29 DJUCED™ and DJ Control AIR c) Keyboard menu The keyboard menu lets you define shortcut keys on your computer’s keyboard. d) General The general menu lets you define 3 settings: (1) Song alert time The song alert is a visual change in the DJUCED waveform display: the waveform area blinks in red when the song is close to its end. This feature is included to prevent the DJ from reaching the end of the track without noticing it, with nothing then playing for the audience. The song alert time lets you choose how many seconds remain in the track’s playback before displaying the song alert. By default, it is set at 30 seconds. (2) Crossfader curve The crossfader curve is the shape of the mixing curve, depending on the crossfader’s position. There are 3 possible crossfader curves: - Mix - Scratch - Custom: you define your own curve (3) Recording path When you record your mix in DJUCED, it is saved by default in the following folder: Users/YourName/Documents/DJUCED/Record. However, you can change this path if you like. DJUCED records the file in uncompressed format, at 44.1KHz /16-bits stereo. 30 DJUCED™ and DJ Control AIR e) Browser The browser setting lets you: - Choose what is displayed in the browser. - Select the colors of the music genres. - Manage your database: - Import or export the database from/to another computer. - Check or clean the database (if you have moved files, folders or drives on your computer). 31 DJUCED™ and DJ Control AIR f) About The About menu displays the version of DJUCED, and a link to check for updates to the software. B. Mixing in DJUCED with DJ Control AIR 1. Preliminary operations When mixing in front of an audience, you must focus on the music and the audience, so you should prepare your tracks and audio library in advance: - Locate all of your songs. - Analyze the audio library. - Place cue points in the tracks. - Create playlists. a) Locating your songs If songs are stored in folders located in multiple areas of your drive, you must gather them in the audio library in advance, so that you can see them instantly while mixing. It is better to store all songs on the same drive unit, rather than on several drives. You should avoid mixing with songs stored on USB keys: store the songs on a hard drive before a public performance, since the access time on USB keys is slower than on hard drives. b) Analyzing the songs Once you know where your songs are stored, analyze them (please see the “Right-click menu” section) to get the BPM values. In the file browser: - Select the tracks to be analyzed, using your mouse/pad. - In Windows: right-click to display the BPM menu. - On Mac, either right-click, click with 2 fingers, or click+Ctrl to display the BPM menu. - Then click Analyze. 32 DJUCED™ and DJ Control AIR BPM analysis is slow and CPU-intensive, so you must not carry out BPM analysis while mixing during a public performance, as this would slow down your computer. If you analyze a complete library of hundreds of songs, you don’t need to remain in front of your computer during the analysis: this can take hours, depending on how fast your computer is. You will know that a track has been analyzed when the browser displays its BPM rate. c) Placing cue points (= bookmarks) in your tracks Once you have analyzed your tracks, you should load them on the DJUCED decks, play them and place cue points. You generally need to set at least 1 cue point (or more than 1) per song: the first cue point is generally placed at the first beat of the song, as a beat is needed to dance. The start of a song with no beat is not danceable. Please see the “Cue point area” section. Load the track on a deck. Play the track. (1) Placing cue point 1 Once you have reached the track position where you want to place a Cue point: - Stop playback. - Press the Cue button on DJ Control AIR; or - Click on the Cue button in the DJUCED graphic interface. Placing cue points 2 or 3 Once you have reached the track position where you want to place cue point 2 or 3: - Stop playback. - Click on Cue buttons 2 or 3 in the DJUCED graphic interface. (2) Deleting a cue point - Click on in DJUCED to delete the last cue point (1, 2 or 3 ) you have used. (3) Moving a cue point Once you have reached the track position where you want to place cue point 1, 2 or 3: - Stop playback. - Click on Cue buttons 1, 2 or 3 point at the current position. in the DJUCED graphic interface to place the cue d) Creating playlists Once you have seen where your audio files are and have placed cue points in these tracks, you can gather them in playlists. A playlist is a way to gather tracks in the same list, even if they are located in different folders. - Create a playlist by clicking on the Enter the name for your playlist. Drag and drop tracks into the playlist. button on the left of the folder browser. 33 DJUCED™ and DJ Control AIR Playlists are made for DJs to gather tracks together that they are likely to play at the same party. Example of playlists: • Wedding • Birthday • 1990s • New Wave • Old standards • Sports songs • 160 BPM As you can place the same audio track in different playlists, you can use playlists to sort the tracks according to several criteria, such as: - The type of event where you may play this track (birthday, wedding, club, café...). - The speed of the track (BPM). - The style of music. - The year the song was produced. - The track length. - The artist name. - The country where the song comes from... 2. Mixing a) Finding a track Once you have sorted your audio library into playlists, you should be able to easily find your tracks. (1) Accessing a playlist or a folder To go to a playlist of a folder: Press the DJ Control AIR Folder button: Use the Up and Down arrow buttons to move to your folder or playlist. If you need to expand a folder (to enter its subfolder), press the DJ Control AIR Folder button again. (2) Browsing through the playlist or the folder Once you have reached the playlist or folder containing the track you want to play, press the DJ Control AIR Files button. Use the Up and Down arrow buttons to move to the track. (3) If you can’t find the track If you aren’t able to find a track, you can: - Go to All Songs in the folder browser. - Type in a chain of characters in the Search field. 34 DJUCED™ and DJ Control AIR b) Loading the track Once you have found the track, you can load it on deck A (the left deck) or deck B (the right deck) by pressing the DJ Control AIR’s Load A or Load B buttons. c) Browsing within the track Once you have loaded the track, you can browse within the track using the jog wheels. (1) Fast browsing - Check that scratch mode is off (the scratch button’s LED must be off). - Make sure that the music track is not playing (otherwise the jog wheels are in pitch bend mode, not in fast browsing mode). Turn the jog wheel to quickly browse within the track. (2) Slow and precise browsing - Check that scratch mode is on (the scratch button’s LED must be on). - Turn the jog wheel to slowly and precisely browse within the track. 35 DJUCED™ and DJ Control AIR d) Previewing the track Preview = Pre-listen = PFL (Pre-Fade Listen) = listen to a track on your headphones, which the audience doesn’t hear. (1) Setting the headphones to Cue mode To use your headphones for previewing tracks, set the headphones output to Cue mode: - If the headphones mode is set to Cue, your headphones are set to preview tracks. - If the headphones mode is set to Mix, your headphones play the mix (i.e. the same sound that is being played on the speakers for your audience). => To preview tracks, set the headphones mode to Cue: the Cue button on the front panel of the DJ Control AIR must be lit up. (2) Selecting the deck to be previewed Once you have loaded a track on a deck, select this deck for previewing by pressing the button with a headphones symbol (located on top of the volume fader on the DJ Control AIR): the button with the headphones symbol must be lit up in blue. - Select the headphones on deck A to preview deck A. - Set the crossfader at 100% on deck B if you plan to preview deck A. Or set the volume fader for deck A at 0%, so that the audience doesn’t hear it in the mix. 36 DJUCED™ and DJ Control AIR (3) Playing the track Press the DJ Control AIR’s Play button on the deck you want to preview. You can hear the track on your headphones. You can now preview the track, meaning that you can check that its rhythm and tone fit with the track you are currently playing for the audience. e) Synchronizing the track Synchronizing the track that you are previewing with the track currently playing for the audience means: - Changing the speed of the track you are previewing to the same speed as the track the audience hears: you change the BPM (Beats Per Minute) rate of the track you are previewing, so that it matches the BPM rate of the track that the audience hears. - Lining up the beats of the track you are previewing with the beats of the track that the audience hears. (1) Automatically, with the Sync function If you press the Sync button on a deck, you instantly: - Change the BPM of the track on this deck to match the BPM rate of the track playing on the other deck. - Line up the beat of the track on this deck with the track playing on the other deck. The Sync button is located: - On top of the pitch fader (on DJ Control AIR). - At the base of the pitch fader (in the DJUCED graphic interface). When both decks are synchronized, the background of the DJUCED beat marks area turns blue. When the decks are not synchronized, the background of the DJUCED beat marks area is black. (2) Manually, with the pitch fader and pitch bend If you prefer to synchronize manually, as you would do with real turntables, then you need to: - Move the pitch fader until the BPM rates of both tracks are similar. - Use the pitch bend function until the track’s beats line up with the beats of the other deck. (a) Move the pitch fader until the BPM of both tracks are similar By moving the pitch fader up, you decrease the BPM: you slow down the music, By moving the pitch fader down, you increase the BPM: you speed up the music. 37 DJUCED™ and DJ Control AIR If you reach the limit of the pitch fader (up or down) while still being far from the target BPM, then you should change the pitch scale by clicking on the % figure displayed on top of the pitch fader in DJUCED. (b) Use pitch bend so that the track’s beats play with the beats of the other deck Once both tracks are playing at the same speed, you still need to move the beats of the track that you are previewing to play at the same time as on the reference deck. You can slow down or speed up the track using the – (slower) or + (faster) buttons. As soon as both beats are playing at the same time, release the pitch bend button. You can also slow down or speed up the track using the jog wheel on the DJ Control AIR: - Make sure that the DJ Control AIR’s Scratch button is turned off. The Scratch button’s LED must be off. - Turn the jog wheel: o Clockwise, to speed up playback = pitch bend + o Counterclockwise, to slow down playback = pitch bend - 38 DJUCED™ and DJ Control AIR As soon as the beats of both tracks play at the same time, you can stop turning the jog wheel, since the tracks are now synchronized. f) Checking that the tracks are synchronized On DJ Control AIR, you can see whether both tracks are synchronized: if so, the LEDs on its VUmeter (located below the AIR sensor) blink in synchronization. If the beat LEDs blink at the same time, but not in the same column, you can move the track 1 beat backward or forward using the Back / Forward buttons on the deck. g) Playing the track for the audience Once both tracks are synchronized, you can mix the track you are previewing so that the audience hears it. You can either: - Directly mix the track you have synchronized, by moving the crossfader; or - Mix using the bass, for example if you have different tones between the songs loaded on deck A and on deck B. (1) Play the track directly for the audience, with a short transition You can directly mix the synchronized track: - By moving the crossfader to the center, so that the audience hears both the tracks on deck B and deck A. - Then move the crossfader from the center to deck A. (2) Play the track for the audience with a transition using low frequencies You can make a transition using bass frequencies, prior to mixing from one track to another: - First, cut the medium and treble frequencies on both decks. 39 DJUCED™ and DJ Control AIR - Move the crossfader to the center, to play both the tracks on deck B and deck A. After a 10 second pause, move the crossfader from the center to deck A. - Restore the medium and treble frequency levels. 3. Scratching and effects a) Scratching (1) Definition Scratching is the sound produced by a vinyl record playing on a turntable, when you place your hand on the record and move it with your hand directly touching the record. Scratchers are turntablists using scratch techniques to produce sounds and create original music tracks with the sounds of scratching. In computer DJing, scratching is a software emulation of the same operation, processed in the DJ software. (2) Scratching on DJ Control AIR To scratch on DJ Control AIR: - Set Scratch mode to on, by enabling the Scratch button. - Load tracks on decks A and B (using the Folder, Files, Load A and Load B buttons). By turning and pressing down on one of the DJ Control AIR’s jog wheels, you can scratch the music file loaded on the corresponding deck. 40 DJUCED™ and DJ Control AIR (3) Notes on scratching The quality of a scratch depends on the DJ’s talent, and also on the music track used to scratch. You cannot make a good scratch sound with just any music track: your scratching performance depends on how the music track you have loaded on the deck sounds when it is scratched. Some DJs emphasize their scratching talent by scratching using music tracks which already include scratch sounds. b) Effects (1) Definition An effect is a filter or a combination of filters applied to music, to change the way it sounds. (2) List In DJUCED, the effects are: • Echo • Flanger • Reverb • Chorus • Compressor • Autowah • Rotate (3) Controlling DJUCED effects on DJ Control AIR (a) Setting the DJ Control AIR pads to Effects mode Press the Effects mode button, between the 2 columns of equalizer controls. It lights up: - The Effects mode button. - The Effects label over the 2 sets of 4 pads. (b) Assigning an effect to a pad The 4 pads (1 to 4) are 4 slots to control effects. The effects loaded on the pads are displayed in the DJUCED graphic user interface, over the platter. 41 DJUCED™ and DJ Control AIR In this example: - Echo is on pad 1. - Flanger is on pad 2. - Reverb is on pad 3. - Chorus is on pad 4. To change the effect assigned to a pad, you can either: - Click on the down arrow icon on top of the effect’s name in the software: this displays a menu allowing you to select the name of the effect with your mouse; or - Tap twice on the pad on DJ Control AIR, keeping your finger on the pad at the second hit, and use the DJ Control AIR Up and Down buttons (located around the Effects mode button) to load another effect on the pad. (c) Applying an effect on the track Once the effects of your choice are assigned to the pads, you can: - Play the effect by pressing the pad. - Stop the effect by pressing the pad again. The effect is applied on the deck (so, when you apply an effect on deck A, it has no impact on deck B). (4) Modulating an effect You can modulate 2 parameters of the effect: - The velocity with which you tap on the pad modulates the first parameter of the effect. - Keep your finger on the pad and modulate the second parameter by varying the distance from your hand to the AIR sensor (the closer your hand, the higher the value of the second parameter). You can see the effect modulation: - On DJ Control AIR: on the 8-LED VU-meter around the AIR sensor. 42 DJUCED™ and DJ Control AIR - In DJUCED: on the 2 rotary buttons in the Effects bar. As soon as you take your finger off of the pad, the AIR sensor setting is saved (so the AIR sensor does not disturb any other settings). c) Samples (1) Definition A sample is a short sound played alone or in combination with other samples, over the music or instead of the music. If a sample is played once, it is called a jingle. If a sample is played continuously, it is called a looped sample. (2) Controlling samples on DJ Control AIR (a) Setting the DJ Control AIR pads to Sample mode Press the Sample mode button, between the 2 columns of equalizer controls. It lights up: - The Sample mode button. - The Samples label over the 2 sets of 4 pads. (b) Assigning samples to the pads There is a checkbox called SAMPLER at the end of the Effects rack: . If you select this checkbox, you will see a column of 4 sample players in DJUCED: the 4 pads (1 to 4) control the 4 sample players for the deck. The samples loaded by default are: - Hithat on player 1 = the Hithat sample is assigned to pad 1. - Snare on player 2 = the Snare sample is assigned to pad 2. - Kick on player 3 = the Kick sample is assigned to pad 3. - Ride on player 4 = the Ride sample is assigned to pad 4. 43 DJUCED™ and DJ Control AIR (c) Playing samples You can control the playback of the 4 samples by tapping on the pads. One tap starts the sample playback. A second tap pauses the sample playback. The velocity with which you tap the pad controls the volume at which the samples are played. Tip: If you want to keep the same level for sample playback, no matter at what velocity the pads are hit: disable the velocity on the pads in sampler mode in the DJ Control AIR control panel (Advanced > Sample Velocity Off). 44 DJUCED™ and DJ Control AIR d) Loops (1) Definition Loop: a portion of an audio track that is played repeatedly. (2) Controlling loops on DJ Control AIR (a) Setting the DJ Control AIR pads to Loop mode Press the Loops mode button, between the 2 columns of equalizer controls. It lights up: - The Loops mode button, - The Loops label over the 2 sets of 4 pads. (b) Setting a Loop In point = start of the loop: Pad 1 While the track is playing, you place the starting point of the loop using Pad 1. When you set a Loop In point, the track keeps on playing without any change. (c) Setting a Loop Out point = end of the loop: Pad 2 Once a Loop In point is placed, you place the Loop Out point using Pad 2. Once you have set a Loop Out point, the track’s playback is replaced by the playback of the loop. (d) Dividing the loop length by 2: Pad 3 Once inside the loop, you can divide the size of the loop by 2 by pressing Pad 3. (e) Doubling the loop length: Pad 4 Once inside a loop, you can double the size of the loop by pressing Pad 4. 45 DJUCED™ and DJ Control AIR (f) Exiting the Loop: Pad 2 Once inside a loop, you can exit the loop and keep on playing the track at the end of the loop by pressing Pad 2. C. Frequently asked questions 1. DJUCED a) Is DJUCED for DJ Control AIR a time-limited version? No: DJUCED is not time-limited if DJ Control AIR is connected, although DJUCED operates in demo mode (a 30-minute limit per session) if DJ Control AIR is not connected to the computer. If you run DJUCED without DJ Control AIR connected to the computer, you can use DJUCED for 30 minutes; after 30 minutes, the software closes. b) Does DJUCED support other DJ controllers than DJ Control AIR? The version included with DJ Control AIR only supports the DJ Control AIR as a controller. c) Can DJUCED support other audio interfaces than DJ Control AIR? Yes, you can select your choice of audio interface in DJUCED. By default, audio is set to use the DJ Control AIR’s built-in audio interface; however, you can choose another audio interface in the configuration menu displayed by clicking the Configuration icon in the top bar. d) Can DJUCED support both ASIO and WDM (Windows Driver Model) modes in Windows? DJUCED can operate in either WDM or ASIO mode. With the DJ Control AIR’s built-in audio interface, DJUCED operates in ASIO mode. 2. DJ Control AIR a) Can DJ Control AIR support other DJ software than DJUCED? Yes: the DJ Control AIR commands are standard MIDI controls, allowing you to control any DJ software whose MIDI commands are open and standard. A TSI file is available for download from the Hercules technical support website, allowing you to control Traktor Pro 2 and Traktor Duo 2, and DJ Control AIR will gradually support most open DJ software. 46 DJUCED™ and DJ Control AIR b) How can I set DJ Control AIR to ASIO mode in Windows? DJ Control AIR exposes both its WDM and ASIO drivers constantly, so you don’t need to switch between ASIO and WDM drivers in the control panel: you can select either the ASIO driver or the WDM driver in the DJ software. c) Is the AIR sensor compatible with other DJ software? Yes, the AIR sensor sends a standard MIDI command. d) How does the AIR sensor function? The AIR sensor is a proximity sensor, detecting the distance of an object located between 0 and 4 inches (10 cm) away – normally the DJ’s hand. The AIR sensor: - Emits infrared light (allowing it to function both in daylight and in dark conditions); and - Calculates the intensity of the reflection, to convert it into a MIDI command. For the user: - The closer his or her hand is to the AIR sensor, the higher the value of the MIDI command. - The further his or her hand is from the AIR sensor, the lower the value of the MIDI command. - Further than 4 inches (10 cm) away, the MIDI command is 0. e) Is there a risk that the AIR sensor may sends commands accidentally? To prevent the DJ’s movements from interfering with the AIR sensor, mapping the AIR sensor in DJ software requires combining the AIR sensor with another button – so that, when you release the other button, the commands sent by the AIR sensor are not taken into account by the software. 3. Mixing with DJUCED and DJ Control AIR a) How can I use the jog wheels to browse within a track? Once a track is loaded on a deck, there are two ways to browse within a track using the jog wheels: - Fast browsing: stop playback on the deck, switch off Scratch mode, and turn the jog wheel while pressing down on it. This lets you browse quickly within the track. - Precise browsing: switch Scratch mode on, and turn the jog wheel while pressing down on it. This lets you browse precisely within the track. b) How can I change the effects assigned to a pad? - Set the pad mode to Effects. Press the pad whose assigned effect you want to change (once to turn the current effect on, twice to turn if off) and keep pressing down on the pad. Change the effect assigned to this pad using the Up and Down arrow buttons, located near the Effects button in the central mixer area of the DJ Control AIR. c) How can I use the AIR sensor? - - Set the pad mode to Effects. Press the pad controlling the effect you want to send, and keep pressing down on the pad: (the velocity with which you have hit the pad controls the first parameter of the effect). Move your other hand over the AIR sensor: the distance between your hand and the AIR sensor modulates the second parameter of the effect (the closer your hand, the higher the parameter, and vice versa). As soon as you remove your finger from the pad, the second parameter is set at that value. 47 DJUCED™ and DJ Control AIR d) Can I use the AIR sensor for other settings in DJUCED? No, the functions mapped in DJUCED cannot be changed. D. DJ Control AIR MIDI messages 1. MIDI channel DJ Control AIR requires only 1 MIDI channel. The MIDI channel is set to channel 1 by default, and can be changed to channel 2, 3, …15, 16 in the DJ Control AIR’s control panel. 2. MIDI Input a) Definition The MIDI Input commands are the commands received by the computer and the software. MIDI Input = commands sent by the DJ controller. 48 DJUCED™ and DJ Control AIR b) Commands (1) Deck A Control Pads (Sensitivity On) Pad 1 Loop Deck A MIDI Message 9x 09 Value Button-Toggling Output Pad 2 Loop Deck A 9x 0A Value Button-Toggling Output Pad 3 Loop Deck A 9x 0B Value Button-Toggling Output Pad 4 Loop Deck A 9x 0C Value Button-Toggling Output Pad 1 Effect Deck A 9x 01 Value Button-Toggling Output Pad 2 Effect Deck A 9x 02 Value Button-Toggling Output Pad 3 Effect Deck A 9x 03 Value Button-Toggling Output Pad 4 Effect Deck A 9x 04 Value Button-Toggling Output Pad 1 Sample Deck A 9x 05 Value Button-Toggling Output Pad 2 Sample Deck A 9x 06 Value Button-Toggling Output Pad 3 Sample Deck A 9x 07 Value Button-Toggling Output Pad 4 Sample Deck A 9x 08 Value Button-Toggling Output Pads (Sensitivity Off) Pad 1 Loop Deck A Pad 2 Loop Deck A Pad 3 Loop Deck A Pad 4 Loop Deck A Pad 1 Effect Deck A Pad 2 Effect Deck A Pad 3 Effect Deck A Pad 4 Effect Deck A Pad 1 Sample Deck A Pad 2 Sample Deck A Pad 3 Sample Deck A Pad 4 Sample Deck A 9x 09 Value 9x 0A Value 9x 0B Value 9x 0C Value 9x 01 Value 9x 02 Value 9x 03 Value 9x 04 Value 9x 05 Value 9x 06 Value 9x 07 Value 9x 08 Value Button-Toggling Output Button-Toggling Output Button-Toggling Output Button-Toggling Output Button-Toggling Output Button-Toggling Output Button-Toggling Output Button-Toggling Output Button-Toggling Output Button-Toggling Output Button-Toggling Output Button-Toggling Output “7F” : Pressed – “00” : Released “7F” : Pressed – “00” : Released “7F” : Pressed – “00” : Released “7F” : Pressed – “00” : Released “7F” : Pressed – “00” : Released “7F” : Pressed – “00” : Released “7F” : Pressed – “00” : Released “7F” : Pressed – “00” : Released “7F” : Pressed – “00” : Released “7F” : Pressed – “00” : Released “7F” : Pressed – “00” : Released “7F” : Pressed – “00” : Released 9x 13 Value 9x 0D Value 9x 0E Value Bx 34 Value Button-Toggling Output Button-Toggling Output Button-Toggling Output Analog – Coarse (128 values) “7F” : Pressed – “00” : Released “7F” : Pressed – “00” : Released “7F” : Pressed – “00” : Released 00 > 7F : Full Down > Full Up Bx 58 Value Analog – Coarse (2 Values) 00 – LSBit zero Non-Zero – LSBit Non-Zero 9x 0F Value 9x 10 Value 9x 11 Value 9x 12 Value Bx 30 Value Button-Toggling Output Button-Toggling Output Button-Toggling Output Button-Toggling Output Incremental – Coarse (128 values) Incremental – Coarse (128 values) Button-Toggling Output “7F” : Pressed – “00” : Released “7F” : Pressed – “00” : Released “7F” : Pressed – “00” : Released “7F” : Pressed – “00” : Released 7F > 40 : CCW Slow>Fast – 01 > 3F : CW Slow>Fast 7F > 40 : CCW Slow>Fast – 01 > 3F : CW Slow>Fast “7F” : Pressed – “00” : Released Pitch Sync Deck A Pitch Bend - Deck A Pitch Bend + Deck A Pitch Fader Deck A (MSB Most Significant Byte) Pitch Fader Deck A (LSB Least Significant Byte) Playback Rewind Deck A Forward Deck A Cue Deck A Play-Pause Deck A Jog wheel rotation Deck A Jog wheel rotation in scratch mode Deck A Pressure on jog wheel Deck A Bx 32 Value 9x 16 Value Message Type 49 Value Description From “01” to “7F” : Pressed – “00” : Released From “01” to “7F” : Pressed – “00” : Released From “01” to “7F” : Pressed – “00” : Released From “01” to “7F” : Pressed – “00” : Released From “01” to “7F” : Pressed – “00” : Released From “01” to “7F” : Pressed – “00” : Released From “01” to “7F” : Pressed – “00” : Released From “01” to “7F” : Pressed – “00” : Released From “01” to “7F” : Pressed – “00” : Released From “01” to “7F” : Pressed – “00” : Released From “01” to “7F” : Pressed – “00” : Released From “01” to “7F” : Pressed – “00” : Released DJUCED™ and DJ Control AIR (2) Deck B Control Pads (Sensitivity On) Pad 1 Loop Deck B Pad 2 Loop Deck B 9x 1F Value 9x 20 Value Button-Toggling Output Button-Toggling Output Pad 3 Loop Deck B 9x 21 Value Button-Toggling Output Pad 4 Loop Deck B 9x 22 Value Button-Toggling Output Pad 1 Effect Deck B 9x 17 Value Button-Toggling Output Pad 2 Effect Deck B 9x 18 Value Button-Toggling Output Pad 3 Effect Deck B 9x 19 Value Button-Toggling Output Pad 4 Effect Deck B 9x 1A Value Button-Toggling Output Pad 1 Sample Deck B 9x 1B Value Button-Toggling Output Pad 2 Sample Deck B 9x 1C Value Button-Toggling Output Pad 3 Sample Deck B 9x 1D Value Button-Toggling Output Pad 4 Sample Deck B 9x 1E Value Button-Toggling Output Pads (Sensitivity Off) Pad 1 Loop Deck B Pad 2 Loop Deck B Pad 3 Loop Deck B Pad 4 Loop Deck B Pad 1 Effect Deck B Pad 2 Effect Deck B Pad 3 Effect Deck B Pad 4 Effect Deck B Pad 1 Sample Deck B Pad 2 Sample Deck B Pad 3 Sample Deck B Pad 4 Sample Deck B 9x 1F Value 9x 20 Value 9x 21 Value 9x 22 Value 9x 17 Value 9x 18 Value 9x 19 Value 9x 1A Value 9x 1B Value 9x 1C Value 9x 1D Value 9x 1E Value Button-Toggling Output Button-Toggling Output Button-Toggling Output Button-Toggling Output Button-Toggling Output Button-Toggling Output Button-Toggling Output Button-Toggling Output Button-Toggling Output Button-Toggling Output Button-Toggling Output Button-Toggling Output “7F” : Pressed – “00” : Released “7F” : Pressed – “00” : Released “7F” : Pressed – “00” : Released “7F” : Pressed – “00” : Released “7F” : Pressed – “00” : Released “7F” : Pressed – “00” : Released “7F” : Pressed – “00” : Released “7F” : Pressed – “00” : Released “7F” : Pressed – “00” : Released “7F” : Pressed – “00” : Released “7F” : Pressed – “00” : Released “7F” : Pressed – “00” : Released 9x 29 Value 9x 23 Value 9x 24 Value Bx 35 Value Button-Toggling Output Button-Toggling Output Button-Toggling Output Analog – Coarse (128 values) “7F” : Pressed – “00” : Released “7F” : Pressed – “00” : Released “7F” : Pressed – “00” : Released 00 > 7F : Full Down > Full Up Bx 59 Value Analog – Coarse (2 Values) 00 – LSBit zero Non-Zero – LSBit Non-Zero 9x 25 Value 9x 26 Value 9x 27 Value 9x 28 Value Bx 31 Value Button-Toggling Output Button-Toggling Output Button-Toggling Output Button-Toggling Output Incremental – Coarse (128 values) Incremental – Coarse (128 values) Button-Toggling Output “7F” : Pressed – “00” : Released “7F” : Pressed – “00” : Released “7F” : Pressed – “00” : Released “7F” : Pressed – “00” : Released 7F > 40 : CCW Slow>Fast – 01 > 3F : CW Slow>Fast 7F > 40 : CCW Slow>Fast – 01 > 3F : CW Slow>Fast “7F” : Pressed – “00” : Released Pitch Sync Deck B Pitch Bend - Deck B Pitch Bend + Deck B Pitch Fader Deck B (MSB Most Significant Byte) Pitch Fader Deck B (LSB Least Significant Byte) Playback Rewind Deck B Forward Deck B Cue Deck B Play-Pause Deck B Jog wheel rotation Deck B Jog wheel rotation in scratch mode Deck B Pressure on jog wheel Deck B MIDI Message Bx 33 Value 9x 2C Value Message Type Value Description + From “01” to “7F” : Pressed – “00” : Released From “01” to “7F” : Pressed – “00” : Released From “01” to “7F” : Pressed – “00” : Released From “01” to “7F” : Pressed – “00” : Released From “01” to “7F” : Pressed – “00” : Released From “01” to “7F” : Pressed – “00” : Released From “01” to “7F” : Pressed – “00” : Released From “01” to “7F” : Pressed – “00” : Released From “01” to “7F” : Pressed – “00” : Released From “01” to “7F” : Pressed – “00” : Released From “01” to “7F” : Pressed – “00” : Released (3) Mixer Control Browser Up Down Files Folders MIDI Message 9x 33 Value 9x 34 Value 9x 35 Value 9x 36 Value Message Type Button-Toggling Output Button-Toggling Output Button-Toggling Output Button-Toggling Output 50 Value Description “7F” : Pressed – “00” : Released “7F” : Pressed – “00” : Released “7F” : Pressed – “00” : Released “7F” : Pressed – “00” : Released DJUCED™ and DJ Control AIR Load Deck A Load Deck B 9x 15 Value 9x 2B Value Button-Toggling Output Button-Toggling Output “7F” : Pressed – “00” : Released “7F” : Pressed – “00” : Released Pads mode Loops Effects Sample Select Down Select Up 9x 37 Value 9x 38 Value 9x 2F Value 9x 31 Value 9x 32 Value Button-Toggling Output Button-Toggling Output Button-Toggling Output Button-Toggling Output Button-Toggling Output “7F” : Pressed – “00” : Released “7F” : Pressed – “00” : Released “7F” : Pressed – “00” : Released “7F” : Pressed – “00” : Released “7F” : Pressed – “00” : Released Air Sensor Proximity sensor Bx 3F Value Analog – Coarse (128 values) 00 > 7F : Furthest : Closest Central buttons Scratch Magic Record 9x 2D Value 9x 2E Value 9x 30 Value Button-Toggling Output Button-Toggling Output Button-Toggling Output “7F” : Pressed – “00” : Released “7F” : Pressed – “00” : Released “7F” : Pressed – “00” : Released Equalization Treble Deck A Medium Deck A Bass Deck A Treble Deck B Medium Deck B Bass Deck B Bx 37 Value Bx 38 Value Bx 39 Value Bx 3C Value Bx 3D Value Bx 3E Value Analog – Coarse (128 values) Analog – Coarse (128 values) Analog – Coarse (128 values) Analog – Coarse (128 values) Analog – Coarse (128 values) Analog – Coarse (128 values) 00 > 7F : Full CW : Full CCW 00 > 7F : Full CW : Full CCW 00 > 7F : Full CW : Full CCW 00 > 7F : Full CW : Full CCW 00 > 7F : Full CW : Full CCW 00 > 7F : Full CW : Full CCW Headphones Listen Deck A Listen Deck B 9x 14 Value 9x 2A Value Button-Toggling Output Button-Toggling Output “7F” : Pressed – “00” : Released “7F” : Pressed – “00” : Released Faders Crossfader Volume fader deck A Volume fader deck B Bx 3A Value Bx 36 Value Bx 3B Value Analog – Coarse (128 values) Analog – Coarse (128 values) Analog – Coarse (128 values) 00 > 7F : Full Left > Full Right 00 > 7F : Full Down > Full Up 00 > 7F : Full Down > Full Up MIDI Message 9x 39 Value 9x 3A Value Message Type Button-Toggling Output Button-Toggling Output Value Description “7F” : Pressed – “00” : Released “7F” : Pressed – “00” : Released 9x 3B Value 9x 3C Value Button-Toggling Output Button-Toggling Output “7F” : Pressed – “00” : Released “7F” : Pressed – “00” : Released (4) Front panel Control Mix in headphones Cue (PFL) in headphones Headphones Volume Headphones Volume + 3. MIDI Output = control on LEDs a) Definition The MIDI Output commands are the commands sent by the computer and the software to the DJ controller. MIDI Output = commands received by the DJ controller = commands to control the LEDs. b) Commands (1) Deck A LEDs Control Pads (Sensitivity On) Pad 1 Loop Deck A Pad 2 Loop Deck A Pad 3 Loop Deck A Pad 4 Loop Deck A Pad 1 Effect Deck A Pad 2 Effect Deck A Pad 3 Effect Deck A Pad 4 Effect Deck A Pad 1 Sample Deck A Pad 2 Sample Deck A Pad 3 Sample Deck A Pad 4 Sample Deck A MIDI Message 9x 09 Value 9x 0A Value 9x 0B Value 9x 0C Value 9x 01 Value 9x 02 Value 9x 03 Value 9x 04 Value 9x 05 Value 9x 06 Value 9x 07 Value 9x 08 Value Value Description 00 : OFF – 7F: ON 00 : OFF – 7F: ON 00 : OFF – 7F: ON 00 : OFF – 7F: ON 00 : OFF – 7F: ON 00 : OFF – 7F: ON 00 : OFF – 7F: ON 00 : OFF – 7F: ON 00 : OFF – 7F: ON 00 : OFF – 7F: ON 00 : OFF – 7F: ON 00 : OFF – 7F: ON 51 DJUCED™ and DJ Control AIR Pitch Sync Deck A 9x 13 Value 00 : OFF – 7F: ON Playback Cue Deck A Play Deck A 9x 11 Value 9x 12 Value 00 : OFF – 7F: ON 00 : OFF – 7F: ON (2) Deck B LEDs Control Pads (Sensitivity On) Pad 1 Loop Deck B Pad 2 Loop Deck B Pad 3 Loop Deck B Pad 4 Loop Deck B Pad 1 Effect Deck B Pad 2 Effect Deck B Pad 3 Effect Deck B Pad 4 Effect Deck B Pad 1 Sample Deck B Pad 2 Sample Deck B Pad 3 Sample Deck B Pad 4 Sample Deck B MIDI Message Value Description 9x 1F Value 9x 20 Value 9x 21 Value 9x 22 Value 9x 17 Value 9x 18 Value 9x 19 Value 9x 1A Value 9x 1B Value 9x 1C Value 9x 1D Value 9x 1E Value 00 : OFF – 7F: ON 00 : OFF – 7F: ON 00 : OFF – 7F: ON 00 : OFF – 7F: ON 00 : OFF – 7F: ON 00 : OFF – 7F: ON 00 : OFF – 7F: ON 00 : OFF – 7F: ON 00 : OFF – 7F: ON 00 : OFF – 7F: ON 00 : OFF – 7F: ON 00 : OFF – 7F: ON Pitch Sync Deck B 9x 29 Value 00 : OFF – 7F: ON Playback Cue Deck B Play Deck B 9x 27 Value 9x 28 Value 00 : OFF – 7F: ON 00 : OFF – 7F: ON (3) Mixer LEDs Control Browser Files Folders MIDI Message Value Description 9x 35 Value 9x 36 Value 00 : OFF – 7F: ON 00 : OFF – 7F: ON Beats VU-Meter Beat 1 Deck A Beat 2 Deck A Beat 3 Deck A Beat 4 Deck A Beat 1 Deck B Beat 2 Deck B Beat 3 Deck B Beat 4 Deck B 9x 44 Value 9x 45 Value 9x 46 Value 9x 47 Value 9x 4C Value 9x 4D Value 9x 4E Value 9x 4F Value 00 : OFF – 7F: ON 00 : OFF – 7F: ON 00 : OFF – 7F: ON 00 : OFF – 7F: ON 00 : OFF – 7F: ON 00 : OFF – 7F: ON 00 : OFF – 7F: ON 00 : OFF – 7F: ON Central buttons Scratch Magic Record 9x 2D Value 9x 2E Value 9x 30 Value 00 : OFF – 7F: ON 00 : OFF – 7F: ON 00 : OFF – 7F: ON Headphones Listen Deck A Listen Deck B 9x 14 Value 9x 2A Value 00 : OFF – 7F: ON 00 : OFF – 7F: ON (4) Front panel LEDs Control Mix in headphones Cue (PFL) in headphones Headphones Volume Headphones Volume + MIDI Message 9x 39 Value 9x 3A Value Value Description 00 : OFF – 7F: ON 00 : OFF – 7F: ON 9x 3B Value 9x 3C Value 00 : OFF – 7F: ON 00 : OFF – 7F: ON (5) Update all LEDs Control All LEDs Off / On MIDI Message Bx 7F Value Value Description 00 : OFF – 7F: ON 52 DJUCED™ and DJ Control AIR E. Technical Support If you encounter a problem with your product, please go to http://ts.hercules.com and select your language. From there you will be able to access various utilities (Frequently Asked Questions (FAQ), the latest versions of drivers and software) that may help to resolve your problem. If the problem persists, you can contact the Hercules products technical support service (“Technical Support”): By email: To reach our Technical Support via email, you must first register online on the http://ts.hercules.com/ website. The information that you provide will help our technicians to resolve your problem as quickly as possible. Click on Product Registration and follow the instructions displayed onscreen. If you have already registered your product, please enter your user info in the Username and Password fields, then click on Login. By telephone (if you do not have Internet access): 08450800942 United Kingdom Monday to Saturday from 8 a.m. to 7 p.m. Charged at local rate Monday to Friday from 9 a.m. to 8 p.m. Saturday from 8 a.m. to 2 p.m. (Eastern Standard Time) 1-866-889-5036 United States Free Monday to Friday from 6 a.m. to 5 p.m. Saturday from 5 a.m. to 11 a.m. (Pacific Standard Time) Monday to Friday from 9 a.m. to 8 p.m. Saturday from 8 a.m. to 2 p.m. (Eastern Standard Time) 1-866-889-2181 Canada Free Monday to Friday from 6 a.m. to 5 p.m. Saturday from 5 a.m. to 11 a.m. (Pacific Standard Time) 80887690 Monday to Saturday from 9 a.m. to 8 p.m. Denmark Free (English) 0200884567 Monday to Saturday from 9 a.m. to 8 p.m. Sweden Free (English) 0800 913060 Monday to Saturday from 10 a.m. to 9 p.m. Finland Free (English) Hours of operation and telephone numbers are subject to change. Please visit http://ts.hercules.com for the most up-to-date Technical Support contact information. F. Warranty information Worldwide, Guillemot Corporation S.A. (“Guillemot”) warrants to the consumer that this Hercules product will be free from material defects and manufacturing flaws for a period of two (2) years from the original date of purchase. Should the product appear to be defective during the warranty period, immediately contact Technical Support, who will indicate the procedure to follow. If the defect is confirmed, the product must be returned to its place of purchase (or any other location indicated by Technical Support). Within the context of this warranty, the consumer’s defective product will, at Technical Support’s option, be either repaired or replaced. Where authorized by applicable law, the full liability of Guillemot and its subsidiaries (including for indirect damages) is limited to the repair or replacement of the Hercules product. The consumer’s legal rights with respect to legislation applicable to the sale of consumer goods are not affected by this warranty. This warranty shall not apply: (1) if the product has been modified, opened, altered, or has suffered damage as a result of inappropriate or abusive use, negligence, an accident, normal wear, or any other cause not related to a material defect or manufacturing flaw; (2) in the event of failure to comply with the instructions provided by Technical Support; (3) to software not published by Guillemot, said software being subject to a specific warranty provided by its publisher. 53 DJUCED™ and DJ Control AIR G. Additional warranty provisions In the United States of America and in Canada, this warranty is limited to the product’s internal mechanism and external housing. Any applicable implied warranties, including warranties of merchantability and fitness for a particular purpose, are hereby limited to two (2) years from the date of purchase and are subject to the conditions set forth in this limited warranty. In no event shall Guillemot Corporation S.A. or its affiliates be liable for consequential or incidental damage resulting from the breach of any express or implied warranties. Some States/Provinces do not allow limitation on how long an implied warranty lasts or exclusion or limitation of incidental/consequential damages, so the above limitation may not apply to you. This warranty gives you specific legal rights, and you may also have other legal rights which vary from State to State or Province to Province. H. Trademarks Hercules® is a registered trademark of Guillemot Corporation S.A. Intel® and Pentium® are registered trademarks of Intel Corporation. Microsoft® Windows® XP®, Vista® and 7™ are registered trademarks or trademarks of Microsoft Corporation in the United States and/or other countries. Mac and Mac OS are trademarks of Apple Inc., registered in the U.S. and other countries. The DJUCED trademark and DJUCED graphics are property of Guillemot Corporation. All other trademarks and brand names are hereby acknowledged and are property of their respective owners. Illustrations not binding. Contents, designs and specifications are subject to change without notice and may vary from one country to another. I. Declaration of conformity EC COMPLIANCE NOTICE: Guillemot Corporation S.A. hereby declares that the device complies with the main requirements and other relevant clauses of Directive CEM 2004/108/CE. In a domestic environment this product may cause radio interference in which case the user may be required to take adequate measures. CANADIAN COMPLIANCE NOTICE: this Class B digital apparatus meets all requirements of the Canadian InterferenceCausing Equipment Regulations. USA COMPLIANCE NOTICE: this equipment has been tested and found to comply with the limits for a Class B digital device, pursuant to Part 15 of the FCC rules. Operation is subject to the following two conditions: (1) This device may not cause harmful interference, and (2) This device must accept any interference received, including interference that may cause undesired operation. These limits are designed to provide reasonable protection against harmful interference in a residential installation. This equipment generates, uses and can radiate radio frequency energy and, if not installed and used in accordance with the instructions, may cause harmful interference to radio communications. However, there is no guarantee that interference will not occur in a particular installation. If this equipment does cause harmful interference to radio or television reception, which can be determined by turning the equipment on and off, the user is encouraged to try to correct the interference by one or more of the following measures: - Reorient or relocate the receiving antenna. - Increase the separation between the equipment and receiver. - Connect the equipment into an outlet on a circuit different from that to which the receiver is connected. - Consult the dealer or an experienced radio/TV technician for help. In the event of malfunction during use due to electrostatic emission, you should exit the software, disconnect the device from the computer, then resume normal use by reconnecting the device to the computer, and restarting the software. J. Copyright © 2012 Guillemot Corporation S.A. All rights reserved. This publication may not be reproduced in whole or in part, summarized, transmitted, transcribed, stored in a retrieval system, or translated into any language or computer language, in any form or by any means, electronic, mechanical, magnetic, photocopying, recording, manual or otherwise, without the prior written permission of Guillemot Corporation S.A. 54 DJUCED™ and DJ Control AIR K. Disclaimer Guillemot Corporation S.A. reserves the right to make changes to specifications at any time and without notice. The information provided by this document is believed to be accurate and reliable. However, no responsibility is assumed by Guillemot Corporation S.A. either for its use or for the infringement of patents or other rights of third parties resulting from its use. This product may exist in a light or special version for PC integration or other purposes. Certain functions detailed in this manual may not be available in these versions. Wherever possible, a README.TXT will be included on the installation CD-ROM detailing the differences between the supplied product and the product described in the present documentation. L. End-user software license Agreement for Hercules software IMPORTANT: please read the Agreement carefully prior to opening and installing the Software. By opening the Software package, you agree to be bound by the terms of this Agreement. The Software enclosed in this package is licensed, not sold, and is only available under the terms of the present license Agreement. If you do not agree with the terms hereafter, you must promptly return the Software within 15 days, together with the entire contents of the box, to the place of purchase. The Guillemot Corporation S.A. Software (hereafter named the “Software”) is copyrighted by Guillemot Corporation S.A. All rights are reserved. The term “Software” refers to all documentation and related material, including drivers, executable programs, libraries and data files. The purchaser is granted a license to use the Software only. The licensee also agrees to be bound by the terms and conditions of the present Agreement concerning copyright and all other proprietary rights for any third party Software, documentation and related material included in the Software package. Guillemot Corporation S.A. reserves the right to terminate this license in the event of failure to comply with any of the terms or conditions laid out in the present Agreement. On termination, all copies of the Software shall immediately be returned to Guillemot Corporation S.A.; the purchaser remaining liable for any and all resulting damages. License: 1.The license is granted to the original purchaser only. Guillemot Corporation S.A. retains all title to and ownership of the Software and reserves all rights not expressly granted. The licensee is not permitted to sub-license or lease any of the rights that are hereby granted. Transfer of the license is permitted, provided that the transferor does not retain any part or copy of the Software and the transferee accepts to be bound by the terms and conditions of the present Agreement. 2.The licensee may only use the Software on a single computer at any time. The machine-readable portion of the Software may be transferred to another computer provided it is previously erased from the first machine and there is no possibility that the Software can be used on more than one machine at any one time. 3.The licensee acknowledges the copyright protection belonging to Guillemot Corporation S.A. The copyright notice must not be removed from the Software, nor from any copy thereof, nor from any documentation, written or electronic, accompanying the Software. 4.The licensee is granted the right to make one back-up copy of the machine-readable portion of the Software on the condition that all copyright and proprietary notices are also reproduced. 5.Except where the present Agreement expressly permits, the licensee is strictly prohibited from engaging in, nor may he permit third parties to engage in, the following: providing or disclosing the Software to third parties; providing use of the Software in a network, multiple PCs, multi-user or time-sharing arrangement where the users are not individual licensees; making alterations or copies of any kind of the Software; making any attempt to disassemble, de-compile or reverse engineer the Software in any way or form, or engaging in any activity aimed at obtaining underlying information not visible to the user during normal use of the Software; making copies or translations of the User Manual. M. End-user software license Agreement for DJUCED™ software Please carefully read the License contract displayed when installing the DJUCED™ software. N. Environmental protection recommendation At the end of its working life, this product should not be disposed of with standard household waste, but rather dropped off at a collection point for the disposal of Waste Electrical and Electronic Equipment (WEEE) for recycling. This is confirmed by the symbol found on the product, user manual or packaging. Depending on their characteristics, the materials may be recycled. Through recycling and other forms of processing Waste Electrical and Electronic Equipment, you can make a significant contribution towards helping to protect the environment. Please contact your local authorities for information on the collection point nearest you. 55

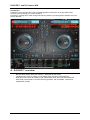
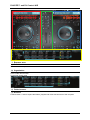
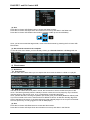

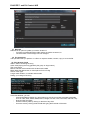


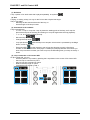

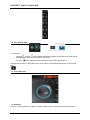

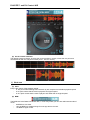


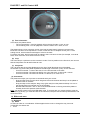


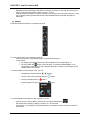
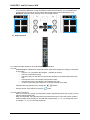


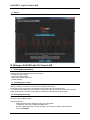


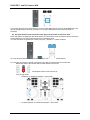


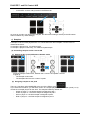


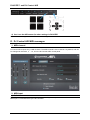


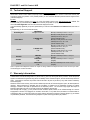


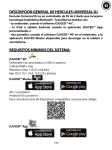

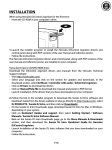


![[English] 2.2 MB](http://vs1.manualzilla.com/store/data/005801224_1-360c03496a849957940b8f23b39f430e-150x150.png)