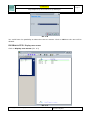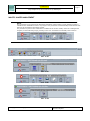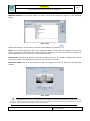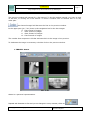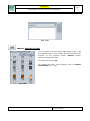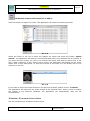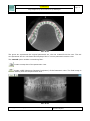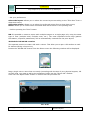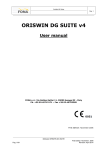
1
ArchiMED Suite ® Page 1 Image management for Dental Cabinet and for Radiologists ArchiMED Suite Us e r M a nu a l 0051 Edition: November 2006 Revision: May 2014 Digital Imaging s.a.s. via Alfieri, 12 10042 Nichelino (TO) tel. +39 011.605.69.62 - Fax +39 011.605.79.87 © Copyright DIGITAL imaging sas – Via Alfieri 12 A B – 10142 Nichelino (TO) www.digitalimaging.it www.archimed.org First edition: November 2006 Revision: May 2014 ArchiMED Suite ® Page 2 Image management for Dental Cabinet and for Radiologists Sommario 1. INTRODUCTION ........................................................................................................................... 5 INTRODUCTION ........................................................................................................................... 6 DESTINATION OF USE AND USER PROFILE .......................................................................... 7 TRAINING ...................................................................................................................................... 7 UPDATE .......................................................................................................................................... 8 WARRANTY................................................................................................................................... 8 COMPUTER REQUIREMENTS .................................................................................................... 8 HOW TO USE THIS MANUAL ..................................................................................................... 9 2. INSTALLATION AND PACKAGING ........................................................................................ 11 PACKAGING ................................................................................................................................ 12 INSTALLATION........................................................................................................................... 12 3. SOFTWARE INITIALIZATION .................................................................................................. 14 SOFTWARE INITIALIZATION .................................................................................................. 15 PASSWORD ADMINISTRATION .............................................................................................. 16 4. PROGRAM ACCESS .................................................................................................................... 20 PROGRAM ACCESS: Password and user administration ............................................................ 21 PROGRAM ACCESS: Reset database selection. .......................................................................... 21 PROGRAM ACCESS: Reset password. ........................................................................................ 21 PROGRAM ACCESS: Access to the software.............................................................................. 22 PROGRAM ACCESS: New User.................................................................................................. 22 PROGRAM ACCESS: Delete User ............................................................................................... 23 PROGRAM ACCESS: Display user access .................................................................................. 24 PROGRAM ACCESS: Forgotten Password .................................................................................. 25 PROGRAM ACCESS: Change Password ..................................................................................... 25 5. DATABASE CONFIGURATION ................................................................................................ 26 DATABASE CONFIGURATION: Drive administration ............................................................. 27 DATABASE CONFIGURATION: Add a drive to the used database .......................................... 27 DATABASE CONFIGURATION: Disconnect a database ........................................................... 28 DATABASE CONFIGURATION: Database Drive configuration ............................................... 29 PATIENTS: Patient database ............................................................................................... 30 6. PATIENTS DATABASE .............................................................................................................. 32 PATIENTS: Create a new patient .................................................................................................. 33 PATIENTS: Compile all the patient’s data.............................................................................. 35 PATIENTS: Patient search ............................................................................................................ 36 PATIENTS: Create a new patient category ................................................................................... 38 PATIENTS: Modify patient ........................................................................................................... 38 PATIENTS: Choice of a patient .................................................................................................... 39 7. IMAGE MANAGEMENT ............................................................................................................. 42 IMAGES: IMAGES MANAGEMENT ......................................................................................... 43 IMAGES: Image toolbar function.................................................................................................. 44 Image options: Setting Image options ............................................................................................ 45 Images: Dicom Viewer .................................................................................................................. 48 IMAGES: Import images ............................................................................................................... 50 MEANING OF THE BUTTONS .................................................................................................. 52 © Copyright DIGITAL imaging sas – Via Alfieri 12 A B – 10142 Nichelino (TO) www.digitalimaging.it www.archimed.org First edition: November 2006 Revision: May 2014 ArchiMED Suite ® Page 3 Image management for Dental Cabinet and for Radiologists IMAGES DATABASE .................................................................................................................. 68 IMAGES: ZOOM ON IMAGE..................................................................................................... 76 IMAGES: IMAGES ACQUISITION ............................................................................................ 82 8. UTILITY ........................................................................................................................................ 92 UTILITY ........................................................................................................................................ 93 Select the language to use .............................................................................................. 94 Working parameters ................................................................................................................... 94 Get incoming phone calls ........................................................................................................... 95 Waiting room management ........................................................................................................ 95 Remote control ........................................................................................................................... 95 PRINT ............................................................................................................................................ 96 IMAGES ........................................................................................................................................ 96 Storage ....................................................................................................................................... 97 NETWORK.................................................................................................................................... 98 TERMINAL SERVER ................................................................................................................... 99 DICOM .......................................................................................................................................... 99 BACKUP DATABASE ............................................................................................................... 100 DATABASE RESTORE.............................................................................................................. 102 REPAIR DATABASE ................................................................................................................. 102 PATIENT COPY ......................................................................................................................... 103 CREATE CD FOR PATIENT ..................................................................................................... 104 9. 3D IMAGES ................................................................................................................................ 106 3D Module: IMAGES MANAGEMENT .................................................................................... 107 3D Module: 3D IMAGES ............................................................................................................ 107 3D Module: 3D reconstruction window....................................................................................... 108 3D Module: Warning. .................................................................................................................. 110 3D Module: Create the panoramic arc ......................................................................................... 110 3D Module: AXIAL VIEW ......................................................................................................... 111 3D Module: 3D VIEW ................................................................................................................. 112 3D Module: CROSS SECTION VIEW ....................................................................................... 114 3D Module: PANORAMIC VIEW .............................................................................................. 115 3D Module: FULL CROSS VIEW .............................................................................................. 117 3D Module: CROSS 3D VIEW ................................................................................................... 118 3D Modules: Hounsfield .............................................................................................................. 119 3D Module: CEPH VIEW............................................................................................................ 119 3D Module: Meaning of the functions ......................................................................................... 120 10. APPENDIX ................................................................................................................................ 136 APPENDIX – Digital sensors that can be connected to Archimed Suite .................................... 137 © Copyright DIGITAL imaging sas – Via Alfieri 12 A B – 10142 Nichelino (TO) www.digitalimaging.it www.archimed.org First edition: November 2006 Revision: May 2014 ArchiMED Suite ® Page 4 Image management for Dental Cabinet and for Radiologists Present Icon in the manual It points out one "NOTE"; particular attention recommend in the reading of the topics identified with such icon. It points out one "ADVICE"; the topics identified with this icon concern the safety aspects of the patient and/or of the operator. 0051 This symbol certifies that the product "ArchiMED Suite®" is conforming to the European directive 93/42 CEE, as modified from 2007/47/CE. ArchiMED Suite is a medical active device, not invasive type, in IIA class according to the above mentioned directive. ArchiMED Suite® is produced by: DIGITAL IMAGING DI TESTONI MARIO & C. S.A.S. Via Alfieri 12 A-B - 10042 Nichelino – To – Italia Tel. + 39 011 6952002 Fax +39 011 60579897 Email: [email protected] © Copyright DIGITAL imaging sas – Via Alfieri 12 A B – 10142 Nichelino (TO) www.digitalimaging.it www.archimed.org First edition: November 2006 Revision: May 2014 ArchiMED Suite ® Page 5 Image management for Dental Cabinet and for Radiologists 1. INTRODUCTION © Copyright DIGITAL imaging sas – Via Alfieri 12 A B – 10142 Nichelino (TO) First edition: November 2006 Revision: May 2014 ArchiMED Suite ® Page 6 Image management for Dental Cabinet and for Radiologists This manual could contain not perfectly aligned information to the attached software. That because it is upgraded to the last emission date. The use of the program comport to accept the use licence contract. NOTE: The manual is updated to the state of the product with which it is sold for guaranteeing to the consumer a suitable reference in the use of the instrument and every aspect to the safety of use. The manual would be not reflected variations of product deprived of impact on the operational formalities and on the safety of use INTRODUCTION First of all we would to congratulated for your purchase. This software is the most complete, tastefully and at the same time simple to use, that is available on the market, for the management of the Dental cabinet and for the filing of digital imagines. NOTE: ArchiMED Suite® is supplied in different versions that foresee the functionality of procedures defined "advanced". Some functionalities listed in the manual are present only in the supplied modules as additional option. Inside this manual it is indicated if the described function is not included in the basic version. This software will permits you to manage all the data of the Dental cabinet in a very simple and intuitive way. Moreover, ArchiMED Suite® integrates calls to the acquisition software of a lot of electronic devices: video radio X-Ray system, telecameras, digitals panoramic, scanners, cameras, slides scanner, etc. All the acquired images, independently from their origin, are automatically saved as acquired by the software of the different devices. You can create a sequential archive for your images, or you can group them to obtain systematics and photographic album. With maths filters you can improve the contrast or the brightness for a better analysis; you can also use the filters to exalt the edges or to transform in 3D your image and also to rotate the 3D image in real time. The original image is always present and can be displayed in every moment. Moreover, with the virtual colorations, the few contrasted X-Ray examination it results very simple. An intelligent system will you clarify in every moment, in a very detailed way, the cause of a malfunctioning or an error. Remember that this software is fruit of the users collaboration. Please, do not hesitate to give us your councils on the use and functioning of the software, and your desire of new functionality also. We should be glad to add it, if necessary, in the future versions of the program. This software has been developed with 32 bits technology. For many users this is a negligible information, but it indicates: further reliability, exclusive use on 32/64 bits Operative System (Windows® NT/2000/XP/Vista/7), much more web reliability. © Copyright DIGITAL imaging sas – Via Alfieri 12 A B – 10142 Nichelino (TO) First edition: November 2006 Revision: May 2014 ArchiMED Suite ® Page 7 Image management for Dental Cabinet and for Radiologists NOTE: ArchiMED Suite® can also be used on operating systems to 64 bits like Windows Vista and Windows 7. Such peculiarity is specific of the product ArchiMED Suite® and not of the devices connected to the computer. Before purchasing a computer with an operating system to 64 bits verified that the equipments to be connected to the personal computer (scanner, cameras, videoradiografy system, digital panoramic, etc) foresees this possibility. ADVICE: The good quality of the monitor is an essential requirement for a correct diagnosis of the examination through analysis of the image. A monitor that don't passed the scheduled verifications (see appendix 2, "Verification of the adequacy of the monitor") is not to consider diagnostic. The use of a monitor of not diagnostic quality returns not diagnostic ArchiMED Suite® system DESTINATION OF USE AND USER PROFILE ArchiMED Suite® is an active medical device destined to be employed on the man to help to the diagnosis, prevention, control of pathologies of the maxillo-facial complex. 1. The system is destined therefore to the acquisition, visualization and filing of radiographies of the maxillo-facial complex, including both the examinations of the dental arcades, included the articulations temporo-mandibular, the air sinuses, radiographies of the head in side to side projection and antero/posterior, radiographies coming from systems CT and or ConeBeamComputed Tomography (CBCT). 2. the tool is destined to be used from personal qualified, dentists, radiologists or personal legally qualified. The typology of population of the patients depends in first place on the used equipment of radiology, without limitation type, age, etc. User profile The user already has basic knowledges about: - output of ionizing radiations - dangers of biological damages tied to the excessive use of ionizing radiations - methods to reduce the risks of excessive radiations to the patient (use of fallen protections, etc.) It is required to the operator to have familiarity in the use of Personal Computer (PC) and relative software, so that to be able to use the present functions on the PC in easy way. TRAINING At the end of the installation of the system it will follow the training of the operator both on the use of the system and of the acquisition and visualization software of the images. The training doesn't ask to use particular tools. ADVICE: At the end of the operations of installation and training it is obligatory to perform the verification of correct visualization of the images on the monitor in use. The procedure is described in the appendix 2 - Controls to the installation and periodical, which it is postponed. © Copyright DIGITAL imaging sas – Via Alfieri 12 A B – 10142 Nichelino (TO) First edition: November 2006 Revision: May 2014 ArchiMED Suite ® Page 8 Image management for Dental Cabinet and for Radiologists ADVICE: The procedures of verification described in the appendix 2 must be perform with regularity, as described in the paragraph related to the periodic controls. This manual describes the necessary operations to perform intraoral radiographies, panoramics and volumetrics (or 3D) with various types of digital sensors. ADVICE: The application of filters to the images, the calibration of the measures, the change of contrast and brightness and all the functions that modify the images, can introduce artificials that compromise the diagnosis. For this reason ArchiMED Suite® always preserves the original copy of the image to which is had to make reference for the diagnosis UPDATE ArchiMED Suite® is a medical device. Before a software update of the product we invite you to observe the specified following warning. ADVICE: ArchiMED Suite® is a software and therefore it can be updated with special procedures without the presence of a specialized technician. ArchiMED Suite® is a medical device and the producer and/or supplier have the duty to hold trace of all the installed versions with the purpose to be able to apply possible call back following found defectiveness. For this reason we invite you not to update the version of the software that has been delivered you if not following of a documented procedure from your supplier of reference that guarantees the traceability of the product. WARRANTY This software is guarantee during 90 (ninety) days after the purchase date. Producer could not be responsible for any direct or indirect damage deriving from the program use; partial or total loss of data neither. The program is assigned in use licence and could be give to thirds parties only upon written authorization of Digital Imaging s.a.s. COMPUTER REQUIREMENTS Minimal requirements of your computer are: Windows® XP/2000 1 GB RAM (2 GB suggested) 1024x768 pixels to 65.000 colours (1280x1024 pixels to 16 millions colours to 32 bits optimized) 5GB HD (10GB suggested) 17” monitor (19” best or higher) © Copyright DIGITAL imaging sas – Via Alfieri 12 A B – 10142 Nichelino (TO) First edition: November 2006 Revision: May 2014 ArchiMED Suite ® Page 9 Image management for Dental Cabinet and for Radiologists The Hard Disk size must be proportional with the archive size you create, and in particularly with the images size that you save. Every X-Ray image need, on the HD, a space that varies between 100KB (compressed) and 500KB (not compressed). A panoramic needs from 1MB (compressed) to 10MB (not compressed). A telecamera pic occupies from 100KB (compressed) to 1MB (not compressed). Your hard disk dimension have to be sufficient to contain the images you want to save. A TC or CBCT exams need from 10 MB to 200 MB (it depends from the resolutions). The necessary RAM (Random Access Memory) for ArchiMED Suite® is almost of 512 MB. Windows® can manages the virtual memory, that is a RAM extension on the HD. This in case the RAM in not sufficient, Windows® uses the Hard Disk like a RAM. This operation involves a slowing down of the system, that because the hard disk is slowness than RAM. Before to run ArchiMED Suite®, please verify the memory available. In Windows Vista® proceed in the follow way Click on Start icon menu item “Property” than click, with right mouse button, on “Computer” than select the Pic. 1.1 Check the Memory (RAM) available. The minimum value under Windows Vista is 1 GB (2 GB if you use the 3D modules). HOW TO USE THIS MANUAL This manual is organized in cards. Every function is presented in his use and if possible with utilize examples. Exist a paragraph “Description”, one “Operation” and one “Additional Informations”. Since this software uses electronics devices (computer, mouse, peripherals), are often used terminologies or specific acronyms. We apologize if the reading can result little clear, but we will here try to explain some terms used in the text. The phrase “move the mouse…” means that you have to displace the monitor indicator (normally an arrow) that indicates the mouse position, in a specific zone. “Click with the mouse” means to bring the mouse in position, then press the right button and release it. © Copyright DIGITAL imaging sas – Via Alfieri 12 A B – 10142 Nichelino (TO) First edition: November 2006 Revision: May 2014 ArchiMED Suite ® Page 10 Image management for Dental Cabinet and for Radiologists The “buttons” represent the program function that you can activate clicking with the mouse on the same. You can also find “To recover the image…”; you have to open the archive window (sequential or systematic), then select the image you want to elaborate and send it, using the right buttons, to the elaborations window. For using this software, we suggest a basilar knowledge of Windows®95 or later. If any basilar concepts are not clear (what’s a window, how to recall a program, ecc) we advise you to read a little Windows® manual, or make the Windows® exercises. © Copyright DIGITAL imaging sas – Via Alfieri 12 A B – 10142 Nichelino (TO) First edition: November 2006 Revision: May 2014 ArchiMED Suite ® Page 11 Image management for Dental Cabinet and for Radiologists 2. INSTALLATION AND PACKAGING © Copyright DIGITAL imaging sas – Via Alfieri 12 A B – 10142 Nichelino (TO) First edition: November 2006 Revision: May 2014 ArchiMED Suite ® Page 12 Image management for Dental Cabinet and for Radiologists PACKAGING When you receive the box with the application, you will receive a usb dongle. This dongle is the software protection. You should connect this key after the full installation to ensure the full application working. You can connect this key to any computer of the network. This key allows you to use the application on 10 computer simultaneously. INSTALLATION When you insert the installation CD in the CD Rom reader the following window will be displayed. Pic. 2.1 Follow these steps to install the application. 1. Program installation This option will install all the application. You can use this option to update an existing installation also. 2. USB Dongle Driver Installation This procedure will install the driver for the usb dongle key protection. When the installation procedure will ask to open a port, select yes. This option is necessary for network installation. When you finish to install these drivers you can connect the usb dongle. © Copyright DIGITAL imaging sas – Via Alfieri 12 A B – 10142 Nichelino (TO) First edition: November 2006 Revision: May 2014 ArchiMED Suite ® Page 13 Image management for Dental Cabinet and for Radiologists THIS PAGE IS INTENTIONALLY LEFT BLANK © Copyright DIGITAL imaging sas – Via Alfieri 12 A B – 10142 Nichelino (TO) First edition: November 2006 Revision: May 2014 ArchiMED Suite ® Page 14 Image management for Dental Cabinet and for Radiologists 3. SOFTWARE INITIALIZATION © Copyright DIGITAL imaging sas – Via Alfieri 12 A B – 10142 Nichelino (TO) First edition: November 2006 Revision: May 2014 ArchiMED Suite ® Page 15 Image management for Dental Cabinet and for Radiologists SOFTWARE INITIALIZATION Pic. 3.1 Before start working with ArchiMED Suite® you need to understand how the software has been projected and then realized. The basilar objective for the realization of this program, is the SEMPLICITY OF USE. To obtain this purpose, we’ve started from the idea that a software is simpler to use if there are few overlapping windows it contains. It is necessary to arrange in the monitor the maximum of possible information, subdivided for argumentation. Often, many software force to complex and long procedures, too difficult to remember. This means that to complete a not frequently operation, it must make a big effort for find the correct way. Our objective is: little clicks with the mouse to follow every procedure. ArchiMED Suite® has been developed for a very intuitive use. The main window of ArchiMED Suite® is like the picture here over. The photo can be easily personalized. The “Close session” button must be utilized every times you go away from the computer; using this button you can standby the program; for being able to re-use it, it will be necessary to insert again the password, in this way, during your absence, if nobody knows the password, no one will be able to use it. This procedure guarantees the use of the software, in conformity with the new dispositions in matter of privacy protection. The “Close program” button must be used to close the application. The program is divided in two big categories: Patients and Utilities. Clicking on one of this button you will approach to three different windows: identifying patients, managerial, © Copyright DIGITAL imaging sas – Via Alfieri 12 A B – 10142 Nichelino (TO) First edition: November 2006 Revision: May 2014 ArchiMED Suite ® Page 16 Image management for Dental Cabinet and for Radiologists usefulness of the program. This three windows contain the button with which you can easily back to the main menu of the program. Pic. 3.2 It is also possible return to the main menu, pressing F1. In Patients page (accessible pressing F2), you can do every operations in relation with the patient: creation, modify, waiting room (all these operations will be explained in the following chapters. In Utilities page (accessible pressing F4) there are a series of functions of varied usefulness. We can find the program setup, the clock, the calculator, all regarding the privacy, etc. PASSWORD ADMINISTRATION PROGRAM ACCESS: First access to the program At the first run of the software it will appear this window Pic. 3.3 Click on OK and the program will automatically use the software starting drive as default database. The application will ask to you the preferred language. Pic. 3.4 Then, if you don’t have installed the demo database, this window will open © Copyright DIGITAL imaging sas – Via Alfieri 12 A B – 10142 Nichelino (TO) First edition: November 2006 Revision: May 2014 ArchiMED Suite ® Page 17 Image management for Dental Cabinet and for Radiologists Pic. 3.5 Click on Yes and ArchiMED Suite® will automatically create the environment for begin NOTE: We recommend you to perform the functional verification of the monitor to verify that the the monitor is proper for the visualization of the radiographic images. This procedures automatically started the first time that is accessed the images module. The procedure to perform this verification is available in the section "Utility" of the module "management imagines", as from following image, pressing on the icon "Verification functionality of the monitor". The procedure to perform this test is described in the chapter….. which is postponed. If you don’t have registered the application yet, the follow window will be displayed. Pic. 3.6 © Copyright DIGITAL imaging sas – Via Alfieri 12 A B – 10142 Nichelino (TO) First edition: November 2006 Revision: May 2014 ArchiMED Suite ® Page 18 Image management for Dental Cabinet and for Radiologists You can enter now your cabinet data. If you don’t want to write the data now, click on Close. This window will be displayed everytime you open the application, until you insert the data. Please remember that you cannot change the registration data after you store them in the hardware protection key, so do not register any information before it is agreed with the customer. © Copyright DIGITAL imaging sas – Via Alfieri 12 A B – 10142 Nichelino (TO) First edition: November 2006 Revision: May 2014 ArchiMED Suite ® Page 19 Image management for Dental Cabinet and for Radiologists THIS PAGE IS INTENTIONALLY LEFT BLANK © Copyright DIGITAL imaging sas – Via Alfieri 12 A B – 10142 Nichelino (TO) First edition: November 2006 Revision: May 2014 ArchiMED Suite ® Page 20 Image management for Dental Cabinet and for Radiologists 4. PROGRAM ACCESS © Copyright DIGITAL imaging sas – Via Alfieri 12 A B – 10142 Nichelino (TO) First edition: November 2006 Revision: May 2014 ArchiMED Suite ® Page 21 Image management for Dental Cabinet and for Radiologists PROGRAM ACCESS: Password and user administration The application is protected by user identification with different permission levels. First access at the program: at the software start, you’ll see this window Pic. 4.1 PROGRAM ACCESS: Reset database selection. This button resets the configuration of active drives. Only the C drive will be preserved. PROGRAM ACCESS: Reset password. This procedure allows to reset the password bringing it to the initial value "12345678". The password can be reset only by the administrator of the computer. Before proceeding to the resetting of the password, ArchiMED Suite® asks the name of the administrator of the computer and the password (credential of Windows). Only the correct insertion of these data allows to perform the resetting of the password. This procedure guarantees the use of the data if the administrator loses the password. NOTE: ArchiMED Suite® allows the zero resetting of the password only from the administrator of the computer. The safety of the data of the administrator and the position of the access to the database is assigned to the administrator of the net or the single computer © Copyright DIGITAL imaging sas – Via Alfieri 12 A B – 10142 Nichelino (TO) First edition: November 2006 Revision: May 2014 ArchiMED Suite ® Page 22 Image management for Dental Cabinet and for Radiologists PROGRAM ACCESS: Access to the software If you are running for the first time ArchiMED Suite®, the password is 12345678. Right after the program will you ask for change it, using this window: Pic. 4.2 Insert the old password one time, then the new for two times. Click on OK then insert the new password in the previous window. (Pic. 4.2). Click on Access to enter in the program. In conformity with the regulations in force, all the accesses are memorized from the software. PROGRAM ACCESS: New User To add a new user or to eliminate an existing one, after the Administrator password insertion, click on Maintenance (Pic. 8) Pic. 4.3 Then click on New User (Pic. 4.3) © Copyright DIGITAL imaging sas – Via Alfieri 12 A B – 10142 Nichelino (TO) First edition: November 2006 Revision: May 2014 ArchiMED Suite ® Page 23 Image management for Dental Cabinet and for Radiologists Pic. 4.4 Insert the name, the password and select the access type. You can also insert a question and an answer you only know, for recover your password in case you have forgot it. The user are of five kind Pic. 4.5 The Administrator is free to make all the operations in the software. The Standard User can do managerial operations but he can’t visualize the amount of the same. The External Consultant is an external collaborator who helps the Cabinet in the management accounting. The Secretary is the cabinet secretary and the Limited Account is the one that can see only some patients that the administrator has decided to show. PROGRAM ACCESS: Delete User Click on Delete User (Pic. 4.3) © Copyright DIGITAL imaging sas – Via Alfieri 12 A B – 10142 Nichelino (TO) First edition: November 2006 Revision: May 2014 ArchiMED Suite ® Page 24 Image management for Dental Cabinet and for Radiologists Pic. 4.6 You could have the possibility to select the user to remove. Click on OK then the user will be deleted. PROGRAM ACCESS: Display user access Click on Display user access (Pic. 4.3) Pic. 4.7 © Copyright DIGITAL imaging sas – Via Alfieri 12 A B – 10142 Nichelino (TO) First edition: November 2006 Revision: May 2014 ArchiMED Suite ® Page 25 Image management for Dental Cabinet and for Radiologists In this way you can see all the access occurred: date and hour, user name and computer name. PROGRAM ACCESS: Forgotten Password Pic. 4.8 Simply answering to the question you have inserted at the registration time, the program will indicate your current password. PROGRAM ACCESS: Change Password Click on Change the password (Pic. 4.1) Pic. 4.9 Insert your old password, then two times the new one. Click on OK and go to insert the new password in the window of Pic. 4.9. © Copyright DIGITAL imaging sas – Via Alfieri 12 A B – 10142 Nichelino (TO) First edition: November 2006 Revision: May 2014 ArchiMED Suite ® Page 26 Image management for Dental Cabinet and for Radiologists 5. DATABASE CONFIGURATION © Copyright DIGITAL imaging sas – Via Alfieri 12 A B – 10142 Nichelino (TO) First edition: November 2006 Revision: May 2014 ArchiMED Suite ® Page 27 Image management for Dental Cabinet and for Radiologists DATABASE CONFIGURATION: Drive administration One of the news of this software is the possibility of multi-task work. This option makes ArchiMED Suite® the most exclusive software. What does mean work contemporary on different drives It means that you can subdivide the archives on more drive with the possibility to see all of them contemporary. Example: If you want to let on the net drive (drive S) only the patients under treatment at the moment, you can save them on drive S. All the others patients, for example the historic ones, can be saved on drive T (general drive). ArchiMED Suite® can use all the archive (until 20 drives) contemporary DATABASE CONFIGURATION: Add a drive to the used database Pic. 5.1 Click on Display or select the database to use or on the double arrow in the lower part of main menu (Pic. 5.1) Pic. 5.2 Click on Add drive and the software will you show the available drives. Pic. 5.3 Select the drive you want to choose, then click on Add. © Copyright DIGITAL imaging sas – Via Alfieri 12 A B – 10142 Nichelino (TO) First edition: November 2006 Revision: May 2014 ArchiMED Suite ® Page 28 Image management for Dental Cabinet and for Radiologists NOTE: ArchiMED Suite® verifies if the added disk contains the database. If the disk doesn't contain the database it will asked you to create the environment of job. In affirmative case a driven procedure will help you to create the database. In negative case, the disk won't be added. DATABASE CONFIGURATION: Disconnect a database To eliminate a database you have two way: Pic. 5.4 Right click on the drive you want to disconnect then click on Disconnect database. Drag with left click the drive to eliminate into the bin on the lower right part. A not more available drive, will be automatically removed. This to prevent the bad functioning of the program. © Copyright DIGITAL imaging sas – Via Alfieri 12 A B – 10142 Nichelino (TO) First edition: November 2006 Revision: May 2014 ArchiMED Suite ® Page 29 Image management for Dental Cabinet and for Radiologists DATABASE CONFIGURATION: Database Drive configuration Pic. 5.5 Assign a colour to this drive: assign the colour you want to the drive Default drive for database: clicking on this option, a floppy disk icon will appear near the selected drive. The default drive is used for: price list of treatments, tabs and prints, cabinet data, access password and all the general data. Default drive for notebook: clicking on this option, a notebook icon will appear near the selected drive. In this way your notebook will be saved in this drive. Hide the patients of this drive from the main list: in the general patients list will not be visualized the patients of the selected drive. Upgrade the database: clicking here the application will show this window Pic. 5.6 © Copyright DIGITAL imaging sas – Via Alfieri 12 A B – 10142 Nichelino (TO) First edition: November 2006 Revision: May 2014 ArchiMED Suite ® Page 30 Image management for Dental Cabinet and for Radiologists At the next run of ArchiMED Suite® will be request the upgrade of the database Pic. 5.7 Click on Yes and the database will be upgraded. Attention: clicking on No you can’t use the database. PATIENTS: Patient database Click on Patients from the main page of the program Pic. 5.8 © Copyright DIGITAL imaging sas – Via Alfieri 12 A B – 10142 Nichelino (TO) First edition: November 2006 Revision: May 2014 ArchiMED Suite ® Page 31 Image management for Dental Cabinet and for Radiologists THIS PAGE IS INTENTIONALLY LEFT BLANK © Copyright DIGITAL imaging sas – Via Alfieri 12 A B – 10142 Nichelino (TO) First edition: November 2006 Revision: May 2014 ArchiMED Suite ® Page 32 Image management for Dental Cabinet and for Radiologists 6. PATIENTS DATABASE © Copyright DIGITAL imaging sas – Via Alfieri 12 A B – 10142 Nichelino (TO) First edition: November 2006 Revision: May 2014 ArchiMED Suite ® Page 33 Image management for Dental Cabinet and for Radiologists PATIENTS: Create a new patient Pic. 6.0 To create a new patient click on New (Pic. 6.0) © Copyright DIGITAL imaging sas – Via Alfieri 12 A B – 10142 Nichelino (TO) First edition: November 2006 Revision: May 2014 ArchiMED Suite ® Page 34 Image management for Dental Cabinet and for Radiologists Pic. 6.1 To create a new patient you must insert some important informations. These informations are highlighted with a darkest colour: name, last name, birth date. It is possible to complete these data in another moment too. Before save a new patient you have to select the destination database (only if you have more than one active database). Click on the destination database and an arrow near the database icon will appear. Click on Save to save it. © Copyright DIGITAL imaging sas – Via Alfieri 12 A B – 10142 Nichelino (TO) First edition: November 2006 Revision: May 2014 ArchiMED Suite ® Page 35 Image management for Dental Cabinet and for Radiologists PATIENTS: Compile all the patient’s data In Pic. 6.1 window, after the patient data insertion, click on Next. Pic. 6.2 Pic. 6.2 allows the acquisition of patient’s images. Clicking on the corresponding buttons you can acquire from: Fotocamera; Scanner, Videocamera and Drive. Then click on Next. Pic. 6.3 contains all the information for the patient card print. Clicking on Print the patient’s card you can print a card for the patient, with his personal codes. This card has a bar code for a fast activation of the patient on the dental chair computer. We recommend to use a specific printer. © Copyright DIGITAL imaging sas – Via Alfieri 12 A B – 10142 Nichelino (TO) First edition: November 2006 Revision: May 2014 ArchiMED Suite ® Page 36 Image management for Dental Cabinet and for Radiologists Pic. 6.3 PATIENTS: Patient search Click on Patients from the main page of the program Pic. 6.4 © Copyright DIGITAL imaging sas – Via Alfieri 12 A B – 10142 Nichelino (TO) First edition: November 2006 Revision: May 2014 ArchiMED Suite ® Page 37 Image management for Dental Cabinet and for Radiologists To find a patient you can proceed using four ways or combining them together: Insert Patient’s name or last name in the proper place; if you write only the first letter of the name, or last name, the program will find all the patients whose last name or name contains the inserted text. Use the icon identification: clicking on Icons menu (Pic. 6.4) you can select the icon associated to the patient you need find Pic. 6.5 Advanced Search: you can insert the data of the patient you are searching in the following window Pic. 6.5.a Use the categories: you can differentiate the patients in various categories to simplify the acknowledgment operations. Clicking on Category menu (Pic. 6.4) you can do the search in the wished category. The software will give you a list of all the patients of the selected category. © Copyright DIGITAL imaging sas – Via Alfieri 12 A B – 10142 Nichelino (TO) First edition: November 2006 Revision: May 2014 ArchiMED Suite ® Page 38 Image management for Dental Cabinet and for Radiologists Pic. 6.6 PATIENTS: Create a new patient category To create a new category, click on Pic. 6.7 Click on New and insert the requested data. Pic. 6.8 Click on OK. PATIENTS: Modify patient To modify the personal data of a patient, click on Patient from main menu. Select the patient you want to modify then click on Modify. © Copyright DIGITAL imaging sas – Via Alfieri 12 A B – 10142 Nichelino (TO) First edition: November 2006 Revision: May 2014 ArchiMED Suite ® Page 39 Image management for Dental Cabinet and for Radiologists Pic. 6.9 PATIENTS: Choice of a patient Select a patient from Found Patient Pic. 6.10 PATIENTS: Images This function opens the database of the patient’s images. PATIENTS: Anamnesis It shows the patient’s anamnesis. If the patient’s anamnesis contains important indication of health status, a red spots flashing to indicate it. This to safeguard the patients’ privacy, avoiding to accidentally show reserved information. © Copyright DIGITAL imaging sas – Via Alfieri 12 A B – 10142 Nichelino (TO) First edition: November 2006 Revision: May 2014 ArchiMED Suite ® Page 40 Image management for Dental Cabinet and for Radiologists Pic. 6.11 PATIENTS: REMEMBER Trough this function you can insert a very important note to remember in anticipation of next patient’s visit. It is possible to write everything you want. As an example to ask to the patient if he has remembered to do the antibiotic treatment or any other important note. Pic. 6.12 PATIENTS: Worklist. This function will connect the computer to a remote RIS. This option is available on if the Dicom PACS module is enabled. The RIS will give the patient list for the requested exams. © Copyright DIGITAL imaging sas – Via Alfieri 12 A B – 10142 Nichelino (TO) First edition: November 2006 Revision: May 2014 ArchiMED Suite ® Page 41 Image management for Dental Cabinet and for Radiologists THIS PAGE IS INTENTIONALLY LEFT BLANK © Copyright DIGITAL imaging sas – Via Alfieri 12 A B – 10142 Nichelino (TO) First edition: November 2006 Revision: May 2014 ArchiMED Suite ® Page 42 Image management for Dental Cabinet and for Radiologists 7. IMAGE MANAGEMENT © Copyright DIGITAL imaging sas – Via Alfieri 12 A B – 10142 Nichelino (TO) First edition: November 2006 Revision: May 2014 ArchiMED Suite ® Page 43 Image management for Dental Cabinet and for Radiologists IMAGES: IMAGES MANAGEMENT NOTE: We recommend you to perform the functional verification of the monitor to verify that the monitor is suitable for the visualization of the X-ray images. This procedures will automatically starts the first time that you will accessed to the images module. The procedure to perform this verification is available in the section "Utility" of the form management imagines, as from following image, pressing on the icon "Verification functionality of the monitor." Pic. 7.1a Pic. 7.1b Pic. 7.1c Pic. 7.1d © Copyright DIGITAL imaging sas – Via Alfieri 12 A B – 10142 Nichelino (TO) First edition: November 2006 Revision: May 2014 ArchiMED Suite ® Page 44 Image management for Dental Cabinet and for Radiologists IMAGES: Image toolbar function The image toolbar is organized in four pages. The functions are the followings. IMAGES: Image acquisition Start the image acquisition from intraoral system classified as number 1 Start the image acquisition from intraoral system classified as number 2 Start the image acquisition from the videocamera Start the image acquisition from panoramic system Start the image acquisition from the TC / CBCT system Start the image acquisition from the scanner using the twain interface Start the image acquisition from photocamera using folder search This option is enabled only in the version that not includes the 3D option. This function allow the user to verify the 3D capability of the application. IMAGES: Image organizer Organize the images in a fixed layout where the user can save the images for a global view, Each patient has one page and 20 images for each box. Organize the images in a custom layout where the user can save the images for a global view. This layout can be customizable by the user. Each patient has 10 different pages, © Copyright DIGITAL imaging sas – Via Alfieri 12 A B – 10142 Nichelino (TO) First edition: November 2006 Revision: May 2014 ArchiMED Suite ® Page 45 Image management for Dental Cabinet and for Radiologists IMAGES: Utilities This option allow the user to import a graphic file. This option allow the user to import a TC or CBCT exam. This option is available only when the 3D module is active. Display a blank screen. Create a dicom cd using the dicom standard cd creation. Create a custom CD with a viewer included. This procedure allow the user to verify the monitor quality. We suggest to use this procedure immediately after the installation and every 3 months. IMAGES: Applications This option starts an external application for Ceph calculation procedure. This option starts an external application for image subtraction procedure. Image options: Setting Image options If you need to open the image configuration procedure click on as in Pict. 37a. The configuration procedure can be used for the following options. This page included the main option for the image modules. © Copyright DIGITAL imaging sas – Via Alfieri 12 A B – 10142 Nichelino (TO) First edition: November 2006 Revision: May 2014 ArchiMED Suite ® Page 46 Image management for Dental Cabinet and for Radiologists This procedure selects the intraoral RVG equipment number “1” and number “2”. The parameters for the specific RVG should be request from the hardware developer. The application supports 2 different RVG at same times. This procedure selects the Panoramic equipment. The parameters for the specific Panoramic system should be request from the hardware developer. This procedure selects the TC or CBCT equipment. The parameters for the specific TC or CBCT system should be request from the hardware developer. This procedure selects the intraoral videocamera option. This procedure sets the 3D module parameters. This function allows to melt more 3D volumes between them. Image Options: Options. Set the main options for the image database module. Image Options: Intraoral. Select the intraoral RVG system to use. It is possible to select 2 RVG systems. The system are identified as system 1 and system 2. You can select any model in the supported list. Image Options: Panoramic. Select the Panoramic / Ceph system; you can select the system model from the drop-down menu. Set the IP address of the system. © Copyright DIGITAL imaging sas – Via Alfieri 12 A B – 10142 Nichelino (TO) First edition: November 2006 Revision: May 2014 ArchiMED Suite ® Page 47 Image management for Dental Cabinet and for Radiologists Set the filters sequence you want to apply as default. Image Options: TC or CBCT. Select the TC / CBCT system. You can select any model in the supported list. Image Options: Camera. Select the option for the videocamera. The supported format for the scanner is the TWAIN driver, file transfer or the direct acquisition using the VFW (Video for Windows) technologies. Image Options: 3D Options. Set the option for the 3D module. Rendering engine. Ray Cast (CPU): uses the CPU to process the 3D reconstruction. This option need a powerful CPU and a powerful graphic board. 3d Texture (GPU): uses the GPU (Graphic Process Unit) to process the 3D reconstruction. This option need a very powerful graphic board. Ray Cast (Best) 3D Texture (Preview): uses the CPU to process the 3D reconstruction for the best result when any 3D movements are finished. Uses the GPU for any 3D volume movements. Shading. Set the shading value for the 3D volume. This option needs a lot of memory to work. Please enable it only if you have at least 2 GB of RAM. Cross Section. Width: set the size of the cross image. The size is in millimetres. Pano Section. © Copyright DIGITAL imaging sas – Via Alfieri 12 A B – 10142 Nichelino (TO) First edition: November 2006 Revision: May 2014 ArchiMED Suite ® Page 48 Image management for Dental Cabinet and for Radiologists Numbers: set the number of the panoramic sections to create. Surface reconstruction. These parameters set the option to create the surface reconstruction. Images: Dicom Viewer This function allows to show the images in DICOM format using a viewer that supports images up to 65535 gray levels. To activate this function (by default is enabled) click on as in Pict. 7.1a. Pic. 7.2 © Copyright DIGITAL imaging sas – Via Alfieri 12 A B – 10142 Nichelino (TO) First edition: November 2006 Revision: May 2014 ArchiMED Suite ® Page 49 Image management for Dental Cabinet and for Radiologists Check the option “Open all images in Dicom modality” to enable the Dicom viewer. If you want to save a copy of the original image (by default is yes) check this option. This option allows you to go back to the original image at any time. If you want a common toolbar check the requested option. Pic. 7.3 then click . © Copyright DIGITAL imaging sas – Via Alfieri 12 A B – 10142 Nichelino (TO) First edition: November 2006 Revision: May 2014 ArchiMED Suite ® Page 50 Image management for Dental Cabinet and for Radiologists IMAGES: Import images To import any supported images, click on as in Pict. 37. Pic. 7.4 If you want to show all file in the selected folder, check the box “Show all files”. To show the dicom files check the box “Dicom Images”. Click on and select the source folder from which you want to import the DICOM image. Once selected the source and the image to save it will open the following window: © Copyright DIGITAL imaging sas – Via Alfieri 12 A B – 10142 Nichelino (TO) First edition: November 2006 Revision: May 2014 ArchiMED Suite ® Page 51 Image management for Dental Cabinet and for Radiologists Pic. 7.5 Click on and the image will automatically be inserted in the file of the patient. To open an image from the database, just double click on it. Pic. 7.6 Holding pressed the left button of the mouse on the image, it’s possible to move the image inside the window. © Copyright DIGITAL imaging sas – Via Alfieri 12 A B – 10142 Nichelino (TO) First edition: November 2006 Revision: May 2014 ArchiMED Suite ® Page 52 Image management for Dental Cabinet and for Radiologists Moving the small wheel of the mouse is possible to zoom the image. Holding pressed the right button of the mouse and moving to the left or to the right the mouse is possible to clear up or to darken the image. MEANING OF THE BUTTONS IMAGES: MAIN FUNCTIONS It belongs to this menu the following functions: Arrange windows: this function allows to open more images and to place side by side so that contemporarily visualize. Original image: this function restores the image where the filters have been applied to the original state. Pan Image: this function allows to move the image inside the window. Cut image: this function allows to visualize only the part interesting of the image. Pressing this button it will open the following window © Copyright DIGITAL imaging sas – Via Alfieri 12 A B – 10142 Nichelino (TO) First edition: November 2006 Revision: May 2014 ArchiMED Suite ® Page 53 Image management for Dental Cabinet and for Radiologists Pic. 7.7 Positioning in one of the angles of the rectangle, and holding pressed the left button of the mouse, it is possible to modify the size of the rectangle; holding pressed the left button of the mouse inside the rectangle it is possible to move the rectangle in the point of the image that interest. Press therefore the button image enlarged. and you will visualize the clipping selected of the Dicom TAGs: pressing this button it will appear all the information related to the image as Dicom tags. Toolbar: pressing this button the toolbar at the top of the window disappears and it will appear the following window of the rapid tools Pic. 7.8 Closing the image with this setting out, the software will remember at the next opening of the image the same setting out. To return to the standard display press . Filters: this function allows to apply some filters at the image as shown following © Copyright DIGITAL imaging sas – Via Alfieri 12 A B – 10142 Nichelino (TO) First edition: November 2006 Revision: May 2014 ArchiMED Suite ® Page 54 Image management for Dental Cabinet and for Radiologists Pic. 7.9 ADVICE: The application of filters to the images can introduce artificials to compromise the diagnosis. For this reason the diagnosis must exclusively have effected on the original image. To return to the original image press . It is possible to create customized filter by entering in menu "Other". The following window will be opened Pic.7.10 Press the right button of the mouse on one of a “UNDEFINED” buttons and it will open the following window © Copyright DIGITAL imaging sas – Via Alfieri 12 A B – 10142 Nichelino (TO) First edition: November 2006 Revision: May 2014 ArchiMED Suite ® Page 55 Image management for Dental Cabinet and for Radiologists Pic. 7.11 ADVICE: The personalization of the filters can give results that improve or worsen the quality of the image. ArchiMED Suite cannot perform any control on the quality of the result. It is responsibility of the user to create personalized filters that help to improve the quality of the image. Insert in the "BUTTON CAPTION" field the name of the new filter. The name will be assigned to the button previously selected. Uses the drop down menu to customize the filters sequence (from 1 to 8). Use the scrollbar on the lower side to modify the GAMMA CORRECTION value. Use the "Reset" button to restore the default value. © Copyright DIGITAL imaging sas – Via Alfieri 12 A B – 10142 Nichelino (TO) First edition: November 2006 Revision: May 2014 ArchiMED Suite ® Page 56 Image management for Dental Cabinet and for Radiologists IMAGES: LUT ADVICE: The editing of contrast and brightness can introduce artificials that can compromise the diagnosis. For this reason the diagnosis must exclusively have effected on the original image. Pressing this button it will open the following menu of functions Pic. 7.12 Invert: it allows to reverse the image from positive to negative and vice versa. W/Level ROI: this function allows to select, with the left button of the mouse, a region of the image that interest to underline, and to modify the levels of ROI to improve the quality of the image of the selected region. Gamma Value: with this function it is possible to modify the value of the Gamma of the image. Restore: this function allows to return to the original image. LUT: making click on this button choose the type of LUT. it will open the following curtain menu that will allow to Pic. 7.13 © Copyright DIGITAL imaging sas – Via Alfieri 12 A B – 10142 Nichelino (TO) First edition: November 2006 Revision: May 2014 ArchiMED Suite ® Page 57 Image management for Dental Cabinet and for Radiologists IMAGES: MEASURES ADVICE: The radiographies are a bidimensional representation of three-dimensional object places in the space, therefore their representation can be deformed in function of various factors, what enlargement, relative position of the object in comparison to the receptor of image, etc. These factors don't allow therefore a precision quantifiable of the trial. ArchiMED Suite® is not a tool of measure because, also after the procedure of calibration of the measure in comparison to a known repere, the accuracy of the same measure cannot be guaranteed, that therefore it has to be considered as indicative. Pressing this button it will open the following menu of functions Pic. 7.14 Single: this function allows to take single measures to the image. Proceed in the following way: - put the cursor of the mouse in the point from which you want to start the measurement and press the left key of the mouse; - put the cursor of the mouse in the point of arrival of the measure and press the left key of the mouse; it will appear the effected measure. To cancel an effected measurement is necessary to make click with the left button of the mouse on the measurement to cancel and press the key Canc" of the keyboard. Multi: this function allows to effect multiple measures to the image. Proceed in the following way: - put the cursor of the mouse on the point from which you want to start the measurement and press the left key of the mouse; - put the cursor mouse on the second point to measure and press the left button of the mouse; - make the same operation for the third point and so on. To finish the measurements press the right button of the mouse. Line/Width.: this function allows to effect the measure of the width of a part of the image. Proceed in the following way: - put the cursor of the mouse on the point from which you want to start the measurement of the width and press the left key of the mouse; - put the cursor of the mouse on the point of arrival of the measure and press the left button of the mouse. To cancel an effected measurement is necessary to make click with the left button of the mouse on the measurement to cancel and press the key Canc" of the keyboard. © Copyright DIGITAL imaging sas – Via Alfieri 12 A B – 10142 Nichelino (TO) First edition: November 2006 Revision: May 2014 ArchiMED Suite ® Page 58 Image management for Dental Cabinet and for Radiologists Line and Width / Height.: this function allows to effect the measure of the width and the height of a part of the image. Proceed in the following way: - put the cursor of the mouse on the point from which you want to start the measurement and press the left key of the mouse; - put the cursor of the mouse on the point of arrival of the measure and press the left button of the mouse. To cancel an effected measurement is necessary to make click with the left button of the mouse on the measurement to cancel and press the key Canc" of the keyboard. Area: this function allows to calculate a determined area of the image. Proceed in the following way: - put the cursor of the mouse on the point from which you want to start the measurement and press the left key of the mouse; - put the cursor of the mouse on the second point of the measure and press the left button of the mouse; - put the cursor of the mouse on the point of arrival of the measure and press the right button of the mouse. The calculation of the selected area will be visualized. To cancel an effected measurement is necessary to make click with the left button of the mouse on the measurement to cancel and press the key Canc" of the keyboard. Angle: this function allows to calculate the angle of a part of the image. Proceed in the following way: - put the cursor of the mouse on the point from which you want to start the measurement and press the left key of the mouse; - put the cursor of the mouse on the point of arrival of the measure and press the left button of the mouse. To cancel an effected measurement is necessary to make click with the left button of the mouse on the measurement to cancel and press the key Canc" of the keyboard. Parallel lines: this function allows to calculate the distance among two parallel lines. Proceed in the following way: - put the cursor of the mouse in the point from which you want to start the measurement and press the left key of the mouse; - put the cursor of the mouse in the point of arrival of the measure and press the left button of the mouse. - proceed in the same way to draw the parallel straight line. To cancel an effected measurement is necessary to make click with the left button of the mouse on the measurement to cancel and press the key Canc" of the keyboard. Calibrate: this function allows to calculate the correct measure of a part of image. Proceed in the following way: © Copyright DIGITAL imaging sas – Via Alfieri 12 A B – 10142 Nichelino (TO) First edition: November 2006 Revision: May 2014 ArchiMED Suite ® Page 59 Image management for Dental Cabinet and for Radiologists -if a measure is not correct, click on “Calibrate” and it will open the following picture Pic. 7.15 Insert the correct value and then press Calibrate. IMAGES: IMPLANT ADVICE: The implant simulation doesn't owe a diagnostic tool but only a tool of visual evaluation. With this function you can simulate an insertion of an implant to a patient. Pressing this button will open the following menu of functions: Pic. 7.16 Pressing the button following figure: an implant will be added for the inferior arcade as shown by the Pic. 7.17 To move the implant in the correct position it is necessary to press the left button of the mouse and, holding pressed the button, move the implant in the correct position. To modify the inclination of the implant it is necessary to position the cursor of the mouse in the low part of the implant, when it becomes an arrow, press the left button of the mouse and change the inclination of the implant. © Copyright DIGITAL imaging sas – Via Alfieri 12 A B – 10142 Nichelino (TO) First edition: November 2006 Revision: May 2014 ArchiMED Suite ® Page 60 Image management for Dental Cabinet and for Radiologists Pressing the right button of the mouse on the implant the following window will appear: Pic. 7.18 Selecting “Implant/Object properties” it will open the following picture: Pic. 7.19 ADVICE: Also in this case, the measures of the implant are to consider as indicative, not being possible to guarantee its accuracy. Choose the correct Diameter and Height of the implant and than press “Update”. Pressing the button following figure: an implant will be added for the superior arcade as shown by the Pic. 7.20 Pressing the button import the object. you can add an object, choosing the folder from which you want to Pressing the button all the inserted implant will be eliminate. To confirm the effected choice the following question will appear: © Copyright DIGITAL imaging sas – Via Alfieri 12 A B – 10142 Nichelino (TO) First edition: November 2006 Revision: May 2014 ArchiMED Suite ® Page 61 Image management for Dental Cabinet and for Radiologists Pic. 7.21 IMAGES: TEXT / ARROWS Pressing this button it will open the following menu of functions Pic. 7.22 Arrow: this function allows to insert on the image arrows inserting besides a text that will appear next to the arrow. Proceed in the following way: - put the cursor of the mouse on the point of the image from which you want to depart the arrow; - put the cursor of the mouse on the point of the image to which you want that the arrow arrives, the following window will appear: Pic. 7.23 insert the text to visualize near the arrow and press . To cancel the insertion of the arrow with the text is necessary to make click with the left button of the mouse on the arrow to cancel and press the key Canc" of the keyboard. Text: this function allows to insert some text on the image. Proceed in the following way: - put the cursor of the mouse on the point of the image on which is wanted to insert the text and to press the left button of the mouse; © Copyright DIGITAL imaging sas – Via Alfieri 12 A B – 10142 Nichelino (TO) First edition: November 2006 Revision: May 2014 ArchiMED Suite ® Page 62 Image management for Dental Cabinet and for Radiologists - the dimension of the rectangle can be modified; once chosen the dimension press the left button of the mouse, it will open the window 57 in which you can insert the text to visualize on the image. Press therefore . To cancel the insertion of the text is necessary to make click with the left button of the mouse on the text to cancel and press the key Canc" of the keyboard. IMAGES: FILTERS ADVICE: The application of filters to the images can introduce artificials that compromise the diagnosis. For this reason the diagnosis must exclusively have effected on the original image. Pressing this button it will open the following menu of functions Pic. 7.24 Tissue: this function allows to underline the tissues of the image. Media: this function reduces the noise of the image. Sharpen: this function underlines the contours of the image. Area Filter: pressing this button will open the following menu © Copyright DIGITAL imaging sas – Via Alfieri 12 A B – 10142 Nichelino (TO) First edition: November 2006 Revision: May 2014 ArchiMED Suite ® Page 63 Image management for Dental Cabinet and for Radiologists Pic. 7.25 IMAGES: FILTER SOFT TISSUE Soft tissues DX: pressing this button it will be possible to underline the soft tissues of the right part of the image. It will appear on the image a vertical straight line that can be moved to the right or to the left according to the demands as shown in the following figure: Pic. 7.26 Soft tissues SX: pressing this button it will be possible to underline the soft tissues of the left part of the image. It will appear on the image a vertical straight line that can be moved to the right or to the left according to the demands. IMAGES: AREA FILTER Selection rectangle: this function allows to select a rectangle of the image to filter. It will open the following menu of filters Pic. 7.27 Proceed in the following way: - select one of the three types of filters; - select the part of the image to filter holding pressed the left button of the mouse, release the button of the mouse and the section of the image it will be filtered. © Copyright DIGITAL imaging sas – Via Alfieri 12 A B – 10142 Nichelino (TO) First edition: November 2006 Revision: May 2014 ArchiMED Suite ® Page 64 Image management for Dental Cabinet and for Radiologists Selection circle: this function allows to select a circle of the image to filter. Also in this case there will be the possibility to select one of the followings filters Pic. 7.28 Proceed in the following way: - select one of the three types of filters; - select the part of the image to filter holding pressed the left button of the mouse, release the button of the mouse and the section of the image it will be filtered. IMAGES: ZOOM ADVICE: The dimension of the image represented to video never has to be considered as an exact report in comparison to the real dimension of the image. it is not possible to measure the image with rulers or other tools supported to the monitor. Selecting this button will open the following menu of functions Pic. 7.29 Zoom Area: this function allows to enlarge only the part selected of the image. Proceed in the following way: - select the area to enlarge holding pressed the left button of the mouse; - release the button of the mouse and the area of the selected image will be enlarged. Lens: this function allows, holding pressed the left key of the mouse on the image, to enlarge the parts of the image touched by the cursor of the mouse. Fit to page: this function allows to fit the image to the page to visualize completely the image. Fit Vert.: this function allows to vertically fit the image to the page. Fit Hor.: this function allows to horizontally fit the image to the page. Total: this function allows to totally enlarge the image. © Copyright DIGITAL imaging sas – Via Alfieri 12 A B – 10142 Nichelino (TO) First edition: November 2006 Revision: May 2014 ArchiMED Suite ® Page 65 Image management for Dental Cabinet and for Radiologists 150%: this function allows to enlarge the image at 150%. To return to the normal visualization press the button "Fit to page." IMAGES: ORIENTATION Selecting this button will open the following menu of functions Pic. 7.30 Mirror horizontal: this function allows to effect the speculate horizontal of the image. Mirror vertical: this function allows to effect the speculate vertical of the image. Rotation 90° to the left: this function allows to rotate to the left the image of 90°. Rotation 90° to the right: this function allows to rotate to the right the image of 90°. IMAGES: UTILITIES Selecting this button will open the following menu of functions Pic. 7.31 Export: this function allows to export the image. It will open the following window Pic. 7.32 Insert the name of the file and press "Save", the image will be saved. You can export an image in dicom format. © Copyright DIGITAL imaging sas – Via Alfieri 12 A B – 10142 Nichelino (TO) First edition: November 2006 Revision: May 2014 ArchiMED Suite ® Page 66 Image management for Dental Cabinet and for Radiologists Medical Report: this function allows to insert notes to the image as shown in the following image Pic. 7.33 Select the category of the image, insert the annotations and press . Print: this function allows to print the visualized image. It will open a window of preview of print in which it can be select the printer and the picture size. If you have the Dicom extension of the application, you can print on a dicom printer also. Send to CD: this function allows to send the image to the CD. The image is added at the other sent before. When the application burn the CD it include a Viewer. Send via email: this function allows to send the image via email. It will open the following window Pic. 7.34 NOTE: ArchiMED Suite® doesn't send away directly the images via email but it prepares them so that can be sent through your default e-mail program. The settings out of the account of e-mail and all the safety settings out must be verify in your e-mail program. © Copyright DIGITAL imaging sas – Via Alfieri 12 A B – 10142 Nichelino (TO) First edition: November 2006 Revision: May 2014 ArchiMED Suite ® Page 67 Image management for Dental Cabinet and for Radiologists Insert the name of the file and the format of the file, if Bit-map, JPEG or DICOM and press , it will open the following window for the dispatch of the e-mail Pic. 7.35 Insert all the necessary data and press "Send". Send to PACS: this function allows to send the image to the PACS Server. © Copyright DIGITAL imaging sas – Via Alfieri 12 A B – 10142 Nichelino (TO) First edition: November 2006 Revision: May 2014 ArchiMED Suite ® Page 68 Image management for Dental Cabinet and for Radiologists IMAGES DATABASE IMAGES: STANDARD IMAGE INTERFACE There are three different possibility to store the images: i. Batch file ii. Schematic iii. Status Pic. 7.36 Pic. 7.37 © Copyright DIGITAL imaging sas – Via Alfieri 12 A B – 10142 Nichelino (TO) First edition: November 2006 Revision: May 2014 ArchiMED Suite ® Page 69 Image management for Dental Cabinet and for Radiologists a. IMAGES: Batch file The batch file is the representation of the patient’s associated images, not organized in a specify mode. The only organization is the sequence, without dental association. The visualization is possible using the lateral scroll bar. The ordination is by insertion date: the most recent will be the first of the list. Every time you select a patient, you can see the preview of all the images. This operation should be slow if the images file is too big, so you can organize the visualization in program setup. To elaborate the images of the batch file you have to double click on the image preview. In this way the image will be zoomed in the elaboration window for a better visualization. The program allows the contemporary zoom of more images. These will be showed all together in the elaboration window, just like in Pic. 7.37. Pic. 7.38 Right click on a preview image (pic. 7.38) AVDICE: ArchiMED Suite® deletes the images in irreversible way. Before deleting the images it will have asked you a confirmation. If the delete is confirmed it won't be more possible to restore the deleted images only from a backup copy. Export image: it saves the preview image selected on the drive. The image will be saved with the real dimension and not like the preview dimension. Delete image: it is a not reversible command for delete an image. The cancellation could not be recovered. It is possible to erase a group of images too. To select more images, keep click on CTRL and clicking on the different images. Compact database: it compacts the images database. This function is automatically execute every time you delete an image. Pic. 7.39 Slide show: it starts a full screen slide show of all the images. This function is useful to create a collection of images o f a specific treatments to the patient. It is possible to control the presentation using the keyboard or the screen button. To go back to the main menu, click on Close. © Copyright DIGITAL imaging sas – Via Alfieri 12 A B – 10142 Nichelino (TO) First edition: November 2006 Revision: May 2014 ArchiMED Suite ® Page 70 Image management for Dental Cabinet and for Radiologists b. IMAGES: Schematic Click on Pic. 7.40 Here you can find a box for every tooth. Every box can contain 20 images. Under every box you can see the number of images inserted in. To insert an image in a box, you have to drag it from the batch file Right click in a box Under the image you can see some function to correct the visualization: Counterclockwise rotation. Clockwise rotation. Flip vertical. Mirror horizontal. Negative/positive. Pic. 7.41 Delete image. © Copyright DIGITAL imaging sas – Via Alfieri 12 A B – 10142 Nichelino (TO) First edition: November 2006 Revision: May 2014 ArchiMED Suite ® Page 71 Image management for Dental Cabinet and for Radiologists The preview window still opened for a few second. To let the window opened, you have to click on the box, or clicking for a few second. To close a window click on another box or on any other part. the showed imaged will become the first in the preview window. In the upper part (pic. 7.41) there is the navigation bar for the box images iv. Fast rewind of images v. Slow rewind of images vi. Slow forward of images vii. Fast forward of images The number that compares in left bar indicate which is the image in box preview. To elaborate the image is necessary a double click on the preview window. c. IMAGES: Status Pic. 7.42 Status is a personal representation. Disposal and dimension is free and you can change it in every moment, clickin on © Copyright DIGITAL imaging sas – Via Alfieri 12 A B – 10142 Nichelino (TO) First edition: November 2006 Revision: May 2014 ArchiMED Suite ® Page 72 Image management for Dental Cabinet and for Radiologists Pic. 7.43 Add new box Enlarge all boxes Delete a box Reduce all boxes Rotate the image 90 degree to the left Move all box to the top Rotate the image 90 degree to the right Move all box to the right Mirror horizontal Move all box to the left Flip vertical Move all box to the down Negative/positive To move the box, simply drag it till the position you desire. To change the box dimension, simply click on low right corner and drag till the dimension you desire. © Copyright DIGITAL imaging sas – Via Alfieri 12 A B – 10142 Nichelino (TO) First edition: November 2006 Revision: May 2014 ArchiMED Suite ® Page 73 Image management for Dental Cabinet and for Radiologists Main menu of status option view Pic. 7.4 Load: load the archive disposal from a file. Pic. 7.45 In left list appears the drive configuration. To find a configuration on another drive, you have to select it in the lists above. In the right part, there is a configuration preview. If you want to use this configuration as default, you have to confirm it clicking on Use selection as default. Clicking on Ok, the disposal will be copied in active window of status. Save: save the disposal active on a file. The files name is free editable. Print: print the active window. We suggest you the horizontal orientation of printer to obtain a better result. Option: change the printer margin, delete the status and select header. Patient: it shows the datas of the patient. d. Elaboration of images ADVICE: The application of filters to the images, the calibration of the measures, the change of contrast and brightness and all the functions that modify the images, can introduce artificials that compromise the diagnosis. For this reason ArchiMED Suite® always preserves the original copy of the image to which is had to make reference for the diagnosis. © Copyright DIGITAL imaging sas – Via Alfieri 12 A B – 10142 Nichelino (TO) First edition: November 2006 Revision: May 2014 ArchiMED Suite ® Page 74 Image management for Dental Cabinet and for Radiologists Double click on the image you want to elaborate. Pic. 7.46 It is possible to modify the images using the left buttons. IMAGES: ARRANGE ALL THE WINDOWS Clicking here you can arrange the images windows, to view all of them without superimposition of the images. IMAGES: WRITE ANNOTATION You can annotate all that you want. To save click on Ok. The text written in the first line, will be reported in image preview. The images category will be used for the previews visualization. © Copyright DIGITAL imaging sas – Via Alfieri 12 A B – 10142 Nichelino (TO) First edition: November 2006 Revision: May 2014 ArchiMED Suite ® Page 75 Image management for Dental Cabinet and for Radiologists Pic. 7.47 IMAGES: DIGITAL FILTERS You can select one of the filter represented in pic. 7.48 and applicate its on your image. The selected filter will execute on the preview image. Restore button removes the preview filter. To confirm it click on Ok. To remove the filter, when applied, click on Delete elaboration (pic. 7.39). Pic. 7.48 © Copyright DIGITAL imaging sas – Via Alfieri 12 A B – 10142 Nichelino (TO) First edition: November 2006 Revision: May 2014 ArchiMED Suite ® Page 76 Image management for Dental Cabinet and for Radiologists IMAGES: ZOOM ON IMAGE Pic. 7.49 After the click on Zoom on images, you can activate the Zoom options function. Zoom: it is possible to zoom 5 different images in contemporarily. If you select zoom x1 you obtain the real dimension filter. Lens Size: it selects the lens size Virtual colours: it selects the virtual coloration to apply on the image. Negative: it applies the inversion of colours filer (from negative to positive or vice versa). Contrast: it contrasts more the image in the portion visualized by the lens. Structure enhancement: it applies the Structure enhancement filter to the portion visualized by the lens. Emboss: it applies the emboss filter to the portion visualized by the lens. Detail: it applies the detail filter to the portions visualized by the lens. Detail and Virtual Colours: it applies the detail and virtual colours filter to the portion visualized by the lens. Contour detection: it applies the contour detection filter to the portion visualized by the lens © Copyright DIGITAL imaging sas – Via Alfieri 12 A B – 10142 Nichelino (TO) First edition: November 2006 Revision: May 2014 ArchiMED Suite ® Page 77 Image management for Dental Cabinet and for Radiologists IMAGES: CONTRAST AND BRIGHTNESS Pic. 7.50 It modifies the contrast and the brightness of the image using the “gamma factor”. This way is much more definite than the simple contrast/brightness function. The gamma factor is an exponential function and not a linear one, so it can better optimize the images. To modify the contrast and the brightness bring the mouse in the middle of the image, then click and keep clicked on with left click. Move the mouse to modify contrast and brightness. Decrease the gamma value Restore the default value for gamma factor Increase the gamma value Decrease contrast Restore the default value for contrast Increase contrast IMAGE ORIENTATION Mirror horizontal Flip vertical Rotate the image 90 degree to the left Rotate the image 90 degree to the right IMAGES: CUT A REGION Left click on Cut a region button; Bring the mouse nearly the region you want to cut; Select with left click the region to cut; Click on © Copyright DIGITAL imaging sas – Via Alfieri 12 A B – 10142 Nichelino (TO) First edition: November 2006 Revision: May 2014 ArchiMED Suite ® Page 78 Image management for Dental Cabinet and for Radiologists IMAGES: 3D SIMULATION Using this function you can value the X-Ray as a 3D vision. The calculating of third dimension is based on radio-opacity, that is the X radiation quantity that is passed trough the object. The 3D image is visualized in a dynamic way, so you can change the point of view. Click on Pic. 7.51 - Bring the mouse in the middle of the image then left click; - Keeping pressed, move the mouse on horizontal/vertical axis to modify the point of view; - Modify the height with the cursor in the right part of the window; - Click on close to go back to the starting image. IMAGES: COLOR ANALISYS This function analyze the images RGB values. Moving the mouse on the image, it shows the RGB value of one small portion under the mouse indicator. © Copyright DIGITAL imaging sas – Via Alfieri 12 A B – 10142 Nichelino (TO) First edition: November 2006 Revision: May 2014 ArchiMED Suite ® Page 79 Image management for Dental Cabinet and for Radiologists IMAGES: MEASURE ADVICE: The radiographies are a bidimensional representation of three-dimensional object places in the space, therefore their representation can be deformed in function of various factors, what enlargement, relative position of the object in comparison to the receptor of image, etc. These factors don't allow therefore a precision quantifiable of the trial. ArchiMED Suite® is not a tool of measure because, also after the procedure of calibration of the measure in comparison to a known repere, the accuracy of the same measure cannot be guaranteed, that therefore it has to be considered as indicative. Pic. 7.52 Measure the distance between two point Bring the mouse till the first point; With left click, drag the mouse till the second point; Release the mouse Measure an angle This function permits the measure of the angle made between two segments Bring the mouse till the first point; With left click, drag the mouse till the second point; Release the mouse Repeat these operations keeping attention to start measuring from the second point of first measure. Measure a circle Bring the mouse corresponding of the centre of the diameter you want measure; Left click while drag the mouse to increase/decrease the diameter. Measure the density This function measure the density, or better the radio-opacity (grey level), of a line indicated with the mouse © Copyright DIGITAL imaging sas – Via Alfieri 12 A B – 10142 Nichelino (TO) First edition: November 2006 Revision: May 2014 ArchiMED Suite ® Page 80 Image management for Dental Cabinet and for Radiologists Move the mouse corresponding with the zone to control; Click in. Grid This function put a grid on the image. Pressing you can specify the greatness of the squares of the grate. Delete This function delete all the measures. Calibrate This function allows calibrating the effected measures. Zoom With this function, you can zoom the image. IMAGES: WRITE TEXT AND DRAWING Pic. 7.53 Show/hide the text and the draw Display the stamp Select object Delete the selected object Draw a circle/ellipse Select the color to use Draws lines Select the font Draws rectangles/squares Select the line width © Copyright DIGITAL imaging sas – Via Alfieri 12 A B – 10142 Nichelino (TO) First edition: November 2006 Revision: May 2014 ArchiMED Suite ® Page 81 Image management for Dental Cabinet and for Radiologists Write tool Enable/disable the object fill IMAGES: SHOW TO FULL SCREEN This function permits to visualize the image to full screen. To go back left click or press ESC from the keyboard. IMAGES: PRINT IMAGE From the Utilities menu press the Print button, a printing preview window will be opened. Pic. 7.54 The following parameters can be personalized: Select Layout: allows you to select the correct layout according to the "Film Size" from a drop-down menu; Select the printer: allows you to select the preferred printer (Windows or Dicom) from a drop-down menu; Annotation: allows you to insert some comments that will be shown in the printing area. Press the Print button in order to complete the task. © Copyright DIGITAL imaging sas – Via Alfieri 12 A B – 10142 Nichelino (TO) First edition: November 2006 Revision: May 2014 ArchiMED Suite ® Page 82 Image management for Dental Cabinet and for Radiologists IMAGES: IMAGES ACQUISITION Pic. 7.55 IMAGES: X-Ray acquisition If no sensor has been indicated, the configuration will be appeared. Answering YES to this question Pic. 7.56 You can configure the sensor trough this window © Copyright DIGITAL imaging sas – Via Alfieri 12 A B – 10142 Nichelino (TO) First edition: November 2006 Revision: May 2014 ArchiMED Suite ® Page 83 Image management for Dental Cabinet and for Radiologists Pic. 7.57 You have to select your sensor, with all them parameters. For more details on the sensor functioning, ask to your technician. You can open the configuration in a second time clicking on Options (Pic. 7.57). © Copyright DIGITAL imaging sas – Via Alfieri 12 A B – 10142 Nichelino (TO) First edition: November 2006 Revision: May 2014 ArchiMED Suite ® Page 84 Image management for Dental Cabinet and for Radiologists IMAGES: Videocamera acquisition Clicking on Videocamera, the software will try to find a videocamera connected to the computer. If it will find it, it will try to utilize it using the typical configuration. Anyway it is possible to personalize the configuration. Pic. 7.58 Move the mouse on the upper bar to show the menu Pic. 7.59 © Copyright DIGITAL imaging sas – Via Alfieri 12 A B – 10142 Nichelino (TO) First edition: November 2006 Revision: May 2014 ArchiMED Suite ® Page 85 Image management for Dental Cabinet and for Radiologists IMAGES: Show the software configuration panel Pic. 7.60 Frame grabber: it indicates the card you want use; Videocamera type: it indicates the videocamera model; Videocameta options: it personalizes the videocamera configuration. Before modify, please contact your videocamera supplier Increase the image size Decrease the image size Every click changes the monitor subdivision: 1 image –> 2 images –> 3 images –> 4 images Change from single image modality to movie acquisition and vice versa Start or stop the single image or videoclip acquisition Exit the acquisition procedure © Copyright DIGITAL imaging sas – Via Alfieri 12 A B – 10142 Nichelino (TO) First edition: November 2006 Revision: May 2014 ArchiMED Suite ® Page 86 Image management for Dental Cabinet and for Radiologists Move the mouse on the lower bar to show the menu (Pic. 7.62) Pic. 7.61 The lower part (Pic. 7.62) in subdivided in single images captured and videos. To save the images or the videos you have to select with right click on the image then select Save. The not saved images, are eliminated when you close the window. IMAGES: Panoramic acquisition The Panoramic to use must be configured from Options menu of images window. Here below an example. If no digital panoramic is selected, the software will ask you: Pic. 7.62 © Copyright DIGITAL imaging sas – Via Alfieri 12 A B – 10142 Nichelino (TO) First edition: November 2006 Revision: May 2014 ArchiMED Suite ® Page 87 Image management for Dental Cabinet and for Radiologists Answering Yes, the configuration panel will open. Pic. 7.63 © Copyright DIGITAL imaging sas – Via Alfieri 12 A B – 10142 Nichelino (TO) First edition: November 2006 Revision: May 2014 ArchiMED Suite ® Page 88 Image management for Dental Cabinet and for Radiologists IMAGES: Scanner acquisition Pic. 7.65 It is necessary to select the scanner then click on Scan. The window will be opened, on respective the scanner you have. For detailes please see to the Operative Manual of the scanner. IMAGES: Digital fotocamera acquisition Pic. 7.66 It is necessary to browse the drive and the fotocamera file (connected to the computer); verify the image clicking on the image name then look to the preview. Click on Import to import a single image or on Import all to import all the images in the directory. The images will be saved in patient’s archive. © Copyright DIGITAL imaging sas – Via Alfieri 12 A B – 10142 Nichelino (TO) First edition: November 2006 Revision: May 2014 ArchiMED Suite ® Page 89 Image management for Dental Cabinet and for Radiologists IMAGES: Acquisition from a folder Pic. 7.67 It is necessary to browse the drive and the directory where the images are saved. Verify the image is clicking on the image name then look to the preview. Click on Import to import a single image or on Import all to import all the images in the directory. The images will be saved in patient’s archive. Clicking on Find you can select the directory you want to import: in the left part of the window will be listed all the images in that directory. Left click on the image for look at the selected image preview. Select the image then click on Import. The image will be saved in patient’s archive. IMAGES: Dicom images viewer (TAC) Dicom size is for example the TAC format. Some Hospitals use this size to save all the Image type. Dicom size is also a filing method. It is possible to buy modules that save the data on a remote server (Dicom store), or that print in remote (Dicom print), or that find again an image on a remote server (Dicom retrive). © Copyright DIGITAL imaging sas – Via Alfieri 12 A B – 10142 Nichelino (TO) First edition: November 2006 Revision: May 2014 ArchiMED Suite ® Page 90 Image management for Dental Cabinet and for Radiologists Pic. 7.68 In the example above are visualized two dental TAC. © Copyright DIGITAL imaging sas – Via Alfieri 12 A B – 10142 Nichelino (TO) First edition: November 2006 Revision: May 2014 ArchiMED Suite ® Page 91 Image management for Dental Cabinet and for Radiologists THIS PAGE IS INTENTIONALLY LEFT BLANK © Copyright DIGITAL imaging sas – Via Alfieri 12 A B – 10142 Nichelino (TO) First edition: November 2006 Revision: May 2014 ArchiMED Suite ® Page 92 Image management for Dental Cabinet and for Radiologists 8. UTILITY © Copyright DIGITAL imaging sas – Via Alfieri 12 A B – 10142 Nichelino (TO) First edition: November 2006 Revision: May 2014 ArchiMED Suite ® Page 93 Image management for Dental Cabinet and for Radiologists UTILITY Click on Utilities from the main menu of the program. Pic. 8.1 © Copyright DIGITAL imaging sas – Via Alfieri 12 A B – 10142 Nichelino (TO) First edition: November 2006 Revision: May 2014 ArchiMED Suite ® Page 94 Image management for Dental Cabinet and for Radiologists Program setup Pic. 8.2 Select the language to use Click on your language button. If your language has not its button, select it from the dropdown list. Not all the languages are available. Working parameters Check the drive database Clicking on this function, ArchiMED Suite execute a continue test to verify the available of the drives. Disconnecting a drive, for example a pen drive, ArchiMED Suite stops to use it. © Copyright DIGITAL imaging sas – Via Alfieri 12 A B – 10142 Nichelino (TO) First edition: November 2006 Revision: May 2014 ArchiMED Suite ® Page 95 Image management for Dental Cabinet and for Radiologists Save the window position It memorizes the position of the main windows. In this way, when you open again the same window, it comes in the last position. Start windows as “Modal” This parameter, normally active, makes possible that every new open window blocks the previous window. Opening the treatment window, for example, the main window will be blocked till the close of treatment window. This option is usable only if you have more than one monitor connected to the same computer. Anyway we advise you against to utilize this option only if you are expert users of Windows®. Get incoming phone calls Check the incoming phone calls number (only ISDN) Using this function, ArchiMED Suite® will show you the incoming phone number and if the number is associated to a patient card, it will show the patient name too. To use this function is necessary to have these requirements: modem ISDN connected to ISND knob, incoming phone calls identification service, active from your operator. Waiting room management This computer is the reception’s one Check this option only on the reception’s computer and only if you want to manage the waiting room. The computer that actives this function receive a message from the other computer in the net, when they want to call a patient from the waiting room. Remote control At next start the software will show the remote control (Pic. 8.3) Pic. 8.3 © Copyright DIGITAL imaging sas – Via Alfieri 12 A B – 10142 Nichelino (TO) First edition: November 2006 Revision: May 2014 ArchiMED Suite ® Page 96 Image management for Dental Cabinet and for Radiologists PRINT Click on Print from Pic. 8.2 Pic. 8.4 This function allows to insert the header at the image and at the document of the cabinet. IMAGES Click on Images from Pic. 8.2 © Copyright DIGITAL imaging sas – Via Alfieri 12 A B – 10142 Nichelino (TO) First edition: November 2006 Revision: May 2014 ArchiMED Suite ® Page 97 Image management for Dental Cabinet and for Radiologists Pic. 8.5 Storage The file format is ignore for the Dicom store file format option. Image database fixed: WARNING! If you don’t know the exactly functioning of this function, don’t active it! This option makes you able to divide the image database from the personal data of the patient database. The one reason for active this function, is little drive capacity. If you use a ZIP drive or a USB drive as archive, it is possible that you fill in low time, if you save the image too. For this reason you can decide to save the image in the internal hard disk, and the personal data in an external one. When you active this function you have to specify the directory address to save the images. ArchiMED Suite® will save all the images in this directory, separating for patient. Here you have an example: We activate this option and we select C:\Images as destination file. Now we can free work on the drive. If the selected USB drive that can have letter “F” from unit drive list, that’s the consequent: ArchiMED Suite® will save all the patient data on the selected drive (F); In C:\Images it will create a subdirectory that will have as name a code assigned from the software; All the images will be saved in the created file (C.\Images\Drive Code). © Copyright DIGITAL imaging sas – Via Alfieri 12 A B – 10142 Nichelino (TO) First edition: November 2006 Revision: May 2014 ArchiMED Suite ® Page 98 Image management for Dental Cabinet and for Radiologists Important: after the activation of this option, ArchiMED Suite® will manage all the drive in the same way. If in your drive, you just have some images, please call the customer care service. Connection with other software It permits the image management activation trough another software. Generally the external software are the applicative supplied with the X-Ray system. For more details please contact the customer care service. NETWORK Click on Network from Pic. 8.2 Pic. 8.6 This function allow to shape the network. © Copyright DIGITAL imaging sas – Via Alfieri 12 A B – 10142 Nichelino (TO) First edition: November 2006 Revision: May 2014 ArchiMED Suite ® Page 99 Image management for Dental Cabinet and for Radiologists TERMINAL SERVER Click on Terminal Server from Pic. 8.2 window Pic. 8.7 This function allow to shape the terminal server use. DICOM Click on Dicom from Pic. 8.2 window © Copyright DIGITAL imaging sas – Via Alfieri 12 A B – 10142 Nichelino (TO) First edition: November 2006 Revision: May 2014 ArchiMED Suite ® Page 100 Image management for Dental Cabinet and for Radiologists Pic. 8.8 You can setup the dicom functions clicking on this button. BACKUP DATABASE Click on Backup database from Pic. 8.1 window Pic. 8.9 © Copyright DIGITAL imaging sas – Via Alfieri 12 A B – 10142 Nichelino (TO) First edition: November 2006 Revision: May 2014 ArchiMED Suite ® Page 101 Image management for Dental Cabinet and for Radiologists ADVICE: We advise you to perform the backup of the data every day. This will make your job more safe over whether to make you to respect how it is foreseen by the norms on the privacy. You have the possibility to make the ArchiMED Suite® data backup; in this way, in critical moment, you can restore all your data. WARNING: we suggest you to do a backup of your database every day! Original source: it indicates the letter identification of the drive that contains the images to save. Destination drive: it indicates the letter of the drive where to save all the data. Copy all the database: it specifics that the database will be copied in the destination drive. Tabs copy: it specifics the selected tab will be copied from the tabs list Subdirectory copy: it permits to select the destination file. Standard copy: it copies a database for time. Multiple copy: it copies more database for time. Start copy: it starts the copy with the parameters indicated. © Copyright DIGITAL imaging sas – Via Alfieri 12 A B – 10142 Nichelino (TO) First edition: November 2006 Revision: May 2014 ArchiMED Suite ® Page 102 Image management for Dental Cabinet and for Radiologists DATABASE RESTORE NOTE: The restore of the database performs a backup copy of the data before the real regeneration. In this way the safety of the data is preserved in case of failure of the procedure of restore. Click on Database restore from Pic. 8.1 window Pic. 8.10 Using this function you can make the upgrade of yours database. Simply selecting the drive where create/upgrade the database, than click on Start. The software scans all the voices and automatically upgrades. When the procedure is finished, click on Close. This option is activable too from drive section. For more details, please look at “Drive management” section. REPAIR DATABASE Click on Repair Database from Pic. 8.1 window © Copyright DIGITAL imaging sas – Via Alfieri 12 A B – 10142 Nichelino (TO) First edition: November 2006 Revision: May 2014 ArchiMED Suite ® Page 103 Image management for Dental Cabinet and for Radiologists Pic. 8.11 Using this function you can repair your database in case of damage. Simply selecting the drive and choose if make the verify or directly start to repair. When the procedure is finished, click on Close. Repair Database Repairs all the database of ArchiMED Suite®. Repair Tables Repairs all the tables used from ArchiMED Suite®. PATIENT COPY Click on Patient Copy from Pic. 8.1 window Pic. 8.12 Using this function, you can copy or move a patient from a drive to another one. © Copyright DIGITAL imaging sas – Via Alfieri 12 A B – 10142 Nichelino (TO) First edition: November 2006 Revision: May 2014 ArchiMED Suite ® Page 104 Image management for Dental Cabinet and for Radiologists Proceed selecting the drive source; select the destination directory. Select a patient to move/copy then click on Copy. During the copy, if ArchiMED Suite® finds the patient already present in the destination drive, it will ask you if you want to upgrade it or not. The same if it find a planned treatment or a date. The question has always more solutions. Make attention to select the corrected one, because the operation is irreversible. CREATE CD FOR PATIENT Click on Create CD for patient from Pic. 8.1 window Pic. 8.13 With this function you will have the possibility to create a CD to give to your patient with all his images and data. The CD will be burn directly from ArchiMED Suite®. © Copyright DIGITAL imaging sas – Via Alfieri 12 A B – 10142 Nichelino (TO) First edition: November 2006 Revision: May 2014 ArchiMED Suite ® Page 105 Image management for Dental Cabinet and for Radiologists THIS PAGE IS INTENTIONALLY LEFT BLANK © Copyright DIGITAL imaging sas – Via Alfieri 12 A B – 10142 Nichelino (TO) First edition: November 2006 Revision: May 2014 ArchiMED Suite ® Page 106 Image management for Dental Cabinet and for Radiologists 9. 3D IMAGES © Copyright DIGITAL imaging sas – Via Alfieri 12 A B – 10142 Nichelino (TO) First edition: November 2006 Revision: May 2014 ArchiMED Suite ® Page 107 Image management for Dental Cabinet and for Radiologists 3D Module: IMAGES MANAGEMENT Pic. 9.1 3D Module: 3D IMAGES This function allows to import a full 3D exam (TC or CBCT). To use this function it is necessary to press the button “Utility” of the picture 9.1. WARNING: The reconstruction of the paraxial images occur on the perpendicular of the panoramic curve drawn by the user. The distance among the reconstructed cuts and the dimension of the perpendicular segment to the panoramic curve, that determines the width of the paraxial image, are configurable parameters from the user. The maximum error produced by the reconstruction is two pixels. The error maximum converted in measure is equal to the dimension of the voxel in the axial plan of the axial image multiplied for two. The dimension of the voxel, converted in millimeters, is accessible from the menu "Project" to the voice "Information Project". The parameter "Thickness image" it points out the dimension in millimeters of the voxel. Supposing a dimension of the voxel of 0.170 mms, the maximum error introduced by the reconstruction will be equal to 0.170 x 2 = 0.340 mms. The error of the reconstruction is the theoretical error supposing that the patient has correctly been positioned, according to the indications of the furnished by the producer of the X-ray instrument, and that the reconstruction has been succesfully. ArchiMED Suite® is not a tool of measure because, also after the possible procedure of calibration of the measure in comparison to a known repere, the accuracy of the same measure cannot be guaranteed, that therefore it has to be considered as indicative. © Copyright DIGITAL imaging sas – Via Alfieri 12 A B – 10142 Nichelino (TO) First edition: November 2006 Revision: May 2014 ArchiMED Suite ® Page 108 Image management for Dental Cabinet and for Radiologists 3D Module: Import a 3D exam (TC or CBCT) Click this button to import the exam. The application will show the following window: Pic. 9.2 Select the folder or the CD in which the images are saved and press the button “Starts search”. The application will search in the selected path and in any subfolder for any exams. If you won't find any exams, you can try to uncheck the option that allow to search only in file with “.DCM” extension. If any exams will be found, the application will display all the found exams with a short description. To open the preview of the exam you can double click on the reference in the list. Pic. 9.3 If you want to import the exam showed in the preview windows, please click on “Confirm”. The application will import all the axials images of the selected exam. When it finish to import the images in the patient's database, the application will automatically start the 3D reconstruction. 3D Module: 3D reconstruction window The 3D reconstruction windows has this layout. © Copyright DIGITAL imaging sas – Via Alfieri 12 A B – 10142 Nichelino (TO) First edition: November 2006 Revision: May 2014 ArchiMED Suite ® Page 109 Image management for Dental Cabinet and for Radiologists Pic. 9.4 Sample 3D View - Pic. 9.5 WARNING: The 3D reconstruction uses the information of the axial images. If this information are wrong or they contain any mistake, unpredictable result are expected. This module is intended only for evaluation and this is not a system fir surgery application. The maximum error that this application will introduce is 2 pixels. The maximum linear error is the pixel size * 2. © Copyright DIGITAL imaging sas – Via Alfieri 12 A B – 10142 Nichelino (TO) First edition: November 2006 Revision: May 2014 ArchiMED Suite ® Page 110 Image management for Dental Cabinet and for Radiologists 3D Module: Warning. The 3D reconstruction uses the information of the axial images. If this information are wrong or they contain any mistake, unpredictable result are expected. This module is intended only for evaluation and this is not a system fir surgery application. The maximum error that this application will introduce is 2 pixels. The maximum linear error is the pixel size * 2. 3D Module: Create the panoramic arc The first step of the 3D reconstruction is to draw the panoramic arc. The panoramic arc is a curve that represent the position of the dental arc. Before you start drawing the panoramic arc, please select an axial image with the bone. The optima position of the panoramic arc is in the middle of the bone tissue. To draw the panoramic arc on the axial image press the following button Move the mouse arrow on the image and press the left button to set all the points of the panoramic arc. When you finish to draw the panoramic arc press again the button. The application will calculate all the cross sections and the panoramic section. You can also use this option to modify an existing panoramic arc. To modify any point, move the mouse arrow on the point to move, click with the left mouse button and drag it to the new position. Moving the scroll bar of the cross images, you can show the cross images around the panoramic arc. In the same time the application will draw the references of the selected cross on the axial view and on the panoramic view. You can also change the active cross section clicking on the panoramic view. © Copyright DIGITAL imaging sas – Via Alfieri 12 A B – 10142 Nichelino (TO) First edition: November 2006 Revision: May 2014 ArchiMED Suite ® Page 111 Image management for Dental Cabinet and for Radiologists Pic. 9.6 If you need to hide the panoramic arc, uncheck the option “Dispaly Arc”. If you want to hide the cross image near the axial view uncheck the option “Display Cross.” Press this button to delete the panoramic arc and to draw a new one. 3D Module: AXIAL VIEW NOTE: The visualization of the axial images is arranged as if the patient was observed by the feet toward the head. In the Axial view you can use these options. - Scroll the images from top to bottom and bottom and from bottom to top. To scroll the images you can use the scroll bar on the right of the axial images or you can use the mouse wheel. - Arrange the brightness and contrast. To modify these values click and hold the right mouse button and move it on the axial image. These changes will affect all views. - Press the CTRL key and hold it, than press the left mouse button. The application will display the information for the pixel position and the pixel gray level value. Press this button to enlarge the current axial image. Create a snap shot of the current axial. The snap shot repository can be used to create a medical report. © Copyright DIGITAL imaging sas – Via Alfieri 12 A B – 10142 Nichelino (TO) First edition: November 2006 Revision: May 2014 ArchiMED Suite ® Page 112 Image management for Dental Cabinet and for Radiologists 3D Module: 3D VIEW In the 3D view you can use these options. - Rotate the orientation. Click and hold click the left mouse and move it. The volume orientation will change according the mouse movement. - Zoom in and out. You can use the mouse wheel to enlarge and reduce the 3D volume view. - Click and hold the mouse wheel and move the mouse. The volume will move according the mouse movements. - Change the gray level represented. On the top of the 3D view the is a range selector that allows you to select the minimum and the maximum gray level to display. This option is very important to select the tissue density to display. You can display for soft tissue, moving the range selector to the left, the metals, moving it to the right. In the 3D menu “3D Options” there are al the function for the 3D view. Pic. 9.7 3D Module: Full LUT. Find a position for the range selector to display the most important information. 3D Module: Stereo 3D. Enable / Disable the stereo 3D option. When this option is enabled you can see a real 3D image. To get the correct effect you need special glasses with one red and one green glass. 3D Module: 3D MIP. © Copyright DIGITAL imaging sas – Via Alfieri 12 A B – 10142 Nichelino (TO) First edition: November 2006 Revision: May 2014 ArchiMED Suite ® Page 113 Image management for Dental Cabinet and for Radiologists Display the 3D MIP (Maximum Intensity Projection). This option allow you to see inside the volume. 3D Module: Zoom 3D View. Make a zoom of the 3D View. 3D Module: LUT Standard. Apply the LUT gray levels standard. 3D Module: LUT Bone + Muscles. Apply the LUT to enhance the Bone and the Muscles. 3D Module: LUT Bone. Apply the LUT to enhance the Bone.. Display a cube to crop the volume. Pic. 9.8 To crop the volume you should move the mouse near on of the green marker, press the left mouse button, hold it and move the mouse to crop the volume. Create a snap shot of the current volume. The snap shot repository can be used to create a medical report. © Copyright DIGITAL imaging sas – Via Alfieri 12 A B – 10142 Nichelino (TO) First edition: November 2006 Revision: May 2014 ArchiMED Suite ® Page 114 Image management for Dental Cabinet and for Radiologists 3D Module: CROSS SECTION VIEW In the Cross section view you can use these options. - Scroll the images from top to bottom and bottom and from bottom to top. To scroll the images you can use the scroll bar on the right of the axial images or you can use the mouse wheel. - Arrange the brightness and contrast. To modify these values click and hold the right mouse button and move it on the cross image. These changes will affect all views. - Press the CTRL key and hold it, than press the left mouse button. The application will display the information for the pixel position and the pixel gray level value. Create a snap shot of the selected cross images. To select the cross images click with left mouse button in the top-left if the image box. Pic. 9.9 The yellow marker inform you that the image is selected. To unselect the image click on the yellow box. If you want to zoom a single cross image check the box “Single”. The application will display a single cross image. © Copyright DIGITAL imaging sas – Via Alfieri 12 A B – 10142 Nichelino (TO) First edition: November 2006 Revision: May 2014 ArchiMED Suite ® Page 115 Image management for Dental Cabinet and for Radiologists Pic. 9.10 3D Module: PANORAMIC VIEW The panoramic view contains the panoramic section calculated around the panoramic arc. Pic. 9.11 To change the panoramic arc of interest you can use the scroll bar on the right. If you want know the position of the active panoramic section you can see the axial view. © Copyright DIGITAL imaging sas – Via Alfieri 12 A B – 10142 Nichelino (TO) First edition: November 2006 Revision: May 2014 ArchiMED Suite ® Page 116 Image management for Dental Cabinet and for Radiologists Pic. 9.12 The green arc represents the original panoramic arc, the one created from the user. The red arc represents the arc calculated and displayed the in current panoramic section view. The smooth option enable a smoothing filter. Create a snap shot of the panoramic view. Create a MIP (Maximum Intensity Projection) of the Panoramic view. The final image is created starting from all the panoramic arcs. Pic. 9.13 © Copyright DIGITAL imaging sas – Via Alfieri 12 A B – 10142 Nichelino (TO) First edition: November 2006 Revision: May 2014 ArchiMED Suite ® Page 117 Image management for Dental Cabinet and for Radiologists 3D Module: FULL CROSS VIEW In the full cross view, the application creates two sections. Both sections are created from the axial image dataset. Pic. 9.14 The top section is created from the right to the left of the patient (L/L view). The bottom section is created from the anterior to the posterior of the patient (A/P view) The background colour helps the user to identify the reference line in the other view. Any line create in any view has the same colour of the source data. For example in the axial view the light green line represent the full cross A/P. © Copyright DIGITAL imaging sas – Via Alfieri 12 A B – 10142 Nichelino (TO) First edition: November 2006 Revision: May 2014 ArchiMED Suite ® Page 118 Image management for Dental Cabinet and for Radiologists 3D Module: CROSS 3D VIEW The 3D cross view is a very innovative 3D reconstruction. This reconstruction uses the cross images to create a 3D volume. Pic. 9.15 The 3D image is created using 18 cross frame. It is possible to use 9 frames also, unchecking the option “Extend”. In the top of the 3D View there is a range selector. Moving the minimum and the maximum position of this selector, you can select the tissue density to evaluate. If you move it to the left you will enhance the soft tissue. If you move it to the right you will enhance the hard tissue. In the 3D view you can use these options. - Rotate the orientation. Click and hold click the left mouse and move it. The volume orientation will change according the mouse movement. - Zoom in and out. You can use the mouse wheel to enlarge and reduce the 3D volume view. - Click and hold the mouse wheel and move the mouse. The volume will move according the mouse movements. If you check the option “MIP” you will see a transparent volume. © Copyright DIGITAL imaging sas – Via Alfieri 12 A B – 10142 Nichelino (TO) First edition: November 2006 Revision: May 2014 ArchiMED Suite ® Page 119 Image management for Dental Cabinet and for Radiologists 3D Modules: Hounsfield The Hounsfield method display the cross using pseudo colours. These colours will help you to better know the tissue quality. The classification is: D1, D2, D3, D4. D1 represent the softest density and D4 the hardest density. Pic. 9.16 If you double click on any images the application will move the images on a new window, In this window you can zoom the images. WARNING: The visualization of the unities Housfied (HU) it doesn't reflect the corresponding visualization of the unities HU obtainable on the sytem TC because the software has not been projected for a correct visualization of HU unit This function cannot be used for diagnostic purposes. 3D Module: CEPH VIEW The Ceph view create two Ceph projection: A/P and L/L. The source data are the axial images. This projection are created using all axial frames. © Copyright DIGITAL imaging sas – Via Alfieri 12 A B – 10142 Nichelino (TO) First edition: November 2006 Revision: May 2014 ArchiMED Suite ® Page 120 Image management for Dental Cabinet and for Radiologists 3D Module: Meaning of the functions 3D Module: Menu Project Pic. 9.17 3D Module Save project Save the current project, It saves the panoramic arc and the view option. The cross images and the panoramic images are not saved but they are created any time you will open againg the project. This method ensure to avoid any problem. 3D Module: Restore project Restore the project to the original data. Any modification to the axial images are deleted. The panoramic arc is deleted included any cross and panoramic sections. © Copyright DIGITAL imaging sas – Via Alfieri 12 A B – 10142 Nichelino (TO) First edition: November 2006 Revision: May 2014 ArchiMED Suite ® Page 121 Image management for Dental Cabinet and for Radiologists 3D Module: Edit axials Open a powerful editor to modify the axial images. This edit is very useful to clear the metal artefact from the images. Pic. 9.18 3D Module: Single image modify. Select the image to modify. Select the minimum level to modify 3D Module: Multi image modify. Select the image from which you want to start to make the changes and press “Tag Begin”. Scroll the images using the scroll bar or the mouse wheel to select the last image that you want to modify. Press the button “Rubber”, a green circle it will appear that represents the size of the rubber that is wanted to use. To modify the rubber size select the size in the left part of the following window: © Copyright DIGITAL imaging sas – Via Alfieri 12 A B – 10142 Nichelino (TO) First edition: November 2006 Revision: May 2014 ArchiMED Suite ® Page 122 Image management for Dental Cabinet and for Radiologists Pic. 9.19 It is also possible to modify the threshold and the level of the rubber and its size. To work on a single image just click the left mouse button and holding it move around the image. If you want to word on multi image, holt the CTRL key before click the left mouse button. To clear a parts of the image it is necessary to move the rubber on the point of the image that you want to modify and, holding pressed the left button of the mouse, move the rubber on the part of the image to cancel. Once you effect all the changes press “Save Changes”. 3D Module: Export slices Export the slices (axial images) to a folder selected from the user. When the export process is finished the application will open the destination folder automatically. 3D Module: Measures Menu NOTE: ArchiMED Suite® implements the volumetric reconstruction (or 3D) of the maxillo-facial complex departing from DICOM images obtained with special software (Dentascan or similar coming from TC) or that utilize the ConeBeam CT technology. The volumetric reconstruction implemented by ArchiMED Suite® is checked by the contained parameters in the original DICOM images. ArchiMED Suite® performs an accurate control of such parameters but it cannot guarantee the correctness and accuracy, that depend on the system that has performed the examination, therefore the measures have to be considered as indicative.. The volumetric reconstruction can be used in the systems of implant planning only when the instructions are followed given by the supplier of the system of planning. Particularly, the images used to this purpose have always to include the relative support used by such systems for the calibration of the geometric properties of the system. © Copyright DIGITAL imaging sas – Via Alfieri 12 A B – 10142 Nichelino (TO) First edition: November 2006 Revision: May 2014 ArchiMED Suite ® Page 123 Image management for Dental Cabinet and for Radiologists Pic. 9.20 The selected measure tool will work on many view: Axial view, Panoramic view, and cross view. Single: this function allows to take single measures to the image. Proceed in the following way: - move the mouse cursor in the point from which you want to start the measurement and press the left key of the mouse; - move the mouse cursor in the final point of the measure and press the left key of the mouse; it will appear the effected measure. To delete an existing measurement it is necessary to click with the left mouse button on the measure to remove cancel and press the key “Canc" from the keyboard. Multi: this function allows to effect multiple measures to the image. - move the mouse cursor in the point from which you want to start the measurement and press the left key of the mouse; - move the mouse cursor in the final point of the measure and press the left key of the mouse; it will appear the effected measure. Repeat this operation to measure a new segment. To finish the measurements process press the right button of the mouse. © Copyright DIGITAL imaging sas – Via Alfieri 12 A B – 10142 Nichelino (TO) First edition: November 2006 Revision: May 2014 ArchiMED Suite ® Page 124 Image management for Dental Cabinet and for Radiologists To delete an existing measurement it is necessary to click with the left mouse button on the measure to remove cancel and press the key “Canc" from the keyboard. Line/Width.: this function allows to take the measure of the width and the distance. Proceed in the following way: - move the mouse cursor in the point from which you want to start the measurement and press the left key of the mouse; - move the mouse cursor in the final point of the measure and press the left key of the mouse; To delete an existing measurement it is necessary to click with the left mouse button on the measure to remove cancel and press the key “Canc" from the keyboard. Line and Width / Height.: this function allows to take the measure of the width and the height and the distance. Proceed in the following way: - move the mouse cursor in the point from which you want to start the measurement and press the left key of the mouse; - move the mouse cursor in the final point of the measure and press the left key of the mouse; To delete an existing measurement it is necessary to click with the left mouse button on the measure to remove cancel and press the key “Canc" from the keyboard. Area: this function allows to calculate an area inside the image. Proceed in the following way: - click with the left mouse button in the center of the circle and click with the left button. - Adjust the circle size moving the mouse inside the circle, click with the left mouse button and holding the button move the mouse to resize the circle. To delete an existing measurement it is necessary to click with the left mouse button on the measure to remove cancel and press the key “Canc" from the keyboard. Angle: this function allows to calculate the angle included in two segments. Proceed in the following way: - move the mouse cursor in the point from which you want to start the first segment and click with the left mouse button. - move the mouse cursor at the end point of the first segment and click with the left mouse button. - move the mouse cursor at the end point of the second segment and click with the left mouse button. To delete an existing measurement it is necessary to click with the left mouse button on the measure to remove cancel and press the key “Canc" from the keyboard. © Copyright DIGITAL imaging sas – Via Alfieri 12 A B – 10142 Nichelino (TO) First edition: November 2006 Revision: May 2014 ArchiMED Suite ® Page 125 Image management for Dental Cabinet and for Radiologists Parallel lines: this function allows to calculate the distance among two parallel lines. - move the mouse cursor in the point from which you want to start the first segment and click with the left mouse button. - move the mouse cursor at the end point of the first segment and click with the left mouse button. - move the mouse cursor in the first point of the first segment and click with the left mouse button. - move the mouse cursor at the end point of the second segment and click with the left mouse button. To delete an existing measurement it is necessary to click with the left mouse button on the measure to remove cancel and press the key “Canc" from the keyboard. 3D Module: Notes Menu Pic. 9.21 Arrow: this function allows to insert on the image arrows inserting besides a text that will appear next to the arrow. Proceed in the following way: - move the mouse cursor on the first point of the arrow and click with the left mouse button; - move the mouse cursor on the end point of the arrow and click with the left mouse button; Pic. 9.22 Insert the text what you want to show near the arrow and press . To delete an arrow with the text, click with the left button of the mouse on the arrow and press the key “Canc" from the keyboard. Text: this function allows to insert any text on the image. Proceed in the following way: - move the mouse cursor on the top left position of the area where to insert the text and to press the left button of the mouse; © Copyright DIGITAL imaging sas – Via Alfieri 12 A B – 10142 Nichelino (TO) First edition: November 2006 Revision: May 2014 ArchiMED Suite ® Page 126 Image management for Dental Cabinet and for Radiologists - move the mouse cursor on the bottom right position of the area where to insert the text and to press the left button of the mouse; - Insert the text and press . To delete an text click with the left button of the mouse on the arrow and press the key “Canc" from the keyboard. 3D Module: 3D Options Menu Pic. 9.23 Create 3D: this function allows to create the 3D view. Full LUT: Select the standard lut to display the preset bone tissue. Stereo 3D: Apply the elaboration to display a real 3D image. To have the 3D simulation you need to uses special 3D glasses with a red glass and a green glass. 3D MIP: Apply the Maximum Intensity Projection calculation to display the image using the transparency. Zoom 3D View: apply a zoom to the 3D volume LUT Standard: this function allows to apply the LUT Standard, using the standard gray levels. LUT Bones + Tissues: this function allows to apply the LUT to enhance the bone tissue and the muscle tissue. LUT Bones: this function allows to apply the LUT to enhance the bone tissue. © Copyright DIGITAL imaging sas – Via Alfieri 12 A B – 10142 Nichelino (TO) First edition: November 2006 Revision: May 2014 ArchiMED Suite ® Page 127 Image management for Dental Cabinet and for Radiologists 3D Module: Reconstruction Menu Pic. 9.24 This function allows to modify the size of the cross images. To apply a new value you need to modify it and press “Regenerate Cross” 3D Module: Screen Capture Pressing this button it is possible to capture the whole screen 3D Module: Captured Images You can show the captured images using this function. To save all the captured images you can use the button “Save All” in the top of the screen. To delete all the captured images you can click on “Delete All” in the top of the screen. To save all the captured image for the selected category you can click on “Save All” on the right of the screen. To delete all the captured image for the selected category you can click on “Delete All” on the right of the screen. © Copyright DIGITAL imaging sas – Via Alfieri 12 A B – 10142 Nichelino (TO) First edition: November 2006 Revision: May 2014 ArchiMED Suite ® Page 128 Image management for Dental Cabinet and for Radiologists Pic. 9.25 The picture shows all the select axial images. Pic. 9.26 © Copyright DIGITAL imaging sas – Via Alfieri 12 A B – 10142 Nichelino (TO) First edition: November 2006 Revision: May 2014 ArchiMED Suite ® Page 129 Image management for Dental Cabinet and for Radiologists Pic. 9.27 © Copyright DIGITAL imaging sas – Via Alfieri 12 A B – 10142 Nichelino (TO) First edition: November 2006 Revision: May 2014 ArchiMED Suite ® Page 130 Image management for Dental Cabinet and for Radiologists Pic. 9.28 © Copyright DIGITAL imaging sas – Via Alfieri 12 A B – 10142 Nichelino (TO) First edition: November 2006 Revision: May 2014 ArchiMED Suite ® Page 131 Image management for Dental Cabinet and for Radiologists Pic. 9.29 © Copyright DIGITAL imaging sas – Via Alfieri 12 A B – 10142 Nichelino (TO) First edition: November 2006 Revision: May 2014 ArchiMED Suite ® Page 132 Image management for Dental Cabinet and for Radiologists 3D Module: Print Image The “Capture image” button allows you (when you are in cross or axial windows) to send a single image or a complete set of images from the current view to the “Image for Report” temporary folder, in order to handle the printing capabilities in Dicom or Windows mode. Pressing the “Capture image” button the following popup menu will be displayed: Pic. 9.30 Capture the current view: send the selected image from the current view to the “Image for Report” temporary folder; Capture all views: send all the images from the current view to the “Image for Report” temporary folder; Add rulers to captured images: allows you to enable or disable the ruler's view on the selected image (or set of images); Show all cross line reference on axial image: allows you to show over the axial image all the reference cross lines, built from the panoramic arc. Proceed in the following way: - Set your preferences and confirm pressing the “Capture” button; © Copyright DIGITAL imaging sas – Via Alfieri 12 A B – 10142 Nichelino (TO) First edition: November 2006 Revision: May 2014 ArchiMED Suite ® Page 133 Image management for Dental Cabinet and for Radiologists - On the new window, press the “Captured Images” button to the “Images for Report” window: in order to enter Pic. 9.31 - Pressing the “Print” button the “Printer preview” window will be displayed. Pic. 9.32 © Copyright DIGITAL imaging sas – Via Alfieri 12 A B – 10142 Nichelino (TO) First edition: November 2006 Revision: May 2014 ArchiMED Suite ® Page 134 Image management for Dental Cabinet and for Radiologists - Set your preferences: Select the layout: allows you to select the correct layout according to the “Film Size” from a drop-down menu; Select the printer: allows you to select the preferred printer from a drop-down menu; Notes: allows you to insert some comments that will be shown in the printing area - Confirm pressing the “Print” button. NB: It's possible to create a report with multiple images on a single page only using the same type of view (multiple axial, multiple cross, etc.). The most important Dicom tags (patient information, exposure parameters) will be automatically inserted into the print layout. 3D Module: DICOM CD creation This operatio permit to create a CD with a viewer. This allow you to oper a 3D studies on each PC without having a licence key. Pressin the “DICOM CD” button from the Dicom menu the following window will be displayed. Pic. 9.34 Drag a single one or more than one study (according with the size of your physical support, CD or DVD) that you want to add to the temporary buffer into the “Dicom CD” window. Click over the “Open Detail” button in orted to see the previews list. Pic. 9.35 © Copyright DIGITAL imaging sas – Via Alfieri 12 A B – 10142 Nichelino (TO) First edition: November 2006 Revision: May 2014 ArchiMED Suite ® Page 135 Image management for Dental Cabinet and for Radiologists Press the “Create CD” button then “Burn” and wait for the end of the job (a log message will be showed when the burning process will be done). © Copyright DIGITAL imaging sas – Via Alfieri 12 A B – 10142 Nichelino (TO) First edition: November 2006 Revision: May 2014 ArchiMED Suite ® Page 136 Image management for Dental Cabinet and for Radiologists 10. APPENDIX © Copyright DIGITAL imaging sas – Via Alfieri 12 A B – 10142 Nichelino (TO) First edition: November 2006 Revision: May 2014 ArchiMED Suite ® Page 137 Image management for Dental Cabinet and for Radiologists APPENDIX – Digital sensors that can be connected to Archimed Suite ArchiMED Suite captures images directly from digital sensors, divided into the following tables according to the type of sensors. The table also specifies the versions of the computers’ systems that we have used to verified ArchiMED Suite; this limitation depends on the manufacturer/supplier of the digital system and not on the program. ADVERTENCE: For more safety, please contact our service center to check the compatibility of the image acquisition system with ArchiMED Suite and with the computer system. INTRAORAL VIDEORADIOGRAPHY Manufacturer Version 4.5.0.0 BlueX Imaging 1.3.0.0 1.0.0.0 Digident / Orex 1.0.0.1 Fimet Oy 0.9.1.0 1.4b Gendex 2.51.0.0 Kodak 2.1.2.0 1.0.0.0 2.2.0.0 Novaxa S.p.A CSN Industrie 2.1.0.4 2.1.0 2.1.0 Schick Technologies 2.1.0.0 Type DigitOs X DigitOsX2 BlueX WiFi CD Dent, Combi-X, PaXorama, PaXorama HS IOX, IOX2 DenOptics intraorale Computer systems Windows XP Windows Vista 32 bits Windows 7 32/64 bits Windows XP Windows XP Windows XP Windows XP Gendex Visualix Windows Vista 32 bits Windows 7 32 bits Windows XP CR 7400 Windows Vista 32/64 bits Windows 7 32/64 bits Windows XP RX2 Senso Windows Vista 32/64 bits Windows 7 32/64 bits RX2 Mega PX Windows XP Windows XP RX2 HP Windows Vista 32/64 bits Windows 7 32/64 bits Windows XP pro – S Pack 2 RX 4 Windows Vista 32/64 S Pack 1 Windows 7 32/64 S Pack 1 Windows XP pro – S Pack 2 RX 5 Windows Vista 32/64 S Pack 1 Windows 7 32/64 S Pack 1 Schick versione Windows XP ISA © Copyright DIGITAL imaging sas – Via Alfieri 12 A B – 10142 Nichelino (TO) First edition: November 2006 Revision: May 2014 ArchiMED Suite ® Page 138 Image management for Dental Cabinet and for Radiologists 4.5.0.0 Schick Technologies usb 1.39.0.0 Sopix 6.02.0.0 PSPIX Soredex Senza numero di versione Trophy Italia 2.2.0.0 Digora intraorale Trophy 3/4/5/Gold Sopro / Acteon Interfaccia TWAIN Vari Visiodent FONA 1.0.0.0 RSV HD 1.0.0.0 AnyScan 4.5.0 CDR 4.5.0 CDR ELITE © Copyright DIGITAL imaging sas – Via Alfieri 12 A B – 10142 Nichelino (TO) Windows XP Windows Vista 32/64 bits Windows 7 32/64 bits Windows XP Windows Vista 32 bits Windows 7 32 bits Windows XP Windows Vista 32/64 bits Windows 7 32/64 bits Windows 8 32/64 bits Windows XP Windows XP Windows XP Windows Vista 32/64 bits Windows 7 32/64 bits Windows XP Windows Vista 32 bits Windows 7 32 bits Windows XP Windows Vista 32 bits Windows 7 32/64 bits Windows XP Windows Vista 32/64 bits Windows 7 32/64 bits Windows XP Windows Vista 32/64 bits Windows 7 32/64 bits First edition: November 2006 Revision: May 2014 ArchiMED Suite ® Page 139 Image management for Dental Cabinet and for Radiologists PANORAMICS Manufacturer Version Type 12.00.00 PantOs XP 3.0.301.3356 PantOs DG Plus 1.0.0.0 CR Tech BlueX Imaging CR Tech Digident / Orex 1.0.0.1 Elektron 1.0.2.0 1.4b CD Dent Combi-X PaXorama PaXorama HS DR XSpeed DenOptics panoramico Gendex 2.51.0.0 Vari modelli 2.1.2.0 CR 7400 2.1.2.0 Xspeed2 CR XSpeed 2.1.2.0 Morita 2D 1.3.7.8 I MAX Plus 1.3.7. I MAX Easy I MAX Touch Kodak Morita Owandy Interfaccia TWAIN Vari Novaxa 1.3.7.8 PanoMax 70 1.3.7.8 Strato D Rotograph D Rotograph Evo 1.0.0.0 ROTOGRAPH EVO 3D Villa Sistemi Medicali © Copyright DIGITAL imaging sas – Via Alfieri 12 A B – 10142 Nichelino (TO) Computer systems Windows XP Windows Vista 32 bits Windows 7 32 bit Windows XP Windows Vista 32/64 bits Windows 7 32/64 bits Windows XP Windows Vista 32 bits Windows 7 32 bits Windows XP Windows XP Windows XP Windows XP Windows Vista 32 bits Windows 7 32 bits Windows XP Windows Vista 32/64 bits Windows 7 32/64 bits Windows XP Windows Vista 32/64 bits Windows 7 32/64 bits Windows XP Windows Vista 32 bits Windows 7 32 bits Windows XP Windows Vista 32 bits Windows 7 32 bits Windows XP Windows Vista 32 bits Windows 7 32 bits Windows XP Windows Vista 32/64 bits Windows 7 32/64 bits Windows XP Windows Vista 32 bits Windows 7 32 bits Windows XP Windows Vista 32 bits Windows 7 32 bits Windows XP Windows Vista 32 bits Windows 7 32 bits First edition: November 2006 Revision: May 2014 ArchiMED Suite ® Page 140 Image management for Dental Cabinet and for Radiologists BlueX Imaging / Ajat 6.12.6 PantOs ART Plus FONA 3.0.0 PantOs DG Plus NET © Copyright DIGITAL imaging sas – Via Alfieri 12 A B – 10142 Nichelino (TO) Windows XP Windows Vista 32/64 bits Windows 7 32/64 bits Windows XP Windows Vista 32/64 bits Windows 7 32/64 bits First edition: November 2006 Revision: May 2014 ArchiMED Suite ® Page 141 Image management for Dental Cabinet and for Radiologists 3D PANORAMICS Manufacturer Version Type Owandy test SDK 1.0.0.0 I-Max Touch 3D Villa Sistemi Medicali 1.0.0.0 Rotograph VO 3D Bronnikov Algorithm 2.1.1.0 Rotograph Evo 3D Computer systems Windows XP Windows Vista 32 bits Windows 7 32 bits Windows XP Windows Vista 32/64 bits Windows 7 32/64 bits Windows XP Windows Vista 32 bits Windows 7 32 bits Various Test Reports Manufacturer Version Type Digital Imaging EVO Tray Digital Imaging Volumetric reconstruction module Digital Imaging RT Test Monitor Digital Imaging PAN Villa Digital Imaging Test report for Digital Keyboard - EVO 3D Villa Digital Imaging Test Report SDK for Owandy Digital Imaging Test report for diagnostic quality of images Digital Imaging Test report for digital filters 3.16.0 Digital Imaging InVivoDental.exe © Copyright DIGITAL imaging sas – Via Alfieri 12 A B – 10142 Nichelino (TO) Computer systems Windows XP, Windows Vista, Windows 7 Windows XP, Windows Vista 32 bits, Windows 7 32/64 bits Windows XP Windows Vista 32 bits Windows 7 32 bits Windows XP Windows Vista 32 bits Windows 7 32 bits Windows XP Windows Vista 32 bits Windows 7 32 bits Windows XP Windows Vista 32 bits Windows 7 32 bits Windows XP Windows Vista 32 bits Windows 7 32 bits Windows XP Windows Vista 32 bits Windows 7 32 bits Windows XP Windows Vista 32 bits Windows 7 32/64 bits First edition: November 2006 Revision: May 2014