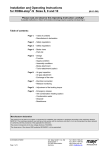
1
Installation and Operating Instructions for ROBA-stop®-silenzio® Type 896._ _ _._ _ Sizes 4 – 1800 (B.8.7.GB) Please read the Operational Instructions carefully and follow them accordingly! Ignoring these Instructions may lead to lethal accidents, malfunctions, brake failure and damage to other parts. Contents: Page 1: - Contents - Manufacturer’s Declaration Page 9: - Single Hand Release Option - Additional Parts for Standard Hand Release - Single Hand Release Installation - Table 4: Tightening Torques Page 2: - Safety Regulations Page 3: - Safety Regulations - TÜV (Technical Inspectorate) License Page 10: - Deviations on Single Brake Design Guidelines Deviating Parts Installation Hand Release Installation (Sizes 4 to 300) Hand Release Installation (Size 500) Page 4: - Brake Illustrations - Safety and Guideline Signs Page 5: - Parts List - Technical Data - Table 1: Technical Data (dependent on size) - Guidelines for Single Brakes Page 11: - Electrical Connection - Magnetic Field Build-up - Magnetic Field Removal Page 6: - Friction Work Diagram - State of Delivery - Application - Function - Installation Conditions Page 12: - Release Monitoring - Release Monitoring Function - Release Monitoring Wiring Diagram - Table 5: Maximum Switch Performance - Release Monitoring Installation and Adjustment - Switch Adjustment - Customer-side Inspection of the Release Monitoring after Mounting Page 7: - Table 2: Braking Torques, Air Gaps, Wrench Openings and Tightening Torques - Installation - Brake Inspection - Dual Circuit Function Inspection Page 13: - Maintenance - Disposal - Malfunctions / Breakdowns Page 8: - Hand Release (Sizes 4 to 500) - Hand Release Installation - Table 3: Adjustment Dimension Hand Release - Hand Release (Sizes 800 to 1800) - Noise Damping Manufacturer’s Declaration This product is intended for installation in a machine or system, based on the machine directive 98/37/EC. It is forbidden to start use of the product until the machine or system into which it should be built is operating in accordance with the EC directives. The product corresponds to the low voltage directive 73/23/EEC. The product corresponds to the elevator directive 95/16/EC The customer is responsible for compliance with the EMC directive 89/336/EEC. Please Observe: According to German notation, decimal points in this document are represented with a comma (e.g. 0,5 instead of 0.5). 05/04/2007/TK/K/AM/GC/RJ Page 1 of 13 Chr. Mayr GmbH + Co. KG Eichenstraße 1 D-87665 Mauerstetten Germany Tel.: 08341 / 804-0 Fax: 08341 / 804-421 http://www.mayr.de eMail: [email protected] Installation and Operating Instructions for ROBA-stop®-silenzio® Type 896._ _ _._ _ Sizes 4 – 1800 (B.8.7.GB) Safety Regulations These Safety Regulations are user hints only and may not be complete! Danger! Danger of death! Do not touch voltage-carrying cables and components. Guidelines for Electromagnetic Compatibility (EMC) In accordance with the EMC directives 89/336/EEC, the individual components produce no emissions. However, functional components e.g. rectifiers, phase demodulators, ROBA®-switch devices or similar controls for mains-side energisation of the brakes can produce disturbance which lies above the allowed limit values. For this reason it is important to read the Installation and Operational Instructions very carefully and to keep to the EMC directives. To prevent injury or damage, only professionals and specialists should work on the devices. Danger! This warning applies if: the electromagnetic brakes are used incorrectly. the electromagnetic brakes are modified. the relevant standards for safety and / or installation conditions are ignored. Device Conditions Warning! Before product installation and initial operation, please read the Installation and Operational Instructions carefully and observe the Safety Regulations. Incorrect operation can cause injury or damage. The electromagnetic brakes have been developed in accordance with the latest technology regulations and are, at the point of delivery, operationally safe. Warning: Without a conformity inspection, this product is not suitable for use in areas where there is a high danger of explosion. This statement is based on the directive 94/9/EC (ATEX directive). The catalogue values are standards which can, in certain cases, vary. When dimensioning the brakes, please remember that installation situations, braking torque fluctuations, permitted friction work, run-in behaviour and wear as well as general ambient conditions can all affect the given values. These factors should therefore be carefully assessed, and alignments made accordingly. Please Observe! Mounting dimensions and connection dimensions must be adjusted according to the size of the brake at the place of installation. The brakes are designed for a relative duty cycle of 100 %. The brakes are only designed for dry running. The braking torque is lost if the friction surfaces come into contact with oil, grease, water or similar substances. The braking torque is dependent on the present run-in condition of the brakes. Manufacturer-side corrosion protection of the metallic surface is provided. Please Observe! Only specialists who are trained in the transport, installation, operation, maintenance and general operation of these devices and who are aware of the relevant standards should be allowed to carry out this work. Technical data and specifications (Type tags and documentation) must be followed. The correct connection voltage must be connected according to the Type tag. Never loosen electrical connections or carry out installations, maintenance or repairs while the voltage connection is energised! Cable connections must not be placed under mechanical strain. Check electrical components for signs of damage before putting them into operation. Never bring them into contact with water or other fluids. The braking torque is lost if the friction lining and / or the friction surface come into contact with oil or grease. Protection Class I This protection can only be guaranteed if the basic insulation is intact and if all conductive parts are connected to the PE conductor. Should the basic insulation fail, the contact voltage cannot remain (VDE 0580). Protection (Mechanical) IP 10: Protected against large body surfaces and against large foreign bodies > 50 mm diameter. Not waterproof. Protection (Electrical) IP 54: Dust-proof and protected against contact as well as against splashing water from all directions. Appointed Use Ambient Temperature –20 °C up to +40 °C mayr ®-brakes are for use in machines and systems and must only be used in the situations for which they are ordered and confirmed. Using them for any other purpose is not allowed! Warning! At temperatures of around or under freezing point, condensation can strongly reduce the torque. During longer downtimes, the friction linings can stick to the friction surfaces. The user is responsible for taking appropriate countermeasures. Thermic Class F (+155 °C) The magnetic coil and the casting compound are suitable for use up to a maximum operating temperature of +155 °C. 05/04/2007/TK/K/AM/GC/RJ Page 2 of 13 Chr. Mayr GmbH + Co. KG Eichenstraße 1 D-87665 Mauerstetten Germany Tel.: 08341 / 804-0 Fax: 08341 / 804-421 http://www.mayr.de eMail: [email protected] Installation and Operating Instructions for ROBA-stop®-silenzio® Type 896._ _ _._ _ Sizes 4 – 1800 (B.8.7.GB) Safety Regulations These Safety Regulations are user hints only and may not be complete! User-implemented Protective Measures: Liability Please cover moving parts to protect against injury through seizure and catapulted objects. Place a cover on the magnetic part to protect against injury through high temperatures. Protect against electric shocks by installing a conductive connection between the magnetic component and the PE conductor on the permanent installation (Protection Class I) and by carrying out a standardised inspection of the continuous PE conductor connection to all contactable metal parts. The information, guidelines and technical data in these documents were up to date at the time of printing. Demands on previously delivered brakes are not valid. Liability for damage and operational malfunctions will not be taken if - the Installation and Operational Instructions are ignored or neglected. - the brakes are used inappropriately. - the brakes are modified. Protect against highly inductive switch-off peaks by installing varistors, spark quenching units or similar devices according to VDE 0580/2000-07, Paragraph 4.6, to prevent damage to the coil insulations or switch contact consumption in extreme conditions (this protection is contained in mayr ® rectifiers). - the brakes are worked on unprofessionally. - the brakes are handled or operated incorrectly. Install additional protective measures against corrosion if the brake is subject to extreme ambient conditions or is installed in open air conditions, unprotected from the weather. Guarantee The guarantee conditions correspond with the Chr. Mayr GmbH + Co. KG Sales and Delivery Conditions. Take precautions against freeze-up of the armature disk and the rotor in high humidity and at low temperatures. Mistakes or deficiencies are to be reported to mayr ® at once! Regulations, Standards and Directives Used: 98/37/EC Machine directive Conformity Markings 73/23/EEC Low voltage directive 89/336/EEC EMC directive The product conforms to the CE according to the low voltage directive 73/23/EEC. 95/16/EC Elevator directive EN 81-1 Safety directives for construction and installation of elevators and small goods elevators Identification mayr ® components are clearly marked and described on the Type tag: BGV C1 (Previously VGB 70) safety directive for theatre stage technical systems DIN VDE 0580 Electromagnetic devices and components, general directives mayr ® Please Observe the Following Standards: DIN EN ISO 12100-1 and 2 Manufacturer Product name / Type Machine safety Article number DIN EN61000-6-4 Noise emission EN12016 Interference immunity (for elevators, escalators and moving walkways) EN60204 Electrical machine equipment Serial number TÜV (Technical Inspectorate) License: The installation sizes 200 to 1800, with a microswitch for release monitoring, were prototype-inspected by the Southern German Technical Inspectorate (TÜV) for their effect as a brake assembly on the drive sheave shaft and as part of the protective assembly against excessive upward-moving cage speeds. Design License number Double brake ABV 760/1 Single brake ABV 761/1 05/04/2007/TK/K/AM/GC/RJ Page 3 of 13 Chr. Mayr GmbH + Co. KG Eichenstraße 1 D-87665 Mauerstetten Germany Tel.: 08341 / 804-0 Fax: 08341 / 804-421 http://www.mayr.de eMail: [email protected] Installation and Operating Instructions for ROBA-stop®-silenzio® Type 896._ _ _._ _ Sizes 4 – 1800 (B.8.7.GB) 6.2 30° Option single hand release 6.1 4 Option single hand release 8 16 10 8.1 2 2 4 1.1 1 3 5.1 Brake body 2 15 14 5 Cable length standard c. 600 mm on sizes 4 - 200 and c. 1000 mm on sizes 300 - 1800 Brake body 1 3 15 5 14 a Air gap Fig. 1 Fig. 2 6.4 6.5 6.3 a a 6.4 Air gap Fig. 3 (Single brake) 7.5 7.4 7.3 7.1 7.2 7.5 7.4 7.3 7.1 7.2 6.5 13 11 12 9 Fig. 4 Fig. 5 Fig. 6 Safety and Guideline Signs Danger! Danger of injury to personnel and damage to machines. 05/04/2007/TK/K/AM/GC/RJ Page 4 of 13 Chr. Mayr GmbH + Co. KG Eichenstraße 1 D-87665 Mauerstetten Germany Guidelines! Guidelines on important points. Tel.: 08341 / 804-0 Fax: 08341 / 804-421 http://www.mayr.de eMail: [email protected] Installation and Operating Instructions for ROBA-stop®-silenzio® Type 896._ _ _._ _ Sizes 4 – 1800 Parts List (Only use mayr 1 (B.8.7.GB) original parts) Hub assembly with 2 O-rings (2) 6.3 Raised head screw 1.1* Hub assembly with 1 O-ring (2) 8 6.4 Thrust spring Hexagon head screw 8.1** Hexagon head screw 2 O-ring 6.5 Hexagon nut 9 Type tag 3 Coil carrier assemblies 1 and 2 7. 10 Shipping brace (3x) 4 Armature disks 1 and 2 7.1 Microswitch 11 Flange plate 5 Rotor 1 Release monitoring assembly 7.2 Cap screw 12 Cap screw 5.1 Rotor 2 7.3 Hexagon head screw 13 Noise damping 6 7.4 Hexagon nut 14 Thrust spring 7.5 Spring washer 15 Shoulder screw 16 Distance bolt Hand release assembly 6.1 Switch bracket 6.2 Hand release rod * Only on single brake designs ** sizes 4 – 300 only on single brake designs Technical Data Nominal voltages: 24 V/104 V/180 V/207 V Protection (electrical) IP54 Protection (mechanical) IP10 Duty Cycle: 100 % Connection: 2 x 0,88 mm² Ambient temperature: -20 °C up to +40 °C Table 1: Technical Data (dependent on size) Braking torque (Tolerance +60 %) [Nm] Nominal Increased Reduced Electrical Maximum nominal torque torque torque speed 100 % 120 % 75 % power Type Type Type Size 896._0_._ _ 896._1_._ _ 896._2_._ _ [rpm] [W] 4 8 16 32 64 100 200 300 500 800 1300 1800 Mass [kg] 2x4 2x5 2x3 4500 2 x 23 2 x 1,4 2x8 2 x 16 2 x 32 2 x 64 2 x 100 2 x 200 2 x 300 2 x 500 2 x 800 2 x 1300 2 x 1800 2 x 10 2 x 19 2 x 40 2 x 77 2 x 120 2 x 235 2 x 360 2 x 600 2 x1000 2 x 1560 2 x 2150 2x6 2 x 12 2 x 26 2 x 43 2 x 80 2 x 157 2 x 225 2 x 380 2 x 600 2 x 980 2 x 1350 3500 2900 2500 2300 2000 1700 1500 1300 1150 1000 900 2 x 27 2 x 33 2 x 45 2 x 55 2 x 63 2 x 78 2 x 86 2 x 90 2 x 10⁷ 2 x 130 2 x 150 2 x 2,8 2 x 3,5 2 x 5,5 2 x 7,75 2 x 10,75 2 x 17 2 x 24 2 x 30 2 x 46 2 x 63 2 x 79 Switching times at Hand release nominal braking torque 100 % force per lever at nominal torque Separation Connection Connection c. t2 t1 (AC) t1 (DC) [N] [ms] [ms] [ms] 35 52 135 33 35 110 100 130 110 200 250 300 300 *** 320 *** 350 *** 70 94 120 174 234 270 308 444 581 589 850 196 398 518 477 488 968 1087 1023 1231 1464 1920 39 99 118 107 105 185 246 193 267 266 420 *** Release of both brakes simultaneously using a lever Guidelines for Single Brakes The ROBA-stop®-silenzio® brake can also be ordered as a single brake. In this case, the individual values for braking torque, electrical nominal power and mass apply. 05/04/2007/TK/K/AM/GC/RJ Page 5 of 13 Chr. Mayr GmbH + Co. KG Eichenstraße 1 D-87665 Mauerstetten Germany Tel.: 08341 / 804-0 Fax: 08341 / 804-421 http://www.mayr.de eMail: [email protected] Installation and Operating Instructions for ROBA-stop®-silenzio® Type 896._ _ _._ _ Sizes 4 – 1800 Friction Performance Diagram with n = 1500 rpm for sizes 4 to 300 with n = 750 rpm for sizes 500 to 1800 Perm. friction work [J] 100000 Function The ROBA-stop®-silenzio® is designed as a double brake in which two brake bodies working independently of one another ensure high operational safety. The braking torque in brake body 1 (3) is produced via the pressure force of several thrust springs (14) using frictional locking between the two rotor friction linings (5), the armature disk 1 (4) and the flange plate (11) or machine wall. The braking torque in brake body 2 (3) is produced via the pressure force of several thrust springs (14) using frictional locking between the two rotor friction linings (5.1), the armature disk 2 (4) and the coil carrier 1 (2). The brake is released electromagnetically. 1800 1300 800 500 300 200 100 64 10000 (B.8.7.GB) 32 16 Installation Conditions 8 The eccentricity of the shaft end in relation to the mounting pitch circle may not exceed 0,2 mm. The position tolerance of the threads for the hexagon head screws (8 or 8.1) may not exceed 0,2 mm. The axial run-out deviation of the screw-on surface to the shaft may not exceed the permitted axial run-out tolerance of 0,04 mm on sizes 4 and 8, 0,05 mm on sizes 16 to 300, and 0,063 mm on sizes 500 to 1800 according to DIN 42955 R. The related diameter is the pitch circle diameter to the brake attachment. Larger deviations can lead to a drop in torque, to continuous slipping on the rotors and to over-heating. The tolerances of the hub (1 or 1.1) and the shaft are to be chosen so that the hub toothing (1 or 1.1) is not widened. Toothing widening leads to clamping of the rotors (5 and 5.1) on the hub (1 or 1.1) and therefore to brake malfunctions (recommended hub – shaft tolerance H7/k6). 4 1000 1 10 Switching frequency [1/h] 100 State of Delivery Please check the state of delivery immediately! mayr® will take no responsibility for belatedly returned goods. Please report transport damage immediately to the deliverer. Please report incomplete delivery and obvious defects immediately to the manufacturer. If the hub (1) is heated to make joining easier, the O-ring must first be removed and then re-mounted after hub installation. The max. joining temperature of 200 °C must not be exceeded. Application The O-rings on the hub (1 or 1.1) must be lightly greased. As holding brake with emergency OFF brakings In closed rooms (only usable in tropical areas, in high humidity, with long downtimes and in sea climates after special measures have been taken)! Dry running Installation position horizontal and vertical In clean ambient conditions (coarse-grained dust as well as liquids of all kinds affect the braking function ⇒ cover the device). Rotors (5 and 5.1) and brake surfaces must be oil- and greasefree. A suitable counter friction surface (steel or cast iron) must be available. Sharp-edged interruptions on the friction surface are to be avoided. Recommended surface quality in the friction surface area: Ra = 1.6 µm. In particular customer-side attachment surfaces made of grey cast iron are to be rubbed down with fine sandpaper (grain ≈ 400). 05/04/2007/TK/K/AM/GC/RJ Page 6 of 13 Chr. Mayr GmbH + Co. KG Eichenstraße 1 D-87665 Mauerstetten Germany Tel.: 08341 / 804-0 Fax: 08341 / 804-421 http://www.mayr.de eMail: [email protected] Installation and Operating Instructions for ROBA-stop®-silenzio® Type 896._ _ _._ _ Sizes 4 – 1800 (B.8.7.GB) Table 2 Rotor thickness Size Nominal air gap "a” Maximum air gap* per brake body per brake body [mm] [mm] [mm] 4 6 0,4 +/-0,07 0,6 8 7 0,5 +/-0,07 0,9 16 8,7 0,5 +/-0,07 1,1 32 9,95 0,5 +/-0,07 1,0 64 11,1 0,5 +/-0,07 0,9 100 12,5 0,5 +/-0,07 0,8 200 13,9 0,5 +/-0,07 1,0 300 13,9 0,5 +/-0,07 1,0 500 16 0,5 +/-0,07 0,9 800 18 0,5 +/-0,07 0,8 1300 18 0,5 +/-0,07 0,9 1800 18 0,5 +/-0,07 0,9 * When the maximum air gap has been reached, the rotor must be replaced. However, the brake will already become louder at an air gap > "a" +0,2 mm. Warning! On brakes with reduced braking torque or during operation with overexcitation, braking function can no longer be guaranteed when air gap > maximum air gap. Installation (Figs. 1, 2 and 4) 1. 2. 3. 4. 5. 6. 7. 8. Fixing screws with wrench openings and tightening torques new condition Dismantle the flange plate (11 / dependent on Type) from the brake or remove the shipping braces (Item 10 only up to size 500) from the hexagon head screws (8). If necessary, mount the flange plate (11) using cap screws (12) onto the mounting surface (please observe the tightening torque according to Table 2). Mount the hub assembly with the O-rings (Item 1 / O-rings must be slightly greased) onto the shaft and bring them into the correct position (the key should lie over the entire length of the hub), then secure axially (e.g. using a locking ring). Push rotor 1 (5) by hand using light pressure over both O-rings (2) onto the hub (1) (the rotor collar should face away from the machine wall or flange plate). Make sure the toothing moves easily. Do not damage the O-rings. Push brake body 1 over hub (1) and rotor collar of rotor 1 (5) (the fixing holes should align with the threaded holes in the flange plate (11) or machine wall). On sizes 500 to 1800: Insert 3 hexagon head screws (8.1 / for sizes 1300 and 1800 4 pieces), evenly spread out into brake body 1 and tighten evenly all round using a torque wrench and tightening torque (acc. Table 2). Push rotor 2 (5.1) by hand using light pressure over an O-ring (2) onto the hub (1), so that the rotor 2 friction lining (5.1) lies against the brake body 1 (the rotor collar should face the machine wall or the flange plate). Make sure the toothing moves easily. Do not damage the O-rings. Insert the hexagon head screws (8) into the bores in brake body 2, which are equipped with distance bolts (16), and then join them with brake body 1 (see Fig. 2) and screw them onto the machine wall or flange plate. Tighten the hexagon head screws (8) evenly all round using a torque wrench and tightening torque (acc. Table 2). Inspect air gap "a" according to Table 2 The nominal air gap must be present. 05/04/2007/TK/K/AM/GC/RJ Page 7 of 13 Items 8 and 8.1 SW [Nm] Item 12 SW [Nm] 3 x M4 3 x M5 3 x M6 3 x M6 3 x M8 3 x M8 3 x M10 3 x M12 6 x M12 6 x M16 8 x M16 8 x M16 7 8 10 10 13 13 16 18 18 24 24 24 3 5 10 13 30 36 71 123 123 250 250 300 3 x M4 3 x M5 3 x M6 3 x M6 3 x M8 6 x M8 6 x M10 6 x M12 6 x M16 6 x M16 8 x M16 8 x M20 3 4 5 5 6 6 8 10 14 14 14 17 3 5 10 15 36 36 71 123 200 300 300 470 Brake Inspection (Before brake initial operation) - Braking torque inspection: Compare the braking torque specified on order with the braking torque printed on the Type tag. - Carry out a release check: by energising the brake or by activating it manually with the hand release (dependent on Type). - Carry out a release monitoring functional inspection: see page 12 (dependent on Type). Dual Circuit Brake Function Inspection The ROBA-stop®-silenzio® brake has a doubly-safe (redundant) braking system. If one brake circuit fails, the braking effect is still maintained. Warning! If the elevator starts to move after releasing one brake circuit, or if it does not slow down appreciably during the braking procedure, switch off the energised coil immediately. The dual circuit braking function is not guaranteed. Stop the elevator, dismantle the brake and inspect it. The individual circuit inspection takes place by energising the individual circuits with nominal voltage; see Type tag (9). Brake Circuit 1 Inspection: 1. Energise brake circuit 2. 2. Activate the emergency braking procedure and inspect the stopping distance according to the elevator directives. 3. De-energise brake circuit 2. Brake Circuit 2 Inspection: 1. Energise brake circuit 1. 2. Activate the emergency braking procedure and inspect the stopping distance according to the elevator directives. 3. De-energise brake circuit 1. Inspection of Both Brake Circuits: Energise both brake circuits using nominal voltage, see Type tag (9). Activate the emergency braking procedure and inspect the stopping distance according to the elevator directives. The stopping distance must be much shorter than the stopping distance / individual circuit. Chr. Mayr GmbH + Co. KG Eichenstraße 1 D-87665 Mauerstetten Germany Tel.: 08341 / 804-0 Fax: 08341 / 804-421 http://www.mayr.de eMail: [email protected] Installation and Operating Instructions for ROBA-stop®-silenzio® Type 896._ _ _._ _ Sizes 4 – 1800 (B.8.7.GB) Hand Release (Sizes 4 to 500) Installation onto Brake Body 2 (Sizes 4 to 300): The hand release is set and installed manufacturer-side! 1. Hand Release Installation (Figs. 7 and 7a) Manufacturer-side 2. 3. In order to install the hand release, the brake must be dismantled and de-energised. On the sizes 4 to 300, the installation procedure is 4. different on brake bodies 1 and 2 (see Fig. 7). If the brake is installed in the wrong order, it could fail. On size 500, the installation procedure for brake 5. bodies 1 and 2 (see Fig. 7a) is identical. Installation onto Brake Body 1 (Sizes 4 to 300): 1. 2. 3. 4. 5. 6. Screw the hand release rod (6.2) into the switch bracket (6.1) and secure using Loctite 243. Insert the raised head screws (6.3) through the slot bores of the switch bracket (6.1). Please Observe: On sizes 32, 64 and 100, a washer should go between the screw head and the switch bracket (6.1). Insert the raised head screws (6.3) with the switch bracket (6.1) into the bores on the coil carrier (3). Please ensure that the switch bracket (6.1) is in the correct position. The switch bracket (6.1) with the screwed-in hand release rod (6.2) must lie over brake body 1. Push the thrust springs (6.4) armature disk-side onto the raised head screws (6.3) and apply the hexagon nuts (6.5). Tighten the hexagon nuts (6.5) evenly, until the specified adjustment dimension “Y” (Fig. 7 and Table 3) is reached. Y 6.5 6.4 6.1 6. Screw the hand release rod (6.2) into the switch bracket (6.1) and secure using Loctite 243. Insert the thrust springs (6.4) onto the raised head screws (6.3). Insert the raised head screws (6.3) with the mounted thrust springs (6.4) through the coil carrier (3) into the armature disk (4) bores. Push the switch bracket (6.1) onto both the raised head screws (6.3) and apply the locking nuts (6.5). Please Observe! On sizes 32, 64 and 100, a washer should go between the switch bracket and the locking nut. Please ensure correct position of the switch bracket (6.1). The switch bracket (6.1) with the screwed-in hand release rod (6.2) must lie over brake body 2. Tighten the locking nuts evenly, until the specified adjustment dimension “Y” has been reached. Installation onto Brake Bodies 1 and 2 (Size 500): 1. 2. 3. 4. Screw out both hexagon nuts (6.5), including their washers, from the hand release assembly (6). Insert the hand release assembly (6) with the mounted thrust springs (6.4) through the coil carrier (3) into the bores on the armature disk (4). Re-apply both hexagon nuts (6.5 / secured with Loctite 243) including the washers. Tighten both hexagon nuts (6.5) evenly using a torque wrench and a tightening torque of 10Nm. 6 6.4 6.5 6 6.4 6.5 Y 6.3 6.4 6.1 6.5 Brake body 1 Brake body 1 Brake body 2 Brake body 2 Fig. 7a (Size 500) Fig. 7 (Sizes 4 to 300) Hand Release (Sizes 800 to 1800) The hand releases on sizes 800 to 1800 must only be installed and Table 3 (Adjustment Dimension and Hand Release adjusted at the mayr ® site of manufacture. As well as this, an Force) Additional Instruction Sheet B.8.7.H.GB is included in the brake Size Dimension "Y" Hand release force per lever 4 1,1 mm 35 N 8 1,5 mm 35 N 16 1,5 mm 110 N 32 1,5 mm 100 N 64 1,5 mm 130 N 100 1,5 mm 110 N 200 1,5 mm 200 N 300 1,5 mm 250 N 500 (1,5 mm) 300 N 05/04/2007/TK/K/AM/GC/RJ Page 8 of 13 delivery. Noise Damping Important: Please Observe: Replacement of damping elements is only permitted at the mayr ® site of manufacture. The noise damping has been set and adjusted manufacturerside. However, dependent on application or operating conditions (torque adjustment, switching frequency, ambient conditions, inherent operating system vibrations etc.), the noise damping is subject to aging. Chr. Mayr GmbH + Co. KG Eichenstraße 1 D-87665 Mauerstetten Germany Tel.: 08341 / 804-0 Fax: 08341 / 804-421 http://www.mayr.de eMail: [email protected] Installation and Operating Instructions for ROBA-stop®-silenzio® Type 896._ _ _._ _ Sizes 4 – 1800 (B.8.7.GB) Single Hand Release Option (not on sizes 300 to 1800) Single Hand Release Installation onto Brake Body 2 The hand release is installed and adjusted manufacturer-side! 1. Additional Parts for Standard Hand Release 6.6 Bracket 6.7 Cap screw 2. 3. Single Hand Release Installation (Figs. 7 and 8) Manufacturer-side For installation of the single hand release, the brake must be dismantled and de-energised. The installation procedure is different for brake bodies 1 and 2 (see Figs. 7 and 8). If the brake is installed in the wrong order, it could fail. 4. 5. 6. Single Hand Release Installation on Brake Body 1: 1. 2. 3. 4. 5. 6. 7. Screw in the bracket (6.6) with the cap screw (6.7) into the switch bracket (6.1) vertical to the switch bracket (6.1) as shown in Fig. 8, and secure with Loctite 243. Please observe the tightening torque according to Table 4! Screw the hand release rod (6.2) into the bracket (6.6) and secure using Loctite 243. Insert the raised head screws (6.3) through the slot bores of the switch bracket (6.1). Please Observe: On sizes 32, 64 and 100, a washer should go between the screw head and the switch bracket (6.1). Insert the raised head screws (6.3) with the switch bracket (6.1) into the bores on the coil carrier (3). Please ensure that the switch bracket (6.1) is in the correct position. The switch bracket (6.1) with the screwed-in hand release rod (6.2) must lie over brake body 1 and the hand release rod (6.2) must face in the direction of the machine wall. Push the thrust springs (6.4) armature disk-side onto the raised head screws (6.3) and apply the hexagon nuts (6.5). Tighten the hexagon nuts (6.5) evenly, until the specified adjustment dimension “Y” (Fig. 7 and Table 3) is reached. 7. Screw in the bracket (6.6) with the cap screw (6.7) into the switch bracket (6.1), vertical to the switch bracket (6.1) as shown in Fig. 8, and secure using Loctite 243. Please observe the tightening torques according to Table 4! Screw the hand release rod (6.2) into the bracket (6.6) and secure using Loctite 243. Insert the thrust springs (6.4) onto the raised head screws (6.3). Insert the raised head screws (6.3) with the mounted thrust springs (6.4) through the coil carriers (3) into the armature disk bores (4). Push the switch bracket (6.1) onto both the raised head screws (6.3) and apply the locking nuts (6.5). Please Observe! On sizes 32, 64 and 100, a washer should go between the switch bracket and the locking nut. Please ensure correct position of the switch bracket (6.1). The switch bracket (6.1) with the screwed-in hand release rod (6.2) must lie over brake body 2 and the hand release rod (6.2) must face away from the machine wall. Tighten the locking nuts evenly, until the specified adjustment dimension “Y” has been reached. Table 4 Size Tightening torque for cap screw Items 6.7 [Nm] 4 6 8 10 16 24 32 24 64 48 100 48 200 83 Single hand release 30° 6.2 6.2 6.7 6.7 Fig. 8 05/04/2007/TK/K/AM/GC/RJ Page 9 of 13 6.6 6.6 6.1 6.1 Brake body 2 Brake body 1 Chr. Mayr GmbH + Co. KG Eichenstraße 1 D-87665 Mauerstetten Germany Tel.: 08341 / 804-0 Fax: 08341 / 804-421 http://www.mayr.de eMail: [email protected] Installation and Operating Instructions for ROBA-stop®-silenzio® Type 896._ _ _._ _ Sizes 4 – 1800 (B.8.7.GB) Deviations on Single Brake Design: Guidelines The ROBA-stop®-silenzio® brake can also be ordered as a single brake. In this case, the individual values for nominal braking torque, electrical nominal power and mass apply. 1. 2. Please Observe! Single brakes do not meet the demands acc. the EN81-1 standard or the BGV C1 (previously VGB 70), DIN 56925 and DIN 56921-11 for installation in elevators and theatre stage technical systems. 3. 4. Deviating Parts 5. Item 1.1: hub for single brake (instead of Item 1) On sizes 4 – 300: Item 8.1: hexagon head screws for single brakes (instead of Item 8) Hand Release Installation (Fig. 9) onto Brake Body (Sizes 4 to 300) 6. Screw the hand release rod (6.2) into the switch bracket (6.1) and secure with Loctite 243. Insert the thrust springs (6.4) onto the raised head screws (6.3). Insert the raised head screws (6.3) with the mounted thrust springs (6.4) through the coil carrier (3) into the bores on the armature disk (4). Push the switch bracket (6.1) onto both the raised head screws (6.3) and apply the locking nuts (6.5). Please Observe! On sizes 32, 64 and 100, a washer should go between the switch bracket and the locking nut. Please ensure correct position of the switch bracket (6.1). The switch bracket (6.1) with the screwed-in hand release rod (6.2) must lie over brake body 1. Tighten the locking nuts evenly, until the specified adjustment dimension “Y” has been reached. Y Function 6.3 6.4 6.1 6.5 The braking torque on brake body 1 (3) is produced via the pressure force of several thrust springs (14) using frictional locking between the two friction linings of the rotor (5), the armature disk 1 (4) and the flange plate (11) or machine wall. Installation (Figs. 1, 3 and 4) 1. Dismantle the flange plate (11 / dependent on Type). 2. If necessary, mount the flange plate (11) using the cap screws (12). (Observe the tightening torque acc. Table 2). 3. Mount the hub assembly with the O-ring (Item 1.1 / O-ring must be lightly greased) onto the shaft and bring them into the correct position. Make sure that the key lies with its full length over the entire length of the hub, and secure axially (e.g. using a locking ring). 4. Push the rotor (5) by hand using light pressure over the Oring (2) onto the hub (1.1) (The rotor collar should face away from the machine wall or flange plate (11). Make sure that the toothing moves easily. Do not damage the O-rings. 5. Push brake body 1 over the hub (1.1) and the rotor collar of rotor 1 (5) (the fixing holes should align with the threaded holes in the flange plate (11) or machine wall). 6. Insert hexagon head screws (8.1), into brake body 1 and screw onto the machine wall or flange plate (11). Tighten the hexagon head screws (8.1) evenly all round using a torque wrench and tightening torque (acc. Table 2). Fig. 9 Hand Release Installation (Fig. 9a) onto Brake Body (Size 500) 1. Screw out both hexagon nuts (6.5), including their washers from the hand release assembly (6). 2. Insert the hand release assembly (6) with the mounted thrust springs (6.4) through the coil carrier (3) into the bores on the armature disk (4). 3. Re-apply both hexagon nuts (6.5 / secured with Loctite 243), including the washers. 4. Tighten both hexagon nuts (6.5) evenly using a torque wrench and a tightening torque of 10 Nm. 6 6.4 6.5 7. Inspect air gap "a" according to Table 2: the nominal air gap must be present. Fig. 9a 05/04/2007/TK/K/AM/GC/RJ Page 10 of 13 Chr. Mayr GmbH + Co. KG Eichenstraße 1 D-87665 Mauerstetten Germany Tel.: 08341 / 804-0 Fax: 08341 / 804-421 http://www.mayr.de eMail: [email protected] Installation and Operating Instructions for ROBA-stop®-silenzio® Type 896._ _ _._ _ Sizes 4 – 1800 (B.8.7.GB) Electrical Connection Magnetic Field Removal DC current is necessary for brake operation. The coil voltage is indicated on the Type tag as well as on the brake body and is designed according to the DIN IEC 60038 (± 10 % tolerance). The device must be operated via DC voltage with low ripple content, e.g. via a bridge rectifier or another suitable DC supply. Dependent on the brake equipment, the connection possibilities can vary. AC-side switching Please follow the exact connections according to the Wiring Diagram. The manufacturer and the user must observe the applicable directives and standards (e.g. DIN EN 60204-1 and DIN VDE 0580). Their observance must be guaranteed and doublechecked! max. 230V~ 2,5A– 1/025.000.6 [U– = 0,9×U~] Brückengleichrichter Bridge rectifier SDC IN 1 2 3 OUT 4 5 6 The power circuit is interrupted in front of the rectifier. The magnetic field slowly reduces. This delays the rise in braking torque. When switching times are not important, please switch AC-side, as no protective measures are necessary for coil or switching contacts. Earthing Connection The brake is designed for Protection Class I. This protection covers not only the basis insulation but also the connection of all conductive parts to the PE conductor on the fixed installation. If the basis insulation fails, no contact voltage will remain. Please carry out a standardized inspection of the PE conductor connections to all contactable metal parts! Demands on the Supply Voltage In order to minimise the noise development on released brakes, they may only be operated via DC voltage with low ripple content. Operation is possible with AC voltage using a bridge rectifier or another suitable DC supply. Supplies whose output voltage show a high ripple content (e.g. half-wave rectifiers, switch mode power supplies etc). are unsuitable for brake operation. S1 Coil F1 N L F1: external fuse low-noise switching; however, the brake engagement time is longer (c. 6-10 times longer than with DC-side switching). Use for non-critical brake times. DC-side switching max. 230V~ 2,5A– Device Fuses 1/025.000.6 [U– = 0,9×U~] Brückengleichrichter Bridge rectifier To protect against damage from short circuits, please add suitable device fuses to the mains cable. Switching Behaviour SDC IN The operational behaviour of a brake is to a large extent dependent on the switching mode used. Furthermore, the switching times are influenced by the temperature and the air gap between the armature disk (4) and the coil carrier (3) (dependent on the wear condition of the linings). 1 2 3 OUT 4 5 6 S1 The power circuit is interrupted between the rectifier and the coil as well as mains-side. The magnetic field reduces very rapidly, resulting in a rapid rise in braking torque. When switching DC-side, high voltage peaks are produced in the coil, which lead to wear on the contacts from sparks and to destruction of the insulation. Coil Magnetic Field Build-up When the voltage is switched on, a magnetic field is built up in the brake coil, which attracts the armature disk (4) to the coil carrier (3) and releases the brake. F1 N L F1: external fuse short brake engagement time (e.g. for emergency OFF operation); however, louder switching noises. Protective Circuit When using DC switching, the coil must be protected by a suitable protective circuit according to VDE 0580, which is already integrated in mayr-® rectifiers. To protect the switching contact from consumption when using DC-side switching, additional protective measures are necessary (e.g. series connection of switching contacts). The switching contacts used should have a minimum contact opening of 3 mm and should be suitable for inductive load switching. Please make sure on selection that the rated voltage and the rated operation current are sufficient. Depending on the application, the switching contact can also be protected by other protective circuits (e.g. mayr ® spark quenching unit), although this may of course then alter the switching times. 05/04/2007/TK/K/AM/GC/RJ Page 11 of 13 Chr. Mayr GmbH + Co. KG Eichenstraße 1 D-87665 Mauerstetten Germany Tel.: 08341 / 804-0 Fax: 08341 / 804-421 http://www.mayr.de eMail: [email protected] Installation and Operating Instructions for ROBA-stop®-silenzio® Type 896._ _ _._ _ Sizes 4 – 1800 Release Monitoring (7) Fig. 10 (Dependent on Type) (B.8.7.GB) Installation and Adjustment per Brake Circuit (Manufacturer-side Fig. 10) The ROBA-stop®-silenzio® brakes are delivered with manufacturer-side adjusted release monitoring. One microswitch (Item 7.1) per braking circuit signalizes each change in brake condition: "brake open" or "brake closed” A signal evaluation of both conditions must take place customer-side. From the time when the brake is energised, a period of three times the separation time must pass before the release monitoring system microswitch signal is evaluated. Please Observe! The brake must be screwed onto the installation device with tightening torque according to Table 2, and the coil must be de-energised. 1. Join the hexagon head screw (7.3) with the hexagon nut (7.4) and the spring washer (7.5), paint the first part of the thread with Loctite 243 and screw into the armature disk (4). 2. Screw the microswitch (7.1) assemblies with the cap screws (7.2) to the partly-assembled brake bodies 1 and 2 (secure with Loctite 243). Wiring Diagram for each Microswitch (7.1): Switch Adjustment 3. Turn the hexagon head screw (7.3) in the direction of the switch (7.1) up to the switch tappet. 2 4. Connect the inspection or measurement device (diode inspection) Input 1 to the NO contact black/blue. Black connection 4 5. Insert the feeler gauge 0,1 mm (loose sensor plate) between the NO Contact switch tappet (7.1) and the hexagon head screw (7.3). Blue connection Connection when 6. Turn the hexagon head screw (7.3) in the direction of the switch brake released (7.1) up to the signal “ON”, and then turn it back to the signal Function “OFF”. Counter the hexagon head screw (7.3) with the hexagon nut (7.4). When the magnetic coil in the coil carrier (3) is energised, the Signal "ON" armature disk (4) is attracted to the coil carrier (3), a microswitch 7. Energise the brake De-energise the brake Signal "OFF" (7.1) emits a signal and the brake is released. If necessary, re-adjust and repeat the inspection. Please Observe: When the hand release (6) is being operated, a switching signal 8. Inspection with feeler gauge 0,15 mm from the release monitoring (7) is not guaranteed. Brake energised Signal "ON", Brake de-energised Signal "ON" 9. Inspection with feeler gauge 0,10 mm Table 5: Maximum Switch Performance Brake energised Signal "ON", Brake de-energised Signal "OFF" AC-side switching DC-side switching 10. Feeler gauge 0,3 mm between the armature disk (4) and performance performance the coil carrier (3) in the area of the switch (7.1). Resistance Resistance Voltage Voltage Energise the brake; the signal must be "ON". load load [VAC] [VDC] [A/R Load] [A/R Load] 11. Paint items 7.4 and 7.2 with safety lacquer. NC Contact Grey connection Connection when brake closed 125 250 5 up to 30 5 125 0,5 250 0,25 Customer-side Inspection after Mounting 5 The customer-side connection takes place as an NO contact Please inspection the release monitors Brake de-energised Signal "OFF", Brake energised Signal "ON" Minimum switch performance: 0,12VA ( > 12V, > 10mA) Contact material: silver 7.5 7.4 7.3 The microswitches cannot be guaranteed fail-safe. There must be a suitable entry point for replacement or adjustment. 7.1 Items see Brake 1 7.2 4 3 5 Fig. 10 05/04/2007/TK/K/AM/GC/RJ Page 12 of 13 5.1 Brake 1 Brake 2 Chr. Mayr GmbH + Co. KG Eichenstraße 1 D-87665 Mauerstetten Germany Tel.: 08341 / 804-0 Fax: 08341 / 804-421 http://www.mayr.de eMail: [email protected] Installation and Operating Instructions for ROBA-stop®-silenzio® Type 896._ _ _._ _ Sizes 4 – 1800 Maintenance ® (B.8.7.GB) Disposal ® ROBA-stop -silenzio brakes are mainly maintenance-free. The friction linings are robust and wear-resistant. This ensures a particularly long service lifetime. However, the friction linings are subject to functional wear on emergency OFF brakings. Therefore, the following inspections should be carried out at regular intervals: - Braking torque or delay inspection (Individual brake circuit) - Inspection of air gap “a” braked Our electromagnetic brake components must be disposed of separately as they consist of different materials. Please observe the relevant authority regulations. Code numbers may vary according to the dismantling process (metal, plastic and cable). Electronic components (Rectifier / ROBA®-switch / Microswitch): Products which have not been dismantled can be disposed of under the Code No. 160214 (Mixed Materials) or Components under Code No. 160216; or the objects can be disposed of by a certified Inspection of the wear condition on the rotors 1 (5) and 2 (5.1) is waste disposal firm. carried out by measuring the air gap “a” (Fig. 2 and Table 2). At the latest after reaching the maximum air gap, the rotors are to Brake bodies made of steel girders with coil / cable and all other steel components: be replaced (Table 2). Steel scrap (Code No. 160117) Before the rotors are replaced (Items 5 and 5.1): Aluminium components: Clean the brake, remove abraded particles Non-ferrous metals (Code No. 160118) (use an industrial vacuum cleaner / wear a dust mask) Measure the rotor thickness (new), the rotor thickness must Brake rotors (steel or aluminium girders with friction linings): be in accordance with Table 2 Brake linings (Code No. 160112) (min. 1 x yearly) (min. 1 x yearly Replacing the rotors (Items 5 and 5.1) The rotors are to be replaced by following the instructions for brake installation backwards. Seals, O-rings, V-seals, elastomere, terminal boxes (PVC): Plastics (Code No. 160119) Warning! On hoist drives, the drive brake must be load-free, otherwise there is a danger of load crashes! Malfunctions / Breakdowns: Malfunctions Possible Causes Solutions Brake does not release Incorrect voltage on the rectifier Apply correct voltage Air gap too large (worn rotor) Replace rotor Interrupted coil Replace brake Brake is switched AC-side Switch DC-side Delayed engagement of brake on emergency OFF 05/04/2007/TK/K/AM/GC/RJ Page 13 of 13 Chr. Mayr GmbH + Co. KG Eichenstraße 1 D-87665 Mauerstetten Germany Tel.: 08341 / 804-0 Fax: 08341 / 804-421 http://www.mayr.de eMail: [email protected]