1
User's Guide
ASSA ABLOY
© Copyright 2003-2010, ASSA ABLOY
ASSA ABLOY
Förmansvägen 11
SE-117 43 Stockholm
Phone: +46 (0)8-775 16 00
Fax: +46 (0)8-775 16 20
UG 559 050 921M
Contents
ARX Access Control System
14
About ARX Access Control System
ARX Access Control System
ARX access control system overview
ARX Access Control System Software
About this User's Guide
Typing conventions
20
ARX Client software
About ARX Client software
Login
Main Window
Licences and options
Toolbar
General Tips
Help
Different menu types
Sort columns
Sort lists
Print reports
Saving Files
Language
Client Settings
User interface
Lock the ARX Client software
Data from server
User's Guide Hidden text
14
14
16
17
19
19
ARX Access Control System
20
21
21
22
24
27
27
28
29
29
29
30
31
33
33
36
37
• 3
Customise toolbar
Lock the ARX client software
37
38
39
Persons
About Persons
Add a Person
PIN code
Disabled clearance
Allocate access categories
Allocate a limited period of validity
Allocate cards
Modify Person Data
Remove Person
Search for a Person
Advanced search
Administrate keys (requires the Performer option)
Hand out key
Hand in key
Performer Integration settings (option)
Additional settings for Persons
PIN Code Settings
Extended Fields for Person
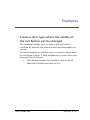
Examples
Register a new employee
Add input field in order to register company
names
Access Categories
68
72
About Access Categories
Create Access Category
Modify Access Category
Remove Access Category
Default validity for access categories
Examples
Define access categories
User's Guide Hidden text
39
40
42
43
45
46
49
53
53
54
54
55
55
59
60
61
61
62
64
64
ARX Access Control System
72
73
75
76
77
78
78
• 4
Credentials
80
About Credentials
Allocate a card
Inhibit a card
Change owner/card number
Clear owner
Remove credential
Open key in Performer (option)
Other settings for Credentials
Card Format
Examples
Lost Card
An employee leaves
Card registered on the wrong person
80
81
82
83
84
85
86
86
86
92
92
92
93
95
Card Receipt Templates
About Card Receipt Templates
Add Card Receipt Template
Additional information (fields)
Edit Card Receipt Template
Remove Card Receipt Template
Web interface
95
97
99
100
100
101
About Web Interface
My Pages
Log in to My Pages
Menu of My pages
Make a booking
Administration of My Pages
Log in settings for My Pages
Messages (option)
Schedules
101
102
102
103
104
105
105
106
110
About Schedules
User's Guide Hidden text
110
ARX Access Control System
• 5
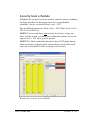
Access schedule
Security level schedule
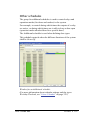
Other schedules
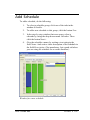
Add Schedule
Modify Schedule
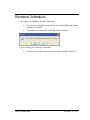
Remove Schedule
Examples
Change the time for the exit button
Increased security after theft
Access Areas
113
114
115
116
118
119
120
120
121
125
About Access Areas
125
Menu choices (areas)
127
Add Access Area
128
Add access category
130
Door functions
133
Remove access category
136
Add exceptions for access category
136
Clear exceptions for access category
138
Add Door
139
Modify Access Area Settings
142
Modify Door Settings
143
Remove Access Area or Door
144
Copy and Move Access Area or Door
144
Control Function
145
Floors (option)
145
Domains (option)
148
Add domain
148
Examples
149
A party during the evening – altered access
149
See which access areas a person has access to 152
See in which access areas an access category has
153
access
The Company Example configures the
153
access areas
The Company Example installs an elevator
156
User's Guide Hidden text
ARX Access Control System
• 6
The Company Example introduces domains
160
165
Door types
About Door types
165
Create new Door type
166
Modify Door type
170
Delete Door type
170
Examples
171
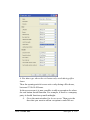
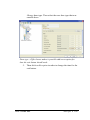
Create a door type where the validity of the exit
171
button can be changed
Triggers
176
About Triggers
Add trigger
Add filter template as trigger
Modify trigger
Add action
Example
LED-panel that shows unclosed doors
Trigger group
176
177
183
187
187
191
191
198
About Trigger group
Add trigger group
Trigger alarm list
198
198
202
About Trigger alarm list
Show Trigger alarm list
Camera
202
203
204
About Camera
Add camera
Show the camera
User's Guide Hidden text
204
205
207
ARX Access Control System
• 7
Installation
208
About Installation
Menu options (installation)
Symbols in the installation tree
Folders
Add folder
Remove folder
Controller
Add controller
Modify controller settings
Remove controller
Extra Functions (controller)
DAC
Add a new DAC
Add connected DAC
DAC options
One door controller
Add a One door controller
Pulse open door
Relay
Input
Airlock (option)
Entry phone (option)
Entry DAC options
Booking panel (option)
Add Booking panel
Booking panel options
RCE-16 board (option)
Add a RCE-16-card
Elevator (option)
Add Elevator
Time Anti-passback (option)
Add Time Anti-passback
Readers
Add readers
Galaxy Intrusion Panel
User's Guide Hidden text
ARX Access Control System
208
209
210
212
212
213
214
214
218
219
219
220
220
222
223
234
234
244
244
247
250
252
253
260
261
261
262
262
264
264
270
271
273
273
275
• 8
Connect controller to Galaxy Intrusion Panel 277
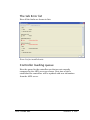
Status
279
The tab Error list
283
Controller loading queue
283
Status settings
284
Examples
286
Adding doors and floors in the installation tree286
Alarm (option)
287
About Alarm
Menu options (Alarm)
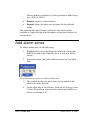
Add alarm zones
Settings for alarm zones
Alarm settings for DAC
Galaxy alarm zone
Add Galaxy alarm zone
Add DAC
Add Virtual RIO (VRIO)
VRIO-inputs
VRIO-outputs
Firmware
287
287
288
289
293
295
295
299
304
305
308
309
About Firmware
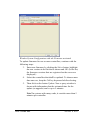
Check and Update Firmware
Logs
309
309
312
About Logs
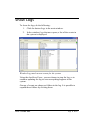
Show Logs
Search
Show details
Filter
Calendar
312
313
314
314
315
319
About Calendar
User's Guide Hidden text
319
ARX Access Control System
• 9
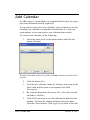
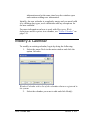
Add Calendar
Modify a Calendar
Calendar tab
Exception tab
Settings tab
Example
Add holiday to an existing calendar.
320
321
322
324
325
329
329
Operators, Operator templates and Roles 332
About Operators, Operator templates and Roles
Operators
Add an operator
Remove operator
Operator templates
Add an operator template
Roles
Add role
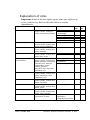
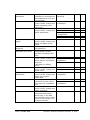
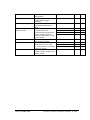
Explanation of roles
Connect Card Reader to ARX Client (PCI)
332
332
333
335
336
336
339
339
341
344
About card reader
Connect PCI-reader
Examples
Adding code
Change PIN code
344
345
349
349
349
Apartments (option)
351
About Apartments
Add an apartment
Modify apartment settings
Remove apartment
Extended field for apartment (option)
Add extra field for apartment
Examples
Obtain position of users during fire alarm
User's Guide Hidden text
ARX Access Control System
351
352
354
359
360
360
362
362
• 10
Booking (option)
364
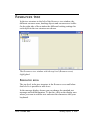
About Booking
Resources tree
Resource area
Area
Booking object
Resource
Door
Relay
Resource access
Create a new resource access
Time slot templates
Create new time slot template
Rules
Create new rule template
Modify rule template
Remove rule template
Booking list
364
366
366
367
368
370
372
373
375
375
378
378
381
381
383
383
383
Entry Phone Directory (option)
385
About Entry Phone Directory
Create new entry
IP Phone Settings (option)
385
386
388
Zone (option)
389
About Zone
389
Add zone
390
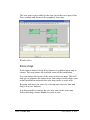
Zone map
391
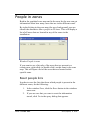
People in zones
392
Reset people lists
392
Automatic reset
393
Anti pass-back in zone (option)
393
Activate door block in the anti pass-back zone 394
Add door
397
Zone door list
398
User's Guide Hidden text
ARX Access Control System
• 11
Examples
The Fire alarm sounds
400
400
Card Reader User Functionality
402
About this chapter
Buying time
Disarming
Arming
Add temporary code for door
Set a door unlocked
Cancel unlocking of door
Lock an unlocked door
402
402
403
403
403
404
405
405
ARX Server Manager
407
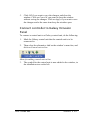
About ARX Server Manager
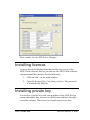
Installing licences
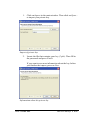
Installing private key
Change system settings
Safety backup
Create safety backup
Scheduling safety backup
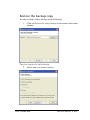
Restore the backup copy
Appendix
424
Proposed Workflow for an Installation
Windows Vista Support
Installation of Performer
Installation of licence
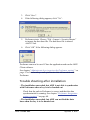
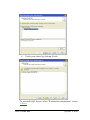
Trouble shooting after installation
Uninstall Performer
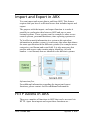
Import and Export in ARX
HTTP Access in ARX
Event logs
Door Modes
User's Guide Hidden text
407
408
408
410
415
415
417
422
ARX Access Control System
424
425
428
431
433
434
436
436
437
437
• 12
Licensing Information
438
Index
439
User's Guide Hidden text
ARX Access Control System
• 13
ARX Access Control
System
About ARX Access Control System
ARX access control system is a client/server system for
administration and supervision of security modules.
The system architecture is a hierarchical tree-like structure of
hardware, logic control units and access areas that makes the
system easy to administer and monitor.
ARX Access Control System
ARX access control system is the name of the complete integrated
security system built around an advanced module for secure
communication together with a modern access control system.
ARX access control system consists of three parts:
•
The core of the system is the server software ARX Server,
that handles the communication in the system between the
hardware and the software.
User’s Guide ARX
ARX Access Control System
• 14
•
The second part is the hardware, which controls the doors
that controls access cards, door codes and keys according to
the your settings made in the software. The system uses
secure communication, which for example means that the
hardware can function even though a cable has been cut.
•
The last part is the ARX Client software, the software this
User guide covers. It is used for administrating the ARX
control system, that is, controls the access rights the users
have.
The ARX Client software offers a large amount of settings.
Moreover, there are a number of optional functions such as, web
interface, Entry phones, administration of reservations of training
rooms/laundry or administration of elevators.
All functions described in this user guide can be used, as long as
the installation is equipped with correct (and valid) licences.
User’s Guide ARX
ARX Access Control System
• 15
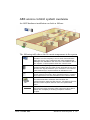
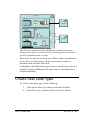
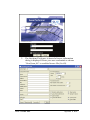
ARX access control system overview
An ARX hardware installation can look as follows:
The following table shows the five main components in the system
ARX Server
Installed on the company’s server and communicates
with the doors, their hardware and other applications.
Manages the database with all of the information about
the system. Communicates with the control units.
Control units (LCU)
Communicates with the ARX Client program server and
divides the signal between up to 16 doors. The Control
units determine if access should be allowed or not.
Door control (DAC)
These control how every door should function; it opens
and closes doors on the command of the control units.
ARX Client
The Administrators software that handles the
communication with the ARX Server. All settings for the
access control system and its users are performed
here.
Network
All communication between ARX hardware takes place
within the company’s existing computer network
TCP/IP.
User’s Guide ARX
ARX Access Control System
• 16
Examples of other components are shown in the following picture:
Card readers, magnetic contacts, alarm siren.
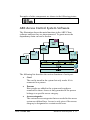
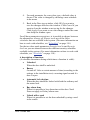
ARX Access Control System Software
The illustration shows the main functions in the ARX Client
software and how they are interconnected. To grant access the
dependency chain can not be broken.
The following list describes the various functions of each part:
•
Card
The card is stored in the system but only works if it is
connected to a person.
•
Persons
Here people are added to the system and a cards are
connected to them. Access is only permitted if the person
belongs to a specific access category.
•
Access categories
The various access categories that are needed in the access
system are defined here. Access is only given if the access
category is designated to a certain access area.
User’s Guide ARX
ARX Access Control System
• 17
•
Access area
All parts of the access system are connected together here.
The access areas are defined by a number of doors. Access
is given by access categories and access schedules that are
connected together and connected to an access area.
•
Doors
Doors (Door controls) are connected to the system as they
are added to the Installation tree. Access through a door is
only allowed if the door is given a door type and added to
an access area.
•
Door categories
The security level and operating modes are allocated for
every door type (using a security schedule and additional
schedules).
•
Schedules
The access schedule controls the access to the access
system for different access categories.
The security schedule controls which security solution that
is valid for a particular door type at a specified time.
The Additional schedules indicate when the door’s different
operation modes apply.
•
Calendar
The calendar defines which days are holidays, weekends
and weekdays.
User’s Guide ARX
ARX Access Control System
• 18
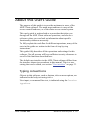
About this User's Guide
The purpose of this guide is to provide assistance to users of the
ARX Client software. The main target audience is users of the
access control hardware, or of the entire access control system.
This user's guide is written both as a procedure that takes you
through all the ARX Client software operations, and also as a
reference where you can look up information about specific
functionality whenever necessary.
To fully explain the workflow for different operations, many of the
texts in this guide are written in the form of step-by-step
instructions.
This guide fully describes all the operations and settings for this
software. Not all persons will have sufficient security clearance to
use all of the functions described here.
The default user interface in the ARX Client software differs from
the interface shown in screenshots in this manual. This is a user
setting that can be edited, see section “User interface” on page 33.
Typing conventions
Objects in this software, such as buttons, tabs or menu options, are
indicated in the body text using italics.
User input, or command line text, is indicated using the Courier
typeface.
User’s Guide ARX
ARX Access Control System
• 19
ARX Client software
About ARX Client software
This chapter covers the overview of the ARX Client software and
the functions and buttons available. It also describes how licences
are added.
User’s Guide ARX
ARX Client software
• 20
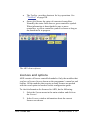
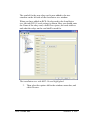
Login
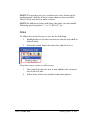
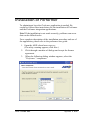
When you start the client software, a login window is displayed.
Login window
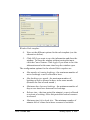
1.
Enter your User name, Password and select Server from
the drop down list.
2.
Click OK.
NOTE! The program is case-sensitive i.e. it differentiates between
upper- and lowercase characters. Ensure that the Caps Lock key is
not activated.
NOTE! The first time you login on the client software, use the user
name master and leave the password field empty.
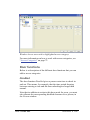
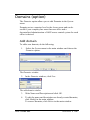
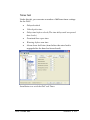
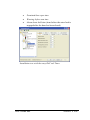
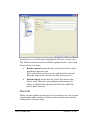
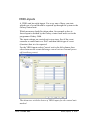
Main Window
The main window of the ARX Client software makes it easy for
you to install and build up your access control system, as well as
simplifying the daily handling of persons and cards.
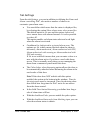
The ARX Client Software main window contains different groups
of options and information:
•
The Menu bar gives you access to all operations and
options in ARX. Menus are: File, Edit, Tools, System,
Window and Help.
User’s Guide ARX
ARX Client software
• 21
•
The Toolbar provides shortcuts for key operations. See
“Toolbar” on page 24.
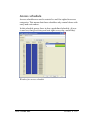
•
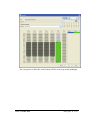
Status field shows the status of connected controllers.
Normally the status field shows a green controller symbol.
When information is downloaded to one or more
controllers, a yellow controller symbol is shown as long as
the download is in progress.
The ARX client software
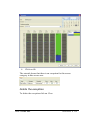
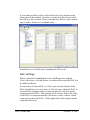
Licences and options
ARX consists of licence controlled modules. Only the modules that
you have a licence for are shown on the programme’s menu bar and
toolbar. All the modules that require an extra licence are marked
with the word option in brackets in this configuration guide.
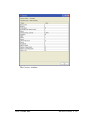
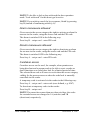
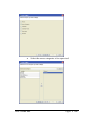
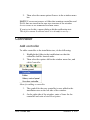
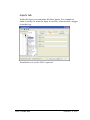
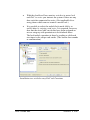
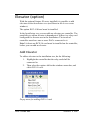
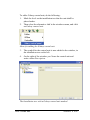
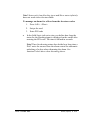
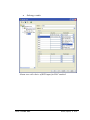
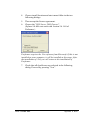
To check information for licences for ARX, do the following:
1.
Select the System menu in the main window and click on
the Licence.
2.
In the Licence window information about the current
licences are shown.
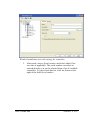
User’s Guide ARX
ARX Client software
• 22
The Licence window
User’s Guide ARX
ARX Client software
• 23
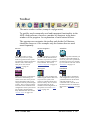
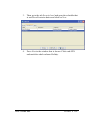
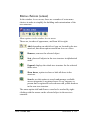
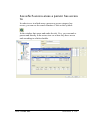
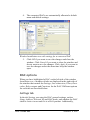
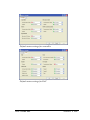
Toolbar
The main window toolbar (example configuration)
To quickly reach commonly used and important functionality in the
ARX client software, there are a number of shortcuts in the main
window of the program. An explanation of each button follows.
The operator can customize the toolbar and decide if all buttons
should be shown or if for example only the buttons that are used
most frequently.
Persons
Access categories
Schedules
Every person that is to have
access in your access system
must be registered in the system.
The function: manage people and
allocate codes, card or key to
each person. See section
“Persons” on page 39.
An access category is a group of
persons with the same levels of
clearance in your access system,
for example caretaker, employee
and consultant. See section
“Access Categories” on page 72.
With the help of the schedule you
are able to control the timing of
access to your access system and
the means of access, for example
by card, code or both. See section
“Schedules” on page 110.
Access areas
Door types
Installation
Under access area you determine
which doors shall belong to a
certain access area. Every access
area is allocated specific access
categories that are permitted right
of entry. This is carried out at the
same time as the installation and
configuration of the system and is
not normally changed during
daily administration. See section
“Access Areas” on page 125.
Under door types you define the
different types of doors that exist
in your access system, with
respect to operation modes and
level of security. This is carried
out at the same time as the
installation and configuration of
the system. See section “Door
types” on page 165.
At the same time as installation
and configuration of the system,
you determine how all the doors
and other hardware are
connected. This is carried out in
the main window for installation.
See section “Installation” on page
208.
User’s Guide ARX
ARX Client software
• 24
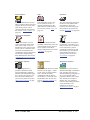
Alarm (option)
Logs
Firmware
With the alarm function you are
able to construct alarm zones and
integrate the access system with
other alarm systems. This is
carried out during configuration.
See section “Alarm (option)” on
page 287.
Everything that occurs in the
access system is saved in a
logbook, both changes in the
ARX software and all the door
accesses. See section “Logs” on
page 312.
The control units that control all
the doors can be updated with
new firmware. This is not
normally carried out during the
daily usage of the system. See
section “Firmware” on page 309.
Card receipt templates
Calendar
Cards/Keys
In this main window you can
create receipts that can be used
when codes, cards or keys are
handed out to new persons in the
system. This is carried out at the
same time as installation and
configuration of the system and is
not normally changed during
daily administration. See section
“Card Reader User Functionality”
on page 402.
Here you can determine when
weekdays and holidays occur and
which exceptions apply for your
access system. This is done
during configuration. See section
“Calendar” on page 319.
When new people are added to
the system it is possible to give
them a card or key as well as an
access code if the system is
constructed in that way. In this
main window you can add new
cards and allocate them to a
specific person. See section
“Credentials” on page 80.
Entry phone (option)
Messages (option)
Apartments (option)
During configuration it is
possible to determine which
persons/apartments, telephone
numbers and card numbers apply
for a certain entry phone if you
have this option connected to
your access system. See section
“Entry phone (option)” on page
252.
Here you decide which texts shall
be shown on My pages – which
are the users’ personal websites.
This is carried out during
configuration and can also be
used if there is a continual need
of information for all users. See
section “Messages (option)” on
page 106.
If your access system is for an
apartment building or residential
area, the rights of access are
determined during configuration
for every apartment and its
proprietors. If the access system
also includes, for example, a
laundry area, it is possible to
control which washing machines
can be booked by every
apartment. See section
“Apartments (option)” on page
351.
User’s Guide ARX
ARX Client software
• 25
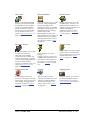
Time slots
Rules templates
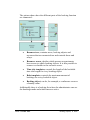
Resource tree
Whilst configuring the booking
function, you are able to decide
the templates for each booking
period. For example a laundry
period shall be for 3 hours, or a
conference room can be booked
for any number of hours. See
section “Time slot templates” on
page 378.
In this main window it is possible
to decide, during configuration,
the rules that apply for all
bookable recourses, for example,
the number of bookings any one
apartment can do per washing
machine and month.
Rule templates are then used
under the Resource tree when you
add the resources (for example
washing machines) that exist in
the system. See section “Rules”
on page 381.
During configuration, all of the
bookable units – resources – are
defined and structured here, for
example, washing machines in an
apartment building, or a
conference room in an office
block. See section “Resources
tree” on page 366.
Resource access
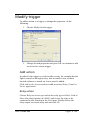
Trigger
Trigger group
In this main window it is possible
to connect certain access
categories to the bookable
resources that are available. For
example, which group of persons
(access category) has permission
to book a certain washing
machine or conference room. See
section “Resource access” on
page 375.
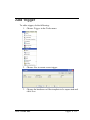
In this window you create a
“trigger”.
A trigger can react on any event
in ARX and can perform one or
several actions. For example to
trip a relay or to send an e-mail.
See section “Triggers” on page
176.
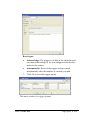
Trigger alarm list
Camera
In this window you have an
overview of all triggers activated
in the system. You can notice and
acknowledge the trigger alarms
activated. See section “Trigger
alarm list” on page 202.
User’s Guide ARX
Here you add surveilance
cameras connected to the LAN
network to ARX and defines
address and settings for the
camera. See section “Camera”
on page 204.
In this window you create trigger
groups, which is a function that
groups triggers with on or several
actions. See section “Trigger
group” on page 198.
Show camera
With this function you can view
the cameras added in with the
Camera function. See section
“Show the camera” on page 207.
ARX Client software
• 26
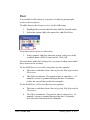
General Tips
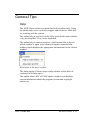
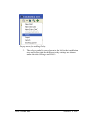
Help
The ARX Client software program has built-in online help. Using
the online help, users can access support and assistance while they
are working with the system.
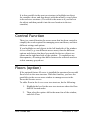
The online help is accessed via the Help menu in the main window,
or by pressing the F1-key on the keyboard.
The online help is context-sensitive, which means that it detects
which window is open in the client and opens a separate help
window which displays the appropriate information for the current
window.
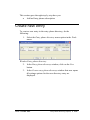
Help menu in the main window
The menu option Content opens a help window with a table of
contents for all help topics.
The option About ARX ACCESS opens a window and displays
current information about the program version and copyright
notices etc.
User’s Guide ARX
ARX Client software
• 27
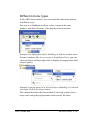
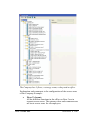
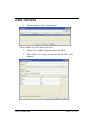
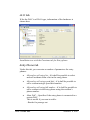
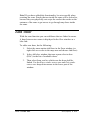
Different menu types
In the ARX client software, you can reach the same menu options
in different ways.
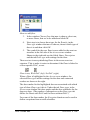
One way is to highlight an object, select a menu in the same
window, and then select one of the displayed menu options.
Example of a highlighted object (Building A) and the window menu
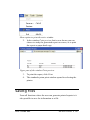
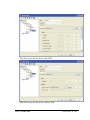
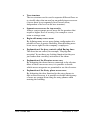
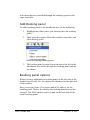
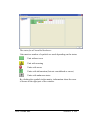
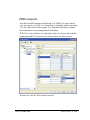
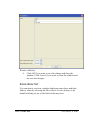
In some windows (like Access areas or Installation Tree), you can
select an object and then right-click to display the popup menu with
related options.
Example of popup menu for a selected object (Building A1) selected
with right-click of the mouse button
This manual describes the first method of selecting a menu, but in
many cases using the popup menus works exactly the same.
User’s Guide ARX
ARX Client software
• 28
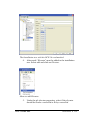
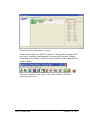
Sort columns
In all windows in the ARX client software that contains lists with
columns is it possible rearrange these columns. This is done by
grabbing the column header with the mouse cursor and move it to
the desired place.
Rearranging columns
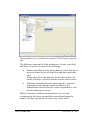
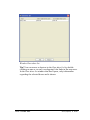
Sort lists
In windows where the information is presented in the form of lists
you can choose how these lists should be sorted. Choose between
ascending or descending order by clicking on the small arrow
shown close to the column header in the list.
Sorting in ascending or descending order
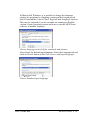
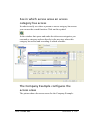
Print reports
From most functions in the ARX client software you can generate
and print reports.
It is possible to study a report immediately on screen or print it on
paper by using a connected printer.
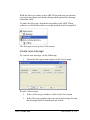
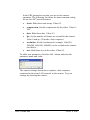
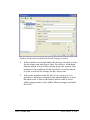
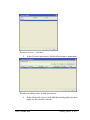
To open a report from any function, do the following:
1.
Select File menu in the main windows menu bar and select
the option Print. (Or, press Ctrl+P on the keyboard.)
User’s Guide ARX
ARX Client software
• 29
Menu option to print the active window
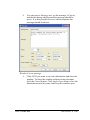
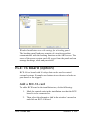
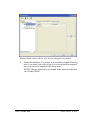
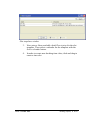
2.
In the window Print preview that is now shown you can
choose to study the generated report on screen, or to print
the report as paper hard copy.
Upper part of the window Print preview
3.
To print the report, click Print.
4.
The standard system print window opens for selecting the
printer.
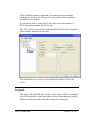
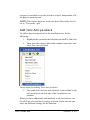
Saving Files
From all functions where the user can generate printed reports is it
also possible to save the information as a file.
User’s Guide ARX
ARX Client software
• 30
The saved (or exported) information can be in the following
formats:
•
XML (*.xml)
•
PDF (*.pdf)
•
PostScript (*.ps)
•
Comma separated file (*.csv)
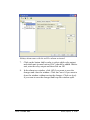
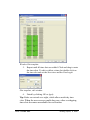
To save data from any activated window, do the following:
1.
Select the File menu in the main windows menu bar and
select the option Save as.
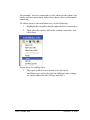
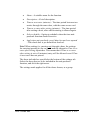
Export menu
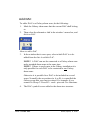
2.
Now a Save window opens where you will enter a filename
and select a file format for the exported information.
3.
If you want to save the exported information, click Save. If
you want to close the window without saving the
information, click Cancel.
Language
The ARX client software automatically selects the language that the
operating system uses.
If the operating systems language setting is not supported by the
ARX client software, then English will be used.
User’s Guide ARX
ARX Client software
• 31
In Microsoft® Windows, it is possible to change the language
settings for programs by changing a setting in the Languages tab
that is found under Control Panel, Regional and Language Options.
This may be required if you for example are running an English
version of your operating system and want to run the ARX client
software in another language.
Choose language in the field for standards and formats.
Also choose the default input language. Enter the Language tab and
click on Details button in the Text services and input languages.
Choose Standard input language
User’s Guide ARX
ARX Client software
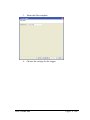
• 32
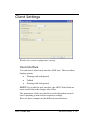
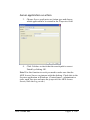
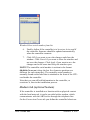
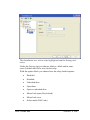
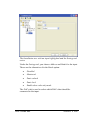
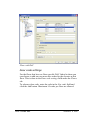
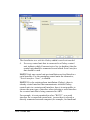
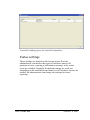
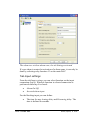
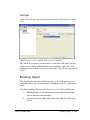
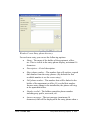
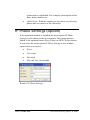
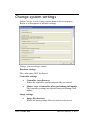
Client Settings
Window for system configuration settings
User interface
You can choose which user interface ARX uses. There are three
display options:
•
Floating with background
•
Tabbed
•
Floating with background
NOTE! If you edit the user interface, the ARX Client Software
must restart before the changes take effect.
The appearance of the user interface is also dependent on each
user's operating system and its respective settings.
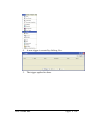
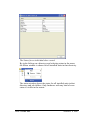
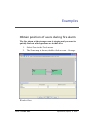
Here are three examples of the different user interfaces:
User’s Guide ARX
ARX Client software
• 33
Example of Floating with background
User’s Guide ARX
ARX Client software
• 34
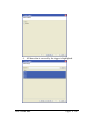
Example of Tabbed user interface
Example of Floating user interface
User’s Guide ARX
ARX Client software
• 35
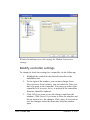
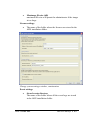
With the slider Size of toolbar icons it is possible for the user to
customize the size of the icons in the main window toolbar.
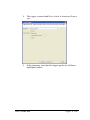
In the field User interface is it possible to reset how warnings are
displayed. These warnings can, for example, be warning dialogs
like Save changes?
Example of a warning
If you have previously chosen not to display these warning
messages, but want to go back to displaying the messages, check
the option Reset warning messages and click on the OK button.
Lock the ARX Client software
In the field Lock ARX Client software a number program settings
are shown.
•
In order to lock the client after a period of inactivity, check
the checkbox Lock the ARX Client software after, and
choose a number of minutes.
•
If you want the client window to be minimized when the
client is locked, check the checkbox Minimise on lock.
•
ARX client software is equipped with a standard lock
screen image, but if you want to display another image,
click the Browse button.
•
The lock screen transparency for the selected lock screen
image can be set with the Use transparency checkbox and
the Lock screen transparency slider.
User’s Guide ARX
ARX Client software
• 36
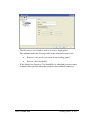
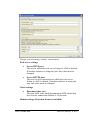
Data from server
Under the heading Data from server you can define Max returning
rows from a query. This option makes it possible to limit long
listings being displayed from search results, which can speed up the
display.
This is mainly desirable for large systems with, for example, a great
many persons registered. For such a system, it would be appropriate
to show 25 or 50 lines as a result of a search, instead of all results
(which could be several thousand!)
NOTE! The choice of maximum returning rows is only valid for
the current user and the respective client.
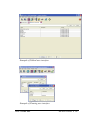
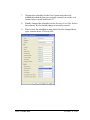
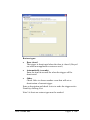
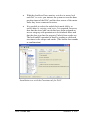
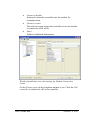
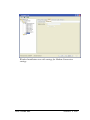
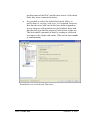
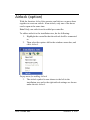
Customise toolbar
With the menu option Customise toolbar is it possible for each user
to choose which toolbar icons that should be visible in the main
window.
When the menu option Customise toolbar is selected, a new
window with two columns is shown. In the left column the
Available icons and objects are shown, and to the right the Selected
objects are shown.
Window Customise toolbar
User’s Guide ARX
ARX Client software
• 37
It is also possible to add icons to other Windows applications or
files, by clicking the New button. Enter the name and select the path
to the application or file that you want to add to the toolbar.
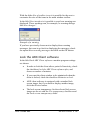
Lock the ARX client software
With the menu option Lock ARX you lock the ARX Client. To
unlock the ARX client software, it is required to log in with a valid
Username and Password.
User’s Guide ARX
ARX Client software
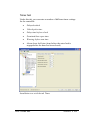
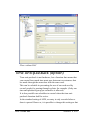
• 38
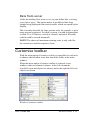
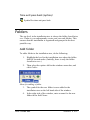
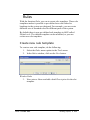
Persons
About Persons
In the ARX client software, you create a person and then attach all
other data (e.g. security classes or cards) to that person.
This section is a step-by-step procedure that shows you how to:
•
Add, change and remove persons
•
Allocate person access to areas and domains (optional
feature)
•
Attach cards to persons
•
Administrate keys with Performer (option)
•
Example from the Company Example
User’s Guide ARX
Persons
• 39
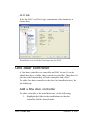
Add a Person
Before you add a new person, it might be advisable to have some
details readily available, for example:
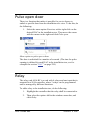
•
First- and last names
•
Description of the person
•
ID number (Created automatically by the system if you
leave this box empty.)
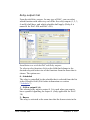
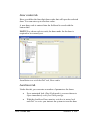
To add a person, do the following:
1.
Click the Persons button on the toolbar of the main
window.
Window with list of persons registered in the system.
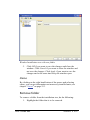
2.
Click the New button at the bottom of the Persons window.
User’s Guide ARX
Persons
• 40
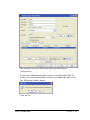
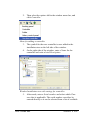
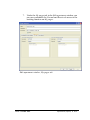
Window for new person
3.
Enter all personal details in the upper part of the window:
First name, Last name, Description, ID and domain if that
optional feature is installed.
NOTE! If you leave the ID field empty, the system will
automatically create a unique ID and attach it to the person.
The system also selects the standard domain if no changes
are made.
4.
If you wish to link a picture for the person, click on Select
under the picture field in the upper right hand side of the
window, and select a picture file in the resulting window.
5.
To save your entry and continue with another, click on Save
& new. To save your entry and close the window, click on
User’s Guide ARX
Persons
• 41
OK. To close the window without saving, click on Cancel.
Click Apply if you want to save the information and at the
same time keep the window open.
It is also possible to add more information fields for persons (e.g.
Telephone number or Department). This is done with the menu
option System, System configuration.
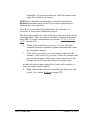
PIN code
It is also possible to allocate a PIN code, set the option Require PIN
change or allocate Disabled privileges for a person.
1.
Enter a personal code (PIN).
2.
With the checkbox Require PIN change, choose if a change
of PIN code is required, and if so within how many days.
3.
Choose if the person should be granted Disabled privileges
with the Disabled person checkbox.
User’s Guide ARX
Persons
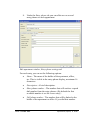
• 42
Window for a person, with door privileges
4.
To save your entries and continue to add a new person,
click Save & new. To save your entry and close the
window, click on OK. To close the window without saving,
click on Cancel. Click Apply if you want to save the
information and at the same time keep the window open.
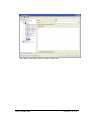
Disabled clearance
The checkbox Disabled person gives a person extra time to check
in- and out. This means, for example, that the time period elapsing
between entering a code and the door unlocking are longer than
normal.
1.
Select if the person should have Disabled person access.
User’s Guide ARX
Persons
• 43
A window for a person with door functions
2.
Click on Save & New if you wish to save the information
and add a new person to the system. Click OK if you wish
to save the information and close the window. Click on
Cancel if you wish to close the window without saving the
information. Click on Apply if you wish to save the
information and keep the window open at the same time.
Note that in addition to allocating disabled clearance for a person,
you must activate the corresponding door mode for each access
categories in the area this should apply to. (For more information,
see “Access Areas” on page 125.)
User’s Guide ARX
Persons
• 44
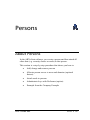
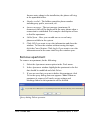
Allocate access categories
In the lower part of the window Editing person, you will find the
Access categories tab. Here you attach the current person to one or
more access categories.
1.
To attach the person to an access category, click the button
Add.
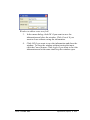
Window Select category
2.
Select one or several categories from the list and click OK.
3.
To save the details and close the window, click OK. To
close the window without saving the input, click Cancel.
For more information on how to create access categories, see
“Access Categories” on page 72.
User’s Guide ARX
Persons
• 45
It is also possible to set the default expiry date for an access
category. This is done with the Default validity for access
categories option (in the System menu).
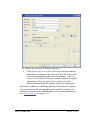
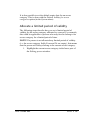
Allocate a limited period of validity
The following steps describe how you set a limited period of
validity for the access category allocated to a person. For example,
this could be applicable to persons who only need to belong to an
access category for a limited period of time.
NOTE! If a person is not allocated any limited period of validity
(i.e. the access category fields From and To are empty), this means
that the person will always belong to the current access category.
1.
Highlight the current access category in the lower part of
the Editing person window.
User’s Guide ARX
Persons
• 46
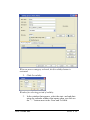
When an access category selected, the Set validity button is
activated.
2.
Click Set validity.
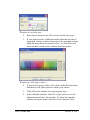
Window for selecting period of validity.
3.
In the window that appears, select the start- and end-date
using the calendar window that opens when you click on
the "…" buttons next to the From and To fields.
User’s Guide ARX
Persons
• 47
4.
Finally, enter the times in the appropriate fields and click
OK. The period of validity is now displayed in the list of
access categories attached to the person.
5.
To save the information and continue with a new window,
click Save & new. To save the information and close the
window, click OK. To close the window without saving the
input, click the Cancel button.
User’s Guide ARX
Persons
• 48
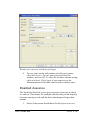
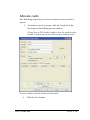
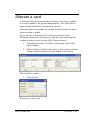
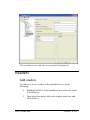
Allocate cards
The following steps show you how to attach an access card to a
person.
1.
To attach a card to a person, click the Cards tab in the
lower part of the Editing person window.
(If you have a PCI-reader simply swipe the card in order
to add a card to the person who you are working with.)
Person window with the Cards tab activated.
6.
Click the New button.
User’s Guide ARX
Persons
• 49
Window for a new card
7.
In the New card window, enter Card number, Card format
and a brief Description.
8.
To save the information and close the window, click OK.
To close the window without saving the input, click the
Cancel button.
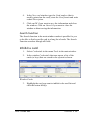
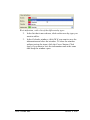
The card is now shown in the summary table in the columns Card
number, Card format, Owner, Description and Inhibited.
User’s Guide ARX
Persons
• 50
Card allocated to a person.
9.
It is now possible to print a card receipt and use this to
document that the person in question has received the card
and signed for it. Click on the button Receipt to do this.
User’s Guide ARX
Persons
• 51
Card receipt window.
10. In the Card receipt window that now opens is it possible to
choose if a custom card receipt template shall be used. If no
template is selected the ARX Client Software standard
template No text is used.
11. Select the option Print in the File menu (or, press Ctrl+P on
the keyboard).
Example of a card receipt (example with no additional text)
User’s Guide ARX
Persons
• 52
12. To print the card receipt on paper, click Print to open a
standard window for printer settings.
NOTE! It is possible to create special custom receipt templates. For
more information see chapter “Card Receipt Templates” on page
95.
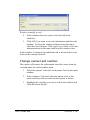
Modify Person Data
At any time, you can add, edit and remove data attached to a
person.
1.
Highlight a person in the Persons window.
2.
Click Modify.
See “Add a Person” on page 40 for more information on how to
edit and add data.
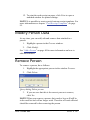
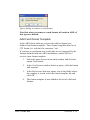
Remove Person
To remove a person, do as follows:
1.
Highlight the appropriate person in the window Persons.
2.
Click Delete.
Query dialog Delete person
3.
If you are sure that this is the correct person to remove,
click Yes.
NOTE! When you remove a person, their card or keys will still be
in the card list and will no longer work. Therefore all cards affected
should be removed before removing the person.
User’s Guide ARX
Persons
• 53
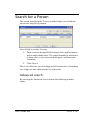
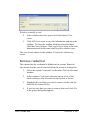
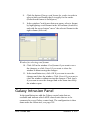
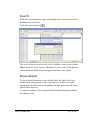
Search for a Person
The search function in the Persons window helps you to find one
person in a long list of persons.
Search field in window Persons
1.
Enter a text in the input field. Separate first- and last names
with a single blank space. The search function is insensitive
to letter case, so you can enter both upper- and lowercase
characters.
2.
Click Search.
This is so called free text searching and all occurrences of matching
text strings are now shown in the list of persons.
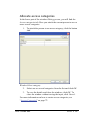
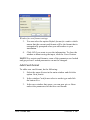
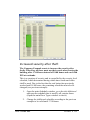
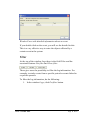
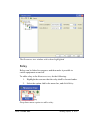
Advanced search
By pressing the Advanced Search button the following window
opens:
User’s Guide ARX
Persons
• 54
Advanced search in window Persons
Enter text in desired input fields and click Search.
The more fields that are completed, the more refined search will be
performed.
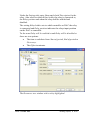
Administrate keys (requires the
Performer option)
If regular Assa keys are used, administration of these can be made
in the ARX client software. This is done by calling the stand alone
application Performer.
To be able to administrate keys, a licence is needed for Performer
and Import/Export. Permission to create multiple operators is also
required.
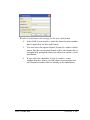
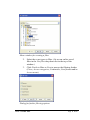
Hand out key
The following steps describe how to hand an Assa key out to a
person through ARX:
1.
Click the Credentials tab in the lower part of the Editing
person window. Click the Hand out key button. .
User’s Guide ARX
Persons
• 55
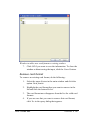
2.
The Performer application starts.
For an entire explanation of the following steps, 3 to 5, and the
functionality of Performer, refer to the Performer User guide.
3.
Start by choosing the System that is used.
User’s Guide ARX
Persons
• 56
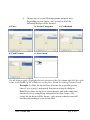
4.
Choose one of the key groups (in the example below, PK1
is selected). Then click “>” followed by “Next”.
User’s Guide ARX
Persons
• 57
5.
Choose one of the keys in the lower pane. Check the ”Print
receipt” if the person should sign (refer to the Performer
user guide for more information). Click the End button.
6.
Performer synchronises with the ARX client software and
shuts down. In the ARX client software an Assa key is
added in the Credentials tab.
User’s Guide ARX
Persons
• 58
Hand in key
The following steps describes what to do when a person returns a
key. (A complete description can be found in the Performer user
guide.):
1.
In the Persons window, click the Credentials tab and
highlight the key that is to be handed in. Click the Hand in
key button.
2.
Performer starts. The following dialog window appears:
3.
Check that the key that is handed in is checked in the list in
the lower pane.
Check Print receipt if this is desired. Finally, click End.
4.
If the key shall be inactivated, click Yes.
User’s Guide ARX
Persons
• 59
Performer synchronises with the ARX. Return to the ARX client
software to continue working. (The application needs a few seconds
to remove the key from the list.)
Performer Integration settings (option)
If the optional feature Performer is installed, administration of keys
can be done from ARX Client software.
In order for the synchronization with the Performer application to
work, ARX Client software needs the correct search path to
Performer. In Performer Integration settings on the System menu
you can edit these settings.
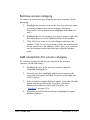
The status of the data synchronization between ARX and Performer
can be seen in this window. The synchronization to Performer and
from Performer must be running. If not, or if you experience other
problems with the synchronization, you can perform a restart by
clicking the Restart button.
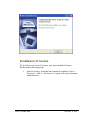
For installation of Performer, refer to “Installation of Performer” on
page 428.
See separate user guide for more information on Performer.
User’s Guide ARX
Persons
• 60
Additional settings for Persons
PIN Code Settings
Options for this menu option (in the System menu) are:
Window PIN code settings
User’s Guide ARX
Persons
• 61
•
Max number of equal digits, i.e. the number of digits that
are the same in a PIN code. (For example to stop codes like
"1111" or "2222" from being used.)
•
Maximum number of failed PIN attempts before card is
blocked, i.e. how many incorrect PIN attempts that the
system shall accept.
NOTE! The value 0 deactivates the feature, and no
maximum level is set and an indefinite number of attempts
are accepted.
NOTE! This counter will be reset to zero if any of the
card’s properties are modified between the attempts.
•
Block PIN from id number, defines if the system will inhibit
the possibility for a person to select a PIN code based on
their ID number
•
Invalid PIN codes, codes that are not allowed are written in
the input field Add invalid PIN and are saved with the
button Add.
Note that changes will only affect persons added after the changes
in PIN code settings.
Extended Fields for Person
There is a possibility to add more text fields in the Person window
(see “Persons” on page 39). The fields that are added here will later
be shown in the Person window, under a special Optional text
fields tab.
Window Extended fields for person
User’s Guide ARX
Persons
• 62
To add a new text field, do the following:
1.
Select the menu System in the main window and click the
option Extended fields for person.
2.
In the window Extended fields for person, click the button
New.
3.
In the dialog window that opens, enter the Name that you
want the field to have in ARX, and enter which External
Name that this field will have when you export or import
data. Default value (not mandatory) is the value that will be
automatically prompted for this field.
Window to add an extra text field
4.
In the menu dialog, click OK if you want to save the
information and close the window. Click Cancel if you
want to close without saving the information.
5.
Click OK if you want to save the information and close the
window. To close the window without saving the input,
click the Cancel button. Click Apply if you want to save the
information and at the same time keep the window open.
User’s Guide ARX
Persons
• 63
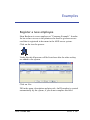
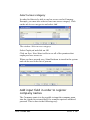
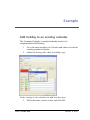
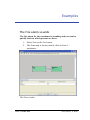
Examples
Register a new employee
Stina Karlsson is a new employee at ”Company Example”. In order
for her to have access to the premises she must be given an access
card that is registered in her name in the ARX access system.
Click on the icon for person:
Under this tab all persons will be listed one after the other as they
are added to the system.
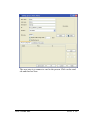
Click on New.
Fill in the name, description and pin code. An ID-number is created
automatically by the system, if you do not complete this field.
User’s Guide ARX
Persons
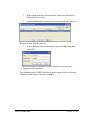
• 64
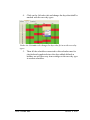
The next step is to connect a card to the person. Click on the card
tab and then on New.
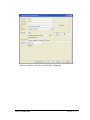
User’s Guide ARX
Persons
• 65
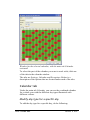
Fill in the card number and select Solid Prox in the window that
opens, because “Company Example” has touch-free EM-card
readers.
Click on Ok.
User’s Guide ARX
Persons
• 66
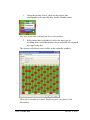
The card has now been allocated to the specific person.
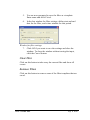
Alternatively:
If you as the administrator have access to a card reader (PCI-10
reader) you can automatically read in a card under the tab Person.
The following window opens:
Click on Yes.
User’s Guide ARX
Persons
• 67
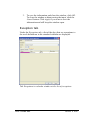
Select access category
In order for Stina to be able to use her access card at Company
Example, you must also select at least one access category. Click
on the tab Access categories and select Add.
The window: Select access category.
Select Employed and click on OK.
Click on Save. Now Stina is able to use all of the premises that
employees have access to.
When you have pressed save, Stina Karlsson is stored in the system
and can be seen in the list of persons.
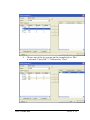
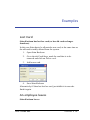
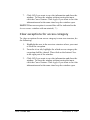
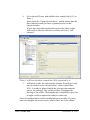
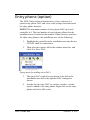
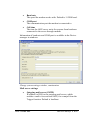
Add input field in order to register
company names
The Company wants it to be possible to input the company name
into the system for external staff, for example repairers and hired
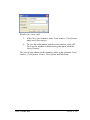
personal. This is done in the following way:
User’s Guide ARX
Persons
• 68
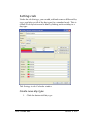
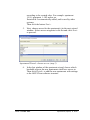
1.
In the main window System-menu, select the alternative
Extra field for person.
2.
In the window Extra field for person click on the icon New.
Window Extra field for person
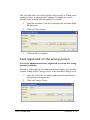
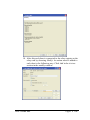
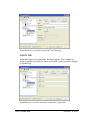
3.
In the dialogue screen that opens, type the following and
click OK:
External name is used for receipts and for exporting and
importing the database.
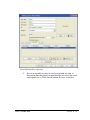
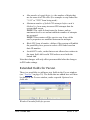
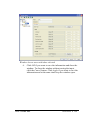
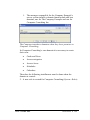
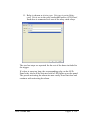
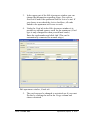
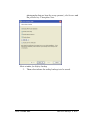
The administrator of ARX Access system is now able to write the
company name in the “person” window:
User’s Guide ARX
Persons
• 69
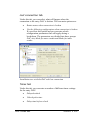
Person window with an extra field for Company
User’s Guide ARX
Persons
• 70
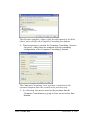
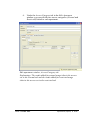
The administrator can now use the new extra field to
automatically show the company name on card receipts:
User’s Guide ARX
Persons
• 71
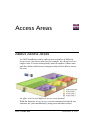
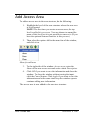
Access Categories
About Access Categories
An access category is a group of persons with shared security
privileges. An example of access categories could be IT-personnel
or Warehouse employees. It is possible for one person to belong to
one or more access categories.
The premise that every access category have access to is not
determined here, instead it is defined under Access areas, see page.
125.
The access categories’ timed accessibility to different parts of the
system is decided by the access schedule, connected to the access
category in affected area.
User’s Guide ARX
Access Categories
• 72
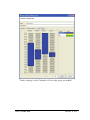
Schedule
Access
Janitor
IT-personell
Visitor
Access
Categories
The
access schedule decides the times during which different access
categories are admitted.
This section contains a step-by-step description showing how to:
•
Create an access category
•
Modify information attached to an access category.
•
Remove an access category
•
Give the standard validity for an access category
(The period of time for which the access card is valid)
•
Example from the Company Example
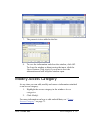
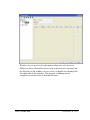
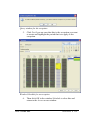
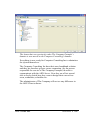
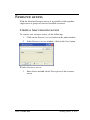
Create Access Category
1.
Click the button Access categories in the main window.
User’s Guide ARX
Access Categories
• 73
The window Access categories have a list over existing groups in
the system.
2.
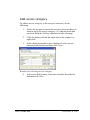
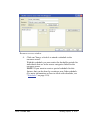
Click the New button at the bottom of the window.
Window Create access category
3.
Enter a Name, Description and choose Domain for the new
access category.
4.
It is also possible to add, remove or change the validity for
persons in this category.
5.
Click the Add button.
6.
Choose the person/s you want to add/delete for current
access category and press OK.
User’s Guide ARX
Access Categories
• 74
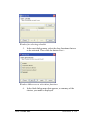
7.
The person/s is/are added to the list:
8.
To save the information and close the window, click OK.
To close the window without saving the input, click the
Cancel button. Click Apply if you want to save the
information and still keep the window open.
Modify Access Category
At any time you can add, modify and remove information attached
to an access category.
1.
Highlight the access category in the window Access
categories.
2.
Click Modify.
For more information on how to edit and add data, see “Create
Access Category” on page 73.
User’s Guide ARX
Access Categories
• 75
Remove Access Category
1.
Select the appropriate access category in the window
Access categories.
2.
Click Delete.
Query dialog for Delete access category
3.
If you are sure that this is the correct access category to
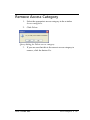
remove, click the button Yes.
User’s Guide ARX
Access Categories
• 76
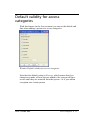
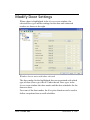
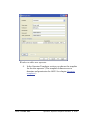
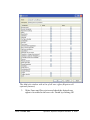
Default validity for access
categories
With this feature (in the System menu) you can set the default end
date when adding a person to a access categories.
Window Default validity for access categories
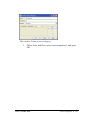
Note that the default setting is Forever, which means that if no
changes are made, all new persons added to the system will have
access until they are removed from the system – or if you add an
exception on a certain person.
User’s Guide ARX
Access Categories
• 77
Examples
Define access categories
Access categories are used in order to group together people who
need different access rights.
Hint: Normally the access categories should be named after a
function, rather than a place or area. For example IT personnel
instead of server room. (The authorities can then be increased by
more areas, without the name of the access category being
misleading.)
Company Example has several well defined groups that are
practical to keep separate: Employees, IT personnel, Visitors,
Consultants and Caretakers.
Repeat the following procedure to add access category groups:
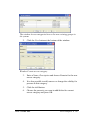
1.
Click on the Access category icon in the main window.
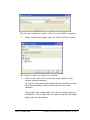
The access category window.
2.
Click on the button New at the bottom of the window.
User’s Guide ARX
Access Categories
• 78
The window Create access category
3.
Fill in Name and Description (not compulsory), and press
OK.
User’s Guide ARX
Access Categories
• 79
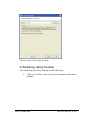
Credentials
About Credentials
You can in ARX assign a person one or more cards or keys. This
section contains a step-by-step description showing how to:
•
Allocate card
•
Inhibit card
•
Clear the card owner
•
Change card owner
•
Remove card
•
Administrate keys (option)
Keys only applies if the Performer option is installed. It
allows administration of keys in the ARX client software
and this information will be synchronized with the
Performer application.
•
Examples
User’s Guide ARX
Credentials
• 80
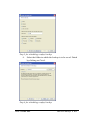
Allocate a card
A card can either be created at the same time as a person is added,
or it can be added to the system independently. The card will not
begin to function until it is allocated to a person.
Note that cards are normally not created on before hand, but when
when a person is added.
(If you use the card reader (PCI) you do not need to do the
following, instead you only have to swipe the card and accept the
reading in order to save it in the ARX Client software.)
1.
Select the alternative Card/Key in the menu Tools in the
main window.
2.
In the window Card/Key that opens, a list is shown with the
various cards/keys that have been added to the system.
The Card/Key window
3.
Click on New.
Window for a new card
User’s Guide ARX
Credentials
• 81
4.
In the New card window type the Card number (that is
usually printed on the card), state the Card format and write
a short Description.
5.
Click on OK if you want to save the information and close
the window. Click on Cancel if you want to close the
window without saving the information.
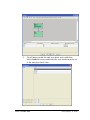
Search function
The Search function in the main window makes it possible for you
to be able to find a specific card in a long list of cards. The Search
Function searches through all fields.
Inhibit a card
1.
Select Credentials in the menu Tools in the main window.
2.
In the window Credentials that now opens, a list of the
cards (or keys) that are stored in the system is shown.
Window Cards
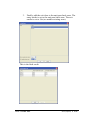
3.
Highlight the card you want to inhibit in the card list and
click the button Modify.
User’s Guide ARX
Credentials
• 82
Window to modify a card
4.
In the window that now opens, check the Inhibited
checkbox.
5.
Click OK if you want to save the information and close the
window. To close the window without saving the input,
click the Cancel button. Click Apply if you want to save the
information and at the same time keep the window open.
In the window Credentials the inhibited card is shown with a cross
in the in the column Inhibited.
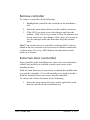
Change owner/card number
This option will remove the information about the owner from the
card and make the card available again
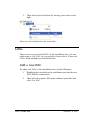
1.
Select the option Credentials in the menu Tools in the main
window.
2.
In the window Credentials that now opens, a list of the
cards (and keys) that are stored in the system is shown.
3.
Highlight the card that you want to edit in the card list and
click the button Modify.
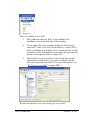
User’s Guide ARX
Credentials
• 83
Window to modify a card
4.
In the window that now opens, click the button Change
owner.
5.
Choose a new person from the list and click OK.
6.
Click OK if you want to save the information and close the
window. To close the window without saving the input,
click the Cancel button. Click Apply if you want to save the
information and at the same time keep the window open.
The card is now shown in the window Credentials without any
owner.
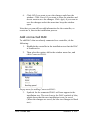
Clear owner
This option will remove the information about the owner from the
card and make the card available again
1.
Select the option Credentials in the menu Tools in the main
window.
2.
In the window Credentials that now opens, a list of the
cards (and keys) that are stored in the system is shown.
3.
Highlight the card that you want to edit in the card list and
click the button Modify.
User’s Guide ARX
Credentials
• 84
Window to modify a card
4.
In the window that now opens, click the button Clear
owner.
5.
Click OK if you want to save the information and close the
window. To close the window without saving the input,
click the Cancel button. Click Apply if you want to save the
information and at the same time keep the window open.
The card is now shown in the window Credentials without any
owner.
Remove credential
This means that the credential is hidden in the system. Removal
also means that the card is removed from the person it belonged to.
1.
Select the option Credentials in the menu Tools in the main
window.
2.
In the window Credentials that now opens, a list of the
cards (and keys) that are stored in the system is shown.
3.
Highlight the card that you want to remove in the card list
and click the button Delete.
4.
If you are sure that you want to remove this card, click Yes
in the query dialog that appears.
User’s Guide ARX
Credentials
• 85
Query dialog to remove a card
When you remove a card from the list in the window Credentials,
this card is also removed from the person associated with it.
Open key in Performer (option)
Administration of keys is handled by the Performer application. To
open a key in Performer, do the following:
1.
Select the option Credentials in the menu Tools in the main
window.
2.
In the window Credentials that now opens, a list of the
keys (and cards) that are stored in the system is shown.
3.
Highlight the key that you want to edit in the card list and
click the button Open key in Performer.
All key settings are described in the Performer user guide.
Other settings for Credentials
Card Format
With the function Card format you can change the settings for
existing card formats, add new formats or remove card formats.
•
Solid magnectic
Format for card that can be read by the Assa reader and are
programmed according to the Assa standard.
User’s Guide ARX
Credentials
• 86
•
Solid Prox
Format for touch free cards, EM-4102.
•
Mifare
Format for cards and a reader with higher security than
Solid Prox.
Modify format settings
To change the settings for a card format, do the following:
1.
Select the menu System in the main window and click the
option Card format.
Window Card format
2.
Highlight the card format that you want to change in the list
and click the button Modify.
User’s Guide ARX
Credentials
• 87
Window for card format settings
3.
You can select the option Default format for readers which
means that the current card format will be the format that is
automatically prompted when you add readers to your
installation.
4.
Click OK if you want to save the information. To close the
window without saving the input, click the Cancel button.
NOTE! For certain card formats, some of the parameters are locked
and greyed out. Locked parameters can not be changed.
Add Card format
To add a new card format, do the following:
1.
Select the menu System in the main window and click the
option Card format.
2.
In the window Card format select a reader type and click
the button New.
3.
In the new window that opens, you can now give a Name
and set the parameters for the new card format.
User’s Guide ARX
Credentials
• 88
Window Card format with settings for the new card format
4.
In the field System number, enter the shared system number
that is applicable for this card format.
5.
You can select the option Default format for readers which
means that the current card format will be the format that is
automatically prompted when you add a new reader to your
installation.
6.
If you select the checkbox Assign to readers, a new
window displays where you can choose to assign the new
card format to readers that are already in the installation.
User’s Guide ARX
Credentials
• 89
Window to add a new card format to existing readers
7.
Click OK if you want to save the information. To close the
window without saving the input, click the Cancel button.
Remove card format
To remove an existing card format, do the following:
1.
Select the menu System in the main window and click the
option Card format.
2.
Highlight the card format that you want to remove in the
list and click the button Delete.
3.
The card format now disappears from the list for valid card
formats.
4.
If you are sure that you want to remove this card format,
click Yes in the query dialog that appears.
User’s Guide ARX
Credentials
• 90
Query dialog to remove a card format
Note that when you remove a card format, all cards in ARX of
this type are deleted.
Add Card format Template
In the ARX client software you can also add (or import) predefined card format templates. These format templates must be in
CTI format (i.e. with the file extension *.cti).
If you have a card format or a reader that are not supported by the
formats included with the ARX installation, contact ASSA to
receive a new format template.
1.
Select the menu System in the main window and click the
option Card format.
2.
In the Card format window that now opens, click the button
Add template.
3.
In the file browser that now opens, step to the folder where
the template is stored, select the format template file and
click OK.
4.
The format template is now added to the list of valid card
formats.
User’s Guide ARX
Credentials
• 91
Examples
Lost Card
Stina Karlsson has lost her card (or her old card no longer
functions).
In this case Stina has to be allocated a new card, at the same time as
the old card is totally deleted from the system.
1.
Open Stina Karlsson.
2.
Go to the tab Cards/keys, mark the card that is to be
removed and click on Delete card.
3.
Add a new card.
4.
Save Stina Karlsson
Alternatively if Stina has lost her card, just inhibit it in case she
finds it again.
An employee leaves
Stina Karlsson leaves.
User’s Guide ARX
Credentials
• 92
The card only has to be cleared when Stina returns it. When a new
employee starts working at the Company Example the card is
already in the system and can quickly be re-used.
1.
Open the window Cards/keys and open the card that Stina
Karlsson has.
2.
Click on Clear Owner.
3.
Click on OK to confirm.
Card registered on the wrong person
You as the administrator have registered a card on the wrong
person by mistake.
Instead of removing the card and registering it again, you are able
to quite simply select Change owner in the window Change card.
1.
Open the Cards/Keys window and open the card that has
been given a wrong owner.
2.
Click on Change Owner.
User’s Guide ARX
Credentials
• 93
3.
Select the person who should have had the card from the
beginning.
4.
Click on OK to confirm.
User’s Guide ARX
Credentials
• 94
Card Receipt
Templates
About Card Receipt Templates
With the feature Card receipt templates the operator can create his
or her own receipt templates. The receipts based on these templates
can be used to facilitate the administration of cards.
What to include in a receipt template is up to the card administrator
to decide, but frequently used items are:
•
Issuer
•
Recipient of card
•
Card number
•
Date
•
Receipt/Signature
Additionally, it can be useful to include information regarding
applicable rules concerning card handling for the users.
User’s Guide ARX
Card Receipt Templates
• 95
If no template is created the ARX Client Software standard
template No text is used.
Example of the default receipt template (with no additional text)
User’s Guide ARX
Card Receipt Templates
• 96
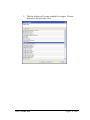
Add Card Receipt Template
1.
Select the menu Tools in the main window and click the
option Card receipt templates.
Window Card receipt templates
User’s Guide ARX
Card Receipt Templates
• 97
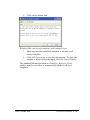
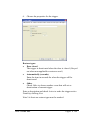
2.
Click on the button Add.
Window Edit card receipt template (with example text)
3.
Enter any text that should be included in the new card
receipt template.
4.
Click OK if you want to save the information. To close the
window without saving the input, click the Cancel button.
The standard information such as: Issued by, Receiver, Card
number and Received date is automatically added to all card
templates.
User’s Guide ARX
Card Receipt Templates
• 98
Example of the default receipt template (with no additional text)
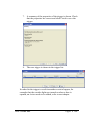
Additional information (fields)
It is possible to add additional information to card receipt
templates. This is done by entering specific field codes in the Edit
card receipt template window. The valid field codes are:
•
${ISSUED_BY}
•
${RECIPIENT}
•
${SENT_DATE}
•
${CARD_NUMBER}
•
${PERSON_EXTERNAL_ID}
•
${ACCESS_CATEGORIES}
The operator can also add all additional fields created for persons
with the Extended fields for person option (System menu). These
extended fields must be written in the receipt template window
User’s Guide ARX
Card Receipt Templates
• 99
exactly as they were created. Upper- and lowercase characters must
correspond to the original name. Example: ${company}
Card receipt template with field codes
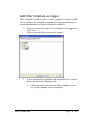
Edit Card Receipt Template
1.
Select the card receipt template you want to edit in the
Card receipt template window.
2.
Click on Edit.
3.
Make the desired changes and save these by clicking OK in
the Edit card receipt template window.
Remove Card Receipt Template
1.
Select the card receipt template you want to edit in the
Card receipt template window.
2.
Click on Remove.
User’s Guide ARX
Card Receipt Templates
• 100
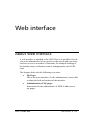
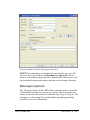
Web interface
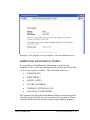
About Web Interface
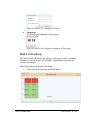
A web interface is attached to the ARX. Here it is possible for both
you as an administrator to have access to the system and your users
can have access to a number of functions, for example booking of
the laundry room, conference room or changing their card’s PINcode.
The chapter deals with the following two areas:
•
My Pages
This is the users interface. As the administrator you are able
to adapt the look and content of the interface.
•
Administration of My pages
Instructions for the administrator of ARX to add users to
my pages.
User’s Guide ARX
Web interface
• 101
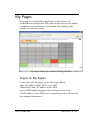
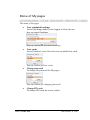
My Pages
My pages is a web interface for all users in the system. All
cardholders can change their PIN-codes to their access card, inhibit
a card that is lost and manage, for example, the booking of the
laundry or conference room.
My pages home page with the booking calender
Log in to My Pages
A user can reach My pages via the following address:
https://[IP address of the ARX server]:5002
(alternatively http://[IP address of the ARX
server]:8000/module/mypages if the certificate is not used)
(The IP address of the ARX server is normally given by the head of
the computer department.)
User’s Guide ARX
Web interface
• 102
Menu of My pages
The menu of My pages
•
Your scheduled bookings
Lists all bookings made by user logged in. Here the user
also can cancel bookings.
Pop-up window for scheduled bookings
•
Your cards
Lists all cards of a user. Here the user can inhibit lost cards.
Pop-up window forYour cards
•
Change password
To change the password for My pages.
Pop-up window for changing password
•
Change PIN code
To change PIN code for access card(s).
User’s Guide ARX
Web interface
• 103
Pop-up window for changing PIN code.
•
Language
To change the language of My pages.
Pop-up window for changing language of My pages
Make a booking
The users can book a booking object, conference rooms, washing
machines or study rooms for example, depending upon how the
system is arranged.
This is how the user makes a booking.
1.
Click on the desired day in the calander.
User’s Guide ARX
Web interface
• 104
Pop-up window for the booking function in My pages
2.
Choose a booking object and click on desired time slot.
3.
Accept by clicking Book.
Click Book to accept a booking
The user can then cancel a booked time by clicking on Your
scheduled bookings in the menu of My pages.
Administration of My Pages
Log in settings for My Pages
The following steps show you how to attach a user name and
password to a person. This information can then be used by the
person to log in to the web module My Pages.
1.
Click the My Pages tab in the lower part of the Editing
person window.
2.
Enter a suitable User name and a Password for the person
in question.
3.
To save the information and close the window, click on
OK.
User’s Guide ARX
Web interface
• 105
Person window with the My pages tab active
NOTE! Even though no credentials are entered, the user can still
log in to My pages with the card number and pin code. But as
soon as a user name and password is added in the dialog above, the
log in method using card number and pin code no longer function.
Messages (option)
The Messages feature in the ARX client software makes it possible
to broadcast messages to users in the system. These messages are
shown in the users personal web interface (My Pages) at log in. The
messages can for example be notifications regarding upcoming
activities or service information.
User’s Guide ARX
Web interface
• 106
With the Message option in the ARX Client software an operator
can create messages and decide during which period the message
should be valid.
To make the Messages functions accessible in the ARX Client
software a valid licence that covers this module must be installed.
The Messages menu option (Tools menu)
Create new message
To create a new message, do the following:
1.
Select the Messages menu option in the Tools menu.
Window All messages
2.
In the All messages window, click on the New button.
3.
In the Message window that now opens all settings for how
the message shall be distributed are visible.
User’s Guide ARX
Web interface
• 107
4.
You can enter a Message text, set the massage’s Priority
and decide during which period the message should be
active. It is also possible to set to which recipients the
message should be shown.
Window Create message
5.
Click OK if you want to save the information and close the
window. To close the window without saving the input,
click the Cancel button. Click Apply if you want to save the
information and at the same time keep the window open
User’s Guide ARX
Web interface
• 108
Modify a message
To change the settings for a message, do the following:
1.
In the window All messages, highlight the message that you
want to change and click Modify.
2.
In the window that now opens you can modify or change
the settings for the message.
3.
Click OK if you want to save the information and close the
window. To close the window without saving the input,
click the Cancel button. Click Apply if you want to save the
information and at the same time keep the window open.
Remove message
To remove a message, do the following:
1.
In the window All messages, highlight the message that you
want to remove and click Delete.
2.
If you are sure that you want to remove this message, click
Yes in the query dialog that now appears.
Query dialog Delete message
User’s Guide ARX
Web interface
• 109
Schedules
About Schedules
By using schedules in the ARX you can organize the access control
system to suit your requirements and solutions for security.
Schedules are used, for example, to restrict access to an office for a
period of time, and for managing access controllers and security
levels.
There are three different schedule groups in the ARX. These three
groups control:
•
Access, weekly schedule that determines which times that
admittance shall be given to the access system.
•
Security levels, weekly schedule that decides which level
of security (code, card or code plus card etc) that is needed
for a certain point in time.
•
Other settings, weekly schedule that determines during
which times that relays and operation modes (for example
the exit button) shall be active.
User’s Guide ARX
Schedules
• 110
Schedule
Access
Janitor
IT-personell
Visitor
Sequrity
Access
Categories
****
+ ****
+ + ****
Door types
Other
The picture shows the three different schedules that control access,
security level and the additional that control relays and the doors’
operation modes
In order to work with one of the different schedule groups, click the
Schedule button in the main window.
In the Schedule window that now opens, there are three tabs, one
for each of the schedule groups.
User’s Guide ARX
Schedules
• 111
Window Schedule with tab Access activated
User’s Guide ARX
Schedules
• 112
Access schedule
Access schedules are used to restrict In- and Out rights for access
categories. This means that these schedules only control doors with
entry-and-exit readers.
In this schedule group, there is also a predefined schedule, Always
in and out, that gives entry and exit rights every day, and all day.
Window for access schedule
User’s Guide ARX
Schedules
• 113
Security level schedule
Schedules for security levels are used to control security conditions
for Entry and Exit. In this group, there are two predefined
schedules, Always card and Always card + PIN.
The predefined options are: Dual cards + PIN, Dual cards, Card +
PIN, Card or Blocked.
NOTE! You can only have one security level active at any one
time. In other words, you must select either the option Card or the
option Card + PIN for a specific period.
NOTE! The Dual credentials alternative does NOT apply during
alarm activation or deactivation, which always can be done with
only one card (and PIN if this security level is active)
Window for security level schedule
User’s Guide ARX
Schedules
• 114
Other schedules
The group for additional schedules is used to control relays and
operation modes (for doors and readers) in the system.
For example, to control during which times the outputs of a relay
are active, or during which times one is able to keep a door open
(operation mode unlocked door for a specific door).
The Additional schedule is used when defining door types.
This schedule controls when the different functions of the system
shall be On or Off.
Window for an Additional schedule
(For more information about calendar settings and day types
Weekday/Weekend, see “About Calendar” on page 319.)
User’s Guide ARX
Schedules
• 115
Add Schedule
To add a schedule, do the following:
1.
To select a schedule group, click one of the tabs in the
window Schedule.
2.
To add a new schedule to this group, click the button New.
3.
In the step-by-step window that now opens, select a
calendar by using the drop-down menu Calendar. Then
click the button Next>.
4.
Give the schedule a name by writing a text string in the
field Name. And write a short description of the schedule in
the field Description. (Not mandatory, but a good aid when
you are using the schedule for a certain function.)
Window for a new schedule
User’s Guide ARX
Schedules
• 116
5.
To the right hand side of the window, select one of the
schedule options (for example In and Out).
6.
Define the period of time that this schedule will be valid.
To do this, use the mouse cursor to drag the time bars for
the start- and stop times (for example from 7:00 AM to
6:00 PM on the Weekday bar).
Optionally, you can select all day by double-clicking in an
empty time bar (Weekday or Weekend).
To define an empty period, you can also double-click in a
similar way. For example, to quickly define the entire "gap"
in the valid period for the schedule, double-click above or
below a period that is already defined.
Select a time period (from the window Schedule)
7.
The time period you have chosen is now filled with the
colour for this schedule.
8.
If you want to adjust a period, position the mouse cursor at
the top or bottom edge of the time bar and drag it up or
down to add the start- or stop time. If you want to move the
User’s Guide ARX
Schedules
• 117
entire period up or down, move the mouse cursor to the
middle of the coloured time bar and drag-and-drop the
entire period. When you are finished with the schedule
settings, click Finish.
Modify Schedule
To modify a schedule, do the following:
1.
To select the current schedule group, click one of the tabs
for the main window Schedule.
2.
To edit the schedule, click the button Modify.
It is possible to adjust the start- and stop time for the periods in the
schedule by either changing them with the mouse cursor or by
double-clicking the selected period.
If you double-click a period, the window Edit period opens. In this
window, you can, for example, enter a new start- or stop time, or
remove the entire period with the button Delete.
Note that the shortest possible period is 15 minutes.
Window Edit period for changing or removing a period
User’s Guide ARX
Schedules
• 118
Remove Schedule
To remove a schedule, do the following:
1.
To select a schedule group, click one of the tabs in the main
window Schedule.
2.
To remove the schedule, click the Delete button.
Query dialog for deleting a schedule
3.
If you are sure you want to remove the schedule, click Yes.
User’s Guide ARX
Schedules
• 119
Examples
Change the time for the exit button
All exterior doors have an exit button. This shall be active up
until 17.00 hours instead of 18.00 hours.
This is accordingly an additional schedule, which is used for exit
buttons on doors and other operation modes that apply to doors.
1.
Open the main Schedule window, go to the tab Other and
open the schedule that is used by all exterior doors.
2.
Click and pull down the lower time limit until 17 is
showing instead of 18. Close by clicking on Finish.
User’s Guide ARX
Schedules
• 120
Increased security after theft
The Company Example wants to increase the security after
thefts. Therefore all users must use their cards when leaving the
building after 17.00 hours instead of 18.00 hours and card with
PIN at weekends.
This is a question of security and is controlled by the security level
schedule, which determines during which times cards and codes
shall be used. Due to the fact that the exit button has previously
worked until 18.00 hours, the remaining schedules must also be
changed (see previous example).
1.
Open the main Schedule window, go to the tab Additional
and open the schedule that is used by all exterior doors.
(Open the main Door Types window to check).
2.
Change the Additional schedule according to the previous
example to be valid until 17.00 hours.
User’s Guide ARX
Schedules
• 121
3.
Then go to the tab Security level and open the schedule that
is used for all exterior doors and click on New.
4.
Press Next in the window that is shown. Click card+PIN
and mark the whole column Holiday.
User’s Guide ARX
Schedules
• 122
5.
Click on Card and mark 8-17 in the column Weekday, click
on CARD+PIN and double click the weekday column before
and after where you marked for Card. Finish by naming the
new schedules and press Finish.
6.
Then open the main window Door Types and open Exterior
doors.
User’s Guide ARX
Schedules
• 123
7.
Change the schedule for the Exit button and select the
additional schedule that you recently created, to set the exit
button only to work between 8-17.
8.
Finally change the schedule for the Security level Out. Select
the security level schedule that you recently created.
9.
This is how the installation now looks for the changed door
type, exterior door. Click on OK.
User’s Guide ARX
Schedules
• 124
Access Areas
About Access Areas
An ARX installation can be split up into a number of different
access areas. An access area can, for example, be a floor level or a
single room. You can subsequently attach a number of door units
and also define which access categories that will be able to access
the area.
An office with several different access areas defined.
With the function Access areas, you can construct the logical tree
structure for your installation by using areas and door access
User’s Guide ARX
Access Areas
• 125
controllers (DAC). If the Domain option is installed, the logical tree
structure is constructed for each domain.
A door must be connected to an access area in order to be used in
the system. A free standing door that is not connected an access
area will not be able to be opened with an access card.
By using the Access areas you can also link different access
categories to one or more areas.
The different parts that you work with in the area structures are:
•
Areas (Folder symbol)
•
Doors (Door symbol)
An access area can have several underlying access areas. But a
single door can only belong to one access area.
The following optional features exist:
•
Floor levels
(Requires the optional feature Elevator)
•
Domains
Domains are a comprehensive level to access areas. In
order to decentralise administration, access can be divided
into several domains. (Requires the Domain option)
User’s Guide ARX
Access Areas
• 126
Menu choices (areas)
In the window Access areas, there are a number of extra menu
choices in order to simplify the building and customisation of the
area structure.
Menu options in the window Access areas
These are, in order of appearance, and from left to right:
Add, depending on which level you are located in the tree
structure, this menu option can add an Area or a Door
Remove, removes the selected object
Sort, places all objects in the tree structure in alphabetical
order.
Expand, displays the whole tree structure for the selected
folder area.
Show doors, option to show or hide all doors in the
structure.
Search, use this option to search and manage available
access categories or registered users. Every category or
person that is registered is also shown with yellow markers
in the area tree structure.
The menu option Add and Remove can also be reached by rightclicking with the mouse on the selected object in the area tree
structure.
User’s Guide ARX
Access Areas
• 127
Add Access Area
To add an access area in the area structure, do the following:
1.
Highlight the level of the area structure where the new area
is to be located.
NOTE! The first time you create an access area, the top
level is called Access areas. You can choose to amend the
name of this level but it is not possible to remove it. (If you
have the optional feature Domains is this you see.)
2.
Then select the option Add in the menu bar of the window,
and click Area.
Menu for add area
3.
To the right side of the window Access areas, enter the
Name of the new access area and write a short Description.
4.
Click OK if you want to save the information and close the
window. To close the window without saving the input,
click the Cancel button. Click Apply if you want to save the
information and at the same time keep the window open to
continue adding new information.
The access area is now added to the area tree structure.
User’s Guide ARX
Access Areas
• 128
Window Access areas with information about the selected area
When you have selected an access area in the area tree structure on
the left side of the window Access areas, its details are displayed in
the right side of the window. The process of adding access
categories to access areas is described below.
User’s Guide ARX
Access Areas
• 129
Add access category
To add an access category to the area tree structure, do the
following:
1.
Select one or more areas in the area tree structure that you
want to apply the access category. (To choose more than
one area, keep the Ctrl key depressed while selecting)
2.
Click the button Add on the right side of the window or
right click.
3.
In the dialog menu that is now displayed, select access
category from the list and then click Next>.
Window for selecting access category
4.
In the next dialog menu, select the schedule from the list
and then click Next>.
User’s Guide ARX
Access Areas
• 130
Window for selecting schedule
5.
In the next dialog menu, select the door functions that are
to be activated. Then click the button Next>.
Window Add access to select door functions
6.
In the final dialog menu that appears, a summary of the
choices you made is displayed.
User’s Guide ARX
Access Areas
• 131
Summary of selections done
7.
If the summary is correct, click Finish. If you are not
satisfied, go to the previous menu with the button <Back
and add your selections.
On the right side of the window Access areas, you can now see that
the access category has been added. Note that the access category
will only be valid for this particular access area, it will not be
inherited by access areas that are located below it.
Click OK if you want to save the information and close the
window. To close the window without saving the input, click the
Cancel button. Click Apply if you want to save the information and
at the same time keep the window open.
User’s Guide ARX
Access Areas
• 132
Window Access areas with a highlighted access category
For more information on how to work with access categories, see
“Access Categories” on page 72.
Door functions
Below is a description of the different door functions that you can
add to access categories.
Disabled
The door function Disabled gives a person extra time to check inand out. This means, for example, that the time period elapsing
between entering a code and the door unlocking are longer than
normal.
Note that in addition to activate this door mode for areas, you must
also allocate the corresponding disabled clearance for a person, in
the Person window.
User’s Guide ARX
Access Areas
• 133
Lock/unlock allowed
This door function gives a person the right to open a door for a
certain period of time.
To open a door via the reader:
Press key 2A – swipe card – enter the number that defines the
period the door is to be left open – confirm with A. The numbers 1
to 23 are equivalent to hours, and the numbers 01 to 059 are
equivalent to minutes.
Example 1: To keep a door open for one hour:
Press key 2A – swipe card – press 1 – press A.
Example 2: To keep a door open for 45 minutes:
Press key 2A – swipe card – press 045 – press A.
Example 3: To permanently open a door:
Press key 2A – swipe card – press A.
A buzzer sounds when the door is permanently unlocked.
NOTE! If a person only have Lock/unlock privilege, the code (to
open) is changed to:
Press key A – swipe card – enter time period – press A.
If you wish to cancel the door being kept open before the door
control schedule or opening time has expired:
Press key 2B – swipe card.
NOTE! If a person only have Lock/unlock privilege, the code (to
cancel) is changed to:
Press key B – swipe card.
If you wish to lock a door being kept open by a door control
schedule:
Press key 3A – swipe card.
To restore the current door controller schedule:
Press key 3B – swipe card.
NOTE! To be able to unlock a door with card, the door operation
mode “Unlock with card” for this door type be active.
User’s Guide ARX
Access Areas
• 134
NOTE! To be able to lock a door with card the door operation
mode “Lock with card” for this door type be active.
NOTE! If you wish to cancel the key sequence, finish by pressing
key B (instead of confirming with key A).
Alarm manoeuvre allowed
Gives users in the access category the right to activate an alarm for
an area via the reader, using the access card and the PIN code.
The alarm is switched ON in the following way:
Press key B – swipe card – enter PIN code
Disarm manoeuvre allowed
Gives users in the access category the right to deactivate an alarm
for an area via the reader, using the access card and the PIN code.
The alarm is switched OFF in the following way:
Press key A – swipe card – enter PIN code.
Caretaker access
Caretaker access can be used, for example, when premises are
being hired out and a person needs to be able to reset a reader so
that it functions as a coded door lock for a limited period of time.
The selected door code will cease to work when the access category
validity for the person ceases or when the code lock is manually
cancelled via the reader.
A temporary code is activated via the reader in the following way:
Press key A – swipe card – enter code (user defined, e.g. 8567)
To deactivate a temporary code via the reader:
Press key B – swipe card
NOTE! If a person have more than one door privilege, the codes
for caretaker access are changed to 1A (activate) and 1B
(deactivate) respectively.
User’s Guide ARX
Access Areas
• 135
Remove access category
To remove an access category from the area tree structure, do the
following:
1.
Highlight one or more areas in the area tree structure where
you want to remove the access category. (Keep the
keyboard's Ctrl-key depressed to highlight more than one
area.)
2.
Highlight the access category you want to remove and click
the button Remove on the right hand side of the window.
3.
Click OK if you want to save the changes and close the
window. Click Cancel if you want to close the window and
do not want to save the changes. Click Apply if you want to
save the changes and at the same time keep the window
open.
Add exceptions for access category
To create exceptions for an access category in the area tree
structure, do the following:
1.
Highlight the area in the area tree structure that the
exception shall apply to.
2.
From the tab Area, highlight which access category the
exception shall apply and click Exception in the right part
of the window.
3.
In the Schedule-window that now opens, select the schedule
option and the period for the exception. (For more
information on how to work with schedules, see
“Schedules” on page 110).
4.
When the period for the exception is highlighted a query
window is shown.
User’s Guide ARX
Access Areas
• 136
Query window for the exception
5.
Click Yes if you are sure that this is the exception you want
to create and highlight the period that is to apply to the
exception.
Window Schedule for an exception
6.
Then click OK in the window Schedule to close this and
return to the Access areas-window.
User’s Guide ARX
Access Areas
• 137
7.
Click OK if you want to save the information and close the
window. To close the window without saving the input,
click the Cancel button. Click Apply if you want to save the
information and at the same time keep the window open.
NOTE! When an exception is created this will be indicated in the
Access areas- window with an asterisk ( * ).
Clear exceptions for access category
To clear exceptions for an access category in area tree structure, do
the following:
1.
Highlight the area in the area tree structure where you want
to clear the exception.
2.
From the Area-tab, highlight for which access category the
exception shall be cleared. Then click on the button Clear
in the right part of the window.
3.
Click OK if you want to save the information and close the
window. To close the window without saving the input,
click the Cancel button. Click Apply if you want to save the
information and at the same time keep the window open.
User’s Guide ARX
Access Areas
• 138
Add Door
NOTE! To be able to add a door in the area structure, a
corresponding DAC must be defined in the Installation view. (For
more information on how to add a DAC, see “Add connected
DAC” on page 222.)
To add a door in the area tree structure, do the following:
1.
Right click on the level in the area tree structure where the
door shall be located under, and choose Add.
2.
Then select the option Add in the menu bar of the window,
and click on Door
Menu to add door
3.
In the window Choose DAC that is now shown, select one,
or more doors, that are to be added and click OK.
User’s Guide ARX
Access Areas
• 139
Window Choose DAC
4.
In the Door type window that now is shown, choose which
type of door it is, or create a new door type (see chapter
“Create new Door type” on page 166) and then click OK.
Window Door type
5.
The door is now added to the area tree structure.
User’s Guide ARX
Access Areas
• 140
Window Access areas with door selected
6.
Click OK if you want to save the information and close the
window. To close the window without saving the input,
click the Cancel button. Click Apply if you want to save the
information and at the same time keep the window open.
User’s Guide ARX
Access Areas
• 141
Modify Access Area Settings
To change the settings for an access area, do the following:
1.
Highlight the access area in the area tree structure.
2.
In the upper right side of the window you can change the
Name of the area and edit its Description.
3.
On the right side of the window the settings for the access
area are shown. The settings with checkboxes (e.g.
Lock/unlock) can be altered directly in the Access area
window.
4.
Each of the rows corresponding to an access category can
be deleted with the Remove button.
5.
Click OK if you want to save the changes and close the
window. Click Cancel if you want to close the window
want saving for the changes. Click Apply if you want to
save the changes and at the same time keep the window
open.
User’s Guide ARX
Access Areas
• 142
Modify Door Settings
When a door is highlighted in the Access areas window, the
selected Door type and the settings for the door and connected
readers are shown to the right.
Window Access areas with door selected
The door modes for the highlighted door are associated with which
type of door (Door type) this is. Under the tab Door types in the
Access area window the door modes and the door schedules for the
door are show.
For some of the door modes, the Exception function can be used to
define exceptions from overall schedules.
User’s Guide ARX
Access Areas
• 143
Remove Access Area or Door
To remove an access area or a door from the area tree structure, do
the following:
1.
Highlight the object that is to be removed.
2.
Then select the menu option Remove in the window menu
bar.
Copy and Move Access Area or
Door
By right-clicking with the mouse on an object in the area tree
structure, you can get three extra options that make it easier to copy
or move an object in the area tree structure:
•
Cut (Ctrl+X)
•
Copy (Ctrl+C)
•
Paste (Ctrl+V)
Popup menu for Cut, Copy and Paste
User’s Guide ARX
Access Areas
• 144
It is also possible in the area tree structure to highlight an object,
for example a door, and then drag it with the mouse to a new place
in the area tree structure. (The result is the same as if you first cut
the object and then pasted it into the new location in the tree
structure)
Control Function
There is a control function for access areas that has been created to
simplify the work required for managing areas and doors, and their
different settings and options.
If you highlight several objects in the left hand side of the window
Access areas (e.g. two different access areas), then the different
options and choices that have been made for the two objects are
shown on the right hand side of the window. To emphasize any
discrepancies, all settings that differ between the selected areas are
in this summary greyed out.
Floors (option)
If the optional feature Elevator is installed the operator also can add
floor levels to the area structure. With this function, you have the
possibility in the access areas window to manage access to the
floors the elevator serves.
To add a floor in the Access area tree structure, do the following:
1.
Highlight the level in the area tree structure where the floor
shall be located under.
2.
Then select the option Add in the menu bar of the window,
and click Floor
User’s Guide ARX
Access Areas
• 145
Menu to add floor
3.
In the window Choose floor that now is shown, select one,
or more floors, that are to be added and click OK.
4.
Next step is to choose door type for the floor(s), in the
Door type window that now is shown, choose which type of
door it is and then click OK.
5.
The symbol for the new floor is now added to the area tree
structure in the left side of the Access areas window.
Shown to the right side are the fields Name, Description
and the tab Door type with settings for the door.
There are two icons symbolizing floors in the access area tree
structure. This to make it easier to determine if the floor is linked to
a floor-specific DAC, or not.
Floor icons, With DAC (left), No DAC (right)
When a floor is highlighted in the Access areas window, the
selected Door type and the settings for the door and connected
readers are shown to the right.
The door modes for the highlighted door are associated with which
type of door (Door type) this is. Under the tab Door types in the
Access area window the door modes and the door schedules for the
door are show. (The number of alternatives on the Door type tab
differs for floors with DAC and for floors without DAC.)
For some of the door modes, the Exception function can be used to
define exceptions from overall schedules.
User’s Guide ARX
Access Areas
• 146
The Door type tab for floor with DAC
The Door type tab for floor without DAC
User’s Guide ARX
Access Areas
• 147
Domains (option)
The Domains option allows you to edit Domains in the System
menu.
Domains act as a superior level to the Access areas and can be
useful if your company has more than one office and a
decentralized administration of ARX access control system for each
office is desired.
Add domain
To add a new domain, do the following:
1.
Select the System menu in the main window and choose the
Domains option..
The Domains window.
2.
In the Domains window, click New.
The add domain window
3.
Write Name and Description and click OK.
4.
To edit the name and description on already created domains,
click Modify in the main window.
To remove domains, click Delete in the main window.
User’s Guide ARX
Access Areas
• 148
Examples
A party during the evening – altered access
In the following example the employees are going to have a party
on Saturday the 1st of October. They are therefore permitted to
have access to the main entrance between 18.00 hours and 23.00
hours on that day. Therefore an exception has to be made from the
access regulations that have been defined for the access areas.
1.
Begin by selecting Shell protection and employee as above.
Click on Exception. The Schedule window opens.
User’s Guide ARX
Access Areas
• 149
2.
Go to the correct week and double-click on the relevant date.
The following window is shown.
3.
Click on Yes. Then add the rights of passage for entering and
leaving the building between 18.00 hours and 23.00 and out
at other times.
User’s Guide ARX
Access Areas
• 150
4.
Click on Ok.
The asterisk shows that there is an exception for this access
category in this access area.
Delete the exception
To delete the exception click on Clear.
User’s Guide ARX
Access Areas
• 151
See which access areas a person has access
to
In order to see in which areas a person or access category has
access, you can use the search function. Click on this symbol:
In the window that opens and under the tab, User, you can mark a
person and directly in the access tree see where they have access
and according to which schedule.
User’s Guide ARX
Access Areas
• 152
See in which access areas an access
category has access
In order to easily see where a person or access category has access
you can use the search function. Click on this symbol:
In the window that opens and under the tab access categories you
can mark a category and see directly in the area tree where this
category has access and according to which schedule.
The Company Example configures the
access areas
The picture shows the access areas for the Company Example:
User’s Guide ARX
Access Areas
• 153
The Company has 3 floors, a storage room, a shop and an office.
Explanation and comments to the configuration of the access areas
of the Company Example:
•
Floor 3's layout:
All the different functions in the office on floor 3 are in
separate access areas. The entrance door and common areas
are basic access areas for all employees.
User’s Guide ARX
Access Areas
• 154
•
Tree structure
The tree structure can be used to separate different floors or
to visually show that an area has an underlying access area.
(Access must be set separately for all access areas,
independent of its level on the tree structure).
•
Separate access areas for top security
Always create separate access areas for the premises that
require a higher level of security, for example a server
room or storage room.
•
Begin with many access areas
By defining many access areas during configuration it is
possible to have a greater flexibility when deciding more
exact access rights for the company’s employees.
•
Explanation of the door controls called Buying time:
The doors hat are called, for example, “Buying time
reception” do not have any locking function but they are
just readers that can delay activation of the alarm.
•
Explanation of the Elevator access area
By delegating the doors that are connected to the elevator
doors to their own access area, it is possible to decide
which access categories are permitted to use the elevators.
•
Explanation of the Entry phone access area
By delegating the door function for the entry phones to
their own access area, it is possible to decide which group
of users are exempt from using the entry phones when
entering the building.
User’s Guide ARX
Access Areas
• 155
The Company Example installs an elevator
When an elevator is installed in the access system, a specific
hardware installation, and several other measures must be taken in
the access area tree.
A RCE-16 card must be installed in connection to the elevator. A
card reader must also be installed in the elevator. The Company
Example will also have a door function connected to floor 1 for
increased security.
The Elevator option must be installed at the configuration of the
ARX Access system. The configuration starts in the installation
tree:
1.
Mark the control units in the installation tree that the
elevator’s RCE-16-card is connected to.
2.
Then add the RCE-16 Card. (An RCE-card must be
connected to every elevator.)
Add a RCE-card
3.
Under the tab Properties, name the RCE-16-card and mark
the relays that are to be connected as ”Elevator”.
User’s Guide ARX
Access Areas
• 156
The Installation tree with the RCE-16 card marked
4.
Afterwards “Elevator” must be added to the installation
tree. Select add and click on Elevator.
Menu to add Elevator
5.
Under the tab elevator properties, select if the elevator
should be Reader controlled or Relay controlled.
User’s Guide ARX
Access Areas
• 157
The Installation tree with Elevator marked (The Elevator property
tab)
The difference between the Mode-alternatives, Reader controlled
and Relay controlled elevator are the following:
•
Reader controlled elevator means that the visitor first has to
press the button for the relevant floor and then swipe their
card.
If they do not have the authority for the chosen floor, the
reader will show a red alert and the elevator will not move.
•
The Relay controlled elevator means that the visitor first
swipes their card, then the system will light up the
lamps/buttons for the floors the visitor is permitted to visit
(has the authority to access).
When an elevator is added to the Installation tree, several
accompanying floors are automatically created based upon the
number of relays specified as elevator relays under item 3.
User’s Guide ARX
Access Areas
• 158
6.
Go to the tab Floors, and add the door control dac-9 (9) to
floor 1.
Also check the ”open elevator door”, which means that the
door unlocks when you have a granted access on the
elevator reader.
If you also want that a granted access on the floor reader
will result in that the elevator is called, check the ”call
elevator”.
Floor 1 will have the door control dac-9(9) connected to it.
7.
Add an in-reader for entering the elevator from floor 1 and
an out-reader for the elevator doors’ door control (dac9(9)). A reader is placed inside the elevator that controls
access for entering. The reader on floor 2 manages the
leaving of the office. (During the day it should be open, but
at night a card is required in order to come out).
Now all configurations in the Installation tree are ready. It is now
time to configure the access areas, where floors are to be added.
User’s Guide ARX
Access Areas
• 159
8.
In the access areas we select a new access area to be called
”The elevator”.
9.
Then select the alternative Add in the window’s menu bar,
and click on Floor.
The Menu for adding a floor
10. The next step is to select the door type for the floor. In the
Door type window that opens mark ”Interior door”.
11. The symbol for the new floor is now added in the access
area tree to the left. Observe the symbol that shows that a
door control is connected to floor 1.
This is how it looks when all the floors have been added:
The Symbol for floor 1 shows that a door control is connected to
the elevator door on floor 1.
Floor 1 will have the same operation modes as other doors in the
system, whilst the other floors will have a limited number of
functions.
The Company Example introduces domains
The Company Example has decided to lease unused premises to
Computer Consulting Inc.
User’s Guide ARX
Access Areas
• 160
1.
The manager responsible for the Company Example’s
access system installs a domain function and adds two
domains, one for The Company Example and one for
Computer Consulting Inc:
The Company introduces domains when they lease premises to
Computer Consulting.
In Computer Consulting’s own domain it is necessary to create
their own:
•
Cards and Users
•
Access categories
•
Access Areas
•
Schedules
•
Calendars
Therefore the following installments must be done when the
domain is created:
2. A new role is created for Computer Consulting (System –Roles).
User’s Guide ARX
Access Areas
• 161
The Role for Computer Consulting has the read rights to the
hardware installation, in order to be able to add its own access
areas. The Company retains the responsibility for the installation
(and therefore owns both the read and write rights.)
3. A new operator template is now created for Computer
Consulting Inc, which is only valid for this domain (SystemOperator templates).
User’s Guide ARX
Access Areas
• 162
The Operator template, whose rights are determined by the Role
above, only valid for the Computer Consulting Inc domain.
4. Then an operator is created for Computer Consulting. (System –
Operator), which then can continue with the remaining
configuration of the Computer Consulting’s domain.
The Computer Consulting’s new operator is attached to the
operator template that was created at the previous step.
5. As a last step, the access areas for the premises that the
Computer Consultants are going to lease are moved to their
domain.
User’s Guide ARX
Access Areas
• 163
The Annex that was previously under The Company Example’s
domain is now moved to the Computer Consulting’s domain.
Everything is now ready for Computer Consulting Inc to administer
the system themselves.
The Computer Consulting Inc have their own broadband solution
and they are therefore given a secure connection, (by the person
responsible for service at The Company Example) in order to
communicate with the ARX Server. Now they are all set up and
able to freely decide how they want to design their own access
areas, authorities, schedules etc.
The administrator of The Company will not see any difference in
the ARX Client software.
User’s Guide ARX
Access Areas
• 164
Door types
About Door types
Templates are defined door types, which are used to decide the specific
security levels and operation modes that are assigned to a specific door.
The characteristics of the door types are decided partly by the
security schedule – what is required for the door to be opened, for
example, code and card, and partly by additional schedules that
control the door’s operation mode (for example the exit button, or
the possibility of setting the door unlocked).
User’s Guide ARX
Door types
• 165
Scheman
Access
Janitor
IT-personell
Visitor
Sequrity
Access
Categories
****
+ ****
+ + ****
Door types
Other
The Security schedule and the additional schedules determine
during which times a certain security solution applies and when a
specific operation mode is active.
Door types are used in an access area. When a door is added to an
access area, it is necessary to choose a door type in order to
determine how the door will work.
In addition to the default door types Interior and Exterior door it is
possible to create additional door types that are customized for a
certain installation.
Create new Door type
To create a new door type, do the following:
1.
Click on the Door type button in the main window.
2.
In the Door types window, click on the New button.
User’s Guide ARX
Door types
• 166
Window Door Types
3.
In the separate window that now opens, set the desired door
and reader settings for the new door type.
Window for Door Type
User’s Guide ARX
Door types
• 167
4.
For each parameter for a new door type, a default value is
shown. This value is changed by choosing a new schedule
in the menu.
5.
Back in the Door type window, click OK if you want to
save the changes and close the window. Click Cancel if you
want to close the window want saving for the changes.
Click Apply if you want to save the changes and at the same
time keep the window open.
For all door parameters except two, is it possible to choose between
the alternatives: Always off, Always on or any of the Other
schedules that are available in the system. (For more information on
how to work with schedules, see “Schedules” on page 110.)
For the two door mode parameters Security level in and Security
level out you can choose between the different security schedules
available in the system. (For more information on how to work with
schedules, see “Schedules” on page 110.)
A description of functions
(A schedule determines during which times a function is valid):
•
Unlocked
When the door shall be unlocked.
•
Buzzer
On and off. After a certain amount of time (according to the
settings in the installation tree) a warning signal sounds if a
door is open.
•
Automatic lock daytime
When the door should be locked with both the ordinary and
the motor lock.
•
Buy alarm time
When it is possible to buy alarm time at the door. Note!
Does not apply to Galaxy alarm zone.
•
Unlock with a card
When it is possible to set the door unlocked by using a card
in the reader.
User’s Guide ARX
Door types
• 168
•
Lock with a card
When it is possible to lock the door with a card (on the
condition that the door type is installed to be unlocked
during some time of the day) – or that it is possible to
unlock the door.
•
Opening switch
When the exit button should be activated.
•
Level triggered exit button
Normally the door is unlocked for 6 seconds, with a level
triggered exit button activated the door is unlocked as long
as the exit button is pressed.
•
Security level In
Choose between the existing security level schedules for
entering that are available.
•
Security level out
Choose between the existing security level schedules for
exiting that are available.
•
Door code In
When a door code for entering shall be active.
•
Door code Out
When a door code for leaving shall be active.
•
Card number as door code In
When the card number is to be used as a door code when
entering.
•
Card number as door code out
When the card number is to be used as a door code when
leaving.
NOTE! If a card number should work as an door code you must
both set the parameter Card number as door code in or Card
number as door code out and create an matching card format. This
card format should be of the type Manual PIN.
NOTE! The operation mode ”Unlock with card” and ”Lock with
card” only works in combination with the security level Card, not
with Card+PIN.
User’s Guide ARX
Door types
• 169
Modify Door type
To change the settings for a door type, do the following:
1.
Click the Door type button in the main window.
2.
Highlight the door you want to change in the Door type
window and click Modify.
3.
Change the parameters for the door type in the separate
window that now opens.
4.
Click OK if you want to save the changes and close the
window. Click Cancel if you want to close the window
want saving for the changes. Click Apply if you want to
save the changes and at the same time keep the window
open.
Delete Door type
1.
Highlight the door you want to remove in the Door type
window.
2.
Click the Delete button.
User’s Guide ARX
Door types
• 170
Examples
Create a door type where the validity of
the exit button can be changed
The Company Example wants to create a door type with an
exception for when the exit button (or other operation modes) are
relevant.
First of all an additional schedule must be created to control when
the exit button is active. A basic installation is to select office time
between 07.00-19.00 hours.
1.
Open the main window for Schedules, click on the tab
Additional Schedules and click on New.
User’s Guide ARX
Door types
• 171
Additional schedules set to be active during office hours
2.
Click on finish and then open the main window for door
types and select New.
3.
Change to Additional schedules office time that you
previously created for the Exit button and press OK.
User’s Guide ARX
Door types
• 172
A New door type where the exit button only works during office
hours
Thus the opening switch is now active only during office hours,
between 07.00-19.00 hours.
In the access areas it is now possible to add an exception for when
the exit button should function. For example, if there is a company
party it should function up until midnight:
4.
Go to the main window for Access areas. Then go to the
door that you want to add an exception to and click on
User’s Guide ARX
Door types
• 173
Change door type. Then select the new door type that was
created above.
Door type – Office hours makes it possible add an exception for
how the exit button should work.
5.
Then click on Exception in order to change the time for the
exit button.
User’s Guide ARX
Door types
• 174
An exception so that the exit button will be active up until midnight
User’s Guide ARX
Door types
• 175
Triggers
About Triggers
The trigger functionality allows you to supervise the hardware or
the software in the access control system. A trigger can be used to
activate other actions in the system.
For example, a trigger can be used to turn on the lights in the office
corridor when the corridor door is opened, or to send an email to
somebody if a certain door is not closed correctly.
User’s Guide ARX
Triggers
• 176
Add trigger
To add a trigger, do the following:
1.
Choose Trigger in the Tools menu.
2.
Choose New to create a new trigger.
3.
Choose the hardware or filter template to be supervised and
click Next.
User’s Guide ARX
Triggers
• 177
The description below applies for a door trigger, but this principle
also applies for RCE-16-cards and controllers. See “Add filter
template as trigger” on page 183.
User’s Guide ARX
Triggers
• 178
4.
The door controllers in ARX are shown. Using the Search
function (only for door controllers) you can find a door by
writing the beginning of the name of the door. .
(Remove the search word and click Search to return to the
complete list.)
Highlight one or several doors in the list and click Next.
User’s Guide ARX
Triggers
• 179
5.
The list displays all events available to trigger. Choose
desired event and click Next.
User’s Guide ARX
Triggers
• 180
6.
Choose the properties for the trigger.
Restore types:
•
Door closed
The trigger is deactivated when the door is closed. (Greyed
out when non-applicable events are used.)
•
Automatically (seconds)
Enter the time in seconds for when the trigger will be
deactivated.
•
Other
Check Other to choose another event that will act as
deactivation of current trigger.
Enter a description and check Active to make the trigger active.
Finish by clicking Next.
Note! At least one restore type must be marked.
User’s Guide ARX
Triggers
• 181
7.
A summary of the properties of the trigger is shown. Check
that the properties are correct and click Finish to save the
trigger.
8.
The new trigger is shown in the trigger list:
In order for the trigger to result in another event to happen, for
example that the corridor lights are turned on when a door is
opened, an Action needs to be added, refer to next chapter.
User’s Guide ARX
Triggers
• 182
Add filter template as trigger
Filter template is used in order to create a trigger for events in ARX
server software, for example to monitor all events performed by a
certain administrator, or when a domain is modified.
1.
Select on or several events to be included in the trigger and
click Next.
(Each event will alone activate the trigger)
2.
If you want the filter template only applicable for a certain
object, perform the following steps:
•
User’s Guide ARX
Check the object you want the filter template to react
for, in this example, access categories.
Triggers
• 183
•
User’s Guide ARX
Select the access categories to be supervised.
Triggers
• 184
3.
Name the filter template.
4.
Choose the settings for the trigger
User’s Guide ARX
Triggers
• 185
Restore types:
•
Door closed
The trigger is deactivated when the door is closed. (Greyed
out when non-applicable events are used.)
•
Automatically (seconds)
Enter the time in seconds for when the trigger will be
deactivated.
•
Other
Check Other to choose another event that will act as
deactivation of current trigger.
Enter a description and check Active to make the trigger active.
Finish by clicking Next.
Note! At least one restore type must be marked.
User’s Guide ARX
Triggers
• 186
Modify trigger
To add an action to a trigger or change the properties, do the
following:
1.
Choose Modify for the trigger.
2.
Change desired properties and press OK, or continue to add
an Action for current trigger.
Add action
In order for the trigger to result in other events, for example that the
light is turned on through a relay, that an email is sent, or that a
desired software is started, an Action must be added.:
Click Add in the Actions section to add an action, Relay, E-mail or
Server application.
Relay action
Choose Relay as action type and set the relay type to Relay Card or
Door (the relay function of a DAC) and choose the relay to be
connected to this function in the Unit menu. Finally choose the
relay output on current relay unit and click Ok.
User’s Guide ARX
Triggers
• 187
A trigger can have any number of relays as action.
User’s Guide ARX
Triggers
• 188
E-mail action
Choose E-mail as action type and write a template for the mail to be
sent when the trigger is activated. Then click Ok.
A email action can send any number of e-mails.
Note! To be able to send e-mails, ARX must be connected to an
existing e-mail account.
This is configured in ARX Server Manager, in File-Change
system properties. Scroll down to Mail server settings.
User’s Guide ARX
Triggers
• 189
Server application as action
3.
Choose Server application as Action type and choose
which application to be started in the Properties field.
4.
Click Validate to check that the search path is correct.
Finish by clicking OK.
Note! For this function to work you need to make sure that the
ARX Access Server can interact with the desktop. Check this in the
Services application in Windows. (Control panel – administrative
tools, open Services and enter the properties for ARX Access
Server, click the Log on tab.)
User’s Guide ARX
Triggers
• 190
Example
LED-panel that shows unclosed doors
The Company Example wants to use the trigger functionality to
control a panel with LED:s that indicates if a door in the access
control system is open. At night when the last person leaves the
office and activates the alarm, the LED-panel displays all the doors
that are not closed.
After installing a RCE.16-card, it is added to the Door list.
1.
Choose Door list in the tools menu.
2.
The RCE-16-card is added to the office controller.
3.
After this the trigger is created. The trigger main window is
entered.
User’s Guide ARX
Triggers
• 191
4.
A new trigger is created by clicking New.
5.
The trigger applies for doors.
User’s Guide ARX
Triggers
• 192
6.
All doors that is covered by the trigger is highlighted.
User’s Guide ARX
Triggers
• 193
7.
Door not closed is chosen in the list.
User’s Guide ARX
Triggers
• 194
8.
The trigger is named and Door closed is chosen as Restore
type.
9.
In the summary, note that the trigger applies for all doors
highlighted earlier.
User’s Guide ARX
Triggers
• 195
10. After this each door is connected to the relay outputs on the
relay card by choosing Modify. An action must be added to
each door in the following way: Click Add in the Actions
section in the modify window:
User’s Guide ARX
Triggers
• 196
11. Relay is chosen as Action type. Unit type is set to Relay
card, Unit is set to the relay card added earlier, LED-Panel,
Each door is connected to a one of the relay cards relays.
.
The two last steps are repeated for the rest of the doors included in
the trigger.
If a door is open too long, the corresponding relay on the LEDPanel relay card will be activated, and a LED lights up on the panel.
The person activating the alarm can now easily close that door and
continue with activating the alarm.
User’s Guide ARX
Triggers
• 197
Trigger group
About Trigger group
With the Trigger group function you can add several individual
triggers in a group, in order to create a common action when one of
the included triggers is activated.
Add trigger group
1.
Select Trigger group in the tools menu.
2.
In the main window for trigger groups, select New.
User’s Guide ARX
Trigger group
• 198
3.
Enter Name, Description and Schema for the trigger group.
(With schema you can decide when the trigger group is
active) Check Show in alarm listif you want that the trigger
is visible in the trigger alarm list.
4.
Click Select and highlight the triggers you want to include
in the trigger group. Finish by clicking Ok.
User’s Guide ARX
Trigger group
• 199
5.
If you want that an action is performed after activation of
the trigger, click Add in the Actions section.
6.
Choose any of the action types Relay, E-mail or server
application. The example below shows the E-mail that will
be sent if the trigger is activated.
User’s Guide ARX
Trigger group
• 200
Reset types:
•
Acknowledge: The trigger is visible in the alarm list and
you must acknowledge it for it to disappear from the list
and reset the action.
•
Automatically: Reset of the trigger action is made
automatically after the number of seconds you add.
7.
Click Ok to save the trigger group.
The main window for trigger groups
User’s Guide ARX
Trigger group
• 201
Trigger alarm list
About Trigger alarm list
With the Trigger alarm list you can monitor all triggers set to be
visible in the alarm list.
This function enables you to create a alarm functionality in ARX
for all types of events in the access system..
User’s Guide ARX
Trigger alarm list
• 202
Show Trigger alarm list
1.
Select Trigger alarm list in the Tools-menu.
Main window for Trigger alarm list
Here you can notice and acknowledge trigger alarms.
•
Notice (yellow icon): Means that you have seen the alarm,
but want to keep it in the list for later. The alarm turns
Yellow.
•
Acknowledge (green icon): The alarm is acknowledged
and stays in the list until the action of the trigger is reset.
(In the settings for trigger group you can set that reset of an
action can be made through acknowledging it in the alarm
list and/or automatically after desired time). The alarm
turns green.
User’s Guide ARX
Trigger alarm list
• 203
Camera
About Camera
With this function you can connect surveillance cameras to you
access control system.
ARX works together with most network cameras on the market. In
the examples below, a Axis 207 is shown.
User’s Guide ARX
Camera
• 204
Add camera
1.
Choose Camera in the Tools-menu.
Main window for the Camera function.
2.
Select New to add a network camera to ARX.
3.
Enter Name, user name, password and the URL to the
camera.
User’s Guide ARX
Camera
• 205
In the URL parameters section you can set the camera
operation. The following list shows the most common setting
for an Axis 207 network camera:
•
clock: Hide/show time stamp. Value 0/1.
•
compression: Set the compression for the video. Value 0100.
•
date: Hide/show date. Value 0/1.
•
fps: Set the number of frames per second for the camera.
Value 0 and up. (20 needs a fast computer.)
•
resolution: Set the resolution for example, 160x120,
240x280, 480x360, 640x480, or the resolution the camera
can deliver.
•
text: Hide/show text in the video. Value 0/1.
To add a new parameter, click the Add…button and enter the
parameter name and value:
The camera settings shown above requires a fast computer,
connected to the same LAN-network as the camera. Try your
settings by showing the camera.
User’s Guide ARX
Camera
• 206
Show the camera
Select Camera viewer in the Tools-menu:
Main window for the camera viewer showing connection attempt.
If the computer or the network is slow and have problems to show
the video correctly, try to lower the frames per second, the
compression or the resolution of the camera.
User’s Guide ARX
Camera
• 207
Installation
About Installation
With the Installation function you link together the different
physical equipment in your installation. Examples of physical
equipment are: controllers, DACs and readers.
In the program, the different equipment is shown in an installation
tree that simplifies the overview of the connections between
equipment, and the architecture of the installation.
The different building blocks in the installation tree are:
•
Folders
•
Controllers
•
DACs (DAC, I/O DAC and Entry Phone DAC)
•
Card readers (in and out readers)
User’s Guide ARX
Installation
• 208
Door controls with card readers are connected to the control units.
Menu options (installation)
To simplify building and customising of the installation tree, there
are a number of extra menu options In the Installation tree window:
Menu option in the window Installation tree
These are in order of appearance and from left to right:
Add, depending on the level you are at in the tree
structure, you can add Folder, Controller, DAC or
Readers, with this menu option.
Remove, removes selected object.
Status, shows the current status for the selected
component in a separate window.
User’s Guide ARX
Installation
• 209
Expand, shows the entire tree structure for the selected
object.
The menu options Add, Remove and Status can also be made
available by right-clicking with the mouse on the desired object in
the installation tree.
NOTE! By right-clicking a controller or DAC in the installation
tree, you will also get the extra menu option Functions:
•
Functions, for a controller you can choose the option Load,
Reboot or Terminal and for a DAC you can choose Pulse
open or Go to door.
Recommendation: When to reboot a controller, use the menu
option Reboot in the Installation tree window.
(Rebooting via command in a terminal window will cause the
terminal window not to close properly.)
Symbols in the installation tree
In the left side of the window Installation tree a tree structure is
shown that provides an overview of the connections between
equipment, and the architecture of the installation.
In the installation tree there are, besides folder symbols, a number
of different ARX-symbols which show the type of object, but also
in certain cases the status of the object.
Controller
Non-activated controller. [Grey]
Activated controller that is uploading information. [Cyan]
Functioning controller. [Green]
Controller active but no contact with the server. [Yellow]
An error has occurred in the controller! [Red]
User’s Guide ARX
Installation
• 210
DAC
Symbol for DAC
Symbol for Hi-O DAC
Readers
Symbol for in- or out readers.
Relay
Symbol for a relay.
Input
Symbol for input.
Airlock (option)
Symbol for airlock.
Entry Phone (option)
Symbol for entry phone DAC
Booking Panel (option)
Symbol for booking panel
Elevator (option)
Symbol for elevator
Relay card RCE-16 (option)
Symbol for an RCE-16 relay card
User’s Guide ARX
Installation
• 211
Time anti pass-back (option)
Symbol for time anti pass-back
Folders
The top level in the installation tree is always the folder Installation
tree. Under it, you subsequently create your own sub-folders. This
ensures that the installation is organized and grouped in the best
possible way.
Add folder
To add a folder to the installation tree, do the following:
1.
Highlight the level in the installation tree where the folder
shall be located under. (Initially, there is only the folder
Installation tree.)
2.
Then select the option Add in the windows menu bar, and
click Folder.
Menu for adding a folder
3.
The symbol for the new folder is now added to the
installation tree on the left hand side of the window.
4.
In the right side of the window, enter a name for the new
folder in the field Name.
User’s Guide ARX
Installation
• 212
Window Installation tree with new folder
5.
Click OK if you want to save the changes and close the
window. Click Cancel if you want to close the window and
not save the changes. Click Apply if you want to save the
changes and at the same time keep the window open.
Status
By clicking on the right hand button of the mouse and selecting
status, you can get information on incorrectly installed units, see
chapter “Status” on page 213.
Remove folder
To remove a folder from the installation tree, do the following:
1.
Highlight the folder that is to be removed.
User’s Guide ARX
Installation
• 213
2.
Then select the menu option Remove in the window menu
bar.
NOTE! You can not remove a folder that contains controllers and
DACs that are stored in the area tree structure of the window
Access areas or are connected to alarm zones.
If you try to do this, a menu dialog with the notification text:
The object cannot be deleted since it is already in use by….
Controller
Add controller
To add a controller to the installation tree, do the following:
1.
Highlight the folder in the installation tree that the
controller shall be located under.
2.
Then select the option Add in the window menu bar, and
click Controller.
Menu for adding a controller
3.
The symbol for the new controller is now added to the
installation tree on the left side of the window.
4.
On the right side of the window, enter a Name for the
controller and write a brief Description.
User’s Guide ARX
Installation
• 214
Window Installation tree with settings for controller
5.
Afterwards, enter a Serial number and select which Time
zone that is applicable. The serial number can either be
entered directly or it can be selected from a list of available
controllers. To select from this list, click the button to the
right of the field Serial number.
User’s Guide ARX
Installation
• 215
Window Select serial number from list
6.
Finally, define if the controller is to be set as Active and if
the controller firmware should be updated automatically
when the controller connects.
7.
Click OK if you want to save the changes and close the
window. Click Cancel if you want to close the window and
not save the changes. Click Apply if you want to save the
changes and at the same time keep the window open.
NOTE! The controller serial number is written in the format
00:06:8e:3x:xx:xx (where the last five character positions are
different for each controller). The controller serial number is
normally found on the label that is attached to the front of the CPUcard inside the controller.
Note that you can still add information to the controller, or
reactivate it, later in the installation process.
Modem tab (optional feature)
If the controller is installed on a location with no physical contact
with the local network, it can be provided with a modem, which
communicates with the ARX server through the telephone line.
On the Connection Events tab you define the controller behaviour:
User’s Guide ARX
Installation
• 216
•
Connect schedule
Setting for when the controller uses the modem for
communication.
•
Connects events
The selected events trigger the controller to use the modem
to contact the ARX server.
•
Notes
Field for additional information.
Window Installation tree with settings for Modem Connection
events
On the Connect now tab the telephone number is set.
User’s Guide ARX
Installation
• 217
Window Installation tree with settings for Modem Connection
settings
Modify controller settings
To change or check the settings for a controller, do the following:
1.
Highlight the symbol for the desired controller in the
installation tree.
2.
To the right of the window, you can now change Name,
Description or Serial number, you can select the Time zone
that is to apply to the controller. You can even select if the
controller is to be set to Active, or not and if the controllers
firmware should be updated.
3.
Click OK if you want to save the changes and close the
window. Click Cancel if you want to close the window and
do not want to save the changes. Click Apply if you want to
save the changes and at the same time keep the window
open.
User’s Guide ARX
Installation
• 218
Remove controller
To remove a controller, do the following:
1.
Highlight the symbol for the controller in the installation
tree.
2.
Select the menu option Remove in the windows menu bar.
3.
Click OK if you want to save the changes and close the
window. Click Cancel if you want to close the window and
do not want to save the changes. Click Apply if you want to
save the changes and at the same time keep the window
open.
Note! You can not remove a controller containing DAC:s that are
added in the tree structure in Access areas or includes connections
to alarm zones. If you try, ARX displays the dependencies that
needs to be broken.
Extra Functions (controller)
For a controller in the installation tree, there a few extra functions
called Load and Reboot available to make work easier in the
installation view.
With the Load function you can choose to upload all available data
to a specific controller. (You will normally never need to do this.)
With the function Reboot you can re-start the controller.
To choose one of these functions, do the following:
1.
Select the menu option Functions with a right-click on the
desired controller in the installation tree.
User’s Guide ARX
Installation
• 219
2.
Then select Load or Reboot by moving your cursor to the
right.
Menu for the Load function for controllers
DAC
There are two ways to add a DAC in the installation tree: you can
either enter a New DAC, or you can select from a list of Connected
DACs. Both methods are described below.
Add a new DAC
To add a new DAC to the installation tree, do the following:
1.
Highlight the controller in the installation tree that the new
DAC shall be connected to.
2.
Then select the option Add in the windows menu bar, and
click New DAC.
User’s Guide ARX
Installation
• 220
Menu for adding a New DAC
3.
The symbol for the new DAC is now added to the
installation tree on the left side of the window.
4.
On the right side of the window (under the tab Settings),
enter DAC Name, External ID and Address, select a DACmode, and define if it shall be Active, or not and if it is a HiO product. (If no External ID is entered by the operator, the
system will assign the DAC a unique ID.)
5.
The fields Force open and Force block only show status
and cannot be altered here. Can only be altered with the
software integrated with ARX. (For more information, see
“HTTP Access in ARX” on page 436 .)
Window Installation tree with settings for a new DAC
User’s Guide ARX
Installation
• 221
6.
Click OK if you want to save the changes and close the
window. Click Cancel if you want to close the window and
do not want to save the changes. Click Apply if you want to
save the changes and at the same time keep the window
open.
Note that you can still can add information for the controller, or
reactivate it, later in the installation process.
Add connected DAC
To add DACs that are already connected to a controller, do the
following:
1.
Highlight the controller in the installation tree that the DAC
is connected to.
2.
Then select the option Add in the window menu bar, and
click Connected DACs.
Popup menu for adding Connected DACs
3.
Symbols for the connected DACs will now appear in the
installation tree. The text close to the DAC-symbols is blue,
which shows that the new installation is not yet saved.
(When the changes are saved, the blue text changes to black
text.)
User’s Guide ARX
Installation
• 222
4.
The connected DACs are automatically allocated a default
name and default settings.
Window Installation tree with settings for a connected DAC
5.
Click OK if you want to save the changes and close the
window. Click Cancel if you want to close the window and
do not want to save the changes. Click Apply if you want to
save the changes and at the same time keep the window
open.
DAC options
When you have highlighted a DAC on the left side of the window
Installation tree, a number of tabs are displayed in the right side of
the window that control the Settings, Lost connection, Times, Door
codes, Relay outputs and Functions for the DAC. Different options
for each tab are described below.
Settings tab
In the tab Settings you enter the DAC general settings, such as
Name, Address, External ID and DAC-mode, and whether the DAC
shall be Active or not and if it is a Hi-O product. Additionally,
User’s Guide ARX
Installation
• 223
information regarding however Forced open and Forced block is on
or off is shown.
The DAC Address consists of a number (from 1 to 16) that
indicates which address the DAC has in the controller.
Installation tree with the DAC tab Settings
User’s Guide ARX
Installation
• 224
Inputs tab
In the tab Inputs you can name the three inputs. For example in
order to easily see what the input is used for, when used in a trigger
or in the Log.
Installation tree with a DAC, input tab.
User’s Guide ARX
Installation
• 225
Lost connection tab
Under this tab, you can select what will happen when the
connection between the controller and the DAC is broken. The two
main options are:
•
Retain status when connection is broken
•
Use the following configuration when connection is broken.
If you select this option and you can enter which
configuration parameters that will apply during a
breakdown. The parameters are divided into three groups:
DAC-init, Mode for outer reader and Mode for inner
reader.
Installation tree with the DAC tab Lost connection
User’s Guide ARX
Installation
• 226
Times tab
Under this tab, you can enter a number of different timer settings
for the DAC:
•
Delayed unlock
•
Unlock pulse time
•
Delay time before relock (The time delay until an opened
door locks.)
•
Permitted door open time
•
Warning before arm time
•
Alarm shunt hold time (time before the outer lock is
engaged after the door has been closed)
Installation tree with the DAC tab Times
User’s Guide ARX
Installation
• 227
Door codes tab
Here you define the four digit door codes that will open the selected
door. You can enter up to ten door codes.
A new door code is entered into the field and is saved with the
button Add.
NOTE! For a door code to work, the door mode for the door is
required to be correctly set.
Installation tree with the DAC tab, Door codes
User’s Guide ARX
Installation
• 228
Relay outputs tab
From the tab Relay outputs, for any type of DAC, you can select
which function each and every one of the five relay outputs (1, 2, 3,
4 and 8) shall have, and which schedule shall apply. (Relay 8 is
named 6 for DAC-420 and DAC-430).
Installation tree with the DAC tab Relay outputs
To select a relay function, click on the field that belongs to the
desired relay and select one of the functions from the menu that is
shown. The options are:
0 - Scheduled
The relay is controlled by the schedule that is selected from the list
in the Schedule field. (For further information see section
“Schedules”).
1 – Follow output 8 (6)
The selected relay mirrors output 8. It is used when you want to
have a parallel signalling for output 8. (Only applicable for DAC30)
2 - Buzzer
The relay is activated at the same time that the buzzer starts in the
User’s Guide ARX
Installation
• 229
reader. The output is not activated if the buzzer is switched off or
deactivated by a schedule.
3 - Temporary alarm shunt
The relay acts like a temporary alarm bypass. It is used when the
DAC’s alarm interface needs a temporary alarm bypass output
(ABP).
4 – Door automatic
The relay pulses, when the motor lock and electric contactor are in
an unlocked mode. When the door unlocks through a schedule, the
output does not pulse.
5 – Door position
The relay closes when the door is closed and opens when the door
is opened.
6 – Motor lock security locked
The relay closes when the motor lock is locked at night and the
door is closed.
7 – Motor lock unlocked
The relay follows the motor lock mode (bolt/lever inside).
8 – Motor lock day locked
The relay follows the motor lock mode (bolt/lever outside).
9 – Electric strike
The relay follows the electric strike mode.
10 - Temporary alarm shunt (do not drop when door not
closed)
This relay function is used when you want to be able to
differentiate between alarm during access (the door has been open
for too long) and when the door is breached. After passing through,
the relay is activated until the door is closed.
11 - Tamper OK, DAC
The relay follows the DAC’s sabotage switch. The relay trips when
the DAC lock is engaged.
12 - Permanent alarm shunt
The relay follows the alarm bypass relay (ABP) in the DAC when
the DAC is the alarm interface. Otherwise, no function.
User’s Guide ARX
Installation
• 230
13 – Warning before alarm arm
When the alarm is activated the relay closes and gives a warning
before the alarm bypass relay in the main DAC interface engages.
The time for the warning is decided by the parameter “Warning
time before engagement”. Kan only be used on the main DAC.
Note! This is not applicable in a Galaxy alarm zone.
14 – Follow input 7 (Input 3 in DAC-420/430)
The relay follows the DAC’s blocking inputs.
15 – Supervised door monitor tamper
Is used mainly when the DAC is acting as a detector. The relay can
also be used when you want to have a summarized sabotage alarm
from the balanced door contactors and DACs.
16 – Supervised door monitor alarm
Is used mainly when the DAC is acting as a detector. The relay
closes when the door is closed and is tripped when the door is
breached. When the door is opened after a valid card swipe or using
the door opener, the relay does not trip.
17 – Handicap function
The relay trips when a person with disabled clearance swipes his
card in the reader. Can be used, for example, to activate automatic
door.
18 – Forced buzzer
The relay is activated at the same time that the buzzer starts in the
reader. The output is activated even when the buzzer is switched off
or inactivated via a schedule.
19 – Motor lock day mode
The relay follows the day mode input (Input 1) in the DAC.
20 – Automatic door remote controlled
The relay trips when the motor lock and electric end lever are
unlocked. The relay is tripped for as long as the door is opened. The
relay also trips when the door is opened via a schedule.
21 – Valid exit
The relay closes when someone enters via the outer reader. The
relay trips at the same time as the alarm bypass relay (ABP) closes
User’s Guide ARX
Installation
• 231
and trips when the door is opened or the time for the unlocked door
is exceeded.
22 – Valid entry
The relay closes when someone exits using the internal reader. The
relay closes at the same time that the alarm bypass relay (ABP)
closes and trips when the door is opened or the time for the
unlocked door is exceeded.
23 – Invalid card
The relay closes at the same time that an invalid card is swiped in
the reader. The relay is reset by swiping a valid card in the reader.
24 – Motor lock error
The relay closes if the motor lock does not locks.
25 – Drops when door forced
The relay is normally closed and drops when “a door is forced".
The relay does not drop on "Door open too long".
26 – “Disabled function”-relay with timed inactivation
The relay closes when using a handicap card (even if the door is
unlocked) and closes after “unlock pulse time” (on the Times tab)
27 – Mirror day/night function without motor lock
Functions even if the DAC does not have a motor lock. The relay
follows the settings for the motor lock of the DAC, for example by
unlocking at first granted access.
28 – Door forced open, reset with valid card
The relay closes and stays closed when door is forced. Can be reset
with valid card.
29-35 – Extra functions
When you have chosen a relay function, click Apply to save the
new settings.
Functions tab
Under this tab, you can enter a number of parameters for doors.
•
For a motorised lock (Day/Night mode), you can choose to
Open immediately or At first valid passage.
User’s Guide ARX
Installation
• 232
•
With the checkbox Door monitor switches in motor lock
and DAC in series you instruct the system to treat the door
position input of the DAC and the door sensor of the motor
locks they were connected in series.
•
It is possible to select the unlock/lock mode Ability to
unlock door by swiping card twice. It is required, however,
also that the users who can do this have been assigned an
access category with permission to lock/unlock doors and
that the door type has the property Unlock from reader set.
The lock/unlock operation is done by reading a valid card
two times in the swipe card reader. (The buzzer then sounds
as confirmation)
Installation tree with the Functions tab for DAC.
User’s Guide ARX
Installation
• 233
Hi-O tab
If the the DAC is of Hi-O type, information of the hardware is
shown here.
Installation tree with the Functions tab for DAC.
One door controller
A One door controller is a controller and DAC in one. It can be
added directly to a folder, thus it needs no controller. Therefore it is
also have the functionality of both a controller and a DAC.
To add a One door controller to the door list (installation tree), do
the following.
Add a One door controller
To add a controller to the installation tree, do the following:
1.
Highlight the folder in the installation tree that the
controller shall be located under.
User’s Guide ARX
Installation
• 234
2.
Then select the option Add in the window menu bar, and
click Controller.
Menu for adding a controller
3.
The symbol for the new controller is now added to the
installation tree on the left side of the window.
4.
On the right side of the window, enter a Name for the
controller and write a brief Description.
Window Installation tree with settings for controller
5.
Afterwards, enter a Serial number and select which Time
zone that is applicable. The serial number can either be
entered directly or it can be selected from a list of available
User’s Guide ARX
Installation
• 235
controllers. To select from this list, click the button to the
right of the field Serial number.
NOTE! The controller serial number is written in the format
00:06:8e:3x:xx:xx (where the last five character positions are
different for each controller).
Note that you can still add information to the controller, or
reactivate it, later in the installation process.
The Force open and Force block only shows the status and can not
be changed here. They can only be altered by software integrated
with ARX. (For more information, see section “HTTP Access in
ARX” on page 436).
6.
Define if the controller is to be set as Active and if the
controller firmware should be updated automatically when
the controller connects.
7.
Click OK if you want to save the changes and close the
window. Click Cancel if you want to close the window and
not save the changes. Click Apply if you want to save the
changes and at the same time keep the window open.
In order for the one door controller to work with a reader, at
least one reader must be added:
8.
Right click on the one door controller icon and select Add
reader. See section Readers on page 273.
User’s Guide ARX
Installation
• 236
One door controller with a reader connected.
User’s Guide ARX
Installation
• 237
Inputs tab
In the tab Inputs you can name the three inputs. For example in
order to easily see what the input is used for, when used in a trigger
or in the Log.
Installation tree with a one door controller, input tab.
Relay outputs tab
See the explanation for the Relay outputs tab for a DAC, section
“Relay outputs tab” on page 229.
Modem tab (optional feature)
If the controller is installed on a location with no physical contact
with the local network, it can be provided with a modem, which
communicates with the ARX server through the telephone line.
On the Connection Events tab you define the controller behaviour:
User’s Guide ARX
Installation
• 238
•
Connect schedule
Setting for when the controller uses the modem for
communication.
•
Connects events
The selected events trigger the controller to use the modem
to contact the ARX server.
•
Notes
Field for additional information.
Window Installation tree with settings for Modem Connection
events
On the Connect now tab the telephone number is set. Click the Call
controller to initiate the call to the controller.
User’s Guide ARX
Installation
• 239
Window Installation tree with settings for Modem Connection
settings
User’s Guide ARX
Installation
• 240
Times tab
Under this tab, you can enter a number of different timer settings
for the controller:
•
Delayed unlock
•
Unlock pulse time
•
Delay time before relock
•
Permitted door open time
•
Warning before arm time
•
Alarm shunt hold time (time before the outer lock is
engaged after the door has been closed)
Installation tree with the tab Times
User’s Guide ARX
Installation
• 241
Door codes tab
Here you define the four digit door codes that will open the selected
door. You can enter up to ten door codes.
A new door code is entered into the field and is saved with the
button Add.
NOTE! For a door code to work, the door mode for the door is
required to be correctly set.
Installation tree with the DAC tab, Door codes
Functions tab
Under this tab, you can enter a number of parameters for doors.
•
For a motorised lock (Day/Night mode), you can choose to
Open immediately or At first valid passage.
•
With the checkbox Door monitor switches in motor lock
and DAC in series you instruct the system to treat the door
User’s Guide ARX
Installation
• 242
position input of the DAC and the door sensor of the motor
locks they were connected in series.
•
It is possible to select the unlock/lock mode Ability to
unlock door by swiping card twice. It is required, however,
also that the users who can do this have been assigned an
access category with permission to lock/unlock doors and
that the door type has the property Unlock from reader set.
The lock/unlock operation is done by reading a valid card
two times in the swipe card reader. (The buzzer then sounds
as confirmation)
Installation tree with the tab Functions
User’s Guide ARX
Installation
• 243
Pulse open door
There is a function that makes it possible for you to choose to
unlock a specific door from the installation tree view. To do this, do
the following:
1.
Select the menu option Functions with a right-click on the
desired DAC in the installation tree. Then move the cursor
with the mouse to the right and click Pulse open.
Menu option to pulse open a door
The door is unlocked for a number of seconds. (The time for pulse
opening is defined for each DAC in the installation tree, see for
example the section “DAC” on page 220.)
Relay
The relay card 6416-RC is a card with 4 relays and one input that is
mounted in a 9016 controller, where 3 relays can be programmed
and be managed by different functions.
To add a relay to the installation tree, do the following:
1.
Highlight the controller that the relay shall be connected to.
2.
Then select the option Add in the windows menu bar, and
click Relay.
User’s Guide ARX
Installation
• 244
Popup menu for adding Relay
3.
The relay symbol is now shown to the left in the installation
tree and to the right the different relay settings are shown
under the tabs Settings and DACs.
User’s Guide ARX
Installation
• 245
The Installation tree with a relay highlighted and the Settings tab
active
Under the Settings tab you choose Address, Mode and in some
cases Schedule and Pulse time for the relay.
With the option Mode you choose how the relay should operate:
•
Disabled
•
Schedule
•
Unlocked door
•
Open door
•
Open or unlocked door
•
Motor lock open (Day locked)
•
Motor lock error
•
Select mask (DACs tab)
User’s Guide ARX
Installation
• 246
If the Schedule option is selected, you can choose between the
alternatives: Always off, Always on or any of the Other schedules
available in the system.
If you choose Select mask (DACs tab) you can set a number of
DAC alternatives under the DACs tab.
The DACs tab is also used for selecting which DACs that should be
affect chosen function of the relay.
The Installation tree with a relay highlighted and the DACs tab
active
Input
The relay card 6416-RC has 4 relays and 1 input, which is mounted
in a 9016 controller, where the input can be programmed to control
different functions in the controller where it is mounted.
User’s Guide ARX
Installation
• 247
For example, it can be connected to a fire alarm so that when a fire
breaks out the control units unlock these doors, this is called panic
unlocking.
To add an input to the installation tree, do the following:
1.
Highlight the controller that the input shall be connected to.
2.
Then select the option Add in the windows menu bar, and
click Input.
Popup menu for adding Input
3.
The input symbol is now shown to the left in the
installation tree and to the right the different relay settings
are shown under the tabs Settings and DACs.
User’s Guide ARX
Installation
• 248
The Installation tree with an input highlighted and the Settings tab
active
Under the Settings tab, you choose Address and Mode for the input.
These are the alternatives for the Mode option:
•
Disabled
•
Monitored
•
Panic unlock
•
Panic lock
•
Enable door code only mode
The DACs tab is used to select which DACs that should be
connected to the input.
User’s Guide ARX
Installation
• 249
Airlock (option)
With the function Airlock the operator can link two or more doors
together to create an airlock. In an airlock, only one of the doors
can be open at the same time.
Note! Only one airlock can be added per controller.
To add an airlock to the installation tree, do the following:
1.
Highlight the controller that the airlock shall be connected
to.
2.
Then select the option Add in the windows menu bar, and
click Airlock.
Popup menu for adding Airlock
3.
The airlock symbol is now shown to the left in the
installation tree and to the right airlock settings are shown
under the tab Airlock.
User’s Guide ARX
Installation
• 250
The Installation tree with an airlock highlighted
Under the Airlock tab enter a Name, a brief Description and choose
which doors (DACs) that should be included in the airlock by
highlighting a DAC in the left column (Available) and with the
arrow button move the selected format to the right column
(Selected).
If you select Show status on blocked readers the red alarm indicator
is lit up when the airlock is blocked, when a door is unlocked or
opened.
User’s Guide ARX
Installation
• 251
Entry phone (option)
The ARX Client software function Entry phone consists of a
special entry phone DAC and a few extra settings associated with
the entry phone function.
NOTE! The maximum number of entry phone DACs per each
controller is 8. The total number of entry phones allowed in the
installation tree is limited to the number of door licences you have.
To add a entry phone to the installation tree, do the following:
1.
Highlight the controller in the installation tree that the new
I/O DAC shall be connected to.
2.
Then select the option Add in the window menu bar, and
click New Entry DAC.
Popup menu for adding entry DACs
3.
The entry DAC symbol is now shown to the left in the
installation tree and to the right the DAC settings are
shown.
4.
In order for the entry DAC to work as a reader, a reader
must be added to the entry phone. Right click on the entry
phone and select Add reader.
User’s Guide ARX
Installation
• 252
The Installation tree with a new entry phone highlighted
Entry DAC options
When you have highlighted a entry DAC on the left side of the
window Installation tree, a number of tabs are displayed in the
right side of the window that control the Settings, Lost connection,
Times, Door codes, Relay outputs, Functions and Entry phone for
the DAC. The different options for each tab are described below.
Settings tab
In the tab Settings you enter the entry DAC general settings, such as
Name, Address, External ID and DAC-mode, and whether the DAC
shall be Active or not and if it is a Hi-O product. Additionally,
information regarding however Forced open and Forced block is on
or off is shown.
The DAC Address consists of a number (from 1 to 8) that indicates
which address the entry DAC has in the controller.
User’s Guide ARX
Installation
• 253
Installation tree with the entry DAC tab Settings
Inputs tab
In the tab Inputs you can name the three inputs. For example in
order to easily see what the input is used for, when used in a trigger
or in the Log.
Installation tree with a one door controller, input tab.
User’s Guide ARX
Installation
• 254
Lost connection tab
Under this tab, you can select what will happen when the
connection to the entry DAC is broken. The two main options are:
•
Retain status when connection is broken
•
Use the following configuration when connection is broken.
If you select this option and you can enter which
configuration parameters that will apply during a
breakdown. The parameters are divided into three groups:
DAC-init, Mode for outer reader and Mode for inner
reader.
Installation tree with the DAC tab Lost connection
Times tab
Under this tab, you can enter a number of different timer settings
for the entry DAC:
•
Delayed unlock
•
Unlock pulse time
•
Delay time before relock
User’s Guide ARX
Installation
• 255
•
Permitted door open time
•
Warning before arm time
•
Alarm shunt hold time (time before the outer lock is
engaged after the door has been closed)
Installation tree with the entry DAC tab Times
User’s Guide ARX
Installation
• 256
Door codes tab
Here you define the four digit door codes that will open the selected
door. You can enter up to ten door codes.
A new door code is entered into the field and is saved with the
button Add.
NOTE! For a door code to work, the door mode for the door is
required to be correctly set.
Installation tree with the entry DAC tab, Door codes
Relay outputs tab
This tab has no function on an entry DAC.
If you want to control relays with an entry phone, you must connect
a main DAC to the entry phone, see the entry phone tab.
Functions tab
Under this tab, you can enter a number of parameters for doors.
•
For a motorised lock (Day/Night mode), you can choose to
Open immediately or At first valid passage. (Not applicable
for a entry phone which can not control a motor lock.)
User’s Guide ARX
Installation
• 257
•
With the checkbox Door monitor switches in motor lock
and DAC in series you instruct the system if there are any
door switches connected in series. (Not applicable for a
entry phone which can not control a motor lock.)
•
It is possible to select the unlock/lock mode Ability to
unlock door by swiping card twice. It is required, however,
also that the users who can do this have been assigned an
access category with permission to lock/unlock doors.
The lock/unlock operation is done by reading a valid card
two times in the swipe card reader. (The buzzer then sounds
as confirmation)
Installation tree with the entry DAC tab Functions
User’s Guide ARX
Installation
• 258
Hi-O tab
If the the DAC is of Hi-O type, information of the hardware is
shown here.
Installation tree with the Functions tab for Entry phone.
Entry Phone tab
Under this tab, you can enter a number of parameters for entry
phones:
•
Allowed to call using list - if it shall be possible to select
and call residents from a list in the entry phone.
•
Allowed to call using speed dial - if it shall be possible to
call a resident using a speed dial number.
•
Allowed to call using full number - if it shall be possible to
call a resident via the entry phone using the resident’s
phone number.
•
Main DAC – Specifies if the entry phone is connected to a
certain DAC.
This is useful if you want to add a:
- Reader for passage out.
User’s Guide ARX
Installation
• 259
- Opening button, not accessible from the outside.
- Motor lock
- Extra relays and inputs
•
Predefined volume settings – Choose between six different
settings for speaker and microphone volume adapted for
indoors and outdoors.
•
Speaker volume
•
Microphone volume
Installation tree with the entry DAC tab Entry Phone
Booking panel (option)
The booking panel allows access to the booking system in the ARX
and manage the booking, for example, of washing machines or
conference rooms.
The booking panels are added to the installation through the
Installation tree and are there linked to a controller. This enables
the booking panels to be used to control equipment connected to
DACs or relays in the installation. It is possible to mix regular door
User’s Guide ARX
Installation
• 260
with doors that are controlled through the booking system in the
same controller.
Add Booking panel
To add a booking panel to the installation tree, do the following:
1.
Highlight the folder where you want to place the booking
panel.
2.
Then select the option Add in the windows menu bar, and
click Booking panel.
Menu for adding Booking panel
3.
The booking panel symbol is now shown to the left in the
installation tree and to the right the booking panel options
are shown.
Booking panel options
When you have highlighted a booking panel on the left side of the
window Installation tree, the options are displayed in the right side
of the window.
Here you set the Name, Description and MAC address for the
booking panel. That is, the identity the booking panel uses on the
network. The MAC address can be found on the back side of the
actual booking panel.
User’s Guide ARX
Installation
• 261
Window Installation tree with settings for a booking panel
The booking panel hardware consists of a touch screen that
communicates with the booking function on the ARX server. The
users of the access system reach My pages from the panel and can
manage bookings, cards and passwords.
RCE-16 board (option)
RCE-16 is a board with 16 relays that can be used to control
external systems. Examples are buttons in an elevator or locks on
post boxes or for triggers.
Add a RCE-16-card
To add a RCE board to the installation tree, do the following:
1.
Mark the control units in the installation tree that the RCE
board is to be connected to.
2.
Then select the alternative Add in the window’s menu bar
and click on RCE-16 Board.
User’s Guide ARX
Installation
• 262
Menu for adding a RCE board
When a RCE-16 board has been added to the left in the Installation
tree window, the RCE-16 Board characteristics is shown on the
right.
On the tab the Name of the relay board is given, a short
Description, the Address as well as the user area that the relays of
the board should have.
Installation tree with RCE-16 board
User’s Guide ARX
Installation
• 263
Elevator (option)
With the optional feature Elevator installed it is possible to add
elevators to the Installation tree (and floors in the Access areas
window).
The option RCE-16 Board must be installed.
In the Installation tree you can add one elevator per controller. The
possibility to add an elevator is dependent of if there is a relay card
configured for elevator use in the installation. The involved
controller must have one or more DACs connected to it.
Note! At least one RCE-16-card must be installed on the controller,
before you can add an elevator.
Add Elevator
To add an elevator to the installation tree, do the following:
1.
Highlight the controller that the relay card shall be
connected to.
2.
Then select the option Add in the windows menu bar, and
click RCE-16 card.
Popup menu for adding RCE-16 card
User’s Guide ARX
Installation
• 264
The symbol for the new relay card is now added to the tree
structure on the left side of the Installation tree window.
When you have added an RCE-16 relay card to the Installation
tree, the tab RCE-16 card settings is shown. Here you should enter
the Name of the relay card, a brief Description, the cards Address
and what the relays on the card shall be used for.
The installation tree with RCE-16 card highlighted
3.
Then select the option Add in the windows menu bar, and
click Elevator.
User’s Guide ARX
Installation
• 265
Popup menu for adding Elevator
4.
The symbol for the new elevator is now added to the tree
structure on the left side of the Installation tree window.
When you have added an elevator to the Installation tree, a number
of tabs are displayed in the right side of the window. These taps
control the Elevator settings and Floor for the elevator. The
different options for each tab are described below.
Elevator settings tab
Here you find all the basic settings for the booking panel. On the
right side of the window, enter the reader Name, a short
Description, Pulse time (in seconds) and in which Mode the
elevator should operate.
User’s Guide ARX
Installation
• 266
Installation tree with Elevator highlighted (Elevator settings tab)
The differences between the two Mode options Reader control and
Switch control are these:
•
Reader control, means that the visitor first selects a floor
and then swipes the card.
If the visitor does not have access rights for the selected
floor the reader alerts and the elevator will not move.
•
Switch control, means that the visitor first must swipe
his/her card. Then the system lights up the buttons (i.e.
makes available) that represent the floors for which the
person have access to.
Floor tab
When you have added an elevator to the Installation tree the system
automatically adds a number of floors, based on the relays that are
configured as elevator relays.
User’s Guide ARX
Installation
• 267
If you want to delete a floor, select the Delete floor button in the
lower part of the window. In order to create new floor levels click
the Add new floor button. Please note that the Add new floor button
only is active if there is a available relay.
Installation tree with Elevator highlighted (Floor tab)
DAC settings
When a elevator is highlighted in the installation tree and the
Floors tab active, you can choose to connect floor-specific DACs to
the different floors.
If you choose to link a DAC to a floor you can also choose if the
DAC should Open elevator door or Call elevator when the DAC is
activated (for example when a visitor swipes the card in a reader
connected to the DAC). The function Call elevator makes the relay
of the RCE-16-card associated to the floor to close, when a visitor
swipes the card on the DAC. (Only applicable when using a reader
controlled elevator)
User’s Guide ARX
Installation
• 268
Floor with DAC
Door code settings
For the floors that have no floor-specific DAC linked to them you
can choose to add one ore more door codes for the elevator at this
floor. This is done in the Door code settings field under the Floors
tab.
To ad anew door code, enter the code in the New code field and
click the Add button. Maximum 10 codes per floor are allowed.
User’s Guide ARX
Installation
• 269
Floor without DAC
Time Anti-passback (option)
Time anti-passback is not hardware, but a function that means that
you control how much time must pass between two entrances that
are made through the same door with the same card.
This can be valuable in preventing the use of one card used by
several people for passing through a sluice for example. (Only one
time anti-passback group per controller is allowed)
It is also possible use schedules to control when the time antipassback function shall be active.
In the standard setting of ARX, an entry is only recorded when a
door is opened. However, it is possible to change this setting so that
User’s Guide ARX
Installation
• 270
an entry is recorded every time a card is swiped, independent of if
the door is opened or not.
NOTE! This feature does not work on a door if the safety level is
set to ”Two cards + pin”.
Add Time Anti-passback
To add an time anti-passback to the installation tree, do the
following:
1.
Highlight the controller that the function shall be linked to.
2.
Then select the option Add in the windows menu bar, and
click Time Anti-passback.
Popup menu for adding Time Anti-passback
3.
The symbol for the time anti-passback is now added to the
tree structure on the left side of the Installation tree
window.
When you have added time anti-passback to the Installation tree,
the tab Time Anti-passback settings is shown. Under this tab you
enter the different settings for the function:
User’s Guide ARX
Installation
• 271
•
Name - A suitable name for the function.
•
Description - A brief description.
•
Time to next enter (minutes) - The time period between two
entries through the same door, with the same access card.
•
Time to re-enter after exiting (minutes) - The time period
after exiting a door, after which entering is allowed again.
•
Select schedule - Option to schedule when the time antipassback function should be active.
•
Apply time anti-passback even if door has not been opened
- This check-box is per default not checked.
Note! When exiting (i.e. passing out) through a door, the settings
for entering (passing in) are set aside and the alternative Time to reenter after exiting supersedes. This means that if Time to re-enter
after exiting is set to 0 (minutes) entry will be allowed even if Time
to next enter has not passed.
The doors included are specified at the bottom of the settings tab.
Select the doors that are to be included in the anti-passback
function, and click the right arrow.
The settings made applies for all the doors chosen, as a group.
User’s Guide ARX
Installation
• 272
The installation tree with time anti-passback highlighted
Readers
Add readers
To add entry- or exit readers to the installation tree, do the
following:
4.
Highlight the DAC in the installation tree where the reader
is to belong to.
5.
Then select the option Add in the window menu bar, and
click Readers.
User’s Guide ARX
Installation
• 273
Popup menu to add readers
6.
The symbol for the new reader is now added to the
installation tree on the left side of the Installation tree
window.
7.
On the right side of the window, enter the reader Name and
Address and select Number of digits for external cards.
(Address 0 = entry readers and address 4 = exit readers.)
If you are unsure of how many digits an external card uses,
you can test this by reading the card in a connected reader
and then read the card number in the log.
Window Installation tree with settings for a new reader
User’s Guide ARX
Installation
• 274
8.
Click the button Change card format for reader in order to
select which card format that is to apply for the reader.
(Default card format is Solid prox.)
9.
In the window Card format that now opens, select a format
by highlighting a card format in the left column (Available)
and with the arrow button "move" the selected format to the
right column (Selected).
Window for selecting card format
10. Click OK in the window Card format if you want to save
the changes, or click Cancel if you want to close the
window without saving the changes.
11. In the installation tree, click OK if you want to save the
changes and close the window. Click Cancel if you want to
close the window without saving the changes. Click Apply
if you want to save the changes and at the same time keep
the window open.
Galaxy Intrusion Panel
In the installation tree add the Galaxy control units that are
available and indicate which ARX control units that are to be
connected to every Galaxy control unit. The configuration is then
done under the Alarm tree, see page 295.
User’s Guide ARX
Installation
• 275
To add a Galaxy control unit, do the following:
1.
Mark the level on the installation tree that the unit shall be
placed under.
2.
Then select the alternative Add in the windows menu, and click
on Galaxy control unit.
Menu for adding the Galaxy control unit
3.
The symbol for the control unit is now added to the window, in
the installation tree on the left.
4.
On the right of the window you Name the control unit and
write a short Description.
The Installation tree with a Galaxy control unit marked
User’s Guide ARX
Installation
• 276
5.
Click OK if you want to save the changes and close the
window. Click on Cancel if you want to close the window
without saving the changes. Click on Apply if you want to save
the changes and at the same time keep the window open.
Connect controller to Galaxy Intrusion
Panel
To connect a control unit to a Galaxy control unit, do the following:
1.
Mark the Galaxy control unit that the control unit is to be
connected to.
2.
Then select the alternative Add on the window’s menu bar, and
click on Control unit to line.
Menu for adding control unit to line
3.
The symbol for the control unit is now added to the window, in
the installation tree on the left.
User’s Guide ARX
Installation
• 277
The Installation tree with the Galaxy added control unit marked
4.
For every control unit that is connected to a Galaxy control
unit, indicate which Communication line (or dataline) that the
control unit should be connected to and which Serial interface
that should be used.
NOTE! Only one control unit per installation can be allotted to a
serial interface. For the remaining control units the alternative;
”Serial interface: None”, is allotted.
NOTE! If, in the existing alarm installation (Galaxy), there is
already a serial interface that communicates with the Galaxy
control unit via a certain serial interface, then it is not possible to
choose the same type of interface when selecting a serial interface
for a control unit that is being connected in ARX.
For example, it is not permitted to select ”RS232”, as a serial
interface for a connected control unit, in case there is already a
directly connected external computer (for example, for functional
User’s Guide ARX
Installation
• 278
programming), that communicates with the Galaxy control unit via
RS232 in the alarm installation.
There is also a possibility to replace the physical serial interface
RS232 by streaming the traffic, between a PC with the programme
Galaxy Gold and the galaxy control unit, over its local network
(LAN) via the connected control unit. In this case it is then possible
to create a TCP/IP connection with the control units IP address and
gateway number 4900, in the programme.
Status
In the installation tree it is possible to get a status for all connected
units, and get information, for example, for a DAC that is not
working
You can get the status for an individual control unit or door control
by right clicking and selecting Status.
User’s Guide ARX
Installation
• 279
The Status for an individual door control
By right clicking on a directory and selecting status in the menu,
the Status window is shown for all installed units in that directory.
The status window shows the status for all installed units in that
directory and sub-folders. Only hardware with any kind of error
status is visible in the matrix.
User’s Guide ARX
Installation
• 280
The status for all installed hardware.
I the matrix a number of symbols are used depending on the status:
Unit without error
Unit with warning
Units with errors
Units with information (but not considdered as errors)
Units with unknown status
By clicking the symbols in the matrix, information about the error
is shown in the right part of the window.
User’s Guide ARX
Installation
• 281
Detailed status information at right
In the main window in ARX the status of the system is displayed. If
any error, warning or information is reported the symbol changes
according to the image. Click the status symbol to enter directly the
status window.
The status symbol to the right in the main window (Normal,
warning and error).
User’s Guide ARX
Installation
• 282
The tab Error list
Here all the faults are shown in lists.
Error list for installed units
Controller loading queue
Here the queue for the controllers are that are not currently
connected to the ARX server are shown. Next time a link is
established the controllers will be updated with new infomaiton
from the ARX server.
User’s Guide ARX
Installation
• 283
Controller loading queue for installed controllers
Status settings
These settings are located on the System menu. Here the
administrator can decide what types of hardware status will
generate an error, warning or information message in the status
overview window. Normally the default settings are used, but
depending on the installation and what level of hardware reports are
needed, the administrator can change the settings for status
reporting.
User’s Guide ARX
Installation
• 284
Default status settings for controller
Default status settings for DAC
User’s Guide ARX
Installation
• 285
Examples
Adding doors and floors in the installation
tree
See the example that also includes how the access areas tree’s
settings are done in section ”Adding doors and floors in the
installation tree” on page 286.
User’s Guide ARX
Installation
• 286
Alarm (option)
About Alarm
You can, in ARX Client software, build alarm zones from with an
alarm tree. This is to integrate the access control with the alarm
system.
Menu options (Alarm)
To simplify building and customising of the alarm tree, there are a
number of extra menu options In the Alarm tree window:
Menu option in the window Alarm tree
These are in order of appearance and from left to right:
•
Add, depending on the level you are at in the tree structure,
you can add Zone or DAC with this menu option. (If a
User’s Guide ARX
Alarm (option)
• 287
Galaxy module is installed, it is also possible to add Galaxy
zone, DAC or VRIO.)
•
Remove, removes selected object.
•
Expand, shows the entire tree structure for the selected
object.
The menu options Add, Remove and Status can also be made
available by right-clicking with the mouse on the desired object in
the alarm tree.
Add alarm zones
To add an alarm zone, do the following:
1.
Highlight the level in the alarm tree where the alarm zone
shall be located under. (Initially, there is only one folder,
Alarm.)
2.
Select the option Add in the windows menu bar, and click
Zone.
Drop down menu option to add an alarm zone
3.
The symbol for the new alarm zone is now added to the
alarm tree on the left side.
4.
On the right side of the window, from the tab Settings, enter
a Name for an alarm zone and enter which unit shall be an
Alarm controlling DAC.
User’s Guide ARX
Alarm (option)
• 288
The alarm tree with an alarm zone, the tab Settings activated
5.
Click OK if you want to save the changes and close the
window. Click Cancel if you want to close the window
without saving the changes. Click Apply if you want to save
the changes and, at the same time, keep the window open.
Settings for alarm zones
For each alarm zone there are a number of configuration options.
These options are located under the two tabs: Settings and Input
settings.
User’s Guide ARX
Alarm (option)
• 289
Tab Settings
From the tab Settings, you can in addition to defining the Name and
Alarm controlling DAC, also make a number of choices to
customise your alarm zone:
•
You can define which users that the status is displayed for,
by selecting the option Show alarm status when armed for.
The default option is No one and the option Authorized
users means users with alarm clearance. It is also possible
to select All.
This option enables red alarm status alert and a red light
when the alarm is activated.
•
Conditions for Authorized to activated alarm zone. The
options are No (which means blocked when the alarm is
activated), Alarm authorized, Alarm authorized with PIN,
Alarm authorized with warning or Alarm authorized with
PIN and warning.
If No is not selected it means that you can enter a door to a
area with the alarm active if you have a card with alarm
access. This is normally used when you are managing the
alarm from a manouver panel inside this door.
•
The Unlock door when disarming option allows the door to
be automatically unlocked when disarming the alarm at the
card reader of this door.
Note! If the door does NOT unlock with this option
enabled, the option at the bottom in the window, Time for
showing status must be increased. Time for showing staus
also decide how long time the DAC waits for an answer
from the alarm central.
•
In the field Time limited disarming you define how long a
sale of alarm time will last.
•
With the checkbox Pulse you can enable the pulse option.
•
With the checkbox Status only from blocking input you can
select how alarm status is shown.
User’s Guide ARX
Alarm (option)
• 290
Note! Status only from blocking input and Show status infinitely
does not work on an elevator reader.
To manage an alarm for a floor from the elevator reader:
•
1.
Press A/B + <Floor>
2.
Swipe the card
3.
Enter PIN code
In the field Statis indication time you define how long the
status for the blocking input is displayed on the reader after
entering the PIN code. The time is defined in seconds.
Note! Time for showing status also decide how long time a
DAC waits for answer from the alarm central for automatic
unlocking of a door when disarming the alarm. See
function Unlock door when disarming above.
User’s Guide ARX
Alarm (option)
• 291
The alarm tree with an alarm zone, the tab Settings activated
If a pre-alarm is wanted at activation of a alarm zone, it can only be
done by selecting relay function 13 on the main DAC.
Tab Input settings
From the tab Input settings you can select function on the input
connection (Inp 4). When no function is selected connection is
performed when Inp 4 is closed:
•
Alarm On/Off
•
Inverted alarm input
For the blocking input you can define:
•
The time for any Arming delay and Disarming delay. The
time is defined in seconds.
User’s Guide ARX
Alarm (option)
• 292
•
How Status indication is to occur, use the option Follow
physical input or Follow blocking delay.
The alarm tree with an alarm zone, the tab Input settings activated
Alarm settings for DAC
For the DAC that is an alarm controller in an alarm zone, there are
a number of configuration options that can be made individually
per DAC.
To change some of these properties you must first check the
checkbox Override.
User’s Guide ARX
Alarm (option)
• 293
The alarm tree with properties for alarm controller DAC
Configuration options for an alarm controller DAC are:
•
Show alarm status when armed for, this defines which
users shall be shown the activated alarms (options are No
one, Authorized users or All.)
•
Authorized to active alarm area defines who has access to
an area with an activated alarm. (The options are No
(normal), Alarm authorized, Alarm authorized with PIN,
Alarm authorized with warning or Alarm authorized with
PIN and warning.)
•
Unlock door when disarming
Finally, you can select if any equipment is not to be
blocked during an alarm: Outer reader, Inner reader or
Exit button.
User’s Guide ARX
Alarm (option)
• 294
Galaxy alarm zone
In the alarm tree it is possible to add Galaxy alarm zones and allot
which alarm groups that are valid for the actual zone. Before this
can be done it is necessary to configure the Galaxy control units
and attached control units in the Installation tree (see page 275).
Then these will automatically be shown in the structure of the alarm
tree.
In the ARX it is possible to indicate that a control unit shall act as a
virtual RIO, even called a VRIO. This means that the control unit
communicates with the Galaxy system in the same way as a
traditional Galaxy-RIO does.
Add Galaxy alarm zone
To add a Galaxy alarm zone, do the following (A Galaxy control
unit must be put in the Installation tree before this can be done.):
1.
Mark the Galaxy control unit that the zone is to belong to.
2.
Then select the alternative Add in the window’s menu, and
click on Galaxy alarm zone.
The Menu for adding an alarm zone
3.
The symbol for the alarm zone is now added to the window on
the left.
User’s Guide ARX
Alarm (option)
• 295
Galaxy alarm zone marked and the tab Settings is active
4.
In the window on the right under the Settings tab enter a Name
for the alarm zone and write a short Description. In addition
indicate which Group (Galaxy alarm group) the current zone
belongs to, the conditions for the Schedule controlled alarm
by-pass as well as the settings for Buy alarm time.
5.
In the same window under the tab Access categories, it is
possible to add access categories that should apply to control
the alarm zone. Click on the button Add in order to select
which category that is to be added. Mark a category and then
click OK.
User’s Guide ARX
Alarm (option)
• 296
Galaxy alarm zone with the tab Access categories activated
6.
Under the third tab, Pre-alarm, it is possible to adjust Warning
time in seconds before the alarm is activated and also connect
one or more relay outputs to the alarm zone.
NOTE! The pre-alarm does not sound if the alarm is activated
via a Galaxy MAP.
User’s Guide ARX
Alarm (option)
• 297
Galaxy alarm zone with the tab Pre-alarm activated
7.
Click on the button Add in order to select which relay output
and which unit (control unit or DAC) should be added. Mark a
unit, state the relay output and then click on OK.
8.
In the alarm tree window, click OK if you want to save the
changes and close the window. Click on Cancel if you want to
close the window without saving the changes. Click on Apply
if you want to save the changes and keep the window open.
User’s Guide ARX
Alarm (option)
• 298
Add DAC
To add a DAC to a Galaxy alarm zone, do the following:
1.
Mark the Galaxy alarm zone that the current DAC shall belong
to.
2.
Then select the alternative Add in the window’s menu-bar, and
click on DAC.
Menu to add a DAC
3.
In the window that is now open, select which DAC is to be
added from the list: Available DAC.
NOTE ! A DAC can not be connected to a Galaxy alarm zone
and a standard alarm zone at the same time.
NOTE ! If there is an elevator in the Galaxy installation it is
only possible for each DAC to be contacted to one Galaxy
alarm zone.
Otherwise it is possible for a DAC to be included in several
zones. Normally the on-position (to A or B), is controlled the
Galaxy group that you want to control. For example if you
connect to Group 3: Press B3 + card + pin code. See functions.
4.
The DAC symbol is now added to the alarm tree structure.
User’s Guide ARX
Alarm (option)
• 299
The alarm tree with a DAC in e Galaxy alarm zone selected
The Settings Tab
Here the alarm settings are given that apply to the current DAC.
The first three settings are for the alarm status and access to the
alarmed area:
•
Show the alarm status when the alarm is on, which specify
the users the status is visible for. You can choose between:
None, Authorised users or All.
•
Access to the active alarm area, which specify the users
who have access to an active alarm area The alternatives
are No, Alarm authorized, Alarm authorized with PIN,
Alarm access with a warning and Alarm access with PIN
and a warning.
•
Status indication time, is given in seconds
Note! Time for status indication also decide how long time
a DAC waits for answer from the alarm central for
User’s Guide ARX
Alarm (option)
• 300
automatic unlocking of a door when disarming the alarm.
See function Unlock door when disarming below.
In the same window with the help of five checkboxes, it is possible
to select further alarm settings for the chosen DAC:
•
Allow alarm activation
•
Allow alarm deactivation
•
Constant showing of status
•
Unlock door when disarming
Note! If the door does NOT unlock with this option
enabled, the Status indication time-option value above must
be increased. Status indication time also decide how long
time the DAC waits for an answer from the alarm central.
Under No Blocking it is possible to choose to allow passage in the
door even though the alarm is activated. The basic settings are: no
passage allowed when the alarm is activated.
•
Exterior reader, Allows users to enter when the alarm is
on.
•
Interior reader, Allows users to exit when the alarm on.
•
Exit button, Allows users to exit by pressing the exit button
when the alarm is on.
Advanced Tab
Here the alarm settings are state for the actual DAC:
User’s Guide ARX
Alarm (option)
• 301
Advanced Tab
•
Deactivation of the alarm during entrance with alarm
access, card and PIN, normally requires a separate
procedure to deactivate (A – card – PIN code). Check this
checkbox so that users with the right to deactivate the alarm
can do so by swiping their card and entering their pin-code.
Note! To cancel an activated alarm during pre-alarm time,
you must always enter A+card+code.
•
Control the alarm of this zone without selecting a group, if
a door is part of several alarm zones it is normally
necessary to indicate in which zone the alarm is intended to
be activated/deactivated, by pressing A/B and the zone’s
group number during the activation/deactivation of the
alarm. By checking this checkbox it is not necessary to
enter the zone’s group number when activating/deactivating
the alarm this specific zone.
•
Block exterior readers during the pre-alarm time, normally
entering is allowed during the pre-alarm time. By checking
User’s Guide ARX
Alarm (option)
• 302
this checkbox, the exterior readers are blocked for entering
the access system when the pre-alarm time has begun.
•
Allow alarm manoeuvre by using button 9 when an alarm is
triggered, normally it is not allowed to acknowledge the
alarm from the card reader. Check this checkbox if you
want to allow users to be able to acknowledge the alarm by
pressing 9 before deactivation of alarm
(9A – card - code).
•
Deactivating the alarm when entering with an alarm access
card, normally a special procedure is required in order to
deactivate the alarm (A – card – pin code). Check this
checkbox in order to allow users with alarm manoeuvre
rights to deactivate the alarm automatically at access
(according to the valid security level schedule, for example,
card or card and code).
Note! To cancel an activated alarm during pre-alarm time,
you must always enter A+card+code.
•
Activate with a card twice, normally a special procedure is
required to activate the alarm (B – card – pin code). Check
this checkbox in order to allow users with alarm manoeuvre
rights in a certain area to activate the alarm by swiping the
same card twice.
•
Always forced activation of the alarm during a Bmanoeuvre (Equivalent to 9B), normally alarm sections are
not affected if they are programmed to be excludable when
the alarm is activated. Check this checkbox in order for the
system to force the alarm activation for all sections. If a
door in a certain section is open, this section is excluded if
it is programmed to be excludable.
•
Always forced deactivation of the alarm during an Amanoeuvre (Equivalent to 9A), normally a triggered alarm
isn’t acknowledged at an alarm deactivation. Check this
checkbox in order to automatically acknowledge triggered
alarms when deactivating the alarm (A – card – pin code).
User’s Guide ARX
Alarm (option)
• 303
Add Virtual RIO (VRIO)
For every control unit connected to Galaxy, it is possible in the
alarm tree to add one or several VRIO.
To add a VRIO, do the following:
1.
Mark the Galaxy connected control unit that the VRIO-unit
belongs to.
2.
Then select the alternative Add in the window’s menu bar and
click on VRIO.
Menu for adding VRIO
3.
The symbol for the new VRIO-unit is now added to the alarm
tree.
4.
Name the VRIO-unit and indicate which address the unit shall
have, on the right in the window. The address is selected
between the interval 0 to 15.
NOTE! On communication line 1 in Galaxy, it is usual that the
addresses 0 and 1 are already occupied by the control unit. This can
differ between various settings and it is therefore safest to check
which addresses are not already occupied.
User’s Guide ARX
Alarm (option)
• 304
VRIO-inputs
A VRIO-unit has eight inputs. For every one of these you state
which type of event should be reported up through the system to the
Galaxy control unit.
Which measures should be taken when, for example a door is
forced open is decided by the Galaxy control unit and is set in the
programme Galaxy Gold.
The input settings are carried out in two steps, first if the event
concerns a control unit or a DAC and then which type of event
(function) that is to be reported.
For the VRIO-inputs select Control unit in the left column, then
select between the events Sabotage control unit or External power
off (auxiliary power).
The alarm tree with the choice of VRIO-inputs for the control unit
marked
User’s Guide ARX
Alarm (option)
• 305
For the VRIO-inputs you select DAC you can choose between the
events:
•
Door forced, sounds the alarm if the door is forced, no
information with a valid access.
•
Door open too long, sounds the alarm if the door remains
open after valid access.
•
Door forced or door open for too long (as the two previous
steps)
•
Duress alarm, sounds the alarm when the PIN-code is
increased by 1000. (Example: normal PIN ”1234” – duress
PIN ”2234”)
•
Invalid PIN, sounds the alarm at an invalid PIN-code.
•
Inp. 1 Free input.
•
Day- and night function (motor lock), the same physical
input as above but will only work if a directly connected
motor lock is installed.
•
Door open/shut, sends the status to the Galaxy control unit
even if the access is valid or not.
•
Inp. 2 Free input
•
Inp. 3 Blocked
•
Inp. 4 Alarm manoeuvre
•
Invalid card
•
Valid card
•
Button (RTE)
•
Motor lock bolt out
•
Motor lock bolt in
•
Motor lock fault
•
Follows pre-alarm relay
User’s Guide ARX
Alarm (option)
• 306
•
Sabotage reader
Alarm tree with choice of RIO-input for DAC marked
User’s Guide ARX
Alarm (option)
• 307
VRIO-outputs
For the four RIO-outputs that belong to a VRIO you state which
type of output it is (DAC or Control unit) and then which relay that
is to be connected to this output. The functions that these outputs
have must have been programmed in Galaxy.
If DAC is selected there are only four relays to choose from in the
beginning and if Control unit is chosen there are three relays.
Alarm tree with the RIO-output marked
User’s Guide ARX
Alarm (option)
• 308
Firmware
About Firmware
With the Firmware feature in ARX it is possible to check which
firmware version that is installed and also update the connected
controllers’ firmware
Check and Update Firmware
To check and update firmware for controllers in ARX, do the
following:
1.
Select the Firmware icon in the main window.
2.
In the Firmware window that now opens the settings for the
connected controllers are shown.
User’s Guide ARX
Firmware
• 309
Window System Configuration with tab Firmware activated
To update firmware for one or more controllers, continue with the
following steps:
3.
Enter new firmware by clicking the Select button, highlight
the new version in the list that is shown and OK. (In the list,
the firmware versions that are registered on the server are
displayed.)
4.
Select the controllers that shall be updated. To choose more
than one row, keep the Ctrl key depressed while selecting.
5.
Then click on the button Update. Now a query window is
shown with information that the estimated time for the
update (or upgrade) can be up to 5 minutes.
Note! In systems with many cards, it can take more than 5
minutes per controller.
User’s Guide ARX
Firmware
• 310
Query window Upgrade firmware
6.
Click Yes to start the update or No to cancel.
NOTE! When you have clicked Update the server will reboot all
the selected controllers. Because they are reset, the controllers are
also updated with the new firmware.
NOTE! During the update all connected doors will be offline.
NOTE! Updates will be performed in sequence, one controller at a
time.
User’s Guide ARX
Firmware
• 311
Logs
About Logs
In the ARX there is a detailed log function that the user can study.
In the logs, all information is saved for events in the system. These
events are all the types of changes that occur in the system, for
example, if a new access group is created, a DAC has been
connected, or if the settings for readers are changed.
In the function Logs there is also the possibility for users to filter
and sort the different records in order to more easily study specific
periods, types of events or events linked to a specific operator.
If you have the optional feature Domains installed you will see the
log information for the domains you have permission to access. (If
you only have permission for one domain, door passages, for
example, in other domains are not visible in your log.)
User’s Guide ARX
Logs
• 312
Show Logs
To show the logs, do the following:
1.
Click the button Logs in the main window.
2.
In the window Logs that now opens, a list of the events in
the system is displayed.
Window Logs med current events for the system
Using the checkbox Pause, you can choose to stop the log, or to
continue updating the log as soon as anything happens in the
system.
Groups of events are shown as folders in the log. It is possible to
expand these folders by clicking them.
User’s Guide ARX
Logs
• 313
Search
With the search function a user can rapidly fin a certain word in the
headline for each event.
Click the search button.
The search function finds words in the headline in the event column
Tip: Search for ”Res” returns ”Resources” as a result. Note that the
search function differs between upper and lower case letters.
Show details
To show details about an event, double-click the line in the Logs
window that corresponds to the event that you wish to see more
information on (You can also highlight the line and select the menu
option Show details.)
A separate window is now opened with detailed information about
the chosen event.
User’s Guide ARX
Logs
• 314
Window Event with detailed information about an event
If you double click on the event, you will see the details for this.
This is a very effective way to enter the objects affected by a
certain event in the system.
Filter
At the top of the window Logs there is the field Filter and the
associated buttons Put filter and Clear filter.
These give users the possibility to filter the log information. For
example, to study events from a specific period or events linked to
a specific operator.
To filter the log information, do the following:
1.
In the window Logs, click Put filter button.
User’s Guide ARX
Logs
• 315
Menu window for creating a filter
2.
Select the event types to filter. (Or use an earlier saved
filter in the Use filter drop down list in the top of the
window.)
3.
Click Finish to filter or Next to narrow the filtering further
(Users, Access categories, Credentials, Card format and/or
Access areas)
Dialog for further filtering options
User’s Guide ARX
Logs
• 316
4.
Choose one or several filtering options and press next.
Depending on your choice, one, several or all of the
following dialogs will be showed:
a) Users
b) Access Categories
d) Card Format
e) Access area
c) Credentials
For all dialogs apply: Highlight desired selection in the left column and click the right
arrow in the middle of the window to set the filter. Finish by clicking Next or Finish.
Example: To filter the log to show all events for a specific person,
check Users in step 3 and specify this person in step 4 (dialog a).
Note! If you filter the log for a certain person, and at the same time
checks to see for example log information for door events, ALL
events for the doors will be shown – only person related events will
be filtered according to your person filter.
User’s Guide ARX
Logs
• 317
5.
You are now prompted to save the filter as a template.
Enter name and click Finish.
6.
In the last window for filter settings, define start and end
date for the filter, and a time window for this period.
Window for filter settings
7.
Click OK if you want to save the settings and close the
window. To close the window without saving the input,
click the Cancel button.
Clear filter
Click on this button to take away the current filter and show all
events.
Remove filters
Click on this button to remove some of the filter templates that are
saved.
User’s Guide ARX
Logs
• 318
Calendar
About Calendar
By using the Calendar function, you can create new or add existing
calendars for a year. When you create a calendar, the main steps to
define are:
•
Day types, for example weekday and weekend…
•
Week definitions, a standard week definition is that you
define Monday thru Friday as day type Weekday and
Saturday thru Sunday as the day type Weekend
•
Exceptions, can for example be that Christmas Day on
December 25th is an exception to the Weekday day type
The ARX is delivered with a default yearly calendar (Standard
calendar) that has the basic day types and week definitions already
defined.
User’s Guide ARX
Calendar
• 319
Add Calendar
In ARX, there is a predefined year template that has basic day types
and week definitions already registered.
If you want to create your own calendars, you can choose to use the
standard year calendar as a template and customise it to suit your
requirements, or you can create a new calendar from scratch.
To create a new calendar, do the following:
1.
Select the menu Tools in the main window and click the
option Calendar.
Window Calendar with a list of the calendars that are stored in the
system.
2.
Click the button New.
3.
Give the new calendar a name by writing a text string in the
Name field and also enter a description in the field
Description.
4.
By using the drop-down list menu Year, select the year that
calendar is valid for.
5.
Click OK if you want to save the information and close the
window. To close the window without saving the input,
click the Cancel button. Click Apply if you want to save the
User’s Guide ARX
Calendar
• 320
information and at the same time keep the window open
and continue adding new information.
Initially, the new calendar is completely empty and you must build
it by defining day types, week definitions and any exceptions for
the new calendar.
For more information on how to work with Day types, Week
definitions and Exceptions in a calendar, see “About Calendar” on
page 319.
Modify a Calendar
To modify an existing calendar, begin by doing the following:
1.
Select the menu Tools in the main window and click the
option Calendar.
Window Calendar with a list of the calendars that are registered in
the system
2.
Select the calendar you want to edit and click Modify.
User’s Guide ARX
Calendar
• 321
Window for the selected calendar, with the main tab Calendar
activated.
To select the part of the calendar you want to work with, click one
of the tabs in the calendar window.
The tabs are Settings, Calendar and Exceptions. Below is a
description of the options that are located under each of the tabs.
Calendar tab
Under the main tab Calendar, you can see the combined calendar
for a whole year with the different day types illustrated with
different colours.
Modify day type for a specific day
To add the day type for a specific day, do the following:
User’s Guide ARX
Calendar
• 322
1.
Using the mouse cursor, click on the square that
corresponds to the specific day on the calendar chart.
Day type menu that is displayed for a selected day
2.
In the menu that is displayed, select the day type by
scrolling down with the mouse cursor and click the required
day type in the list.
The chosen selection is now visible in the calendar window.
Main tab Calendar activated, displaying one exception (24th
December).
User’s Guide ARX
Calendar
• 323
3.
To save the information and close the window, click OK.
To close the window without saving the input, click the
Cancel button. Click Apply if you want to save the
information and still keep the window open.
Exception tab
Under the Exceptions tab, a list of the days that are exceptions to
the week definitions in the standard calendar are displayed.
Tab Exceptions in calendar window with a list of exceptions.
User’s Guide ARX
Calendar
• 324
Settings tab
Under the tab Settings, you can add, add and remove different Day
types, and also set all of the day types for a standard week. This is
called Week definition and is done by linking each weekday to a
day type.
Tab Settings in the Calendar window.
Create new day type
1.
Click the button Add day type.
User’s Guide ARX
Calendar
• 325
Window for new day type
2.
Enter Name and write an Abbreviation for the day type.
3.
If you want to select a different colour than the one that is
suggested, choose a colour from one of the standard colours
using the drop-down list menu Colour, or click More and
select another colour in the window that then opens.
Window for selecting a colour
4.
If you choose a new colour, first click on the desired colour
and then on OK when you have made your choice.
5.
Click OK in the window for selecting day type.
6.
In the calendar window, click OK if you want to save the
information and close the window. To close the window
without saving the input, click the Cancel button. Click
User’s Guide ARX
Calendar
• 326
Apply if you want to save the information and at the same
time keep the window open.
The new day type is now displayed in the list of day types.
Modify day type information
You can, whenever required, change the information that is
attached to a day type.
1.
Choose the day type you want to change in the area for Day
types in the calendar window.
2.
Click the button Change day type.
See “Create new day type” above for more information on how to
add a day type.
Remove a day type
1.
Choose the desired day type in the area for Day types in the
calendar window.
2.
Click Remove day type.
Query dialog to remove a day type
3.
Click Yes in the query dialog that appears if you are sure
that you want to remove this day type.
Change a week definition
To change a week definition, do the following:
1.
In the area for Week definitions, click on the field that
corresponds to the weekday you want to change.
User’s Guide ARX
Calendar
• 327
Week definition, with a list of the different day types
2.
In the list that is now shown, click on the new day type you
want to add to.
3.
In the Calendar window, click OK if you want to save the
information and close the window. To close the window
without saving the input, click the Cancel button. Click
Apply if you want to save the information and at the same
time keep the window open.
User’s Guide ARX
Calendar
• 328
Example
Add holiday to an existing calendar.
The Company Example’s standard calendar needs to be
complemented with holidays.
1.
Go to the main window for Calendar and choose to edit the
existing standard calendar.
2.
Under the Settings tab, click on Add day type.
Under settings in the calendar you add new day types.
3.
Fill in the name, choose colour and click OK.
User’s Guide ARX
Calendar
• 329
4.
Click on the Calendar tab and change the days that shall be
marked with the new day types.
Under the Calendar tab change the days that fit in on the new day
types.
5.
Then all the schedules connected to this calendar must be
checked and completed since the days added defined as
holiday not will have any time settings on the new day type
in current schedules.
User’s Guide ARX
Calendar
• 330
Under settings in the Calendar, all new day types are added.
User’s Guide ARX
Calendar
• 331
Operators, Operator
templates and Roles
About Operators, Operator
templates and Roles
Everybody with a user account in ARX Client is regarded as an
operator. The Roles defines the user right for the operator in the
ARX Client. Operator templates define in what domain, the
operator has access.
This section explains how to:
•
Create Operators, Operator templates and Roles
•
Remove Operators, Operator templates and Roles
Operators
By using the menu option Operators (in the main windows System
menu) an administrator can manage other ARX Client software
User’s Guide ARX
Operators, Operator templates and Roles
• 332
users (or operators). Here, the administrator can add and remove
users.
In ARX it is possible to create a number of different users, with
different security clearance. For example is it possible to create
users that only have clearance to administrate users and cards, or
users that only manage the system within a domain (requires the
optional feature Domain).
An operator that create new users can not create users accounts that
have higher clearance that his or her own account.
Add an operator
To add a new operator, do the following:
1.
Select the System menu in the main window and click the
option Operators.
2.
In the window Operators click New to add an operator.
Window Operators with a list of registered users
3.
In the window that opens, enter User Name, Full name, a
Description and Password (twice). A password must be
entered.
If you have the optional feature Domains all new operators
are automatically added to the standard domain.
NOTE! The password field is case sensitive (differentiates
between upper and lower case characters).
User’s Guide ARX
Operators, Operator templates and Roles
• 333
Window to add a new operator
4.
In the Operator Templates section you choose the template
for the new operator. (The template defines access to
domains and permission for ARX. See chapter Operator
templates.)
User’s Guide ARX
Operators, Operator templates and Roles
• 334
Window to add a new operator
5.
Choose a template and click OK.
6.
Click OK if you want to save the information and close the
window. To close the window without saving the input,
click the Cancel button.
Remove operator
To remove an operator, do the following:
1.
Select the Tools menu in the main window and click the
option Operators.
2.
In the window Operators, highlight the operator profile you
want to remove and click Delete.
3.
If you are sure that you want to remove this operator, click
Yes in the query dialog that now appears.
User’s Guide ARX
Operators, Operator templates and Roles
• 335
Query dialog Delete operator
Operator templates
Using the Operator templates menu option (in the System menu), a
user with the correct user rights can administrate operator
templates.
The operator template sets privileges for:
•
The domains to be administrated
(Requires the optional feature Domains.)
•
The roles applicable for the template
(That is, the privileges in ARX Client software the operator
template will have.)
The operator templates is used when a new user is added as
operator, see section “Add an operator” on page 333.
Add an operator template
To add an operator template, do the following:
1.
Choose System - Operator templates in the main window.
2.
In the window Operator templates, click on New to add a
operator template.
User’s Guide ARX
Operators, Operator templates and Roles
• 336
The Operator templates window with a list of available templates.
3.
In the window that opens, enter the Name and Description.
The window to add a new Operator template.
4.
Click on the Add role to set the role (user rights) for the
current operator template.
(If you have the optional feature Domains installed you also
have the possibility to define different roles for each
domain.)
If you add a role on the globe icon, the user rights apply for
all domains. If you add a role on a house icon the user rights
apply only for this domain.
User’s Guide ARX
Operators, Operator templates and Roles
• 337
(Using the button “Create a new template from this” you copy the
active operator template with a new name in a new window. This
is useful if you want to create many similar templates.)
The Choose roles window
5.
Add desired role by highlighting it and click on the right
arrow. Finish by clicking OK.
User’s Guide ARX
Operators, Operator templates and Roles
• 338
Roles
Using the Roles menu option (in the System menu), a user with the
correct user rights can administrate roles.
The roles function lets you define the user rights to be applied to a
certain role. A role works like a template for the user rights for new
operators in the system. In other words, when creating operator
templates, the user rights is decided by adding a certain role.
Add role
To add a new role, do the following:
1.
Select the System menu in the main window and choose the
Role option.
The roles window.
2.
In the Roles window, click New.
User’s Guide ARX
Operators, Operator templates and Roles
• 339
The Add role window with a list of all user rights (Requires all
optional features)
3.
Write Name and Description and check the desired user
rights to be added to the new role. Finish by clicking OK.
User’s Guide ARX
Operators, Operator templates and Roles
• 340
Explanation of roles
Important: Some of the user rights require other user rights to be
set in a certain way. Refer to the table below to see the
dependencies:
Rights
Explanation
Also demands
Administrate bookings
Gives the right to see
and/or create, change or
delete bookings for people.
Calendar
Basic configuration
of bookings.
Person register
Access categories
Apartments
Schedules
Person register
x
x
x
x
x
Access Areas
Schedules
x
x
Calendars
Hardware
installation
Access categories
x
x
x
Person register
x
Operator,
Operator’s
templates and Roles
x
Access categories
Domains
Door types
Booking: Basic
configuration
Hardware installation
Calendars
Cards
Card receipts
Show logs
User’s Guide ARX
Gives the right to see
and/or create, change and
delete access categories.
Gives the right to see
and/or create, change and
delete domains.
Gives the right to see
and/or create, change and
delete door types.
Gives the right to see
and/or create, change and
delete posts for everything
that has to do with the
configuration of the
booking function.
(Resource tree, time slot
templates etc).
Gives the right to see
and/or create, change and
delete hardware in the
installation tree.
Gives the right to see
and/or create, change and
delete calendars.
Gives the right to see
and/or create, change and
delete cards.
Gives the right to see
and/or create, change and
delete Card receipts.
Gives the right to see the
log function in ARX.
Operators, Operator templates and Roles
Re
ad
x
x
• 341
Wri
te
x
x
Download client
application
Alarm
Apartments
Messages for My
pages
Operator, change own
password
Operator, Operator’s
templates and Roles
Access areas
Person register
Entry phone
subscribers
Pulse opening of door
Schedules
Single sign-on
User’s Guide ARX
Gives the operator the
possibility to download the
client application from the
web interface.
Gives the right to see
and/or create, change and
delete hardware in the
alarm tree.
Gives the right to see
and/or create, change and
delete apartments.
Gives the right to see
and/or create, change and
delete messages for My
pages.
Gives the right to change
own password.
Gives the right to see or
administrate operator,
operator’s templates and
roles.
Gives the right to see
and/or create, change and
delete posts in the access
area tree.
* Necessary if adding
doors.
Gives the right to see
and/or create, change and
delete users.
Gives the right to see
and/or create, change and
delete entry phone
subscribers.
Gives the right to the
command to pulse open a
door from the installation
tree.
Gives the right to see
and/or create, change and
delete schedules.
Gives the right to
show/hide information
about login, in the ARX
web interface. Only valid if
part of a web solution, for
example extranet.
Administrate
bookings
x
Hardware
installation
x
x
Person register
Access categories
Booking: Basic
configuration
Cards
Schedules
x
x
x
x
x
x
x
x
x
Access categories
Hardware
installation
Schedules
x
x
Cards
Access categories
x
x
Hardware
installation
x
Access areas
Hardware
installation
x
x
x
System settings
Operators, Operator templates and Roles
x*
x
• 342
Synchronise Axio
Trigger
System settings
Exception for the
Access areas
Show logs
Show persons in zone
Zone
User’s Guide ARX
Contact Assa for more
information.
Gives the right to
read/modify trigger
settings.
Gives the right to change
the system settings for
ARX.
Gives the right to add
exceptions for the
schedule that controls the
access categories and
functions for a door in the
access areas.
Gives the right to see the
log function in ARX.
Gives the right to see and
reset persons in a zone.
*) Is required for resetting
people in zones.
Gives the right to see
and/or create, change and
delete zones.
Schedules
Access category
Access areas
Calendar
x
x
x
x
Person register
Zone
Access category
x
x
x
Operators, Operator templates and Roles
• 343
x
Connect Card Reader
to ARX Client (PCI)
About card reader
To make the administration of cards, card numbers and PIN codes
easier, it is possible in ARX Client software to connect a PCI
reader. This reader can then be used to attach cards to a users, add
new cards to card lists or change the PIN code settings for cards in
the system.
The menu option PCI Settings is shown in the System menu. With
the options available through this option you can configure the
settings for the PCI reader.
This section goes through step by step how you:
•
Connect a PCI-reader
•
Change the settings for a PCI-reader
•
Examples from The Company Example
User’s Guide ARX
Connect Card Reader to ARX Client (PCI)
• 344
Connect PCI-reader
To be able to use a PCI-card reader you have to connect it to a
COM port or usb-port on the client and connect the power cord.
Restart the ARX Client software and configure the settings for the
card reader in the system menu – PCI-settings.
When the card reader is connected, an additional icon is displayed
in the toolbar in the main window. This icon indicates the status of
the connected PCI reader.
The main window toolbar, with PCI reader icon (blocked)
By clicking on the PCI reader button in the main window toolbar it
is possible to toggle between Active and Blocked PCI reader.
The icons for Active (green) and Blocked (red) PCI reader
PCI reader settings
If you chose the PCI option in the System menu a window for PCI
reader settings opens.
User’s Guide ARX
Connect Card Reader to ARX Client (PCI)
• 345
Menu option PCI Settings
In the upper part of this window the COM port that the reader is
connected to, is chosen and also the status of the reader. (If no PCI
reader is connected to the client, the status message Not connected
is shown.)
User’s Guide ARX
Connect Card Reader to ARX Client (PCI)
• 346
Window for PCI settings
In the field Settings it is possible to select options for the following
settings:
•
Card format to use, with this the drop-down menu you
select which card format the reader will use.
Note! Format chosen must comply with how the cards you
want to read are programmed.
•
Reading method, the method for how data is acquired from
the card is selected with this drop-down menu.
Solid standard
This input method should normally be used.
5-5
Alternative input method. Try this alternative if the ARX
Client software does not register the card number correctly.
Straight input
Alternative input method. Try this alternative if the ARX
Client software does not register the card number correctly.
•
If a card is presented, what should then be created? The
alternatives are Card or Person and card (or Apartment if
the apartment module is installed).
User’s Guide ARX
Connect Card Reader to ARX Client (PCI)
• 347
•
Ability to change PIN when blocked means that the reader
is blocked for data gathering, but it can be used for PIN
code change for cards.
•
The checkbox Show help on client when changing PIN will
enable help instructions on the client computers screen, as
support for operators who are instructing other users.
The PIN code is changed by: press key A – swipe card – enter
current PIN code – enter new PIN code – enter new PIN code again
(as confirmation). The LED on the reader then flashes green three
times if the code change was successful.
NOTE! For cards that have no PIN code, a new code can be added
by: press key A – swipe card – enter desired PIN code – enter new
PIN code again (as confirmation). The LED on the reader then
flashes green three times to confirm a successful registration.
User’s Guide ARX
Connect Card Reader to ARX Client (PCI)
• 348
Examples
Adding code
You only have to start the ARX Client software for the following
procedure to work.
1.
Press A
2.
Swipe Card
The reader lights up the symbols on the buttons.
3.
Enter desired code
(Or give the card reader to the card owner so that they can
select a code)
The reader confirms by a fast flashing green light.
4.
Repeat the same code again to confirm
The reader flashes green 3 times if everything is ok.
Change PIN code
You only have to start the ARX Client software for the following
procedure to work.
User’s Guide ARX
Connect Card Reader to ARX Client (PCI)
• 349
1.
Press A
2.
Swipe card
The reader lights up the symbols on the buttons.
3.
Enter the present four number code
(Or give the card reader to the card owner so that they can
enter a code)
The reader confirms by a fast flashing green light.
4.
Enter a new code
5.
Repeat the same code again to confirm
The reader flashes green 3 times if everything is ok.
User’s Guide ARX
Connect Card Reader to ARX Client (PCI)
• 350
Apartments (option)
About Apartments
The apartment module is used for handling information and access
permissions for apartments in the installation.
In ARX, you can create a number of apartments and then decide
which access permissions each apartment shall have and which
bookable objects the apartment residents shall be able to book.
Linked to each apartment are two access categories (security
levels): Normal and Restricted. These two access categories can be
used to give residents of an apartment different access permissions.
Please note that the cards linked to an apartment are linked to the
actual apartment – not to a person.
The apartment module is only accessible in the ARX Client
software if you have a valid licence which covers these features.
User’s Guide ARX
Apartments (option)
• 351
Add an apartment
To add an apartment, do the following:
1.
Click the Apartment button on the toolbar of the main
window.
2.
Click the New button at the bottom of the Apartment
window that now opens.
Window with list of apartments registered in the system.
3.
Now the Apartment wizard that will assist you in adding
new apartments. The first step is to enter the number of
apartments to add and set the naming conventions for these
apartments.
Apartment Wizard - configure batch creation (step 1)
4.
Use the two built-in macros (“@1@” and “@2@”) to
create batch rules for how the new apartments shall be
labeled. The new apartments are then automatically
User’s Guide ARX
Apartments (option)
• 352
according to the created rules. For example apartment
1:101, apartment 1:102 and so on.
External id: Is automatically added, and is used by other
systems.
Then click the button Next>.
5.
Next, choose access for the apartment(s) in the next wizard
window. Select access categories in the list and click Next>
to proceed.
Apartment Wizard - choose access (step 2)
6.
In the last window of the apartment wizard, choose which
bookable objects the new apartments shall have access to.
Then click Finish> to add the new apartments with settings
to the ARX Client software structure.
User’s Guide ARX
Apartments (option)
• 353
Apartment Wizard - choose bookable objects (step 3)
7.
Now the wizard closes and the new apartments are added to
the list in the Apartment window. New apartments are by
default set to be Active.
The Apartments window with new apartments added
Modify apartment settings
To change or modify settings for an apartment, do the following:
1.
Select the Apartments menu option in the Tools menu.
2.
In the Apartment window highlight the apartment in the list
that should be modified and click Modify.
User’s Guide ARX
Apartments (option)
• 354
3.
In the upper part of the Edit Apartment window you can
change the information regarding Name, Description,
External Id and if the apartment shall be Active or not. If
you choose to un-check the Active checkbox, all cards
linked to the apartment will cease to work.
4.
Under the Card tab in the Edit Apartment window it is
possible to add and remove cards for the apartment. (Card
type is only changeable when you add new cards.)
Enter the card number and click Add. (The card is
automatically connected for normal usage.)
Edit apartment window, Cards tab
5.
The card can now be changed to restricted use if you want.
Do this by clicking the text in the Usage column and
choose restricted.
User’s Guide ARX
Apartments (option)
• 355
6.
Under the Access Category tab in the Edit Apartment
window you can edit the two access categories (Normal and
Restricted) linked to each apartment.
Edit apartment window, Access Category tab
Explanation: The cards added for normal usage inherit the access
set in the Normal tab and the cards added for restricted usage
inherits the access set in the restricted tab.
User’s Guide ARX
Apartments (option)
• 356
7.
Under the My pages tab in the Edit apartment window you
can user credentials for Normal and Restriced access to the
booking function on My pages .
Edit apartment window, My pages tab
User’s Guide ARX
Apartments (option)
• 357
8.
Under the Entry phone tab you can allot one or several
entry phones to each appartment.
Edit apartment window, Entry phone settings tab
For each entry you can set the following options:
•
Name - The name of the holder of the apartment, office,
etc. This is visible in the entry phone display, maximum 16
characters.
•
Description - A brief description.
•
Short phone number - The number that will work as a speed
dial number from the entry phones. (By default the first
available number is set for a new entry.)
•
Full phone number - The number that will be linked to the
holder of the apartment or office. If you dial this number
User’s Guide ARX
Apartments (option)
• 358
from an entry phone in the installation, the phone will ring
at the apartment/office.
•
Number to dial - The holders complete phone number
including any prefix, area code, etc.
•
Answer message - The text message (maximum 16
characters) that will be displayed in the entry phone when a
connection is established. For example a description of how
to find the apartment.
•
Called from – Here you can add one or several entry
phones available in the system.
9.
Click OK if you want to save the information and close the
window. To close the window without saving the input,
click the Cancel button. Click Apply if you want to save the
information and at the same time keep the window open.
Remove apartment
To remove an apartment, do the following:
1.
Select the Apartments menu option in the Tools menu.
2.
In the Apartment window highlight the apartment in the list
that should be modified and click Delete.
3.
If you are sure that you want to delete this apartment, click
Yes in the query dialog that now appears. Note! When an
apartment is removed, all cards, access settings and
bookings linked to the apartment will be deleted.
Query dialog Delete operator
User’s Guide ARX
Apartments (option)
• 359
Extended field for apartment
(option)
If the apartment module is installed menu option Extended fields
for apartment is shown in the System menu. With this menu option
you can add additional information fields for apartments in the
installation.
Add extra field for apartment
To add a new information field, do the following:
1.
In the window Extended fields for apartment, click the
button New.
Window Extended fields for apartment
2.
In the dialog window that opens, enter the Name that you
want the field to have in ARX Client software, and enter
which External Name that this field will have when you
export or import data. Default value (not mandatory) is the
value that will be automatically prompted for this field on
all apartments.
User’s Guide ARX
Apartments (option)
• 360
Window to add an extra text field
3.
In the menu dialog, click OK if you want to save the
information and close the window. Click Cancel if you
want to close without saving the information.
4.
Click OK if you want to save the information and close the
window. To close the window without saving the input,
click the Cancel button. Click Apply if you want to save the
information and at the same time keep the window open.
User’s Guide ARX
Apartments (option)
• 361
Examples
Obtain position of users during fire alarm
The fire alarm at the storage room is ringing and you want to
quickly find out which persons are in that area.
1.
Select Zone in the Tools-menu.
2.
The Zone map is shown, double-click on zone – Storage.
Window Zone
User’s Guide ARX
Apartments (option)
• 362
Window: Person in zone
Here you can see that there are 3 persons in this zone.
User’s Guide ARX
Apartments (option)
• 363
Booking (option)
About Booking
With the Booking module is it possible to create a logical structure
of bookable resources available in the installation. The two main
components are the Booking module and a number of actual
booking panels.
The booking panels are connected to controllers and are added to
the installation via the Installation tree. This makes it possible to
manoeuvre connected units from the booking panels through
installed DACs and relays. Regular doors and doors controlled by
the booking functions can be connected to the same controller.
The Booking module is only accessible in the ARX Client software
if there is a valid licence that covers these features present.
User’s Guide ARX
Booking (option)
• 364
The picture shows how the different parts of the booking function
are connected:
•
Resource tree, contains areas, booking objects and
resources that are connected too and controls doors and
relays.
•
Resource access, decides which persons or apartments
have access to which booking objects. It is also possible to
connect a schedule to the resource access.
•
Time slot templates, controls the length of the bookable
time slot length for every booking object.
•
Rule templates, controls the maximum amount of
bookings for every bookable object.
•
Booking object, can be, for example, a conference room or
a laundry room.
Additionally there is a booking list where the administrator can see
the bookings made and which ones are active.
User’s Guide ARX
Booking (option)
• 365
Resources tree
In the tree structure to the left of the Resource tree window, the
different resource areas, booking objects and resources are visible.
On the right side of the window the different booking settings for
each object in the tree structure are shown.
The Resources tree window with the top level (Resource area)
highlighted
Resource area
The top level in the tree structure is the Resource area and below
that level is it possible to add Areas.
In the message display shown you can change the standard text
message and add information. To do this, click on the display area
where you want to add the text and enter the characters with your
keyboard.
User’s Guide ARX
Booking (option)
• 366
NOTE! The message text for a certain area is only shown on the
booking panel’s display if there is more than one area available.
That is, if the user have to make a choice.
NOTE! In addition to letters and digits, the panel can only handle
following special symbols: ?,.;:)(/\<>&%¤#!"=@-.
Area
To add an area to the Resources tree, do the following:
1.
Highlight the level in the resource tree that the area shall be
located under.
2.
Select the option Add in the menu bar, and click Area.
Drop down menu option to add an area
3.
The symbol for the new area is now added to the resources
tree on the left side.
4.
Add a Name of the area and add a short description.
User’s Guide ARX
Booking (option)
• 367
Settings
Under the Settings tab, enter Name and a brief Description for the
area.
The Resources tree window with a area creaated
The the Rule template you can select a rule that will apply for the
whole area or allow that different rule templates apply for each
booking object within the area by selecting <Resource group holds
rules>.
Booking object
The level below an area is Booking object. A booking object is a
bookable unit, such as for instance a laundry room or a conference
room.
To add a booking object to the Resources tree, do the following:
1.
Highlight the level in the resource tree that the booking
object shall be located under.
2.
Select the option Add in the menu bar, and click Booking
object.
User’s Guide ARX
Booking (option)
• 368
Drop down menu option to add a booking object
3.
The symbol for the new object is now added to the
resources tree on the left side. A resource is also
automatically created.
4.
Enter Name and a brief Description for the booking object.
The Resources tree window with a booking object highlighted
5.
Also select a slot template and Rule template.Click New
template for tailor made rules for this booking object.
6.
Finally select which controller that is connected to this
booking object.
User’s Guide ARX
Booking (option)
• 369
Resource
The next level in the resources tree, below booking objects, is
Resources. A resource can for instance be a washing machine in a
laundry room (the booking object) or a video projector linked to a
conference room (the booking object).
A resource can also be a seminar or a training session, that several
users can book at the same time (several concurrent bookings). The
overlying booking object is here the seminar room or the training
premises.
To add a booking object to the Resources tree, do the following:
1.
Highlight the level in the resource tree that the resource
shall be located under.
2.
Select the option Add in the menu bar, and click Resource.
Drop down menu option to add a resource
3.
The symbol for the new resource is now added to the
resources tree on the left side.
4.
Enter Name and a brief Description for the resource.
User’s Guide ARX
Booking (option)
• 370
The Resources tree window with a resource highlighted
The options under the Settings tab for the selected resource are:
•
Resource can not be activated from booking panel
•
Inactive (Not bookable)
If the check box Inactive (Not bookable) is checked you can create
a limited time period when the resource not bookable (inactive).
User’s Guide ARX
Booking (option)
• 371
Door
It is possible to link doors to a resource in order to grant people
access to the resources.
To add a door to the Resources tree, do the following:
1.
Highlight the resource that the door shall be located under.
2.
Select the option Add in the menu bar, and click Door.
Drop down menu option to add a door
3.
In the window Add door that now opens, select one of the
available doors (DACs) from the list. Click OK.
For each door, under the Settings tab, you can set when a user shall
have access to the resource.
To the field Door is accessible from there are two options:
•
The time to calculate from. Start of period, End of period or
First entry.
•
The Offset in minutes. If a negative time is entered (i.e. -15
minutes), access is granted through the door 15 minutes
before the start of the period (for example).
To the field Door will lock at there are two options:
•
The time to calculate from. Start of period, End of period or
First entry.
•
The Offset in minutes. If a positive time is entered (i.e. 15
minutes), access is granted through the door 15 minutes
after the end of the period (for example).
User’s Guide ARX
Booking (option)
• 372
The Resources tree window with a door highlighted
Relay
Relays can be linked to resources and thus make it possible to
switch equipment on and off.
To add a relay to the Resources tree, do the following:
1.
Highlight the resource that the relay shall be located under.
2.
Select the option Add in the menu bar, and click Relay.
Drop down menu option to add a relay
User’s Guide ARX
Booking (option)
• 373
Under the Settings tab, enter Name and a brief Description for the
relay. Also select to which Relay holder the relay is connected to,
the Relay position and when the relay shall be enabled and
disabled.
The setting Relay holder sets to which controller or DAC the relay
is connected and Relay position indicates the relays input position
on the DAC or controller.
To the rows Relay will be enabled at and Relay will be disabled at
there are two options:
•
The time to calculate from. Start of period, End of period or
First entry.
•
The Offset in minutes.
The Resources tree window with a relay highlighted
User’s Guide ARX
Booking (option)
• 374
Resource access
With the function Resource access it is possible to link together
single users or groups of users to bookable resources.
Create a new resource access
To create a new resource access, do the following:
1.
Click on the Resource access button in the main window.
2.
In the Resource access window, click on the New button.
Window Resource access
3.
Enter Name and add a brief Description of the resource
access.
User’s Guide ARX
Booking (option)
• 375
Resource access window
4.
Click on Change schedule to attach a schedule to the
resource access.
With this schedule you can restrict the bookable periods for
individuals that are in the access categories linked to the
resource access.
NOTE! If you want to create a special schedule for this
feature, that can be done by creating a new Other schedule.
(For more information on how to work with schedules, see
“Schedules” on page 110).
User’s Guide ARX
Booking (option)
• 376
Resource access - schedule
5.
In the Persons/apartments field add a person or apartment.
Window to add persons or/and apartments
6.
In the Bookable objects field add the booking object(s) that
apply for the resource access.
User’s Guide ARX
Booking (option)
• 377
Window to add bookable objects
7.
Select the available objects, click the arrow. Finish by
clicking OK.
8.
Finally, click OK to add the new resource access.
Time slot templates
With the function Time slot templates t it is possible to create time
slot templates for the booking feature. The rules included in the
templates will control the time slots for the bookable resources.
Default for time slots are Free time, which means that the user
defines time period for the booking himself.
Create new time slot template
To create a new time slot template, do the following:
1.
Select the Time slot menu option in the Tools menu.
2.
In the Slot templates window, click on the New button.
User’s Guide ARX
Booking (option)
• 378
Slot templates window
3.
Now enter a Name and add a brief Description for the slot
template. Then select a calendar for the template with the
Select calendar button.
4.
In order to create new booking time slots, click and drag to
create a time slot.
User’s Guide ARX
Booking (option)
• 379
Window Slot template
5.
Repeat until all time slots are added. Click and drag to mote
the time slots. To edit or delete a time slot double click on
the time slot and set the Start time and the Passlength.
Slot template, edit window
6.
Finish by clicking OK or Apply.
Tip: Rules can extend over night, which allows multi-day time
slots. When the user reserves multi-day pass, other overlapping
time slots becomes unavailable for reservation.
User’s Guide ARX
Booking (option)
• 380
Rules
With the function Rules you can to create rule templates. These rule
templates makes it possible to pre-define how rules linked to
bookings in the system are designed. For example, you can create
different sets of standard rules for different parts of the system.
By default there is one pre-defined rule template in ARX called
Default rule. The default template can be modified, or you can
create new rule templates.
Create new rule template
To create a new rule template, do the following:
1.
Select the Rules menu option in the Tools menu.
2.
In the Rules window, click on the New button.
Window Rules
3.
Now enter a Name and add a brief Description for the slot
template.
User’s Guide ARX
Booking (option)
• 381
Window Rule template
4.
Now set the different options for the rule template (see the
alternatives below).
5.
Click OK if you want to save the information and close the
window. To close the window without saving the input,
click the Cancel button. Click Apply if you want to save the
information and at the same time keep the window open.
The configuration options for the selected Rule template are:
•
Max number of coming bookings - the maximum number of
active bookings a user is allowed to have.
•
Max bookings per month - the maximum number of
bookings a user is allowed to have in the same month.
(Restarts the first of each month.)
•
Minimum days between bookings - the minimum number of
days a user must have between two bookings.
•
Release time - the time period (in minutes) a user is allowed
to activate a booking. After this period the booked resource
is released.
•
Minimum time left to book slot - The minimum number of
minutes left of a time slot when a resource is bookable.
User’s Guide ARX
Booking (option)
• 382
•
Bookers name in web booking- The name of the person
making a booking is visible for other user in My pages.
Modify rule template
To change the settings for a rule template, do the following:
1.
In the window Rules, highlight the template that you want
to change and click Modify.
2.
In the window that now opens you can modify or change
the settings for the template.
3.
Click OK if you want to save the information and close the
window. To close the window without saving the input,
click the Cancel button. Click Apply if you want to save the
information and at the same time keep the window open.
Remove rule template
To remove a rule template, do the following:
1.
In the window Rules, highlight the template that you want
to remove and click Delete.
2.
If you are sure that you want to remove this time slot
template, click Yes in the query dialog that now appears.
Query dialog Delete resource access
Booking list
The main window gives the administrator an overview of all
bookings made.
User’s Guide ARX
Booking (option)
• 383
Booking list main window
If the booking list contains of a large number of bookings, use the
Search or Advanced search function.
User’s Guide ARX
Booking (option)
• 384
Entry Phone Directory
(option)
About Entry Phone Directory
The Entry phone directory feature handles all settings and options
linked to the entry phone functionality.
To make the optional module Entry phone accessible in the ARX
Client software, a valid licence for this module must be installed.
The objects listed in the entry phone directory can for example be
apartments or a reception desk.
The Entry phone director menu option (Tools menu)
User’s Guide ARX
Entry Phone Directory (option)
• 385
This section goes through step by step how you:
•
Add an Entry phone subscription
Create new entry
To create a new entry in the entry phone directory, do the
following:
1.
Select the Entry phone directory menu option in the Tools
menu.
Window Entry phone directory
2.
In the Entry phone directory window, click on the New
button.
3.
In the Create entry phone directory window that now opens
all settings options for the new directory entry are
displayed.
User’s Guide ARX
Entry Phone Directory (option)
• 386
Window Create Entry phone directory
For each new entry you can set the following options:
•
Name - The name of the holder of the apartment, office,
etc. This is visible in the entry phone display, maximum 16
characters.
•
Description - A brief description.
•
Short phone number - The number that will work as a speed
dial number from the entry phones. (By default the first
available number is set for a new entry.)
•
Full phone number - The number that will be linked to the
holder of the apartment or office. If you dial this number
from an entry phone in the installation, the phone will ring
at the apartment/office.
•
Number to dial - The holders complete phone number
including any prefix, area code, etc.
•
Answer message - The text message (maximum 16
characters) that will be displayed in the entry phone when a
User’s Guide ARX
Entry Phone Directory (option)
• 387
connection is established. For example a description of the
floor, house number etc.
•
Called from - With this option you set one or several entry
phone units to connect to the subscriber.
IP Phone Settings (option)
If the apartment module is installed the menu option IP Phone
Settings is also shown in the System menu. This menu option is
linked to the optional feature Entry Phone in ARX Client software.
If you select the menu option IP Phone Settings a new window
opens where you can set:
•
Server
•
User name
•
Password
•
Max call time (in seconds)
Window IP Phone Settings
User’s Guide ARX
Entry Phone Directory (option)
• 388
Zone (option)
About Zone
If you have a licence that covers the optional feature Zone, you can
create and manage zones in your installation.
Zones can for example be used when monitoring where (in a
building for example) people are. This can for instance be helpful if
an area or a building must be evacuated.
The Zone menu option (Tools menu)
This section goes through step by step how you:
•
See how many persons there are in the different zones
•
Use anti passback
•
Example taken from The Company Example
For more information on additional functions, adding doors or how
to create or change zones, see the configuration guide.
User’s Guide ARX
Zone (option)
• 389
Add zone
To create a new zone, do the following:
1.
Select the Zone menu option in the Tools menu.
The Zone window
2.
In the Zone window, click on the Add zone button (or rightclick in the windows map area and choose Add zone.)
3.
In the Add zone window that now opens enter a Name for
the new zone.
Dialog window Add zone
4.
Now add the doors to the zones, where you set what readers
on each door leads in and out from the zone.
User’s Guide ARX
Zone (option)
• 390
The new zone is now added to the zone list in the lower part of the
Zone window and shown in the graphical zone map.
Window Zone
Zone map
In the main window for the Zone function a graphical zone map is
shown. This map shows all available zones in the installation.
You can change the layout of the zones in the zone map. This will
help you to organize the zones in the zone map to better depict your
actual installation and make the zone map easier to work with.
Regroup and move the zones by selecting one zone at a time and
drag it to a new location.
It is also possible to change the size of a zone in the zone map.
Select and drag a corner handle to resize a zone.
User’s Guide ARX
Zone (option)
• 391
People in zones
Both in the graphical zone map and in the zone list the user can get
information about how many users that are in the different zones.
By right-clicking in the zone map (the grey background) you can
choose the alternative Show people in all zones. This will display a
list of all users that are located in any of the zones in the
installation.
Window People in zone
If you want to see a list only of the users that are present in a
certain zone, right-click (or double-click) on this zone in the zone
map. This will open a list of the users that are located in this
specific zone.
Reset people lists
In order to reset the lists that show which people is present in the
different zones, do the following:
1.
In the window Zone, click the Reset button in the windows
menu row.
2.
If you are sure that you want to reset the information
stored, click Yes in the query dialog that appears.
User’s Guide ARX
Zone (option)
• 392
Query dialog Reset zone person tracking
Automatic reset
With this function you can put in a time interval for when the
person lists are to be reset. Click on Change:
Select a time of day when the user lists shall be reset.
Note! Choose a time when the access system is as empty of persons
as possible.
Note! Be especially careful to check that there are no people in an
anti-passback zone. After reset, these persons can not exit this zone.
Anti pass-back in zone (option)
Anti pass-back in zone is a feature that makes it possible to deny a
person entry through a door twice (that is, not allowing a person to
swipe his/her card twice in a door reader).
For a zone you can either choose anti pass-back as an option
(check-box) when you creates an new zone or by editing an existing
zone.
To edit a existing zone, do the following:
User’s Guide ARX
Zone (option)
• 393
1.
Select a zone and click the Edit button in the lower part of
the window (or right-click on a zone in the map area and
choose Edit).
2.
Click OK if you want to save the change and close the
window. Click Cancel if you want to close the window and
not save the changes.
Note! The anti pass-back function applies to the zone a person
enters. That is, the zone a person walks in to.
The Anti pass-back function is optional and only accessible in the
ARX Client software if there is a valid licence that covers anti passback present.
Activate door block in the anti pass-back zone
When anti pass-back is activated for a zone it is possible to block
all other doors in the zone for passage for users that have been let
into the zone by other users. This is useful in zones that does not
utilize revolving doors for entrance/exit. In other words, the
function requires granted access at the entrance of the zone for a
user to be able to open other doors within the zone:
1.
An out-zone must be created (if no other zone exists) to
activate door block in the anti pass-back zone.
User’s Guide ARX
Zone (option)
• 394
2.
For all doors inside the anti pass-back zone with door
block, both the entry reader and the exit reader must be set
to the anti pass-back zone.
User’s Guide ARX
Zone (option)
• 395
3.
Finally, add the exit door to the anti pass-back zone. The
entry reader is set to the anti pass-back zone. The exit
reader is set to Out (or another existing zone).
This is the final result:
User’s Guide ARX
Zone (option)
• 396
Note! If you have added this functionality, be extra careful when
resetting the zone. People that are inside the zone will be locked in,
because they can physically not swipe the card at the reader on the
entrance of the zone to get access to go through any doors inside
the zone.
Add door
With the zone function you can add doors that are linked to zones.
A door between two zones is displayed in the Zone window as a
blue link.
To add a new door, do the following:
1.
Select the menu option Add door in the Zone window (or
right-click on a zone in the map area and choose Add door).
2.
In the Add door window that now opens select a door
(DAC) in the list of available doors.
3.
Then select from, and to, which zone the door shall be
linked. Use the Entry reader enters zone and Exit reader
enters zone drop-down menus in the lower part of the
window.
User’s Guide ARX
Zone (option)
• 397
Window Add door
4.
Click OK if you want to save the change and close the
window. Click Cancel if you want to close the window and
not save the changes.
Zone door list
You can open a overview window displaying zone doors and their
links to zones by selecting the Show doors to zones button, or by
double-clicking on one of the links in the map area.
User’s Guide ARX
Zone (option)
• 398
Window Zone door list
Tip! You can access a shortcut to the Zone door list by doubleclicking on one or several (overlapping) blue links in the map area.
In the Zone door list window that then opens, only information
regarding the selected doors and is shown.
User’s Guide ARX
Zone (option)
• 399
Examples
The Fire alarm sounds
The fire alarm for the warehouse is sounding and you want to
quickly find out which persons are there.
1.
Select Zone in the Tool-menu.
2.
The Zone map is shown; double click on Zone 1 –
warehouse.
The Zone window
User’s Guide ARX
Zone (option)
• 400
The window: Persons in zone
Here you can see that there are 3 persons in the warehouse.
User’s Guide ARX
Zone (option)
• 401
Card Reader User
Functionality
About this chapter
This chapter is about which functions can be performed at the card
reader. This chapter is for the users of the access system.
Buying time
This means that the user is able to extend the amount of time before
the office’s alarm system starts ringing, for doors that have this
operation mode activated.
1.
Press A
2.
Swipe the card
3.
Enter the code
User’s Guide ARX
Card Reader User Functionality
• 402
Disarming
Persons with access can activate the alarm for an area via a reader,
with an access card and PIN-code:
1.
Press B
2.
Swipe card
3.
Enter PIN-code.
For the galaxy alarm it is also possible to allow a person alarm
access for the area to activate the alarm by swiping the card twice.
Arming
Persons with access can deactivate the alarm for a certain area via
the reader, with an access card and PIN-code:
1.
Press A
2.
Swipe card
3.
Enter the PIN-code.
For the galaxy alarm it is also possible for a person with alarm
access to deactivate the alarm by swiping their card and entering
their code – or just swiping the card (and code if the door’s
current security level schedule demands this).
Add temporary code for door
Users with caretaker access can change the settings of a reader
during a limited period so that it works as a code lock with a door
code.
The chosen door code stops working when the card’s period of
validity runs out or when the code lock function is manually turned
off from the reader.
User’s Guide ARX
Card Reader User Functionality
• 403
A temporary code is activated via the reader by:
1.
Press A
2.
Swipe card
3.
Enter chosen code.
The temporary code is removed via the reader by:
1.
Press B
2.
Swipe card.
NOTE! If a person has been added with the code for the caretaker
function the code is changed to:
To activate a code:
1.
Press A
2.
Swipe card
3.
Remove code
Enter desired code
1.
Press B
2.
Swipe the card
Set a door unlocked
Press 2A – swipe card – press the number that corresponds to the
unlocking time – finish with A. The numbers 1 - 23 correspond to
hours and 01 - 059 correspond to minutes.
Example 1: To set a door unlocked for an hour:
Press 2A – swipe card – press 1 – press A.
Example 2: To set a door unlocked for 45 minutes:
Press 2A – swipe card – press 045 – press A.
Example 3: To permanently set a door unlocked:
Press 2A – swipe card – press A.
A buzzer sounds when a door is permanently set unlocked.
User’s Guide ARX
Card Reader User Functionality
• 404
NOTE! If a person only is authorized to the door function Set door
unlocked, the code is changed for the set unlocked function to:
Press A – swipe card – indicate time – press A.
Note! If you made a mistake you can cancel by pressing B (instead
of A). If a person only is authorized to the door function Set door
unlocked, the code is changed for the set unlocked function to:
1.
Press A
2.
Swipe card
To return to applicable door function schedule:
1.
Press B
2.
Swipe card.
Cancel unlocking of door
If you want to cancel the unlocking of a door:
Press 2B– swipe card, before the current door function schedule or
set unlocked has passed.
NOTE! If a person has is authorized to the door function, Set door
unlocked, the code for cancelling is changed to:
Press B – Swipe card.
Lock an unlocked door
If you want to lock a door that is unlocked according to the door
function schedule:
Press 3A – swipe card.
To return to the current door function schedule:
Press 3B – swipe card
OBS! If during the input the decision is regretted, it is possible to
cancel by finishing the input with B (instead of A).
User’s Guide ARX
Card Reader User Functionality
• 405
User’s Guide ARX
Card Reader User Functionality
• 406
ARX Server Manager
About ARX Server Manager
Before the ARX Client software can run, configure the ARX Server
Manager. In the ARX Server Manager you can also control some of
the parameters that are needed for the ARX Client software.
In ARX Server Manager all licences and keys are installed. This is
also where the database is backed up.
This section goes through step by step how you:
•
Install licences
•
Install server keys
•
Edit system properties
•
Back up the database.
User’s Guide ARX
ARX Server Manager
• 407
Main window for the ARX Server Manager
Installing licences
Licences decide which functions that you have access to in the
ARX Client software. Before you can use the ARX Client software
you must install the licences. Do the following:
1.
Click on Add… in the main window
2.
Open the licence files (*.alc) that you have. The password
is automatically filled in.
Installing private key
You receive a private key with your purchase of the ARX Access
system that shows that you have a valid licence and have the right
to use the software. This is how you install your private key:
User’s Guide ARX
ARX Server Manager
• 408
1.
Click on Import in the main window. Then click on Open…
to import your private key.
Import of private key
2.
Locate the file that contains your key (*.pfx). Then fill in
the password and press Finish.
If you want to see more information about the key before
you finalize the import, press on Next:
Information about the private key
User’s Guide ARX
ARX Server Manager
• 409
Change system settings
Select Change system settings in the menu in Server manager.
Below is a description of possible settings.
Change system settings window
Database settings
This value must NOT be altered.
Controller settings
•
Controller save directory
Where the controller synchronisation files are stored
•
Master reset of conrroller when performing full update
The controller settings are deleted when performing a full
update
Image settings
•
Image file directory
Where the person image files are stored on the server
User’s Guide ARX
ARX Server Manager
• 410
•
Maximage file size (kB)
maximum file size will promt the administrator if the image
is too large.
Licence settings
•
The name of the folder where the licences are stored in the
ARX installation folder.
Change system settings window, continuation
Event settings
•
Stored events directory
The name of the folder where all the event logs are stored
in the ARX installation folder.
User’s Guide ARX
ARX Server Manager
• 411
•
Number of days events are saved
After this time period the event logs are deleted.
•
Event filter
Contact Assa Abloy for more information.
Secrets settings
•
Secrets directory
Where the private keys are stored in the ARX installation
folder. This value must not be changed.
Firmware settings
•
Firmware directory
Where the firmware files are stored, in the ARX installation
folder.
•
Firmware version file
Contact Assa Abloy for more information.
Multiple server settings
By using this option you can run several ARX systems on one
server. Contact Assa Abloy for more information.
User’s Guide ARX
ARX Server Manager
• 412
Change system settings window, continuation
Web server settings
•
Server HTTP port
The port to which the web server listens to. 8000 is default.
If another software is using this port, this value must be
changed.
•
Server HTTPS port
The port for safe connections to which the web server
listens to. 8443 is default. If another software is using this
port, this value must be changed.
Client settings
•
Disconnect time (sec)
The time ARX waits until disconnecting ARX clients that
have lost the connection.Default is 30 seconds.
Modem settings (If modem licence is installed)
User’s Guide ARX
ARX Server Manager
• 413
•
Baud rate
The speed the modem works with. Default is 115200 baud.
•
COM-port
The communication port the modem is connected to.
•
Call time
The time the ARX server waits for respons from hardware
connected to the server through modem.
Information of baud rate and COM-port is available in the Device
manager in windows.
Change system settings window, continuation
Mail server settings
•
Outgoing mail server (SMTP)
IP-address or DNS to the outgoing mail server, which
enables e-mail to be sent from ARX, for exampel from the
Trigger function. Default is localhost.
User’s Guide ARX
ARX Server Manager
• 414
•
Port
The port in the fire wall mail is routed. Default is 25.
•
Use SSL
Check this box to use SSL. Then enter username, password
and e-mail for the sender for mails from ARX.
Hi-O settings
•
Daily update time
The time when the Hi-O hardware are updated. Default is
02:00.
Safety backup
ASSA recommends regular backup of the ARX database. If the
database should become corrupt or the hard drive is broken then it
can lead to the whole system needing to be reconfigured.
You have three backup alternatives, make safety backup
immediately, schedule the safety backup and the third, and restore
the database from a previous safety backup.
Create safety backup
To make an immediate safety backup of the database do the
following:
1.
Select Safety backup in the main window.
2.
Mark the areas that you want to backup:
ARX database, (all information in the access system), the
event log (all events in the system), person pictures (the
User’s Guide ARX
ARX Server Manager
• 415
photographs that are kept for every person.), the licence and
the private key. Then press Next.
Main window for Safety backup
3.
Then select where the safety backup is to be saved.
User’s Guide ARX
ARX Server Manager
• 416
The last step at the safety backup
Scheduling safety backup
For scheduling the safety backup do the following:
1.
Click on Schedule safety backup in the menu on the main
window.
User’s Guide ARX
ARX Server Manager
• 417
Main window for scheduling the safety backup
2.
Click on New… to add a new schedule.
3.
Enter Name and a Description (not compulsory) and click
on Next.
User’s Guide ARX
ARX Server Manager
• 418
Main window for scheduling the safety backup
4.
Select where sections are to be backed up then click on
Next.
User’s Guide ARX
ARX Server Manager
• 419
Step 2 for scheduling a safety backup
5.
Enter the time interval and at which time that the safety
backup should be done. Then click on Next.
User’s Guide ARX
ARX Server Manager
• 420
Step 3 for scheduling a safety backup
6.
Select the folder in which the backup is to be saved. Finish
by clicking on Finish.
Step 4 for scheduling a safety backup
User’s Guide ARX
ARX Server Manager
• 421
Restore the backup copy
In order to load a safety backup do the following:
1.
Click on Restore the safety backup in the menu on the main
window
The first step for the safety backup
2.
Select what you want to restore.
User’s Guide ARX
ARX Server Manager
• 422
The last step for the safety backup
User’s Guide ARX
ARX Server Manager
• 423
Appendix
Proposed Workflow for an
Installation
Here is a proposal for how the workflow for an installation should
look. You are not required to follow this workflow but we believe
this will simplify your task in a structured way.
The proposed workflow consists of eleven steps:
1.
Pre-study. Plan the installation, use the floor plans for
help, think through the domains, areas, groups etc. Study
the floor plans for buildings and premises.
2.
Calendar. Create a calendar (or modify an existing one)
and check that the day types are enough (weekday,
weekend, etc.)
3.
Schedules. Create schedules for: accesses, security levels
and other process options.
4.
Access categories. Create access categories, i.e. the groups
of users that are to exist.
User’s Guide ARX
Appendix
• 424
5.
Card formats. To be able to use system cards (cards
programmed with both system number and a consecutive
number), you must add a new card format and enter the
valid system number.
6.
Domains. Find out if the optional feature Domains is
necessary. It can be useful when creating large access
control systems that are geographically spread. The
incentive can also be if you want to achieve a decentralized
administration of ARX, where local administrators can be
given different access to manage their own domain.
7.
Access areas. Build up the area structure, but wait for the
doors.
8.
Installation tree. Add the different physical units in the
installation tree: controllers, DACs and readers (in/out).
9.
Add access categories. Add access categories in the area
tree structure, and attach schedules.
10. Create door types. Link security level- and door mode
schedules for access areas in the area tree structure.
11. Doors. Add doors in the area tree structure.
12. Extra fields for persons. Create the extra fields for person
details that you need.
13. Persons. Enter personal details (Name, ID number, etc.)
and link persons to access categories. Link cards till
persons.
Windows Vista Support
After ARX Access Server installation, the following settings must
be made in Windows Vista in order to get ARX server running
correctly.
User’s Guide ARX
Appendix
• 425
1.
Enter Administrative tools on the Control panel. Open the
Services application.
2.
Highlight ARX Access server, right click and choose
Properties.
User’s Guide ARX
Appendix
• 426
3.
Enter the Log on tab and check This account and enter the
credentials for the account (administrative user rights are
required) where ARX Access Server is installed.
User’s Guide ARX
Appendix
• 427
Installation of Performer
To administrate keys the Performer application is needed. Be
careful to follow these instructions for the installation of Performer
and the Performer integration applications.
Note! If the installation is not made correctly, problems can occur
that can be difficult solve.
For a complete description of the installation procedure and use of
the application, please refer to the performer user guide.
1. Open the ARX cd and run setup.exe.
(If a safety warning appears, click Run.)
2.
Click through a number of dialogs and accept the licence
agreement.
3.
When the following dialog window appears, select the
”Performer” component.
User’s Guide ARX
Appendix
• 428
4.
Choose install location and start menu folder in the two
following dialogs.
5.
Then accept the licence agreement.
6.
Choose the ”SQL Server 2005 Express”.
(Sybase 9.0 does not work with version 2.6.1.40 of
Performer.)
Performer requires the .Net software from Microsoft. If this is not
installed on your computer, it will be installed at this stage. After
the installation of .Net, you will return to the installation of
Performer.
7.
Check that all checkboxes are selected in the following
dialog. Proceed by pressing ”Next”.
User’s Guide ARX
Appendix
• 429
Assa Performer will now be installed.
8.
When the installation is completed, click Next.
9.
Close the installation application by clicking “Finish”.
User’s Guide ARX
Appendix
• 430
Installation of licence
To be able to run Assa Performer you must install as licence.
Perform the following steps:
1.
Start Performer from the Start menu in windows (Start >
Program > ASSA > Performer). Log in with your username
and password.
User’s Guide ARX
Appendix
• 431
2.
The first time Performer is started a licence information
dialog is displayed. Enter your user credentials or choose
“Read from file” to read the licence file (.lic-fil).
User’s Guide ARX
Appendix
• 432
3.
Click “Save”.
4.
If the following dialog appears, click ”No”:
5.
Performer starts. Choose “File > Import > Security Master”
to import the data base file. The data base file is named
AAA287.bak.
6.
Click “OK” if the following dialog appears.
Performer can now be used. Close the application and run the ARX
Client software.
See chapter “Administrate keys (requires the Performer option)” on
page 55 to hand out keys and synchronize this information with
Performer.
Trouble shooting after installation
- The installation succeeded, but ARX is not able to synchronize
with Performer when a key is to be handed out.
Check that the path to Performer is correct and that the data
synchronization is running. See chapter “Performer Integration
settings (option)” on page 60.
- The installation succeeded, but ARX can not find the data
base when the key is to be handed out.
User’s Guide ARX
Appendix
• 433
Uninstall Performer and remove the data base that handles the
keys, according to below. Then re-install Performer according
to previous chapter.
Uninstall Performer
1.
Open the control panel in Windows (Start > Settings >
Control Panel) and choose Add and remove Programs.
2.
Find Performer and choose click Remove.
Apart from removing the Assa Performer, un-installation also
requires removal of the data base that handles the key information
in SQL Server:
3.
Open the Control panel in Windows (Start > Settings >
Control panel) and choose Add and remove Programs.
4.
Find Microsoft SQL Server 2005 and choose Remove.
5.
Highlight ”PERFORMER: Database Engine” and click next.
User’s Guide ARX
Appendix
• 434
6.
Verify your choice by clicking Finish.
To un-install SQL Server, select ”Workstation components” in step
5 above.
User’s Guide ARX
Appendix
• 435
Import and Export in ARX
You can import and export data to and from ARX. This feature
requires that you have a sufficient licence that includes import and
export.
The purpose with the import- and export function is to make it
possible to synchronise data between ARX and one or more
external systems. These systems can for example be other access
control systems, personnel databases, time reporting systems etc.
To be able to match information in a system with equivalent
information in another system, it is necessary that some data shares
the same specification in the different systems (for example access
categories, card format and extra field). It is also necessary that
persons and access cards contain unique identifiers (id, card
number + card format) that are identical in the different systems.
Information flow
For additional information regarding the import and export
functions, please contact Assa for additional information.
HTTP Access in ARX
There are a number of functions in ARX that can be accessed via
HTTP. Apart from import and export these functions are :
User’s Guide ARX
Appendix
• 436
•
Event logs
•
Door modes
Event logs
The event logs in the system can be accessed using HTTP. There
are two modes by which the information can be retrieved: historical
and real time. Historical access retrieves events that have occurred
in the past while real time retrieves events as they happen.
Additionally it is possible to specify a number of request
parameters that control the log period, number of events and filters.
For additional information regarding HTTP access, please contact
Assa for additional information.
Door Modes
The doors in the system can be controlled by sending HTTP
requests to the built-in web server. The following operations can be
performed:
•
Pulse open, the door is temporarily opened.
•
Force open, the door is unlocked regardless of other
configuration options.
•
Force close, the door is locked regardless of all other
configuration options other than the above mentioned
Force open command.
For additional information regarding HTTP access, please contact
Assa for additional information.
User’s Guide ARX
Appendix
• 437
Licensing Information
This product contains software licensed under the GNU General Public
Licence and the GNU Library General Public Licence. The sources to this
software can be found on the accompanying CD.
This product includes software developed by the Apache Software
Foundation (http://www.apache.org/).
This product includes software developed by the OpenSSL Project for use
in the OpenSSL Toolkit (http://www.openssl.org/)
This product includes cryptographic software written by Eric Young
([email protected])
This product includes cryptographic software from PuTTY
(http://www.chiark.greenend.org.uk/~sgtatham/putty/).
This product includes software written by Graham Mainwaring
([email protected]).
This product includes Suns Java 2 Runtime Environment (J2RE), Standard
Edition which is subject to the following licences:
This product includes code licensed from RSA Security, Inc.
Some portions licensed from IBM are available at
http://oss.software.ibm.com/icu4j/.
(For more information on licences, see the ARX installation CD.)
User’s Guide ARX
Licensing Information
• 438
Index
A
Acces areas
Example 149
Access areas 125
Add 128
Add access category 130
Add exceptions 136
Clear exceptions 138
Control function 145
Copy or move object 144
Door
Add 139
Modify 143
Menu choices 127
Modify settings 142
Remove 136
Remove object 144
Access category 72
Create 73
Example 78
Modify 75
Remove 76
User's Guide Hidden text
Action at cardreader 402
Activate alarm 403
Buy time 402
Deactivate alarm 403
Temporary code 403
Alarm 287
Menu options 287
Apartment
Add 352
Apartments 351
Example 362
Modify 354
Remove 359
ARX Server
Windows Vista Support 425
ARX Server manager 407
License 408
Private key 408
Safety backup 415
B
Booking 364
Resource access 375
Resources tree 366
Time slots 378
C
Calendar 319
Add 320
Example 329
Modify 321
Camera 204
Add 205
Card format 86
Add 88
Example 92
Modify 87
Index
• 439
Remove 90
Template 91
Card Receipt Template
Add 97
Edit 100
Remove 100
Card Receipt Templates 95
Credentials
Remove 85
Credentials 80
Change owner 83
Clear owner 84
Inhibit 82
D
Domains 148
Add 148
Door controls
Disabled clearance 43
Door type
Delete 170
Example 171
Modify 170
Door types 165
Create 166
E
Entry Phone Directory 385
F
Firmware 309
Floor
Add 145
User's Guide Hidden text
G
General tips 27
Different menu types 28
Help 27
I
Import and Export 436
Installation 208
Airlock 250
controller
Inputs 254
Controller 214
Add 214
Extra Functions 219
Modify 218
Remove 219
DAC 220
Add connected 222
Add new 220
Door codes 228, 257
Functions 232, 234, 257,
259
Inputs 225
Lost connection 226, 255
Options 223
Pulse open 244
Relay outputs 229, 257
Settings 223
Times 227, 255
Entry phone
Options 253
Settings 253
Folders 212
Add 212
Remove 213
Input 247
Menu options 209
Index
• 440
One door controller
Door codes 242
Functions 242
Inputs 238
Relay outputs 238
One door controller
Add new 234
One door controller
Modem 238
One door controller
Times 241
RCE-16 board 262
Add 262
Relay 244
Symbols 210
Intallation
One door controller 234
L
Language 31
Licensing information 438
Login 21
Logs 312
Show 313
M
Main window 21
Menu bar 21
O
Operator 332
Add 333
Remove 335
Operator templates 336
Add 336
User's Guide Hidden text
P
PCI reader 344
Settings 345
PCI-reader
Connect 345
Example 349
Performer
Installation 428
Integration Settings 60
Trouble shooting 433
Person 39, 73
Access category 45
Add 40
Allocate Cards 49
Example 64
Keys 55
Hand in key 59
Hand out key 55
Limited period of validity 46
Modify 53
Other settings 61
PIN code 42
Remove 53
Search 54
Proposed workflow
(installation) 424
R
Roles 339
Add 339
S
Save files 30
Schedules 110
Access 113
Add 116
Index
• 441
Additional 115
Example 120
Modify 118
Remove 119
Security level 114
Status field 22
T
Toolbar 22
Trigger 176
Add 177
Add action 187
Relay 187
Server application 190
Add action
E-mail 189
Example 191
Modify 187
Trigger alarm list 202
Show 203
Trigger group 198
Add 198
V,W
Web Interface 101
Z
Zone 389
Add 390
Example 400
User's Guide Hidden text
Index
• 442