Download OPERATORS MANUAL 3M Drag
Transcript
OPERATORS MANUAL 3M Drag www.agriweld.co.uk The Workshops Main Street Garton-on-the-Wolds Driffield, YO25 3ET Tel: 01377 259140 Fax: 01377 259141 Email: [email protected] 2 Page 3 User Information, Qualification & Training Page 4 Think Safety Page 5 Operation & Adjustment Page 6 Reversing/Replacing the Points, Transport Page 7 Full Assembly Page 8 Depth Wheel Assembly Page 9 Parts List For Depth Wheel Assembly Page 10 Drag Leg Assembly Page 11 Parts List For Drag Leg Assembly Page 12 Stickers Page 13 Warranty 3 USER INFORMATION This manual contains basic advice, which should be observed during setting-up, operation and maintenance. It must be read by personnel concerned prior to starting up and using the machine and be available at all times to all operators. If safety instructions are not complied with, it can lead to the risk of injury to yourself and others as well as damage to the environment or the machine. Non-compliance to the safety instructions can also lead to claims for damages becoming invalid. New equipment - be careful! It is very important to be careful when new equipment is going to be used for the first time. Incorrect mounting of equipment and operational errors can lead to expensive repair work and operational losses. Your warranty with Agriweld is not valid if the instructions in this operating manual are not followed correctly. QUALIFICATION AND TRAINING Competent personnel may only perform any work on, or with the machine. Statutory minimum age limits must be observed. Only trained or instructed staff should operate, set up and maintain this machine. Individual responsibilities of personnel concerning operation, setting up, maintenance and repair must be clearly established. Define the machine operator’s responsibilities – also with regard to observing traffic regulations. The operator must have the authority to refuse any instructions issued by third parties, which contravene safety. Persons undergoing training or instruction should not be allowed to work on or with the machine unless they are under the constant supervision of an experienced person. The use of spare parts, accessories and ancillary equipment not supplied and/or not approved by Agriweld could have detrimental effects to this machine or its functions and hence impair the active and/or passive driving and/or operational safety (accident prevention). Agriweld shall not be responsible for any damage caused by the use of spare parts, accessories and ancillary equipment not supplied and/or approved by Agriweld. Conversions of, or modifications to the machine may only be carried out after consultation with Agriweld 4 THINK SAFETY Read the instruction manual and follow the instructions given. Take care when hitching up or unhitching the machine to and from the tractor It is forbidden to allow any persons to sit or ride on the implement at any time The tractor should be fitted with enough front-end weights for stability and to maintain secure steering. Driving, steering and braking characteristics are influenced by mounted machines and ballast weights. The operator must ensure adequate steering and braking ability Use the tractor’s position control when coupling the implement to the tractor. Do not stand between tractor and implement while it is being raised. The tractor's lower link arms should be stabilised before driving on a public road so that the implement and tractor lower link arms do not touch the tyres during transport. Make sure that all nuts and bolts are always fully tightened. NEVER stand or work beneath a suspended load unless supported by chocks or stands capable of carrying the implements weight and bulk. The user is responsible for ensuring the implement complies with the law when driving on public roads and to check the lighting units are in full working order. Always lower the implement attached to a tractor whilst parked. 5 OPERATION AND ADJUSTMENT Attach the drag to the tractor using the 3 point linkage. The top link should be as short as possible whilst remaining as horizontal as is achievable. This may mean using the bottom hole on the drags top link point and top hole on the tractors top link point. It is important to the function of the drag to ensure the machine is running level to allow optimum level of soil disturbance and to prolong the lifespan of the wearing parts. Please ensure that the implement is mounted correctly. Check that the hydraulic hoses (if relevant) are free of damage and not in a position to fowl when lifting and lowering the drag on the tractors linkage. Check that all nuts and bolts are firmly tightened For folding machines, attach the hydraulics. HYDRAULIC SYSTEM (Folding machines only) The hydraulic system is working under high pressure and is therefore potentially dangerous. It is very important that all hoses and connections are checked frequently for leakage and external damage. The hydraulic hoses should not be connected to, or removed from the hydraulic system on the tractor unless the oil pressure in both the tractor and implement has been released. Porous and defective hoses must always be replaced immediately. Oil leakage from damaged hoses and connections can cause fatal injury and possible fire risk. Always seek medical treatment immediately following any injury. DEPTH WHEEL ADJUSTMENT Prior to starting work it is important to set the working depth of the machine using the depth wheels. Remove the lower pin on the depth control adjuster and put the drag into work position in the ground and set the machine to the depth that you require and replace the pin into the nearest available hole setting to fix the height. Replace the higher of the 2 pins 6 into the closest hole to the “stop” to avoid the wheel dropping every time you lift the drag out of the ground. Always adjust both sides to the same setting. REVERSING/REPLACING THE POINTS Only carry out reversing/replacing the points on solid ground conditions, e.g. cement/tarmac, to avoid the risk of sinking and potential injuries whilst changing the points. The implement must be raised on the tractor linkage and the tractor engine turned off. Remember to use the parking brake and/or wheel chocks to ensure that the tractor is held stable. It is important to support the drags weight with stands/chocks in the event of failure of the tractor hydraulics. Remember it is forbidden to work under a suspended load without the adequate support. Once you are confident that you have met the safety standards required you can proceed; Unbolt each worn point to free the worn point. A new point can then be replaced into the same position with the appropriate nut/bolt tightened up to secure it in position. To reverse a point, simply turn the point around and re-bolt into position as above. When you have finished replacing or reversing the points, remove the drag supports/chocks and lower the machine as in the Think Safety! section above until you are ready to move off. ROAD TRANSPORT Before taking the tractor with the implement attached on to a public road, implements wider than 3m will require folding up into transport position. Wider rigid machines will require other transport methods. The Department for Transport requires the maximum width of an agricultural machine to be 2.55m. However, under special circumstances Agricultural machines wider than 2.55m are permitted to use public roads. The Road Vehicles Order 2003 permits the road use of Agricultural vehicles that are up to 4.3 metres in width, subject to terms and conditions. The key ones are as follows: Width – between 2.55m and 3m: speed must not exceed 20mph Width – between 3m and 3.5m: maximum speed 20mph as above, plus if the journey is over 5 miles or the speed limit in the road is 40mph or lower, the operator must notify the Police in advance of the journey. 
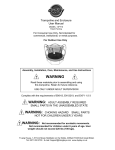
7 Width – between 3.5m and 4.3m: the Police must be notified, the maximum speed is limited to 12mph and the vehicle(s) must be accompanied by an attendant, who may ride in a different vehicle but must ensure no danger is cause to the vehicle or other road users. The police, following notification, may place restrictions on the use of the vehicle in the interests of road safety or to avoid undue traffic congestion. TRANSPORT OF FOLDING MACHINES With the machine attached to the tractor and in raised position, fold it up using the tractor hydraulics. Lower the machine to the ground and fit the safety bar onto the left and right ram pin mount. Lock off the ball valves on the left and right hydraulic cylinders (located directly on top of each cylinder). Check all lights are working before setting off on the road. See diagram on page 8 8 Full Assembly Spare Shear Bolt Holder Packer location holes Reversible Drag Point (40mm Thick) Linkage Points (Cat 2/3) comes with required pins Leg Assembly Including Shear Bolt and Pivot Bolt (See Page …) Depth Wheel Assembly (See Page …) 9 Depth Wheel 4 10 1 12 8 7 9 6 11 16 15 13 14 8 2 5 3 10 Parts List for Depth Wheel Item Number Part Number Description Quantity per Depth Wheel 1 D5M_CWA12011 Depth Wheel 1 2 D5M_SAUB5020001 Un braked Stub Axle 1 3 D5M_M16_45F Stub Axle Stud 5 4 D5M_M16_DN Stub Axle Dome Nut 5 5 D5M_M24_150 Depth Wheel Adjuster Bolt 2 6 D5M_M16_W Adjuster Washer 6 7 D5M_1212 Wheel Adjustment Profile 2 8 D5M_50MM_SP Depth Wheel Spacer 3 9 D5M_M24_120 Adjuster Stop 1 10 D5M_M24_NYL Adjuster Stop Nut 1 11 D5M_Z325_095 Adjustment Pin 2 12 D5M_LP11Z Lynch Pin 2 13 D5M_1207 Depth Wheel Hinge Pin 1 14 D5M_M16_65 Hinge Pin Bolt 1 15 D5M_M16_W Hinge Pin Washer 2 16 D5M_M16_NYL Hinge Pin Nut 1 11 Drag Leg 9 8 6 7 1 2 4 5 3 12 Drag Leg Parts List Item Number Part Number Description Quantity per Machine 1 D5M_3001 Drag Leg 19 2 D5M_REV_PO Reversible Drag Point 19 3 D5M_M12_70_PlOV Lower Point Plovbolt 19 4 D5M_M12_90_PLOV Higher Point Plovbolt 19 5 D5M_M12_NYL Point Nut 38 6 D5M_M20_SB Shear Bolt 19 7 D5M_M20_Nyl Shear Bolt / Fixed Point Nut 38 8 D5M_M20_90 Fixed Point Bolt 19 9 D5M_M20_W Washer 38 13 Stickers Sticker Part number Description Quantity per Machine Green Union Jack Sticker D3M_UJS 4 Size: (85mm x 55mm) D3M_RCS Rhino Cultivation Sticker 2 Size: (160mm x 110mm) D3M_AGRIS Green Agriweld Sticker 2 Size: (170mm x 80mm) D3M_GNS Grease Sticker 2 14 WARRANTY Your Drag is covered for a period of 12 months from the date of delivery (which is recorded on our files) against faulty components and/or bad workmanship. Exclusions are: wearing parts, hydraulic hoses and fittings and shear bolts. All our welders are coded to the relevant standard to manufacture your equipment, and all products are checked for quality prior to delivery/collection. We cannot be responsible for claims arising from ignorance, occurrences outside our control, such as accidents, malicious damage and non maintenance.