1
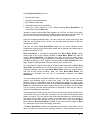
is for the pictures, the small window for other filetypes. These may be text
files or even a software player for your PC. If a File Browser is not open yet
you can open one by selecting New File Browser from the View menu or
clicking the appropriate 'File Browser' icon. To specify that Nero is started
with an open File Browser, check ‘Start with File Browser’ in the ‘General’
section on the File Browser tab (File -> Preferences).
11. Compile the files for the Photo CD using Drag&Drop editing by simply
clicking on the required files in the File Browser and dragging them into the
appropriate compilation window. Clicking the right mouse button opens a
context menu where you can selectively add or omit certain file types. In
addition there are a number of commands that you will also find in Windows
Explorer, such as 'Copy', 'Open‘ and 'Cut'.
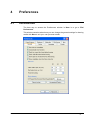
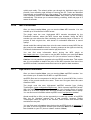
Double-clicking a picture file opens the 'MPEG Information' dialog box.
'Properties' tab
This tab displays basic information about the selected picture. You can also
specify the length of the pause after the picture. Click OK to confirm your
choice and close the dialog box.
Note: If you have highlighted several picture files, the 'Video Properties'
dialog box will open. This box displays information about the pictures you
have highlighted. You can also specify the pause for all picture files. Click OK
to confirm your choice and close the dialog box.
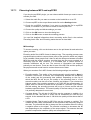
12. Click on the Write CD button or select the Write CD command from the File
menu to open the write dialog box. This option is only available when the
compilation window is selected, as can be seen from the fact that the title bar
is blue. If the File Browser is selected (and the title bar of the compilation
window is therefore grayed) the option is not available and CD writing cannot
be started. In this case click anywhere in the compilation window.
13. In the ‘Action’ section activate the other check boxes you require in addition
to the ‘Write‘ check box. You will find more information about this section in
'Before you burn your first disc'. You must remember that when you create a
Video CD you must activate the 'Finalize CD' checkbox. This setting write
protects the CD and no further writing is possible.
All settings on this and the other tabs can now be reviewed and changed if
required.
14. Click on the Burn button to start the burn process (or the simulation depending on the chosen option). All the selected steps now run in sequence
until writing is complete. You can monitor progress in a status window which
shows the individual steps being logged as they are executed. A typical final
message would be: 'Burn process was successful with 12x (1800 KB/s)‘. The
CD is then ejected. The messages shown can either be saved, printed or
discarded. Close the window by clicking on the Discard or Close buttons.
15. You can now check what has been written to your new CD by inserting it
again and clicking the 'CD Info’ icon.
7.10.3.1
Single pictures and slideshows
With Nero version 5.0 and higher you can also add single pictures to a (Super)
Video CD. Unlike video films, single pictures can and must be encoded by
Nero itself.
From version V5.5, filetypes bmp, ico, ljp, pbm, pcx, png, tga, tif and wmf can be
used as a source for freeze frames.
Nero
Creating a CD/DVD • 82