1
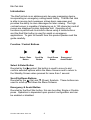
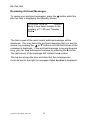
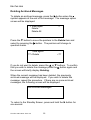
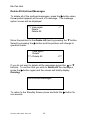
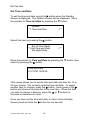
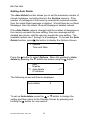
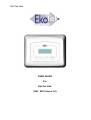
EkoTek Hub USER GUIDE For EkoTek Hub 9261- 8276 (Issue 3.0) EkoTek Hub 2 EkoTek Hub CONTENTS Introduction Compliance General User Information EkoTek System Schematic Powering Up the EkoTek Hub Status and Warning Messages Using the Emergency / Assist Button Dead Man Alert Receiving a Message Reading a Message Viewing a Message Again Accepting, Rejecting & Deleting Two-Way Messages Deleting a Message Delete All Messages Archiving a Message Reviewing Archived Messages Deleting Archived Messages Delete All Archived Messages Set 12/24 Hour Mode Set Time and Date Set Day / Night Mode Setting the Alert Options Setting the Message Display Options Setting Auto Delete IP Address Part No. 9261-8276 Issue 3.0 3 4 5 6 7 8 9 10 11 12 14 15 16 17 19 20 21 22 23 24 25 26 28 29 31 32 EkoTek Hub Introduction The EkoTek Hub is an alphanumeric two-way messaging device, incorporating an emergency calling/assist facility. The EkoTek Hub is able to receive text messages, allows basic responses and provides the ability to store messages for later viewing. The high contrast screen is capable of displaying up to 150 characters and all menus are displayed in plain language text. Operation of all functions is performed via intuitive menus using 4 tactile buttons and the Red Star button is used for assist or emergency applications. To gain full benefit from this product please read this guide carefully. Function / Control Buttons X S T Ä Select / Enter Button Scroll Up Button Scroll Down Button Emergency / Assist Button Select & Enter Button Denoted by the X symbol, this button is used to move to and confirm selected options within the Menu Screens and to return to the Standby Screen when pressed for more than 1 second. Scroll Up/Down Buttons Denoted by the S (Up) and T (Down) Symbols. These buttons are used to scroll up and down the Menu Screens. Emergency & Assist Button Denoted by the Red Star button, this can be either Single or Double press. Operation is dependent upon product configuration and can be enabled or disabled. Part No. 9261-8276 Issue 3.0 4 EkoTek Hub Compliance This product complies with the requirements of the EU Radio & Telecommunications Terminal Equipment Directive 99/5/EC. FCC & Industry Canada Statement Of Compliance This device complies with Part 15 of the FCC Rules and Industry Canada Standard RSS 210. Operation is subject to the following two conditions: (1) this device may not cause harmful interference and (2) this device must accept any interference that may cause undesired operation. Unauthorised modification to this equipment will void the user's authority to continue to operate the device within the scope of the Industry Canada and FCC Part 15 Rules. A full technical specification for this product may be obtained from your Multitone representative. WEEE Directive & Product Disposal At the end of its serviceable life, this product should not be treated as household, or general waste. It should be handed over to the applicable collection point for the recycling of electrical and electronic equipment, or returned to the supplier for disposal. Part No. 9261-8276 Issue 3.0 5 EkoTek Hub General User Information Radio Reception The EkoTek Hub has been designed to give optimum performance within the coverage area of the wireless network. Hazardous Areas The EkoTek Hub must not be installed in areas where explosive gas, or dust products, may be present. EkoTek Hub Care Protect the EkoTek Hub from liquids, extreme temperatures and strong magnetic fields. Do not install in a place where it will be exposed to strong sunlight. Servicing Should the EkoTeK Hub need repair, return it to the designated service agent. Do not attempt to open or repair the product, as it contains delicate components and requires specialised test equipment. Part No. 9261-8276 Issue 3.0 6 EkoTek Hub EkoTek System Schematic EkoTek Self Organising & Repairing Wireless Mesh Network AC Call Fob Wireless Repeater Power Adaptor Battery Powered Repeater Hub With Web Server Pager Repeater Includes Personal Security Alarm Repeater Repeater to Repeater Distance Typically 10 to 15m Part No. 9261-8276 Issue 3.0 7 EkoTek Hub Powering Up the EkoTek Hub The EkoTek Hub is powered via a 110, 220 or 240 Volt switch mode power supply unit. On switching on the EkoTek Hub a message will then be displayed for three seconds, whilst self-checks are being performed. Finally, the Standby Screen will be displayed: 12!00 AM 01.01.06 HUB Day An exclamation mark (!) will flash between the Hours and the Minutes (11!34 AM). This indicates that the EkoTek Hub is in the process of starting up. Once the EkoTek Hub has started up this will change to a ‘period’ symbol and the EkoTek Hub will automatically synchronise with the EkoTek network. The 4th line of the screen will display ‘EKOTEK’ once the EkoTek Hub has initialised: 11:34 AM 12.03.07 HUB EKOTEK Part No. 9261-8276 Issue 3.0 8 Day EkoTek Hub Status and Warning Messages When the EkoTek Hub is switched on the Standby Screen is displayed. This consists of the time and date plus additional status and warning messages. A typical screen is shown below: 11:34 AM 12.03.07 1 Unread Message Silent EKOTEK Day The first line is the clock displaying the current time and date, the time may be in either a 12 or 24-hour format. In the top right hand corner the hub will display Day or Night this is used to indicate the shift mode. The second line displays, Hub Name or ‘n’ Unread Message, showing how many messages have been received but not viewed. The third line shows the status of the alert, Silent to warn that the audible alert has been turned off. If nothing is displayed then the audible alert is turned on The fourth line normally displays the EkoTek logo, however, if the AC power is removed and the hub is running on its internal back-up batteries, Mains Fail is displayed. A Page: 9 battery symbol will then appear at the top of the screen cf a pager. Part No. 9261-8276 Issue 3.0 9 EkoTek Hub Using the Emergency / Assist Button Note: This feature has to be enabled by the System Supervisor Raising an Alarm In the event of an Emergency or where immediate Assistance is required press the Red Star button. Depending on how the EkoTek system is configured this may require a single or a double press. Please confirm this with your EkoTek system supervisor. On pressing the Red Star button the EkoTek Hub will either beep and/or vibrate in sequence with a flashing alert lamp. Please note that the precise nature of this acknowledgement is subject to configuration. The screen will display the following information indicating that the alarm has been raised and delivered: 11:34 AM 12.03.07 HUB Day Raising Alarm 11:34 AM 12.03.07 HUB Day Alarm Delivered Cancelling an Alarm At any stage during the initiation of an emergency / assist alarm it can be cancelled. To cancel the alarm press and hold the X button, the display will confirm this action with the following message: 11:34 AM 12.03.07 HUB Clearing Alarm Part No. 9261-8276 Issue 3.0 10 Day EkoTek Hub Dead Man Alert The EkoTek Hub is equipped with a Dead Man Alert this feature has to be enabled by the System Supervisor. The Dead Man Alert operates by initiating an alert to the EkoTek Hub at pre-set time intervals, this alert must be acknowledged by single press on ANY of the pager buttons within a pre-set time period: 11:34 AM 12.03.07 HUB Day Press any key to cancel Please note that the System Supervisor configures both the frequency of the Dead Man Alert and the required response time. If the alert is not acknowledged within the pre-set time period the EkoTek Hub will automatically initiate the following alarm escalation sequence: 11:34 AM 12.03.07 HUB Day Raising Alarm 11:34 AM 12.03.07 HUB Day Alarm Delivered Please note that at any stage during the Dead Man Alert process it is possible to cancel the alarm by pressing the X button. Part No. 9261-8276 Issue 3.0 11 EkoTek Hub Receiving a Message When the EkoTek Hub receives a message the audible alert will activate, unless silent mode has been selected. The message will be displayed during the alert period: Your car will be ready for collection next Monday afternoon■ The end of the message is always shown by the character ■. If the message is very long and cannot be fully displayed the last character will be designated using the following symbol h. This indicates that the message continues onto the next screen: Contact Mr Moore of ABC Electronics Tel: 01763-246391. The new contract is ready for signature can you sign thish To see the rest of the message, simply press the X button: before Wednesday. JILL■ If the message is not acknowledged the EkoTek Hub will return to the Standby Screen indicating that a message has been received: 3:54 PM 12.03.07 1 Unread Message Part No. 9261-8276 Issue 3.0 12 EkoTek Hub As each new message is received it is stored. The maximum number of messages that can be stored is 6. To make room for new messages the EkoTek Hub will start to delete the oldest read messages. If there are no read messages it will delete the oldest unread message. Part No. 9261-8276 Issue 3.0 13 EkoTek Hub Reading a Message To read a message, press the T button whilst the EkoTek Hub is in the Standby Screen. The most recently received unread message will be displayed: 4:38 PM 12.09.06 Unread Your car will be ready for collection next Monday afternoon■ The top line shows the time and the date the message was received and to the right message status will be displayed, this will either be Unread or Read. Press the T button to display the next previously received unread message, or select the S button to display the previously viewed message. 9:05 AM 12.09.06 Unread Contact Mr Moore of ABC Electronics Tel: 01763 - 246391. The new contract is readyh Using the S and T buttons allow navigation of the stored messages. Unread messages are sorted in time order and are displayed first, followed by the read messages, also in time order. 2:17 PM 12.09.06 Read You are booked on Flight BA153. Departs at 18:05 ticket confirmed. Helen■ Part No. 9261-8276 Issue 3.0 14 EkoTek Hub Viewing a Message Again While a message is being displayed, press the X button and the message option screen will be displayed. The display response will dependent upon the message type received. If it is a single-way message the following options will be displayed: **> View Again Delete Delete All Archive <** If it is a two-way message, the options change to allow initiation of a response (see section on accepting, rejecting and deleting two-way messages): View Again **> Accept <** Reject Delete Both options allow you to view the message. Press the X button again to select View Again the EkoTek Hub will display the last message again, which will then remain in the memory for you to view in future, until deleted. 9:05 AM 12.09.06 Read Contact Mr Moore of ABC Electronics Tel: 01763 - 246391. The new contract is ready► If the message is in an unread state when View Again is selected, the status will change to Read. Should the View Again option be used on a message before it has been retrieved from the memory, the date and time will be displayed with the message when it is displayed again, with the status set to Read. Part No. 9261-8276 Issue 3.0 15 EkoTek Hub Accepting, Rejecting & Deleting Two-Way Messages Accept is now the default entry onto this screen. Only a single button press is required to accept/reject the message confirmation stage only required for delete. On receipt of a message press the ► button directly. Or From the Standby Screen press the T button to read the message, press the ► button to acknowledge the message. For two-way messages the following options screen will be displayed: View Again **> Accept Reject Delete <** To respond to the message press the T button and move the pointers to: Accept, Reject or Delete. Select the option by pressing the X button: View Again **> Accept Reject Delete <** The pointers will change to question marks requesting confirmation of the action: View Again ??> Accept Reject Delete <?? To confirm the action press the X button, the EkoTek Hub will briefly display the following depending on the action selected: For Accept the response is: Sending Accept Response For Accept the response is: Sending Reject Response Part No. 9261-8276 Issue 3.0 16 EkoTek Hub For Delete the response is: Deleting Deleting a Message To delete a message, press the X button when the ■ appears at the end of the message. The message option screens will be displayed depending on the message type received: For 1-way Messages: For 2-way Messages: **> View Again Delete Delete All Archive <** **> View Again Accept Reject Delete <** Press the T button to move the pointers to the Delete item and select by pressing the X button: For 1-way Messages: For 2-way Messages: **> View Again Delete Delete All Archive <** View Again Accept Reject **> Delete <** The pointers will change to question marks to show that confirmation of the delete action is required. If you do not want to delete, press the S or T buttons. To confirm that you wish to Part No. 9261-8276 Issue 3.0 17 EkoTek Hub delete the message, press the X button again and the screen will briefly display Deleting. When the current message has been deleted, the previously received message will be displayed. If you wish to delete this message repeat the procedure above. To return to the Standby Screen press and hold the X button for one second, if there are no more messages, the following screen will be displayed: No messages Part No. 9261-8276 Issue 3.0 18 EkoTek Hub Delete All Messages Note: The delete all feature is available to all 1-way messages. However, for 2-way messages the delete all feature can only be accessed once the message has been viewed and appropriate action taken. To delete all the messages, press the X button when the ■ appears at the end of the message. The message option screen will be displayed: **> View again Delete Delete All Archive <** Press the T button to move the pointers to the Delete All item and select by pressing the X button: View again Delete ??> Delete All Archive <?? The pointers will change to question marks, to show that confirmation of the delete action is required. If you do not want to delete, press the S or T buttons. To confirm that you wish to delete the message, press the X button again and the screen will briefly display Deleting. Having deleted all the messages the following screen will be displayed: No Messages Part No. 9261-8276 Issue 3.0 19 EkoTek Hub Archiving a Message Note: The archive feature is available to all 1-way messages. However, for 2-way messages the archive feature can only be accessed once the message has been viewed and appropriate action taken. Messages may be stored for reference, by using the archive facility. The EkoTek Hub cannot automatically delete archived messages when the message memory is full, only the user can delete messages. At the end of the message you wish to archive, press the X button to see the message option screen. Move the pointers to the Archive item with the S or T button: View again Delete Delete All **> Archive <** Select Archive with the X button and the pointers will change to question marks. Confirm your selection by pressing the X button again. The screen will briefly display Archiving. When the current message has been archived, the screen will show the previously received message. If you wish to archive this message, repeat the procedure. If there are no other messages, you may return to the Standby Screen by pressing and holding the X button for one second. The following screen will be displayed: No Messages Part No. 9261-8276 Issue 3.0 20 EkoTek Hub Reviewing Archived Messages To review your archived messages, press the S button whilst the EkoTek Hub is displaying the Standby Screen: 10.50 AM 12.09.06 Archive Bring 2 new demo models to the meeting at 11.30 next Tuesday. Ruth■ The first screen of the most recent archived message will be displayed. You may select the archived message that you want to review, by pressing the: S or T buttons until the first screen of the message is displayed. If the archived message is several screens long, you can view subsequent screens by pressing the X button. The last screen of the message will contain the ■ symbol. The top line shows the time and date that the message was received and to the right the message status Archive is displayed. Part No. 9261-8276 Issue 3.0 21 EkoTek Hub Deleting Archived Messages To delete an archived message, press the X button when the ■ symbol appears at the end of the message. The message option screen will be displayed: **> View again Delete Delete All <** Press the T button to move the pointers to the Delete item and select by pressing the X button. The pointers will change to question marks. View again ??> Delete <?? If you do not want to delete, press the S or T buttons. To confirm that you wish to delete the message press the X button again and the screen will briefly display Deleting. When the current message has been deleted, the previously archived message will be displayed. If you wish to delete this message, repeat the procedure. If there are no more archived messages, the following screen will be displayed: No Archived Messages To return to the Standby Screen, press and hold the X button for one second. Part No. 9261-8276 Issue 3.0 22 EkoTek Hub Delete All Archived Messages To delete all of the archived messages, press the X button when the ■ symbol appears at the end of a message. The message option screen will be displayed: **> View again Delete Delete All <** Move the pointers to the Delete All item by pressing the T button. Select by pressing the X button and the pointers will change to question marks: View again Delete ??> Delete All <?? If you do not want to delete all the messages press the: S or T buttons. To confirm that you wish to Delete All the messages, press the X button again and the screen will briefly display Deleting: No Archived Messages To return to the Standby Screen press and hold the X button for one second. Part No. 9261-8276 Issue 3.0 23 EkoTek Hub Set 12/24 Hour Mode This function allows you to set 12 hour to 24-hour mode only. From the Standby Screen press the X button. From the Options Screen press the T button move the pointers to Time and Date and select by pressing the X button: Options **> Time and Date <** Depending on if the Hub is in 12-hour or 24-hour mode the following screen will be displayed: **> Set 12 Hour Mode Set Time and Date Set Night Mode <** **> Set 24 Hour Mode Set Time and Date Set Night Mode <** Toggle between the 12 Hour and 24 hour modes by pressing the X button: ??> Set 24 Hour Mode Set Time and Date Set Night Mode <?? When the pointer change to question marks press the X button to confirm the selection. Part No. 9261-8276 Issue 3.0 24 EkoTek Hub Set Time and Date To set the time and date, press the X button when the Standby Screen is displayed. The Options Screen will be displayed. Move the pointers to Time and Date by pressing the T button: Options **> Time and Date <** Select this item by pressing the X button: Set 12 Hour Mode **>Set Time and Date Set Night Mode <** Move the pointers to Time and Date by pressing the T button, then select by pressing the X button: Time and Date 12:21 PM 12.09.06 This screen allows you to set the time and date and also the 12 or 24-hour format. The currently selected item will flash. To select another item for change, press the X button. Each press of the X button will advance the selection to the next item. When the item you wish to change is flashing, press the S or T buttons to increase or decrease its value. Once you have set the time and date, to return to the Standby Screen press and hold the X button for one second. Part No. 9261-8276 Issue 3.0 25 EkoTek Hub Set Day / Night Mode The Day / Night function is used to put the EkoTek system into day or night shift working operational modes. From the Standby Screen press the X button. From the Options Screen press the T button move the pointers to Time and Date and select by pressing the X button: Options **> Time and Date <** From the Time and Date Options Screen press the T button move the pointers to Set Day/Night Mode and press the X button to select this option: Set 12/24 Hour Mode Set Time and Date **> Set Night Mode <** If the Hub is in Day or Night mode the following will be displayed: ??> Set Day Mode <?? ??> Set Night Mode <?? Part No. 9261-8276 Issue 3.0 26 EkoTek Hub When the pointer change to question marks press the X button to confirm the selection. Part No. 9261-8276 Issue 3.0 27 EkoTek Hub Setting the Alert Options The EkoTek Hub allows full control of how the pager alerts when messages are received, the audible alert and vibrate alert can be set to ‘off’ or ‘on’. From the Standby Screen press the X button to select the Options Screen: **> Options Time and Date <** Select Options and press the X button again. The following screen will be displayed, use the T button and move the pointers to the Alert option: Display Auto-delete **> Alert IP Address <** Select Alert by pressing the X button and the following screen will be displayed: Audible Alert On To enable or disable Audible Alert option press the S and T button to select ‘On’ or ‘Off’. Once your have selected the desired alert state press and hold the X button for one second and the EkoTek Hub will return to the Standby Screen. Part No. 9261-8276 Issue 3.0 28 EkoTek Hub Setting the Message Display Options The EkoTek Hub is equipped with display options these can be customised according to your personal requirements. To change the message display options, press the X button from the Standby Screen. The Options Screen will now be displayed and select Options by pressing the X button: **> Options Time and Date <** Move the pointers to Display by pressing the T button and select this item by pressing the X button: **> Display Auto-delete Alert IP Address <** The following screen will be displayed: Font Backlight Display Timeout Contrast 2 On 16s 16 The selected item will flash. To select the next item, press the X button. Each press of the X button will advance the selection to the next menu item. When the item you wish to change is flashing, press the S or T buttons to change its value. Part No. 9261-8276 Issue 3.0 29 EkoTek Hub The Font option can be set to 1, 2 or 3: • Font option 1 - Corresponds to a text size allowing up to 6 lines per screen (this text size option may be disabled via the programming software). • Font option 2 - Corresponds to a text size allowing up to 4 lines of larger text per screen. • Font option 3 - Corresponds to a text size allowing up to 4 lines per screen of larger text, in a bold font (the date stamp can be suppressed via the programming software, when this text size is selected). The Backlight can be either enabled, or disabled. When disabled, it will help to prolong battery life. The Display Timeout can be set to 8, 16 or 32 seconds. This option determines the length of time that selected screen remains on display before reverting back to the Standby screen, if no buttons are selected. The Display Contrast can be increased, or decreased. When you have finished setting your display options, return to the Standby Screen by pressing and holding the X button for 1 second. Part No. 9261-8276 Issue 3.0 30 EkoTek Hub Setting Auto Delete The Auto Delete function allows you to set the maximum number of stored messages, excluding those in the Archive memory. If the number of messages in the memory exceeds the selected number, then the oldest Read message is deleted. Should there be no Read Messages, then the oldest Un-read Message is deleted instead. If the Auto Delete value is changed and the number of messages in the memory exceeds the new setting, then one message will be deleted per minute, until the memory equals the new setting. The available options are 1 through to 6 messages. To access the Auto Delete function, press X the button to display the Options Screen. **> Options Time and Date <** Press the X button to select Options. Move the pointers to Autodelete by pressing the T button and select using the X button: Alert Display **> Auto-delete IP Address <** The following screen will then be displayed: Auto-delete 5 To set up Auto-delete, press the S or T button to change the setting and then return to the Standby Screen by pressing and holding the X button for one second. Part No. 9261-8276 Issue 3.0 31 EkoTek Hub IP Address The IP Address function allows you to check the IP address for the EkoTek Hub. To access the Auto Delete function, press X the button to display the Options Screen: **> Options Time and Date <** Press the X button to select Options. Move the pointers to IP Address by pressing the T button and select using the X button: Alert Display Auto-delete **> IP Address <** The pointers will change to question marks, press the X button: Alert Display Auto-delete ??> IP Address <?? After a few seconds the IP address will be displayed, to return to the Standby Screen press the X button: 192.168.1.2 Part No. 9261-8276 Issue 3.0 32 EkoTek Hub Notes: Part No. 9261-8276 Issue 3.0 33 EkoTek Hub Multitone Electronics plc Multitone House, Shortwood Copse Lane, Basingstoke, Hampshire, England RG23 7DH Part No. 9261-8276 Part No. 9261-8276 Issue 3.0 34