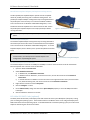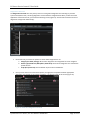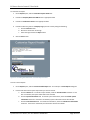
1
PC-Doctor Service Center 9.5 User Guide © 2005-2015 PC-Doctor, Inc. ALL RIGHTS RESERVED Page 1 of 69 PC-Doctor Service Center 9.5 User Guide Table of Contents Thank you for choosing PC-Doctor Service Center ........................................................................................................4 Service Center Kit Contents ...........................................................................................................................................5 Multipurpose USB Device .....................................................................................................................................5 Diagnostics DVD ....................................................................................................................................................6 CD and DVD Test Media ........................................................................................................................................6 Loopback Adapters ...............................................................................................................................................6 PCI & Mini PCI POST Cards (optional) ...................................................................................................................7 Power Supply Tester (optional) ............................................................................................................................9 Using Service Center to Test PCs .................................................................................................................................11 Choosing a Test Environment..................................................................................................................................11 Testing with Service Center for Windows ...............................................................................................................11 Testing with Service Center Bootable Diagnostics ..................................................................................................12 Boot Menu ..........................................................................................................................................................12 Graphical User Interface .........................................................................................................................................13 Configuring a Session (Optional) .........................................................................................................................14 Configuring and Running Diagnostics .................................................................................................................14 System Information ............................................................................................................................................18 Reports ................................................................................................................................................................19 My Links ..............................................................................................................................................................21 Drive Erase (Bootable Diagnostics Only) .............................................................................................................23 Automated Testing (Bootable Diagnostics Only) ................................................................................................23 Testing with Service Center for DOS .......................................................................................................................24 Menu ...................................................................................................................................................................24 Configuring and Running Diagnostics .................................................................................................................25 Standalone Mode................................................................................................................................................25 Erase Hard Drive Contents ..................................................................................................................................27 Using Service Center to Test Intel based Apple Macs .................................................................................................30 Using Service Center to Test Android Devices .............................................................................................................31 Step 1. Prepare the Android Device for Testing..................................................................................................31 Step 2. Configure the Test Host PC .....................................................................................................................31 Service Center for Android UI .............................................................................................................................33 Appendix A: Windows Command Line ........................................................................................................................35 © 2005-2015 PC-Doctor, Inc. ALL RIGHTS RESERVED Page 2 of 69 PC-Doctor Service Center 9.5 User Guide Appendix B: Working From the DOS Command Line...................................................................................................37 /BA:<x> and /MS:<x> – Batch Mode and Maximum System Load .....................................................................37 /RT – Run Test Switch and Arguments ................................................................................................................38 General Command Line Switches .......................................................................................................................42 Appendix C: Service Center for Android Test Descriptions .........................................................................................46 Android Specific Tests .........................................................................................................................................46 CPU (x86) ............................................................................................................................................................48 CPU (ARM) ..........................................................................................................................................................49 Memory ..............................................................................................................................................................50 PCI .......................................................................................................................................................................51 Appendix D: Service Center for DOS Test Descriptions ...............................................................................................52 CPU/CoProcessor ................................................................................................................................................52 System Memory ..................................................................................................................................................54 System Board ......................................................................................................................................................54 Video Adapter .....................................................................................................................................................56 Serial Port............................................................................................................................................................57 Parallel Port.........................................................................................................................................................57 Fixed Disk ............................................................................................................................................................58 Diskette ...............................................................................................................................................................59 SCSI Fixed Disk ....................................................................................................................................................61 Optical Drive Write .............................................................................................................................................62 Optical Drive Scan ...............................................................................................................................................62 Interactive Test Descriptions ..............................................................................................................................63 Appendix E: FAQ and Diagnostic Tips ..........................................................................................................................65 Multipurpose USB Device........................................................................................................................................65 Service Center for Windows ....................................................................................................................................65 Service Center Bootable Diagnostics .......................................................................................................................66 Service Center for DOS ............................................................................................................................................66 Index ............................................................................................................................................................................69 Product Support ..........................................................................................................................................................70 Company Information .............................................................................................................................................70 © 2005-2015 PC-Doctor, Inc. ALL RIGHTS RESERVED Page 3 of 69 PC-Doctor Service Center 9.5 User Guide Thank you for choosing PC-Doctor Service Center Welcome to PC-Doctor Service Center, the most complete computer diagnostic software solution! Industry leaders from manufacturing to refurbishment have relied on PC-Doctor hardware diagnostics for over 20 years. Service Center is an affordable hardware diagnostic and information gathering software solution, bringing the same level of diagnostic standards from the factory floor to your organization. Service Center minimizes the time needed to identify and diagnose a variety of hardware issues across a wide variety of platforms, all while reducing the cost of support. Service Center consists of multiple test environments, which offer support for the following platforms: Personal Computers (PC) Service Center for Windows Service Center Bootable Diagnostics Windows XP SP3 – 8.1 UEFI & non-UEFI systems with more than 256 MB of RAM Android Intel based Macs Android 2.3 “Gingerbread” 5.01 “Lollipop” Service Center for Android Service Center for DOS Apple Computers Legacy Boot enabled and non-UEFI PCs Service Center for Windows – provides an ideal testing environment for issues that may only occur in Windows, and with all of the possible software interactions or conflicts that may occur. It offers easy access to the various system tools and events (such as the Device Manager), as well as providing detailed information about any recorded BSODs (Blue Screen of Death; a popular term for a Windows OS crash). The software is compatible with the following releases of Windows: XP (SP3 Only), Vista, 7, 8, and 8.1. Windows 10 support will be released after Microsoft release to manufacturing in the next version of Service Center. Service Center Bootable Diagnostics – is capable of running on non-UEFI, UEFI, and Secure Boot enabled PCs and Intel based Macs. Bootable Diagnostics offers many of the same diagnostics available when testing in Windows, but with the added benefit of being able to test outside of Windows OS (Operating System). Bootable Diagnostics is also capable of running the Drive Erase utility for securely erasing both HDDs (Hard Disk Drives) and SSDs (Solid State Drives). Service Center for Android – is capable of running on both ARM and Intel based Android devices running version 2.3 “Gingerbread” to 5.01 “Lollipop”. After running automated or ad hoc diagnostics, Service Center can save printable test reports to the Multipurpose USB Device, and remove the diagnostic software from the test Android device. Service Center for DOS – provides a legacy environment for running diagnostics on any non-UEFI and Legacy Boot enabled system. Since DOS requires a minimum of resources to run, this environment is perfectly suited to run on older systems while offer a greater level of access to the system’s resources on all compatible systems. © 2005-2015 PC-Doctor, Inc. ALL RIGHTS RESERVED Page 4 of 69 PC-Doctor Service Center 9.5 User Guide Service Center Kit Contents The Service Center kit includes the following: Multipurpose USB Device Diagnostics DVD CD and DVD test media Loopback adapters for testing of: o Serial ports o Audio ports o Parallel ports o RJ-45 Network Ports PCI POST card set (Included with premier kit) which includes: o PCI POST Card o MiniPCI POST Card o Remote Display Power Supply Tester (Included with premier kit) Note: These are the standard contents; however, some variation may occur depending on your purchase. Multipurpose USB Device The Multipurpose USB Device (or MUD for short) is the most important component in the Service Center kit and provides: License allowing Service Center to authenticate Boot device for DOS, Bootable Diagnostics, and Android Diagnostics Installer for Service Center for Windows Storage to save session information, diagnostic results, and reports Test/Dongle status LEDs (see lanyard for a legend) USB port test functionality While running Service Center diagnostics, the MUD must remain plugged in to a USB port at all times. Your MUD is protected by a one year Figure 1: Service Center Multipurpose USB Device limited warranty, and PC-Doctor technical support is available to help with any problems that may occur that have not been covered by this guide. See Product Support to learn how to submit a technical support ticket. Caution: Electrostatic discharge (ESD) can damage the motherboard, components, and the USB device. Always install components at an ESD-controlled workbench. If such a workbench is not available, wear an antistatic wrist strap when handling the Multipurpose USB Device. © 2005-2015 PC-Doctor, Inc. ALL RIGHTS RESERVED Page 5 of 69 PC-Doctor Service Center 9.5 User Guide The current state of the system can be determined using the MUD LEDs as described in Figure 2: Diagnostic State LED Diagram. This is particularly useful if working with several units at the same time using a Keyboard/Video/Mouse (KVM) switch. Note: The yellow LED light will flash periodically if the system is in an idle state due to the system periodically checking for authentication. Diagnostics DVD The Diagnostics DVD is used to install Service Center Figure 2: Diagnostic State LED Diagram for Windows and use as a boot device for DOS, Bootable Diagnostics and Android diagnostics on systems that cannot use the MUD for booting. The Diagnostics DVD can also restore a Multipurpose USB Device if the necessary data is erased or corrupted. CD and DVD Test Media CD and DVD test media provide known good disk media to use for optical audio and data testing. Other CD or DVD media can be substituted if it is full of data. Note: The provided CD Test Media is a Mixed Mode CD to support both audio and data optical tests. Loopback Adapters Service Center includes a set of loopback adapters for testing various external I/O port signals. 9-Pin Serial Port Loopback Adapter Audio Loopback Cable Parallel Port Loopback Adapter Network Loopback Adapter Serial Port Loopback Adapter The serial port loopback adapter is designed to loop incoming data back to the serial port and is necessary to run the Serial Port External Loopback Test in Service Center for Windows, Bootable Diagnostics, and DOS. Attach the serial port loopback adapter to the 9-pin Serial (COM) port on your PC. Your PC may have more than one serial port. Figure 3: Serial Port Loopback Adapter Audio Loopback Cable The audio loopback cable is designed to loop sound from the output port (e.g. speaker, line out, etc.) to the input port (e.g. mic, line in, etc.) and is necessary to run the Rough Audio Test in Service Center for Windows. Locate the audio ports and attach one connector an output port and the other connector to an input port. The position and order of the ports may not be the same for all computers. Figure 4: Audio Loopback Cable © 2005-2015 PC-Doctor, Inc. ALL RIGHTS RESERVED Page 6 of 69 PC-Doctor Service Center 9.5 User Guide Parallel Port Loopback Adapter (and Software Locking Device) The blue parallel port loopback adapter operates as both a loopback device for parallel port testing and as a software locking device. The parallel port loopback adapter is designed to loop incoming data back to the parallel port and is necessary to run the External Read and Write Test in Service Center for Windows and Bootable Diagnostics, or the Parallel Port External Loopback Test in Service Center for DOS. Attach the parallel port loopback adapter to the 25-pin parallel port before running these tests. Figure 5: Parallel Port Loopback Adapter Note: Only blue parallel port loopback adapters with a hologram on the top will function as a software locking device. Network Loopback Adapter The network loopback adapter is designed to loop incoming data back to the network port and can be used to run the Network External Loopback Test in Service Center for Windows and Bootable Diagnostics. To use the loopback adapter, attach it directly to the systems NIC (Network Interface Card). Caution: The Network Loopback Adapter does not support Gigabit communication, and will require the network adapter to be configured for 10/100 Megabit speed. Figure 6: Network Loopback Adapter Set Network Adapter Speed in Windows The network adapter must be set to 10 Mbps or 100 Mbps in order to receive accurate results for the Network External Loopback Test in Service Center for Windows. 1. Open the Windows Control Panel. 2. Select Network Connections: a) In Windows XP, click Network Connections. b) In Windows Vista or Windows 7, access the Start menu, and use the search box to find Network Connections. c) In the Windows 8 or 8.1 Modern UI move the mouse to the right hand side of the UI, click the Search Icon, Select the Settings Tile, and use the search box to find Network Connections. 3. Right-click the connection and click Properties. 4. Click the Configure... button. 5. On the Advanced tab, change the value of the Speed & Duplex property to 10 or 100 Mbps with Half or Full Duplex. 6. Click the OK button and then run the test. PCI & Mini PCI POST Cards (optional) The POST (Power On Self-Test) cards display codes that indicate what the system BIOS (Basic I/O System) is doing prior to loading the operating system. The last POST code from the BIOS is shown on the 2-digit LED display if the BIOS should fail to load the operating system. If the BIOS should fail to load the operating system, this code can be helpful in determining the reason for the failure. © 2005-2015 PC-Doctor, Inc. ALL RIGHTS RESERVED Page 7 of 69 PC-Doctor Service Center 9.5 User Guide In addition, the POST Cards display voltage levels for the system and the clock speed of the PCI/miniPCI bus. Being aware of the voltage levels can be helpful in diagnosing power issues that may not be exposed by the Power Supply Tester. Note: Displays for the voltage levels and clock speed are not located on the miniPCI POST Card and are only accessible with the remote display connected. Figure 7: PCI POST Card (right) connected to the Remote Display (left) The green and yellow LEDs (one for each bus voltage) indicate if voltage levels are within limits set by the PCI/miniPCI specification. The smaller three digit LED display shows the selected measurement value. A small yellow LED indicates the current selection. Pressing the button briefly will change the current selection. Green: Selected mode is currently within specifications. Yellow: Selected mode is outside of specifications. This LED will remain lit until reset by the user. Green and Yellow: Selected mode is currently within acceptable range but was out of range in the past. You can also define additional mode options using the 2-selector switch as listed below: Operating Mode Description The I/O port being monitored for the POST code. The default setting is 80H and this Switch 1 (marked “1”) works for most systems. If the POST code is not properly displayed while using the default setting, switch the setting to the alternate I/O address of 84H. Places the card in Active or Passive mode. In Active mode, the card monitors write activity to the I/O port selected via Switch 1 and accepts them immediately. In Switch 2 (marked “2”) Passive mode, the POST card will wait to accept write activity. Use the Passive switch setting if other POST cards are installed in the system. Caution: Do not switch operating modes with the POST card inserted in the system! Note: POST cards include a non-functional USB port that is intended for future use. Using the POST Cards 1. Attach the remote display to the PCI/miniPCI POST card using the included cable. © 2005-2015 PC-Doctor, Inc. ALL RIGHTS RESERVED Page 8 of 69 PC-Doctor Service Center 9.5 User Guide 2. 3. Make sure the system is shut down and insert the PCI/miniPCI POST Card in an available PCI/miniPCI slot. Turn on system power and observe the POST codes in the 2-digit LED display. POST codes are unique to each PC manufacturer. You can obtain these codes from technical support websites for the related PC manufacturer, or visiting http://www.pcdservicecenter.com/biospostcodes. 4. Use the button on the remote display or on the main card to select the detail reading shown on the 3-digit LED display. The top row of LEDs indicates the current reading. The available detail selections are: MHz: Shows the system bus frequency in MHz -12V: The -12V power rail reading +12V: The +12V power rail reading I/O: The voltage of the I/O bus which will be 5V or 3.3V depending on the system Auxiliary: The auxiliary voltage reading (normally 3.3V) +3.3V: The +3.3V power rail reading +5V: The +5V power rail reading The yellow LEDs do not switch off by themselves once illuminated. You can manually reset the yellow LEDs by pressing the button on the card or remote display and holding it until the letters rst appear on the 3-digit LED display. Caution: Electrostatic discharge (ESD) can damage the motherboard, components, and the POST Cards. Always install components at an ESD-controlled workbench or with ESD-controlled tools, such as a properly grounded antistatic wrist strap. Inserting the card incorrectly will result in damage to the card and the system! Power Supply Tester (optional) The PC-Doctor Power Supply Tester is a test device that verifies the integrity of your power supply and power supply cables. When you attach a power supply cable to the tester, a series of LEDs will illuminate verifying the power supply or cables are functional. LED Status: ON = Pass OFF = Fail Figure 8: Power Supply Tester Note: The LED status indicators will turn on to indicate a pass, or remains unlit to indicate a failure. Testing a Power Supply with a 20/24-pin Connector 1. Disconnect the power supply from the motherboard. © 2005-2015 PC-Doctor, Inc. ALL RIGHTS RESERVED Page 9 of 69 PC-Doctor Service Center 9.5 User Guide 2. 3. 4. Plug the power supply into a power source. Connect the power supply to the tester through the 20/24-pin connector. Confirm that the +3.3V, +5, +12V, -5V, -12V, +5VSB, and PG LED status lights illuminate Note: Some power supplies do not produce -5V. Testing the Power Supply Cables To test a power supply output on secondary cables, individually plug any of the following cables into the tester while connecting the power supply tester to the 20/24-pin power supply cable: 1. Hard drive cable – confirm that the +12V and +5V LEDs illuminate. 2. Any 4, 6, or 8-pin power cable (use 4P, 6P, or 8P connectors) – confirm that the +12V LED illuminates. 3. Floppy drive cable – confirm that the +12V and +5V LEDs illuminate. 4. SATA cable – confirm that the +12V, +5V, and +3.3V LEDs illuminate. Danger: This product is only to test the output of a power supply. Do NOT leave the tester connected while unattended. This tester generates heat and could damage the power supply and/or cause fire. © 2005-2015 PC-Doctor, Inc. ALL RIGHTS RESERVED Page 10 of 69 PC-Doctor Service Center 9.5 User Guide Using Service Center to Test PCs Choosing a Test Environment When running diagnostics on PC hardware, many technicians rely on the environments that are most comfortable and familiar to them. However, each test environment does have its own strengths depending on the components that need to be tested. Please keep in mind that all environments are capable of diagnosing issues with the system’s components, but some environments are ideal for certain hardware issues. Here is a quick outline of the more notable strengths of each environment: Service Center for Windows – is the ideal environment for testing a system’s graphics card, sensors, and multimedia devices. It is also capable of testing all of a system’s communication devices: such as Bluetooth Adapters, Wireless Adapters, Ethernet Adapters, Mobile Broadband, and Dial-up Modems. Service Center Bootable Diagnostics – is ideal for testing outside of the system’s OS (Operating System), and accessing a greater percentage of the system’s RAM than Windows allows. It can also run diagnostics on many of the same communication devices as Windows. Service Center for DOS – is ideally suited for testing outside of the system’s OS, and allows you to test the greatest percentage of the system’s RAM. Note: It is sometimes a good idea to run diagnostics in multiple environments to get the best possible coverage. Testing with Service Center for Windows Service Center for Windows allows you to run hardware diagnostics on systems booted into Microsoft Windows. The following are required to run Service Center for Windows: Windows XP SP3, Vista, 7, 8, or 8.1 USB port or DVD optical drive To run Service Center for Windows: 1. Insert the Multipurpose USB Device into an available USB port or insert the Diagnostics DVD into the optical disk drive. Figure 9: The Install Options Menu © 2005-2015 PC-Doctor, Inc. ALL RIGHTS RESERVED Page 11 of 69 PC-Doctor Service Center 9.5 User Guide 2. Wait for the Install Options Menu to appear if autorun is enabled or launch the Setup.exe found in the diagnostics media 3. Check the ‘Terms and Conditions’ checkbox at the bottom 4. Choose the desired installation method: a) Install PC-Doctor Service Center 9.5 – Choose this option if planning to keep the software installed on the system (e.g. on a workbench computer used to test individual components). b) Quick Install and Run – This option will install the software to a temporary directory that is removed when the system is rebooted. c) Run from DVD/USB – Choosing this option will launch the software directly from the Multipurpose USB Device or diagnostics DVD. It will limit the diagnostics capabilities of the optical drive or USB port based on the chosen diagnostics media. d) User Guide – Provides easy access to this User Guide for your reference. e) Multipurpose USB Device Restore Tool – Will overwrite the contents of the Multipurpose USB Device in the event of data loss or corruption. See Multipurpose USB Device Restore Tool for additional information. Testing with Service Center Bootable Diagnostics Boot Menu Set your system’s boot order to boot from the Multipurpose USB Device or the Diagnostics DVD. Because the process of setting the boot device is different depending on the system’s BIOS, you will need to check the system documentation. Figure 10: Example of the BIOS Boot Menu Once you have done so, the PC-Doctor Service Center Diagnostics boot menu will appear. The four options available for Bootable Diagnostics, these options are: 1. PC-Doctor Service Center Bootable Diagnostics. This boots the system into the Service Center Bootable Diagnostics test environment and launches the Graphical User Interface (GUI). © 2005-2015 PC-Doctor, Inc. ALL RIGHTS RESERVED Page 12 of 69 PC-Doctor Service Center 9.5 User Guide 2. 3. 4. PC-Doctor Service Center Bootable Diagnostics – Automated Testing. This boots the system into the Service Center Bootable Diagnostics test environment, launches the Graphical User Interface (GUI) and automatically executes automate.xml test script (See section Automated Testing for additional information) PC-Doctor Service Center Bootable Diagnostics (Video Fallback). This is the same as Option 1 and it should only be used on systems that cannot boot using Option 1. PC-Doctor Service Center Bootable Diagnostics – Automated Testing (Video Fallback). This is the same as Option 2 and it should only be used on systems that cannot boot using Option 2. Graphical User Interface The GUI (Graphical User Interface is the same within both the Windows and Bootable Diagnostics. Figure 11 explains the primary layout. Figure 11: The Service Center GUI 1. 2. 3. Menu Bar – provides menus to access features such as application settings, access to documentation, and session controls. Tabs – provides access to all major features and tools such as diagnostics, the script editor, system information, and reports. Session Information – if a session is started, it displays the current name in the top right corner. © 2005-2015 PC-Doctor, Inc. ALL RIGHTS RESERVED Page 13 of 69 PC-Doctor Service Center 9.5 User Guide 4. 5. 6. Used Space – just below the Session Information, it displays the remaining storage capacity of the Multipurpose USB Device. Clicking on it will reveal more detailed information. Main Pane – displays all the options available for the current tab. Sub-Pane – below the Main Pane, it displays relevant system tools or information. Configuring a Session (Optional) Sessions will automatically save system information, test results, and system snapshots to the MUD within the “data\sessions\” directory. You can use session for any naming scheme you prefer (e.g. Customer Name, System Identifier, Date, etc. There are two ways to set the session: 1. 2. At the launch of the application (Figure 12) File -> Session -> Start Figure 12: The Session Selection dialog Configuring and Running Diagnostics There are three primary ways of running diagnostics: 1. 2. 3. Home tab: PC-Doctor provided default test scripts Diagnostics and Tools: Adhoc testing Script Editor: Custom test scripts PC-Doctor Provided Default Test Scripts These are the five default test scripts included in the product. They are base recommendations for testing but can be customized using the Script Editor. Test Script System Test Burn-in Test Short Hard Drive Test Extended Hard Drive Test Memory Test Purpose The System Test runs a series of tests against the system’s primary components (CPU, RAM, Motherboard, etc.). The Burn-in Test will run a series of tests in parallel on the CPU, RAM, Video Card, and Hard Drive. This will place a high load on the system for a minimum of 15 minutes per test to reveal intermittent stability or thermal issues. The Short Hard Drive Test is one of two recommended testing levels for Hard Drives and Solid State Drives. This test script will maximize fault detection rate in a short period. For a background on how PC-Doctor determines these recommendations, you can review our whitepaper: http://www.pc-doctor.com/images/files/case_study_hdd_testing.pdf The Extended Hard Drive Test is the second recommended testing level for Hard Drives and Solid State Drives. The Memory Test runs a full series of memory tests on the system. © 2005-2015 PC-Doctor, Inc. ALL RIGHTS RESERVED Page 14 of 69 PC-Doctor Service Center 9.5 User Guide Diagnostics and Tools The Diagnostics and Tools tab is the primary access to running adhoc diagnostics and accessing any relevant systems tools (bottom bar). Launching diagnostics via this method is straightforward. When you first launch the application and click on this tab, you will see the following screen (Figure 13). The left side will contain the list of diagnostics and right side will be empty. Figure 13: Diagnostics and Tools pane 1. On the left side, you have three options to choose which diagnostics to run: a. Category (Ex: Audio, Storage): All PC-Doctor diagnostics are categorized for easier navigation. b. Device Type (Sound Card, Microphone, Hard Drive): All PC-Doctor diagnostics are associated to specific devices. c. Script (Ex: System Test): The five default scripts are also included here. 2. Once you have chosen one of the three options, the right pane will update will all the appropriate diagnostics. For example, if you choose ‘Hard Drive’, you will see similar to this screen (Figure 14) Figure 14: Hard Drive Diagnostics and Tools © 2005-2015 PC-Doctor, Inc. ALL RIGHTS RESERVED Page 15 of 69 PC-Doctor Service Center 9.5 User Guide 3. The right pane is then used to run the diagnostics with some additional options available for fine tuning and links to common system tools as annotated in Figure 14. a. Pass Count: Choose the radio button and choose a value from the dropdown. By default, all chosen diagnostics will be executed once but increasing this value will repeat each diagnostic that many times. b. Minimum Time Per Test: Choose this radio button and choose a value from the dropdown. By default, all diagnostics will take the least amount possible to finish their test algorithm. Changing the value from default will cause each diagnostic to run for at least the specified amount of time. If the diagnostic finishes its test algorithm before the specified time, it will repeat itself. This is most commonly used in burn-in or stress testing. c. The device to be tested is shown. Clicking on the checkbox will choose all related diagnostics for that device. Clicking on ‘details…’ will show the available system information. d. If there are multiple devices chosen, then this checkbox can be selected to test all devices in parallel. e. Each individual diagnostic is shown in the list based on the chosen category, device or script. All diagnostics have a little help icon that will display its description. Some diagnostics include parameters to further fine tune the diagnostic. For example, you may customize the Linear Read Test. The default value and a description of each parameter is shown to guide you in choosing the best option. Figure 15: Diagnostic Parameters 4. The bottom bar displays links common system tools available for each category or device. © 2005-2015 PC-Doctor, Inc. ALL RIGHTS RESERVED Page 16 of 69 PC-Doctor Service Center 9.5 User Guide 5. Click the Run Tests button to begin testing. Diagnostics run in real time in the order listed. Figure 16: Test progress shown through the Diagnostics and Tools pane Script Editor Script Editor tab is similar to the Diagnostics and Tools tab with the main difference being that it is used to create and run test scripts and not adhoc testing. The diagnostics themselves are shown in the left side in the same manner (organized by category and device type) and all the available customization options (pass count, minimum test per time, test parameters) are the same. The primary difference is that this tab will show diagnostics even if they are not available to run on this system. For example, you would see the Solid State Drive (SSD) diagnostics even if the system does not contain a SSD. Follow these steps to configure your test scripts: 1. Choose whether you want to create a script from scratch or use one of the default test scripts as your base a. If starting from scratch, make sure no current tests are selected or click ‘Clear Script’ if the button is enabled. b. If starting from a base script, click ‘Load Script’ and choose the base test script (PC-Doctor provided default test script reside under pcdoctor\sc_win\bin\scripts on the MUD or Diagnostics DVD) 2. Click on desired category or device type from the left to add any additional tests 3. Per diagnostic a. Use the checkbox to determine if this diagnostic will run or not in the test script b. Use the help icon if you would like to better understand what the diagnostic does c. Configure any available test parameters 4. Per device type a. Set the ‘Parallel’ checkbox if desired to do parallel testing. PC-Doctor scripting engine will run tests in parallel on multiple devices if this checkbox is checked. b. Use the arrows to configure the test order 5. Configure ‘Pass Count’ or ‘Minimum Test Per Time’ if desired 6. Click ‘Save Script’ © 2005-2015 PC-Doctor, Inc. ALL RIGHTS RESERVED Page 17 of 69 PC-Doctor Service Center 9.5 User Guide 7. If desired, you can add this test script to your favorite links (See My Links section for more details) Note: Scripts will only work in the environment used to create them (e.g., Test scripts created in Windows will only work in Service Center for Windows). This is also true of scripts created in Bootable Diagnostics. In order to save a custom script for continued use with Service Center Bootable Diagnostics, it must be saved in the \scripts\usb_key directory. System Information System Information provides comprehensive information about the PC hardware configuration and Windows events including operating system crashes (BSOD), application crashes, and device manager issues. The UI includes multiple views of system information The Home tab displays a summary version of the most important system information. Figure 17: The System Information Tab The System Information tab contains four views depending on your needs. Clicking on System Information will show three views (basic, detailed and advanced). Advanced View can be used to view the entire output of system information. Clicking on System Events will show Windows events including device manager issues (Hardware Alerts), operating system alerts (BSOD), and application crashes (Software Alerts). Figure 18: The System Information pane. © 2005-2015 PC-Doctor, Inc. ALL RIGHTS RESERVED Page 18 of 69 PC-Doctor Service Center 9.5 User Guide System Snapshot A system snapshot is a hardware and software profile of the system that you can use to compare to other system configurations or as a tool for auditing hardware. This can only be used in conjunction with Sessions so that Service Center can accurately detect system changes. To generate a system snapshot: 1. Start a session if not already done so (File -> Session -> Start) 2. Click the Create System Snapshot link on the System Information tab. A confirmation message will appear if the system snapshot is saved successfully 3. Snapshots that are in the same session can be compared against each other as noted in the Reports section Reports The UI contains save and print links with all system information views and at the end of running any diagnostics. Alternatively, you can generate a custom printable report from the Reports Tab that can contain: Custom header to include company name, company address, technician’s name, and company logo. System Information Test Information Snapshot Comparison Figure 19: The Reports Tab Figure 20: Example of a Custom Report © 2005-2015 PC-Doctor, Inc. ALL RIGHTS RESERVED Page 19 of 69 PC-Doctor Service Center 9.5 User Guide To customize the report: 1. On the Reports pane, click the Customize Report Header link. 2. Provide the Company Name and Address in the appropriate field. 3. Provide the Technician’s Name in the appropriate field. 4. Provide the directory path to a Company Logo you wish to use by doing the following: a. Click the Browse button. b. Browse to the location of the logo. c. Select the logo and click the Open button. 5. Click the Save button. Figure 21: Providing Information for a Custom Report Header To Print or Save a Report: 1. On the Reports pane, click the Create Printable Report link. This will open a Create Report dialog box. 2. Preview and select which report components you want to include. a. Click the Header tab. To include a report header, check the Include Header check box. If this box is unchecked, the report header will not be included. b. Click the System Information tab. To include system information, check the Include system information check box. If this box is unchecked, system information will not be included. c. Click the Test Information tab. To include test information, check the Include test information check box. If this box is unchecked, test information will not be included. © 2005-2015 PC-Doctor, Inc. ALL RIGHTS RESERVED Page 20 of 69 PC-Doctor Service Center 9.5 User Guide d. 3. Click the Snapshots tab. Select the snapshots you wish to compare. To include the selected snapshots, check the Include snapshot comparison check box. If this box is unchecked, the snapshot comparison will not be included. Click the Print or Save Report tab. Review the information to be included in the report by scrolling down. My Links The My Links tab provides links to local applications, test scripts, and resources on the Internet. You can add or delete links at any time. You can also modify existing links. Links are displayed on the My Links pane and the My Top Links section of the Home pane. Warning: Restoring the Multipurpose USB Device will clear all saved links. See Multipurpose USB Device FAQs for additional information. Figure 22: The My Links tab Add a New Link To add a new link: 1. Click the My Links tab (see Figure 22). © 2005-2015 PC-Doctor, Inc. ALL RIGHTS RESERVED Page 21 of 69 PC-Doctor Service Center 9.5 User Guide Figure 23: Adding a new link 2. Click Add New Link. This will open the Add New Link dialog box. 3. Select the Link Type you are creating. a. If you are creating a link to a local resource (for example, a file on the system), select Local File, click the browse button and browse to the location of the file. b. If you are creating a link to a test script, select Test Script, click the browse button, and browse to the location of the script file. c. If you are creating a link to an Internet resource, select URL and provide the URL in the Web Address field. 4. In the Name field, type the name of the link. The name is what is displayed for the link on the My Links pane. 5. In the Description field, type a description of the link. The description is what is displayed with the name on the My Links pane. 6. Click the Save button. Editing a Link To edit a link: 1. Click the My Links tab. 2. On the link you want to edit, click the Edit button. This will open the Edit Link dialog box (see Figure 24). Figure 24: Editing an existing link 3. Edit the link information as necessary. 4. Click the Save button. © 2005-2015 PC-Doctor, Inc. ALL RIGHTS RESERVED Page 22 of 69 PC-Doctor Service Center 9.5 User Guide Drive Erase (Bootable Diagnostics Only) Service Center Bootable Diagnostics includes the ability to wipe a HDD or SSD. Service Center Bootable Diagnostics contains three test scripts that provide a method to erase all content on the system’s hard drive. To launch one of the Drive Wipe test scripts, click the link for the desired method; Drive Wipe (1 pass), Drive Wipe (3 pass), or Drive Wipe (7 pass). These links are shown both on the Home tab and on the My Links tab. You will be prompted with a warning that the utility will erase the contents of the drive to avoid accidental erase. Danger: Please be aware that the option to cancel the Drive Wipe script is available once the script has begun, but will not restore any portion of the drive that has been erased before the process was aborted. The Drive Wipe (1 pass) script will erase the drive by writing ones to each byte in every sector of the drive in one pass. The Drive Wipe (3 pass) script will erase the drive by writing zeros, followed by writing ones, and finally by writing random data to each byte in every sector. The Drive Wipe (7 pass) script will perform the following write operations in order to each byte across every sector: ones, zeros, ones, random data, zeros, ones, and finally random data. Additionally, it is possible to modify one of the existing Drive Wipe scripts using the Script Editor. This allows you to make the following changes to comply with different drive wipe standards internationally. o Increase the number of passes made o Disable the verification prompt o Change the test patterns that are run o Perform a verification of the drive wipe Note: In order to maintain a custom script for continued use with Service Center Bootable Diagnostics, it must be saved in the \scripts\usb_key directory. Automated Testing (Bootable Diagnostics Only) Bootable Diagnostics contains an option to automatically boot into the test environment and run a test script (Options 2 and 4 as noted in Boot Menu section). To run a series of automated tests and log the results without user interaction a generic test script based upon the Quick Test has been included as an outline. If you would like to modify the automated test script: 1. Launch the PC-Doctor Bootable Diagnostics Graphical UI by using one of the non-automated boot options 2. Open the Script Editor pane 3. Select the Load Script option a) Navigate to usb_key directory b) Select automate.xml file. 4. Edit the script as shown in Script Editor section 5. Click ‘Save Script’ to save your changes © 2005-2015 PC-Doctor, Inc. ALL RIGHTS RESERVED Page 23 of 69 PC-Doctor Service Center 9.5 User Guide a) Navigate to scripts/usb_key directory b) Select automate.xml file c) Click ‘Save’ and confirm the prompt to replace the file 6. Navigate to scripts/usb_key directory and overwriting the existing automate.xml file. Note: The Automated Testing script will only work with the automate.xml script file, testing will not function correctly if the name is changed. On subsequent runs, you can choose one of the automated options and it will execute the automate.xml test script you just created and it will save sysinfo and test logs automatically on the MUD under “data\sessions\AUTOMATED”. Testing with Service Center for DOS The following describes how to navigate the user interface, and how to perform important functions like running diagnostics and access system information with Service Center for DOS. Menu Service Center for DOS starts by displaying Menu and its Select Log Drive dialog (See Figure 25). Figure 25: Service Center for DOS Menu Select Log Drive Screen It displays a list of drive letters and each drives volume label (if available). Select the drive letter where you would like to save the test logs. For example, choosing D: will instruct Service Center for DOS to log test results to the RAM Drive. Note: The Multipurpose USB Device or Diagnostics DVD appears in the Select Log Drive dialog with the volume label PC_DOCTOR. Warning: The RAM Drive is a virtual disk created in memory (RAM). Content saved to this location will not persist after reboot. © 2005-2015 PC-Doctor, Inc. ALL RIGHTS RESERVED Page 24 of 69 PC-Doctor Service Center 9.5 User Guide After selecting the log drive, you can choose from the Available Tests and Available Tools menus to run diagnostics, gather system information, and access additional features (see Figure 26). Figure 26: Service Center for DOS Menu Screen Configuring and Running Diagnostics PC-Doctor Provided Test Scripts The Available Tests menu provides quick access to common system and component scripts. While descriptions of the provided scripts can be found below, the addition of your own custom scripts will change the list. Option Quick Tests Optical Drive Test Extended Memory Tests CPU / Quick Memory Tests Motherboard / Video Test Short HDD Test Long HDD Test Continuous Memory Tests Maximum System Load (20 min) Description Runs a series of quick test functions for a basic overview of system health Runs a series of tests on optical drive devices. Runs the Memory Fault, Address Fault and the Extended Advanced Pattern tests on the system memory. Runs a series of tests on the system CPU and Memory. Runs a series of tests on the system motherboard (CMOS, RTC Clock, IRQ Controller, etc.) and video adapter. Runs a small sub-set of hard drive tests including: Controller, Funnel Seek, Random Seek, Random Verify, and SMART Status. Runs every available hard drive test except the SMART Self-Test Long. Runs the Extended Advanced Pattern test on the system memory. Runs a stress-level test that performs a series of diagnostic exercises designed to produce stress on the PC under test. Note: Some devices, such as CD-ROM drives, PC Cards (PCMCIA), network cards, modems, SCSI devices and others require DOS device drivers to function in DOS. If you wish to test any of these devices, you must load the supported device driver into memory before running the diagnostic. Standalone Mode The PC-Doctor Standalone Mode menu has options for Diagnostics, Interactive Tests, Hardware Info, Utility, and Quit. Use the cursor and ESC keys to navigate the menus and ENTER to select. © 2005-2015 PC-Doctor, Inc. ALL RIGHTS RESERVED Page 25 of 69 PC-Doctor Service Center 9.5 User Guide Figure 27: Service Center for DOS Standalone Mode The Diagnostics menu lists the test categories for hardware diagnostics. Select a test category to view its Test Category window and choose the diagnostics to run (see Figure 27). Select from multiple test categories to diagnose multiple system components. Figure 28: PC-Doctor Standalone Mode Test Category screen Tests to be run are marked with a double arrow (»). If a test cannot be run on a device, it is marked as disabled with a sequence of dots (. . .). Option CTRL-ENTER ENTER ESC F1 F2 F3 F5 Description Runs all tests enabled in the current test category. Runs the highlighted test. Returns to previous screen. Displays help topic for the highlighted test. Displays the Test Options dialog. Displays the Test Log from the selected log drive. Runs all tests enabled from each test category. © 2005-2015 PC-Doctor, Inc. ALL RIGHTS RESERVED Page 26 of 69 PC-Doctor Service Center 9.5 User Guide F10 SPACE Enables or disables all tests in the current test category. Enable or disable the highlighted test. When diagnostics are executing, the Test Running window will display progress and current results Erase Hard Drive Contents PC-Doctor Service Center for DOS includes a drive erase tool that erases hard drives quickly or as recommended by the United States Department of Defense specifications for confidential information. 1. Click the Utility menu, then click Erase Drive Contents Figure 29: The Utility menu 2. Select between two erase methods and one verify method: a. Clear Hard Drive: This method will erase the drive by writing zero to each byte in every sector on the drive. This operation is conducted in one pass of the media. b. Sanitize Hard Drive: This method will erase the drive in four complete passes of the drive media. The first two passes write a pre-determined pattern. The third pass writes a random value over the entire media, and the last pass verifies that the pattern in pass three was written to the drive. This erase method is implemented according to the United States Department of Defense recommendations. For more information, see: http://en.wikipedia.org/wiki/DOD_5220.22-M. c. Verify Hard Drive: This utility will determine if one of the methods listed above has already erased the drive. © 2005-2015 PC-Doctor, Inc. ALL RIGHTS RESERVED Page 27 of 69 PC-Doctor Service Center 9.5 User Guide Figure 30: Erase Drive Method Selection Dialog 3. 4. Select hard drive: If there is more than one disk in the system, a drive selection dialog will be presented. To ensure that the correct drive is erased, PC-Doctor highly recommends that you disconnect all drives except the target drive before initiating the drive erase. Confirm erasure: If you selected either of the erase methods, you will be asked to confirm that you want to erase the drive. Figure 31: Erase Drive Confirmation Dialog 5. The erasure progress is displayed as shown here. The ESC key will abort the erasure, but will not restore any portion of the drive erased before the process was aborted. © 2005-2015 PC-Doctor, Inc. ALL RIGHTS RESERVED Page 28 of 69 PC-Doctor Service Center 9.5 User Guide Figure 32: Erase Drive Progress Screen 6. This screen is displayed when the drive has been completely erased. Figure 33: Erase Drive Results Screen © 2005-2015 PC-Doctor, Inc. ALL RIGHTS RESERVED Page 29 of 69 PC-Doctor Service Center 9.5 User Guide Using Service Center to Test Intel based Apple Macs PC-Doctor Service Center Bootable Diagnostics is also able to test Intel based Apple Macs with the same user interface as above. The boot process for Macs is identical requires you to press and hold the Option key to access 1 the Startup Manager (if necessary, see Apple Support for additional instructions). Please note that diagnostics are only available for Intel based Macs. Apple transitioned to Intel based architecture in 2006. 1 https://support.apple.com/en-us/HT201255 © 2005-2015 PC-Doctor, Inc. ALL RIGHTS RESERVED Page 30 of 69 PC-Doctor Service Center 9.5 User Guide Using Service Center to Test Android Devices Step 1. Prepare the Android Device for Testing In order to install and run diagnostics on an Android device, you must first enable USB debugging (usually found in rd “Developers options” in the system settings). PC-Doctor Service Center for Android is built as a 3 party application to avoid the need for internet access or Google Play while testing. If “Developer options” are not already available on the device, you must first enable Developer Mode. Each Android manufacturer is able to customize their devices, but these are the most common method to enable developer mode on Android devices. On Android devices running versions 4.2 and up: open the system settings and then select the “About” menu. Locate the “Build Number” listing within the menu, and tap it seven times to enable Developer Mode. You can then return to the system settings to access the “Developer options” menu. On Android devices running versions 3.0 – 4.1: open the system settings and select the “Developer options” menu. On Android devices running versions 2.3: open the system settings and select the “Applications” menu, then select the Development submenu. Once you have accessed Developer Mode on the applicable device, select USB debugging found in the menu. rd Additionally, you will need to allow your device to allow installation of 3 party application not on the Google Play Store. An example of how to do can be found here: https://support.google.com/nexus/answer/2812853 Step 2. Configure the Test Host PC Android testing is driven by a simple menu navigation hosted on a test PC that can be used to launch diagnostics and save logs from multiple Android devices. 1. Boot a system using the Multipurpose USB Device or Diagnostics DVD Figure 34: Service Center for Android Session Prompt 2. Connect any Android test devices to this test PC using a microUSB cable 3. Select either the PC-Doctor Android Diagnostics or PC-Doctor Android Diagnostics (Video Fallback) option. The second option is a fallback in case the first one does not work. 4. Once the test PC is up, it will prompt you to continue and then ask you to optionally enter a session name (See Figure 34). Note: This simple menu is navigated either via a mouse or by the keyboard (arrow keys and Enter key). 5. You can also customize the report header for the printable report here by selecting <ReportHdr> a. Company Logo (Drop in a .png file of your logo under the data directory on the MUD) b. Technician Name, Company Name, and Company address can be edited with the provided text edit utility (Figure 35). © 2005-2015 PC-Doctor, Inc. ALL RIGHTS RESERVED Page 31 of 69 PC-Doctor Service Center 9.5 User Guide Figure 35: Report Header Editor 6. It will then display all of the Android devices it can find connected to the test PC. It is best to turn on the Android device and unlock it before continuing. Note: Check the following if the device still does not appear in the list of connected Android devices or is listed as offline: 1. Has USB Debugging been enabled on the device? 2. Is the device displaying a message and waiting for USB authorization? 3. Is the system able to detect other Android devices using the same USB cable? 7. If you do have issues with the device as listed above, select <Refresh> to see if the device can now be seen correctly. You will see something like Figure 36 when your device is ready to go. Figure 36: Connected Android Devices 8. Choose the device (if multiple are connected) that you want to test first 9. Select one of the five options to continue a. Automated Test – Automatically launch a test script on the test device as outlined in Running a Preconfigured Script. b. AdHoc Test – Launch only the Android UI as outlined in Running Diagnostics from the App c. Save Logs From Device – Will download and save any test logs from previous testing onto the Multipurpose USB Device. d. Test Next Device – Uninstalls the Android application from the device, and prepares the system to test the next device. e. View Logs – Will display a listing of all logs © 2005-2015 PC-Doctor, Inc. ALL RIGHTS RESERVED Page 32 of 69 PC-Doctor Service Center 9.5 User Guide Figure 37: Test Option Menu Warning: Disconnecting the Android device while testing may cause unexpected behavior and interrupted testing. If the device loses connection, the menu will take you back to the device selection screen from which you can re-continue. It will NOT uninstall the application in this case so that you could still save logs from the device. 10. Once you are done testing a device (Automated Test or Adhoc Test) and have saved logs (Save Logs from Device), you can select Test Next Device to continue to the next one. If you choose ‘View Logs’, a browser will open containing the contents of the printable HTML test report Service Center for Android UI Once you have selected the device to be tested, the Test PC will prompt you choose a test option. Please see Appendix C: Service Center for Android Test Descriptions for a list of all test descriptions. Running a Preconfigured Script Within the Automated Test option are five preconfigured test scripts to allow you to begin troubleshooting the Android device quickly and easily. The provided options are: 1. CPU – Initiates a series of CPU tests. 2. Battery – Initiates a check of the overall Battery health (if applicable). 3. Cameras – Initiates a series of both the front and rear camera tests (if applicable). Some of these tests will require technician interaction. 4. Storage – Initiates a scan of the any built-in and add-on storage. 5. System – Runs diagnostics against all system components, and will require technician interaction. Running Diagnostics from the App Choosing the AdHoc option allows you to run diagnostics from the device itself and access additional device information. Once the application has launched on the device, you will be presented with the testing home screen consisting of the following options: System Test – Runs diagnostics against all system components like the Automated System script outlined above. Component Test – Displays additional scripts targeting specific areas of the device such as: o Primary Device Components – CPU, RAM, etc. © 2005-2015 PC-Doctor, Inc. ALL RIGHTS RESERVED Page 33 of 69 PC-Doctor Service Center 9.5 User Guide o Sound, Camera, Touchsceen – Multimedia Tests o Sensors and External Buttons – Accelerometer, Gyrometer, Compass, Ambient Light, etc. o Communication Components – GPS, Bluetooth, Wifi, Cellular, NFC, etc. o Stress Test – Performs CPU and RAM intensive diagnostics o Automated Script – Performs non-interactive tests o Test Individual Devices – Categorizes by component Phone/Tablet Information – Displays detailed system information for the device. Test History – Provides access to a record of previous test results. Figure 38: AdHoc Testing Home Screen © 2005-2015 PC-Doctor, Inc. ALL RIGHTS RESERVED Page 34 of 69 PC-Doctor Service Center 9.5 User Guide Appendix A: Windows Command Line To issue Windows commands, open a command prompt and navigate to the PC-Doctor Service Center program files. The basic command format is: sccui.exe -<first parameter> -<second parameter> A space must precede the dash that precedes each parameter. The parameters are: -script <RelativePath\ScriptName>.xml This parameter starts PC-Doctor Service Center and runs the test script specified after the space. The relative path to the script file from the Service Center program files directory must be included. This example starts PC-Doctor Service Center and runs the test script called system.xml, located in the scripts directory. sccui.exe -script scripts\system.xml -session <SessionName> This parameter automatically configures the prompt with the value listed. The logs for any tests run by the script and until the program is closed will be automatically saved to the declared session folder. sccui.exe –script scripts\system.xml –session TestSystem -sdtl <FileName> This parameter automatically saves the detailed test log to the specified file name. If no file extension is specified or the specified extension is not valid, the report will be saved as an HTML file. Valid file name extensions are HTML and TXT. Note: This parameter must be used in conjunction with the -script parameter. This example starts PC-Doctor Service Center and runs the test script called system.xml, located in the scripts directory, and then saves the detailed test log in a file called systemtestlog.html. sccui.exe -script scripts\system.xml -sdtl systemtestlog -spr <FileName> This parameter automatically saves the printable report to the specified file name. If no file extension is specified or the specified extension is not valid, the report will be saved as an HTML file. Valid file name extensions are HTML and TXT. The printable report items that were previously selected via the Windows user interface will be included. The TXT format does not support the saving of a company logo in the header. Note: This parameter must be used in conjunction with the -script parameter. © 2005-2015 PC-Doctor, Inc. ALL RIGHTS RESERVED Page 35 of 69 PC-Doctor Service Center 9.5 User Guide This example starts PC-Doctor Service Center and runs the test script called system.xml, located in the scripts directory, and then saves the printable report in a file called systemtest_pr.html. sccui.exe -script scripts\system.xml -spr systemtest_pr.html -exit This parameter automatically exits PC-Doctor Service Center after all other specified parameters have been executed. Note: This parameter must be used in conjunction with other parameters. This example starts PC-Doctor Service Center, runs the test script called system.xml, located in the scripts directory, saves the printable report in a file called systemtest_pr.html, and then exits PC-Doctor Service Center. sccui.exe -script scripts\system.xml -exit -spr systemtest_pr.html © 2005-2015 PC-Doctor, Inc. ALL RIGHTS RESERVED Page 36 of 69 PC-Doctor Service Center 9.5 User Guide Appendix B: Working From the DOS Command Line The DOS command line is available by exiting Service Center for DOS. From the initial menu screen (see Figure 39), press the ESC key. If the standalone diagnostics screen (see Figure 40) is open, it will need to be closed by selecting the Quit menu and choosing Exit Diags. The basic command format is: PCDR.EXE /switch1 /switch2 Figure 39: Service Center for DOS Menu screen Note: In the command line examples, the brackets (<,>) are used to indicate variables. Do not include when typing the commands at the command line. A space must precede the forward slash that begins each switch. You can use up to 128 characters on a single command line, allowing a variety of switch combinations. There are three methods to launch tests from the command line: 1. 2. 3. Figure 40: PC-Doctor Standalone Mode /BA:<x> – Batch Mode: Use this switch to run one of the test sets stored in the PC-Doctor test overlay file. /MS:<x> – Maximum System Load: Use this switch to run the Maximum System Load for x minutes. /RT – Run Test: Use this switch to run specific tests. There are three forms of this command. See /RT – Run Test Switch and Arguments for more information. Note: None of the above switches can be used in combination with each other, though multiple /RT switches may be used in one command. /BA:<x> and /MS:<x> – Batch Mode and Maximum System Load The Batch Mode (/BA:<x>) command line switch starts batch mode testing of test overlay (or test set) number <x>. The overlay number must range from 1-8 and will correspond to the same numbered Available Tests shown on the menu screen (see Figure 39). The Maximum System Load (/MA:<x>) switch runs a Maximum System Load test for <x> minutes. The number of minutes must be in the range of 2-9999 inclusive. This is the same test run when selecting Maximum System Load from the Available Tools on the menu screen (see Figure 40). These test modes will result in Service Center for DOS automatically starting testing and exiting when complete. At the end of testing, Service Center for DOS returns with an ERRORLEVEL return code: © 2005-2015 PC-Doctor, Inc. ALL RIGHTS RESERVED Page 37 of 69 PC-Doctor Service Center 9.5 User Guide 0 = No errors were detected 1 = One or more errors were detected 2 = Testing was canceled by the user For best results with this switch, consider combining it with one or more of these switches: /HE – Halt on Error (see page 87) /ID:<identString> – Customer ID (see page 87) /NP – No Prompting (see page 87) /PC:<x> – Pass Count (see page 88) /PR:<outputFilename> - Print to File (see page 88) /TM:<x> – Minimum Test Time (see page 89) /TX:<x> – Maximum Test Time (see page 89) /RT – Run Test Switch and Arguments The Run Test (/RT) switch is used to run individual Service Center for DOS tests in a variety of ways. The following explains the differences between the three Run Specific Test commands. /RT:<testCategory>&<x> - Run a specified test category The /RT:<testCategory>&<x> format runs a specific test or all available tests for a specific device in the provided <testCategory>. The <x> in this switch represents the specific test in the test category to run. You can specify all the subtests in a category with an *. Only one test category can be specified with each /RT:<n> switch, but you can combine up to 10 /RT:<n> switches on the same command line. Example 1: Run all the tests in the CPU/CoProc Test Category pcdr /rt:cpu&* /RT:<testCategory>&<x>,<y> - Run a specified test in a particular device This form of the /RT switch allows the user to specify the device to be tested. The <y> argument is an integer that identifies the device, where 0 is the first, 1 is the second, and so on. Example 2: Run the Fixed Disk SMART Status Check on the first hard drive pcdr /rt:hd&8,0 /RT:<testCategory>&<x>/<y> - Run a specified test on multiple devices The use of a forward slash with the /rt switch allows for multiple devices to be tested. In this case, <y> is a 1-byte bitmask specifying the device(s) to test. Example 3: Run the Fixed Disk SMART Status Check on the first and third hard drives (5 = 00000101) pcdr /rt:hd&8/5 Supported Test IDs Service Center for DOS diagnostics are generally broken down into diagnostic categories, and further broken down into individual subtests, with each subtest designed for testing various aspects of a hardware component. Each subtest has a specific test ID that is used to identify the test to run when launched from a command line. © 2005-2015 PC-Doctor, Inc. ALL RIGHTS RESERVED Page 38 of 69 PC-Doctor Service Center 9.5 User Guide The following tables list of diagnostic categories and subtests with the test IDs used by the /RT command line switch. Table 1: CPU and CoProcessor Test Names and IDs Test Name CPU Registers CPU Arithmetics CPU Logical Operations CPU String Operations CPU Miscellaneous Operations CPU Interrupts/Exceptions CPU Buffers/Cache CoProc Registers CoProc Commands CoProc Arithmetics CoProc Transcendental CoProc Exceptions MMX Test SSE SSE2 SSE3 SSSE3 SSE4.1 SSE4.2 SSE4A Test ID CPU&1 CPU&2 CPU&3 CPU&4 CPU&15 CPU&5 CPU&6 CPU&8 CPU&9 CPU&10 CPU&11 CPU&12 CPU&14 SSETEST&1 SSETEST&2 SSETEST&3 SSETEST&4 SSETEST&5 SSETEST&6 SSETEST&7 Table 2: System Memory Test Names and IDs Test Name Memory Fault Test Address Fault Test Random Pattern Test Short Advanced Pattern Test Extended Advanced Pattern Test Test ID PCDMEM&1 PCDMEM&2 PCDMEM&3 PCDMEM&4 PCDMEM&5 Table 3: System Board Test Names and IDs Test Name System Timer BIOS Timer IRQ Controller RAM Refresh RTC Clock CMOS RAM Keyboard PCI PCMCIA PCMCIA Detection SMBUS USB Port USB Port External Loop IEEE1394 Controller Test ID MB&1 MB&2 MB&3 MB&5 MB&6 MB&7 MB&8 MB&10 MB&11 PCMCIA&3 SMBTEST&1 MB&12 USB&1 MB&17 © 2005-2015 PC-Doctor, Inc. ALL RIGHTS RESERVED Page 39 of 69 PC-Doctor Service Center 9.5 User Guide Table 4: Video Adapter Test Names and IDs Test Name Video Memory Video Pages VGA Controller Registers VGA Color-DAC Registers VESA Full Video Memory Test AGP PCI Express Test ID VID&1 VID&2 VID&3 VID&4 VID&5 AGP&1 AGP&2 Table 5: Serial Port Test Names and IDs Test Name Registers And Interrupts Internal Loopback External Loopback FIFO Buffers (16550A) Test ID COM&1 COM&2 COM&3 COM&4 Table 6: Parallel Port Test Names and IDs Test Name Command And Data Port External Loopback And IRQ Test ID LPT&1 LPT&2 Table 7: Fixed Disk Test Names and IDs Test Name Controller Funnel Seek Random Seek Linear Verify Random Verify SMART Status Check SMART Self-Test Short SMART Self-Test Long SMART Conveyance Test SMART Attribute Check Inner/Outer Surface Read Read Surface Scan Write Surface Scan Drive Cache Test Spin Down/Spin Up Test Test ID HD&1 HD&3 HD&5 HD&6 HD&7 HD&8 HD&12 HD&13 HD&20 HD&21 HD&14 HD&15 HD&11 HD&16 HD&17 Table 8: Diskette Test Names and IDs Test Name Hi-Low Seek Funnel Seek Track To Track Seek Random Seek Linear Verify Random Verify Linear Write/Read Linear Write/Random Read Random Write Test ID FD&1 FD&2 FD&3 FD&4 FD&5 FD&6 FD&7 FD&8 FD&9 © 2005-2015 PC-Doctor, Inc. ALL RIGHTS RESERVED Page 40 of 69 PC-Doctor Service Center 9.5 User Guide Table 9: SCSI Fixed Disk Test Names and IDs Test Name Controller Funnel Seek Track To Track Seek Random Seek Linear Verify Random Verify Short Self Test Extended Self Test Inner/Outer Read Surface Scan Read Surface Scan Write Surface Scan Spin Down/Spin Up Test Test ID SHD&1 SHD&3 SHD&4 SHD&5 SHD&6 SHD&7 SHD&11 SHD&12 SHD&13 SHD&8 SHD&9 SHD&10 Table 10: Optical Drive Write Test Names and IDs Test Name CD-RW Drive DVD-RW Drive DVD+RW Drive DVD-RAM Drive HD DVD-RAM Drive BD-RE Drive Test ID CDRW&1 CDRW&3 CDRW&4 CDRW&5 CDRW&6 CDRW&7 Table 11: Optical Drive Scan Test Names and IDs Test Name Insert Media Linear Seek Random Seek Funnel Seek Remove Media Test Test ID CD&2 CD&8 CD&9 CD&10 CD&4 © 2005-2015 PC-Doctor, Inc. ALL RIGHTS RESERVED Page 41 of 69 PC-Doctor Service Center 9.5 User Guide General Command Line Switches /AC – Alternate Colors This switch changes the colors in the user interface. Example 4: Run the first CPU/CoProc test using alternate colors pcdr /rt:cpu&1 /ac /BRD – Launch Battery Rundown Utility This switch automatically launches the Battery Rundown utility. /BRDR – Report Last Battery Test This switch displays the last time the Battery Rundown utility ran. /EM – Extend Maximum System Load Test This switch can be used with the /MS switch (See /BA:<x> and /MS:<x> – Batch Mode and Maximum System Load for additional information). When this switch is provided, Service Center will attempt to find a Hayes compatible modem. If a compatible modem is found (internal or external), it will be tested along with the other components tested in the System Load Test. /FD:<x> – Floppy Disk Tracks This switch enables you to specify specific a track to test in the Linear Verify Test. Multiple tracks can be specified by providing a comma-separated list. Track numbers should be specified as an integer from 0 to 79, inclusive and may be specified in any order. Note that the length of the command line cannot exceed 128 characters. Example 5: Run Diskette Linear Verify test on tracks 0, 12, 34, and 67 pcdr /rt:fd&5 /fd:0,12,34,67 /FT – Run Full Test This switch automatically launches the Full Test. Example 6: Run Full Test and save results to test.log pcdr /ft /pr:test.log /FULLTEST – Run Full Test This switch is the long form of the /FT switch above. /HDERASE:<Mode> This switch will run the hard drive erase utility. Valid options for <Mode> are: SHORT – performs a quick erase of the hard drive SANITIZE – performs a four pass erase of the hard drive VERIFY – checks to see if either of the erase methods have been run against the hard drive For additional information about these options, see Erase Hard Drive Contents. © 2005-2015 PC-Doctor, Inc. ALL RIGHTS RESERVED Page 42 of 69 PC-Doctor Service Center 9.5 User Guide Warning: If a system has multiple hard drives, the hard drive erase utility will be run against each drive. /HE – Halt on Error This switch enables halt-on-errors mode. If Service Center for DOS encounters a failed diagnostic test, it prompts the user to indicate whether to continue or to abort testing. /ID:<identString> – Customer ID This switch adds the text string <identString> as the Customer ID in the test log for identification purposes. The string will be converted to all uppercase. If you want to use spaces in the text string, you must encapsulate the entire switch in quotes. Example 7: Run all tests in the CPU Test Category and set the Customer ID to "pc-doctor, inc." while logging to output.log pcdr /rt:cpu&* “/id:pc-doctor, inc.” /pr:output.log /NA2F – Convert N/A Results to FAIL This switch will cause tests that report results of N/A to instead log as Failed. /NJ – No Joystick Enumeration This switch disables enumerating joysticks. Use this if your system hangs while enumerating joysticks. /NN – No Network Enumeration This switch disables enumerating network cards. Use this if your system hangs while enumerating network cards. /NOMOUSE – No Mouse This switch disables loading of the mouse driver. This is the default behavior. Regardless of the switch setting, the mouse driver will be loaded when the Mouse Interactive Test is run. /NP – No Prompting This switch disables user dialog prompting for the serial port, parallel port, and floppy tests, making unattended, automated testing possible for those devices. /NPS2M – No PS/2 Mouse This switch disables BIOS calls that attempt to determine the presence of a PS/2 mouse. Some BIOS have bugs that might otherwise cause the system to hang. PC-Doctor will automatically select this switch if the system has a Phoenix BIOS. /NSMP – No SMP Test Enumeration This switch disables the SMP Test from enumerating. /NV PC-Doctor usually performs an internal virus check when initially launched. This switch bypasses the internal virus check (a CRC check on PCDR.EXE). /OL:<x> This switch is similar to the /BA:<x> switch (SEE ALSO: /BA:<x> and /MS:<x> – Batch Mode and Maximum System Load on page 80). When this switch is used, the main PC-Doctor screen appears, but the overlay does not © 2005-2015 PC-Doctor, Inc. ALL RIGHTS RESERVED Page 43 of 69 PC-Doctor Service Center 9.5 User Guide immediately run. If you go to any diagnostic test and press F5, the overlay you specified on the command line will run. /PAUSE – Pause This switch can be used with system information (SEE ALSO: /SI:<x> – System Information below) switch and will keep the UI open, allowing the user to interact with the system info reports. /PC:<x> – Pass Count This switch defines a test pass count. Specified tests in the command line will be run from 1 to 9999 times as specified by the <x> variable. /PR:<outputFilename> - Print to File This switch configures a test to record all test log information in a log file. The filename is specified by the variable <outputFilename>. PC-Doctor automatically sends test results to the file <outputFilename>. The name of the file can optionally include a path. When you send the results to a file, this file can be viewed in any text editor and printed out. Note: Filenames are saved relative to the logging drive. If a logging drive is not selected, the RAM drive is used and results will not persist after the system powers down. /QT – Run Quick Test This switch automatically launches the Quick Test overlay. By default, this is overlay 1 from in the Available Tests on the menu screen. /QUICKTEST – Run Quick Test This switch is an alternate syntax for the /QT switch above. /SHOWLOG – Show Log File For /HDERASE This switch can be combined with /HDERASE:<Mode> (on page 86) to display the results of the hard drive erase command. If this switch is not used, the hard drive erase utility will not display the results. This switch will have no effect if it is not used with /HDERASE. /SI:<x> – System Information This switch will generate the system information report that corresponds to Hardware Info menu items as specified by <x>. The <x> value is an integer that is determined by the available Hardware Info menu selections in the UI (see Table 12). If a value for <x> is not specified, PC-Doctor will run the first available menu selection. Table 12: Hardware Info Menu Options Hardware Info Options System Configuration Memory Contents VGA Information SCSI Drive Info ATA Drive Info ATAPI Drive Info Network Information PCMCIA Information PCI Information SMP Information <x> 1 2 3 4 5 6 7 8 9 10 © 2005-2015 PC-Doctor, Inc. ALL RIGHTS RESERVED Page 44 of 69 PC-Doctor Service Center 9.5 User Guide Hardware Info Options SMBIOS Info DIMM/RIMM Info USB Info <x> 11 12 13 The Hardware Info reports are generated in the order specified. Multiple /SI:<x> switches will generate multiple Hardware Info reports. For information on generating all Hardware Info options into a single report, SEE ALSO: /T – Prepare Tech Support Form below. /T – Prepare Tech Support Form This switch will prepare the Tech Support Form that is a single report comprised of all Hardware Info categories. To generate a report(s) of individual Hardware Info options, SEE ALSO: /SI:<x> – System Information on page 88. /TM:<x> – Minimum Test Time This switch defines the minimum test time for tests and scripts run from the command line specified by the integer variable <x>. If a test has completed before the specified amount of time, the test will continue running until the specified amount of time has elapsed. /TX:<x> – Maximum Test Time This switch defines the maximum test time for tests and scripts run from the command line specified by the integer variable <x>. If a test has not completed in the specified amount of time, the test aborts, shows the halt on error prompt, and records Failed in the test log. © 2005-2015 PC-Doctor, Inc. ALL RIGHTS RESERVED Page 45 of 69 PC-Doctor Service Center 9.5 User Guide Appendix C: Service Center for Android Test Descriptions Android Specific Tests Video Memory Test Verifies the video memory can successfully retain video data. Vibration Test Verifies the vibration device can accurately enable and run a vibrate pattern Pixel Test Interactive Test that allows the user to verify correct pixel function at varying colors. Brightness Test This test verifies that the user is able to adjust the brightness of the screen. Full TouchScreen Test Tests the entire touchscreen to determine if there are areas that the user’s touches do not trigger properly. TouchScreen Test Tests whether the touchscreen on the device is usable by having the user touch and drag certain interface elements. MultiTouch Test The Multi-touch test ensures functionality of a touch screen with multi-touch capability. The test detects the maximum number of touch points supported and requires the user to touch each point simultaneously. Camera Test Verifies the camera autofocus, preview, and zoom perform correctly. Camera Flash Test Verifies the camera flash performs correctly. RGB Pixel Test Verifies that an image captured from the device’s camera does not have too many bad pixels. RGB Line Driver Test Verifies that the device’s camera does not have a bad RGB line driver. RGB Line Amplifier Test Verifies that the device’s camera does not have a bad RGB line amplifier. RGB Channel Test Verifies that the device’s camera does not have a bad RGB color channel. RGB Color Depth Test Verifies that the device’s camera has a reasonable RGB color depth. Luminance Depth Test Verifies that the device’s camera has a reasonable luminance depth. © 2005-2015 PC-Doctor, Inc. ALL RIGHTS RESERVED Page 46 of 69 PC-Doctor Service Center 9.5 User Guide Edge Detection Test Verifies that edges can be detected in an image captured from the device’s camera. Volume Button Test Verifies that the volume buttons work. Rotation Lock Button Test Verifies that the rotation lock button works. Accelerometer Sensor Test Verifies the accelerometer is within threshold values while stationary. Verifies the accelerometer can surpass threshold values while being moved along three axes. Gyroscope Sensor Test Verifies the gyroscope sensor is operating within threshold values when stationary. Verifies the gyroscope sensor can surpass threshold values when rotated on three separate axes. Magnetic Field Sensor Test Verifies the magnetic field sensor is operating within threshold values. Light Sensor Test Verifies the light sensor is operating within threshold values and can detect difference between light and dark. Proximity Sensor Test Verifies the proximity sensor is operating within threshold values and can detect the distance from the de3vice to an object. Headset Connectivity Test Tests whether the connectivity of the headset can be determined. Microphone Test Verifies the microphone can record and play back the recorded audio. Speaker Test Verifies the speakers can play a prerecorded wav file through the left and right speakers. GPS Any Signal Test Tests the GPS device to determine if at least one satellite signal is available. GPS Minimum Signals Test Tests the GPS device to determine if the minimum number of required satellite signals are detected. SIM Detection Test This test queries the device for the presence of a Subscriber Identity Module (SIM) card. SIM Communication Test This test attempts to connect to the cellular provider using the device's Subscriber Identity Module (SIM) card configuration. © 2005-2015 PC-Doctor, Inc. ALL RIGHTS RESERVED Page 47 of 69 PC-Doctor Service Center 9.5 User Guide Cellular Signal Strength Test This test compares the received signal strength of the cellular radio from the currently connected cell tower to a predetermined threshold. Wireless Scan Test The Wireless Scan Test initializes a wireless scan of the available access points in the vicinity. If no partners are found the test will return No Signal. Bluetooth Detection Test This test is applicable when there are a certain number of known good remote Bluetooth devices in the vicinity. The test can detect a malfunctioning Bluetooth antenna, in which case the required number of devices will not be detected. Bluetooth Communication Test This test builds a list of remote Bluetooth partners and then attempts to connect with them. NFC Detection Test Tests issues with NFC devices detecting NFC tags. NFC NDEF Read Test Tests reading from a NFC tag with the NDEF format. Internal Storage Pattern Test This test determines if the drive is successfully recording data to media. The test writes test patterns to the test media, and then reads the data to verify it is correct. If the read data does not match the written data, the test logs as Failed. Note: If power fails during this test, the original data from the drive may be lost or corrupted. Battery USB Test This test determines if the system is power over the USB connection. Battery Health Test This test whether the battery is near its end-of-life, is in an over current state, or is in an overheated state. Battery Temperature Test This test verifies that the battery temperature has not exceeded the maximum acceptable threshold. CPU (x86) Register Test The CPU registers are tested using default test patterns that simulate the processing of data. The test writes patterns to various CPU registers. The contents of each register are then read and compared with the original pattern. If the read is different from the data written, this test logs as Failed and lists the failed registers. Math Register Test This test verifies the CPU co-processor, register stack, pointers, and commands are functional by running various commands that exercise the math registers. If errors are detected, the failed steps and commands are listed in the test log. © 2005-2015 PC-Doctor, Inc. ALL RIGHTS RESERVED Page 48 of 69 PC-Doctor Service Center 9.5 User Guide MMX Test This test verifies that the tested CPU supports special Multimedia functions. If errors are detected, the failed commands are recorde3d in the test log and the test logs as Failed. SSE Test This test intensely exercises various Streaming SIMD Extensions (SSE)-specific commands and lists any resulting errors. The SSE test also exercises all eight of the 128-bit Extended Memory Manager (XMM) registers. In addition, there are certain conversion functions, which will exercise a single Multi-Media Extension (MMX) register in conjunction with the XMM registers. If the test encounters any errors, it will log as Failed. SSE2 Test This test intensely exercises various SSE2-specifc commands and records any resulting errors in the test log. Like the SSE Test, the SSE2 Test exercises all eight of the 128-bit XMM registers. In addition, there are certain conversion functions, which exercise a single MMX register in conjunction with the XMM registers. If the test encounters any errors, it will log as Failed. SSE3 Test The test intensely exercises various SSE3-specifc commands and records any failing commands. Like the SSE2 Test, the SSE3 Test exercises all eight of the 128-bit XMM registers. If the test encounters any errors, it will log as Failed. Cache Test This test uses the system RAM to perform indirect testing of L2 cache memory. It forces repeated data transfer in and out of the L2 cache. If any errors occur, the test logs as Failed. Errors are listed in the test log by test-block type and location. Stress Test The CPU Stress Test imposes a strenuous workload on the CPU by performing SIMD math computations on each physical CPU. These computations will use the latest SSE instructions. CPU (ARM) Register Test The CPU registers are tested using default test patterns that simulate the processing of data. The test writes patterns to various CPU registers. The contents of each register are then read and compared with the original pattern. If the read is different from the data written, this test logs as Failed and lists the failed registers. Math Register Test This test verifies the CPU co-processor, register stack, pointers, and commands are functional by running various commands that exercise the math registers. If errors are detected, the failed steps and commands are listed in the test log. Cache Test This test uses the system RAM to perform indirect testing of L2 cache memory. It forces repeated data transfer in and out of the L2 cache. If any errors occur, the test logs as Failed. Errors are listed in the test log by test-block type and location. © 2005-2015 PC-Doctor, Inc. ALL RIGHTS RESERVED Page 49 of 69 PC-Doctor Service Center 9.5 User Guide Stress Test The CPU Stress Test imposes a strenuous workload on the CPU by performing SIMD math computations on each physical CPU. These computations will use NEON if available on the ARM processor. If NEON is unavailable, the test will run VFP operations. Memory Pattern Test This test uses eighteen test patterns to test memory locations by writing each predefined patter, one by one, into memory. After writing the pattern, the test reads the memory to make sure the pattern is written correctly. If the test detects a mismatch in data, it reports the address of the failing block in the test log and logs the test as Failed. Bit Low Test This test sets all memory bits to zero then reads each bit value. If a read bit value is not zero, the test logs as Failed. The test loops from low address to high address for all available pages. Bit High Test This test loops from low address to high address for all available pages, sets all memory bits to one, then reads each bit value. If a read bit value is not one, the test logs as Failed. Nibble Move Test This test loops from low address to high address for all available pages, sets a nibble (a nibble is four bits) to both high and low values one address at a time, then reads each individual bit value in the nibble. If the bit values in the nibble are inconsistent, the test logs as Failed. Checkerboard Test This test writes a checkerboard pattern to a memory address, switching all bits to a value of 01010101, then switching all bits to a value of 10101010. The test then loops from low address to high address for all available pages and reads each bit value in the address. If the bit values in the address are inconsistent, the test logs as Failed. Walking Ones Left Test This test starts by setting all bits in a byte to a value of zero. One at a time from right to left, each bit is set to a value of one and back to zero. The test then reads each bit value in the byte. If the bit values in the byte are inconsistent, the test logs as Failed. The test loops from low address to high address for all available pages. Walking Ones Right Test This test starts by setting all bits in a byte to a value of zero. One at a time from left to right, each bit is set to a value of one and back to zero. The test then reads each bit value in the byte. If the bit values in the byte are inconsistent, the test logs as Failed. The test loops from low address to high address for all available pages. Auxiliary Pattern Test This test fills each memory location with extra data patterns that supplement patterns used in other tests. The test then reads each memory location to verify the patterns were written correctly. If there is any inconsistency between the written data and read data, the test logs as Failed. Moving Inversion Test This test is a 32-bit inversion test that starts by writing a data pattern to the first available address in the memory space. Once the test pattern is written, the test shifts the data pattern left one bit to the next available address, © 2005-2015 PC-Doctor, Inc. ALL RIGHTS RESERVED Page 50 of 69 PC-Doctor Service Center 9.5 User Guide continuing in this fashion until the test has shifted the test pattern through all available addresses. The test then reads all memory bits to verify the written and read data match. If the test detects any mismatches in data, it logs as Failed. Note: The Moving Inversion Test is very effective at detecting data sensitive errors but the execution time is long. Modulo20 Test This test is a variation of the Pattern Test. The test starts by writing a test pattern to every 20th address location in the memory location and writes the compliment of that pattern to all other locations. For example, if the pattern is 0000 0000H, the test will write 00000000H to addresses 00000000H, 00000014H, 00000028H, 0000003CH and so on. For all other address locations (00000001H, 00000002H, 00000003H and so on) the test will write FFFFFFFFH. Once the test finishes writing to all available memory locations, it reads the data from the tested memory locations to verify the written and read data match. If the test detects any mismatch in data, it logs as Failed. Advanced Pattern Test This test checks for memory cell corruption from read/write activity on adjacent cells (cells are individual bits). It is run from memory address 0 through each memory cell sequentially to the top of extended memory, then from the top down to memory address 0. Address Test This test fills each memory location with its own address value, then reads each memory location to verify it contains its own unique address value. If there is any inconsistency between the address value and the value written to the memory location, the test logs as Failed. PCI Configuration Test This test verifies that PCI support is functional, then scans all PCI devices to verify they are communicating with the microprocessor. The test first determines if the PC supports PCI devices. It then verifies the BIOS version number to determine if the BIOS is invalid. If the test detects an invalid version number, or fails to detect any PCI buses, it will record an error in the test log. The test then scans for each of the PCI cards in the system. If the test encounters an error attempting to read the configuration data of a card, it will record an error in the test log. If the test records more than 10 errors, it will log as Failed. © 2005-2015 PC-Doctor, Inc. ALL RIGHTS RESERVED Page 51 of 69 PC-Doctor Service Center 9.5 User Guide Appendix D: Service Center for DOS Test Descriptions CPU/CoProcessor CPU Registers This test verifies all CPU registers excluding CS and IP successfully retain values by writing a default set of test patterns to the registers. On 32-bit CPUs, the extended registers are also verified as functional. If the test detects any errors, it identifies the failed registers and logs as Failed. CPU Arithmetics This test verifies the CPU can accurately perform arithmetic calculations while exercising arithmetic operations ADC, ADD, DEC, DIV, IDIV, IMUL, INC, MUL, SBB and SUB using 16 and 32-bit operands. If the test detects any errors, it identifies the failed operands and logs as Failed. CPU Logical Operations This test verifies the CPU can accurately perform logical operations while exercising logical operations AND, NOT, OR and XOR using 16 and 32-bit operands. If the test detects any errors, it identifies the failed operands and logs as Failed. CPU String Operations This test verifies the CPU can accurately perform string transfers while exercising string operations LODS, MOVS, SCAS and STOS using 8, 16 and 32-bit operands. If the test detects any errors, it identifies the failed operands and logs as Failed. CPU Misc. Operations This test verifies the Read Time Stamp Counter (RDTSC) instruction by reading the timer twice and checking for duplicate values. If the test detects duplicate values for the RDTSC, it logs as Failed. If the CPU under test does not support the instruction, the RDTSC is disabled, or the CPU does not permit access to the timer, the test will log as N/A. CPU Interrupts/Exceptions This test verifies the CPU successfully manages software interrupts and real-mode accessible exceptions. If the test detects any errors, it identifies the failed software interrupt numbers, identifies the failed exception names, and logs as Failed. CPU Buffers/Cache This test verifies 386/486 Translation Lookaside Buffer (TLB) and the 486 on-chip cache is functional in two steps. First, the test verifies if the address for each register is accurate. If the test determines that register addressing is accurate, it verifies the registers successfully retain values by writing a default set of test patterns to each register. If the test detects any errors, it identifies the errors and logs as Failed. If the test detects that the CPU is not in Real Mode (no memory manager loaded), it records a warning that the CPU was in protected mode and logs N/A. CoProc Registers This test verifies the register stack and pointers are accurate. In addition, the test exercises the following constants: FLDLZ, FLDPI, FLDLN2, FLDLG2, FLDL2T, FLDL2E, and FLD1. If the test detects any errors, it identifies the failing command and logs as Failed. © 2005-2015 PC-Doctor, Inc. ALL RIGHTS RESERVED Page 52 of 69 PC-Doctor Service Center 9.5 User Guide CoProc Commands This test verifies the coprocessor successfully conducts the following coprocessor commands: FBLD/FBSTP, FILD/FIST, FLD/FST, FXCH, FCOM, FICOM, FTST, FXAM, and FUCOM. If the test detects any errors, it identifies the failing command and logs as Failed. CoProc Arithmetics This test verifies the coprocessor successfully conducts the following arithmetic commands: FADD, FDIV, FIADD, FIDIV, FIMUL, FISUB, FMUL, FSUB, FABS, FCHS, FPREM, FRNDINT, FSCALE, FSQRT, FXTRACT, and FPREM1. If the test detects any errors, it identifies the failing commands and logs as Failed. CoProc Transcendental This test verifies the coprocessor successfully conducts the following transcendental commands: F2XM1, FPATAN, FPTAN, FYL2X, FYL2XP1, FCOS, FSIN, and FSINCOS. If the test detects any errors, it identifies the failing commands and logs as Failed. CoProc Exceptions This test verifies the coprocessor successfully identifies the following exceptions: Invalid Operation, Denormal Operand, Division by Zero, Overflow, Underflow, Precision, and Stack Fault. If the test detects any errors, it identifies the failing exceptions and logs as Failed. MMX Test This test verifies the CPU can successfully interpret and conduct the MMX (also referred to as MultiMedia eXtension) SIMD instruction set. If the test detects any errors, it identifies the failing instructions and logs as Failed. If the CPU does not support the MMX instruction set, the test will log as N/A. SSE This test verifies the CPU can successfully interpret and conduct the SSE (Streaming SIMD Extensions) SIMD instruction set. If the test detects any errors, it logs as Failed. If the CPU does not support the SSE instruction set, the test will log as N/A. SSE2 This test verifies the CPU can successfully interpret and conduct the SSE2 (Streaming SIMD Extensions 2) SIMD instruction set. If the test detects any errors, it logs as Failed. If the CPU does not support the SSE2 instruction set, the test will log as N/A. SSE3 This test verifies the CPU can successfully interpret and conduct the SSE3 (Streaming SIMD Extensions 3) SIMD instruction set. If the test detects any errors, it logs as Failed. If the CPU does not support the SSE3 instruction set, the test will log as N/A. SSSE3 This test verifies the CPU can successfully interpret and conduct the SSSE3 (Supplemental Streaming SIMD Extensions 3) SIMD instruction set. If the test detects any errors, it logs as Failed. If the CPU does not support the SSSE3 instruction set, the test will log as N/A. SSE4.1 This test verifies the CPU can successfully interpret and conduct the SSE4.1 (Supplemental Streaming SIMD Extensions 4.1) SIMD instruction set. If the test detects any errors, it logs as Failed. If the CPU does not support the SSSE4.1 instruction set, the test will log as N/A. © 2005-2015 PC-Doctor, Inc. ALL RIGHTS RESERVED Page 53 of 69 PC-Doctor Service Center 9.5 User Guide SSE4.2 This test verifies the CPU can successfully interpret and conduct the SSE4.2 (Supplemental Streaming SIMD Extensions 4.2) SIMD instruction set. If the test detects any errors, it logs as Failed. If the CPU does not support the SSSE4.2 instruction set, the test will log as N/A. SSE4A This test verifies the CPU can successfully interpret and conduct the SSE4A (Supplemental Streaming SIMD Extensions 4A) SIMD instruction set. If the test detects any errors, it logs as Failed. If the CPU does not support the SSSE4A instruction set, the test will log as N/A. System Memory Memory Fault Test This test uncovers memory bits that are affected by a “stuck-at” fault. Sometimes referred to as a “sticky bit”, a “stuck-at” fault is an error with the memory module circuitry that causes a bit to permanently retain its value when changed. Once the bit obtains a specific value (0 or 1), it will retain this value no matter what is written to the location. This test uncovers “stuck-at” faults by writing a known pattern across all testable memory, then reading and comparing what was read to what was written. If the test detects a mismatch between the written and read data, it records the error in the test log and logs as Failed. Address Fault Test This test uses unique addressing to determine if the memory address decoder is prone to specific failures. This is accomplished by controlling the order in which patterns are read and written to memory. A disconnected address A misdirected address Multiply selected addresses Multiply selected cells Random Pattern Test This test fills sequential memory locations with random data then reads each memory location to verify the data was written correctly Short Advanced Pattern Test This test fills a memory location with a test pattern, then reads the memory location to verify the pattern was written correctly. When done testing a memory location, it moves on to the next memory location. Test passes occur from the first available memory address to the highest available address and back to the first available address. Extended Advanced Pattern Test This test is similar to the Short Advanced Pattern Test but it will run significantly longer. It has the potential to uncover significantly more defects. System Board System Timer This test confirms that all three system timers are accurate. The control lines of the freely programmable clock 2 are also tested. If the test detects any errors, it records the source of the error in the test log and logs as Failed. © 2005-2015 PC-Doctor, Inc. ALL RIGHTS RESERVED Page 54 of 69 PC-Doctor Service Center 9.5 User Guide BIOS Timer This test verifies the BIOS timer functions without error in three ways: the generation of IRQ 0, the generation of software interrupt 1CH and the roll-over correction at date change (timer counter correctly resets to 0 at midnight). IRQ Controller This test verifies the IRQ Controller functions without error by writing test patterns to various IRQ registers, reading the registers and verifying the written test pattern and read test pattern match. In addition, this test also runs various commands associated with the IRQ controller. The registers and commands tested include the mask register, request register, in-service register, poll command, nonspecific EOI command, and specific EOI command. If the test detects any errors, it records the failed functions in the test log and logs as Failed. RAM Refresh This test checks a bit of the PC/AT 8042 keyboard controller that indicates if RAM Refresh is occurring. If the bit does not change state, the test logs as Failed. RTC Clock This test verifies the Real Time Clock (RTC) of PC/AT class computers successfully conducts time updates, periodic interrupts, alarm interrupts, time/date rollovers, and that the RTC is accurate. If the test detects any errors, it records the failing functions in the test log and logs Failed. CMOS RAM This test writes test patterns to addresses 10H-3FH of the nonvolatile Real Time Clock (RTC) CMOS RAM. The test then performs a checksum count of the contents to verify the test patterns were written correctly. If the test detects any errors, it logs as Failed. Keyboard The keyboard interface is tested with the built-in keyboard self-test and a function to test the keyboard IRQ. If the keyboard controller chip is PC/AT (8042) compatible, a controller and interface self-test is initiated. If any self-test fails, it records the errors in the test log and logs Failed. PCI This test verifies the PCI bus can successfully communicate with the attached devices. All PCI devices are detected and their configuration space checked. If the test does not detect any PCI devices or there are errors checking device configuration spaces, it logs as Failed. PCMCIA This test scans for all available PCMCIA cards and reads parts of their tuple information to make sure the PCMCIA adapter and the cards are working correctly. Note: This test requires that PCMCIA drivers are loaded. PCMCIA Detection This test scans the ACPI (Advanced Configuration & Power Interface) for the existence of the PCMCIA Bus. SMBUS The SMBus test makes sure that SMBus is present, enabled, and working properly. The SMBus is used in personal computers and servers for low-speed system management communications, allowing a computer host to communicate with internal (on-board) system devices, such as ICs, temperature sensors and smart batteries. © 2005-2015 PC-Doctor, Inc. ALL RIGHTS RESERVED Page 55 of 69 PC-Doctor Service Center 9.5 User Guide USB Port This test uses PCI to search for the presence of USB BIOS devices using the UHCI interface (Intel chipsets) through the PIIX4 and LPT port. The test talks directly to the USB controller to get this information. If devices are found, the test performs a register check. If the test detects any errors, it logs as Failed. USB Port External Loopback This test verifies the system can successfully communicate with external USB devices. This is accomplished by determining the total number of available USB ports and correctly identifying ports that are populated with an external USB device. IEEE1394 Controller This test scans the system for an IEEE 1394 controller, verifies if the controller is memory mapped, and checks if the controller is enabled. If an IEEE 1394 controller is not present or is not memory mapped, this test logs N/A. Video Adapter Video Memory The Video Memory Test flips through all possible video modes and fills the video buffer with 18 test patterns. On VESA Super-VGA adapters, all VESA compliant video modes are tested as well. The test obtains a list of available video modes through the VESA BIOS and switches to each one, writing to and reading back test patterns. Using VESA calls, one full screen of memory is tested for each video mode as a single block. If the test reads back a different value than the written value, it records the mode and memory plane (if it is a multi-planed display mode) to the test log and logs as Failed. Note: The Video Memory Test looks for VGA compatible adapters and only tests the standard VGA memory addresses. Video Pages The Video Pages Test flips through all possible video modes and pages, and fills the video buffer with the page number. For VESA Super-VGA cards, all VESA compliant modes are tested. The test flips the pages back starting with 0 and reads the first character on screen. If the character does not match the page, it records the mode and page number in the test log and logs as Failed. VGA Controller Registers The VGA Controller Registers Test reads VGA card registers: RAM enable, Map Mask Register, Data Rotate Register and Read Map Select Register. If the test detects any errors, it records the name of the register in the test log and logs as Failed. VGA Color-DAC Registers The VGA Color-DAC Registers Test reads VGA color-DAC registers in mode 13H (320x200 in 256 colors) for all possible values. Only the standard 6-bit register values are used (262,144 different color values). If the test detects an error, it records the register number in the test log and logs as Failed. VESA Full Video Memory Test The VESA Full Video Memory Test uses a special VESA video mode that allows access to all video memory by issuing inquiry commands to the video BIOS. A VESA BIOS provides the responses that indicate the level of support, supported modes, memory access information, and so on. The test uses this special VESA video mode to switch between video pages, testing the video memory by writing a portion of data and reading it back. If the test © 2005-2015 PC-Doctor, Inc. ALL RIGHTS RESERVED Page 56 of 69 PC-Doctor Service Center 9.5 User Guide reads back a different value than the written value, it logs as Failed. If the video card does not support this VESA function, the test logs as N/A. AGP The AGP Test checks to see if the AGP video controller is functional. PCI Express The PCI Express Test begins by determining if a PCI Express video card is available for test in the PC. If the test is unable to locate a PCI Express video card, the test logs as N/A. Serial Port Registers And Interrupts This test uses test patterns to verify that serial port registers can successfully retain values. This includes serial port baud rate divisor register, divisor latch access bit, line control register, and modem control register. In addition, this test makes sure the serial port can interrupt the system without error. If the test detects any errors, it records the errors in the test log and the test logs as Failed. Internal Loopback This test verifies a serial port functions without error by looping test data through the internal loopback function of the serial port. 96 characters are transmitted at the following speeds (bits per second): 1200, 2400, 4800, 9600, 19200, 38400, 57600, and 115200. Since interrupts are not possible during internal loopback, the test polls the serial port for received characters. If the test detects any errors, it records the errors in the test log and the test logs as Failed. External Loopback This test verifies a serial port functions without error by looping test data through an attached external loopback adapter. 96 characters are transmitted at the following speeds (bits per second): 1200, 2400, 4800, 9600, 19200, 38400, 57600, and 115200. Data is received using the interrupt of the serial chip. If the test detects any errors, it records the errors in the test log and the test logs as Failed. FIFO Buffers (16550A) This test checks performance of the First In First Out (FIFO) buffered serial port (16550A chips) in internal loopback mode. The test transmits 96 characters at the following speeds (bits per second): 1200, 2400, 4800, 9600, 19200, 38400, 57600, and 115200. Characters are written as a set of 14 at a time to check the FIFO capability. FIFO interrupt limit is set to 14 characters, but because internal loopback disables interrupts, the test polls for the interrupt state. If the test detects any errors, it records the errors in the test log and the test logs as Failed. Parallel Port Command And Data Port This test writes test patterns to the parallel port and loops the data back, verifying the parallel port can successfully send and receive data. Only IBM-defined bits of the command port are tested. If the test detects an error, it logs as Failed. External Loopback And IRQ This test writes test patterns to the parallel port, loops the test pattern through an attached loopback adapter, and verifies the written test patterns and read test pattern are the same. This test also verifies signal lines and that IRQ © 2005-2015 PC-Doctor, Inc. ALL RIGHTS RESERVED Page 57 of 69 PC-Doctor Service Center 9.5 User Guide generation functions without error. If an error is detected, it records the names of the pins that failed in the test log and logs as Failed. Fixed Disk Controller The internal diagnostic test of the fixed disk controller is performed 4 times. Then the drive is reset. If an error is detected, the test logs as Failed. Funnel Seek This test verifies a drive’s actuator arm can accurately move the read/write heads to sector locations in a funnel fashion across the disk media. It moves the drive read/write heads from the first track (track 0) to the last track, then from the second track to the second to the last track, then from the third track to the third to the last track, and so on. If the test detects errors with the movement of the drive read/write heads, it records the errors in the test log and logs as Failed. Random Seek This test verifies a drive’s actuator arm can accurately move the read/write heads to random locations on the disk media. It moves the drive read/write heads to random sectors for 300 repetitions. If the test detects errors with the movement of the drive read/write heads, it records the errors in the test log and logs as Failed. Linear Verify This test verifies a drive’s actuator arm can accurately move the read/write heads to specific locations on the disk media and that data can be read accurately. It moves the drive read/write heads to each sector in sequence, reads the sector data and computes a CRC checksum to compare against the CRC checksum stored on the media for the sector from which the data was read. If errors are detected, the sector number is recorded in the test log and the test logs as Failed. Random Verify This test verifies a drive’s actuator arm can accurately move the read/write heads to specific locations on the disk media and that data can be read accurately. It moves the drive read/write heads to 300 random sectors, reads the sector data and computes a CRC checksum to compare against the CRC checksum stored on the media for the sector from which the data was read. If errors are detected, the sector number is recorded in the test log and the test logs as Failed. SMART Status Check This test interrogates devices for support of the SMART instruction set. Then it issues an ENABLE SMART command to make sure SMART functionality is active. Lastly, it performs the SMART RETURN STATUS command to check if any thresholds have been exceeded. If thresholds have been exceeded, an error message is reported in the test log and the test logs as Failed. If the device does not support SMART technology, the test logs N/A. SMART Self-Test Short This test is provided by the drive and is designed to detect current and potential problems. There are two phases: Electrical, and the Sector. The Electrical part takes about 10 seconds. The Sector part takes one to two minutes and is looking for new data errors. If the test reports an error, it logs as Failed. SMART Self-Test Long This test is provided by the drive and is designed to detect current and potential problems. There are two phases: Electrical, and the Sector. The Electrical part takes about 10 seconds. The Sector part may take a long time based © 2005-2015 PC-Doctor, Inc. ALL RIGHTS RESERVED Page 58 of 69 PC-Doctor Service Center 9.5 User Guide on the size of the drive (a 250GB drive will take approximately one hour) and is looking for new data errors. If the test reports an error, it logs as Failed. SMART Attribute Check This test polls drives that support SMART, checking the values of the SMART attributes to see if they are within the appropriate thresholds. If any are found that are near a threshold, they are reported in the test log and the test will log as Failed. SMART Conveyance Self-Test The SMART Drive Conveyance Self-Test checks for problems caused during shipment. Implementation varies by vendor and model and focuses on faults and physical damage caused by mishandling. Inner/Outer Surface Read This test performs a sector-by-sector read of the entire drive, reads the data, and transfers it back to the computer memory. This differs from the Linear Verify Test, which instructs the drive to verify that it can read the sectors, and as such takes significantly longer. If the test discovers any errors, they are recorded in the test log and the test logs as Failed. Read Surface Scan This test ensures that data can be transferred from the drive to the host controller. The test scans the entire drive by reading data from a configured number of sector blocks. If any errors occur, the test records them in the test log and logs as Failed. Write Surface Scan This test scans the entire drive by writing a pattern to a block of sectors and then reads the same block back into memory to validate the data. This test ensures that the drive heads accurately read and write data. If any errors occur, it records them in the test log and logs as Failed. Drive Cache Test This test works by stressing the internal cache RAM of the drive being tested. The drive cache RAM is tested by performing a series of write operations that use all of the internal cache RAM, followed by a read back of the same sectors. This sequence is repeated several times with varying patterns. If the test discovers any errors, it records them in the test log and logs as Failed. Spin Down/Spin Up Test This test instructs the drive to turn off the motor (spin down), wait a few seconds, then spin the drive back up and attempt to read from it. If the test discovers any errors, it records them in the test log and logs as Failed. Diskette Hi-Low Seek This test verifies the tested drive can accurately move the read/write heads to specific locations on the media. Drive read/write heads are moved from the lowest sector to the highest sector and back. This is repeated 30 times. If the test detects errors with the movement of the drive heads, it records the error locations and logs as Failed. Funnel Seek This test verifies the tested drive can accurately move the read/write heads to sector locations in a funnel fashion across the media. Drive read/write heads are moved from the first track (track 0) to the last track, then from the © 2005-2015 PC-Doctor, Inc. ALL RIGHTS RESERVED Page 59 of 69 PC-Doctor Service Center 9.5 User Guide second track to the second to the last track, then from the third track to the third to the last track, and so on. If the test detects errors with the movement of the drive heads, it records the error locations and logs as Failed. Track To Track Seek This test verifies the test drive can accurately move the read/write heads to sequential locations on the media. Drive read/write heads are moved from track 0 to the maximum track, one track at a time. If the test detects errors with the movement of the drive heads, it records the error locations and logs as Failed. Random Seek This test verifies the tested drive can accurately move the read/write heads to random locations on the media. Drive read/write heads are moved to random sectors for 100 repetitions. If the test detects errors with the movement of the drive heads, it records the error locations and logs as Failed. Linear Verify This test verifies a drive’s actuator arm can accurately move the read/write heads to specific locations on the disk media and that data can be read accurately. It moves the drive read/write heads to each sector in sequence, reads the sector data and computes a CRC checksum to compare against the CRC checksum stored on the media for the sector from which the data was read. If errors are detected, the sector number is recorded in the test log and the test logs as Failed. Random Verify This test verifies a drive’s actuator arm can accurately move the read/write heads to specific locations on the disk media and that data can be read accurately. It moves the drive read/write heads to 100 random sectors, reads the sector data, and computes a CRC checksum to compare against the CRC checksum stored on the media for the sector from which the data was read. If errors are detected, the sector number is recorded in the test log and the test logs as Failed. Linear Write/Read This test writes test data to all tracks on the diskette media sequentially and then reads the written test data back. If the read data does not match the written data, it records the errors to the test log and logs as Failed. Danger: This test destroys all previously existing data on the diskette. Linear Write/Random Read This test sequentially writes test data to 100 tracks on the diskette media and then reads the written test data back in a random order. If the read data does not match the written data, it records the errors to the test log and logs as Failed. Danger: This test destroys the previously existing data on the diskette that is located on the 100 random tracks to which this test writes. Random Write This test writes test data to 100 random tracks on the diskette media and then reads the written test data back. If the read data does not match the written data, it records the errors to the test log and logs as Failed. Danger: This test destroys the previously existing data on the diskette that is located on the 100 random tracks to which this test writes. © 2005-2015 PC-Doctor, Inc. ALL RIGHTS RESERVED Page 60 of 69 PC-Doctor Service Center 9.5 User Guide SCSI Fixed Disk Controller The internal diagnostic test of the SCSI fixed disk controller is performed 5 times and then the drive is reset. If the test detects an error, it records the errors to the test log and logs as Failed. Funnel Seek This test verifies a SCSI fixed disk drive actuator arm can accurately move the read/write heads to sector locations in a funnel fashion across the disk media. The test moves the drive read/write heads from the first track (track 0) to the last track, then from the second track to the second to the last track, then from the third track to the third to the last track, and so on. If the test detects errors with the movement of the drive heads, it records the errors in the test log and logs as Failed. Track To Track Seek This test verifies a SCSI fixed disk drive actuator arm can accurately move the read/write heads to sequential locations on the disk media. The test moves the drive read/write heads from track 0 to the maximum track one track at a time. If the test detects errors with the movement of the drive read/write heads, it records the errors in the test log and logs as Failed. Random Seek This test verifies a SCSI fixed disk drive actuator arm can accurately move the read/write heads to random locations on the disk media. The test moves the drive read/write heads to random sectors for 300 repetitions. If the test detects errors with the movements of the drive read/write heads, it records the errors in the test log and logs as Failed. Linear Verify This test verifies a drive’s actuator arm can accurately move the read/write heads to specific locations on the disk media and that data can be read accurately. It moves the drive read/write heads to each sector in sequence, reads the sector data and computes a CRC checksum to compare against the CRC checksum stored on the media for the sector from which the data was read. If errors are detected, the sector number is recorded in the test log and the test logs as Failed. Random Verify This test verifies a drive’s actuator arm can accurately move the read/write heads to specific locations on the disk media and that data can be read accurately. It moves the drive read/write heads to 300 random sectors, reads the sector data and computes a CRC checksum to compare against the CRC checksum stored on the media for the sector from which the data was read. If errors are detected, the sector number is recorded in the test log and the test logs as Failed. Short Self-Test This test executes the SCSI hard drive short self-test routine on SCSI drives. If the drive supports the Self-Test Results log page, it will enumerate the SCSI Short Self-Test as an available test. When you start this test, it starts the short self-test routine and monitors testing until completion. If a failure occurs, the test records an error message based on the results returned by the drive. Extended Self-Test This test executes the SCSI hard drive extended self-test routine on SCSI drives. If the test is able to determine that the Self-Test Results log page exists, it will enumerate the SCSI Extended Self-Test as an available test. When you © 2005-2015 PC-Doctor, Inc. ALL RIGHTS RESERVED Page 61 of 69 PC-Doctor Service Center 9.5 User Guide start this test, it attempts to start the extended self-test routine on the drive if supported and monitors testing until completion. If a failure occurs, the test records an error message based on the results returned by the drive. Inner/Outer Read Surface Scan This test performs a sector-by-sector read of the entire drive, reads the data, and transfers it back to the computer memory. This differs from the Linear Verify Test, which instructs the drive to verify that it can read the sectors, and as such takes significantly longer. If the test discovers any errors, they are recorded in the test log and the test logs as Failed. Read Surface Scan This test ensures that data can be transferred from the drive to the host controller. The test scans the entire drive by reading data from a configured number of sector blocks. If any errors occur, the test records them in the test log and logs as Failed. Write Surface Scan This test scans the entire drive by writing a pattern to a block of sectors and then reads the same block back into memory to validate the data. This test ensures that the drive heads accurately read and write data. If any errors occur, the test records them in the test log and logs as Failed. Spin Down/Spin Up Test This test instructs the drive to turn off the motor (spin down), wait a few seconds, then spin the drive back up and attempt to read from it. If the test discovers any errors, it records them in the test log and logs as Failed. Optical Drive Write This test verifies all drives that support re-writeable media (CD-RW, DVD-RW, DVD+RW, DVD-RAM, HD-DVD RAM, and BD-RE) are in good working order by writing data to the disc, then reading the disc to verify data was written and recorded correctly. If the test detects any errors, it records them to the test log and logs Failed. Caution: These tests will erase existing data on the disc! Optical Drive Scan Insert Media This test verifies that tested drives can accurately detect if media has been inserted. If the drive is unable to detect an inserted disc, it logs as Failed. Linear Seek This test verifies that the drive actuator arm can accurately move the read/write heads to sector locations, starting with the first track and moving in a linear fashion across the disc. If the test detects errors with the movement of the drive heads, it records the errors in the test log and logs as Failed. Random Seek This test verifies the drive actuator arm can accurately move the read/write heads to random sector locations. If the test detects errors with the movement of the drive heads, it records the errors in the test log and logs as Failed. © 2005-2015 PC-Doctor, Inc. ALL RIGHTS RESERVED Page 62 of 69 PC-Doctor Service Center 9.5 User Guide Funnel Seek This test verifies the drive actuator arm can accurately move the read/write heads to sector locations in a funnel fashion across the disc. It moves the drive read/write heads from the first track (track 0) to the last track, then from the second track to the second to the last track, then from the third track to the third to the last track, and so on. If the test detects error with the movements of the drive heads, it records the errors in the test log and logs as Failed. Remove Media Test This test verifies that the drive can accurately detect if an inserted disc has been removed. If the test is unable to determine a previously inserted disc has been removed, it logs as Failed. Interactive Test Descriptions Keyboard Keyboard Keys This test verifies that each key on the keyboard registers properly when pressed. The test is shipped with definitions for several of the most frequently used keyboard layouts. Press every key in order and verify they register on-screen. You can also observe the scan codes sent by the keys when they are pressed and released. Press ESC or SPACE BAR three times to exit. Keyboard LEDs This test verifies the three keyboard LEDs (Num Lock, Caps Lock and Scroll Lock) and their programming interface are functional. The LEDs are lit in different combinations as shown on the screen. Press the SPACE BAR to change to the next combination. You may also press any of the three keys to see their status change on the screen. Press the ESC key to exit. Keyboard Repeat This test verifies the key repeat signal function is working. Hold down any key until the test recognizes the repeat signal. If a repeat signal is not detected within 20 seconds, the test aborts automatically. Video Character Sets This test will switch the video adapter to any of the indicated modes and display the standard character set. Modes can be switched through the mode selection menu, or by pressing Page Up/Down in the test mode. All standard video modes for the indicated adapter will be displayed. Press ESC to exit this test. Color Palettes This test will switch the video adapter to any of the indicated modes and display the available colors. Modes can be switched through the mode-selection menu, or by pressing Page Up/Down in the test mode. All standard video modes for the indicated adapter will be displayed. Press ESC to exit this test. Monitor Quality This function tests monitor quality through high contrast patterns. If patterns produce monitor distortions, it indicates the monitor has trouble adjusting to the image. Press any key to exit this test. © 2005-2015 PC-Doctor, Inc. ALL RIGHTS RESERVED Page 63 of 69 PC-Doctor Service Center 9.5 User Guide Internal Speaker This test programs the internal speaker to produce a constant sound at the specified frequency, which can be adjusted with certain keyboard keys. The speaker volume should be observed at different frequencies. The lowest possible frequency is 18 Hz; the highest is 30,000 Hz. Use the Up and Down Cursor keys to change the frequency. Holding down the Shift key while using the Cursor keys will allow for fine-tuning while the Page Up and Page Down keys will allow for doubling or halving the frequency, respectively. Press the ESC key to exit. Mouse This test verifies Microsoft compatible pointing devices and associated driver are functional. During the test, a character mode mouse pointer is activated and visible on screen as a small red rectangle. You can move this pointer around the screen with the coordinates displayed on the screen in the Mouse Data box. The X-axis can range from 0 to 632, and the Y-axis can range from 0 to 192. The mouse buttons are displayed in the Mouse Data as OFF (when not pressed) or ON (when pressed). Diskette Change Signal This test checks the change signal when removing a floppy diskette from the drive and inserting a new one. If the test is unable to detect a change in diskette media, the test logs as Failed. Write Protect This test checks if write protection is enabled for the floppy diskette under test. Write protection prevents you from saving data to a floppy diskette. Insert a formatted and write protected diskette in the drive. The test will read the second sector of the disk and then attempt to write the data back to the diskette. If the test is able to write to the drive, it will log as Failed. System Load This function performs a unique type of test that simultaneously tests several parts of your system. This simulates the conditions that are produced by modern operating systems. The parts tested include: CPU CoProcessor Base Memory Extended Memory EMS Memory Serial Ports Parallel Ports Floppy Fixed Disks Video CD-ROM/DVD Note: Appropriate memory managers must be loaded for the Extended and EMS Memory tests to run. For example, HIMEM.SYS for Extended or XMS memory, and EMM386.EXE for Expanded or EMS memory. LCD Panel Test This test fills an LCD display with a series of solid color blocks (black, white, red, green, blue), making any dead pixels appear as a black dot. © 2005-2015 PC-Doctor, Inc. ALL RIGHTS RESERVED Page 64 of 69 PC-Doctor Service Center 9.5 User Guide Appendix E: FAQ and Diagnostic Tips In addition to the frequently asked questions and troubleshooting tips below, visit the PC-Doctor Forums online at: http://www.pcdoctor-community.com/forum/ Forums specifically dedicated to Service Center are available here: http://www.pcdoctor-community.com/forum/index.php?board=19.0 Multipurpose USB Device Can I make a copy of the USB device? While we understand the desire to back up your USB device or to test multiple systems at the same time. While we do allow you to make a backup copy the Diagnostics DVD, because the Multipurpose USB Device also acts as your product license any attempts to duplicate the Multipurpose USB Device is a violation of the Service Center End User License Agreement. If you do require an additional USB device, we ask that you please contact our sales department. http://www.pc-doctor.com/company/contact-us My USB device isn’t working, what can I do to fix it? If the Multipurpose USB Device becomes corrupted or erased, you can use the following method to restore it to its original configuration. 1. Plug the Multipurpose USB Device into an available USB port. 2. Insert the Service Center Diagnostics CD. 3. On the Install Options Menu, click More - advanced options. 4. Select Multipurpose USB Device Restore Tool. 5. Follow the on-screen instructions. If this doesn’t fix the problem, please contact our support team as detailed in Product Support. Warning: The Multipurpose USB Device Restore Tool is only designed for the Service Center 9 and 9.5 Multipurpose USB Devices. Attempting to use this utility to restore a Service Center Multipurpose USB Device from an earlier version will result in permanent corruption of the device. Note: Restoring the Service Center Multipurpose USB Device will restore all of the necessary files for Windows, Bootable Diagnostics, and DOS. This process can take approximately twenty minutes. What do the Lights on my USB device mean? The light combinations are listed on the reference card attached to the Multipurpose USB Device, and are used to indicate the test status of the system under test. See Multipurpose USB Device on page 5. Service Center for Windows Why does Service Center state that I am not using the correct version? You may need to insert the Multipurpose USB Device into an available USB port. The Multipurpose USB Device must remain plugged into a USB port when running Service Center for Windows. © 2005-2015 PC-Doctor, Inc. ALL RIGHTS RESERVED Page 65 of 69 PC-Doctor Service Center 9.5 User Guide Why does a test fail in Windows but passes when I test in DOS or Bootable Diagnostics? This often occurs if the device driver is not configured properly in Windows. Why does system information gathered from BIOS differ substantially from SMBIOS? BIOS system information reports will occasionally show a difference in information for specific devices compared to the same device found in SMBIOS system information. This is because the device vendor provides the SMBIOS information for a device. If there is a discrepancy in device information between BIOS and SMBIOS, it will probably not affect performance. However, it might indicate that the BIOS vendor or system (motherboard) manufacturer did not take the additional steps to ensure that the BIOS information was correct. Why is Service Center so slow when I run tests in parallel? Systems with limited memory may experience issues when attempting to run tests in parallel. However, you can still run tests sequentially. Why do I receive errors when I attempt to run the Hard Drive Pattern Test? The Hard Drive Pattern Test will only run on hard drives formatted as FAT or NTFS. It will not run on unformatted drives. You might see similar errors if the test encounters any empty sectors on the drive. Why does xulrunner.exe attempt to access the Internet when I run Service Center? xulrunner.exe is a component of the Service Center for Windows user interface. Attempts to access the Internet are actually xulrunner.exe attempting to open listening ports for internal communication. If you see that xulrunner.exe is attempting to access the Internet but your firewall is blocking access, you can safely allow access. Service Center Bootable Diagnostics What does the error message "Driver 88PM80x already registered, aborting" mean? This error message is expected during the boot process for the Bootable Diagnostics test environment. If you wait for the system to complete the boot process, the software should finish loading in a couple of minutes. The software starts to boot, but then the system only shows a blue (or black) screen. What is the matter? Both problems have been known to occur on some systems if the video drivers are unable to load. That is the primary reason for the “Video Fallback” boot option for Bootable Diagnostics, if the first option fails to load correctly please try the alternate option. We have also discovered that some laptops will load what initially appears to be a black screen. It has been determined that the problem is with the backlight turned all the way down by the operating system, and can be resolved by simply increasing the brightness with the keyboard (e.g. Fn + Brightness Up). Service Center for DOS What does an “xx is an invalid value...” error message mean? You specified an invalid number with the /ba:xx switch. This is also the case if you see a “This Entry Is Empty, Select Again” error message. You must select a number from 1 through 10 (corresponding to an existing overlay). Make sure the overlay you specify exists. © 2005-2015 PC-Doctor, Inc. ALL RIGHTS RESERVED Page 66 of 69 PC-Doctor Service Center 9.5 User Guide Why does Service Center for DOS shutdown if I remove the Multipurpose USB Device? If you remove the Multipurpose USB Device after starting up Service Center for DOS, you must reboot the system to reestablish authentication. What does an “Unknown Command Line Option” error message mean? You specified an invalid command line switch. For more information on supported command line switches, see Appendix B. What does “Error detected in batch mode diagnostic testing” message mean? One or more diagnostic tests in your batch file produced a failure. Review the test log for additional details. This error message can also occur if you use the wrong test ID with the /rt command line switch. Why am I unable to access my hard drive(s) when using the virtual RAM disk (vdisk.sys)? This problem only occurs with FAT32 and NTFS disk partitions. DOS cannot access the FAT32 or NTFS partition information and the Service Center for DOS Logical Drive Info module will not reflect this information. However, Service Center for DOS hard drive testing is not affected by this problem. Why do some devices report N/A (modems, NIC, SCSI)? Service Center for DOS cannot test some devices unless you install the device driver first. If a Service Center for DOS diagnostic test reports N/A for a device, ensure that the appropriate device driver (or enabler) is installed and run the test again. In many cases, Service Center for DOS can provide system information for devices even if it cannot test them. The categories PCI Info and PCMCIA Info on the Hardware Info menu report information about devices whether their drivers are installed or not. Why were the contents of the floppy disk erased after running Diskette Drive tests? The Diskette Drive category includes two destructive subtests, resulting in loss of data: Linear Write/Read and Linear Write/Random Read tests. These tests will destroy any data on the disk. You must manually select these tests, which produces a warning message explaining the possible loss of data. Use a blank formatted disk when running the Diskette Linear Write/Read and Linear Write/Random Read tests. Why was data deleted while running the Surface Scan Hard Disk utility? The Surface Scan Hard Disk utility has two subtests, Write/Verify Test and Write/Read Test, which under normal circumstances run without destroying data. However, if the PC loses power or you restart it while testing is in progress, you may lose data. Service Center for DOS displays a warning about potential data loss when you select these tests. Danger: Do not turn off or reboot the system while either test is running! Why can’t I delete an empty directory on the Multipurpose USB Device? This is most likely because you have deleted a file in DOS that references a long file name in Windows. DOS does not support long file names. You can define a long file name as any file name with more than eight characters or any file extension with more than three characters. If DOS encounters a long file name, it will rename it to support the DOS filename standard. This means DOS will keep the first seven characters of the filename and append a tilde (~) symbol at the end to indicate the filename has been truncated so that DOS can read it. © 2005-2015 PC-Doctor, Inc. ALL RIGHTS RESERVED Page 67 of 69 PC-Doctor Service Center 9.5 User Guide When DOS truncates a file in this way, it essentially breaks the file up into multiple pointers that allow Windows to recognize the file even if the filename has been truncated. If you delete the file in Windows, it will recognize the file and all of its pointers as a single file. However, if you attempt to delete a file with a truncated file name in DOS, it will only recognize the file itself and ignore the filename pointers, leaving them in the directory. This will prevent you from deleting the directory in DOS and the filename pointers are inaccessible in Windows. If you need to delete a file with a truncated filename on the Multipurpose USB Device, delete the file from within Windows. If you have already deleted files in DOS with truncated filenames and need to restore the directory structure, use the Multipurpose USB Device Restore Tool to restore it to its original configuration. For more information on the Multipurpose USB Device Restore Tool, see USB Restore Tool. © 2005-2015 PC-Doctor, Inc. ALL RIGHTS RESERVED Page 68 of 69 PC-Doctor Service Center 9.5 User Guide Index Android ...................................... 4, 5, 6, 31, 32, 33, 46 Automated ................................ 13, 23, 24, 32, 33, 34 Blue Screen of Death BSOD ................................................................ 4, 18 Boot Menu ...............................................................12 Bootable Diagnostics 4, 5, 6, 7, 11, 12, 13, 18, 23, 30, 65, 66 Central Processing Unit CPU ....14, 25, 33, 34, 38, 39, 42, 43, 48, 49, 50, 52, 53, 54, 64 Command Line ....................................... 35, 37, 42, 67 Device Manager .........................................................4 Diagnostics DVD .........................................................6 DOS .... 4, 5, 6, 7, 11, 24, 25, 26, 27, 37, 38, 43, 52, 65, 66, 67, 68 © 2005-2015 PC-Doctor, Inc. ALL RIGHTS RESERVED Drive Wipe ...............................................................23 Electrostatic Discharge ESD ..................................................................... 5, 9 Graphical User Interface GUI ................................................................. 12, 13 Light Emitting Diode LED ....................................................... 6, 7, 8, 9, 10 Multipurpose USB Device .................................... 5, 65 MUD . 2, 3, 4, 5, 6, 11, 12, 14, 17, 21, 24, 31, 32, 65, 67, 68 PCMCIA ............................................ 25, 39, 44, 55, 67 SCSI .............................................. 3, 25, 41, 44, 61, 67 Session ......................................................... 13, 14, 19 Snapshot ...................................................... 14, 19, 21 Windows ... 4, 5, 6, 7, 11, 13, 18, 35, 65, 66, 67, 68, 70 Page 69 of 69 PC-Doctor Service Center 9.5 User Guide Product Support To learn about other PC-Doctor products, visit: http://www.pc-doctor.com/ If you have any questions about the Service Center product, visit: http://www.pcdservicecenter.com/ For any support issues that may arise, you can submit a ticket or check existing FAQs here: http://www.pcdservicecenter.com/support If you should ever need to submit a support ticket, we ask that you please provide as much information about the issue as possible. Here are some questions to keep in mind: Which version of Service Center are you currently having issues with? Does Service Center or Windows display any error messages? Is this issue happening on only one system or on many systems you have tested? Are there any errors or test logs that you are able to provide? We always appreciate receiving feedback from our customers, if you have other thoughts to share about Service Center, visit: http://www.pcdservicecenter.com/feedback Company Information PC-Doctor, Inc. 10345 Professional Circle Reno, NV 89521 Phone: Fax: Web: Facebook: 1.775.336.4000 1.775.336.4099 http://www.pc-doctor.com/ http://www.facebook.com/pcdoctorinc © 2005-2015 PC-Doctor, Inc. ALL RIGHTS RESERVED Page 70 of 2