1
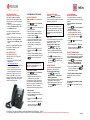
BASIC PHONE FEATURES
PLACING A CALL
Using the Handset:
Pick up the handset, and then dial the
number. Or, dial the number first, and
then pick up the handset.
Using the hands-free Speakerphone:
With the handset on-hook, press ,
any assigned line key, or the
NewCall softkey. Then, enter the
number.
or
Dial the number, and then press
or
or an available line key.
®
SoundPoint IP 335
Quick User Guide
for 8x8 Virtual Office
Applies to phones running
Polycom Software 3.2.3.x.
NAVIGATION
Scrolling
or
Step in/out of menus, toggle
enabled/disabled:
or
Enter/Select:
Using the optional Headset:
With the headset connected, press
, any assigned line key, or the
NewCall softkey.
or
Dial the number and then press .
During a call, you can alternate
between modes by pressing
or
or picking up the handset.
ANSWERING A CALL
Handset: Pick up the handset.
Speakerphone: Press: , the line key,
or the Answer softkey.
Headset (optional): Press .
Incoming calls may be ignored by
pressing the Ignore softkey, or sent
directly to voicemail by pressing the
More softkey, then the Reject softkey
during ringing.
ENDING A CALL
Press the EndCall softkey or the line
key corresponding to the line. Or,
depending on the call mode, press ,
press , or hang up the handset.
REDIAL
Press
to display the Placed
Call list. Scroll to select the desired
recipient and press
again.
LOCAL CONFERENCE CALLS
To create a three-way local
conference call:
1. Connect to the first party.
2. Press the Conf softkey to create a
new call (the active call is placed on
hold).
3. Place a call to the second party.
4. When the second party answers,
press the Conf softkey again to join
all parties in the conference.
Conference Behavior:
Placing the conference call on hold
will place the other conference
parties on hold.
Pressing the Split softkey will split
the conference into two separate
calls on hold.
To create a conference between an
active call and a call on hold, press
the down
button, followed by the
Join softkey.
CONFERENCE BRIDGE
To call into a conference:
1. Find the ConfS softkey by pressing
the More softkey.
2. Follow the Conference Bridge voice
prompts.
CALL TRANSFER
1. During a call, press the Trans
softkey (the active call is placed on
hold).
2. Place a call to the party to which you
want to transfer the call.
3. After speaking with the second party,
press the Trans softkey to complete
the transfer.
Press the Blind softkey to transfer
the call without speaking to the
second party.
DO NOT DISTURB (DND)
Press
and select Features >
Do Not Disturb to prevent the phone
from ringing for incoming calls. Press
again to return to the home
screen. An icon appears for all lines to
confirm that DND is enabled. To turn
Do Not Disturb off, press
and
select Features > Do Not Disturb.
Press
again to return to the
home screen.
MICROPHONE MUTE
During a call, press . Mute applies to
all modes. You can hear all other
parties while Mute is enabled, but other
parties cannot hear you.
To un-Mute, press
again.
CALL HOLD AND RESUME
During a call, press
.
Press
again, the Resume softkey,
or the line key to resume the call.
LCR – LAST CALL RETURN
1. Press the More softkey, then the
LCR softkey.
2. You can pick up the handset first,
then press LCR to place the call on
your handset
INTERCOM
1. Press the Intercom softkey.
2. Dial the number you wish to Intercom
to and then press the Enter softkey.
If you are receiving an intercom call, the
phone rings, then automatically
connects to your speakerphone.
AUTO ATTENDANT
To access the Auto Attendant:
1. Press the AA softkey. (Press the
More softkey if the AA softkey is
hidden.)
2. Follow Auto Attendant voice prompts.
Transfer can be canceled by pressing
the Cancel softkey.
Page | 1
ONLINE CALL FORWARDING
8x8 strongly recommends using online call
forwarding instead of phone-based call
forwarding so your call forwarding
instructions are stored online instead of on
your phone. If you set your call forwarding
rules on your phone, they will not be in
effect if your phone is disconnected from
an Internet connection.
To enable online call forwarding
(Virtual Office):
1. Log on to your Virtual Office Online
dashboard at
http://virtualoffice.8x8.com
2. Select Settings then Call
Forwarding, then select the
My Rules tab.
3. Update your Call Forwarding Rules
and press Save.
You can return to Virtual Office Online
at any time to update your Call
Forwarding Rules.
PHONE-BASED CALL FORWARDING
To enable phone-based
Always Forward:
1. Press
2. Select Features (1), then select
Forward (4) .
3. Select Always (1) .
4. The screen will say Contact. Press
the
button to enter the number to
forward calls to. Then select OK.
5. Press the down
button to
Disabled.
6. Press the
button.
7. Press the right
button; the screen
will say Enabled. Select OK.
8. Press the left
button, you will see
the word Save. Press Yes.
9. Press
To enable phone-based
No Answer Forward:
To disable phone-based
call forwarding
1. Press
2. Select Features (1), then select
Forward (4) .
3. Select No Answer (2).
4. The screen will say Contact. Press
the
button to enter the number to
forward calls to. Then select OK.
5. Press the down
button to
Disabled and press the
button.
6. Press the right
button; the screen
will say Enabled. Select OK.
7. Press the down
button. You will
see Forward After Rings on the
screen.
8. Press the
button, enter number of
times to ring before forwarding, then
press OK.
9. Press the left
button, you will see
the word Save. Press Yes.
1. Press
2. Select Features (1), then select
Forward (4).
3. Select the forwarding feature you
want to disable: Always (1), No
Answer (2) or Busy (3).
4. The screen will say Contact. Press
10. Press
To enable phone-based
Busy Forward:
1. Press
2. Select Features (1), then select
Forward (4)
3. Select Busy (3)
4. The screen will say Contact. Press
the
button to enter the number to
forward calls to. Then select OK.
5. Press the down
button to
Disabled and press the
button.
6. Press the right
button; the screen
will say Enabled. Select OK.
7. Press the left
button, you will see
the word Save. Press Yes.
8. Press
the
button to skip; the screen will
say Enabled. Press the
button
5. Press the left
button, the screen
will say Disabled, press OK.
6. Press the left
button, the screen
will say Save. Press Yes.
7. Press
VOICE MAIL
A voice mail icon on the screen, a
flashing line key, and a stutter dial tone
indicate one or more new voice mail
messages.
To listen to new voice messages:
Press the Msgs softkey, select
Message Center, then select
Connct or
Press the More softkey to find the
Voicemail softkey.
TRANSFER CALL TO VOICEMAIL
1. During a call, select the xferVM
softkey.
2. Enter the extension of the person you
want to transfer the caller to.
3. The caller is transferred directly to
the voicemail box at that extension.
CALL PARK
During a call, press the More softkey,
then the Park softkey. A recording
will tell you which extension the call
is parked on (your other party is
placed on hold until the parked call is
picked up).
To pick up a parked call, just dial the
extension the call is parked at.
CORPORATE DIRECTORY
1. Press
and select
Applications then select Apps
Home, then Corporate Directory
Listing.
2. Browse up and down the directory list
and select the person you wish to call
(speed dial).
CORPORATE DIRECTORY SEARCH
For long directories, you can search for
a user in the directory and then select
their name to speed dial them.
1. Press
and select
Applications, then Apps Home then
Corporate Directory Search.
2. Input name, extension, or other data
into the search field, then scroll down
and select Search.
3. Select the matching entry to speed
dial the user (or select Back to do a
new search).
CALL LISTS
From the idle screen, press up
for
Speed Dial, down
for Received
Calls, or right
for Placed Calls. Or,
press
then select Features >
Call Lists. Choose Received Calls,
Placed Calls or Clear. Call information
will be displayed.
Select a call and press
to dial
the number. To Delete the entry, Save
the contact information, or see Info
about the call, press the More softkey.
SPEED DIALING
To assign a speed dial index, see the
CONTACT DIRECTORY section. To dial
a contact assigned to a line key, press
the corresponding line key. You can
also enter <X X #>, where XX is a valid
speed dial index from 1 to 99, and then
press the Dial softkey to call the
corresponding speed dial contact.
Page | 2
CALL RECORD ON/OFF
(Virtual Office Pro users only)
Call Record On/Off is available on
Virtual Office Pro users when the Call
Recording feature is set to record calls
On Demand.
1. To turn on Call Recording during a
call, press the More softkey to find
the CallRecrd softkey.
You will see a “Recording is On”
confirmation message on the phone
screen.
2. To turn Call Recording off, press the
Exit softkey, then press the More
softkey to find the CallRecrd softkey
again.
Once you press the CallRecord softkey,
you will see a “Recording is Off”
confirmation message.
CALL QUEUE IN/OUT
(Call Queue Users Only)
Users can log in or out of their Call
Queues online:
1. Log into your Virtual Office Online
dashboard at
http://virtualoffice.8x8.com
2. Select the Call Queue you wish to log
in or out of from the top of the
screen. If you are not part of a call
queue this option won’t be visible.
Another way to login or out of a call
queue is to dial 557. If you are not a
member of a call queue, you will hear a
message telling you that you are not a
member of any call queues.
CUSTOMIZING YOUR PHONE
CONTACT DIRECTORY
To add a contact in your local phone
directory:
1. Press
then select Features
then Contact Directory.
2. Press
to enter a contact into the
phone’s database.
3. Enter first name from the dial pad.
4. Press the Ok or Cancel softkeys to
accept or cancel changes.
5. Press the right arrow
to display
the next field in the contact’s entry.
6. Repeat steps 2 through 5 to enter
last name and a unique contact
phone number (not already in the
directory).
7. Change the other fields as desired.
8. Press the left arrow
to end data
entry.
9. Press the Yes or Cancel softkeys to
accept or cancel changes, then press
twice to return to the idle
screen.
Contacts can be easily added from
Call Lists. For more information, see
the CALL LISTS section.
VOLUME ADJUSTMENT
Press the
volume keys to
adjust the call volume of the active
mode. Pressing these keys in idle state
adjusts the ringer volume.
Handset volume will return to a preset
level after each call. Headset and
hands-free (speakerphone) volume will
be remembered after each call. This
configuration can be changed by 8x8
Support.
RING TYPE
You can select different rings to match
your preferences and distinguish
between calls on lines.
To change the incoming ring:
1. Press
, and then select
Settings > Basic > Ring Type.
2. Scroll to highlight the desired ring
type. Press the Play softkey to hear
it.
3. Press
or the Select softkey to
accept the highlighted ring type, and
then press
idle screen.
to return to the
To search for a contact:
AUDIBLE RINGER
You can select the default alerting
destination for incoming calls.
To change the audible ringer:
1. Press
then select Features,
then Contact Directory.
2. Using the dial pad, enter the first
characters for the last name.
For example, to find the first directory
entry with the last name starting with J,
press the 5 key once. Searches are not
case sensitive. Dial the successful
match from the resulting search screen.
1. Press
, and then select
Settings > Basic > Preferences >
Alerting Destination.
2. Scroll to highlight the desired alerting
destination for incoming calls.
3. Select the desired destination, and
then press
to return to the
idle screen.
CALL TREATMENT
DISTINCTIVE RINGING /
You can set distinctive incoming ring
tones for different contacts in your local
directory.
To set a distinctive ring for a local
contact:
1. Press
then select Features >
Contact Directory.
2. Search for the contact (see the
CONTACT DIRECTORY section).
3. Press the Edit softkey, then scroll
down to Ring Type and press
to
edit it.
4. Using
or , select the desired
ring tone.
5. Press the OK softkey to accept the
change, and then press
to return to the idle screen.
twice
HEADSET MEMORY MODE
For frequent headset users, there is an
option to default all calls to the headset.
To enable Headset Memory Mode:
1. Press
and select Settings
followed by Basic, Preferences,
Headset, and Headset Memory.
2. Scroll down to Enable and press
to select it, and then press
return to the idle screen.
to
To disable Headset Memory Mode:
Repeat steps 1 and 2, but select
Disable.
To activate Headset Memory Mode
(if enabled):
Press
twice. The headset icon will
flash.
To edit a contact:
1. Search for contact (see above).
2. Press the Edit softkey and make the
necessary changes.
3. Press the left arrow
to end data
entry
4. Press the Yes softkey to accept your
changes, and then press
twice to return to the idle screen.
SoundPoint IP 335 Quick User Guide for 8x8 Virtual Office Service. PM3501010 02/2011
For more details, please see the Polycom SoundPoint IP 335 User Guide available at: http://www.8x8.com/Support/BusinessSupport/Documentation.aspx
Page | 3