1
Advanced Users Guide
Version 1.2.5
Advanced Users Guide - 1
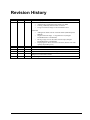
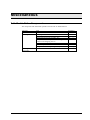
Revision History
Date
28/02/00
16/09/08
Version
1.0
1.1
Author
CD
CD
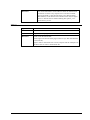
10/03/10
22/04/10
13/09/10
24/6/11
13/12/11
1.2
1.2.1
1.2.2
1.2.3
1.2.4
BT
BT
BT
BT
BT
16/6/12
1.2.4
BT
Changes
Initial version prepared
Added:
o Automatically Calculate Savings based on an RRP
o Creating a Mutually-Exclusive Set of Choices
o Using Out of Stock Images in the Push Button Grid
Amended
o Adding Extra Fields into the Customer Email (added Payment
Method)
o Single Product Per Page – Using Subsections (changed
ProductReference to ProductID)
o Having a larger box for the 'Other Info' Prompt (changed
ProductReference to ProductID)
o Displaying Store Prices In Three Currencies (doesn't work with
quantity-dependent prices)
Removed articles not relevant to v10
Additional articles for v10
Corrections and additions, v10.0.3
Updated for v11, removed articles no longer relevant.
Corrections to ‘Email a friend’ and ‘Automatically Rescale Your Product
Images to a Certain Size’ articles
Rebranding to ‘SellerDeck’
Advanced Users Guide - 2
Table of Contents
Read This First ........................................................................................................................... 7
Using the Preview to Select a Layout .......................................................................... 7
Navigating Round the Layouts .................................................................................... 8
Page Structure.............................................................................................................. 8
Editing and Undoing .................................................................................................. 10
The Library ................................................................................................................ 10
Inserting Variables..................................................................................................... 12
Exercise - Including the 'Author' Variable into the Design ........................................ 12
Inserting Layouts ....................................................................................................... 13
Hiding Things With Conditions ................................................................................. 14
Using Stylesheets ....................................................................................................... 15
Advanced: Fixed Layouts vs. Selectable Layouts ...................................................... 16
Advanced: Editing Lists ............................................................................................ 17
SellerDeck and CSS ................................................................................................................. 19
The SellerDeck Stylesheet ......................................................................................... 19
Other Default SellerDeck Style Information.............................................................. 20
Including Custom Stylesheets in SellerDeck ............................................................. 20
Editing Your Stylesheet in Dreamweaver .................................................................. 20
Custom CSS Files and the Dreamweaver Integration ................................................ 21
Tips on Handing Over Designs to Clients ................................................................................ 22
Removing a Dreamweaver Design from SellerDeck ................................................................ 24
Section B – Layouts
25
General Advanced Tips ........................................................................................................... 25
Making Sure Images in the CSS Appear Correctly.................................................... 25
Hiding Code From The Preview ................................................................................ 25
Including File Content Dynamically Online .............................................................. 26
Creating PHP Functions ............................................................................................ 26
Stripping Out File Paths from Variables .................................................................... 26
Advanced List Functionality ...................................................................................... 27
Variable Qualifiers .................................................................................................... 29
Using an Email Link that is Invisible to Spammers ................................................... 29
Inserting Your Own Custom Rollover Buttons .......................................................... 30
Stopping SellerDeck from Parsing Things in Square Brackets .................................. 30
Restricting Object Display to Single-Item Pages ....................................................... 30
Section Pages ........................................................................................................................... 32
Taking People Straight to a Section........................................................................... 32
Optimising Page Titles For Search Engines .............................................................. 32
Inserting Content to Only Appear on the Store Front Page ....................................... 33
Splitting a Section into Multiple Pages: Creating Links to 'Previous' and 'Next'
Sections ..................................................................................................................... 33
Only Using a Single Parent Section List in a Design ................................................. 34
Having Different Background Colours on Different Pages ....................................... 34
Have Every Navigation Button Appearing on Every Page ........................................ 35
Preventing Search Engines from Indexing Certain Pages .......................................... 36
Section Navigation ................................................................................................................... 37
Creating a Rollover for your Section Links ............................................................... 37
Hiding Top Level Section Links from the Sitemap ................................................... 38
Using a different Section Name in the Breadcrumb Trail .......................................... 39
How to Only Show Certain Sections in the Top Level Section List .......................... 40
Highlighting the 'Current' Section in the Section List ................................................ 41
Section List With Sub Sections In Bullets ................................................................. 43
Jump List Containing Every Section ......................................................................... 44
Different Sections in Different Parts of the Page ....................................................... 45
Advanced Users Guide - 3
Including Section Lists with Javascript ..................................................................... 47
Creating a Jump List Containing the Top-Level Sections ......................................... 50
Creating a Drop-Down List Containing the Top-Level Sections and Sub Sections ... 51
Creating a List Box Containing the Top-Level Sections ........................................... 52
Creating a Bulleted List containing the Top-Level Sections ..................................... 52
Creating a List of Hyperlinks with Sections and Sub-sections .................................. 53
Creating a List of Hyperlinks with Sections and Two Levels of Sub-sections .......... 53
Creating a Section List (With Sub-Sections) in 2 Columns ....................................... 54
Listing Sub-Sections Within Each Main Section ....................................................... 55
Inserting a List of Section Images With JavaScript ................................................... 56
Including a SellerDeck-Generated Jump List Anywhere on the Internet ................... 56
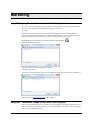
Marketing ................................................................................................................................. 58
Only Displaying Certain Products in the Marketing Lists ......................................... 58
Using the 'Thumbnail' Image in the 'Mini' Item Layouts............................................ 58
Changing the Configuration of the ‘Recently Viewed Products’ List ........................ 59
Enable Automatic Resubmission of the Google Product Feed .................................. 60
Products ................................................................................................................................... 61
Taking People Straight to a Product .......................................................................... 61
Only Displaying the First Ten Words of the Full Description ................................... 61
Different Cart Button Text for Each Product ............................................................. 62
Selecting Quantity From A Drop-Down .................................................................... 62
Including an 'Email A Friend' Link into SellerDeck .................................................. 63
Displaying Store Prices In Three Currencies ............................................................. 63
Automatically Calculate Savings based on an RRP ................................................... 64
Creating a Rollover for your Add to Cart Button ...................................................... 64
Reversing the Order of Years in the Date Prompt ..................................................... 66
Allowing Ordering of Out of Stock Products ............................................................ 67
Product Images ........................................................................................................................ 72
Automatically Rescale Your Product Images to a Certain Size ................................. 72
Clickable Expanding Product Image Thumbnails...................................................... 74
Product Options ....................................................................................................................... 76
Changing the Way Attributes are Laid Out................................................................ 76
Displaying Images Against Radio Button Choices .................................................... 77
Creating a Mutually-Exclusive Set of Choices .......................................................... 78
Using Out of Stock Images in the Push Button Grid ................................................. 81
Extended Information Windows .............................................................................................. 82
Showing Stock Levels In Extended Information Pages ............................................. 82
Pop-Up Windows That Automatically Resize to Fit the Images Within Them ......... 82
Fragments and Brochure Pages ................................................................................................ 84
Displaying Fragments Separately From Products ...................................................... 84
Automatically Generating Hyperlinks in Fragment Text ........................................... 86
Using The Same Layouts for Brochure Pages as for Section Pages .......................... 86
Stopping Specific Brochure Pages from Appearing in the List ................................. 87
Including Brochure Pages in the Site Map ................................................................ 88
Shopping Cart and Checkout ................................................................................................... 90
Viewing the Shopping Cart from Anywhere on the Internet ...................................... 90
Adding to Cart from Anywhere on the Internet ......................................................... 90
Inserting Links to Save and Retrieve Shopping Carts................................................ 91
Displaying a Message that Counts Down to Free Shipping ....................................... 91
Multiple Currency Conversion .................................................................................. 92
Going Straight to the Checkout after Adding to Cart................................................. 92
Making ‘Hide Cart Details’ the Default in the Checkout ........................................... 94
Stopping People from Checking Out with Less Than 2 Items ................................... 94
Offering Payment Methods to Customers in Different Formats ................................ 95
Adding a Giftwrap Option to the Checkout ............................................................... 96
Turning a Text Field into a Check Box ..................................................................... 97
Automatically Capitalising Customer Input ............................................................... 98
Supporting an Affiliate Program with SellerDeck Ecommerce ................................. 99
Creating a 'When To Deliver' Drop Down List........................................................ 100
Advanced Users Guide - 4
Specifying a Delivery Cut-Off Time for Orders ...................................................... 100
Emptying The Cart When People Leave The Checkout .......................................... 101
Customer Accounts ................................................................................................................ 102
Hiding Elements from Retail Customers, but Showing Them to ALL Registered
Customers ................................................................................................................ 102
Preventing Unregistered Customers from Entering Certain Sections in your Store . 102
Bouncing Unregistered Customers Out of Sections ................................................. 102
Miscellaneous ........................................................................................................................ 104
Running SellerDeck within a Custom Frame ........................................................... 104
Adding New Terms and Conditions ........................................................................ 104
Using a Text Field for Searchable Properties .......................................................... 104
Section C - Perl Script Changes
106
Products ................................................................................................................................. 106
Making the Other Info Box Optional ....................................................................... 106
Having a larger box for the 'Other Info' Prompt ...................................................... 106
Having Two Other Info Prompts ............................................................................. 108
Search .................................................................................................................................... 110
Omitting Certain Products From Search Results ..................................................... 110
Turning the Search Results into a Buyable List of Products .................................... 110
Creating Multiple Search Tools ............................................................................... 111
Editing the Search Page HTML ............................................................................... 111
Editing the 'customsearch.fil' Files .......................................................................... 112
Joining Search Terms Together in Different Ways.................................................. 114
Marching Plurals in the Search ................................................................................ 115
Keeping a Log of Search Terms Used at the Site .................................................... 115
Understanding Relevance ........................................................................................ 116
Contact Us Form .................................................................................................................... 117
Adding Extra Fields to the 'Contact Us' Form ......................................................... 117
Creating a Newsletter Subscription Form ................................................................ 118
Shopping Cart ........................................................................................................................ 122
Removing Product Hyperlinks from the Shopping Cart .......................................... 122
Using Dual Currency Pricing in the Store Pages But Not in the Cart ...................... 122
Changing the Destination of the 'Continue Shopping' Button .................................. 122
Removing the Bounce Page when Adding to Cart ................................................... 123
Checkout ................................................................................................................................ 124
Using Images for the Checkout Buttons .................................................................. 124
Changing the Order of the Shipping Methods ......................................................... 125
Displaying Shipping Options as Radio Buttons ....................................................... 126
Customer Accounts ................................................................................................................ 127
Taking the Customer to Brochure Home Page after Login ...................................... 127
Suppressing the 'Re-Enter Password' Page .............................................................. 127
Orders .................................................................................................................................... 129
Making the SellerDeck Order Number Shorter ....................................................... 129
Changing the Time on the Orders ............................................................................ 129
Using The Referrer Perl Script ................................................................................ 130
Emails .................................................................................................................................... 133
Adding Extra Fields into the Customer Email ......................................................... 133
Section D – Other Tricks
135
Importing ............................................................................................................................... 135
Creating a Design Import File ................................................................................. 135
Reports ................................................................................................................................... 136
Adding Your Own Reports into SellerDeck's Built-in List ...................................... 136
Mailing Lists .......................................................................................................................... 137
List All Customers Who Have Bought Product X But Not Product Y .................... 137
Printing Packing Labels For Today's New Orders ................................................... 137
Advanced Users Guide - 5
Uploading .............................................................................................................................. 138
Uploading Without FTP Access .............................................................................. 138
Using SellerDeck with a Firewall ............................................................................ 139
Section E – Web Servers
140
SellerDeck Hosting Requirements ......................................................................................... 140
Specifications Required for SellerDeck to Run ....................................................... 140
Web Space Required by SellerDeck ........................................................................ 141
Permissions required by SellerDeck Ecommerce .................................................... 141
Miscellaneous ........................................................................................................................ 143
SellerDeck's Online Components ............................................................................ 143
Section F: Installing a Standalone Demo on a PC
144
Downloading The Required Components .............................................................................. 144
Perl Interpreter ......................................................................................................... 144
Web Server .............................................................................................................. 144
FTP Server............................................................................................................... 145
Installation Instructions .......................................................................................................... 146
ActivePerl ................................................................................................................ 146
Apache HTTP Server .............................................................................................. 146
War FTP Daemon .................................................................................................... 146
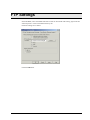
Configuration ......................................................................................................................... 147
Apache ..................................................................................................................... 147
War-FTP Configuration ........................................................................................... 147
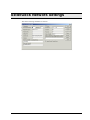
SellerDeck Network Settings ................................................................................................. 150
Testing if it Works ................................................................................................... 150
Troubleshooting ..................................................................................................................... 151
Section G: IIS5 Server Setup
153
Host Headers.......................................................................................................................... 153
Vocabulary .............................................................................................................. 153
Setup of Catalog Web Site ..................................................................................................... 154
CGI-BIN Directory ................................................................................................................ 157
CGI-BIN Physical Directory Creation ..................................................................... 157
CGI-BIN Virtual Directory Creation ....................................................................... 157
cgi-bin IIS Check ..................................................................................................... 159
cgi-bin Perl Association........................................................................................... 160
NTFS Permissions ................................................................................................................. 162
Catalog Home Directory .......................................................................................... 162
Acatalog Directory Permissions .............................................................................. 164
CGI-BIN Directory Permissions .............................................................................. 165
Web Sharing .......................................................................................................................... 170
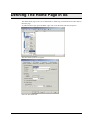
FTP Settings........................................................................................................................... 171
Perl Setup ............................................................................................................................... 172
Perl Association ....................................................................................................... 172
Perl Checks .............................................................................................................. 172
SellerDeck Network Settings ................................................................................................. 174
Defining The Home Page In IIS ............................................................................................ 175
Troubleshooting ..................................................................................................................... 177
cgi-bin Accessed Denied ......................................................................................... 177
Advanced Users Guide - 6
Section A:
Understanding Design in
SellerDeck
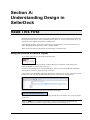
Read This First
Designing in SellerDeck can take a little while to understand - this is just because there aren't that
many programs that work in the way SellerDeck does. However, once you've learnt the basics, you
will discover how flexible SellerDeck is to design with.
The important thing is to spend a bit of time trying to understand how the various features work,
before ploughing ahead and trying to make a specific change.
These articles will lead you through the essential things you need to know.
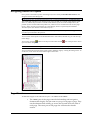
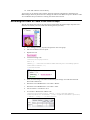
Using the Preview to Select a Layout
Try clicking within the preview panel in the Design tab.
You should see a dotted line appearing round the thing you've clicked on. This means you've
selected a layout (or an item within a layout).
Layouts are the building blocks of SellerDeck pages. They are pieces of HTML that SellerDeck
sticks together in order to create each page in the store.
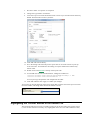
It is possible to see the HTML code of the layout you've clicked on. To do this, look at the 'Layout
Code' panel. This will either be underneath the preview, or it will be on a separate tab.
In the title bar of the Layout Code panel is the name of the layout.
Make a mental note of this, as it's useful to know what the layout is called in case you ever need to
go back to it.
Note: The
button on the layout code toolbar is used to toggle between an 'advanced' and
'simple' view of the layout code. You generally just leave it on the 'simple' view.
Advanced Users Guide - 7
Navigating Round the Layouts
Once you have selected a layout in the Design tab, look at the layout breadcrumb trail that runs
along the bottom of the Design tab.
The breadcrumb trail shows you that the layout you've clicked on is located within another layout
'above' it, and that layout in turn is located within another layout. So in the example above, the
product layout is located within the product list, which in turn is located within the 'section page'
layout - and so on until you reach the 'top' of the design, which is a special layout called the
'Overall Layout' (also known as the 'Outer Layout').
If you only see one layout in the breadcrumb trail, it's probably because you've already got the
Overall Layout selected in the preview.
You can click on the layouts in the breadcrumb trail to select them, and this way you can move up
in the design.
You can also click the
up a level in the design.
button on the layout code toolbar and the
icon in the preview to move
The down arrows are for taking you back to the layout you were on previously.
You can see the full structure of the layouts used to build the page by viewing the 'Design Tree'. To
see the tree, click on the tab at the bottom right of the screen.
Page Structure
All SellerDeck pages are divided into two parts - the 'outer' and the 'inner'.
The 'outer' part of the page controls the branding and navigation
elements that largely stay the same as you go from page to page. They
are the elements that usually go across the top and down the side of
each page. The outer part of the page also contains the <head>
section.
Advanced Users Guide - 8
The 'inner' part of the page controls the content for that page - so if it's
a section page it will be the section links and products, and if it's a
checkout page it will be the checkout fields etc.
Outer Layout
The outer part of the page is controlled by a layout called the 'Overall Layout' (also known as the
'Outer Layout'). This is the 'top' layout of each page - which every other layout is inserted within.
Outer layouts always contain a pink/purple placeholder called INNERLAYOUT, which will be
replaced by the content (inner layout) for that page when the page is generated.
You can select the overall layout within the Design tab by clicking anywhere within the preview,
and then clicking the first layout on the layout breadcrumb trail.
Alternatively, you can view the Design Tree and then click on the top item in the tree to select the
overall layout.
All the outer layouts are kept together in the library within a group called 'Web Page Outer Layout'.
You'll find out more about the library in a moment.
Inner Layout
The inner layout is harder to talk about as it will be different depending on which page you are
looking at.
For section pages, the inner layout will probably have a name that starts within 'Section Page...' and
when you look in the code of it, you'll see lots of references to 'section lists' and 'product lists'.
Every 'type' of page has a different inner layout that controls the layout of its content. All the inner
layouts used by the store are collected together in the library in a group called 'Web Page Inner
Layout'.
Advanced Users Guide - 9
Editing and Undoing
You can make a change to the HTML of a layout and then click the 'Apply' button to see what
effect this has on the store.
The preview will be automatically updated when you click 'Apply'.
If you are not happy with the results, click the 'Undo' button on the toolbar to undo the change .
You can also edit layouts using Dreamweaver. This is described in the main help in a section called
'Working With Dreamweaver'.
Remember when making changes that this layout is probably going to be inserted within another
layout, so be careful when making changes that you don't do anything that might distort or corrupt
this 'parent' layout.
If you have made a mistake with a layout, and you cannot work out how to get the layout working
again then you can always revert the layout back to its 'factory settings'. This is described in the
next section.
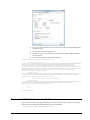
The Library
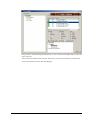
The Design tab allows you to edit the layouts that are used within a page, but the Library allows
you to search through and edit all the layouts within SellerDeck.
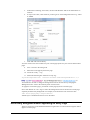
You can open the library by going to 'Design | Library', then change to the 'Layouts' tab.
Highlighting the layouts you've edited
If you click the 'Highlight edited library layouts (*)' checkbox at the bottom of the 'Layouts' tab,
you will highlight any layouts you've customised, and new layouts you've created.
Layouts you've customised will be marked with a (*) and have a
icon.
You can also highlight any new layouts you've added by selecting the 'Highlight new user layouts
(+)' checkbox.
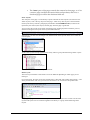
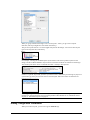
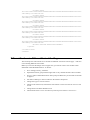
Searching for layouts
Right-click anywhere within the Layouts tab and select 'Find'.
Advanced Users Guide - 10
You can search for the name of a layout or some code within a layout.
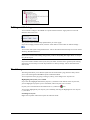
Creating new layouts
Right-click on a layout and select 'New Layout'.
Give the layout a name and click 'OK'.
Note: You can also create new layouts within the Layouts panel of a product/section/Site Options.
Simply select the '<New>' option at the bottom of the drop down lists.
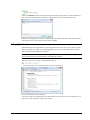
Deleting layouts
You can only delete a layout from the library if it's a custom layout that you've created, and you
haven't selected it anywhere.
Reverting to Factory Settings
If you have made a mistake in a layout, and you want to put it back to how it was before you started
making changes to it, then you can right-click on it in the library and select 'Revert to Factory
Settings'.
Layout selectors
Layouts are only part of the picture. There are also round things called 'Layout Selectors' control how layouts are listed within the 'Layout' panels.
- that
Advanced Users Guide - 11
You can edit these layout selectors to change which layouts are listed within SellerDeck, and in
what order.
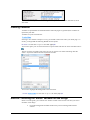
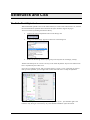
Inserting Variables
Variables are placeholders for SellerDeck data. When the pages are generated, the variables are
replaced by real data.
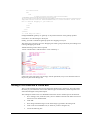
Variables in layouts look like this:
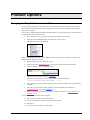
Inserting a new variable is simple. Let's say you wanted to add a new link to your home page. To
do this, you might add the following HTML into the layouts:
You can now place your cursor between the two quote marks and click the 'Insert Variable' button The list of layouts is initially really long, but you can use the 'List names containing' filter the
search. If you enter 'Home' into the list, the list becomes:
You can now highlight 'HomePageURL' and click 'Insert'.
Exercise - Including the 'Author' Variable into the Design
Earlier on in this guide, you created a new 'Author' variable. This exercise will show you how to
include it in the design.
1.
Go to the Design tab and then make sure you are looking at the 'Books'
section.
Advanced Users Guide - 12
2.
Click on the name of one of the books on this page. This should highlight the
'ProductName' variable.
3.
Add in a new blank line straight after the variable.
4.
In the new blank line, type <br />
You might notice that SellerDeck prompts you here to complete the tag. This is a feature of
SellerDeck - it will help you create the HTML within the layouts.
5.
Just after the <br /> right-click and select 'Insert Variable'.
6.
Select 'Author' from the list of variables that appears and click 'Insert'.
7.
Click 'Apply' and check the preview to see if your value have appeared.
If the author value has not appeared for all your books, it may be because your books are using
different layouts from each other. You may need to insert the <br />Author in more than one
layout.
Inserting Layouts
To insert a layout, use the
button on the layout code toolbar.
Advanced Users Guide - 13
What you get presented with though is not a list of layouts - rather, you get a list of Layout
Selectors (which you might have seen within the Library).
The job of a layout selector is to insert a type of layout into the design. You can see these layout
types in the 'Layouts' tab of the library.
For example, inserting the 'ProductLayout' layout selector will insert a product layout into the
design, and the 'AddToCartButton' layout selector will insert an add to cart button into the design.
The actual layout that is used is controlled elsewhere - usually in Site Options.
If there is a specific layout that you know you want to insert, rather than just inserting any layout of
a particular type, then you can select the 'Use Fixed Layout' button and select one from the list.
Warning - using 'Fixed Layouts' means that you will no longer be able to change the layout in Site
Options or in the Layout panel of your sections/products. More details are in "Advanced: Fixed
Layouts vs. Selectable Layouts" on page 16.
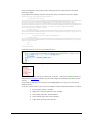
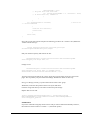
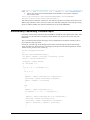
Hiding Things With Conditions
When you look in layouts, you see lots of green 'block if' tags.
Advanced Users Guide - 14
These are conditions, which will hide the text between the block tags unless a certain condition is
met. You can view and edit the condition by double-clicking on the opening 'block if' tag.
In the above example, the text shown is hidden unless the 'Author' field has a value. If the 'Author'
setting doesn't have a value, then the whole thing is hidden.
Using Stylesheets
SellerDeck makes use of stylesheets to control layout and fonts in the store. If you want to change
the layout of items on a page, or the default appearance of text, you will probably have to think
about editing the main SellerDeck stylesheet.
Note: You can edit the default font size and appearance in the 'General' panel of 'Site Options', and
you can edit colours in the 'Color Schemes' tab of 'Design | Themes'.
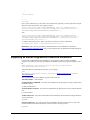
Whenever you see a style used in a SellerDeck layout e.g.:
... you can right-click on the style and select 'Look Up In Stylesheet'.
You can then edit the style as required.
You can also select the stylesheet from the 'Select Page Type' drop down list in the 'Design' tab, or
click the ‘Current Stylesheet’ button on the toolbar.
Advanced Users Guide - 15
Note: In the Library, you'll find the stylesheet layout within the 'Web Page Outer Layout' group.
You can use your own styles with SellerDeck. Either just add them to the bottom of the current
stylesheet layout, or save your stylesheet within the SellerDeck site folder and then use a tag similar
to the following to link your stylesheet in.
This tag needs to go in the <head> section in the overall layout used by the site.
If you right-click on an HTML tag in your layout that is using a tag from your custom stylesheet,
and then select 'Look Up In Stylesheet', SellerDeck will open up your custom css file in your
default CSS editor.
Advanced: Fixed Layouts vs. Selectable Layouts
In the section called "Inserting Layouts" on page 13 it talks about how when you insert a layout
selector, you have a choice.
You can insert a layout selector into the design, without specifying a
specific layout - this is also known as using a Layout Placeholder
Alternatively, you can select a specific layout to insert into the design this is known as a Fixed Layout
Using Layout Placeholders
When you insert a layout placeholder (rather than a fixed layout) it will insert a type of layout into
the design. You can generally choose the layout to be inserted within the 'Layout' panel of 'Settings
| Site Options'.
You can then often override this setting within the Layout panel of a section, or of a product.
Not all layout selectors have a place of setting in Site Options. If you find one that doesn't, then you
need to go to the 'Layouts' tab of 'Design | Library', and edit the layout selector there.
Advanced Users Guide - 16
Edit the 'Top Level Value' there in order to change the layout that will be inserted.
Fixed Layouts
When you insert a fixed layout, it effectively disables the layout selection options in 'Settings | Site
Options'. The choice of layouts is still there, but they will be ignored when the pages are built.
To change a fixed layout into a layout placeholder, you can right-click on the pink layout name in
layout code and select 'Edit Appearance'.
In the screen that appears, set the 'Use Fixed Layout' option to 'No()' and click 'OK'.
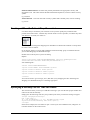
Advanced: Editing Lists
As well as standard layouts, you will sometimes come across things called lists. They look like this
in the layout breadcrumb trail:
Lists always have an orange link across the top of the layout code that says 'Click here to edit list
layout settings':
Lists work differently to other layouts. Their job is to insert a set of items into a page. Wherever
you see a list of products, or a list of sub-sections, or a list of best sellers, or a list of locations,
somewhere in there a list will be controlling the placement of the items.
Editing the list allows you to edit the HTML that goes at the start of a list of items, at the end of a
list of items and around each individual item.
To edit a list, click the orange 'Click here to edit list layout settings' text at the top of the layout, or
click the 'Edit List Layout Settings' button.
Advanced Users Guide - 17
The 'Start of List' and 'End of List' fields here are self explanatory. It gets a bit trickier in the 'Edit
Rows/Columns' tab:
Don't panic! This screen looks more complicated than it is. This is where you can control the code
that goes before and after each item in the list.
Generally, you only have to worry about the 'Middle Rows'. Only use the 'First Row' and 'Last Row'
settings if you want the first or last row to be different to the other rows. The 'No of items' is where
you can set the number of columns in your list - but this only works if your list is a table.
Otherwise, just leave this set to 'Dynamic'. If you see a variable within this field, it means you can
set the number of columns in the 'Layout' panel of the section/product you are currently editing.
Also, there are three sets of 'Before' and 'After' fields just in case you have multiple columns in
your list and you want the columns to look different from each other. Most of the time you can just
put the same code into each set of fields.
Advanced Users Guide - 18
SellerDeck and CSS
The SellerDeck Stylesheet
When SellerDeck uploads a store to the online website, it creates a file called 'actinic.css', which is
the main SellerDeck stylesheet that contains all the styles needed to support the pages.
You can view the layout that generates this file by:
Clicking the 'Current Stylesheet' button in the 'Design' tab
Going to the 'Select Page Type' drop down list in the Design tab
Within the 'Web Page Outer Layout' group in the 'Layouts' tab of 'Design | Library'.
Themes introduced prior to version 11 all rely on the ‘Main Stylesheet’ layout. Later themes each
have a stylesheet layout of their own.
If you are ever editing a layout, and you see that there is a 'class=' or 'id=' value that you want to
look up in the stylesheet, you can right-click on that value and select 'Lookup in Stylesheet'.
You can include your own custom styles into the stylesheet layout – just add them right at the
bottom so they don't get overwritten by any of the default SellerDeck styles and classes.
Advanced Users Guide - 19
Other Default SellerDeck Style Information
You will also see some outer/overall layouts contain some embedded styles within the <head>
section. These are usually just a few trivial layout instructions that directly relate to code only
found within that layout.
Older themes use a file called 'theme.css' located within your site folder (usually 'Site1'). It is
included into the design with a '@import url("theme.css");' command at the top of the 'Main
Stylesheet' layout. This file contains information that relates to the current theme that is being used.
This file generally just controls the use of background images in sidebars and header areas, and
also the width of any sidebars.
Including Custom Stylesheets in SellerDeck
If you have got your own custom stylesheet that you want to use within SellerDeck, the best way to
include it is to save it within the site folder (usually Site1) and then include a link to it within the
<head> section of the overall/outer layouts you are using within SellerDeck. E.g.
<link href="my-custom-styles.css" rel="stylesheet" type="text/css">
Make sure this line goes AFTER the line containing the reference to 'actinic.css' or else you run the
risk of having your styles overwritten by the SellerDeck default ones.
Also, any custom css files MUST be saved within the site folder, you can't save them within a subfolder in the site folder.
It is also a good idea to include the file in the 'Additional Files' list in 'Design | Additional Files' as
this will make sure SellerDeck doesn't compact it when it uploads all the pages to the website.
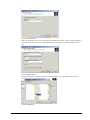
Editing Your Stylesheet in Dreamweaver
There are two ways you can edit your stylesheet in Dreamweaver. The first is to simply click the
'Edit Layout In Dreamweaver' button on the layout code toolbar in SellerDeck when you are editing
the stylesheet layout.
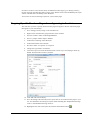
The second method allows you to permanently save the stylesheet layout as a *.css file on your PC
that can be edited at any time. The method for this is below.
1.
In Dreamweaver go to 'File | New' and create a new basic 'CSS' page.
2.
Save this page within your SellerDeck site folder (usually 'Site1') and call it 'sellerdeckstyles.css'.
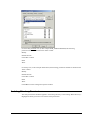
3.
Now go to SellerDeck and in the 'Design' tab, select 'Current Stylesheet' from the 'Select
Page Type' list.
4.
The current stylesheet layout should appear in the layout code window at the bottom.
Copy the entire contents of the layout to the clipboard.
5.
Now paste this content within your 'sellerdeck-styles.css' file and save your changes.
6.
Now in Dreamweaver go to 'SellerDeck | Register a Design with SellerDeck'.
7.
In the 'Register a Design with SellerDeck' window that appears, select ‘Stylesheet Layout’,
which is about three-quarters of the way down the list.
8.
In the 'Name of the new design' field, call it something like 'SellerDeck Styles'.
9.
Click 'Register'.
SellerDeck will not look any different, but now the ‘Stylesheet’ page will be using 'sellerdeckstyles.css' as its source.
Advanced Users Guide - 20
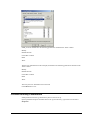
Custom CSS Files and the Dreamweaver Integration
If you are using the Dreamweaver integration to register a new custom design within SellerDeck,
you are probably going to have a *.css file for that design. Here are some tips for success in making
sure the Dreamweaver integration works correctly for you:
It is a good idea to save your *.html file (that you want to register with SellerDeck) within
the site folder (usually Site1). This will ensure that if you transfer your site via a snapshot
to a different PC, that the design and all the *.css and images will all appear correctly first
time.
Your custom *.css file needs to be saved at the same level as the *.html file. You cannot
have the *.css file within a sub-folder because SellerDeck has a hard time displaying all
the images in at *.css correctly in the built-in preview. You can keep all the images for
your design in sub-folders, but you need to make sure the *.css file is in the 'root' of your
design.
Advanced Users Guide - 21
Tips on Handing Over Designs to
Clients
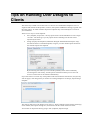
The easiest way to hand over an entire site to a client is via a standard 'Site Snapshot'. This is a
single file that includes all the products, sections, Site Options and Business Settings, together with
the entire Library. So when customers import this snapshot they will essentially have a clone of
your installation.
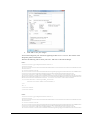
There are two ways to create snapshots:
'File | Snapshot | Export Site' - this zips up the entire current SellerDeck site into a single
*.acd file – but doesn't give you any options about controlling how this file will be
imported by the client.
'Design | Deploy Site Snapshot' (SellerDeck Designer and SellerDeck Enterprise only) –
this does the same as a standard snapshot, but gives you a few further options about how
the customer imports the snapshots.
By de-selecting 'All Orders' you can avoid the possibility of the client accidentally
overwriting their order history, and the options at the bottom mean you can close off
access to certain areas of the software automatically.
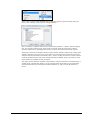
If you don't want to overwrite any of the products and sections that the customer has, and you only
want to supply a new design, then you need to use a 'Design Snapshot' via 'Design | Export Design
Snapshot'.
This will just take accross the design of your store (i.e. library elements, images used by the design,
colour scheme, Site Options settings etc.) and will leave all the content of the store alone.
Your clients can import this data by going to 'File | Snapshot | Import Design'.
Advanced Users Guide - 22
There is also an option within SellerDeck for sending the customer specific elements from your
library. This is 'Design | Export Specific Design Elements...'.
This is essentially a snapshot that will only contain library elements – it doesn't contain anything
else. You can keep clicking 'Next' on the wizard to send the client the entire library. When a
customer imports this, it will update their library, but leave the products and sections in place.
The thing to watch out for though is that this 'export specific elements' snapshot can contain layout
selectors, and when you import a new layout selector it resets all instances of that layout selector
within the Content Tree back to the 'Initial Value' - which is usually 'Use Parent'. So what it means
is that any products/sections that need a setting other than the default 'Top Level Value' set in the
library need to be manually set after the import.
The 'export specific elements' snapshot is most useful to send your clients the occasional layout or
variable to fix or update their design. You can click the 'Select None' button on any panel of the
wizard and then select just the layouts/variables/conditions etc. that you want the customer to
receive.
Advanced Users Guide - 23
Removing a Dreamweaver Design
from SellerDeck
When you use the Dreamweaver extension to apply a new design, you have to 'register' a design
with SellerDeck. Registering the design is pretty simple. Unregistering it, and deleting it, is a little
tricker.
The first thing to do is make sure you are not using the registered design anywhere within
SellerDeck. The quickest way to do this is to change to a default SellerDeck theme (using 'Design |
Themes') or, alterntatively, register another different design with SellerDeck using Dreamweaver.
You also need to make sure that the design you want to unregister is not used by any sections in the
store.
Then:
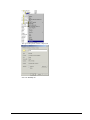
1.
Go to 'Settings | Site Options' and ensure that your external design is not selected within
the 'Receipt Page Layout' setting (in the 'Layout' panel).
2.
Next you need to go to 'Design | Library | Layouts' and go to the 'Web Page Outer Layout'
group.
3.
Double-click on the 'ReceiptPageLayout' layout selector. Set the 'Top Level Value' to
'Receipt Page Layout'.
4.
Double-click on the 'TermsAndConditionsPopupLayout' layout selector. Set the 'Top
Level Value' to 'Terms and Conditions Popup Page'.
5.
Locate your externally-registered layout that you want to remove within the 'Web Page
Outer Layout' group. Right-click on it and select 'Delete'.
The layout is now removed from SellerDeck.
.
Advanced Users Guide - 24
Section B – Layouts
General Advanced Tips
Making Sure Images in the CSS Appear Correctly
When you include an image in a stylesheet layout, or in another custom *.css file you are using,
make sure you include single quotes in the code e.g...
background-image: url(background.gif);
...will not work. But...
background-image: url('background.gif');
... will ensure the image is picked up by SellerDeck and will be uploaded and previewed correctly.
Hiding Code From The Preview
Sometimes you will have some code in your designs (e.g. an affiliate tracking scheme) that will
only work online, and may actually have an adverse effect on the performance of the preview.
If this is the case, it is possible hide it from appearing in the preview with a condition. The code
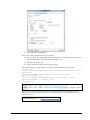
will then only be included in the store pages in the online store.
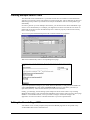
To do this, highlight the code you want to hide in the 'Layout Code' panel in the 'Design' tab, and
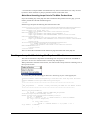
then click the 'Insert Condition' button (green 'C' with a '+').
Use the following condition:
Here is some code to copy and paste to create the condition:
<actinic:variable name="IsPreviewMode" /> == false
Advanced Users Guide - 25
Then click 'OK' and click 'Apply' in the 'Layout Code' panel, and the code should vanish from the
preview. It will be there in the online store though.
Including File Content Dynamically Online
If you want to include the content of a text file into your web pages, and the file only exists online
(not on your PC) then use a link for the following form within your SellerDeck layouts:
<a rel="fragment" href="http://your.URL/name-of-file.html">Alternate
text</a>
This will only work if the user has JavaScript enabled in their web browser. If they don't then the
'alternate text' will appear instead.
Creating PHP Functions
It is possible to include PHP expressions within the layouts in SellerDeck. These are only executed
on the desktop, i.e. you cannot create PHP functions to dynamically change things online, but they
still allow you to do a range of advanced customisations on your store data.
There are some example PHP functions elsewhere in this guide – to find them, search this guide
for: php="true"
To include a php expression into a layout, start the code with...
<actinic:block php="true">
...and finish it with...
</actinic:block>
When including a variable within a PHP function you need to right-click on it, select 'Edit
Appearance' and then 'Encoding' to 'Quoted Perl' and set 'Selectable' to 'False'.
encoding="perl" means that any line breaks, quotes etc. within the variable values that
might break the PHP expression will be encoded safely.
selectable="false" means that it cannot be selected in the 'Design' tab – this is essential as
the dotted lines that get placed around selected variables will break PHP expressions.
Within the 'SellerDeck' folder there is a file called 'actinic_main.php' which contains a set of PHP
functions that are referred to from within the SellerDeck default layouts. If you want to create your
own php functions and then refer to them from your layouts, do the following:
1.
Create a new file within the 'SellerDeck' folder called 'custom.php'.
2.
Add your new functions within 'custom.php'
3.
Place the following line within 'actinic_main.php':
include_once("custom.php");
Stripping Out File Paths from Variables
Sometimes when a filename variable is used in certain contexts, the entire filepath is displayed
online, instead of just the filename.
In other words, instead of:
image.gif
... what actually gets included in the code is:
Advanced Users Guide - 26
C:\My Documements\SellerDeck v11\Sites\Site1\image.gif
To avoid this, replace the variable in the code e.g.:
<actinic:variable name="VariableName"/>
...with the following PHP expression:
<actinic:block php="true">echo basename('<actinic:variable
name="VariableName"/>');</actinic:block>
Advanced List Functionality
A standard list of items in SellerDeck is created by inserting a 'list' layout into the design, and then
inserting a layout within the list.
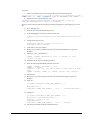
Here are some examples of how this appears in the Design Tree:
It is also possible within SellerDeck to insert layout code that you want listed, directly into a
layout, and then insert 'block' tags around this layout code to 'list' it - i.e. repeat the code however
many times is necessary.
Here's an example.
In the chapter called 'Including Brochure Pages in the Site Map' you are shown how to insert a list
of brochure pages into the site map bulk area. To do this, you have to create a new brochure link
layout, then create a new brochure page list layout, and then insert them both into the design.
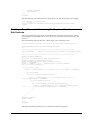
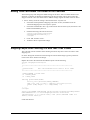
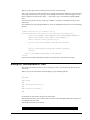
With these advanced list layouts, however, that is not necessary. All you need to insert into the
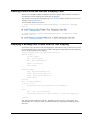
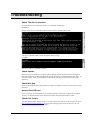
'Sitemap Page Bulk Area' layout is the following code:
<actinic:block type="BrochurePagesList">
<a href="<actinic:variable name="BrochurePageURL"
/>"><actinic:variable name="BrochureName" /></a>
<br />
</actinic:block>
This will include a basic list of brochure pages into the sitemap.
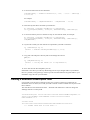
As a further example, this code will give you a list of all the sections in your store:
<actinic:block type="EntireSectionList">
<a href="<actinic:variable Name="SectionPageName"/>">
<actinic:variable Name="SectionName"/>
</a>
<br />
</actinic:block>
The crucial element in the <actinic:block> tag is the type= value. This tells SellerDeck what type
of list to draw.
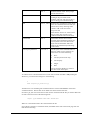
The full list of 'list types' is as follows:
BrochurePagesList – lists all the brochure pages in the store
Advanced Users Guide - 27
BrochureFragmentsList – lists all the fragments in the current brochure page
EntireSectionList – lists all the sections in the store
TopLevelSectionList – lists the top level sections in the store
ChildSectionList – lists all the sub sections within the current section
ParentSectionList – lists all the sections above the current section
ProductList – lists all the products within the current section
PriceList – lists all the prices for the product (when using quantity-dependent pricing)
ComponentList – lists all the components within the current product
AttributeList – lists all the attributes within the current product/component
ChoiceList – lists all the choices within the current attribute
PermutationList – lists all the permutations within the current component
PermutationChoiceList – lists all the choices that make up the current permutation
DayList – all the days that can be selected for a date info prompt
MonthList – all the months that can be selected for a date info prompt
YearList – all the years that can be selected for a date info prompt
ProductDiscountList – lists all the discounts for the current product
SectionDiscountsList – lists all the discounts for the current section
BestSellersList – lists all the best sellers in the store
NewProductsList – lists all the new products in the store
AlsoBoughtList – lists all the 'also bought' items for the current product
RelatedProductsList – lists all the related items for the current product
SearchPriceBandList – lists all the price bands on a search page
SearchPropertiesList – lists all the searchable property fields on a search page
SearchPropertyValueList – lists all the values within a searchable property field
CountryList – lists all the countries to choose from in the checkout
StateList – lists all the states to choose from in the checkout
CreditCardTypeList – lists all the different types of credit card to choose from
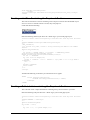
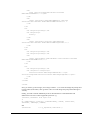
You can also use lists within lists, e.g. the following code will give you a basic product list
containing a list of component names and a list of attribute names:
<actinic:block type="ProductList" />
<b><actinic:variable name="ProductName" /></b> <br/>
<actinic:block type="ComponentList" />
<actinic:variable name="ComponentName" /> <br/>
<actinic:block type="AttributeList" />
<actinic:variable name="AttributeName" />
<br/>
</actinic:block>
</actinic:block>
</actinic:block>
Advanced Users Guide - 28
Variable Qualifiers
A 'Variable Qualifier' is a way of specifying exactly where you want data to come from, where
there is more than one choice for the data source.
There are three variable qualifiers:
MainBrochure - used in brochure page links to insert details about the current brochure
page.
MainSection - used in section links to insert details about the current section.
AssociatedProduct - used in permutation layouts to insert details about the associated
product.
Here is the format of a variable qualifier:
<actinic:variable name="VariableQualifier::VariableName"/>
Here are some examples of where to use them.
If you insert the following variable within a brochure page link layout, it will insert the name of the
current brochure page into the layout:
<actinic:variable name="MainBrochure::BrochureName" />
For example, if the list of brochure pages was displaying on a page called 'Home', the above
variable would be substituted for the text 'Home'.
The following variable will insert the ID of the current section into the section list:
<actinic:variable name="MainSection::SectionID" />
So if the section list was displaying within a section that had an ID of '5', the above variable would
be substituted for the number '5'.
Finally, you can enter almost any product variable into a permutation layout with the variable
qualifier of 'AssociatedProduct' and the details of the associated product will be shown in the
permutation layout. For example:
<actinic:variable name="AssociatedProduct::ProductName" />
... will insert the name of the associated product into the permutation layout.
Using an Email Link that is Invisible to Spammers
When you include a link of the format:
<a href="mailto:[email protected]">click to email us</a>
...it can be picked up by email address harvesters and used to build spam lists.
The following code will look the same to customers, but will protect your email address:
<script type=text/javascript>
var _u = "sales";
var _d = "domain.co.uk";
var _l = _u + "@" + _d;
var _m = "click to email us";
document.write("<a href='mailto:"+_l+"'>"+_m+"</a>");
</script>
Change the 'sales' and 'domain.co.uk' to your own email address.
Advanced Users Guide - 29
Inserting Your Own Custom Rollover Buttons
To insert your own custom navigation buttons, with image rollovers, you can recycle the code from
any of the existing navigation image layouts.
1.
Go to 'Design | Library | Layouts'.
2.
Locate the 'Navigation Icons' group and click on any layout in the list whose name ends in
'Image Navigation Button'.
3.
Right-click on this layout and select 'New Layout'. Call your new layout whatever you
want.
4.
Customise the code as you see fit.
Image navigation button layouts have the following format:
<a href="http://url.to.link.to/" target="_self"
onmouseover="SwapImage('image_name','rollover_image.gif')"
onmouseout="RestoreImage()"><img src="normal_image.gif" alt="Some
alternative text" border="0" name="image_name" /></a>
Substitute the placeholder values in there with real relevant values for you.
normal_image.gif - the normal button graphic
rollover_image.gif - the highlighted button graphic
image_name - a name for the image. Each button needs to have a unique name.
Stopping SellerDeck from Parsing Things in Square Brackets
This is quote a tecchy issue but it can be very frustrating if you don't understand what's happening.
If you place the following expression within a full description:
<input type="hidden" name="nlbox[1]" value="97">
SellerDeck will turn it into the following:
<input name="p" id="p" value="12" type="hidden"><input
name="nlbox<Actinic:Variable Name = '1'/>" value="97"
type="hidden">
The reason for this is SellerDeck turns [1] into a variable called '1'. The square brackets tell
SellerDeck to treat it like a variable.
To avoid this, just use spaces between the square brackets and the content e.g. [ 1 ]
<input type="hidden" name="nlbox[ 1 ]" value="97">
Restricting Object Display to Single-Item Pages
If you have a layout or variable that you don’t want shown on pages with multiple items, you can
enclose it in a simple condition to impose that restriction. This may be useful, for example, for the
tables showing Feefo product feedback, which can increase page load times significantly on pages
with multiple products. To limit the display to single item pages, find the variable (eg
‘FeefoProductFeedback’) in the Product Layout and wrap it in a condition as follows:
<actinic:block
if="%3cactinic%3avariable%20name%3d%22ListCount%22%20%2f%3e%20%3d%3d%201"
>
<actinic:variable name="FeefoProductFeedback" />
</actinic:block>
Advanced Users Guide - 30
This method can be used for any layout or variable within a section layout or brochure fragment list, or in
layouts that lie inside them, including product lists and product and fragment layouts.
NB. This method will prevent the item from showing on pages with more than one product, or more than one
fragment, or with both a product and a fragment.
Advanced Users Guide - 31
Section Pages
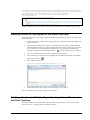
Taking People Straight to a Section
If you want to create a link to a section in a store, then use a link of the following form...
http://your.URL/cgibin/ss00000x.pl?SECTIONID=Section%5fPage%2ehtml&NOLOGIN=1
Where:
http://your.URL/cgi-bin is the URL of your CGI-BIN
ss00000x.pl is the name of your search script with the 'x' replaced with your CGI ID number
Section%5fPage%2ehtml is the filename of your desired page. Note that you have to encode
any non-alphanumeric characters so an underscore '_' becomes '%5f' and a full stop '.' becomes
'%2e'.
&NOLOGIN=1 is an essential thing to add to the end of the URL to order to bypass the login
page
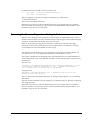
Linking from Other URLs
Note: If you are using this code from outside the 'acatalog' folder then you will need to include a
hidden form field of 'ACTINIC_REFERRER=' where the value is your 'Catalog URL' from 'Web |
Network Setup'. For example:
http://your.URL/cgibin/ss00000x.pl?PRODREF=12345&NOLOGIN=1&ACTINIC_REFERRER=http://your.URL/
acatalog/
and also
<INPUT TYPE=HIDDEN NAME="ACTINIC_REFERRER"
VALUE="http://your.URL/acatalog/">
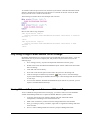
Optimising Page Titles For Search Engines
By default, SellerDeck will automatically create a page title for your section pages which is the
company name followed by the section name. You can overwrite this by enter a value in the 'Page
Title' field within the 'Page Settings' panel of a section. It is, however, possible to edit the
automatically generated page titles for all your sections.
To do this, you need to locate the <title></title> field within the overall page layout of your section
pages. This will contain a variable called PageTitle.
Replace the PageTitle variable with the following code:
<actinic:block
if="%3cactinic%3avariable%20name%3d%22PageType%22%20%2f%3e%20%3d%3d%20%27
Section%27"><actinic:block
if="%3cactinic%3avariable%20name%3d%22SectionLevel%22%20%2f%3e%20%3e%200"
><actinic:variable name="SectionName" />, <actinic:variable
name="CompanyName" /></actinic:block><actinic:block
if="%3cactinic%3avariable%20name%3d%22SectionLevel%22%20%2f%3e%20%3d%3d%2
00"><actinic:variable name="CompanyName"
/></actinic:block></actinic:block><actinic:block
if="%3cactinic%3avariable%20name%3d%22PageType%22%20%2f%3e%20%3d%3d%20%27
Brochure%27"><actinic:variable name="BrochureName" />, <actinic:variable
name="CompanyName" /></actinic:block><actinic:block
Advanced Users Guide - 32
if="%28%3cactinic%3avariable%20name%3d%22PageType%22%20%2f%3e%20%21%3d%20
%27Section%27%29%20AND%20%28%3cactinic%3avariable%20name%3d%22PageType%22
%20%2f%3e%20%21%3d%20%27Brochure%27%29" ><actinic:variable
name="PageType" />, <actinic:variable name="CompanyName"
/></actinic:block>
All the conditions (green 'block' tags) are there to show different titles on different types of pages.
Inserting Content to Only Appear on the Store Front Page
If you want a message or an image to appear on the front page of the store, but no other page, then
do the following:
1.
Change the preview to show the front page of the store. This is the 'Online Catalogue' icon
in the content tree.
2.
Select the 'Main Product Area Layout' in the 'Design' tab. This will be called something
like 'Standard Section Page' or 'Section Page With Section Name At The Top'. The easiest
way to do this is to click on anything in the main part of a section page and then keep
pressing the 'Navigate to Parent Layout' button -
- until the correct layout is selected.
3.
Insert your content that you only want to appear on the front page.
4.
Once you have got it looking correct, highlight all the content and press the 'Insert Block'
button on the toolbar -
5.
.
The condition to enter is:
<actinic:variable name="SectionLevel" /> == 0
6.
Click 'OK' and then click 'Apply' to save the changes to your layout.
Your content will now only appear on the store front page.
Splitting a Section into Multiple Pages: Creating Links to 'Previous'
and 'Next' Sections
SellerDeck allows you to include links to 'previous' and 'next' sections (i.e. sections at the same
level in the store – sometimes known as 'sibling sections').
Advanced Users Guide - 33
To include a link to the previous section, insert the layout selector called 'PrevNextSectionLink'
and use a fixed layout of 'Link To Previous Section'. For the link to the next section, the fixed
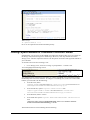
layout you want to use is 'Link To Next Section'.
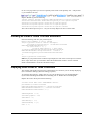
The following screenshot shows some example code to do this:
Here is some code to copy and paste:
<div style="float: left;">
<actinic:variable name="PrevNextSectionLink" value="Link to Previous
Section" />
</div>
<div style="float: right;">
<actinic:variable name="PrevNextSectionLink" value="Link to Next
Section" />
</div>
Only Using a Single Parent Section List in a Design
By default, SellerDeck has two 'parent section lists' (breadcrumb trails) in the design – a top one
and a bottom one. If you want to simplify this, and just have one parent section list, use the
following steps.
1.
Go to 'Design | Library | Layouts' and expand the 'Parent Section Lists' group.
2.
Double-click on the 'ParentSectionListBottom' layout selector and de-select 'Site' under
'Place of Setting'.
3.
Click 'OK' and close the library.
4.
Now click on the 'bottom' parent section link in the preview in the 'Design' tab.
5.
Click the 'Navigate To Parent Layout' button - until you are in the 'Section Page'
layout (called something like 'Standard Section Page' or 'Section Page With Section Name
At The Top').
6.
You can now delete the 'ParentSectionListBottom' layout selector. If you want, you can
replace it with 'ParentSectionListTop'.
Having Different Background Colours on Different Pages
To have a different background colour on each page, you need to create a new user-definable
variable called 'BackgroundColor' to replace the default 'BGColor' system variable.
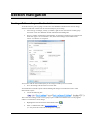
1.
To do this, first of all go into 'Design | Themes' and click 'Advanced Themes
Configuration', and change to the 'Colour Scheme' tab.
2.
Make a note of whatever you have set for the background colour at the moment
3.
Next, go to 'Design | Library | Variables', right-click on 'Appearance Settings' and select
'New Variable'.
4.
Give it a name of 'BackgroundColor' and use a prompt of 'Background Color'.
Advanced Users Guide - 34
5.
Under 'Place of Setting', select 'Site', 'Section' and 'Brochure' and set the 'Panel Name' to
'General'.
6.
In 'Top Level Value', enter whatever you have got set as the background colour e.g. 'white'
or '#ffffff'.
7.
Click 'OK' and close the library.
You now need to insert this variable into your overall page layouts for your sections and brochure
pages.
8.
View a section in the 'Design' tab.
9.
Select the overall page layout for the page.
10. Locate the <body... > tag.
11. Add in the following line within the <body> tag:
style="background-color: <actinic:variable name="BackgroundColor" />;"
You should now be able to change the background colour for each section by changing the
'Background Color' value in the 'General' panel of each section.
To apply this to brochure pages, just edit the overall page layout of a brochure page.
Note: some themes use <div> tags to control the background colour of the main area of the page
separately from the body background. For example, in the 'Executive' look out for this line:
<div class="page_body" align="center">
Add the style= command into this line to see the effect.
Have Every Navigation Button Appearing on Every Page
There are some rules on the default SellerDeck navigation bars to control which navigation button
appears on which page.
Advanced Users Guide - 35
If you want to remove these rules, and have all buttons on all pages, then just go to 'Design |
Library | Layouts' and expand the 'Navigation Bars' group.
Double-click on the navigation bar layout you want to edit.
Remove every green 'block' tag you see there EXCEPT the ones around the 'Up A Level'
navigation icon.
You will now have every navigation button appearing on all pages.
Preventing Search Engines from Indexing Certain Pages
As you may know, search engines will 'spider' through all your pages on your website and make a
note of the content of each page. This is great for your store pages, as customers can search on
words that are on your pages, but there may be certain pages in your store that you do not want
search engines finding.
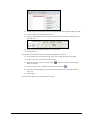
1.
Go into the 'Layout' panel that of the section that you want hide from search engines.
2.
Locate the 'Overall Page Layout' field and make a mental note of the name of the current
overall page layout.
3.
Click in the 'Overall Page Layout' field and select '<New>' from the bottom of the list.
4.
In the 'Based On' field, select the overall page layout that is currently being used by the
section.
5.
In the 'Name' field enter 'Hidden From Search Engines'.
6.
Click 'OK' and then click 'Apply' to make this section use the new layout.
7.
Now change to the 'Design' tab and select the overall page layout.
8.
Within the <head> section of the layout, enter the following line:
<META NAME="robots" CONTENT="none">
You can now specify this file as the overall page layout for any pages that you do not want indexed.
Advanced Users Guide - 36
Section Navigation
Creating a Rollover for your Section Links
To do this exercise, you are going to create a new user-definable variable for the rollover image,
and then include this variable into the section link layout you are using.
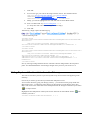
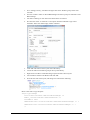
1.
First of all, go to 'Design | Library | Variables', right-click on the 'Section' variable group
and create a new user definable variable called and 'SectionImageAlt'.
2.
Give it a prompt of 'Alternative Section Image', set the 'Place of Setting' to be 'Section' and
make sure 'Type' is set to 'Filename'. Also, select 'Allow Empty Value' and de-select
'Allow <Use Parent> as an Option'.
You can now edit the section link layout you are using to include your new variable.
3.
Go to the 'Design' tab and click on a section link.
You should have selected a layout called something like 'Image on Left Section Link' or 'CSS
Section Link Layout'.
4.
Locate the following line:
This is the current image code. You are going to put a condition around this line so it only appears
if there is no alternative section image.
5.
Highlight this line and click the 'Insert Block' button -
6.
Enter a condition that reads: SectionImageAlt == ""
(i.e. 'only show this code if SectionImageAlt is empty').
Advanced Users Guide - 37
7.
Click 'OK'.
8.
You can now type your code for the image with the rollover. This should look like:
<img src="SectionImageFileName" alt="SectionName"
onMouseOver="src='SectionImageAlt' "
onMouseOut="src='SectionImageFileName' " border="0">
9.
Finally, you need to highlight this new code and click the 'Insert Block' button.
10. Insert a condition that says: SectionImageAlt != ""
(i.e. 'Only show this code if SectionImageAlt is not empty').
11. Click 'OK'.
Alternatively, simply replace the following tag:
...with the following code:
<actinic:block
if="%3cactinic%3avariable%20name%3d%22SectionImageAlt%22%20%2f%3e%20%3d%3
d%20%22%22">
<img alt="<actinic:variable name="SectionName"/>"
src="<actinic:variable Name="SectionImageFileName"/>" border="0" />
</actinic:block>
<actinic:block
if="%3cactinic%3avariable%20name%3d%22SectionImageAlt%22%20%2f%3e%20%21%3
d%20%22%22">
<img src="<actinic:variable name="SectionImageFileName" />"
alt="<actinic:variable name="SectionName" />"
onMouseOver="src='<actinic:variable name="SectionImageAlt" />' "
onMouseOut="src='<actinic:variable name="SectionImageFileName" />' "
border="0">
</actinic:block>
Now try entering an image filename into the 'Alternative Section Image' field in the 'Properties'
panel. You should find that the section image changes when you move your mouse over it.
Hiding Top Level Section Links from the Sitemap
This exercise will show you how to prevent any links to top level sections from appearing in the
Site Map.
First of all you need to get into the layout called 'Site Map Section List'.
You can either do this by going into 'Design | Library' – you will find it in the group called 'Site
Map Section Lists' - or change the 'Select Page Type' drop down list in the 'Design' tab to 'Site
Map'. Then click on one of the links in the sitemap and click the 'Navigate to Parent Layout' button
-
- a couple of times.
Highlight the 'Site Map Section Link' layout selector and click the 'Insert Block' button condition you want is:
. The
<actinic:variable name="SectionLevel" /> > 2
Advanced Users Guide - 38
Click 'OK' to implement the rule.
The top level section links will now be hidden from the sitemap.
Using a different Section Name in the Breadcrumb Trail
Sometimes, you might want to have more specific control over what appears in your breadcrumb
trail (parent section list) at the top and bottom of each page.
If you want to show something other than the section name in the breadcrumb trail, then you just
need to create a new variable at the section level called 'BreadCrumbName'. To do this:
1.
Go to 'Design | Library | Variables' and expand the 'Section' group.
2.
Right-click on the 'Section' group name and select 'New Variable'.
3.
Give it a name of 'BreadCrumbName' and a prompt of 'Name for Breadcrumb Trail'
4.
Under 'Place of Setting' select 'Section'.
5.
De-select 'Allow <Use Parent> as an option'
6.
Leave 'Panel Name' as 'Properties'
7.
Leave both 'Initial Value' and 'Top Level Value' as empty
Advanced Users Guide - 39
8.
Now go to the 'Layouts' tab of the library and expand the 'Parent Section List Entry' group.
9.
In all the layouts you see there, replace the 'SectionName' variable with the following
code:
<actinic:variable encoding="actinic" name="SectionName"
if="%3cactinic%3avariable%20name%3d%22BreadCrumbName%22%20%2f%3e%2
0%3d%3d%20%22%22" /><actinic:variable name="BreadCrumbName" />
You can now enter a 'Name for Breadcrumb Trail' within the 'Properties' panel of your
sections.
How to Only Show Certain Sections in the Top Level Section List
This will show you how to manually select which sections will appear in the 'top level section list'
that is in the sidebar of most of the SellerDeck designs.
1.
Go to 'Design | Library' and go to the 'Variables' tab.
2.
Right click on the 'Section' group and select 'New Variable'
3.
Give the variable a name of 'ShowInSidebar'.
4.
Give it a prompt of 'Show Section in Sidebar'.
5.
Under 'Place of Setting' select 'Section'.
6.
Under 'Panel Name' select 'General'.
Advanced Users Guide - 40
7.
De-select 'Allow <Use parent> as an Option'
8.
Change the 'Type' field to 'True/False'.
9.
Leave the 'Top Level Value' and 'Initial Value' to 'True' if you want all sections shown by
default. Set them both to 'False' if you don't.
10. Click 'OK' and close the library.
11. Go to the 'Design' tab and in the preview pane click on one of the sections in your top
level section list. You should now be looking at a layout called 'Section Name Only
Section Link'.
12. Double click on the block if at the top of the layout code.
13. You should now be in the Condition Editor. Change the condition to:
<actinic:variable name="IsSectionIncludedInSiteMap" /> AND
<actinic:variable name="ShowInSidebar" />
You can just copy and paste the code straight into the editor.
14. Click 'OK' and then click 'Apply' to confirm your changes.
You can now go into the 'General' panel of any section that you don't want in the top level section
list in the sidebar, and change 'Show Section In Sidebar' to 'False'.
Highlighting the 'Current' Section in the Section List
This technique will show you how to include a section list in the store where the 'current' section
(i.e. the one the customer is currently on) is highlighted. In this case it is made a different colour,
Advanced Users Guide - 41
but you can adapt this code as required. This technique uses the 'Advanced Lists' as described
earlier in this guide.
Copy and paste the following code into your layouts where you want the section list to appear:
<actinic:block type="TopLevelSectionList" >
<a href="<actinic:block
if="%3cactinic%3avariable%20name%3d%22IsLoginPageSuppressed%22%20%2f%3e%20AND%0d%3
cactinic%3avariable%20name%3d%22UnregCustomersAreNotAllowed%22%20%2f%3e"
><actinic:variable name="SectionPageName" /></actinic:block><actinic:block
if="%28%3cactinic%3avariable%20name%3d%22IsLoginPageSuppressed%22%20%2f%3e%20%3d%3
d%20false%29%20OR%0d%28%3cactinic%3avariable%20name%3d%22UnregCustomersAreNotAllow
ed%22%20%2f%3e%20%3d%3d%20false%29" ><actinic:variable name="SectionURL"
/></actinic:block>" target="_self">
<actinic:block
if="%3cactinic%3avariable%20name%3d%22SectionID%22%20%2f%3e%20%3d%3d%20%3cactinic%
3avariable%20name%3d%22MainSection%3a%3aSectionID%22%20%2f%3e"><span style="color:
green;"><strong></actinic:block>
<actinic:variable name='SectionName'/>
<actinic:block
if="%3cactinic%3avariable%20name%3d%22SectionID%22%20%2f%3e%20%3d%3d%20%3cactinic%
3avariable%20name%3d%22MainSection%3a%3aSectionID%22%20%2f%3e"><<</strong></
span></actinic:block>
</a>
<br />
</actinic:block>
It will look like this once you've copied and pasted it in:
And the results will look something like:
You'll need to adapt this code to get it looking as you need it – look at the two block if tags above
and below the SectionName variable. They are what changes the formatting of the link in specific
sections.
It is possible to adapt this trick to keep the section highlighted even if you go into a sub-section
within the section.
To do this, you first need to create a new user definable variable called 'SectionNumber' as follows:
1) Go to 'Design | Library | Variables'.
2) Right-click on 'Section' and select 'New Variable'.
3) In the 'Name' field, enter 'SectionNumber'.
4) In the 'Prompt' field, enter 'Section Number'.
5) Under 'Place of Setting' select 'Section'.
Advanced Users Guide - 42
6) Now go to your first main top-level section in the content tree and change to the
'Properties' panel.
7) Set the value of 'Section Number' as '1'.
8) Repeat this for all your other main top-level sections, using a different number
for each section.
9) Now use the following code for the section list:
<actinic:block type="TopLevelSectionList" >
<a href="<actinic:block
if="%3cactinic%3avariable%20name%3d%22IsLoginPageSuppressed%22%20%2f%3e%20AND%0d%3
cactinic%3avariable%20name%3d%22UnregCustomersAreNotAllowed%22%20%2f%3e"
><actinic:variable name="SectionPageName" /></actinic:block><actinic:block
if="%28%3cactinic%3avariable%20name%3d%22IsLoginPageSuppressed%22%20%2f%3e%20%3d%3
d%20false%29%20OR%0d%28%3cactinic%3avariable%20name%3d%22UnregCustomersAreNotAllow
ed%22%20%2f%3e%20%3d%3d%20false%29" ><actinic:variable name="SectionURL"
/></actinic:block>" target="_self">
<actinic:block
if="%3cactinic%3avariable%20name%3d%22SectionNumber%22%20%2f%3e%20%3d%3d%20%3cacti
nic%3avariable%20name%3d%22MainSection%3a%3aSectionNumber%22%20%2f%3e" ><span
style="color: green;"><strong></actinic:block>
<actinic:variable name='SectionName'/>
<actinic:block
if="%3cactinic%3avariable%20name%3d%22SectionNumber%22%20%2f%3e%20%3d%3d%20%3cacti
nic%3avariable%20name%3d%22MainSection%3a%3aSectionNumber%22%20%2f%3e"
><<</strong></span></actinic:block>
</a>
<br />
</actinic:block>
Section List With Sub Sections In Bullets
This code can be used on any page, and will give a list of the main sections, and any sub-sections
will be listed in a bulleted list underneath the main section heading.
<actinic:block type="EntireSectionList">
Advanced Users Guide - 43
<actinic:block
if="%3cactinic%3avariable%20name%3d%22SectionLevel%22%20%2f%3e%20%3d%3d%2
01" >
<br /><strong><a href="<actinic:variable name="SectionPageName"/>"
target="_self"><actinic:variable name='SectionName'/></a></strong>
</actinic:block>
<actinic:block
if="%28%3cactinic%3avariable%20name%3d%22SectionLevel%22%20%2f%3e%20%3d%3
d%202%29%20AND%20%28%3cactinic%3avariable%20name%3d%22ListIndex%22%20%2f%
3e%20%3d%3d%201%29" >
<ul>
</actinic:block>
<actinic:block
if="%3cactinic%3avariable%20name%3d%22SectionLevel%22%20%2f%3e%20%3d%3d%2
02">
<li><a href="<actinic:variable name="SectionPageName"/>"
target="_self"><actinic:variable name='SectionName'/></a></li>
</actinic:block>
<actinic:block
if="%28%3cactinic%3avariable%20name%3d%22SectionLevel%22%20%2f%3e%20%3d%3
d%202%29%20AND%20%28%3cactinic%3avariable%20name%3d%22ListIndex%22%20%2f%
3e%20%3d%3d%20%3cactinic%3avariable%20name%3d%22ListCount%22%20%2f%3e%29"
>
</ul>
</actinic:block>
</actinic:block>
Jump List Containing Every Section
The following code will include a jump list into the site that contains every section in the store,
with indents showing the depth of section.
<select size="1" name="ACT_droplstbox"
onClick="if(options[selectedIndex].value)
window.location.href=(options[selectedIndex].value)">
<option value="" selected="selected">Select a section</option>
<actinic:block type="EntireSectionList" >
<option value="<actinic:block
if="%3cactinic%3avariable%20name%3d%22IsLoginPageSuppressed%22%20%2f%3e%2
0AND%0d%3cactinic%3avariable%20name%3d%22UnregCustomersAreNotAllowed%22%2
0%2f%3e" ><actinic:variable name="SectionPageName"
/></actinic:block><actinic:block
if="%28%3cactinic%3avariable%20name%3d%22IsLoginPageSuppressed%22%20%2f%3
e%20%3d%3d%20false%29%20OR%0d%28%3cactinic%3avariable%20name%3d%22UnregCu
stomersAreNotAllowed%22%20%2f%3e%20%3d%3d%20false%29" ><actinic:variable
name="SectionURL" /></actinic:block>">
Advanced Users Guide - 44
<actinic:block
if="%3cactinic%3avariable%20name%3d%22SectionLevelIsGreaterThan1%22%20%2f
%3e"> </actinic:block>
<actinic:block
if="%3cactinic%3avariable%20name%3d%22SectionLevelIsGreaterThan2%22%20%2f
%3e"> </actinic:block>
<actinic:block
if="%3cactinic%3avariable%20name%3d%22SectionLevelIsGreaterThan3%22%20%2f
%3e"> </actinic:block>
<actinic:block
if="%3cactinic%3avariable%20name%3d%22SectionLevelIsGreaterThan4%22%20%2f
%3e"> </actinic:block>
<actinic:block
if="%3cactinic%3avariable%20name%3d%22SectionLevelIsGreaterThan5%22%20%2f
%3e"> </actinic:block>
<actinic:block
if="%3cactinic%3avariable%20name%3d%22SectionLevelIsGreaterThan6%22%20%2f
%3e"> </actinic:block>
<actinic:block
if="%3cactinic%3avariable%20name%3d%22SectionLevelIsGreaterThan7%22%20%2f
%3e"> </actinic:block>
<Actinic:Variable Name="SectionName">
</option>
</actinic:block>
</select>
Different Sections in Different Parts of the Page
This technique uses 'Advanced Lists' to include two different section lists into the page – with each
one containing different section links.
Before you can insert the design code to support this, you need to create a new variable within
SellerDeck called 'WhichSectionList'. To do this:
1.
Go to 'Design | Library | Variables'.
2.
Expand the 'Section' group and then right-click on any variable and select 'New Variable'
3.
Give it a name of 'WhichSectionList' and a prompt of 'Where do you want this section link
to appear?'
4.
Set 'Place of Setting' to 'Section' and leave the 'Panel' as 'Properties'.
5.
Change the 'Type' to 'List of Choices'.
6.
Change to the 'Values' tab, and click the 'New' button to create two choices of 'List 1' and
'List 2'.
7.
Change back to the 'Basic Definition' tab.
8.
Check 'Initial Value' is set to 'Use Parent ()' and 'Top Level Value' is set to 'List 1'.
Advanced Users Guide - 45
9.
Click 'OK' to save your changes.
You can then categorise your sections as appearing in either 'List 1' or 'List 2'. This is done in the
'Properties' panel of each section.
Then use the following code to insert your 'List 1' and 'List 2' code into the design.
List 1:
<actinic:block type="TopLevelSectionList" >
<actinic:block
if="%3cactinic%3avariable%20name%3d%22WhichSectionList%22%20%2f%3e%20%3d%3d%20%22L
ist%201%22" >
<a href="<actinic:block
if="%3cactinic%3avariable%20name%3d%22IsLoginPageSuppressed%22%20%2f%3e%20AND%0d%3
cactinic%3avariable%20name%3d%22UnregCustomersAreNotAllowed%22%20%2f%3e"
><actinic:variable name="SectionPageName" /></actinic:block><actinic:block
if="%28%3cactinic%3avariable%20name%3d%22IsLoginPageSuppressed%22%20%2f%3e%20%3d%3
d%20false%29%20OR%0d%28%3cactinic%3avariable%20name%3d%22UnregCustomersAreNotAllow
ed%22%20%2f%3e%20%3d%3d%20false%29" ><actinic:variable name="SectionURL"
/></actinic:block>" class="product_section">
<Actinic:Variable Name="SectionName"/>
</a>
<br />
</actinic:block>
</actinic:block>
List 2:
<actinic:block type="TopLevelSectionList" >
<actinic:block
if="%3cactinic%3avariable%20name%3d%22WhichSectionList%22%20%2f%3e%20%3d%3d%20%22L
ist%202%22" >
<a href="<actinic:block
if="%3cactinic%3avariable%20name%3d%22IsLoginPageSuppressed%22%20%2f%3e%20AND%0d%3
cactinic%3avariable%20name%3d%22UnregCustomersAreNotAllowed%22%20%2f%3e"
><actinic:variable name="SectionPageName" /></actinic:block><actinic:block
if="%28%3cactinic%3avariable%20name%3d%22IsLoginPageSuppressed%22%20%2f%3e%20%3d%3
Advanced Users Guide - 46
d%20false%29%20OR%0d%28%3cactinic%3avariable%20name%3d%22UnregCustomersAreNotAllow
ed%22%20%2f%3e%20%3d%3d%20false%29" ><actinic:variable name="SectionURL"
/></actinic:block>" class="product_section">
<Actinic:Variable Name="SectionName"/>
</a>
<br />
</actinic:block>
</actinic:block>
Including Section Lists with Javascript
SellerDeck has the ability to generate a JavaScript array file (with an extension of *.js) that
contains information about all the top-level sections, or the entire section tree complete with subsections. This section information is in the form of 'array' data. This file is uploaded with the store
pages, and can be used to generate drop-down lists, list boxes and other more advanced navigation
tools to help your customers to jump to their desired sections of the store. The advantage of using
this external file is that it can be used by web pages that are located outside the store, so that a list
of all the store sections can be incorporated into any web page. This list will be automatically
updated by SellerDeck as you make changes to the structure of the online store.
The list of all the layouts available to perform this function, with a description of what they do, the
JavaScript file they cause to generate and the HTML they include in the page, is below. You will
find all the layouts within the 'JavaScript Section List' group in the library, and they are all inserted
into the design via the 'JavaScriptArray' layout selector.
There are some examples of how to incorporate this code at the bottom of this section.
Layout:
Description:
Code inserted
into design:
Layout:
Description:
All Data From Top Level Sections
Will cause the generation of a JavaScript file called Act_sections.js that
contains all the names, URLs, image filenames, image heights and widths
and section IDs* of the top-level sections of the online store. Also creates
the HTML in the store to incorporate that file.
<script type="text/javascript" src="Act_sections.js"></script>
All Data From All Sections
Will cause the generation of a JavaScript file called Act_section_tree.js that
contains all the names, URLs, image filenames, image heights and widths
and section IDs* for every section of the online store. Also creates the
Advanced Users Guide - 47
Code inserted
into design:
Layout:
Description:
Code inserted
into design:
Layout:
Description:
Code inserted
into design:
Layout:
Description:
Code inserted
into design:
Layout:
Description:
Code inserted
into design:
Layout:
Description:
Code inserted
into design:
Layout:
Description:
Code inserted
into design:
Layout:
Description:
Code inserted
into design:
Layout:
HTML in the store to incorporate that file.
<script type="text/javascript" src="Act_section_tree.js"></script>
Name Data From All Sections
Will cause the generation of a JavaScript file called
Act_section_tree_names.js that contains all the names for every section of
the online store. Also creates the HTML in the store to incorporate that file.
<script type="text/javascript" src="Act_section_tree_names.js"></script>
URL Data From All Sections
Will cause the generation of a JavaScript file called
Act_section_tree_URLs.js that contains all the URLs for every section of
the online store. Also creates the HTML in the store to incorporate that file.
<script type="text/javascript" src="Act_section_tree_URLs.js"></script>
Image Name Data From All Sections
Will cause the generation of a JavaScript file called
Act_section_tree_images.js that contains all the image filenames for every
section of the online store. Also creates the HTML in the store to
incorporate that file.
<script type="text/javascript" src="Act_section_tree_images.js"></script>
Image Width Data From All Sections
Will cause the generation of a JavaScript file called
Act_section_tree_imagewidths.js that contains all the image widths for
every section image in the online store. Also creates the HTML in the store
to incorporate that file.
<script type="text/javascript"
src="Act_section_tree_imagewidths.js"></script>
Image Height Data From All Sections
Will cause the generation of a JavaScript file called
Act_section_tree_imageheights.js that contains all the image heights for
every section image in the online store. Also creates the HTML in the store
to incorporate that file.
<script type="text/javascript"
src="Act_section_tree_imageheights.js"></script>
ID Data From All Sections
Will cause the generation of a JavaScript file called Act_section_tree_ids.js
that contains all the section IDs* for every top-level section in the online
store. Also creates the HTML in the store to incorporate that file.
<script type="text/javascript" src="Act_section_tree_ids.js"></script>
Name Data From Top Level Sections
Will cause the generation of a JavaScript file called Act_sections_names.js
that contains all the names for every top-level section of the online store.
Also creates the HTML in the store to incorporate that file.
<script type="text/javascript" src="Act_sections_names.js"></script>
URL Data From Top Level Sections
Advanced Users Guide - 48
Description:
Code inserted
into design:
Layout:
Description:
Code inserted
into design:
Layout:
Description:
Code inserted
into design:
Layout:
Description:
Code inserted
into design:
Layout:
Description:
Code inserted
into design:
Will cause the generation of a JavaScript file called Act_sections_URLs.js
that contains all the URLs for every top-level section of the online store.
Also creates the HTML in the store to incorporate that file.
<script type="text/javascript" src="Act_sections_URLs.js"></script>
Image Name Data From Top Level Sections
Will cause the generation of a JavaScript file called Act_sections_images.js
that contains all the image filenames for every top-level section of the
online store. Also creates the HTML in the store to incorporate that file.
<script type="text/javascript" src="Act_sections_images.js"></script>
Image Width Data From Top Level Sections
Will cause the generation of a JavaScript file called
Act_sections_imagewidths.js that contains all the image widths for every
top-level section image in the online store. Also creates the HTML in the
store to incorporate that file.
<script type="text/javascript" src="Act_sections_imagewidths.js"></script>
Image Height Data From Top Level Sections
Will cause the generation of a JavaScript file called
Act_sections_imageheights.js that contains all the image heights for every
top-level section image in the online store. Also creates the HTML in the
store to incorporate that file.
<script type="text/javascript" src="Act_sections_imageheights.js"></script>
ID Data From Top Level Sections
Will cause the generation of a JavaScript file called Act_sections_ids.js that
contains all the section IDs* for every top-level section in the online store.
Also creates the HTML in the store to incorporate that file.
<script type="text/javascript" src="Act_sections_ids.js"></script>
There is also a layout type group called 'JavaScript Sub Section Lists' which contains the following
layouts:
List Of All Data From Sub Sections
List Of Name Data From Sub Sections
List Of URL Data From Sub Sections
List Of Image Name Data From Sub Sections
List Of Image Width Data From Sub Sections
List Of Image Height Data From Sub Sections
List Of ID Data From Sub Sections
They are all inserted into the design via the 'JavaScriptSubSectionArray' layout selector.
These perform the same function as the layouts already described (creating a JavaScript array
containing the section details) but these insert the information about the sub-sections within the
current section. In other words, the section information they contain will depend on what section
page they are being used within. These placeholders work differently as they will actually embed
the JavaScript array into the page when the pages are generated. They do not cause the creation of
an external JavaScript file.
Advanced Users Guide - 49
* A section ID is a unique number associated with every section in the online store. They are used
by forms to allow customers to jump to particular sections in the online store.
Note About Inserting Jump Lists In The Main Product Area
If you are including any of the 'jump lists' below within the main product area of a page, you will
need to precede the code with the following line:
</form>
and then copy and paste the following lines after the form code:
<actinic:block if="%3cactinic%3avariable%20name%3d%22IsMainFormUsed%22%20%2f%3e">
<form method="post" action="<actinic:variable name="OnlineScriptURL"
value="Shopping Cart Script URL" />">
<input type="hidden" name="SID" value="<Actinic:Variable
Name="SectionID"/>" />
<input type="hidden" name="PAGE" value="PRODUCT" />
<input type="hidden" name="PAGEFILENAME" value="<actinic:variable
name="SectionPageName" />" />
<Actinic:SECTION blob='<Actinic:Variable Name="SectionCatFile"/>'/>
<input type="hidden" name="RANDOM" value="<actinic:variable name="Random"
/>" />
<actinic:block
if="%3cactinic%3avariable%20name%3d%22IsHostMode%22%20%2f%3e">
<!-- Hidden field when in trial mode -->
<input type="hidden" name="SHOP" value="<Actinic:Variable
Name="HiddenFields"/>" />
</actinic:block>
</actinic:block>
This is to ensure the continuation of the main store page form either side of the jump list.
Creating a Jump List Containing the Top-Level Sections
This exercise will insert a drop-down list containing a list of top-level sections into the HTML of
your store. As soon as a customer selects a section, they will jump to it.
When presented to customers in the browser, the code becomes a drop-down list containing a list of
the top-level sections.
To include this, paste the following just above the </head> tag of your overall page layout:
<actinic:variable name="JavaScriptArray" value="All Data From Top Level Sections"
/>
<SCRIPT LANGUAGE="JavaScript" TYPE="text/javascript">
<!-/***********************************************************************
*
* ACT_DropListBox returns a string containing the HTML for the SELECT listbox
*
************************************************************************/
function ACT_DropListBox(ar)
{
var strIDs = '<SELECT SIZE="1" NAME="ACT_droplstbox"
onClick="if(options[selectedIndex].value)
window.location.href=(options[selectedIndex].value)">'
var sel = " SELECTED"
strIDs += '<OPTION ' + sel + ' VALUE="">Select a Section</OPTION>'
for (var i=1;i<=ar.length;i++)
{
if (ar[i].sURL !=null)
{
strIDs += '<OPTION VALUE="' + ar[i].sURL + '">' +
ar[i].sName + '</OPTION>'
}
}
Advanced Users Guide - 50
strIDs+='</SELECT>'
return strIDs
}
//-->
</SCRIPT>
Paste the following code within your store design where you want the drop-down list to appear.
<form name="Act_SectionDroplist">
<script
language=Javascript1.1>document.write(ACT_DropListBox(sections))</script>
</form>
Creating a Drop-Down List Containing the Top-Level Sections and
Sub Sections
This exercise will insert a drop-down list containing a list of sections and subsections (to three
levels of depth) into the HTML of your store. As soon as a customer selects a section, they will
jump to it.
Paste the following code just above the </head> tag in your overall page layout:
<actinic:variable value="All Data From All Sections" name="JavaScriptArray" />
<SCRIPT LANGUAGE="JavaScript" TYPE="text/javascript">
<!-/***********************************************************************
*
* ACT_DropListBox returns a string containing the HTML for the SELECT listbox
*
************************************************************************/
function ACT_DropListBox(ar)
{
var strIDs = '<SELECT SIZE="1" NAME="ACT_droplstbox"
onClick="if(options[selectedIndex].value)
window.location.href=(options[selectedIndex].value)">';
var sel = " SELECTED"
strIDs += '<OPTION ' + sel + ' VALUE="">Select a Section</OPTION>';
for (var i=1;i<=ar.length;i++)
{
if (ar[i].sURL !=null)
{
strIDs += '<OPTION VALUE="' + ar[i].sURL + '">' + ar[i].sName + '</OPTION>';
{
if (ar[i].pChild)
{
for (var j=1;j<=ar[i].pChild.length;j++)
{
strIDs += '<OPTION VALUE="' + ar[i].pChild[j].sURL + '">' + '- ' +
ar[i].pChild[j].sName + '</OPTION>';
{
if (ar[i].pChild[j].pChild)
{
for (var k=1;k<=ar[i].pChild[j].pChild.length;k++)
{
strIDs += '<OPTION VALUE="' + ar[i].pChild[j].pChild[k].sURL +
'">' + '- - ' + ar[i].pChild[j].pChild[k].sName + '</OPTION>';
}
}
}
}
}
}
}
}
strIDs+='</SELECT>'
return strIDs
}
//-->
</SCRIPT>
Then paste the following code where you want the drop-down list to appear.
Advanced Users Guide - 51
<form name="Act_SectionDroplist">
<script
language=Javascript1.1>document.write(ACT_DropListBox(section_tree))</script>
</form>
Creating a List Box Containing the Top-Level Sections
This exercise will insert a list box containing a list of top-level sections into the HTML of your
store. As soon as a customer selects a section, they will jump to it.
It will look like the following:
Place the following function just above the </head> tag in your overall page layout..
<actinic:variable name="JavaScriptArray" value="All Data From Top Level Sections"
/>
<SCRIPT LANGUAGE="JavaScript" TYPE="text/javascript">
<!-//ACT_ListBox(ar)
//ar= Section array name, returns a string containing the HTML for the SELECT
listbox.
function ACT_ListBox(ar)
{
var strIDs = '<SELECT SIZE="' + ar.length + '" NAME="ACT_lstbox"
onClick="if(options[selectedIndex].value)
window.location.href=(options[selectedIndex].value)">'
var sel = ' SELECTED'
for (var i=1;i<=ar.length;i++)
{
strIDs += '<OPTION ' + sel + ' VALUE="' + ar[i].sURL + '">' + ar[i].sName +
'</OPTION>'
sel = ''
}
strIDs+='</SELECT>'
return strIDs
}
//-->
</script>
And then the following code where you want the list box to appear:
<FORM>
<script language=Javascript1.2>
document.write(ACT_ListBox(sections) + "<BR>")
</script>
</FORM>
Creating a Bulleted List containing the Top-Level Sections
This code will create a simple bulleted list containing the top-level sections in your store.
Paste the following code just above the </head> tag in your overall page layout.
<actinic:variable name="JavaScriptArray" value="All Data From Top Level Sections"
/>
<SCRIPT LANGUAGE = JavaScript>
<!-function BulletList(pItem)
{
var strIDs = '<ul>';
{
for (var i = 1; i <= pItem.length; i++)
{
Advanced Users Guide - 52
strIDs += '<li><a href=' + pItem[i].sURL + '>'+ pItem[i].sName + '</a></li>';
}
}
strIDs += '</UL>'
return strIDs
}
-->
</SCRIPT>
And then insert the following code in the main body of the page where you want the bulleted list to
appear.
<script language=Javascript1.2>
document.write(BulletList(sections))
</script>
Creating a List of Hyperlinks with Sections and Sub-sections
This code will lay out your sections and sub-sections within a list of hyperlinks (first depth of subsections only). The sub-sections will appear indented.
Paste the following code just above the </head> tag in your overall page layout:
<actinic:variable value="All Data From All Sections" name="JavaScriptArray" />
<SCRIPT LANGUAGE="JavaScript" TYPE="text/javascript">
<!-function SectionList(ar)
{
var strIDs = '<table border=0 width=95% cols=2>';
for (var i=1;i<=ar.length;i++)
{
if (ar[i].sURL !=null)
{
strIDs += '<tr><td colspan=2><a href="' + ar[i].sURL + '"><span
class="actxxsmall">' + ar[i].sName + '</span></a></td></tr>';
{
if (ar[i].pChild)
{
for (var j=1;j<=ar[i].pChild.length;j++)
{
if (j <= ar[i].pChild.length)
{
strIDs += '<tr><td><img src=shim.gif width=5></td><td><a href="' +
ar[i].pChild[j].sURL + '"><span class="actxxsmall">' + ar[i].pChild[j].sName +
'</span></a></td></tr>';
}
}
}
}
}
}
strIDs += '</table>'
return strIDs
}
//-->
</SCRIPT>
And then insert the following code in the main body of the page where you want the list to appear.
<script language=Javascript1.1>document.write(SectionList(section_tree))
</script>
Creating a List of Hyperlinks with Sections and Two Levels of Subsections
This code will lay out your sections and two levels of sub-sections within a list of hyperlinks. The
sub-sections will appear indented.
Paste the following code just above the </head> tag in your overall page layout:
Advanced Users Guide - 53
<actinic:variable value="All Data From All Sections" name="JavaScriptArray" />
<SCRIPT LANGUAGE="JavaScript" TYPE="text/javascript">
<!-function SectionList(ar)
{
var strIDs = '<table border=0 width=95% cols=2>';
for (var i=1;i<=ar.length;i++)
{
if (ar[i].sURL !=null)
{
strIDs += '<table><tr><td colspan=2><a href="' + ar[i].sURL + '"><span
class="actxxsmall">' + ar[i].sName + '</span></a></td></tr></table>';
{
if (ar[i].pChild)
{
for (var j=1;j<=ar[i].pChild.length;j++)
{
strIDs += '<table><tr><td><img src=shim.gif width=5></td><td><a href="' +
ar[i].pChild[j].sURL + '"><span class="actxxsmall">' + ar[i].pChild[j].sName +
'</span></a></td></tr></table>';
{
if (ar[i].pChild[j].pChild)
{
for (var k=1;k<=ar[i].pChild[j].pChild.length;k++)
{
strIDs += '<table><tr><td width="20"></td><td><a href="' +
ar[i].pChild[j].pChild[k].sURL + '"><span class="actxxsmall">' +
ar[i].pChild[j].pChild[k].sName + '</span></a></td></tr></table>';
}
}
}
}
}
}
}
}
strIDs += '</table>'
return strIDs
}
//-->
</SCRIPT>
and this bit to go into the main body:
<script language=Javascript1.1>document.write(SectionList(section_tree))
</script>
Creating a Section List (With Sub-Sections) in 2 Columns
This code will lay out your sections and two levels of sub-sections within a list of hyperlinks. The
sub-sections will appear indented.
Paste the following code just above the </head> tag in your overall page layout:
<actinic:variable value="All Data From All Sections" name="JavaScriptArray" />
<SCRIPT LANGUAGE="JavaScript" TYPE="text/javascript">
<!-function SectionList(ar)
{
var col = 1;
var strIDs = '<table width="100%"><tr><td valign=top width="50%">';
for (var i=1;i<=ar.length;i++)
{
if (ar[i].sURL !=null)
{
strIDs += '<a href="' + ar[i].sURL + '"><span class="actxsmall">' +
ar[i].sName + '</span></a><br>';
{
if (ar[i].pChild)
Advanced Users Guide - 54
{
for (var j=1;j<=ar[i].pChild.length;j++)
{
if (j <= ar[i].pChild.length)
{
strIDs += '<a href="' + ar[i].pChild[j].sURL + '"><span
class="actxxsmall">' + ar[i].pChild[j].sName + '</span></a><br>';
}
}
}
}
if ( col == 1 )
{
strIDs += '</td><td valign=top width="50%">';
col++;
}
else
{
strIDs += '</td></tr><tr><td valign=top width="50%">';
col = 1;
}
}
}
if ( col == 1 ) strIDs += '</td><td>';
return strIDs + '</td></tr></table>';
}
//-->
</SCRIPT>
and this bit to go into the main body:
<script language=Javascript1.1>document.write(SectionList(section_tree))
</script>
Listing Sub-Sections Within Each Main Section
This code will create a list of sections and sub-sections (first depth of sub-sections only) into your
store in the following style:
First Section
Subsection 1, Subsection 2
Second Section
Sub section 1, Subsection 2, Subsection 3
Paste the following code just above the </head> tag in your overall page layout:
<actinic:variable value="All Data From All Sections" name="JavaScriptArray" />
<SCRIPT LANGUAGE="JavaScript" TYPE="text/javascript">
<!-function YahooSections(ar)
{
var strIDs = '';
for (var i=1;i<=ar.length;i++)
{
if (ar[i].sURL !=null)
{
strIDs += '<a href="' + ar[i].sURL + '"><span class="actregular">' +
ar[i].sName + '</span></a><br>';
{
if (ar[i].pChild)
{
for (var j=1;j<=ar[i].pChild.length;j++)
{
if (j < ar[i].pChild.length)
{
strIDs += '<a href="' + ar[i].pChild[j].sURL + '"><span
class="actxsmall">' + ar[i].pChild[j].sName + '</span></a>, ';
}
Advanced Users Guide - 55
else
{
strIDs += '<a href="' + ar[i].pChild[j].sURL + '"><span
class="actxsmall">' + ar[i].pChild[j].sName + '</span></a>, ...';
}
}
}
}
strIDs += '<br><br>'
}
}
return strIDs
}
//-->
</SCRIPT>
And then insert the following code in the main body of the page where you want the list to appear.
<script language=Javascript1.2>
document.write(YahooSections(section_tree))
</script>
Inserting a List of Section Images With JavaScript
This section will insert your top-level section images in a list, one underneath the other. When a
customer clicks on a section image they will be taken into that section.
Paste the following code just above the </head> tag in your overall page layout:
<actinic:variable value="All Data From Top Level Sections" name="JavaScriptArray"
/>
<SCRIPT LANGUAGE = JavaScript>
<!-function ImageList(pItem)
{
var strIDs = '';
{
for (var i = 1; i <= pItem.length; i++)
{
strIDs += '<a href=' + pItem[i].sURL + '><img src="' + pItem[i].sImage + '"
alt="'+ pItem[i].sName + '" width=' + pItem[i].nImageWidth + ' height=' +
pItem[i].nImageHeight + ' border=0></a><br>';
}
}
return strIDs
}
-->
</SCRIPT>
And then insert the following code in the main body of the page where you want the image list to
appear.
<script language=Javascript1.2>
document.write(ImageList(sections))
</script>
NB this method does not work on the site home page.
Including a SellerDeck-Generated Jump List Anywhere on the Internet
Any of the preceding examples should work anywhere on the Internet, with the following
conditions.
Obviously the SellerDeck variables layouts will not be substituted on other pages, so you will need
to include the fully generated call to the *.js file – including full path information. For example:
<script language="JavaScript" src="Act_section_tree.js"></script>
Advanced Users Guide - 56
…will not work as it refers to a local file called 'Act_section_tree.js'. What will work are the
following examples:
<script language="JavaScript
src="../acatalog/Act_section_tree.js"></script>
or
<script language="JavaScript
src="http://your.URL/acatalog/Act_section_tree.js"></script>
You also need to include the code contained within actiniccore.js and actinicextras.js. In other
words, also include lines of the following form:
<script language="JavaScript" src="../acatalog/actiniccore.js"></script>
or
<script language="JavaScript"
src="http://your.URL/acatalog/actiniccore.js"></script>
and
<script language="JavaScript"
src="../acatalog/actinicextras.js"></script>
or
<script language="JavaScript"
src="http://your.URL/acatalog/actinicextras.js"></script>
These lines must be ABOVE any other script functions in the headers of your web site pages.
Advanced Users Guide - 57
Marketing
Only Displaying Certain Products in the Marketing Lists
This tip allows you to generate a long best sellers or new products list (e.g. with 20 products) but
then only show a few of them within the store pages (e.g. the top 6).
To do this:
Within SellerDeck, select the list you want to edit. This might be called something like 'New
Products List With Horizontal Dividers' or 'Sidebar Best Sellers List'. You can find these in the
library within either the 'Best Sellers List' group or the 'New Products List' group.
Highlight all the code within this list and click the 'Insert Block' button Enter the following expression:
This will mean only the first 6 products are shown.
Click 'OK' when done.
You can vary the expression as required. For example, the following code will show products 7-15:
Thanks to John at www.bikster.co.uk for this solution.
Using the 'Thumbnail' Image in the 'Mini' Item Layouts
The items in the best sellers list, new products list, also bought list and related items list all have a
'Mini' item layout. This includes the name, price and description of the product, and also includes a
small version of the product image.
Advanced Users Guide - 58
By default, the layout just uses the standard product image scaled down – but it is possible to use
the image specified in the actual 'Thumbnail' product field instead.
To do this, click on the 'Mini' layout that you want to edit.
Locate the following code:
Replace all three lines with the following:
<actinic:block
if="%28%3cactinic%3avariable%20name%3d%22ProductImageFileName%22%20%2f%3e
%20%21%3d%20%22%22%29%20AND%20%28%3cactinic%3avariable%20name%3d%22Produc
tThumbnailImageFileName%22%20%2f%3e%20%3d%3d%20%22%22%29" >
<img src="<actinic:variable name="ProductImageFileName" />" width="75"
alt="<actinic:variable name="ProductName" />" />
</actinic:block>
<actinic:block
if="%3cactinic%3avariable%20name%3d%22ProductThumbnailImageFileName%22%20
%2f%3e%20%21%3d%20%22%22" >
<img src="<actinic:variable name="ProductThumbnailImageFileName" />"
alt="<actinic:variable name="ProductName" />" />
</actinic:block>
Apply the changes to the layout.
The layout will now use the 'Thumbnail' image, if available.
Changing the Configuration of the ‘Recently Viewed Products’ List
Through the user interface you can change the layout of the ‘Recently Viewed Products’ list, and a
few other settings. But there are a few other things you can adjust by changing settings in the
Javascript configuration.
Firstly, go to 'Design | Library | Layouts' and scroll down to the 'Recent Products' group.
Click on the '+' icon next to 'Recent Products' and double-click on 'Recent Products List –
Configuration Details' to open the Javascript configuration file.
Now you can make a few changes.
1.
To reduce the number of items stored in the list, find this statement:
var nMaxRecent
= 12;
and change '12' to a lower number. We do not recommend storing more than 12, because of
limitations on cookie size.
Advanced Users Guide - 59
2.
To create overlap when scrolling through the list, so that the last product in the first list page
appears as the first product in the next, find this statement:
var nScrollBy
= RecentProductsShowCount;
and change it to:
var nScrollBy
3.
= RecentProductsShowCount-1;
To reverse the order of filling the list, so that the most recent product is added to the right
instead of to the left, find the following statement:
var bDisplayReversed = true;
and change it to:
var bDisplayReversed = false;
4.
To change the length of time for which the list is remembered, find the following statement:
var nKeepRecentHours = 12;
and change '12' to the length of time you want, in hours.
Click 'OK' and then 'Close' to save your changes.
Enable Automatic Resubmission of the Google Product Feed
The SellerDeck Google Product Feed enables you to submit your products to Google Product
Search. Normally, your feed needs to be re-uploaded to Google each time you change the contents
of your online catalogue. However, the need for this can be removed by using Google’s Merchant
Center tools and making a few small changes in SellerDeck.
Firstly, you need to generate your Google Product Feed and have it uploaded to your web site. To
do this, follow these steps.
1.
Select 'Export Google Product Search Data Feed' from the 'Marketing' menu.
2.
Click 'Browse', make sure your Site folder is selected, and enter a File name such as
'GoogleProducts.txt'.
3.
Click 'Save' and then 'OK'. This generates the feed.
4.
Now select 'Additional Files' from the 'Design' menu.
5.
Click 'Add', click on the file you just saved, and click 'Open'.
6.
Click 'OK'.
This will make SellerDeck upload the file automatically to your 'acatalog' folder or equivalent.
Next, you will need to set up a Google Account if you do not already have one. This is free to do,
and you can find the registration page by searching on Google for 'Google Account'. If you are
using Google Adwords or Google Mail then you have a Google Account already, and you can log
into it using the same username and password.
To register your feed, do the following. The exact steps are subject to change by Google, but are
correct at the time of writing. You will still need to export your feed manually when you make
changes, but SellerDeck will then upload it and Google will regularly spider it automatically.
1.
Log in to your Google Account and click on 'Merchant Center' in the 'My products' list.
2.
Click on 'Data feeds' in the left-hand sidebar, the click the 'New Data Feed' button.
3. Enter the Date feed file name, eg 'GoogleProducts.txt' if you followed the example above.
4.
On the page you are then taken to, click the 'Create' button.
5.
Enter the location of the file in the format 'http://yoururl.com/acatalog/'.
6.
Click 'Save Changes'.
Advanced Users Guide - 60
Products
Taking People Straight to a Product
It is possible to take people straight to a specific product with a hyperlink of the following form:
http://your.URL/cgi-bin/ss00000x.pl?PRODREF=12345&NOLOGIN=1
Where:
http://your.URL/cgi-bin is the URL of your CGI-BIN
ss00000x.pl is the name of your search script with the 'x' replaced with your CGI ID number
12345 is the product reference of your desired product.
&NOLOGIN=1 is an essential thing to add to the end of the URL to order to bypass the login
page
Linking from Other URLs
Note: If you are using this code from outside the 'acatalog' folder then you will need to include a
hidden form field of 'ACTINIC_REFERRER=' where the value is your 'Catalog URL' from 'Web |
Network Setup'. For example:
http://your.URL/cgibin/ss00000x.pl?PRODREF=12345&NOLOGIN=1&ACTINIC_REFERRER=http://your.URL/
acatalog/
Only Displaying the First Ten Words of the Full Description
It is possible to include a PHP statement which only displays the first 10 words of the full
description in the store pages. This is useful if you are displaying a compact version of the product,
and don't want the full description to appear.
Simply click on the product description (in the 'Design' tab) that you want to shorten.
Then locate the 'ProductDescription' variable in the layout code.
Highlight that variable and replace it with the following code:
<actinic:block php="true" >
$sShort = "";
$nCount = 0;
$sOriginal = '<actinic:variable encoding="perl" name="ProductDescription"
selectable="false" />';
foreach(explode(" ", $sOriginal) as $sWord)
{
if ($nCount > 10)
{
$sShort .= "...";
break;
}
$sShort .= $sWord . " ";
Advanced Users Guide - 61
$nCount++;
}
echo $sShort;
</actinic:block>
Different Cart Button Text for Each Product
This technique will allow you to enter different text for the cart button for each product in your
store.
1.
Go to 'Design | Library | Variables' and expand the 'Product' group.
2.
Double-click on the 'CartButtonText' variable.
3.
Under 'Place of Setting' select 'Section' and 'Product'.
4.
Change 'Panel Name' to 'Properties'.
5.
Select 'Allow <Use Parent> as an Option'.
6.
Set 'Initial Value' to 'Use Parent()'.
7.
Click 'OK'.
You will now be able to edit the text on the cart buttons in the 'Properties' panel of each product, or
set the defaults for an entire section within the 'Properties' panel of a section.
Selecting Quantity From A Drop-Down
This technique will replace the usual text field for entering a product quantity on the product page,
with a drop-down list for customers to select how many they want.
Advanced Users Guide - 62
Go to a store page where you can see a 'Quantity' field. Click on the 'Quantity' text – and just after
it, you should see this line:
Replace HTML tag with the following:
<select name="Q_<Actinic:Variable Name="ProductID"/>"><option selected
value="<Actinic:Variable Name="DefaultQuantity"/>">1</option><option
value="2">2</option><option value="3">3</option><option
value="4">4</option><option value="5">5</option><option
value="6">6</option><option value="7">7</option><option
value="8">8</option><option value="9">9</option></select>
This code contains options up to '9' – but you can easily adapt it for more or fewer items.
Including an 'Email A Friend' Link into SellerDeck
Enter the following code into your product layout:
Enter e-mail address to tell a friend
<input type=text value="" size=40 onchange="
var thisloc=location.href + '%23<Actinic:Variable
Name="EncodedProductAnchor"/>';
if (this.value != '') {
location.href='mailto:' + this.value
+'?subject=Take%20a%20look%20at%20<Actinic:Variable
Name="ProductName"/>&body=I%20saw%20' + thisloc +
'%20and%20thought%20you%20would%20be%20interested.'
}
">
<input type=button value="OK">
NB If any of your product names contains an apostraphe, this will cause a Javascript error with the
above script. In this case you will need to delete the ProductName variable <Actinic:Variable
Name="ProductName"/> from the code before using it.
Displaying Store Prices In Three Currencies
This solution will display a third currency alongside the two currencies you are already displaying
(this is enabled in 'Settings | Business Settings | Options').
To insert the third currency, simply click on a price in the 'Design' tab. You should highlight a
layout called something like 'Product Price Including Tax' or 'Product Price Excluding Tax'.
Replace the code in the layout with the following:
<actinic:block PHP='true' SELECTABLE='false'>
priceformat('<actinic:variable
name="SecondCurrencyFormat"/>','<Actinic:Variable
Name="TaxExclusivePrice"/>', '<actinic:variable
name="TaxExclusivePriceAlt" />');
$nExchangeRate = 2.5;
$sCurrencySymbol = "$";
$nDecimals = 2;
$sDecimalSep = ".";
$sThousandsSep = ",";
echo "/ ";
Advanced Users Guide - 63
formattedcurrency($nExchangeRate * <actinic:variable encoding="perl"
name="ProductPriceRaw" selectable="false" />, $nDecimals, $sDecimalSep,
$sThousandsSep, $sCurrencySymbol);
</actinic:block>
Please note that this technique doesn't work with quantity-dependent prices.
Automatically Calculate Savings based on an RRP
This technique will calculate a saving on prices based on the value of 'RRP' – a custom variable
that you will need to create.
It will display as follows within your product layouts.
RRP: £10.00 – you save 8%
To do this:
1.
Create a new variable called 'RRP' based on the instructions in the main help:
'Understanding Variables > Adding a New Variable'. It needs to have a type of 'Number'
rather than 'Text'.
2.
Enter some RRP values for your products. Remember to NOT include a currency symbol.
3.
Copy and paste the following code into your product layout(s) wherever you want the
price saving message to appear.
<actinic:block php="true">
$rrp = <actinic:variable name="RRP" selectable="false" />;
$rawprice = <actinic:variable name="ProductPriceRaw" selectable="false" />;
$rawprice = $rawprice * 1.2;
// add in vat if showing VAT inc prices
// only display is we have an RRP and there's a saving to show
if ( ($rrp != 0) && ($rrp > $rawprice) )
{
$savepercent = round((($rrp - $rawprice) / $rrp) * 100);
echo "RRP £$rrp - you save $savepercent%";
}
</actinic:block>
4.
Apply changes and check the results in the preview.
There are several areas where you can tweak this code.
o
Use a currency other than pounds by amending the '£' just before where it says '£$rrp'
o
If you use a tax rate other than VAT at 20% then you can amend the line that talks about
'add in vat if showing VAT inc. prices'. If you don't charge tax at all you can safely delete
this line.
With thanks to Norman Rouxel (http://www.drillpine.biz/) for this solution.
Creating a Rollover for your Add to Cart Button
This exercise will create a new user-definable variable called 'AltCartButtonImage' and a new
layout for the 'add to cart button', which includes rollover code.
Advanced Users Guide - 64
1.
Go to 'Design | Library | Variables' and right-click on the 'Product' group. Select 'New
Variable'.
2.
Give the variable a name of 'AltCartButtonImage' and enter a prompt of 'Alternative Cart
Button Image'.
3.
Set 'Place of Setting' as 'Site' and set the 'Panel Name' as 'General'.
4.
De-select the 'Allow <Use Parent> as an Option' checkbox and under 'Type' select
'Filename'. Select the 'Allow Empty Values' checkbox.
5.
Click 'OK' and switch to the 'Layouts' tab of the library.
6.
Locate the 'Add to Cart Button' group at the top of the library.
7.
Right-click on 'Add To Cart Button Image' layout and select 'New Layout'.
8.
Call it 'Rollover Add To Cart Button' and click 'OK'.
9.
Now edit the code of the layout, and change it to look like the following:
Here's some code to copy and paste:
<input type="image"
src="<actinic:variable name="CartButtonImage" />"
name="_<actinic:variable name="ProductID" />"
alt="Add to Cart"
onMouseOver="src='<actinic:variable name="AltCartButtonImage" />' "
onMouseOut="src='<actinic:variable name="CartButtonImage" />' "
/>
Advanced Users Guide - 65
10. Click 'OK' and then close the library.
You can now go to 'Settings | Site Options | General' and enter a filename for 'Alternative Cart
Button Image'. Then all you need to do is change the 'Add To Cart Button Layout' to 'Rollover Add
To Cart Button' and you will have a working cart button with rollovers.
Reversing the Order of Years in the Date Prompt
This fix will change the order of the years that are listed within the 'Date Prompt' drop down list –
and show the current year first (rather than showing the last year first).
1.
Go to 'Design | Library | Layouts' and open the 'Year List' group.
2.
Edit the 'Standard Year List' layout.
3.
Replace the line:
4.
with the following code
<actinic:block php="true">
echo " ";
$dates[] = '<Actinic:Variable Name="YearLayout" encoding="perl"
selectable="false" />';
</actinic:block>
5.
Next, click the orange "Click here to edit list layout settings" text and select the 'Edit
Rows and Columns' tab.
6.
Delete the text in Middle Rows > First Item > Before
7.
Delete the text in Middle Rows > First Item > After
8.
Set No of Items > Last Row to be '1'
9.
In Last Row > Before Row add the code
<actinic:block php="true"> $dates = array_reverse($dates);
foreach($dates as $thisdate) { echo "<option>$thisdate</option>";
} $dates = array(); </actinic:block>
Advanced Users Guide - 66
10. Click 'OK' and close and save the layout.
Now the years appear reversed.
Allowing Ordering of Out of Stock Products
By default, SellerDeck suspends ordering for items that are out of stock. To prevent this you can
set the ‘Default “Suspend if Below”’ value in Business Settings | Options | Stock Control /
Monitoring to a large negative number, eg -999. However in this case SellerDeck will add this to
the stock level that it displays on the site – the stock level displayed will be the number for which
orders will be accepted, not the number actually held in stock.
To prevent this you need to change some of the Layouts in Design | Library.
1.
In the ‘Javascript Header Functions’ section, open the ‘Standard Javascript Header
Functions’ layout and paste the following code at the very end, after the link to the Google
Analytics Tracking Code:
<script language="javascript" type="text/javascript">
/******************************************************************
*****
*
* getSectionStockSuspend - Call our server script to determine the
real time stock
*
levels of the products in the given section
*
When the page is previewed from the desktop (within EC) we
do not want to make
*
server calls for RTS levels. Therefore in this case we are
passing in the
*
list of stock monitored products and their offline stock
level in sProdRefs and
*
sStockList parameters.
*
* Input:
sURL - the ajax script URL to call
*
sSID - the section ID list to be passed in to
the ajax script
*
sProdRefs - list of the products with stock
monitoring on in this section
*
sStockList - the stock level of the products
in the list above
*
sSuspendLevel - current suspend offset of the
products in the list
*
*
SellerDeck handle negative suspend levels by adding them to
the stock level
*
this code removes the compensation from the displayed value.
In order to handle
*
multiple negative suspend values, this code accepts an array
of suspend levels.
*
*
The suspend levels always come from the page not from the
server.
*
*******************************************************************
*****/
function getSectionStockSuspend(sURL, sSID, sProdRefs, sStockList,
sSuspendLevel)
{
var mapStockByRef = {};
var mapStockByLevel = sSuspendLevel;
//
// In case of preview use passed in data
//
if (sURL.indexOf("file://") == 0)
{
var arrProds = sProdRefs.split("|");
var arrStock = sStockList.split("|");
for (var i = 0; i < arrProds.length; i++)
{
Advanced Users Guide - 67
var aRef = arrProds[i].split("!");
var sKey = aRef[aRef.length - 1];
mapStockByRef[sKey] = arrStock[i];
}
updateStockDisplayLevel(mapStockByRef,mapStockByLevel);
}
else
{
var ajaxRequest = new ajaxObject(sURL);
ajaxRequest.callback = function (responseText)
{
mapStockByRef = responseText.parseJSON();
updateStockDisplayLevel(mapStockByRef,mapStockByLevel);
}
ajaxRequest.update("ACTION=GETSECTIONSTOCK&SID="+sSID, "GET");
}
}
/******************************************************************
*****
*
* updateStockDisplayLevel - dynamically update the DOM tree
depending on stock levels
*
* Input:
mapStockByRef - product ref to stock level map
*
mapStockByLevel - offeset to compensate for
suspend setting
*
*******************************************************************
*****/
function updateStockDisplayLevel(mapStockByRef,mapStockByLevel)
{
//
// For each product reference set the stock level and
enable/disable
// the controlling DIV tags in the page source
//
var arrStockElems= getStockNodes();
for (var nIndex = 0; nIndex < arrStockElems.length; nIndex++)
{
var aRef = arrStockElems[nIndex].id.split("_");
var sProdRef = aRef[aRef.length - 1];
var sIDStart = arrStockElems[nIndex].id.substring(0,
arrStockElems[nIndex].id.length - sProdRef.length - 1);
if (mapStockByRef[sProdRef] != null)
{
// single value passed from web page.
var iStockLevel = mapStockByRef[sProdRef] mapStockByLevel;
//
// The stock level
//
if (sIDStart == 'StockLevel')
{
if ( iStockLevel <= 0)
{
iStockLevel = 0;
}
arrStockElems[nIndex].innerHTML = iStockLevel;
}
//
// Out of stock
//
if (sIDStart == 'EnableIfOutOfStock')
{
if (iStockLevel <= 0)
{
arrStockElems[nIndex].style.visibility =
"visible";
Advanced Users Guide - 68
arrStockElems[nIndex].style.display =
"inline";
}
else
{
arrStockElems[nIndex].style.visibility =
"hidden";
arrStockElems[nIndex].style.display =
"none";
}
}
if
(sIDStart == 'RemoveIfOutOfStock')
{
if (iStockLevel <= 0)
{
arrStockElems[nIndex].innerHTML = "";
}
}
//
// In stock
//
if (sIDStart == 'EnableIfInStock')
{
if (iStockLevel > 0)
{
arrStockElems[nIndex].style.visibility =
"visible";
arrStockElems[nIndex].style.display =
"inline";
}
else
{
arrStockElems[nIndex].style.visibility =
"hidden";
arrStockElems[nIndex].style.display =
"none";
if
}
}
(sIDStart == 'RemoveIfInStock')
{
if (iStockLevel > 0)
{
arrStockElems[nIndex].innerHTML = "";
}
}
//
// Generic flag to indicate ajax call went fine
//
if (sIDStart == 'EnableIfStockOk')
{
arrStockElems[nIndex].style.visibility =
"visible";
arrStockElems[nIndex].style.display =
"inline";
}
}
}
}
</script>
2.
Next open the ‘Display Stock Quantities’ layout in the ‘Real Time Stock Display’ section
and replace the existing code with the following:
<!-- The code below is automatically enabled/disabled by js
depending on RTS -->
<actinic:block
if="%3cactinic%3avariable%20name%3d%22RealTimeStockEnabled%22%20%2f
%3e%20%26%26%20%3cactinic%3avariable%20name%3d%22DisplayRealStockLe
vel%22%20%2f%3e" >
Advanced Users Guide - 69
<span id="RemoveIfOutOfStock_<actinic:variable
name="ProductReference" selectable="false" />" class="ActinicRTS" >
<span id="EnableIfStockOk_<actinic:variable
name="ProductReference" selectable="false" />" class="ActinicRTS"
style="visibility: hidden; display: none;">
<span id="StockLevel_<actinic:variable
name="ProductReference" selectable="false" />" class="ActinicRTS"
style="display: inline;"></span> in stock.
</span>
</span>
<span id="EnableIfOutOfStock_<actinic:variable
name="ProductReference" selectable="false" />" class="ActinicRTS"
style="visibility: hidden; display: none;">
<strong><span class="actrequired"><br /><Actinic:Variable
Name="OutOfStock"/></span></strong>
</span>
</actinic:block>
3.
Thirdly, open the ‘Javascript Section Stock Query’ layout in the 'Javascript Section Stock
Query' section, and replace the existing code with the following:
<actinic:block
if="%3cactinic%3avariable%20name%3d%22PageType%22%20%2f%3e%20%3d%3d
%20%22Section%22" >
<actinic:block
if="%3cactinic%3avariable%20name%3d%22RealTimeStockEnabled%22%20%2f
%3e%20%26%26%20%3cactinic%3avariable%20name%3d%22DisplayRealStockLe
vel%22%20%2f%3e" >
<script language="javascript" type="text/javascript">
function displayStock()
{
var sProdRefs = "";
var sStockList = "";
var sSuspendLevel = "1000";
<actinic:block
if="%3cactinic%3avariable%20name%3d%22IsPreviewMode%22%20%2f%3e" >
sProdRefs = "<actinic:variable
name="RTSProductsInThisSection" selectable="false" />";
sStockList = "<actinic:variable
name="RTSStocksInThisSection" selectable="false" />";
</actinic:block>
getSectionStockSuspend('<actinic:variable
name="StockScriptCGIURL" selectable="false" />', '<actinic:variable
name="SectionID" selectable="false" />', sProdRefs,
sStockList,sSuspendLevel);
}
AttachEvent(window, "load", displayStock);
</script>
</actinic:block>
</actinic:block>
NB if you use a figure other than -999 for the Default “Suspend if Below”’ value, you will
need to change the figure of 1000 in the above code accordingly.
4. Finally, you need to allow the ‘Add to Cart’ button for out of stock products. To do this,
go to the Design tab and click the ‘Split View’ toolbar button. Click on a Section page in
the Design or Content Tree, then click on the ‘Add to Cart’ button in the preview. In the
Layout Code window, find the following lines in the ‘Add to Cart’ button layout (normally
the first and the last), and delete them:
<span id="RemoveIfOutOfStock_<actinic:variable
name="ProductReference" selectable="false" />" class="ActinicRTS" >
and
</span>
Advanced Users Guide - 70
If you make these changes we recommend also changing the ‘Out of Stock’ message in Design
Text to something more friendly, such as ‘Available Soon’.
Disclaimer: This code was provided by a SellerDeck user via the SellerDeck Community
(http://community.sellerdeck.com/) and so can't be supported by the SellerDeck Technical Support
team.
Advanced Users Guide - 71
Product Images
Automatically Rescale Your Product Images to a Certain Size
This is a handy PHP expression that will dynamically rescale your product images and display
them in their new size. This resizing happens on the desktop PC, and the new files will be uploaded
to the store with the other image files. The names of the new image files will all start with 't_'.
In order for it to work, your current images must be in *.jpg format.
INSTALLATION
1.
In your site folder (usually called 'Site1') create a sub-folder called "Thumbnails".
2.
Go to 'Design | Library | Variables' and expand the 'Product' group.
3.
Right-click on 'Product' and choose 'New Variable'.
4.
Set the new variable as follows:
Setting
Value
Name
ProductImageScaledWidth
Description
Automatically resized product image
Prompt
Product Image Scaled Width
Group
Product
Place Of Setting
Site, Section, Product
Allow <Use Parent>...
Checked
Panel Name
Layout
Type
Number
Allow Empty Value...
Unchecked
Whole Numbers Only
Checked
Searchable
Unchecked
Modifiable In Duplicate
Unchecked
Upload
Unchecked
Initial Value
Use Parent
Top Level Value
100
5.
Go to 'Design | Library | Layouts' and expand the 'Product Image' group.
6.
Right-click "Standard Product Image" and select Copy.
7.
Rename that copy variable to be "Thumbnail Product Image".
8.
Open layout "Thumbnail Product Image".
9.
Replace the entire contents of that layout with the following:
<actinic:block
if="%3cactinic%3avariable%20name%3d%22IsPopUpDisplayedByImage%22%20%2f%3e">
<actinic:block
if="%3cactinic%3avariable%20name%3d%22ExtendedInformationType%22%20%2f%3e%20%3d%3d
%20%22Opens%20in%20a%20Pop%2dUp%20Window%22">
<a href="<actinic:variable name=ExtendedInfoPageEncoded />"
target="ActPopup" onclick="return ShowPopUp('<actinic:variable
name=ExtendedInfoPageEncoded />',<actinic:variable name="ExtInfoWindowWidth"
/>,<actinic:variable name="ExtInfoWindowHeight" />);">
</actinic:block>
Advanced Users Guide - 72
<actinic:block
if="%3cactinic%3avariable%20name%3d%22ExtendedInformationType%22%20%2f%3e%20%3d%3d
%20%22Opens%20in%20the%20Same%20Window%22" >
<a href="<actinic:variable name="ExtendedInfoPageName" />">
</actinic:block>
</actinic:block>
<actinic:block
if="%3cactinic%3avariable%20name%3d%22IsProductImageDisplayed%22%20%2f%3e">
<actinic:block php="true" >
// START Create a thumbnail image t_ProductImageFileName
$sOriginalImageName = str_replace('\\','/', '<actinic:variable
name="ProductImageFileName" encoding="perl" selectable="false" />');
$nScaledWidth = <actinic:variable name="ProductImageScaledWidth"
encoding="perl" selectable="false" />;
$sThumbImageName = 'Thumbnails/t_' . basename($sOriginalImageName);
$image = @imagecreatefromjpeg($sOriginalImageName); /* Attempt to
open */
if (!$image)
{ /* See if it failed */
echo "<br><font color=red>Thumbnail creation error opening:
$sOriginalImageName </font>";
}
else
{
// Get new dimensions
$width = imagesx($image);
$height = imagesy($image);
$t_width = $nScaledWidth;
$t_height = round($height * ($t_width / $width));
// Resample
$thumbimage = imagecreatetruecolor($t_width, $t_height);
imagecopyresampled($thumbimage, $image, 0, 0, 0, 0,
$t_width, $t_height, $width, $height);
if ( ! imagejpeg($thumbimage, $sThumbImageName) )
{
echo "<font color=red>Thumbnail image creation
failed: $sThumbImageName </font><br>";
}
else
{
echo "<img src=\"$sThumbImageName\"
width=\"$t_width\" height=\"$t_height\" border=\"0\"";
echo " alt=\"<actinic:variable name="ProductName"
encoding="strip"/>\" />";
}
}
// END Create a thumbnail image t_ProductImageFileName
</actinic:block>
</actinic:block>
Advanced Users Guide - 73
<actinic:block
if="%3cactinic%3avariable%20name%3d%22IsProductImageDisplayed%22%20%2f%3e%20%3d%3d
%20False">
<img src="<actinic:variable name="DefaultProductImage" />"
border="0"
alt="<actinic:variable name="ProductName" />" />
</actinic:block>
<actinic:block
if="%3cactinic%3avariable%20name%3d%22IsPopUpDisplayedByImage%22%20%2f%3e">
</a>
</actinic:block>
OPERATION
To select this layout, go to 'Settings | Site Options | Layout' and set Product Image Layout to
"Thumbnail Product Image".
To alter the image width, go to 'Settings | Site Options | Layout' and set 'Product Image Scaled
Width' as required.
NOTES
You can now use the following line to include the rescaled product images in the best seller / new
products / related items / also bought lists:
<img src="Thumbnails/t_<actinic:variable name="ProductImageFileName" />" />
With grateful thanks to Norman Rouxel (http://www.drillpine.biz/) for this solution.
Disclaimer: This code was provided by a SellerDeck user via the SellerDeck Community
(http://community.sellerdeck.com/) and so can't be supported by the SellerDeck Technical Support
team.
Clickable Expanding Product Image Thumbnails
Here's a very simple way of replacing the Product Image with a small icon that expands / contracts
when clicked.
Go to 'Design | Library | Layouts' and expand the 'Product Image' group.
Right-click on 'Standard Product Image' and choose 'Copy'.
Rename that copy to be 'Expanding Product Image'. Open 'Expanding Product Image' and replace
all code there with the following:
<actinic:block
if="%3cactinic%3avariable%20name%3d%22IsPopUpDisplayedByImage%22%20%2f%3e">
<actinic:block
if="%3cactinic%3avariable%20name%3d%22ExtendedInformationType%22%20%2f%3e%20%3d%3d
%20%22Opens%20in%20a%20Pop%2dUp%20Window%22">
<a href="javascript:ShowPopUp('<actinic:variable
name=ExtendedInfoPageEncoded />',<actinic:variable name="ExtInfoWindowWidth"
/>,<actinic:variable name="ExtInfoWindowHeight" />);">
</actinic:block>
<actinic:block
if="%3cactinic%3avariable%20name%3d%22ExtendedInformationType%22%20%2f%3e%20%3d%3d
%20%22Opens%20in%20the%20Same%20Window%22" >
<a href="<actinic:variable name="ExtendedInfoPageName" />">
</actinic:block>
Advanced Users Guide - 74
</actinic:block>
<actinic:block
if="%3cactinic%3avariable%20name%3d%22IsProductImageDisplayed%22%20%2f%3e">
<img src="<actinic:variable name="ProductImageFileName" />"
border="0"
width="50"
style="cursor:pointer"
onclick="if(this.width == 50){this.width=<actinic:variable
name="ProductImageWidth" />;}else{this.width=50;}"
alt="<actinic:variable name="ProductName" encoding="strip"/> - Click to
change size" />
</actinic:block>
<actinic:block
if="%3cactinic%3avariable%20name%3d%22IsProductImageDisplayed%22%20%2f%3e%20%3d%3d
%20False">
<img src="<actinic:variable name="DefaultProductImage" />"
border="0"
alt="<actinic:variable name="ProductName" encoding="strip"/>" />
</actinic:block>
<actinic:block
if="%3cactinic%3avariable%20name%3d%22IsPopUpDisplayedByImage%22%20%2f%3e">
</a>
</actinic:block>
Click 'OK'
Now, in your 'Product Image Layout' field (in the 'Layout' panel of your products' select 'Expanding
Product Image' and the new layout will be used.
You can set your entire site to use this by going to 'Settings | Site Options | Layout' and change the
'Product Image Layout' setting there.
The browser will resize the product image down so the icon will be somewhat rough. As the icons
are really the main image (scaled in the browser) they'll still add to the page load time.
You can change the icon width by altering the 3 occurrences of '50' in the code above.
Many thanks to Norman Rouxel (http://www.drillpine.biz/) for providing this neat trick.
Disclaimer: This code was provided by a SellerDeck user via the SellerDeck Community
(http://community.sellerdeck.com/) and so can't be supported by the SellerDeck Technical Support
team.
Advanced Users Guide - 75
Product Options
Changing the Way Attributes are Laid Out
To lay out attributes side by side, rather than one underneath the other, go to the 'Layout' panel of
the product that the attributes are within, and set the 'Column Count For Attributes' to something
other than 'Use Parent'.
If you want to display different attributes in different parts of your product layout, rather than all in
the same place, then do the following:
1.
Go to 'Design | Library | Layouts' and locate the 'Attribute Lists' Group.
2.
Right-click on 'Standard Attribute List' and select 'New Layout'.
3.
Call this new layout 'First Attribute'.
What you are going to do now is set a condition in the new list layout so that 'First Attribute' only
displays the first attribute in the list.
4.
Double-click on the 'First Attribute' layout.
5.
Right-click on the 'AttributeLayout' layout selector and select 'Edit Appearance'.
6.
Under 'Condition', select '<Edit Expression>'.
7.
The expression you need to enter is: ListIndex == 1
Feel free to copy and paste the following code to create the expression:
<actinic:variable name="ListIndex" /> == 1
8.
Now right-click on 'First Attribute' and select 'New Layout'. Call this new layout 'Second
Attribute'.
9.
Now edit the code of the 'Second Attribute' list layout and edit the condition on
'AttributeLayout' so it reads 'ListIndex == 2'.
10. Finally, create a 'Third Attribute' list layout and put a condition on 'AttributeLayout' of
'ListIndex == 3'.
You are now ready to use these new list layouts.
11. Exit the library and go into the 'Design' tab.
12. Locate 'AttributeList' within the layout code of a product.
13. Delete this.
14. In its place, click the 'Insert Layout' button.
Advanced Users Guide - 76
15. Select 'AttributeList' in the top list and select 'Use Fixed Layout'. Select 'First Attribute' in
the bottom list.
16. You can now insert 'Second Attribute' and 'Third Attribute' in the same way.
17. Now put the different layout selectors in different parts of your design, depending on
where you want the attributes to appear.
Displaying Images Against Radio Button Choices
It is possible to display an image against each radio button choice.
This change will include a new field for your choices called 'Image', and whatever image you
specify there will be displayed next to the radio button for that choice in the web page.
To begin, go to 'Design | Library | Variables'. Then right click on the 'Choices' group and select
'New Variable'.
Use the following settings for the new variable:
Name
ChoiceImage
Description
An image to use with this choice.
Prompt
Image
Group
<leave as 'Choice'>
Place of Setting
Choice
Allow <Use Parent>...
<unchecked>
Panel Name
General
Type
Filename
Allow Empty Value
Checked
Initial Value
<blank>
Top Level Value
<blank>
Then click 'OK' and change to the 'Layouts' tab of the library.
Advanced Users Guide - 77
Open the 'Choices' layout group and and double-click on the layout called 'Radio Button Choice'.
Replace all the code with the following:
<input type="radio" name="<Actinic:Variable Name="UIWidgetName"/>"
value="<Actinic:Variable Name="ChoiceSelectedValue"/>"<actinic:block
if="%3cactinic%3avariable%20name%3d%22ListIndex%22%20%2f%3e%20%3d%3d%201">checked=
"checked"</actinic:block> />
<Actinic:Variable Name="ChoiceDisplayLabel"/><actinic:block php="true">
$choiceimage = '<Actinic:Variable Name="ChoiceImage" encoding="perl"
selectable="false" />';
if ( $choiceimage )
{
list($width, $height, $type, $attr) = getimagesize($choiceimage);
if ( $width )
{
echo " <img src=\"$choiceimage\" width=\"$width\"
height=\"$height\" />";
}
else
{
echo "<font color=\"red\"><b> BAD IMAGE</b></font>";
}
}
</actinic:block>
Click 'OK' and close the Library, and that's it.
Your 'Choice Details' dialogue should now have a new entry ' Image', where you can browse for an
image to add to this choice.
Disclaimer: This code was provided by a SellerDeck user via the SellerDeck Community
(http://community.sellerdeck.com/) and so can't be supported by the SellerDeck Technical Support
team.
Creating a Mutually-Exclusive Set of Choices
Sometimes you may create several sets of attributes and choices, but you only want customers to be
able to select a single choice from just one of the attributes – and not select a choice from each
attribute.
e.g. If you had these attributes and choices set up....
... you might want customers to only choose a colour under 'Large' or 'Small' but not both.
Advanced Users Guide - 78
This technique only works if you use simple Attributes (without components) and set the first
Choice to be "---" (without the quotes). You also need to be using a drop down list.
First, create a file using Notepad called "mutuallyexclusivechoices.js" in your Site folder.
Copy and paste the following code into the file:
// mutually exclusive choices
function exclusivechange(sel){
set other drop-downs to --- if appropriate
// called when drop-down changes -
if ( sel.options[0].text != '---' ) return;
this isn't an exclusive attribute
// ignore if
var thisname = sel.name;
var rootname = thisname.replace(/(v_.*_).*/, "$1");
variant name
// the basic
for (i=1; i<6; i++)
{
var variant = document.getElementById(rootname + i); // look for up
to 6 variants
if ( variant )
{
if ( variant.type == "select-one" && (variant.name !=
// don't reset the current select
thisname) )
{
if ( variant.options[0].text == '---' )
variant.selectedIndex = 0;
// set other valid variants back to empty
}
}
}
}
function checksizeset(prodid){
down sets that start with --- have been set
// check that at least one of drop-
var exclusiveitems = false;
var nosizeset = true;
for (i=1; i<6; i++)
{
var variant = document.getElementById('v_' + prodid + '_' + i);
// check up to 6 variants
if ( variant )
{
if ( (variant.type == "select-one") &&
(variant.options[0].text == '---') ) // is it a variant with --- entry
{
Advanced Users Guide - 79
exclusiveitems = true;
// flag that we've some such items
if ( variant.selectedIndex != 0 ) nosizeset = false;
// if valid choice set, remember it
}
}
}
if ( exclusiveitems && nosizeset)
--- choices undefined
// warn if all
{
alert('No size selected');
return false;
}
return true;
}
Next, edit your Overall Layout and place the following just above the "</head>" line (NB not the
<head> line near the top):
<script language="javascript" type="text/javascript"
src="mutuallyexclusivechoices.js"></script>
Edit your Product Layout(s) and look for the line
<form method="post" action="<actinic:variable name="OnlineScriptURL"
value="Shopping Cart Script URL" />">
Change it to be
<form method="post" action="<actinic:variable name="OnlineScriptURL"
value="Shopping Cart Script URL" />" onsubmit="return
checksizeset('<actinic:variable name="ProductID" />');">
You may also need to do this for the <form> tag at the top of the 'inner layout' for your section
pages. This is probably a layout called 'Section Page With Section Name At The Top'.
Next, go to 'Design | Library | Layouts' and locate the 'Choice List' group.
Within that, locate the 'Drop Down Choice List' layout and edit it.
Click the orange text that says 'Click here to edit list layout settings'.
Replace Start of List with:
<select onchange="exclusivechange(this);" id="<Actinic:Variable
Name="UIWidgetName"/>" name="<Actinic:Variable Name="UIWidgetName"/>"
class="form_input_general">
OPERATION
If you have Attributes using drop-down choices and you want to make them mutually exclusive,
then make sure the first Choice is called "---" (without the quotes).
Advanced Users Guide - 80
Attributes using drop-downs that don't have the first Choice set to "---" will operate as usual.
The above will work with upto 6 Attributes per product.
With thanks to Norman Rouxel (http://www.drillpine.biz/) for this solution).
Using Out of Stock Images in the Push Button Grid
There's a solution documented on SellerDeck's online community for including 'Out of Stock'
images as part of the push button grid of choices that's available within SellerDeck.
The solution is documented online at the following URL:
http://community.sellerdeck.com/showthread.php?t=37812
The solution is rather too complicated to document in detail here.
Advanced Users Guide - 81
Extended Information Windows
Showing Stock Levels In Extended Information Pages
By default the variables that enable the display of stock levels are not included in extended
information pages. If you want to show stock levels in an Extended Information Page, you need to
add two variables to the layout.
1.
Select 'Library' from the 'Design' and click the 'Layouts' tab.
2.
Scroll down to the 'Extended Info Layout' section and double-click to expand it.
3.
Double-click the layout that you want to include the stock levels in, eg 'Includes Add To
Cart Button'.
4.
Find the line that contains the variable 'JavaScriptFunctions. Place the cursor at the end of
the line, and press 'Enter' to create a new line.
5.
Right-click in the new line and select 'Insert Layout'.
6.
Scroll down and select ‘JavascriptSectionStockQuery'. Tick 'Use Fixed Layout' and click
'Insert'.
7.
Scroll down to the place in the layout where you want to show the stock, eg the line below
the one showing the 'ProductName' variable.
8.
Right click in the appropriate line and select 'Insert Layout'.
9.
Scroll down and select 'RealTimeStockDisplay', and untick 'Use Fixed Layout'.
10. Click 'Insert', then 'OK' and 'Close'.
Pop-Up Windows That Automatically Resize to Fit the Images Within
Them
The code below can be used for an 'extended information' page layout. It works by creating a popup window that will automatically resize to the dimensions of the image that is within the pop-up
window.
To use this code, go to 'Design | Library | Layouts' and expand the 'Extended Info Layout' group.
Right-click on any existing layout in that group and select 'New Layout'. Give your new layout a
name of 'Auto-Resizing Layout' and click 'OK'.
Once your new layout is created in the library, double-click on it to open it and replace all the code
within it with the HTML below...
<html>
<head>
<Actinic:WINDOW width="<Actinic:Variable Name="ExtendedInfoImageWidth"/>"
height="<Actinic:Variable Name="ExtendedInfoImageHeight"/>"/>
<title><actinic:variable name="PageTitle" /></title>
<actinic:variable name="BaseHref" />
<script language='javascript'>
var arrTemp=self.location.href.split("?");
var picUrl = (arrTemp.length>0)?arrTemp[1]:"";
var NS = (navigator.appName=="Netscape")?true:false;
Advanced Users Guide - 82
function FitPic()
{
iWidth = (NS)?window.innerWidth:document.body.clientWidth;
iHeight = (NS)?window.innerHeight:document.body.clientHeight;
iWidth = document.images[0].width - iWidth;
iHeight = document.images[0].height - iHeight;
window.resizeBy(iWidth, iHeight); self.focus(); };
</script>
</head>
<body bgcolor="<actinic:variable name="BGColor" />" onload='FitPic();'
topmargin="0" marginheight="0" leftmargin="0" marginwidth="0">
<script language='javascript'>
document.write( '<a href="javascript:window.close();">' +
'<img src="<Actinic:Variable Name="ExtendedInfoImage"/>" ' +
'width="<Actinic:Variable Name="ExtendedInfoImageWidth"/>" ' +
'height="<Actinic:Variable Name="ExtendedInfoImageHeight"/>" border="0"></a>' );
</script>
</body>
</html>
Click 'OK' to save your changes when done.
Your new layout will be available to select within the 'Extended Information' panel of 'Site Options'
or within your products/sections.
Disclaimer: This code was provided by a SellerDeck user via the SellerDeck Community
(http://community.sellerdeck.com/) and so can't be supported by the SellerDeck Technical Support
team.
Advanced Users Guide - 83
Fragments and Brochure Pages
Displaying Fragments Separately From Products
By default, fragments within a section are laid out by the 'Standard Product List' layout (or the
'Product List With Horizontal Dividers' layout if you are using that one). So therefore all fragments
and products are laid out as a single list.
It is possible though to create a list that just does products, and a list that just does fragments, and
then include them in different parts of your design.
To begin, you need to find out what kind of product list layout you are using. To do this:
1.
Go to 'Settings | Site Options | Layout'
2.
Under the 'Product' sub-heading, locate the 'Product List Layout' field.
3.
Make a note of the layout that is selected in the field.
You can now edit this layout.
1.
Now go to 'Design | Library | Layouts' and expand the 'Product Lists' group.
2.
Right-click on the list layout you are using in your store and select 'New Layout'.
3.
Give the new layout a name of 'Section Fragment List' and click 'OK'.
4.
Double-click on this layout to edit it.
5.
Delete everything in this layout down to line '15' (i.e. remove the references to
'ProductLayout' but leave the references to 'FragmentLayout').
6.
You now need to highlight all the code in this layout and then click the 'Insert Block'
button:
7.
Enter the following condition:
Advanced Users Guide - 84
You can copy and paste the following code to create the condition:
<actinic:variable name="ProductType" /> == 2
8.
Click 'OK' to save the condition, and then click 'Apply' and then 'OK' to save the changes
to the list layout.
9.
Now double-click on the product list layout that your store is using.
10. Delete everything AFTER line 15 (i.e. remove the references to 'FragmentLayout' but
leave the references to 'ProductLayout')
11. Now highlight all this code and again click the 'Insert Block' button:
12. This time, use the following condition:
If you prefer, you can copy and paste the following code:
(<actinic:variable name="ProductType" /> == 0) OR
(<actinic:variable name="ProductType" /> == 1)
13. Click 'OK' to save the condition, and then click 'Apply' and then 'OK' to close the layout.
You have now created two different layouts. Your next job is to include those layouts into the
design of your section pages.
14. Close the library and switch to the 'Design' tab.
15. Make sure you are looking at a section that contains both fragments and products. You
should find that the fragments within the section are not appearing.
16. Click anywhere within the main part of the section page (e.g. on a product).
17. Press the 'Navigate to parent layout' button (yellow spiral with up arrow) until you are in a
layout called something like 'Standard Section Page' or 'Section Page With Section Name
At The Top'.
18. Within this layout, locate the pink 'ProductList' selector:
Advanced Users Guide - 85
This shows you where your products are being inserted into the design. You can move this to a
different location within the layout if you want.
To insert your list of fragments into the design:
1.
Click the 'Insert Layout' button -
2.
From the top list select 'ProductList' and select 'Use Fixed Layout'.
3.
From the bottom list select 'Section Fragment List' and click 'Insert'.
This will insert the list of fragments into the design.
Automatically Generating Hyperlinks in Fragment Text
If you have a lot of hyperlinks to include into a fragment, you will not be able to use the 'Link'
feature (in the 'Links' panel) as that only supports a single hyperlink.
You could use embedded html (!!< and >!!) to include the links, but this method will automatically
parse links that begin with 'www' and turn them into hyperlinks.
To begin, go to 'Design | Library | Layouts' and expand the 'Fragments' group.
Select the layout that you would like to use for this and then right-click on it and select 'Copy'.
Rename this new layout to something like 'Auto Link Generator'.
Now edit this layout and replace the 'FragmentText' variable with the following code:
<actinic:block php="true">
$ftext = <<<ENDFRAG
<actinic:variable Name="FragmentText" selectable="false" />
ENDFRAG;
$ftext = str_replace('<br', ' <br', $ftext);
echo preg_replace('/(www.\S+)/', '<a href="http://$1"
target="_blank">$1</a>', $ftext);
</actinic:block>
You can now use this 'Auto Link Generator' layout for any fragment where you have lots of 'www'
links in the 'Text' field. Select the layout within the 'Layout' panel of the fragment.
Disclaimer: This code was provided by a SellerDeck user via the SellerDeck Community
(http://community.sellerdeck.com/) and so can't be supported by the SellerDeck Technical Support
team.
Using The Same Layouts for Brochure Pages as for Section Pages
Doing this change means that the 'Overall Page Layout' field (which is controlled by a layout
selector called 'StandardLayout') can be used for brochure pages as well as section pages. In other
words, the default 'Overall Page Layout' you set in 'Settings | Site Options | Layout' will also be
used for brochure pages.
1.
Go to 'Design | Themes' and click the 'Advanced Themes Configuration' button
2.
Change to the 'Page Layouts' tab and click the 'Advanced Page Configuration' button.
3.
In the 'Brochure' row, change the 'Outer Layout Selector' from 'BrochureLayout' to
'StandardLayout'.
4.
Click 'OK'.
Advanced Users Guide - 86
In order to be able to overwrite this choice for different brochure pages, go to 'Design | Library |
Layouts' and open the 'Web Page Outer Layout' group. Double-click on the 'StandardLayout' layout
selector and under 'Place Of Setting' select 'Brochure'.
You can now set the 'Overall Page Layout' for your brochure pages.
Stopping Specific Brochure Pages from Appearing in the List
This will show you how to specify which brochure pages will appear in the list of brochure pages
that appears in your store design.
1.
Go to 'Design | Library' and go to the 'Variables' tab.
2.
Right click on the 'Brochure' group and select 'New Variable'
3.
Give the variable a name of 'ShowPageInSidebar'.
4.
Give it a prompt of 'Show Page in Sidebar'.
5.
Under 'Place of Setting' select 'Brochure'.
6.
Under 'Panel Name' select 'General'.
7.
De-select 'Allow <Use parent> as an Option'
8.
Change the 'Type' field to 'True/False'.
9.
Leave the 'Top Level Value' and 'Initial Value' to 'True' if you want all pages shown by
default. Set them both to 'False' if you don't.
10. Click 'OK' and close the library.
11. Go to the 'Design' tab and in the preview pane click on one of the brochure pages in your
list. You should now be looking at a layout called something like 'Simple Brochure Page
Link' or ' Standard Brochure Page Link' etc.
12. Highlight all the code in the layout and click the 'Insert Block' button:
Advanced Users Guide - 87
13. You should now be in the Condition Editor. Change the condition to:
<actinic:variable name="ShowPageInSidebar" /> == true
You can just copy and paste the code straight into the editor.
14. Click 'OK' and then click 'Apply' to confirm your changes.
You can now go into the 'Properties' panel of any brochure page that you don't want in the list, and
change 'Show Page In Sidebar' to 'False'.
Including Brochure Pages in the Site Map
This technique will show you how to include a list of the brochure pages in your store into your site
map page.
The first thing you need to do is create a brochure page link layout that is similar in style to the
existing links in the site map.
1.
Go to 'Design | Library | Layouts' and expand the 'Brochure Page Links' group.
2.
Right-click on 'Text Brochure Page Link' and select 'New Layout'.
3.
Give it a name of 'Sitemap Brochure Page Link' and click 'OK'.
4.
Double-click on this layout and replace everything in it with the following code:
<a href="<actinic:variable name="BrochurePageURL" />">- <actinic:variable
name="BrochureName" /></a>
5.
Click 'OK'.
Next you need to create a brochure page list layout to be inserted in the site map page.
6.
In the library, open the 'Brochure Page Link Lists' layout group.
7.
Right-click on 'Brochure Page Text Link List' and select 'New Layout'.
8.
Give it a name of 'Sitemap Brochure Page List' and click 'OK'.
9.
Double-click on this new list layout to edit it.
10. Right-click on the layout selector that is there already and select 'Edit Appearance'.
Advanced Users Guide - 88
11. Change the 'Use Fixed Layout' field to read 'Sitemap Brochure Page Link' and click 'OK'.
12. Click the 'Edit List Layout Settings' button.
13. Change to the 'Edit Rows and Columns' tab and replace each instance of ' ' in the
grid with '<br />'.
14. Click 'OK' and then click 'OK' again to close the layout.
15. Exit the Library.
You can now include this new list in the 'Sitemap Page Bulk Area' layout.
16. In the 'Design' tab, use the 'Select Page Type' list to change the page to 'Site Map'.
17. Click on one of the site map links in the preview.
18. Click the 'Navigate to Parent Layout' button Bulk Area' layout.
- until you are in the 'Sitemap Page
19. Put your cursor in line 2 and click the 'Insert Layout' button 20. Insert the 'BrochurePageList' layout selector with a fixed layout of 'Sitemap Brochure
Page List'.
21. Click 'Apply'.
Your brochure pages will now be listed in the sitemap.
Advanced Users Guide - 89
Shopping Cart and Checkout
Viewing the Shopping Cart from Anywhere on the Internet
The page that shows a summary of the shopping cart details is actually displayed as a result of a
call to an online Perl script in the cgi-bin directory.
Go to your online website and click the 'view cart' button on the navigation bar. Even with nothing
in your shopping cart, the address of the page in the 'Address' bar of your browser will be
something like:
http://your.URL/cgi-bin/ca000001.pl?ACTION=SHOWCART
This link will work when the call has come from inside the 'acatalog' folder online, but it might not
work from outside. If it doesn't, you will need to add an 'ACTINIC_REFERRER=' parameter that
tells the browser where your 'acatalog' folder is. This is the 'Catalog URL' value, which can be seen
in 'Web | Network Setup'.
If your Catalog URL is 'http://your.URL/acatalog/' then the call to the shopping cart becomes:
http://your.URL/cgibin/ca000001.pl?ACTION=SHOWCART&ACTINIC_REFERRER=http://your.URL/acatalog
/
Adding to Cart from Anywhere on the Internet
The following URL shows you the format to follow to add a product to the cart from anywhere on
the Internet.
http://your.URL/cgi-bin/ca000001.pl?SID=3&PAGE=PRODUCT&Q_7=5
The SID parameter should be the section ID of the section where the product can be found. You
can figure out the exact SID by inserting the 'SectionID' variable somewhere in your store pages
and see what it becomes in the previewed page.
The Q_ parameter informs the script about the product reference and the quantity. The product
reference is the (CGI encoded) string prefixed by Q_ while the quantity is the parameter value
(prod ref is 7, qty is 5 in the above example).
If you are adding from outside the 'acatalog' folder, then ensure you add
ACTINIC_REFERRER=http://your.URL/acatalog/
onto the end of the URL.
Obviously this works only for products where components, attributes, date or other info prompts
are not used. However these more complex products can also be added to the cart on similar way
but more parameters are required (check the HTML source of your product page for hidden input
parameters to see what else required in these cases).
The result of this script call may vary depending on the "Shopping mode" setting of the section
where the product is located. E.g. if your product is located in a section where "Quantity on
Product Page" shopping mode is used then using this link the product will be added to the cart and
a bounce page will drop you back to the last used shop page, but if the shopping mode is "Quantity
in Shopping Cart" then the cart will be displayed clicking on the link.
Note that this solution is not supported by SellerDeck therefore you should use this at your own
risk.
Advanced Users Guide - 90
Inserting Links to Save and Retrieve Shopping Carts
There are two variables available to include in your store designs, which will allow customers to
save and retrieve their shopping carts whilst they are shopping.
The variable to save the current shopping cart is SaveCartUrl and the variable to restore a saved
shopping cart is RestoreCartUrl.
You can include them in code such as:
<a href="<actinic:variable name="SaveCartUrl" />">Save Your Shopping
Cart</a>
<a href="<actinic:variable name="RestoreCartUrl" />">Restore A Saved
Shopping Cart</a>
Displaying a Message that Counts Down to Free Shipping
If you have set up your store to offer free shipping for orders that are over a certain value, you can
use the following script in your layouts to include a message that tells people how much more they
have to spend to qualify for free shipping.
<script language="javascript" type="text/javascript">
function de(prc) {
var data, endata;
data = new String(prc);
data = data.split(" ");
endata = cut(data[0]);
return endata;
}
function cut(dpt) {
stng = dpt.replace("£","");
stang = stng.replace(".",".");
stang = stang.replace(",","");
return stang; }
var left;
price = de(getCartItem(1));
if (price >= 100) {
document.write("You have qualified for free shipping!");
}
else {
left = (100 - price).toFixed(2);
document.write("You need to spend £"+left+" to obtain free shipping!");
}
</script>
The '100' represents £100.00 (or $100.00 – depending on what currency you are using). You
should change this to match the value set in Business Settings | Shipping and Handling | Global
Free Over.
Advanced Users Guide - 91
Disclaimer: This code was provided by a SellerDeck user via the SellerDeck Community
(http://community.sellerdeck.com/) and so can't be supported by the SellerDeck Technical Support
team.
Multiple Currency Conversion
By default, SellerDeck cannot support multiple currency conversion. However, it is possible to
embed the Universal Currency Converter (produced by Xenon Laboratories Inc) within your
Shopping Cart and your Checkout. The Universal Currency Converter can appear as either an
embedded frame or as a floating window. It will take the value from the Shopping Cart and present
you with a range of currencies to convert the value into. The Universal Currency Converter is
updated in real time to give you all the accuracy you will need.
In order to incorporate the Universal Currency Converter into your catalogue:
Select 'Shopping Cart' from the 'Select Page Type' drop down list on the 'Design' tab.
Click on the 'Shopping Cart' title above the grid to open the layout called 'View Cart Page
Shopping Cart Grid'. Scroll down to the bottom of this layout until you find:
</Actinic:XMLTEMPLATE>
Just above this line, enter the following:
<iframe src="http://www.xe.com/pca/input.php?Amount=<actinic:variable
name="Total" />&From=GBP&ToSelect=USD" width="620" height="200"
name="Currency" frameborder="0" scrolling="no"></iframe>
Change the currency values in red if required.
Going Straight to the Checkout after Adding to Cart
This solution will take customers straight to the checkout after adding product to the cart from a
page with a shopping mode of 'Quantity on Product Page' with a single add to cart button per page.
This is set in the ‘Page Settings' panel of the section.
To begin, you need to create a new user-definable variable called 'GoDirectToCheckout' which you
can use to control which sections will take the customer directly to the checkout after adding to
cart.
1.
Go to 'Design | Library | Variables'.
2.
Right-click on the 'Section' group and select 'New Variable'.
3.
Give it a name of 'GoDirectToCheckout'.
4.
Give it a prompt of 'Take Customer Directly To Checkout?'.
5.
Under 'Place Of Setting' select 'Section'.
6.
De-select 'Allow <Use Parent> as an Option'.
7.
Under 'Type' select 'True/False'.
8.
Set 'Initial Value' and 'Top Level Value' both to 'False'.
Advanced Users Guide - 92
9.
Click 'OK' and close the library.
You are now ready to include the code in your design.
10. Set up a section with a 'Shopping Mode' of 'Single Add To Cart Button' where you want to
take customers directly to the checkout after adding to cart.
11. Change to the 'Design' tab.
12. Click on the single add to cart button in the design.
In the layout code for the single 'add to cart' button, copy and paste the following code:
<actinic:block
if="%3cactinic%3avariable%20name%3d%22GoDirectToCheckout%22%20%2f%3e%20%3
d%3d%20true">
<input type="hidden" name="ACTION" value="<actinic:variable
name="CheckoutButton" />">
<input type="hidden" name="CHECKOUTURL" value="<actinic:variable
name="OrderLinkText" />" target="_self">
</actinic:block>
Now for any section where you want to take your customers directly to the shopping cart after
adding to cart, go to the 'Properties' panel of the section and set 'Take Customer Directly To The
Checkout?' to 'True'.
Advanced Users Guide - 93
Making ‘Hide Cart Details’ the Default in the Checkout
The following steps will change the default setting for the show / hide cart details button in the
checkout, so that the cart details are hidden and only the total order value is shown unless the
shopper clicks the ‘show cart details’ button. NB this change negates the effect of the one above.
1.
Select ‘Library’ from the ‘Design’ menu and select the ‘Layouts’ tab.
2.
Scroll down and expand the ‘Shopping Cart Table’ section, and double-click the
‘Checkout Shopping Cart Grid’ layout to open it.
3.
Scroll down and find the </div> tag on the last line but one of the layout, and insert a new
blank line immediately above it.
4.
Paste the following code into the new line:
<script type="text/javascript">
SetShoppingCartVisibility();
</script>
5.
Click ‘OK’ and then ‘Close’.
6.
‘Publish to Web’ to upload the change.
Stopping People from Checking Out with Less Than 2 Items
This code will prevent customers from checking out unless they have at least two items in their
shopping cart.
Go to the 'Design' tab and select 'Checkout Page 0' from the 'Select Page Type' drop-down list.
Click on the 'Next>' button in the design.
Replace the code in the 'Checkout Next Button' layout with the following:
<script language="JavaScript">
<!-/************************************************************/
*
* getCartItem Gets the SellerDeck Cart Value & No of Items
*
*************************************************************/
//CART_CONTENT = Cookie name
//1 = TOTAL_VALUE
//3 = CART_COUNT
function getCartItem(index)
{
var act_cart= getCookie("CART_CONTENT")
temp =(act_cart != null) ? temp=act_cart.split("\t"):0;
return (temp.length > 0) ? temp[index] : 0;
}
// -->
</script>
<input type=SUBMIT name=ACTION value="<actinic:variable encoding="html"
name="NextButton" />" class="highlight-button" onclick="if
(getCartItem(3) >= 2) {return true;} else {alert('Minimum order is 2
items');return false;}">
It will look like this:
Advanced Users Guide - 94
Where it says
if (getCartItem(3) >= 2)
the '2' can be replaced with another minimum quantity.
Offering Payment Methods to Customers in Different Formats
In SellerDeck, you can access all the HTML used within the checkout. Most of it is accessible via
the 'Design' tab (Checkout Page 0/1/2 and Receipt). However, some key elements are within
'Design | Text'. The most important of these is the drop-down list used to offer payment methods to
your customers.
To find the relevant section of Design | Text:
1.
Go to 'Design | Text', click 'Go to' and go to prompt Phase: -1 and ID: 1951.
You will highlight the following section:
The highlighted line, and the three lines below it, contains the HTML used to build the paymentmethod drop-down list in the checkout. To change it to something else (in this case a list of radio
buttons) you will need to do the following:
2.
In the first line, delete
<select name="PAYMENTMETHOD" size="1" id="idPAYMENTMETHOD"
onchange="SetCreditCardFieldsVisibility();">
3.
In the second line, replace <option value="%s">%s with
<input type="radio" name="PAYMENTMETHOD" value="%s"
onclick="SetCreditCardFieldsVisibility();">%s<br>
4.
In the third line, delete </select>
5.
In the fourth line replace <option selected="selected" value="%s">%s
with
<input type="radio" name="PAYMENTMETHOD" value="%s" checked="checked"
onclick="SetCreditCardFieldsVisibility();">%s<br>
The finished result will look something like the following:
Advanced Users Guide - 95
Adding a Giftwrap Option to the Checkout
This trick will add a 'gift wrapping' product to your store, and include a link to that product in the
shopping cart, so people can add it to their order.
To begin, you need to create the giftwrapping product in your store. Create the product in an
appropriate location (e.g. a new section called 'Gift Wrapping') and use the following settings:
Setting
Value
Product Reference
giftwrap
Other Info (Prompts panel)
Please enter a message to go with
the gift:
Minimum Quantity (Details
panel)
1
Maximum Quantity (Details
panel)
1
Exclude from Froogle Data
Feed (Details panel)
Selected
Exclude from Shipping Band
Calculation (Details panel)
Selected
Include in Automatic Lists
(Marketing panel)
All de-selected
If you are automatically generating product reference numbers, you will not be able to enter a
product reference of 'giftwrap'. You'll just need to make a note of the product reference assigned to
the product.
Next, you need to create a new layout for the shopping cart. To do this:
1.
Go to 'Design | Library | Layouts'.
2.
Expand the 'Checkout Area' group.
3.
Right-click within the group and select 'New Layout'.
4.
Give it a name of 'Giftwrap' and click 'OK'.
5.
Double-click on the layout to edit it and copy and paste the following code into the layout:
<!-- Gift Wrap list begin-->
<table cellspacing="2" cellpadding="3" border="0" width="<actinic:variable
name="ACTSTDWIDTH" />">
<tr>
<th align="left" class="cartheading"><strong>Gift Wrap:</strong></th>
</tr>
<tr>
Advanced Users Guide - 96
<td class="cart">
<ul>
<li>
<a href="<actinic:variable name="SearchCGIURL"
/>?PRODREF=giftwrap&NOLOGIN=1<actinic:block
if="%3cactinic%3avariable%20name%3d%22HiddenFields%22%20%2f%3e%20%21%3d%20%22%22">
&SHOP=<Actinic:Variable Name="HiddenFields"/></actinic:block>"> Please click
here to add Gift Wrapping to your Order</a>
</li>
</ul>
</td>
</tr>
</table>
<!-- Gift Wrap list end-->
Change PRODREF=giftwrap so "giftwrap" is the product reference of the giftwrap product.
Click 'OK' to save the changes to the layout.
Finally, you need to include the giftwrap layout into shopping cart layout.
The easiest way to do this is go to the 'Shopping Cart Table' group in the library and editing 'View
Cart Page Shopping Cart Grid'.
Add the following code in where required.
<actinic:variable name="CheckoutArea" value="Giftwrap" />
It may take a few goes before you are happy with the placement, but you can check the results in
the previw panel in the 'Design' tab.
Turning a Text Field into a Check Box
This is a neat trick that will turn any text field in the checkout into a check box. This will extend
the ability of your SellerDeck store to take different types of information, and the responses will
still look meaningful in the printed reports.
This example is based on the 'User Definable' field in the 'Invoice Address' part of the checkout.
1.
Go to 'Design | Text | Web Site (cont) | Invoice Address' and select the 'Show' box next to
the 'Invoice User Defined' field.
2.
Click 'OK'.
3.
Next change 'Checkout Page 0' in the 'Select Page Type' field in the 'Design' tab.
4.
Click on the 'User Definable' text (or whatever you have changed it to).
5.
Locate the following line:
Advanced Users Guide - 97
6.
This is the code for the user defined field, and by default it is a text field. Change the
above code to read:
<input type="checkbox" name="INVOICEUSERDEFINED" value="CHECKED"
<Actinic:Variable Name="InvoiceUserDefined"/>>
This will turn the text field into a check box. This will stay checked if a customer leaves the invoice
address page and then re-enters it for any reason. The value that will appear in the order processing
reports to indicate whether the customer ticked the box is the word 'CHECKED'.
Automatically Capitalising Customer Input
Customers will not always enter their name and address information with capital letters online. This
then means you will often have to manually edit the details once you have receive the order into
SellerDeck.
This is a JavaScript function that will apply correct capitalisation to the details customers enter in
your checkout as they type them.
First of all, you need to go to the 'Design' tab and select 'Checkout Page 0' from the 'Select Page
Type' drop down list. Then locate the overall page layout and insert the following function into the
<head> section, just above the </head> tag.
<script language=JavaScript>
<!-function capitalizeWords(string) {
var tmpStr, tmpChar, preString, postString, strlen;
tmpStr = string.toLowerCase();
stringLen = tmpStr.length;
if (stringLen > 0)
{
for (i = 0; i < stringLen; i++)
{
if (i == 0)
{
tmpChar = tmpStr.substring(0,1).toUpperCase();
postString = tmpStr.substring(1,stringLen);
tmpStr = tmpChar + postString;
}
else
{
tmpChar = tmpStr.substring(i,i+1);
if (tmpChar == " " && i < (stringLen-1))
{
tmpChar = tmpStr.substring(i+1,i+2).toUpperCase();
preString = tmpStr.substring(0,i+1);
postString = tmpStr.substring(i+2,stringLen);
tmpStr = preString + tmpChar + postString;
}
}
Advanced Users Guide - 98
}
}
return tmpStr;
}
// -->
</script>
Once you have done that, you can click on any fields in the page that you want capitalised, and just
add in the call to the function. For example, replace:
<input type="text" name="INVOICEADDRESS1" size="30" maxlength="200"
value="<actinic:variable name="InvoiceAddress1" selectable="false" />"
tabindex="NETQUOTEVAR:TABINDEXINVOICEADDRESS1" />
with
<input type="text" name="INVOICEADDRESS1" size="30" maxlength="200"
value="<actinic:variable name="InvoiceAddress1" selectable="false" />"
tabindex="NETQUOTEVAR:TABINDEXINVOICEADDRESS1" onchange="this.value =
capitalizeWords(this.value)" />
i.e. add the following into any <input> tag where you want the contents capitalised:
onchange="this.value = capitalizeWords(this.value)"
Disclaimer: This code was provided by a SellerDeck user via the SellerDeck Community
(http://community.sellerdeck.com/) and so can't be supported by the SellerDeck Technical Support
team.
Supporting an Affiliate Program with SellerDeck Ecommerce
It is possible to add markup to the SellerDeck's receipt page in order to support an affiliate
program. The markup is generally specified by the affiliate program, but a typical example would
be:
<IMG SRC="https://www.server.com/log.cgi?amount=[order-amounthere]&orderid=[order-id-here]">
Translating this into a SellerDeck ready line, you would get:
<IMG
SRC="https://www.server.com/log.cgi?amount=NumericOrderTotal&orderid=
TheOrderNumber">
The variables available to an affiliate program of this nature are:
TheOrderNumber - order number.
FormattedOrderTotalHTML - the order total formatted in the appropriate currency and encoded
for HTML display
e.g. £55.57
FormattedOrderTotalCGI - the order total formatted in the appropriate currency and encoded for
CGI
e.g. %a355%2e57
ActinicOrderTotal - the order total formatted in the SellerDeck internal format (integer number in
currency base unit)
e.g. 5557
NumericOrderTotal - the order total partially formatted in the appropriate currency. This value
include decimal and thousand separators, but leaves off the currency symbol.
e.g. 55.57
Advanced Users Guide - 99
NumericOrderTotalCGI - the order total partially formatted in the appropriate currency and
encoded for CGI. This value include decimal and thousand separators, but leaves off the currency
symbol.
e.g. 55%2e57
TextOrderTotal – The order total with currency symbols and a decimal point, with no encoding.
e.g. £55.57
Creating a 'When To Deliver' Drop Down List
It could be that you would like your customers to tell you how quickly they would like their
products delivered to them – whether they want the items as soon as possible, or whether they don't
want them for one week, two weeks etc.
To do this, you can change the 'Shipping User Definable' text field in the checkout to a drop-down
list. This is done as follows:
Go to 'Design | Library | Layouts' and expand the 'Checkout Prompt' group. Towards the bottom
you will find 'Shipping User Definable Prompt'.
Double click on this layout to open it for editing.
Replace
<input type="text" name="SHIPUSERDEFINED" size="20" maxlength="255"
value="<Actinic:Variable Name="ShipUserDefined"/>" />
with something like...
<select name="SHIPUSERDEFINED">
<option value="ASAP" selected>ASAP</option>
<option value="1 week">1 week</option>
<option value="2 weeks">2 weeks</option>
<option value="3 weeks">3 weeks</option>
</select>
You will also need to go to 'Design | Text | Web Site (cont) | Shipping and Tax' and change the
'Shipping User Definable Prompt' to something appropriate.
Specifying a Delivery Cut-Off Time for Orders
This section will show you how you could add a warning to your site that tells people whether their
order will be sent the same day.
Simply place the following code into your product layout where you want the message to appear:
<script language=JavaScript>
now = new Date();
if ( now.getUTCHours() >= 16 ) document.write('<span
style="color:red;">Warning text here</span>');
</script>
In the above example, the cut-off time is 4pm - 16.00. If you want a different time, change the '16'
to another number on the 24 hour clock.
Advanced Users Guide - 100
You can also put this code into the overall page layout for the store.
Disclaimer: This code was provided by a SellerDeck user via the SellerDeck Community
(http://community.sellerdeck.com/) and so can't be supported by the SellerDeck Technical Support
team.
Emptying The Cart When People Leave The Checkout
This JavaScript function will empty your customer's shopping cart when they click the 'Cancel'
button on the checkout. It is useful as sometimes it is confusing for customers if they still have
items in their shopping cart, when they think they have cancelled the transaction.
To begin, place the following JavaScript functions in the <head> area of the overall page layout
that is being used in the checkout. You can verify this in the 'Checkout Pages Layout' field in
'Settings | Site Options | Layouts'.
Add it in just above the closing </head> tag.
<script language="Javascript" type="text/javascript">
function createCookie(name,value,days) {
if (days)
{
var date = new Date();
date.setTime(date.getTime()+(days*24*60*60*1000));
var expires = "; expires="+date.toGMTString();
}
else var expires = "";
document.cookie = name+"="+value+expires+"; path=/";
}
function CancelOrder() {
if (confirm('This will clear your order and address details
completely.\nClick "View Cart" to change your order.\nDo you wish to
proceed?') == true)
{
createCookie("ACTINIC_CART","",-2);
createCookie("CART_CONTENT","",-2);
createCookie("CART_COUNT","",-2);
createCookie("CART_TOTAL","",-2);
createCookie("ACTINIC_BUSINESS","",-2);
createCookie("ACTINIC_REFERRER","",-2);
window.location.href = 'http://www.YOURSITE.com/RETURN-PAGE';
}
}
</script>
Replace 'http://www.YOURSITE.com/RETURN-PAGE' with the location of a page you want to
take customers to.
Then go to 'Design | Library | Layouts' and locate the 'Checkout Button' group. Within it, locate
'Checkout Cancel Button' and double-click on it to open it.
Replace the code in the layout with the following:
<input type="button" name="ACTION" value="<actinic:variable
encoding="html" name="CancelButton" />" class="normal-button"
onclick="CancelOrder();" />
Advanced Users Guide - 101
Customer Accounts
Hiding Elements from Retail Customers, but Showing Them to ALL
Registered Customers
If you have a design element in your site that you only want to show to registered customers, and
hide from retail customers, then you need place the following tags before the code:
<Actinic:NOTINB2B><!--</Actinic:NOTINB2B>
…and put these after the code:
<Actinic:NOTINB2B>--></Actinic:NOTINB2B>
This will mean that the HTML comment marks will only appear for unregistered customers, and
hence the content will be hidden from them.
Please note that in order for this to work, you need to ensure that 'Compact HTML/CGI' is deselected in 'Design | Design Options'.
Preventing Unregistered Customers from Entering Certain Sections in
your Store
It is possible to have sections that only customers within certain customer groups will see online.
To do this, you need to create a new section link template with a very specific format.
Go to 'Design | Library | Layouts' and locate the 'Section Links' group.
Right-click on any of the layouts there and select 'New Layout'. Call it 'Section Link for Registered
Customers Only'.
Now double-click on this layout to edit it, and copy and paste the following code into it, in place of
any existing code:
<Actinic:SHOWFORPRICESCHEDULE Schedules="2" HTML="<a
href=<actinic:variable name="SectionPageName"/>><actinic:variable
name="SectionName"/></a>"/>
You can then select this layout within the 'Section Link Layout' field in the 'Layout' panel of any
section that you want to be hidden.
You have to change the code in this template depending on which customer groups you want the
section link to be visible within. The Schedules="2" value needs to be the ID of your desired
customer group. You can find this from the 'Price Schedules' table in the 'ActinicCatalog.mdb'
database.
Note: This section really needs to be at the end of a list of sections, Otherwise unregistered
customers will have a gap appearing where the link should be.
Bouncing Unregistered Customers Out of Sections
If you wish to prevent unregistered customers from being able to view specific store pages, then
you will need to include a simple JavaScript function into the overall page layout for those
sections.
Advanced Users Guide - 102
1.
Go into the 'Layout' panel of the section that you want to restrict to only registered
customers.
2.
Locate the 'Overall Page Layout' field and make a mental note of the name of the current
overall page layout.
3.
Click in the 'Overall Page Layout' field and select '<New>' from the bottom of the list.
4.
In the 'Based On' field, select the overall page layout that is currently being used by the
section.
5.
In the 'Name' field enter 'Registered Customers Only'.
6.
Click 'OK' and then click 'Apply' to make this section use the new layout.
7.
Now change to the 'Design' tab and select the overall page layout.
8.
Locate the following command in the headers of the template:
<meta http-equiv="Content-Type" content="text/html; charset=iso-8859-1">
9.
Just underneath this, copy and paste the following into the template:
<Actinic:NOTINB2B>
<meta http-equiv="Refresh" content="0; url=NoEntry.html">
</Actinic:NOTINB2B>
<script language="javascript1.1">
function actNotRegistered(){
//<Actinic:NOTINB2B>
location.replace ('NoEntry.html');
//</Actinic:NOTINB2B>
}
</script>
Note: replace page.html with whatever page you want unregistered customers to be bounced to.
10. Next, locate the <body> tag further down in the layout:
11. Change the 'onload' part to read:
Whatever sections you don't want unregistered customers going into, specify this new layout in the
'Overall Page Layout' field. This should now automatically take customers back to the designated
page if they try and go to a page in your store that you do not want them to.
Naturally, you are going to want to have some explanation in the section description of the section
to point out that certain sections are for trade customers only.
Advanced Users Guide - 103
Miscellaneous
Running SellerDeck within a Custom Frame
If you are just browsing products, then SellerDeck will run with no problems within an existing
custom frame.
However, you must ensure that the frame set file is on the SAME domain (web site) as the
SellerDeck store. If you do not do this then Internet Explorer will stop your SellerDeck store from
working because it will treat the SellerDeck shopping cart cookie as a 'third party cookie' and
customers will not be able to add products to their shopping cart. The same will happen if you are
accessing the store via a different URL than the one that is in your network settings.
Also, there are potential difficulties when you go get to the point of making payments in the
checkout as no SSL padlock will appear within the browser if the secure pages are being viewed
through a non-secure frame.
The best way to avoid this problem is to check where it says 'Remove Custom Frame in Checkout'
in 'Design | Design Options'. This will mean that any frames will be removed at the start of the
checkout phase.
In the 'URL for Completed and Aborted Checkout' field you can then put the URL for your
frameset document. Therefore whenever anybody leaves the checkout for whatever reason, the
frameset will be restored.
Adding New Terms and Conditions
If you leave any of the boxes in 'Business Settings | Terms and Conditions' empty then the
corresponding heading (e.g. 'Remittance Terms') will not appear in the HTML. However, if you
wish to add your own Terms and Conditions entry you can fill in your text in an unused panel and
then simply change the appearance of the title in the HTML.
To do this, go to 'Design | Text' and search for the heading you want to change.
Using a Text Field for Searchable Properties
Searchable properties allow you set up fields where customers can search on the values entered for
the 'user-definable variables' in your store.
Instructions for doing this are in the main help in 'Online Store Features | Searching On Product
Properties'.
By default, searchable property values are shown as a list for customers to select from online.
However, it is possible to amend this to be a free text input box where customers can enter the
value they want to search on.
Advanced Users Guide - 104
To do this:
1.
First you need to set up a working searchable property as described in the help.
2.
When adding your property to the 'Searchable Properties' grid, use a 'HTML
Representation' of something like 'List with Multiple Selection' i.e. one you won't use for
anything else.
3.
Where it says 'Combining Results' at the bottom select 'OR'
4.
Now go to 'Design | Library' and go to the 'Searchable Property Value Lists' group.
5.
Edit the 'List with Multiple Selection' layout
6.
Replace the layout selector that's in there with ' ' (SellerDeck seems to need to have
something in there)
7.
Click the orange 'Click here to edit list layout settings text'
8.
Delete everything in the 'End of List' field
9.
Replace the content of the 'Start of List' field with:
<input type name="<Actinic:Variable
Name="SearchPropControlName"/>" value="" />
10. Click 'OK'
This will replace the list of values with a single empty text box. The box will not support partial
matches though (unlike the standard search box).
Advanced Users Guide - 105
Section C - Perl Script Changes
Products
Making the Other Info Box Optional
This prompt can be made optional by editing one of the perl scripts.
Locate the file ActinicOrder.pm in the site folder.
Edit the file with a text editor such as Notepad
Search for "sub InfoValidate", you should see…
if (length $sInfo == 0)
{
$sMessage .= ACTINIC::GetPhrase(-1, 55, "<B>$sPrompt</B>") . "<P>\n";
}
elsif (length $sInfo > 1000)
Comment out the first 4 lines (using #) and change the last line from 'elsif' to 'if' so that the code
reads:
#if (length $sInfo == 0)
# {
# $sMessage .= ACTINIC::GetPhrase(-1, 55, "<B>$sPrompt</B>") . "<P>\n";
# }
if (length $sInfo > 1000)
Save and exit.
Update the site.
SellerDeck is not able to provide any detailed support for script changes made. If you find that
there is a problem, an original copy of the script can be found within the 'Original' folder in your
installation. Copy this into your site folder.
Having a larger box for the 'Other Info' Prompt
By default, customers only have a single line to provide an answer for the 'Other Info' question
online. It is possible to edit the product layout and the 'Design | Text' area to provide a 'text area'
box instead of a single line
First of all, you just need to edit the 'Other Info' prompt that appears as part of your product layout
on the store pages (if you are using a shopping mode of 'Quantity on Product Page').
Advanced Users Guide - 106
To do this:
1.
Select your product layout in the 'Design' tab and locate the following line:
2.
Replace this line with the following code:
<textarea name="O_<Actinic:Variable Name="ProductID"/>" rows="5"
cols="40" maxlength="1000" value="" /></textarea>
You now need to edit the code for the other info prompt that appears in the shopping cart. To do
this:
3.
Go to 'Design | Text'
4.
Click 'Go To' and in the ID field enter '2161'.
5.
It should highlight a line that says find a line that says:
%s<input type="text" name="%s" size="%d" maxlength="%d" value="%s"
%s />
6.
Change the prompt to read:
%s<textarea name="%s" rows="5" cols="40" %d
maxlength="%d">%s</textarea>
7.
Click 'OK' to save your changes.
8.
Now go into your 'Site1' folder and locate a file called 'ActinicOrder.pm'. Open it in
Notepad.
9.
Search for '2161', you should see...
$sHTML = ACTINIC::GetPhrase(-1, 2161, "", $sIndex, 35, 1000,
$sValue, $sStyle);
10. Comment out this line by preceding it with a #.
11. Insert the following immediately after the above line...
$sHTML = ACTINIC::GetPhrase(-1, 2161);
$sHTML =~ s/%d/%s/;
$sValue =~ s/%0a//ig; # we seem to need to remove some Line Feeds
here
$sHTML = sprintf( $sHTML, "", $sIndex, $sStyle, 1000, $sValue);
12. Save the file.
13. Now go into your 'Site1' folder and locate a file called 'OrderScript.pl'. Open it in
Notepad.
14. Look for:if (length $$pProduct{'OTHER_INFO_PROMPT'} > 0)
{
MailOrderLine( "",
$$pProduct{'OTHER_INFO_PROMPT'} . "\r\n " . $CurrentItem{'INFO'},
15. Change to:if (length $$pProduct{'OTHER_INFO_PROMPT'} > 0)
{
my $PatchIt = $CurrentItem{'INFO'};
$PatchIt =~ s/%0a/\r\n /ig;
MailOrderLine( "",
$$pProduct{'OTHER_INFO_PROMPT'} . "\r\n " . $PatchIt,
16. Save the file and then upload your SellerDeck store.
Advanced Users Guide - 107
SellerDeck is not able to provide any detailed support for script changes made. If you find that
there is a problem, an original copy of the script can be found within the 'Original' folder in your
installation. Copy this into your site folder.
Having Two Other Info Prompts
It is possible to split the 'Other Info' field in the shopping cart and on the confirmation page into
two different fields. This allows your customers to provide much more detailed information with a
product. Furthermore, it is possible to only have the extra field created just for specific products,
based on the product reference of the product.
In order to do this, you need to open the file called 'ActinicOrder.pm'. When you have the file
open, do a search for
sub InfoHTMLGenerate
This will bring you into a subroutine within ActinicOrder.pm that controls this functionality.
Look for the following code under where it says 'CUSTOMISATION BEGIN' code:
if ($sProdref eq "5")
{
my @aValues = split /\|\|\|/, $sValue;
if ($bStatic)
{
$sHTML = join "<BR>", @aValues;
}
else
{
$sHTML = "<INPUT TYPE=TEXT SIZE=\"80\" NAME=\"O_1_$nIndex\"
VALUE=\"" . $aValues[0] . "\"><BR>";
$sHTML .= "<INPUT TYPE=TEXT SIZE=\"80\" NAME=\"O_2_$nIndex\"
VALUE=\"" . $aValues[1] . "\">";
}
}
Note the word wrap that has occurred on the 11th and 12th line in the code above. These should be
long lines without line breaks.
Advanced Users Guide - 108
You will see that this code is all preceded with hashes '#'. These comment out the lines and prevent
them from being active. In order to make the lines active, remove the '#'s.
Change the if ($sProdref eq "5") line to reflect the product reference of the product that you want
to use the extra fields. For instance, if you wanted the extra field on a product with a reference of
'b16' then change the line to read
if ($sProdref eq "b16").
You then need to go down to 'sub InfoGetValue' and remove the '#'s from the custom code there,
again changing the if ($sProdref eq "5") line as necessary.
Finally, if you want any specific validation done on the entries in the two fields, you need to go
down to 'sub InfoValidate' and uncomment and adjust the code in there. The sample code there will
flash up a warning message if the number of characters in either field does not exceed '5'.
Once you have made the required changes you can save the file and upload your store.
Disclaimer: This code was provided by a SellerDeck user via the SellerDeck Community
(http://community.sellerdeck.com/) and so can't be supported by the SellerDeck Technical Support
team. If you find that there is a problem, an original copy of the script can be found within the
'Original' folder in your installation. Copy this into your site folder.
Advanced Users Guide - 109
Search
Omitting Certain Products From Search Results
This is a change to the SearchScript.pl Perl script which will mean that any products that end in 'x'
will not be shown in the search results. Note that the search results sequence numbers will show a
missing result.
Open SearchScript.pl within a text editor such as Notepad and locate the following line:
for ($nCount = $nMin; $nCount < $nMax; $nCount++) # process the range of
product references in the results set
Immediately after this line add the 2 lines:
{
# patch
if ( $$rarrResults[$nCount] !~ /x$/ ) # hide products that have reference
ending in x
Then a little way below this, look for the pair of lines
$sHTML .= ACTINIC::ParseXML($sResultMarkup); # parse the XML
}
Immediately after this pair of lines add the single line
}
# patch
Then save the file and upload to test it.
With grateful thanks to Norman Rouxel for this solution.
Disclaimer: This code was provided by a SellerDeck user via the SellerDeck Community
(http://community.sellerdeck.com/) and so can't be supported by the SellerDeck Technical Support
team. If you find that there is a problem, an original copy of the script can be found within the
'Original' folder in your installation. Copy this into your site folder.
Turning the Search Results into a Buyable List of Products
This is a substantial change to SellerDeck, which allows the Search Results to look like a normal
list of products, complete with cart button, etc.
It works by creating a small text file for each product which is incorporated into the search results.
If you have thousands of products make sure your server can handle that number of extra files.
It's designed for sites using 'Quantity on Product Page' and it won't work with 'Single Add To Cart'
pages.
This code is too big to detail in the Advanced User Guide, so you need to go to the 'SellerDeck
Community' where it was originally posted.
Browse to http://community.sellerdeck.com/ and search for 'Search Results Hack'. Or just go
straight to http://community.sellerdeck.com/showthread.php?t=31559
The instructions are in post #8 and #9 on this thread.
Warning – this is a highly advanced change that requires detailed knowledge of SellerDeck and of
web servers. No support is available for this other than asking questions on the thread. Please read
through all the other replies to the thread before posting as some people have already hit a few pitfalls with this solution.
Advanced Users Guide - 110
Creating Multiple Search Tools
The advanced search in SellerDeck is a powerful tool but there is a limitation in that SellerDeck
will only ever generate a single search form on a single search page. This is limited if you have two
different types of product in your online store and you would like to search on each product type
individually.
In order to generate your own multiple search forms, you will first need to allow SellerDeck to get
as far as it can automatically. For example, you might have an online store that has one section of
DVDs and one section of CDs. Each DVD may have a 'Director' property whereas each CD may
have a 'Artist' property.
You can set up the 'Searchable Properties' tab to search on these two properties.
Which will automatically create a corresponding search page.
If you now upload this catalog (or go to 'Web | Generate Web Site') it will generate an HTML file
called 'search.html' and a file called 'customsearch.fil' which you will find in your Site1 (or
equivalent) directory. These are the files that you will need to customise.
Finally, go to 'Settings | Search Settings | Search Options' and un-check where it says 'Catalog
Maintains Search Page'. This will mean that SellerDeck will no longer create any more search page
HTML or a customsearch.fil file; even if you make a change to the search settings in the
application. You are now able to customise these files to your exact specifications.
Editing the Search Page HTML
'search.html' is now a totally complete, fully functional HTML page that can be opened in any
visual HTML editor such as 'Dreamweaver'.
Advanced Users Guide - 111
When you open up this file for editing, please take note of the following:
The <form></form> tags of the search form are located right at the top and bottom of the main area
of the page. Therefore if you are going to create multiple search forms on the same page, you will
have to duplicate and relocate the <form…> and </form> tags to surround each separate HTML
form.
You will need to ensure that any <input type="hidden"> elements are included correctly in each
search form.
You could begin by rearranging the HTML to create an independent search form to look something
like this:
<p>What director are you looking for?</p>
<form method="get" action="http://your.URL/cgi-bin/ss000001.pl">
<input type="hidden" name="RANDOM" value="NETQUOTEVAR:RANDOM" />
<input type="hidden" name="PAGE" value="SEARCH" />
<select size="1" name="S_Director1_0">
<option value="Baz Luhrmann" selected>Baz Luhrmann
...
...
<option value="Stephen Spielberg">Stephen Spielberg
</select>
<input type=SUBMIT name=ACTION value="Search">
</form>
Notice that two hidden input fields are required to get the Perl to treat the form correctly.
Editing the 'customsearch.fil' Files
This online search will not work yet as we still need to create a 'customsearch.fil' file just for this
form to use.
When you open up customsearch.fil in Wordpad, you get something like this:
1
Price!PR
Text!SS!TB
And
Text Property!S_Director1_0
And
Text Property!S_Artist1_1
And
(In Notepad, the line breaks will appear as black blobs)
This file tells the online search which values to look for in the catalogue and how the results are to
be combined with each other.
A breakdown of this file is as follows:
Value
Line
Explanation
Advanced Users Guide - 112
1
Line 1
Indicates format of file. Always begin
the file with this line
Price!PR
Line 2
This means that the search will be
looking at the price fields of the
products. This line will only be here if
you are doing price-based searching.
And
Lines 4 , 6 & 8
Indicates how the different search fields
are to be combined with each other (the
intersection). Set by choosing either
'AND' or 'OR' in the Searchable
Properties tab.
Note that the 'And' or 'Or' refers to how
the preceding line of code is to be
combined with the other search fields.
Text!SS!TB
Line 3
This means that the search will be
scanning short and full descriptions for
any keywords. 'SS' is the name of the
keyword text field whilst 'TB' is the
name of the 'combine keywords using'
radio buttons.
Text Property!Whatever
Lines 5 & 7
The first part of this command refers to
the type of data you are searching on.
This can be one of the following:
Price
Text (keyword search only)
Text Property
Integer
Date
The second part ('Whatever') refers to
the name of the form object.
To edit the above 'customsearch.fil' file to work with an online form that is only looking for
'Directors', you will need to change it to the following:
1
Text Property!S_Director1_0
And then save it as something like 'customsearch2.fil'. The file name must be of the form
'customsearch#.fil'. Ensure there are no blank lines at the bottom of the file.
In order to get your new search form to look for this 'customsearch#.fil' file you need to add a line
of code to the search tool of the following form:
<input type=HIDDEN name="SN" VALUE="#">
Where '#' is the number used in the 'customsearch#.fil' file.
If you did save the file as 'customsearch2.fil', the HTML form code in the search page will now
look like the following:
Advanced Users Guide - 113
<p>What director are you looking for?</p>
<form method="get" action="http://your.URL/cgi-bin/ss000001.pl">
<input type="hidden" name="RANDOM" value="NETQUOTEVAR:RANDOM" />
<input type=HIDDEN name="SN" VALUE="2">
<input type="hidden" name="PAGE" value="SEARCH" />
<select size="1" name="S_Director1_0">
<option value="Baz Luhrmann" selected>Baz Luhrmann
...
...
<option value="Stephen Spielberg">Stephen Spielberg
</select>
<input type=SUBMIT name=ACTION value="Search">
</form>
In order to have SellerDeck to upload this new file, you will need to add it into the list in 'Design |
Additional Files'.
This technique can be expanded to create multiple search pages, each one with a different search
tool on it. Remember to add any additional search pages to the 'Design | Additional Files' list in
order for them to be uploaded. Note that SellerDeck will not automatically link to any custom
written search pages so you will have to write your own HTML to include these.
Joining Search Terms Together in Different Ways
You can also edit the 'customsearch.fil' file to join the search terms together in more complex ways.
For instance, in the case of a catalogue of films, you may wish people to choose either the director
or the star of the movie they want, and then choose what genre (Thriller, Comedy etc.) of film they
are interested in. E.g. "Find all action films starring Harrison Ford or directed by Steven
Spielberg."
If you set up 'Director', 'Star' and 'Genre' as custom properties and set up the 'Searchable Properties'
tab to search on them, the 'customsearch.fil' file generated would look something like the following:
1
Text!SS!TB
Text Property!S_Director1_0
And
Text Property!S_Star1_1
And
Text Property!S_Genre1_2
And
This file would still search on keywords, and would only find films that contain the director AND
the star AND the genre chosen. You could make the 'Director' and 'Star' fields both optional (to
allow people to search on either) but you could not search on the director OR the star at the same
time, and then look for the genre.
However, you can do this by changing 'customsearch.fil' to something like the following:
1
Text Property!S_Director1_0
Text Property!S_Star1_1
Or
Advanced Users Guide - 114
Text Property!S_Genre1_2
And
This code removes the references to the keyword search (allowing you to remove the keyword
search box from the search page) and changes how the search properties are joined together.
Online, the search would act on this file in the following way:
1.
It would firstly see line 2 and find all the films of the chosen director (e.g. Steven Spielberg). It
makes a list of them and stores them this list in its memory
2.
It then would read line 3 and find all the films starring the chosen star (e.g. Harrison Ford) and
adds this list to the director list and holds it in its memory.
3.
The 'Or' in line 4 tells the search to combine both lists into one. If it was an 'And' then the
search at this point would disregard all films starring Harrison Ford that were not directed by
Steven Spielberg (and vice versa)
4.
The search reads line 5 now and finds all the films of the chosen genre (e.g. Action), makes a
list of them and stores them in its memory.
5.
The 'And' in line 6 means that it will firstly compare the genre list with the director and star
list, keeping the products that match. It disregards all the products that do not fulfil either
criteria.
6.
The products that match the required criteria are then displayed in the results page.
Remember that the 'And' or 'Or' command refers to how the preceding line is to be combined with
the results gathered so far.
Marching Plurals in the Search
Sometimes if you have the word 'apples' in your product description, you want people to be able to
find that product if they search for the word 'apple' (without the 's'). This little addition to the Perl
script will take care of that.
Open 'SearchScript.pl' (from within your site directory) in Notepad or a similar editor.
Find the line:
# Combine any multiple-white-spaces into single space
Place the following lines just above that line:
$$psSearchString
$$psSearchString
$$psSearchString
$$psSearchString
=~
=~
=~
=~
s/es$//io;
s/s$//io;
s/es\b//io;
s/s\b//io;
This solution was provided by a customer on the SellerDeck Community
(http://community.sellerdeck.com/), and can't be supported by the SellerDeck Technical Support
team. If you find that there is a problem, an original copy of the script can be found within the
'Original' folder in your installation. Copy this into your site folder.
Keeping a Log of Search Terms Used at the Site
You can enable search term monitoring by editing ActinicConstants.pm and removing the comment
(the '#') from the line:
#$::SEARCH_WORD_LOG_FILE
= "search.log";
Setting any non empty file name to $::SEARCH_WORD_LOG_FILE will result a log file. E.g.
$::SEARCH_WORD_LOG_FILE = "searchword.log";
… will create a file called 'searchword.log' in the acatalog directory on the web server.
Advanced Users Guide - 115
The log file contains the following information:
#
#
#
#
#
#
0 - date/time
1 - browser name or IP address
2 – referrer
3 - customer ID
4 - buyer ID
5 - word list
These values are comma separated. E.g. entering word "Desk" on the search page as unregistered
customer will result the following line in the log file:
2002/04/11 19:17, 10.3.4.1, http://10.3.4.2/actinic/acatalog/search.html,0,0,desk
If more than one search word is entered then the words are separated by spaces. E.g.
2002/04/11 20:00, 10.3.4.1, http://10.3.4.2/catalog-cgi/bb000241.pl,2,3,desk fan
Note: the "2, 3" means that this search was made by a registered customer where the customer ID
is 2 and the buyer ID is 3.
Understanding Relevance
The concept of Relevance is widely used in online search functionality, and was introduced in
SellerDeck 2013 along with the ability to change the sort order of search results.
In Settings | Search And Filtering Settings | Options you can choose which fields are to be indexed
in relation to your products. Each time a word is found in an indexed field for any given product, it
increases the Relevance of the product to searches containing that word.
Words in some fields contribute more to the Relevance score than others. For example, a word
appearing in a product Short Description has a higher weighting than the same word appearing in
the Long Description.
If a word appears twice in a field, the weighting for that field is multiplied by two. By default,
further occurrences are not counted.
The weightings for each field are summed to give the overall Relevance of the product to the word.
For technical reasons the maximum possible score is 4095. The higher the Relevance score of any
product to any word, the earlier the product will appear in search results for that word.
Advanced Users Guide - 116
Contact Us Form
Adding Extra Fields to the 'Contact Us' Form
To create new fields in the 'Contact Us' form you need to:
1.
Go to the 'Design' tab in the 'Select Page Type' drop-down list select 'Contact Us'.
2.
Click on one of the prompts on the page (e.g. 'Message') to select the 'Contact Us Bulk Area'
layout.
3.
Add a new row where you want the field to display using the following
code:
<tr>
<td> </td>
<td>My New Field Name:</td>
<td><input type="text" name="MyNewField" size="50" maxsize="125"
value="" /></td>
</tr>
4.
If the field is to be required then change the field prompt to look
like:
<td><span class="actrequiredcolor">My New Field Name:</span>*</td>
5.
Save and close the file
You now need to edit the Perl script that controls the message sending.
6.
Open 'Windows Explorer' and browse to your site folder (usually called 'Site1'). It's probably
in 'My Documents\SellerDeck v11\Sites'
7.
Open 'MailForm.pl' in a text editor such as Notepad.
8.
Search for: 'sub SendMailToMerchant'
9.
You should see the following line:
# Receive parameters from input hash
#
my ($sEmailRecpt, $sSubject, $sTextMailBody, $sName, $sMessage,
$sHTML);
10. Add in $sMyNewField, so it looks something like
# Receive parameters from input hash
#
my ($sEmailRecpt, $sSubject, $sTextMailBody, $sName, $sMessage,
$sMyNewField, $sHTML);
11. You need to create a variable for each extra field that you want to
display so after :
$sSubject = $::g_InputHash{'Subject'};
add a similar line for each field, for example:
$sMyNewField
= $::g_InputHash{'MyNewField'};
12. Then search for: '# Construct the mail text and send it to the merchant'
Advanced Users Guide - 117
13. You need to add a line for each field after:
$sTextMailBody .= ACTINIC::GetPhrase(-1, 2373) . "\r\n" . $sMessage .
"\r\n\r\n";
for example:
$sTextMailBody .= "MyNewFieldName:" . $sMyNewField . "\r\n";
14. Then directly after these new fields you should see:
my @Response = ACTINIC::SendMail($::g_sSmtpServer,
$$::g_pSetupBlob{EMAIL}, $sSubject, $sTextMailBody, $sEmailRecpt);
15. You need to add in your new variables so they are sent with the email, for example:
my @Response = ACTINIC::SendMail($::g_sSmtpServer,
$$::g_pSetupBlob{EMAIL}, $sSubject, $sTextMailBody, $sEmailRecpt,
$sMyNewField);
16. If you want to make your new field to be required then you need to search for:
if ($sEmailRecpt eq "")
{
$sError .= ACTINIC::GetRequiredMessage(-1, 2371);
}
17. Copy this code and paste it directly after it and change the relevant
parts, i.e.:
if ($sMyNewField eq "")
{
$sError .= "<b>'My New Field'</b> is required<br>";
}
18. Save and close the file and update your site.
SellerDeck is not able to provide any detailed support for script changes made. If you find that
there is a problem, an original copy of the script can be found within the 'Original' folder in your
installation. Copy this into your site folder.
Creating a Newsletter Subscription Form
It is possible to use the above technique to turn your 'Contact Us' form into a 'Subscribe To
Newsletter' form. To do this, first of all you need to edit the 'Contact Us Bulk Area' layout to look
like as follows.
This will add two new fields into the form - 'Surname' and 'Subscribe'. It will also change the
'Message' field to a 'Country' field.
<form method="post" action="<Actinic:Variable Name="SendMailPageURL"/>">
<input type="hidden" name="RANDOM" value="<actinic:variable
name='Random'/>" />
<actinic:block
if="%3cactinic%3avariable%20name%3d%22IsHostMode%22%20%2f%3e">
<!-- Hidden field when in trial mode -->
Advanced Users Guide - 118
<input type="hidden" name="SHOP" value="<Actinic:Variable
Name="HiddenFields"/>" />
</actinic:block>
<actinic:variable Name="ValidationError"/>
<input type="hidden" name="Subject" value="Newsletter" />
<table cellpadding="3" cellspacing="0">
<tr>
<td width="15"> </td>
<td colspan="2">
<strong><Actinic:Variable Name="MailFormHeader"/></strong><br />
<br />
</td>
</tr>
<tr>
<td> </td>
<td>
Forename
</td>
<td>
<input type="text" name="Name" size="50"
value="<Actinic:Variable Name="MailFormNameValue"/>" />
</td>
</tr>
<tr>
<td> </td>
<td>
Surname
</td>
<td>
<input type="text" name="Surname" size="50" value="" />
</td>
</tr>
<tr>
<td> </td>
<td>
</td>
<td>
Subscribe: <input type="radio" checked="checked"
name="Subscribe" value="yes" /><br />
Unsubscribe: <input type="radio" name="Subscribe" value="no" />
</td>
</tr>
<tr>
<td> </td>
Advanced Users Guide - 119
<td>
<span class="actrequired"><Actinic:Variable
Name="MailFormEmail"/> *</span>
</td>
<td>
<input type="text" name="EmailAddress" size="50"
value="<Actinic:Variable Name="MailFormEmailValue"/>" />
</td>
</tr>
<tr>
<td valign="top"> </td>
<td valign="top">
Country:
</td>
<td>
<input type="text" size="50" name="Message"
value="<Actinic:Variable Name="MailFormMessageValue"/>" />
</td>
</tr>
<tr>
<td valign="top"> </td>
<td valign="top"> </td>
<td>
<input type="submit" name="ACTION" value="<Actinic:Variable
Name="MailFormSendButton"/>" />
</td>
</tr>
<tr>
<td valign="top"> </td>
<td colspan="2" valign="top">
<Actinic:Variable Name="RequiredFields"/> <span
class="actrequired"><Actinic:Variable Name="Highlighted"/></span>.
</td>
</tr>
</table>
</form>
Next, you need to go into 'Design | Text' and go to Phase: -1, ID: 2370 and change the prompt there
to 'First Name' (from Name). Then go down to ID: 2373 and change the prompt from 'Message' to
'Country'.
Finally, you need to edit the 'MailForm.pl' file as described above to add $sSurname and
$sSubscribe to the list of values supported by the Perl. e.g.
# Receive parameters from input hash
#
my ($sEmailRecpt, $sSubject, $sTextMailBody, $sName, $sSubscribe,
$sSurname, $sMessage, $sHTML);
and
$sSubscribe
= $::g_InputHash{'Subscribe'};
Advanced Users Guide - 120
$sSurname
= $::g_InputHash{'Surname'};
SellerDeck is not able to provide any detailed support for script changes made. If you find that
there is a problem, an original copy of the script can be found within the 'Original' folder in your
installation. Copy this into your site folder.
Advanced Users Guide - 121
Shopping Cart
Removing Product Hyperlinks from the Shopping Cart
This technique will remove the link to the product that appears around product names in the
shopping cart.
Locate 'ActinicOrder.pm' within the 'Site1' (or equivalent) folder. Open it in Notepad (or a similar
text editor).
Search for $sProdLinkFormat, you should see...
my $sProdLinkFormat = "<a
href=\"$::g_sSearchScript?PRODREF=%s&NOLOGIN=1$sShop\">%s</A>";
replace this line with...
my $sProdLinkFormat = " <!-- %s -->%s";
Save your changes and upload to see the results.
SellerDeck is not able to provide any detailed support for script changes made. If you find that
there is a problem, an original copy of the script can be found within the 'Original' folder in your
installation. Copy this into your site folder.
Using Dual Currency Pricing in the Store Pages But Not in the Cart
If you are showing prices in two currencies, but only want the prices in the shopping cart (and
checkout) to show one currency, then you can fix this with a one line change in 'ActinicOrder.pm'.
Locate this file in your 'Site1' (or equivalent) folder and open it in Notepad. Look for the line...
if($$::g_pSetupBlob{'PRICES_DISPLAYED'} &&
$$::g_pSetupBlob{'ALT_CURRENCY_PRICES'})
and change it to
if($::FALSE && $$::g_pSetupBlob{'PRICES_DISPLAYED'} &&
$$::g_pSetupBlob{'ALT_CURRENCY_PRICES'})
SellerDeck is not able to provide any detailed support for script changes made. If you find that
there is a problem, an original copy of the script can be found within the 'Original' folder in your
installation. Copy this into your site folder.
Changing the Destination of the 'Continue Shopping' Button
This section will show you how to change the URL for ‘Continue Shopping’ on the ‘View Cart’
page.
Locate 'CartManager.pl' within your 'Site1' folder and open it in 'Notepad' for editing.
Locate
sub ContinueShopping
A few lines down you will see:
my $sURL = $::Session->GetLastShopPage();
Advanced Users Guide - 122
Comment out this line and add a new line so that it reads...
#
my $sURL = $::Session->GetLastShopPage();
my $sURL = "TargetPage";
Where 'TargetPage' is the path to the page to be displayed, eg ‘/index.html’ or
‘/acatalog/Cameras.html’.
Then save the file and upload the store.
SellerDeck is not able to provide any detailed support for script changes made. If you find that
there is a problem, an original copy of the script can be found within the 'Original' folder in your
installation. Copy this into your site folder.
Removing the Bounce Page when Adding to Cart
When you use a shopping mode of 'Quantity on Product Page', the standard behaviour is when a
customer clicks the add to cart button, SellerDeck shows a bounce page with the updated shopping
cart details, and then takes the customer back to the store page.
However, the bouncing cart page has the potential to confuse some customers and it might
potentially be unneccessary, particularly if you have implemented a cart summary in your page
layout template that shows the updated cart totals anyway.
This method causes the bounce page to be suppressed, but the product will still be added to the
cart, and all errors (e.g. exceeding maximum quantities) will still appear correctly.
This requires a modification of 'ShoppingCart.pl' (which SellerDeck uses to build 'ca00000n.pl')
Locate 'ShoppingCart.pl' in your SellerDeck site folder, and edit with Notepad or a code editor eg
Dreamweaver.
Goto line 1122:
@Response = ReturnToLastPage($nBounceDelay, ACTINIC::GetPhrase(-1, 1962)
. $sCartHTML . ACTINIC::GetPhrase(-1, 1970) . ACTINIC::GetPhrase(-1,
2051), $sPageTitle); # bounce back in the broswer
And replace with:
@Response = ReturnToLastPage(0,""); # immediate bounce back in the
browser without page display
Note: you must ensure that 'Bounce Page Delay' (in 'Design | Design Options' is set to something
other than '0'.
This will not affect the behaviour of the 'Quantity on Confirmation Page', or 'Quantity in Shopping
Cart' shopping modes.
SellerDeck is not able to provide any detailed support for script changes made. If you find that
there is a problem, an original copy of the script can be found within the 'Original' folder in your
installation. Copy this into your site folder.
Advanced Users Guide - 123
Checkout
Using Images for the Checkout Buttons
You can use images for the 'Next', 'Back' and 'Cancel' buttons in the checkout. This requires a little
Perl customisation, so please carry out the steps in this exercise with care.
To begin, use the 'Select Page Type' drop-down in the 'Design Tab' to change to the 'Checkout Page
1' page. Scroll down until you find the three grey 'Next', 'Back' and 'Cancel' buttons.
Click on the '<Back' button and replace
<input type="submit" name="ACTION" id="idBtnPrev" value="BackButton"
class="normal-button" />
with
<input type="image" name="ACTION_BACK" id="idBtnPrev"
value="<actinic:variable encoding="html" name="BackButton" />"
src="back.gif" />
Next, click on the 'Cancel' button and replace
<input type="submit" name="ACTION" value"CancelButton" class="normalbutton"/>
with
<input type="image" name="ACTION_CANCEL" value="<actinic:variable
encoding="html" name="CancelButton" />" src="cancel.gif"/>
Next, click on the 'Next' button and replace
<input type="submit" name="ACTION" id="idBtnNext" value="NextButton"
class="highlight-button"
with
<input type="image" name="ACTION_NEXT" id="idBtnNext"
value="<actinic:variable encoding="html" name="NextButton" />"
src="next.gif"
Next, use the 'Select Page Type' drop-down in the 'Design Tab' to change to the 'Checkout Page 2'
page. Scroll down until you find the grey 'Confirm Order' button. Click on it and replace
<input type="submit" name="ACTION_CONFIRM" id="idBtnConfirm"
value="ConfirmOrderButton" />" class="highlight-button"
with
<input type="image" name="ACTION_CONFIRM" id="idBtnConfirm"
value="<actinic:variable name="ConfirmButton" />" src="confirm.gif"
This is all assuming 'back.gif' is the image you want to use for the back button, 'cancel.gif' is the
image you want to use for the cancel button, 'next.gif' is the image you want to use for the next
button and ‘confirm.gif’ is the image you want to use for the ‘Confirm Order’ button. These images
need to already be in your 'Site1' (or equivalent) folder.
Finally, locate 'OrderScript.pl' within your 'Site1' (or equivalent) folder with Notepad and find the
following code:
@Response = ReadAndParseBlobs();
# read the catalog blobs
($Status, $Message) = @Response;
# parse the response
if ($Status != $::SUCCESS)
{
ACTINIC::ReportError($Message, ACTINIC::GetPath());
}
Advanced Users Guide - 124
Underneath it, copy and paste the following code:
if (!exists $::g_InputHash{'ACTION'})
{
if (defined $::g_InputHash{'ACTION_NEXT.x'})
{
$::g_InputHash{'ACTION'} = ACTINIC::GetPhrase(-1, 502);
}
elsif (defined $::g_InputHash{'ACTION_BACK.x'})
{
$::g_InputHash{'ACTION'} = ACTINIC::GetPhrase(-1, 503);
}
elsif (defined $::g_InputHash{'ACTION_CANCEL.x'})
{
$::g_InputHash{'ACTION'} = ACTINIC::GetPhrase(-1, 505);
}
elsif (defined $::g_InputHash{'ACTION_CONFIRM.x'})
{
$::g_InputHash{'ACTION_CONFIRM'} = ACTINIC::GetPhrase(-1,
2602);
}
}
Now upload to see your new button images. If it does not work, there is an untouched
OrderScript.pl within the 'Original' folder in your SellerDeck installation, which you can copy into
your 'Site1' (or equivalent) folder.
Changing the Order of the Shipping Methods
The script ShippingTemplate.pl (in the 'ShipControl' subfolder within your site folder) determines
the sequence of the shipping classes shown in the checkout.
The script supports 4 sorting sequences, by cost (ascending or descending) and by description
(ascending or descending). The default is to sort by cost ascending.
To change the sequence:
1.
Locate the file 'ShippingTemplate.pl' in the ShipControl folder below the site folder.
2.
Open the file in Notepad.
3.
Search for ‘CUSTOMISE: Sort’
4.
Here you will find the four options, the last three are commented out with a ‘#’ at the start
of the line’
5.
Insert a ‘#’ at the start of the line of the currently enabled sort option and remove the ‘#’
from the start of the line of the sort option that you wish to enable.
6.
Save and Exit
7.
Update the site.
Important: If you enable either the ascending or descending alphabetical sort then you will need to
replace ‘<=>’ with ‘cmp’.
SellerDeck is not able to provide any detailed support for script changes made. If you find that
there is a problem, an original copy of the script can be found within the 'Original' folder in your
installation. Copy this into your site folder.
Advanced Users Guide - 125
Displaying Shipping Options as Radio Buttons
This change will replace the shipping class drop-down list in the checkout, with a set of radio
buttons.
You will need to edit 'ShippingTemplate.pl', which you will find within your 'ShipControl' folder.
Open the file in Notepad or an equivalent text editor.
Look for this line
$sSelectHTML = "<SELECT ID='lstClass' NAME='ShippingClass'>\n";
Change it to
# $sSelectHTML = "<SELECT ID='lstClass' NAME='ShippingClass'>\n";
Next, look for this line
$sSelectHTML .= "</SELECT>\n";
and replace it with
# $sSelectHTML .= "</SELECT>\n";
Next, look for
'SELECTED ':
and replace it with
'checked="checked" ':
Finally, look for
$sSelectHTML .= sprintf("<OPTION %s Value='%s'>%s\n",
and replace it with
$sSelectHTML .= sprintf("<input type=\"radio\" name=\"ShippingClass\" %s
value=\"%s\">%s<br />\n",
SellerDeck is not able to provide any detailed support for script changes made. If you find that
there is a problem, an original copy of the script can be found within the 'Original' folder in your
installation. Copy this into your site folder.
Advanced Users Guide - 126
Customer Accounts
Taking the Customer to Brochure Home Page after Login
By default, when a customer logs in they are taken to the store home page. This solution will take
your customers to the brochure home page instead.
You need to go to your site folder (usually 'Site1') and edit 'AccountsScript.pl' in Notepad.
Search in the file for ACTINIC::CAccLogin();
Immediately above this, add the following lines:
if( $::g_InputHash{USER} and $::g_InputHash{HASH} )
{
$::g_InputHash{PRODUCTPAGE} =
$$::g_pSetupBlob{'BROCHURE_MAIN_PAGE'}; $sProdRef = "";
}
Save and close the file and then upload to see the results.
SellerDeck is not able to provide any detailed support for script changes made. If you find that
there is a problem, an original copy of the script can be found within the 'Original' folder in your
installation. Copy this into your site folder.
Suppressing the 'Re-Enter Password' Page
This will remove the 'Confirm Password' page that appears at the end of the checkout for any
customers who have logged in with a username and password.
Locate the OrderScript.pl file and open it in a text editor such as Notepad or Dreamweaver.
Search for 'sub DisplayPage'
Underneath this, look for the following lines:
while ($nKeyCount == 0 &&
$nPageNumber >= 0)
{
my $sTempCookie;
Just after these lines, insert the following code into the file:
my $ePaymentMethod=
ActinicOrder::PaymentStringToEnum($::g_PaymentInfo{'METHOD'});
if ($ACTINIC::B2B->Get('UserDigest') && # if a user is logged in and
($ePaymentMethod == $::PAYMENT_ON_ACCOUNT || # the payment method is pay
on account or
$ePaymentMethod == $::PAYMENT_INVOICE) && ($nPageNumber == 3)) {
$nPageNumber += $nInc;
}
Advanced Users Guide - 127
Just to be sure it is on the right place, the lines after the inserted lines must look like the following:
($status, $sMessage, $pVarTable, $pDeleteDelimiters, $pKeepDelimiters,
$pSelectTable, $sTempCookie) =
ProcessPage($nPageNumber);
# process the current page
Save and close the file and upload your site.
SellerDeck is not able to provide any detailed support for script changes made. If you find that
there is a problem, an original copy of the script can be found within the 'Original' folder in your
installation. Copy this into your site folder.
Advanced Users Guide - 128
Orders
Making the SellerDeck Order Number Shorter
Currently, order numbers are made up the customer initials, then the postcode, then a sequential
number – totalling 14 characters.
If you want this to be shorter, use the following technique.
In this example we will replace the first part of the order number with two letters ('SD') and then
only have 5 characters for the sequential number, rather than 8.
Locate the file 'OrderScript.pl' within your site folder and open it using 'Notepad' or a similar text
editor.
Search for '0000000'. You should find the following line:
$::s_sOrderNumber = $sInitials . $sPostCode .
substr($$::g_pSetupBlob{CGI_ID}, -1) . substr("0000000" . $nCounter, -7);
Change the line to:
$::s_sOrderNumber = "SD" . substr($$::g_pSetupBlob{CGI_ID}, -1) .
substr("0000" . $nCounter, -4);
Change "SD" as required.
SellerDeck is not able to provide any detailed support for script changes made. If you find that
there is a problem, an original copy of the script can be found within the 'Original' folder in your
installation. Copy this into your site folder.
Changing the Time on the Orders
This section will show you how to change the time that shows on the customer receipt email, and
the date that the orders get created.
SellerDeck uses GMT for the date on the orders. In order to change this, you need to edit the Perl
scripts in several places.
First you need to edit the 'Order Date' function.
Within your site directory, find 'ACTINIC.pm' and open it in a text editor
Find…
sub GetActinicDate
…and then find the following line in this function:
($sec, $min, $hour, $mday, $mon, $year, $wday, $yday, $isdst) =
gmtime(time);
Then adjust the time as required by adding (or subtracting) seconds from the 'time' value. E.g. if
you want the time to be displayed as a GMT-5 time then the above line should be modified as
($sec, $min, $hour, $mday, $mon, $year, $wday, $yday, $isdst) =
gmtime(time - 5 * 60 * 60);
If you save your changes and upload your site then all orders will be downloaded by using the
adjusted times.
Advanced Users Guide - 129
The next step is to change the time on the customer confirmation email.
Locate 'OrderScript.pl' within your site directory and open it in Notepad.
Find…
sub GenerateCustomerMail
… where the same line as above can be found.
Just apply the same changes here and save the file. Please note that there is a line just a few lines
below which contains the string 'GMT'. This should also be modified to reflect your real time zone.
In other words the line
$sDate = $sDatePrompt . sprintf(" %2.2d:%2.2d GMT", $hour, $min);
should be modified to use your time zone. E.g.
$sDate = $sDatePrompt . sprintf(" %2.2d:%2.2d PST", $hour, $min);
The receipt page already uses the server's local time. If it is not appropriate then this can also be
modified by editing 'sub DisplayReceiptPhase' in OrderScript.pl. Just find the line:
($sec, $min, $hour, $mday, $mon, $year, $wday, $yday, $isdst) =
localtime(time);
and modify as appropriate. The suggestion is to change this to the same as the one in
'GetActinicDate'.
SellerDeck is not able to provide any detailed support for script changes made. If you find that
there is a problem, an original copy of the script can be found within the 'Original' folder in your
installation. Copy this into your site folder.
Using The Referrer Perl Script
An extra Perl file (normally called rs000001.pl – depending on your script ID) is available in the
installer and is automatically uploaded to your web site. It is a way of tracking which sites
customers have come through in order to reach your site. It works by creating a text string as a
cookie in the customer's browser if they click on a specific type of hyperlink. If the customer places
an order, the text string is then included with the order.
The main uses of this are as follows:
If you have several links on different websites that point to the same store, you can see how
much business comes from each of those links by assigning a different text string to each link.
If you have several links pointing to your catalogue from different parts of your website, you
can see which part of your website is the most popular route for people to go down before
arriving at your store by assigning a different text string to each link.
Once an order is downloaded the text string from the cookie appears in a field called
sUserDefinedGeneral in the 'Order' table in 'ActinicCatalog.mdb'. By changing the User Definable
3 prompt in 'Design | Text | Web Site (cont) | General Information', to 'Referrer' (but NOT showing
it), you can make the text string generated by referrer.pl appear on the Transaction Logs (in the
format 'Referrer: <Text String>').
Correct Format for the Call to The Referrer Script
Presuming the following settings:
URL of your cgi-bin folder
http:// www.myserver.com/cgi-bin/
URL of acatalog directory
http:// www.myserver.com/acatalog/
CGI-Script ID
1
Advanced Users Guide - 130
Path from cgi-bin to the acatalog folder
../htdocs/acatalog
Page you want people to land on
Section_Page.html
Text string to indicate where people have come from
123
The call to referrer.pl would be as follows:
http://www.myserver.com/cgibin/rs000001.pl?SOURCE=123&DESTINATION=Section%5fPage%2ehtml&PATH=%2e%
2e%2fhtdocs%2facatalog&BASEURL=http%3a%2f%2fwww%2emyserver%2ecom%2faca
talog%2f
There are four values you pass to the referrer script:
SOURCE=
The text string to indicate where people have come from.
DESTINATION=
The page in your 'acatalog' folder you want people to land on
PATH=
The path from your cgi-bin folder to your 'acatalog' folder
BASEURL=
The URL of your acatalog directory
The values can be anything as long as they follow the x-www-form-urlencoded standard (%XX
where XX is the hex code for the special character like spaces, & , ?, etc.). The text string is limited
to 255 characters.
For example, http://www.myserver.com/acatalog/ will appear as:
http%3a%2f%2fwww%2emyserver%2ecom%2facatalog%2f
/ becomes %2f
. becomes %2e
_ becomes %5f
: becomes %3a
- becomes %2d
NB this script is not compatible with using PayPal as a Payment Method.
Advanced Users Guide - 131
Advanced Users Guide - 132
Emails
Adding Extra Fields into the Customer Email
General Information Fields
This technique will allow you to put the customer's answer to the question you ask with the 'How
did you find our site?', 'What was your reason for buying' and 'User Definable 3' questions into the
receipt email that is sent to the customer. These prompts can be edited in 'Design | Text | Web Site
(cont) | General Information'.
Please note that this technique will require you to edit the Perl scripts that are used to run the online
checkout. SellerDeck cannot provide support for any programming changes made. If it goes wrong,
please revert back to the original 'OrderScript.pl' script, which is found in your 'Original' directory.
Edit OrderScript.pl in 'Notepad'.
Search for 'CUSTOMER_NAME' you will see...
$ACTINIC::B2B->SetXML('CUSTOMER_NAME',$sName);
After this line, insert the following...
#
# GeneralInfo
#
$ACTINIC::B2B->SetXML('HOWFOUND', $::g_GeneralInfo{'HOWFOUND'});
$ACTINIC::B2B->SetXML('WHYBUY', $::g_GeneralInfo{'WHYBUY'});
$ACTINIC::B2B->SetXML('GENUSERDEF', $::g_GeneralInfo{'USERDEFINED'});
Save and exit.
You will now be able to use the following tags in the 'Customer Email' layout (available in the
'Select Page Type' drop down list in the 'Design' tab):
<Actinic:HOWFOUND/>
<Actinic:WHYBUY/>
<Actinic:GENUSERDEF/>
Purchase Order Number
This section will show you how to place your customers' purchase order number into the email they
are sent.
Open 'OrderScript.pl' within your site folder in Notepad.
Find the line:
$ACTINIC::B2B->SetXML('CUSTOMER_NAME',$sName);
You will find this in the sub 'GenerateCustomerMail' function.
Once you have found this line, add the following code underneath:
$ACTINIC::B2B->SetXML('PURCHASEORDERNUMBER', $::g_PaymentInfo{'PONO'});
Once you have made this change, you will be able to use the tag
<Actinic:PURCHASEORDERNUMBER/> in the 'Customer Email' layout.
Shipping Method
This will show you how to include the customer’s selected shipping class as a variable in the online
receipt.
Advanced Users Guide - 133
Open ‘OrderScript.pl’ on Notepad and search for “read the template”.
It will jump to the following lines:
#
# Read the template
#
Just above this, enter the following lines:
#
# Add shipping info
#
$ACTINIC::B2B->SetXML('ShippingClass', $::s_Ship_sShippingDescription);
You can then enter <Actinic:ShippingClass/> into the 'Customer Email' layout wherever you want
the shipping method to appear.
Order Number
To quote the current order number in an email, insert the following variable:
<actinic:variable name="OrderNumber" />
Payment Method
This technique will show the Payment Method in the email that gets sent out when the customer
places an order
Edit 'OrderScript.pl' in your site folder (take a backup first)
Search for:
#
# Read the template
#
Insert the following directly before the above:
#
# Add payment info
#
my $sPaymentDescription =
>{PROMPT};
$::g_pPaymentList->{$::g_PaymentInfo{METHOD}}-
$ACTINIC::B2B->SetXML('PaymentMethod', $sPaymentDescription);
Close and save the file
You can then add the following into your customer email template:
Payment Method: <Actinic:PaymentMethod/>
Advanced Users Guide - 134
Section D – Other Tricks
Importing
Creating a Design Import File
A 'Design Import' file is a hierarchical file that just contains layout code (and variables/layout
selectors etc.). It is a quick way of passing on design code from one copy of SellerDeck to another.
To generate a design import file, carry out a Partial Site Design snapshot export (Design | Deploy
Partial Site Design) containing the layouts you want in the import file.
Then in the site folder will be a file called Act_DesignExport.txt, which is a hierarchical export file
of all the design objects contained in the snapshot.
Advanced Users Guide - 135
Reports
Adding Your Own Reports into SellerDeck's Built-in List
First, you need to save your custom report in the SellerDeck installation directory.
Next, you need to edit the file called ‘Reports.ini’, which can be found within the site working
folder (normally ‘Sites\Site1’). Edit the code at the bottom to look something like the following:
[Reports]
TransactionsSummaryByReferrer="Transaction Summary by Referrer"
[TransactionsSummaryByReferrer]
ReportName=ME_TransByRefV6.rpt
FromDate="Select &From:"
ToDate="Select &To:"
TestedDate="orders.date ordered"
PromptID=4
PromptPhase=1
SelectionFormula=
ExtraConditions="{Orders.bOrderIsDeleted} = false and {Orders.nPaymentStatus} <> 8
and {Orders.nPaymentStatus}>0"
Explained :
[Reports] :
A section that lists the user defined reports and references a section
giving the report details.
[TransactionsSummaryByReferrer]: the section for this report
ReportName:
the file name of the report, must be in the main catalog directory
FromDate:
the prompt for the from date
ToDate:
the prompt for the to date
TestedDate:
the crystal format date field to test
PromptID:
prompt id for report string
PromptPhase:
prompt phase for report string
SelectionFormula
selection formula for the report
ExtraConditions
extra where clause conditions
Unfortunately, you can't add a report to work with the currently selected catalog items or orders.
Advanced Users Guide - 136
Mailing Lists
'Marketing | Mailing Lists' allows you to filter your customer data by specific criteria to generate
mailing lists. Here are some advanced tips for filtering customer data for SellerDeck Business
users:
List All Customers Who Have Bought Product X But Not Product Y
Within the tree in the 'Select Products' tab, select your product X products – i.e. the products that
your desired customers have bought.
Within the 'Product Search' tab, select 'Exclude matching products' and then enter the product
reference of product Y (the products that your desired customers haven't bought) into the
'Reference' field.
You can now set up your 'Main' tab to search for particular date ranges and click 'Preview list' to
check what customers have been selected.
Printing Packing Labels For Today's New Orders
Within the 'Main' tab, set the date fields to only contain today's date. You might also want to set the
'Order Status' to 'Complete'.
Go to the 'Options' tab and under 'Unique Field' select 'Order Number'.
Now go to the 'Preview' tab and click the 'Print' button. Under 'Type' select 'Label Sheets' and then
select how many labels per sheet you want to use. Click 'Preview' to check your data.
Advanced Users Guide - 137
Uploading
Uploading Without FTP Access
SellerDeck uploads its files via FTP. If a user is not able to have FTP access to his or her cgi-bin
directory, it is possible to work around this by having the user manually generate the files that are
normally transmitted to the website via FTP. The rest of the site can then be transmitted via HTTP.
These can then be passed onto the ISP to be installed on the web site by the ISP.
In order to manually generate the files required, the user must carry out the following:
1.
Start SellerDeck
2.
Set all the Network Preferences (found at Web | Network Setup) except the FTP details. (Refer
to the main help file if required.)
3.
Go to 'Advanced | Generate Scripts'. Follow the directions to install the files that are normally
FTPed to your web site..
To update your web site installation,
Transfer the CGI scripts to the CGI-BIN on your web server:
nq000001.pl
ms000001.pl
ca000001.pl
os000001.pl
bb000001.pl
ss000001.pl
sh000001.pl
md000001.pl
al000001.pm
ad000001.pm
as000001.pm
di000001.pm
ae000001.pm
ao000001.pm
Create the SellerDeck web site directory ('acatalog')
If the web server is a UNIX server, be sure to set the proper executable permissions on the CGI
scripts. The CGI scripts can be found in your site folder (usually called 'Site1'). The applet
archives and loose classes can be found in C:\Program Files\SellerDeck v11\.
Once the files are in place, the user needs to use the 'Web | Update Website' menu option to
complete the upload process.
If the user changes their network preferences or selects the 'Web | Refresh Website' menu option,
SellerDeck will regenerate all of the "base" files and it will appear to SellerDeck that these files
Advanced Users Guide - 138
need to be uploaded, even if the vendor did a "manual" install immediately before the refresh. This
is not a serious problem and it can be worked around. The correct operation should be as follows:
1.
Change some network settings or prepare for a refresh.
2.
Select the 'Web | Generate Scripts' menu option.
3.
Manually install the base files at the web site if they have changed at all.
4.
Select either the 'Web | Update Website' menu option or the 'Web | Refresh Website' menu
option.
5.
A warning will be shown, explaining that the base files need to be uploaded. Click the OK
button.
6.
Let the upload complete.
7.
Select the 'Web | Generate Scripts' menu option. Again but don't transfer any files to the web
site.
8.
Further uploads will complete without the warning from step e.
Using SellerDeck with a Firewall
SellerDeck is composed of two parts:
1) An application that runs on a PC that is the part that the merchant operates. This is the 'PC
client'
2) Online components (written in Perl) that run on a web server.
If there is a firewall between the PC client and the web server, the following must be allowed:
HTTP
FTP
HTTPS (when security has been set to "SSL")
SellerDeck uses the standard ports 80 for HTTP, 21 for FTP.
Also, SMTP communications take place between the web server and the selected SMTP server.
The SMTP server will usually be on the same physical server, but if communication is via a
firewall it must allow SMTP. Obviously, the SMTP server must be allowed to send emails to the
general Internet.
Customers will use a browser to buy from the online shop. If there is a firewall between the
browser and the web server, the following must be allowed:
HTTP
HTTPS (when security has been set to "SSL")
SellerDeck uses the standard port 80 for HTTP.
Advanced Users Guide - 139
Section E – Web Servers
SellerDeck Hosting Requirements
Specifications Required for SellerDeck to Run
SellerDeck installs on a website by sending certain files to the website via FTP. The SellerDeck
scripts do not have very complex requirements: all the user needs is a web hosting account that
allows them to run CGI scripts written in Perl.
The specific requirements for SellerDeck to run successfully are as follows:
1.
A UNIX or Windows NT system running a web server.
2.
The web server must support POSTs and GETs to CGI scripts implemented in Perl
3.
Perl 5.004 or greater must be installed on the server
4.
The user must have access to a cgi-bin directory (or any directory that allows them to execute
CGI scripts).
5.
The user must have access to a web server document directory (a directory from which the web
server distributes files). This directory is referred to as the web root directory.
6.
The CGI scripts must have access to the web root directory (the directory from #5).
7.
The effective user ID of the CGI scripts when they are executed via the web browser must
have read and write access to the web root directory (from #5).
8.
The user ID of the web server must have read access to the web root directory (from #5) and
read/execute access to the cgi-bin directory (from #4).
9.
The server must execute the CGI scripts in the directory in which they are installed. (There
has never been a problem with UNIX servers or third party NT web servers violating this
requirement, but Microsoft's IIS breaks this rule unless the cgi-bin directories are located in a
particular directory specified by IIS.)
10. The user must have FTP access to the server, or they must be running in Freetrial* mode, or
they must do manual installs**.
11. If the user plans to FTP files to the server, their FTP account must be able to read, write, and
delete files in the cgi-bin directory and the web root directory (from #5). They must also be
able to create sub-directories in the catalog directory. Users on UNIX systems must also be
able to change the file and directory permissions.
12. If the user plans to run in Freetrial mode, they must have an account with an ISP that supports
Freetrial.
13. If the user plans to perform manual installs, they must have some method of transporting and
installing the files on the web server.
14. A SMTP server must be available to the CGI scripts if the user would like to be notified via
email when new orders arrive.
Advanced Users Guide - 140
15. If the user plans to use SSL to secure the credit card details of their customers, the catalog files
(files in the acatalog directory created within the acatalog directory from #5) must be
accessible to the secure server.
* Freetrial is a version of SellerDeck which comes preconfigured to be hosted on a specific server.
It does not require FTP as all the cgi and java files are already loaded on the server. It is used for
SellerDeck's trial hosting.
** A Manual Install is the process by which the cgi and java files, that are normally transmitted to
the website via FTP, are generated on the desktop computer. The files can then be transmitted to
the website via another method. This is normally used when a user does not have FTP access to
their site.
Web Space Required by SellerDeck
A formula for estimating the amount of space you will need at the web site for your catalogue is as
follows:
if p = number of products in the store
and s = number of sections you are planning on using
then
Size of store (in MB) = (0.85p + 15.55s)/1000 + 0.8
The above is based on the Business theme, with compacted HTML and an average of 30 words per
full description. This figure includes the Perl and Java etc. but does not include images (which can
often form the bulk of the space taken up on a website.)
Disclaimer: These figures are based only on rough estimates and should be accepted as such.
Permissions required by SellerDeck Ecommerce
UNIX Servers
If the customer is running in normal mode, the minimum permissions required are:
'cgi-bin' directory
755
'acatalog' directory
The FTP user ID must have full permissions (7)
The effective user ID of the CGI scripts must have read/write permission
The effective user ID of the Web server must have read permissions. Depending on the set up,
the permissions could be 700, 760, 764, 746, or 706. 700 and 760 are probably the most
common.
If you encounter problems with permissions when trying to upload your store for the first time, try
setting the permissions on the effective user ID of the web server to '777'. Once your store is
uploaded, progressively tighten up the permissions on the web server to one of the settings
recommended above, or until your store no longer functions.
Advanced Users Guide - 141
NT Servers
See Section G , below.
Advanced Users Guide - 142
Miscellaneous
SellerDeck's Online Components
The components that SellerDeck uploads to the Internet are detailed below.
Directory
/cgi-bin
/acatalog
/acatalog/COM/Acti
nic/Catalog
Files
Perl Files
Web Pages
Images specified within the application
Shipping/tax/login/search config. files
Binary files accessed by Perl when adding a
product to the shopping cart etc.
Unique order number generation files
E-mail templates
'encrypt' files containing encryption key data
Java Archives
Extension
.pl
.html
.gif / .jpg
.fil
.cat
.num
.txt
.cab / .zip
.class
Advanced Users Guide - 143
Section F: Installing a
Standalone Demo on a PC
These instructions will allow you to turn your PC into a web server, in order to be able to upload a
SellerDeck store for testing/demonstration purposes - without connecting to the Internet.
Note: This will only work for a user on a PC with Administrative rights.
Downloading The Required
Components
There are three components that are required are:
Perl Interpreter - to execute the SellerDeck Perl scripts
Web Server - so you can connect to folders on your PC with an http address
FTP Server - so you can log into folders on your PC via FTP, with a username and
password
Here is where you can get hold of these three components (instructions are correct as of 06/02/04):
Perl Interpreter
Application:
ActivePerl
Preferred Version:
5.8.8.817 (or higher)
URL:
http://www.activestate.com/
Directions:
In the top menus, go to ‘Languages | ActivePerl Family’ and then
click ‘Download’. Then click on 'ActivePerl'
You will need to register with your name, email address and
company name before you download.
Download the Windows MSI package.
Web Server
Application:
Apache HTTP Server
Preferred Version:
2.2.3
URL:
http://httpd.apache.org/
Advanced Users Guide - 144
Click on the 'Download > From a Mirror' link at the left hand side.
Directions:
Scroll down to where it says 'Apache 2.2.3 is the best available
version' and under it, click the link where it says 'Win32 Binary
(MSI Installer)'. Note that the best available version may be higher
than 2.2.3 The file will be called something like 'apache_2.2.3win32-x86-no_ssl.msi'.
FTP Server
Application:
War FTP Daemon
Version:
1.82
URL:
http://www.warftp.org/
Directions:
Click on the 'Download' link.
Scroll right to the bottom of the page to where it says 'War FTP Daemon
1.80 (Current)'
Ignore where it talks about beta versions, and just click the 'warftpd-1.8200-RC2-i386.exe' link to download the file.
Advanced Users Guide - 145
Installation Instructions
ActivePerl
Run 'ActivePerl-*.*.*.*.msi' (different versions have different filenames in place of the asterisks).
A successful installation can be achieved by going with all the default settings in the installer
(although you can click 'Browse' when required to install on a drive other than C:\).
Note: You need to restart the computer before Perl will work properly.
Apache HTTP Server
Run 'apache_2.0.59-win32-x86-no_ssl.exe' (or whatever version you have downloaded).
During installation, set both the 'server name' and 'web site name' to 'localhost'. For the
administrator email, just put 'anyone@localhost'.
IMPORTANT: The default installation directory should be changed to C:\Apache2 (rather than
C:\Program Files\Apache Group). Naturally, you can install on D:\ rather than C:\ if required.
If you are using Windows NT/2000/XP then Apache will start right away after installation. There is
a 'Service Manager' icon appearing in the system tray next to the clock that you can use to monitor
Apache.
War FTP Daemon
Run 'warftpd-1.82-00-RC2-i386.exe'. It will extract the installation files to a temporary folder, and
you can click 'INSTALL' to install the application.
You can just accept the default installation directory (or change it to install on D:\ rather than C:\ if
required).
A configuration wizard will then start. Select that you want a 'New Installation' and then just accept
the next three defaults.
IMPORTANT: When the install wizard asks you to enter a 'root file system', the click the browse
'…' button and browse to 'C:\Apache2\htdocs'. Click 'Next >' when ready.
Accept the next default and then enter a 'SYSADMIN' password for the FTP Manager. Remember
to make a note of the password you enter, as you will need it when you first start the server. Click
'Next>'.
Don't worry about entering an email address, and then click 'Next>' twice until you see a green
'Go!' and you are ready to start the installation.
War FTP Daemon will then configure itself and start. You can access it at any time by clicking the
yellow triangle in the system tray (next to the clock).
Advanced Users Guide - 146
Configuration
Apache
Under the 'C:\Apache2\htdocs' directory create a directory called 'cgi-bin'.
Then, open 'C:\Apache2\conf\httpd.conf' in Notepad and make the following changes:
Locate the line:
ScriptAlias /cgi-bin/ "C:/Apache2/cgi-bin/"
Just search for 'cgi-bin' to find the required line.
Change it to read:
ScriptAlias /cgi-bin/ "C:/Apache2/htdocs/cgi-bin/"
A few lines later you will need to change:
<Directory "C:/Apache2/cgi-bin">
To read:
<Directory "C:/Apache2/htdocs/cgi-bin">
Naturally, substitute D:\ for C:\ if required.
Now close the file and save it.
Please note that any changes made to httpd.conf will not be implemented until Apache has been
started/restarted.
If you are using Windows NT/2000/XP then Apache will already be running so you need to go to
the 'Apache Service Manager' icon in the system tray (next to the clock) to restart it.
War-FTP Configuration
Open the War FTP Manager by double-clicking on the yellow icon in the system tray. You may
need to log in.
Click the 'UserManager' icon on the toolbar (by clicking the folder icon with the face on it).
Click on 'System' (in the top-left). Then in the right hand panel, activate FTP Login access by
double-clicking on 'FTP Login Access' in the box in the middle of the right-hand panel.
Next, select the 'FTP' tab (at the bottom) and click on the '+' next to 'Security'. Then click on 'File
Access'. Some file paths will appear in a list at the top of the panel.
Click on the top file path that reads 'C:\Apache2\htdocs'.
In the check boxes underneath, make sure the following are selected:
Recursive, Free, Create, Remove, List (DIR), Read, Write, Delete
This is shown below:
Advanced Users Guide - 147
Next, right click in the list of file paths and select 'New'.
Enter 'C:\Apache2\htdocs\cgi-bin' (without the quotes) in the 'Path' field. Then, select the 'Freeze
the mount point' box and in the 'Mount Point' field, enter '/cgi-bin'.
Click 'OK'. Then in the boxes underneath select:
Read, Write, Delete, Execute
This is shown below:
Advanced Users Guide - 148
Next, go back to the left-hand panel and click the '+' next to 'System'. Then right-click on 'User' and
select 'Add User'.
Enter a username of 'demo' and click 'OK'. Then enter a password (and confirm it) and click 'OK'.
Click 'Close' and then close the War FTP Manager.
Advanced Users Guide - 149
SellerDeck Network Settings
Start SellerDeck and go to 'Web | Network Setup'. If it says 'SellerDeck Host Mode' at the top then
click 'Convert' and 'Yes'. Enter the following details in the fields provided.
Server details:
Catalog URL:
http://localhost/acatalog/
CGI-BIN URL:
http://localhost/cgi-bin/
Codebase:
./
Path from CGI-BIN to Catalog Directory:
../acatalog
Common Settings
Script ID Number:
1
Extension:
.pl
Mail (SMTP) Host:
[leave blank]
Web Site URL:
http://localhost/
Path to Perl:
C:\Perl\bin\perl.exe (or D:\Perl\bin\perl.exe)
FTP Details:
Server Host:
localhost
Username:
demo (or username created in War-FTP)
Password:
Whatever was setup in War-FTP
Path to CGI-BIN:
cgi-bin/
Testing if it Works
Go to SellerDeck and go to 'Web | Refresh Website'. This will upload all the necessary files. Once
it has completed, you should now be able to browse to your home page:
http://localhost/acatalog/
Advanced Users Guide - 150
Troubleshooting
Check That Perl Is Installed
To check that Perl is installed on your PC, in a command window type:
C:\>perl –v
Sample output from a command window check that Perl is installed and will run:
Also in the command window check the path to Perl by typing:
C:\>path
The correct path is: C:\Perl\bin, as above.
Check Apache
Open up a browser and browse to http://localhost/ and the Apache Welcome page should appear.
The page should read "It HAS Worked! The Apache Web Server is Installed on this Web Site!". If
it does not appear, check your installation of Apache by repeating the steps listed earlier in this
document.
Check War-ftpd
Open up War-ftpd and check the permissions settings are identical to the screen shots earlier in this
document.
Access Denied Errors
If you are getting 'Access Denied' Errors on upload, then check the boxes in War-FTP are ticked
correctly, as described earlier in this document, and also check that War-FTPd is online.
Check Perl Scripts
To check that the path to the perl scripts is correct, and that they will run, in the browser, browse to
http://localhost/cgi-bin/nq000001.pl. If a page with nothing but the words 'Script Error' (in red)
appear then the upload has been successful.
Advanced Users Guide - 151
Manual Check of War-ftpd
To check that War-ftpd is working and is providing access to the cgi-bin directory, make sure Warftpd is online, and then in a Command Window type:
ftp localhost
Then connect as your demo user, entering your password when prompted. Next enter the following
commands:
cd cgi-bin
dir
If it shows you a list of files, then the permissions are set correctly.
Perl Association
To check the association of the Perl file extension (.pl) in Windows NT the following registry key
needs to be checked:
LocalMachine\SYSTEM\CurrentControlSet\Services\W3SVC\Parameters\Script Map
The association should look like the following:
The association should be:
Name
Type
Data
.pl
REG_SZ
C:\Perl\bin\Perl.exe %s %s
Note: The "s" of %s %s are both lowercase.
Advanced Users Guide - 152
Section G: IIS5 Server Setup
Host Headers
Host headers are a mechanism where more than one domain name can be hosted from a single IP
Address.
Use the IIS MMC to create a host header name for each web site to be hosted on the IP Address.
The host header name has to be registered with the appropriate name resolution system.
If the computer is on an intranet (a private LAN that uses Internet technology), register it with the
intranet's name resolution system, such as the Windows Internet Name Service (WINS).
If the computer is on the Internet, register the host header name with the Domain Name System
(DNS), which is administered by InterNic.
If you are using a name that is not a registered DNS name you can add to the systems hosts file,
found at:
C:\WINNT\System32\drivers\etc\hosts
Note: This mechanism only works for the system(s) with the host header entry in their hosts file.
Vocabulary
Term
Definition
DNS
Domain Name System is a method for resolving IP addresses to/from host
names. DNS root servers are owned and maintained by the InterNIC for
the Internet.
Virtual directory alias
A virtual directory alias is a name that clients use when referring to your
virtual directory. For example, in the address http://www.
sellerdeck.com/cgi-bin, cgi-bin is a virtual directory.
Virtual Web site
A virtual Web site provides the appearance that two or more sites are
different, even though they exist on the same Internet server.
Advanced Users Guide - 153
Setup of Catalog Web Site
Open the IIS MMC and expand the pane view of the server structure.
Right click on the server and select 'New | Web Site':
The Web Site Creation Wizard appears:
Click the Next> button.
Enter the Description of the Web Site:
Advanced Users Guide - 154
Click the Next> button.
Select the IP Address to use for this Web Site from the drop-down list. Change the Port Number if
a port other than 80 is to be used. If Host Headers are to be used, enter the Host Header for this
site:
Click the Next> button.
Click on the Browse… button and browse to the Home Directory to be used for this Web Site:
Click the OK button.
Advanced Users Guide - 155
Click the Next> button.
Select the following permissions:
Click the Next> button.
Click the Finish button.
Advanced Users Guide - 156
CGI-BIN Directory
The cgi-bin directory has to exist on two levels:
1.
The physical level – actually on the hard disk.
2.
The Virtual level – within IIS.
CGI-BIN Physical Directory Creation
A cgi-bin directory has to be created before it can be an IIS “Virtual Directory”.
Open up Windows Explorer and drill down to the Web Site “Home” directory:
Right click on the directory and in the popup menu select: New | Folder
Enter cgi-bin as the directory name.
CGI-BIN Virtual Directory Creation
For Catalog to be able to access the perl script files on the host server, a cgi-bin (created in 3.1
above) must enabled as a Virtual Directory within IIS.
Before the cgi-bin Virtual Directory has been created, in the IIS MMC it appears as a normal
folder:
Advanced Users Guide - 157
The Virtual Directory Creation Wizard appears:
Click the Next> button.
Enter cgi-bin in the Virtual Directory Alias box:
Then click the Next> button.
Browse to the cgi-bin directory, to be used in Web Site Content Directory via the Browse… button:
Then click the Next> button.
Advanced Users Guide - 158
Check Read, Run Scripts and Execute in the Access Permissions:
Then click the Next> button.
The "You have successfully completed the Virtual Directory Creation Wizard" window appears:
Click Finish button.
The icon on the cgi-bin should be created as the one pictured below:
Note: The normal folder icon will most likely still be visible in the Web Site, doing a Refresh
should remove the cgi-bin normal folder icon, and just leave the cgi-bin Virtual Directory.
cgi-bin IIS Check
In the IIS MMC expand the web site containing the cgi-bin directory and check the Properties
settings:
Advanced Users Guide - 159
Check - A directory located on this computer.
Local Path: C:\Inetpub\wwwroot\Catalogsite\cgi-bin
Check - Read and log visits
Application name: cgi-bin
Execute Permissions: Scripts and Executables
Application Protection: Medium (Pooled)
cgi-bin Perl Association
Check the cgi-bin Perl association in IIS.
Right click on the cgi-bin virtual directory icon:
Select Properties | Configuration | Application Configuration
Advanced Users Guide - 160
There should be only one entry for the Perl association and it should be:
Extension
Executable Path
.pl
C:\Perl\bin\Perl.exe %s %s
Note: the “s” of the %s %s are both lower case.
Verbs should be limited to: GET, HEAD and POST
Advanced Users Guide - 161
NTFS Permissions
Catalog Home Directory
Open up Windows Explorer and drill down to the Catalog “Home directory” right click on it and
select Properties:
The Catalogsite Properties window is displayed.:
Select the Security tab:
Advanced Users Guide - 162
Highlight the Everyone User and click on the Remove button and remove the Everyone User.
Click on the Add… button.
Scroll down to the IUSR_hostname (in this example IUSR_PORTALSERVER)
Click the Add button.
Select ftp User (in this example Shaun Sloan) and click the Add button.
Click OK.
The Catalog site directory permissions should look like:
Advanced Users Guide - 163
For the IUSR_hostname User (in this example IUSR_PORTALSERVER) the following
permissions should be checked in the Allow column:
Modify
Read & Execute
List Folder Contents
Read
Write
For the ftp User (in this example Shaun Sloan) the following permissions should be checked in the
Allow column:
Modify
Read & Execute
List Folder Contents
Read
Write
Click OK to exit the Catalogsite Properties window.
Acatalog Directory Permissions
The same permissions should be applied to the acatalog directory as the Catalog “Home directory”.
Highlight the IUSR_hostname User and check the permissions:
Advanced Users Guide - 164
IUSR_hostname should have the following permissions checked in the Allow column:
Modify
Read & Execute
List Folder Contents
Read
Write
The ftp User (Shaun Sloan in this example) should have the following permissions checked in the
Allow column:
Modify
Read & Execute
List Folder Contents
Read
Write
The Everyone User should have been removed.
Click OK button to exit.
CGI-BIN Directory Permissions
NTFS permissions for the cgi-bin directory have to also be set up.
Open up Windows Explorer and drill down to the cgi-bin directory, right click on it and select
Properties:
Advanced Users Guide - 165
The cgi-bin Properties window is displayed:
Select the Security tab:
Advanced Users Guide - 166
Highlight the Everyone User:
Check the following Allow Permissions:
Read & Execute
List Folder Contents
Read
Uncheck:
Allow inheritable permissions from parent to propagate to this object.
FTP User
Because the Everyone User permissions have been restricted it is necessary to give the user that
will be used to ftp the files to the server write access to the cgi-bin directory.
Advanced Users Guide - 167
Click on the Add button and select the appropriate user:
Click OK.
The following permissions should be checked for the ftp User:
Modify
Read & Execute
List Folder Contents
Read
Write
Click on Apply and then OK to exit cgi-bin Properties window.
Network Password Dialog-box
If an “Enter Network Password” dialog-box appears after clicking on the Add To Basket button:
Advanced Users Guide - 168
The Internet Guest Account does not have Read & Execute permissions on the cgi-bin directory.
Check the permissions are set as in section 7 above.
Advanced Users Guide - 169
Web Sharing
Open up Explorer and drill down to the cgi-bin directory, right click on it and select Properties and
select Web Sharing tab. If there are multiple Web Sites then the will be a drop down list associated
with Share on:, select the Catalog Web Site associated with this cgi-bin.
The settings should be as follows:
Checked - Share this folder
Aliases – cgi-bin
Then click the OK button.
Advanced Users Guide - 170
FTP Settings
In the IIS MMC, select the Default FTP Site or FTP site associated with Catalog, right click and
select Properties. Click on the Home Directory tab.
Check the settings are as below:
Click the OK button.
Advanced Users Guide - 171
Perl Setup
Perl Association
To check the association of the Perl file extension (.pl) in Windows NT the following registry key
needs to be checked:
LocalMachine\SYSTEM\CurrentControlSet\Services\W3SVC\Parameters\Script Map
The association should look like the following:
The association should be:
Name
Type
Data
.pl
REG_SZ
C:\Perl\bin\Perl.exe %s %s
Note: The “s” of %s %s are both lowercase.
Perl Checks
The following checks should be made to ensure that Perl is installed on the Server.
In a command window check that Perl is installed and will run:
C:\> perl –v
Output should look something like:
Advanced Users Guide - 172
Also in the command window check the path to Perl:
C:\> path
The output should be something like:
Note: If the perl –v returns a message along the lines:
“‘perl –v’ is not recognised as an internal or external command, operable program or batch file.”
is displayed then perl is most likely not installed.
If Perl is not installed, it can be downloaded from the ActiveState web site:
http://www.activestate.com/Products/ActivePerl/Download.html
Advanced Users Guide - 173
SellerDeck Network Settings
The Network settings should be as follows:
Advanced Users Guide - 174
Defining The Home Page In IIS
The default home page in IIS is set to default.htm or default.asp, but SellerDeck uses index.html as
the home page.
To add index.html open up the IIS MMC, right click on the Web Site and select Properties:
The Web Site Properties box appears:
Select the Documents tab:
Advanced Users Guide - 175
Click on the Add… button:
Enter index.html and click the OK button.
Using the
button move index.html to the top of the list:
Click on the OK button.
Advanced Users Guide - 176
Troubleshooting
cgi-bin Accessed Denied
There are occasions when access to the cgi-bin directory is denied after following the above
guidelines.
It may become necessary to delete the cgi-bin virtual directory in IIS and then the cgi-bin directory
in Windows Explorer, and then re-create both and reapply the necessary permissions
Advanced Users Guide - 177