1
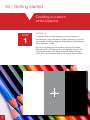
The 2 in 1 Grey White Balance
Colour Card
user guide
www.greywhitebalancecolourcard.co.uk
Contents
01 | Introduction
02 | System requirements
03 | Download and installation
04 | Getting started
Creating a custom white balance
05
06
07
08
09
Neutral images with the
Grey White Balance Card
Using the 24 Swatch Colour Card
13
18
Using the 24 Swatch Colour Card
with Adobe DNG Profiler
23
05 | The 24 Swatch colours
06 | Questions & answers
07 | Notes
35
36
37
4
01 | Introduction
The 2 in 1 Grey White Balance Colour Card is a great
little addition to your photography bag, It works on a simple
principle: by shooting a photograph with a set of reference
colours, then using image editing software to make
adjustments to match the colour swatches of the card.
For precise colour rendering, a calibrated monitor is
therefore essential along with good image editing skills.
Using Adobe’s DNG Profile Editor will be a good starting
point with fine tuning for precise colour representation.
Colour profiling is a science! Photography is an art form!
Colour profiling for photography is therefore very subjective.
There is no magical one stop profile solution for perfect
colour, and no Colour Card can replace the artistic
subjective adjustments possible in Lightroom or Photoshop.
The 2 in 1 Grey White Balance Colour Card will help you to
create a faster work-flow and more consistent colour,
providing a simple and inexpensive path to creating better
colour images using a base profile.
The 2 in 1 Grey White Balance Colour Card user guide
is a simple step by step guide to help you achieve the
best out of the cards. This guide assumes you have a
good understanding of your DSLR and knowledge of your
preferred images editing software.
5
02 | System requirements
Minimum system
requirements for using
Adobe DNG Profiler
Windows
• Intel® Pentium® 4 or AMD Athlon® 64 processor
• Microsoft® Windows Vista® with Service Pack 2 or
Windows® 7 with Service Pack 1
• 2GB of RAM
• 1GB of available hard-disk space
• 1024x768 display
• DVD-ROM drive
Macintosh
• Multicore Intel processor with 64-bit support
• Mac OS X v10.6.8 or v10.7
• 2GB of RAM
• 1GB of available hard-disk space
• 1024x768 display.
6
03 | Download and installation
Download DNG Profile Editor 1.0.4
under the resource section at:
www.adobe.com/dng or click on
the icon below for your operating
platform below*.
The DNG Profile Editor does not require installation.
Simply unzip the zip file and run the software.
* Links correct at going to file. If you have problems
with the below links, go to www.adobe.com and
search for ‘DNG Profile Editor’
PC
7
MAC
04 | Getting started
Creating a custom white balance
Neutral images with the
Grey White Balance Card
Using the 24 Swatch Colour Card
Using the 24 Swatch Colour Card
with Adobe DNG Profiler
8
04 | Getting started
Creating a custom
white balance
STEP
1
Setting up
To create a custom white balancing, set your Camera to
manual mode, using evaluative or matrix metering, do not use
spot, partial, or centre weighted. White balance should also be
set to automatic. (AWB)
Set-up your lighting and composition with the Grey White
Balance Card. For indoor product photography set your ISO
to the lowest setting, this will produce finer detail with less
noise. Your camera should also be set to save files as RAW.
9
04 | Getting started
Creating a custom
white balance
STEP
2
Reading the histogram
Place the Grey White Balance Card in front of the composition.
The white band should be on the side of strongest light source.
The card should fill your screen. You may need to zoom in or
move closer. You may also need to turn your camera to manual
focus in order to take a photo of this card. The image doesn’t
need to be in focus you can take a blurred shot.
Take a photo of the card. The histogram for the file should have
fairly defined spikes in the darks, mids and highlights if correctly
exposed. If not, adjust the shutter speed, flash or f-stop till you
have the best exposure for all three bands.
10
04 | Getting started
Creating a custom
white balance
STEP
3
Setting custom white balance
You now need to set your DSLR to Custom White Balance
and load the image of the Grey White Balance Card.
Remember to set your white balance to custom instead
of AWB.
Your DSLR is now set to use a custom white balance.
The shots you take will now be using the same white
balance unless you change back to another white balance
setting or load a new image. Refer to your DSLR’s user
guide for setting a custom white balance as this may differ
to the Canon EOS system.
11
04 | Getting started
Creating a custom
white balance
STEP
4
The results
The top image shows the photograph using the Custom White
Balance. You can see that the image is more neutrally toned
without the reddish colour cast of the shot on the left, the
whites also look whiter. As long as you are in the same lighting
environment you can now photograph away knowing all your
photographs with have the same balance and neutral tone.
12
04 | Getting started
Neutral images with the
Grey White Balance Card
STEP
1
13
Setting up
It is not always possible to use a custom white balance but
you can use the Grey White Balance Card to create a neutral
balanced image in Photoshop and apply to several images.
Take a photograph of your composition including the
Grey White Balance Card. Now take a photograph of your
composition without the card. You will only need to use the
Grey White Balance Card if you move to an area where the
lighting has changed
04 | Getting started
Neutral images with the
Grey White Balance Card
STEP
2
Using Levels
In Photoshop open the image of the Grey White Balance Card.
Open the ‘Levels’ window. Using the white eye dropper click
on the white band. Do the same for the middle band using
the grey eye dropper. It is not away necessary to set the black
eye drop as this may make the image too dark. You will have
to use judgment for each photo. If necessary move the black
point triangle to get the results you need.
14
04 | Getting started
Neutral images with the
Grey White Balance Card
STEP
3
15
Save Levels
Once you are happy with the results you will need to save
these settings. Click the drop-down options for Levels and
select Save Presets.
04 | Getting started
Neutral images with the
Grey White Balance Card
STEP
4
Load Levels
Now open one of the images without the card.
Open Levels again and load the Levels that you just saved.
The Levels for the Grey White Balance Card image will now be
applied to this image. You can apply this same technique to
the rest of your images.
TIP: If you have a lot of images to edit create a batch process
in Photoshop to save time.
16
04 | Getting started
Neutral images with the
Grey White Balance Card
STEP
5
17
The results
Image with Grey White Balance Card Levels applied.
04 | Getting started
Using the 24 Swatch
Colour Card
STEP
1
Getting starter
The 24 Swatch Colour Card is ideal for white balancing and
more detailed colour correcting. Start by composing your
photograph including the 24 Swatch Colour Card. Make the
card part of the composition, you are not trying to fill the card
in the view finder. Take a photograph of your composition.
Now take the same photograph but this time remove the
24 Swatch Colour Card. You will only need to take the card
again if you move to a different lighting condition.
18
04 | Getting started
Using the 24 Swatch
Colour Card
STEP
2
19
Colour adjustment in RAW
In RAW, load the photograph with the 24 Swatch Colour
Card. Using the HLS and or any of the other settings make
adjustments to closely match the 24 Swatch Colour Card or
to the results you require.
04 | Getting started
Using the 24 Swatch
Colour Card
STEP
3
Setting the white balance in RAW
To set the white balance, click on the white eye dropper
(circled in red) then select the white swatch or one of the
light grey swatches. You can also slide the temperature
setting to set your desired results.
20
04 | Getting started
Using the 24 Swatch
Colour Card
STEP
4
21
Save settings
Once you are happy with the adjustments, save these settings
by selecting Save Settings from the drop-down menu. This will
save your colour changes and the white balance temperature
for use with your other photographs.
04 | Getting started
Using the 24 Swatch
Colour Card
STEP
5
Apply settings
You can now open one of the images taken without the
24 Swatch Colour Card and apply the setting you created by
selecting Load Settings,
TIP: Open several RAW images at once, ‘Select All’ then
apply ‘Load Settings’ to all the images in one sweep.
22
04 | Getting started
Using the 24 Swatch
Colour Card with
Adobe DNG Profiler
Getting started
Adobe DNG
Profile Editor
User Guide
The 24 Swatch colour card can be used with the
Adobe DNG Profile Editor to automatically colour correct your
reference image and create a camera profile for applying to
your RAW images. Adobe DNG It is not designed as a 100%
replacement for colour editing but as an aid to correcting your
images and producing a faster work-flow.
Adobe DNG Profile Editor is a powerful editing tool and is
designed for advanced users. The full Adobe DNG Profile
Editor guide can be downloaded using the link on the left.
23
04 | Getting started
Using the 24 Swatch
Colour Card with
Adobe DNG Profiler
Important note about
Adobe DNG Profiler Editor
Within Adobe DNG Profiler Editor colour adjustments will be
made and a white balance temperature as if taken in neutral
light. However, when it exports the profile for use in Photoshop
or Lightroom it makes no assumption about the white balance
temperature you require so will only export the colour changes
as you may want a cooler or a warm white. If you require the
white temperature that Adobe DNG Profiler Editor generates
you will need to make a note of the setting and apply them to
profile in RAW. This guide will show you how this is done and
another means of setting the white temperature.
To use DNG Profile Editor you need to be shooting in RAW.
Now follow this simple guide for creating an automated
work-flow and camera profile.
24
04 | Getting started
Using the 24 Swatch
Colour Card with
Adobe DNG Profiler
STEP
1
25
The composition
Set your camera to use RAW. Set your white balance if
required. Set-up your composition with the Colour Card.
Take a photograph of your composition, making sure you
have a good exposure. This photograph will be used as the
reference file for creating the camera profile using Adobe DNG
Profile Editor. Once this is done you can continue taking your
photographs without the card.
04 | Getting started
Using the 24 Swatch
Colour Card with
Adobe DNG Profiler
STEP
2
Adobe DNG
Converter
Adobe DNG
Converter
PC
MAC
Creating A DNG file
To use DNG Profile Editor you need to convert your RAW file
to DNG format (digital negative). There are free converters
on the web and Adobe have their own ‘DNG Converter’,
(download links on the left) but this guide we will show you
how this is done using Photoshop.
Open your RAW reference file in Photoshop. On the bottom
left (circled red) you will see a button ‘Save Image’. Select this
button and save file to DNG format in a location easy to find.
Once this is done quit Photoshop. Photoshop will not read the
new camera profile till re-booted.
26
04 | Getting started
Using the 24 Swatch
Colour Card with
Adobe DNG Profiler
STEP
3
27
Open DNG Profile Editor
Open Adobe DNG Profile Editor and select the ‘Chart’ tab.
04 | Getting started
Using the 24 Swatch
Colour Card with
Adobe DNG Profiler
STEP
4
Open the DNG file
Now go to ‘File’ in the menu and select ‘Open DNG Image’.
Open the file you saved in DNG format.
Once you open this file you will see 4 coloured dots.
28
04 | Getting started
Using the 24 Swatch
Colour Card with
Adobe DNG Profiler
STEP
5
29
Position the four coloured dots
Using the mouse, position these dots to the middle of each
matching corner swatches.
In the ‘Chart’ tab, select a colour temperature (6500k is the
neutral colour temperature). Now select ‘Create Colour Table’.
04 | Getting started
Using the 24 Swatch
Colour Card with
Adobe DNG Profiler
STEP
6
Colour tables, curves and colour matrices
Once a colour table is created it can be edited if required.
You can also use the curves and colour matrices for even finer
tuning. Make a note or your new White Balance (circled here in
red), you will need this reading in RAW.
Once you are happy with the results, export profile from the
File menu. Adobe DNG Profile Editor will save it in the correct
folder so that your image editing program can read it.
TIP: Name your profile using your white balance setting
e.g. ‘newprofile_2450_–15’
30
04 | Getting started
Using the 24 Swatch
Colour Card with
Adobe DNG Profiler
STEP
7
Apply profile in RAW
Open Photoshop and the photograph with the Colour Card.
In the RAW editor under Camera Profile you will now see the
profile you exported from Adobe DNG Profile Editor in the
drop-down menu.
Apply this to the photograph.
31
04 | Getting started
Using the 24 Swatch
Colour Card with
Adobe DNG Profiler
STEP
8
Enter your Temperature and Tint settings
Under Basic, enter your Temperature and Tint settings that
you noted in DNG Profile Editor. Save these setting under the
options drop-down menu. This will save your White Balance,
the Camera Profile applied, and any other changes you have
made in RAW.
Creating your own white balance temperature
If you want to set your own white balance temperature refer to
page 20, this shows how to use the white eye dropper on the
white or one of the grey swatches.
32
04 | Getting started
Using the 24 Swatch
Colour Card with
Adobe DNG Profiler
STEP
9
33
Load Settings
You can now open one of the photographs without the
Colour Card. Under the same drop-down menu apply the
setting you saved under ‘Load Settings’
TIP: Open several RAW images at once, ‘Select All’ then
apply ‘Load Settings’ to all the images in one sweep.
04 | Getting started
Using the 24 Swatch
Colour Card with
Adobe DNG Profiler
STEP
10
Before and after
Before and after image. You can see that the blues on the
right are less purple, the reds less orange and the yellows less
green. By using Adobe DNG Profile Editor you will achieve
consistent colour management and a faster work-flow.
34
05 | The 24 swatch colours
What are the numbers on the 6x4 colour card?
These are the RGB values of the printed card (paper card only, now
discontinued) - the original RGB settings to created the CMYK printed
card. This is handy if you have a professional set-up with a contract
calibrated printer.
You can create your own larger card for a large studio work.
By converting the RGB colours to a 39L profile then outputting to your
printer you will produce a Colour Card compatible with the 6x4 or
credit card for use with Adobe DNG profile Editor.
The new PVC 6x4 card no longer displays the RGB values, however
these values are listened below.
35
R=125
G=80
B=56
R=246
G=172
B=152
R=103
G=130
B=167
R=76
G=114
B=31
R=149
G=146
B=199
R=105
G=191
B=173
R=241
G=132
B=0
R=85
G=103
B=174
R=236
G=96
B=129
R=108
G=31
B=121
R=183
G=205
B=0
R=253
G=191
B=0
R=0
G=80
B=159
R=15
G=165
B=56
R=230
G=49
B=18
R=255
G=229
B=0
R=219
G=81
B=151
R=0
G=163
B=207
R=255
G=255
B=255
R=227
G=227
B=227
R=192
G=192
B=192
R=136
G=134
B=134
R=61
G=61
B=60
R=51
G=51
B=51
06 | Questions & answers
What are the numbers on the 6x4 colour card?
These are the RGB values of the printed card - the original RGB
settings to created the CMYK printed card. This is handy if you have
a calibrated printer and wanted to create your own larger card or just
to compare how these colours look in commercial print.
Why do you need to make a note of the white
balance temperature and tint set by Adobe DNG
Profile Editor?
The profiler works by correcting the colours and creating a white
balance if shot under perfect neutral lighting conditions. However,
when you export the profile it only exports the colour correction and
leaves white balance alone. You will need to add the WB settings
that DNG creates to simulate this. You have the option to leave
the white balance alone or add in your own as you may prefer to
have a warmer or cooler look to your images rather that the neutral
temperatures set in DNG.
What is a Dual Illuminat profile?
A Dual Illuminat profile is a profile that is created by using two images
shot under different colour temperatures. When applied to an image
a mathematical function is created which calculates the best profile
to use for that image. If you choose the illuminants that are very wide
apart for example, a warm tungsten and shade, then you would have
a DNG profile that would cover a wide range of colour temperatures
accurately. Dual Illuminat profiles are good for general photography
where the lighting is consistently changing. You can create one
profile and use this for most of your photos instead of creating lots
of different ones. Single profiles are better for studio work under
controlled lighting conditions.
36
06 | Questions & answers (cont)
How do you create a Dual Illuminat profile?
A Dual Illuminat profile can be created in Adobe DNG Profile Editor
and Colorchecker Passport. See ‘Tutorial 6’ of the ‘Adobe DNG
Profile Editor User Guide.’
Error when I hit the Create Color Table button?
I get an error when I hit the Create Colour Table button. ‘The gray
patch in row 4, column3, has a significant colour cast. Please reshoot
the chart carefully to avoid colour casts and try again.’ – This can
happen if you have shot the Colour Card and it was under exposed.
To avoid this problem (bracket exposure ) take a few shots of the
Colour Card under and over-exposed. Don’t reply on the one shot.
This will also give you more flexibility when building your profiles.
If you get such an error and it is impossible to re-shoot the Colour
Card in the same area and conditions you can still create a profile but
not using Adobe DNG Profile Editor. You will have to manually create
a profile. This is where your true colour correcting skills will come into
play. See section 04 | Using the 24 Swatch Colour Card page 18.
How are the cards printed, and why is the 6x4 card
slightly brighter?
Both cards are commercially printed in CMYK to match the Macbeth
colours. The 6x4 is digitally printed on a very white based silk, the
PVC card is lithographically printed on plastic. The 6x4 card is a touch
brighter due to the restrictions of the white base PVC but both cards
are within tolerance rendering the same results in Adobe DNG Profile
Editor. The paper card has been discontinued and is now produced in
PVC so this as been resolved.
37
07 | Notes
Enter your notes here..
38