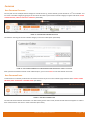
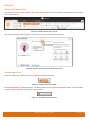
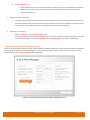
1
e4education User Guide Version 4
e4education CMS User Guide 4.0
Page| 1
Welcome to the e4education User Guide
This user guide will introduce administrators of your website to some of the key administration features.
We hope that you will find this guide useful and informative. Should you require further clarification or assistance regarding any
aspect of this guide, please contact: e4education, Tel: 0845 257 0224 or email: [email protected]
e4education CMS User Guide 4.0
Page| 2
Table of Contents
LOGGING INTO THE ADMIN AREA ............................................................................................................... 8
FORGOTTEN YOUR PASSWORD? ....................................................................................................................................................... 8
THE ADMIN BAR .......................................................................................................................................... 9
UPDATING YOUR ACCOUNT DETAILS ................................................................................................................................................ 9
GENERAL TAB .................................................................................................................................................................................. 10
OPTIONS TAB ................................................................................................................................................................................... 10
WEBSITE TAB ................................................................................................................................................................................... 10
MY TASKS .................................................................................................................................................. 11
MY DRAFTS ............................................................................................................................................... 12
SITEMAP / REORDERING ITEMS ................................................................................................................. 13
THE PAGE EDITOR ..................................................................................................................................... 14
ICONS USED IN THE EDITOR ............................................................................................................................................................ 14
TEXT ................................................................................................................................................................................................. 15
PASTING TEXT IN FROM WORD DOCUMENTS ............................................................................................................................ 15
IMAGES ............................................................................................................................................................................................ 15
THE IMAGE MANAGER ................................................................................................................................................................ 16
CREATING ADDITIONAL FOLDERS ........................................................................................................................................... 16
UPLOADING IMAGES .............................................................................................................................................................. 17
ROTATING IMAGES ................................................................................................................................................................. 17
DELETING IMAGES .................................................................................................................................................................. 18
SELECTING AN IMAGE TO ADD TO THE PAGE......................................................................................................................... 18
HYPERLINKS ..................................................................................................................................................................................... 19
LINKS TO EXTERNAL SITES ........................................................................................................................................................... 19
LINKS TO AN ANCHOR POINT ...................................................................................................................................................... 20
LINKS TO EMAIL ADDRESSES ....................................................................................................................................................... 20
LINKS TO A DOCUMENT / IMAGE................................................................................................................................................ 21
THE FILE MANAGER..................................................................................................................................................................... 21
UPLOADING NEW FILES .......................................................................................................................................................... 22
e4education CMS User Guide 4.0
Page| 3
FILE TYPES THAT CAN BE UPLOADED ..................................................................................................................................... 22
RENAMING FILES .................................................................................................................................................................... 23
REMOVING PREVIOUSLY UPLOADED FILES ............................................................................................................................ 23
REMOVING HYPERLINKS ............................................................................................................................................................. 23
TABLES ............................................................................................................................................................................................. 24
FLASH ELEMENTS............................................................................................................................................................................. 24
VIDEO .............................................................................................................................................................................................. 25
ADDING A NEW VIDEO ................................................................................................................................................................ 25
DELETING VIDEOS ....................................................................................................................................................................... 27
SELECTING A VIDEO TO ADD TO THE PAGE................................................................................................................................. 27
PAGES ....................................................................................................................................................... 28
CREATING YOUR PAGE .................................................................................................................................................................... 28
ALLOWING USERS TO LEAVE COMMENTS....................................................................................................................................... 29
FILE ATTACHMENTS ......................................................................................................................................................................... 29
ADDING FILE ATTACHMENTS ...................................................................................................................................................... 29
REORDERING FILE ATTACHMENTS .............................................................................................................................................. 29
RENAMING FILE ATTACHMENTS ................................................................................................................................................. 30
DELETING FILE ATTACHMENTS ................................................................................................................................................... 30
MAKING THE PAGE SECURE............................................................................................................................................................. 31
PAGE KEYWORDS............................................................................................................................................................................. 31
META KEYWORDS ....................................................................................................................................................................... 32
META DESCRIPTION .................................................................................................................................................................... 32
ARCHIVING DATES FOR THE PAGE................................................................................................................................................... 32
SAVING YOUR PAGE ........................................................................................................................................................................ 33
EDITING A PAGE............................................................................................................................................................................... 34
DELETING A PAGE ............................................................................................................................................................................ 34
NEWS AREA ............................................................................................................................................... 35
CREATING A NEWS CATEGORY ........................................................................................................................................................ 35
NEWS ARTICLES ............................................................................................................................................................................... 36
ADD A NEWS ARTICLE ................................................................................................................................................................. 36
SAVING YOUR NEWS ARTICLE ..................................................................................................................................................... 37
EDIT EXISTING NEWS ARTICLE .................................................................................................................................................... 38
DELETE EXISTING NEWS ARTICLE ................................................................................................................................................ 38
e4education CMS User Guide 4.0
Page| 4
CALENDAR................................................................................................................................................. 39
ADD CALENDAR CATEGORY ............................................................................................................................................................. 39
ADD CALENDAR EVENT .................................................................................................................................................................... 39
DAILY RECURRENCE .................................................................................................................................................................... 40
WEEKLY RECURRENCE ................................................................................................................................................................. 41
MONTHLY RECURRENCE ............................................................................................................................................................. 41
RECURRENCE EXCEPTIONS .......................................................................................................................................................... 41
SAVING YOUR CALENDAR EVENT ................................................................................................................................................ 41
EDIT CALENDAR EVENT.................................................................................................................................................................... 42
DELETE CALENDAR EVENT ............................................................................................................................................................... 42
PHOTO GALLERIES & ALBUMS ................................................................................................................... 44
CREATING A PHOTO GALLERY ......................................................................................................................................................... 44
ADD PHOTO ALBUM ........................................................................................................................................................................ 44
CHANGING THE DEFAULT THUMBNAIL IMAGE .......................................................................................................................... 46
REORDERING THE IMAGES .......................................................................................................................................................... 46
ADDING IMAGE TITLES & DESCRIPTIONS .................................................................................................................................... 47
DELETING IMAGES FROM THE ALBUM ....................................................................................................................................... 47
SAVING YOUR PHOTO ALBUM .................................................................................................................................................... 48
EDIT PHOTO ALBUM ........................................................................................................................................................................ 49
DELETE PHOTO ALBUM ................................................................................................................................................................... 49
BLOGS ....................................................................................................................................................... 50
CREATING A BLOG ........................................................................................................................................................................... 50
ADDING A BLOG ENTRY ................................................................................................................................................................... 51
SAVING YOUR BLOG ENTRY ........................................................................................................................................................ 52
EDITING A BLOG ENTRY ................................................................................................................................................................... 53
DELETING A BLOG ENTRY ................................................................................................................................................................ 53
FORMS ...................................................................................................................................................... 54
ADDING A FORM ............................................................................................................................................................................. 54
STORING FORM RESPONSES ....................................................................................................................................................... 55
FORM ELEMENTS ........................................................................................................................................................................ 55
TEXT ........................................................................................................................................................................................ 55
TEXTBOX ................................................................................................................................................................................. 55
e4education CMS User Guide 4.0
Page| 5
LIST ITEMS .............................................................................................................................................................................. 57
Reordering List Options ..................................................................................................................................... 58
Renaming List Options....................................................................................................................................... 58
Deleting List Options ......................................................................................................................................... 58
SAVING YOUR FORM ................................................................................................................................................................... 58
EDITING A FORM ............................................................................................................................................................................. 59
DELETING A FORM ........................................................................................................................................................................... 60
FORUMS.................................................................................................................................................... 61
CREATING A FORUM........................................................................................................................................................................ 61
ADDING A TOPIC .............................................................................................................................................................................. 61
RESPONDING TO A PREVIOUSLY ADDED TOPIC .............................................................................................................................. 62
MODERATING TOPIC POSTS ............................................................................................................................................................ 62
EDITING FORUM POSTS .............................................................................................................................................................. 62
DELETING FORUM POSTS ............................................................................................................................................................ 63
EXTERNAL LINKS ........................................................................................................................................ 63
PODCASTS ................................................................................................................................................. 64
CREATING A PODCAST PAGE ........................................................................................................................................................... 64
ADDING AUDIO FILES....................................................................................................................................................................... 64
SAVING YOUR PODCAST ............................................................................................................................................................. 66
EDITING AUDIO FILE ........................................................................................................................................................................ 67
DELETING AUDIO FILES .................................................................................................................................................................... 67
POLLS ........................................................................................................................................................ 68
CREATING A POLL ............................................................................................................................................................................ 68
EDITING A POLL ............................................................................................................................................................................... 70
DELETING A POLL ............................................................................................................................................................................. 70
SURVEYS ................................................................................................................................................... 71
ADDING A SURVEY ........................................................................................................................................................................... 71
STORING SURVEY RESPONSES .................................................................................................................................................... 72
SURVEY ELEMENTS...................................................................................................................................................................... 72
TEXT ........................................................................................................................................................................................ 72
e4education CMS User Guide 4.0
Page| 6
TEXTBOX ................................................................................................................................................................................. 73
LIST ITEMS .............................................................................................................................................................................. 74
Reordering List Options ..................................................................................................................................... 75
Renaming List Options....................................................................................................................................... 75
Deleting List Options ......................................................................................................................................... 75
RATEABLE ITEMS .................................................................................................................................................................... 75
TABLE ...................................................................................................................................................................................... 77
SAVING YOUR SURVEY ................................................................................................................................................................ 78
EDITING A SURVEY........................................................................................................................................................................... 79
DELETING A SURVEY ........................................................................................................................................................................ 80
USER & ROLE MANAGER ........................................................................................................................... 80
CREATING A NEW ROLE FOR EDITING THE SITE .............................................................................................................................. 81
CHOOSING THE ROLE PERMISSIONS ........................................................................................................................................... 82
CREATING A NEW ROLE VIEWING SECURED AREAS ON THE SITE ................................................................................................... 83
CHOOSING THE ROLE PERMISSIONS ........................................................................................................................................... 84
EDITING A ROLE ............................................................................................................................................................................... 84
CREATING A NEW USER ................................................................................................................................................................... 85
EDITING A USER ACCOUNT .............................................................................................................................................................. 86
DELETING A USER ............................................................................................................................................................................ 87
WEBSITE SETTINGS .................................................................................................................................... 88
WEBSITE STATISTICS.................................................................................................................................. 89
ADDITIONAL SUPPORT .............................................................................................................................. 90
e4education CMS User Guide 4.0
Page| 7
LOGGING INTO THE ADMIN AREA
In order to gain access to the CMS (Content Management System) you will require a Username and Password. To login you will
need to add ‘Admin’ to the end of your schools domain name.
e.g. http://www.”yourschooldomainname”/admin
You will then be taken to the login screen asking for your username and password (see below).
FIGURE 1 ‐ THE ADMIN PANEL LOGIN WINDOW
Once you have entered your username and password click on the ‘Submit’ button to log in. If the username or password entered
is incorrect then you will not be logged in and you will have to check your login details and try again.
FORGOTTEN YOUR PASSWORD?
If you do forget your password at any point you can have your login details emailed to you by entering your username and clicking
on ‘Send’ at the bottom of the login window (see below).
FIGURE 2 ‐ RETRIEVING A FORGOTTEN PASSWORD
Provided you have entered your username correctly, an email with your login details should be sent to your email inbox.
e4education CMS User Guide 4.0
Page| 8
THE ADMIN BAR
Once you have logged into the admin area of your site. You will see the admin bar at the top of your browser window (see below).
FIGURE 3 ‐ THE WEBSITE ONCE SUCCESSFULLY LOGGED IN SHOWING THE ADMIN BAR
UPDATING YOUR ACCOUNT DETAILS
Once you have successfully logged into the CMS you will be able to update your personal details by clicking on the ‘My Account’
link in the top right of the browser window.
You will then be able to change your password as well as update your account details for the site (see below).
FIGURE 4 ‐ UPDATING YOUR USER ACCOUNT DETAILS ONCE YOU HAVE LOGGED INTO THE CONTENT MANAGEMENT SYSTEM
Once you have finished updating your details click on ‘Save’. Your details will then be saved.
e4education CMS User Guide 4.0
Page| 9
GENERAL TAB
The general tab allows you to view the sitemap for your site, check how many items you need to review for other users as well as
the number of items you are currently waiting on other users to review that you have created. The general tab is also used for
creating or deleting items of content to or from the site.
FIGURE 5 ‐ THE GENERAL TAB
OPTIONS TAB
The options tab allows you to edit the page title and change the location of the page. You can also use the options tab to save the
page either directly to the site or send it to someone for review, choose if comments can be left for that item, upload
attachments, make the page secure, add keywords and also choose when the item goes live and get archived from public view.
FIGURE 6 ‐ THE OPTIONS TAB
WEBSITE TAB
The website tab allows you to manage user roles and accounts (if you are an administrator), you can also access the file manager
and web stats for your site.
FIGURE 7 – THE WEBSITE TAB
e4education CMS User Guide 4.0
P a g e | 10
MY TASKS
To view the tasks that you need to review, click on the ‘My Tasks’ button (see below).
FIGURE 8 ‐ THE 'MY TASKS' BUTTON
Clicking on ‘My Tasks’ will display all of the items of content that have been sent to you to check and approve or reject before
being added or removed from the site (see below).
FIGURE 9 ‐ MY TASKS SHOWING THE ITEMS OF CONTENT YOU NEED TO REVIEW
When you click on one of them items in the list waiting to be reviewed you will be shown the following information regarding the
item:
•
•
•
•
•
Date created / Edited
Item location
Author
Type Of Item (blog / calendar / news / form / forum / external link / page / photo gallery / podcast / poll / survey)
Action (new / edited item).
You will also be shown a preview of the item waiting to be reviewed with the option to expand to full screen.
Once you have previewed the item you will have the option to either approve the item or reject it. If you click ‘Approve’ the item
will be added to the site or updated.
If you click on ‘Reject’ you will then be able to give the author of the item a reason to why it hass being rejected before clicking on
‘Reject Item’. The author will then be sent an email with the reason for it being rejected. The author will need to edit the item and
make changes to it before re‐sending it for review.
e4education CMS User Guide 4.0
P a g e | 11
MY DRAFTS
To view the tasks that you are currently waiting for other users to review, click on the ‘My Drafts’ button (see below).
FIGURE 10 ‐ THE 'MY DRAFTS' BUTTON
Clicking on ‘My Drafts’ will display all of the items of content that you are currently waiting on other members of staff to review
before going live on the site or being removed. Clicking on one of the draft pages will give you some details including:
•
•
•
•
•
Date Edited
Item Location
Author
Type Of Item
Action
You will also be shown a preview of the item waiting to be reviewed with the option to expand to full screen (see below).
FIGURE 11 ‐ MY DRAFTS SHOWING ITEMS YOU ARE CURRENTLY WAITING ON OTHER USERS TO REVIEW
While you are waiting on the item to be reviewed you can either edit or delete the draft item. If you delete the draft then it will no
longer appear in the reviewers list of items.
If you edit the item you can make the required changes and then send it to be reviewed by the same person or someone different.
e4education CMS User Guide 4.0
P a g e | 12
SITEMAP / REORDERING ITEMS
There may be times when you need to re order pages or even move a page from one area of the site to another. This is easily
done using the ‘Sitemap’ icon. Once you have clicked on the icon you will be shown the top level pages. You can click on the
‘Expand To Full Screen’ button to display the sitemap in a larger window. Any areas that have subpages will have a small triangle
to the left of them. Clicking on the triangle will display the subpages for that area (see below).
FIGURE 12 ‐ SITEMAP SHOWING ALL THE PAGES CURRENTLY ON THE SITE
You can now find the page you wish to re order or move. Once found, click on the page and hold down the left mouse button and
drag it up or down the list to where you wish the page to be moved to.
The order on the live site is changed as soon as the page is moved.
e4education CMS User Guide 4.0
P a g e | 13
THE PAGE EDITOR
ICONS USED IN THE EDITOR
Top row
Bottom Row
Bold Text
View HTML Source
Italic Text
Inset / Edit Hyperlink
Underlined Text
Remove Hyperlink
Strike Through Text
Insert / Edit Anchor
Left Align Text
Text Colour
Centre Align Text
Insert / Edit Table
Right Align Text
Insert / Edit Image
Block Justify Text
Insert Video
Bulleted Lists
Insert Flash
Numbered Lists
Maximize Editor Size
Subscript Text
Insert Template
Superscript Text
Insert Special Characters
Cut
Copy
Paste From Word
Remove Formatting
Undo Last Action
Redo Last Action
When you hover over any of the icons in the page editor, a tooltip will appear, displaying a short description of what the icon does
when clicked on.
e4education CMS User Guide 4.0
P a g e | 14
TEXT
You can type text directly into the editor or you can paste text into the editor from external documents.
PASTING TEXT IN FROM WORD DOCUMENTS
It is always recommended that when copying and pasting content in from Microsoft Word or other word processing packages that
you use the ‘Paste From Word’ icon. This will ensure that any additional formatting contained in the document is stripped and
that will ensure all text throughout the site uses the same font, font size and font colour.
Clicking on the ‘Paste From Word’ icon will display a window into which you enter your text copied from your word document
(see below).
FIGURE 13 ‐ PASTING TEXT INTO THE 'PASTE FROM WORD' WINDOW TO ENSURE TEXT IS CONSISTANT THROUGHOUT THE SITE
Once you have pasted it in, click on ‘OK’ to continue. Any additional formatting will be removed and the text will be displayed in
the editor.
IMAGES
To add an image, place the cursor where you wish the image to appear vertically and click on the ‘Insert / Edit Image’ icon. This
displays the ‘Image Properties’ window, allowing you to browse the Image Manager to either upload a new image or select an
existing image to add into the page (see below).
FIGURE 14 ‐ THE IMAGE PROPERTIES WINDOW BEFORE AN IMAGE HAS BEEN SELECTED
e4education CMS User Guide 4.0
P a g e | 15
THE IMAGE MANAGER
The image manager displays thumbnails of all the images that have previously been uploaded to the website. From here you can
upload new images, rotate or remove images (see below).
FIGURE 15 ‐ THE IMAGE MANAGER SHOWING THUMBNAILS OF PREVIOUSLY UPLOADED IMAGES
If you are logged in as an administrator you have the ability to add or delete images that has been previously uploaded, regardless
of the folder it is in. if you are a publisher or a writer, you will have your own folder within the image manager which you can
upload images to or remove them from. You will still be able to select images that other users have uploaded.
C REATING A DDITIONAL F OLDERS
You can create additional folders within the image manager by right clicking on the folders in the left hand panel of the image
manager. You now have the option to create, edit or delete folders (see below).
FIGURE 16 ‐ CREATING, RENAMING OR DELETING ADDITIONAL FOLDERS WITHIN THE FILE MANAGER
e4education CMS User Guide 4.0
P a g e | 16
U PLOADING I MAGES
To upload images to the image manager click on the ‘Upload’ button in the top left corner of the image manager (see below).
FIGURE 17 – THE ‘UPLOAD FILE(S)’ BUTTON
You will need to locate and select the image(s) that you wish to upload. Once you have selected the images to upload, click on
‘Open’ and the images will start to upload (see below). All images uploaded to the image manager will be automatically resized to
reduce the time taken to load the image on the site.
FIGURE 18 ‐ SELECTING THE IMAGE(S) TO BE UPLOADED TO THE IMAGE MANAGER
The time it takes for the image(s) to upload will depend on the overall file size of the image(s) being uploaded. The image manager
will automatically resize the image(s) down to a much more manageable file size for use on the website allowing the images to
load up quicker on the front end of the site.
If you are uploading multiple images to the image manager it is recommended that the images are resized prior to them being
uploaded as it will greatly reduce the amount of time it takes for the image(s) to be uploaded.
There are several free programs such as Windows Picture Manager and PixResizer that you can download and install that will
allow you to resize images. You may need to get the network manager within the school to install these onto your PC.
R OTATING I MAGES
You can rotate previously uploaded images either clockwise or anti clockwise by clicking on the ‘Rotate Clockwise’ or ‘Rotate
Anticlockwise’ (see below).
FIGURE 19 ‐ ROTATING IMAGES CLOCKWISE OR ANTICLOCKWISE
e4education CMS User Guide 4.0
P a g e | 17
D ELETING I MAGES
You can delete images that are no longer required by clicking on the ‘Delete file’ icon (see below).
FIGURE 20 ‐ DELETING AN IMAGE FROM THE IMAGE MANAGER
You will then be asked to confirm that you wish the image to be deleted from the image manager (see below).
FIGURE 21 ‐ CONFIRMING THAT THE IMAGE IN QUESTION IS TO BE PERMANENTLY REMOVED FROM THE IMAGE MANAGER
If you select ‘Yes’ then the image will be removed from the file manager and any instances of the image on the front end of the
site will disappear. If you select ‘No’, then the image will not be deleted.
S ELECTING A N I MAGE T O A DD T O T HE P AGE
Once you have found the image you want to add to the page, click on it and the selected image will appear in the preview window
on the right hand side of the image properties window (see below).
FIGURE 22 ‐ IMAGE PROPERTIES WINDOW ONCE AN IMAGE HAS BEEN SELECTED FROM THE IMAGE MANAGER
Before you can add the image onto the page you will need to ensure that the image has some ‘Alternative Text’. Alternative text
is needed to ensure the image meets DDA (Disability Discrimination Act) compliancy.
e4education CMS User Guide 4.0
P a g e | 18
If you find that the image is slightly too big on the page you can adjust the dimensions of the image by changing the values for
either the width or height. As you change the value of one dimension, the other dimension will be automatically changed in
proportion to the image to ensure the image doesn’t get stretched or distorted.
You can also add a border around the image if you wish to, it is a numerical value, so the higher the number the thicker the border
will be. Some designers may choose to have a default border style around all images on the site so in some cases you will not need
to add a border around the image.
You can also add some horizontal and vertical spacing around the image so the text doesn’t sit alongside the edge of the image.
Again, this is a numerical value and the higher the number, the wider the spacing will be. In some cases the designer may set some
default spacing around the image so all images on the site have consistent spacing around them throughout the site.
You also have the option to choose what side of the content area the image sits. If you select ‘Left’, the image will appear on the
left hand side and the text will wrap around the right side of the image then continue underneath. If you choose ‘Right’, then the
image will be placed on the right side, with the text wrapping around the left side of the image and then continue underneath.
Once you are happy, you can click on ‘OK’ and the image will be added to the page.
HYPERLINKS
LINKS TO EXTERNAL SITES
There may be some instances where you wish to create a hyperlink to your schools Ofsted report or some useful links. To create
the link to an external page on the Internet, make sure the ‘URL’ option is selected from the drop down menu. You will then be
asked to enter in the web address that you wish to link to in the textbox underneath (see below).
FIGURE 23 ‐ CREATING A HYPERLINK TO AN EXTERNAL WEBSITE
Any links to external sites that you create should be opened up in a new window. To ensure the link opens up in a new window,
click on the ‘Target’ tab and from the target drop down menu select the ‘New Window (_blank)’ option. This will ensure that the
link opens in a new window (see below).
FIGURE 24 ‐ ENSURING THE HYERLINK OPENS UP IN A NEW WINDOW / TAB
Once you have entered in the URL and selected the link to open in a new window, click on ‘OK’ to create the link. You will see that
the link has been created successfully as the text will be a different colour to the rest of text on the page.
e4education CMS User Guide 4.0
P a g e | 19
LINKS TO AN ANCHOR POINT
Anchor points will allow you to create a link to a specific part on a page. To create a link to an anchor point on the page, the first
thing that needs to be done is to create the location that the link should go to on the page. To do this, place the cursor where you
wish the hyperlink to go to once clicked and select the ‘Insert / Edit Anchor’ icon. You will then be asked to give the anchor point a
name (see below).
FIGURE 25 ‐ CREATING AN ANCHOR POINT ON THE PAGE
This will place a small anchor icon where the cursor was located. You then need to select the text that will be used as the link to
the anchor point and click on the ‘Insert / Edit Hyperlink’ icon and select ‘Link To An Anchor Point On Page’ option from the drop
down menu. You will then be asked to choose the anchor you wish the link to go to (see below).
FIGURE 26 ‐ CHOOSING THE ANCHOR THE HYPERLINK WILL LINK TO
Once chosen, click on ‘OK’ and link will be created.
LINKS TO EMAIL ADDRESSES
You can create links to an email address by selecting the ‘E‐mail’ option from the drop down menu. You can then enter the email
address it will be sent to. You can also enter a message subject and some text to go in the message body which will automatically
be added when the user clicks on the email link (see below).
FIGURE 27 ‐ CREATING A LINK TO AN EMAIL ADDRESS
Once you have filled these out, click on ‘OK’ to create the link to the email address. When an end user clicks on the link once the
page is live, their default email program will open up with the email address, message subject and any message body text already
filled out.
e4education CMS User Guide 4.0
P a g e | 20
LINKS TO A DOCUMENT / IMAGE
There may be times when you wish to create a link to a document in the middle of a page of text. To do this, highlight the text,
and click on the ‘Insert / Edit Hyperlink’ icon and click on the ‘Browse Server’ button. This will load up the ‘File Manager’ (see
below).
FIGURE 28 ‐ LINKING TO A DOCUMENT OR IMAGE UPLOADED TO THE FILE / IMAGE MANAGER
THE FILE MANAGER
The file manager works in a similar way to the ‘Image Manager’. You can upload and delete files as well as creating new
directories (see below).
FIGURE 29 ‐ THE FILE MANAGER DISPLAYING LIST OF FOLDERS AND ALL PREVIOUSLY UPLOADED FILES
e4education CMS User Guide 4.0
P a g e | 21
You can create additional folders within the file manager by right clicking on the folders in the left hand panel of the image
manager. You now have the option to create, edit or delete folders (see below).
FIGURE 30 – CREATING, RENAMING OR DELETING ADDITIONAL FOLDERS WITHIN THE FILE MANAGER
U PLOADING N EW F ILES
To upload a new file to the file browser, click the ‘Upload New File’ icon (see below).
FIGURE 31 ‐ UPLOAD FILE(S) BUTTON
You can now browse your machine for the file(s) you wish to upload (see below). Once the file(s) have been uploaded they will be
displayed in the file manager.
FIGURE 32 ‐ SELECTING THE FILE(S) TO BE UPLOADED TO THE FILE MANAGER
F ILE T YPES T HAT C AN B E U PLOADED
The file manager will accept many different file formats including:
•
•
•
•
•
•
PDF documents (.pdf)
Plain text documents (.txt)
Word documents (.doc)
Excel spreadsheets (.xls)
PowerPoint presentations (.ppt)
Flash (.swf)
It is recommended that where possible, documents are converted into PDF. The main reasons for this are:
• Security – PDF documents are read only, meaning it is more difficult for the end user to edit the document and then print
it. E.g. changing the price of a school trip.
• Compatibility Issues – the latest version of Microsoft Office (Office 2007) uses different file extensions to previous
versions. The only way to view the document if you don’t have the latest version is to download a compatibility patch
which would enable you to view the document. Click here to download the Microsoft Office Compatibility Pack.
e4education CMS User Guide 4.0
P a g e | 22
•
File Size – converting documents into PDF can greatly reduce the file size of the document, making it both quicker for you
to upload the document, and the end user to download it. You can download some free software called ‘Cute PDF
Writer’, which will allow you to convert documents into PDF quickly and easily.
You can download the latest version of adobe PDF reader for free at: http://get.adobe.com/reader/
R ENAMING F ILES
You can rename files once they have been uploaded by clicking on the file title (see below). Once you have renamed the file, click
off the file title and the updated title will be saved.
FIGURE 33 ‐ RENAMING THE TITLE OF AN UPLOADED FILE
R EMOVING P REVIOUSLY U PLOADED F ILES
You can remove files that are no longer needed by hovering over the file and clicking on the ‘Delete file’ icon (see below).
FIGURE 34 ‐ DELETING A PREVIOUSLY UPLOADED FILE FROM THE FILE MANAGER
You will then be asked to confirm that you are happy for the file to be deleted from the file manager (see below). If you select
‘Yes’, then the file will be permanently deleted from the file manager. Clicking ‘No’ will cancel the deletion of the file.
FIGURE 35 – CONFIRMING THAT THE FILE IN QUESTION IS TO BE PERMANENTLY REMOVED FROM THE FILE MANAGER
REMOVING HYPERLINKS
If you wish to remove a hyperlink that is no longer required on a page, select it and click on the ’Remove Hyperlink’ icon. The
hyperlink will then be removed.
e4education CMS User Guide 4.0
P a g e | 23
TABLES
You can insert tables into the editor by clicking on the ‘Insert / Edit Table’ icon. Upon clicking on the icon, a window will appear
allowing you to choose the number of rows and columns (see below).
FIGURE 36 ‐ ADDING A TABLE TO THE PAGE EDITOR AND CHOOSING THE NUMBER OF ROWS AND COLUMNS AND THE WIDTH OF THE TABLE
You can also choose the thickness of the border, the higher the number, the thicker the border will be. You can also choose the
amount of ‘Cell Padding’ and ‘Cell Spacing’ for the table cells.
•
•
Cell Padding ‐ The amount of space between the outer edges of the table cell and the content of the cell.
Cell Spacing ‐ The amount of space in between the individual table cells.
It is recommended that you change the width of the table to be a percentage of the content area instead of a specific width so the
table fits within the content area of the page. To do this, click on the drop down menu on the right hand side and select the
‘Percentage’ option instead of ‘Pixels’ (see below). Now, as long as the width of the table is less than 100%, the table will always
be contained within the content area.
FIGURE 37 ‐ CHANGING THE WIDTH OF THE TABLE TO BE A PERCENTAGE TO ENSURE IT ALWAYS FITS WITHIN THE CONTENT AREA OF THE SITE
FLASH ELEMENTS
You can insert flash elements onto the page by placing the cursor where you want it to appear and clicking on the ‘Insert / Edit
Flash’ icon. You will then be presented with the ‘Flash Properties’ window (see below).
FIGURE 38 ‐ ADDING A FLASH ELEMENT TO THE PAGE
e4education CMS User Guide 4.0
P a g e | 24
You then need to click on the ‘Browse Server’ button to open the file manager to either select a previously uploaded flash
element, or upload a new one. See the file manager section for more information on uploading files, or you can paste in the URL
from an external site where the video is located.
Once you have selected the flash element or pasted a URL in, a preview of the flash element will be displayed (see below). Once
you are happy, click on ‘OK’ and it will be added to the page.
VIDEO
You can add video to any page on your website. The video manager will accept the following video file formats:
•
•
•
•
WMV (.wmv)
QuickTime (.mov)
AVI (.avi)
Mpeg (.mpg)
You are given 500mb of space for videos. If you go over this amount it can be increased for a small fee.
ADDING A NEW VIDEO
To add a video, place the curser roughly where you want the video to be placed on the page and click on the ‘Insert Video’ icon.
Upon clicking on the icon, the ‘Video Properties’ window will appear (see below).
FIGURE 39 – THE VIDEO PROPERTIES WINDOW PRIOR TO A VIDEO BEING UPLOADED OR SELECTED
e4education CMS User Guide 4.0
P a g e | 25
You will need to click on the ‘Browse Server’ button which will open up the ’Video Browser’ (see below) to either upload a new
video or select a previously uploaded video. Once the video manager loads up, it will display thumbnails of all the videos that have
previously been uploaded. In the top right corner you will see how much space you have currently used up for videos.
FIGURE 40 ‐ THE VIDEO MANAGER SHOWING PREVIOUSLY UPLOADED VIDEOS
To upload a new video, click on ‘Upload’. You will now be presented with a window asking you to browse for the video file you
wish to upload. Click on the ‘Browse’ button and you will then need to navigate through the files on your machine to find the
video you wish to upload. Once found, click on ‘Open’. You will then be able to click on ‘Upload’ to upload the video and start the
conversion process into the playable format for the site.
A progress bar will appear showing you the upload progress of the video (see below). The larger the file size, the longer it will take
the video to upload to the site.
FIGURE 41 ‐ VIDEO UPLOAD PROGRESS BAR
e4education CMS User Guide 4.0
P a g e | 26
Once the video has successfully been uploaded, the progress bar will disappear and you will be presented with a thumbnail letting
you know that the video has been successfully uploaded and that it is now being converted so it can be played on the site (see
below).
FIGURE 42 ‐ UPLOADED VIDEO BEING ENCODED TO ENABLE IT TO BE PLAYED ON THE SITE
DELETING VIDEOS
To delete a video click on the ‘Options’ button underneath the video you wish to delete. You will then have the option to insert,
preview or delete the video (see below).
FIGURE 43 ‐ DELETING A VIDEO FROM THE VIDEO MANAGER
If you click on ‘Delete Video’ you will be asked to confirm that you are happy for the video to be deleted. If you click on ‘Continue’
the video will be removed.
SELECTING A VIDEO TO ADD TO THE PAGE
Once the video has been uploaded and converted, you will be presented with a thumbnail of the first frame of the video. You can
click on the video thumbnail message to select the video to be added into the page while it is still being encoded but you won’t be
able to play the video until the encoding has been completed. When you click on a video to add onto the page, you will be taken
back to the ‘Video Properties’ window, showing a preview of the video. You can then choose if you want the video to appear on
the left or right side of the page. Once you are happy, click on ‘OK’.
e4education CMS User Guide 4.0
P a g e | 27
PAGES
CREATING YOUR PAGE
You can create a new page by going to the area of the site where you want the new page to appear and select ‘Create > Under
This Item / Next To This Item > Page (see below).
FIGURE 44 ‐ CREATING A NEW PAGE UNDERNEATH OR NEXT TO THE CURRENT ITEM
You will then be able to add a title and some content to the page by clicking on the ‘Edit Content’ icon when hovering over the
content area of the page (see below).
FIGURE 45 ‐ ADDING A PAGE TITLE AND LOADING UP THE PAGE EDITOR
This will display the page editor (see below) which will allow you to add text, images, links, tables and videos to your page (see the
Page editor area for more information).
FIGURE 46 ‐ THE PAGE EDITOR
e4education CMS User Guide 4.0
P a g e | 28
ALLOWING USERS TO LEAVE COMMENTS
You can choose if comments can be left on the page you are working on by clicking on the ‘Comments’ button to toggle them on
and off (see below).
FIGURE 47 ‐ DECIDING IF COMMENTS CAN BE LEFT ON THE PAGE
Any comments that are left will need to be reviewed by an administrator on the site before they are published on the live site.
FILE ATTACHMENTS
File attachments can be added to the bottom of any page to allow the user to view and download documents.
ADDING FILE ATTACHMENTS
To add attachments to the page click on the ‘Upload Attachments’ button (see below). It will then allow you to locate and select
multiple files to upload as attachments.
FIGURE 48 ‐ UPLOAD ATTACHMENTS BUTTON
Once you have selected the file(s) and clicked on ‘Open’ they will be uploaded and added to the bottom of the page (see below).
FIGURE 49 ‐ LIST OF UPLOADED ATTACHMENTS
REORDERING FILE ATTACHMENTS
When uploading multiple attachments they might not appear in the correct order once uploaded. You can re order an attachment
by clicking on the left hand side of the attachment and dragging it up or down to place it in the correct order (see below).
FIGURE 50 ‐ REORDERING UPLOADED FILE ATTACHMENTS
e4education CMS User Guide 4.0
P a g e | 29
RENAMING FILE ATTACHMENTS
You can rename the title of any uploaded attachment by clicking on the ‘Edit Title’ icon. This will then allow you to rename the
attachment title (see below).
FIGURE 51 ‐ RENAMING ATTACHMENT TITLES
DELETING FILE ATTACHMENTS
To remove a file from the attachment list, click on the ‘Remove Attachment’ and the attachment will be removed. Once deleted,
if you realise that you wanted to undo the deletion click on the ‘Undo Delete’ link on the right hand side (see below).
FIGURE 52 ‐ DELETING PREVIOUSLY UPLOADED ATTACHMENTS
e4education CMS User Guide 4.0
P a g e | 30
MAKING THE PAGE SECURE
There may be some areas of your website that you wish only certain people to have access to (i.e. governors, staff or parents). You
can make the page secure so that only members from a certain group can view the content on that page.
To make the page secure, click on the ‘Security’ button (see below).
FIGURE 53 ‐ MAKING AN AREA ON THE SITE SECURE
You will then be able to choose if the page is publically viewable and also what user groups have access to either modify or view
that page (see below).
FIGURE 54 ‐ CHOOSING WHAT ROLES HAVE PERMISSION TO VIEW THE ITEM
To add a user role who will have permission to edit or view that page, drag the user group from the list on the right hand side
panel to the ‘Roles With Permissions’ window in the bottom left of the window.
Once you have made your choices you can close the window.
PAGE KEYWORDS
Though meta description tags are not a major factor search engines consider when ranking sites, they should not be left off
the page.
Both the meta keyword tag and the meta description tag contribute to your search engine ranking, and the meta description
tag influences the likelihood that a person will actually click on the search engine results page and visit your site.
To add meta keywords or meta descriptions for that area of the site click on the ‘Keywords’ button (see below).
FIGURE 55 ‐ ADDING META KEYWORDS AND DESCRIPTIONS TO AN AREA ON THE SITE
e4education CMS User Guide 4.0
P a g e | 31
META KEYWORDS
The meta keyword is designed to provide a brief description of your site which can be used by search engines or directories.
When you write a meta keywords list, start by scanning the copy on your page. Make a list of the most important terms you see
on the page. Then read through the list. Pick the 10 or 15 terms that most accurately describe the content of the page. If you
cannot narrow your keyword list down to 10‐15 keywords, then the content on your page may be rambling too far.
META DESCRIPTION
The meta description is intended to be a brief and concise summary of your page's content.
When you write a meta description, you should limit it to 170 characters or 200 characters at most. You should pick a style and be
consistent throughout your pages, writing a unique description for each page of your site.
ARCHIVING DATES FOR THE PAGE
You can set a page item of content to automatically go live on site and / or be removed by clicking on the ‘Archiving’ button (see
below).
You can then choose if the page is to go live as soon as it has been reviewed and accepted or whether it goes live on a particular
date in the future. You can also choose the date that the page is archived on by clicking the ‘Remove And Archive’ checkbox. You
can then choose the date the page is automatically removed from the site (see below).
FIGURE 56 ‐ CHOOSING WHEN THE ITEM GOES LIVE AND IS REMOVED FROM PUBLIC VIEW
You also have the option to archive the page immediately by clicking on the ‘Archive Now’ button (see below).
FIGURE 57 ‐ ARCHIVE THE ITEM IMMEDIATELY
e4education CMS User Guide 4.0
P a g e | 32
SAVING YOUR PAGE
Once you have finished creating / editing your page you can save it by clicking on the ‘Save’ button (see below).
You will then have the option to either publish the page directly to the site without it having to be reviewed or to send the item to
someone for review before it goes live (see below).
FIGURE 58 ‐ SAVING THE ITEM AND DECIDING IF IT GOES DIRECTLY ON THE SITE OR IF IT IS TO BE REVIEWED BEFORE GOING LIVE
If you select ‘Publish To Web’ then the created / edited page will automatically be put live. If you select ‘Send For Approval’, you
will then be asked who the page is sent to for approval (see below).
FIGURE 59 ‐ SENDING THE ITEM TO ANOTHER USER FOR APPROVAL
Once you have chosen the reviewer for the page click on ‘Send To This User’. The page will then be sent to that user to be
reviewed before it can be placed on the site.
e4education CMS User Guide 4.0
P a g e | 33
EDITING A PAGE
To edit a page of content, locate the page you wish to edit and then hover over the content area and click on the ‘Edit Content’
icon (see below).
FIGURE 60 ‐ EDITING A PREVIOUSLY CREATED PAGE
The page editor will then load up displaying the previously added content for that page. Once you have edited the content click on
‘Update’ and the changes will be displayed on the page (see below). You can then add or remove attachments, choose archiving
dates and also save the page.
FIGURE 61 ‐ EDITING THE CONTENT FOR AN EXISTING PAGE OF CONTENT ON THE SITE
DELETING A PAGE
To remove a page that is no longer needed on the site you will need to make sure you are currently on that page. Then within the
‘General’ tab in the admin bar select ‘Delete’ (see below).
FIGURE 62 ‐ DELETING A PAGE
e4education CMS User Guide 4.0
P a g e | 34
You will then be asked to send the page to someone to review before it gets removed from the site. Clicking on the ‘Request
Deletion From Another User’ button will allow you to select the person who will review the item before it is removed from the
site. If when your user account was created it was set up to enable you to delete the item straight from the site without it being
reviewed, you will also be able to click on the ‘Delete Now’ button to remove the page straight from the site.
If the page you wish to delete has subpages underneath it, you won’t be able to delete that page until the subpages have been
relocated to a different area of the site or deleted.
NEWS AREA
CREATING A NEWS CATEGORY
You may wish to have multiple news categories around the site e.g. school news, sports news or 6th form news. You can create a
news category by going to the area of the site where you want the news category to appear and select ‘Create > Under This Item /
Next To This Item > News Area’ (see below).
FIGURE 63 ‐ CREATING A NEW NEWS AREA ON THE SITE
You will then need to give the news category a title and a description (see below).
FIGURE 64 ‐ GIVING THE NEW NEWS CATEGORY A TITLE AND DESCRIPTION
Once you have entered both a title and description for the news category you can click on ‘Save’.
e4education CMS User Guide 4.0
P a g e | 35
NEWS ARTICLES
Once you have created you news category you will be able to start adding news articles to it.
ADD A NEWS ARTICLE
To add a new news article, locate the news category it will appear within, and select ‘Create > Under This Item / Next To This
Item > News Article’ (see below).
FIGURE 65 ‐ ADDING A NEWS ARTICLE TO A NEWS AREA ON THE SITE
You will then need to give the news article a title, thumbnail image, some intro text and content for the main article (see below).
FIGURE 66 ‐ CREATING A NEW NEWS ARTICLE TO BE ADDED TO THE SITE
To edit the content using the Page editor hover over the introduction text and the main news article text for the edit icon to
appear.
You will then be able to decide whether comments can be left by members of the public, you can also choose if the news article is
secure so that only certain people can read the article and finally when the article goes on the site and is removed.
e4education CMS User Guide 4.0
P a g e | 36
SAVING YOUR NEWS ARTICLE
Once you have finished creating / editing your news article you can save it by clicking on the ‘Save’ button (see below).
FIGURE 67 ‐ SAVING THE ITEM
You will then have the option to either publish the news article directly to the site without it having to be reviewed or to send the
item to someone for review before it goes live (see below).
FIGURE 68 – DECIDING FI THE ITEM GOES DIRECTLY ON THE SITE OR IF IT IS TO BE REVIEWED BEFORE GOING LIVE
If you select ‘Publish to web’ then the created / edited news article will automatically be put live. If you select ‘Send For
Approval’, you will then be asked who the news article is sent to for approval (see below).
FIGURE 69 ‐ SENDING THE ITEM TO ANOTHER USER FOR APPROVAL
Once you have chosen the reviewer for the news article, click on ‘Send To This User’. The news article will then be sent to that
user to be reviewed before it can be placed on the site.
e4education CMS User Guide 4.0
P a g e | 37
EDIT EXISTING NEWS ARTICLE
To edit a previously created news article, locate the news category which the article has been added to. Then find the article title
and click on the ‘Read More’ link to view the news article (see below).
FIGURE 70 ‐ EDITING A PREVIOUSLY ADDED NEWS ARTICLE ON THE SITE
You will then be able to edit the news article title, thumbnail image, intro and main story text. Once you have made the necessary
changes you can decided if comments can be left, if the article is password protected and if the article will automatically be
archived at a later date. Once you are happy you can save your news article.
DELETE EXISTING NEWS ARTICLE
You can remove news articles that are no longer needed by locating the news article you wish to delete and selecting ‘Delete’
from the ‘General’ tab in the admin bar at the top of the screen (see below).
FIGURE 71 – DELETING A NEWS ARTICLE FROM THE SITE
You will then be able to send the news article to another user to delete by clicking on ‘Request Deletion From Another User’ and
selecting the user the deletion request will go to (see below); or if you have the permission, you will be able to remove the news
article directly from the site without it being reviewed by selecting ‘Delete Now’.
FIGURE 72 ‐ SENDING THE ITEM TO ANOTHER USER FOR APPROVAL
e4education CMS User Guide 4.0
P a g e | 38
CALENDAR
ADD CALENDAR CATEGORY
You may wish to have multiple calendar categories around the site e.g. school calendar, sports calendar or a 6th form calendar. You
can create a calendar category by going to the area of the site where you want the calendar category to appear and select ‘Create
> Under This Item / Next To This Item > Calendar’ (see below).
FIGURE 73 ‐ CREATING A NEW CALENDAR ON THE SITE
You will then need to give the new calendar category a name and a description (see below).
FIGURE 74 ‐ GIVE THE NEW CALENDAR A TITLE AND DESCRIPTION AND CLICK ON'SAVE' TO ADD IT TO THE SITE
Once you have entered the calendar name and description, you can click ‘Save’ to save the calendar to the site.
ADD CALENDAR EVENT
To add events to a calendar you will first of all need to ensure that you are on the calendar page and then select ‘Create > Under
This Item / Next To This Item > Calendar Event’ (see below).
FIGURE 75 ‐ CREATING A CALENDAR EVENT
You will now see the Calendar Event Editor. You will need to give the event a title, choose the date the event happens on and the
start and end time for the event or if the event takes place all day.
e4education CMS User Guide 4.0
P a g e | 39
You can then enter in a description for that event (see below).
FIGURE 76 ‐ ADDING THE CALENDAR EVENT DETAILS (TITLE, DESCRIPTION, DATE, START AND FINISH TIME)
You can then choose if the event recurs on a daily, weekly or monthly basis. To make the event recur, click the ‘This Event Recurs’
checkbox. You will then be asked how often the event recurs (see below).
FIGURE 77 ‐ DECIDING HOW OFTEN THE EVENT RECURS
DAILY RECURRENCE
If you require the event to recur daily, select how frequent the event happens in days. An end date for the daily recurrence must
also be added (see below).
FIGURE 78 ‐ SELECTING THE EVENT TO RECUR DAILY AND CHOOSING THE END DATE OF THE RECURRENCE
e4education CMS User Guide 4.0
P a g e | 40
WEEKLY RECURRENCE
If you require the event to recur weekly you can select the day(s) the event will happen on. An end date for the weekly recurrence
is also required (see below).
FIGURE 79 ‐ SELECTING THE EVENT TO RECUR ON A WEEKLY BASIS, THE DAY(S) THE EVENT HAPPENS ON AND THE END DATE OF THE RECURRENCE
MONTHLY RECURRENCE
You can set the monthly recurrence to happen on the same day every month or you can set the event to recur every 2nd
Wednesday for example. An end date for the weekly recurrence is also required (see below).
FIGURE 80 ‐ SELECTING THE EVENT TO RECUR ON A MONTHLY BASIS AND CHOOSING THE DATE IT RECURS ON AND THE END DATE FOR THE EVENT
RECURRENCE EXCEPTIONS
There may times when you create recurring events such as afterschool sport activities which do not happen during school
holidays. You can create exceptions for the calendar event you are creating so it does not show up in the calendar between certain
dates.
To create an exception click on the ‘Add Exception’ button and you will then be asked to enter the start and end day for that
exception (see below).
FIGURE 81 ‐ ADDING EXCEPTION DATES TO A CALENDAR EVENT
You can add additional exceptions by clicking on the ‘Add Another Exception’ button.
SAVING YOUR CALENDAR EVENT
Once you have created your calendar entry (title, description, date, event recurrence and recurrence exceptions) you can then
save the event. You can either request that another member of staff reviews the event before going live by clicking on the ‘Send
e4education CMS User Guide 4.0
P a g e | 41
pproval’ butto
on, or you can
n save the event directly to the website (if you have th
he permission) by clicking on the ‘Publish
h
For Ap
Event’’ button.
EDITT CALENDARR EVENT
To editt the details fo
or an event frrom the calendar, find the event you wissh to edit and click on the event title (see
e below).
FIGURE 82 ‐ SELECTING THE CALENDAR
C
EVEN
NT THAT YOU WISSH TO EDIT
You will then be sho
own the details for that eveent. To make changes
c
to the event details click the ‘Ed
dit Content’ button
b
in the
conten
nt area for thee event (see below).
b
FIGURE 83 ‐ EDITING
E
THE EVEENT DETAILS
You will then be ablle to change the event detaails. Once you have made th
he changes yo
ou will be ablee to send the edited event for
f
approvval or send it directly
d
to thee site (if you have
h
the perm
mission to do so).
s
DELETE CALENDDAR EVENTT
To delete an event from
f
the calendar, find thee event you wiish to remove
e and click on it to display th
he details for that individuaal
event. Then click on
n the delete button within the
t ‘General’ tab in the adm
min bar at thee top of the paage (see below
w).
FIGURE 84 ‐ DELETING THE CALEENDAR EVENT
e4educatio
on CMS User Guide
G
4.0
P a g e | 42
You will then have the option to send it to another user to delete by clicking on the ‘Request Deletion From Another User’ button
or you can remove it directly from the site by clicking on the ‘Delete Now’ button (if you have permission to do so).
e4education CMS User Guide 4.0
P a g e | 43
PHOTO GALLERIES & ALBUMS
CREATING A PHOTO GALLERY
You may wish to have multiple photo galleries around the site e.g. trips and visits gallery or sports gallery. You can create a photo
gallery by going to the area of the site where you want the photo gallery to appear and select ‘Create > Under This Item / Next To
This Item > Photo Gallery’ (see below).
FIGURE 85 ‐ CREATING A PHOTO GALLERY
You will then be asked to give the new photo gallery a title and description (see below).
FIGURE 86 ‐ GIVING THE NEW GALLERY A TITLE AND DESCRIPTION
Once you have given the gallery a title and description click ‘Save’ to add it to the site.
ADD PHOTO ALBUM
Once you have created your photo gallery you can start to add albums of images by ensuring you are on the gallery page that you
wish to add the album to and then selecting ‘Create > Under This Item / Next To This Item > Photo Album’ (see below).
FIGURE 87 ‐ CREATING A PHOTO ALBUM
You will then be able to start creating your photo album. You will need to give the album a title and description.
You can then upload the images that will make up the photo album by clicking on the ‘Upload Images’ button (see below).
e4education CMS User Guide 4.0
P a g e | 44
FIGURE 88 ‐ UPLOAD ALBUM IMAGES BUTTON
You will then be able to locate and select the image(s) that you want to upload to the album (see below).
FIGURE 89 ‐ SELECTING THE IMAGE(S) TO BE UPLOADED TO THE ALBUM
Once you have selected the image(s) click on ‘Open’ and the image(s) will be uploaded to the album. The first image in the album
will automatically become the thumbnail for that album (see below).
FIGURE 90 ‐ THE UPLOADED IMAGES AND THE DEFAULT THUMBNAIL IMAGE FOR THE ALBUM
e4education CMS User Guide 4.0
P a g e | 45
CHANGING THE DEFAULT THUMBNAIL IMAGE
You can also change the default thumbnail image by dragging the new image that you want to use over the current default
thumbnail (see below).
FIGURE 91 ‐ CHANGING THE DEFAULT THUMBNAIL IMAGE FOR THE ALBUM
REORDERING THE IMAGES
Once your images have been uploaded you can reorder them if you need to by dragging and dropping the images into the correct
order (see below).
FIGURE 92 ‐ REORDERING THE IMAGES IN THE PHOTO ALBUM
e4education CMS User Guide 4.0
P a g e | 46
ADDING IMAGE TITLES & DESCRIPTIONS
You can add titles and descriptions to all the images in the album by clicking on the ‘Detailed View’ button (see below).
FIGURE 93 ‐ THE 'DETAILED VIEW' BUTTON ALLOW YOU TO ADD TITLES AND DESCRIPTIONS TO THE IMAGES WITHIN THE ALBUM
This will then allow you to add or edit the image titles as well as the deceptions (see below).
FIGURE 94 ‐ GIVING TITLES AND DESCRIPTIONS TO THE IMAGES IN THE ALBUM
Once the album has been saved and the end user clicks on one of the thumbnail images, a larger version of the image will be
displayed over the page, and the title and description for that image will be displayed (if a title and description has been added for
that image) .
DELETING IMAGES FROM THE ALBUM
You can delete unwanted images from the photo album by clicking on the ‘Delete’ icon at the top of the thumbnail of the image
you wish to remove (see below).
FIGURE 95 ‐ DELETING AN IMAGE FROM THE PHOTO ALBUM
e4education CMS User Guide 4.0
P a g e | 47
SAVING YOUR PHOTO ALBUM
Once you have finished creating / editing your photo album you can save it by clicking on the ‘Save’ button (see below).
FIGURE 96 ‐ SAVING THE PHOTO ALBUM
You will then have the option to either publish the photo album directly to the site without it having to be reviewed or to send the
item to someone for review before it goes live (see below).
FIGURE 97 ‐ DECIDING IF THE ITEM GOES DIRECTLY ON THE SITE OR IF IT IS TO BE REVIEWED BEFORE GOING LIVE
If you select ‘Publish To Web’ then the created / edited photo album will automatically be put live. If you select ‘Send For
Approval’, you will then be asked who the photo album is to be sent to for approval (see below).
FIGURE 98 ‐ SENDING THE ITEM TO ANOTHER USER FOR APPROVAL
Once you have chosen the reviewer for the photo album, click on ‘Send To This User’. The photo album will then be sent to that
user to be reviewed before it can be placed on the site.
e4education CMS User Guide 4.0
P a g e | 48
EDIT PHOTO ALBUM
To edit a previously created photo album, go to the gallery page that the album to be edited belongs to, and click on either the
thumbnail image or the album title (see below).
FIGURE 99 ‐ EDITING A PREVIOUSLY UPLOADED PHOTO ALBUM
You will now be able to edit the album title and description as well as add, edit, reorder or delete the images for that album.
DELETE PHOTO ALBUM
To delete a photo album, find the album you wish to remove. Then click on the delete button within the ‘General’ tab in the
admin bar at the top of the page (see below).
FIGURE 100 ‐ DELETING THE CALENDAR EVENT
You will then have the option to send it to another user to delete by clicking on the ‘Request Deletion From Another User’ button
or you can remove it directly from the site by clicking on the ‘Delete Now’ button (if you have permission to do so).
e4education CMS User Guide 4.0
P a g e | 49
BLOGS
CREATING A BLOG
To add a new blog area to the site select ‘Create > Under This Item / Next To This Item > Blog’ where you want the blog to appear
(see below).
FIGURE 101 ‐ ADDING A NEW BLOG TO THE SITE
You will then need to give the blog a title and description (see below).
FIGURE 102 ‐ GIVING THE NEW BLOG A TITLE AND DESCRIPTION
e4education CMS User Guide 4.0
P a g e | 50
ADDING A BLOG ENTRY
To add a blog entry locate the blog category it will appear within and select ‘Create > Under This Item / Next To This Item > Blog
Post’ (see below).
FIGURE 103 ‐ ADDING A NEW BLOG POST TO THE SITE
You will then need to give the blog entry a title, thumbnail image, some intro text and text for the main blog article (see below).
FIGURE 104 ‐ ADDING A NEW BLOG POST TO THE SITE
To edit the content using the Page editor, hover over the introduction text and the main blog entry text and the edit icon will
appear.
You will then be able to decide whether comments can be left by members of the public, if the blog post is secure so that only
certain people can read the article and when the article goes on the site and is removed.
e4education CMS User Guide 4.0
P a g e | 51
SAVING YOUR BLOG ENTRY
Once you have finished creating / editing your blog entry you can save it by clicking on the ‘Save’ button (see below).
FIGURE 105 ‐ SAVING THE BLOG POST
You will then have the option to either publish the blog entry directly to the site without it having to be reviewed, or to send the
item to someone for review before it goes live (see below).
FIGURE 106 ‐ DECIDING IF THE ITEM GOES DIRECTLY ON THE SITE OR IF IT IS TO BE REVIEWED BEFORE GOING LIVE
If you select ‘Publish To Web’ then the created / edited blog entry will automatically be put live. If you select ‘Send For Approval’,
you will then be asked who the blog entry is to be sent to for approval (see below).
FIGURE 107 ‐‐ SENDING THE ITEM TO ANOTHER USER FOR APPROVAL
Once you have chosen the reviewer for the blog entry, click on ‘Send to this user’. The blog entry will then be sent to that user to
be reviewed before it can be placed on the site.
e4education CMS User Guide 4.0
P a g e | 52
EDITING A BLOG ENTRY
To edit a previously created blog entry, locate the blog category which the blog entry has been added to. Then find the blog entry
title and click on the ‘Read More’ link (see below).
FIGURE 108 ‐ EDITING A BLOG POST
You will then be able to edit the blog entry title, thumbnail image, intro and main story text. Once you have made the necessary
changes you can decided if comments can be left, if the blog entry is password protected and if the blog entry will automatically
be archived at a later date.
Once you are happy you can save your blog entry.
DELETING A BLOG ENTRY
You can remove blog entries that are no longer needed by locating the blog entry you wish to delete and selecting ‘Delete’ from
the ‘General’ tab in the admin bar at the top of the screen (see below).
FIGURE 109 ‐ DELETING A BLOG POST
You will then be able to send the blog entry to another user to delete by clicking on ‘Request Deletion From Another User’ and
selecting the user the deletion request will go to, or if you have the permission, you will be able to remove the blog entry directly
from the site without it being reviewed by selecting ‘Delete Now’.
e4education CMS User Guide 4.0
P a g e | 53
FORMS
A form can be created and used to allow parents to submit enquiries or pupil absences. The form results can either be saved to a
database to be exported at a later date or / and sent to a specified email address.
ADDING A FORM
To add a form to the site, select ‘Create > Under This Item / Next To This Item > Form’ where you want the form to appear on the
site (see below).
FIGURE 110 ‐ CREATING A FORM
The Form creator will now appear allowing you to create your form (see below).
FIGURE 111 ‐ THE FORM CREATOR
e4education CMS User Guide 4.0
P a g e | 54
STORING FORM RESPONSES
You can choose whether the completed forms are stored into a database which you can later export, or if they are sent in an email
to someone within the school by ticking one or both checkboxes in the right hand panel (see previous page) or by selecting the
settings option. You will need to ensure you have chosen one of the options before you can save the form.
If you choose to send the responses to a email address, you will need to specify the email address that the results are to go to
along with the message subject.
FORM ELEMENTS
As you add form elements, they will automatically appear in the form preview window on the left hand side of the window
T EXT
You can use the ‘Text’ icon to add a line of text to your form to tell the end user what the form is used for.
You can choose if the text entered is a heading or if it is just plain text. You also have a text box which you enter the desired text
into (see below).
FIGURE 112 ‐ ADDING TEXT TO THE FORM
The text will then be added to the form (see below).
FIGURE 113 ‐ THE RESULTED TEXT IN THE FORM PREVIEW WINDOW
T EXTBOX
This is one of the most commonly used form elements. It allows users to freely type content that will be included as part of their
response. You can configure this to be a single line (similar to what you type into when performing a search), a multiline (this is
useful when you want to capture a large piece of information such as a description or address), or a rich text field (this will provide
the user with a small text editor that allows them to create bold text, headings, links and insert images).
FIGURE 114 ‐ ADDING A SINGLE LINE / MULTILINE TEXTBOX
e4education CMS User Guide 4.0
P a g e | 55
If you click the ‘Size’ tab you can choose how many characters wide the textbox will be. If the textbox is set to multiline then you
will also have the option of choosing how many rows high the textbox will be (see below).
FIGURE 115 ‐ SETTING THE WIDTH OF THE TEXTBOX
You can also set the field to require a response before the form can be saved by clicking on the ‘Validation’ tab and selecting ‘Yes’
from the ‘Requires An Answer’ drop down menu (see below). This then forces the end user to have to enter a response into that
field before the form can be saved.
FIGURE 116 ‐ CHOOSING IF A RESPONSE MUST BE ENTERED BEFORE THE FORM CAN BE SUBMITTED
The textbox will then be added to the form (see below).
FIGURE 117 ‐ THE RESULTED TEXTBOX IN THE FORM PREVIEW WINDOW
e4education CMS User Guide 4.0
P a g e | 56
L IST I TEMS
This type of element allows users to select one or more options from a list that you can define. This can be in the form of some
radio buttons, checkboxes, a drop‐down box, or a list that limits the user to a single selection, or allows multiple items to be
selected.
FIGURE 118 ‐ ADDING A LIST ITEM TO THE FORM AND CHOOSING THE TYPE OF LIST ITEM
•
Radio Buttons ‐ Displays a list of radio buttons that allow the user to pick one option from a list of possible selections
•
Drop Down ‐ Displays a dropdown menu which allows users to pick one option from a list of options.
•
List ‐ Displays a list of options which allows a user to select zero, one, or more of the options.
•
Checkboxes ‐ Displays a list of options with checkboxes to the left which allows the user to select multiple options
You can add the values that will appear in the list by clicking on the ‘Values’ tab. You will then be able to start to add values that
will appear in the list (see below).
FIGURE 119 ‐ ADDING RESPONSE VALUES TO THE LIST
e4education CMS User Guide 4.0
P a g e | 57
R EORDERING L IST O PTIONS
You can reorder the list options by clicking and holding the mouse button on the ’Reorder’ icon and moving the item up or down
to the desired location then releasing the mouse button (see below).
FIGURE 120 ‐ REORDERING LIST RESPONSES
R ENAMING L IST O PTIONS
You can rename a list option by clicking on the ‘Rename’ icon (see below).
FIGURE 121 ‐ RENAMING LIST OPTION RESPONSES
You will then be able to rename the list option and save the change by clicking on the ‘Confirm’ icon (See below).
FIGURE 122 ‐ CONFIRMING THE RENAMED LIST OPTION RESPONSE
D ELETING L IST O PTIONS
You can delete list option responses that are no longer needed by clicking on the ‘Delete Item’ icon (see below).
FIGURE 123 ‐ DELETING LIST OPTION RESPONSE
SAVING YOUR FORM
Once you have completed your form, click on ‘Save’ and your form will be saved to the website.
e4education CMS User Guide 4.0
P a g e | 58
EDITING A FORM
To edit the form, go to the form page and click on the ‘Edit content’ icon (see below).
FIGURE 124 ‐ EDITING A PREVIOUSLY CREATED FORM
The form creator will now appear allowing you to edit the form (see below).
FIGURE 125 ‐ EDITING THE DETAILS OF THE FORM
Once you have made the required changes, click on ‘Save’ to update the form.
e4education CMS User Guide 4.0
P a g e | 59
DELETING A FORM
If you wish to delete the form from the site you can do so by ensuring you are on the form page and clicking ‘Delete’ from the
‘General’ tab of the admin bar (see below).
FIGURE 126 ‐ DELETING A FORM
Clicking on ‘Delete Now’ will delete the form from the site.
e4education CMS User Guide 4.0
P a g e | 60
FORUMS
CREATING A FORUM
To add a form on the site select ‘Create > Under This Item / Next To This Item > Forum’ where you want the forum to appear on
the site (see below).
FIGURE 127 ‐ CREATING A FORUM AREA ON THE SITE
You will then be asked to give the forum a title and also a description (see below).
FIGURE 128 ‐ GIVING THE NEW FORUM A TITLE AND DESCRIPTION
Once you have given the forum a title and a description you will be able to save the forum.
ADDING A TOPIC
Once you have created a forum you can start adding topics by clicking the ‘Create Topic’ link (see below).
FIGURE 129 ‐ ADDING A NEW TOPIC TO THE FORUM
e4education CMS User Guide 4.0
P a g e | 61
You will then be able to enter a topic title and the question / content for the topic (see below).
FIGURE 130 ‐ ADDING A TITLE AND A QUESTION / CONTENT TO START THE TOPIC OFF
RESPONDING TO A PREVIOUSLY ADDED TOPIC
Once a topic has been created you can add a reply by clicking on the ‘Reply to this topic’ link at the bottom of the responses (see
below).
FIGURE 131 ‐ REPLYING TO A TOPIC POST
You will then be able to add your reply to the post and click ‘Create Post’ to post the response (see below).
FIGURE 132 ‐ POSTING A RESPONSE TO THE TOPIC
MODERATING TOPIC POSTS
EDITING FORUM POSTS
To edit a post, click on the ‘Moderate Post’ link (see below)
FIGURE 133 ‐ MODERATING A FORUM TOPIC POST
You will then be able to edit the post content and then click on ‘Edit Post’ to save the updated post content.
e4education CMS User Guide 4.0
P a g e | 62
DELETING FORUM POSTS
To delete a post from the topic completely, click the ‘Delete Post’ link (see below).
FIGURE 134 ‐ DELETING A TOPIC POST
You will then be asked to make sure you are happy for the post to be deleted (see below). If you click ‘Yes’ then the post will be
removed from the website.
FIGURE 135 ‐ CONFIRMING THE DELETION OF THE FORUM TOPIC POST
EXTERNAL LINKS
There may be times when you want to create a hyperlink to an external website (e.g. Ofsted report) without having to create a
page which then contains the link. To do this, select ‘Create > Under This Item / Next To This Item > Link’ where you want to link
to the external site to appear on the site (see below).
FIGURE 136 ‐ CREATING A LINK TO AN EXTERNAL SITE
You will then be asked to add the link text, the URL of the link and if the link will open in a new window, or if it opens up in the
same window (see below).
FIGURE 137 ‐ ENTERING THE LINK TITLE AND THE URL
Clicking on ‘Save’ will add the link to the navigation.
e4education CMS User Guide 4.0
P a g e | 63
PODCASTS
CREATING A PODCAST PAGE
To do this select ‘Create > Under This Item / Next To This Item > Podcast’ where you want the link to the external site to appear
on the site (see below).
FIGURE 138 ‐ ADDING A PODCAST PAGE TO THE SITE
Once you have added the podcast page, you can then give it a title and a description (see below).
FIGURE 139 ‐ ADDING A TITLE AND DESCRIPTION TO THE PODCAST PAGE
ADDING AUDIO FILES
To add an audio file to the podcast click on the ‘Add Episode’ button (see below).
FIGURE 140 ‐ ADDING A NEW PODCAST EPISODE
The ‘Add Podcast Episode’ window will appear. You will then need to click the ‘Upload Attachments’ button, locate the podcast
to upload and then click ‘Open’ to upload the mp3 (see below).
FIGURE 141 ‐ UPLOADING AN EPISODE AUDIO FILE
e4education CMS User Guide 4.0
P a g e | 64
Once the mp3 has been uploaded you can then give the audio file a title and a description (see below). Once you have done this,
click on ‘Add Episode’. The audio file will then be added to the existing list.
FIGURE 142 ‐ ADDING A PODCAST EPISODE
The podcast episode will then be displayed on the page (see below).
FIGURE 143 ‐ THE ADDED PODCAST EPISODE
Once the podcast page is live, the end user will be able to either play the podcast episode directly on the site by clicking ‘Play’ or
they can download and save the file by clicking on ‘Download’.
e4education CMS User Guide 4.0
P a g e | 65
SAVING YOUR PODCAST
Once you have finished creating / editing your podcast you can save it by clicking on the ‘Save’ button (see below).
FIGURE 144 ‐ SAVING THE PODCAST PAGE
You will then have the option to either publish the podcast directly to the site without it having to be reviewed or to send the item
to someone for review before it goes live (see below).
FIGURE 145 ‐ DECIDING IF THE ITEM GOES DIRECTLY ON THE SITE OR IF IT IS TO BE REVIEWED BEFORE GOING LIVE
If you select ‘Publish To Web’ then the created / edited podcast will automatically be put live. If you select ‘Send For Approval’,
you will then be asked who the podcast is sent to for approval (see below).
FIGURE 146 ‐ SENDING THE ITEM TO ANOTHER USER FOR APPROVAL
Once you have chosen the reviewer for the podcast, click on ‘Send To This User’. The podcast will then be sent to that user to be
reviewed before it can be placed on the site.
e4education CMS User Guide 4.0
P a g e | 66
EDITING AUDIO FILE
You can edit the title and descriptions of previously uploaded audio files by clicking on the ‘Edit Episode’ icon to the left of the title
for the audio file you wish to edit (see below).
FIGURE 147 ‐ EDITING A PODCAST EPISODE
You can then update the title and description of the audio file. Once you have made the changes, click on ‘Edit Episode’ to update
the details.
DELETING AUDIO FILES
You can remove previously uploaded audio files by clicking on the ‘Delete episode’ button to the left of the title of the audio file
you wish to remove (see below).
FIGURE 148 ‐ DELETE A PODCAST EPISODE
The file will be removed from the page once the page is saved. If you wish to undo the deletion of the audio file, click on the ‘Set
For Deletion. Click Here To Undo’ button (see below).
FIGURE 149 ‐ UNDOING A PODCAST EPISODE DELETION
e4education CMS User Guide 4.0
P a g e | 67
POLLS
CREATING A POLL
To create a new poll select ‘Create > Under This Item / Next To This Item > Poll’ where you want the poll to appear on the site
(see below).
FIGURE 150 ‐ CREATING A POLL
When you click on poll, the ‘Poll Create’ window will appear. You will be presented with some tips to help you create your poll. To
close this window click on ‘Close Tips Window’.
The first thing you will need to do is give the poll a title. Once you have done that you can add the poll question and responses by
clicking on the ‘List’ icon. That will then add the question to the poll (see below).
FIGURE 151 ‐ ADDING A TITLE TO THE POLL AND DECIDING HOW THE RESPONSES WILL BE STORED
e4education CMS User Guide 4.0
P a g e | 68
This will then allow you to enter the question that the end user will need to answer and also the type of list the responses will be
displayed in (see below).
FIGURE 152 – ADDING A POLL QUESTION
Once you have added your question you can then click on the ‘Values’ tab to enter the responses (see below).
FIGURE 153 ‐ ADDING POLL RESPONSES
You can add as many responses as you need to. As you add responses they will automatically appear on the left hand side of the
window (see below).
FIGURE 154 ‐ THE RESULTED POLL PREVIEW WINDOW
Once you have finished creating your poll you will need to decide how the user responses will be saved. You can either save them
to a database so they can be exported at a later date or you can get the responses automatically sent to an email address that can
be specified.
Once you have finished creating your poll and you have decided how the results will be stored, click on ‘Save’ to save the poll.
e4education CMS User Guide 4.0
P a g e | 69
EDITING A POLL
If you need to amend the poll question or the responses, you can do so by finding the poll on the site and clicking on the ‘Edit
Content’ icon (see below).
FIGURE 155 ‐ EDITING A POLL
You will then be able to edit the poll question and responses. Once you have made the necessary amendments, click ‘Save’ to save
the updated poll.
DELETING A POLL
To delete a poll that is no longer needed on the site, locate the poll and then select ‘Delete’ from the ‘General’ tab in the admin
bar (see below).
FIGURE 156 ‐ DELETING A POLL
e4education CMS User Guide 4.0
P a g e | 70
SURVEYS
A survey can be created and used to gather information from end users on topics such as school travel. The survey results can
either be saved to a database to be exported at a later date or / and sent to a specified email address.
ADDING A SURVEY
To add a survey on the site select ‘Create > Under This Item / Next To This Item > Survey’ where you want the to survey to appear
on the site (see below).
FIGURE 157 ‐ CREATING A SURVEY
The Survey editor will now appear allowing you to create your survey (see below).
FIGURE 158 ‐ THE SURVEY CREATOR
e4education CMS User Guide 4.0
P a g e | 71
STORING SURVEY RESPONSES
You can choose whether the completed surveys are stored into a database which you can later export, or if they are sent in an
email to someone within the school by ticking one or both checkboxes in the right hand panel (see above) or by selecting the
settings option. You will need to ensure you have chosen one of the options before you can save the survey.
If you choose to send the responses to an email address, you will need to then specify the email address that the results will go to
along with the message subject.
SURVEY ELEMENTS
As you add survey elements, they will automatically appear in the survey preview window on the left hand side of the window.
T EXT
You can use the ‘Text’ icon to add a line of text to your survey to tell the end user what the survey is used for.
You can choose if the text entered is a heading or if it is just plain text. You also have a text box which you enter the desired text
into (see below).
FIGURE 159 ‐ ADDING TEXT TO THE SURVEY
The text will then be added to the survey (see below).
FIGURE 160 ‐ THE RESULTED TEXT IN THE SURVEY PREVIEW WINDOW
e4education CMS User Guide 4.0
P a g e | 72
T EXTBOX
This is one of the most commonly used survey elements. It allows users to freely type content that will be included as part of their
response. You can configure this to be a single line (similar to what you type into when performing a search), a multiline (this is
useful when you want to capture a large piece of information such as a description or address), or a rich text field (this will provide
the user with a small text editor that allows them to create bold text, headings, links and insert images).
FIGURE 161 ‐ ADDING A SINGLE LINE / MULTILINE TEXTBOX
If you click the ‘Size’ tab you can choose how many characters wide the textbox will be. If the textbox is set to multiline then you
will also have the option of choosing how many rows high the textbox will be (see below).
FIGURE 162 ‐ SETTING THE WIDTH OF THE TEXTBOX
You can also set the field to need a response before the survey can be saved by clicking on the ‘Validation’ tab and selecting ‘Yes’
from the ‘Requires An Answer’ drop down menu (see below). This then forces the end user to enter a response into that field
before the survey can be saved.
FIGURE 163 ‐ CHOOSING IF A RESPONSE MUST BE ENTERED BEFORE THE SURVEY CAN BE SUBMITTED
e4education CMS User Guide 4.0
P a g e | 73
The textbox will then be added to the survey (see below).
FIGURE 164 ‐ THE RESULTED TEXTBOX IN THE SURVEY PREVIEW WINDOW
L IST I TEMS
This type of element allows users to select one or more options from a list that you can define. This can be in the survey of some
radio buttons, checkboxes, a drop‐down box, or a list that limits the user to a single selection, or allows multiple items to be
selected.
FIGURE 165 ‐ ADDING A LIST ITEM TO THE SURVEY AND CHOOSING THE TYPE OF LIST ITEM
•
•
•
•
Radio Buttons ‐ Displays a list of radio buttons that allow the user to pick one option from a list of possible answers
Drop Down ‐ Displays a dropdown menu which allows users to pick one option from a list of options
List ‐ Displays a list of options which allows a user to select zero, one, or more of the options
Checkboxes ‐ Displays a list of options with checkboxes to the left which allows the user to select multiple options.
You can add the values that will appear in the list by clicking on the ‘Values’ tab. You will then be able to start to add values that
will appear in the list (see below).
FIGURE 166 ‐ ADDING RESPONSE VALUES TO THE LIST
e4education CMS User Guide 4.0
P a g e | 74
R EORDERING L IST O PTIONS
You can reorder the list options by clicking and holding the mouse button on the ’Reorder’ icon and moving the item up or down
to the desired location then releasing the mouse button (see below).
FIGURE 167 ‐ REORDERING LIST RESPONSES
R ENAMING L IST O PTIONS
You can rename a list option by clicking on the ‘Rename’ icon (see below).
FIGURE 168 ‐ RENAMING LIST OPTION RESPONSES
You will then be able to rename the list option and save the change by clicking on the ‘Confirm’ icon (See below).
FIGURE 169 ‐ CONFIRMING THE RENAMED LIST OPTION RESPONSE
D ELETING L IST O PTIONS
You can delete list option responses that are no longer needed by clicking on the ‘Delete Item’ icon (see below).
FIGURE 170 ‐ DELETING A LIST OPTION RESPONSE
R ATEABLE I TEMS
Rateable items allow you to define one or more questions and provides the user the option to rate each question from:
•
•
•
•
•
1‐5
1 ‐ 10
Very poor ‐ excellent
Very low ‐ very high
Custom options
e4education CMS User Guide 4.0
P a g e | 75
To choose a list of different responses, click the ‘Choices’ tab. You can then click on the drop down menu to select the type of
responses that will be available to the user (see below).
FIGURE 171 ‐ CHOOSING THE RATEABLE RESPONSES
If you choose ‘Custom’ from the drop down menu you will be able to select custom responses (see below).
FIGURE 172 ‐ CUSTOM RATEABLE OPTION RESPONSES
Once you have chosen the response headings from the drop down menu, you can start adding questions by clicking on the
‘Questions’ tab. You can then begin adding the questions (see below).
FIGURE 173 ‐ ADDING THE QUESTIONS THAT THE USER WILL NEED TO RATE
e4education CMS User Guide 4.0
P a g e | 76
T ABLE
Tables are used in a similar manner to the rateable element; however you can choose your own field types to be displayed in a
tabular layout (made up of rows and columns). You can customise the questions in each row and the headings in each column.
When you add a table to the survey, you will be able to choose if the user has a single line for the response or if they can enter
multiple lines of text for their answer (see below).
FIGURE 174 ‐ CHOOSING IF THE RESPONSE IS SINGLE OR MULTIPLE LINED
You can then choose the responses that the user can choose from:
•
•
•
•
•
1‐5
1 ‐ 10
Very poor ‐ excellent
Very low ‐ very high
Custom options
If you choose ‘Custom’ then you can choose your own responses that the user can select from (see below).
FIGURE 175 ‐ CUSTOM RATEABLE OPTION RESPONSES
e4education CMS User Guide 4.0
P a g e | 77
Once you have chosen the response headings from the drop down menu you can start adding questions by clicking on the
‘Questions’ tab. You can then begin adding the questions (see below).
FIGURE 176 ‐ ADDING THE QUESTIONS THAT THE USER WILL NEED TO RATE
SAVING YOUR SURVEY
Once you have completed your survey, click on ‘Save’ and your survey will be saved to the website.
e4education CMS User Guide 4.0
P a g e | 78
EDITING A SURVEY
To edit the survey, go to the survey page and click on the ‘Edit content’ icon (see below).
FIGURE 177 ‐ EDITING A PREVIOUSLY CREATED SURVEY
The survey creator will now appear allowing you to edit the survey (see below).
FIGURE 178 ‐ EDITING THE DETAILS OF THE SURVEY
Once you have made the required changes, click on ‘Save’ to update the survey.
e4education CMS User Guide 4.0
P a g e | 79
DELETING A SURVEY
If you wish to delete a survey from the site you can do so by ensuring you are on the survey page and clicking ‘Delete’ from the
‘General’ tab of the admin bar (see below).
FIGURE 179 ‐ DELETING A SURVEY
Clicking on ‘Delete Now’ will delete the survey from the site.
USER & ROLE MANAGER
The user and role manager is used to create new roles within the Content Management System to that restrict them to what area
they can maintain, or roles can be set up and used for secure areas on the front end of the site. You can also create new user
accounts that are associated with a particular role.
The following area of the user guide describes how the security roles and permissions work within the Content Management
System. The scenario below gives an example of how the security roles and permissions would be required within the CMS .
Scenario
Joe is head of IT and also teaches Physics. She needs to be able to manage the IT area of the site, but only contribute to the
Physics area by sending the content to Head of Science for review.
Given the above scenario, below is a possible solution to allow Joe to have different levels of access dependent on the area of the
site she wishes to edit.
Solution
Two roles will need to be created:
The first role would be a ‘Head of IT’ role which has allow rights to everything except the ability to manage users or adjust site
settings. The second role would be that of a ‘Physics Writer’ allowing rights to create, edit or delete any type of content but does
not have approval rights.
The ‘Head of IT’ role then needs to be assigned to the IT area of the site and the ‘Physics Writer’ role needs to be assigned to the
Physics area of the site. Joe’s user account then needs to be assigned to both the ‘Head of IT’ and the ‘Physics Writer’ roles.
Solution walkthrough
1.
Create the roles
a.
Create ‘Physics Writer’ role
i. Set permissions for the role – To allow users assigned to this role to be able to create and edit content
within an assigned areas of the site, you need to set: create, edit and delete to ‘allow’ for each of the
appropriate content types. The ‘approve’ permission is left as ‘not set’ meaning that unless they are
part of another role assigned to the same area that specifically allows them to approve content,
anything they do within the assigned area must be sent for review before appearing on the site.
e4education CMS User Guide 4.0
P a g e | 80
b.
Create ‘Head of IT’ role
i. Set permissions for the role – the same permissions can be set as per the ‘Physics Writer’ role with the
addition of the ‘approve’ permission being set to ‘allow’ enabling Joe to approve content for the
assigned area of the site.
2.
Assigning the roles to the pages
a.
In order to apply the permissions set on the roles in the previous step, these must be assigned to the required
areas of the website using the security option from the admin bar. Once a role is assigned to a page/area of the
site and saved, the permissions set on the role will take effect within that area of the site.
3.
Create Joe’s user account
a.
Assign to ‘Head of IT’ and the ‘Physics Writer’ roles
To give Joe the permissions required to manage the IT area, and to contribute content to the Physics area of the
site you need to assign Joe to both the ‘Head of IT’ and the ‘Physics Writer’ roles via the User Manager.
CREATING A NEW ROLE FOR EDITING THE SITE
There may be times when you want to create a new role within the CMS that allows only certain areas of the site to be updated or
limiting exactly what the user can do once logged in (e.g. only upload new photo albums or new stories). To create a new role
within the CMS, click on ‘Create new Role’ button (see below).
FIGURE 180 ‐ CREATING A NEW ROLE WITHIN THE CONTENT MANAGEMENT SYSTEM
e4education CMS User Guide 4.0
P a g e | 81
You can then give the role a name and description (see below).
FIGURE 181 ‐ GIVING THE ROLE A NAME AND DESCRIPTION
CHOOSING THE ROLE PERMISSIONS
Once you have given the role a title and a description you can then choose the role permissions by clicking on ‘Choose Roles’ (see
above). You will now be able to choose the roles permissions (see below).
FIGURE 182 ‐ CHOOSING THE PERMISSIONS FOR THE NEW ROLE
The left hand panel shows a list of all of the different areas that the user can have control over. By default no permissions are set
for any of the areas.
e4education CMS User Guide 4.0
P a g e | 82
When you click on an area from the list on the left hand side, the individual permissions for that area will be displayed (see below).
FIGURE 183 ‐ CHOOSING PERMISSIONS FOR INDIVIDUAL AREAS WITHIN THE CMS
You will then be able to set whether members of that role can create, edit, delete or view that area once logged into the CMS.
Once you have finished choosing the permissions for that role click ‘Save’.
CREATING A NEW ROLE VIEWING SECURED AREAS ON THE SITE
You can also create a role that will allow areas of the site to be password protected so that only members who belong to a certain
role can view the content of that page.
FIGURE 184 ‐ CREATING A ROLE TO BE USED WITH A SECURE AREA ON THE SITE
e4education CMS User Guide 4.0
P a g e | 83
CHOOSING THE ROLE PERMISSIONS
Once you have given the role a name and description, you can then set that role’s permissions. Because you don’t want the
members of this role to be able to edit the content, you only want the members to ‘View’ the secure area (see below).
FIGURE 185 ‐ SETTING THE PERMISSIONS FOR THE SECURE ROLE
Once you have checked through the permissions and you are happy, click on the ‘Add role’ button to add the role.
EDITING A ROLE
To edit the roles title or permissions open the ‘User & Role Manager’ and click on the role that you wish to edit, then be able to
click on ‘Edit Role’ (see below). You will then be able to modify the roles permissions.
FIGURE 186 ‐ EDITING A ROLE AND ITS PERMISSIONS
e4education CMS User Guide 4.0
P a g e | 84
CREATING A NEW USER
Once a role has been created, you can create a user account that you can assign to that role. To create a user account, click on the
‘Add User’ button. You will then be required to enter some details for the user account (see below).
FIGURE 187 ‐ ADDING A NEW USER ACCOUNT
You can also choose if the user can change their own password once they have successfully logged in. When you have filled out all
the fields click on ‘Choose Roles’ to decide what user group(s) the user will be part of.
Clicking on ‘Choose Roles’ will allow you to select the role(s) that the user will be a part of (see below).
FIGURE 188 ‐ CHOOSING THE ROLES THAT THE USER WILL BE PART OF
e4education CMS User Guide 4.0
P a g e | 85
Once you have selected the role(s) the user will be part of, click ‘Add User’ to add the user to the admin panel. The user will then
receive an email with their log in details and they will then be able to log into the admin panel.
EDITING A USER ACCOUNT
To edit a user, click on the group that the user belongs to. You will then be shown all of the users that belong to that group. Click
on the user you wish to edit. Click on ‘Edit Role’ to edit the users’ details (see below).
FIGURE 189 ‐ EDITING A PREVIOUSLY ADDED USER ACCOUNT
You can then edit that user’s details and update their site permissions. Once you have made the changes click ‘Save Changes’.
e4education CMS User Guide 4.0
P a g e | 86
DELETING A USER
To edit a user click on the group that the user you want to delete belongs to. You will then be shown all of the users that belong to
that group. Click on the user you wish to delete. Click on ‘Delete User’ to delete that user (see below).
FIGURE 190 ‐ DELETING A USER ACCOUNT
You will then need to confirm whether the user account will be deleted (see below).
FIGURE 191 ‐ CONFIRMING THE DELETION OF THE USER ACCOUNT
If you click ‘Yes, delete user’ the user account will be permanently removed. Clicking on ‘No, don’t delete user’ will take you back
to the user’s details.
e4education CMS User Guide 4.0
P a g e | 87
WEBSITE SETTINGS
The site settings icon allows you to choose whether comments canbe added to individual areas of the site and if comments are on
by default for any new items (see below).
FIGURE 192 ‐ EDITING THE SITE SETTINGS
You can also decide if news stories and blog posts are paginated and if so, how many news stories or blog posts are shown per
page (see above).
Once you have made any changes, click on ‘Save’ to confirm the changes.
e4education CMS User Guide 4.0
P a g e | 88
WEBSITE STATISTICS
You can view certain statistics for your school website by clicking on the ‘Web stats’ icon within the ‘Website’ tab in the admin bar
at the top of the screen (see below).
FIGURE 193 ‐ SCHOOL WEBSTATS
You will then be able to view details such as:
•
•
•
•
•
•
Traffic to your site (monthly, daily, days of the week, hourly) – How many people have visited the site so you can see
peak days and times
Visit duration – How long the visitor stayed on the site before closing the window / tab or navigating away from the site
Browser – The browser that the user views the site in
How people got to your site – did the user get to your site by directly typing in the URL, did they use a search engine or
did they get referred to the site from someone else’s website.
Search keyphrases / search keywords – what keywords or phrases the users enter when searching for your site
Top visited pages – displays the most viewed pages on the site so you can see where all the viewers are going.
e4education CMS User Guide 4.0
P a g e | 89
ADDITIONAL SUPPORT
We hope that you have found this user guide helpful. If you have any further questions or if you encounter any problems with
your site please contact us and a member of our team will do all they can to answer your question or rectify your problem as soon
as they possibly can.
Phone support
Please call 0845 257 0224
Monday – Friday 09:00 – 17:30 (UK time)
Email support
[email protected]
We also have a help website that can be found at the following address:
http://www.help.e4education.co.uk
FIGURE 194 ‐ THE E4EDUCATION HELP WEBSITE
Tel: 0845 257 0224
Email: [email protected]
e4education CMS User Guide 4.0
P a g e | 90