Download User Guide
Transcript
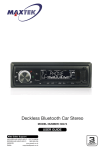
User Guide Car CD/MP3 Bluetooth Radio with USB & Front Aux Input & SD/MMC Slot Now you have purchased a MAXTEK® product you can rest assured in the knowledge that as well as your manufacturer’s warranty you have the added peace of mind of dedicated helplines and web support: AFTER SALES SUPPORT GB 01270 508538 IRE www.quesh.co.uk MODEL NUMBER: 53712 1800 995 036 r $BSTUFSFP r 'BTDJBDBSSZDBTF r *40DBCMFT r "VYDBCMF YEARS WARRANTY Contents 03 04 05 07 09 10 11 12 13 16 17 18 18 19 Welcome Section Precautions Before You Install Installation Wiring Connection Location of the Controls Bluetooth Operation Basic Operation Radio Operation CD/MP3/WMA/USB/SD Operation ID3 TAG RCA, AUX FAQ Warranty AFTER SALES SUPPORT GB 01270 508538 IRE www.quesh.co.uk MODEL NUMBER: 53712 1800 995 036 r $BSTUFSFP r 'BTDJBDBSSZDBTF r *40DBCMFT r "VYDBCMF YEARS WARRANTY Welcome! You have made an excellent choice with the purchase of this quality MAXTEK brand product. By doing so you now have the assurance and peace of mind which comes from purchasing a product that has been manufactured to the highest standards of performance and safety, supported by the high quality standards of Quesh. We want you to be completely satisfied with your purchase so this MAXTEK product is backed by a comprehensive manufacturer’s 3 year warranty and an outstanding after sales service through our dedicated Helpline. We hope you will enjoy using your purchase for many years to come. If you require technical support or in the unlikely event that your purchase is faulty please telephone our Helpline for immediate assistance. Faulty product claims made within the 3 year warranty period will be repaired or replaced free of charge provided that you have satisfactory proof of purchase (keep your till receipt safe!). This does not affect your statutory rights. However, be aware that the warranty will become null and void if the product is found to have been deliberately damaged, misused or disassembled. AFTER SALES SUPPORT GB 01270 508538 IRE www.quesh.co.uk MODEL NUMBER: 53712 1800 995 036 r $BSTUFSFP r 'BTDJBDBSSZDBTF r *40DBCMFT r "VYDBCMF YEARS WARRANTY Precautions This unit will only play the following discs. This unit does not play files that have Digital Rights Management (DRM). If you have files that have Digital Rights Management (DRM) you should consult with the vendor that you purchased files from for instructions on proper use. Type of disc Label on the disc Recorded material Size of disc Audio only 12 cm CD, MP3, WMA Never allow children to play with electrical equipment Care of Discs Handle the disc by its edge to keep the disc clean. Do not touch the disc’s surface. Do not use a CD with paste or ink residue on it. AFTER SALES SUPPORT GB 01270 508538 IRE www.quesh.co.uk MODEL NUMBER: 53712 1800 995 036 r $BSTUFSFP r 'BTDJBDBSSZDBTF r *40DBCMFT r "VYDBCMF Do not use CDs with labels or stickers attached. The label may leave a sticky residue when it begins to peel. Clean the discs with an optional cleaning cloth. Wipe each disc from the centre out. YEARS WARRANTY Before You Install IMPORTANT: Remove the two transport screws from the top of the unit before installing. Please remove the screws before installing the radio; Failure to do so will result in the CD deck rejecting the disc. Please refer to the illustration below: Remove the half sleeve Notes on Installation Disconnect negative battery terminal before starting installation. Consult the vehicle owner’s manual for proper instruction. The unit is designed for a 12Volt DC negative ground operation system only. Before installing the unit, make sure your vehicle is a 12Volt DC negative ground system. Be sure to connect the colour coded leads according to the diagram. Incorrect connections may cause the unit to malfunction or damage the vehicle's electrical system. Be sure to connect the negative (-) speaker leads to the negative (-) speaker terminal. Never connect negative (-) speaker leads to chassis ground. The unit is only designed for use with 4 speakers. Do not combine output for use with 2 speakers. Do not ground negative speaker leads to the chassis ground. Make sure all the connections are completely correct before turning on your unit. When replacing the fuse(s), the replacement must be of the same amperage as shown on the fuse holder. Do not block vents or heater panels. Blocking them will cause heat to build up inside and may result in fire. After completing the installation and before operating the unit, reconnect the battery. Then press the (RES) button with a pointed object, such as a ball-point pen to set the unit to its initial status. If you have difficulty installing this unit in your vehicle. Please contact your dealer. AFTER SALES SUPPORT GB 01270 508538 IRE www.quesh.co.uk MODEL NUMBER: 53712 1800 995 036 r $BSTUFSFP r 'BTDJBDBSSZDBTF r *40DBCMFT r "VYDBCMF YEARS WARRANTY Before You Install Car audio equipment installations can be troublesome at times, even to the most experienced of installation technicians. If you are not confident working with electrical wiring, removing and reinstalling interior panels, carpeting, dashboards or other components of your vehicle, please call your dealer in order to have the unit professionally installed. Remove the Old Unit from the Dashboard 1. Remove the outer trim frame. 2. Insert the keys supplied with the old unit into both sides of the unit as shown in figure below until they click. Pull to remove the old unit from the dashboard. DIN Front Mount DO NOT DISCONNECT WIRES AT THIS TIME! 2. Mark Polarity of the Speaker Wires Marking the polarity of the speaker wires will make it easier to connect the existing speakers to your car radio. Consult wiring diagram of existing head unit before disconnecting any wires. If you are not positive of the polarity of the existing wires from the speakers to the head unit, install new wires. a. While the old unit is playing, disconnect the wires from one speaker. b. Take a length of masking tape and fold it around the wire so it forms a flag. c. On the masking tape mark the polarity of the speaker wires (+ & - ), as well as left or right, and front or rear. AFTER SALES SUPPORT GB 01270 508538 IRE www.quesh.co.uk MODEL NUMBER: 53712 1800 995 036 r $BSTUFSFP r 'BTDJBDBSSZDBTF r *40DBCMFT r "VYDBCMF d. Double check that you marked the first speaker correctly by checking that the speaker wires are the same at the head unit. e. Repeat this procedure for all of the speakers. f. Mark the power, ground, and any other wires also. YEARS WARRANTY Installation WARNING! Disconnect negative battery terminal from battery before starting installation. Consult the vehicle owner’s manual for proper instructions. NOTE 1: Mark the polarity of the existing speaker wires before disconnecting battery. NOTE 2: Remove the two transport screws from the top of the unit before installing. DIN Front Mount 1. After removing the old radio and mounting sleeve, insert supplied mounting sleeve into opening. 2. Bend the tabs on the mounting sleeve to keep the mounting sleeve firmly in place. 3. Attach wires from the unit to existing wires. See wiring connections diagram. Insert radio into dashboard. Then apply the trim frame to outside of radio. 4. Support radio using supplied rear mounting bolt and steel bar. See parts list. AFTER SALES SUPPORT GB 01270 508538 IRE www.quesh.co.uk MODEL NUMBER: 53712 1800 995 036 r $BSTUFSFP r 'BTDJBDBSSZDBTF r *40DBCMFT r "VYDBCMF YEARS WARRANTY Installation Din Rear-Mount Installation using the screw holes on both sides of the unit. 1. Screw holes on the side of the unit. 2. Screws. Use either truss screws (5x8mm) or flush surface screws (4x8mm), depending on the shape of the screw holes in the bracket. 3. Vehicle factory mounting bracket. 4. Dashboard or console. 5. Hook (remove this part) Note: The mounting sleeve, outer trim ring and the mounting strap are not used for this method of installation. Supplied Parts 2 Keys 1 Hex Nut 2 Lock Washers 1 Sheet Metal Screw 1 Metal Support Strap 2 Flat Washers 1 Mounting Bolt 1 Faceplate Case (not shown) 1 1/8” Stereo Cable AFTER SALES SUPPORT GB 01270 508538 IRE www.quesh.co.uk MODEL NUMBER: 53712 1800 995 036 r $BSTUFSFP r 'BTDJBDBSSZDBTF r *40DBCMFT r "VYDBCMF YEARS WARRANTY Wiring Connection Make sure that you have a good chassis ground. Good ground connections will eliminate most electrical noise problems. A good chassis ground requires a tight connection to the vehicle's metal chassis. The area around the ground connection should be clean, bare metal without rust, paint, plastic, dust, or dirt for a good electrical connection. Antenna socket RCA OUT left=white right=red ISO-connector A B Connector A 1. Rear right speaker(+)/Blue 2. Rear right speaker(-)/Blue-White 3. Front right speaker(+)/Grey 4. Front right speaker(-)/Grey-White 5. Front left speaker(+)/Green 6. Front left speaker(-)/Green-White 7. Rear left speaker(+)/Brown 8. Rear left speaker(-)/Brown-White Connector B 1. 2. 3. 4. Battery 12V (+)/Yellow 5. Antenna power/Orange 6. Panel light/White 7. ACC+/Red 8. Ground/Black Speaker Wiring Notes Follow the above wiring diagram to install the head unit with new or existing speakers. This unit is designed for use with four (4) speakers with an impedance between 4 Ohms to 8 Ohms. An impedance load of less than 4 Ohms could damage the unit. AFTER SALES SUPPORT GB 01270 508538 IRE www.quesh.co.uk MODEL NUMBER: 53712 1800 995 036 r $BSTUFSFP r 'BTDJBDBSSZDBTF r *40DBCMFT r "VYDBCMF Never bridge or combine the speaker wire outputs. When not using four speakers, use electrical tape to tape the ends of the un-used speaker outputs to prevent a short circuit. Never ground the negative speaker terminals to chassis ground. YEARS WARRANTY Location of the Controls 25 1. Next Track / Fast Forward Button 2. Release Button 3. Mode Select / Answer Button 4. Band Switch / Phone 5. Power on / off / Mute 6. PTY / Clock 7. LCD Screen 8. Disc slot 9. MIC Receiver 10. Eject Disc Button 11. AF 12. Previous Track / Backward Button 13. Auto Preset Scan / Reject Button AFTER SALES SUPPORT GB 01270 508538 IRE www.quesh.co.uk MODEL NUMBER: 53712 1800 995 036 r $BSTUFSFP r 'BTDJBDBSSZDBTF r *40DBCMFT r "VYDBCMF 14. Sound Select / Volume +/15. TA 16. Number 1 / Play / Pause 17. Number 2 / Introduction 18. Number 3 / Repeat 19. Number 4 / Random 20. Number 5 / Folder Down 21. Number 6 / Folder Up 22. Aux input Jack 23. USB Slot 24. Reset Button 25. SD Card Slot YEARS WARRANTY 10 Bluetooth Operation 1. Pairing Press and hold the BND/ID3/TEL button until the word “PAIRING” appears on the display waiting for the bluetooth device to connect. At this blinking time, please run the bluetooth search and connect function in your cellphone. The car radio model no “BT car stereo” will be shown on the cellphone. Select this car radio and connect. When you are asked for a connection password, please input “0000” in your cellphone to finish the pairing. The bluetooth icon on the display will be on indicating that the connection is established. Bluetooth function is ready to use. 2. Calling In any play mode, dial the desired number on your cellphone. The unit will switch to bluetooth handsfree mode automatically. “DIALING” will be shown on the display indicating the dialling is in progress. 3. Accepting Calls When there is incoming call, “INCOMING” will be shown on the display indicating there is phone call to answer. “TALKING” AFTER SALES SUPPORT GB 01270 508538 IRE www.quesh.co.uk MODEL NUMBER: 53712 1800 995 036 r $BSTUFSFP r 'BTDJBDBSSZDBTF r *40DBCMFT r "VYDBCMF will be shown after the “ANSWER” button is pressed. Rotate the volume knob during ringing or conversation to adjust the respective volume level. 4. Rejecting Calls During ringing or conversation, press the “EJECT” button to end the call or reject the call. “CALL END” will be shown on the display and the unit will resume to the original play mode. 5. BT Audio (A2DP) Press MOD/(with green phone logo) button until the unit entered BT MUSIC. BT audio will play automatically when you play the song in the cellphone. You could pause by “1 ” button, to choose previous or next song by pressing |<< and >>| button. 6. Disconnecting Disconnect the paired phone by operating on the cellphone. You can also disconnect/reconnect the cellphone connection by holding the “ANSWER” button. YEARS WARRANTY 11 Basic Operation 1. Tuning the unit On / Off Press any Button to turn the unit on, the display will show a message Welcome to Car Audio to indicate it is ready for use. Press the PWR button once to turn the unit off. The display will show a message “GOODBYE”. 2. Mode Selection Press the MOD Button to cycle the Play Mode amoung AUX, RADIO and CD PLAY. Note: USB mode will only show on the display when a USB flash memory is inserted into the USB port. 3. Loudness Control Press the SEL button until “LOUD OFF” is shown on the display indicates that the loudness function is OFF. Turn the volume knob to select between ON or OFF. 4. Mute Control Press POWER/MUTE Button on the panel or MUTE Button on the RC to swith off the sound. Press it again or rotate VOL knob or press VOL+/- buttons on the RC to resume the sound. 5. Volume Use the VOL knob to adjust the volume level. The larger the number, the higher the volume level. 6. Bass Press the SEL Button repeatedly until the display shows “BAS”. Use the VOL knob to adjust. When EQ is ON, bass control is not available. 7. Treble Press SEL Button repeatedly until the display shows “TRE”. Use the VOL knob to adjust. When EQ is ON, treble control is not available. AFTER SALES SUPPORT GB 01270 508538 IRE www.quesh.co.uk MODEL NUMBER: 53712 1800 995 036 r $BSTUFSFP r 'BTDJBDBSSZDBTF r *40DBCMFT r "VYDBCMF 8. Balance Press SEL Button repeatedly until the display shows “BAL”, then use the VOL knob to adjust the balance between the left & right speakers. 9. Fader Press SEL Button repeatedly until the display shows “FAD”, then use the VOL knob to adjust the balance between the front & rear speakers. 10. Clock The time clock can be set anytime when the power is on. Press the PTY/ CLK Button on the faceplate or remote control once (press and hold for more than 2 seconds during radio mode), the time will show on the display. Then press and hold the button until the hour blinks on the display. Rotate the VOL knob to set hours, then press the VOL knob for the minutes to blink and rotate the VOL knob to set. Press the CLK button again or leave the unit idle for new setting to effect. Press the CLK button anytime to view the time clock display. 11. Preset Beep Sound Off Press the SEL button repeatedly until “BEEP ON” is displayed. Turn the VOL knob to select “BEEP OFF” or “BEEP ON”, then leave the unit idle for setting to take effect. 12. Preset Equalizer Function Press the SEL Button repeatedly until “EQ” indication is displayed then rotate the Volume knob to choose between the EQ sound effects. The Sequence of equalizer setting will be as follows: OFF FLAT YEARS WARRANTY POP ROCK CLASSIC 12 Radio Operation 1. Choose Radio Band Press the MOD Button to access the radio function. The unit comes with five bands- three FM Bands (FM1, FM2, and FM3) and two AM Bands (AM1, and AM2) selects. Each of the five bands can store up to six preset stations, for a total of 30 preset memory stations. 5. Save Your Preset Stations There are six numbered preset buttons which can store and recall stations for each band. While listening to a radio station you would like to save as a pre-set, press and hold one of the buttons numbered 1-6 until you hear a beep. The button you pressed is now the pre-set button for that station. 2. Radio Tune / Seek Function In Radio Mode, press Seek +/- Button to manually adjust the radio frequency. 6. Automatic Store / Preset Scan There are six numbered preset stations which can store and recall stations for each band. While listening to a radio station you would like to save as a preset, press and hold one of the buttons numbered 1-6 until the number of the radio change to the number you selected. The button you pressed is now the pre-set button for that station. 3. Tuning • Manual tuning: Press and hold |<< or >>| button on the panel until the screen shows MANUAL. Press these buttons repeatedly to manually adjust the radio frequency. Or press repeatedly shortly |<< or >>| button on the RC to manually adjust the radio frequency. • Auto tuning: Press shortly |<< or >>| button on the panel or press and hold |<< or >>| button on the RC the radio will seek to the next up or down strong and clear frequency station automatically. Repeat this action to seek for other desired stations. To stop automatic search, press one of these buttons. 4. Mono / Stereo Reception Control In FM radio mode, Press the SEL Button repeatedly until the display shows “STEREO”, then use the VOL knob to select between “STEREO” or “MONO”. AFTER SALES SUPPORT GB 01270 508538 IRE www.quesh.co.uk MODEL NUMBER: 53712 1800 995 036 r $BSTUFSFP r 'BTDJBDBSSZDBTF r *40DBCMFT r "VYDBCMF A. Automatic Scan & Store While listening to the FM Radio, press and hold the F/PS Button. The receiver will automatically scan and save stations of the 3 FM Bands. While listening to the MW Radio, press and hold the F/PS Button. The receiver will automatically scan and save stations of the 2 MW Bands. B. Scan & Preview Saved Stations Press the F/PS button once and the receiver will scan the radio stations in the current band. YEARS WARRANTY 13 Radio Operation RDS (Radio Data System) service availability varies with areas. Please understand if RDS service is not available in you area, the following service is not available, either. 1. AF (Alternative Frequencies) Press AF button on the panel to turn the AF function on or off. When the radio signal strength is poor, enabling the AF function will allow the unit to automatically search another station with the same PI (Program Identification) as the current station but with a stronger signal. When AF symbol is on, it means RDS information is received; when AF symbol is flashing, it means RDS information is not yet received. 2. TA (Traffic Alarm) Press TA button to turn TA function on or off. In TA mode traffic program will be automatically searched, until the program is received. When traffic announcement is received the unit will temporarily switch to the tuner mode (regardless of the current mode) and begin broadcasting the announcement. After the traffic announcement is over, it will return to the previous mode and volume level. To interrupt traffic announcement press TAbutton shortly; it will not switch off the TA mode. 3. PTY (Program Type) This radio will allow you to select the type of program required, and will search for a station broadcasting that type of program. Press CLK/PTY button to show the music type. Then press 1 6 number buttons to choose different music programs available. Press CLK/ PTY button twice to show the speech type program. Then press 1 - 6 number buttons to choose different speech programs. Each number button will AFTER SALES SUPPORT GB 01270 508538 IRE www.quesh.co.uk MODEL NUMBER: 53712 1800 995 036 r $BSTUFSFP r 'BTDJBDBSSZDBTF r *40DBCMFT r "VYDBCMF show 3 different speech programs for you to choose. (see table below). Music group Speech group Pop, Rock News, Affairs, Info Easy, Light Sport, Educate, Drama 3 Classics, Other Culture, Science, Varied 4 Jazz, Country Weather, Finance, Children 5 Nation, Oldies Social, Religion, Phone IN Folk Travel, Leisure, Document Button 1 2 6 When PTY is selected, the radio starts to search corresponding PTY information, and stops if the corresponding PTY information is detected. If no buttons are pressed within several seconds, previously selected PTY is searched. During 1 loop, if desired PTY is not found, the unit will return to previous mode. Press CLK/PTY button for the 3rd time to switch the PTY function off. 4. Other parameter setting To choose the corresponding parameter, press and hold SEL button for 2 seconds, then press it repeatedly until the display YEARS WARRANTY 14 Radio Operation shows the needed parameter. Turn VOLUME knob to choose the needed value. After choosing, please leave the unit idle to activate. TA SEEK/TA ALARM: In TA SEEK mode, the unit will seek for traffic announcement program when TA button is pressed; in TA ALARM the unit does not retune to TA information. MASK DPI/MASK ALL: During MASK DPI mode, the unit will mask only the AF which has different PI, this is the default mode; during MASK ALL mode, the unit will mask the AF which has different PI and no RDS signal with high field strength. AFTER SALES SUPPORT GB 01270 508538 IRE www.quesh.co.uk MODEL NUMBER: 53712 1800 995 036 r $BSTUFSFP r 'BTDJBDBSSZDBTF r *40DBCMFT r "VYDBCMF RETUNE S/L - SHORT/LONG: “RETUNE” refers to the time period the unit allows for radio scan when reception is interrupted. “S” represents a long time period, and “L” represents a short time period. TA VOL: The default volume level for TA (Traffic Announcement) mode is 25. You can set it at any desired level. When the volume of your current playmode is below your saved level, the unit will boost to your saved level once TA signal is receieved. When the volume of your current playmode is above your saved level, the unit will keep the same level even when TA signal is received. YEARS WARRANTY 15 CD/MP3/WMA/USB/SD Operation 1. Insert / Eject CD Insert a disc into CD slot with label side up. The disc will be automatically loaded into the unit, even when it is off or at radio mode. The word “DISC” will on the display and the CD will play automatically. Press the EJECT Button to eject the disc from the slot. If the disc is not removed from the slot within 5 seconds, it will automatically be loaded into the slot again. When the disc is ejected and removed, the unit will automatically switch to radio mode. To play MP3/WMA files from a USB flash memory, insert a USB flash memory into the USB port on the left side of the unit. The unit will start playing MP3/ WMA files on the USB flash memory automatically. If the MP3/WMA files are stored in folders on the USB drive, the unit will start by playing the first song in the first folder. After playing all the files sequentially in the first folder, the unit will play sequentially all of the files in the next folder. The unit will continue playing through all of the folders on the USB drive in this manner. If the USB drive has loose files and folders containing files, it will play the loose files sequentially, then it will play the files in the folders sequentially. 2. Multi-Session CD Reading This unit can read multi-session CDs. The multi-session reading will be activated automatically if the player detects a file that is written in multi-session format. 3. Selecting Tracks Press the SEEK >>| Button to advance CD to the next track. Track numbers will be shown on the display. Press and hold SEEK >>| to fast forward. Press the SEEK |<< Button to go to a AFTER SALES SUPPORT GB 01270 508538 IRE www.quesh.co.uk MODEL NUMBER: 53712 1800 995 036 r $BSTUFSFP r 'BTDJBDBSSZDBTF r *40DBCMFT r "VYDBCMF previous track. Track numbers will be shown on the display. Press and hold the SEEK |<< Button to fast reverse. Disc will play normally when the No. 1(play/ pause) Button is pressed. 4. Play / Pause CD Press the No.1/PAU Button to pause the CD. PAUSE will show on the screen.Press this button again to resume playback. 5. Introduction Press the No.2/INT Button to play the first 10 seconds of each track, “INT ON” will be shown on the display. Press this button again to resume playback.“INT OFF” will be shown on the display. 6. Repeat Press the No.3/RPT Button to repeat the current track. “RPT ONE” will appear on the display. Press it again to repeat folder play. “FOLD” will appear on the display. Press the button again to cancel. 7. Random Press the No.4/RDM Button to play all the tracks in random order. “RDM ON” will appear on the display. Press this button again to stop random play. RDM OFF will appear on the display. 8. FOLDER +(for MP3/WMA only) Press the No 6/FOLDER+ Button to choose upper folder from current folder. 9. FOLDER - (for MP3/WMA only) Press the No 5/FOLDER- Button to choose next folder from current folder. 10. Search Modes There are 3 search modes to help find your favorite MP3 & WMA tracks. The search modes only works with MP3/ WMA CDs, and USB flash memory with MP3/WMA files. YEARS WARRANTY 16 CD/MP3/WMA/USB/SD Operation A. Simple Track Search Press the SEEK |<< or >>| Button to go to MAINTENANCE the next track or previous track. B. Track Search Press the F/PS Button, TRK-SCH will appear on the display. Use the VOL knob to select the track number. Press and hold the SEL button for 2 seconds,the number of the track is assigned according to you added the file into the media. The file wich are written later will be assigned a larger number. C. Folder Search Press the F/PS Button and NAVIGATE will be shown on the display.Use the VOL knob to select the folder name. Then press the SEL Button to play the chosen folder. 11. Electronic Shock Protection Electronic Shock Protection is for driving on rough roads. The CD will play for 10 seconds on rough roads without skipping. if driving on a rough road for more than 10 seconds the CD may skip. For MP3 or WMA files will play for 60 seconds. If the road is rough for more than 60 seconds the CD with MP3 or WMA files may skip. Cleaning the Unit Do not use any liquids to clean this unit. Do not use petroleum distillates to clean this unit. Use a clean, dry cloth to clean this unit. Replacing the Fuse Make sure the amperage matches the specified value when replacing the fuse(s). If the fuse is bad, check the power connection and replace the fuse with a new one. If the same problem occurs, this might indicate a malfunction within the unit. Warning When replacing a fuse, do not use a fuse with a higher amperage rating than the fuse originally supplied to your unit, otherwise damage will result to your unit. ID3 Tag If an MP3 file has ID3 Tag information, it will be displayed on the LCD. If there is no ID3 Tag information, nothing will shown on LCD. AFTER SALES SUPPORT GB 01270 508538 IRE www.quesh.co.uk MODEL NUMBER: 53712 1800 995 036 r $BSTUFSFP r 'BTDJBDBSSZDBTF r *40DBCMFT r "VYDBCMF YEARS WARRANTY 17 RCA, AUX 1. Auxiliary Input The Auxiliary Input Jack is on the front panel. Insert the AUX IN cable's stereo plug into the AUX IN jack on the panel of the unit. Route the other end of the stereo plug to the headphone jack of any external audio device such as walkman and discman. Press the Mode button to choose AUX. Connect any portable audio device such as a DVD player or VCD player to the AUX IN cable. Use the volume control to adjust volume. 2. RCA Output The RCA Output Jack is on the back of the unit. (Refer to Wiring) This output is for connecting amplifier, equalizer, or other audio component that requires a pre-amp out connection. (Red = Right, White = Left) Follow the manufacturers instructions for the audio component that you are connecting. FAQ PROBLEM CAUSE/SOLUTION No Power Check wiring connections. Check and make sure the fuse is not blown. Replace with the proper rating/size fuse. Some errors occur in the LCD or no functions when buttons are pressed. Press the RESET Button (21). Unable to receive stations Check and make sure the antenna is connected properly. Poor radio reception Check and make sure the antenna is the correct length. Make sure the antenna is not broken. If the antenna is broken, replace it. The antenna is poorly grounded. Check and make sure the antenna is grounded at mounting location. CD’s cannot be loaded A CD is already loaded in the player. Eject CD. Songs keep skipping The CD is dirty or damaged. File information shows in LCD but will not play. If you have files with Digital Rights Management(DRM). Contact the vendor for proper use. MP3/WMA files on the USB/SD flash memory do not play. Flash memory is formatted as NTSC. Format the flash memory as FAT or FAT32. The files have Digital Rights Management (DRM). If the files you are attempting to play were purchased online, they may have Digital Rights Management, this unit is not DRM compatible. AFTER SALES SUPPORT GB 01270 508538 IRE www.quesh.co.uk MODEL NUMBER: 53712 1800 995 036 r $BSTUFSFP r 'BTDJBDBSSZDBTF r *40DBCMFT r "VYDBCMF YEARS WARRANTY 18 Warranty Card Car CD/MP3 Bluetooth Radio 53712 Please keep your purchase receipt together with your warranty card Name Address Date of purchase Location of purchase Detailed description of malfunction: Quesh Ltd 1 Solway Court, Crewe Business Park, Crewe, Cheshire, CW1 6LD. Email: [email protected] Web: www.quesh.co.uk AFTER SALES SUPPORT GB 01270 508538 IRE www.quesh.co.uk MODEL NUMBER: 53712 1800 995 036 r $BSTUFSFP r 'BTDJBDBSSZDBTF r *40DBCMFT r "VYDBCMF YEARS WARRANTY


