1
TG6461E(e).book Page 13 Monday, March 16, 2009 8:50 AM
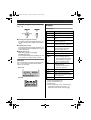
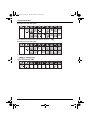
Getting started
Y Handset
Important:
L When the language selection is displayed
after installing the batteries for the first time,
perform step 5.
1
2
3
4
5
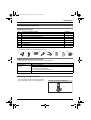
8 (middle soft key)
{V}/{^}: “Handset Setup” i M
{V}/{^}: “Display Setup” i M
{V}/{^}: “Language” i M
{V}/{^}: Select your desired language. i
M i {ih}
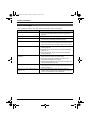
If you select a language you cannot read
Important:
L If the unit is not in standby mode, press {ih}.
1
2
3
8 (middle soft key)
{^} 4 times i M
{V} 2 times i M 2 times i
{V}/{^}: Select your desired language. i
M i {ih}
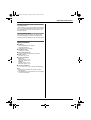
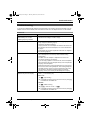
Date and time
Y Handset
1
2
3
4
5
8 (middle soft key)
6
Enter the current hour and minute.
Example: 9:30
{0}{9} {3}{0}
L You can select 24-hour or 12-hour clock
format (“AM” or “PM”) by pressing {*}.
7
M i {ih}
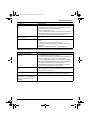
{V}/{^}: “Handset Setup” i M
{V}/{^}: “Time Settings” i M
{V}/{^}: “Set Date/Time” i M
Enter the current date, month, and year. i
M
Example: 15 July, 2009
{1}{5} {0}{7} {0}{9}
Note:
L To correct a digit, press {^} or {V} to move the
cursor to the digit, then make the correction.
L The date and time may be incorrect after a
power failure. In this case, set the date and time
again.
Helpline Tel. No.: U.K. 0844 844 3898 R.O.I. 01289 8333
13