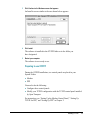
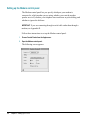
1
K
Open Transport/PPP
User’s Manual
K Apple Computer, Inc.
© 1996 Apple Computer, Inc. All rights reserved.
Under the copyright laws, this manual may not be copied,
in whole or in part, without the written consent of Apple.
Your rights to the software are governed by the
accompanying software license agreement.
The Apple logo is a trademark of Apple Computer, Inc.,
registered in the U.S. and other countries. Use of the
“keyboard” Apple logo (Option-Shift-K) for commercial
purposes without the prior written consent of Apple may
constitute trademark infringement and unfair competition
in violation of federal and state laws.
Every effort has been made to ensure that the information
in this manual is accurate. Apple is not responsible for
printing or clerical errors.
Apple Computer, Inc.
1 Infinite Loop
Cupertino, CA 95014-2084
408-996-1010
http://www.apple.com
Apple, the Apple logo, AppleScript, Mac, Macintosh, and
PowerBook are trademarks of Apple Computer, Inc.,
registered in the U.S. and other countries.
Netscape Navigator is a trademark of Netscape
Communications Corporation.
PowerPC is a trademark of International Business
Machines, Inc., used under license therefrom.
Simultaneously published in the United States and Canada.
Mention of third-party products is for informational
purposes only and constitutes neither an endorsement nor
a recommendation. Apple assumes no responsibility with
regard to the performance or use of these products.
Contents
Before You Begin / 7
1 Installing Open Transport/PPP / 11
Before you can connect to a network / 11
Hardware and software requirements / 12
Installing OT/PPP / 12
Preparing to use OT/PPP / 13
Displaying onscreen help / 14
2 Setting Up OT/PPP / 17
Setting up the Modem control panel / 18
Setting up TCP/IP for PPP / 20
Setting up PPP / 23
Setting PPP options / 25
Setting the protocol options / 25
Setting the connection options / 27
Setting the redialing options / 29
Saving your configuration / 31
Where to go from here / 31
3 Using OT/PPP / 33
Connecting directly / 33
Connecting through a command-line host / 35
Using a terminal window / 35
Using a connect script / 38
Saving a connect script / 38
Importing a connect script / 39
Connecting automatically / 40
Using manual dialing / 42
Using the activity log / 42
Exporting the log to a file / 43
Clearing the log / 43
Disconnecting / 44
4 Using Configurations / 45
Displaying the Configurations dialog box / 46
Creating a new configuration / 48
Making a different configuration active / 48
Altering a configuration / 49
Renaming a configuration / 49
Exporting a configuration to a file / 50
Importing a configuration / 50
Deleting a configuration / 50
5 Troubleshooting / 51
Your modem isn’t listed in the Modem control panel / 51
You are unable to make a call / 51
You can’t hear the modem working / 52
You are unable to connect to a server / 52
You can’t maintain the connection / 53
4
Contents
You are unable to dial manually / 54
OT/PPP connects when you start your Macintosh / 54
TCP/IP applications don’t start OT/PPP automatically / 54
Appendix A For System Administrators / 55
Locking control panels / 55
Appendix B Using AppleScript With OT/PPP / 59
Sample scripts / 60
AppleScript OT/PPP commands / 61
Error codes / 62
Appendix C Additions to the CCL Scripting Language for Connect Scripts / 65
Appendix D Using Null-Modem Scripts / 67
Index / 69
Contents
5
Before You Begin
The Apple Open Transport/PPP (OT/PPP) software allows you to connect your
computer to remote TCP/IP networks, such as corporate networks and the
Internet, using a modem and the telephone system. It includes control panels
for your modem and for Point-to-Point Protocol (PPP) as well as onscreen
help for using these control panels.
The Internet is the global “network of networks.” It consists of an
interconnection of countless computers and networks located throughout the
world. By connecting to the Internet, you can gain access to a vast and rapidly
expanding repository of information and a means of communicating nearly
instantaneously with people all over the world.
OT/PPP is part of Apple’s Open Transport networking software. It establishes
connections using PPP, which is an industry-standard protocol for establishing
remote connections, and is one of the most commonly used networking protocols.
OT/PPP provides the following capabilities:
m lets you access TCP/IP networks over PPP
m works with Open Transport
m lets you use remote terminals to save your connection routines as
“connect scripts”
m lets you use AppleScript to automate connecting and disconnecting
m allows system administrators to lock the settings of the Modem, PPP,
and TCP/IP control panels so the settings can be distributed to users and
remain unaltered
What you need to know
This book assumes you have no previous experience using PPP or TCP/IP.
However, it does assume that you are familiar with the network you are using
or logging in to, or the requirements of your Internet service provider. For this
information, contact the network administrator or the Internet service provider.
What’s covered in this manual
This manual contains the following chapters and appendixes:
m Installing Open Transport/PPP: hardware and software requirements;
installing OT/PPP
m Setting Up OT/PPP: setting up the Modem, TCP/IP and PPP control panels
and their options; saving a configuration
m Using OT/PPP: connecting via the PPP control panel; connecting through a
command-line host; using connect scripts; connecting automatically;
dialing out manually; and using the activity log
m Using Configurations: using multiple configurations; making different
configurations active; duplicating, naming, creating, exporting, importing,
and deleting configurations
m Troubleshooting: solving several commonly encountered problems
m Appendix A, For System Administrators: locking the telecommunications
dialog boxes so that users cannot change the settings
m Appendix B, Using AppleScript With OT/PPP: using AppleScript
commands to run OT/PPP (for the advanced user)
m Appendix C, Additions to the CCL Scripting Language for Connect Scripts:
how the CCL scripting language deals with user names and passwords
m Appendix D, Using Null-Modem Scripts: how to use the null-modem setting
in the Modem control panel
8
Before You Begin
Terminology used in this guide
This section explains the terminology used in this manual to refer to various
mouse and keyboard operations.
Basic mouse and keyboard operations
In this guide, some terms represent a series of actions that you perform with
the mouse, the keyboard, or both. For example, the word enter indicates that
you type a character (or a series of characters), then press the Return key.
Here is a list of standard terms for mouse and keyboard operations and the
meaning of each term.
Term
Action
Click
Double-click
Press and then immediately release the mouse button.
Press and release the mouse button twice in quick succession without
moving the mouse.
Position the pointer on an item on the screen, such as an icon that you
want to move. Press and hold down the mouse button while moving
the mouse until you have accomplished the desired task, such as
moving the icon to a new location, and then release the mouse button.
Activate a command in a menu by positioning the pointer on the menu
title and dragging (usually downward) through the menu until the
command you want is highlighted. Then release the mouse button.
Designate where the next action will take place. To select an object
such as an icon, position the pointer on the object and click the mouse
button once. When selected, the object appears highlighted. To select
text, drag across the text until the entire range of text that you want to
select is highlighted.
Type a series of characters without pressing the Return key.
Drag
Choose
Select
Type
Press
Press a single key or key combination without pressing the Return
key afterward.
Before You Begin
9
Onscreen help
If you are using Mac OS 7.5.3 or later, Macintosh Guide is available to assist
you with questions you may have while using OT/PPP.
To open Macintosh Guide, choose the Macintosh Guide option in the Guide
menu, which is designated by the following icon located near the right-hand
end of the menu bar.
You can look for information by topic or by index key word, or you can type a
word indicating what you are looking for. For topics relating to OT/PPP, click
the Telecommunications topic area.
The TCP/IP, PPP, and Modem control panels have a question-mark button in
the lower-left corner.
Click here for onscreen help.
You can click this button to open the Macintosh Guide and see topics related
to OT/PPP.
For further information, see “Displaying Onscreen Help” in Chapter 1.
10
Before You Begin
1
Installing Open Transport/PPP
This chapter explains how to install and set up your Open Transport/PPP
(OT/PPP) software so that you can connect to the Internet or to other
TCP/IP networks.
Once you are ready to connect to a network and have set up OT/PPP, you can
use OT/PPP to access the PPP server of your choice.
Before you can connect to a network
There are some conditions that you must meet before you can connect to a
network. Normally, before you can connect to a network, be it a corporate or
governmental network or the Internet, you need the following:
m Your computer must be physically connected to a modem that is
compatible with the computer, whether the modem is built in to the
computer or is external.
m The modem must be connected to a telephone line.
m You generally need an account on the server to which you are planning
to connect. Some servers let users without accounts log in as “Guest.”
Consult your Internet service provider or network administrator about
what you need.
m If you have an account, the server will require you to enter your user name
and, most probably, a password. Consult your Internet service provider or
network administrator about whether you need a password and whether the
administrator has already assigned you a password.
m You need specific information to set up the modem, TCP/IP, and PPP, as
described in Chapter 2.
Hardware and software requirements
OT/PPP requires the following hardware and software:
m a computer running the Macintosh operating system (Mac OS) with a
68030, 68040, or PowerPC microprocessor
m at least 8 megabytes (MB) of RAM
m system software version 7.1 or 7.1.2
or
system software version 7.5.3 or later (not earlier versions of system 7.5)
m Open Transport 1.1.1 or later
Installing OT/PPP
Follow these instructions to install the OT/PPP software:
12
1
Open the OT/PPP folder.
2
Double-click the Installer icon.
Chapter 1 / Installing Open Transport/PPP
3
Click Continue in the Welcome screen that appears.
An Installer screen similar to the one shown below appears:
4
Click Install.
The software is installed in the OT/PPP folder or in the folder you
have designated.
5
Restart your computer.
The software is now ready to use.
Preparing to use OT/PPP
During the OT/PPP installation, two control panels are placed in your
System Folder:
m Modem
m PPP
You need to do the following:
m Configure these control panels.
m Modify your TCP/IP configuration with the TCP/IP control panel installed
by Open Transport.
For instructions, see “Setting Up the Modem Control Panel,” “Setting Up
TCP/IP for PPP,” and “Setting Up PPP” in Chapter 2.
Installing OT/PPP
13
Displaying onscreen help
If you are using system software version 7.5.3 or later, you have access to
Macintosh Guide, which displays help panels on screen that teach you how to
use your software.
There are two ways to open onscreen help while using OT/PPP:
m
Click the question mark in the lower-left corner of a control panel.
Click here for onscreen help.
14
Chapter 1 / Installing Open Transport/PPP
Macintosh Guide opens in the Look For mode, with a list of topics related to
the control panel you have opened.
You can also do the following:
1
Choose Macintosh Guide in the Guide menu (the h at the right of the menu bar).
2
Click one of the three buttons at the top of the window.
If you clicked the Topics button, the following window of Macintosh
Guide appears:
You can use Macintosh Guide in any of three ways by clicking the Topics,
Index, or Look For button.
Installing OT/PPP
15
2
Setting Up OT/PPP
This chapter explains how to set up your OT/PPP software so that you can
connect to the Internet or to other TCP/IP networks.
Once you are ready to connect to a network and have set up OT/PPP, you can
access the PPP server of your choice.
Before you can use OT/PPP, you must set up three control panels: TCP/IP,
Modem, and PPP.
Notice that these are also applications with their own menu bars. You can pull
down the menus to see what you can do in each control panel. Individual
options in the menus will be described as appropriate later in this manual.
Each of these control panels lets you enter specific items of information. When
you have entered the information, you have created a configuration. To learn
about creating and using multiple configurations (in case you have to log in to
different networks or use different modems), see Chapter 4.
Setting up the Modem control panel
The Modem control panel lets you specify which port your modem is
connected to, which modem you are using, whether you want the modem
speaker on or off, whether your telephone uses touch-tone or pulse dialing, and
whether to ignore the dial tone.
IMPORTANT If you are connecting through a serial cable rather than through a
modem, see Appendix D.
Follow these instructions to set up the Modem control panel:
1
Choose Control Panels from the Apple menu.
2
Open the Modem control panel.
The following screen appears:
18
Chapter 2 / Setting Up OT/PPP
3
In the “Connect via” pop-up menu, choose the port to which your modem is connected.
4
In the Modem pop-up menu, choose the modem you are using.
Modem scripts for many popular modems are included with the OT/PPP
software and are installed when you install the software.
IMPORTANT If your modem does not appear in the pop-up menu, be sure that
OT/PPP is properly installed. If it is, see “Your Modem Isn’t Listed in the
Modem Control Panel” in Chapter 5.
Note: The Apple Modem Script Generator, an extra item available with
OT/PPP, allows you to create your own modem scripts. Although the Modem
Script Generator is not a supported Apple product, many users have found it to
be very helpful in creating their own modem scripts.
5
Click the settings you want (On or Off for the modem speaker; Tone or Pulse for dialing).
6
If your phone has a nonstandard dial tone or no dial tone, click the Ignore Dial Tone
checkbox to select it.
You are now set up to connect through a specific modem. If you want to
connect through a different one, you must enter different information into the
Modem control panel; that is, you must create a new configuration. For
information on creating and using multiple configurations, see Chapter 4.
Setting up the Modem control panel
19
Setting up TCP/IP for PPP
The TCP/IP control panel lets you specify detailed information about the
network you plan to log in to and the communications protocol you plan to use
(in this case, PPP).
Follow these instructions to set up the TCP/IP control panel:
1
Choose Control Panels from the Apple menu.
2
Open the TCP/IP control panel.
A setup screen similar to the following appears:
3
Choose PPP from the “Connect via” pop-up menu.
IMPORTANT If PPP is not listed, the software has not been properly installed.
Try reinstalling OT/PPP.
20
Chapter 2 / Setting Up OT/PPP
The screen displays the options available for the choices you’ve made:
4
Choose your configuration method from the Configure pop-up menu.
Consult your network administrator or your Internet service provider for
advice on what to choose.
The most common selection (and the default) is Using PPP Server, which
causes OT/PPP to request an IP address from the server when it connects. If
you choose Using PPP Server, the dialog box that appears informs you that the
IP address, the subnet mask, and the router address are supplied by the server
(as shown above).
If your network administrator advises you to choose Manually from the popup menu, the dialog box requests the IP address.
Setting up TCP/IP for PPP
21
Ask for your network administrator’s advice before choosing either of the
remaining options.
Note: Some administrators describe a manual configuration as static.
5
Enter name server addresses. If you have chosen Manually in the Configure pop-up
menu, enter an IP address.
Obtain these from your network administrator or from your Internet
service provider.
6
Click OK.
7
Close the TCP/IP control panel; then click Save in the dialog box that appears.
You are now set up to connect to a specific PPP server. If you want to
connect to a different one, you must enter different information into the
TCP/IP control panel; that is, you must create a new configuration. For
information on creating and using multiple configurations, see Chapter 4.
22
Chapter 2 / Setting Up OT/PPP
Setting up PPP
The PPP control panel is the place where you enter information about your
PPP connections. To set up PPP, follow these instructions:
1
Choose Control Panels from the Apple menu.
2
Open the PPP control panel.
The following screen appears:
3
Click Guest or Registered User.
Whether you should access the remote server as a guest or a registered user
depends on the rules for that server. Check with the server’s administrator.
Note: If you clicked Guest, skip steps 4 through 6.
4
Type your PPP user name in the Name text box.
Obtain this name from your Internet service provider or network administrator.
Setting up PPP
23
5
Type your PPP password in the Password text box.
Obtain this password from your Internet service provider or network
administrator.
6
To save your password, click the checkbox next to Save Password
If Save Password isn’t selected, you need to enter your password every time
you log in. This is more secure but less convenient.
7
In the Number text box, type the telephone number for the service to which you will
be connecting.
Enter the number exactly as you would dial it manually, including outside line
access and area code, if necessary.
Note: A problem is sometimes caused when the touch-tone signals occur too
quickly. To alleviate this problem, you can type a comma in the telephone
number—for example, after the area code—to insert a brief pause in the
dialing. See “You are Unable to Connect to a Server” in Chapter 5 for details.
IMPORTANT Even if you are not using a modem (that is, if you have selected
Null Modem in the Modem control panel), you still need to type a number in
the Number box. See Appendix D for more information.
PPP is now ready to use. You can, however, fine-tune the configuration using
the available options, as described in the next section, “Setting PPP Options.”
If you don’t want to use the options and aren’t ready to dial in to the network
immediately, do this:
m
Click the close box, and click Save when you are prompted to save the configuration.
If you don’t want to use the options and you want to dial in to the network
now, see the section “Connecting Directly” in Chapter 3.
24
Chapter 2 / Setting Up OT/PPP
Setting PPP options
The PPP options allow you to control various aspects of the OT/PPP’s
behavior. To access the options, do the following:
m
Click the Options button in the PPP control panel.
A dialog box containing three tabs appears, which allows you to set three sets
of options: protocol, connection, and redialing.
Setting the protocol options
Click the Protocol tab to display the protocol options:
The first two options (“Allow error correction and compression in modem”
and “Use TCP header compression”) are selected by default when you first
install OT/PPP. They can improve performance. Click the checkboxes to turn
them off only if you experience difficulties in making or maintaining a
connection (see “You are Unable to Connect to a Server” in Chapter 5).
Setting PPP options
25
The third option (“Connect to a command-line host”) allows you to connect to
a server that requires you to log in by entering information (such as your login
name and password) into a terminal window. If you are connecting through a
command-line host, you need to click the “Connect to a command-line host”
checkbox to select it, as described in “Connecting Through a Command-Line
Host” in Chapter 3.
The subsidiary options work as follows:
m “Use terminal window”: This option allows you to open a terminal window,
in which you can enter the information needed for logging in to a
command-line host. See “Using a Terminal Window” in Chapter 3.
m “Use connect script”: This option allows you to use the Import Script button
in the Configurations dialog box (described in Chapter 4) to attach a script
to the configuration. You are then able to automate your interaction with the
terminal window.
Note: You can create a connect script for your host by logging in and
connecting through a terminal window, then saving the contents of the
terminal window. See “Using a Connect Script” in Chapter 3.
26
Chapter 2 / Setting Up OT/PPP
Setting the connection options
Click the Connection tab to display the connection options:
If you click the “Connect automatically when starting TCP/IP applications”
checkbox to select it, PPP attempts to connect whenever you open a TCP/IP
application, such as Netscape Navigator or Fetch. OT/PPP dials the number
and uses the settings in the active PPP control panel configuration (that is, the
settings that are displayed when the control panel is open). If you make
changes to any of the settings or options in the control panel and don’t save
them (see “Saving Your Configuration” later in this chapter), those changed
settings will not apply to automatic connections.
WARNING Although you can set the PPP control panel to connect you
automatically to the Internet or other PPP server when you start TCP/IP
applications, you can’t set PPP to disconnect automatically when you
close TCP/IP applications. You always need to disconnect manually
using the Disconnect button in the PPP control panel or by using an
appropriate AppleScript applet (see Appendix B). If you forget to do so,
your telephone charges continue to mount, as do the fees charged by
your Internet service provider. The Reminders options (discussed next)
can help you prevent this. See also “Disconnecting” in Chapter 3.
Setting PPP options
27
If you click the “Use verbose logging” checkbox to select it, the activity log
saves information that is more detailed than it does if “Use verbose logging” is
not selected. For information on the activity log, see “Using the Activity Log”
in Chapter 3.
You can select Reminders options to help you avoid staying connected longer
than you intend. (To select an option, click to put an X in its checkbox.)
m If the “Flash icon in menu bar while connected” option is selected, a
flashing icon is displayed continuously over the Apple menu as long as
you are connected.
m The “Prompt every # minutes to maintain connection” option allows you to
specify the number of minutes between prompts. If the option is selected, a
dialog box appears after the number of minutes you have specified (in the
number box) has passed.
If you don’t click OK to close the dialog box, you are disconnected
automatically.
m The “Disconnect if idle for # minutes” option allows you to specify the
number of minutes that can pass with no network traffic. If the option is
selected, you are disconnected automatically after the interval you have
specified (in the number box) has elapsed, if there has been no activity.
IMPORTANT Be aware that your Internet service provider might also have a
time limit after which you are disconnected automatically if there is no data
exchanged to or from your computer.
28
Chapter 2 / Setting Up OT/PPP
Setting the redialing options
There are three redialing options available:
m Off: If the number you have dialed is busy, the system will not redial
automatically.
m Redial main number only: If the number you have dialed is busy, the system
redials the main number. You may enter the number of seconds between
redialings and the number of redialings you want.
m Redial main and alternate numbers: If the number you have dialed is busy,
the system will redial an alternate number. If the alternate number is also
busy, the system tries the main number again. You may enter the main
telephone number, the alternate telephone number, the number of redialings,
and the number of seconds between redialings. Depending on the number of
redialings you have specified, the system continues to switch between the
main and the alternate number, as long as they both return busy signals.
Note: If a number doesn’t answer, it is not redialed. Only numbers that return
a busy signal are redialed. If the main number doesn’t answer, the alternative
number is dialed once.
To set the redialing options, follow these instructions:
1
Click the Redialing tab.
The dialog box has different choices available, depending on which redialing
option is active. If redialing is off, the dialog box looks something like the one
shown here:
Setting PPP options
29
2
To change the redialing option, choose from the Redial pop-up menu.
If you choose “Redial main number only,” the following options appear:
If you choose “Redial main and alternate numbers,” the following
options appear:
3
Type the number of seconds between redialings and the number of redialing
attempts. If you have chosen “Redial main and alternate numbers,” type the alternate
telephone number.
The main number is the number entered in the main screen of the PPP
control panel.
4
30
Click OK when you have finished specifying the options you want.
Chapter 2 / Setting Up OT/PPP
Saving your configuration
If you have changed any settings in a TCP/IP, Modem, or PPP control panel,
you are automatically prompted to save the current configuration when you
close the control panel. You are also prompted to save the configuration if you
choose Configuration in the File menu of any of the above-mentioned control
panels. The Configuration option in the File menu is discussed in Chapter 4.
To save the changes you have made in the control panel’s settings, do this:
m
Click the Save button in the dialog box that appears when you close the control panel or
when you choose Configuration in the File menu.
Note: There is no other way to save a configuration. These control panels do
not have Save or Save As commands in their File menus.
Where to go from here
After you click OK to confirm your settings in each of the options dialog
boxes, the PPP control panel reappears.
You can press Connect to begin dialing out or you can close the control panel
to save the configuration for later use. For further instructions on connecting
and using OT/PPP, see Chapter 3. For instructions on creating and using
multiple configurations, see Chapter 4.
Where to go from here
31
3
Using OT/PPP
Once you have set up the OT/PPP software, as described in Chapter 2, you need
to know whether the remote server requires you to connect directly or through
a command-line host (which you can do either by entering your login information
into a terminal window or by using a previously saved connect script).
Whether you log in to the server directly or through a command-line host, you
can set up PPP to connect automatically when you start a TCP/IP application
(such as Netscape Navigator or Fetch).
You can also dial out manually, or connect and disconnect by using an
AppleScript applet. (See Appendix B for information on using AppleScript
with OT/PPP.
Connecting directly
To connect through the PPP control panel, follow these instructions:
1
Choose Control Panels from the Apple menu.
2
Open the PPP control panel.
The current PPP settings appear. If this is your only PPP configuration, or the
configuration you want to use, skip to Step 4.
If you want to use a different saved configuration, go to Step 3.
3
In the File menu, select Configuration; then select the configuration you want to use and
click Make Active.
The Configurations dialog box disappears, leaving the PPP control panel
displayed. For a discussion of the Configurations dialog box, see Chapter 4.
4
Click Connect.
If you saved your password and if you are not using a terminal window,
OT/PPP now attempts to make the connection.
If you haven’t saved your password, you are prompted to enter it now. The
program attempts to make the connection. During this attempt, the Connect
button changes to a Cancel button, which you can press to cancel the
attempted connection.
Once the connection is made, the Connect button changes to a Disconnect
button, as shown here:
The status window provides the connection speed, time connected, time
remaining, and the Internet address of the server host.
Note: If you checked “Connect to a command-line host” in the Protocol
Options dialog box when you set up the PPP control panel for the
configuration you’re using, you are connected to a terminal window (see
“Connecting Through a Command-Line Host,” later in this chapter). To dial
out manually instead of having the PPP control panel dial a preset number
when you press Connect, see “Using Manual Dialing,” later in this chapter.
You can also set your options to connect automatically whenever you open a
TCP/IP application, such as Netscape Navigator or Fetch. See “Connecting
Automatically,” later in this chapter.
34
Chapter 3 / Using OT/PPP
Connecting through a command-line host
A command-line host is a remote server that requires you to log in through a
terminal window. Typically, you must provide a valid account name and
password (and perhaps other information).
Using a terminal window
If you plan to connect to a command-line host, follow these steps:
1
Click Options in the PPP control panel and click the Protocol tab.
The protocol options appear.
2
Click the “Connect to a command-line host” checkbox to select it.
3
Click “Use terminal window.”
4
Click OK.
Connecting through a command-line host
35
5
Click Connect in the PPP control panel.
Note: In addition to starting your PPP connection by clicking Connect in the
PPP control panel, you have the option of starting OT/PPP automatically when
opening a TCP/IP application. See “Connecting Automatically,” later in this
chapter. To connect by dialing out manually, see “Using Manual Dialing” later
in this chapter.
During the login attempt, the program displays a terminal window similar to
the following:
36
Chapter 3 / Using OT/PPP
6
When the terminal window appears, enter the information requested, pressing Return at
the end of each response.
By default, when the connection is established, PPP closes the window. If the
window doesn’t close automatically, click the Continue button to close it.
You can choose whether or not the terminal window closes when you connect
with PPP. To make your choice, click Settings.
If the “Close terminal window when PPP is started” checkbox is not selected,
the terminal window is displayed until you click Continue.
Note: To learn how to automate the process of logging in through a terminal
window by creating a connect script, see the next section, “Using a Connect
Script.”
Also be aware that if you don’t respond to a server prompt in the terminal
window, you will eventually be disconnected from the server. The amount of
time it takes for this to happen depends on the server to which you are
connecting. When the timeout occurs, the server’s modem sends “hangup
strings,” such as ATFV or +++.
Connecting through a command-line host
37
Using a connect script
A connect script is a set of pretyped responses to a command-line host’s
requests for user name, password, and any other information the host may
require. A connect script lets you connect to a command-line host without
typing responses in the terminal window.
IMPORTANT An effective connect script is created by saving the session of a
successful connection. Because making a connection depends on many factors,
your first attempt(s) may not be successful. For example, the server’s phone
line may be busy when you try to connect. Or, you may have been
disconnected by the server before you could log in and save the session. If
your first attempt connecting and logging in fails, try again.
Saving a connect script
You create a connect script by saving the interaction that takes place when you
log in to a command-line host manually. To do so, follow these instructions:
1
Open a terminal window, as described in the previous section “Using a Terminal Window.”
2
Type all information as requested by the command-line prompts.
3
Before completing your login, click the Settings button at the bottom of the
terminal window.
The PPP Terminal Settings dialog box appears, as shown in the previous section.
4
Click the “Prompt to save Connect Script on close” checkbox to select it.
5
If you want the terminal window to be closed as soon as the login is complete, click the
“Close Terminal when PPP is started” checkbox to put an X in it.
6
Click OK.
If the “Close Terminal when PPP is started” option (in the PPP Terminal
Settings dialog box) is selected, the PPP Terminal Settings dialog box closes.
If the option is not selected, you must click the Continue button in the PPP
Terminal window to close it. When you finish the login, a dialog box appears
that lets you name and save the script.
7
38
Name the script, choose a destination for it, and click Save to save the script.
Chapter 3 / Using OT/PPP
Importing a connect script
Your system administrator or your Internet service provider may export a
connect script for your use. This section describes how to import the script.
To import a connect script, follow these instructions:
1
In the Protocol Options dialog box, click the “Connect to a command-line host”
checkbox to put an X in it and click “Use connect script.”
The Protocol Options dialog box now looks like the following:
2
Click the Import Script button.
A dialog box appears that lets you select a script to import.
Connecting through a command-line host
39
3
Select the script you want to import; then click Open (or double-click the name of
the script).
The Protocol Options dialog box now contains the name of the script that is to
be imported, in this example, “connect.1.”
4
Click OK in the Protocol Options dialog box.
When you connect automatically, dial out manually (see “Connecting
Automatically” and“Using Manual Dialing,” next in this chapter), or click
Connect in the PPP control panel, the script takes over. If you save the settings
to create or modify a configuration, the script you imported will control your
initial interaction with the command-line host when you use this configuration.
Connecting automatically
If you configure PPP to connect automatically, OT/PPP automatically attempts
a connection whenever you launch a TCP/IP application such as Netscape
Navigator or Fetch.
If you have not already configured PPP for automatic connection, follow
these instructions:
40
Chapter 3 / Using OT/PPP
1
Click Options in the PPP control panel; then click the Connection tab.
The dialog box shown here appears.
2
Click the “Connect automatically when starting TCP/IP applications” checkbox to put
an X in it.
3
Click OK, and then close and save the configuration.
IMPORTANT If you are set up to connect automatically, changes in the active
configuration do not become effective until you save the configuration. See
“Saving Your Configuration” in Chapter 2.
4
Start the TCP/IP application.
This is a one-time-only procedure if you have saved the changed
configuration. Every other time you start a TCP/IP application with a
configuration for automatic connection, the connection attempt occurs
automatically, so you don’t need to repeat these steps. If you didn’t save, as
described in Step 3, you are not connected automatically when you start a
TCP/IP application.
IMPORTANT The connection does not terminate automatically when you quit
the TCP/IP application. In order to terminate the connection you must manually
click the Disconnect button in the PPP control panel (see “Disconnecting,”
later in this chapter). If you forget to do so, your telephone charges continue to
mount, as do the fees charged by your Internet service provider.
Connecting automatically
41
Using manual dialing
Connecting manually means dialing the phone number before establishing the
connection. You might need to dial manually, for example, if you want to
make an operator-assisted call.
Note: In order to place a call manually, you must have a telephone attached to
your modem.
To connect manually, do this:
m
From the PPP menu, choose Dial Manually, then follow the instructions on your screen.
If the connection fails, click Cancel, then choose Dial Manually again from the
PPP menu.
Using the activity log
OT/PPP maintains a log of all connections and connection attempts. To view
the activity log, do this:
m
Choose Activity Log from the PPP menu.
A screen such as the following appears:
42
Chapter 3 / Using OT/PPP
To maintain more detailed information in the activity log, click the “Use
Verbose Logging” checkbox in the Connection option of the PPP control panel
to put an X in it. The Activity Log window allows you to export the log to a
file and to clear the log (see “Exporting the Log to a File” and “Clearing the
Log” next).
Note: The top of the Activity Log window contains a line that shows the number
of entries displayed and the total number of entries in the log file. Because of
memory constraints, the Activity Log window might not be able to display all
the entries. If this is the case, you can see all the entries by exporting the log to
a text file and opening or printing the file.
Exporting the log to a file
To export the activity log to a file, follow these instructions:
1
Click the Export button.
2
In the dialog box that appears, choose a destination and a name for the file.
You can print the file or open it to read it.
Clearing the log
To clear the log, click the Clear button.
Using the activity log
43
Disconnecting
To disconnect from the network, do this:
m
Click Disconnect in the PPP control panel.
IMPORTANT Unless you set the Connections options to remind you to
disconnect when you are finished with the network, or to disconnect
automatically, you might forget to disconnect. Be sure to disconnect or you are
likely to find yourself piling up large charges from the telephone company and
your Internet service provider. See “Remembering to Disconnect” in the
section “Setting the Connection Options” in Chapter 2.
Note: If you are using AppleScript, your script can include the disconnect
instruction PPP disconnect. See Appendix B.
OT/PPP disconnects automatically when you shut down or restart your
computer. In the case of PowerBooks, putting the computer to sleep also
causes OT/PPP to disconnect automatically.
44
Chapter 3 / Using OT/PPP
4
Using Configurations
The term configuration is used to describe all the settings that you specify for
a control panel. This chapter explains how to work with the configurations you
have saved.
If you need to log in to different TCP/IP servers—for example, if you need to
log in to an Internet service provider and one or more corporate networks—you
need different TCP/IP and PPP configurations for each server. If you carry a
laptop computer to different locations, each location will probably have its own
modem and is likely to need a different modem configuration. If, for each
control panel, you save a configuration for each situation that requires a
different configuration, all you need to do is make the appropriate
configurations active at the appropriate time.
Displaying the Configurations dialog box
In Chapter 2 you learned how to set up and save a configuration. Every
configuration has a name. The first configuration you make and save after
installing OT/PPP is automatically saved under the name Default. Whenever
you change a configuration or create a new configuration, you can give it a
name. To perform these and other tasks, use the Configurations dialog box.
To display the Configurations dialog box, follow these instructions:
1
In the File menu, choose the Configurations option.
If you have changed anything in the PPP control panel, click Save in the dialog
box that appears if you wish to save the changes.
After you click Save, the Configurations dialog box appears, similar to the
one here:
You can display this dialog box, or one like it, with the TCP/IP control panel,
the Modem control panel, or the PPP control panel open.
46
Chapter 4 / Using Configurations
IMPORTANT A change in the configuration in one control panel doesn’t
automatically change the configurations in other control panels that you need.
For example, when you try to access a server that requires a new PPP
configuration and a new TCP/IP configuration, you must select the appropriate
configurations in both control panels. You are urged to give all configurations
for a given environment closely related names, so that it is immediately
apparent which configurations need to be used together.
You can create as many configurations as you like; you can save them, export
them, import them, rename them, and change them at any time.
Let’s assume that you set up PPP by entering the appropriate settings in
the PPP control panel and that you saved the settings when you closed the
control panel, thus creating a saved configuration. If you were setting up the
control panel for the first time, the configuration would be saved under the
name “Default.”
If several configurations have been created and saved, then the last one that
was active before the control panel was closed is the one that appears when
you open the control panel. Even if you have changed it and saved the
changes, its name stays the same unless you rename it.
The configurations dialog box allows you to do the following with the
selected configuration:
m Use it as the basis for creating a new configuration
m Alter it
m Export it to a file
m Make a duplicate of it
m Rename it
m Delete it
Displaying the Configurations dialog box
47
Creating a new configuration
To create a new configuration, begin by making a copy of an existing
configuration. Follow these instructions:
1
With the configuration selected in the open Configurations dialog box, click Duplicate.
The dialog box shown below appears.
2
Rename the configuration if you wish to, and click OK.
3
Make sure the name of the configuration is selected, then click the Make Active button.
4
Specify the settings you want in the new configuration.
5
Close the control panel or choose Configuration in the File menu.
6
Click Save to save the new configuration.
Making a different configuration active
To use a configuration that is not currently active, follow these instructions:
48
1
Select the appropriate configuration in the Configurations dialog box.
2
Click Make Active.
Chapter 4 / Using Configurations
Altering a configuration
To alter an existing configuration, follow these instructions:
1
Select the appropriate configuration in the Configurations dialog box.
2
Click Make Active.
The control panel reappears.
3
Change the settings or options you wish to alter.
4
Close the control panel or redisplay the Configurations dialog box to save the change.
See “Saving Your Configuration” in Chapter 2.
Renaming a configuration
To rename a configuration, follow these instructions:
1
With the Configurations dialog box open, select the configuration and click Rename.
A dialog box similar to the following appears:
2
Enter a new name and click OK.
Renaming a configuration
49
Exporting a configuration to a file
To distribute a configuration to others, follow these steps:
1
Select the configuration in the list.
2
Click the Export button.
A dialog box appears that lets you name a file that will contain the
configuration and specify a destination for it.
3
Type a name and specify a destination; then click Save.
Note: The name you give the file does not change the name of the
configuration; it merely names the file that contains the configuration. When
you give the file to another user and that user imports the configuration into his
or her system, the configuration will still have the name of your original
configuration. See the next section, “Importing a Configuration.”
Importing a configuration
To import a configuration, follow these instructions:
1
With the Configurations dialog box open, click Import.
A dialog box appears that lets you choose the file containing the configuration
to import.
2
Select the name of the file that contains the configuration; then click Open.
The configuration appears in the list in the Configurations dialog box.
Deleting a configuration
To delete a configuration, follow these instructions:
1
Select the name of the configuration in the list and click Delete.
A dialog box appears that lets you confirm that you want to delete
the configuration.
2
50
Click Delete to delete the configuration.
Chapter 4 / Using Configurations
5
Troubleshooting
This chapter helps solve some common problems.
Your modem isn’t listed in the Modem control panel
The modem script for your modem might not be properly installed. Refer to
the OT/PPP Read Me file in the Open Transport/PPP folder on your hard disk
for the list of modem scripts that came with OT/PPP. Modem scripts should be
in the Modem Scripts folder, which is located in the Extensions folder (in your
System Folder). If you don’t have the script, check with one of the following
sources to see if a modem script is available:
m your modem manufacturer’s technical support line
m your Apple-authorized dealer
m Apple’s World Wide Web site (http://www.apple.com)
You are unable to make a call
If you can’t make a call, something may be wrong with your telephone line,
your modem, or the modem setup.
m Make sure your modem is connected properly and turned on. Refer to your
modem documentation if you have any problems.
m Make sure your modem type and port are correctly selected in the Modem
control panel.
You can’t hear the modem working
Most modems have built-in speakers that let you hear that the modem is
working. While connecting to a remote server, you can hear the dial tone, the
tones of the numbers being dialed, and the sounds of the modems
communicating with each other. After a connection is successfully established,
the modem typically turns the speakers off. If you can’t hear these sounds, try
the following:
m Make sure that the Sound option in the Modem control panel is set to On.
m If your modem has a volume control, make sure that it is not turned all the
way down.
You are unable to connect to a server
If your modem is working but you can’t connect to the server, try the
following suggestions, in the order in which they are listed here, until you are
able to connect:
m Verify the phone number of the server you’re trying to call. Dial the number
using a regular telephone and listen for the “whistle” of a modem. Make
sure that you’re calling a PPP server.
m Make sure you’re a registered user on the server or that the server is
set up for guest access. If you try to connect as a registered user, check that
you’ve entered your user name and password correctly. Passwords are
“case-sensitive”—capitalization matters.
m You may need to create pauses while the telephone number is being dialed.
Insert a comma between parts of the number where a pause might be
needed. Inserting a second comma lengthens the pause. For example, the
following entries cause OT/PPP to dial a “9” to get an outside line, then
pause before dialing the rest of the number:
9, 555-1234
9,, 555-1234
m Make sure you’re using the correct modem script for your modem, and that
the script came from Apple or the manufacturer of your modem. To test if the
problem is your modem and script, try connecting with a different modem.
52
Chapter 5 / Troubleshooting
m The server you’re calling may require that you log in to a command-line
host through a terminal window. Try selecting the “Connect to a commandline host” protocol option. (From the PPP control panel, click the Options
button, then click the Protocol tab to display the protocol options.)
m The server you’re calling lets you connect directly, but you’ve selected the
“Connect to a command-line host” protocol option. Try turning this option
off. (From the PPP control panel, click the Options button, then click the
Protocol tab to display the protocol options.)
m Try deselecting the “Allow error correction and compression in modem”
protocol option. (From the PPP control panel, click the Options button, then
click the Protocol tab to display the protocol options.)
You can’t maintain the connection
If you are losing the connection, check the following:
m Servers sometimes develop problems that log users out without explanation.
Try calling back later. You might also try a different service provider.
m If you have call waiting, an incoming call can interrupt the connection. In
the PPP control panel, precede the phone number with the code to turn off
call waiting. Check with your telephone company to find out the code to use.
m Many servers automatically end a connection if it is inactive for a certain
time. Check with your Internet service provider or network administrator.
m Some combinations of modems work better than others. Your modem may
not be a good match for the modem of the server you’re calling. If possible,
try calling an alternate number for the server or using a different modem.
m You may have noisy phone lines. If you can hear a “crackle” during a
normal voice call, have your line checked by your phone company.
You can’t maintain the connection
53
You are unable to dial manually
If you have trouble using the Dial Manually feature, contact the modem
manufacturer to be sure the modem script has been upgraded to support the
latest features available with OT/PPP.
OT/PPP connects when you start your Macintosh
If you don’t want OT/PPP to connect automatically to the Internet when you
start up your computer, make sure the “Load only when needed” checkbox in
the TCP/IP Options dialog box has an X in it. You open the TCP/IP Options
dialog box by clicking the Options button in the TCP/IP control panel. (If the
Options button is not visible, you must set the User Mode to Advanced or
Adminstartion. Choose User Mode from the Edit menu to open the User Mode
dialog box.)
TCP/IP applications don’t start OT/PPP automatically
Be sure that the “Connect automatically when starting TCP/IP applications”
option (in the PPP control panel’s Connection options) is selected. See
“Setting the Connection Options” in Chapter 2.
54
Chapter 5 / Troubleshooting
Appendix A For System Administrators
Locking control panels
If you are the system administrator, OT/PPP allows you to set a password and
to lock the Modem, TCP/IP, and PPP control panels so that only you (or
whoever knows the password) can change the configurations. This is a useful
feature if you plan to create configurations to distribute to your users, but you
don’t want them to change the settings. For information on exporting a
configuration to a file for distribution, see Chapter 4.
To lock a control panel’s configuration, follow these instructions:
1
Create the configuration by entering the appropriate settings in the control panel.
2
In the Edit menu, choose User Mode.
The User Mode dialog box appears, looking something like this:
Note: The TCP/IP control panel has an Advanced mode as well as Basic and
Administration.
3
Click Administration.
If you haven’t used administration mode previously, the Change Password
button (for setting a password) is activated. Proceed to step 4.
If you have already used administration mode and have a password, go to
step 5.
4
Click Change Password.
The Administration Password dialog box appears as follows:
If you have already created a password, the Administration Password dialog
box appears as follows:
56
Appendix A / For System Administrators
5
Type the password (type it in both boxes if you are creating an administration password
for the first time) and click OK.
The control panel now shows open locks alongside the various text boxes, as
shown in this illustration:
Locking control panels
57
6
Click the lock icons to lock the text boxes you want to lock.
In the following illustration, all three text boxes have been locked.
To return to basic mode, follow these instructions:
58
1
In the Edit menu, choose User Mode.
2
Click Basic in the User Mode dialog box.
Appendix A / For System Administrators
Appendix B Using AppleScript with OT/PPP
This appendix assumes that you already know how to use AppleScript. You
can use AppleScript to create scripts to automate an entire network
transaction—for example, to establish a remote connection, copy a file to a
server, and then disconnect.
Open Transport/PPP contains an AppleScript scripting addition called PPP
Commands. This extension adds new commands to the AppleScript commands
for creating and maintaining OT/PPP connections. The Open Transport/PPP
installer places PPP Commands in the Scripting Additions folder in your
Extensions folder. After you have set up the Modem and PPP control panels,
you can use AppleScript scripts to operate your OT/PPP software.
After you create the script and save it as an “applet,” its icon looks much like
the following:
When you double-click this icon, the script runs and handles your PPP
connection.
Sample scripts
The OT/PPP installation disk contains several sample scripts to show you
some ways of using AppleScript commands. To run a script, double-click
its icon; to view the contents of the script, drag its icon onto the
Script Editor application.
Before you use these scripts, make sure that you have set up the PPP control
panel as discussed in Chapters 2, 3, and 4. The sample scripts are not meant to
replace the functionality of the PPP control panel. Moreover, you might need
to edit the sample scripts somewhat to make them useful in your environment.
The following scripts are available:
m PPP Connect
This script prompts you for basic information and starts the OT/PPP
connection. Connection information not explicitly passed to the
PPP connect verb is taken from the active PPP configuration.
m PPP Disconnect
This script disconnects OT/PPP if there is an active PPP connection.
m PPP Reconnect
This differs from PPP Connect in that it attempts to reestablish a connection
if PPP status returns idle (for example, if the PPP server disconnects
you because of a timeout or similar reason).
m PPP Save Log
This script prompts you for the name and location of a new file that it will
create for the current text of the OT/PPP activity log. The text is a tabdelimited ASCII version of the full contents of the activity log file.
m PPP Status
This script displays the current status of the OT/PPP software. If there is no
active connection, the status is “idle.” If there is a connection, this script
causes information (such as connection time elapsed and time remaining) to
be displayed. A time value of -1 means “no limit.”
60
Appendix B / Using AppleScript with OT/PPP
AppleScript OT/PPP commands
The AppleScript commands for OT/PPP (including parameters) are listed here:
PPP connect: Initiates a PPP connection
PPP connect
[address string] — The connection address [telephone number]
[user name string] — The user name (cannot use guest address)
[password string] — The user password (cannot use guest address)
[guest access boolean] — Guest access (cannot use name or password)
[terminal window boolean] — Open terminal window
[connect script alias] — Use this connect script
[quiet mode boolean] — The result code; check the Open Transport PPP Errors List
[Result: small integer] — The result code; check the Open Transport/PPP Errors list
PPP disconnect: Closes a PPP connection
PPP disconnect
[after integer] — Number of seconds until disconnect
[Result: small integer] — The result code; check the Open Transport/PPP Errors list
PPP status: Retrieves the status of a PPP connection
[Result: PPPStatusParam] — The resulting status information
PPP save log: Saves the PPP log to a disk file
PPP save log
to file specification — Name of the file to which the log is saved
[clearing entries boolean] — Should the log entries be cleared after saving?
[appending boolean] — Should the log entries be appended to the disk file?
[Result: small integer] — the result code; check the Open Transport/PPP Errors list
Class PPPStatusParam: PPP connection status parameters
Properties:
state unknown/idle/connecting/connected/disconnecting [r/o] — State of this connection
seconds connected integer [r/o] — Time connected, in seconds
seconds remaining integer [r/o] — Time left for this connection, in seconds
user name string [r/o] — The name of the user for this connection
server name string [r/o] — The name of the system at the other end of this connection
message string [r/o] — The most recent message received for this connection
baud string [r/o] — The baud rate established for this connection
bytes in integer [r/o] — Number of bytes received during this connection
bytes out integer [r/p] — Number of bytes sent during this connection
AppleScript OT/PPP commands
61
Error codes
This section contains a partial list of the error codes that can be returned from
OT/PPP AppleScript commands, with corresponding descriptions. You can use
this information to tailor your script’s responses to errors.
Note: The error numbers are not in strict sequence. Some numbers in the
sequence may be missing. Other error codes may be returned from other parts
of the Mac OS during execution of an OT/PPP AppleScript command.
-7102: OT/PPP did not load properly at system start up.
-7103: OT/PPP could not set up a port.
-7104: OT/PPP is out of memory.
-7105: The requested action is not supported.
-7106: One or more resources are missing from OT/PPP’s installed files.
-7107: The Remote Access Connections file is not compatible with the
installed version of OT/PPP.
-7108: An action requiring a connection was requested when there was
no connection.
-7109: The connection attempt or established connection was terminated by
the user.
-7110: The user name is unknown.
-7111: The password is invalid.
-7112: An unexpected error with no useful information has occurred.
-7113: One or more of the installed OT/PPP files is damaged.
-7114: The requested action could not be performed because OT/PPP
was busy.
-7115: The OT/PPP logical port is in an unknown state.
-7116: The OT/PPP logical port is in an invalid state.
-7117: The OT/PPP logical port has detected an invalid serial protocol.
-7118: Login is disabled for the given user.
-7120: The server administrator requires the user to enter a password.
continued .
62
Appendix B / Using AppleScript with OT/PPP
-7122: OT/PPP could not initialize Open Transport.
-7123: The requested action could not be performed because OT/PPP is not
fully initialized yet.
-7124: TCP/IP is inactive and cannot be loaded.
-7125: TCP/IP is not yet configured.
-7126: PPP is not selected as the TCP/IP interface in the current
TCP/IP configuration.
-7128: The requested PPP protocol was rejected by the PPP peer.
-7129: PPP authentication failed.
-7130: PPP negotiation failed.
-7131: PPP was disconnected locally.
-7132: The PPP peer disconnected unexpectedly.
-7133: The PPP peer is not responding.
-7134: The OT/PPP log file is not open.
-7135: The OT/PPP log file is already open.
-7136: The OT/PPP log entry could not be retrieved.
-7138: OT/PPP can not locate the active System Folder.
-7139: OT/PPP can not locate its Preferences folder.
-7140: There is a preexisting file using an OT/PPP type or creator.
-7141: There is a preexisting folder using an OT/PPP folder name
and location.
-7142: The Remote Access Connections file is not open.
-7144: An unknown PPP control protocol type was received.
-7145: PPP received a packet with an invalid length.
-7146: PPP received a negotiable option with an invalid value.
-7147: PPP received a negotiable option with invalid flags.
-7148: PPP ran out of memory while negotiating with the peer.
-7152: PPP encountered an error with no useful information.
-7153: PPP is in an invalid state.
continued .
Error codes
63
-7163: The user canceled the password entry dialog.
-7164: The user did not respond to the password entry dialog in time.
-7165: An unknown Open Transport serial port was referenced.
-7166: The OT/PPP logical port is not configured.
-7167: No AppleTalk services endpoints are available.
-7168: The user canceled the modem script ASK or the Manual Dialing dialog.
64
Appendix B / Using AppleScript with OT/PPP
Appendix C Additions to the CCL Scripting Language for
Connect Scripts
This appendix is provided for users who are familiar with the
CCL scripting language.
The following varStrings have been added to the CCL scripting language
for the user name and password:
Name:
^11 or ^U
Password: ^12 or ^P
When the connect script is executed, the strings stored in the Name and
Password boxes of the PPP control panel replace these varStrings. However,
when you save a connect script, the user name and password that you entered
are replaced by ^U (or ^11) and ^P (or ^12), respectively. This is done so that
your name and password are not shown in clear ASCII form for others to see.
The ^U and ^P varStrings are provided as mnemonics for the user name and
password. However, you cannot use them as parameters of CCL for commands
that require a varString index, such as IFSTR.
Appendix D Using Null-Modem Scripts
If you are connecting through a serial cable rather than through a modem,
follow these instructions:
1
In the Modem control panel, use the Modem pop-up menu to select Null Modem 57600.
2
In the PPP control panel, type a number in the Number box, even though this is a dummy
telephone number and is meaningless.
The Connect button is not available unless a telephone number has been typed
in the Number box. Since a large majority of the users are using a modem, the
control panel was designed this way to avoid the common user error of
neglecting to enter a telephone number.