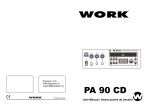
1
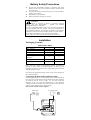
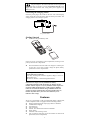
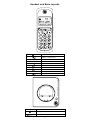
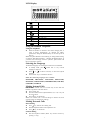
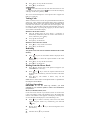
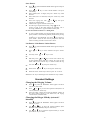
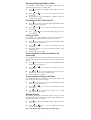
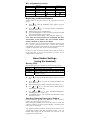
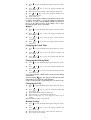
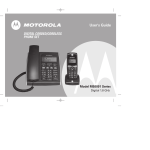
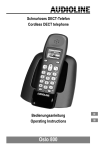
21825
Digital Cordless Telephone
With Dual Mode Caller ID
User’s Guide
Thomson Telecom
46, Quai Alphonse le Gallo,
92648 Boulogne Cedex, France
is a trademark of General Electric company and is under license by
Thomson Telecom, France.
Model: CE21825GEX-A
00017022 (Rev. 0
E)
06-43
Printed in China
Precautions of Use
The quality of communication depends on the location and
environment of the base and the handset. The 21825 must be kept
away from sources of excessive heat (radiators, direct sunlight, etc.)
and protected against vibrations and dust. Never allow your telephone
to come into contact with water or other liquids or with aerosols. To
reduce the risk of interference and optimize reception, take particular
care to keep it away from the immediate vicinity of windows, large
metal objects, reinforced concrete, televisions, music centres, halogen
lamps or heating devices, fluorescent lighting, burglar alarms,
microwave ovens, computers, etc.
To clean the 21825, use a lightly moistened antistatic cloth
Information for DECT product:
The 21825 telephone is compliant with the DECTTM* standard. It is
designed to transmit and receive telephone calls and be connected to
the public telephone “Country” network.
*DECT is a trademark registered by ETSI.
Safety
In the event of danger, the mains adaptor acts as 230V power
isolating device. It should therefore, as a precaution, be installed
close to the appliance and be easily accessible.
If the mains adaptor fails, it must be replaced by an identical model.
If not connected to the mains power or if there is a mains power
failure, installations with cordless handsets will no longer work. You
will then be unable to make or receive calls in the event of an
emergency. This is why we recommend that you also have a
conventional telephone as a backup. The appliance is designed for
connection to an analogue telephone line class TRT3
(telecommunications network voltage).
! Do not use your telephone to notify a gas leak when you are in
the vicinity of the leak.
It is recommended that you avoid using this device during electrical
storms.
Thomson Telecom hereby declares that the 21825 conforms to the
essential requirements and other applicable provisions of European
directive 1999/5/CE.
IMPORTANT: Because cordless phones operate on electricity, you
should have one phone in your home that isn’t cordless, in case the
power in your home goes out.
WARNING:
TO PREVENT FIRE OR ELECTRICAL SHOCK HAZARD, DO
NOT EXPOSE THIS PROCUCT TO RAIN OR MOISTURE.
THE LIGHTING
FLASH AND
ARROW HEAD
WITHIN THE
TRIANGLE IS A
WARNING SIGN
ALERTING YOU
OF “DANGEROUS
VOLTAGE”
INSIDE THE
PRODUCT.
CAUTION: TO
REDUCE THE RISK OF
ELECTRICAL SHOCK,
DO NOT REMOVE
COVER (OR BACK).
NO USER
SERVICEABLE PARTS
INSIDE. REFER
SERVICING TO
QUALIFIED SERVICE
PERSONNEL.
THE
EXCLAMATION
WITHIN THE
TRIANGLE IS
WARNING SIGN
ALERTING YOU
OF IMPORTANT
INSTRUCTIONS
ACCOMPANYIN
G THE
PRODUCT.
SEE MARKING ON BOTTOM / BACK OF PRODUCT
2
Battery Safety Precautions
z
z
z
z
Do not burn, disassemble, mutilate, or puncture. Like other
batteries of this type, toxic materials could be released which
can cause injury.
To reduce the risk of fire or personal injury, use only the battery
listed in User’s Guide.
Keep batteries out of children.
Remove batteries if storing over 30 days.
CAUTION:
Danger of explosion if battery is incorrectly replaced.
Replace only with GP60AAAHC – Ni-MH 1.2V 600mAh
rechargeable battery or equivalent.
Only use rechargeable batteries with exactly the same specifications
as those supplied with the product. Using non-rechargeable or
non-conforming batteries can damage the product. The batteries
could split or leak if incorrectly inserted, opened or exposed to heat.
Never dispose of batteries in a fire: the cell could explode.
Check with local code for possible special disposal instruction.
Installation
Packaging Contents
Model name: 21825
Base stations
Handsets
Power plugs
Telephone line
Batteries, type AAA, “1.2V
600mAh”
Charging station
Operating instructions
Solo Pack
1
1
1
1
Duo Pack*
1
2
2
1
2
4
0
1 + optional
1
1 + optional
Please check the contents of the package carefully. If anything is
missing or shows signs of transport damage, do NOT put the
telephone into service! In such a case, contact either your sales outlet
with the purchase receipt.
Note: Keep the equipment package so that it will not be damaged in
the event of transport.
Connecting the Base Station and Power Plug
Connecting the plugs to the corresponding sockets in the base station
(they can not be connected incorrectly because the sockets and plugs
are designed prevent reverse poling). Lay the cable under the
telephone to the rear. Plug the telephone line in the telephone
connection socket. Insert the power plug at the other end in the power
outlet. The base station in now ready to operate.
Only use the connection cable supplied.
Phone jack
AC power outlet
3
CAUTION:
Plug the adaptor to the socket outlet that near the equipment
and shall be easily accessible. Use only the Thomson Telecom power
supply that came with this unit. Using other power supplies may
damage the unit.
Connecting the charging station
Insert the power plug in the socket on the rear side of the charging
station. Insert the power plug at the other end in the power outlet. The
charging station is now ready to operate.
AC power outlet
Getting Started
z
Install and Charge the Battery Pack
Insert two pieces AAA batteries in the compartment, ensuring correct
polarity and close the compartment.
z
Place the handset in the base station to charge for 14 hours prior
for first use. If you don’t properly charge the phone, battery
performance will be compromised.
Warning: The handset does not work and damaged if the
wrong batteries are inserted.
Use Only Rechargeable batteries supplied (charge at least 14
hours before use).
Do Not use Alkaline or Non Rechargeable batteries.
If batteries are empty or newly installed into battery
compartment, handset LCD will not has any display and the
handset will not response to any key. Handset is then required to
put back on Base Station/Charger cradle to charge. Handset
cannot be used until 15 minutes charged. Handset name and
aerial icon appear. If handset does not charged full before use,
handset may emit battery low alert tone and battery level
indicator shows empty.
Features
We are very pleased that you have purchased this highly sophisticated,
cordless telephone which is equipped with the following features:
z
Digital cordless telephone complying to DECT* standards
z
10 MMI menu language
z
Teleconference
z
Call forwarding
z
Internal, free communication between handsets
z
Prefix dialing
z
Automatic call answering on/off
z
Call log function with caller list for 20 numbers or names from
phone book (network dependent)
4
z
z
z
z
z
z
z
z
z
z
z
z
z
z
z
z
z
Alphanumeric LCD display (7 segment, 10 segment display)
Phone book for 40 entries with name and call number
Extended redialing for 5 call numbers
Microphone muting function
Acoustic Low battery and range warning signals
Key lock
Key input tone on/off
10 incoming call ringing melodies
Ringing volume control (5 levels and silent)
DTMF/Pulse dialing
Operation of up to 4 handsets
Paging function from base station to handset
Programmable number barring
Up to 100 hours standby
Up to 8.5 hours continuous call time.
Operation with 2 standard AAA batteries (Ni-MH)
Adjustable flash time
*DECT = Digital Enhanced Cordless Telecommunication = Standard
for Cordless Telephones.
Menu Structure (Handset)
1 CALL LOG
2 PHONE BOOK
1 NEW ENTRY
ENTER NO
ENTER NAME
NORMAL RING
2 LIST ENTRY
VIP RING 1-10
3 EDIT ENTRY
4 DELETE
5 DELETE ALL
CONFIRM?
VOLUME
3 HANDSET
1 RINGER
[- - - - - ]
EXT RINGER
MELODY 1-10
INT RINGER
MELODY 1-10
2 HS NAME
3 PREFIX MEM
4 KEY TONE
4 BASE
ON/OFF
5 AUTO ANS
ON/OFF
6 CALL TIMER
ON/OFF
7 DEFAULT
CONFIRM?
8 REGISTER
SEARCHING
1 BARRING
ENTER PIN
HANDSET1,….
DISABLE
2 EMERGENCY
ENTER PIN
1
EXTERNAL
2
NUMBER
3 RINGER
[-----]
ENTER NO
MELODY
1-10
4 FLASH TIME
100/300/600
5 DIAL MODE
TONE
PULSE
6 CHANGE PIN
ENTER PIN
NEW PIN
7 DEFAULT
ENTER PIN
CONFIRM?
8 DEREGISTER
ENTER PIN
HANDSET1,…..
5 LANGUAGE
ENGLISH
DEUTSCH
ITALIANO
FRANCAIS
ESPANOL
PORTUGUES
NEDERLANDS
POLSKI
SVENSKA
TURKCE
5
REPEAT
CONFIRM?
Handset and Base Layouts
Menu / down key
CID key / Asterisk key
Int/ok
Int/ok key
C
Cancel
Mute key
Redial / Pause key /Up key
External call key.
Phone book key
Flash key
Hash key / lock key
R
Page
Paging
Charging
(amber)
Voice Mail Waiting Indicator (VMWI)/In-use (blue)
6
LCD Display
Battery icon
Phone icon
EXT
INT
External call icon
Internal call icon
CLI icon
No ring icon
▲/▼
Mute icon
Key lock icon
Aerial icon
Up / Down arrow
Voice mail waiting indicator (VMWI icon)
Using the Handset Telephone
Using the telephone
z
When the handset is inserted in the station charging unit, it
starts to charge automatically. To optimize the battery
performance, charge the handset battery for 14 hours prefer to
first use.
Note: This phone defaults to Tone Dialing. To change Pulse Dialing,
see chapter “Base Station Settings – Changing the Dialing Mode”. If
you don’t know which type of service you have, please check with
the local telephone company.
Selecting the Language
Ten different languages are available for selection for each handset.
z
In standby mode, press
language is displayed.
z
or
as often as necessary to select the required
Press
language.
Press “Int/ok” key to confirm the selection.
z
button and “5” key. Current
Note: The following languages are available:
ENGLISH; DEUTSCH; ITALIANO; FRANCAIS;
ESPANOL; PORTUGUES; NEDERLANDS; POLSKI;
SVENSKA; TURKCE
Making Internal Calls
IMPORTANT: Internal calls can be made only if more than one
handset is registered on the base station.
z
Press “Int/ok” key.
z
Press the number of the required handset (1,2,3 or 4). Carry out
the conversation.
key to end the call.
z
Press
Note: If an external call is received during an internal call, short
acoustic signals are emitted (call waiting).
Making External Calls
Direct dialing
z
z
z
Press
key and wait for a dialing tone.
Dial the telephone number and complete the call.
key to end the call.
Press
On hook dialing
z
Dial the telephone number (delete any incorrect entries by
pressing “C” key).
7
z
z
Press
Press
key to carry out the conversation.
key to end the call.
VMWI/LED
The
bule LED in the base unit will flash when there are new
voice message calls received. Icon
turns on and the LCD display
“Message” in the call log memory.
This service need subscription to local operator and it supports the
FSK CLI system only.
Taking Calls
When an external call is received, all registered handsets and the base
station ring. “EXT” flashes in the handset display and, if configured,
the telephone number of the caller appears (network depended). If the
caller has been entered in your phone book, the name appears. The
incoming call
blue LED on the base station flashes. In the case
of an internal call or on pressing the paging key on the base station,
“INT” flashes in the handset display.
Handset is in the base station
z
z
z
Take the handset from the base station; a connection is
automatically established (when the AUTO ANS function is
key.
active). Otherwise, press
Carry out the conversation.
key to end the call.
Press
Handset is not in the base station
z
z
Press
Press
key. Carry out the conversation.
key to end the call.
Redialing
The phone stores the last five numbers dialled in the redial
memory
z
Press
z
z
or
key to search the required number in the redial
memory list.
Press
key to carry out the conversation.
key to end the call.
Press
key; the last call number dialed is displayed. Press
Dialing from the Phone Book
z
Press
key; the first entry in the phone book appears. (Or
“MEM EMPTY” if no entry)
z
or
key to select the required subscriber from
Press
the phone book. Alternatively, enter the first letter of the name
required.
Press
key. The number is dialed. Carry out the
conversation.
z
Note: How to store entries in the phone book is explained in
the Chapter “Phone Book”.
Call Log Operations
IMPORTANT: To use the “Call Log” function, you must
subscribe to your network operator’s Caller Line Identification
(CLI) service.
Browse, Call Back, Delete, Save
If calls have been received in your absence, these are stored in the
CALL LOG memory when your telephone service has enabled this
function. The number of calls appears in the display. Incoming calls
are also indicated in the display for 10 seconds during a call.
z
key as often as necessary until CALL LOG menu
Press
appears and press “Int/ok” key. Alternatively, press and hold
“
z
Or
z
Or
” key.
Browse: Press
LOG memory.
or
Call Back: Press
key to call back.
key to browse through the CALL
8
z
Delete: Press and hold “C” key two seconds to delete one or all
the entries. Selection is made using
Or
z
or
key.
Save: Press
key to enter the subscribers in the phone book.
Enter the name and press “Int/ok” key.
Note: 1. The CALL LOG symbol and display indicator only
disappear after browsing through all the entries.
2. It is only possible to enter subscribers in the phone book
who are not already entered.
Muting the Microphone
z
Press
key to switch the microphone on or off during a call.
Holding Calls / Forwarding Calls
If the telephone is connected to a PABX system, it is possible to put
calls on hold and call other extension lines or to forward calls.
z
Press “R” key to put the call on hold and dial the extension
number (e.g. 23).
z
Press “R” key once more to take the call back again or press
key to forward the call.
Note: If several handsets are registered on the base station and
a call should be put on hold or forwarded, press “Int/ok” key
instead of “R”.
Note: The above information can vary according to the PABX
system used. Therefore, refer to the relevant information of the
PABX network.
Teleconference
After have received an external call, it is possible to include a second
handset in the conversation (three way conference).
z
Press “Int/ok” key and enter the number of the corresponding
handset (1,2,3 or 4) which will join the teleconference.
z
The external caller is kept on hold. As soon as the other handset
takes the call example handset 1 can intercom with handset 2.
z
Only the initiating handset can start a 3 way conference, press
” key 2 seconds.
and hold “
z
By pressing
key, any of the handsets quit from the
teleconference and the other handset continues with the external
call.
Changing the Receiver Volume
z
Press
call.
or
key to change the receiver volume during a
Paging the Handset
If a handset has been misplaced, it is possible to call all the handsets.
z
Short pressing the page key on base station can call all the
handsets.
z
Pressing the page key or any key in the handset can stop the
Entering a Dialing Pause (P)
If the telephone is connected to a PABX system, it may be necessary
to insert a dialing pause. To do this, press
key after entering
the relevant digit in the pre-dial buffer, e.g. 0, for an outside line
(0P….). A “P” appears in the display indicating a pause. The pause
can also be entered when programming numbers in the phone book.
Switching the Key Lock On/Off
Incoming calls can still be received when key locked.
z
Press and hold “
” key for 2 seconds to activate or
deactivate the key lock.
Phone Book
The telephone can store up to 40 entries in the phone book with name
and call number. When the function is supported by the telephone
provider service and the caller, the handset displays the name of the
caller (when stored in the phone book).
9
Store Entries
z
Press
key until the PHONE BOOK menu appears and press
“Int/ok” key.
z
or
key to select “NEW ENTRY” and press
Press
“Int/ok” key.
Enter number (max. 25 digits) and press “Int/ok” key when
finished.
Enter name (max. 10 characters) and press “Int/ok” key when
finished.
z
z
z
z
Select the ringing tone with
or
“Int/ok” key when finished.
“MEM FULL” appear stand for memory full.
key and press
z
If a VIP ring is assigned for that entry, a digit ‘ ’ will be
shown in front of the name during the incoming call or
browsing “MEM FULL” appear stand for memory full.
Or Store the number from the Pre - dialing mode
z
To store a phone number from the Pre-dialing mode (when a
phone number is entered during Standby mode before pressing
the
key) to the phonebook, first press
key, follow by
press “Int/ok”. Then, the user will be prompted to enter the
name. The Entry procedure will be same as above.
List Entries / Edit Entries / Delete Entries
z
Press
key until the PHONE BOOK menu appears and press
“Int/ok” key.
z
Press
key.
z
Or
List Entry: Press
z
Edit Entry: Press
or
key to scroll. Press “Int/ok” key
to start Number edition and press “Int/ok” key again to start
Name edition. Press “Int/ok” key to confirm. Select the ring
or
tone with
key to select submenu and press “Int/ok”
or
or
key to scroll.
key and press “Int/ok” key.
Or
z
Or
z
Delete: Press
or
key to scroll, press “Int/ok” key.
Delete All: Press “Int/ok” key 2 times or press “C” to cancel.
Note: Press “C” key to delete digit. Press and hold “C” key to EXIT.
Handset Settings
Changing the Ringing Volume
z
Press
key until the HANDSET menu appears and Press
“Int/ok” key three times.
z
Press
or
key to select the required volume(from 0 to
5 levels) and Press “Int/ok” key.
Note: The ringer volume can be heard at different volumes. If
the ringer symbol appears as non dotted line, the ringing
volume will be switched to OFF.
z
Changing the Ringer Melody (external /
internal)
z
Press
key until the HANDSET menu appears and Press
“Int/ok” key twice.
z
or
key to select the required submenu (EXT
Use
RINGER or INT RINGER) and press “Int/ok” key.
z
or
key to select the required melody (1-10) and
Use
press “Int/ok” key to confirm.
10
Entering/Changing Handset Name
It is possible to assign a name to each handset. This name is then
displayed when the phone is in standby mode.
z
Press
key until the HANDSET menu appears and press
“Int/ok” key.
z
Press
or
key to select the submenu and press
“Int/ok” key.
Enter/change the name of the handset (e.g. MOBIL 1) and press
“Int/ok” key to confirm.
z
Switching the Key Tone On/Off
z
Press
key as often as necessary until the HANDSET menu
appears and press “Int/ok” key.
z
or
Press
“Int/ok” key.
key to select the submenu and press
z
or
Press
key to confirm.
key to select the setting and press “Int/ok”
Saving a Prefix
It is possible to save prefix numbers in the handset. This number is
then recalled after pressing and hold “0” key for two seconds.
z
key as often as necessary until the HANDSET menu
Press
appears and press “Int/ok” key.
z
or
key to select the submenu and press
Press
“Int/ok” key.
Enter prefix number (e.g. access code of the subscriber you call
most frequently).
Press “Int/ok” key to confirm.
z
z
Activating/Deactivating Automatic Call
Answering
The automatic call answering function enables the incoming call to
be taken immediately when the handset is removed from the base
station.
z
key as often as necessary until the HANDSET menu
Press
appears and press “Int/ok” key.
z
Press
or
“Int/ok” key.
z
Use
or
key to switch automatic call answering on or
off and press “Int/ok” key to confirm the input.
Press “Int/ok” key to confirm.
z
key to select the submenu and press
Activating/Deactivating Call Timer
It is possible to display the call duration of a call on the handset. The
timer starts when the conversation begins.
z
key as often as necessary until the HANDSET menu
Press
appears and press “Int/ok” key.
z
Press
or
“Int/ok” key.
z
Use
or
key to switch the call timer on or off and
press “Int/ok” key to confirm.
key to select the submenu and press
Default Settings
The handsets can be reset to the default settings. In doing so, all the
settings which you have changed are returned to their default values.
The phone book entries are retained.
z
Press
key until the HANDSET menu appears and press
“Int/ok” key.
z
Press
or
key to select the submenu and press
“Int/ok” key to confirm.
Note: The display will switch back to standby mode.
11
Key assignment Overview
1
2
3
4
5
SPACE, 1
a, b, c, 2
d, e, f, 3
g, h, i, 4
j, k, l, 5
6
m, n, o, 6
7
8
9
0
p, q, r, s, 7
t, u, v, 8
w, x, y, z, 9
+, -, 0
[, ],
?, :,
Registering Additional Handsets
Further handset of the same model can be registered on one base
station.
z
key until the HANDSET menu appears and press
Press
“Int/ok” key.
z
Press
or
key to select the submenu “REGISTER”
and press “Int/ok” key.
Handset display shows “SEARCHING”.
Press and hold Page key on the base station more than 3seconds
until acknowledgement signal is heard.
Enter the PIN (default setting = 0000) and press “Int/ok” key.
z
z
z
Note: After the connection has been established, the name
and number of the handset (the next available handset
number should be 2) appear in the display.
The base will be ready for registration for 5 minutes when the page
key is pressed and hold for more than 3 seconds. After selecting
“REGISTER”, the handset starts searching for a base station which is
available for registration. The “Aerial” icon starts flashing.
If a base is found, user will be asked to enter the PIN for that base.
If the input PIN is correct, the registration procedure will be
completed with a confirm tone
Base Station Settings
(using the Handset)
Barring Calls
The following options are available for selection for barring calls:
Option
Description
DISABLE
All telephone calls are possible.
EXTERNAL
All external calls are barred.
NUMBER
Phone number starting with that number will be
barred, e.g. 0190
z
Press
key.
z
Press
or
key to select the submenu BARRING and
press “Int/ok” key.
Enter the PIN (factory setting is 0000) and press “Int/ok” key.
z
key until the BASE menu appears and press “Int/ok”
z
Use
or
key to select the handset which should be
barred and press “Int/ok” key.
z
Use
or
key to select DISABLE/EXTERNAL/
NUMBER and press “Int/ok” key.
If NUMBER selected, enter a number with maximum 5 digits.
Then press “Int/ok”.
z
Entering/Changing Emergency Number
Emergency numbers are free of any restriction, i.e. they can still be
called even if call barring of any kind is set.
Before emergency numbers can be used, they must be stored. The
emergency numbers can then be dialed manually or from the phone
book if they are stored there.
Two different emergency numbers (maximum of five digits) can be
programmed. Example: three digit emergency number = 123. All
numbers which begin with 123 are dialed even if the unit is only
programmed for internal calls.
12
z
Press
key.
z
or
key to select the required submenu and
Press
press “Int/ok” key.
Enter the PIN (factory setting = 0000) and press “Int/ok” key.
z
key until the BASE menu appears and press “Int/ok”
z
or
key to select the emergency number to be
Use
changed and change it.
z
Press “Int/ok” key.
Note: Save the emergency numbers in the phone book, too (refer
to chapter “Phone Book”), e.g. with self explanatory names such
as “Doctor” or “Fire”. If these numbers should be positioned at
the top of the phone book list in the display, enter a space
preceding the name “DOC” and “FIRE”.
Ringer
z
Press
key.
z
or
key to select the required submenu and
Press
Press “Int/ok” key.
z
Press
or
“Int/ok” key.
key to select the ringer volume and Press
z
Press
or
“Int/ok” key.
key to select the ringing melody and Press
key until the BASE menu appears and Press “Int/ok”
Changing the Flash Time
z
Press
key.
z
Press
or
key to select the required submenu and
press “Int/ok” key.
z
or
key to select the required flash time and
Press
press “Int/ok” key.
key until the BASE menu appears and press “Int/ok”
Changing the Dialing Mode
z
Press
key.
z
or
key to select the required submenu and
Press
press “Int/ok” key.
key until the BASE menu appears and press “Int/ok”
z
Press
or
key to select the required dialing mode and
press “Int/ok” key.
Note: This Flash Time / Dialing mode is used only when dialing
from handset.
key. This will get you into the tone mode
Note: By pressing
and will allow you to input the required number.
It will reset automatically to pulse dialing after you end your call.
Changing the PIN
z
Press
key.
key until the BASE menu appears and press “Int/ok”
z
Press
or
key to select the required submenu and
press “Int/ok” key.
z
Enter old PIN (0000) and press “Int/ok” key.
z
Enter new PIN (e.g. 1111) and press “Int/ok” key.
z
Enter new PIN again (e.g. 1111) and press “Int/ok” key to
confirm.
Note: maximum of 8 digits can be entered.
Default Settings
z
Press
key.
z
Press
or
key to select the required submenu and
press “Int/ok” key.
Enter the PIN (factory setting = 0000) and press “Int/ok” key.
Press “Int/ok” key to confirm.
z
z
key until the BASE menu appears and press “Int/ok”
13
Deregister HS
If several handsets are registered on one base station, they can
deregister each other mutually. The last handset can not be
deregistered.
z
Press
key.
z
Press
or
key to select the required submenu and
press “Int/ok” key.
Enter the PIN (factory setting = 0000) and press “Int/ok” key.
z
z
z
key until the BASE menu appears and press “Int/ok”
If necessary, Use
or
key to select the handset and
press “Int/ok” key.
Press “Int/ok” key to confirm.
Technical Specifications
Handset
Operating
Time:
(average
values*)
AC / DC Adaptor
AC / AC Adaptor (for
Handset charging)
Telephone connection
Rechargeable Battery
“WEEE” weight
Approx. 8.5 hours talk time
Approx. 100 hours standby
VD060035D
Input: 230V AC / 50 Hz
Output: 6V DC, 350mA
Single-phase AC excluding IT installations
defined by the EN 60950 standard.
Caution: the network voltage is classified
as a hazard by the criteria of this standard.
VA070020D
Input: 230V AC / 50 Hz
Output: 7V AC, 200mA
Single-phase AC excluding IT installations
defined by the EN 60950 standard.
Caution: the network voltage is classified
as a hazard by the criteria of this standard.
Appliance designed for connection to an
analogue telephone line class TRT3
(telecommunications network voltage) as
defined by the EN 60950 standard.
GP60AAAHC, 1.2V / 600mAh / Ni-MH,
AAA x 2 or equivalent
447g
* For guidance only, depends on initial battery charge.
General Product Care
Simply wipe the base station with a damp cloth or an antistatic wipe.
Never use a dry cloth as this can cause static discharge.
Periodically clean the charge contacts on the handset, base and
charger with a soft cloth.
Troubleshooting Guide
When you forget base PIN, following the procedure to Reset the units.
ALL MEMORY AND SETTING WILL BE LOST.
z
Refer to handset – Call Log Operation procedure, select
DELETE ALL to delete all Call Log Memories in handset.
z
Disconnect the line cord and AC power supply.
z
Hold "PAGE" button and plug in the AC power supply (in-use
LED will be on).
z
Release "PAGE" button after hear two beep tones and press it
two times again.
z
The In-Use LED will turn Off.
z
The unit will return to its default setting a PIN code (0000).
z
Unplug AC power of base station and plug in again, handset
LCD will display “ ---- ”.
z
Following “Registering Additional Handsets” to register all
handsets again.
14
PROBLEMS
Registration not
work.
No display.
No reactions to
keystroke.
No radio
connection to the
base station:
blinking!
CAUSES
The battery is not
sufficiently charged.
Handset and base
station were not
prepared for
registration.
The battery has not
been charged.
The keypad is locked.
The handset is outside
the base station range.
The handset is not
registered.
The base station does
not work.
SOLUTIONS
Charge the battery for
14 hours.
Unplug and then plug in
the power adaptor.
Charge the battery or
replace them.
Press
key longer
than 2 seconds.
Move closer to the base
station.
Register the handset (see
Registering Handset).
Unplug and then plug
the power adaptor to the
power outlet (220-230V
AC / 50 Hz) and the
other end into the power
jack on base bottom.
Environment
“WEEE” weight: 0.447Kg
Used equipment and used handset batteries must be disposed of in
compliance with current environmental protection regulations. You
should return them to your reseller or dispose of them at an approved
recycling centre.
Do not attempt to open the batteries, as they contain chemical
substance. In the event of leakage, avoid contact with the skin, eyes
and mouth. In the event of contact, rinse the affected part for several
minutes in running water. Clean the product with absorbent paper or
a dry cloth and contact your reseller for replacement batteries.
15