1
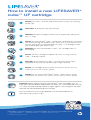
Quick User Guide
INSTRUCTIONS
This quick user guide should be used in conjuction with the
Instruction Manual provided with your LIFESAVER® cube™.
The full technical instruction booklet can be found online at
www.lifesaversystems.com.
FIRST USE
1 Priming - Unscrew and remove the pump from the
LIFESAVER® cube™. Fill with tap water, camp water
or water from any clean source to the top. Screw pump firmly back into place. Let stand for 5-10 minutes.
2 Pump & Discard - Turn the tap to the open position. Pump several times until water starts to flow. Empty cube™ through tap, do not drink. Repeat twice. Your LIFESAVER® cube is ready to use.
ROUTINE USE
®
1 Caution! - When filling the LIFESAVER cube™ with water
take care to keep the tap area clean.
2 Filling - Unscrew and remove pump. Fill with water from
tap, camp, river, lake, stream or other source to the top. Use the cleanest water source available. This will prolong the life of your LIFESAVER® cube™.
3 Pumping - Ensure tap is closed and pump a few times.
4 Drinking - Push tap cap down and turn tap cap to open
position or twist and lock tap cap to enable clean, sterile
drinking water to flow. Continue to pump to improve flow. Turn tap off after use.
®
5 Operation & Storage - Your LIFESAVER cube™ will
work in different orientations. As the water gets low
changing the orientations will improve the flow rate.
Protect from freezing and shocks.
IMPORTANT
• Ensure the product is always kept full of water once primed
• Do not drop or subject to shock
• Be careful not to over pump & over pressurise this product
© 2007-2013 LIFESAVER® systems ltd. All rights reserved. Patents and registered designs pending and
granted. LIFESAVER® is a registered trade mark. The following are trademarks of the LIFESAVER® group of
companies:- FOR A HOSTILE WORLD™, FILL.PUMP.DRINK™, FAILSAFE™
V1.0
How to install a new LIFESAVER®
cube™ UF cartridge
1 Empty the cube™ of water and release pressure by unscrewing
pump cap.
2 Unscrew and remove tap cap and tap.
3 Remove the old cartridge and discard it responsibly along with
the “O” rings.
®
4 Clean the LIFESAVER cube™ and pump completely by washing it
with mild washing up liquid in warm water (use a soft cloth for this).
Ensure that all dirt is removed and the cube™ is thoroughly clean.
Rinse thoroughly and allow to dry.
®
5 Remove the new LIFESAVER cube™ UF cartridge from it’s
packaging.
6 Insert the new cartridge complete with new “O” rings into the
cube™ and press down.
7 Thread tap cap onto the cube™. Ensure that the tap cap is
tightened firmly with the tap pointing straight forward.
8 Prime the cartridge (please follow instructions for the first use shown on the reverse of this guide).
®
9 Ready to use your LIFESAVER cube™ again (please follow instructions for routine use shown on the reverse of this guide).
Caution! When replacing the LIFESAVER® filter cartridge, the “O”
rings positioned above and below the filter must be renewed. Ensure
“O” rings are positioned correctly tight against the flange of the filter
and are not pinched during reassembly.
The full technical instruction booklet can be found online at
www.lifesaversystems.com.
LIFESAVER® systems ltd, Hall Chase, London Road, Marks Tey, Colchester, Essex CO6 1EH UK
t +44(0)1206 580999 f +44(0)1206 215679 e [email protected]
w www.lifesaversystems.com