1
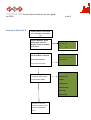
Service Date Interface Unit user guide
Jan 2010
issue 2
Contents
Service Data Interface Unit (SDIU)Description ................................................................................................................ 2
General Operation ............................................................................................................................................................ 2
SDIU Layout & Keypad functions ...................................................................................................................................... 4
Turn on & link to SCU........................................................................................................................................................ 5
Power Save Mode ............................................................................................................................................................. 6
Production data Mode ...................................................................................................................................................... 6
View Production data.................................................................................................................................................... 6
Edit Production Data..................................................................................................................................................... 7
Send Production data.................................................................................................................................................... 7
Service Data Mode............................................................................................................................................................ 8
Entering service data .................................................................................................................................................... 8
Repair Mode...................................................................................................................................................................... 1
Display Mode ..................................................................................................................................................................11
Mattress Test Mode.......................................................................................................................................................... 1
Fault Log Mode ...............................................................................................................................................................14
SDIU set up Mode ...........................................................................................................................................................14
Battery Mode ..................................................................................................................................................................15
Data Exchange with a PC.................................................................................................................................................16
Turning off the SDIU........................................................................................................................................................16
Batteries..........................................................................................................................................................................16
SDIU maintenance & Technical support .........................................................................................................................16
General Maintenance .................................................................................................................................................16
Software updates........................................................................................................................................................16
Technical support........................................................................................................................................................16
Page 1 of 16
Service Date Interface Unit user guide
Jan 2010
issue 2
Service Data Interface Unit (SDIU)Description
The SDIU is a sophisticated state of the art microprocessor controlled special to type test equipment ,designed to
reduce equipment down time and increase service efficiency by helping the field or hospital service engineer
maintain & repair any of the range of Linet Active Pressure relieving mattresses.
The SDIU has a strong ABS equipment casing that is designed to survive in the engineers tool kit and workshop or
field repair environments.
The Infra-red data link provides easy , reliable instant connection to any of the lInet range of SCUs without the need
to open the Pump or additional external cables.
The SDIU can be used to simply check the Production details of the SCU or review and update the Fault and service
data thus providing the service engineer with;
•
•
A live service history of the unit without the need to contact head office for service records.
An instant log of any faults that the unit has experienced and when they occurred.
The powerful Repair, Display & Mattress test modes allow ,at the touch of a button ,all product functions and SCU
components to be tested without opening the SCU case. Also greatly reducing the time taken for fault diagnosis and
eliminating time wasted trying to repair by component substitution.
If required for your service organisation the Data Exchange facility SCU repair & test information can be stored and
downloaded to a PC on return to base thus reducing the need for and time taken writing or typing in service details.
The SDIU’s own firmware can easily be updated to take enable it to be used with any new Linet models or updates
to current model SCUs this allowing the SDIU to keep pace with the product range and being a service engineers
tool for life.
General Operation
If using the SDIU for the first time or after changing the batteries the SDIU data will need to be set up ,see relevant
section of this manual.
The SDIU I.R link is very reliable and can operate a long distances from the SCU, it is however recommended to ho;d
the SDIU approximately level with the SCU I.R window and at no more than 0.5Mtr form the SCU so that the SCU
display panel can be seen and its mode of operation monitored.
If communication to the SCU is lost for any reason , the SDIU will always try to automatically recover the link. If
communication cannot be automatically re-established you will need to return to the Link menu and press F2.
If there is no SCU in range or the SCU has no mains power connected or is not turned on, the display will show,
Page 2 of 16
Error no SCU reply
Service Date Interface Unit user guide
Jan 2010
issue 2
and only the SDIU set up mode will be available.
Page 3 of 16
Service Date Interface Unit user guide
Jan 2010
issue 2
SDIU Infra-Red (I.R)
window. Must be
pointed at SCU I.R
Window CPR label above
SDIU Layout & Keypad functions
LCD display with back
light. Displays SDIU &
SCU status& data.
Not linked to SCU
Press F2 to link to SCU
Time
Day
Date
Menu Navigation
pad. Use up↑
,Down↓, left ←&
right →keys to
move through on
screen menus & ok
√ to accept
changes
Green power light.
Illuminated when
SDIU is live , flashing
when SDIU in power
save mode
F1(Go ) button
Soft function keys F1-F6
key functions defined in on
screen menus
Press & hold for 3 seconds to
turn SDIU on or off or to exit
power save mode
F4 + & F5 - keys used to select
required characters by moving
up|(F4) or down(F5) through the
available number, character or
symbol range
USB computer
connection for data
exchange
Page 4 of 16
Service Date Interface Unit user guide
Jan 2010
Turn on & link to SCU
issue 2
F1(Go ) button Press & hold
for 3 seconds to turn SDIU
on
Single audio tone .Green
power light comes on.
Display comes on showing
Link screen
Point SDIU I.R window at
the IR window on the SCU
Not linked to SCU
Press F2 to link to SCU
Time
Day
Date
Linked to Model type
SCU firmware version ver x.xx
Press F2 to connect.
S/N xxxxxxxxxxx
Link screen will show
Production data
Use → or ← keys on
navigation pad to select
required SDIU Mode
Service data
Repair
Display test
Mattress test
Fault Log
SDIU Set up
Use ↑or ↓ keys on
navigation pad to enter
required SDIU Mode
menu
Page 5 of 16
Service Date Interface Unit user guide
Jan 2010
issue 2
Power Save Mode
If no SDIU control button is used for 3 minutes the SDIU will automatically go into power save mode to help
conserve battery power.
In this mode the Green power LED will flash to indicate that Power save mode is active and the mains display will
show no data.
Provided that it is not moved out of range of the SCU the I.R link will be maintained and the selected SDIU operating
mode will continue to function.
To exit power save mode and return to full display operation simply give the F1 button one short press..
Production data Mode
This mode allows the operator to read & Edit the production data that has been loaded during the manufacture of
the SCU. This data is made up of 112 characters , the first 11 being the SCU Serial number.
The data edit function is provided so that the service engineer can load the correct SCU production data into an SCU
if the main control circuit board has to be replaced.
View Production data
Display will show Production data
menu. Press F1,2 as required
Press F1 Display will show 112
production data characters. First 11
characters are SCU serial number rest
of content format not yet defined.
Use ↑or ↓ keys on
navigation pad to
return to Production
data Menu
Page 6 of 16
Get Data from SCU
F1
Edit Data
F2
Send data
F3
20091809173****************
***************************
***************************
*************************
Service Date Interface Unit user guide
Jan 2010
issue 2
Edit Production Data
Display will show Production data
menu. Press F1,2 as required
Press F2 Display will show 112
production data characters. First 11
characters are SCU serial number rest
of content format not yet defined.
defined)
Get Data from SCU
F1
Edit Data
F2
Send data
F3
20091809173****************
***************************
***************************
*************************
Use F4 & F5 keys on
navigation pad to
select data content &
→← to move position
Send Production data
Press F3 Display will go blank for a
couple of seconds then show data
sent ok
Get Data from SCU
F1
Edit Data
F2
Send data
F3
Data sent to SCU ok
Use ↑or ↓ keys on
navigation pad to
Page 7 of 16
return to Production
data Menu
Service Date Interface Unit user guide
Jan 2010
issue 2
Service Data Mode
This mode allows the service engineer to review and update the service data stored in the SCU.
Display will show Service data menu.
Press F1,2,,4 as required
Enter service data
Get data from SCU
Reset service indicator
Entering service data
F1
F2
F4
Press F1 Display will show Service
data. Entry menu
02 Nov 09 @14.29
Today’s date (SDIU fills this
automatically)
Service Engineer code
##########
Service engineer code (SDIU fills this
automatically)
Run Time 0000000.3
Service data 10 digits (Enter this data
using F4,5&6)
Run time since manufacture.
Use ↑or ↓ keys on navigation
pad to return to Service data
Menu
Press F3 to send service data
Enter service data
Get data from SCU
Bottom line of screen will show
data send status
F3
Reset service indicator
F4
Send new service
F1 send/F2 cancel
Send new service
data entry to SCU?
Sending Data
When Data sent ok
Use ↑or ↓ keys on navigation pad
to return to Service data Menu
Page 8 of 16
F2
Send data to SCU
data entry to SCU?
Then F1 or F2 to send or cancel
F1
Send new service
data entry to SCU?
Data sent to SCU ok
Service Date Interface Unit user guide
Jan 2010
issue 2
Reading service data
Press F2 on Service data.
Display will show last service data
entry
Enter service data
Get data from SCU
Reset service indicator
Today’s date
Service engineer code
02 Nov 09 @14.29
Service data 10 digits
Service Engineer code
Run time since manufacture.
##########
Run Time 0000000.3
Use →←keys
to scroll through data content move
position
Use ↑or ↓ keys on navigation pad
to return to Service data Menu
Page 9 of 16
F1
F2
F4
Service Date Interface Unit user guide
Jan 2010
issue 2
Reset Service Indicator
Press F4 on Service data.
Display will show ask you to confirm
reset action
Enter service data
F1
Get data from SCU
F2
Reset service indicator
Press F1 to confirm
Display will then indicate if the Service
indicator has been reset
Confirm reset
Service indicator
F1 confirm/F2 Cancel
SCU Service
indicator
reset ok
Use ↑or ↓ keys on navigation pad
to return to Service data Menu
Repair Mode
Display will show
Status of push buttons of front panel
Button Status
Air con Fitted
I3 mattress fitted
0= off *=on. This can be used to test
each button.
Order of indictors is
GO,-,+,Mode, Mute
Press each button in turn to test
Display will then indicate if the Service
indicator has been reset
Page 10 of 16
Back rest position
0000
F4
Service Date Interface Unit user guide
Jan 2010
issue 2
Display will show if the mattress is
connected and the type of mattress
Button Status
0000
Air con Fitted
I3 mattress fitted
Virtuoso, Virtuoso 2 or Precioso
Back rest position
Display will show the backrest
position lowered or raised
Use ↓ to move onto the next screen
or ↑or key on navigation pad to
return to Repair Mode top level.
Compressor off
F1
Rotary Valve ? Degrees <E>
Buzzer test
F3
Led Test 1 off F4,5,6
Display will show
Compressor on or off use F1 to switch state
Rotary valve position
Use √ key on navigation pad to select & Use
→←keys
scroll through positions
Display will show Led test .
Select the number of the LED to be tested using F4 & F5
Use F6 to turn LED off/on
LED numbers are: Pressure adjust indicator 1-5, mode 6, static
7,Evaluation 8,Battery 9,Backrest 10,Seat 11,Service 12,CPR 13,Fault 14
Page 11 of 16
Service Date Interface Unit user guide
Jan 2010
issue 2
Display Mode
The first Display mode screen will
show the status of all indicators on
the SCU front panel
Mode = Alternating ,Static,Evaluation
mmHg 00000 Mode 000
Back 0
Seat 0
CPR 0
Fail 0
Bat 0
Serv 0
F6 back rest toggle
F6 can be used to toggle the backrest
indicator on/off.
Use →←keys to change F6 option to
Use ↑or ↓ keys on navigation pad
to return to Display mode top level
Menu or move down to next level
The second Display mode screen will
show the performance of the rotor
valve
Run time = operating hours since
manufacture
Last home = number of steps since
home position was last passed.
Back lash= number of steps lost when
rotor moves backwards
Use ↑or ↓ keys on navigation pad
to return to Display mode top level
Menu or move down to next level
Page 12 of 16
SCU Data Display
Run Time = 0000000.0
Last home= xxxx
Backlash=xxxx
Service Date Interface Unit user guide
Jan 2010
issue 2
Mattress Test Mode
Display will give the option to display
or record mattress pressure readings
Display readings F2
Record readings F3
Select F2
Display Readings
Display will show current mattress
pressure readings in mmHG
Press F1 to end test & return to first
menu screen
Pressure Reading
A=00.00 B=00.00
C=00.00 S=00.00
F1 to end test
Record readings
Display will give the option to display
or record mattress pressure readings
Display readings F2
Record readings F3
Select F3
Display will give option to set
recording time using F4/5
Record Reading
Set time to record
3 mins
Press √ to start test
Display will show pressure readings
and time left to run test
Pressure Reading
At end of test display will show test
complete
C=00.00 S=00.00
Press F1 to exit test & return to
Mattress test top level menu
A=00.00 B=00.00
Time to go =15 mins
Pressure Reading
A=00.00 B=00.00
C=00.00 S=00.00
Page 13 of 16
Test Complete press F1
Service Date Interface Unit user guide
Jan 2010
issue 2
Fault Log Mode
Display will show fault log entries
Fault Log 1
Run Time 0000000.0
Entry number
Fault code
Run time when fault occurred
Fault cells ABCS
Fault Code
If applicable which cell(s) caused the
fault
Use →←keys to scroll through log
entries
Use ↑or ↓ keys on navigation pad
to return to Fault log top level Menu
SDIU set up Mode
This is the only mode that will be available if the SDIU is not linked to an SCU.
This mode is used to set the service engineers code & SDIU time & date .
Display will show Back light setting
Set LCD Back light
Back light =off
Use F4/F5 to set level from range :
Off,1-20,Full (note use minimum level
necessary to save battery power)
Use ↓ keys on navigation pad to to
move onto next screen
Page 14 of 16
Service Date Interface Unit user guide
Jan 2010
issue 2
Display will show time & date menu
Set LCD Back light
Set SDIU Time & Date
Use ↑↓ →←keys on navigation pad
to select digit to change.
12:54:43
Sun 1 Jan 0000
Use F4/F5 to change digit (note after
replacing battery change year using
F5 to 2099 then F4 to select 2009)
Use ↓ keys on navigation pad to
move onto next screen
Set LCD Back light
Set service engineer
Press √ to Select first service engineer
code digit. Use F4/F5 to change value
#######
Use ↓ keys on navigation pad to
move onto next screen
Set LCD Back light
Press √ to select language field
English
Use F4/F5 to language type
Press √ to confirm selection
Use ↑or ↓ keys on navigation pad
to return to Fault log top level Menu
Battery Mode
Not yet available
Page 15 of 16
Current Language
Service Date Interface Unit user guide
Jan 2010
issue 2
Data Exchange with a PC
Not yet available
Turning off the SDIU
To Turn off your SDIU simply return to the Link Menu ,press F2 then Press and hold the F1 button for 3 seconds .
There will be a short single audio tone and the mains display and green power Led will go off.
Do not leave the SDIU in Power save mode when not in use as this will greatly reduce the life of the internal
batteries.
Batteries
The SDIU is power by two type AA 1.5 v Alkaline batteries. Depending on the length of time the SDIU is turned on
for ,should provide at least twelve months of average daily usage. It is not recommended to use rechargeable
batteries as they will changing more often and the SDIU set up data will need to be reset each time the batteries are
changed.
The Batteries are accessed via the battery compartment cover on the rear of the SDIU , there is no need to open the
main SDIU case.
It is recommended that Batteries should be inspected once a year to ensure that no leakage or corrosion has
occurred. If there any signs or this occurring both batteries should be replaced immediately after cleaning the
battery terminals.
Alkaline batteries should be disposed of in accordance with your local environmental waste policies & procedures
SDIU maintenance & Technical support
General Maintenance
Software updates
Technical support
Page 16 of 16