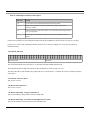
1
Malibu Library User's Manual
Malibu Library User's
Manual
The Malibu Library User's Manual was prepared by the technical staff
of Innovative Integration on June 28, 2011.
For further assistance contact:
Innovative Integration
2390-A Ward Ave
Simi Valley, California 93065
PH:
FAX:
(805) 578-4260
(805) 578-4225
email: [email protected]
Website: www.innovative-dsp.com
This document is copyright 2011 by Innovative Integration. All rights
are reserved.
$/Distributions/Components/Malibu/Documentation/OO_Manual/Mali
bu.pdf
Rev 1.4
Table of Contents
Chapter 1. Introduction..........................................................................................................................10
Real Time Solutions!.............................................................................................................................................................10
Vocabulary.............................................................................................................................................................................10
What is Malibu? ........................................................................................................................................................10
What is wxWidgets?...................................................................................................................................................10
What is C++ Builder?.................................................................................................................................................11
What is Microsoft MSVC?.........................................................................................................................................11
What is DialogBlocks?...............................................................................................................................................11
What kinds of applications are possible with Innovative Integration hardware?.......................................................11
Why do I need to use Malibu with my Baseboard?....................................................................................................11
Finding detailed information on Malibu.....................................................................................................................12
Online Help......................................................................................................................................................................12
Innovative Integration Technical Support........................................................................................................................12
Innovative Integration Web Site......................................................................................................................................13
Typographic Conventions......................................................................................................................................................13
Chapter 2. A Tour of Malibu.................................................................................................................14
Malibu Architecture...............................................................................................................................................................14
High Performance Code...................................................................................................................................................14
Synergistic operation with DSP co-processor boards......................................................................................................14
A Portable Class Library..................................................................................................................................................15
Class Groups In Malibu.........................................................................................................................................................15
Operating System Independence...........................................................................................................................................16
Malibu Namespaces...............................................................................................................................................................17
Interface Classes in Malibu....................................................................................................................................................17
Event Callbacks in Malibu.....................................................................................................................................................19
UI Thread Synchronization..............................................................................................................................................20
Using the Malibu Library......................................................................................................................................................20
Creating a Streaming Application in Visual C++............................................................................................................21
Creating the Malibu Objects.......................................................................................................................................21
Initializing Object Properties and Events...................................................................................................................22
Event Handler Code...................................................................................................................................................23
Loading COFF Files...................................................................................................................................................25
Loading Logic Files....................................................................................................................................................25
Script Files..................................................................................................................................................................26
Chapter 3. Creating Applications using an IDE..................................................................................27
Creating Projects in Borland C++ Builder 6.0.......................................................................................................................27
Enabling Auto-Saving of Projects.........................................................................................................................................27
Creating a Malibu Project......................................................................................................................................................28
Creating a Malibu Project in Borland Developer's Studio/Turbo C++..................................................................................31
Enabling Auto-Saving of Projects.........................................................................................................................................31
Default Project Options which should be Changed...............................................................................................................32
Creating a Malibu Project in Microsoft Visual Studio 7.......................................................................................................34
Enabling Auto-Saving of Projects.........................................................................................................................................34
Creating a Malibu Project......................................................................................................................................................34
Other Configuration Requirements........................................................................................................................................36
Malibu Library User's Manual
3
Creating a Malibu Project in Microsoft Visual Studio Vc8/Vc9...........................................................................................37
Enabling Auto-Saving of Projects.........................................................................................................................................37
Creating a Malibu Project......................................................................................................................................................38
Other Configuration Requirements........................................................................................................................................40
Creating a Malibu Application using Anthemion DialogBlocks...........................................................................................41
Build wxWidgets Library......................................................................................................................................................41
Creating a Malibu Application using Nokia QtCreator.........................................................................................................45
Install and/or Rebuild Qt Library...........................................................................................................................................45
Chapter 4. The Malibu Framework Library.......................................................................................50
Framework Support Classes.................................................................................................................................................50
Thunking..........................................................................................................................................................................50
Chapter 5. The Malibu OS Library......................................................................................................51
Thread Support Classes........................................................................................................................................................51
Threads.............................................................................................................................................................................51
Signals..............................................................................................................................................................................51
Resource Control..............................................................................................................................................................52
Inter-Thread Communications ........................................................................................................................................52
Operating-System ............................................................................................................................................................52
Chapter 6. The Malibu Utility Library.................................................................................................53
Buffer Classes........................................................................................................................................................................53
Message Packet Classes...................................................................................................................................................53
Disk I/O Classes...............................................................................................................................................................53
Data Recording and Playback Classes.............................................................................................................................54
System Components.........................................................................................................................................................54
File Support Methods.......................................................................................................................................................55
String Support .................................................................................................................................................................55
Matlab Interface Classes..................................................................................................................................................55
Data Set Classes...............................................................................................................................................................56
Chapter 7. The Malibu Hardware Library..........................................................................................57
Target I/O Streaming Classes................................................................................................................................................57
Interface Classes....................................................................................................................................................................58
Timebase Classes...................................................................................................................................................................58
Hardware Support Classes.....................................................................................................................................................58
Hardware Register Classes....................................................................................................................................................59
Chapter 8. The Malibu Analysis Library.............................................................................................60
Statistical Analysis Classes....................................................................................................................................................60
Signal Processing Classes......................................................................................................................................................60
Signal Generation Classes.....................................................................................................................................................61
Chapter 9. The Malibu PCI Library.....................................................................................................63
PCI Baseboard Classes..........................................................................................................................................................63
Baseboards and PMC Modules..................................................................................................................................63
PMC Module Classes.............................................................................................................................................................64
XMC Module Classes............................................................................................................................................................64
Chapter 10. The Malibu Ethernet Library...........................................................................................66
Malibu Library User's Manual
4
Baseboard Classes..................................................................................................................................................................66
Chapter 11. Writing Custom Applications...........................................................................................67
The ASnap Example........................................................................................................................................................67
Tools Required.................................................................................................................................................................67
Program Design................................................................................................................................................................68
The Host Application ............................................................................................................................................................68
User Interface...................................................................................................................................................................68
Host Side Program Organization.....................................................................................................................................69
ApplicationIo....................................................................................................................................................................69
Initialization................................................................................................................................................................69
Logic Loading............................................................................................................................................................71
COFF File Loading.....................................................................................................................................................72
Starting a Data Capture..............................................................................................................................................73
The Target Application....................................................................................................................................................74
Main Thread...............................................................................................................................................................74
The Capture Thread....................................................................................................................................................74
Configuring Data Acquisition....................................................................................................................................76
The Close() Method....................................................................................................................................................78
Data Logging....................................................................................................................................................................78
Command Packet Reception.......................................................................................................................................78
Data Packet Reception................................................................................................................................................79
Chapter 12. Malibu Buffer Classes.......................................................................................................80
Buffer Design Decisions........................................................................................................................................................80
Design Decision #1 – A “Typeless” Buffer class............................................................................................................80
Design Decision #2 – Data Access Datagrams................................................................................................................80
Design Decision #3 – Predefined Access Datagram Classes...........................................................................................81
Design Decision #4 – IPP Datagram Classes...................................................................................................................81
Buffer Internals......................................................................................................................................................................82
Data Buffers : The Innovative::Buffer Class.........................................................................................................................82
Buffer Class (Buffer_Mb.h).......................................................................................................................................83
Holding Template (Buffer_Mb.h)..............................................................................................................................83
MessageDatagram (Buffer_Mb.h)..............................................................................................................................83
Buffer Data Access................................................................................................................................................................83
Access Template Features................................................................................................................................................84
Template AccessDatagram<T> (AccessDatagrams_Mb.h).......................................................................................84
Template Class DatagramIterator (AccessDatagrams_Mb.h)....................................................................................85
Interface Class IDatagrammable (AccessDatagrams_Mb.h).....................................................................................87
Interface Class IIteratable (AccessDatagrams_Mb.h)................................................................................................87
Standard Implementation Classes....................................................................................................................................87
IntegerDG (BufferDatagrams_Mb.h).........................................................................................................................87
UIntegerDG (BufferDatagrams_Mb.h)......................................................................................................................87
FloatDG (BufferDatagrams_Mb.h)............................................................................................................................88
ShortDG (BufferDatagrams_Mb.h)............................................................................................................................88
ComplexDG (BufferDatagrams_Mb.h)......................................................................................................................88
CharDG (BufferDatagrams_Mb.h).............................................................................................................................88
IPP Implementation Classes.............................................................................................................................................88
IppCharDG (IppCharDG_Mb.h)................................................................................................................................88
IppComplexDG (IppComplexDG_Mb.h)..................................................................................................................88
IppFloatDG (IppFloatDG_Mb.h)...............................................................................................................................88
Malibu Library User's Manual
5
IppIntegerDG (IppIntegerDG_Mb.h).........................................................................................................................89
IppShortDG (IppShortDG_Mb.h)..............................................................................................................................89
Special Purpose Datagrams..............................................................................................................................................89
PacketBufferHeader (BufferHeader_Mb.h)...............................................................................................................89
IDatagram Template (Datagram_Mb.h).....................................................................................................................89
MessageDatagram (Buffer_Mb.h)..............................................................................................................................89
Internal Datagrams (various CPPs)............................................................................................................................89
Guidelines for Converting to new Buffers.............................................................................................................................90
Translate all buffers to be Innovative::Buffer............................................................................................................90
Convert array operators on buffers.............................................................................................................................90
Size Issues..................................................................................................................................................................90
Datagrams and Iterators are Disposable.....................................................................................................................91
Packet Stream Header Access....................................................................................................................................91
Porting Buffer Access Modes #1 – The Aztec Model................................................................................................91
Porting Buffer Access Modes #2 – Buffer [] operator...............................................................................................92
Porting Buffer Access Modes #3 -- Applying a Structure to Buffer Content............................................................94
Chapter 13. Using the X6 Family Baseboards in Malibu....................................................................95
Overview................................................................................................................................................................................95
Buffers and their Type...........................................................................................................................................................95
Buffer Conversions..........................................................................................................................................................96
Applying a Type.........................................................................................................................................................96
Buffer Sizing Template Functions...................................................................................................................................97
Holding<T>() :: Sizing a buffer to hold N elements..................................................................................................97
CouldHold<T>() :: Elements in a current buffer........................................................................................................97
Buffer Header Datagrams................................................................................................................................................97
Buffer Trailer Datagrams.................................................................................................................................................98
Buffer Header/Trailer Utility Functions...........................................................................................................................98
Clear Functions...........................................................................................................................................................98
Header Correctness Functions....................................................................................................................................98
Trailer Correctness Functions.....................................................................................................................................99
Header Size Conversion.............................................................................................................................................99
New Streaming Object – VitaPacketStream..........................................................................................................................99
Connection..................................................................................................................................................................99
Native Buffer Methods...............................................................................................................................................99
Send and Recv Methods...........................................................................................................................................100
Stream Data Notification Events..............................................................................................................................100
Direct Data Mode.....................................................................................................................................................100
Working with Vita Packet Streams......................................................................................................................................100
VitaPacketParser – Parsing Input Packets......................................................................................................................100
VitaPacketPacker – Filling Output Packets...................................................................................................................102
Chapter 14. Vita Packet Format..........................................................................................................104
Overview..............................................................................................................................................................................104
X6 Velocia Packets..............................................................................................................................................................104
Packet Header Format....................................................................................................................................................104
Packet Data Format........................................................................................................................................................105
X6 Vita Packets...................................................................................................................................................................105
Packet Header Format....................................................................................................................................................106
VITA Header IF word..............................................................................................................................................106
VITA Header SID word...........................................................................................................................................107
Malibu Library User's Manual
6
VITA Header Class OUI Word................................................................................................................................107
Vita Header Class Info Word...................................................................................................................................107
Vita Header Timestamp – Integer Seconds Word....................................................................................................107
Vita Header Timestamp – Fractional Seconds High and Low Words.....................................................................107
Vita Packet Trailer Format.............................................................................................................................................108
VITA Trailer Word...................................................................................................................................................108
State and Event Bits and Enable Bits.......................................................................................................................108
Bits 20-23.................................................................................................................................................................108
Context Packet Count...............................................................................................................................................108
Padding.....................................................................................................................................................................108
Chapter 15. Interfacing to Software Applications via a DLL...........................................................110
Overview..............................................................................................................................................................................110
Development Approach.......................................................................................................................................................110
Example Source...................................................................................................................................................................110
Chapter 16. Using the embedded FICL interpreter..........................................................................112
Ficl Features.........................................................................................................................................................................112
A Beginners Guide...............................................................................................................................................................113
Using Ficl.......................................................................................................................................................................113
Malibu Library User's Manual
7
List of Tables
Table 1. Path Spec Options....................................................................................................................................................30
Table 2. Path Spec Options....................................................................................................................................................35
Table 3. Path Spec Options....................................................................................................................................................39
Table 4. Development Tools for the Asnap Example............................................................................................................67
Table 5. Basic Buffer Datagram Classes...............................................................................................................................81
Table 6. IPP Function Datagrams..........................................................................................................................................81
Table 7. PacketBufferHeader Field Methods........................................................................................................................89
Table 8. X6 Velocia (Velo) Packet Header.........................................................................................................................104
Table 9. Velocia Header Word............................................................................................................................................104
Table 10. Vita Packet Format..............................................................................................................................................105
Table 11. Timestamp Integer Seconds Options ..................................................................................................................106
Table 12. Timestamp Fractional Seconds Options .............................................................................................................107
Table 13. Padding Example ................................................................................................................................................109
Table 14. Maximum Padding for X6 Boards.......................................................................................................................109
Malibu Library User's Manual
8
List of Figures
Malibu Library User's Manual
9
Chapter 1.
Introduction
Real Time Solutions!
Thank you for choosing Innovative Integration, we appreciate your business! Since 1988, Innovative Integration has grown
to become one of the world's leading suppliers of DSP and data acquisition solutions. Innovative offers a product portfolio
unrivaled in its depth and its range of performance and I/O capabilities .
Whether you are seeking a simple DSP development platform or a complex, multiprocessor, multichannel data acquisition
system, Innovative Integration has the solution. To enhance your productivity, our hardware products are supported by
comprehensive software libraries and device drivers providing optimal performance and maximum portability.
Innovative Integration's products employ the latest digital signal processor technology thereby providing you the competitive
edge so critical in today's global markets. Using our powerful data acquisition and DSP products allows you to incorporate
leading-edge technology into your system without the risk normally associated with advanced product development. Your
efforts are channeled into the area you know best ... your application.
Vocabulary
What is Malibu?
Malibu is the Innovative Integration-authored component suite, which combines with the Borland, Microsoft or GNU C++
compilers and IDEs to support programming of Innovative hardware products under Windows and Linux. Malibu supports
both high-speed data streaming plus asynchronous mailbox communications between the DSP and the Host PC, plus a wealth
of Host functions to visualize and post-process data received from or to be sent to the target DSP.
What is wxWidgets?
wxWidgets was started in 1992 by Julian Smart at the University of Edinburgh. Initially started as a project for creating
applications portable across Unix and Windows, it has grown to support the Mac platform, WinCE, and many other toolkits
and platforms. The number of developers contributing to the project is now in the dozens and the toolkit has a strong userbase
Malibu Library User's Manual
10
that includes everyone from open source developers to corporations such as AOL. So what is special about wxWidgets
compared with other cross-platform GUI toolkits?
wxWidgets gives you a single, easy-to-use API for writing GUI applications on multiple platforms that still utilize the native
platform's controls and utilities. Link with the appropriate library for your platform (Windows/Unix/Mac, others coming
shortly) and compiler (almost any popular C++ compiler), and your application will adopt the look and feel appropriate to
that platform. On top of great GUI functionality, wxWidgets gives you: online help, network programming, streams,
clipboard and drag and drop, multithreading, image loading and saving in a variety of popular formats, database support,
HTML viewing and printing, and much more.
What is C++ Builder?
C++ Builder is a general-purpose code-authoring environment suitable for development of Windows applications of any type.
Armada extends the Builder IDE through the addition of functional blocks (VCL components) specifically tailored to
perform real-time data streaming functions.
What is Microsoft MSVC?
MSVC is a general-purpose code-authoring environment suitable for development of Windows applications of any type.
Armada extends the MSVC IDE through the addition of dynamically created MSVC-compatible C++ classes specifically
tailored to perform real-time data streaming functions.
What is DialogBlocks?
DialogBlocks is an easy-to-use dialog editor for your wxWidgets applications, generating C++ code and XRC resource files.
Using sizer-based layout, DialogBlocks helps you build dialogs and panels that look great on Windows, Linux or any
supported wxWidgets platform. Add context-sensitive help text, tooltips, images, splitter windows and more.
What kinds of applications are possible with Innovative Integration hardware?
Data acquisition, data logging, stimulus-response and signal processing jobs are easily solved with Innovative Integration
baseboards using the Malibu software. There are a wide selection of peripheral devices available in the Matador DSP
product family, for all types of signals from DC to RF frequency applications, video or audio processing. Additionally,
multiple Innovative Integration baseboards can be used for a large channel or mixed requirement systems and data
acquisition cards from Innovative can be integrated with Innovative's other DSP or data acquisition baseboards for highperformance signal processing.
Why do I need to use Malibu with my Baseboard?
One of the biggest issues in using the personal computer for data collection, control, and communications applications is the
relatively poor real-time performance associated with the system. Despite the high computational power of the PC, it cannot
reliably respond to real-time events at rates much faster than a few hundred hertz. The PC is really best at processing data,
Malibu Library User's Manual
11
not collecting it. In fact, most modern operating systems like Windows are simply not focused on real-time performance, but
rather on ease of use and convenience. Word processing and spreadsheets are simply not high-performance real-time tasks.
The solution to this problem is to provide specialized hardware assistance responsible solely for real- time tasks. Much the
same as a dedicated video subsystem is required for adequate display performance, dedicated hardware for real-time data
collection and signal processing is needed. This is precisely the focus of our baseboards – a high performance, state-of-theart, dedicated digital signal processor coupled with real-time data I/O capable of flowing data via a 64-bit PCI bus interface.
The hardware is really only half the story. The other half is the Malibu software tool set which uses state of the art software
techniques to bring our baseboards to life in the Windows environment. These software tools allow you to create applications
for your baseboard that encompass the whole job - from high speed data acquisition, to the user interface.
Finding detailed information on Malibu
Information on Malibu is available in a variety of forms:
•
Data Sheet (http://www.innovative-dsp.com/products/malibu.htm)
•
On-line Help
•
Innovative Integration Technical Support
•
Innovative Integration Web Site (www.innovative-dsp.com)
Online Help
Help for Malibu is provided in a single file, Malibu.chm which is installed in the Innovative\Documentation folder during the
default installation. It provides detailed information about the components contained in Malibu - their Properties, Methods,
Events, and usage examples. An equivalent version of this help file in HTML help format is also available online at
http://www.innovative-dsp.com/support/onlinehelp/Malibu.
Innovative Integration Technical Support
Innovative includes a variety of technical support facilities as part of the Malibu toolset. Telephone hotline supported is
available via
Hotline (805) 578-4260 8:00AM-5:00 PM PST.
Alternately, you may e-mail your technical questions at any time to:
[email protected].
Also, feel free to register and browse our product forums at http://forum.iidsp.com/, which are an excellent source of FAQs
and information submitted by Innovative employees and customers.
Malibu Library User's Manual
12
Innovative Integration Web Site
Additional information on Innovative Integration hardware and the Malibu Toolset is available via the Innovative Integration
website at www.innovative-dsp.com
Typographic Conventions
This manual uses the typefaces described below to indicate special text.
Typeface
Source Listing
Boldface
Emphasis
Cpp Variable
Cpp Symbol
KEYCAPS
Menu Command
Malibu Library User's Manual
Meaning
Text in this style represents text as it appears onscreen or in code. It
also represents anything you must type.
Text in this style is used to strongly emphasize certain words.
Text in this style is used to emphasize certain words, such as new
terms.
Text in this style represents C++ variables
Text in this style represents C++ identifiers, such as class, function,
or type names.
Text in this style indicates a key on your keyboard. For example,
“Press ESC to exit a menu”.
Text in this style represents menu commands. For example “Click
View | Tools | Customize”
13
Chapter 2.
A Tour of Malibu
Malibu is a powerful, feature-rich software library designed to meet the challenge of developing software capable of highspeed data flow and real-time signal analysis on the PC. Malibu adds high performance data acquisition and data processing
capabilities to Microsoft Visual C++ .NET 2003/2005/2008/2010, Borland/CodeGear/Embarcadero Developers Studio/Turbo
C++/BCB6 or GNC C++ applications with a complete set of functions that solve data movement, analysis, viewing, logging
and fully take advantage of the object-oriented nature of C++.
Harnessing the expressive power of the standard C++ environments listed above, Malibu offers the most powerful and
flexible tools to rapidly integrate high-end data processing in applications. This class library offers an excellent means to
application engineers for synchronizing host side data movement and processing with hardware-driven data that is transferred
to/from DSP or data acquisition cards. Malibu simply delivers the highest performance data streaming achievable on a
desktop or industrial PC.
Rapid application development is achieved using principles such as reusable C++ classes, visual application and form design
and full-bandwidth direct hardware access. Malibu is an environment that allows you to create any real-time applications
running under Windows or Linux.
Malibu Architecture
High Performance Code
A critically-important feature of Malibu is that it was written from the ground up with demanding real-time applications as
the focus of the product. Malibu features a C++ foundation that has powerful data acquisition and analysis features added to
it. So when you work with Malibu, you are building on C++ - a language that is unrivaled for its power, ease of development
and flexibility. You can code with the tool that suits you, within your preferred visual development environment, supporting
rapid prototyping and attractive user interface creation with minimal code.
Synergistic operation with DSP co-processor boards
Innovative baseboards which are equipped with an on-board DSP, such as products within the Matador or Velocia family, are
provided with an additional library named Pismo which facilitates real-time data acquisition and analysis through embedded
DSP programs running on the DSP. Pismo (for target DSP development) coupled with Malibu (for Host development) gives
you the power to collect real-time data, analyze it, process it, record it and display it - all within a flexible, yet feature rich
tool set. Pismo supports several data capture/playback modes including continuous streaming, transient capture and
stimulus/response that allow you to construct your experiment to suit the situation. Complete control over the triggering and
data collection/ playback process makes it easier to capture the data you need, all from within one single host application.
When developing an embedded DSP application, Pismo is a tremendous complement of tools for the host side that will
greatly facilitate your development. Malibu will help you capture data that has been transferred over the PCI bus by your
Malibu Library User's Manual
14
DSP, and manipulate it, view it and log it. You can even “pass it” through to your own processing code segment, all with
ease. Pismo simply equates to an incredible amount of time saved.
A major portion of the Malibu library is support for data transfer between the host software and a target baseboard at the
highest speed the hardware will support. Obtaining high performance on a PC is a challenging job. Malibu does all of that
internally by way of its streaming support classes.
A Portable Class Library
One of the design concepts for Malibu was to allow its library to be used on the most popular platforms on PCs: Microsoft
Visual Studio, Borland's C++ products and GNU C++. Malibu is written in standard C++, using standard C++ constructs.
The same source code set is compiled into libraries for each supported compiler, meaning that on any platform the same
objects with the same methods and interfaces are supported.
In order to provide the main services of the Malibu library, a number of building-block classes and methods were developed.
Many of these classes have uses in the user application as well as in the library, since they provide a portable and tested class
or function to perform the sorts of operations that are common in applications.
Class Groups In Malibu
The classes in the Malibu suite fall into several functional categories. These are implemented within different library files
within Malibu to provide maximum autonomy and keep the organization of the library clear. These categories are outlined in
the table and the following paragraphs.
Category
Purpose
Framework
Access to framework-system specific features such as those within the Win32, Win64 or Qt
API to accomplish inter-thread messaging and command-line access. Implemented within
the Framework_Mb library. This is the only library containing platform-specific code.
OS
Access to operating-system specific features, such as threads, signals resource locks.
Implemented within the Os_Mb library. Note: All OS-specific code is isolated into classes
within the OSAL layer, described below.
Analysis
Provide access to the common signal processing functions such as filters and FFTs; Logging
and playback of waveforms and other classes needed in data acquisition and control
applications. Implemented within the Analysis_Mb library.
Utility
Wide variety of common helper classes to manipulate elementary objects such strings and
buffers; perform file I/O; accurate timing measurements and delays; implement inter-thread
callbacks. Includes a C++ implementation of OpenWire inter-class callback events to allow
convenient data processing of a data stream. Implemented within the Utility_Mb library.
Malibu Library User's Manual
15
Category
Purpose
Hardware
Provide software interface to generic hardware devices used on Innovative baseboards.
Provision for COFF file parsing and downloads, HPI DSP bus access, message I/O
structures, XSVF parsing and loading, FPGA loading via SelectMap, access to baseboard
calibration ROM and debug scripts. Implemented within the Hardware_Mb library.
PCI
Provide software interface to PCI-equipped DSP baseboards and PMC modules Provision for
peripheral initialization and bus-mastering data transfers between target DSP and/or FPGA
peripherals and Host PC. Implemented within the Pci_Mb library.
Ethernet
Provide software interface to ethernet-equipped DSP baseboards, such as the SBC6713e.
Provision for peripheral initialization and TCP/IP communications between target DSP and
Host PC. Implemented within the Ethernet_Mb project.
Application
Classes which simplify creation of example code, such as static waveform generator, INI file
writer, etc.
Each library has its contents summarized in a later chapter in this document. In addition, Malibu has an online help file that
provides further information on the classes in the library and their use.
Operating System Independence
Malibu currently runs under nearly all versions of Windows 32 and 64 bit, most Linux 32 and 64-bit variants including those
using the Xenomai RTOS extensions as well as Wind River VxWorks 6.8.
Malibu has been designed for portability and migrating to a new operating system is straightforward. All OS dependencies in
Malibu are isolated into the OS abstraction layer (OSAL). OSAL is a pure, abstract C++ interface. To port Malibu to a new
OS, one need only implement a concrete version of the OSAL interface, then link accordingly.
The OSAL interface consists of six classes which provide access to primitive OS objects such as mutexes, events, threads,
debug tracing and hardware enumeration, mapping and interrupt hooking. The complete interface specification is listed in the
header Osal_Mb.h, located in the Innovative/Malibu folder after software installation.
To port Malibu to a new OS, implement concrete versions of each of the classes in namespace OsalSupport. For instance,
your mutex class should derive from IOsMutex and must implement a Lock and Unlock method.
Once all methods for all five classes have been implemented and tested, the standard example code provided with each board
which uses Malibu will work without change. Simply subsume the entire ApplicationIo object into your application code, and
call it's public methods similar to the supplied example to control the card.
Malibu Library User's Manual
16
Malibu Namespaces
Malibu uses C++ name spaces to distinguish its classes and methods from those of other libraries. The majority of the classes
within Malibu reside within the Innovative name space. Another common name space is OpenWire for classes that
make up the OpenWire data transfer and connection library in Malibu. There are other name spaces in Malibu that are used
internally and not usually involved at the application level.
Like any C++ library, to use Malibu objects you must include the appropriate header that defines the structure of the object
and its methods. If this object is in a namespace, the class name has to include the namespace to provide the full name of the
class. For instance:
#include <Quadia.h>
...
MyClass::DoWork()
{
Innovative::Quadia Dsp;
Dsp.Target(0);
Dsp.Open().
...
}
Since Quadia is in the Innovative namespace, its fully qualified name is Innovative::Quadia. To avoid having to
include the namespace, a using directive can be used to tell the compiler to search the Innovative namespace
automatically:
#include <Quadia.h>
using namespace Innovative;
...
MyClass::DoWork()
{
Quadia Dsp;
Dsp.Target(0);
Dsp.Open().
...
}
These directives should be used with caution, since names shared in two namespaces may create errors in compilation. Also,
be aware that it is poor form to employ the using namespace directive within a header file.
Refer to the Malibu.chm on-line help file for detailed descriptions of any of the classes or components in the Malibu library
suite.
Interface Classes in Malibu
An interface is a software technique that helps organize the methods of a class into functional groups. Malibu uses interface
classes extensively to help manage the complexity of our objects.
What does this mean? Consider these two classes controlling radios:
class OldStyleRadio
{
enum KnobDirection { knobLeft, knobRight };
Malibu Library User's Manual
17
};
void
void
int
float
PlugIn();
Unplug();
TurnStationKnob(KnobDirection turn);
TunedFrequecy();
class NewRadio
{
void PowerButton(bool state);
void SetBand( BandType band );
int
StationUpButton();
int
StationDownButton();
float TunedFrequecy();
int
PressPreset(int which);
};
Now an application can't easily use both sorts of radio, because the methods differ. Each radio supports similar actions, but in
unique ways. Also, it isn't apparent which methods belong with what 'action set' in the radio. So lets define the actions our
common radio must perform:
class IRadioPower
{
virtual void Power(bool state) = 0;
};
class IRadioTuning
{
virtual void TuneUp() = 0;
virtual void TuneDown() = 0;
virtual float TunedFrequency() = 0;
};
These interface classes define a set of methods that we need to have in order to support an operation. Note that this interface
says nothing at all about how an object will actually get the job done; just what method we can call to do a defined task. If
our application is written to use the IRadioPower and IRadioTuning interface classes, it will be able to operate any radio
that supports the two interfaces.
So here we change the radios to implement the interfaces:
class OldStyleRadio : public IRadioPower, public IRadioTuning
{
enum KnobDirection { knobLeft, knobRight };
// IRadioPower implementation
virtual void Power(bool state)
{
if (state)
PlugIn();
else
Unplug();
}
// IRadioPower implementation
virtual void TuneUp()
{
TurnStationKnob( knobRight );
}
virtual void TuneDown()
{
TurnStationKnob( knobLeft );
}
float TunedFrequecy();
//
basic functions
Malibu Library User's Manual
18
};
void PlugIn();
void Unplug();
int PressPreset(int which);
int TurnStationKnob(KnobDirection turn);
class NewRadio : public IRadioPower, public IRadioTuning
{
// IRadioPower implementation
virtual void Power(bool state)
{
PowerButton(state);
}
// IRadioPower implementation
virtual void TuneUp()
{
StationUpButton();
}
virtual void TuneDown()
{
StationDownButton();
}
float TunedFrequecy();
// basic functions
void PowerButton(bool state);
void SetBand( BandType band );
int StationUpButton();
int StationDownButton();
};
Not only can an application now control both the radios, but the interface classes themselves provide a definition of a
subsystem of a device that can aid in reducing the complexity of a complex system. In the above example, the dozen or so
methods are reduced to two subsystems – power management and station channel management.
In the baseboard objects that control Innovative's co-processor boards, there are many of these subsystems defined to manage
logic loading, loading of code to a target device, and board I/O. As each of these systems is more complicated than this
simple example, the value of defining interfaces increases all the more.
Event Callbacks in Malibu
It is often the case in a complicated library that a procedure in a library may have to be customized for a particular
application or that the application will need to be notified of certain events in a procedure.
An example of the former case is data processing. The Malibu library contains means for getting messages and data from a
target baseboard, but it obviously has no way of knowing how the application wishes to process the command. In this case,
the application needs to insert custom code in this place to complete the process.
An example of the latter is progress messages. If a process such as COFF downloading or logic downloading takes a
considerable amount of time, an application may wish to display some feedback to the user giving the current progress. An
event can perform this notification as part of the download process.
Malibu Library User's Manual
19
In order to support event callbacks, a class needs to create an instance of the OpenWire::EventHandler template. The
template parameter is the Event data class, which is the parametric information passed into the installed callback handler
when an event is called. The application provides a handler for an event by calling the SetEvent() method.
UI Thread Synchronization
One additional aspect of event callbacks involves user-interface (UI) functions. An event handler often is triggered in a
different thread than the main user-interface thread. The use of background threads allows time-consuming tasks to work
without interfering with the responsiveness of the main program. But this leads to a problem if event handlers are executed
from within the context of a background thread and the handler are expected to update a user-interface (UI) element such as a
progress bar, or edit control. Since user interfaces are built atop APIs such as Win32 and Qt which are not thread-safe, such
UI control updates are not thread-safe and can cause mysterious, unpredictable failures in an application at runtime.
To avoid this, an event handler can be “thunked” or “synchronized” with the main thread by using the Thunk() or
Synchronize() method. Even though invoked from within a background thread, the installed, user-specific event handler
will be executed within the context of the main UI thread, albeit at a slight efficiency penalty. Note that most of the event
handlers built into Malibu objects which are routinely used for UI updates are thunked or synchronized by default.
However, the synchronization behavior of any event may be overridden using these methods within application code, if
desired.
Using the Malibu Library
The Malibu library is a library of standard C++ classes. Its classes are created and used in a similar fashion to the classes of
the standard library. Versions of the library are built for Visual C++ (v7, v8 and v9), for Borland C++ (BDS2006/TurboC++
and BCB6) and for GNC C++ under Linux. The code that interacts with Malibu classes is identical on all versions – the
differences actually come when interacting with the different APIs for the visual portion of the application.
The Malibu library provides a simple means of accessing the features of the Innovative baseboards, and streaming data
between a Host application and target peripherals. By using Malibu, you can easily process and analyze data in real-time, as
it is moved to and from the hardware.
The Malibu system uses a number of classes to perform data acquisition and analysis functions. Depending on the operations
to be performed, you may need a streaming class, one or more baseboard classes, analysis classes and so on. The properties
of the baseboard classes are used to define the system configuration. The properties of the analysis classes and especially the
connections to other analysis components are crucial in defining the data analysis.
Event handler callbacks are another major part of creating an application in Malibu. Malibu objects provide 'Events' that the
user can install a handler for that provide feedback or to customize processing.
Malibu Library User's Manual
20
Creating a Streaming Application in Visual C++
Creating the Malibu Objects
First we will declare the necessary objects. In this case we are developing an MFC application and we have selected a dialogbased application in the Visual C++ wizard, so that we can have a visual means of laying out the main window. This is a
common technique in Visual C++.
The best place for the declarations is the dialog class that was auto-created by the application wizard. Here is how the code
will look like if the code if we have given the name CAppDlg to our dialog class:
namespace
{
class
class
class
class
}
Innovative
Uwb;
Quadia;
C64xDsp;
DataLogger;
class CAppDlg : public CDialog
{
...
...
private:
Innovative::Uwb *
Uwb[2];
bool
UwbOpened[2];
Innovative::Quadia *
Quadia;
bool
QuadiaOpened;
Innovative::C64xDsp *
Dsp[4];
bool
DspOpened[4];
Innovative::TiBusmasterStream * Stream[4];
bool
StreamConnected[4];
Innovative::IntegerBuffer BB2;
Innovative::DataLogger * Log;
...
...
protected:
};
void
void
void
void
CoffLoadProgressHandler( Innovative::ProcessProgressEvent & event);
CoffLoadCompleteHandler( Innovative::ProcessCompletionEvent & event);
MailAvailableHandler( Innovative::TiBusmasterStreamDataEvent & event);
PacketAvailableHandler( Innovative::TiBusmasterStreamDataEvent & event);
In this application we will be creating several baseboard objects. The Quadia baseboard has 4 C64x Dsps on it, each of which
has its own baseboard. In addition there may be 2 UWB Ultra Wideband PMC baseboards on the Quadia. The header only
contains pointers to the objects. The actual objects will be created later.
Later in the declaration are several event handler functions. Each handler has the signature of the event it handles, which is a
single class that holds parameters for the handler.
Now it's time to initialize the objects. The OnInitDialog member function is a good place for initialization, since the dialog
controls are available but the window is not visible.
BOOL CAppDlg::OnInitDialog()
{
Malibu Library User's Manual
21
...
...
//
// Create devices (but don't open!)
Quadia = new Innovative::Quadia();
...
...
Uwb[0] = new Innovative::UwbCs;
Uwb[1] = new Innovative::UwbCs;
//
// Coff File progress events
for (int i=0; i<4; i++)
{
Dsp[i] = new Innovative::C64xDsp;
Dsp[i]->Cpu().OnCoffLoadProgress.SetEvent(this, &CAppDlg::CoffLoadProgressHandler);
Dsp[i]->Cpu().OnCoffLoadProgress.Synchronize();
Dsp[i]->Cpu().OnCoffLoadComplete.SetEvent(this, &CAppDlg::CoffLoadCompleteHandler);
Dsp[i]->Cpu().OnCoffLoadComplete.Synchronize();
Dsp[i]->SdramCE = SdramCE;
}
for (int i=0; i<4; i++)
{
Stream[i] = new Innovative::TiBusmasterStream();
Stream[i]->OnMailAvailable.SetEvent(this, &CAppDlg::MailAvailableHandler);
Stream[i]->OnMailAvailable.Synchronize();
Stream[i]->OnPacketAvailable.SetEvent(this, &CAppDlg::PacketAvailableHandler);
Stream[i]->OnPacketAvailable.Synchronize();
}
return TRUE;
// return TRUE
unless you set the focus to a control
}
Initializing Object Properties and Events
The code immediately after the constructor of the C64xDsp and TiBusmasterStream objects are to attach handlers to
events contained in the baseboard and its subsystems. In the case of the C64xDsp object, the COFF loading interface returned
by the Cpu() member function has the OnCoffLoadProgress event.
This event will be called during the downloading of code to the Dsp in order to give a completion percentage of the
download. The handler usually updates a progress bar with this data to give visual feedback. Because this handler will update
the GUI, it needs to be synchronized with the GUI main thread. This is done by the call to the Synchronize() member
function of the event handler object.
Below that code is the initialization of the streams. Each DSP will have its own stream object to manage . These objects have
events associated with data arriving from the target. The two event handlers are attached to functions and set to be
synchronized here.
This code also shows setting a property of a baseboard. SdramCE is a property that sets which addressing space on the target
the SDRAM is located. For the Quadia, it needs to be initialized to 0.
Malibu Library User's Manual
22
In order to use a baseboard, it must be associated with an actual device. Each device in the system is given a unique index
known as the Target ID. After being assigned a target number, the device can be attached to the hardware with a call to
Open():
// Open Cpus 0 and 1 & connect their streams
Dsp[0]->Target(0);
Dsp[0]->Open();
DspOpened[0] = true;
Stream[0]->ConnectTo(Dsp[0]);
StreamConnected[0] = true;
Dsp[1]->Target(1);
Dsp[1]->Open();
DspOpened[1] = true;
Stream[1]->ConnectTo(Dsp[1]);
StreamConnected[1]= true;
AppendToLog("C64x Pair #0, #1 Opened...");
In order to perform I/O with a baseboard, a stream object needs to be connected to it. This is done by the ConnectTo()
method. If a baseboard does not support a type of streaming, the ConnectTo() call will not compile.
Event Handler Code
Data comes from the target via stream event handlers. 'Mail' messages are small (16 word) packets of data intended for
command and control information exchange. Two words of the message is a header that is divided into standard fields. The
TypeCode field is usually used for distinguishing different types of messages:
//--------------------------------------------------------------------------// CAppDlg::MailAvailableHandler() -//--------------------------------------------------------------------------void CAppDlg::MailAvailableHandler( Innovative::TiBusmasterStreamDataEvent & event)
{
//
// Read the mail message packet
Innovative::MatadorMessage Msg;
event.Sender->Recv(Msg);
CString Txt;
Txt.Format("Dsp Target %d Message:", event.Sender->Target());
AppendToLog(Txt);
switch (Msg.TypeCode())
{
case kChannelInitMsg:
{
//TargetLogin = true;
int Ver = Msg.Data(0) - 0x100;
CString Txt;
Txt.Format("Target logged in OK - Ver: %d\r\n", Ver);
AppendToLog(Txt);
AppendToLog("Blocks Rcvd: 0");
}
break;
case kDInInfo:
{
CString Txt;
Txt.Format("Ev/Buf: %d\r\n", Msg.Data(0));
Malibu Library User's Manual
23
AppendToLog(Txt);
Txt.Format("Actual: %d\r\n", Msg.Data(1));
AppendToLog(Txt);
Txt.Format("Burst: %d\r\n", Msg.Data(2));
AppendToLog(Txt);
Txt.Format("Actual: %d\r\n", Msg.Data(3));
AppendToLog(Txt);
}
break;
case kThresholdAlert:
{
AppendToLog("ALERT");
CString Txt = "Threshold Alert Rcvd";
AppendToLog(Txt);
}
break;
case kOverflowAlert:
{
AppendToLog("ALERT");
CString Txt = "Overflow Alert Rcvd";
AppendToLog(Txt);
}
break;
default:
{
AppendToLog("Invalid DSP message received");
}
break;
}
MessageBeep(MB_OK);
}
The event handler argument contains parameters for the event. In this case, the event data structure contains a pointer to the
stream that generated the event. This pointer is used to actually extract the message via the Recv() method.
Handling the packet data event is similar: the buffer is extracted using the Recv() method and processed. In this case the
data is logged using the LogDataBlock() function.
//--------------------------------------------------------------------------// CAppDlg::PacketAvailableHandler() -//--------------------------------------------------------------------------void
{
CAppDlg::PacketAvailableHandler( Innovative::TiBusmasterStreamDataEvent & event)
static int PacketCount(0);
// Since we got this message we know a buffer is available. So read it now.
//
Buffer will be sized to fit the incoming data.
event.Sender->Recv(BB2);
//
// Find which Cpu is our target
int DspIdx;
for (int i=0; i<4; i++)
if (DspOpened[i])
{
if (event.Sender->Target() == CaptureInfo[i].Target)
{
DspIdx = i;
break;
Malibu Library User's Manual
24
}
}
...DspIdx is which Dsp # to use
//
//
// Increment
CaptureInfo[DspIdx].CaptureBlocks++;
//
// Log the data block
LogDataBlock(DspIdx, BB2);
//
// Update message showing data arrival.
CString Text;
Text.Format("Dsp %d, Packet %d with %d words arrived", DspIdx, ++PacketCount, BB2.IntSize());
AppendToLog(Text);
}
Loading COFF Files
Operations such as downloading COFF files to a DSP are grouped in an interface class so that the methods used to perform
them and the events presented are the same from board to board. This code initiates a download to all four CPUs on a
Quadia. Events can be hooked to provide feedback on the progress of the download.
void CAppDlg::OnBnClickedDownloadCoff()
{
CString filename;
CoffFileNameEdit.GetWindowText(filename);
std::string FileName(filename);
for (int i=0; i<4; i++)
if (DspOpened[i])
{
AppendToLog("---------------------------------------");
CString Txt;
Txt.Format("-- COFF Load Dsp #%d", i);
AppendToLog(Txt);
AppendToLog("---------------------------------------");
}
Dsp[i]->Cpu().DownloadCoff(FileName);
}
Loading Logic Files
Many baseboards have down-loadable logic to provide customized behavior. Loading this logic is also grouped into an
interface class. In the code below, one of the Quadia's two logic chips is being loaded. The interface class also contains
events that can be hooked to provide feedback in the user interface.
//--------------------------------------------------------------------------// BaseboardLogicLoadDialog::OnBnClickedQfpga1Cfgbtn() -//--------------------------------------------------------------------------void BaseboardLogicLoadDialog::OnBnClickedQfpga1Cfgbtn()
{
if (!Owner->QuadiaOpened)
{
Owner->AppendToLog("No Quadia Installed");
return;
}
CString ExoFilename;
Malibu Library User's Manual
25
Fpga1FileName.GetWindowText(ExoFilename);
if (! Innovative::IIFileExists(ExoFilename))
throw Innovative::IIException("Exo file not found!");
}
Owner->AppendToLog("-----------------------\r\nParsing FPGA 1");
Owner->UpdateWindow();
Owner->Quadia->Logic(1).ConfigureFpga(std::string(ExoFilename));
Owner->AppendToLog("-----------------------\r\n");
Owner->UpdateWindow();
Script Files
Many PMC modules feature user-reprogrammable FPGA logic. As the behavior of this logic is subject to change to
accommodate user requirements, it is commonplace to map registers into the User FPGA on these modules to support
configuration and control.
To facilitate rapid prototyping of new logic, Malibu features two script interpreter classes Scripter and GcScripter.
These classes parse the contents of a text file at application runtime, calling predefined event handlers during the process. By
overloading these handlers within application code, it is possible to read and write to custom user logic registers at strategic
times during application execution.
For instance, the Digital Receiver PMC module supports four GrayChip 5016 down-converter ICs. These are sophisticated
devices with a large complement of mapped registers used to configure the down-conversion process. Rather than building
one particular initialization pattern for these devices into the DigitalReceiver class, Malibu defers the initialization
process for these IC devices into the application domain.
The application program instantiates a GcScripter object, and calls the Execute method on this object at the inception of
analog data flow, within the OnStreamStart event handler of the DigitalReceiver object. In turn, the GcScripter object
parses a user-authored text file which contains initialization commands targeting the GC5016 devices addressable through the
command-channel (PCI bus). The initialization command file may be created manually, or the Texas Instruments -supplied
utility for creation of 5016-compliant initialization files may be used. Regardless of the origin of this file, its contents will be
parsed and used to initialize the 5016 devices dynamically at application runtime, without requiring recompilation of the
Malibu libraries.
Later, once the initialization sequence is finalized, the contents of the script can be subsumed into the application directly,
and explicit calls to PokeDdcReg used to initialize the 5016 IC devices, eliminating need for the GcScripter object.
Malibu Library User's Manual
26
Chapter 3.
Creating Applications using an IDE
Developing an application will more than likely involve using an integrated development environment (IDE) , also known as
an integrated design environment or an integrated debugging environment. This is a type of computer software that assists
computer programmers in developing software.
The following sections will aid in the initial set-up of these applications in describing what needs to be set in Project Options
or Project Properties for each of the supported development environments.
Creating Projects in Borland C++ Builder 6.0
Creating a project that will successfully build a Malibu project requires a few extra steps beyond making a new, empty form
project.
Enabling Auto-Saving of Projects
By default, files and project settings in Builder are only saved when you manually save them. In practice, this can be risky as
a crashing program can cause the loss of much programming effort. You can change Borland to save all files and project
settings whenever a project is compiled. This takes little time, and increases the safety of using the compiler.
To change the setting, open the Environment
Options by selecting Tools | Environment
Options from the main Builder Menu.
Selecting this will open the Environment
Options dialog.
Select the Preferences tab. In the top left side,
select the Autosave option's two check boxes
to ensure that both the Editor files and Project
desktop will be saved before each project
compilation.
Malibu Library User's Manual
27
Creating a Malibu Project
Since Borland knows nothing about Malibu, the basic project options need to be modified to allow the compiler to find
Malibu. The Project Option dialog is displayed when the menu Project | Options... is selected.
While it is not a required setting, and is not Malibu specific,
we recommend that the use of the dynamic C++ run-time
library be turned off.
The advantage of using this setting is a somewhat smaller
EXE file. The disadvantage of using it is that the DLL file
has to accompany the EXE or be installed on the target
computer for the program to work. This usually is more
trouble than the size decrease is worth.
To disable this option, select the Linker tab. The check box is
the second selection in the upper right: Use dynamic RTL.
For similar reasons, Borland's packages should also be static
bound. This increases the size of the executable, but allows it
to run with a minimum of extra files.
In the Runtime Packages group box in the lower portion of
the Packages tab, uncheck the Build with runtime packages
check box.
Malibu Library User's Manual
28
The compiler now needs to be informed of Malibu's location. There are three places where the system needs to be informed
of the location of library files. These are
1) The “Include Path”, which allows header source files to be found in the compilation process.
2) The “Library Path”, which allows the linker to find the libraries to search for code modules the application
requires.
3) The “Debug Source Path”, which is used in debugging to locate code that is being stepped through.
Each of these paths is set by the Directories/Conditionals tab
of the Project Options dialog.
First we will change the Include Path. You can just edit the
path itself, but an easier way is to press the '...' button next to
the edit control to display a path editing control dialog.
The path editing control allows directories to be rearranged,
and each can be edited by selecting it, changing it in the
dialog below, and replacing the result in the list.
Here, we wish to add the Malibu source directory to the list.
By default, this is installed at C:\Innovative\Malibu. In
this case, we use a relative path to indicate its location.
There are several ways that you can define these paths, each
with advantages and disadvantages.
Malibu Library User's Manual
29
Table 1. Path Spec Options
Type of Path Spec
Advantages
Disadvantages
Example
..\..\..\Malibu
Relative Path
Doesn't need to be changed if project
moves only at same level below
source directory.
Doesn't require the project know
where Malibu source directory is or
what name the install directory has.
Lots of “..”s. Hard to set up.
Requires projects be under
the Innovative tree.
Absolute Path
Project doesn't have to be located
under the Innovative source tree.
Project can be moved after creation
without change.
Project must be on same
drive as Malibu source
directory.
Project has to know the
name of the Malibu install
directory.
\Innovative\Malibu
Full Path plus Drive
Letter
Project can be anywhere in system.
Requires that Malibu source
directory never moves.
Project has to know the
name and drive of the
Malibu install directory.
C:\Innovative\Malibu
The Innovative Examples use relative paths, since we wish to have to specify the name and location of the Malibu source.
User projects may have other constraints that make one of the other options more desirable.
To set the library path, select the path editing option button
next to the library path edit control.
Here, we wish to add the Malibu Library directory to the list.
There are several directories for libraries, since the source
must be built for each compiler. For Borland C++ Builder
6.0, this is installed at C:\Innovative\Lib\Bcb. In this
case, we use a relative path to indicate its location.
Malibu Library User's Manual
30
To set the debug source path, select the path editing option
button next to the debug source edit control.
Here, we wish to add the Malibu Source directory to the list.
Again, this is installed by default at
C:\Innovative\Malibu. In this case, we use an absolute
path and drive letter to indicate its location.
Creating a Malibu Project in Borland Developer's Studio/Turbo C++
Developing an application will more than likely involve using an integrated development environment (IDE) , also known as
an integrated design environment or an integrated debugging environment. This is a type of computer software that assists
computer programmers in developing software.
Creating a project that will successfully build a Malibu project requires a few extra steps beyond making a new, empty VCLForm-based project.
The following sections will aid in the initial set-up of these applications in describing what needs to be set in Project Options.
Enabling Auto-Saving of Projects
By default, files and project settings in Builder are only saved when you manually save them. In practice, this can be risky as
a crashing program can cause the loss of much programming effort. You can change BDS to save all files and project settings
whenever a project is compiled. This takes little time, and increases the safety of using the compiler.
Malibu Library User's Manual
31
To change the setting, open the Environment
Options by selecting Tools | Environment
Options from the main Builder Menu.
Selecting this will open the Environment
Options dialog.
Select the Preferences tab. In the top left side,
select the Autosave option's two check boxes
to ensure that both the Editor files and Project
desktop will be saved before each project
compilation.
Default Project Options which should be Changed
BCB10 (Borland Turbo C++) Project Settings
When creating a new application with File, New, VCL Forms Application - C++ Builder
Change the Project Options for the Compiler:
Project Options
++ Compiler (bcc32)
C++ Compatibility
Check ‘zero-length empty base class (-Ve)’
Check ‘zero-length empty class member functions (-Vx)’
Failure to change these options may result in an access violation when attempting to enter any OpenWire Event function.
i.e.
Access Violation OnLoadMsg.Execute – Load Message Event
Because of statement
Board->OnLoadMsg.SetEvent( this, &ApplicationIo::DoLoadMsg );
Malibu Library User's Manual
32
Change the Project Options for the Linker:
Project Options
Linker (ilink32)
Linking – uncheck ‘Use Dynamic RTL’
In our example Host Applications, if not unchecked, this will cause the execution to fail before the Form is constructed.
Error: First chance exception at $xxxxxxxx. Exception class EAccessViolation with message “Access Violation!”
Process ???.exe (nnnn)
Other considerations:
Project Options
++ Compiler (bcc32)
Output Settings
check – Specify output directory for object files(-n)
(release build) Release
(debug build) Debug
Paths and Defines
add Malibu
Pre-compiled headers
uncheck everything
Linker (ilink32)
Output Settings
check – Final output directory
(release build) Release
(debug build) Debug
Paths and Defines
(ensure that Build Configuration is set to All Configurations)
add Lib/Bcb10
(change Build Configuration to Release Build)
add lib\bcb10\release
(change Build Configuration to Debug Build)
add lib\bcb10\debug
(change Build Configuration back to All Configurations)
Packages
uncheck - Build with runtime packages
Malibu Library User's Manual
33
Creating a Malibu Project in Microsoft Visual Studio 7
Creating a project that will successfully build a Malibu project requires a few extra steps beyond making a new, empty form
project.
Enabling Auto-Saving of Projects
Files and project settings in MSVC should be set to be whenever the program is compiled. This avoids the problem when a
program crash causes the loss of much programming effort.
To change the setting, open the Environment
Options by selecting Tools | Options from the
main Menu.
Selecting this will open the Options dialog.
Select the Environment | Projects and
Solutions entry in the list on the left. The
Build and Run Options section should be set
to Save all Changes ensure that everything
will be saved before each project compilation.
This option is set by default.
Creating a Malibu Project
Since MSVC knows nothing about Malibu, the basic project options need to be modified to allow the compiler to find
Malibu. The Project Option dialog is displayed when the menu Project | <ProjectName> Properties... is selected.
There are two places where the system needs to be informed of the location of library files. These are
4) The “Include Path”, which allows header source files to be found in the compilation process.
5) The “Library Path”, which allows the linker to find the libraries to search for code modules the application
requires.
Malibu Library User's Manual
34
First we will change the Include Path. On the C/C++ |
General page of the Property Page dialog, The Additional
Include Directories entry determines the extra directories
where source files will be searched for. You can just edit the
path itself, but an easier way is to select the path, and then
press the '...' button that appears in the edit control to display
a path editing control dialog.
The path editing control allows directories to be rearranged,
and each entry can be edited by selecting it, browsing to a
directory by pressing the '...' button and replacing the result
in the list.
Here, we wish to add the Malibu source directory to the list.
By default, this is installed at C:\Innovative\Malibu. In
this case, we use a relative path to indicate its location.
There are several ways that you can define these paths, each
with advantages and disadvantages.
Table 2. Path Spec Options
Advantages
Disadvantages
Relative Path
Type of Path Spec
Doesn't need to be changed if project
moves only at same level below
source directory.
Doesn't require the project know
where Malibu source directory is or
what name the install directory has.
Lots of “..”s. Hard to set up.
Requires projects be under
the Innovative tree.
Absolute Path
Project doesn't have to be located
under the Innovative source tree.
Project can be moved after creation
without change.
Project must be on same
drive as Malibu source
directory.
Project has to know the
name of the Malibu install
directory.
Malibu Library User's Manual
Example
..\..\..\Malibu
\Innovative\Malibu
35
Type of Path Spec
Full Path plus Drive
Letter
Advantages
Project can be anywhere in system.
Disadvantages
Requires that Malibu source
directory never moves.
Project has to know the
name and drive of the
Malibu install directory.
Example
C:\Innovative\Malibu
The Innovative Examples use relative paths, since we wish to have to specify the name and location of the Malibu source.
User projects may have other constraints that make one of the other options more desirable.
To set the library path, on the Linker | General page of the
Property Page dialog, the Additional Library Directories entry
determines the extra directories that will be searched to find
libraries. You can just edit the path itself, but an easier way
is to select the path, and then press the '...' button that appears
in the edit control to display a path editing control dialog.
Here, we wish to add the Malibu Library directory to the list.
There are several directories for libraries, since the source
must be built for each compiler. For MSVC 7.0, this is
installed at C:\Innovative\Lib\Vc7. In this case, we use
a relative path to indicate its location.
Other Configuration Requirements
Since Malibu applications are multi-threaded, your application should be configured to use Multi-threaded libraries, via the
Configuration Properties | C/C++ | Code Generation | Runtime Library option. When building console
or unmanaged applications, select Multi-threaded Debug (/MTd) or Multi-threaded (/MT). When building
managed code, select the DLL variants of these libraries.
Disable use of precompiled headers by setting Configuration Properties | C/C++ | Precompiled Headers |
Create/Use Precompiled Header to Not Using Precompiled Headers.
When the C Run-Time (CRT) library and Microsoft Foundation Class (MFC) libraries are linked in the wrong order, you
may receive a LNK2005 error such as:
nafxcwd.lib(afxmem.obj) : error LNK2005:
"void * __cdecl operator new(unsigned int)"(??2@YAPAXI@Z) already defined in
LIBCMTD.lib(new.obj)
The CRT libraries use weak external linkage for the new, delete, and DllMain functions. The MFC libraries also contain
new, delete, and DllMain functions. These functions require the MFC libraries to be linked before the CRT library is linked.
Malibu Library User's Manual
36
When you use the MFC libraries, you must make sure that they are linked before the CRT library is linked. You can do this
by making sure that every file in your project includes Msdev\Mfc\Include\Afx.h first, either directly (#include
<Afx.h>) or indirectly (#include <Stdafx.h>). The Afx.h include file forces the correct order of the libraries, by using
the #pragma comment (lib,"<libname>") directive.
If the source file has a .c extension, or the file has a .cpp extension but does not use MFC, you can create and include a small
header file (Forcelib.h) at the top of the module. This new header makes sure that the library search order is correct.
Visual C++ does not contain this header file. To create this file, follow these steps:
1.
Open Msdev\Mfc\Include\Afx.h.
2.
Select the lines between #ifndef _AFX_NOFORCE_LIBS and #endif //!_AFX_NOFORCE_LIBS.
3.
Copy the selection to the Windows Clipboard.
4.
Create a new text file.
5.
Paste the contents of the Clipboard into this new file.
6.
Save the file as Msdev\Mfc\Include\Forcelib.h.
See http://support.microsoft.com/default.aspx/kb/148652 for details.
Creating a Malibu Project in Microsoft Visual Studio Vc8/Vc9
Creating a project that will successfully build a Malibu project requires a few extra steps beyond making a new, empty
Windows Form project.
Enabling Auto-Saving of Projects
Files and project settings in Visual Studio should be set to be whenever the program is compiled. This avoids the problem
when a program crash causes the loss of much programming effort.
Malibu Library User's Manual
37
To change the setting, open the Environment
Options by selecting Tools | Options from the
main Menu.
Selecting this will open the Options dialog.
Select the Environment | Projects and
Solutions entry in the list on the left. The
Build and Run page has a Before building:
combo box at the top. It should be set to Save
all Changes ensure that everything will be
saved before each project compilation.
This option is set by default.
Creating a Malibu Project
Since Visual Studio knows nothing about Malibu, the basic project options need to be modified to allow the compiler to find
Malibu. The Project Option dialog is displayed when the menu Project | <ProjectName> Properties... is selected.
There are two places where the system needs to be informed of the location of Malibu support files. These are
6) The “Include Path”, which allows header source files to be found in the compilation process.
7) The “Library Path”, which allows the linker to find the libraries to search for code modules the application
requires.
First we will change the Include Path. On the C/C++ |
General page of the Property Page dialog, The Additional
Include Directories entry determines the extra directories
where source files will be searched for. You can just edit the
path itself, but an easier way is to select the path, and then
press the '...' button that appears in the edit control to display
a path editing control dialog.
Malibu Library User's Manual
38
The path editing control allows directories to be rearranged,
and each entry can be edited by selecting it, browsing to a
directory by pressing the '...' button and replacing the result
in the list.
Here, we wish to add the Malibu source directory to the list.
By default, this is installed at C:\Innovative\Malibu. In
this case, we use a relative path to indicate its location.
There are several ways that you can define these paths, each
with advantages and disadvantages.
Table 3. Path Spec Options
Type of Path Spec
Advantages
Disadvantages
Example
..\..\..\Malibu
Relative Path
Doesn't need to be changed if project
moves only at same level below
source directory.
Doesn't require the project know
where Malibu source directory is or
what name the install directory has.
Lots of “..”s. Hard to set up.
Requires projects be under
the Innovative tree.
Absolute Path
Project doesn't have to be located
under the Innovative source tree.
Project can be moved after creation
without change.
Project must be on same
drive as Malibu source
directory.
Project has to know the
name of the Malibu install
directory.
\Innovative\Malibu
Full Path plus Drive
Letter
Project can be anywhere in system.
Requires that Malibu source
directory never moves.
Project has to know the
name and drive of the
Malibu install directory.
C:\Innovative\Malibu
The Innovative Examples use relative paths, since we wish to have to specify the name and location of the Malibu source.
User projects may have other constraints that make one of the other options more desirable.
Malibu Library User's Manual
39
To set the library path, on the Linker | General page of the
Property Page dialog, the Additional Library Directories entry
determines the extra directories that will be searched to find
libraries. You can just edit the path itself, but an easier way
is to select the path, and then press the '...' button that appears
in the edit control to display a path editing control dialog.
Here, we wish to add the Malibu Library directory to the list.
There are several directories for libraries, since the source
must be rebuilt for each version of the compiler and
platform. For Visual Studio 2005, the libraries are installed at
C:\Innovative\Lib\Vc8. For Visual Studio 2008,
C:\Innovative\Lib\Vc9. The 64-bit platform libraries
are located at C:\Innovative\Lib\Vc9_x64.
Other Configuration Requirements
Since Malibu applications are multi-threaded, your application should be configured to use Multi-threaded libraries, via the
Configuration Properties | C/C++ | Code Generation | Runtime Library option. When building console
or unmanaged applications, select Multi-threaded Debug (/MTd) or Multi-threaded (/MT). When building
managed code, select the DLL variants of these libraries.
Disable use of precompiled headers by setting Configuration Properties | C/C++ | Precompiled Headers |
Create/Use Precompiled Header to Not Using Precompiled Headers.
When the C Run-Time (CRT) library and Microsoft Foundation Class (MFC) libraries are linked in the wrong order, you
may receive a LNK2005 error such as:
nafxcwd.lib(afxmem.obj) : error LNK2005:
"void * __cdecl operator new(unsigned int)"(??2@YAPAXI@Z) already defined in
LIBCMTD.lib(new.obj)
The CRT libraries use weak external linkage for the new, delete, and DllMain functions. The MFC libraries also contain
new, delete, and DllMain functions. These functions require the MFC libraries to be linked before the CRT library is linked.
When you use the MFC libraries, you must make sure that they are linked before the CRT library is linked. You can do this
by making sure that every file in your project includes Msdev\Mfc\Include\Afx.h first, either directly (#include
<Afx.h>) or indirectly (#include <Stdafx.h>). The Afx.h include file forces the correct order of the libraries, by using
the #pragma comment (lib,"<libname>") directive.
If the source file has a .c extension, or the file has a .cpp extension but does not use MFC, you can create and include a small
header file (Forcelib.h) at the top of the module. This new header makes sure that the library search order is correct.
Visual C++ does not contain this header file. To create this file, follow these steps:
1.
Open Msdev\Mfc\Include\Afx.h.
Malibu Library User's Manual
40
2.
Select the lines between #ifndef _AFX_NOFORCE_LIBS and #endif //!_AFX_NOFORCE_LIBS.
3.
Copy the selection to the Windows Clipboard.
4.
Create a new text file.
5.
Paste the contents of the Clipboard into this new file.
6.
Save the file as Msdev\Mfc\Include\Forcelib.h.
See http://support.microsoft.com/default.aspx/kb/148652 for details.
Since Malibu is compiled as native code, pure .NET applications cannot be built. However, you may build build mixedmode applications. Set the Configuration Properties | General | Common Language Runtime Support to Common
Language Runtime Support (/clr).
Mixed-mode code, .NET applications manage two heaps, one for the .NET code and another for the native code. To workaround an initialization bug within the .NET runtime libraries which fail to initialize both heaps properly, it is essential to
force a reference to a C runtime initialization module within the Microsoft-supplied libraries. To do this, you must add a
symbol to Configuration Properties | Linker | Input | Force Symbol References. For 32-bit code, add the symbol
__DllMainCRTStartup@12. For 64-bit code, add the symbol _DllMainCRTStartup.
Creating a Malibu Application using Anthemion DialogBlocks
Creating a project that will successfully build a Malibu application requires a few extra steps beyond making a new, empty
wxForm project.
Build wxWidgets Library
DialogBlocks projects rely on the open-source wxWidget controls to implement user interface elements. Download the
latest, all-inclusive wxWidgets package from http://www.wxwidgets.org/downloads/. Then, follow the instructions within
the <wxWidgets>/install-x11.txt file to rebuild the wxWidgets libraries.
Malibu is dependent on the Jungo WinDriver device-driver libraries. These libraries may be downloaded from
http://www.innovative-dsp.com/ftp/Linux/WinDriver.tar.gz and should be extracted into a user-accessible location on your
hard disk, (typically /home/WinDriver). Due to the volatility of the Linux kernel and its multiple distributions, it is
necessary to rebuild the Jungo WinDriver and the associated Innovative kernel plug-in prior to running applications.
Instructions to accomplish this are located in the chapter titled “Linux Driver Installation”.
Invoke the configurations dialog using Build | Configurations.
Malibu Library User's Manual
41
Malibu Library User's Manual
42
Click on Settings | Paths within the listbox on the left :
Click the Add button to add a path to the root of the folder into which the Malibu libraries have been installed (typically
/home/<user>/Innovative) and label it INNOVATIVE. Update the pathspec to the folder by clicking the browse button
(...) located on the right of the new line.
Click the Add button to add a path to the root of the folder into which the WinDriver redistributables have been installed
(typically /home/WinDriver) and label it WINDRIVER. Update the pathspec to the folder by clicking the browse button
(...) located on the right of the new line.
Malibu Library User's Manual
43
Click on Settings | Configurations within the listbox within the left pane of the Settings dialog. Change the Toolkit option
to use the wxX11 version of the libraries, enable Use wxconfig and Use installed wxWidgets.
Scroll down through the configuration settings list and edit the settings listed below.
Setting
Value
Debug flags
-ggdb -DLINUX
Library path
%INNOVATIVE%/Lib/Gcc/Debug/,%INNOVATIVE%/WinDriver/lib/%AUTO%
Linker flags
%AUTO% -Wl,@%PROJECTDIR%/Application.lcf
Include path
-I%INNOVATIVE%/Malibu -I%INNOVATIVE%/Malibu/LinuxSupport %AUTO%
Malibu Library User's Manual
44
Note reference to an external linker command file named Application.lcf within the Linker flags. Create this file
containing the information shown below and place it into the project folder along with the application source code. This will
insure that all necessary libraries are linked when building Malibu application programs.
--start-group
-lOs_Mb
-lFramework_Mb
-lUtility_Mb
-lHardware_Mb
-lPci_Mb
-lAnalysis_Mb
-lwdapi901
--end-group
At this point, you should be able to successfully open any of the supplied, DialogBlocks example programs located in the
board-specific subfolder of the Innovative folder.
Creating a Malibu Application using Nokia QtCreator
Creating a project that will successfully build a Malibu application requires a few extra steps beyond making a new, empty
QtForm project.
Install and/or Rebuild Qt Library
QtCreator projects rely on the open-source Qt controls to implement user interface elements. Download the latest, allinclusive Qt package from Nokia QtCreator Website. Then, install following the instructions provided on the site. If using
one of the provided binary installers, this is accomplished by executing
./qt-sdk-linux-x86-opensource-2009.05.bin
from the command line.
Malibu is dependent on the Jungo WinDriver device-driver libraries. These libraries may be downloaded from
http://www.innovative-dsp.com/ftp/Linux/WinDriver.tar.gz and should be extracted into a user-accessible location on your
hard disk, (typically /home/WinDriver). Due to the volatility of the Linux kernel and its multiple distributions, it is
necessary to rebuild the Jungo WinDriver and the associated Innovative kernel plug-in prior to running applications.
Instructions to accomplish this are located in the Linux Notes on our website.
Following successful installation, launch QtCreator.
Malibu Library User's Manual
45
Create a new project by clicking the File | New File or Project menu item.
Select Qt4 Gui Application or Qt4 Console Application, depending on the type of project required. Browse to a location in
which to store the new project:
Malibu Library User's Manual
46
Accept the defaults for the Qt library dependencies:
This creates a new, empty project.
Malibu Library User's Manual
47
Next, edit the .pro project file to incorporate the Malibu libraries. The addition of the LIBS directive in the .pro file
automatically links in all required Malibu libraries.
# ------------------------------------------------# Project created by QtCreator 2009-12-17T08:49:47
# ------------------------------------------------TARGET = Snap
TEMPLATE = app
SOURCES += main.cpp \
mainwindow.cpp \
../Common/ApplicationIo.cpp \
../Common/ModuleIo.cpp
HEADERS += mainwindow.h
FORMS += mainwindow.ui
DEFINES += GCC
unix:HOMEDIR = "/usr/Innovative"
unix: DEFINES += LINUX
win32:HOMEDIR = $$(INNOVATIVECOMMON)
CONFIG(debug, debug|release) {
OBJECTS_DIR = Debug
DESTDIR = Debug
}
else {
OBJECTS_DIR = Release
DESTDIR = Release
}
LIBS += -L$$HOMEDIR/Lib/Gcc \
-L$$HOMEDIR/Lib/Gcc/$(OBJECTS_DIR) \
-Wl,@$$HOMEDIR/Lib/Gcc/Malibu_Qt.lcf
INCLUDEPATH = $$HOMEDIR/Malibu ../Common
This project will now compile and run, but does not yet incorporate any Innovative board control functionality. It's typically
most efficient to subsume the entire ApplicationIo class from an example program provided with your card directly into the
new application in order to insure that you have all of the necessary initialization and event closures required.
Malibu Library User's Manual
48
Creation of a headless or console-style application is also supported. To build such an application, stub out the functionality
of the UserInterface class which is passed by pointer to the ApplicationIo object. And change the .pro file above to link
against Malibu_Con.lcf instead of Malibu_Qt.lcf. See the zen console forum thread for details.
Malibu Library User's Manual
49
Chapter 4.
The Malibu Framework Library
The Malibu framework library Framework_Mb.lib contains classes which interact with the operating-system at a low-level
to allow inter-thread notification used to synchronize execution via the Malibu OpenWire::Event mechanism. Also, a
provision to access the application command-line is available, which facilitates authoring of more-portable programs.
The contents of the framework library differ, depending on the application programming interface in use. Under Windows
using Borland or Microsoft IDEs, methods within the Win32 API are used to provide inter-thread messaging which forms the
basis for thunking between threads. Under Linux, use of the wxWidgets API compiled using GNC C++ is used to
accomplish similar thunking. Consequently, be aware that the specific source files in the Framework_Mb project differ as a
function of the tool chain in use.
Framework Support Classes
Thunking
Special care must be taken within multi-threaded applications operating in the context of a user-interface. Specifically,
simultaneous calls to UI code from one or more background threads is illegal. To circumvent this limitation, Malibu includes
provisions for automatically marshaling (thunking) code execution from a background into the foreground GUI thread
context when using OpenWire::Event objects.
In order to provide portability amongst various OS frameworks, Malibu implements different versions of the code needed to
thunk between threads. All supported frameworks implement an object of type ThunkerIntf within the Framework_Mb
library to accomplish this. .
Class
Description
ThunkerIntf
Abstract base class from which API-specific thunking class is derived. Provides means of interthread notification, usually via a posted message of some sort sent from within the (Malibu)
background thread context and dispatched within the foreground (UI) thread context.
CommandLineArguments
Abstract base class from which API-specific concrete class is derived. Provides means of retrieving
command-line from operating system using framework-specific methods.
Malibu Library User's Manual
50
Chapter 5.
The Malibu OS Library
The Malibu utility library Os_Mb.lib contains classes which interact with the operating-system at a low-level to allow
creation of threads and to synchronize their execution via events, semaphores and mutexes. These features are built atop the
Jungo WinDriver package to provide portability between operating systems such as Windows and Linux.
Thread Support Classes
Threads
It is often useful to run tasks in a separate background thread of execution. Malibu provides class Innovative::Thread
that simplifies the creating and using of threads, as well as derived classes that are used in Malibu for some commonly used
variants. For example, StartStopThread adds the ability to freeze a thread by command and the ability to wait on
several conditions.
Class
Description
Thread
Abstract base class from which most application threads are derived. Embedded MultipleObjects
manages multiple-condition synchronization.
StartStopThread
Extension of Thread base class which implements bipolar execution model: Thread may be running
or suspended, but remains live and usable in memory.
Sleep
Block for specified number of millseconds
uSleep
Block for specified number of microseconds
Signals
When using threads, it is essential to provide efficient and safe ways to block until one or more conditions occur. This is
generally followed by processing based the signaled condition(s). Malibu includes classes to simplify use of these mainstay
building blocks.
Class
Description
Semaphore
Managed counter. When counter is non-zero, thread is signaled.
Event
Boolean state signal. When active, thread is signaled. Both persistent or single-shot modes
supported.
MultipleObjects
Smart container for Semaphores and Events. Provides ability to block until either these
synchronization objects signals, then unblocks thread, identifies the condition which unblocked the
thread to facilitate processing.
Malibu Library User's Manual
51
Resource Control
When using threads, applications must carefully govern access to shared resources such as memory or hardware devices.
Malibu provides a variety of support classes to provide exclusive control to data structures, peripherals or code sections.
Class
Description
Mutex
Basic mutual exclusion.
AtomicAccess
Thread-safe value increment, decrement and exchange
CriticalSection
Exclusive code access via critical section. Method-wise.
CriticalSectionArea
Exclusive code access via critical section. Region-wise.
ThreadSafeQueue
Template class providing thread-safe access to a queue object.
Inter-Thread Communications
A means of passing data efficiently between tasks within an application is commonplace. These classes support such
operations.
Class
Description
MailSlot
Inter-process messaging via OS mail slots (Windows-only)
ServerPipe
Inter-process messaging via named pipes (server side)
ClientPipe
Inter-process messaging via named pipes (client side)
Operating-System
The classes below allow access to process or application-level information maintained by the operating system.
Class
Description
Application
Information about the running application, such as path and name of executable
Registry
Manipulation of registry variables (Windows-only)
Malibu Library User's Manual
52
Chapter 6.
The Malibu Utility Library
The Malibu utility library Utility_Mb.lib contains a wide variety of common helper classes to manipulate elementary
objects such strings and buffers; perform file I/O; accurate timing measurements and delays and implement inter-object
callbacks.
Buffer Classes
The main purpose of the buffer class is to allow the blocks of data transferred around the Malibu system to be handled in
chunks freely as objects. The data inside can be accessed by an indexed access just like a C array. In addition, iterators are
provided for C++ STL-like iteration over the buffer.
The buffer class is a simple container of data and does not provide advanced access methods such as vector signal processing
functions and analysis functions needed in real-time data acquisition and control applications or for post-processing
operations. Rather, those features are present in the datagram objects Most of the classes utilize MMX and SIMD-optimized
code using the Intel Performance Primitive libraries that offer the highest performance.
The Malibu buffer classes implement copy-on-write to maximize performance. Malibu’s internal, proprietary buffer manager
has been designed for optimal real-time performance with minimal runtime heap thrashing and superfluous copy operations.
Class
Buffer
Description
Basic aligned buffer class with built-in header.
Application
Data movement between target hardware and
Host PC memory
Message Packet Classes
In addition to the large block buffer classes, there is often a need for a 'command' packet to exchange commands and
parameters with a baseboard. The MatadorMessage class encapsulates a small 16 word message format used for command
I/O on Matador baseboards and C64x DSPs. It is used by convention for other message transfer modes as well, as it provides
a good balance of small size with room for parametric data.
Disk I/O Classes
Many applications make extensive use of disk files in order to log or analyze collected data. Malibu features a number of
classes and stand-alone methods specifically-tailored to aid in these situations.
Malibu Library User's Manual
53
Class
Description
IniFile
Read/write access to local configuration (INI) files. Useful for persistent application storage.
BinFile
Motorola S-record file reader
Data Recording and Playback Classes
Malibu provides built-in support and extensive examples for data logging and playback applications. You can record data to
and playback data from standard Windows file system disks at up to 50 Mb/s with the components supplied with Malibu.
You can also record to network drives for system integration.
Class
Description
Application
BinView
Binview INI file generator class. Useful to create
binary data description files which providing
formatting information for data display within the
Innovative BinView applet.
Tag binary data files via secondary descriptor
file. Interface to binary viewer application.
DataLogger
Records raw data received from any input device to
Windows local or network disks.
High bandwidth data recording.
RamDataLogger
Records raw data received from any input device to
Windows local or network disks.
High bandwidth data recording.
DataPlayer
Retrieves raw data previously stored to Windows local
or network disk for real-time output.
High bandwidth data playback.
The DataPlayer class may be used to read signals from a binary data file to be sent downstream. The downstream chain
could be as simple as a direct connection to a hardware output pin such as a module DAC or a baseboard output pin, or a
complex chain of analysis components, each processing the data in an elaborate, application-specific manner. The
component automatically fetches data from the disk as needed to sustain the real-time data flow to downstream components.
A special property, Mode, allows continuous replay of the data contained in the file when the end-of-file condition is
reached.
The DataLogger class may be used to store signals received from upstream into a binary data file. The class automatically
stores received data blocks to disk as needed to sustain the real-time data flow from upstream components. A special
property, Ceiling, allows capping of the total amount of data logged to the data file.
System Components
A useful set of system components saves development time. Classes and functions are provided for precision profiling and
delays, automatically marshal event processing into the foreground thread A stop watch allows for quick application profiling
while other components give direct access to data in RAM, facilitate the numeric display of data arrays and simplify the use
of registered Windows messages.
Class
StopWatch
Description
Precision sub-microsecond elapsed time component
for code profiling
Malibu Library User's Manual
Application
Application profiling, precise delays.
54
OpenWire::Event
Inter-class notification
Implementing callbacks within libraries. May
be synchronized (marshaled) to main thread or
run in caller’s context
MalibuException
Exception base class
Error handling
PathSpec
Class used to extract and insert components of file
path specifications
Construction/analysis of path specifications by
parts
File Support Methods
Malibu includes some stand alone functions for common file operations.
Method
Description
FileExists
Determine file presence
FileSize
Determine file size
String Support
The following classes allow management of collection of strings in Malibu:
Class
Description
StringList
Quick text file parser object
StringVector
Quick text file parser object
In addition there are conversion functions between numeric values and text for I/O to the user interface of an application.
Function
Description
BinToHex
Efficiently converts a binary array to hex string equivalent.
Endian
Endian reversal
FloatToString
Returns the string representation of a double value.
HexToBin
Efficiently converts a hex string to byte equivalent.
IntToString
Returns the string representation of an integer value.
StringToFloat
Convert a string into a floating point value
StringToHex
Convert a string representing a hex string into an integer.
StringToInt
Converts a string into an integer value.
Matlab Interface Classes
Mathworks MatLab and Simulink are powerful analysis and simulation tools. Malibu provides tools to remotely control
instances of MatLab, and to transfer data between a C++ application and the Matlab workspace at rates beyond 100 MB/s.
Malibu Library User's Manual
55
Method
Description
MatlabMatrix
Manipulate Matlab-compatible vectors of various types within C++ programs
MatlabFile
Read or write vectors from standard Matlab .m files.
MatlabEngine
Launch or close a Matlab instance. Allows use of Matlab as a C++ coprocessor.
Data Set Classes
Generally, data flow between target hardware and host system memory is organized as interleaved data from all enabled
channels in module-specific binary format. This is done to maintain the highest data flow rates. Malibu's DataSet objects
provide channelized access to interleaved data stored in standard disk files, to simplify post-analysis or pre-calculation of
output data.
Method
Description
DataSet
Channelized read/write methods on data set containing interleaved data in binary file format.
Automatic translation between native format data and integer, floating point or u/A-law
compessed data sets.
FileDataSet
Data set access to interleaved data stored in disk file.
PacketFileDataSet
Similar to FileDataSet, but specialized to accommodate buffer-prefaced data buffers within a
disk file. This packet buffers are produced by all PMC/XMC modules, the M6713, P25M and
and other baseboards.
RamDataSet
Similar to FileDataSet, but specialized to accommodate interleaved data stored in a RAM
buffer.
Malibu Library User's Manual
56
Chapter 7.
The Malibu Hardware Library
The Malibu hardware library Hardware_Mb.lib contains software interfaces and support classes for the generic hardware
devices used on Innovative baseboards. It includes provision for COFF file parsing and downloads, HPI DSP bus access,
message I/O structures, XSVF parsing and loading, FPGA loading via SelectMap, access to baseboard calibration ROM and
debug scripts.
Target I/O Streaming Classes
Data I/O between the target and the host is a major component of many applications. It is also one of the most complicated
tasks, involving interrupts on both target and host, busmastering, DMA, data buffering and buffer management, among other
issues. In Malibu, each particular style of I/O is packaged into a separate Stream class. When associated with a baseboard
class, the stream can provide the methods and events needed for efficient I/O to and from the target.
Before being used, a stream must be attached to a baseboard with the ConnectTo() method. Only if this method of
streaming is supported on a baseboard will the ConnectTo() compile. The DisconnectFrom() method removes the
connection.
A limitation on all busmaster communications that streams commonly used is that single packet size is limited to what can fit
into the allocated busmaster region. This region must be reserved for use by the Innovative ReserveMemDsp applet and is
subsequently allocated by the device driver at O.S. startup. The maximum size this buffer can be sized to can depend on the
system BIOS or Windows. In any event, it is often relatively-easy to send large amounts of data in multiple packets rather
than depend on a single transfer.
Stream
Usage
PacketStream
Packet based streaming, with data from separate data sources in individual packets.
TiBusmasterStream
Packet based streaming from TI CPUs with PCI bus-mastering.
BlockSteam
Matador style streaming, with no header and interleaved channels.
Innovative::PacketStream provides packet based streaming to the newer PMC cards and the M6713 baseboard.
Packets may be of different sizes, the size being inserted into the packet header. A baseboard may have a number of
'peripheral' devices that can source or consume data. For instance, a TX PMC module features four D/A channels addressed
as two device pairs. Each is accessible via Peripheral ID #0 and #1. Data is marked by a Peripheral ID field to allow routing
according to the source or destination of the data.
By contrast, Innovative::BlockStream on the Toro, Conejo and Delfin baseboards are designed for analog
processing and produce more typical data streams containing interleaved data from all enabled analog channels. All blocks
are of uniform size, and all data is of a uniform format for that run.
The stream Innovative::TiBusmasterStream supports both command packets and buffers directly to the TI C64x
CPU. There are no headers, and data packets may be of any size.
Malibu Library User's Manual
57
Interface Classes
Interface Object
Subsystem
IUsesOnboardCpu
CPU related functions such as Booting and COFF Downloading.
IUsesVirtexFpgaLoader
User Logic Loading.
IUsesVirtexJtagLoader
Logic EEPROM programming via JTAG scan path.
PacketDeviceMap
Packet-based, bus mastering transfers. Used by all PMC modules and M6713
IUsesCalibration
Storage/retrieval of analog cal coefficients in PMC EEPROM
IUsesFpgaLogicVersionInfo
Standardized logic version information retreival
The Interface Object classes include the methods to perform the subsystem tasks, and they also include the events that can be
hooked by the application in the subsystem. For example, in the COFF loading there are events that allow the intercepting of
error and status messages produced during the load, and a progress event that can be used to provide user feedback during the
process.
Timebase Classes
Class
Ics8442
Description
Phase-lock loop timebases for high-speed clock generation
Ics8402
Certain baseboards have high precision timebases on board. These classes are available in the baseboard object to program
these timers.
Hardware Support Classes
Additional support classes.
Class
Description
ClockBase
Clock settings management class
GcScripter
Script interpreter for GrayChip devices
Scripter
Add scripting to a class
HpiEngine
Memory-region access object
PmcIdrom
Base class for Flash ROM Block
ZbtRam
Class to interact with ZBT RAM on a device
Malibu Library User's Manual
58
Hardware Register Classes
In interacting with the memory mapped registers of the hardware, some support classes for the different characteristics of a
register were created. Usually these will only be used inside of a baseboard support class.
Class
Description
AddressingSpace
Memory-region access object
ReadOnlyRegister
Read-only register access
ReadOnlyRegisterBit
Read-only register bit access
ReadOnlyRegisterBitGroup
Register field access
Register
Read/write register access
RegisterArray
Register array access
RegisterBit
Register bit access
RegisterBitGroup
Register field access
ShadowRegister
Control a memory location as a register with a shadow showing
the current state
CachedShadowRegister
Deferred-update ShadowRegister object
Malibu Library User's Manual
59
Chapter 8.
The Malibu Analysis Library
The Malibu analysis library Utility_Mb.lib provides classes that perform common signal processing functions such as
filters and FFTs, logging and playback of waveforms and other classes needed in data acquisition and control applications .
These routines make use of the Intel Performance Primitives libraries in order to achieve optimal performance.
Consequently, use of the classes within this library create a runtime dependency on the IPP shared object codes, which are
packaged as DLLs under Windows and .sa files under Linux.
If this dependency is problematic in your application, do not use any of the classes within this library, exclude #include
<Analysis_Mb.h> from your application source and avoid calling the Init::UsePerformanceMemoryFunctions()
which forces binding to the IPP libraries.
Statistical Analysis Classes
The analysis classes provide access to common DSP algorithms and analysis functions. Most of the components are MMX
and SIMD optimized code from the Intel libraries that offer the highest performance.
Class
Description
Application
Stats
Statistics: Min, max, mean, std dev, dynamic range,
integrals
Signal analysis
AdcStats
A/D statistics: Signal-Noise, SINAD, total-harmonic
distortion, harmonic analysis
User application data pump. Channelized data
available on events.
A/D and D/A characterization
Signal Processing Classes
Common signal processing operations such as FFTs, and filters are implemented as components within the Malibu package.
These operations have been implemented using the Intel IPP library for performance. The IPP library uses the full features of
Pentium processors to make analysis even more efficient.
Class
Description
Malibu Library User's Manual
Application
60
BandPass
Band-pass filter, variable # taps, automatic digital filter
designer.
BandStop
Band-stop filter, variable # taps, automatic digital filter
designer.
Highpass
High-pass filter, variable # taps, automatic digital filter
designer
Lowpass
Low-pass filter, variable # taps, automatic digital filter
designer
Fir
Generic FIR filter. Variable # taps
Iir
Generic IIR filter. Variable # taps
Fourier
Time to frequency domain transformations, adjustable
size, numerous window functions.
InverseFourier
Frequency to time domain transformations, adjustable
size.
Waveform filtering. >100 MTaps/sec on
Pentium IV 3GHz
>100,000 1K-point transforms/sec on Pentium
IV 3 GHz
The Fourier class may be used to convert signals between the frequency and time domains. Properties control the number
of points in the FFT frame, from 128 to 512K points. The InverseFourier class performs inverse transformations (from
frequency to time domain). A property is available to enable windowing of time-series input data prior to transformation
using common windows such as Hanning and Blackman.
The LowPass, HighPass, BandPass, BandStop, IIir and Fir classes perform filtering operations on data blocks.
Properties control the number of filter taps to be used to implement the filter, the cutoff frequencies and the sampling rate.
The Filter() method performs a convolution on a data block using filter coefficients, which are automatically calculated
using the specified properties. As with the FFT component, a property is available to enable windowing of time-series input
data prior to transformation using common windows such as Hanning and Blackman.
Signal Generation Classes
The SignalGen class generates contiguous sinusoidal, triangular or square waves in block format suitable for consumption
by other processing functions, or to be sent to target hardware as block data. A single SignalGen object can provide blocks
of data to multiple independent streaming output channels within an application, if so desired.
The GaussGen class generates random noise, distributed in a Gaussian distribution about a mean value. This mean value and
its standard deviation can be changed to suit the needs of the application.
The RandomGen class also generates a random noise source, but with a different distribution. This noise distribution is flat, a
uniform distribution between an upper and lower boundary.
Digital Signal Processing Classes
Class
CommonGen
Description
Base class for all signal generators.
Malibu Library User's Manual
Application
Allows creation of user-defined filters
61
GaussGen
User-adjustable Gaussian noise source
SignalGen
User-adjustable arbitrary signal source. Sin, Cos,
Triangle, Square waves
RandomGen
User adjustable random noise source
Malibu Library User's Manual
Frequency response testing, vibration
62
Chapter 9.
The Malibu PCI Library
The Malibu ethernet library Pci_Mb.lib provides support for baseboards that use the PCI bus and busmastering as the
primary means of communication between target and host.
PCI Baseboard Classes
A major part of the purpose of the Malibu library is to provide easy interaction with Innovative hardware products. These
products all require means of loading logic, software to CPUs present, configuration and control, and providing the transfer
of data and commands to and from the board.
In the Malibu library, most of the details of these procedures is contained inside the library so that the application writer does
not need to concern themselves with low level details. This means that it is possible for boards with different means of
performing a function can be used in similar or identical ways by an application, simplifying the learning curve for the user.
Baseboards and PMC Modules
The DSP baseboard components listed below encapsulate the capabilities of the baseboard hardware. For more information
about any baseboard class, see the hardware manual for the baseboard. It includes a chapter giving an overview of the object.
Object
Product
Matador
Toro, Delfin, Conejo, Lobo, Oruga DSP baseboards
C64xDsp
TMS320C6416 DSP hosted on Quadia and Quixote baseboards
M6713
M6713 PCI DSP baseboard
Quadia
Quadia and Duet baseboard features (not including the four C64x CPUs).
Quixote
Quixote baseboard features (not including the one C64x CPU).
Baseboard objects are created in a one-to-one relationship with hardware. To associate a baseboard with a hardware device,
each device in a system is given a unique index, known as the target number. These indexes are unique for each type of
baseboard. Once the target number has been assigned, the baseboard can be attached to the hardware with an Open()
command. If the target is not present, this method will throw an exception. Otherwise, the baseboard is ready for use. To
detach from hardware, use the Close() method.
Baseboard objects also have methods to allow access to the features of the board. Some of these are unique to a particular
baseboard, and are implemented as simple methods. Other board features are more complex or are shared on several
baseboards. These are called subsystems. Logic loading and COFF file loading are examples of subsystems.
Malibu Library User's Manual
63
Subsystems are implemented as an interface class that can be shared from baseboard to baseboard, even if the
implementation differs internally. Each baseboard can provide the subsystems that it requires. For example, the Quadia
baseboard class has interfaces to load each of the twin user-programmable Virtex II FPGAs.
PMC Module Classes
The PMC Module classes provide application access to Innovative's PMC module family. Like the regular baseboards, these
modules all require means of loading logic, configuration and control, and providing the transfer of data and commands to
and from the board. For more information about any PMC module class, see the hardware manual for the module. It includes
a chapter giving an overview of the object and a detailed annotated example.
Object
Product
Uwb
Ultra wide-band analog capture
Sio
High-speed serial I/O
Tx
High-speed analog waveform playback and streaming
DigitalReceiver
Wide-band analog capture and hardware down-conversion
XMC Module Classes
The XMC Module classes provide application access to Innovative's X-series module family. Like the regular baseboards,
these modules all require means of loading logic, configuration and control, and providing the transfer of data and commands
to and from the board. For more information about any XMC module class, see the hardware manual for the module. It
includes a chapter giving an overview of the object and a detailed annotated example.
Object
Product
X5-400M
400 MHz A/D and D/A
X3-10M
Eight-channel, 10 MHz A/D
X3-SD
Sixteen-channel, sigma-delta A/D
X3-SDF
Four-channel, high-speed, instrumentation-grade sigma-delta A/D
X3-Servo
Twelve-channel, high-speed, instrumentation-grade successive-approximation A/D for low-latency servo
applications
Malibu Library User's Manual
64
Malibu Library User's Manual
65
Chapter 10.
The Malibu Ethernet Library
The Malibu ethernet library Ethernet_Mb.lib provides support for baseboards that use ethernet as the primary means of
communication between target and host.
Baseboard Classes
At present, only a single baseboard uses the Ethernet interface to communicate. For more information about the baseboard
class, see the hardware manual for the baseboard. It includes a chapter giving an overview of the object.
Object
Sbc6713e
Product
Supports the SBC6713e ethernet single board processor.
Malibu Library User's Manual
66
Chapter 11.
Writing Custom Applications
Moving from a recital of features of a library to writing your own application can be a difficult step. The examples provided
in the distribution for a baseboard can help with this step. This chapter takes an example and annotates it with notes that may
help clarify the use of Malibu in an application.
This example uses the Quixote baseboard. Other baseboards may use different methods of communication or other methods,
but the general procedure is similar for all baseboards.
The ASnap Example
Most scientific and engineering applications require the acquisition and storage of data for analysis after the fact. Even in
cases where most data analysis is done in place, there is usually a requirement that some data be saved to monitor the system.
In many cases a pure data logger that does no immediate processing is the most common application.
Because of the high data rate of the Quixote baseboard, a logger that saves all of the data to the host disk is impossible.
Instead, the best that can be done is to capture a relatively large set of samples out of the data stream, and send that to the
host.
The Asnap example in the Quixote software distribution demonstrates this kind of capture application. It consists of a host
program in Windows that controls and communicates with a target program on the Quixote's DSP. Commands and Data
move between the two programs, using Innovative's software libraries to accomplish the task.
Tools Required
In general, writing applications for the Quixote requires the simultaneous development of two programs – one for the host
and one for the target. Each of these requires a development environment, a debugger, and a set of support libraries from
Innovative.
Table 4. Development Tools for the Asnap Example
Processor
Development Environment
Innovative
Toolset
Project Directory
Target DSP
Code Composer Studio 3.0
Pismo
Examples\ASnap
Host PC
Borland C++ Builder 6.0
Malibu
Examples\ASnap\Bcb
Microsoft Visual Studio 2003
Examples\ASnap\VC7
Microsoft Visual Studio 2005
Examples\ASnap\VC8
Common Host Code
Examples\ASnap\Common
Malibu Library User's Manual
67
On the host side, the Malibu library is source code compatible with all three of the above environments. The code that
performs much of the actual functioning of the program, outside of the User Interface portion of the program, is therefore
common code. Each project uses the same file to interact with the hardware and acquire data.
Program Design
The Asnap example is designed to allow repeated data taking runs on command from the host. Because of the high data rate
of the analog hardware, we know we can not take data forever without falling behind. However we maximize our chances by
setting up the system to capture blocks into target memory as fast as possible until a specific amount is read in. Then the data
taking is stopped and the accumulated data delivered to the host and logged.
The example uses the Messages to send commands and parameters to the target to control the I/O. Busmaster block transfer
is used to deliver data to the host.
After delivering the data the target resets itself for further commands from the host so that repeated data snapshots can be
taken.
The Host Application
The picture to the left shows the main window of the Asnap example. This form is from the designer of the Borland C++
Builder version of the example. It shows the layout of the controls of the User Interface.
User Interface
On the top of the form is a button bar than contains control
buttons for the example. These buttons are how the user initiates
an action in the example.
From left to right, the buttons perform these actions:
•
Logic Loading. The user logic of the Quixote must be
loaded at least once per session (it remains valid until
power is removed from the board). This button
performs the logic loading from an EXO File.
•
COFF Loading. Similarly, the DSP must be loaded with
a target program COFF File. This button controls this.
•
Capture. This button controls a single capture of data
following the parameters given in the UI.
The square to the left is a non-visual component in Builder that
controls the posting of a File Open Dialog box. It will not appear in the running application.
Malibu Library User's Manual
68
Below that is a set of controls that hold the parameters of the acquisition. These settings are delivered to the target and
configure the target program accordingly.
The Event Log, Progress Bar and Status Bar at the bottom display progress messages and feedback during the operation of
the program.
Host Side Program Organization
The Malibu library is designed to be rebuildable in each of three different host environments: Borland C++ Builder,
Microsoft Visual Studio 2003, and Microsoft Visual Studio 2005 using the .NET UI. Because the library has a common
interface in all environments, the code that interacts with Malibu is separated out into a class, ApplicationIo in the files
ApplicationIo.cpp and .h. This class acts identically in all the platforms.
The Main form of the application creates an ApplicationIo to perform the work of the example. The UI can call the methods
of the ApplicationIo to perform the work when, for example, a button is pressed or a control changed.
Sometimes, however, the ApplicationIo object needs to 'call back into' the UI. But since the code here is common, it can't use
a pointer to the main window or form, as this would make ApplicationIo have to know details of Borland or the VC
environment in use.
The standard solution to decouple the ApplicationIo from the form is to use an Interface class to hide the implementation. An
interface class is an abstract class that defines a set of methods that can be called by a client class (here, ApplicationIo). The
other class produces an implementation of the Interface by either multiple inheriting from the interface, or by creating a
separate helper class object that derives from the interface. In either case the implementing class forwards the call to the UI
form class to perform the action. ApplicationIo only has to know how to deal with a pointer to a class that implements the
interface, and all UI dependencies are hidden.
The predefined IUserInterface interface class is defined in ApplicationIo.h. The constructor of ApplicationIo requires a
pointer to the interface, which is saved and used to perform the actual updates to the UI inside of ApplicationIo's methods.
ApplicationIo
Initialization
The main form creates an ApplicationIo object in its constructor. The object creates a number of Malibu objects at once as
can be seen from this detail from the header ApplicationIo.h.
private:
//
// Member Data
IUserInterface *
Innovative::C64xDsp
Innovative::Quixote
Innovative::TiBusmasterStream
Innovative::DataLogger
Innovative::BinView
UI;
Dsp;
Board;
Stream;
Logger;
BinView;
In Malibu, objects are defined to represent units of hardware as well as software units. The C64xDsp and Quixote objects
represent the baseboard and the CPU on it. The TiBusmasterStream object encapsulates the I/O operations supported by the
CPU. The Logger and BinView objects support logging data to disk and the BinView data analysis application.
Malibu Library User's Manual
69
Creating a hardware object such as Quixote does not attach it to the hardware. The object has to be explicitly opened. The
OpenBoards() method sets up the hardware objects:
//--------------------------------------------------------------------------// ApplicationIo::OpenBoards() -- Open Hardware & set up callbacks
//--------------------------------------------------------------------------void
{
ApplicationIo::OpenBoards(int dspTarget)
Board.Target(dspTarget);
Board.Open();
Board.Reset();
Board.Logic().OnFpgaParseProgress.SetEvent(this, &ApplicationIo::HandleParseProgress);
Board.Logic().OnFpgaParseComplete.SetEvent(this, &ApplicationIo::HandleParseComplete);
Board.Logic().OnFpgaParseMessage.SetEvent(this, &ApplicationIo::HandleLoadError);
Board.Logic().OnFpgaLoadProgress.SetEvent(this, &ApplicationIo::HandleLoadProgress);
Board.Logic().OnFpgaLoadComplete.SetEvent(this, &ApplicationIo::HandleLoadComplete);
Board.Logic().OnFpgaLoadMessage.SetEvent(this, &ApplicationIo::HandleLoadError);
This code configures the Quixote object. First the identifier target number is set, then the Open() method attaches the object
to the actual physical device. The board is then reset.
The next lines configure the Quixote logic loader's informational events. Malibu has a method where functions can be
'plugged into' the library to be called at certain times or in response to certain events detected. Events allow a tight integration
between an application and the library. These events are informational messages called by the logic loader feature of the
Quixote. They display feedback during the loading of the user logic.
Dsp.Target(dspTarget);
Dsp.Open();
UI->AppendToLog("Quixote Opened!");
Dsp.Reset();
This code initializes the DSP on the Quixote. Note the use of the UI interface class object (UI) to perform a UI function. The
AppendToLog() method adds the text to the log display on the main window.
Stream.ConnectTo(&Dsp);
Stream.OnPacketAvailable.SetEvent(this, &ApplicationIo::PacketAvailableHandler);
Stream.OnPacketAvailable.Synchronize();
Stream.OnMailAvailable.SetEvent(this, &ApplicationIo::MailAvailableHandler);
Stream.OnMailAvailable.Synchronize();
The Stream object is an 'stream' object that manages communication between the application and a piece of hardware.
Separating the I/O into a separate class clarifies the distinction between an I/O protocol and the implementing hardware.
Different types of hardware can all support a single type of streaming. Also, it is possible that a single type of hardware could
support several styles of I/O, each with its own distinct interface.
A I/O Stream class is attached to a piece of hardware via the ConnectTo() method. If an objects supports a stream type, this
call will be implemented. Unsupported stream types will not compile. We then attach handlers to important events.
The TiBusmasterStream supports two types of communication: a 'Mail' message transfer that sends small packets and a
busmastered Packet transfer for large data transfers. An event is defined that will be called when each of these types of data
arrives from the target, and we intercept both of them here.
An event is not necessarily called in the same thread as the UI. If it is not, and you want to call a UI function in the handler
you have to have the event synchronized with the UI thread. The call to Synchronize() directs the event to call the event
Malibu Library User's Manual
70
handler in the main UI thread context. This results in a slight performance penalty, but allows us to call UI methods in the
event handler freely.
//
// Hook progress message
Dsp.Cpu().OnCoffLoadProgress.SetEvent(this, &ApplicationIo::DownloadProgress);
Dsp.Cpu().Boot();
}
The final line boots the CPU so that the debugger can be started.
Logic Loading
Because the logic must be loaded for Quixote applications to function, the example includes a logic loader button. Let's
follow the button press code through the entire operation.
In the UI, when the logic load button is pressed a handler method is called. Here it is attached to the method
LogicLoadBtnClick():
//--------------------------------------------------------------------------// TForm1::LogicLoadBtnClick() -- Load Logic
//--------------------------------------------------------------------------void __fastcall TForm1::LogicLoadBtnClick(TObject *Sender)
{
OpenDialog->Title = "Logic File Selection";
OpenDialog->Filter = "Logic Files (*.exo)|*.EXO|All Files (*.*)|*.*";
OpenDialog->FileName = "";
OpenDialog->InitialDir = ExtractFilePath(AppPath.c_str());
OpenDialog->Options.Clear();
OpenDialog->Options << ofFileMustExist << ofHideReadOnly << ofNoChangeDir;
if (!OpenDialog->Execute())
return;
The code above posts a dialog allowing the user to select a logic file. If the user cancels out, no logic is loaded. If he selects a
file, we move on to the loading.
// don't let this be clicked again until download completes
ProgressBar->Position = 0;
ProgressBar->Max = 100;
LogicLoadBtn->Enabled = false;
Io->LoadLogic(std::string(OpenDialog->FileName.c_str()));
}
We do some more UI tricks, such as setting up the progress bar limits and disabling the load button, before we get to the meat
of the handler. We extract the file name from the dialog, and pass it to the ApplicationIo method LoadLogic().
//-----------------------------------------------------------------------------// ApplicationIo::LoadLogic() -//-----------------------------------------------------------------------------void
ApplicationIo::LoadLogic(const std::string & Image)
Malibu Library User's Manual
71
{
Board.Reset();
UI->AppendToLog("-----------------------------------------------");
UI->AppendToLog(" Parsing logic file");
UI->UpdateLogicLoadProgress(0);
The handler resets the board, then uses the UI callback interface to do more setting up of the UI for the logic loading. The
interface allows UI calls to be made here in the Io object or out in the UI class itself, whichever is more convenient.
Board.Logic().ConfigureFpga(Image);
}
And here we have a call into Malibu. This starts the long sequence of logic loading. The call returns at once, as the loading is
managed by a background thread. Status and feedback are given by events that can be intercepted by the application or not.
//-----------------------------------------------------------------------------// ApplicationIo::HandleLoadProgress() -//-----------------------------------------------------------------------------void ApplicationIo::HandleLoadProgress(Innovative::ProcessProgressEvent & event)
{
UI->UpdateLogicLoadProgress( event.Percent );
}
This event is called to give a percentage progress of the entire operation. The handler calls back to the UI, where a Progress
bar control is updated to give a visible indication of the loading progress. Knowing the events to handle is a large part of
operating with the Malibu library.
//-----------------------------------------------------------------------------// ApplicationIo::HandleLoadComplete() -//-----------------------------------------------------------------------------void ApplicationIo::HandleLoadComplete(Innovative::ProcessCompletionEvent & event)
{
UI->UpdateLogicLoadProgress( 100 );
UI->AppendToLog("Load completed ok");
UI->OnLogicLoadComplete();
}
Finally, the logic loader sends this event when the load is finally done. In this case, all we do is update the UI so the user can
see that the load is finished. In other cases this could trigger the application to automatically perform additional actions.
COFF File Loading
The next stage of the configuration is to load code onto the target CPU. Again, this is triggered by a button on the UI, which
posts a dialog allowing a file to be selected. Then it calls this method of the ApplicationIo object:
//--------------------------------------------------------------------------// ApplicationIo::DownloadCoff() -- Coff Loading
//--------------------------------------------------------------------------void
{
ApplicationIo::DownloadCoff(const std::string & filename)
Dsp.Cpu().DownloadCoff(filename);
}
Malibu Library User's Manual
72
Again, a single method performs the entire COFF load – or at least begins the COFF loading. Like logic loading, this call
initiates a COFF load that is actually performed in the background. You can use events to get feedback about the progress of
the load. After the COFF load is complete, the target program is started.
In this case, however, even knowing when the load is complete is not enough. The target program has to set up itself for
communication and the host must wait until this is complete before sending commands or data to the target. This is the point
where the two programs have to begin cooperating. The solution we use is to have all target programs send a “Login”
message to the host at the end of their initialization. This message signals to the host that the target is ready for
communications to begin. This snippet from the application message handler shows this login message response:
case ccLogin:
UI->AppendToLog("ccLogin");
UI->AppendToLog("Dsp logged in: " + IntToString(++LoginTally));
UI->OnLoginCommand();
break;
This prints message to the log and activates the 'Snap' button that begins data transfers.
Starting a Data Capture
After downloading, the Snap button is activated to enable capturing data.
//--------------------------------------------------------------------------// ApplicationIo::BeginSnap() -- Start data taking
//--------------------------------------------------------------------------// This function is executed when the user clicks on the RcvButton.
// It causes the ccDataXferMsg command to be sent to the target DSP,
// which responds by sending a buffer of contiguous analog acquisition data
void
{
ApplicationIo::BeginSnap(const std::string & data_file_base)
RcvMessageTally = RcvByteTally = 0;
//
// Logger saves the data transmitted into a file if checking data
Logger.Stop();
Logger.FileName = AppPath + data_file_base + ".bin";
Logger.Start();
UI->GetSettings();
This UI interface command loads the settings information from the UI controls into the Settings structure in the ApplicationIo
class. This class is declared as publicly accessible to reduce the amount of access methods in the class.
MatadorMessage Msg;
Msg.TypeCode(ccDataXferMsg);
Msg.AsFloat(0, Settings.SampleRate);
Msg.Data(1, Settings.Events);
Msg.Data(2, Settings.Channels );
Msg.Data(3, Settings.ClockSource );
Msg.Data(4, Settings.Plot );
//
// Send the command to send data buffers on target to host
Stream.Send(Msg);
The configuration information is loaded into a MatadorMessage object for transmission to the target. The data is a 16 word
packet, the first two of which are reserved for header information. We use the TypeCode() field to define what type of
Malibu Library User's Manual
73
message this is. Data can be loaded as different data types. The Sample Rate is transferred as floating point, while the others
are transferred as integers.
The Stream's Send() method sends the packet to the target as a mail command packet.
UI->AppendToLog("------------------------------------------------------------");
UI->AppendToLog("Capturing...");
}
At this point, the action shifts to the target side program. The next section will discuss the target code.
The Target Application
Main Thread
On the target we use the Pismo libraries to access the hardware. These libraries are built on the TI DSP/BIOS operating
system that provides a multithreaded working environment. The library launches a starting thread that calls the IIMain()
function. This thread starts first, acting much like the main() function in a standard C program.
void IIMain()
{
CaptureThread Capture(tpHigher);
Capture.Resume();
The data acquisition requires its own thread, which is created and started here. Its priority is elevated to assure that data
taking gets executed first when it needs servicing.
MessageTransfer Xfr;
IIMessage C;
for (;;)
{
//
// Wait for message to arrive from host
Xfr.Recv(0, C);
DispatchPacket(Capture, C);
}
We also need a thread dedicated to responding to messages from the host, so we use this one. The Recv() method waits for a
message packet to arrive from the host. The DispatchPacket() function then processes the message. When we left the host, we
had just issued a command packet to the target, thus waking up this thread to process it.
}
The Capture Thread
The capture thread is a class derived from the Pismo Thread class. It manages the creation and use of threaded code. To use it
you derive your class from thread:
class CaptureThread : public Thread
{
....
Malibu Library User's Manual
74
The Thread class creates a thread that executes the Execute() method in a separated thread. You therefore have to override
that method to perform the work of the thread:
void Execute()
{
for (int i = 0; i < 1; ++i)
{
IIMessage Cmd;
Cmd.TypeCode(ccLogin);
Cmd.Data(0, i);
Cmd.Data(1, 100);
Cmd.Data(2, 101); Cmd.Data(3, 102);
MailXfr->Send(0, Cmd);
}
The first action the thread takes is to send the “Login” message to the host, to indicate the target is up and running. Note that
sending a command on the target is much like sending a message on the host. A message object is 'filled in' and sent via a
method call.
The values used to distinguish commands are an enumeration defined in a header that is shared between the target and the
host program. This assures that both sides agree on the meaning of a message packet.
while(!Terminated())
{
Start.Acquire();
Open();
Gather();
if (Info.Plot)
WriteBuffer(Snaps);
}
Close();
Available.Release();
}
Here is the thread loop. The thread remains idle until the Start semaphore is signaled. Once it is it calls the Open() method to
configure the analog driver, Gather() to collect the data, and then closes the driver. The Available semaphore signals the main
thread that data has been sent to the host, so it respond to commands again.
When we left the main thread, we were processing the command to take data. The DispatchPacket() function calls the
CaptureThread's Acquire() method:
void Acquire(IIMessage & Msg)
{
//
// Fill transfer Info from message
Info.SampleRate = Msg.AsFloat(0);
Info.Events
= Msg.Data(1);
Info.Channels
= Msg.Data(2);
Info.ClockSource = Msg.Data(3);
Info.Plot
= Msg.Data(4);
Info.SampleRate *= 1000;
Start.Release();
Available.Acquire();
}
Malibu Library User's Manual
75
The Acquire() method copies out the information in the message into our local cache. The release of the Start semaphore
wakes up the background thread. The main thread then waits for the Acquire semaphore to be signaled, suspending the main
thread while data taking is going on.
In this simple example, there is no real need to respond to messages all of the time. In other cases, you might wish to
continue to respond to messages and reduce the interlocking. If so, you have to take more care that a second data taking
request does not corrupt the data taking information.
Configuring Data Acquisition
With the waking of the CaptureThread, Open() is called to configure the analog.
void Open()
{
...
AIn->Device().Channels().EnableChannels(Info.Channels);
int IntsPerEvent = AIn->Device().Channels().BytesPerEvent() / sizeof(int);
Analog I/O is managed by Analog Stream objects. These use BIOS device drivers to DMA data into a set of buffer objects
and return them to the application as they are filled with data. The CaptureThread uses the AdcStream object Ain which takes
data from the ADCs.
Here we are configuring the number of channels to activate in the data stream, and using the information block to read back
the size of the data that will come out per event.
// Simple, continuous data flow
BasicTmb Timebase;
Timebase.ClockSource( (Info.ClockSource==0) ?
ClockManager::csTimer0 : ClockManager::csDds );
Timebase.Rate(Info.SampleRate);
Ain->Device().Attach(Timebase);
Analog streams need to have a timebase to physically drive the I/O. These objects configure the hardware and logic to use the
type of clock the application requires. The BasicTmb is a simple continuous clock. We use one of the parameters to set which
physical timer is used as the timebase and attach it to the analog device.
EventsPerBuffer = 65536/IntsPerEvent;
int IntsPerBuffer;
// Buffers sized to signal at specified rate
Ain->Events(EventsPerBuffer);
The size of the buffers used to accept data is an important parameter. Too small a size creates excess overhead since you are
continually switching buffers. Too large a size can either overflow memory or suspend the application waiting for the first
block to finish for too long a time.
// Create an image buffer for data snaps
Resize(Info.Events);
BufferCount = 1;
IntsPerBuffer = Info.Events * IntsPerEvent;
This application saves a fixed number of events for transmission back. The Snaps buffer is used to store this data. The
Resize() method sizes it to fit the data needed.
volatile int status = AIn->Open();
Malibu Library User's Manual
76
The Stream's Open() method starts the acquisition of data. We then send a message to the host informing the host of the
number of buffers to expect.
IIMessage Cmd;
Cmd.TypeCode(ccBufferCount);
Cmd.Data(0, IntsPerBuffer / MaxPayload + 1);
MailXfr->Send(0, Cmd);
FCount = 0;
}
From the Open() method the Capture thread moves straight to the Gather() method. This method takes enough buffers in to
fill the capture buffer. The core of the Gather() is the call to Get(), which calls Ain->Get(). This method blocks until a buffer
of acquired data has arrived from the Analog input. This buffer can then be accessed as AIn->Buffer().
//----------------------------------------------------// Sample in analog buffer
//----------------------------------------------------void Get()
{
AIn->Get();
++FCount;
}
After getting a buffer, the contents are copied into the Snaps buffer. We keep track of the location where to write the next
block as the Cursor variable. When we have filled the Snaps buffer we are done.
//----------------------------------------------------// Accumulate segments into acqusition buffer
//----------------------------------------------------void Gather()
{
Cursor = 0;
while (Cursor < Snaps.Elements())
{
Get();
int Residual = Snaps.Ints()-Cursor;
int Chunk = std::min(Residual, AIn->Buffer().Ints());
Snaps.Copy(AIn->Buffer(), Cursor, Chunk);
Cursor += Chunk;
}
}
After filling the Snaps buffer, we send it back to the host. Sending a data packet is similar to sending a command, except the
object sent is a buffer rather than an IIMessage. There is a maximum size of packet that can be sent based on the size of the
region reserved for busmastering by the device driver. The example uses a modest maximim packet size saved in the
MaxPayload constant. Packets are copied out of the snap buffer in chunks of MaxPayload, until the final packet which sends
the remainder.
Each data packet is preceded by a ccDataFlushMsg command. This is by no means a requirement. Data packets can be sent at
any time and in any number without messages marking them, as long as both sides agree on what these data packets mean. In
this example the messages allow progress feedback to be displayed as the data is acquired.
//-----------------------------------------------------
Malibu Library User's Manual
77
// WriteBuffer() -- Send buffer to host
//----------------------------------------------------void WriteBuffer(IntBuffer & Buffer)
{
int Elements = Buffer.Ints();
int * Cursor = Buffer.Addr();
while (Elements)
{
const int Residual = std::min(Elements, MaxPayload);
IIMessage Cmd;
Cmd.TypeCode(ccDataFlushMsg);
MailXfr->Send(0, Cmd);
// Copy buffer to payload
IntBuffer Dst(Residual);
IntBuffer Src(Cursor, Residual);
Dst.Copy(Src);
Xfr->Send(0, Dst);
}
}
Cursor += Residual;
Elements -= Residual;
The Close() Method
After taking the data, the Close() method is called. It sends a summary message to the host giving the results of the log
session, then shuts down the data taking stream to await the next capture.
Data Logging
At this point the attention shifts to the host. The data capture operation has resulted in a sequence of messages and data
packets that the host needs to process properly.
Command Packet Reception
In this example we use the notification events of the TiBusmasterStream class to alert us when a command arrives from the
target. The handler was installed as part of the Open() method described earlier. On examination, the first interesting item is
the argument of the event, a class named TiBusmasterStreamDataEvent.
Often an event needs to pass data to the handler. The Malibu event library restricts an event handler to have just a single
argument. However, this argument can be a class that can contain any number of subelements. The class
TiBusmasterStreamDataEvent contains a pointer to the stream that issued the event, which is used to extract the message
from the stream.
//----------------------------------------------------------------------------// ApplicationIo::MailAvailableHandler() -- Data Packet arrival event handler
//----------------------------------------------------------------------------void
{
ApplicationIo::MailAvailableHandler(TiBusmasterStreamDataEvent & Event)
static int LoginTally(0);
//
// Read the mail message packet
MatadorMessage Msg;
Malibu Library User's Manual
78
Event.Sender->Recv(Msg);
By sending the sender pointer as data, we allow a single handler to process multiple stream object's messages. Once the
message arrives, it can be analyzed and processed by a switch statement on the type code.
//
// ...Process the packet
switch (Msg.TypeCode())
{
case ccInfo:
{
UI->AppendToLog("pmInfo");
<< additional handler code ommitted >>
The first message sent as part of the capture protocol was a ccBufferCount message. The purpose of this command is to
inform the application of how many data buffers will be sent to complete the capture. This value is saved, and also resizes the
progress bar to display the fraction of blocks remaining in the transmission.
Next comes one ccDataFlush message for each data packet, followed by the packet itself. The application actually notes these
packets but displays nothing. Finally on Close() comes a final ccDataFlush command followed by a result command ccInfo.
This command closes the logger, writes the data to disk, displays some of the information and creates a data description file
for the BinView analysis application and saves it to disk.
Data Packet Reception
Like the message packet handler, the arrival of data packets can be processed inside of an event handler function.
//----------------------------------------------------------------------------// ApplicationIo::PacketAvailableHandler() -- Data Packet arrival event handler
//----------------------------------------------------------------------------void
{
ApplicationIo::PacketAvailableHandler(TiBusmasterStreamDataEvent & Event)
IntegerBuffer Packet;
Event.Sender->Recv(Packet);
UI->AppendToLog("Packet Rcvd");
UI->UpdateAcquisitionProgress();
std::string text = "Rx: " + IntToString(++RcvMessageTally);
UI->MessageText(text);
Logger.Log(Packet.IntPtr(), Packet.Size());
}
The sender pointer in the event argument is used to receive the data into the IntegerBuffer object Packet. After some update
of the UI, the packet data is appended to data logger by the Log method. So the actual process of responding to a data packet,
reading it in and logging it is accomplished in two lines of source code.
As stated above, the final ccInfo message closes the logged file, writing out the last piece of data and closing the file. This
allows other programs to open and analyze the results.
Malibu Library User's Manual
79
Chapter 12.
Malibu Buffer Classes
The Buffer Classes in Malibu have been designed for efficiency in the context of real-time data processing and flow
requirements. This document provides an overview of the design decisions made in their architecture.
Buffer Design Decisions
Previous versions of Malibu utilized specialized buffers for each type of data contained. The resulting class family design
suffered from a number of issues: The different classes were defined primarily by the type of the data contained in the
buffer, namely is it floating point data, integers, and so on. This was problematic for buffers that have no clearly defined
type, such as message packets, or if the data type is unknown.
The need to port Malibu to other platforms drove these problems to the surface. The old buffer classes relied on the Intel IPP
library, which is not available on all platforms. Since the IPP requirement had to be removed, this opened the door to
reworking the class family entirely.
Design Decision #1 – A “Typeless” Buffer class
In the present design, a buffer is a very simple thing. It is a package of data of undetermined type and format. Its primary
purpose is to act as a container to simplify movement of data between application and target hardware. From this
requirement, the natural element-size within a buffer is 32-bit integers because that is the smallest size of data that can be
bus-mastered on Innovative hardware. All buffers have a header block and a data block. The header information may be
ignored if the data streaming method used does not understand or make use of headers.
This reduces the number of buffer classes that our streaming classes needed to deal with down to one. Packet streams use the
header. The others ignore it. This class is called Innovative::Buffer.
Since a buffer is agnostic as to the size of the elements it holds, the only size method is called SizeInInts().
Design Decision #2 – Data Access Datagrams
Though Malibu uses typeless buffers, it is still important to be able to access the contents of the buffer simply and easily. To
accommodate this need, access to the data in buffers is performed by a wrapper class that is linked to the buffer just as access
is needed. In most applications, there are two kinds of buffers in general use:
•
“Command” messages, in which the data is a set heterogeneous argument values
•
“Data” packets where the all the data is likely to be of the same, if undetermined, type. For example one buffer
might be all 16 bit short data. Another might be floating point data.
Malibu Library User's Manual
80
The former type of message is supported by the IDatagram interface and the MessageDatagram class which derives from
it. The latter type is supported by the AccessDatagram class.
Since the AccessDatagram needs to support many different data types, it is implemented as a template class AccessDatagram<T>. It provides typed, random-access iterators, STL-like begin() and end() methods and array
operators. Each instance of a datagram provides a size() method that returns the size of the buffer in units of the data type
accessed. The template assures that any new operations will be available to all data types without cutting and pasting code.
This datagram has no dependencies on the IPP library.
An additional benefit of this design is that the template works on any data type as well as any structure that is defined by the
user. If the buffer contains an array of records, parsing the data is then very simple without adding any code to the library.
Design Decision #3 – Predefined Access Datagram Classes
While an access datagram can be simply built up for any data type, there are some data types that are commonly in use. For
simplicity's sake, numerous datagrams have been pre-defined in wrapper classes for these common types in
BufferDatagrams_Mb.cpp. Classes are provided for these data types:
Table 5. Basic Buffer Datagram Classes
Class Name
Data Type
IntegerDG
int
UIntegerDG
unsigned int
FloatDG
float
ComplexDG
Complex
ShortDG
short
CharDG
char
Design Decision #4 – IPP Datagram Classes
Malibu uses the Intel Performance Primitives under operating systems that support it to accelerate signal processing and
vector operations. As a consequence, Malibu implements IPP-enabled datagrams which wrap buffer objects and allow highspeed manipulations of their contents. These datagram classes reside in the Analysis_Mb library and also derive from the
AccessDatagram template. In addition to IPP-specific functionality, all basic access methods are supported as well.
Table 6. IPP Function Datagrams
Class Name
IppCharDG
Data Type
char
Malibu Library User's Manual
File
IppCharDG_Mb.h
81
Class Name
Data Type
File
IppComplex
DG
Complex
IppComplexDG_Mb.h
IppFloatDG
float
IppFloatDG_Mb.h
IppInteger
DG
int
IppIntegerDG_Mb.h
IppShortDG
short
IppShortDG_Mb.h
Buffer Internals
Buffers are designed to be the primary transport vehicle for data moving from an application to Innovative hardware boards.
This means that there is an advantage in being able to create and move buffers about in our system without copying data
when it is not required, as copying large amounts of data will degrade performance.
Since data transfers to the target are done at least in units of 32 bit words, the internal buffer size and pointers are integer
pointers. Even if the data type is shorter, such as a short or byte, the size still must be an integral number of 32-bit words.
PacketStream buffers have an additional requirement that the header and body be an integral number of 64-bit words,
meaning that the size of each in 32-bit words must be an even number.
In addition, the IPP library has some alignment restrictions on were the data buffers must begin for optimal performance. To
insure that buffers are compatible with this library, Malibu insures suitable buffer alignment.
The buffer class minimizes the cost of copying data by using a handle-body approach. When a buffer is copied, two 'handle'
class instances are created, each pointing to the same header and data body information. This is a faster operation than bulk
copying the large amount of data, especially if the data is only rarely-changed. There are in fact two handles present, one to
the header data and one to the packet data. Both handles manage properly aligned data blocks for use with the IPP library.
If the data body is changed, however, all handles will be affected. This breaks the simplistic logical model. Therefore Malibu
implements a 'copy on write' scheme in which any write to a data region will force the body to be separated from all other
handles and copied. This can be a relatively expensive process. Data access datagrams will properly force this to happen
when used. Using raw pointers to buffer data regions will not, and should therefore be avoided.
A final optimization is that the buffer classes use a shared pool to cache blocks to reduce the time to allocate and free buffer
data blocks. If a buffer of the correct size has been previously freed it will be reused from the cache rather than reallocated.
Provisions are made to pre-allocate buffers of a specified size in order to mitigate allocation time prior to real-time activities.
Data Buffers : The Innovative::Buffer Class
The Buffer class is the class used for all bulk data transfers to Innovative boards. All stream classes exchange Buffer objects.
Malibu Library User's Manual
82
Buffer Class (Buffer_Mb.h)
The Buffer class contains a header block and a data block. The header block is only used and transmitted/received on Packet
Stream boards. Other streams ignore the header, although it is always present and sized to hold at least 2 words.
Like the previous buffers, Buffer uses managed aligned blocks, and is reference counted for fast copying as long as the data
is unchanged.
Unlike before, the Buffer class assumes no type to its contents. The size of the buffer's contents are returned in units of 32-bit
ints. The pointers to the base of the data and header region are available, but access to the contents are best done with
datagrams.
The use of non-const methods such as Data() and Resize() will force a copy of the contents if the Buffer contents are
shared with another buffer. This may invalidate datagrams associated with this buffer.
Holding Template (Buffer_Mb.h)
Because the Buffer class is logically typeless, sizing presents a small problem. With STL containers, such as vectors, one can
create a buffer sized to a specified number of elements. For example:
std::vector<int>( 1000 );
would make a buffer that is 1000, 32-bit words long. But the Buffer class has no notion of the size of the elements that it
contains. For this reason, Malibu includes the Holding template. This template performs the conversion of a size in
elements of a type to a size in integers needed by the Buffer constructor. So in the case above where we need to hold 1000
short integers:
Innovative::Buffer KiloBuf( Holding<int>(1000) );
This sizes the Buffer to be large enough to hold the 1000 integer elements that will be accessed later using a datagram class.
MessageDatagram (Buffer_Mb.h)
A specialty access datagram class interface has been created to simplify filling packet stream buffers with command
parameters similar to those used in the message packets used on Matador cards and C64x streaming. This interface, called
IDatagram, allows access to the data as a heterogeneous collection of data – for example one argument can be an integer and
the next a float.
Previous versions of Malibu employed PmcBuffers which had an implementation of this interface to support sending
packets containing commands to boards with DSPs such as the M6713 and P25 called PmcBufferDatagram. Within the
current Malibu, this has been renamed MessageDatagram to more closely follow the use of the object.
Buffer Data Access
The data access requirements seem to require contradictory features: Support for many types of data quickly and easily is
required, but a minimal code base is desired. Templates solve this problem very cleanly. A template class can be
instantiated for many data types from a single code base. If a feature is added to the template, it is added to them all.
In fact, the template allows the user to apply his own structure to a buffer as easily as any that we provide.
Malibu Library User's Manual
83
The data access template provides a view of a buffer as an array of same-typed data. So an integer datagram accesses the
buffer as an array of integers.
Access Template Features
Template AccessDatagram<T> (AccessDatagrams_Mb.h)
The access datagram uses an interface as its view of the buffer to on which to operate. This decouples the template from the
Buffer class itself and makes the template more general. The buffer class implements the interface by deriving from
IDatagrammable, so all buffers can be accessed by the template easily:
Buffer A(128);
AccessDatagram<unsigned int> A_dg(A);
// accesses buffer A
for (int i=0; i<A_dg.size(); i++)
A_dg[i] = i;
The for-loop in the above code fills the buffer with a ramp. The size() method returns the size of the data in elements. The
datagram array operator accesses the data in the buffer as an array of unsigned int. This version is not range checked.
The at() method performs the same access with range checking.
There are some additional methods for returning sizes. The size() method returns the size in elements.
SizeInElements() is an alias for that method. SizeInInts() returns the size in integers, and SizeInBytes() returns
the size in bytes. ElementSizeBytes() returns the size of the access element in bytes.
The access datagram supports resizing the associated buffer.
An access datagram can be constructed from any structure. For example:
struct FourSamples
{
unsigned short sample[4];
}
Buffer B(100);
AccessDatagram<FourSamples> B_4Sample_dg(B);
for (int i=0; i<B_4Sample_dg.size(); i++)
{
B_4Sample_dg[i].sample[0] = i;
B_4Sample_dg[i].sample[1] = i + 100;
B_4Sample_dg[i].sample[2] = i + 200;
B_4Sample_dg[i].sample[3] = i + 300;
}
// accesses buffer B
// size will return 50 here
Since the size of the element is 2, 32 bit words, the buffer only fits 50 elements in the 100 words.
AccessDatagram supports an STL iterator over the data. This iterator is a random access iterator. Forward and reverse
iteration is supported using the standard begin(), end(), rbegin(), and rend() methods. Constant versions of iterators
allow read-only access.
Buffer C( Holding<float>(20) );
AccessDatagram<float> C_dg(C);
Malibu Library User's Manual
// accesses buffer C
84
// write
for (AccessDatagram<float>::iterator iter = C_dg.begin(); iter != C_dg.end(); ++iter)
*iter = i;
// read – outputs 0.0, 1.0, 2.0...
for (AccessDatagram<float>::const_iterator iter = C_dg.begin(); iter != C_dg.end(); ++iter)
Output(*iter);
// read backward – outputs 19.0, 18.0, 17.0...
for (AccessDatagram<float>::reverse_iterator iter = C_dg.rbegin(); iter != C_dg.rend(); ++iter)
Output(*iter);
The availability of these iterators also allows STL algorithm templates to be used on buffers via datagrams. The following
code fills a buffer with 0 using the std::fill algorithm.
Buffer D( Holding<unsigned int>(20) );
AccessDatagram<unsigned int> D_dg(D);
std::fill(D_dg.begin(), D_dg.end(), 0);
Note: A datagram object can be made invalid by certain operations on the buffer. Since the datagram cache the information
about the data for speed, if the buffer changes the iterator will no longer point to its assumed buffer, and may point nowhere.
Similarly, any iterators created from a datagram can be invalidated by these operations.
Buffer E( Holding<unsigned int>(20) );
Buffer F;
F = E;
// F shares E's buffer
AccessDatagram<unsigned int> F_dg(F);
F.MakeUnique();
// F_dg now invalid!
In the above code sample, two buffers share the same data block after the assignment. When F is split away via the
MakeUnique() method, F_dg is no longer pointing to F's buffer. (In this case it is probably pointing to E's buffer). Similar
issues can occur with multiple datagrams:
Buffer E( Holding<unsigned int>(20) );
AccessDatagram<unsigned int>
E_dg(E);
AccessDatagram<unsigned short> E_short_dg(E);
E_short_dg.Resize( 500 );
// E_dg now invalid!
In the above code, when the second datagram changes the internal buffer by resizing it, the E_short_dg datagram is updated
to match the new block, but E_dg is not and is invalidated. To mitigate these problems, datagrams should be constructed as
close to the point of use as possible. Also, a datagram can be revalidated with the renew call:
E_dg.Renew();
// E_dg now valid again.
Renew() does not re-validate any iterators created by the datagram that also were invalidated. These remain invalid.
Template Class DatagramIterator (AccessDatagrams_Mb.h)
This template provides the iterator objects for the access datagram. It is a standard random-access iterator supporting
forwards and backwards iteration.
// Iterator Test
Log("Iterator Test!");
Malibu Library User's Manual
85
Buffer A(100);
AccessDatagram<int> A_dg(A);
AccessDatagram<int>::iterator Iter1 = A_dg.begin();
AccessDatagram<int>::iterator Iter2 = A_dg.begin();
Iterators can be compared with each other.
Log("Compare equal Iterators");
{
std::stringstream msg;
msg << " ==: " << (Iter1==Iter2) << " !=: " << (Iter1!=Iter2) <<
" <: " << (Iter1<Iter2) << " <=: " << (Iter1<=Iter2) <<
" >: " << (Iter1>Iter2) << " >=: " << (Iter1>=Iter2) ;
Log(msg.str());
}
Subtracting iterators gives the 'distance' between them in elements.
Log("Iterator Difference");
++Iter1; ++Iter1; ++Iter1;
int delta = Iter1 – Iter2;
// delta is 3
{
std::stringstream msg;
msg << "Pointer Difference " << delta ;
Log(msg.str());
}
Iterators can be assigned, pointing them to the same location. They can be offset like pointers
Log("Iterator Assign");
AccessDatagram<int>::iterator Iter3 = A_dg.begin() + 10;
int delta2 = Iter3 – Iter1;
// delta2 is 7
Iter3 = Iter2;
int delta3 = Iter3 – Iter1;
// delta3 is -3
{
std::stringstream msg;
msg << "Delta2 " << delta2 << " Delta3 " << delta3; ;
Log(msg.str());
}
Log("Compare Unequal Iterators (A>B)");
{
std::stringstream msg;
msg << " ==: " << (Iter1==Iter2) << " !=: " << (Iter1!=Iter2) <<
" <: " << (Iter1<Iter2) << " <=: " << (Iter1<=Iter2) <<
" >: " << (Iter1>Iter2) << " >=: " << (Iter1>=Iter2) ;
Log(msg.str());
}
Iterators can use the bracket notation just like a pointer or array can. It adjusts the location without moving the iterator.
for (int i=0; i<100; i++)
Iter2[i] = i;
Datagram iterators can be bound to any class that supports the IIteratable interface. This allows the code to be reused if
new datagrams are developed.
Malibu Library User's Manual
86
Interface Class IDatagrammable (AccessDatagrams_Mb.h)
This interface allows the access datagram to bind to a buffer class. The buffer class derives from IDatagrammable allowing
access to the data portion of the buffer. Users can implement this interface to allow the access template to work on another
class. There are several examples of this in the library, one being AlignedBlockDatagram which builds an interface for the
AlignedBlock class.
//==============================================================================
// CLASS IDatagrammable -- Interface required to support datagrams
//==============================================================================
class IDatagrammable
{
public:
virtual ~IDatagrammable() {}
virtual
virtual
virtual
virtual
unsigned int
int *
bool
void
DatagramSize() = 0;
DatagramBasePtr() = 0;
MakeWritable() = 0;
// returns 'true' if buffer renewed
Resize(unsigned int size_in_ints) = 0;
};
Interface Class IIteratable (AccessDatagrams_Mb.h)
This interface allows the Datagram Iterator template to bind to a Datagram class. Any class supporting IIteratable can
be iterated-through with a DatagramIterator.
//==============================================================================
// CLASS IIteratable -- Interface required to support iteration over data
//==============================================================================
class IIteratable
{
public:
virtual char *
virtual size_t
};
Base() = 0;
SizeInBytes() = 0;
Standard Implementation Classes
The Malibu library provides some standard implementations of access datagrams. These provide shorter names that the full
template syntax, and also allow a reference to the original buffer to be returned by the WrappedBuffer() method.
IntegerDG (BufferDatagrams_Mb.h)
Provides access as integers.
UIntegerDG (BufferDatagrams_Mb.h)
Provides access as unsigned integers.
Malibu Library User's Manual
87
FloatDG (BufferDatagrams_Mb.h)
Provides access as floating point data.
ShortDG (BufferDatagrams_Mb.h)
Provides access as short integers.
ComplexDG (BufferDatagrams_Mb.h)
Provides access as complex numbers.
CharDG (BufferDatagrams_Mb.h)
Provides access as characters.
IPP Implementation Classes
The original buffer classes provided methods to use IPP functions to manipulate the buffer. These datagrams preserve the
functions so that code using them can be easily ported to the new library. One difference from the old classes is that datagram
methods that create a new buffer return a Buffer, not a datagram This buffer then must be wrapped in a datagram to be
manipulated further.
// Assume A, B, C are buffers containing float data
IppFloatDG A_dg(A);
IppFloatDG B_dg(B);
IppFloatDG C_dg(C);
Buffer D = A + B + C;
// will not compile! Can't Add buffers
Buffer D = A_dg + B_dg + C_Dg;
// will not compile! Can't use the temporary
// correct way to sum A, B, and C
Buffer AB = A_dg + B_dg;
IppFloatDG AB_dg(AB);
Buffer D = AB_dg + C_Dg;
All the calculations supported before can be performed in the new system, but it may well be more verbose due to the
requirement to explicitly assign temporary sums to a buffer handle and wrapping them in a datagram before continuing.
IppCharDG (IppCharDG_Mb.h)
Character IPP vector functions.
IppComplexDG (IppComplexDG_Mb.h)
Complex IPP vector functions.
IppFloatDG (IppFloatDG_Mb.h)
Float IPP vector functions.
Malibu Library User's Manual
88
IppIntegerDG (IppIntegerDG_Mb.h)
Integer IPP vector functions
IppShortDG (IppShortDG_Mb.h)
Short IPP vector functions.
Special Purpose Datagrams
PacketBufferHeader (BufferHeader_Mb.h)
This datagram is crafted to access the header of a buffer rather than the data. In addition, it defines some additional methods
to access the header information fields used by Packet Stream buffers.
Table 7. PacketBufferHeader Field Methods
Method Name
Description
PeripheralId()
Access PID field of header (Packet Type)
PacketSize()
Size of entire packet in words (data and header)
DataSize()
Size of data region in words
IDatagram Template (Datagram_Mb.h)
This datagram is designed to allow access to a buffer as a heterogeneous collection of arguments, like a command packet.
This is especially useful for Packet Stream boards with co-processors, like the P25 and M6713 as it is common for the host
and target software to have to communicate via a command protocol. This datagram provides a similar interface than that
used by Matador message packet and the TI Bus-master stream mail packets. This aids in porting code between these
platforms.
MessageDatagram (Buffer_Mb.h)
This datagram implements the IDatagram interface on a Buffer.
Internal Datagrams (various CPPs)
The original buffer classes had functions that were used internally by stream classes to move data to and from data packets to
the hardware. These have been separated out into separate datagram classes, removing them from the interface of the user
classes.
Malibu Library User's Manual
89
Guidelines for Converting to new Buffers
Translate all buffers to be Innovative::Buffer
Previous code may have used PmcBuffers, IntegerBuffers, MemoryBuffers, or something else. All these references
must be replaced by Buffers.
The original buffer type may give you a guideline on which type of data access datagram you will need, if any.
Convert array operators on buffers
The old buffer classes used to provide a native array operator method. These no longer exist. You have to create a access
datagram to do the same thing.
// Original Code:
static PmcBuffer Packet;
//
// Extract the packet from the Incoming Queue...
Event.Sender->Recv(Packet);
for (int i=0; i<Packet.Size(); i++)
Log(Packet[i]);
// Ported Code
static Buffer Packet;
//
// Extract the packet from the Incoming Queue...
Event.Sender->Recv(Packet);
IntegerDG Packet_DG(Packet);
for (int i=0; i<Packet_DG.size(); i++)
Log(Packet_DG[i]);
An IntegerDG datagram is used since the PmcBuffer's native size was integer. A FloatBuffer would have used a
FloatDG to produce the same effect.
Note that the datagram was created as late as practical, to avoid any issues with invalidation by the Recv() method of the
stream.
Size Issues
The original buffers used Size() to give the size in elements. In order to force a reexamination of various size calls, the new
buffers and datagrams do not have a Size() method.
The Buffer class has a SizeInInts() method to return the raw size of the data region. HeaderSizeInInts() returns the
size of the header. FullSizeInInts() returns the sum of these.
Datagram wrappers provide a size() method for compatibility with STL that is size in elements. There is also
SizeInElements() that is more explicit. For calculating rates, SizeInBytes() or SizeInInts() can give the values for
any type directly.
Malibu Library User's Manual
90
Datagrams and Iterators are Disposable
As discussed above, there can be cases where datagrams can be made invalid by changes to their underlying buffer. The best
way to reduce this risk is to consider a datagram as a very volatile entity. Create a datagram at the last minute before use.
Limit its lifetime as much as possible.
Creating a new datagram is inexpensive, so this technique will not cost much in computation time.
Packet Stream Header Access
Normal datagrams only access the data portion of a buffer. To access the header region, use a PacketBufferHeader
datagram.
// ...Old way
//
void ApplicationIo::HandleDataAvailable(PacketStreamDataEvent & Event)
{
static PmcBuffer Packet;
//
// ...Get the packet from the system
Event.Sender->Recv(Packet);
//
// ...Process the packet
short PacketType = Packet.Header()->PeripheralId();
switch (PacketType)
{
case ccLogin:
UI->Log("Dsp logged in: " + IntToString(++LoginTally));
UI->OnLoginCommand();
break;
// ...continues
// ...New way
//
void ApplicationIo::HandleDataAvailable(PacketStreamDataEvent & Event)
{
static Buffer Packet;
//
// ...Get the packet from the system
Event.Sender->Recv(Packet);
//
// ...Process the packet
PacketBufferHeader PktHeader(Packet);
short PacketType = PktHeader.PeripheralId();
switch (PacketType)
{
case ccLogin:
UI->Log("Dsp logged in: " + IntToString(++LoginTally));
UI->OnLoginCommand();
break;
// ...continues
The PacketBufferHeader has methods to set or get the fields of a buffer to be used in packet streaming applications.
Porting Buffer Access Modes #1 – The Aztec Model
Here we look at how buffers are accessed in applications and how the new style can improve matters. In this mode of access
the programmer pulls all the interesting parts out of the object and works with them. The main reason for this was that we
wanted to use a different data type. This is far better done with an access datagram.
Malibu Library User's Manual
91
//--------------------------------------------------------------------------// BlockChecker::Ramp16BitCheck() -- verify loopback
//--------------------------------------------------------------------------bool
{
BlockChecker::Ramp16BitCheck(PmcBuffer & pda, unsigned int block_idx)
//
// we have short data so recast the pointer
short * Data = pda.ShortPtr();
const int ShortScaleFactor = sizeof(int)/sizeof(short);
bool is_error;
if (Data[0] != (short)NextBlockStartVal)
is_error = true;
else
is_error = false;
NextBlockStartVal = Data[0] + pda.Size()*ShortScaleFactor;
if (is_error)
return true;
// ...in-block continuity
for (unsigned int i=1; i<pda.Size()*ShortScaleFactor; i++)
if (Data[i] != Data[i-1]+1)
return true;
return false;
}
Since we wish to access as short integers, we will create a short datagram. This choice makes all the code to convert sizes
unnecessary, as the short datagram knows how many elements it has in it.
//--------------------------------------------------------------------------// BlockChecker::Ramp16BitCheck() -- verify loopback
//--------------------------------------------------------------------------bool
{
BlockChecker::Ramp16BitCheck(Buffer & pda, unsigned int block_idx)
ShortDG pda_dg(pda);
bool is_error;
if (pda_dg[0] != (short)NextBlockStartVal)
is_error = true;
else
is_error = false;
NextBlockStartVal = pda_dg[0] + pda_dg.size();
if (is_error)
return true;
// ...in-block continuity
for (unsigned int i=1; i<pda_dg.size(); i++)
if (pda_dg[i] != pda_dg[i-1]+1)
return true;
}
return false;
Porting Buffer Access Modes #2 – Buffer [] operator
This code is a bit nicer, in that we used the array access methods of the buffer to access the contents. Of course, these
methods no longer exist.
Malibu Library User's Manual
92
//--------------------------------------------------------------------------// BlockChecker::LoopbackCheck() -- verify loopback
//--------------------------------------------------------------------------bool
{
BlockChecker::LoopbackCheck(PmcBuffer & pda, unsigned int block_idx)
//
// check for gaps in between packets
bool is_error;
if ((unsigned int)pda[0] != NextBlockStartVal)
is_error = true;
else
is_error = false;
NextBlockStartVal = pda[0] + pda.Size();
if (is_error)
return true;
// ...in-block continuity
for (unsigned int i=1; i<pda.Size(); i++)
if (pda[i] != pda[i-1]+1)
return true;
return false;
}
The IntegerDG Access datagram is a fast substitute:
//--------------------------------------------------------------------------// BlockChecker::LoopbackCheck() -- verify loopback
//--------------------------------------------------------------------------bool
{
BlockChecker::LoopbackCheck(Buffer & pda, unsigned int block_idx)
IntegerDG pda_dg(pda);
//
// check for gaps in between packets
bool is_error;
if ((unsigned int)pda_dg[0] != NextBlockStartVal)
is_error = true;
else
is_error = false;
NextBlockStartVal = pda_dg[0] + pda_dg.size();
if (is_error)
return true;
// ...in-block continuity
for (unsigned int i=1; i<pda_dg.Size(); i++)
if (pda_dg[i] != pda_dg[i-1]+1)
return true;
return false;
}
As an alternative, you can use iterators. Note the use of operator [] in the loop to look backwards at the previous sample
from the current location. As an alternative, *(iter-1) could have been used. In use, iterators act much as a pointer would
and code written for pointers converts naturally to using an iterator in place of the pointer.
//--------------------------------------------------------------------------// BlockChecker::LoopbackCheck() -- verify loopback
//--------------------------------------------------------------------------bool
{
BlockChecker::LoopbackCheck(Buffer & pda, unsigned int block_idx)
Malibu Library User's Manual
93
IntegerDG pda_dg(pda);
IntegerDG::iterator iter = pda_dg.begin();
//
// check for gaps in between packets
bool is_error;
if ((unsigned int)(*iter) != NextBlockStartVal)
is_error = true;
else
is_error = false;
NextBlockStartVal = (*iter) + pda_dg.size();
if (is_error)
return true;
// ...in-block continuity
iter++;
for ( ; iter<pda_dg.end() ; iter++)
if ((*iter) != iter[-1]+1)
return true;
}
return false;
Porting Buffer Access Modes #3 -- Applying a Structure to Buffer Content
In some cases example programs use this technique to overlay a structure on a message packet:
// Display capture stats
ResultsInfo Info;
memcpy(&Info, Packet.IntPtr(), ResultsInfoSize);
UI->Log( "PreOverrun flag: " + IntToString(Info.PreOverflow));
UI->Log( "PostOverrun flag: " + IntToString(Info.PostOverflow));
Interface datagrams allow this code to do the same thing by laying the structure over the data using the access datagram.
Then, the data can be copied using structure assignment rather than memcpy():
// Display capture stats
ResultsInfo Info;
AccessDatagram<ResultsInfo> PacketDG(Packet);
Info = PacketDG[0];
// apply structure
// copy out
UI->Log( "PreOverrun flag: " + IntToString(Info.PreOverflow));
UI->Log( "PostOverrun flag: " + IntToString(Info.PostOverflow));
In fact, in this case there is no need for the copy at all, as the data could be read from the datagram directly:
// Display capture stats
AccessDatagram<ResultsInfo> PacketDG(Packet);
// apply structure
UI->Log( "PreOverrun flag: " + IntToString(PacketDG[0].PreOverflow));
UI->Log( "PostOverrun flag: " + IntToString(PacketDG[0].PostOverflow));
Malibu Library User's Manual
94
Chapter 13.
Using the X6 Family Baseboards in Malibu
Overview
The X6 family of baseboards a number of changes from the X5 and X3 family baseboards. These differences will impact the
application using an X6.
The most profound change is that the X6 introduces a new style of data streaming. The raw data is enclosed in VITA
standard formatted packets, that are enclosed in a packet similar, but not identical to the X5 and X3 buffers. This means that
there is no longer a single kind of Buffer, but now three different flavors of buffers may be in use.
Buffers and their Type
The concept of the Innovative::Buffer class is that of a container of generic data. The type and format of the data contained in
a buffer is defined by the datagram object used to view it. What had been consistent, the presence of a header of a fixed size,
is required to be different for these new types of data. A class is needed to manage these differences.
Buffer class
Header Size
Trailer Size
Description
Buffer
2 words
n/a
Original buffer, plus the common base for all buffers
PmcBuffer
2 words
n/a
X3/X5 buffer formats
VeloBuffer
4 words
n/a
X6 stream buffer wrapper
VitaBuffer
7 words
1 word
X6 stream buffer data packet
The Vita buffers require a trailer in addition to the header and data sections. To accommodate this, all buffers now include a
Trailer section in addition to the Header and Data. Since older code will not access this section, the presence of the trailer
will not harm legacy applications.
Most software processing buffers only are interested in the data portion of the buffer. This code will be able to work
identically on all kinds of buffers without problems. For example, a buffer filling function coded like this:
void
MyBufferStuffer( Buffer & buf_to_fill );
MyBufferStuffer can handle any buffer type without any problems
VeloBuffer Vbuf;
PmcBuffer Pbuf;
Buffer
Buf;
MyBufferStuffer(Vbuf);
MyBufferStuffer(Pbuf);
Malibu Library User's Manual
95
MyBufferStuffer(Buf);
Note that Pbuf and Buf actually have exactly the same format, although they are not identical types. But a function can be
written to only allow particular types to be passed in:
void
VeloBuffersOnly( VeloBuffer & buf );
MyBufferStuffer(Vbuf);
MyBufferStuffer(Pbuf);
// works
// does not compile – PmcBuffers not allowed.
This technique is used on the X6 Streaming object to only allow Vita and Velo packets to be streamed.
Buffer Conversions
At times, these types can introduce some difficulties. For example, lets say you already have a generator function that creates
buffer objects full of data for output. So this function returns a buffer object, and has a signature like this:
Buffer
BufGen();
Buffer
Dbuf = BufGen();
But if you use this function with a VitaBuffer:
VitaBuffer
Vbuf = BufGen();
You have a problem. The assignment copies all the parts of the buffer – header, trailer, and body. But the header and trailer
of the Buffer are incorrectly sized. Code (such as streaming) that relies on properly formatted packets will fail.
To help with this situation, a template function ConvertData has been defined to create a correct buffer of one type from
another, copying only the data.
VitaBuffer Vbuf;
Buffer Dbuf = BufGen();
Vbuf = ConvertData<VitaBuffer>(Dbuf);
// Vbuf shares Dbuf's data only.
The header and trailer of Vbuf will be overwritten with those in the temporary VitaBuffer returned. If you want to preserve
your VitaBuffer's header and trailer for some reason do this:
VitaBuffer Vbuf;
… set up Vbuf header/trailer
Buffer Dbuf = BufGen();
VitaBuffer scratch = ConvertData<VitaBuffer>(Dbuf);
Vbuf.SwapData(scratch);
// header and trailer unaffected
Applying a Type
At times you can have the opposite situation – you have a proper buffer, header and all, but it has the wrong type. This
happens in the library when we share code with X3/X5 streaming systems, and it can happen in this situation in an
application: assume you have a piece of code that you want to only accept PmcBuffers, and a generator that creates Buffer
objects from legacy code:
void
Buffer
PmcBuffersOnly( PmcBuffer & buf );
Dbuf = BufGen();
Malibu Library User's Manual
96
So even though the buffer Dbuf is perfectly formatted to be passed into PmcBuffersOnly(), its incorrect type makes it
impossible. For this, we have another template function Convert<>(), which shares all sections with the original buffer and
changes its type:
Buffer Dbuf = BufGen();
PmcBuffer Pbuf = Convert<PmcBuffer>(DBuf);
PmcBuffersOnly(Pbuf);
// works
These conversions are all fast, since they only involve moving pointers around. No data is copied by any of these
conversions.
Buffer Sizing Template Functions
These functions already existed before, but this is a good place to mention it. Since Buffers are generic, the size arguments in
the constructors and in Resize() use the size in integers as an argument. Writing unit conversion code from scratch is error
prone, so these template functions exist:
Holding<T>() :: Sizing a buffer to hold N elements
This template function is intended for use in a constructor or Resize() call to make sure the resulting buffer can hold N
elements. For example, to make a buffer hold 1000 doubles, use”
Buffer DoubleStore( Holding<double>(1000) );
// DoubleStore.SizeInInts() will be 2000
CouldHold<T>() :: Elements in a current buffer
This is more or less the reverse operation. Given a buffer, how many elements could it hold without resizing. (In effect this is
what the size would be if the buffer were wrapped in a datagram of that type).
unsigned int shorts_available = CouldHold<short>(
DoubleStore.SizeInInts() );
// result is 4000
Buffer Header Datagrams
The increase in the number of buffer types also means there needs to be Header Datagrams to access them.
Buffer class
Header Datagram
Description
Buffer
PacketBufferHeader, PacketHeaderDatagram
Original datagram for the X3/X5, plus an alias to follow new
naming convention.
PmcBuffer
PmcHeaderDatagram
X3/X5 buffer formats
VeloBuffer
VeloHeaderDatagram
X6 stream buffer wrapper
VitaBuffer
VitaHeaderDatagram
X6 stream buffer data packet
The datagrams for all buffer types except the Vita buffer have the same interface. The first word of the header is the standard
PeripheralId() field, and the remainder is the packet size. A DataSize() field allows setting the size without caring about the
size of any header or trailer size.
Malibu Library User's Manual
97
The Vita Buffer's header has a different format. There is a 16 bit size field, a StreamId that acts much like the PeripheralId
does for the other packets. Any other information in the header will be supported by methods of this datagram.
Buffer Trailer Datagrams
The addition of trailers means there be Trailer Datagrams to access them.
Buffer class
Trailer Datagram
VitaBuffer
VitaTrailerDatagram
Description
X6 stream buffer data packet
Since the VitaBuffer is the only buffer to use trailers, this is the only one with an explicit trailer datagram defined. The main
function of interest in this case is the Padding() field. Vita buffers must be an even multiple of four words long. The system
supports the truncation of a packet when data ends (for example when a trigger falls) so that all data before the boundary is
transmitted. If the full four word packet is incomplete, the Padding() field of the trailer is set to show what part of the last 16
byte double word is “padding” – that is, not full of data. The value of this field is 0-15, where 0 means all data is valid, and
15 means that only the first byte is valid.
The AccessDatagram template and all classes derived from it understand the Padding() call and will truncate the effective
size of the buffer to avoid the padding. So assume a Short datagram is wrapped around a buffer with a padding of 1. The
datagram will ignore the last short integer (2 bytes) because one of them is invalid. An integer datagram would ignore the
last four bytes. Only a char datagram would allow viewing of all valid data and still ignore the invalid data.
Buffer Header/Trailer Utility Functions
These functions perform some useful operations on buffer headers and trailers.
Clear Functions
void
void
ClearHeader(Buffer & buffer);
ClearTrailer(Buffer & buffer);
// fill with 0s
These functions clear the header or trailer of a buffer. They work with any buffer type.
Header Correctness Functions
void
void
void
void
InitPmcHeader(Buffer & buffer);
InitHeader(PmcBuffer & buffer);
InitHeader(VeloBuffer & buffer);
InitHeader(VitaBuffer & buffer);
// "correct" Header
// (make size correct and
//
other required fields
These functions make sure the headers are correct for each type. An important check is to fill the size field with the current
size of the Data region plus headers and trailers. The Vita packet has some additional required fields that are initialized
correctly by this function.
Malibu Library User's Manual
98
Trailer Correctness Functions
void
InitTrailer(VitaBuffer & buffer);
// "correct" Trailer
This function makes sure all required fields of the trailer are initialized correctly.
Header Size Conversion
void
ConvertHeader(VeloBuffer & buffer);
// if Velo Buffer has wrong type of header, fix it
This function corrects a buffer whose header was resized by some legacy operation to be the correct size for Velo packets. It
copies the contents of the original header, as much as possible. It also calls Clear() and InitHeader() in the process.
New Streaming Object – VitaPacketStream
The new streaming format of the X6 family is supported by a new streaming object, VitaPacketStream. The
VitaPacketStream object connects to an X6 board exactly as the PacketStream object connected to an X5 or X3 board to
implement the stream functionality.
The most fundamental difference between the VitaPacketStream is the format of the packet data. In PacketStream, each
packet contains raw data from the source device. These packets were PmcBuffers. In VitaPacketStream, the basic packet
streamed is a VeloBuffer. The contents of the VeloBuffer is a stream of VitaBuffer data. This stream is not necessarily
aligned on VitaBuffer boundaries.
There are Malibu objects to simplify the construction of these packets, as described in the next section.
Connection
A VitaPacketStream is associated with a particular X6 board object with the ConnectTo() method. If Module is an X6
baseboard and Stream a VitaPacketStream, the following code shows the connection and disconnection process:
Stream.ConnectTo(Module);
FStreamConnected = true;
Log("Stream Connected...");
… code that uses the Stream and board …
Stream.Disconnect();
FStreamConnected = false;
Module.Close();
Native Buffer Methods
VeloBuffer
VitaBuffer
NativeBuffer(size_t data_size, bool autoinit=true);
NativeVitaBuffer(size_t data_size, bool autoinit=true);
These methods produce a properly typed buffer for use with the streaming object. The autoinit parameter, if true, will
initialize the buffer header and trailer for the buffer to zeros and for required values. This is done by calling the standard
buffer InitHeader and ClearHeader functions. The VitaBuffer version also clears and initializes the trailer using InitTrailer
and ClearTrailer.
Malibu Library User's Manual
99
Send and Recv Methods
virtual void
virtual void
virtual void
Send( short PeriphId, VeloBuffer & packet );
Send( VeloBuffer & packet );
Recv( VeloBuffer & packet );
Like PacketStream, these methods are used to dispatch a new packet to the output, or read a packet from the input. These can
be used alone, asynchronously, or in conjunction with the stream data notification callback events for a more demand driven
interface.
Stream Data Notification Events
OpenWire::EventHandler<VitaPacketStreamDataEvent>
OpenWire::EventHandler<VitaPacketStreamDataEvent>
OnVeloDataRequired;
OnVeloDataAvailable;
These notification events allow the user to install a handler method that will be called when a data packet arrives as input
(OnVeloDataAvailable) or when a new buffer should be sent to the output ( OnVeloDataRequired). The application then
uses the Send() method to issue a completed output buffer or the Recv() method to obtain the next input buffer.
Each event that is handled needs to be hooked to an application function or method to be used, as shown below. An unhooked
event is silently ignored.
Stream.OnVeloDataRequired.SetEvent(this, &ApplicationIo::HandleDataRequired);
Stream.OnVeloDataAvailable.SetEvent(this, &ApplicationIo::HandleDataAvailable);
Direct Data Mode
VitaPacketStream also supports Direct Data Mode, where raw slabs of data are processed without being broken up into Velo
or Vita packets. This allows higher rate logging applications, since a minimal amount of processing is being done on the data.
This is done in an identical fashion to PacketStream, since it is a function of the common base class to both stream objects,
PacketStreamBase.
Working with Vita Packet Streams
The data in a Velo buffer is part of a stream of Vita packet data. This stream does not need to be aligned on packet
boundaries. This makes parsing more difficult, as all packets need to be accounted for to properly extract the data. Malibu
contains a pair of objects to insert Vita packets into Velocia packets (VitaPacketPacker) or to extract Vita packets from the
stream (VitaPacketParser).
VitaPacketParser – Parsing Input Packets
The VitaPacketParser object is used to extract Vita packets from the Velo packets received. To set up, you need to create the
object in your application class:
Innovative::VitaPacketParser
Vpp;
Then as part of the initialization, add a handler to the OnImageAvailable event. This handler is called when the parser finds a
complete Vita packet in the data stream.
Malibu Library User's Manual
100
Vpp.OnImageAvailable.SetEvent(this, &ApplicationIo::Handle_VPP_ImageAvailable);
In the Snap example application, we read in a previously logged Velo packet stream in and extract the Vita packets in as a
post processing step. This could also be done along with logging, but the extra processing reduces the data rate of the
application.
// ...Reset Vita Parser
Vpp.Clear();
//
// Start Playback
IntermediatePlayer.Start();
VeloBuffer PB_Buffer;
while (1==1)
{
// Extract Velo Blocks, Quit if done
unsigned int good = IntermediatePlayer.PlayWithHeader(PB_Buffer);
if (!good)
break;
// Parse Blocks
Vpp.Append(PB_Buffer);
Vpp.Parse();
Each Velo packet is appended to the parser and processed when Parse() is called. Parse() will walk through the data in the
parser, finding all packets and calling the OnImageAvailable() for each one. All buffers must be passed in to allow the
parsing to process the entire data stream.
// Quit if Parser has an error?
}
IntermediatePlayer.Stop();
For efficiency, the parser returns an object pointing to the image of the data in the original buffer. This allows the handler to
only copy buffers with data of interest rather than all buffers streamed. The image class allows the inspection of the header
region to return the Vita Stream identification word to determine the data type. If the data is found to be of interest, the
Image class has the CopyDataTo() method to create a VitaBuffer from the image data. This buffer can then be analyzed using
standard Malibu tools.
//--------------------------------------------------------------------------// ApplicationIo::Handle_VPP_ImageAvailable() -- Parser callback
//--------------------------------------------------------------------------void
{
ApplicationIo::Handle_VPP_ImageAvailable(Innovative::VitaPacketParserImageAvailable & event)
// Create Vita Packet
VitaBuffer Vita;
// Fill with Image Data
event.Image.CopyDataTo( Vita );
}
//
...Process Vita Packet Data
Malibu Library User's Manual
101
VitaPacketPacker – Filling Output Packets
The corresponding helper class for output packets is VitaPacketPacker. To use this, you push Vita packets into the packer,
and when packets of a particular size are accumulated, an event is fired to allow this Velo packet to be processed (presumably
by sending it to the VitaPacketStream output with Send()).
This illustration is for a Wave example filling a Velo buffer full of a list of Vita packets holding a waveform. This is done
once at start, and the Waveform buffer sent repeatedly when wave data is needed during the run.
//
// We now have the data in a regular buffer. We need to copy it into
//
VITA buffers, and then those VITAs into the Waveform packet
std::vector<Innovative::VitaBuffer> VitaQ;
...copy buffer into queue of Vita Packets...
At this point we have our Vita packets pre-made, so we can enter them all at once. You could generate them and Pack each
one at a time if desired.
The normal use of the packer is to insert the buffers after we have entered the packet data size to be the size of output buffer
we want. In this case, its handier for us to just have one resulting buffer that fits the entire pattern in it so that we can send it
over and over, the same as the X5 Wave did. So we intentionally make the “automatic” size too large, so no packets will be
output as we go. Note that the size of the fill pattern includes the size of all the headers and trailers of the Vita packets, as
well as the data itself.
We also hook the callback function before starting the packing.
//
// Use a packer to load full VITA packets into a velo packet
// ...Make the packer output size so big, we will not fill it before finishing
VitaPacketPacker VPPk(scratch_pkt_size*2);
VPPk.OnDataAvailable.SetEvent(this, &ApplicationIo::HandlePackedDataAvailable);
// ...Shove in our VITA packets
for (unsigned int i=0; i<VitaQ.size(); i++)
{
VPPk.Pack( VitaQ[i] );
}
All the data is packed, but the buffer isn't full so it can' t be sent. To push out these kind of fractional packets, the Flush()
command is provided that truncates the remaining data and outputs it as packet exactly sized for the data. InitHeader() then
called to make sure the size field of the header is properly set up.
VPPk.Flush();
// outputs the one waveform buffer into Waveform
// WaveformPacket is now correctly filled with data...
InitHeader(WaveformPacket);
// make sure header packet size is valid...
This is the handler called when the Flush() function truncates and emits the packet. Since we constructed this example to only
make one output packet, we just copy it to our Buffer. Other applications could call Send() here to output it, or add the buffer
to a list or vector.
//--------------------------------------------------------------------------// ApplicationIo::HandlePackedDataAvailable() -- Packer Callback
//---------------------------------------------------------------------------
Malibu Library User's Manual
102
void
{
ApplicationIo::HandlePackedDataAvailable(Innovative::VitaPacketPackerDataAvailable & event)
WaveformPacket = event.Data;
}
Malibu Library User's Manual
103
Chapter 14.
Vita Packet Format
Overview
The X6 family of baseboards introduces a new form of data streaming that changes the format of the data packets streamed to
and from the card. This chapter describes the format and the changes from previous use.
X6 Velocia Packets
Packet Header Format
Just as in the X5, data busmastered between the board and the application program is enclosed in a data packet. For the most
part, this packet has not changed. What has changed is that the packet header is now 4 words long, rather than 2. Also, the
total packet size now must be divisible by 4 words rather than 2 as well. This is a reflection of the new internal bus being
made wider for increased efficiency.
Table 8. X6 Velocia (Velo) Packet Header
0
Velocia Header Word
1
(reserved)
2
(reserved)
3
(reserved)
As before, the first word in the header contains the information used to identify the packet and determine its size. The
Peripheral ID is a tag value used to identify the data source – all packets with the same Peripheral ID are defined as making
up a single stream of data. The size allows the parsers to find the next header.
Table 9. Velocia Header Word
3
1
3
0
2
9
2
8
Peripheral ID
2
7
2
6
2
5
2
4
2
3
2
2
2
1
2
0
1
9
1
8
1
7
1
6
1
5
1
4
1
3
1
2
1
1
1
0
9
8
7
6
5
4
3
2
1
0
Packet size (in 32 bit words)
In the Malibu library there are additional classes to support these packets – VeloBuffer to hold packet data and
VeloHeaderDatagram to access the header. The standard access datagrams will operate on VeloBuffers identically with the
original buffers to access the data portion of the packet.
Malibu Library User's Manual
104
Packet Data Format
The contents of an X6 Velocia packet is not raw data as in earlier systems, but a stream of VITA-49 formatted packets that
are processed individually. These packets can be split across Velo packets, so the start of a Velo packet does not mean that a
Vita packet header follows. The initial data could be part of a previous Vita packet's data.
X6 Vita Packets
Like Velocia packets, Vita packets require information included with them in addition to the data to indicate the data source
and other useful information. This header is seven words long. There is an additional trailer word for each packet that
increases the total to 8 words. The total size of a Vita packet on the X6 must be a multiple of 4 words long.
The table below shows a minimal Vita packet – it contains only 4 words of data with its 8 words of header information.
Table 10. Vita Packet Format
0
Header IF Word
1
Header SID Word
2
Header Class OUI Word
3
Header Class Info Word
4
Header Timestamp – Integer Seconds Word
5
Header Timestamp – Fractional Seconds High Word
6
Header Timestamp - Fractional-Seconds Low Word
7
Packet Data 0
8
Packet Data 1
9
Packet Data 2
10
Packet Data 3
11
Trailer Word
The requirement of the Vita packet to remain aligned to a 4 word boundary conflicts with the need to dispatch a packet at
once when events occur such as the trigger signal going off. If the packet remains unsent, part of the data will not arrive and
even if it will eventually come in, part of the packet will have occurred at one time and part at potentially a much later time.
To allow the packet to be sent in the absence of valid data, the concept of Padding was added.
A field in the trailer can be set to indicate to the destination which bytes in the last 16 bytes are not valid data. The
application must ignore this data when processing the buffer. So in the case a trigger ends in the middle of a 4 word block,
the packet can be padded to achieve alignment and the padding field in the trailer set to indicate this to the analysis routines.
Malibu Library User's Manual
105
The Access Datagram classes all recognize this padding value and reduce the size of the packet accordingly. This means the
applications must initialize the Padding field before attempting to fill a packet.
Packet Header Format
The above table shows the arrangement of the seven header words in the header. The remainder of this section will describe
the fields for each word
VITA Header IF word
3
1
3
0
2
9
2
8
2
7
2
6
2
5
2
4
2
3
Packet Type
C
T
R
R
0001
1
1
0
0
2
2
2
1
TSI
2
0
TSF
1
9
1
8
1
7
1
6
Packet Count
1
5
1
4
1
3
1
2
1
1
1
0
9
8
7
6
5
4
3
2
1
0
Packet Size
Packet type: set to IF Data packet with Stream Id, binary 0001.
C (bit 27): Optional Class field, enabled.
T (bit 26): Optional Trailer field, enabled.
TSI (bits 23-22): Timestamping format for integer seconds field, configurable.
Table 11. Timestamp Integer Seconds Options
TSI code
Meaning
00
No Integer-seconds Timestamp field included (Not supported)
01
UTC: seconds elapsed since January 1, 1970 GMT.
10
GPS: seconds elapsed since January 6, 1980 GMT.
11
Other: seconds elapsed since some documented starting time.
TSF (bits 21-20): Timestamping format for fractional seconds field, configurable between 01 (sample count) or 11 (free
running).
Malibu Library User's Manual
106
Table 12. Timestamp Fractional Seconds Options
TSF code
Meaning
00
No Fractional-seconds Timestamp field included (Not supported)
01
Sample count timestamp: fractional seconds since last integer-seconds event,
counting in samples.
10
Real time timestamp: counts in increments of 1 picosecond since last integer-seconds
event. (Not supported)
11
Free running count timestamp: No relation to the integer-seconds field. Counts in
samples.
Packet count: increments on each subpacket with the same Stream Id (PDN). It's allowed to roll over from 1111 to 0000.
Packet size: in 32-bit words, including the header; the packet size is always a multiple of 4 due to how the packets are
handled internally.
VITA Header SID word
3
1
3
0
2
9
2
8
2
7
2
6
2
5
2
4
2
3
2
2
2
1
2
0
1
9
1
8
1
7
1
6
Destination Mask
1
5
1
4
1
3
1
2
1
1
1
0
9
8
7
6
5
4
3
2
1
0
Stream ID
The VITA-49 Stream Id field is split into two 16-bit fields: Destination Mask and Stream Id.
The Destination Mask will help route packets to their destinations (ie. PCIE, Aurora 0 or 1 etc.).
The Stream ID will be used much like the peripheral ID is for Velocia packets – to identify the source or meaning of the data
in the packet.
VITA Header Class OUI Word
This word is reserved.
Vita Header Class Info Word
This word is reserved.
Vita Header Timestamp – Integer Seconds Word
This word contains the integer portion of the timestamp data.
Vita Header Timestamp – Fractional Seconds High and Low Words
These words contain the fractional portion of the timestamp data.
Malibu Library User's Manual
107
Vita Packet Trailer Format
VITA Trailer Word
3
1
3
0
2
9
2
8
2
7
2
6
2
5
2
4
Enables
2
3
2
2
1111
2
1
2
0
1
9
1
8
1
7
1
6
1
5
1
4
1
3
State and Event indicators
1
2
1
1
1
0
9
8
7
Padding in
bytes
E
6
5
4
3
2
1
0
Context Packet count
State and Event Bits and Enable Bits
Enable bit position
State and event Indicator
bit position
Indicator name
31
19
Calibrated Time
30
18
Valid Data
29
17
Reference lock
28
16
AGC/MGC Indicator
27
15
Detected Signal indicator
26
14
Spectral inversion
25
13
Over-range indicator
24
12
Sample Loss (over-run)
Setting the appropriate bit in the Enable field will cause the State/Event bit to follow the signals given in the table. These will
flag if the enabled conditions occur in the current Vita packet.
Bits 20-23
These should always be set to 1
Context Packet Count
This number tells which context packet is associated with this packet. Context packets can give slowly changing information,
such as temperature readings, into a data stream without burdening each data packet with data that is unlikely to be different
from packet to packet.
Padding
The Padding field indicate how many padding bytes were added to align the current packet to a 4 word boundary. Padding
values can be from 0 (no padding) to 15 (1 data byte valid in the last 4 words).
Malibu Library User's Manual
108
Table 13. Padding Example
Data n-3
Data n-4
Data n-5
Data n-6
Padding 1
Data n
Data n-1
Data n-2
Padding 5
Padding 4
Padding 3
Padding 2
Padding 9
Padding 8
Padding 7
Padding 6
Trailer (Padding Field Value = 9)
The above table shows an example of padding. The logic had accumulated the data in grey when the trigger was disabled –
seven bytes of data. The packet can not be sent because the data would not be properly aligned. The logic therefore adds the
nine byte remainder to the packet as padding, and loads the value 9 into the padding field of the trailer.
Analysis routines that check the padding value will properly limit themselves to reading the valid data and ignore the padding
bytes.
Table 14. Maximum Padding for X6 Boards
Source FIFO parallel samples
Event size (bits)
Maximum Padding (bytes)
1x16 (RX)
16
14
2x16 (400M)
32
12
4x8 (GSPS)
32
12
8x8 (GSPS DES)
64
8
The above table shows the maximum expected padding value for a particular X6 board. The RX, which has one 16 bit sample
per packet for each period, could possibly have to pad 14 of 16 bytes in a 4 word block. Devices which send more data per
sample period will have smaller maximum padding values.
Malibu Library User's Manual
109
Chapter 15.
Interfacing to Software Applications via a
DLL
Overview
The desire to control one or more Innovative board level products from within a foreign environment such as NI Labview or
Mathworks Matlab is commonplace. Unfortunately, it is virtually impossible to create a universal interface between these
environments and the Malibu C++ libraries that meets all of the needs of every possible application. Fortunately, these thirdparty environments provide extensibility via user-supplied dynamic link libraries (DLLs). A user written DLL acts as a
“bridge” between the Malibu C++ and the third party environments.
Development Approach
The DLL must be written in C++ and linked to the Malibu libraries – similar to the process used in the creation of a standard
executable program. The DLL can incorporate any available Malibu class, user-developed C/C++ classes or libraries or other
commercial libraries to implement complex computations in addition to Innovative board control functions. The DLL
provides another opportunity to factor code as required to best meet your application requirements. For instance, analog
time-series data received via bus mastering from an Innovative XMC module within a DLL could be transformed into
frequency domain using the Malibu Fourier class. This frequency domain data could be further analyzed to provide AC
quality information such as SNR or THD using the Malibu AdcStats class and the results of this analysis could be made
available to external applications or third party environments via C-callable functions. Any application that uses the DLL
gains access to this board control and analysis capability.
The most efficient approach to creating such a DLL is to subsume the entire ApplicationIo board control object which is
included in each of the Innovative example programs directly into the user-written DLL. Control of Innovative XMC
modules within supplied examples are factored such that all board control functions and real-time callback handlers are
inplemented in the portable ApplicationIo C++ object. Because this class is compiler and user interface independent, we
recommend incorporation of this class directly into end-user applications and DLLs, since this guarantees that all required
board initialization and control are properly implemented.
Example Source
Complete source code illustrating this technique is available on the II forum here. This project uses the above encapsulation
strategy to assimilate ApplicationIo into a DLL, which exports various board control functions as plain “C-style” function
calls, so that they can be used from environments like LabView or Matlab. The Windows, 32-bit DLL has been written in
Malibu Library User's Manual
110
C++ under MSVC 2008. All exported functions are C-compatible and will be restricted to use of plain C data types and
structures for parameters.
The underlying C++ code within the DLL uses the Innovative Malibu libraries to perform all board configuration and control
functions. Malibu runs as native machine code, is not dependent on the .NET libraries, but requires that the MSVC runtime
libraries be present on the target machine. This particular example exposes registers of a dual-channel DDC which was
developed in conjunction with custom firmware for a specific application. While the functions in this DLL are specialized
for that application, they are merely representative of the types of functions that could be exposed in any custom static or
dynamic library.
Malibu Library User's Manual
111
Chapter 16.
Using the embedded FICL interpreter
Since Innovative products include user-programmable FPGA devices, the requirement to interact with newly-added
peripheral devices is routine. Malibu incorporates an interpreted language facility, named Ficl, which is useful when initially
testing new devices and resources. Ficl is a programming language interpreter designed to be embedded into other systems
as a command, macro, and development prototyping language. Ficl is an acronym for "Ficl Inspired Command Language".
Ficl Features
Ficl is written in strict ANSI C and runs natively on 32- and 64-bit processors. It has a small memory footprint - A fully
featured Win32 console version takes less than 100K of memory, and a minimal version is less than half that.
Ficl is easy to integrate into custom C++ programs. Where most Ficls view themselves as the center of the system and
expect the rest of the system to be coded in Ficl, Ficl acts as a component of your program. Since Ficl is embedded into
Malibu, most C++ applications inherit Ficl with no effort whatsoever.
Ficl is fast, thanks to its "switch-threaded" virtual machine design. Ficl also features blindingly fast "just in time" compiling,
removing the "compile" step from the usual compile-debug-edit iterative debugging cycle.
Ficl is a complete and powerful programming language.
Ficl is an implementation of the Ficl language, a language providing a wide range of standard programming language
features including integer and floating-point numbers, with a rich set of operators, arrays, file I/O, flow control (if/then/else
and many looping structures), subroutines with named arguments and language extensibility.
Ficl is standards-compliant and conforms to the 1994 ANSI Standard for Ficl (DPANS94). See the document
Ficl_Primer.pdf for a tutorial introduction to Ficl, as this knowledge is directly applicable to creation and use of Ficl within
Malibu-based C++ applications.
Ficl is extensible. Ficl is extensible both at compile-time and at run-time. You can add new script functions, new native
functions, even new control structures.
Ficl is interactive. Ficl can be used interactively, like most other Ficls, Python, and Smalltalk. You can inspect data, run
commands, or even define new commands, all on a running Ficl VM. Ficl also has a built-in script debugger that allows you
to step through Ficl code as it is executed.
Ficl is open-source and free. The Ficl licence is a BSD-style license, requiring only that you document that you are using
Ficl. There are no licensing costs for using Ficl.
Previous versions of Malibu utilized specialized scripting classes such as Innovative::Scripter, which were limited in
capability. The new integrated Ficl interpreter renders such classes obsolete.
Malibu Library User's Manual
112
A Beginners Guide
Ficl is embedded into the Snap example provided with most X5 and X3 XMC modules. Launching that application will
result in a display that resembles the following:
Event log displays Ficl interpreter responses
Command line accepts Ficl commands
You can use upper or lower case to type commands and data, since Ficl is case-insensitive. You can also store commands in
a standard text file using your favorite editor, then execute these commands using the load <filename> command. Ficl
allows execution of the system shell, via the system command, which can be used to invoke you editor to add commands to
a file. For instance under Windows, the command system notepad hello.fr, creates a new text file called hello.fr using
the Notepad editor. New commands added to this file could be loaded into Ficl using the command load test.fr.
Using Ficl
Ficl is an embedded variant of the interpreted language Forth. Review the Forth Primer to become acquainted with the
characteristics and capabilities of this powerful language. The Forth Standard is the definitive reference on the language
features, but most users will find the primer sufficient. The examples illustrated below assume a working knowledge of the
material presented in these documents. The particular features and capabilities of FICL are detailed on the FICL Website.
Note that Malibu implements FICL 3 rather than FICL 4, to allow operation in both 32 and 64-bit environments.
Ficl incorporates a floating point stack in addition to the conventional parameter and return stacks. Floating point values are
recognized via an embedded 'e' within the number. For instance 1.0e3 is interpreted as floating point 1000. Within stack
notation, values prefaced with f: are floating point values and reside on the floating point stack rather than the parameter
stack.
Ficl-enabled XMC module object derive publicly from Innovative::IFiclTarget. Consequently, the following moduleoriented words are available for use:
Malibu Library User's Manual
113
Word
Description
Stack
?<module-name>
e.g. ?X5-G12
Display default module-specific wordset
( -- )
l@
Fetch from logic space. Read 32-bit FPGA register contents.
( addr -- data )
l!
Store to logic space. Write 32-bit FPGA register contents.
( data addr -- )
p@
Fetch from pci space
( addr -- data )
p!
Store to pci space
( data addr -- )
d@
Fetch from sub-device space. Read 32-bit value from specified address
in specified device. Used to access registers stored within peripheral
devices attached to the FPGA via I2C, SPI or other buses.
( addr dev -- data )
d!
Store to sub-device space. Write 32-bit value to specified address in
specified device. Used to access registers stored within peripheral
devices attached to the FPGA via I2C, SPI or other buses.
( data addr dev -- )
Pll, Vcxo, RefVcxo,
Adc0, Adc1
Module-specific constants which name the device values used with d@
and d!. Specific constants available vary by module.
( -- index )
dFreq
Set sample clock frequency
( f:freq dev -- )
dFreqActual
Report actual sample clock frequency
( dev -- f:freq)
Ficl words may be executed interactively at the Ficl command line, or they may be typed into a standard disk file for
subsequent re-use. The Ficl word load may be used to interpret the entire contents of a file, exactly as though the contents
of the file were typed into the Ficl command line. Usage is
load <filename>
Note that Ficl word definitions may also be added to files, to create utility functions containing loops, register displays and
myriad other useful diagnostics.
For example, the word .regs below will create a hex dump of the contents of user FPGA logic registers 0..10:
: .regs
( -– )
base @ hex
10 0 do
.” Reg: 0x” i .
.” =” i l@ .
cr
loop
base ! ;
Once this definition has been added to the dictionary, it may be executed by typing:
.regs
at the Ficl command line. Or, this word could be used within other words to create a more sophisticated diagnostic.
Stream Support
A handful of Ficl words are executed automatically at strategic times during data flow to accommodate automated
initialization, finalization or diagnostic display.
Malibu Library User's Manual
114
Word
When Executed by Malibu
Stack
OnStreamConfigure
Prior to register configuration in preparation for
streaming
( -- )
OnBeforeStreamStart
Before assertion of FPGA RUN bit. Contents of
all FPGA registers have been reapplied.
( -- )
OnAfterStreamStart
After assertion of FPGA RUN bit. Streaming is
underway.
( -- )
OnBeforeStreamStop
Before deassertion of FPGA RUN bit as
streaming is about to terminate
( -- )
OnAfterStreamStop
After deassertion of FPGA RUN bit after
streaming terminates
( -- )
Words added to the dictionary named as listed above will be executed automatically at the time specified during data
streaming. This can be be used to initialize application-specific registers, display state or any other diagnostic function.
Malibu Library User's Manual
115