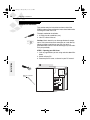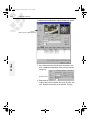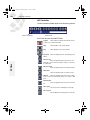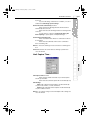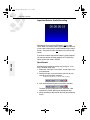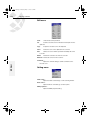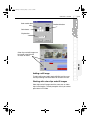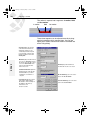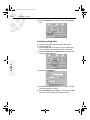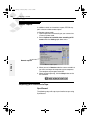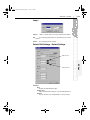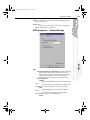
1
ezdv.book Page i Tuesday, May 30, 2000 2:31 PM
i
Installation and User’s Manual
Canopus Corporation
711 Charcot Ave.
San Jose, CA 95131
Canopus Part No. 000-10032-001
Printed in the USA
Copyright©2000 Canopus Corporation. All Rights Reserved.
First Edition - February 2000
ezdv.book Page ii Tuesday, May 30, 2000 2:31 PM
ii
Notice to Reader
Canopus Corporation makes no warranty of any kind with
regard to this material, including, but not limited to, the
implied warranties of merchantability and fitness for a particular purpose. Canopus shall not be liable for errors contained herein or for incidental consequential damages in
connection with the furnishing, performance, or use of this
material.
This document contains proprietary information which is
protected by copyright. All rights are reserved. No part of
this document may be photocopied, reproduced, or translated into another language without the prior written consent of Canopus Corporation.
The information in this document is subject to change without notice.
EZDV - Limited Warranty
Your EZDV hardware is covered by a limited warranty when
you register your Canopus product. This warranty is for a
period of three years from the date of purchase from Canopus or an authorized Canopus agent. This warranty applies
only to the original purchaser of the Canopus product and
is not transferable. Canopus Corporation warrants that for
this period the product will be in good working order.
Should our product fail to be in good working order, Canopus will, at its option, repair or replace it at no additional
charge, provided that the product has not been subjected
to misuse, abuse or non-Canopus authorized alterations,
modifications and/or repair. Proof of purchase is required
to validate your warranty.
Canopus Corporation has gone to considerable effort to
make the users manual as accurate as possible at the time
of printing. Canopus cannot assume, however, any responsibility for any inaccuracies that may be contained in the
manual. In no event will Canopus Corporation be liable for
ezdv.book Page iii Tuesday, May 30, 2000 2:31 PM
iii
direct, indirect, special, incidental, or consequential damages resulting from any defect or omission in the manual,
even if advised of the possibility of such damages.
As part of their ongoing process of continued product development, Canopus Corporation reserves the right to make improvements in the manual and the products it describes at any time,
without notice or obligation.
CANOPUS CORPORATION IS NOT RESPONSIBLE FOR ANY
LOST PROFITS, LOST SAVINGS OR OTHER INCIDENTAL OR
CONSEQUENTIAL DAMAGES ARISING OUT OF THE USE OF,
OR INABILITY TO USE, THIS PRODUCT. THIS INCLUDES
DAMAGE TO PROPERTY AND, TO THE EXTENT PERMITTED
BY LAW, DAMAGES FOR PERSONAL INJURY. THIS WARRANTY IS IN LIEU OF ALL OTHER WARRANTIES OF MERCHANTABILITY AND FITNESS FOR A PARTICULAR
PURPOSE.
FCC Notice
This equipment has been tested and found to comply with
the limits for the class B digital device, pursuant to part 15
of the FCC Rules. These limits are designed to provide
reasonable protection against interference in a residential
installation. This equipment generates, uses and can radiate radio frequency energy and if not installed, and used in
accordance with the instructions, may cause harmful interference to radio communications. However, there is no
guarantee that interference will not occur in a particular
installation. If this equipment does cause harmful interference to radio or television reception, which can be determined by turning the equipment off and on, the user is
encouraged to try and correct the interference by one or
more of the following measures:
Reorient or relocate the receiving antenna. Increase the
separation between the equipment and receiver.
Connect the equipment into an outlet on a circuit different
from that to which the receiver is connected.
Consult the dealer or an experienced radio/TV technician
for help.
ezdv.book Page iv Tuesday, May 30, 2000 2:31 PM
iv
This equipment has been certified to comply with the limits
for a class B computing device, pursuant to FCC Rules. In
order to maintain compliance with FCC regulations,
shielded cables must be used with this equipment. Operation with non-approved equipment or unshielded cables is
likely to result in interference to radio and TV reception.
The user is cautioned that changes and modifications
made to the equipment without the approval of manufacturer could void the user’s authority to operate this equipment.
This device complies with part 15 of the FCC Rules. Operation is subject to the following two conditions: (1) This
device may not cause harmful interference, and (2) this
device must accept any interference received, including
interference that may cause undesired operation.
Declaration of Conformity
According to FCC Part 15
Responsible Party Name: Canopus Corporation
Address:
711 Charcot Avenue
San Jose, CA 95131-2208
Telephone:
(408) 954-4500
Declares that product:
Model: M24-PC-912
Complies with Part 15 of the FCC Rules.
Responsible Person’s Name: Roger Hounshell
ezdv.book Page v Tuesday, May 30, 2000 2:31 PM
v
FCC-B Radio Frequency Interference Statement
This equipment has been tested and found to comply with
the limits of a Class-B digital device, pursuant to Part 15 of
the FCC rules. These limits are designed to provide reasonable protection against harmful interference when the
equipment is operated in a commercial environment. This
equipment generates, uses and can radiate radio frequency energy and, if not installed and used in accordance
with the instruction manual, may cause harmful interference to radio communications. Operation of this equipment
in a residential area is likely to cause harmful interference,
in which case the user will be required to correct the interference at his own expense.
Notice 1
The changes or modifications not expressly approved by
the party responsible for compliance could void the users
authority to operate the equipment.
Notice 2
Shielded interface cables and AC power cord, if any, must
be used in order to comply with the emission limits.
Canopus Corporation
Tested to Comply
with FCC Standards
For Home or Office Use
ezdv.book Page vi Tuesday, May 30, 2000 2:31 PM
vi
Specifications
Board Spec
Connector :
Data format :
IEEE 1394(i.LINK 4pin) x 1
Blue Book compliant DV Codec (5:1 DV
compression)
Video Size :
720x480 (NTSC version)
720x576 (PAL version)
Audio Format : 4 channel 32kHz 12bit stereo
2 channel 32 / 44.1 / 48kHz 16bit stereo
Board length : 135mm x 107mm
Power :
+5V 0.5A
ezdv.book Page vii Tuesday, May 30, 2000 2:31 PM
TABLE OF CONTENTS
Notice to Reader . . . . . . . . . . . . . . . . . . . . . . . . . . . . . . . . ii
EZDV - Limited Warranty . . . . . . . . . . . . . . . . . . . . . . . . . . ii
FCC Notice . . . . . . . . . . . . . . . . . . . . . . . . . . . . . . . . . . . . iii
Declaration of Conformity . . . . . . . . . . . . . . . . . . . . . . . . . iv
FCC-B Radio Frequency Interference Statement. . . . . . . . v
Specifications . . . . . . . . . . . . . . . . . . . . . . . . . . . . . . . . . . vi
CHAPTER 1: Introduction
Thank you. . . . . . . . . . . . . . . . . . . . . . . . . . . . . . . . . . . . 1-1
About this manual. . . . . . . . . . . . . . . . . . . . . . . . . . . . . . 1-1
Manual conventions . . . . . . . . . . . . . . . . . . . . . . . . . . . . 1-3
Trademarks. . . . . . . . . . . . . . . . . . . . . . . . . . . . . . . . . . . 1-4
CHAPTER 2: Installation
Before Installation. . . . . . . . . . . . . . . . . . . . . . . . . . . . . . 2-1
EZDV System Requirements . . . . . . . . . . . . . . . . . . . . . 2-2
Before installing EZDV hardware . . . . . . . . . . . . . . . . . . 2-3
Test Your Hardware with EZDVTest . . . . . . . . . . . . . . . . 2-3
Machine Info . . . . . . . . . . . . . . . . . . . . . . . . . . . . . . . . . . . 2-4
Hard Disk Performance. . . . . . . . . . . . . . . . . . . . . . . . . . . 2-6
Special note for IDE hard drive users . . . . . . . . . . . . . . . . 2-6
Special note for Windows NT users using IDE hard drives 2-7
Hardware Installation . . . . . . . . . . . . . . . . . . . . . . . . . . . 2-8
Before installing EZDV software . . . . . . . . . . . . . . . . . . 2-10
Windows 98 Driver Installation . . . . . . . . . . . . . . . . . . . 2-10
vii
ezdv.book Page viii Tuesday, May 30, 2000 2:31 PM
viii
TABLE OF CONTENTS
1 INTRODUCTION
Windows 2000 Driver Installation . . . . . . . . . . . . . . . . . 2-10
Windows NT 4.0 Driver Installation . . . . . . . . . . . . . . . 2-10
Applications Installation . . . . . . . . . . . . . . . . . . . . . . . . 2-11
Bundled Applications Installation . . . . . . . . . . . . . . . . . 2-11
SmartSound for Multimedia . . . . . . . . . . . . . . . . . . . . . . 2-11
SoftXplode . . . . . . . . . . . . . . . . . . . . . . . . . . . . . . . . . . . 2-11
Connecting your DV camera or deck . . . . . . . . . . . . . . 2-11
CHAPTER 3: Quick Start - Your First Editing Project
Basic steps in video production . . . . . . . . . . . . . . . . . . . 3-1
Acquisition . . . . . . . . . . . . . . . . . . . . . . . . . . . . . . . . . . . 3-1
Batch capture footage in EZ Video. . . . . . . . . . . . . . . . . 3-2
SyncCapture Audio in EZ Audio . . . . . . . . . . . . . . . . . . . 3-5
Editing in EZ Edit . . . . . . . . . . . . . . . . . . . . . . . . . . . . . . 3-7
Starting EZ Edit . . . . . . . . . . . . . . . . . . . . . . . . . . . . . . . . 3-7
Setting the Temporary Drives . . . . . . . . . . . . . . . . . . . . . . 3-7
Loading clips to edit . . . . . . . . . . . . . . . . . . . . . . . . . . . . 3-10
Adding clips to the timeline . . . . . . . . . . . . . . . . . . . . . . . 3-12
Adding transitions between clips . . . . . . . . . . . . . . . . . . 3-15
Adding an Insert cut away . . . . . . . . . . . . . . . . . . . . . . . 3-17
Adjusting Audio levels . . . . . . . . . . . . . . . . . . . . . . . . . . . 3-18
Adding a Title . . . . . . . . . . . . . . . . . . . . . . . . . . . . . . . . . 3-19
Outputting your Production to Tape . . . . . . . . . . . . . . . 3-23
CHAPTER 4: EZ Video
Introducing EZ Video . . . . . . . . . . . . . . . . . . . . . . . . . . . 4-1
EZ Video Interface . . . . . . . . . . . . . . . . . . . . . . . . . . . . . 4-1
ezdv.book Page ix Tuesday, May 30, 2000 2:31 PM
TABLE OF CONTENTS
Capturing Video . . . . . . . . . . . . . . . . . . . . . . . . . . . . . . . 4-3
Manual Capture . . . . . . . . . . . . . . . . . . . . . . . . . . . . . . . . 4-3
Batch Capture. . . . . . . . . . . . . . . . . . . . . . . . . . . . . . . . . . 4-5
Changing, Saving, and Loading Capture lists . . . . . . . . . . . 4-8
Adding, Inserting, and Deleting clips in the Play list. . . . . . 4-19
Important note about Timecode . . . . . . . . . . . . . . . . . . . 4-10
Seamless capture . . . . . . . . . . . . . . . . . . . . . . . . . . . . . . 4-11
Changing, Saving, and Loading Capture lists . . . . . . . . . . 4-13
Reference AVI files and the 2-gigabyte AVI filesize limit. 4-15
Working with Captured Clips . . . . . . . . . . . . . . . . . . . . 4-16
Loading clips. . . . . . . . . . . . . . . . . . . . . . . . . . . . . . . . . . 4-16
Playing and Scrubbing Video . . . . . . . . . . . . . . . . . . . . . 4-17
Using the Play list . . . . . . . . . . . . . . . . . . . . . . . . . . . . . . 4-18
Rearranging clips in the Play list . . . . . . . . . . . . . . . . . . . .
Playing clips from the Play list . . . . . . . . . . . . . . . . . . . . . .
Trimming and Separating clips in the Play list . . . . . . . . . .
Saving and Loading Play lists . . . . . . . . . . . . . . . . . . . . . .
Playing the Play list . . . . . . . . . . . . . . . . . . . . . . . . . . . . . .
4-21
4-21
4-22
4-24
4-25
Output to Tape . . . . . . . . . . . . . . . . . . . . . . . . . . . . . . . 4-26
SyncRecord . . . . . . . . . . . . . . . . . . . . . . . . . . . . . . . . . . 4-26
Manual record. . . . . . . . . . . . . . . . . . . . . . . . . . . . . . . . . 4-27
Interface In-depth . . . . . . . . . . . . . . . . . . . . . . . . . . . . . 4-28
Toolbar . . . . . . . . . . . . . . . . . . . . . . . . . . . . . . . . . . . . . .
File and Deck Information. . . . . . . . . . . . . . . . . . . . . . . .
AVI Controller . . . . . . . . . . . . . . . . . . . . . . . . . . . . . . . . .
Audio level meters . . . . . . . . . . . . . . . . . . . . . . . . . . . . .
Deck Controller . . . . . . . . . . . . . . . . . . . . . . . . . . . . . . . .
Play list . . . . . . . . . . . . . . . . . . . . . . . . . . . . . . . . . . . . . .
Status Bar . . . . . . . . . . . . . . . . . . . . . . . . . . . . . . . . . . . .
4-28
4-29
4-30
4-31
4-32
4-33
4-34
Menu options . . . . . . . . . . . . . . . . . . . . . . . . . . . . . . . . 4-35
File Menu . . . . . . . . . . . . . . . . . . . . . . . . . . . . . . . . . . . .
Edit Menu . . . . . . . . . . . . . . . . . . . . . . . . . . . . . . . . . . . .
Settings Menu. . . . . . . . . . . . . . . . . . . . . . . . . . . . . . . . .
View menu . . . . . . . . . . . . . . . . . . . . . . . . . . . . . . . . . . .
Help menu . . . . . . . . . . . . . . . . . . . . . . . . . . . . . . . . . . .
4-35
4-36
4-37
4-39
4-39
Dialogs . . . . . . . . . . . . . . . . . . . . . . . . . . . . . . . . . . . . . 4-40
Batch/seamless capture - Batch mode . . . . . . . . . . . . . . 4-40
Batch Capture completion . . . . . . . . . . . . . . . . . . . . . . . 4-42
ix
ezdv.book Page x Tuesday, May 30, 2000 2:31 PM
TABLE OF CONTENTS
Batch/Seamless capture - Seamless mode . . . . . . . . . .
Seamless Capture completion . . . . . . . . . . . . . . . . . . . .
Save as still image... . . . . . . . . . . . . . . . . . . . . . . . . . . . .
Limit Capture Time... . . . . . . . . . . . . . . . . . . . . . . . . . . .
Still capture settings . . . . . . . . . . . . . . . . . . . . . . . . . . . .
EZDV properties... - Sync Rec . . . . . . . . . . . . . . . . . . . .
EZDV properties... - Detailed Settings . . . . . . . . . . . . . .
About . . . . . . . . . . . . . . . . . . . . . . . . . . . . . . . . . . . . . . .
1 INTRODUCTION
x
4-43
4-45
4-45
4-47
4-48
4-49
4-50
4-51
CHAPTER 5: EZ Audio
Introducing EZ Audio . . . . . . . . . . . . . . . . . . . . . . . . . . . 5-1
EZ Audio Interface . . . . . . . . . . . . . . . . . . . . . . . . . . . . . 5-1
Supported Audio Sampling Rates . . . . . . . . . . . . . . . . . 5-2
Capturing Audio . . . . . . . . . . . . . . . . . . . . . . . . . . . . . . . 5-2
Manual Capture . . . . . . . . . . . . . . . . . . . . . . . . . . . . . . . . 5-3
SyncCapture . . . . . . . . . . . . . . . . . . . . . . . . . . . . . . . . . . . 5-4
Adjusting Audio Levels while Recording . . . . . . . . . . . . . . 5-4
Output to Tape . . . . . . . . . . . . . . . . . . . . . . . . . . . . . . . . 5-5
Important Note on Audio Recording . . . . . . . . . . . . . . . . .
SyncRecord . . . . . . . . . . . . . . . . . . . . . . . . . . . . . . . . . . .
Manual record. . . . . . . . . . . . . . . . . . . . . . . . . . . . . . . . . .
Adjusting Audio Levels during Output. . . . . . . . . . . . . . . .
5-6
5-6
5-7
5-7
Interface In-depth . . . . . . . . . . . . . . . . . . . . . . . . . . . . . . 5-9
Toolbar . . . . . . . . . . . . . . . . . . . . . . . . . . . . . . . . . . . . . . . 5-9
Level Meters . . . . . . . . . . . . . . . . . . . . . . . . . . . . . . . . . . . 5-9
File Information . . . . . . . . . . . . . . . . . . . . . . . . . . . . . . . . 5-10
WAV Controller . . . . . . . . . . . . . . . . . . . . . . . . . . . . . . . . 5-10
Deck controller . . . . . . . . . . . . . . . . . . . . . . . . . . . . . . . . 5-11
Deck information. . . . . . . . . . . . . . . . . . . . . . . . . . . . . . . 5-12
Status Bar . . . . . . . . . . . . . . . . . . . . . . . . . . . . . . . . . . . . 5-12
Menu options . . . . . . . . . . . . . . . . . . . . . . . . . . . . . . . . 5-13
File menu . . . . . . . . . . . . . . . . . . . . . . . . . . . . . . . . . . . . 5-13
Edit Menu . . . . . . . . . . . . . . . . . . . . . . . . . . . . . . . . . . . . 5-13
ezdv.book Page xi Tuesday, May 30, 2000 2:31 PM
TABLE OF CONTENTS
Settings Menu. . . . . . . . . . . . . . . . . . . . . . . . . . . . . . . . . 5-13
View menu . . . . . . . . . . . . . . . . . . . . . . . . . . . . . . . . . . . 5-14
Help menu . . . . . . . . . . . . . . . . . . . . . . . . . . . . . . . . . . . 5-15
Dialogs . . . . . . . . . . . . . . . . . . . . . . . . . . . . . . . . . . . . . 5-16
File Properties . . . . . . . . . . . . . . . . . . . . . . . . . . . . . . . .
Limit Capture Time... . . . . . . . . . . . . . . . . . . . . . . . . . . .
EZDV properties... - Sync Rec . . . . . . . . . . . . . . . . . . . .
EZDV properties... - Detailed Settings . . . . . . . . . . . . . .
About . . . . . . . . . . . . . . . . . . . . . . . . . . . . . . . . . . . . . . .
5-16
5-16
5-17
5-18
5-20
CHAPTER 6: EZ Navi
Introducing EZ Navi . . . . . . . . . . . . . . . . . . . . . . . . . . . . 6-1
EZ Navi Interface . . . . . . . . . . . . . . . . . . . . . . . . . . . . . . 6-1
Choosing a Scan Method . . . . . . . . . . . . . . . . . . . . . . . . 6-2
Scanning for Scenes . . . . . . . . . . . . . . . . . . . . . . . . . . . 6-3
Indexing an entire tape . . . . . . . . . . . . . . . . . . . . . . . . . . . 6-3
Indexing from a particular point . . . . . . . . . . . . . . . . . . . . 6-4
Important note about Timecode . . . . . . . . . . . . . . . . . . . . 6-5
Working with the Scene list . . . . . . . . . . . . . . . . . . . . . . 6-6
Selecting and Moving clips . . . . . . . . . . . . . . . . . . . . . . . . 6-6
Viewing scenes. . . . . . . . . . . . . . . . . . . . . . . . . . . . . . . . . 6-7
Adding scenes . . . . . . . . . . . . . . . . . . . . . . . . . . . . . . . . . 6-7
Redefining scenes . . . . . . . . . . . . . . . . . . . . . . . . . . . . . . 6-7
Deleting scenes . . . . . . . . . . . . . . . . . . . . . . . . . . . . . . . . 6-9
Adding Comments to scenes . . . . . . . . . . . . . . . . . . . . . . 6-9
Saving and Loading Scene lists . . . . . . . . . . . . . . . . . . . 6-10
Capturing your clips . . . . . . . . . . . . . . . . . . . . . . . . . . . . 6-11
Interface In-depth . . . . . . . . . . . . . . . . . . . . . . . . . . . . . 6-12
Toolbar . . . . . . . . . . . . . . . . . . . . . . . . . . . . . . . . . . . . . .
Deck Information. . . . . . . . . . . . . . . . . . . . . . . . . . . . . . .
Deck Controller . . . . . . . . . . . . . . . . . . . . . . . . . . . . . . . .
Scene List . . . . . . . . . . . . . . . . . . . . . . . . . . . . . . . . . . . .
6-12
6-13
6-14
6-16
xi
ezdv.book Page xii Tuesday, May 30, 2000 2:31 PM
xii
TABLE OF CONTENTS
Menu options . . . . . . . . . . . . . . . . . . . . . . . . . . . . . . . . 6-17
1 INTRODUCTION
File menu . . . . . . . . . . . . . . . . . . . . . . . . . . . . . . . . . . . .
Edit menu . . . . . . . . . . . . . . . . . . . . . . . . . . . . . . . . . . . .
Setting menu. . . . . . . . . . . . . . . . . . . . . . . . . . . . . . . . . .
View menu . . . . . . . . . . . . . . . . . . . . . . . . . . . . . . . . . . .
Help menu . . . . . . . . . . . . . . . . . . . . . . . . . . . . . . . . . . .
6-17
6-18
6-18
6-19
6-19
Dialogs . . . . . . . . . . . . . . . . . . . . . . . . . . . . . . . . . . . . . 6-20
Jump . . . . . . . . . . . . . . . . . . . . . . . . . . . . . . . . . . . . . . . .
Comments... . . . . . . . . . . . . . . . . . . . . . . . . . . . . . . . . . .
Index search... . . . . . . . . . . . . . . . . . . . . . . . . . . . . . . . .
Deck control.... . . . . . . . . . . . . . . . . . . . . . . . . . . . . . . . .
EZDV properties... - Sync Rec . . . . . . . . . . . . . . . . . . . .
EZDV properties... - Detailed Settings . . . . . . . . . . . . . .
About... . . . . . . . . . . . . . . . . . . . . . . . . . . . . . . . . . . . . . .
6-20
6-20
6-21
6-22
6-23
6-24
6-25
CHAPTER 7: EZ Edit
Introducing EZ Video . . . . . . . . . . . . . . . . . . . . . . . . . . . 7-1
EZ Edit Interface. . . . . . . . . . . . . . . . . . . . . . . . . . . . . . . 7-1
Setting the Temporary drives . . . . . . . . . . . . . . . . . . . . . 7-2
Loading clips to edit . . . . . . . . . . . . . . . . . . . . . . . . . . . . 7-4
Supported clip types . . . . . . . . . . . . . . . . . . . . . . . . . . . . . 7-6
The Timeline. . . . . . . . . . . . . . . . . . . . . . . . . . . . . . . . . . 7-7
Add clips to the timeline . . . . . . . . . . . . . . . . . . . . . . . . . 7-8
Controlling the timeline . . . . . . . . . . . . . . . . . . . . . . . . . . 7-9
Adjusting the time scale . . . . . . . . . . . . . . . . . . . . . . . . . . 7-9
Scrubbing . . . . . . . . . . . . . . . . . . . . . . . . . . . . . . . . . . . . 7-10
Shuttling . . . . . . . . . . . . . . . . . . . . . . . . . . . . . . . . . . . . . 7-11
Playing . . . . . . . . . . . . . . . . . . . . . . . . . . . . . . . . . . . . . . 7-11
Working with Clips in the DV Bin . . . . . . . . . . . . . . . . . 7-11
Arranging clips . . . . . . . . . . . . . . . . . . . . . . . . . . . . . . . . 7-11
Trimming clips . . . . . . . . . . . . . . . . . . . . . . . . . . . . . . . . . 7-12
Removing clips . . . . . . . . . . . . . . . . . . . . . . . . . . . . . . . . 7-12
ezdv.book Page xiii Tuesday, May 30, 2000 2:31 PM
TABLE OF CONTENTS
Deleting clips from the hard drive . . . . . . . . . . . . . . . . . . 7-12
Working with Video Clips in the Timeline . . . . . . . . . . . 7-13
Arranging clips . . . . . . . . . . . . . . . . . . . . . . . . . . . . . . . .
Trimming clips . . . . . . . . . . . . . . . . . . . . . . . . . . . . . . . . .
Separating clips . . . . . . . . . . . . . . . . . . . . . . . . . . . . . . .
Removing clips . . . . . . . . . . . . . . . . . . . . . . . . . . . . . . . .
Adjusting Audio levels . . . . . . . . . . . . . . . . . . . . . . . . . . .
7-13
7-13
7-14
7-15
7-15
Working with Audio clips in the Timeline . . . . . . . . . . . 7-17
Arranging clips . . . . . . . . . . . . . . . . . . . . . . . . . . . . . . . .
Trimming clips . . . . . . . . . . . . . . . . . . . . . . . . . . . . . . . . .
Separating clips . . . . . . . . . . . . . . . . . . . . . . . . . . . . . . .
Removing clips . . . . . . . . . . . . . . . . . . . . . . . . . . . . . . . .
Adjusting Audio levels . . . . . . . . . . . . . . . . . . . . . . . . . . .
7-17
7-17
7-17
7-18
7-18
Using the Insert AV track . . . . . . . . . . . . . . . . . . . . . . . 7-19
Using the Ex Audio tracks. . . . . . . . . . . . . . . . . . . . . . . 7-20
Using 4-channel audio . . . . . . . . . . . . . . . . . . . . . . . . . . 7-21
Adding Graphics and Backgrounds . . . . . . . . . . . . . . . 7-22
Adding a color clip . . . . . . . . . . . . . . . . . . . . . . . . . . . . . 7-22
Adding a still image. . . . . . . . . . . . . . . . . . . . . . . . . . . . . 7-23
Working with color clips and still images . . . . . . . . . . . . 7-23
Adding Transitions . . . . . . . . . . . . . . . . . . . . . . . . . . . . 7-24
Adding Titles. . . . . . . . . . . . . . . . . . . . . . . . . . . . . . . . . 7-27
Entering Title Text . . . . . . . . . . . . . . . . . . . . . . . . . . . . . .
Positioning Titles. . . . . . . . . . . . . . . . . . . . . . . . . . . . . . .
Title Attributes. . . . . . . . . . . . . . . . . . . . . . . . . . . . . . . . .
Title Color . . . . . . . . . . . . . . . . . . . . . . . . . . . . . . . . . . . .
Title Motion . . . . . . . . . . . . . . . . . . . . . . . . . . . . . . . . . . .
Working with title layers . . . . . . . . . . . . . . . . . . . . . . . . .
Creating scrolling titles . . . . . . . . . . . . . . . . . . . . . . . . . .
Using a Title as a Logo tag . . . . . . . . . . . . . . . . . . . . . . .
Using a Fill Square to colorize video . . . . . . . . . . . . . . .
Saving and Loading Title data . . . . . . . . . . . . . . . . . . . .
7-28
7-28
7-28
7-29
7-29
7-31
7-34
7-35
7-36
7-37
Batch and Seamless Capture. . . . . . . . . . . . . . . . . . . . 7-37
Remote Capture . . . . . . . . . . . . . . . . . . . . . . . . . . . . . . 7-38
Outputting your Production to Tape . . . . . . . . . . . . . . . 7-38
xiii
ezdv.book Page xiv Tuesday, May 30, 2000 2:31 PM
xiv
TABLE OF CONTENTS
1 INTRODUCTION
SyncRecord . . . . . . . . . . . . . . . . . . . . . . . . . . . . . . . . . . 7-38
Manual Record . . . . . . . . . . . . . . . . . . . . . . . . . . . . . . . . 7-39
Creating AVI files from the timeline . . . . . . . . . . . . . . . 7-40
Reference AVI files and the 2-gigabyte AVI filesize limit. 7-42
Interface In-depth . . . . . . . . . . . . . . . . . . . . . . . . . . . . . 7-44
Toolbar . . . . . . . . . . . . . . . . . . . . . . . . . . . . . . . . . . . . . .
Timeline . . . . . . . . . . . . . . . . . . . . . . . . . . . . . . . . . . . . .
Deck controller . . . . . . . . . . . . . . . . . . . . . . . . . . . . . . . .
AVI Controller . . . . . . . . . . . . . . . . . . . . . . . . . . . . . . . . .
Status Bar . . . . . . . . . . . . . . . . . . . . . . . . . . . . . . . . . . . .
7-44
7-46
7-46
7-47
7-48
Menu options . . . . . . . . . . . . . . . . . . . . . . . . . . . . . . . . 7-49
File Menu . . . . . . . . . . . . . . . . . . . . . . . . . . . . . . . . . . . .
Edit menu . . . . . . . . . . . . . . . . . . . . . . . . . . . . . . . . . . . .
Effects menu . . . . . . . . . . . . . . . . . . . . . . . . . . . . . . . . . .
Settings menu. . . . . . . . . . . . . . . . . . . . . . . . . . . . . . . . .
View Menu . . . . . . . . . . . . . . . . . . . . . . . . . . . . . . . . . . .
Help menu . . . . . . . . . . . . . . . . . . . . . . . . . . . . . . . . . . .
7-49
7-50
7-52
7-53
7-56
7-57
Dialogs . . . . . . . . . . . . . . . . . . . . . . . . . . . . . . . . . . . . . 7-58
Batch capture/Seamless capture . . . . . . . . . . . . . . . . . .
Trim clip. . . . . . . . . . . . . . . . . . . . . . . . . . . . . . . . . . . . . .
Jump... . . . . . . . . . . . . . . . . . . . . . . . . . . . . . . . . . . . . . .
Default Edit Settings - Default Settings. . . . . . . . . . . . . .
EZDV properties... - Sync Rec . . . . . . . . . . . . . . . . . . . .
EZDV properties... - Detailed Settings . . . . . . . . . . . . . .
AVI Properties - File Information. . . . . . . . . . . . . . . . . . .
AVI Properties - Edit Information . . . . . . . . . . . . . . . . . .
AVI Properties - Rec Information . . . . . . . . . . . . . . . . . .
AVI Properties - Reference AVI Information . . . . . . . . . .
WAV Properties - File Information. . . . . . . . . . . . . . . . . .
WAV Properties - Edit Information . . . . . . . . . . . . . . . . .
About . . . . . . . . . . . . . . . . . . . . . . . . . . . . . . . . . . . . . . .
7-58
7-58
7-59
7-59
7-62
7-63
7-64
7-65
7-66
7-67
7-68
7-69
7-69
Transition Settings . . . . . . . . . . . . . . . . . . . . . . . . . . . . 7-71
Blind Slide. . . . . . . . . . . . . . . . . . . . . . . . . . . . . . . . . . . .
Blind Wipe. . . . . . . . . . . . . . . . . . . . . . . . . . . . . . . . . . . .
Block . . . . . . . . . . . . . . . . . . . . . . . . . . . . . . . . . . . . . . . .
Box . . . . . . . . . . . . . . . . . . . . . . . . . . . . . . . . . . . . . . . . .
Circle. . . . . . . . . . . . . . . . . . . . . . . . . . . . . . . . . . . . . . . .
7-71
7-72
7-73
7-74
7-75
ezdv.book Page xv Tuesday, May 30, 2000 2:31 PM
TABLE OF CONTENTS
Clock. . . . . . . . . . . . . . . . . . . . . . . . . . . . . . . . . . . . . . . .
Dissolve . . . . . . . . . . . . . . . . . . . . . . . . . . . . . . . . . . . . .
Push . . . . . . . . . . . . . . . . . . . . . . . . . . . . . . . . . . . . . . . .
Push Stretch (Under Scan). . . . . . . . . . . . . . . . . . . . . . .
Slide . . . . . . . . . . . . . . . . . . . . . . . . . . . . . . . . . . . . . . . .
Slide (Under Scan) . . . . . . . . . . . . . . . . . . . . . . . . . . . . .
Stretch . . . . . . . . . . . . . . . . . . . . . . . . . . . . . . . . . . . . . .
Stretch (Under Scan) . . . . . . . . . . . . . . . . . . . . . . . . . . .
Stripe/Reveal . . . . . . . . . . . . . . . . . . . . . . . . . . . . . . . . .
7-76
7-77
7-77
7-78
7-79
7-80
7-81
7-82
7-83
CHAPTER 8: Troubleshooting
Troubleshooting . . . . . . . . . . . . . . . . . . . . . . . . . . . . . . . 8-1
Pre-Installation issues . . . . . . . . . . . . . . . . . . . . . . . . . . 8-1
My computer does not meet the minimum requirements for
EZDV. Can I still use it? . . . . . . . . . . . . . . . . . . . . 8-1
I don’t have a DV or Digital 8 camera or deck. Can I
use EZDV? . . . . . . . . . . . . . . . . . . . . . . . . . . . . . 8-1
I have a DVCAM camera or deck. Can I use it
with EZDV? . . . . . . . . . . . . . . . . . . . . . . . . . . . . . 8-1
I have a DVCPRO camera or deck. Can I use it
with EZDV? . . . . . . . . . . . . . . . . . . . . . . . . . . . . . 8-2
Can I capture analog footage with EZDV? . . . . . . . . . . . . 8-2
Can EZDV output analog audio or video? . . . . . . . . . . . . 8-2
I have a NTSC (or PAL) EZDV card. Can I use a PAL (or
NTSC) camera or footage with it? . . . . . . . . . . . . 8-2
My computer is overclocked. Can I use EZDV in it? . . . . . 8-2
Installation issues . . . . . . . . . . . . . . . . . . . . . . . . . . . . . . 8-3
EZDV is not detected by EZDVTest or behaves
erratically . . . . . . . . . . . . . . . . . . . . . . . . . . . . . . . 8-3
I cannot see video playing in the video windows of the
EZDV applications.. . . . . . . . . . . . . . . . . . . . . . . . 8-3
General usage issues. . . . . . . . . . . . . . . . . . . . . . . . . . . 8-4
Does EZDV support 16:9 aspect ratio? . . . . . . . . . . . . . . 8-4
I get “Disk speed is too slow” during capture.
xv
ezdv.book Page xvi Tuesday, May 30, 2000 2:31 PM
1 INTRODUCTION
xvi
TABLE OF CONTENTS
What’s wrong? . . . . . . . . . . . . . . . . . . . . . . . . . . .
I cannot capture more than 9 minutes of video
into one file. . . . . . . . . . . . . . . . . . . . . . . . . . . . . .
Why do I get “Disk Write Error” the first time I capture,
but it captures okay in subsequent captures? . . .
I cannot output my production to tape. . . . . . . . . . . . . . . .
The stills in my timeline jitter or have incorrect colors. . . .
Still images in my production look slightly distorted on
output. . . . . . . . . . . . . . . . . . . . . . . . . . . . . . . . . .
What are the specifications for rendering to the Canopus
DV CODEC from another application? . . . . . . . .
What colorspace does EZ Edit edit in?. . . . . . . . . . . . . . .
8-4
8-4
8-4
8-5
8-5
8-5
8-6
8-6
Other questions . . . . . . . . . . . . . . . . . . . . . . . . . . . . . . . 8-6
Why does SoftXplode not work in Windows NT? . . . . . . . 8-6
Where can I get more information? . . . . . . . . . . . . . . . . . 8-6
ezdv.book Page 1 Tuesday, May 30, 2000 2:31 PM
CHAPTER: 1 Introduction
1-1
CHAPTER 1
Introduction
Thank you
Thank you for purchasing EZDV, the DV editing card for
everyone. Before installing the software we recommend
you read this manual and acquaint yourself with the installation and use of the product. If you have any questions
please call, fax, mail or email us at:
Canopus Corporation
711 Charcot Ave.
San Jose, CA 95131
About this manual
The information contained in this manual covers:
Chapter 1—Introduction
Provides information about contacting us and using this
manual.
Chapter 2—Installation
Includes easy to follow instructions on how to install the
EZDV hardware and software.
Introduction
Main telephone: (408)954-4500
Main fax: (408)954-4504
Technical support number: (408)954-4506
Web site: www.canopuscorp.com
ezdv.book Page 2 Tuesday, May 30, 2000 2:31 PM
1-2
CHAPTER: 1 Introduction
Chapter 3—Quick Start - Your First Editing Project
Walks through a simple production from capture to editing
to output.
Chapter 4—EZ Video
Provides a detailed look at the EZ Video application for
video capture and output.
Chapter 5—EZ Audio
Provides a detailed look at the EZ Audio application for
audio capture and output.
Chapter 6—EZ Navi
Provides a detailed look at the EZ Navi application for tape
scanning and scene logging.
Introduction
Chapter 7—EZ Edit
Provides a detailed look at the EZ Edit application for editing.
ezdv.book Page 3 Tuesday, May 30, 2000 2:31 PM
CHAPTER: 1 Introduction
1-3
Manual conventions
The following conventions are used throughout this manual:
• Bold usually indicates software menu commands
•
•
File>Open
Italic is used for emphasis and naming
[square brackets] refer to software messages to you
“info check” notifies you to write down parameters or make
note of manual suggestions.
“caution” means to take care in avoiding physical injury or
damage to the computer or peripherals.
“STATIC” warns you of situations where the danger of damage from static electricity is present.
Introduction
The two screw driver icons represent removing screws
(counter clockwise) and replacing screws (clockwise).
ezdv.book Page 4 Tuesday, May 30, 2000 2:31 PM
1-4
CHAPTER: 1 Introduction
Trademarks
Introduction
EZDV, EZ Edit, EZ Video, EZ Navi, and EZ Audio are trademarks of Canopus Corporation. i.LINK is a trademark of
Sony Corporation. DirectDraw and IntelliMouse are trademarks of Microsoft. All other trademarks and registered
trademarks belong to their respective owners.
ezdv.book Page 1 Tuesday, May 30, 2000 2:31 PM
CHAPTER: 2 Installation
2-1
CHAPTER 2
Installation
This product is not intended for and should not be used for
medical purposes, or with any equipment which might be
used for life support.
Before Installation
Make sure to read the following sections before installing
the EZDV hardware and software. Please check to make
sure you have a compatible system and your EZDV is
installed and working properly.
Make sure your package contains the following items:
•
•
•
•
•
•
•
EZDV PCI board
EZDV Software CD
EZDV Manual
Registration card (in the manual)
SmartSound CD
SoftXplode Manual
4-pin i.LINK cable
Installation
Package Contents
ezdv.book Page 2 Tuesday, May 30, 2000 2:31 PM
2-2
CHAPTER: 2 Installation
EZDV PCI board
EZDV Manual
SoftXplode Manual
SmartSound
for Multimedia
P k
Installation
EZDV System Requirements
Make sure your computer system meets the following
requirements:
• Pentium II 400MHz, Celeron 466MHz or over
Pentium III 500MHz or faster recommended
• CD-ROM drive
• 64MB RAM (128MB recommended)
• A hard disk with 4.5MB/sec sustained data transfer
rate
• 50 MB free hard disk space
• Microsoft® Windows® 98, Windows® NT4.0* (Service
Pack 4 or higher), Windows® 2000
*SoftXplode does not work under Windows NT.
Detailed Requirements
Graphics Board
To display and overlay video on the VGA monitor you need
a graphics board that supports hardware DirectDraw and
DirectDraw overlay.
ezdv.book Page 3 Tuesday, May 30, 2000 2:31 PM
CHAPTER: 2 Installation
2-3
Hard Disk requirements
When working with DV data, a high sustained data
throughput is necessary. We recommend a dedicated hard
disk with a sustained data transfer rate of at least 4.5MB/
Sec for video. Popular video editing storage configurations
include UltraATA33 drives, Ultra Wide SCSI controllers and
Ultra Wide SCSI hard disks.
Testing your system for compatibility
The EZDV Software CD-ROM contains a utility called EZDVTest which will test your system for compatibility with
EZDV.
Before installing EZDV hardware
Please test your system for compatibility with EZDV by running EZDVTest, described in the next section.
Test Your Hardware with EZDVTest
Running EZDVTest
1. Close all applications and utilities.
2. Insert the EZDV Software CD-ROM into your CD-ROM
drive
3. Open Windows Explorer and navigate to the EZDVTest
folder
4. Double-click EZDVTest.exe
5. The EZDVTest Readme file will appear, along with the
EZDVTest window.
Installation
EZDV comes with EZDVTest software to profile your system. This program checks PCI BIOS version, motherboard
chipset, hard disk speed, and graphics card capabilities.
By running this small application you can make sure your
computer meets the requirements of EZDV. Run EZDVTest
before installing the EZDV board.
ezdv.book Page 4 Tuesday, May 30, 2000 2:31 PM
2-4
CHAPTER: 2 Installation
EZDVTest System Profile
Installation
Machine Info
Displays information about your computer system. It shows
the version of Windows you are running, as well as the
type and speed of your CPU(s).
The items listed in Machine Info and their descriptions follow. Pay special attention to DirectDraw Overlay, Chip
Set and PCI Latency Timer.
Windows version
Displays the version of Windows that is currently running.
EZDV supports Windows 98, Windows 98 Second
Edition, Windows NT 4.0 (with Service Pack 4 or
later), and Windows 2000.
ezdv.book Page 5 Tuesday, May 30, 2000 2:31 PM
CHAPTER: 2 Installation
2-5
Computer
Displays the type and speed of your CPU(s), as well
as the amount of memory available to Windows (this
number may be less than the amount of memory you
have installed). If there is less than 60 MB available
to Windows, you may encounter problems using
EZDV. Close other open applications or add more
memory to your system.
DirectDraw Overlay
Refers to your graphics card’s ability to display a
video window on the computer monitor.
If DirectDraw Overlay comes up No, try changing display resolution (1024x768 or higher), refresh rate
(60Hz or higher), and/or color depth (16-bit or
higher). Also make sure you are using the latest drivers for your graphics card.
If you cannot find a mode where DirectDraw Overlay
is supported, you will have to replace your graphics
card with a graphics card that supports DirectDraw
Overlay (such as the Canopus Xplode card).
Displays the detected motherboard chip set. If your
motherboard chip set cannot be detected, you may
run into problems
PCI Latency Timer
Displays the current PCI Latency Timer setting. The
PCI Latency Timer determines how long a PCI card
can hold the CPU’s attention before attention is
passed to another card.
The PCI Latency should be set to 60 or higher. If it is
lower than 64, you may encounter problems. Most
BIOS configuration utilities allow you to change the
PCI Latency Timer setting in the Advanced, Chipset,
or PCI/PNP settings.
Installation
Chip Set
ezdv.book Page 6 Tuesday, May 30, 2000 2:31 PM
2-6
CHAPTER: 2 Installation
Hard Disk Performance
Displays performance measurements of your hard disk
drive and rates it for use with EZDV.
Select the drive you want to test from the Drive drop-down.
Click the HDD Test button to execute the hard drive test.
Make sure no other programs are running while the test is
being performed, as this may affect the results.
The measured read and write performance of your hard
drive is listed in KB/Sec and by a colored bar.
The bar is split into three colors:
Red:
The data transfer rate is below 4.5MB/Sec.
This drive is not suitable for capture.
Installation
Yellow: The data transfer rate is between 4.5MB/Sec to
7MB/Sec. This drive has moderate performance
and should be fine for capture.
Green: The data transfer rate is above 7MB/Sec. This is a
high performance drive and should be fine for capture.
If your hard drive is not suitable for capture, you should get
a faster hard drive dedicated for video storage, or you can
possibly increase drive performance by using multiple
drives in a RAID striped configuration.
Special note for IDE hard drive users
When using IDE video and system hard drives, we strongly
recommend that your video drive(s) be on a separate IDE
channel from your system drive. IDE does not allow for
overlapped I/O, so if two hard drives are on the same IDE
channel, only one can be accessed at any given time.
Keeping your video drives on separate channels will give
you optimal performance.
ezdv.book Page 7 Tuesday, May 30, 2000 2:31 PM
CHAPTER: 2 Installation
2-7
Special note for Windows NT users using IDE
hard drives
Windows NT, by default, does not enable DMA transfers for
IDE drives connected to the primary and secondary IDE
controller. Thus, IDE performance under Windows NT is
often much slower than in other Windows versions.
To enable DMA transfers for IDE drives under Windows NT,
obtain the DMACHECK utility from Microsoft’s support site
and use it to enable DMA transfers.
Note that if you have a separate IDE controller card, its
drivers may already enable DMA transfers.
EZDV
Displays whether the EZDV board is detected, and if so,
the video standard (NTSC or PAL) of the detected board.
Option
The “Show Information file at startup” box, if checked, will
display the Readme for EZDVTest when EZDVTest is
started.
Installation
ezdv.book Page 8 Tuesday, May 30, 2000 2:31 PM
2-8
CHAPTER: 2 Installation
Hardware Installation
This section contains instructions on how to install the
EZDV hardware. Please follow the instructions below while
installing the EZDV PCI card.
The tools needed for installation.
1. A Phillips head screwdriver (star)
2. Your PC’s User's Manual
Caution: Static electricity can damage electronic components. Take care not to touch connectors or cards directly.
When installing or working on your PC, first touch a
grounded metal surface. This will discharge any static electricity on your body
Installation
STEP 1: Opening your PC Cover
1. Quit any applications you are using and shut down Windows.
2. Switch off your PC.
3. Remove your PC cover, as shown in your PC manual.
Remove computer
cover
Preparation for EZDV installation
ezdv.book Page 9 Tuesday, May 30, 2000 2:31 PM
CHAPTER: 2 Installation
2-9
STEP 2: EZDV PCI card Installation
1. Find a free PCI slot (preferably NOT the PCI slot next to
the AGP slot) and remove the protective bracket.
2. Remove the EZDV PCI card from the anti-static bag.
HANDLE THE CARD BY THE EDGES. AVOID TOUCHING THE CARD’S SURFACE
3. Gently push the card into the slot and screw it into
place.
Replace the
computer cover
STEP 3: Checking Connections
After installing the EZDV card, check all your connections
and replace the computer cover.
Installation
Replacing the computer cover
ezdv.book Page 10 Tuesday, May 30, 2000 2:31 PM
2-10
CHAPTER: 2 Installation
Before installing EZDV software
Please make sure your system is working properly and
free of viruses.
Windows 98 Driver Installation
The first time you start Windows after installing the EZDV
board, the Add New Hardware dialog will appear. Insert
the EZDV software CD-ROM in your CD-ROM drive and
point the Add New Hardware wizard to look in D:\Win9x
(where D: is the letter of your CD-ROM drive). Follow the
on-screen instructions to install the EZDV drivers.
After the EZDV drivers are installed, restart your system
and follow the steps under Applications Installation later in
this chapter to install the EZDV applications.
Installation
Windows 2000 Driver Installation
The first time you start Windows after installing the EZDV
board, the Add New Hardware dialog will appear. Insert
the EZDV software CD-ROM in your CD-ROM drive and
point the Add New Hardware wizard to look in D:\Win2k
(where D: is the letter of your CD-ROM drive). Follow the
on-screen instructions to install the EZDV drivers.
After the EZDV drivers are installed, restart your system
and follow the steps under Applications Installation later in
this chapter to install the EZDV applications.
Windows NT 4.0 Driver Installation
There is no driver installation necessary for Windows NT
4.0. Please install the EZDV applications by following the
steps under Applications Installation later in this chapter.
ezdv.book Page 11 Tuesday, May 30, 2000 2:31 PM
CHAPTER: 2 Installation
2-11
Applications Installation
To install the EZDV applications, insert the EZDV CD-ROM
into your CD-ROM drive, open the App folder, and run
Setup.exe by double-clicking the icon. The EZDV setup
application will appear. Follow the prompts to install EZ
Edit, EZ Audio, EZ Video, and EZ Navi.
Bundled Applications Installation
SmartSound for Multimedia
Insert the SmartSound CD-ROM into your CD-ROM drive
and run Setup.exe by double-clicking the icon. The SmartSound for Multimedia installer will appear. Follow the
prompts to install SmartSound for Multimedia. The SmartSound for Multimedia manual is included on the CD as a
PDF document.
SoftXplode
SoftXplode does not support Windows NT. For Xplode
effects in Windows NT, you ned to purchase the Xplode
hardware.
Connecting your DV camera or deck
Connect your camera or deck to your EZDV using the provided 4-pin to 4-pin i.LINK cable. Plug one end of the cable
Installation
The EZDV installation application will install SoftXplode
under Windows 98 and Windows 2000. Please make sure
you have DirectX 6.1 or higher installed on your system. If
you do not have DirectX 6.1 or higher, you can find the
DirectX installer on the EZDV software CD.
ezdv.book Page 12 Tuesday, May 30, 2000 2:31 PM
2-12
CHAPTER: 2 Installation
into your camera or deck’s i.LINK jack, and plug the other
end of the cable into EZDV’s i.LINK jack.
DV jack on your
camera or deck
EZDV card
4-pin to 4-pin i.LINK cable
Installation
If you are connecting a DV camera, make sure it is in
VTR mode, and not Camera mode.
ezdv.book Page 1 Tuesday, May 30, 2000 2:31 PM
CHAPTER: 3 Quick Start - Your First Editing Project
3-1
CHAPTER 3
Quick Start - Your First Editing Project
Basic steps in video production
To help you learn the EZDV software quickly, this chapter
will take you through the steps necessary to do a simple
editing project. For more detailed explanations of the programs and procedures in this chapter, please refer to the
individual chapters on EZ Video, EZ Navi, EZ Audio and
EZ Edit.
Watch for the info check symbol throughout the chapter. It
will tell you where to look for further information on the
steps described.
The video editing process involves three steps - Acquisition, Editing, and Output.
Acquisition
The first step in starting an editing project is to gather video
and audio material to edit. This is the acquisition stage,
where raw footage is viewed and usage pieces of video
(clips) are identified and transferred (captured) to the computer’s hard disk.
First Project
For this quick start tutorial, you will need the following
items:
1. DV or Digital 8 camera or deck connected to EZDV and
in VTR mode.
2. A DV or Digital 8 tape (whichever is appropriate to your
device) with some video footage on it (a few minutes at
least).
ezdv.book Page 2 Tuesday, May 30, 2000 2:31 PM
3-2
CHAPTER: 3 Quick Start - Your First Editing Project
EZDV can be used with DV and Digital 8 digital video
sources. You can identify and capture video clips by using
EZ Navi, or by using EZ Video and EZ Edit.
The various acquisition methods are further explained in
the individual chapters for each application.
For this tutorial, we will use EZ Video Batch capture to capture a few clips and EZ Audio to capture some audio clips.
If your DV or Digital 8 tape is not in your camera or deck,
please insert it now.
Batch capture footage in EZ Video
First Project
Batch, Seamless, and Manual
capture are documented in the
EZ Video chapter.
You can also use EZ Navi to
automatically identify clips and
create a capture list for batch
capture in EZ Video. Please
see the EZ Navi and EZ Video
chapters for more information.
We will use batch capture in EZ Video to capture a video
clip. Follow the following steps to batch capture video in EZ
Video.
1. Open EZ Video
2. Click the Batch capture/Seamless capture button on
the EZ Video toolbar or choose Batch capture/Seamless capture from the File menu.
Click the Batch capture/Seamless capture button
Or choose Batch Capture/Seamless capture from the File menu
ezdv.book Page 3 Tuesday, May 30, 2000 2:31 PM
CHAPTER: 3 Quick Start - Your First Editing Project
3-3
3. The Batch capture/Seamless capture window will
appear. Make sure the Capture Method is set to Batch
for batch capture.
Make sure this is set to Batch
4. Set a filename for the clip you want to capture. For this
tutorial, we will create a file called
D:\DemoCapture1.AVI (substitute D:\ with the letter of
your video drive, if you have one).
Set AVI filename to
DemoCapture1.AVI
First Project
Batch capture/Seamless capture window
ezdv.book Page 4 Tuesday, May 30, 2000 2:31 PM
3-4
CHAPTER: 3 Quick Start - Your First Editing Project
5. Use the Deck controller to position the tape at the start
of where you want to capture.
Position the tape at
the start of where
you want to capture
by using the Deck
controller.
6. Click the Mark In button. The In point will be entered
automatically.
7. Advance the tape a few minutes.
First Project
Position the tape at
the end of where
you want to capture
by using the Deck
controller.
8. Click the Mark Out button. The Out point will be
entered automatically.
ezdv.book Page 5 Tuesday, May 30, 2000 2:31 PM
CHAPTER: 3 Quick Start - Your First Editing Project
3-5
9. Click the Add button to add the selected clip to the capture list. The clip will appear in the list on the bottom of
the Batch capture/Seamless capture window.
Add button
Capture list
10.Repeat steps 5-9 for another clip. EZ Video will automatically increment the filename for you.
11.Click the Capture button to begin capture. EZ Video will
capture the selected clips to your hard disk.
You should have two AVI files on your hard disk DemoCapture1.AVI and DemoCapture2.AVI. Remember
where you saved these files, you’ll need them for the editing part of the tutorial.
Now we’ll use EZ Audio to capture some audio from our DV
tape.
SyncCapture and Manual
capture are documented in the
EZ Audio chapter.
We will use SyncCapture, which allows you to capture
audio from a specific point on the tape. Follow the steps
below to SyncCapture some audio.
1. Position the deck at the start of the segment you want
to record by using the Deck controller. Choose a segment after the video that you captured in the previous
step.
Position the tape at the start of where you
want to capture by using the Deck
controller.
First Project
SyncCapture Audio in EZ Audio
ezdv.book Page 6 Tuesday, May 30, 2000 2:31 PM
3-6
CHAPTER: 3 Quick Start - Your First Editing Project
2. Click the SyncCapture button on the WAV controller.
REC PAUSE will flash in the WAV info display. Click the
Play button on the WAV controller to start SyncCapture.
If you do not have Set new filenames automatically
checked and have not already set a filename, a dialog
will appear to ask you for the filename to use for the
captured video.
First Project
If this window appears, give the clip a name and save it
on your video drive
For this tutorial, name the file D:\DemoMusic.WAV
(substitute D:\ with the letter of your video drive, if you
have one).
3. The DV deck will start playing and the computer will
start capturing. Let it capture for a few minutes, then
click the Stop button on the WAV controller to stop capture.
Now you have a WAV audio file on your computer. Remember where you saved it - you will need it for the next part of
the tutorial.
ezdv.book Page 7 Tuesday, May 30, 2000 2:31 PM
CHAPTER: 3 Quick Start - Your First Editing Project
3-7
Editing in EZ Edit
This portion of the tutorial will familiarize you with EZ Edit.
For more detailed information, please refer to the EZ Edit
chapter.
You can capture video from
EZ Edit as well. See the EZ
Edit chapter for more details.
Now that you have acquired your footage, you can begin
editing your clips. You should also start thinking about any
graphics or special effects you want to add to your project.
Starting EZ Edit
Open EZ Edit by choosing it from the EZDV program group
in the Start menu.
First Project
EZ Edit
Setting the Temporary Drives
The temporary drives are where rendered (processed)
effects are stored. It is important that rendered effects are
ezdv.book Page 8 Tuesday, May 30, 2000 2:31 PM
3-8
CHAPTER: 3 Quick Start - Your First Editing Project
stored on a video-capable drive, or they may not render
correctly.
Before starting to edit, you need to make sure the temporary drives are set to your video hard disks.
To set the Temporary drives, follow these steps.
1. Open EZ Edit.
2. Choose Default edit settings... from the Settings
menu.
First Project
Choose Default edit settings from the Settings menu
ezdv.book Page 9 Tuesday, May 30, 2000 2:31 PM
CHAPTER: 3 Quick Start - Your First Editing Project
3-9
3. In the Default settings dialog, select the Temporary
Drives tab.
Drive
First Project
Temporary Drives setting
4. Select your video drive from the Drive drop-down.
5. Click the Add button. The drive you specified will
appear in the list. If you have multiple video drives, you
can add them here and as each gets filled, the next one
will be used.
ezdv.book Page 10 Tuesday, May 30, 2000 2:31 PM
3-10
CHAPTER: 3 Quick Start - Your First Editing Project
6. Once you set the temporary drives, EZ Edit will remember the setting until you uninstall or reinstall the software. Click the OK button to close the settings dialog.
Loading clips to edit
First Project
Now that your temporary drives are set, we can proceed to
load clips to edit.
ezdv.book Page 11 Tuesday, May 30, 2000 2:31 PM
CHAPTER: 3 Quick Start - Your First Editing Project
3-11
1. Double-click the mouse in the DV Bin to bring up the
Add clip to bin window dialog.
Double-click in the DV Bin
The Add Clip to Bin Window dialog will appear.
First Project
2. Locate the two video we captured DemoCapture1.AVI and DemoCapture2.AVI.
ezdv.book Page 12 Tuesday, May 30, 2000 2:31 PM
3-12
CHAPTER: 3 Quick Start - Your First Editing Project
3. Select them and click the Open button. They will
appear in the DV Bin.
4. There will be two clips listed in the DV Bin. If your clips
have 48 kHz audio, the name will have a blue background, if they have 44.1 kHz audio, they will have a
green background, and if they have 32 kHz audio, they
will have a yellow background.
5. Load the DemoMusic.WAV file created that we captured earlier using the same steps above.
6. Now you should have three clips in the DV Bin.
First Project
The color of clips in the bin
represent their audio rates.
Blue = 48 kHz 16-bit
Green = 44.1 kHz 16-bit
Yellow = 32 kHz 12-bit
Adding clips to the timeline
In order to edit our video, we need to put our clips on the
timeline.
ezdv.book Page 13 Tuesday, May 30, 2000 2:31 PM
CHAPTER: 3 Quick Start - Your First Editing Project
3-13
1. Drag DemoCapture1.AVI from the DV Bin on to the
Main AV track.
Drag DemoCapture1.AVI from the DV Bin to the Main AV track
We now have a clip on the Main AV track.
DemoCapture1.AVI clip
2. Before we proceed, we should adjust the time scale of
the timeline so we can see more of our project. Click on
the right side of the Timescale slider to change the
First Project
The color of clips in the timeline
represent their audio rates.
Blue = 48 kHz 16-bit
Green = 44.1 kHz 16-bit
Yellow = 32 kHz 12-bit
Purple = still image (no audio)
ezdv.book Page 14 Tuesday, May 30, 2000 2:31 PM
3-14
CHAPTER: 3 Quick Start - Your First Editing Project
timeline units. Keep clicking on it until your clip does not
take up the entire Main AV track or it is set to Fit.
Click the right side until the
clip no longer takes up the
entire track or it is set to Fit.
First Project
3. Drag DemoCapture2.AVI from the DV Bin to a position
to the right of the existing clip on the Main AV track.
ezdv.book Page 15 Tuesday, May 30, 2000 2:31 PM
CHAPTER: 3 Quick Start - Your First Editing Project
3-15
4. You should now have two clips on the Main AV track of
the timeline.
As you can see, EZ Edit places the two clips right next
to each other. The Main AV track does not allow for
empty space between clips. All clips are pressed up
against each other.
The vertical line in the Timeline is the timeline cursor.
The image in the video window is the video at the frame
where the timeline cursor is.
Adding transitions between clips
First Project
EZ Edit includes multiple
transitions - see the EZ Edit
chapter for more details.
1. Now we will add a transition between the two clips in
the timeline. Move the timeline cursor to the point where
the two clips meet by clicking and dragging the mouse
in the time area.
2. Click the Add transition button on the toolbar. This will
add the default transition (1-second dissolve) between
the two clips.
ezdv.book Page 16 Tuesday, May 30, 2000 2:31 PM
3-16
CHAPTER: 3 Quick Start - Your First Editing Project
The two clips on the timeline will overlap each other,
and a block will appear under the overlap.
Transition
Overlap
First Project
3. In order to view the transition, we need to render it.
Right-click the transition and choose Render.
4. EZ Edit will render the transition, and it will change
color from red to blue, indicating that it has been rendered.
Rendered transition
5. The timeline cursor will be placed at the beginning of
the transition. Hit the Spacebar on the keyboard or click
the Play button on the AVI controller to play the time-
ezdv.book Page 17 Tuesday, May 30, 2000 2:31 PM
CHAPTER: 3 Quick Start - Your First Editing Project
3-17
line.
Hit the space bar, or press the Play button
You can see that the transition between the clips plays.
Also notice that the audio from the first clip fades out
while the audio from the second clip fades in. EZ Edit
did this automatically when it added the transition
between the clips.
Adding an Insert cut away
The Insert AV track allows you to cut away to a separate
piece of video, then cut back.
1. Drag DemoCapture2.AVI from the DV Bin to the Insert
AV track, under the first clip on the Main AV track.
First Project
2. Play the timeline (Space bar, or click the Play button on
the AVI controller). Notice how the video switches to the
Insert AV clip when the timeline cursor passes over it.
Also note that the audio from both the underlying Main
AV clip and the Insert AV clip play. You can use Insert
AV cuts to add video to a “talking head” while keeping
the audio from both clips.
ezdv.book Page 18 Tuesday, May 30, 2000 2:31 PM
3-18
CHAPTER: 3 Quick Start - Your First Editing Project
Adjusting Audio levels
First Project
The line in the middle of the clip represents its volume
level. To adjust the audio levels of your clips, click on the
line to add a node, then drag the node up or down to adjust
the level.
ezdv.book Page 19 Tuesday, May 30, 2000 2:31 PM
CHAPTER: 3 Quick Start - Your First Editing Project
3-19
To delete an audio node, right-click on it and choose Delete
level point.
Adding a Title
You can add titles that will appear over video on the Title
track.
Follow the steps below to create a simple title.
1. Add a title by clicking the Add title/Edit title button on
the toolbar.
2. The interface will switch to Title mode.
First Project
Titling interface
3. Type some text. It will appear on the screen.
ezdv.book Page 20 Tuesday, May 30, 2000 2:31 PM
3-20
CHAPTER: 3 Quick Start - Your First Editing Project
First Project
4. Press the Preview button to see what the title will look
like over video.
5. To position the title on the screen, click off of the title to
stop entering text, then click and drag it to the desired
ezdv.book Page 21 Tuesday, May 30, 2000 2:31 PM
CHAPTER: 3 Quick Start - Your First Editing Project
3-21
position.
Click and drag to position the title.
First Project
You can set many aspects of the title such as shadow,
edge, color, and motion in the Attributes, Color, and
Motion tabs. These features are described in more
detail in the EZ Edit chapter.
ezdv.book Page 22 Tuesday, May 30, 2000 2:31 PM
3-22
CHAPTER: 3 Quick Start - Your First Editing Project
6. Click OK to accept the title and close the titling interface. The title appears on the Title track.
Adding a title
First Project
7. Before you can see the title in the video, you need to
render it. Right-click the title and choose Render from
the menu.
8. The title will change color from red to blue to signify that
it has been rendered. You can now play the timeline
and see the title in the video.
ezdv.book Page 23 Tuesday, May 30, 2000 2:31 PM
CHAPTER: 3 Quick Start - Your First Editing Project
3-23
The title we created was just a simple title that dissolves
in and out. The Motion tab of the Title dialog has
options you can change to have titles slide, wipe, and
do various other things.
Outputting your Production to Tape
The final step in editing your video is to output your completed production back to tape. Output to tape can be done
in EZ Edit and EZ Video. For this tutorial, we will output
directly from EZ Edit, as this is the most convenient way to
do it.
The following steps will output your timeline to tape.
1. Verify that all transitions and titles have been rendered.
There should be no red blocks on the timeline.
If one or more items are not rendered, you can click the
Render all effects on time line button in the toolbar to
render them all.
Click the Render all effects button if it is not grayed out
EZ Edit will rewind the tape, then record the timeline to
the tape.
This is the end of the Quick Start - Your First Editing
Project chapter.
The EZDV applications have many more features than
were discussed in this simple tutorial. Please take some
time to go through the chapters on each application to
learn about all their features.
First Project
2. Insert a blank tape into your DV device. Make sure it is
not write-protected.
3. Click the SyncRecord button on the Deck controller.
ezdv.book Page 24 Tuesday, May 30, 2000 2:31 PM
First Project
3-24
CHAPTER: 3 Quick Start - Your First Editing Project
ezdv.book Page 1 Tuesday, May 30, 2000 2:31 PM
CHAPTER: 4 EZ Video
4-1
CHAPTER 4
EZ Video
Introducing EZ Video
This chapter will introduce you to EZ Video, the video capture and output component of the EZDV software.
The features of EZ Video will be described to familiarize
you with its functions.
EZ Video Interface
The EZ Video window consists of eight main sections:
1. Toolbar - includes shortcut buttons for commonly used
menu items
2. Video area - shows the video coming from, or going out
to, your DV or Digital 8 device. Playback of DV AVI files
also appears here.
3. File and Deck information area - displays information
about the currently loaded AVI file and the status of the
DV device.
4. AVI controller - contains buttons to control playback of
the loaded AVI file, a button to start capture from the
connected DV device, buttons for trimming, and a slider
to scrub through the video.
EZ Video
The EZ Video application allows you control your DV or
Digital 8 camera or deck to both capture video and record
video back to tape. It provides playback of video on the
computer screen, camera/deck control, capture, and output capabilities.
ezdv.book Page 2 Tuesday, May 30, 2000 2:31 PM
4-2
CHAPTER: 4 EZ Video
5
6
7
1
2
3
EZ Video
4
EZ Video
8
5. Audio level meters - displays the audio level during
playback and capture of video. Available in Full size
preview only.
6. Deck controller - contains a shuttle slider and controls
for playback of the connected DV device. There are also
SyncRecord and Record buttons to start recording on
the connected DV device.
7. Play list - contains a list of clips (AVI files) that you can
have EZ Video play in sequence using List Play mode.
You can use the Play list to do simple assemble editing
to arrange your clips for import to EZ Edit.
8. Status bar - lists information about the DV device, play
list, and also displays the function of the button the
mouse cursor is over.
ezdv.book Page 3 Tuesday, May 30, 2000 2:31 PM
CHAPTER: 4 EZ Video
4-3
Capturing Video
Before you can edit your video, you need to capture (transfer) the video to your computer.
EZDV captures video in the Microsoft AVI format using the
Canopus DV CODEC. The compression rate is fixed, so 4
GB of storage will hold about 18 minutes of video, and 13
GB will hold about one hour of video.
You can capture video in one of three ways in EZ Video manual capture, batch capture, and seamless capture.
Manual Capture
Capturing video to your computer can be as simple as
clicking Play on the Deck controller and clicking Capture
on the AVI controller.
Click the Play button to start the deck playing
If you do not have Set new filenames automatically
checked and have not already set a filename, a dialog will
EZ Video
Then click the Capture button
ezdv.book Page 4 Tuesday, May 30, 2000 2:31 PM
4-4
CHAPTER: 4 EZ Video
appear to ask you for the filename to use for the captured
video.
If this window appears, give the clip a name and save it
on your video drive
Make sure that you capture to your video hard drive, if you
have one. When you want to stop capturing, click the Stop
button on the AVI controller.
EZ Video
Click the Stop button when you are done
ezdv.book Page 5 Tuesday, May 30, 2000 2:31 PM
CHAPTER: 4 EZ Video
4-5
Batch Capture
Batch capture allows you to mark and capture only the
segments of video that you want.
To bring up the Batch Capture window, click the Batch
capture/Seamless capture button or choose Batch capture/Seamless capture from the File menu.
Click the Batch capture/Seamless capture button
Or choose Batch Capture/Seamless capture from the File menu
EZ Video
ezdv.book Page 6 Tuesday, May 30, 2000 2:31 PM
4-6
CHAPTER: 4 EZ Video
The Batch capture/Seamless capture window will appear.
EZ Video
Make sure this is set to Batch
Batch capture/Seamless capture window
Make sure the Capture Method is set to Batch for batch
capture.
Batch capture involves marking segments of video, creating a capture list, and capturing all the clips in the batch.
Batch capturing clips:
1. Set a filename for the clip you want to capture. If you
have a dedicated video drive, make sure you are capturing to it.
Set AVI filename
ezdv.book Page 7 Tuesday, May 30, 2000 2:31 PM
CHAPTER: 4 EZ Video
4-7
2. Use the Deck controller to position the tape at the start
of where you want to capture.
Position the tape at
the start of where
you want to capture
by using the Deck
controller.
3. Click the Mark In button. The In point will be entered
automatically.
4. Advance the tape to the end of where you want to capture.
Position the tape at
the end of where
you want to capture
by using the Deck
controller.
6. The In and Out points you marked will be entered in the
In and Out boxes. If you want to change the In or Out
EZ Video
5. Click the Mark Out button. The Out point will be
entered automatically.
ezdv.book Page 8 Tuesday, May 30, 2000 2:31 PM
4-8
CHAPTER: 4 EZ Video
point, you can change the numbers in the In and Out
boxes.
In and Out point
settings
7. Click the Add button to add the selected clip to the capture list. The clip will appear in the list on the bottom of
the Batch capture/Seamless capture window.
Add button
EZ Video
Capture list
8. Repeat steps 2-7 for additional clips you want to capture. EZ Video will automatically increment the filename
for you.
9. Click the Capture button to begin capturing your capture list.
Changing, Saving, and Loading Capture lists
1. Select a capture list entry by clicking on the number to
the left of the entry.
Click the number at the left
of the entry to select it
ezdv.book Page 9 Tuesday, May 30, 2000 2:31 PM
CHAPTER: 4 EZ Video
4-9
2. You can change a capture list entry’s In and Out points
by selecting it, changing the In and Out points, and
clicking the Update button.
Click the Update
button to change
an entry’s In and Out
points
3. To change the position of a capture list entry, select it
and click the Go Up or Go Down buttons. Sometimes it
is helpful to re-arrange clips if you have marked them in
a different sequence than in which they occur on the
tape.
5. To delete all entries from the list, click the Delete All
button.
6. You can save the list of clips to a capture list file by
clicking the Save button. A dialog will appear to let you
name the file. It is useful to save capture lists for
EZ Video
4. To delete a clip from the list, select it and click the
Delete button.
ezdv.book Page 10 Tuesday, May 30, 2000 2:31 PM
4-10
CHAPTER: 4 EZ Video
projects in the event you need to recapture clips from
the master tape in the future.
EZ Video
7. You can load a list of clips from a capture list file by
clicking the Load button. Locate the capture list file you
want to load and click Open. The list will appear in the
capture list.
8. After capture is complete, the clip(s) will appear in the
Play list.
Important note about Timecode
If your tape has discontinuous timecode, or timecode that
repeats the same value, you may have problems using
ezdv.book Page 11 Tuesday, May 30, 2000 2:31 PM
CHAPTER: 4 EZ Video
4-11
batch capture. EZ Video may not be able to find the in
frame if it scans beyond the current set of timecode.
Thus, it is very important to keep timecode continuous on
your tape. It is a common practice to “black” or “stripe” new
tapes by recording black over the entire tape in one pass to
establish continuous timecode.
Timecode is normally reset when the tape is removed from
the camera. If you have to remove and reinsert a tape without timecode while recording, after reinserting the tape,
rewind it to a point where there is timecode, and continue
recording from that point.
Also, it is good practice to record 10-20 seconds of black
“leader” at the beginning of each tape.
Seamless capture
Seamless capture allows you to capture a segment of
video as a series of separate AVI files. Seamless capture is
useful when you need to take AVI files to other programs
and to split a captured segment across drives or directories.
Click the Batch capture/Seamless capture button
Or choose Batch Capture/Seamless capture from the File menu
EZ Video
To bring up the Seamless Capture window, click the Batch
capture/Seamless capture button or choose Batch capture/Seamless capture from the File menu.
ezdv.book Page 12 Tuesday, May 30, 2000 2:31 PM
4-12
CHAPTER: 4 EZ Video
The Batch capture/Seamless capture window will appear.
EZ Video
Make sure this is set to Seamless
Batch capture/Seamless capture window
1. Set a filename for the clip you want to capture. If you
have a dedicated video drive, make sure you are capturing to it.
Set AVI filename
2. Determine the length of the clip you want to capture,
subtract one frame, and enter this value (in hours, minutes, seconds and frames) in the Out box. The one
ezdv.book Page 13 Tuesday, May 30, 2000 2:31 PM
CHAPTER: 4 EZ Video
4-13
frame subtraction is necessary since the first frame
captured is 00:00:00;00.
Set capture length
3. Click the Insert button. The filename and duration will
appear in the clip list.
4. If you wish to add more time (files) to the capture,
repeat steps 2-3. EZ Video will automatically increment
the filename for you.
5. Use the Deck controller to position the tape slightly
before the start of where you want to capture.
Position the tape slightly
before the start of where
you want to capture by
using the Deck controller
7. After capture is complete, the clip(s) will appear in the
Play list.
Changing, Saving, and Loading Capture lists
You can save the list of clips to a capture list file by clicking
the Save button. A dialog will appear to let you name the
EZ Video
6. Click the Capture button. Capture will begin and the
video will be captured to the file(s) you specified in the
capture list.
ezdv.book Page 14 Tuesday, May 30, 2000 2:31 PM
4-14
CHAPTER: 4 EZ Video
file. It is useful to save capture lists for common times and
clip lengths.
EZ Video
8. You can load a list of clips from a capture list file by
clicking the Load button. Locate the capture list file you
want to load and click Open. The list will appear in the
capture list.
ezdv.book Page 15 Tuesday, May 30, 2000 2:31 PM
CHAPTER: 4 EZ Video
4-15
Reference AVI files and the 2-gigabyte AVI
filesize limit
Standard AVI files have a size limitation of 2 gigabytes.
This corresponds to slightly over 9 minutes (depending on
audio sampling rate) of video captured using EZDV.
EZDV overcomes this limitation with Reference AVI technology. Reference AVI files are small AVI files that “point” to
other files that contain the actual video data.
When capturing a Reference AVI file, the system makes as
many 4 gigabyte data files as necessary, then creates a
single AVI file that references those data files.
To capture AVI files as
reference AVIs, check
the Capture as reference
AVI option in the Settings
menu.
Any AVIs captured while
Capture as reference AVI
is checked will be captured
as Reference AVIs.
If you try to capture a single AVI file that is larger than 2
gigabytes (about 9 minutes), you must use capture as Reference AVI. Alternatively, you can capture multiple 2
gigabyte or smaller clips using Batch capture or Seamless
capture.
It is also possible to make Reference AVI files from another
AVI file. In this case, the new AVI file will point to the original AVI file or the original Reference AVI data file(s), if the
original AVI file is a Reference AVI file itself. Also in this
case, if the original (referenced) AVI file is moved, the Reference AVI file that points to it will not play back properly.
EZ Video
Reference AVI files maintain absolute paths to their data
files. This means that it remembers the entire drive and
directory path to the data files. Do not move the data files
of a Reference AVI! If the data files are moved, the Reference AVI will not play back properly.
ezdv.book Page 16 Tuesday, May 30, 2000 2:31 PM
4-16
CHAPTER: 4 EZ Video
Working with Captured Clips
Loading clips
To load a clip into the video window, click the Open file
button, or choose Open file from the File menu.
Click the Open file button on the toolbar
EZ Video
Or choose Open... from the File menu
Locate the file you want to load. Keep in mind that only AVI
files created with EZDV can be loaded.
The AVI file will load and appear in the video window.
ezdv.book Page 17 Tuesday, May 30, 2000 2:31 PM
CHAPTER: 4 EZ Video
4-17
Playing and Scrubbing Video
You can play and scrub (quickly move through) video using
the playback buttons and the scrub bar slider on the AVI
controller.
Drag the slider to the left or right to scrub through the video
in the AVI.
The blue shaded area represents the area between the In
and Out point marked on the clip. See the following section
on using the Play list for more information on In and Out
points of clips.
Playback controls
Scrub bar slider
To move frame-by-frame through video using an Intellimouse (or compatible), pause playback and roll the wheel
down to step forward, and roll the wheel upward to step
backward.
EZ Video
To shuttle through video using an Intellimouse (or compatible), pause playback and click the wheel to go into Shuttle
mode. Roll the wheel down to shuttle forward. Roll the
wheel up to shuttle in reverse. The shuttle speeds are: 1/4
speed, 1/2 speed, 1x speed, 2x speed, 4x speed, 8x
speed, 10x speed, 20x speed, and 40x speed.
ezdv.book Page 18 Tuesday, May 30, 2000 2:31 PM
4-18
CHAPTER: 4 EZ Video
Using the Play list
EZ Video
The Play list is located on the right side of the EZ Video
window.
The Play list
ezdv.book Page 19 Tuesday, May 30, 2000 2:31 PM
CHAPTER: 4 EZ Video
4-19
If the Play list is not visible, click the Play list button or
choose Play list from the View menu.
Click the Play list button to show the Play list
Or choose Play list from the View menu
You can use the play list to arrange a number of clips and
play them together back-to-back.
Adding, Inserting, and Deleting clips in the Play list
To add the current clip you are viewing to the Play list, click
the Add button on the Play list control. The current clip will
be added to the end of the Play list.
Click the Add file button
Or choose Add file to play list from the Edit menu
EZ Video
You can also add clips directly to the Play list by clicking
the Add file button on the Play list side of the toolbar or by
choosing Add file to playlist from the Edit menu.
ezdv.book Page 20 Tuesday, May 30, 2000 2:31 PM
4-20
CHAPTER: 4 EZ Video
A window will appear so you can find the files you want.
After you select your files, they will appear in the Play list.
To insert the current clip you are viewing into the Play list
before another clip, select a clip in the Play list by clicking
on it, then click the Insert button on the Play list control.
The current clip you are viewing will be inserted into the
Play list above the highlighted clip.
EZ Video
Click on a clip to select it
Then click Insert
To Delete a clip from the Play list, click on the clip in the
Play list to select it, then click the Delete button in the Play
ezdv.book Page 21 Tuesday, May 30, 2000 2:31 PM
CHAPTER: 4 EZ Video
4-21
list control or choose Delete from the Edit menu. The
selected clip will be removed from the Play list.
Click Delete in the Play list control
Or choose Delete from the Edit menu
Rearranging clips in the Play list
To rearrange the order of clips in the Play list, select a clip
and use the Go Up and Go Down buttons in the Play list
control to change its position. You can rearrange drag clips
by dragging them with the mouse.
Click to move the clip down
Playing clips from the Play list
To play a clip from the Play list, double-click on it and it will
appear in the video window.
To play the clip, click the Play button on the AVI controller.
To play just the marked area from the In point to the Out
point, turn on Play the trimmed area in the Settings menu.
When you click Play in the AVI controller, it will only play
EZ Video
Click to move the clip up
ezdv.book Page 22 Tuesday, May 30, 2000 2:31 PM
4-22
CHAPTER: 4 EZ Video
the marked area of clips. See the next section on trimming
and separating clips to learn about In and Out points.
Trimming and Separating clips in the Play list
Trimming a clip alters the start and end points of the clip,
but it does not change the AVI file itself. The start playback
point of the clip is called the In point. The end playback
point of the clip is called the Out point.
EZ Video
Trimming a clip allows you to eliminate portions of video
that you don’t need.
To trim a clip:
1. Double-click the clip in the Play list, or select the clip in
the Play list and click the Trimming button on the Playlist controller. The clip will appear in the video window.
2. Move to the point where you want the playback to start
and click the In button on the AVI controller or choose
Set In Point from the Edit menu.
ezdv.book Page 23 Tuesday, May 30, 2000 2:31 PM
CHAPTER: 4 EZ Video
4-23
3. Move to the point where you want the playback to end
and click the Out button on the AVI controller or choose
Set Out Point from the Edit menu.
4. To preview the trimmed area, make sure Play the
trimmed area is set in the Settings menu, and click the
Play button on the AVI controller to view the trimmed
section.
5. Once you have the In and Out points where you want
them, click the Update In/Out points button on the AVI
controller or choose Update in/out points from the Edit
menu. The In and Out points of the clip in the Play list
will update.
EZ Video
Separating a clip splits the clip into two pieces and allows
you to insert pieces of video between the parts.
To separate a clip:
1. Double-click the clip in the Play list, or select the clip in
the Play list and click the Trimming button on the Playlist controller. The clip will appear in the video window.
2. Move to the point where you want to separate the clip
and click the Separate button in the toolbar, or choose
ezdv.book Page 24 Tuesday, May 30, 2000 2:31 PM
4-24
CHAPTER: 4 EZ Video
Separate from the Edit menu. The two halves of the clip
will both be added to the Play list.
Click the Separate button
Or choose Separate from the Edit menu
Saving and Loading Play lists
You can save and load Play lists for future use, and also for
import to EZ Edit.
EZ Video
To save your play list, click the Save play list button in the
toolbar, or choose Save play list... from the File menu.
Click the Save play list button
Or choose Save play list from the File menu
ezdv.book Page 25 Tuesday, May 30, 2000 2:31 PM
CHAPTER: 4 EZ Video
4-25
To load a saved play list, click the Open play list button in
the toolbar, or choose Open play list from the File menu.
Click the Open play list button
Or choose Open play list from the File menu
It is useful to save play lists, as you can also load them into
EZ Edit.
Playing the Play list
When List Play is enabled, the List Play button is highlighted.
EZ Video
To play all the clips in the Play list in sequence, click the
List Play button on the Play list control. All the clips in the
Play list will be played one after the other without seams inbetween.
ezdv.book Page 26 Tuesday, May 30, 2000 2:31 PM
4-26
CHAPTER: 4 EZ Video
Output to Tape
EZ Video can also output your DV AVIs back to your DV or
Digital 8 camera or deck. There are two methods to output
back to tape - SyncRecord and manual record.
SyncRecord
EZ Video
SyncRecord will output the current clip (or clip list, if List
Play is enabled) to DV tape.
1. Make sure a DV tape is in the deck, and the tape is not
write-protected.
2. Position the tape at the point where you want to start
recording using the Deck controller.
3. Click the SyncRecord button on the Deck controller.
The deck will go into Record Pause, then after a few
seconds the current clip or clip list (depending on
whether List Play mode is enabled or not) will be
recorded to tape.
4. When recording is done the DV deck will go into Record
Pause.
Note: Because DV decks and cameras are mechanical
devices, the actual start of recording may not coincide with
the exact time when the Record button is pressed or the
Record command is sent. If you find that the beginning or
end of the recording is starting or stopping too early or too
late, you can make adjustments in the Sync Rec section of
the EZDV Properties. The necessary settings vary for
each DV device.
ezdv.book Page 27 Tuesday, May 30, 2000 2:31 PM
CHAPTER: 4 EZ Video
4-27
Manual record
Manual recording will record whatever you play out to DV
tape.
1. Play an AVI clip.
2. Click the Record button on the DV Deck controller. The
DV deck will start recording
3. Click the Stop button on the DV Deck controller when
you are done recording.
EZ Video
ezdv.book Page 28 Tuesday, May 30, 2000 2:31 PM
4-28
CHAPTER: 4 EZ Video
Interface In-depth
Toolbar
The toolbar contains buttons for many commonly used
menu items.
Main toolbar
The functions of the main toolbar buttons are as follows:
Specifies that a new file should be created the
New
next time the capture button is pressed.
Open
Opens an existing AVI file.
Separates the video clip at the current position
Separate
and adds the pieces to the play list.
EZ Video
Save as still image
Save the current video frame as a still image.
Batch capture / Seamless capture
Opens the Batch/Seamless capture dialog for
batch or seamless capture of video.
Play list
Shows or hides the play list area.
Play list toolbar
New play list
Creates a new play list.
Open play list
Brings up the file dialog to open a play list.
ezdv.book Page 29 Tuesday, May 30, 2000 2:31 PM
CHAPTER: 4 EZ Video
4-29
Save play list
Save the current play list.
Add file
Add file
Cuts the selected clip from the playlist and
Cut
moves it to the clipboard.
Copy
clipboard.
Copies the selected clip in the playlist to the
Paste
Pastes the clip on the clipboard into the play list.
File and Deck Information
The file and deck information area displays information
about the loaded AVI file and the connected DV device.
5
1
6
2
3
File and Deck Information
The information in the File and Deck Information area is as
follows:
1.
2.
3.
4.
5.
6.
Filename of the loaded AVI file
Current time position and Total time of the AVI
Audio sampling rate of the AVI
Current clip status (Stop, Play, etc.)
Clip In and Out trimming points and total time for the clip of the AVI
DV device timecode, recording mode, audio sampling rate, and status
EZ Video
4
ezdv.book Page 30 Tuesday, May 30, 2000 2:31 PM
4-30
CHAPTER: 4 EZ Video
AVI Controller
The AVI controller provides playback and trimming controls
Slider for scrubbing
AVI Controller
for AVI files that you load into EZ Video.
EZ Video
Starts capture of DV data from the DV camera
Capture
or deck to the computer hard disk.
Stop
Stops playback of the current AVI file.
Play
Starts playback of the current AVI file.
Top frame
AVI file.
Moves the playback point to the beginning of the
Previous clip
Moves the playback point to the previous In or
Out point, or to the start of the AVI file, if there is no previous
In or Out point.
Previous frame
Moves the playback point one frame backward.
Next frame
Moves the playback point one frame forward.
Moves the playback point to the next In or Out
Next clip
point, or to the end of the AVI file, if there is no next In or Out
point.
Bottom frame
Moves the playback point to the end of the AVI
file.
Set in point
Sets the In point for trimming the current clip.
Set out point
Sets the Out point for trimming the current clip.
ezdv.book Page 31 Tuesday, May 30, 2000 2:31 PM
CHAPTER: 4 EZ Video
4-31
Update in/out points
Updates the clip in the Play list or EZ Edit with
the new In and Out points.
Scrub Bar
Slide to scrub through the AVI file. The area in
blue represents the subclip defined by the In and Out points.
Audio level meters
The audio level meters display the audio level during playback and capture of video. They are only visible when in
full size preview mode.
Audio Level Meters
EZ Video
ezdv.book Page 32 Tuesday, May 30, 2000 2:31 PM
4-32
CHAPTER: 4 EZ Video
Deck Controller
The Deck controller lets you control the connected DV deck
through the i.LINK interface.
1
5
6
2
7
3
8
4
9
EZ Video
10
1. Shuttle controller
The shuttle controller lets you play the tape forward or backward at
varying speeds.
There are five stops on either side of the middle.
Drag the yellow slider to the left to play backward, drag it to the right
to play forward.
The playback speeds will depend on your DV deck, but the stops are
generally 1/10 speed, 1/5 speed, 1x, 2x, and 20x.
2. Previous frame
Moves the DV deck one frame back.
3. Rewind
Pressed when the DV deck is stopped, it will rewind the tape.
Pressed when the DV deck is playing, it will go into reverse-scan
mode.
4. SyncRecord
Use SyncRecord to record video back to tape.
Please see the section on SyncRecord in this chapter for information
on how to use SyncRecord.
5. Pause
Pauses the DV deck
6. Next frame
Moves the DV deck one frame forward.
7. Forward
Pressed when the DV deck is stopped, it will fast-forward the tape.
Pressed when the DV deck is playing, it will go into forward-scan
mode.
ezdv.book Page 33 Tuesday, May 30, 2000 2:31 PM
CHAPTER: 4 EZ Video
4-33
8. Play
Plays the tape in the DV deck.
9. Record
Starts recording on the DV deck.
10. Stop
Stops the tape in the DV deck.
Play list
The Play list allows you to arrange, trim, and rearrange
clips in a list that can be played in order from start to end.
EZ Video
Play list
ezdv.book Page 34 Tuesday, May 30, 2000 2:31 PM
4-34
CHAPTER: 4 EZ Video
You can use the Play list for simple assemble editing. The
list shows the clips in the Play list. Each clip lists its In
point, Out point, and Duration of the marked area.
In point
Out point
Duration
Status Bar
EZ Video
The Status Bar lists the AVI and DV deck status on it.
ezdv.book Page 35 Tuesday, May 30, 2000 2:31 PM
CHAPTER: 4 EZ Video
4-35
Menu options
File Menu
Recent file list
Specifies that a new file should be created the next time the
New
capture button is pressed.
Open
Opens an AVI file in the video window.
File Properties
Opens the File Properties dialog.
Recent file list
Provides quick opening of recent files.
New play list
Clears the current play list and creates a new one.
Open play list...
Opens a saved play list file.
Save play list
Saves the current play list.
Save play list as...
Saves the current play list as a new play list file.
Exit
Quits the EZ Video application.
EZ Video
Batch capture/Seamless capture
Opens the Batch capture/Seamless capture dialog.
ezdv.book Page 36 Tuesday, May 30, 2000 2:31 PM
4-36
CHAPTER: 4 EZ Video
Edit Menu
Set In PointSets the In point for the current clip.
Set Out Point
Sets the Out point for the current clip.
Update the in/out points
Updates the In and Out points of the selected clip in the clip
list.
EZ Video
Separate
Separates the clip at the current position.
Save as still image...
Opens the Save as still image dialog to save the current
frame as a still image.
Search
Jump
Opens the Jump dialog to jump to a particular time or frame.
Jump to previous scene
Searches for and moves the playback position to the previous
scene (if any).
Jump to next scene
Searches for and moves the playback position to the next
scene (if any).
Jump to previous index
Moves the playback position to the previous index point (if
any).
Jump to next index
Moves the playback position to the next index point (if any).
Delete
Cut
Deletes the selected clip from the Play list.
Places the selected clip from the Play list on the clipboard
and removes it from the clip list.
ezdv.book Page 37 Tuesday, May 30, 2000 2:31 PM
CHAPTER: 4 EZ Video
Copy
Copies the selected clip from the Play list to the clipboard.
Paste
Pastes the clip on the clipboard to the Play list.
4-37
Create AVI file
Creates a new AVI file from the selected clip. If the selected
clip is larger than 2 gigabytes (slightly over 9 minutes) then you
should create a ref. AVI file instead, or only the first 2 gigabytes of the
clip will be put into the new AVI.
Create ref. AVI file
Creates a Reference AVI file from the selected clip.
Add file to play list
Opens the Open File dialog to add a file to the Play list.
Delete file
Deletes the selected clip file from the Play list and from hard
drive. Use with caution!
Clear the play list...
Clears the play list.
Settings Menu
EZ Video
Repeat Playback
When checked, AVI playback will loop until stopped by the
user.
When un-checked, AVI playback will stop at the end of the
AVI or the end of the last clip (in List Play mode).
Play the trimmed area
When checked, only video from the In point to the Out point
of the clip will be played.
When un-checked, the entire AVI file will play regardless of
the marked In and Out points.
Correct Square Pixel
When checked, the on-screen display will be corrected to dis-
ezdv.book Page 38 Tuesday, May 30, 2000 2:31 PM
4-38
CHAPTER: 4 EZ Video
play the DV video as it would look on a television or video monitor.
When un-checked, the on-screen DV video will be slightly different from the image viewed on a television or video monitor.
It is best to leave this option checked.
Full size preview
When checked, the full-size interface with audio meters is
used.
When un-checked, the compact interface without audio
meters is used.
Limit Capture Time...
Opens the Limit Capture Time dialog which lets you restrict
captures to a certain time or number of frames.
Set new file names automatically
When checked, each time the Capture button is pressed, a
the current filename is incremented by 1 and a new file is automatically created for the capture. Set the default name and location in the
Open file dialog.
When un-checked, each time the Capture button is pressed,
it will either ask for a new filename (if New was pressed) or overwrite
the existing file (if a file was loaded).
EZ Video
Confirm when overwriting a file
When checked, EZ Video will ask for confirmation before
overwriting an existing file.
When un-checked, EZ Video will not ask for confirmation if a
file is about to be overwritten.
Capture as reference AVI file
When checked, EZ Video will capture Reference AVI files.
See the section about Reference AVI files in this chapter for more
information.
When un-checked, EZ Video will capture standard AVI files,
which are limited to 2 gigabytes (a little over 9 minutes).
Playback audio sampling rate
Controls the audio sampling rate used for playback. This
should be set to a particular value, and not left at Original sampling
rate.
Still capture settings
Opens the Save as still image dialog to change the Save as
still image settings.
EZDV properties...
Opens the EZDV properties dialog.
ezdv.book Page 39 Tuesday, May 30, 2000 2:31 PM
CHAPTER: 4 EZ Video
4-39
View menu
Tool Bar
Toggles display of the Tool bar.
Status Bar
Toggles display of the Status bar.
Play list
Toggles display of the Play list.
Help menu
About...
Opens the About dialog to display software version information.
EZ Video
ezdv.book Page 40 Tuesday, May 30, 2000 2:31 PM
4-40
CHAPTER: 4 EZ Video
Dialogs
EZ Video
Batch/seamless capture - Batch mode
Capture Method
BatchUse Batch capture mode.
Seamless
Use Seamless capture mode.
Settings
In Timecode at which the clip should begin.
Out Timecode at which the clip should end.
AVI File
Filename for the captured clip.
Mark In button
Set the current tape location as the in point for the clip.
Mark Out button
Sets the current tape position as the out point of the clip.
ezdv.book Page 41 Tuesday, May 30, 2000 2:31 PM
CHAPTER: 4 EZ Video
4-41
Browse button
Opens a window to set the clip’s filename.
Update button
Updates the selected list entry with the specified In point, d
Out point, and AVI filename.
Add button Add the current settings as a new clip at the end of the capture list.
Insert buttonAdd the current settings as a new clip before the selected
clip in the capture list (or to the end of the capture list, if no there is no
selection).
Go Up buttonMoves the selected clip one position upward in the capture
list.
Go Down button
Moves the selected clip one position downward in the capture
list.
Delete buttonDeletes the selected list entry from the capture list.
Delete All button
Deletes all clips from the capture list.
Save buttonSaves the capture list.
Load buttonLoads a capture list.
Capture buttonStarts the batch capture operation.
Batch Capture progress
# / # xxxxx Displays the current clip being captured, the total number of
clips to be captured, and the current clip’s filename. Ex. 1 / 2
D:\capture1.avi specifies that clip 1 of 2 clips is currently being captured and it is writing to D:\capture1.avi
EZ Video
Cancel buttonClears the capture list and closes the Batch capture/Seamless capture window.
ezdv.book Page 42 Tuesday, May 30, 2000 2:31 PM
4-42
CHAPTER: 4 EZ Video
Displays the current frame out of the total frames for the curFrame
rent clip in hours, minutes, seconds, frames, and frame count.
Displays the current frame out of the total frames for the
Total
entire capture in hours, minutes, seconds, frames, and frame count.
Status
Displays the current AVI operation.
Displays the current tape position in hours, minutes, seconds,
Deck
frames, and frame count and the deck’s current operation.
Skip button Ends the current clip and proceeds to the next clip in the capture list.
Stop button Stops the batch capture at the current point, saving all clips
that have been captured.
Cancel buttonStops the batch capture and discards all clips that have
been captured.
Batch Capture completion
EZ Video
Total Time Displays the total time captured in hours, minutes, seconds, frames, and frame count.
OK button Closes the completion window.
ezdv.book Page 43 Tuesday, May 30, 2000 2:31 PM
CHAPTER: 4 EZ Video
4-43
Batch/Seamless capture - Seamless mode
Settings
Out Duration of the clip plus one frame (clip duration will be one
frame longer than the specified duration).
AVI File
Filename for the captured clip.
Browse button
Opens a window to set the clip’s filename.
Update button
Updates the selected list entry with the specified Out point
(duration) and AVI filename.
Insert buttonAdd the current settings as a new clip before the selected
clip in the capture list (or to the end of the capture list, if no there is no
selection).
EZ Video
Capture Method
BatchUse Batch capture mode.
Seamless
Use Seamless capture mode.
ezdv.book Page 44 Tuesday, May 30, 2000 2:31 PM
4-44
CHAPTER: 4 EZ Video
Go Up buttonMoves the selected clip one position upward in the capture
list.
Go Down button
Moves the selected clip one position downward in the capture
list.
Delete buttonDeletes the selected list entry from the capture list.
Delete All button
Deletes all clips from the capture list.
Save buttonSaves the capture list.
Load buttonLoads a capture list.
Capture buttonStarts the seamless capture operation.
Cancel buttonClears the capture list and closes the Batch capture/Seamless capture window.
EZ Video
Seamless Capture progress
# / # xxxxx Displays the current clip being captured, the total number of
clips to be captured, and the current clip’s filename. Ex. 1 / 2
D:\capture1.avi specifies that clip 1 of 2 clips is currently being captured and it is writing to D:\capture1.avi
Displays the current frame out of the total frames for the curFrame
rent clip in timecode and frame count.
Displays the current frame out of the total frames for the
Total
entire capture in timecode and frame count.
Status
Displays the current AVI operation.
Displays the current tape position in timecode and frames
Deck
and the deck’s current operation.
Skip button Ends the current clip and proceeds to the next clip in the capture list.
ezdv.book Page 45 Tuesday, May 30, 2000 2:31 PM
CHAPTER: 4 EZ Video
4-45
Pause buttonPauses the capture
Stop button Stops the seamless capture at the current point, saving all
clips that have been captured.
Cancel buttonStops the seamless capture and discards all clips that have
been captured.
Seamless Capture completion
Total Time Displays the total time captured in hours, minutes, seconds, frames, and frame count.
OK button Closes the completion window.
Save as still image...
EZ Video
NTSC
PAL
Size
720x480 (NTSC), 720x576 (PAL)
Save bitmap using DV aspect ratio resolution. When displayed on a computer screen it will appear slightly distorted, but will
appear correct on output from a DV device when used in a DV
project.
Use this setting when you intend to use the image in a DV
production and want the stills to appear as you captured them.
640x480 (NTSC), 720x540 (PAL)
Save bitmap using square pixel aspect ratio resolution. When
displayed on a computer screen it will appear normal, but may
appear slightly distorted if used for DV productions.
Use this setting when you intend to use the image in com-
ezdv.book Page 46 Tuesday, May 30, 2000 2:31 PM
4-46
CHAPTER: 4 EZ Video
puter applications such as presentations or web pages and want the
stills to appear correct on the computer monitor.
EZ Video
Capture Field
Note: Television images are interlaced, meaning that even and
odd lines of a frame video are split into two fields.
Frame
Use the entire frame (both fields) for the still image. In stills
with high motion, there may be some jagged edges on moving
objects because of the difference in position in the fields.
Use this for the best horizontal resolution on images that contain little or no motion.
Odd Field
Uses only the odd field for the still image. The even lines will
be duplicated or interpolated from the odd lines.
Use this for images that contain motion and do not look good
when saved with Frame.
Even Field
Uses only the even field for the still image. The odd lines will
be duplicated or interpolated from the even lines.
Use this for images that contain motion and do not look good
when saved with Frame.
Filtering
No filtering
Do not filter the image.
Motion only
Filter for average motion.
Use this when there is moderate motion occurring in the
image.
Full screen
Filter the entire image.
Use this when there is a high amount of motion occurring in
the image.
File
Specifies the file name for the captured image. Images can
be saved in one of the following formats:
Windows bitmap (.BMP, .DIB)
JPEG (.JPG, .JPEG)
Tagged Image File Format (.TIF, .TIFF)
Adobe Photoshop 3.0 (.PSD)
Truevision TARGA (.TGA, .TARGA)
Browse button
Opens a window to set the still image’s filename.
Open this dialog box when capturing checkbox
When checked, this dialog will appear when Save as still
image... is selected or the Save as still image button is pressed.
When unchecked, this dialog will not appear and the current
Save as still image... settings will be used to save the image when
Save as still image... is selected or the Save as still image button
ezdv.book Page 47 Tuesday, May 30, 2000 2:31 PM
CHAPTER: 4 EZ Video
4-47
is pressed.
If you turn the dialog off and want to re-enable it, you can reenable it in the Still image capture settings.
Set new file names automatically checkbox
When checked, the still image filename will incremented
automatically after each save.
When unchecked, the still image filename is unchanged after
each save.
Use this option in conjunction with Open this dialog box
when capturing to speed capture of multiple still images.
Confirm when overwriting a file
When checked, EZ Video will ask for confirmation if a file is to
be overwritten.
When unchecked, EZ Video will not ask for confirmation
before overwriting a file.
OK button Saves the still image and closes the Save as still image window.
Cancel buttonCancels the current Save as still image operation and
closes the window.
Limit Capture Time...
EZ Video
Limit Capture Time checkbox
When checked, enables automatic stop of manual capture
after the specified time.
When unchecked, manual capture will not automatically stop.
Time Settings
TimeLength of time that manual captures should automatically
stop at, in hours, minutes, seconds, and frames.
FrameLength of time that manual captures should automatically
stop at, in number of frames.
OK button Accepts the changes to the Limit Capture Time settings and
closes the window.
ezdv.book Page 48 Tuesday, May 30, 2000 2:31 PM
4-48
CHAPTER: 4 EZ Video
Cancel buttonCancels changes to the Limit Capture Time settings and
closes the window.
Still capture settings
NTSC
PAL
OK button Sets these settings as default for Save as still image and
closes the window.
Cancel buttonCancels changes to the Save as still image settings and
closes the window.
EZ Video
Other settings are the same as for the Save as still image... dialog.
ezdv.book Page 49 Tuesday, May 30, 2000 2:31 PM
CHAPTER: 4 EZ Video
4-49
EZDV properties... - Sync Rec
Record Position on Tape
Steps
Sets the default recording position when SyncRecording from
a paused frame. The default is for recording to start at the paused
frame.
Return to default button
Returns the settings for this tab to the defaults.
EZ Video
Offset Time
Start Point
Sets the number of frames early or late that AVI file playback
should occur when doing a SyncRecord.
The default is for the AVI file to start playing 5 frames after the
DV deck has been set to start recording. This assumes that it takes 5
frames of time for the DV deck to actually engage the recording head
and start recording.
End Point
Sets the number of frames early or late that the DV deck
should stop recording.
The default is for the DV deck to get the Stop command 5
frames before the end of the AVI file. This assumes that it takes 5
frames of time for the DV deck to actually disengage the recording
head and stop recording.
ezdv.book Page 50 Tuesday, May 30, 2000 2:31 PM
4-50
CHAPTER: 4 EZ Video
OK button Apply the current Sync Rec and Detailed Settings settings
and close the window.
Cancel button
Cancel the current changes to the Sync Rec and Detailing
Settings settings and close the window.
EZ Video
EZDV properties... - Detailed Settings
Video
Count Dropped Frames in Time Display checkbox (NTSC only)
When checked, 29.97 fps drop-frame timecode is used.
When unchecked, 30 fps non-drop-frame timecode is used.
This option affects all timecode entry and calculations.
Except in special cases, this option should be checked.
Field during pause
FRAME
When AVI playback is paused, the frame (both fields) is
shown.
There may be some jitter apparent in the display when
FRAME is selected for pause. This does not affect DV output.
ODD
When AVI playback is paused, only the odd field is
shown.
Use this option to eliminate jitter in the display on
paused playback. This does not affect DV output.
EVEN
ezdv.book Page 51 Tuesday, May 30, 2000 2:31 PM
CHAPTER: 4 EZ Video
4-51
When AVI playback is paused, only the even field is
shown.
Use this option to eliminate jitter in the display on
paused playback. This does not affect DV output.
YUV and RGB Conversions
Expand RGB range to 150% checkbox
When checked, the luminance and chrominance ranges are
increased during conversion to RGB.
When unchecked, the standard DV Blue Book conversion
method (which limits the RGB range) is used.
This option has no effect on programs which edit in YUV colorspace, such as EZ Edit. However, for programs which use RGB
colorspace, setting this option may help increase the video quality of
AVIs created in those programs.
Return to default button
Returns the settings for this tab to the defaults.
OK button Apply the current Sync Rec and Detailed Settings settings
and close the window.
Cancel button
Cancel the current changes to the Sync Rec and Detailing
Settings settings and close the window.
About
EZ Video
Free MemoryDisplays the amount of free memory in the system.
Free Disk Space
Displays the amount of free disk space on the temporary
drive.
Free Capture Time
Displays the amount of video that can be stored on the drive
listed for Free Disk Space, in hours, minutes, seconds, and frames,
and in frame count.
ezdv.book Page 52 Tuesday, May 30, 2000 2:31 PM
EZ Video
4-52
CHAPTER: 4 EZ Video
ezdv.book Page 1 Tuesday, May 30, 2000 2:31 PM
CHAPTER: 5 EZ Audio
5-1
CHAPTER 5
EZ Audio
Introducing EZ Audio
This chapter will introduce you to EZ Audio, the audio capture component of the EZDV software.
The features of EZ Audio will be described to familiarize
you with its functions.
EZ Audio Interface
The EZ Audio application allows you control your DV or
Digital 8 camera or deck and can capture audio from your
DV device. It provides playback and capture of DV audio.
1
6
2
3
7
4
8
EZ Audio
EZ Audio
5
ezdv.book Page 2 Tuesday, May 30, 2000 2:31 PM
5-2
CHAPTER: 5 EZ Audio
The EZ Audio window consists of eight main sections:
1. Toolbar - includes shortcut buttons for commonly used
menu items
2. Level meters - displays the incoming or outgoing audio
level.
3. File Information - displays information about the loaded
WAV file.
4. WAV controller - contains buttons to control playback of
the loaded WAV file, a button to start capture from the
connected DV device, a button for SyncCapture from
the connected DV device, buttons for trimming, and a
slider to scrub through the audio.
5. Deck controller - contains a shuttle slider and controls
for playback of the connected DV device. There are also
SyncRecord and Record buttons to start recording on
the connected DV device.
6. Deck information area - displays information about the
status of the DV device.
7. Status bar - lists information about the DV device, and
also displays the function of the button the mouse cursor is over.
EZ Audio
Supported Audio Sampling Rates
When capturing DV audio in EZAudio, the audio is captured at the same sampling rate the DV device captured it
at. Valid sampling rates for DV audio are: 32 KHz 12-bit
stereo, 44.1 KHz 16-bit stereo, and 48 KHz 16-bit stereo.
EZAudio supports only standard DV sampling rates for
both capture and playback.
Capturing Audio
It is often useful to be able to capture just the audio from a
video, for voice-over and other purposes. EZAudio lets you
capture just the audio portion of the DV data into a WAV
file.
There are two footage ways you can capture audio with EZ
Audio - Manual capture and SyncCapture.
ezdv.book Page 3 Tuesday, May 30, 2000 2:31 PM
CHAPTER: 5 EZ Audio
5-3
Manual Capture
Capturing audio to your computer can be as simple as
clicking Play on the Deck controller and clicking Capture
on the WAV controller.
Click the Play button to start the deck playing
Then click the Capture button
If you do not have Set new filenames automatically
checked and have not already set a filename, a dialog will
appear to ask you for the filename to use for the captured
audio.
If this window appears, give the clip a name and save it
on your drive
EZ Audio
While it is not necessary to save audio on your video drive,
it is often convenient to keep all the files for a production
together. When you want to stop capturing, click the Stop
button on the WAV controller.
Click the Stop button when you are done
ezdv.book Page 4 Tuesday, May 30, 2000 2:31 PM
5-4
CHAPTER: 5 EZ Audio
SyncCapture
SyncCapture allows you to start audio capture at a specific
point on the tape.
To start sync capture
1. Position the deck at the start of the segment you want
to record by using the Deck controller.
Position the tape at the start of where you
want to capture by using the Deck
controller.
2. Click the SyncCapture button on the WAV controller.
3. REC PAUSE will flash in the WAV info display. Click the
Play button on the WAV controller to start SyncCapture.
EZ Audio
4. The DV deck will start playing and the computer will
start capturing. When you’re done capturing, click the
Stop button on the WAV controller to stop capture.
Adjusting Audio Levels while Recording
The Rec level slider allows you to boost or lower the audio
level during capture. The adjusted audio level is displayed
on the level meters. This allows you to adjust for audio that
is too loud or too soft.
To reset the recording level back to 100%, click the Reset
Rec Level button.
Recording level adjustment slider
Reset Rec Level button
ezdv.book Page 5 Tuesday, May 30, 2000 2:31 PM
CHAPTER: 5 EZ Audio
5-5
You can also use the Rec Level setting dialog to enter a
specific percentage instead of using the slider.
Right-click in the Level Meter area and choose
Rec Level setting... from the pop-up menu.
Set the desired recording level in the Rec
Level Setting dialog.
The goal in adjusting recording levels is to keep the peaks
below 0, or the audio will clip. The yellow region is generally a safe area to keep the levels in.
EZ Audio can also output your DV-compatible WAVs back
to your DV or Digital 8 camera or deck. There are two
methods to output back to tape - SyncRecord and manual
record.
EZ Audio
Output to Tape
ezdv.book Page 6 Tuesday, May 30, 2000 2:31 PM
5-6
CHAPTER: 5 EZ Audio
Important Note on Audio Recording
EZ Audio video output
Recording back to tape from EZ Audio is not an audio
insert! When you record audio to tape, both the audio and
a blue video screen with the audio timecode will be output
to tape - the previous audio and video (if any) will be overwritten.
EZ Audio
If you want to add or replace the audio of a video segment,
you need to capture the video segment in EZ Video and
add or replace the audio in EZ Edit.
SyncRecord
SyncRecord will output the current clip (or clip list, if List
Play is enabled) to DV tape.
1. Make sure a DV tape is in the deck, and the tape is not
write-protected.
2. Position the tape at the point where you want to start
recording using the Deck controller.
Position the tape where you want to start recording
3. Click the SyncRecord button on the Deck controller.
The deck will go into Record Pause, then after a few
seconds the current WAV will be recorded to tape.
4. When recording is done the DV deck will go into Record
Pause.
ezdv.book Page 7 Tuesday, May 30, 2000 2:31 PM
CHAPTER: 5 EZ Audio
5-7
Note: Because DV decks and cameras are mechanical
devices, the actual start of recording may not coincide with
the exact time when the Record button is pressed or the
Record command is sent. If you find that the beginning or
end of the recording is starting or stopping too early or too
late, you can make adjustments in the Sync Rec section of
the EZDV Properties. The necessary settings vary for each
DV device.
Manual record
Manual recording will record whatever you play out to DV
tape.
1. Play a WAV file.
2. Click the Record button on the Deck controller. The DV
deck will start recording.
3. Click the Stop button on the DV Deck controller when
you are done recording.
The Rec level slider allows you to boost or lower the audio
level during output. The adjusted audio level is displayed
on the level meters. This allows you to adjust for audio that
is too loud or too soft.
To reset the recording level back to 100%, click the Reset
Rec Level button.
Recording level adjustment slider
Reset Rec Level button
EZ Audio
Adjusting Audio Levels during Output
ezdv.book Page 8 Tuesday, May 30, 2000 2:31 PM
5-8
CHAPTER: 5 EZ Audio
You can also use the Rec Level setting dialog to enter a
specific percentage instead of using the slider.
Right-click in the Level Meter area and choose
Rec Level setting... from the pop-up menu.
EZ Audio
Set the desired recording level in the Rec
Level Setting dialog.
ezdv.book Page 9 Tuesday, May 30, 2000 2:31 PM
CHAPTER: 5 EZ Audio
5-9
Interface In-depth
Toolbar
The toolbar contains buttons for many commonly used
menu items.
Toolbar
Specifies that a new file should be created the
New
next time the capture button is pressed.
Open
Opens an existing WAV file.
Level Meters
The level meters provide a visual display of the audio gain.
The Rec Level slider allows adjustment of audio level during capture and output.
Reset Rec Level button
Recording level adjustment slider
The slider allows you to increase or decrease the recording
level on capture or output. The level can be adjusted from 0% (mute)
to 200% (double volume).
Reset Rec Level button
Resets the Recording Level to 100%.
EZ Audio
Recording level adjustment slider
ezdv.book Page 10 Tuesday, May 30, 2000 2:31 PM
5-10
CHAPTER: 5 EZ Audio
File Information
The file information area displays information about the
loaded WAV file.
1
2
3
4
File Information
The information in the File and Deck Information area is as
follows:
1.
2.
3.
4.
Filename of the loaded WAV file
Current time position and Total time of the WAV
Audio sampling rate of the WAV
Current clip status (Stop, Play, etc.)
EZ Audio
WAV Controller
The WAV controller provides playback and trimming controls for WAV files that you load into EZ Audio.
WAV Controller
Starts capture of DV audio data from the DV
Capture
camera or deck to the computer hard disk.
SyncCapture Starts sync capture of DV audio data from the
DV camera or deck to the computer hard disk.
Stop
file.
Stop playback or capture of the current WAV
Starts playback of the WAV file. Also starts
Play
recording in SyncCapture.
Top frame
WAV file.
Moves the playback point to the beginning of the
ezdv.book Page 11 Tuesday, May 30, 2000 2:31 PM
CHAPTER: 5 EZ Audio
5-11
Previous frame
Moves the playback point one frame backward.
Next frame
Moves the playback point one frame forward.
Bottom frame Moves the playback point to the end of the WAV
file.
Set in point
Sets the In point for trimming the current clip.
Set out point Sets the Out point for trimming the current clip.
Update In/Out points
Updates the audio clip in EZ Edit with the new In
and Out points.
Deck controller
Deck Controller
Stop playback or recording on the DV deck.
Play
Starts playback on the DV deck.
Pause
Pauses playback on the DV deck.
When the DV deck is stopped, it will rewind the
Rewind
tape. When the DV deck is playing, it will go into reverse-scan
mode.
Previous frame
Moves the DV deck one frame backward.
Next frame
Moves the DV deck one frame forward.
When the DV deck is stopped, it will fast-forward
Forward
the tape. When the DV deck is playing, it will go into forwardscan mode.
EZ Audio
Stop
ezdv.book Page 12 Tuesday, May 30, 2000 2:31 PM
5-12
CHAPTER: 5 EZ Audio
Record
Starts recording on the DV Deck.
SyncRecord
Starts SyncRecording on the DV Deck.
Deck information
1
2
3
Deck information
The information in the Deck Information area is as follows:
1. Deck audio sampling rate and recording mode (SP/LP)
2. Current time position and frame number of the deck
3. Current deck status (Stop, Play, etc.)
EZ Audio
Status Bar
The Status Bar lists the AVI and DV deck status on it.
When the Play list is open, it also shows information about
the current Play list.
ezdv.book Page 13 Tuesday, May 30, 2000 2:31 PM
CHAPTER: 5 EZ Audio
5-13
Menu options
File menu
Recent file list
Specifies that a new file should be created the next time the
New
capture button is pressed.
Open
Opens an existing WAV file.
Properties Opens the File Properties dialog.
Edit Menu
Set Out Point
Sets the Out point for the current clip.
Settings Menu
Repeat Playback
When checked, AVI playback will loop until stopped by the
user.
EZ Audio
Set In PointSets the In point for the current clip.
ezdv.book Page 14 Tuesday, May 30, 2000 2:31 PM
5-14
CHAPTER: 5 EZ Audio
When un-checked, AVI playback will stop at the end of the
AVI or the end of the last clip (in List Play mode).
Capture Audio From Track 3 and 4
When checked, audio will be captured from Tracks 3 and 4 for
DV tapes that have 4-channel audio. If you capture from DV tapes
with 2-channel audio, channels 1 and 2 will be captured.
When unchecked, audio will be captured from Tracks 1 and 2.
even if channel 3 and 4 are present (4-channel audio).
Note: EZ Edit can capture video with channel 1 and 2 audio
(in an AVI) along with channel 3 and 4 audio (in a WAV) simultaneously.
Limit Capture Time...
Opens the Limit Capture Time... dialog.
Set new file names automatically
When checked, each time the Capture button is pressed, a
the current filename is incremented by 1 and a new file is automatically created for the capture. Set the default name and location in the
Open file dialog.
When un-checked, each time the Capture button is pressed,
it will either ask for a new filename (if New was pressed) or overwrite
the existing file (if a file was loaded).
EZ Audio
Confirm when overwriting a file
When checked, EZ Audio will ask for confirmation before
overwriting an existing file.
When un-checked, EZ Audio will not ask for confirmation if a
file is about to be overwritten.
EZDV properties...
Opens the EZDV properties dialog.
View menu
Tool Bar
Toggles display of the Tool bar.
Deck Controller
Toggles display of the Deck Controller.
Control Bar
Toggles display of the WAV Controller.
Status Bar
Toggles display of the Status bar.
ezdv.book Page 15 Tuesday, May 30, 2000 2:31 PM
CHAPTER: 5 EZ Audio
5-15
Help menu
About...
Opens the About dialog to display software version information.
EZ Audio
ezdv.book Page 16 Tuesday, May 30, 2000 2:31 PM
5-16
CHAPTER: 5 EZ Audio
Dialogs
EZ Audio
File Properties
The File Properties dialog displays all the important information about the loaded WAV file.
Close buttonCloses the File Properties window.
Limit Capture Time...
Limit Capture Time checkbox
When checked, enables automatic stop of manual capture
ezdv.book Page 17 Tuesday, May 30, 2000 2:31 PM
CHAPTER: 5 EZ Audio
5-17
after the specified time.
When unchecked, manual capture will not automatically stop.
Time Settings
TimeLength of time that manual captures should automatically
stop at, in hours, minutes, seconds, and frames.
FrameLength of time that manual captures should automatically
stop at, in number of frames.
OK button Accepts the changes to the Limit Capture Time settings and
closes the window.
Cancel buttonCancels changes to the Limit Capture Time settings and
closes the window.
EZDV properties... - Sync Rec
EZ Audio
Offset Time
Start Point
Sets the number of frames early or late that AVI file playback
should occur when doing a SyncRecord.
The default is for the AVI file to start playing 5 frames after the
DV deck has been set to start recording. This assumes that it takes 5
frames of time for the DV deck to actually engage the recording head
and start recording.
End Point
Sets the number of frames early or late that the DV deck
ezdv.book Page 18 Tuesday, May 30, 2000 2:31 PM
5-18
CHAPTER: 5 EZ Audio
should stop recording.
The default is for the DV deck to get the Stop command 5
frames before the end of the AVI file. This assumes that it takes 5
frames of time for the DV deck to actually disengage the recording
head and stop recording.
Record Position on Tape
Steps
Sets the default recording position when SyncRecording from
a paused frame. The default is for recording to start at the paused
frame.
Return to default button
Returns the settings for this tab to the defaults.
OK button Apply the current Sync Rec and Detailed Settings settings
and close the window.
Cancel button
Cancel the current changes to the Sync Rec and Detailing
Settings settings and close the window.
EZ Audio
EZDV properties... - Detailed Settings
Video
Count Dropped Frames in Time Display checkbox (NTSC only)
When checked, 29.97 fps drop-frame timecode is used.
When unchecked, 30 fps non-drop-frame timecode is used.
ezdv.book Page 19 Tuesday, May 30, 2000 2:31 PM
CHAPTER: 5 EZ Audio
5-19
This option affects all timecode entry and calculations.
Except in special cases, this option should be checked.
Field during pause
FRAME
When AVI playback is paused, the frame (both fields) is
shown.
There may be some jitter apparent in the display when
FRAME is selected for pause. This does not affect DV output.
ODD
When AVI playback is paused, only the odd field is
shown.
Use this option to eliminate jitter in the display on
paused playback. This does not affect DV output.
EVEN
When AVI playback is paused, only the even field is
shown.
Use this option to eliminate jitter in the display on
paused playback. This does not affect DV output.
YUV and RGB Conversions
Expand RGB range to 150% checkbox
When checked, the luminance and chrominance ranges are
increased during conversion to RGB.
When unchecked, the standard DV Blue Book conversion
method (which limits the RGB range) is used.
This option has no effect on programs which edit in YUV colorspace, such as EZ Edit. However, for programs which use RGB
colorspace, setting this option may help increase the video quality of
AVIs created in those programs.
OK button Apply the current Sync Rec and Detailed Settings settings
and close the window.
Cancel button
Cancel the current changes to the Sync Rec and Detailing
Settings settings and close the window.
EZ Audio
Return to default button
Returns the settings for this tab to the defaults.
ezdv.book Page 20 Tuesday, May 30, 2000 2:31 PM
5-20
CHAPTER: 5 EZ Audio
About
Free MemoryDisplays the amount of free memory in the system.
Free Disk Space
Displays the amount of free disk space on the temporary
drive.
EZ Audio
Free Capture Time
Displays the amount of video that can be stored on the drive
listed for Free Disk Space, in hours, minutes, seconds, and frames,
and in frame count.
ezdv.book Page 1 Tuesday, May 30, 2000 2:31 PM
CHAPTER: 6 EZ Navi
6-1
CHAPTER 6
EZ Navi
Introducing EZ Navi
This chapter will introduce you to EZ Navi, the automatic
tape scanning and scene logging component of the EZDV
software.
The features of EZ Navi will be described to familiarize you
with its functions.
EZ Navi Interface
The EZ Navi window consists of seven main sections:
1. Toolbar - includes shortcut buttons for commonly used
menu items
2. Video area - shows the video coming from your DV or
Digital 8 device.
3. Deck information area - displays information about the
status of the DV device.
4. Deck controller - contains a shuttle slider and controls
for playback of the connected DV device.
5. Scene list - contains a list of clips that EZ Navi found on
your tape.
EZ Navi
The EZ Navi application allows you to control your DV or
Digital 8 camera or deck and can automatically scan
through your DV or Digital8 tapes to identify clips. It provides playback of video on the computer screen, camera/
deck control, scene list generation and batch capture list
generation.
ezdv.book Page 2 Tuesday, May 30, 2000 2:31 PM
6-2
CHAPTER: 6 EZ Navi
5
1
2
3
4
EZ Navi
EZ Navi
6
6. Status bar - lists information about the DV device, play
list, and also displays the function of the button the
mouse cursor is over.
Choosing a Scan Method
There are six methods of scanning the tape for scenes.
Which method you choose will largely depend on how your
ezdv.book Page 3 Tuesday, May 30, 2000 2:31 PM
CHAPTER: 6 EZ Navi
6-3
footage was shot as well as how much time you have to let
EZ Navi run.
Scanning for Scenes
Since multiple takes or tapings can be on the same tape, a
useful step in video production is to identify different
scenes on a tape and create a list of those scenes. EZ
Navi can do this for you automatically and generate a
scene list for you. You can also edit the generated list and
manually add scenes to it.
Indexing an entire tape
To have EZ Navi scan your tape and generate a scene list
automatically, follow these simple steps:
1. Insert a tape with footage into your DV camera or deck.
EZ Navi
In most cases, Standard or Slow search mode will be sufficient. For more a detailed explanation of each mode,
please see the Dialogs section later in this chapter.
ezdv.book Page 4 Tuesday, May 30, 2000 2:31 PM
6-4
CHAPTER: 6 EZ Navi
2. Click the Search Start button in the Index Search area
of the Deck controller. EZ Navi will rewind the tape and
start scanning it. Clips will appear in the scene list as
EZ Navi identifies them.
Click the Search Start button
Indexing from a particular point
EZ Navi
Sometimes it is useful to generate a scene list starting from
a particular point on the tape instead of from the entire
tape.
To have EZ Navi scan your tape from a particular point
instead of beginning of the tape:
1. Position the tape at the point where you want to start
indexing using the Deck controller.
2. Hold down the Shift key and click the Search Start button. EZ Navi start scanning the tape. Clips will appear
in the scene list as EZ Navi identifies them
Position the tape where you want to start indexing
Hold down the Shift key and click the Search Start button
ezdv.book Page 5 Tuesday, May 30, 2000 2:31 PM
CHAPTER: 6 EZ Navi
6-5
Important note about Timecode
If your tape has discontinuous timecode, or timecode that
repeats the same value, you may have problems using EZ
Navi. EZ Navi may not be able to pre-roll the deck if it
rewinds beyond the zero point and into previous timecode.
Thus, it is very important to keep timecode continuous on
your tape. It is a common practice to “black” or “stripe” new
tapes by recording black over the entire tape in one pass to
establish continuous timecode.
Timecode is normally reset when the tape is removed from
the camera. If you have to remove and reinsert a tape without timecode while recording, after reinserting the tape,
rewind it to a point where there is timecode, and continue
recording from that point.
Also, it is good practice to record 10-20 seconds of black
“leader” at the beginning of each tape.
EZ Navi
ezdv.book Page 6 Tuesday, May 30, 2000 2:31 PM
6-6
CHAPTER: 6 EZ Navi
Working with the Scene list
EZ Navi
The scene list displays a list of scenes EZ Navi has logged.
Scene list
Each scene is listed with its In point, Out point, and Duration. If the recording timestamp is available, it will also be
listed, along with an optional user-defined comment.
Selecting and Moving clips
You can select a clip in the scene list by clicking on it to
highlight it.
To change a clip’s position, click on it and drag it to the
desired position. A little line will show you the new insertion
point.
ezdv.book Page 7 Tuesday, May 30, 2000 2:31 PM
CHAPTER: 6 EZ Navi
6-7
Viewing scenes
To cue the tape to a clip, double-click on the clip in the
scene list.
Adding scenes
You can add a new scene by choosing Add from the Edit
menu, or by right-clicking in the Scene list and choosing
Add from the pop-up menu. A new scene with the selected
In and Out points will appear in the Scene list.
Choose Add from
the Edit menu
Or Add from the right-click
pop-up menu
Redefining scenes
Select a scene
EZ Navi
You can redefine a scene by changing its In and Out
points. To redefine a scene:
1. Select a scene from the Scene list.
ezdv.book Page 8 Tuesday, May 30, 2000 2:31 PM
6-8
CHAPTER: 6 EZ Navi
2. Use the Deck controller to locate the new In or Out
point.
Use the Deck controller
to locate a new In or
Out point.
3. Click the In button on the In/Out section of the Deck
controller to mark the new In point, or click the Out button on the In/Out section of the Deck controller to mark
the new Out point.
Mark new In point
EZ Navi
Mark new Out point
4. Click the Ok button on the In/Out section of the Deck
controller to update the scene in the Scene list with the
new In and Out points.
Click Ok to update the In/Out points
Note: Clicking Ok with no scene selected will add a new
scene with the specified In and Out points to the scene list.
ezdv.book Page 9 Tuesday, May 30, 2000 2:31 PM
CHAPTER: 6 EZ Navi
6-9
Deleting scenes
You can delete a scene you don’t want by selecting it and
choosing Delete from the Edit menu, or by right-clicking
the scene and choosing Delete from the pop-up menu.
Choose Delete from
the Edit menu
Or Delete from the right-click
pop-up menu
You can delete the entire scene list by choosing Delete all
from the Edit menu, or by right-clicking in the Scene list
and choosing Delete all from the pop-up menu.
EZ Navi
Choose Delete all from
the Edit menu
Or Delete all from the
right-click pop-up menu
Adding Comments to scenes
EZ Navi also lets you add comments to each scene on the
scene list. These comments appear next to the clip and
thumbnail when the scene list is printed.
ezdv.book Page 10 Tuesday, May 30, 2000 2:31 PM
6-10
CHAPTER: 6 EZ Navi
To add a comment to a scene
1. Select a scene from the Scene list.
Select a scene
EZ Navi
2. Choose Comments... from the Edit menu, or right-click
the scene and choose Comments... from the pop-up
menu.
Choose Comments... from
the Edit menu
Or Comments... from the
right-click pop-up menu
Saving and Loading Scene lists
To save your Scene list:
1. Choose Save from the File menu.
ezdv.book Page 11 Tuesday, May 30, 2000 2:31 PM
CHAPTER: 6 EZ Navi
6-11
2. If you have not already saved the Scene list, the Save
As window will appear. Give the scene list a name and
click Save. The Scene list will be saved for future use.
To load an existing Scene list:
1. Choose Open from the File menu.
EZ Navi
2. Find the RNL file you want to load and click Open. The
scenes stored in the file will appear in the Scene list.
Capturing your clips
You can take your EZ Navi scene list to EZ Video batch
capture for capture.
Just save your scene list (RNL file) from EZ Navi, open EZ
Video, then load the RNL file in EZ Video batch capture.
ezdv.book Page 12 Tuesday, May 30, 2000 2:31 PM
6-12
CHAPTER: 6 EZ Navi
Interface In-depth
Toolbar
The toolbar contains buttons for many commonly used
menu items.
Toolbar
The functions of the toolbar buttons are as follows:
Specifies that a new scene list file is to be creNew
ated. The current scene list will be cleared.
Open
Opens a scene list file.
Save
Save the current scene list.
EZ Navi
Add a new scene with the specified In and Out
Add
point to the Scene list.
Cuts the selected scene from the Scene list and
Cut
puts it on the clipboard.
Copy
Copies the selected scene to the clipboard.
Paste
list.
Pastes the scene on the clipboard to the scene
Opens the Comment dialog to edit the comment
Comment
for the selected scene.
Show or hide the thumbnail
Toggles display of thumbnails in the scene list.
Print list
Prints the scene list to the printer.
ezdv.book Page 13 Tuesday, May 30, 2000 2:31 PM
CHAPTER: 6 EZ Navi
6-13
Deck Information
The deck information area displays information about the
loaded AVI file and the connected DV device.
1
4
2
5
3
Deck Information
The information in the Deck Information area is as follows:
1.
2.
3.
4.
5.
Input tape mode (SP/LP), Audio sampling rate, and deck status
Current time position in hours, minutes, seconds, and frames
Current time position in frames
Current In point
Current Out point
EZ Navi
ezdv.book Page 14 Tuesday, May 30, 2000 2:31 PM
6-14
CHAPTER: 6 EZ Navi
Deck Controller
The Deck controller lets you control the connected DV deck
through the i.LINK interface.
4
1
5
6
9
10
11
12
2
13
3
EZ Navi
7
8
14
15
16
1. Shuttle controller
The shuttle controller lets you play the tape forward or backward at
varying speeds.
There are five stops on either side of the middle.
Drag the yellow slider to the left to play backward, drag it to the right
to play forward.
The playback speeds will depend on your DV deck, but the stops are
generally 1/10 speed, 1/5 speed, 1x, 2x, and 20x.
2. Previous frame
Moves the DV deck one frame back.
3. Rewind
Pressed when the DV deck is stopped, it will rewind the tape.
Pressed when the DV deck is playing, it will go into reverse-scan
mode.
4. Pause
Pauses the DV deck
5. Next frame
Moves the DV deck one frame forward.
6. Forward
Pressed when the DV deck is stopped, it will fast-forward the tape.
Pressed when the DV deck is playing, it will go into forward-scan
mode.
7. Play
Plays the tape in the DV deck.
8. Stop
Stops the tape in the DV deck.
ezdv.book Page 15 Tuesday, May 30, 2000 2:31 PM
CHAPTER: 6 EZ Navi
6-15
9. Search Start
Rewind the DV deck and start scanning the tape for scenes.
Hold down Shift when clicking the button to start scanning from the
current position.
10. Jump to previous index
Rewinds the DV deck to the previous index point.
11. Jump to timecode location
Opens the Jump dialog to move the tape to a particular timecode or
frame location.
12. Jump to next index
Advances the DV deck to the next index point.
13. Set Contents
Sets the current preview image to be the thumbnail for the selected
scene.
14. Set In point
Sets the current frame as the In point for the scene.
15. Set Out point
Sets the current frame as the Out point for the scene.
16. Update In/Out points
Updates the selected scene with the specified In and Out points.
If there is no scene selected, a new scene with the specified In and
Out points will be added to the Scene list.
EZ Navi
ezdv.book Page 16 Tuesday, May 30, 2000 2:31 PM
6-16
CHAPTER: 6 EZ Navi
Scene List
EZ Navi
The Scene list displays scenes detected on the tape.
Scene list
Each clip is listed with its In point, Out point, Duration,
Date/Time of Recording (if available), and Comment (if
set).
In point
Out point
Duration
Recording date/time
Comment
ezdv.book Page 17 Tuesday, May 30, 2000 2:31 PM
CHAPTER: 6 EZ Navi
6-17
Menu options
File menu
Recent file list
Specifies that a new scene list file is to be created. The curNew
rent scene list will be cleared.
Open
Opens a scene list file.
Save
Save the current scene list.
Save as... Save the current scene list as a new file.
Print
Print the current scene list.
Print settings...
Opens the settings dialog for the printer.
Recent file list
Provides quick opening of recent files.
Exit
Quits the EZ Navi application.
EZ Navi
Print preview
Opens a print preview for the current scene list.
ezdv.book Page 18 Tuesday, May 30, 2000 2:31 PM
6-18
CHAPTER: 6 EZ Navi
Edit menu
Undo
Cut
Undo the last action performed.
Cuts the selected scene from the Scene list and puts it on the
clipboard.
Copy
Copies the selected scene to the clipboard.
Paste
Pastes the scene on the clipboard to the scene list.
Add
Adds a new scene with the specified In and Out points to the
scene list.
Delete
Deletes the selected scene from the scene list.
Delete all
Deletes all scenes from the scene list.
EZ Navi
Comments...
Opens the comments dialog to edit the comments for the
selected scene.
Setting menu
Index search...
Opens the Index search dialog to set the scanning method.
Deck control...
Opens the Deck control dialog to set deck options.
EZDV properties...
Opens the EZDV properties dialog.
ezdv.book Page 19 Tuesday, May 30, 2000 2:31 PM
CHAPTER: 6 EZ Navi
6-19
View menu
Toolbar
Toggles display of the Tool bar.
Status bar Toggles display of the Status bar
Thumbnail Toggles display of Content thumbnails in the scene list.
Help menu
About
tion.
Opens the About dialog to display software version informa-
EZ Navi
ezdv.book Page 20 Tuesday, May 30, 2000 2:31 PM
6-20
CHAPTER: 6 EZ Navi
Dialogs
Jump
Jump to
Set the timecode or frame number to jump to.
OK button Position the tape at the specified timecode or frame number.
Cancel
Cancel and close the Jump dialog.
Comments...
EZ Navi
Comment area
Comment area
Enter and edit comments here.
OK button Accept the changes to the comment and close the Comments... dialog.
Cancel the changes to the comment and close the ComCancel
ments... dialog.
ezdv.book Page 21 Tuesday, May 30, 2000 2:31 PM
CHAPTER: 6 EZ Navi
6-21
Index search...
Interval setting (Interval search and Slow search + interval search only)
Sets the time interval for scenes to be generated with Interval search
and Slow search + interval search.
EZ Navi
Search precision
Fast search (Low accuracy)
Performs a fast speed index search. While it goes through the
tape quickly, it is not very accurate and can often miss scene
changes.
Standard
Performs a standard speed search at normal playback speed.
Slow search (High accuracy)
Performs a slow speed index search. While it takes more
time, this method is very accurate.
Interval search
Performs an interval search. Essentially, this cuts the video
into equal pieces based on the interval setting.
Slow search + interval search
Performs a slow search combined with interval search.
Slow search + scene search
Performs a slow search combined with a image-based scene
detection search. This is the slowest method, but will yield the most
clips. Set the scene search sensitivity in the Scene search sensitivity
box.
ezdv.book Page 22 Tuesday, May 30, 2000 2:31 PM
6-22
CHAPTER: 6 EZ Navi
Scene search sensitivity (Slow search + scene search only)
Sets the sensitivity for scene search. The higher the sensitivity, the
greater the number of potential scenes detected.
OK button Accept the changes to the Index Search Settings and close
the Index Search Settings dialog.
Cancel the changes to the Index Search Settings and close
Cancel
the Index Search Settings dialog.
Deck control...
DV deck pre roll
Specifies the number of seconds to roll the DV deck before
indexing starts.
OK button Accept the changes to the Deck control settings and close
the Deck control settings dialog.
EZ Navi
Cancel the changes to the Deck control settings and close
Cancel
the Deck control settings dialog.
ezdv.book Page 23 Tuesday, May 30, 2000 2:31 PM
CHAPTER: 6 EZ Navi
6-23
EZDV properties... - Sync Rec
Record Position on Tape
Steps
Sets the default recording position when SyncRecording from
a paused frame. The default is for recording to start at the paused
frame.
EZ Navi
Offset Time
Start Point
Sets the number of frames early or late that AVI file playback
should occur when doing a SyncRecord.
The default is for the AVI file to start playing 5 frames after the
DV deck has been set to start recording. This assumes that it takes 5
frames of time for the DV deck to actually engage the recording head
and start recording.
End Point
Sets the number of frames early or late that the DV deck
should stop recording.
The default is for the DV deck to get the Stop command 5
frames before the end of the AVI file. This assumes that it takes 5
frames of time for the DV deck to actually disengage the recording
head and stop recording.
ezdv.book Page 24 Tuesday, May 30, 2000 2:31 PM
6-24
CHAPTER: 6 EZ Navi
EZDV properties... - Detailed Settings
EZ Navi
Video
Count Dropped Frames in Time Display checkbox (NTSC only)
When checked, 29.97 fps drop-frame timecode is used.
When unchecked, 30 fps non-drop-frame timecode is used.
This option affects all timecode entry and calculations.
Except in special cases, this option should be checked.
Field during pause
FRAME
When AVI playback is paused, the frame (both fields) is
shown.
There may be some jitter apparent in the display when
FRAME is selected for pause. This does not affect DV output.
ODD
When AVI playback is paused, only the odd field is
shown.
Use this option to eliminate jitter in the display on
paused playback. This does not affect DV output.
EVEN
When AVI playback is paused, only the even field is
shown.
Use this option to eliminate jitter in the display on
paused playback. This does not affect DV output.
YUV and RGB Conversions
Expand RGB range to 150% checkbox
ezdv.book Page 25 Tuesday, May 30, 2000 2:31 PM
CHAPTER: 6 EZ Navi
6-25
When checked, the luminance and chrominance ranges are
increased during conversion to RGB.
When unchecked, the standard DV Blue Book conversion
method (which limits the RGB range) is used.
This option has no effect on programs which edit in YUV colorspace, such as EZ Edit. However, for programs which use RGB
colorspace, setting this option may help increase the video quality of
AVIs created in those programs.
Return to default button
Returns the settings for this tab to the defaults.
OK button Apply the current Sync Rec and Detailed Settings settings
and close the window.
Cancel button
Cancel the current changes to the Sync Rec and Detailing
Settings settings and close the window.
About...
OK button Close the About dialog.
EZ Navi
ezdv.book Page 26 Tuesday, May 30, 2000 2:31 PM
EZ Navi
6-26
CHAPTER: 6 EZ Navi
ezdv.book Page 1 Tuesday, May 30, 2000 2:31 PM
CHAPTER: 7 EZ Edit
7-1
CHAPTER 7
EZ Edit
Introducing EZ Video
This chapter will introduce you to EZ Edit, the editing component of the EZDV software.
The features of EZ Edit will be described to familiarize you
with its functions.
EZ Edit Interface
The EZ Edit window consists of eight main sections:
1. Toolbar - includes shortcut buttons for commonly used
menu items
2. Video area - shows the video coming from, or going out
to, your DV or Digital 8 device. Playback of the timeline
also appears here.
3. Timeline - displays video clips, transitions, audio clips,
and titles used in the production.
4. Deck controller - contains a shuttle slider and controls
for playback of the connected DV device. There are also
SyncRecord and Record buttons to start recording on
the connected DV device.
5. DV Bin - contains video, audio, and bitmap clips to use
in the production.
6. AVI controller - contains buttons to control playback of
the loaded AVI file, a button to start capture from the
EZ Edit
The EZ Edit application allows you to edit and output your
captured video. It provides playback of video on the computer screen, titling, transitions, camera/deck control, and
output capabilities.
ezdv.book Page 2 Tuesday, May 30, 2000 2:31 PM
7-2
CHAPTER: 7 EZ Edit
4
1
2
5
3
7
EZ Edit
6
EZ Edit
connected DV device, buttons for trimming, and a slider
to scrub through the video.
7. Status bar - lists information about the DV device, timeline, and also displays the function of the button the
mouse cursor is over.
Setting the Temporary drives
The temporary drives are where rendered (processed)
effects are stored. It is important that rendered effects are
stored on a video-capable drive, or they may not render
correctly.
Before starting to edit, you need to make sure the temporary drives are set to your video hard disks.
To set the Temporary drives, follow these steps.
ezdv.book Page 3 Tuesday, May 30, 2000 2:31 PM
CHAPTER: 7 EZ Edit
7-3
1. Open EZ Edit.
2. Choose Default edit settings... from the Settings
menu.
Choose Default edit settings from the Settings menu
3. In the Default settings dialog, select the Temporary
Drives tab.
EZ Edit
Drive
Temporary Drives setting
4. Select your video drive from the Drive drop-down.
ezdv.book Page 4 Tuesday, May 30, 2000 2:31 PM
7-4
CHAPTER: 7 EZ Edit
EZ Edit
5. Click the Add button. The drive you specified will
appear in the list. If you have multiple video drives, you
can add them here and as each gets filled, the next one
will be used.
6. Once you set the temporary drives, EZ Edit will remember the setting until you uninstall or reinstall the software.
Loading clips to edit
Before you can work with any audio, video, or bitmaps in
EZ Edit, you need to make them available. You can make
them available by loading them into the DV Bin.
Follow the steps below to load a clip into the DV Bin.
1. Open the Add clip to bin window dialog by clicking the
Add clip to bin window button on the toolbar, by dou-
ezdv.book Page 5 Tuesday, May 30, 2000 2:31 PM
CHAPTER: 7 EZ Edit
7-5
ble-clicking a blank area in the DV Bin, or by choosing
Add clip to bin window... from the File menu.
Click the Add clip to bin window button on the Toolbar
Or double-click a blank area in the DV Bin
Double-click a blank area
Or choose Add clip to bin window from the File menu
EZ Edit
ezdv.book Page 6 Tuesday, May 30, 2000 2:31 PM
7-6
CHAPTER: 7 EZ Edit
2. The Add clip to bin window dialog will appear. Select
one or more files to load and click the Open button.
3. The clip(s) you selected will appear in the DV Bin.
EZ Edit
Supported clip types
EZ Edit supports the following types of files as clips:
1. AVI files compressed with Canopus DV CODEC, frame
size 720x480 (NTSC EZDV)
2. AVI files compressed with Canopus DV CODEC, frame
size 720x576 (PAL EZDV)
3. WAV files at 32 kHz, 16-bit, stereo
4. WAV files at 44.1 kHz, 16-bit, stereo
5. WAV files at 48 kHz, 16-bit, stereo
6. BMP (.BMP, .DIB) still images
7. JPEG (.JPG, .JPEG) still images
8. Tagged Image File format (.TIF, .TIFF) still images
9. Adobe Photoshop PSD (.PSD) still images
10.TARGA (.TGA, .TARGA) still images
11.PhotoCD (.PCD) still images
12.FlashPix (.FPX) still images
13.Title Data File (.TDF) EZ Edit title data files
If you want to use files of other types in your project, you
will need to convert them to one of the above types using a
third-party program. EZ Edit will not accept other types of
files.
ezdv.book Page 7 Tuesday, May 30, 2000 2:31 PM
CHAPTER: 7 EZ Edit
7-7
The Timeline
The EZ Edit timeline has 5 tracks - Film and Main AV,
Insert AV, Title, Ex Audio 1, and Ex Audio 2.
Main AV clip
Overlapped clips with
transition
Transition
Insert AV clip
Title
Ex Audio clip
The Main AV track is the main video track. You can drag
video clips to this track and they will appear one-afteranother. You can add effects or transitions between clips
on this track.
The Insert AV track is used for placing segments of video
over the Main AV video. Video clips placed here will appear
in place of the corresponding video on the Main AV track.
The Title track is used for placing titles over video.
The Ex Audio 1 and Ex Audio 2 tracks are used to add
extra audio such as music to your production.
EZ Edit
The Film track displays thumbnail views of the video on the
Main AV and Insert AV tracks. This track can be turned off
if you want.
ezdv.book Page 8 Tuesday, May 30, 2000 2:31 PM
7-8
CHAPTER: 7 EZ Edit
Add clips to the timeline
To add a clip from the DV Bin to the timeline, click on it and
drag it to the timeline. It will be added or inserted where
you drop it.
EZ Edit
Drag clip
to timeline
Video clips (AVI files) and still images (see above for supported file types) can be placed on the Main AV and Insert
AV tracks.
Audio clips (WAV files) can be placed on the Ex Audio 1
and Ex Audio 2 tracks.
To move all the video clips from the DV Bin to the timeline
in the order they appear in the bin, choose Auto arrange
clips from the Edit menu. To put clips in reverse order,
ezdv.book Page 9 Tuesday, May 30, 2000 2:31 PM
CHAPTER: 7 EZ Edit
7-9
choose Auto arrange clips in reverse order, from the
Edit menu.
Controlling the timeline
Adjusting the time scale
Often times, you may want to view a zoomed-in or
zoomed-out view of the timeline for fine adjustments or
locating an interesting section.
The Timescale slider controls how the timeline is displayed. Slide it to the left to go down to a 1 frame view, or
slide it to the right to go to a Fit view. The timeline can be
viewed in 1 frame, 10 frame, 1 second, 2 second, 5 sec-
EZ Edit
Clips appear as colored blocks in the timeline. Blue blocks
represent clips with 48 kHz audio, green blocks represent
clips with 44.1 kHz audio, and yellow blocks represent clips
with 32 kHz audio.
ezdv.book Page 10 Tuesday, May 30, 2000 2:31 PM
7-10
CHAPTER: 7 EZ Edit
ond, 10 second, 15 second, 30 second, 1 minute, and Fit
scale.
Timescale slider
Scrubbing
You can scrub through the timeline by clicking and dragging the mouse in the time display area.
EZ Edit
Click and drag the mouse across the time display
If you have an Intellimouse (or compatible), you can also
use the scroll wheel to move frame-by-frame through the
timeline. Roll the wheel down to step forward, and roll the
wheel upward to step backward.
You can also use the Next frame and Previous frame buttons on the AVI controller to move from frame to frame.
ezdv.book Page 11 Tuesday, May 30, 2000 2:31 PM
CHAPTER: 7 EZ Edit
7-11
Shuttling
You can use the Shuttle bar on the AVI controller to shuttle
through video. Click the slider and drag it to quickly move
through the video.
Click and drag the slider to shuttle quickly through video
To shuttle through video using an Intellimouse (or compatible), click the wheel to go into Shuttle mode. Roll the wheel
down to shuttle forward. Roll the wheel up to shuttle in
reverse. The shuttle speeds are: 1/4 speed, 1/2 speed, 1x
speed, 2x speed, 4x speed, 8x speed, 10x speed, 20x
speed, and 40x speed.
Playing
You can play the timeline by hitting the Spacebar, or using
the controls on the AVI controller.
AVI controller
Arranging clips
To move a clip in the DV Bin, click on it and drag it over the
clip you want to move it before, then release the mouse
button.
EZ Edit
Working with Clips in the DV Bin
ezdv.book Page 12 Tuesday, May 30, 2000 2:31 PM
7-12
CHAPTER: 7 EZ Edit
Trimming clips
A clip in the bin is just a reference to a start and end point
in an AVI (or WAV) file. Thus, multiple clips in the bin can
point to different sections of the same AVI (or WAV) file.
You can trim a clip in the bin by double-clicking the clip or
right-clicking it and choosing Open EZ Video (or Open EZ
Audio) to open the clip in EZ Video (or EZ Audio) for trimming.
Removing clips
To remove a clip from the DV Bin, right-click on it and
choose Remove clip.
EZ Edit
Deleting clips from the hard drive
You can delete a clip from the hard drive by right-clicking
on it and choosing Delete file.
Be very careful when using this option, as the file cannot
be undeleted!
ezdv.book Page 13 Tuesday, May 30, 2000 2:31 PM
CHAPTER: 7 EZ Edit
7-13
Working with Video Clips in the Timeline
Arranging clips
To move a clip on the timeline, click on it and drag it to a
new position. You can also cut and paste clips using the
Cut, Copy, and Paste buttons on the toolbar.
Cut, Copy, and Paste buttons
Trimming clips
A video clip in the timeline is just a reference to a start and
end point in an AVI file. Thus, multiple clips in the timeline
can point to different sections of the same AVI file.
You can trim a clip on the timeline in one of four ways:
1. Drag the end of the clip using the mouse.
2. Right-click on the clip and choose Trim clip to bring up
the trimming dialog.
Any of the methods will work, it’s just a matter of individual
preference and situation. If you know the timecode you
want to trim at, the trimming dialog is the most efficient. If
you need to be precise and view the entire AVI file, opening
the clip in EZ Video is the most effective. If you just need to
shorten or lengthen the clip slightly, dragging the clip ends
is the fastest.
EZ Edit
3. Double-click the clip or right-click it and choose Open
EZ Video to open the clip in EZ Video for trimming.
4. Move the timeline cursor to the desired in or out point
and click the In or Out button on the AVI controller.
ezdv.book Page 14 Tuesday, May 30, 2000 2:31 PM
7-14
CHAPTER: 7 EZ Edit
Separating clips
You can separate a video clip into two clips by positioning
the timeline cursor at the point you want to separate the
clip, then clicking the Separate button on the toolbar, or by
right-clicking on the clip and choosing Separate from the
pop-up menu.
Click the Separate button on the toolbar
EZ Edit
Or choose Separate from the right-click menu
ezdv.book Page 15 Tuesday, May 30, 2000 2:31 PM
CHAPTER: 7 EZ Edit
7-15
Removing clips
To remove a clip from the timeline, right-click on it and
choose Delete.
The line in the middle of the clip represents its volume
level. To adjust the audio levels of your clips, click on the
EZ Edit
Adjusting Audio levels
ezdv.book Page 16 Tuesday, May 30, 2000 2:31 PM
7-16
CHAPTER: 7 EZ Edit
EZ Edit
line to add a node, then drag the node up or down to adjust
the level.
You can also adjust the levels of all the level points in a clip
by holding down the Shift key, placing the mouse cursor
over the audio line, and dragging up or down.
ezdv.book Page 17 Tuesday, May 30, 2000 2:31 PM
CHAPTER: 7 EZ Edit
7-17
You can adjust the levels of all the clips in the Main AV
track by holding down the Shift and Control keys, placing
the mouse cursor over the audio line, and dragging up or
down.
To delete an audio node, right-click on it and choose Delete
level point.
Working with Audio clips in the Timeline
Arranging clips
To move a clip on the timeline, click on it and drag it to a
new position. You can also cut and paste clips using the
Cut, Copy, and Paste buttons on the toolbar.
Cut, Copy, and Paste buttons
An audio clip in the timeline is just a reference to a start
and end point in a WAV file. Thus, multiple clips in the timeline can point to different sections of the same WAV file.
You can trim an audio clip in the timeline by double-clicking
the clip or right-clicking it and choosing Open EZ Audio to
open the clip in EZ Audio for trimming.
Separating clips
You can separate an audio clip into two clips by positioning
the timeline cursor at the point you want to separate the
EZ Edit
Trimming clips
ezdv.book Page 18 Tuesday, May 30, 2000 2:31 PM
7-18
CHAPTER: 7 EZ Edit
clip, then right-clicking on the clip and choosing Separate
from the pop-up menu.
Removing clips
To remove a clip from the timeline, right-click on it and
choose Delete Ex Audio.
EZ Edit
Adjusting Audio levels
The line in the middle of the clip represents its volume
level. To adjust the audio levels of your clips, click on the
ezdv.book Page 19 Tuesday, May 30, 2000 2:31 PM
CHAPTER: 7 EZ Edit
7-19
line to add a node, then drag the node up or down to adjust
the level.
You can also adjust the levels of all the level points in a clip
by holding down the Shift key, placing the mouse cursor
over the audio line, and dragging up or down.
Using the Insert AV track
The Insert AV track allows you to cut away to a separate
piece of video, then cut back.
Place a clip on the Insert AV track to insert it over the Main
AV video. Both audio tracks (Main AV and Insert AV)
remain audible unless you mute one.
EZ Edit
You can adjust the levels of all the clips in the Ex Audio
track by holding down the Shift and Control keys, placing
the mouse cursor over the audio line, and dragging up or
down.
ezdv.book Page 20 Tuesday, May 30, 2000 2:31 PM
7-20
CHAPTER: 7 EZ Edit
To position an Insert AV clip by its start frame, hold down
the Control key while dragging the clip.
EZ Edit
You can disable the Insert AV track (keep Insert video from
displaying) by clicking on the Insert AV label next to the
track. When the label is white, Insert AV is disabled. When
the label is black, Insert AV is enabled.
Click the Insert AV label to hide or show the Insert AV track
Note: When Main AV clips are added or deleted, the Insert
AV clips may no longer be at the same position corresponding to the Main AV clips. To prevent this from happening, make sure Ripple Editing is checked in the
Setting menu.
Using the Ex Audio tracks
The Ex Audio 1 and Ex Audio 2 tracks provide extra places
to add additional audio such as music to your production.
To add audio to the Ex Audio tracks, drag a WAV clip from
the DV Bin to one of the Ex Audio tracks.
ezdv.book Page 21 Tuesday, May 30, 2000 2:31 PM
CHAPTER: 7 EZ Edit
7-21
To position an Ex Audio clip by its first frame, hold down the
Control key while dragging the clip.
To position an Ex Audio clip by scrubbing a specific video
frame, position the timeline cursor at the frame you want to
scrub, then hold down the Shift key while dragging the clip.
Click the Ex Audio 1 or Ex Audio 2 label to mute or play
the track
Using 4-channel audio
Some DV devices support 4-channel 32kHz 12-bit audio.
EZ Edit
You can disable the Ex Audio 1 or Ex Audio 2 track (keep
Ex Audio from playing) by clicking on the Ex Audio 1 or Ex
Audio 2 label next to the track. When the label is white, the
track is disabled. When the label is black, the track is
enabled.
ezdv.book Page 22 Tuesday, May 30, 2000 2:31 PM
7-22
CHAPTER: 7 EZ Edit
To capture the extra channels from tape, make sure Capture audio from track 3 and 4 is checked in the Settings
menu, and use Batch or Seamless capture to capture the
video. For each AVI file captured, there will be a corresponding WAV file with the same name. The AVI file will
have the audio from channels 1 and 2 along with the video,
and the additional WAV file will have the audio from channels 3 and 4.
To output the extra channels to tape, put the WAV clip for
channel 3 and 4 in the Ex Audio 2 line and make sure
Record to track 3,4 from Ex Audio 2 (32kHz) is checked
in the Settings menu. Also make sure that the Playback
audio sampling rate option is set to 32kHz 12-bit in the
Settings menu.
Adding Graphics and Backgrounds
EZ Edit
EZ Edit allows you to add colors clips (solid colors and gradients) and bitmap graphic files. These files can be placed
into either the Main AV or Insert AV tracks and work almost
identically to video clips. In addition, you can also make
transitions into these files and title over the top of them.
Adding a color clip
1. Add a color clip, click the Add color clip to bin window
button on the Toolbar, or choose Add color clip to bin
window from the Edit menu.
Add color clip to bin window button
2. The Color Clip dialog will appear. Click on a color box to
select a color. For a solid color, make sure the Colors
box is set to 1. For a gradient, set Colors to 2 or more.
and set the gradient direction using the Direction radio
buttons.
3. After you have defined your color clip click OK, the color
clip will be placed into the DV Bin. At this point you can
drag the color clip into the timeline.
ezdv.book Page 23 Tuesday, May 30, 2000 2:31 PM
CHAPTER: 7 EZ Edit
Color combination
7-23
Gradient direction
Color boxes
Clip duration
Color clips and still images can
be placed in the Main AV
or Insert AV tracks
EZ Edit
Adding a still image
To add a still image, load it into the DV Bin just like a normal clip and drag it on to the Main AV or Insert AV track.
Working with color clips and still images
Color clips and still images work the same was as video
clips in the timeline. The only exception is that you cannot
open them in EZ Video.
ezdv.book Page 24 Tuesday, May 30, 2000 2:31 PM
7-24
CHAPTER: 7 EZ Edit
Adding Transitions
Transitions can be added between clips on the Main AV
line. The first clip is often referred to as Video A and the
second clip is often referred to as Video B.
There are two ways to add a transition:
1. Click the Add transition button on the toolbar.
Add transition button
2. Right-click and select a transition duration from the popup menu.
EZ Edit
3. Choose a transition duration from the Effects menu.
You can also have EZ Edit add the default transition to all
separation points on the Main AV track that do not already
ezdv.book Page 25 Tuesday, May 30, 2000 2:31 PM
CHAPTER: 7 EZ Edit
7-25
have transitions by choosing Set all clips from the Effect
menu.
To change the settings of a transition on the timeline, double-click it or right-click it and choose Settings.
The transition dialog will appear.
EZ Edit
ezdv.book Page 26 Tuesday, May 30, 2000 2:31 PM
7-26
CHAPTER: 7 EZ Edit
Choose a transition from the list. There are 14 transitions
that come with EZ Edit. If you have other transition plug-ins
for EZ Edit (such as SoftXplode), those transitions will
appear on the list as well.
You can change the duration of the selected transition by
changing the number in the Duration box.
You can bring up the configuration settings for the selected
transition by clicking the Config button.
EZ Edit
Transition settings
For a detailed explanation of each transition’s options, see
the Transition Settings section of this chapter.
ezdv.book Page 27 Tuesday, May 30, 2000 2:31 PM
CHAPTER: 7 EZ Edit
7-27
Adding Titles
To add a title to your production, click the Add title/Edit
title button on the toolbar, or right-click in the Title track
and choose Edit title from the pop-up.
Click the Add title/Edit title button
Or choose right-click in the Title track and choose Edit title
The Titling interface will appear.
EZ Edit
Titling interface
ezdv.book Page 28 Tuesday, May 30, 2000 2:31 PM
7-28
CHAPTER: 7 EZ Edit
Entering Title Text
Enter text in the title display by double-clicking the block.
You can enter text from the keyboard or paste from the clipboard. You can use any Windows TrueType font that is
installed on your system.
Positioning Titles
Click the mouse outside of the title text, so the box appears
with a dotted line. Click and drag the title where you want it
to be.
Title Attributes
Font
Select type-face, style, size
and alignment.
Fill square fills the font
location with a solid rectangle
of color
Emboss
There are 2 emboss styles:
Inside, fits the effect within the
Filter & Edge determine the
thickness of the emboss
character outline.
EZ Edit
Outside, puts the effect outside
the character outline.
Light determines where the
light source is located for
highlight
Shadow
There a 3 shadow styles:
Projection, is a drop shadow
Slant, is a cast shadow
Perspective, is a shadow with a
vanishing point.
SourceH/ShadowH/Tilt/Dist
determines height relationship
between the light source and
shadow
New adds a new title line
H & S adjusts the hard edge and
Copy copies the title line
soft edge properties of the
Del deletes current line
shadow.
Preview preview-render the
page
Up/Down moves the selected
text line up or down in layers
Center (V) & (H) centers the title
on screen
The title attributes tab allows you to change various settings of the title text. You can specify the font, add emboss-
ezdv.book Page 29 Tuesday, May 30, 2000 2:31 PM
CHAPTER: 7 EZ Edit
7-29
ing, add a shadow, and center the title horizontally or
vertically from this dialog.
Title Color
The color tab allows you to set the color properties of the
font, edge and the shadow. You can also set transparency
for the font, edge, and shadow.
Colors determines the color
of the font.
1 is a solid color
2 is a gradient between 1 and 2
3 is a combination of 1, 2 and 3
4 is a combination of 1, 2, 3 and 4
Transparency adjusts the
degree of transparency
100 is solid, 0 is transparent.
Characters, shadows and
edges can be transparent.
To change the box color click
on one of the boxes.
Direction adjusts the
direction of the gradient fill
Note: Fonts, Edges and Shadows
can all be set in the same way
using solid colors, gradients and
transparency.
Screen allows you to preview
the title over either: the video,
a black background or, a
white background
Title Back displays a white
background to help you see the
complete title if the video and
title are too similar in color.
Title Motion
After you have created a title and selected its font and
shadow characteristics you are ready to add motion to
move your title on-screen.
EZ Edit
Guideline display’s a safe titling
area to make sure your titles
display within the video
picture.
ezdv.book Page 30 Tuesday, May 30, 2000 2:31 PM
7-30
CHAPTER: 7 EZ Edit
Title motion is separate into 3 segments: In motion, Hold
and Out motion.
In motion
Hold
Out motion
These three segments can be adjusted manually by dragging the boundaries which separate them. You can also
adjust the In motion, Hold and Out motion in the Motion tab
of the Titling dialog.
EZ Edit
In point displays the in-point
of the title in the timeline. To
adjust this setting you can:
1/ manually enter the in-point
2/ use the AVI controller and
play the production and click
Set In point.
Motion displays the title motions
you can use. In motion refers to
the motion when the title comes
on screen. Out motion refers
to the motion when the title
leaves the screen.
Start/end in motion adjust the
Start/end point of the title clip.
Click this button if you have
scrubbed to a new title in or
out point.
Loop play will play the current
video clip as defined by the
title duration. In the example to
the right the clip will loop
from start to end
for 3;01 seconds.
Hold displays the hold-time for
the title after it come son screen.
Go in start/end goes to the end or
start of the title In motion.
Go out start/end goes to the end o
start of the title In motion.
ezdv.book Page 31 Tuesday, May 30, 2000 2:31 PM
CHAPTER: 7 EZ Edit
7-31
Working with title layers
A single title can have multiple layers of text. Each layer
can have text of different attributes. However, all layers
share the same Motion settings.
The title shown above was created by doing the following
steps.
1. Create a new title.
2. Enter the text “Foo” in the title box.
3. Move the title box to the upper left area of the screen.
4. Add a drop-shadow and emboss
EZ Edit
Layered title example
ezdv.book Page 32 Tuesday, May 30, 2000 2:31 PM
7-32
CHAPTER: 7 EZ Edit
5. Click the New button to create a new title layer.
6. A new box appears. Enter “Bar” in the box.
7. Change the font to a different font.
EZ Edit
8. Change the color of the title in the Color tab.
9. Move the title to the lower right area of the screen.
10.Click the New button again to create another title layer.
11.Enter “XXXXX” in the box. The text doesn’t matter - just
the width.
ezdv.book Page 33 Tuesday, May 30, 2000 2:31 PM
CHAPTER: 7 EZ Edit
7-33
12.Click the Fill Square button, this will change the title
from text to a filled square.
13.Change the color of the square in the Color tab.
14.Move the box so it overlaps part of the “Foo” text.
15.Click the Preview button to see the title. Notice how the
box covers some of the “Foo” text.
EZ Edit
16.Move the box under the “Foo” text by clicking the Down
button until it appears below the “Foo” text.
ezdv.book Page 34 Tuesday, May 30, 2000 2:31 PM
7-34
CHAPTER: 7 EZ Edit
17.Click the Preview button again to view the completed
title.
Creating scrolling titles
EZ Edit
It’s easy to create titles that scroll across the screen.
1. Create a new title.
2. Enter enough lines in the title so it takes more space
than the screen. Increase the font size if necessary.
3. Click the Center (V) and Center (H) to center the title
vertically and horizontally.
4. Switch to the Motion tab.
5. Enter 00:01:00;00 in the In Motion Time box. This will
set the In motion to 1 minute.
6. Enter 00:00:00;00 in the Hold box. This will set the Hold
time to 0, since we don’t want the title to stop.
ezdv.book Page 35 Tuesday, May 30, 2000 2:31 PM
CHAPTER: 7 EZ Edit
7-35
7. Enter 00:01:00;00 in the Out Motion Time box. This will
set the Out motion to the same time as the In motion.
This is important, otherwise the In and Out scroll
speeds will be different.
8. Choose Slide Up as both the In Motion and the Out
Motion.
9. Click OK to accept and close the title.
10.Render the title.
11.Play the section of the timeline with the title. You will
see it scroll upward across the screen.
You can have a title scroll down, left, or right by changing
the In and Out motions from Slide Up to Slide Left, Slide
Right, or Slide Down.
Note: You can accomplish the same effect as the steps
above by setting the In motion time to 2 minutes, setting
the Hold and Out motion times to 0, and moving the title so
it is located completely above the screen instead of clicking
Center (V) and Center (H) in step 3.
Alternatively, you could set only the Out motion time and
position the title below the screen.
Using a Title as a Logo tag
EZ Edit
You can use a semi-transparent title as a logo tag in the
video.
1. Create a new title.
2. Position it somewhere on the screen.
3. Set an Inside emboss to make the title a bit more
defined.
ezdv.book Page 36 Tuesday, May 30, 2000 2:31 PM
7-36
CHAPTER: 7 EZ Edit
4. Change the body Transparency setting in the Color tab
to 20. This will make the title mostly transparent.
5. Click OK to accept the title.
6. Render the title.
7. Play the timeline to view the logo tag you made.
Using a Fill Square to colorize video
EZ Edit
You can use a large semi-transparent fill square to colorize
all or part of the video frame.
1. Create a new title.
2. Enter some text and make it large enough to occupy a
good portion of the screen.
3. Check the Fill square checkbox.
4. Set the Transparency setting in the Color tab to 30.
ezdv.book Page 37 Tuesday, May 30, 2000 2:31 PM
CHAPTER: 7 EZ Edit
7-37
5. Click the Preview button to preview the colorization
effect.
Saving and Loading Title data
You can save a title to a Title Data File (.TDF) for use in
other EZ Edit projects. Right click the title and choose
Save to file from the menu.
You can also add title data files to the DV Bin as clips.
Batch and Seamless Capture
Please refer to the EZ Video chapter for an explanation of
Batch and Seamless capture.
EZ Edit
To load a Title Data File (.TDF) into the title track, rightclick on the title track and choose Load from file.
ezdv.book Page 38 Tuesday, May 30, 2000 2:31 PM
7-38
CHAPTER: 7 EZ Edit
Remote Capture
In addition to batch and seamless capture, EZ Edit supports a feature called remote capture.
In Remote capture mode,
1. Open Raptor Edit and manually put your camera into
camera or photo mode.
2. Select Capture to hard disk when recording to DV
camera from the Settings pull-down menu.
EZ Edit
Remote capture
Remote capture option
3. When you are in Remote mode the camera record button starts and stops the computer capture sequence.
The complete capture goes to one file.
4. When finished capturing, click the Stop button on the
AVI controller.
Outputting your Production to Tape
SyncRecord
The following steps will output your timeline to tape using
SyncRecord.
ezdv.book Page 39 Tuesday, May 30, 2000 2:31 PM
CHAPTER: 7 EZ Edit
7-39
1. Verify that all transitions and titles have been rendered.
There should be no red blocks on the timeline.
If one or more items are not rendered, you can click the
Render all effects on time line button in the toolbar to
render them all.
Click the Render all effects button if it is not grayed out
2. Insert a blank tape into your DV device. Make sure it is
not write-protected.
3. Click the SyncRecord button on the Deck controller.
EZ Edit will rewind the tape, then record the timeline to
the tape.
Manual Record
Click the Render all effects button if it is not grayed out
2. Insert a blank tape into your DV device. Make sure it is
not write-protected.
3. Click the Play button on the AVI controller to start playback of the timeline.
EZ Edit
The following steps will output your timeline to tape using
Record.
1. Verify that all transitions and titles have been rendered.
There should be no red blocks on the timeline.
If one or more items are not rendered, you can click the
Render all effects on time line button in the toolbar to
render them all.
ezdv.book Page 40 Tuesday, May 30, 2000 2:31 PM
7-40
CHAPTER: 7 EZ Edit
4. Click the SyncRecord button on the Deck controller.
EZ Edit will rewind the tape, then record the timeline to
the tape.
5. When you are done, click the Stop button on the Deck
controller to stop recording.
Creating AVI files from the timeline
Most times you would output a completed project directly
from the timeline using SyncRecord or Manual Record.
EZ Edit
However, there may be instances when you need to save
the timeline as an AVI. For example, you may want to combine two projects together, or use the edited video in
another program.
There are two options for creating an AVI from the timeline,
Create AVI file from timeline and Create ref. AVI file
from timeline. Which option you use largely depends on
the length of your timeline and what you plan to do with the
outputted AVI file.
Create AVI file from timeline will create a new AVI file that
contains all the audio and video data from the timeline.
This AVI file can be moved to another machine and used. If
your timeline is longer than 2 gigabytes (about 9 minutes),
only the first 2 gigabytes of the timeline will be output. If
your timeline is longer than 2 gigabytes (about 9 minutes)
you will need to create a reference AVI instead.
ezdv.book Page 41 Tuesday, May 30, 2000 2:31 PM
CHAPTER: 7 EZ Edit
7-41
To create a AVI from the timeline, choose Create AVI file
from timeline in the File menu.
The Create AVI file from timeline dialog will appear.
EZ Edit
Give the file a name and click the Save button.
Create ref. AVI file from timeline will create a reference
AVI file that contains only pointers to the files that contain
the audio and video data from the timeline. This AVI file
relies on the clip files and rendered temporary files of the
project. It cannot be moved to another machine without
duplicating the same drive and directory structure on the
other machine. However, reference AVI files take up very
little space, and can be of unlimited length. Creating reference AVIs of projects is useful when you need to join or
combine projects.
ezdv.book Page 42 Tuesday, May 30, 2000 2:31 PM
7-42
CHAPTER: 7 EZ Edit
To create a reference AVI from the timeline, choose Create
ref. AVI file from timeline in the File menu.
EZ Edit
The Create reference AVI file from timeline dialog will
appear.
Give the file a name and click the Save button.
Reference AVI files and the 2-gigabyte AVI
filesize limit
Standard AVI files have a size limitation of 2 gigabytes.
This corresponds to slightly over 9 minutes (depending on
audio sampling rate) of video captured using EZDV.
EZDV overcomes this limitation with Reference AVI technology. Reference AVI files are small AVI files that “point” to
other files that contain the actual video data.
ezdv.book Page 43 Tuesday, May 30, 2000 2:31 PM
CHAPTER: 7 EZ Edit
7-43
When creating a Reference AVI file, the system makes a
single AVI file that references the finished project data files.
Reference AVI files maintain absolute paths to their data
files. This means that it remembers the entire drive and
directory path to the data files. Do not move the data files
of a Reference AVI! If the data files are moved, the Reference AVI will not play back properly.
If you try to output a timeline that is larger than 2 gigabytes
(about 9 minutes), you must output a Reference AVI file.
EZ Edit
ezdv.book Page 44 Tuesday, May 30, 2000 2:31 PM
7-44
CHAPTER: 7 EZ Edit
Interface In-depth
Toolbar
The toolbar contains buttons for many commonly used
menu items.
Toolbar (left side)
The functions of the toolbar buttons are as follows:
Clears the current bin and timeline and creates
New
a new project.
Open
Opens an existing project file.
Save
Saves the project file.
EZ Edit
Add clip to bin window
Opens the Add clip to bin window dialog.
Add color clip to bin window
Opens the Color clip dialog to add a color clip to
the DV Bin.
Open EZ Video
Opens EZ Video.
Open EZ Audio
Opens EZ Audio.
Batch capture/Seamless capture
Opens the Batch/Seamless capture dialog.
Close all edit windows
Closes any EZ Video or EZ Audio instances that
were launched from EZ Edit.
Cut
Cuts the selected clip from the timeline and
moves it to the clipboard.
ezdv.book Page 45 Tuesday, May 30, 2000 2:31 PM
CHAPTER: 7 EZ Edit
Copy
clipboard.
Copies the selected clip in the timeline to the
Paste
line.
Pastes the clip on the clipboard into the time-
Separate
Separates the clip at the timeline cursor.
7-45
Toolbar (right side)
Add transitionAdds the default transition to the separation
nearest to the timeline cursor.
Add fade in Adds a fade in (from black) to the separation
nearest to the timeline cursor.
Add fade out Adds a fade out (to black) to the separation
nearest to the timeline cursor.
Add title/Edit title
Opens the title GUI to add or edit a title at the
timeline cursor position.
Undo
Undo the last action.
Redo
Redo the action that was undone.
1/2 Preview size
Sets the preview window to 1/2 size.
Full Preview size
Sets the preview window to full size.
Restore previous preview size
Restores the preview window to the previous
size.
EZ Edit
Render all effects on time line
Renders all the transitions and titles on the time
line.
ezdv.book Page 46 Tuesday, May 30, 2000 2:31 PM
7-46
CHAPTER: 7 EZ Edit
Timeline
See the Timeline section earlier in the chapter.
Deck controller
The Deck controller lets you control the connected DV deck
through the i.LINK interface.
Deck controller
Stop
Stops the Deck.
Play
Starts playback on the deck.
Pause
Pauses the deck.
EZ Edit
Pressed when the DV deck is stopped, it will
Rewind
rewind the tape.
Pressed when the DV deck is playing, it will go
into reverse-scan mode.
Previous frame
Moves the deck one frame back.
Shuttle controller
The shuttle controller lets you play the tape forward or backward at varying speeds. There are five
stops on either side of the middle.
Drag the slider to the left to play backward, drag
it to the right to play forward. The playback speeds will depend on your DV
deck, but the stops are generally 1/10 speed, 1/5 speed, 1x, 2x, and 20x.
Next frame
Moves the deck one frame forward.
Forward
Pressed when the DV deck is stopped, it will
fast-forward the tape.
Pressed when the DV deck is playing, it will go
into forward-scan mode.
ezdv.book Page 47 Tuesday, May 30, 2000 2:31 PM
CHAPTER: 7 EZ Edit
7-47
Record
Starts recording on the deck.
SyncRecord
Starts SyncRecord on the deck. SyncRecord
will record the timeline to the deck automatically.
AVI Controller
The AVI Controller provides playback controls for the timeline.
Stop
Stop playback of the timeline.
Play
Play the timeline from the timeline cursor.
Top frame
Go to the beginning of the timeline.
Previous clip
Jump to the previous clip.
Previous frame
Moves the timeline cursor one frame back.
Next frame
Moves the timeline cursor one frame forward.
Scroll timeline right
Scrolls the timeline to the right.
Bottom frame
Go to the end of the timeline.
Marks the current timeline cursor point as the In
Mark in
point for the clip.
EZ Edit
Scroll timeline left
Scrolls the timeline to the left.
ezdv.book Page 48 Tuesday, May 30, 2000 2:31 PM
7-48
CHAPTER: 7 EZ Edit
Marks the current timeline cursor point as the
Mark out
out point for the clip.
The shuttle bar allows you to quickly move
Shuttle Bar
through the timeline. Drag the slider to move through the timeline.
Status Bar
The status bar lists pertinent information about the timeline.
AVI/DV indicator
Status
Position
Total time
Audio sampling rate
AVI/DV indicator
Displays AVI if the position information is for the timeline or
DV if the position information is for the deck.
Status
Displays the status of the deck or timeline.
Displays the time position and frame position of the deck or
Position
timeline cursor.
EZ Edit
Total time Displays the total time length of the timeline in hours, minutes, seconds, frames and in number of frames.
Audio sampling rate
Displays the sampling rate of the timeline.
ezdv.book Page 49 Tuesday, May 30, 2000 2:31 PM
CHAPTER: 7 EZ Edit
7-49
Menu options
File Menu
Recent file list
New
Clears the current bin and timeline and creates a new project.
Open
Opens an existing project file.
Add clip to bin window
Opens the Add clip to bin window dialog to load clips into the
DV bin.
Save
Saves the project file.
Save as... Saves the project file to a new file.
Batch capture/Seamless capture
Opens the Batch capture/Seamless capture dialog. See the
EZ Video chapter for more information.
Create AVI from timeline
Creates a new AVI file from the timeline. If the timeline is over
2 gigabytes (about 9 minutes), only the first 2 gigabytes will be saved
to the new AVI. Consider creating a Reference AVI instead.
Create ref. AVI from timeline
Creates a reference AVI file from the timeline. The reference
AVI can be of unlimited length, however it is only a pointer to the clips
and rendered files. Please refer to the section on Reference AVIs and
the 2 gigabyte AVI limit in this chapter.
EZ Edit
Load the playlist file
Opens an EZ Video playlist file and brings its clips into the DV
bin and Timeline.
ezdv.book Page 50 Tuesday, May 30, 2000 2:31 PM
7-50
CHAPTER: 7 EZ Edit
Clear all temporary files
Clears all the temporary files for this project.
Clear all unused temporary files
Clears any unused temporary files for this project (rendered
transitions that were subsequently deleted, etc).
Recent file list
Provides quick opening of recent files.
Quits out of EZ Edit.
Exit
EZ Edit
Edit menu
Undo
Undo the last action performed.
Redo
Redo the undone action.
Delete
Deletes the selected clip from the timeline.
Cut
Cuts the selected clip from the timeline and puts it on the clipboard.
Copy
Copies the selected clip to the clipboard.
Paste
Pastes the clip on the clipboard to the timeline.
Paste to bin window
Pastes the clip on the clipboard to the DV Bin.
Separate
Separates the clip at the timeline cursor.
ezdv.book Page 51 Tuesday, May 30, 2000 2:31 PM
CHAPTER: 7 EZ Edit
7-51
Paste transition
Pastes the transition on the clipboard to the timeline.
Paste title Pastes the title on the clipboard to the timeline.
Search
Jump
Opens the Jump dialog to jump to a particular time or frame.
Jump to previous scene
Searches for and moves the timeline cursor to the previous
scene (if any).
Jump to next scene
Searches for and moves the timeline cursor to the next scene
(if any).
Jump to previous index
Moves the timeline cursor to the previous index point (if any).
Jump to next index
Moves the timeline cursor to the next index point (if any).
Set In PointSets the timeline cursor position as the In point for the current
clip.
Set Out Point
Sets the timeline cursor position as the Out point for the current clip.
Trim clip... Opens the Trim clip dialog to manually trim a clip by frame or
timecode.
Auto arrange clips
Arranges the clips in the DV bin on to the Main AV track.
Auto arrange clips in reverse order
Arranges the clips in the DV bin on to the Main AV track in
reverse order.
Add clips on Main AV to bin window
Adds the clips on the Main AV track to the DV bin.
Clear bin window
Clears the DV bin of clips. The timeline will not be changed.
Clear timeline
Clears the timeline. The DV bin will not be changed.
EZ Edit
Add color clip to bin window
Opens the Color clip dialog to add a color clip to the bin window.
ezdv.book Page 52 Tuesday, May 30, 2000 2:31 PM
7-52
CHAPTER: 7 EZ Edit
EZ Edit
Effects menu
Transition
1/2 sec
Adds a 1/2 second default transition.
1 sec
Adds a 1 second default transition.
2 sec
Adds a 2 second default transition.
3 sec
Adds a 3 second default transition.
4 sec
Adds a 4 second default transition.
5 sec
Adds a 5 second default transition.
Default
Adds a default transition with the length.
Start from here
Adds the default transition starting from the timeline cursor.
End here
Adds the default transition ending at this point.
Set all clips
Adds the default transition with default duration to all separation points that do not already have transitions.
Fade in
1/2 sec
Adds a 1/2 second fade in.
1 sec
Adds a 1 second fade in.
2 sec
Adds a 2 second fade in.
3 sec
Adds a 3 second fade in.
4 sec
Adds a 4 second fade in.
5 sec
Adds a 5 second fade in.
ezdv.book Page 53 Tuesday, May 30, 2000 2:31 PM
CHAPTER: 7 EZ Edit
7-53
Fade out
1/2 sec
Adds a 1/2 second fade out.
1 sec
Adds a 1 second fade out.
2 sec
Adds a 2 second fade out.
3 sec
Adds a 3 second fade out.
4 sec
Adds a 4 second fade out.
5 sec
Adds a 5 second fade out.
Title
Opens the titling GUI to add titles.
Render
Renders the transition or title.
Settings menu
EZ Edit
Repeat playback
When checked, playback will repeat from the beginning of the
timeline when it hits the end.
When unchecked, playback will stop at the end of the timeline.
Correct Square Pixel
When checked, the on-screen display will be corrected to display the DV video as it would look on a television or video monitor.
When un-checked, the on-screen DV video will be slightly different from the image viewed on a television or video monitor.
It is best to leave this option checked.
Record to track 3,4 from Ex Audio 2 (32kHz)
When checked, the audio on Ex Audio 2 will be recorded to
channels 3 and 4 of the DV tape (4-channel 32kHz 12-bit audio
mode).
ezdv.book Page 54 Tuesday, May 30, 2000 2:31 PM
7-54
CHAPTER: 7 EZ Edit
When unchecked, the audio on Ex Audio is mixed with the
rest of the audio and output to channel 1 and 2 of the DV tape.
EZ Edit
Playback audio sampling rate
48 kHz 16bit
Specifies that the timeline should be played with 48 kHz 16bit audio. Any audio that is not 48 kHz, 16-bit, will be upsampled as
necessary.
This is the best setting to use unless you are outputting 4channel 32 kHz audio.
44.1 kHz 16bit
Specifies that the timeline should be played with 44.1 kHz 16bit audio. Any audio that is not 44.1 kHz, 16-bit, will be upsampled or
downsampled as necessary.
32 kHz 16bit
Specifies that the timeline should be played with 32 kHz 16bit audio. Any audio that is not 32 kHz, 16-bit, will be upsampled or
downsampled as necessary.
32 kHz 12bit
Specifies that the timeline should be played with 32 kHz 12bit audio. Any audio that is not 32 kHz, 12-bit, will be downsampled
as necessary.
Ripple editing
When checked, Insert AV clips, titles, and Ex Audio clips will
move with the corresponding Main AV clip location when a Main AV
clip is added or deleted from the Main AV track. Ripple editing keeps
Insert AV clips, titles, and Ex Audio clips synced to the proper positions.
When unchecked, if a Main AV clip is added or removed only
clips in the Main AV track will shift.
It is generally good to keep this option checked.
Default edit settings...
Opens the Default edit settings dialog to set or change edit
defaults.
Capture audio from track 3 and 4
When checked, audio from channel 3 and 4 on the tape (4channel 32 kHz 12-bit audio) will be captured to a separate WAV file
simultaneously with the AVI capture in EZ Edit. The separate WAV
file can be synced to the corresponding AVI clip to get all four channels of audio.
When unchecked, audio from channel 3 and 4 will not be captured.
Capture without audio track
When checked, DV audio will not be copied to the AVI audio
track.
When unchecked, DV audio is copied to the AVI audio track
for compatibility.
ezdv.book Page 55 Tuesday, May 30, 2000 2:31 PM
CHAPTER: 7 EZ Edit
7-55
Check this option only if you need to capture a clip with
mixed sampling rates and are getting “Invalid DV data” errors.
Capture to hard disk when recording to DV camera
When checked, recording to the hard disk will start and stop
with recording on the camera.
When unchecked, recording to the hard disk occurs independently from the record status of the camera.
Capture as reference AVI file
When checked, EZ Edit will capture Reference AVI files,
which can be of unlimited length. See the section about Reference
AVI files in the EZ Video chapter for more information.
When un-checked, EZ Edit will capture standard AVI files,
which are limited to 2 gigabytes (a little over 9 minutes).
EZDV properties...
Opens the EZDV properties dialog.
EZ Edit
Time scale
1 Frame
Sets the timeline scale to 1 frame.
10 Frames
Sets the timeline scale to 10 frames.
1 Second
Sets the timeline scale to 1 second.
2 Seconds
Sets the timeline scale to 2 seconds.
5 Seconds
Sets the timeline scale to 5 seconds.
10 Seconds
Sets the timeline scale to 10 seconds.
15 Seconds
Sets the timeline scale to 15 seconds.
30 Seconds
Sets the timeline scale to 30 seconds.
1 Minute
Sets the timeline scale to 1 minute.
Fit
Sets the timeline scale to whatever value is necessary for the
entire timeline to be visible on the screen.
ezdv.book Page 56 Tuesday, May 30, 2000 2:31 PM
7-56
CHAPTER: 7 EZ Edit
View Menu
Tool Bar
Toggles display of the Tool bar.
Deck Controller
Toggles display of the Deck controller.
Control Bar
Toggles display of the AVI controller.
Status Bar
Toggles display of the Status bar.
EZ Edit
Small thumbnails in bin window
When checked, small thumbnails are used in the bin window.
When unchecked, large thumbnails are used in the bin window.
Small thumbnails in timeline
When checked, small thumbnails are used in the Film track.
When unchecked, large thumbnails are used in the Film
track.
Always show Main AV track
When checked, the Main AV track will be “locked” on to the
interface. When not all tracks are shown and the tracks are scrolled,
Main AV will remain locked at the top.
When unchecked, the Main AV track will scroll with the
remaining tracks if not all tracks are shown.
Show thumbnails in timeline
When checked, the Film track shows thumbnails of the video
at varying intervals.
When unchecked, the Film track is hidden and no thumbnails
are shown.
ezdv.book Page 57 Tuesday, May 30, 2000 2:31 PM
CHAPTER: 7 EZ Edit
7-57
Help menu
About...
tion.
Opens the About dialog to display software version informa-
EZ Edit
ezdv.book Page 58 Tuesday, May 30, 2000 2:31 PM
7-58
CHAPTER: 7 EZ Edit
Dialogs
Batch capture/Seamless capture
Please refer to the EZ Video chapter for an explanation of
Batch capture/Seamless capture.
EZ Edit
Trim clip
In
Sets the In point for the clip in hours, minutes, seconds, and
frames or by frame count.
Out
Sets the Out point for the clip in hours, minutes, seconds, and
frames or by frame count.
Duration Sets the Duration for the clip in hours, minutes, seconds, and
frames or by frame count.
For non-Main AV clips, sets the start position of the clip in
Begin
hours, minutes, seconds, and frames or by frame count.
OK
Accept the changes to the In, Out, Duration, and Begin points
and close the dialog.
Cancel
Cancel changes and close the dialog.
ezdv.book Page 59 Tuesday, May 30, 2000 2:31 PM
CHAPTER: 7 EZ Edit
7-59
Jump...
Jump to
OK
Jump to a specific timecode or frame number in the timeline.
Close the dialog and jump to the specified timecode or frame
number.
Cancel
Close the dialog and do nothing.
Default Edit Settings - Default Settings
Fade in color
Transition
Type
Displays the default transition type.
Settings button
Brings up the Transition dialog to select the default transition.
Duration
Sets the duration of the default transition in hours, minutes,
EZ Edit
Fade out color
ezdv.book Page 60 Tuesday, May 30, 2000 2:31 PM
7-60
CHAPTER: 7 EZ Edit
seconds, and frames.
Fade out audio on A checkbox
When checked, audio on the first clip will automatically be set
to fade out during the transition.
When unchecked, audio levels on the first clip will not be
changed.
Fade in audio on B checkbox
When checked, audio on the second clip will automatically be
set to fade in during the transition.
When unchecked, audio levels on the second clip will not be
changed.
EZ Edit
Fade in / out
In
Sets the default duration for fade in, in hours, minutes, seconds, and frames.
Fade in color
Click to set the default Fade in color.
Fade in audio checkbox
When checked, audio is automatically set to fade in when a
fade in is added.
Out
Sets the default duration for fade out, in hours, minutes, seconds, and frames.
Fade out color
Click to set the default Fade out color.
Fade out audio checkbox
When checked, audio is automatically set to fade out when a
fade in is added.
Still image
Duration
Sets the default duration for still images in hours, minutes,
seconds, and frames.
Title
In
Sets the default In Motion duration for titles in hours, minutes,
seconds, and frames.
Hold
Sets the default Hold duration for titles in hours, minutes, seconds, and frames.
Out
Sets the default Out Motion duration for titles in hours, minutes, seconds, and frames.
OK
Accept changes and close the dialog.
Cancel
Cancel changes and close the dialog.
ezdv.book Page 61 Tuesday, May 30, 2000 2:31 PM
CHAPTER: 7 EZ Edit
7-61
Default Edit Settings - Default Settings
Drive selector
Total time Displays the total storage time of all temporary drives in the
list.
Add button
Click the Add button to add the selected drive to the temporary drives list.
Up position button
Click a drive entry and click the Up position button to move it
up in the list (higher priority).
Down position button
Click a drive entry and click the Down position button to move
it down in the list (lower priority).
Delete button
Click a drive entry and click the Delete button to remove it
from the temporary drives list.
OK
Accept changes and close the dialog.
Cancel
Cancel changes and close the dialog.
EZ Edit
Drive selector
Select a drive from the drop-down to add it to the list.
ezdv.book Page 62 Tuesday, May 30, 2000 2:31 PM
7-62
CHAPTER: 7 EZ Edit
EZ Edit
EZDV properties... - Sync Rec
Offset Time
Start Point
Sets the number of frames early or late that AVI file playback
should occur when doing a SyncRecord.
The default is for the AVI file to start playing 5 frames after the
DV deck has been set to start recording. This assumes that it takes 5
frames of time for the DV deck to actually engage the recording head
and start recording.
End Point
Sets the number of frames early or late that the DV deck
should stop recording.
The default is for the DV deck to get the Stop command 5
frames before the end of the AVI file. This assumes that it takes 5
frames of time for the DV deck to actually disengage the recording
head and stop recording.
Record Position on Tape
Steps
Sets the default recording position when SyncRecording from
a paused frame. The default is for recording to start at the paused
frame.
Return to default button
Returns the settings for this tab to the defaults.
ezdv.book Page 63 Tuesday, May 30, 2000 2:31 PM
CHAPTER: 7 EZ Edit
7-63
OK button Apply the current Sync Rec and Detailed Settings settings
and close the window.
Cancel button
Cancel the current changes to the Sync Rec and Detailing
Settings settings and close the window.
EZDV properties... - Detailed Settings
Count Dropped Frames in Time Display checkbox (NTSC only)
When checked, 29.97 fps drop-frame timecode is used.
When unchecked, 30 fps non-drop-frame timecode is used.
This option affects all timecode entry and calculations.
Except in special cases, this option should be checked.
Field during pause
FRAME
When AVI playback is paused, the frame (both fields) is
shown.
There may be some jitter apparent in the display when
FRAME is selected for pause. This does not affect DV output.
ODD
When AVI playback is paused, only the odd field is
shown.
Use this option to eliminate jitter in the display on
paused playback. This does not affect DV output.
EVEN
EZ Edit
Video
ezdv.book Page 64 Tuesday, May 30, 2000 2:31 PM
7-64
CHAPTER: 7 EZ Edit
When AVI playback is paused, only the even field is
shown.
Use this option to eliminate jitter in the display on
paused playback. This does not affect DV output.
YUV and RGB Conversions
Expand RGB range to 150% checkbox
When checked, the luminance and chrominance ranges are
increased during conversion to RGB.
When unchecked, the standard DV Blue Book conversion
method (which limits the RGB range) is used.
This option has no effect on programs which edit in YUV colorspace, such as EZ Edit. However, for programs which use RGB
colorspace, setting this option may help increase the video quality of
AVIs created in those programs.
Return to default button
Returns the settings for this tab to the defaults.
OK button Apply the current Sync Rec and Detailed Settings settings
and close the window.
Cancel button
Cancel the current changes to the Sync Rec and Detailing
Settings settings and close the window.
EZ Edit
AVI Properties - File Information
File Name Name of the file.
ezdv.book Page 65 Tuesday, May 30, 2000 2:31 PM
CHAPTER: 7 EZ Edit
Location
Drive and directory where the file is stored.
Size
File’s size in MB and bytes.
Created
File’s creation date.
Modified
File’s modification date.
Audio
Audio sampling rate and number of bits
7-65
Play Time File’s play time
In
File’s In point
Out
File’s Out point
Duration
File’s duration
AVI Properties - Edit Information
EZ Edit
Play Time Play time of the timeline.
In
Timeline In point for this clip.
Out
Timeline Out point for this clip.
Position
Position of the timeline cursor.
ezdv.book Page 66 Tuesday, May 30, 2000 2:31 PM
7-66
CHAPTER: 7 EZ Edit
EZ Edit
AVI Properties - Rec Information
Date
Date the clip was recorded.
Time
Time the clip was recorded.
In
In point of the clip on tape.
Out
Out point of the clip on tape.
Position
Position of the clip on tape.
Source
Source type.
ezdv.book Page 67 Tuesday, May 30, 2000 2:31 PM
CHAPTER: 7 EZ Edit
7-67
AVI Properties - Reference AVI Information
Reference File
The file(s) this reference AVI refers to.
The location of the referenced file(s).
Position
Position of this clip in the reference file(s).
EZ Edit
Location
ezdv.book Page 68 Tuesday, May 30, 2000 2:31 PM
7-68
CHAPTER: 7 EZ Edit
WAV Properties - File Information
EZ Edit
File Name Name of the file.
Location
Drive and directory where the file is stored.
Size
File’s size in MB and bytes.
Created
File’s creation date.
Modified
File’s modification date.
Audio
Audio sampling rate and number of bits
Play Time File’s play time
In
File’s In point
Out
File’s Out point
Duration
File’s duration
ezdv.book Page 69 Tuesday, May 30, 2000 2:31 PM
CHAPTER: 7 EZ Edit
7-69
WAV Properties - Edit Information
Play Time Play time of the timeline.
Timeline In point for this clip.
Out
Timeline Out point for this clip.
Position
Position of the timeline cursor.
About
Free MemoryDisplays the amount of free memory in the system.
EZ Edit
In
ezdv.book Page 70 Tuesday, May 30, 2000 2:31 PM
7-70
CHAPTER: 7 EZ Edit
Free Disk Space
Displays the amount of free disk space on the temporary
drive.
EZ Edit
Free Capture
Displays the amount of video that can be stored on the drive
listed for Free Disk Space, in hours, minutes, seconds, and frames,
and in frame count.
ezdv.book Page 71 Tuesday, May 30, 2000 2:31 PM
CHAPTER: 7 EZ Edit
7-71
Transition Settings
Blind Slide
Blind Slide divides Video B into multiple stripes and slides
those stripes over Video A.
X Divide
Number of horizontal repetitions that occur in the transition.
Y Divide
Number of vertical repetitions that occur in the transition.
Style
Determines how the sections enter the video frame.
Reverse
Swaps Video A and Video B.
Displays a video frame for Video A and Video B instead of the
Image
A and B images.
EZ Edit
Stripe Number
Number of stripes.
ezdv.book Page 72 Tuesday, May 30, 2000 2:31 PM
7-72
CHAPTER: 7 EZ Edit
Blind Wipe
Blind Wipe divides Video B into multiple stripes and wipes
Video A to show those stripes.
X Divide
Number of horizontal repetitions that occur in the transition.
Y Divide
Number of vertical repetitions that occur in the transition.
EZ Edit
Stripe Number
Number of stripes.
Style
Determines how the sections enter the video frame.
Reverse
Swaps Video A and Video B.
Displays a video frame for Video A and Video B instead of the
Image
A and B images.
ezdv.book Page 73 Tuesday, May 30, 2000 2:31 PM
CHAPTER: 7 EZ Edit
7-73
Block
Block divides Video B into multiple blocks and pops the
blocks over Video A.
Number of horizontal repetitions that occur in the transition.
Y Divide
Number of vertical repetitions that occur in the transition.
X Block
Number of blocks horizontal blocks.
Y Block
Number of blocks vertical blocks.
Style
Determines how the blocks appear in the video frame.
Start Direction
Determines from where and which way the blocks appear.
Progress Mode
Determines whether the block appearance goes linearly,
skips forward then back, or is staggered.
Reverse
Swaps Video A and Video B.
Displays a video frame for Video A and Video B instead of the
Image
A and B images.
EZ Edit
X Divide
ezdv.book Page 74 Tuesday, May 30, 2000 2:31 PM
7-74
CHAPTER: 7 EZ Edit
Box
Border color
Border size
EZ Edit
Box makes Video B appear as a group of growing boxes
that fill over Video A.
X Divide
Number of horizontal repetitions that occur in the transition.
Y Divide
Number of vertical repetitions that occur in the transition.
Determines how and where the blocks appear in the video
Style
frame.
Border color
Determines the color of the border, if any.
Border size
Determines the width of the border, if any.
Solid border
Enables the border.
Soft Border
Softens the border with a slight feathering.
Round Shape
Applies rounded corners to the border.
Reverse
Swaps Video A and Video B.
Displays a video frame for Video A and Video B instead of the
Image
A and B images.
ezdv.book Page 75 Tuesday, May 30, 2000 2:31 PM
CHAPTER: 7 EZ Edit
7-75
Circle
Center point
Recenter
Border color
Border size
Circle makes Video B appear as a growing circle that fills
over Video A.
X Divide
Number of horizontal repetitions that occur in the transition.
Y Divide
Number of vertical repetitions that occur in the transition.
Center point
Drag the center point to move the center point of the circle or
use the X and Y percentages to move it. Click the Recenter button to
re-center the center point.
Border color
Determines the color of the border, if any.
Border size
Determines the width of the border, if any.
Solid border
Enables the border.
Soft Border
Softens the border with a slight feathering.
Reverse
Swaps Video A and Video B.
EZ Edit
Determines how and where the blocks appear in the video
Style
frame.
ezdv.book Page 76 Tuesday, May 30, 2000 2:31 PM
7-76
CHAPTER: 7 EZ Edit
Displays a video frame for Video A and Video B instead of the
Image
A and B images.
Clock
Center point
Recenter
EZ Edit
Clock wipes Video B over Video A in a sweeping motion.
X Divide
Number of horizontal repetitions that occur in the transition.
Y Divide
Number of vertical repetitions that occur in the transition.
Determines how the “wedges” are filled - from the center out,
Style
or by sweeping across.
Center point
Drag the center point to move the center point of the circle or
use the X and Y percentages to move it. Click the Recenter button to
re-center the center point.
Border color
Determines the color of the border, if any.
Border size
Determines the width of the border, if any.
Sector Number
Determines the number of “wedges” in the transition.
Reverse
Swaps Video A and Video B.
Displays a video frame for Video A and Video B instead of the
Image
A and B images.
ezdv.book Page 77 Tuesday, May 30, 2000 2:31 PM
CHAPTER: 7 EZ Edit
7-77
Dissolve
Dissolve fades Video A out while simultaneously fading
Video B in.
Displays a video frame for Video A and Video B instead of the
Image
A and B images.
Push
EZ Edit
Push is similar to Blind Slide, except the Video A stripes
get pushed by the Video B stripes.
Blind Slide divides Video B into multiple stripes and slides
those stripes over Video A.
X Divide
Number of horizontal repetitions that occur in the transition.
Y Divide
Number of vertical repetitions that occur in the transition.
ezdv.book Page 78 Tuesday, May 30, 2000 2:31 PM
7-78
CHAPTER: 7 EZ Edit
Stripe Number
Number of stripes.
Style
Determines how the sections enter the video frame.
Reverse
Swaps Video A and Video B.
Displays a video frame for Video A and Video B instead of the
Image
A and B images.
Push Stretch (Under Scan)
EZ Edit
Border color
Border size
Push Stretch has Video B “squash” Video A.
Style
dle.
Determines how Video B comes in - from the side or the mid-
Direction
cally.
Determines whether Video B comes in horizontally or verti-
Border color
Determines the color of the border, if any.
Border size
Determines the width of the border, if any.
Solid border
Enables the border.
Reverse
Swaps Video A and Video B.
ezdv.book Page 79 Tuesday, May 30, 2000 2:31 PM
CHAPTER: 7 EZ Edit
7-79
Displays a video frame for Video A and Video B instead of the
Image
A and B images.
Slide
Slide has Video B slide in over Video A.
Number of horizontal repetitions that occur in the transition.
Y Divide
Number of vertical repetitions that occur in the transition.
Style
Determines how Video B comes in.
Direction
Determines which side or corner Video B comes in from.
Reverse
Swaps Video A and Video B.
Displays a video frame for Video A and Video B instead of the
Image
A and B images.
EZ Edit
X Divide
ezdv.book Page 80 Tuesday, May 30, 2000 2:31 PM
7-80
CHAPTER: 7 EZ Edit
Slide (Under Scan)
Border color
Border size
EZ Edit
Slide (Under Scan) slides Video B in over Video A with an
optional border.
Border color
Determines the color of the border, if any.
Border size
Determines the width of the border, if any.
Solid border
Enables the border.
Round Shape
Applies rounded corners to the border.
Direction
Determines which side or corner Video B comes in from.
Reverse
Swaps Video A and Video B.
Displays a video frame for Video A and Video B instead of the
Image
A and B images.
ezdv.book Page 81 Tuesday, May 30, 2000 2:31 PM
CHAPTER: 7 EZ Edit
7-81
Stretch
Stretch takes Video B and stretches it over Video A.
Number of horizontal repetitions that occur in the transition.
Y Divide
Number of vertical repetitions that occur in the transition.
Direction
Determines which side or corner Video B comes in from.
Reverse
Swaps Video A and Video B.
Displays a video frame for Video A and Video B instead of the
Image
A and B images.
EZ Edit
X Divide
ezdv.book Page 82 Tuesday, May 30, 2000 2:31 PM
7-82
CHAPTER: 7 EZ Edit
Stretch (Under Scan)
Border color
Border size
Stretch (Under Scan) stretches Video B over Video A with
an optional border.
EZ Edit
Border color
Determines the color of the border, if any.
Border size
Determines the width of the border, if any.
Solid border
Enables the border.
Direction
Determines which side or corner Video B comes in from.
Reverse
Swaps Video A and Video B.
Displays a video frame for Video A and Video B instead of the
Image
A and B images.
ezdv.book Page 83 Tuesday, May 30, 2000 2:31 PM
CHAPTER: 7 EZ Edit
7-83
Stripe/Reveal
Border color
Border size
Stripe number
Stripe/Reveal wipes Video B over Video A in multiple
stripes.
Border size
Determines the width of the border, if any.
Solid border
Enables the border.
Soft Border
Softens the border with a slight feathering.
Both Side Determines whether the border is applied to both sides of the
stripe or just one.
Determines how Video B comes in - from one side or from
Style
the middle.
Direction
Determines the orientation of the Video B stripes.
Reverse
Swaps Video A and Video B.
Displays a video frame for Video A and Video B instead of the
Image
A and B images.
EZ Edit
Border color
Determines the color of the border, if any.
ezdv.book Page 84 Tuesday, May 30, 2000 2:31 PM
EZ Edit
7-84
CHAPTER: 7 EZ Edit
ezdv.book Page 1 Tuesday, May 30, 2000 2:31 PM
CHAPTER: 8 Troubleshooting
8-1
CHAPTER 8
Troubleshooting
Troubleshooting
This chapter will cover some common problems with EZDV
and steps you can use to resolve them before you need to
contact Canopus Technical Support.
Pre-Installation issues
My computer does not meet the minimum
requirements for EZDV. Can I still use it?
I don’t have a DV or Digital 8 camera or deck.
Can I use EZDV?
Not really. EZDV requires a DV or Digital 8 camera or deck
to acquire and output footage. If you somehow have AVIs
compressed with the Canopus DV CODEC footage on your
computer (from another machine with a Canopus DV card)
then you could edit the footage. Still, EZDV is designed for
users who have a DV or Digital 8 source.
I have a DVCAM camera or deck. Can I use it
with EZDV?
No. EZDV does not support DVCAM. It supports DV only.
Troubleshooting
The minimum requirements for EZDV are exactly that.
While EZDV might work in your system, we cannot guarantee that it will, nor can we provide support for EZDV in a
system that does not meet the minimum requirements.
ezdv.book Page 2 Tuesday, May 30, 2000 2:31 PM
8-2
CHAPTER: 8 Troubleshooting
I have a DVCPRO camera or deck. Can I use it
with EZDV?
No. EZDV does not support DVCPRO. It supports DV only.
Can I capture analog footage with EZDV?
No. EZDV does not have any analog capture capabilities.
However, if your DV camera or deck can record analog
footage to DV tape, you can then use that DV tape with
EZDV.
Can EZDV output analog audio or video?
No. EZDV does not have any analog audio or video output
capabilities. If you need analog output, connect your DV
camera or deck to EZDV and use the analog output on
your camera or deck.
Troubleshooting
I have a NTSC (or PAL) EZDV card. Can I use a
PAL (or NTSC) camera or footage with it?
No. The NTSC version of EZDV supports only NTSC footage and devices, while the PAL version of EZDV supports
only PAL footage and devices.
My computer is overclocked. Can I use EZDV
in it?
Canopus does not support overclocked machines. Overclocking often puts the PCI bus out of specification and this
can cause numerous problems from intermittent connection loss to lockups. Please do not overclock your machine
if you are going to use EZDV in it.
ezdv.book Page 3 Tuesday, May 30, 2000 2:31 PM
CHAPTER: 8 Troubleshooting
8-3
Installation issues
EZDV is not detected by EZDVTest or
behaves erratically
First of all, make sure EZDV is installed correctly. Check
that the EZDV PCI card is seated in the PCI slot. Try
switching slots or reseating the card. Many motherboards
have the AGP slot sharing resources with the PCI slot next
to it. This can cause problems.
Check for IRQ conflicts with other devices in the system.
EZDV should have its own IRQ, preferably 9 or higher.
Also, check the PCI Latency timer in your BIOS settings.
The latency timer should be set to 64 or higher, however
not all motherboards allow you to change the timer. Please
consult with your motherboard manufacturer for more
details.
I cannot see video playing in the video windows of the EZDV applications.
Check that your VGA card is capable of DirectDraw overlay. You can use the EZDVTest utility to check this. If your
VGA card does not support DirectDraw overlay, you will not
be able to see video playing on the computer. You should
still be able to see video playing through your DV or Digital
8 device, if it has a screen or viewfinder.
Some VGA cards do not support DirectDraw overlay at all
refresh rates, color depths, and refresh rates. Try
1024x768, 16-bit color at 75 Hz or 1152x856, 16-bit color
at 60 Hz. Also make sure you are using the latest driver for
your video card.
Troubleshooting
If Power Management (especially ACPI) is enabled, please
turn it off. EZDV does not support ACPI power saving.
ezdv.book Page 4 Tuesday, May 30, 2000 2:31 PM
8-4
CHAPTER: 8 Troubleshooting
General usage issues
Does EZDV support 16:9 aspect ratio?
No. EZDV supports 4:3 aspect ratio only.
I get “Disk speed is too slow” during capture.
What’s wrong?
This message means that your hard disk cannot sustain
the required 4.5 MB/sec transfer rate. You can test your
drive speed with EZDVTest.
If you have a dedicated video drive, make sure you are
capturing to it and not your system drive.
Troubleshooting
Drives have a tendency to slow down as they become full
due to fragmentation. Defragmenting your drive may help a
drive that used to be able to capture.
Run ScanDisk to check your drive for errors as well. Drive
errors can often cause the write speed to drop.
If you are using Windows NT, and are capturing to an IDE
disk drive, you may need to enable DMA transfers using
the DMACHECK utility from Microsoft.
I cannot capture more than 9 minutes of
video into one file.
You are encountering the 2 gigabyte AVI filesize limitation.
You need to capture as a Reference AVI, or use Seamless
capture to capture to multiple files.
Why do I get “Disk Write Error” the first time I
capture, but it captures okay in subsequent
captures?
If you have Power Management turned on, your hard
drives may be going to sleep. This is especially true if you
have a separate hard drive dedicated for video.
ezdv.book Page 5 Tuesday, May 30, 2000 2:31 PM
CHAPTER: 8 Troubleshooting
8-5
In general, it is a good idea to turn Power Management off
on your video editing machine.
I cannot output my production to tape.
Check that the tape in your camera or deck is not write-protected.
If you are using a PAL DV or Digital 8 device, it may have
its DV Input capability disabled (especially in Europe).
Some devices that have DV-In disabled can be enabled by
third party hardware. Unless you can enable DV input, you
will not be able to output your production back to tape.
The stills in my timeline jitter or have incorrect colors.
Still images that are not specifically tailored for video may
jitter. If this is the case, you should de-interlace them using
image manipulation software such as Adobe Photoshop.
Still images in my production look slightly
distorted on output.
This is probably due to the difference between DV pixels,
which are rectangular, and computer pixels, which are
square. To compensate for this, when using square pixel
images, such as those from a scanner or digital camera,
crop them to 640x480 before bringing them into EZ Edit.
What are the specifications for rendering to
the Canopus DV CODEC from another application?
The DV specification requires both audio and video. Video
must be 720x480 for NTSC, or 720x576 for PAL. Audio
Troubleshooting
Furthermore, the full RGB color range used on the computer is not valid for video. Colors in images should be
restricted between RGB 15, 15, 15 and 240, 240, 240,
approximately. Again, image manipulation software may be
of use to convert colors to “safe colors.”
ezdv.book Page 6 Tuesday, May 30, 2000 2:31 PM
8-6
CHAPTER: 8 Troubleshooting
must be 32 kHz 12-bit stereo, 44.1 kHz 16-bit stereo, or 48
kHz 16-bit stereo.
If you generate an AVI with no audio (from a 3D modeling
application, for example), you should use EZ Edit to add
accompanying audio (even if it is zero-level audio) before
outputting to tape.
What colorspace does EZ Edit edit in?
EZ Edit edits in YUV colorspace.
Other questions
Troubleshooting
Why does SoftXplode not work in Windows
NT?
SoftXplode requires DirectX 6.1 or higher. Windows NT
only has DirectX 3.0. In order to have Xplode effects under
Windows NT, you will need to get the Canopus Xplode
AGP card. Alternatively, you can upgrade to Windows
2000.
Where can I get more information?
Go to the EZDV section of the Canopus website at
http://www.justedit.com/ezdv
While you’re there, you can also visit our User groups
where you can get help and advice from customers using
Canopus products around the world.