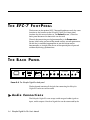
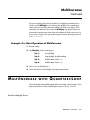
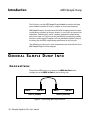
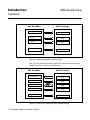
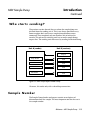
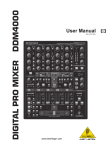
1
Echoplex
Digital Pro Plus
User ’s Manual
CREDITS
MANUAL WRITTEN BY KIM FLINT
AND
WARREN SIROTA
LAYOUT & DESIGN BY WS DESIGNS
ECHOPLEX DIGITAL PRO PLUS
LOOPIV SOFTWARE
LOOP®
IS A PRODUCT OF
IS A PRODUCT OF
AURISIS RESEARCH, LLC
IS A REGISTERED TRADEMARK OF
ECHOPLEX DIGITAL PRO PLUS
AND
GIBSON GUITAR CORPORATION
AURISIS RESEARCH, LLC
LOOPIV SOFTWARE DESIGNED BY:
AURISIS RESEARCH, LLC – MATTHIAS GROB, KIM FLINT, ERIC OBERMÜHLNER
WITH MAJOR CONTRIBUTIONS FROM: ANDY EWEN, CLAUDE VOIT, ANDY
BUTLER, MARK LEAS, KEITH MCMILLEN, TIM CANNING, ANDRE LAFOSSE,
DAVID TORN, CHRIS MUIR, WILLY STREHLER, LJUBO MAJSTOROVIC,
EBERHARD WEBER, DAVID KIRKDORFFER
SPECIAL THANKS
TESTERS, AND
TO THE STAFF OF
GIBSON GUITAR CORPORATION,
THROUGHOUT THE HISTORY OF THE
i-2
OUR
BETA
ALL WHO HAVE CONTRIBUTED THEIR THOUGHTS AND IDEAS
Echoplex Digital Pro Plus User’s Manual
ECHOPLEX.
CONTACT INFORMATION
FOR
MORE INFORMATION
,
CONTACT
IN EUROPE:
TRACE ELLIOT LIMITED
MALDON
ESSEX
CM9 4GG
ENGLAND
PHONE:
+44 (0) 1621 851851
FAX:
+44 (0) 1621 851932
EMAIL:
[email protected]
IN
USA:
GIBSON STRINGS AND ACCESSORIES
1150 BOWES RD.
ELGIN, IL 60123
USA
PHONE:
(847) 741-7315
TOLL FREE:
(800) 544-2766
FAX:
(847) 741-4644
EMAIL:
[email protected]
THE
HTTP
://WWW.GIBSONECHOPLEX.COM
WARNINGS
CAUTION
RISK OF ELECTRIC SHOCK
DO NOT OPEN
i-4
Echoplex Digital Pro Plus User’s Manual
Echoplex
U
S
E
R
’
S
M
Digital Pro Plus
A
N
U
A
L
Contents
Introduction
Credits
...........................................................................i-2
Contact Info ...........................................................................i-3
Contents
..........................................................................ii-1
About This Manual................................................................iii-1
Typeface Conventions ............................................................................iii-1
Terminology ............................................................................................iii-2
Section I – User Guide
User Guide Introduction ................................................................I-i
Chapter 1 Quick Start ...............................................................1-1
Instant Gratification and Depth..............................................................1-1
Before Powering Up .................................................................................1-2
Level Adjustment .....................................................................................1-3
Start Looping! ...........................................................................................1-4
Chapter 2 Front, Back and Underfoot ........................................2-1
The Front Panel ........................................................................................2-1
The EFC-7 Footpedal ...............................................................................2-6
The Back Panel .........................................................................................2-6
Stereo Operation ......................................................................................2-9
Chapter 3 MIDI..........................................................................3-1
Table of Contents ii-1
Section II – Reference Guide
Reference Introduction .................................................................II-i
Reference Guide Introduction.................................................................II-i
Key to the Diagrams ................................................................................II-ii
Chapter 4 Parameters ...............................................................4-1
8ths/Cycle .................................................................................................4-2
AutoRecord ...............................................................................................4-6
Channel.....................................................................................................4-7
ControlSource ..........................................................................................4-8
FeedBkCont ............................................................................................4-10
InsertMode .............................................................................................4-11
Loop/Delay (InterfaceMode) ................................................................4-15
LoopCopy................................................................................................4-29
LoopTrig..................................................................................................4-31
MoreLoops..............................................................................................4-32
MuteMode ..............................................................................................4-33
OverdubMode ........................................................................................4-34
Overflow..................................................................................................4-35
Quantize..................................................................................................4-36
Presets .....................................................................................................4-39
RecordMode ...........................................................................................4-40
Reserved..................................................................................................4-42
RoundMode ............................................................................................4-43
SamplerStyle...........................................................................................4-44
Source #...................................................................................................4-47
SwitchQuant ...........................................................................................4-48
Sync .........................................................................................................4-57
Threshold................................................................................................4-59
Velocity....................................................................................................4-60
VolumeCont............................................................................................4-61
Chapter 5 Functions...................................................................5-1
Dump ........................................................................................................5-2
Feedback ...................................................................................................5-4
GeneralReset.............................................................................................5-8
HalfSpeed..................................................................................................5-9
Insert .......................................................................................................5-10
Load.........................................................................................................5-18
LoopDivide .............................................................................................5-20
LoopTriggering .......................................................................................5-21
LoopWindowing.....................................................................................5-22
MultiIncrease..........................................................................................5-26
Multiply...................................................................................................5-28
Mute ........................................................................................................5-38
NextLoop ................................................................................................5-41
ii-2
Echoplex Digital Pro Plus User’s Manual
Overdub ..................................................................................................5-43
PreviousLoop..........................................................................................5-46
Record .....................................................................................................5-47
Rehearse..................................................................................................5-53
Replace....................................................................................................5-54
Reset ........................................................................................................5-55
Retrigger..................................................................................................5-56
Reverse ....................................................................................................5-58
SamplePlay .............................................................................................5-62
StartPoint ................................................................................................5-64
Substitute................................................................................................5-65
SUS Commands .....................................................................................5-69
SUSNextLoop .........................................................................................5-71
Undo........................................................................................................5-72
Chapter 6 Synchronization ........................................................6-1
AutoStartPoint ..........................................................................................6-2
BeatSync ...................................................................................................6-3
BrotherSync ..............................................................................................6-7
Global/Local MIDI Clock ........................................................................6-9
MIDI Sync Indicators .............................................................................6-11
MuteQuantMIDIStartSong....................................................................6-12
QuantMIDIStartSong.............................................................................6-13
QuantStartPoint .....................................................................................6-14
ReAlign ....................................................................................................6-15
SongPositionPointer and Continue ......................................................6-22
StartSong, StopSong, Continue.............................................................6-23
StopSync .................................................................................................6-28
SyncStartPoint ........................................................................................6-29
SyncRecord .............................................................................................6-30
TempoSelect ...........................................................................................6-32
Chapter 7 MIDI Control ..............................................................7-1
DirectMIDI................................................................................................7-2
MIDI Command List ................................................................................7-3
MIDI DataWheel ......................................................................................7-7
MIDIpipe...................................................................................................7-8
MIDI VirtualButtons ..............................................................................7-10
Receiving MIDI Commands ..................................................................7-11
SysEx........................................................................................................7-12
SUS MIDI Commands ...........................................................................7-13
Transmitting MIDI Commands ............................................................7-15
Chapter 8 Parameter Presets.....................................................8-1
Parameter Presets.....................................................................................8-2
Preset Editor .............................................................................................8-8
Chapter 9 User Interface ...........................................................9-1
Table of Contents ii-3
DataWheel ................................................................................................9-2
Feedbk Indicator ......................................................................................9-4
Feedback Pedal Jack.................................................................................9-5
Feedback Knob.........................................................................................9-6
Footpedal Jack ..........................................................................................9-7
Input Indicator .........................................................................................9-8
Input Jack..................................................................................................9-9
Input Knob..............................................................................................9-10
Loop Display...........................................................................................9-11
Loops LED...............................................................................................9-12
LoopTime Display ..................................................................................9-13
MIDI LED................................................................................................9-17
MIDI Ports ..............................................................................................9-18
Mix Knob.................................................................................................9-19
Multiple Display .....................................................................................9-20
Output Jack .............................................................................................9-21
Output Knob...........................................................................................9-22
Overdub Jack ..........................................................................................9-23
Parameter Button ...................................................................................9-24
SmartButtons..........................................................................................9-26
Switches LED ..........................................................................................9-28
Timing LED.............................................................................................9-29
Visual Tempo Guide...............................................................................9-30
Chapter 10 MIDI Sample Dump .................................................10-1
Introduction ...........................................................................................10-2
Sample Dump User Guide.....................................................................10-9
Other Device Implementations ..........................................................10-16
Sample Dump Trouble Shooting ........................................................10-20
Chapter 11 MIDI SysEx ..............................................................11-1
MIDI SysEx Detailed Reference ............................................................11-2
ii-4
Echoplex Digital Pro Plus User’s Manual
I
N
T
R
O
D
U
C
T
I
O
N
About This Manual
T Y P E FA C E C O N V E N T I O N S
User Interface elements like Buttons, Jacks, and Knobs are shown in
bold, since references to them are usually about actions that you might
take.
Function and Operation names are shown in a plain typeface.
Buttons generally either represent parameters or initiate actions, which
we usually call functions or operations.
We use different versions of the same typeface for the button (bold) and
the function (regular); e.g. "the Record button starts and ends Record
operations."
Parameter Names and Values will be shown as italics.
EXAMPLES:
■
"Press the Overdub button."
■
"You can end the Record operation several ways:"
■
"When MuteMode=Continuous, the loop runs in the background even
when it’s silent."
Introduction iii-1
TERMINOLOGY
There are a few key terms that are used frequently in this manual. Here’s
a summary:
PLAY MODE
This is the condition of the Echoplex Digital Pro Plus when you’re not
editing parameters or performing an operation like recording,
overdubbing, inserting, etc. None of the Row Indicator LEDs are lit in
this condition, and the current loop simply plays back over and over.
PARAMETER EDIT MODE
This is the condition of the Echoplex Digital Pro Plus when you are
editing parameters. You reach this state by pressing the Parameter
button, and you will see one of the Row Indicator LEDs lit to indicate
which row is being edited.
OTHER MODES
These are the states that the Echoplex Digital Pro Plus is in after you’ve
pressed a button to initiate an action, but before you’ve ended the
action. The mode is the name of the button that you’ve pressed; e.g.
Record mode, Mute mode, Insert mode, etc.
LOOP, LOOP LENGTH, CURRENT LOOP, CYCLE
A loop is the entire program that plays when the Echoplex is in Play
mode. The length of the loop is the number that is in the LoopTime
iii-2 Echoplex Digital Pro Plus User’s Manual
Display while in Play mode (the length of the recorded material), which
will be less than the total length available for recording.
If the MoreLoops parameter is greater than one (see MoreLoops in the
Reference section), then the Echoplex will hold several different loops.
In this case, one loop will be active at any given time, and we’ll call this
the current loop. The leftmost digit in the display is the number of the
current loop.
When you use Multiply or Insert, a new loop is built from a number of
blocks of material with identical lengths. We’ll call each of these
component blocks a cycle, and continue to refer to the entire groups of
cycles as a loop.
RESETTING LOOPS, EMPTY LOOPS
When you Reset a loop by holding down the Record button for half a
second you completely empty it. The time display will show just a
decimal point. This creates an empty loop. We often refer to this as being
in reset, or the Reset state.
If you have set up multiple loops using the MoreLoops parameter, you
can reset them all at once. This is called a GeneralReset and is done with
a long press of the Multiply button while in a loop that is already reset.
SHORT PRESS
Most functions are accessed with a quick tap of the appropriate button.
This is usually referred to as a Short Press.
LONG PRESS
In many situations, a Long Press of a button will have a different effect
than simply pressing the button and releasing it immediately (resetting
a loop through a long press of the Record button is the most obvious
example). Although there are situations where you may want to press a
button for quite a long while, any press longer than half a second will
count as a long press.
Introduction iii-3
IMMEDIATE ACTION
This is a term used in the Reference chapter to describe buttons that
initiate an operation as soon as you press them, in contrast to buttons
that set parameters.
QUANTIZE
When an action is Quantized it means it will waits until an appropriate
rhythmic moment before it executes. The Quantize parameters let you
choose whether actions wait until the next Loop StartPoint, the next Cycle
StartPoint, or the next Cycle Subdivision point (or 8th).
ROUNDED
AND
UNROUNDED
Some functions, like Multiply and Insert, are designed to automatically
operate for an integer number of Cycles. If you end the operation
sometime in the middle of the Cycle, it will continue operating until the
end of the cycle time so that you end up with an even rhythm. This is
called Rounding, because it rounds off to the nearest integer number of
Cycles. The RoundMode parameter lets you determine how the Echoplex
operates while Rounding.
It is possible for the user to force a Rounded action to end without
Rounding. This is referred to as an UnRounded operation. For example, an
UnRounded Multiply is a Multiply that is forced to end without reaching
the end of the cycle.
iii-4 Echoplex Digital Pro Plus User’s Manual
S
E
C
T
I
O
N
I
User Guide
USER GUIDE INTRODUCTION
This section will help you get started using the Echoplex and provide
instruction on using some of the Echoplex’s most common features. For
greater detail and complete information about all Echoplex features,
please consult Section II, the Reference Guide.
This section contains the following chapters:
■
Chapter 1 - Quick Start
■
Chapter 2 - Front, Back, and Underfoot
■
Chapter 3 - MIDI
User Guide I-i
I-ii
Echoplex Digital Pro Plus User’s Manual
C
H
A
P
T
E
R
1
Quick Start
C
ongratulations! You’re in for more fun than you can possibly
imagine, playing music with the Echoplex Digital Pro Plus. This is
the spiritual successor to the original Echoplex, a device made by
Maestro in the 1960s that relied on tape loops to create effects. It was
used extensively by the Jimi Hendrix, the Doors, and many others. Now,
the temperamental tape technology that terminated the triumph of the
original Echoplex has been replaced by high-fidelity, utterly consistent
digital technology. Not only does this result in increased sound quality,
but the flexibility afforded by programmable digital control also makes
possible a much wider range of performance options.
I N S TA N T G R AT I F I C AT I O N A N D D E P T H
One of the great things about the Echoplex Digital Pro is that it offers
both instant gratification and depth. Once you hook it up, it will
probably take you about 10 minutes to learn how to work the basic
functions and start making music. After that, you may be intoxicated
with power for an hour or two before you’re ready to come back and
learn more. The Echoplex Digital Pro will reward further study, because
there are layers of refinements that will allow you to create more
complex pieces with interesting variations. But, because you start
making cool music from day 1, you can learn to use these refinements at
your own pace, gradually adding to your bag of Echoplex tricks when
you have the time and energy. We’ve tried to make that process as
efficient for you as possible by providing you with a carefully-planned
front panel, footpedal, and manual.
Quick Start 1-1
In the next few paragraphs, you’ll learn the basics of using your
Echoplex Digital Pro. After you’ve recovered from the shocking joy of
your first loops, browse through this manual at your leisure. You’ll
discover lots of new ideas that will keep you coming back time after
time.
BEFORE POWERING UP
Make the connections
The basic connections for using the Echoplex Digital Pro are quite
simple: power, audio in and out, and the optional footpedal. Follow
along with the steps below, and refer to Figures 2.1 and 2.3 in Chapter 2
for more information.
1. Check that the Power Selector Switch on the back of the unit is set
properly for your power source—115V for US- and Japanese-style power
outlets, or 230V for European-style. If it is set incorrectly, change it to
the correct setting with a screwdriver.
2. Plug the Echoplex Digital Pro into a power source using the supplied
power cord.
3. If you own the optional EFC-7 footpedal, connect it to the Footpedal
jack on the back panel using a standard guitar cord with 1/4" phone
plugs on each end.
4. Connect an audio source to the Echoplex’s back-panel Audio Input
jack with a standard guitar cord, or plug a high-impedance microphone
directly into the jack. The Echoplex Digital Pro can accept microphonelevel, instrument-level, and line-level inputs (along with anything inbetween).
5. Connect the Echoplex’s Audio Output jack to an amplifier, mixer, or
preamp to let you hear what’s happening!
These are all the basic connections. See Chapter 2 for information on
additional possibilities.
1-2 Echoplex Digital Pro Plus User’s Manual
Tu r n i t O n
Use the power switch at the right of the Echoplex Digital Pro to turn it
on. The display will briefly show the software version number and then
switch to the standard display (see the section titled “The Display” in
Chapter 2).
LEVEL ADJUSTMENT
Set the Levels
1. Turn the Output knob all the way off.
2. Turn the Feedback Knob all the way up. This is the best setting for
most uses of the Echoplex Digital Pro. See Feedback Knob in the
Reference chapter for more information.
3. The Mix knob lets you balance the volumes of your playing and loop
playback. Set it to the half-way point (straight up) to start with.
4. Set the Input knob so that the LED light labeled “Input” is dark when
you’re not playing anything, green when you play at normal levels, and
orange when you play at your loudest levels. This light will turn red if
you overload the Echoplex input. Fortunately, the Echoplex has a built in
limiter to protect you from causing ugly digital distortion in your loops.
However, if you are engaging the limiter the audio recorded in your loop
will still not be a perfect representation of what you played. If this
happens, turn down the Input level.
5. Play your instrument and adjust the Output knob until you reach a
pleasant listening volume.
6. The LED labeled “Feedbk” indicates the level of the audio recorded in
the current loop. This turns red to indicate digital distortion in the loop.
If you see this after Recording and Overdubbing a loop, your Input level
is set too high.
Quick Start 1-3
S TA R T L O O P I N G !
Record
It’s easy to record your first loop.
1. Press the Record button.
2. Play a few notes.
3. Press the Record button.
Now you should be hearing your notes loop over and over again. If you
don’t like what you recorded, simply repeat the steps above once again.
The Record function starts instantaneously when you press the Record
button. You’ll probably find that you get the best timing results if you
press Record simultaneously with the first note or chord of your loop
(as opposed to trying to press it an instant before). To end recording,
press it exactly at the time when you want the loop to restart (right on
the downbeat, if you’re recording rhythmically). A few minutes of
practice will be all that you need to create great loops with no audio or
rhythmic glitches.
As you record, you’ll see the length of the current recording in the
display. Keep an eye on this, especially if you don’t have much memory
installed in your unit (see Appendix A, Memory for more details). Your
maximum recording time is displayed when you first power on the
Echoplex Digital Pro Plus. If you exceed this time during recording, your
loop won’t be kept (with the default settings. See Overflow in the
Reference chapter for other options).
If your loop seems surprisingly loud or soft in relation to what you
played, adjust the Mix knob until you find the right balance.
If you want to record a new loop, simply repeat steps 1-3 above. If you
want to reset (completely clear) the loop, simply press and hold the
Record button for half a second.
For more information on recording, see Record in the Reference chapter.
1-4 Echoplex Digital Pro Plus User’s Manual
Mute
If you get sick of listening to your loop, you can silence it without
erasing it by pressing the Mute button. The light under the Mute
button on the front panel will turn red. Press the Mute button a second
time to hear your loop again.
For more information, see Mute and MuteMode in the Reference chapter.
Overdub
Now that you have a loop running, let’s start to have some fun by
overdubbing some additional sounds. It’s incredibly easy.
1. Press Overdub. The Overdub light turns red.
2. Play. Each time the loop restarts, you’ll hear whatever you played during
the last pass added to the mix.
3. When you’re done overdubbing, press Overdub again to stop (it’s a
good idea to not leave the Overdub function on when you’re not actually
playing).
For more information, see Overdub in the Reference chapter.
Undo
If you don’t like what you’ve just overdubbed, you can press Undo to
erase it. If your loop length is short compared to the amount of memory
in your Echoplex, Undo can erase the layers of overdubs one by one.
However, this capability is limited by the amount of memory that you
have installed. If your loop length is longer than half your memory
capacity, for instance, you won’t be able to Undo at all.
Undo also cancels a function that you may have started by accident.
After you press Record without meaning to, for instance, you can
recover your loop simply by pressing Undo instead of Record to end
the Record operation.
For more information, see Undo in the Reference chapter.
Quick Start 1-5
Multiply
Multiply is like Overdub, except that Multiply lets you record longer
passages. For instance, you can use Multiply to overlay a 4-bar bass riff
over two repetitions of a 2-bar chord pattern. Or, if you have enough
memory, you can use Multiply to record a long solo over a repetitive
backing track. It’s a powerful function that adds a lot to your expressive
capabilities using the Echoplex Digital Pro.
Here’s a quick introduction to Multiply:
1. Record a simple, short loop.
2. Press Multiply and play over several repetitions of the loop.
3. Press Multiply again to end the recording.
Multiply doesn’t restart the loop the instant you press it the second
time—it always “rounds off” so that the original loop isn’t cut-off in the
middle.
Notice that the right-hand digit of the display counts the repetitions of
your first loop as the entire loop is played back. There are a number of
situations where we’ll need to distinguish between these, so we’ll
introduce some terminology:
KEY POINT:
The first loop, the “atom” that you started with, is called a cycle. We’ll
reserve the term loop to refer to the full loop, which can consist of
several full cycles (never a fractional number of cycles, like 2-1/2). If
you’ve just recorded a single loop and not used Multiply or Insert, then
your loop will be exactly one cycle long.
Reverse
Reverse is a great deal of fun. In the Echoplex, loops can be Reversed at
any time. You can easily and quickly create loops with some parts going
forwards and some parts going backwards. Before we can do Reverse
however, we will need to edit a Parameter value. This is a good
opportunity to learn how to do Parameter editing.
The parameter we wish to change is called InsertMode. This parameter
determines what function the Insert button will do. We are going to set
it to become the Reverse button.
1-6 Echoplex Digital Pro Plus User’s Manual
1. In the Parameter Matrix printed on the front panel of the Echoplex,
locate the InsertMode parameter. You should see it in the row labeled
Switches, under the Insert button.
2. Press the Parameter button. You are now in the Parameter Editing
Mode. You should see “P1” in the Multiple Display, indicating we have
selected the first row of Parameters. The Timing LED is also lit to
indicate that the Timing Row of parameters is selected.
3. We want the Switches Row, since that is where the InsertMode
parameter is located. Press the Parameter button once more. You
should now see “P2” in the Multiple Display, and the Switches LED
will be lit to indicate we have now selected the Switches Row.
4. Press the Insert button to select the InsertMode Parameter. The
LoopTIme Display will show the current value of this Parameter.
5. Continue tapping the Insert button to step through the possible values
for the InsertMode parameter. We want Reverse, so stop when you see the
display show “rEV”.
5. Press the Parameter button to a few times to cycle back to Play Mode.
We’ve now programmed the Insert button to be the Reverse button, and
learned about Parameter Editing in the process. The InsertMode
parameter has some other interesting functions in it as well, like
HalfSpeed, Substitute, Replace, and of course, Insert. But we want to
play with Reverse first, so let’s do that!
1. Record a loop.
2. Press the Insert button.Your loop is playing backwards!
3. Now press Overdub, with your loop still in Reverse.Play something
interesting over your backwards part. Your Overdub will now be playing
in the loop forwards, while the original part is playing backwards.
4. Press Insert again. Your original part will be going forwards again, and
the Overdub you added is now Reversed.
You can go on like this, adding as many forwards and backwards parts
as you like!
See the InsertMode and Reverse sections of the Reference Guide for more
details on these features.
Quick Start 1-7
Echoplex
Input
Digital Pro Plus
Feedbk
Output
Mix
•
•
loop
dir
Input
Feedback
LOOP
Level Indicator Lights
LOOPTIME
•
•
MULTIPLE
Display
Level Control Knobs
FIGURE 2.1A: The Echoplex Digital Pro Plus front panel, left half
Buttons
Status Indicator Lights
Parameters
Record
Overdub Multiply
Loops
MIDI
Switches
Timing
MoreLoops
AutoRecord
LoopCopy
Channel
ControlSource
Source #
RecordMode OverdubMode
Loop/Delay
Quantize
Row Indicator Lights
Ins/Rev
Mute
Undo
NextLoop
SwitchQuant
LoopTrig
Velocity
SamplerStyle
VolumeCont
FeedBkCont
Dump
Load
RoundMode
InsertMode
MuteMode
Overflow
Presets
8ths/Cycle
Sync
Threshold
Reverse
StartPoint
Parameter Grid
FIGURE 2.1B: The Echoplex Digital Pro Plus front panel, right half
2-i
Echoplex Digital Pro User’s Guide
POWER
Power Switch
C
H
A
P
T
E
R
2
Front, Back and
Underfoot
In this chapter we’ll discuss the physical elements of the interface: the
front panel, optional EFC-7 footpedal, and back panel.
T H E F R O N T PA N E L
The front panel of the Echoplex Digital Pro contains a Power Switch,
Knobs that set critical levels, two multicolored Level Indicator Lights
to monitor levels, a 6-character Display that shows timing and other
information, and a row of eight multi-function Buttons for setting
parameters and operating the unit. It also contains four Row Indicator
Lights, controlled by the Parameter button, that determine which set
of functions or parameters correspond to the buttons. Each button has a
multi-colored Status Indicator Light.
Level Control Knobs
The four Level Control Knobs control the input and output levels, the mix
between the input signal and the looped or delayed signal, and the
feedback level. The Quick Start in Chapter 1 describes how to set these
levels, and you’ll find more information in the entries for Input Knob,
Output Knob, Mix Knob, and Feedback Knob in the Reference
chapter.
Front, Back and Underfoot 2-1
Level Indicator Lights
These multicolored lights monitor audio levels. The Input Indicator
monitors the levels that are received at the audio input jack on the back
panel, while the Feedbk Indicator monitors the volume of the
material that is recorded in the current loop.
When one of these lights is dark, it is measuring very little (or no) signal.
When it is green, the signal is healthy. Orange indicators are fine too,
with the signal at a good level. The orange color indicates that caution
should be displayed, however, because the levels are approaching the
red zone. Levels that cause the indicator lights to glow red will cause
distortion.
You can’t do much about controlling the level already in the loop, except
to lower the feedback, to Undo recent actions, or to reset the loop.
However, you can and should control the input level as follows:
KEY POINT:
Set the Input Knob so that the loudest signals make the Input
Indicator Light turn orange. It should never turn red.
Display
The Echoplex display conveys some critical information in a compact
manner. It takes on different roles according to the context.
STARTUP DISPLAY
When you first power on the Echoplex, it will show the amount of time
available in the current loop. If MoreLoops=1, it will show the total time
available, reflecting the amount of memory installed in the unit. The
Multiple display on the right will show how many loops are currently
setup with the MoreLoops parameter.
The following illustration shows the display immediately after bootup.
2-2 Echoplex Digital Pro Plus User’s Manual
FIGURE 2.2
The startup display shows
the time available and
number of loops setup.
Number of the
current loop
Current number of loops
(set with MoreLoops)
Total LoopTime
per Loop
•
LOOPTIME
LOOP
MULTIPLE
PLAY MODE DISPLAY
A typical display in Play Mode looks like this:
Number of the
current loop
Time display
Flashes to indicate
Loop StartPoint
Current Cycle
(from Multiply or Insert)
Flashes to indicate
Cycle StartPoint
Loops
MIDI
•
•
LOOP
LOOPTIME
Flashes to indicate
AutoUndo
FIGURE 2.3:
Indicates Sync
Correction
•
•
MULTIPLE
Switches
Timing
Flashes to indicate
Global MIDI StartPoint
Flashes to indicate
Sub-Cycle (8th note)
The PlayMode display provides important information about current status and activity
When you are in a Record, Multiply, or Insert operation, the LoopTime
Display will keep track of how much time you’ve recorded so far. You
will see it counting the time as the operation progresses. Once
something has been recorded into a loop, the time display will show the
Front, Back and Underfoot 2-3
length of the current loop. And, once you’ve reset a loop, the time
display will be blank until you record some material in the loop.
During Play Mode, the MIDI LED, Switches LED, Timing LED, and the
right dot of the Multiple Display flash to indicate the Tempo and
StartPoints of your loop. These are indicated in the figure above. See
Visual Tempo Guide and StartPoint in the Reference chapter for a deeper
discussion of these LEDs and for how to reposition the loop beginning.
The left dot of the Multiple Display flashes during Sync operations
when Sync is on and an external clock is present. See the discussion of
Sync in the Reference chapter for more information.
The Loop Display dot indicates AutoUndo, explained in the Undo
section of the Reference chapter.
The LoopTime Display is also used briefly to show other information
when appropriate. For example, it displays the value as you change
Feedback, it displays various command names that don’t have their own
LED when you execute those commands, and it shows the expected
LoopTime when an incoming MIDI clock is present for synchronization.
This feature allows you clearly see what is going on with the Echoplex as
you use it. See the LoopTime Display section in the Reference chapter
for more specific details.
Buttons and Row Indicator Lights
PLAY MODE
AND THE
ROW INDICATOR LIGHTS
The row of 8 buttons on the right side of the Echoplex Digital Pro Plus
control most operations. The leftmost button, labeled Parameters
alters the meaning of the other buttons. When none of the Row Indicator
Lights to the left of the Parameter Matrix (the printed names of all the
functions, arranged in a 4x8 grid under the buttons) are lit, then all
buttons perform their primary functions: Record, Overdub,
Multiply, etc. This state is what we call Play Mode, and is probably
where you’ll spend the most time while performing. Pressing the
Parameter button several times selects each row in turn, lighting the
corresponding indicator light.
When a row indicator light is lit, then the buttons (other than
Parameters) take on the meanings written in that row of the grid. For
2-4 Echoplex Digital Pro Plus User’s Manual
instance, when the Loops light is on, the Record button no longer
performs the Record function; instead, it finds a convenient phone
booth and changes into the MoreLoops button, able to increase the
number of loops with a single push. When we refer to this in the text,
we’ll utilize both button names; for example, "Press the Record
(MoreLoops) button."
THE PERSISTENCE
OF
MEMORY
All changes to parameters are active as soon as you make them, and
they’re stored into permanent memory when you choose a different
parameter or press the Parameter button.
KEY POINT:
If you shut off the Echoplex Digital Pro and restart it, all your saved
parameters will remain the same (although you will lose any music that
you have in your loops).
You can reset all parameters to their factory defaults by holding down
the Parameters button when you power up.
Status Indicator Lights
As you take the Echoplex through its paces, you’ll discover that the lights
directly under the front-panel buttons change. Here are the meanings of
these lights:
Unlit: The function is unavailable.
Green: The button is ready to perform its usual function.
Red: The button was the last pressed and its function is operating. The
button is the most likely candidate to end the function that it started.
While editing parameters, Red indicates the current parameter column
being edited.
Orange: The button is available, but will perform a function other
than its usual one—one that is especially appropriate to the current
activity or state of the Echoplex.
Front, Back and Underfoot 2-5
THE EFC-7 FOOTPEDAL
The buttons on the optional EFC-7 footpedal perform exactly the same
function as the buttons on the Echoplex Digital Pro’s front panel.
Anytime that this manual refers to “the Record button,” either the
front-panel button or the footswitch can be used.
The only button missing on the footcontroller is the Parameters
button, which takes you out of Play mode and lets you edit parameters.
We felt that it would be inappropriate to put this button on the
footcontroller, as it might take you to an unexpected place if pressed
accidentally during a performance.
T H E B A C K PA N E L
SERIAL No:-
CAUTION
RISK OF ELECTRIC SHOCK
DO NOT OPEN
MIDI
Sync
ATTENTION
RISQUE DE CHOC ELECTRIQUE
NE PAS OUVRIR
Foot Switches
Audio
WARNING - ATTENTION
THIS APPARATUS MUST BE EARTHED.
FOR CONTINUED PROTECTION
AGAINST RISK OF FIRE REPLACE ONLY
WITH SAME TYPE AND RATING OF FUSE
UTILISER UN FUSIBLE DE RECHANGE DE
MEME TYPE ET CALIBRE
Mains Input 100-240 V.A.C.
50-60 Hz. 130mA @ 115V
Voltage
Selector
WARNING
TO REDUCE THE RISK OF FIRE OR
ELECTRICAL SHOCK DO NOT EXPOSE
THIS EQUIPMENT TO RAIN OR MOISTURE
Made in the UK
Brother
Beat
In
Out
Thru
FootPedal Overdub Feedback
Output
Input
FIGURE 2.4: The Echoplex Digital Pro back panel
The back panel contains all the jacks for connecting the Echoplex
Digital Pro to the rest of the world.
Audio Connections
The Echoplex Digital Pro can accept a wide range of audio signals as
input, and it outputs a line-level signal that can be attenuated by the
2-6 Echoplex Digital Pro Plus User’s Manual
Output knob (or MIDI Control Change messages). This makes it fit
easily into a number of audio configurations, such as:
■
Plug a guitar, keyboard, or microphone directly into the Echoplex and
plug the output into any amplifier or preamplifier. The Echoplex has a
high impedance input that works well with passive devices like electric
guitar or bass.
■
Put the Echoplex in the effects loop of your favorite amplifier or effects
device. Be careful about using distortion in the amp after the Echoplex.
When you build up a loop it will often sound muddy with distortion
after it, which you may or may not want.
■
Plug the final output of your favorite effects device directly into the
Echoplex and plug the Echoplex output into any amplifier or
preamplifier.
■
Connect the Echoplex to the Effects (Aux) Send and Return of your
mixer.
■
Connect a pair of Echoplexes to loop stereo signals. Refer to the "Stereo"
section later in this chapter.
MIDI Connections
The standard MIDI In, Out and Thru ports are described in detail under
the MIDI Ports heading in the Reference chapter. A wide range of MIDI
functions are available to you. These are summarized at the start of
Chapter 3.
Footswitch Jacks
FEEDBACK
1/4" jack that connects to the output of a passive volume pedal (one
that doesn’t require power) with a standard guitar cord. This connector
doesn’t work with all pedals, but it will work with many, including the
popular Boss FV-50L. Call Gibson if you are in doubt about whether a
particular pedal will work (or test it, if it’s convenient).
Front, Back and Underfoot 2-7
OVERDUB
A 1/4" mono phone jack for attaching a momentary switch. This is
useful if you don’t own the EFC-7 footpedal or if you prefer to use a
different style of footswitch (one with a different feel, like a sustain
pedal modeled after a piano pedal). This would be especially
appropriate for if you like to play with OverdubMode=SUS.
FOOTPEDAL
A 1/4" mono phone jack that connects to the optional EFC-7 footpedal
with a standard guitar cord. This jack also accepts a momentary switch
to execute the Record function.
If you are electrically and mechanically skilled, building your own pedal
is fairly easy. Contact customer support if you would like instructions on
how to do this.
Sync Jacks
These jacks are used to synchronize to external sync pulses or to
synchronize multiple Echoplexes. The BeatSync jack takes 1/4 mono
cord, while Brother Sync uses a 1/4" stereo cable. See the Reference
chapter entries for BeatSync and BrotherSync for more information.
Vo l t a g e S e l e c t o r S w i t c h
The Echoplex Digital Pro Plus can operate on US-style 115V power,
Japanese-style 100V power, and on European-style 230V power. All that’s
required is that the Voltage Selector Switch be set properly and the
proper power cord be attached to the Power Input Jack.
Power Input Jack
Use a power cord to connect this to a wall socket after checking that the
Voltage Selector Switch is set properly.
2-8 Echoplex Digital Pro Plus User’s Manual
S T E R E O O P E R AT I O N
You can use a pair of Echoplex Digital Pro Pluses to loop stereo signals. A
BrotherSync connection will ensure that the two halves of the signal
maintain their phase relationships through loops of any length. A MIDI
connection provides simultaneous control over the process. Figure 2.4
shows the way to create a seamless connection. The values of all
parameters in the MIDI row of the Parameter grid should be set
identically in both units. Make sure ControlSource is set to Notes or
Controllers, and not off. The Sync parameter should normally be set to
Out on both units, unless you are using an external MIDI clock. In that
case set Sync=In on both units.
"Slave" Echoplex
Audio In
Stereo Audio Source
BrotherSync
MIDI In
Audio Out
Left
Left
Right
Stereo Audio Amplifer
Right
Audio In
BrotherSync MIDI Out
Audio Out
"Master" Echoplex
Footpedal
FIGURE 2.5: Using a pair of Echoplexes to loop or delay stereo signals
Front, Back and Underfoot 2-9
2-10 Echoplex Digital Pro Plus User’s Manual
C
H
A
P
T
E
R
3
MIDI
There are a number of different ways that MIDI interacts with the
Echoplex Digital Pro. The MIDI chapter in the Reference guide contains
extensive details on all MIDI features. The MIDI functions available are:
■
You can virtually control all front-panel buttons with NoteOn or
Continuous Control messages (see the ControlSource and VirtualButtons
entries in the Reference chapter).
■
You can directly control many features that are difficult or complicated
to access from the front panel with NoteOn or Continuous Control
messages (see the MIDI Command List and DirectMIDI entries in the
Reference chapter).
■
MIDI NoteOn messages can be used to trigger loops (see the LoopTrig,
LoopTriggering, and SamplerStyle entries in the Reference chapter).
■
MIDI clocks can be used to synchronize the cycle time with drum
machines and sequencers (see the Sync parameter entry and the
Synchronization chapter in the Reference section).
■
MIDI Continuous Controllers can be used to control Volume and
Feedback levels (see the VolumeCont and FeedBkCont entries in the
Reference chapter).
■
MIDI Program Change messages can be used to select parameter
Presets. (see the Presets chapter in the Reference section.)
■
One Echoplex can control numerous others by connecting the MIDI Out
port of each one to the MIDI In port of the next, as in the figure below.
Be careful not to complete the circle and make a closed loop.
MIDI 3-1
X
MIDI In
MIDI Out
Echoplex 1
MIDI In
MIDI Out
Echoplex 2
MIDI In
MIDI Out
Echoplex 3
Figure 3.1 Connecting several Echoplexes together by MIDI
■
Loops can be dumped to sequencers and samplers, and loaded from
these devices, without any loss of sound quality (see the Sample Dump
chapter in the Reference section).
■
Parameters can be directly edited using MIDI SysEx.
■
Parameters and Presets can be uploaded and downloaded for saving on
a computer or other storage device, also using MIDI SysEx commands.
(see the SysEx chapter in the Reference section.)
3-2 Echoplex Digital Pro Plus User’s Manual
S
E
C
T
I
O
N
I I
Reference Guide
REFERENCE GUIDE INTRODUCTION
This section is a comprehensive reference for the Echoplex Digital Pro
Plus. You can find any function or button name, any knob, and any jack
by looking for its name in the upper outside corners of these pages.
This section is divided into the following chapters:
■
Chapter 4 - Parameters
■
Chapter 5 - Functions
■
Chapter 6 - Synchronization
■
Chapter 7 - MIDI Control
■
Chapter 8 - Parameter Presets
■
Chapter 9 - User Interface
■
Chapter 10 - MIDI Sample Dump
■
Chapter 11 - MIDI SysEx
Within each chapter the entries are listed alphabetically with their titles
at the top of the page, so it should be relatively easy to find what you are
looking for. If you have difficulty, consult the table of contents.
Reference II-i
KEY
TO THE
DIAGRAMS
Some of the entries in this section contain diagrams portraying the way
various Echoplex functions behave. Here are some tips that will help you
to interpret them:
■
Musical material is represented as boxes filled with patterns, like this:
■
When musical material is mixed together, the patterns are shown
overlapping, like this:
+
=
■
Button pushes are indicated by vertical lines with arrowheads at the
ends, labeled by the first letter of the button. The button abbreviations
are:
R
O
M
I
Me
U
N
Record button
Overdub button
Multiply button
Insert button
Mute button
Undo button
NextLoop button
The arrows have the following meanings:
Press and release the button in one motion.
II-ii
Echoplex Digital Pro Plus User’s Manual
Press the button and hold it down
Release the button
Reference II-iii
II-iv Echoplex Digital Pro Plus User’s Manual
C
H
A
P
T
E
R
4
Parameters
Reference - Parameters 4-1
8ths/Cycle
Default: 8
Parameter Row: Timing
Synchronization parameter that determines tempo based on
Loop time.
Values: 1-96, 128, 256
When synchronizing with MIDI, 8ths/cycle determines the number of
8th-notes that make up each cycle. In order to use this feature, you must
have a device that generates or syncs to MIDI Clock messages. This
device will usually be a sequencer or drum machine. In this discussion,
we will refer to a device that generates MIDI clocks as a clock source.
When editing 8ths/cycle, the most important values come first to make
them easy to select: 8,4,2,6,12,16,32,64,128,256, then it goes on with
1,2,3...96.
While editing 8ths/cycle the Feedback Knob becomes the
DataWheel, so you can use it to quickly change the value to what you
want.
Note that with the DataWheel feature, the top of the knob range ends
at 54 instead of 96. This was done because we found it was easier to set
the more typical values when the knob resolution was limited a little bit.
To reach the values between 54 and 96 you simply use the front panel
button to continue incrementing the number in the usual way.
A long-press while editing the 8ths/cycle parameter returns you to the
initial value of 8.
Example 4.1: Syncing to an external MIDI clock
1. Set 8ths/Cycle=8. This means that each cycle will be eight eighth-notes
(one measure) long.
2. Set Sync=In.
3. Connect the MIDI Out port of a clock source to the Echoplex Digital
Pro’s MIDI In port using a standard MIDI cable.
4-2 Echoplex Digital Pro Plus User’s Manual
8ths/Cycle
Continued
4. Make sure that your clock source is set to transmit MIDI Clocks (this
setting is usually found under a “MIDI” or “Sync” menu or function
key).
5. Reset the current loop by holding down the Record button for several
seconds.
6. Load a rhythm pattern or sequence into your clock source, set it up to
loop indefinitely, and hit Play. At the beginning of each measure, you
will see the sync LED flash on the Echoplex display.
7. The next time you hit Record, the Echoplex will wait for the beginning
of the next measure before starting the Record process. You end the
Record operation by pressing the Record button a second time. Instead
of ending immediately, recording will continue until the next measure
boundary, as determined by the incoming MIDI clocks.
8. Once you’ve recorded your first cycle this way, the Echoplex continues to
monitor the clock source and maintain synchronization. However, once
the basic loop is recorded, the Echoplex will not change the timing or
playback speed of the loop to respond to changes in your clock rate.
Sequences with tempo changes in them, therefore, are not good choices
for sync sources for the Echoplex.
Another useful variation on the above theme is to reset the current loop
and briefly send MIDI clock to the Echoplex from your clock source. You
can easily do this by playing a single empty measure from a sequencer.
Once the Echoplex has received MIDI clock while in reset, it will know
to expect more. Press Record before restarting your clock source. Then,
the Echoplex will wait for the first clock pulse before recording,
displaying "ooo" in the display while it does so. This is a good way to get
the Echoplex and a sequencer to start simultaneously. Some sequencers
make this approach difficult, however, because they send out MIDI
clocks even when they’re not actively playing.
Example 4.2: Syncing a drum machine or sequencer to the
Echoplex
1. Set 8ths/Cycle=8. This means that each cycle will be eight eighth-notes
(one measure) long.
Reference - Parameters 4-3
8ths/Cycle
Continued
2. Set Sync=Out.
3. Connect the MIDI In port of a sequencer or drum machine to the
Echoplex Digital Pro’s MIDI Out port using a standard MIDI cable.
4. Load a pattern or sequence into your drum machine or sequencer. Set
the clock parameter to Internal and play back the material to verify that
your MIDI and audio connections are working. Stop the device.
5. Set your drum machine or sequencer to sync to incoming MIDI Clocks.
6. Press Play on your drum machine or sequencer. It will wait for incoming
clocks before taking off.
7. Record a loop one measure long (in 4/4 time) in the Echoplex. As soon
as you press Record the second time, MIDI clocks will be transmitted.
Your drum machine or sequencer should play back in perfect sync.
If you want to sync to loops that have different lengths, set 8ths/Cycle
appropriately. For instance, set 8ths/Cycle=6 to sync to a 3/4 time
measure, or set 8ths/Cycle=16 to sync to 2 4-beat measures.
C H A N G I N G T I M E S I G N AT U R E
RHYTHM
IN
When a loop is playing and the 8ths/Cycle or Sync parameters are edited,
the change of value is only activated at the first Loop StartPoint after you
come out of the Parameter Editing state. At that point you jump directly
to the new selected value. This means the value change occurs only
while back in the playing state, and only at a rhythmically sensible
point. This helps eliminate any confusion when working with a
synchronized sequencer and makes for much smoother transitions into
new time signatures.
Try changing 8ths/Cycle with Sync = Out and a sequencer slaving to the
clock. You control the sequencer's tempo in relation to your loop!
4-4 Echoplex Digital Pro Plus User’s Manual
8ths/Cycle
Continued
MIDI CLOCK LIMITS
There is a limit to how fast the Echoplex will transmit MIDI clocks—the
equivalent of about 400 beats per minute. If you create a loop that’s 1/2
a second long with 8ths/Cycle=16, then that 1/2 second will represent 2
measures, or 8 beats. Since there are 120 1/2 seconds in a minute, each
with 8 beats, the effective timing would be 960 beats per second, which
isn’t very common in musical usage, and won’t be transmitted by the
Echoplex. The moral: short loops and high values of 8ths/Cycle don’t
mix.
In older versions of the Echoplex hardware the 8ths/Cycle parameter
was labeled 8ths/Beat.
See Also: Sync, Quantize, Visual Tempo Guide, LoopDivide, MIDI Ports
Reference - Parameters 4-5
AutoRecord
Default: Off
Parameter Row: Loops
Starts recording whenever you enter an empty loop.
Values: Off, On
When this is on, the Echoplex Digital Pro will start recording every time
you enter an empty loop. This only applies when the number of loops is
more than one.
Example 4.3: AutoRecord
1. Set the number of loops to 2 with MoreLoops
2. Record a short loop in loop 1
3. Press the NextLoop button
4. Start playing right away—you’ll be recording
5. Press Record or NextLoop to end recording in Loop 2
See Also: MoreLoops, SwitchQuant, LoopTrig, NextLoop
4-6 Echoplex Digital Pro Plus User’s Manual
Channel
Default: 1
Parameter Row: MIDI
Determines the MIDI channel for all MIDI functions.
Values: 1-16
This sets the MIDI channel for controlling Echoplex operations with an
external MIDI controller or sequencer.
See also: Source #, ControlSource, MIDI Control Chapter
Reference - Parameters 4-7
ControlSource
Default: Notes
Parameter Row: MIDI
Sets up MIDI control of Echoplex Digital Pro operations.
Values: Notes (not), Controllers (Ctr), Off (OFF)
This parameter controls how (and if ) Echoplex Digital Pro operations
are transmitted and received over MIDI. It is useful primarily if you have
an interest in controlling the Echoplex Digital Pro from a sequencer or
from a programmable footcontroller. If you are controlling one or more
"slave" Echoplexes from a single "master," all the values for
ControlSource among the various units should be identical (and not Off).
Every button on the Echoplex Digital Pro front panel (and the
corresponding buttons on the footpedal) can generate either a Note On
or a Continuous Controller (with value 64) when it is pressed. When it is
released, the corresponding Note Off or Continuous Controller with
value 0 is sent. This allows a sequencer to capture and later recreate
almost any sequence of Echoplex moves, no matter how complex. The
fact that each button push and release pair generates a pair of MIDI
messages allows you to duplicate long presses of buttons that either
initiate special functions or reset parameters to their default values.
When ControlSource=Notes, each button press will send out a pair of
notes (exactly which notes is controlled by the Source # parameter).
When ControlSource is set to Controllers, each button press will send out
a pair of Continuous Controllers. Each of these methods works equally
well—the only reason that you might be compelled to set this to
Controllers is if you want to embed a track of Echoplex control
commands into a sequence that is playing notes on all 16 MIDI
channels. You can usually choose a starting controller number (with
Source #) so that the Echoplex commands will be able to share a channel
with a stream of notes destined for a sound module without affecting
their sound.
You generally won’t know what state the Echoplex Digital Pro will be in
when you play back your control sequence. Because of this, there are
many cases where it’s not enough to simply record your button pushes.
Suppose, for instance, that you want to create a short sequence to
change the SamplerStyle to One. If you start from the normal playing
4-8 Echoplex Digital Pro Plus User’s Manual
ControlSource
Default: Notes
Continued
state, and also have SamplerStyle set to its default value of Run, it takes 4
pushes of the Parameters button and two pushes of the NextLoop
(SamplerStyle) button to accomplish this. So you record exactly those
button pushes into a sequence. Fine. Then you play it back—Whoops!
You didn’t start from the same state as when you recorded the sequence,
and the sequence starts a Load operation, wiping out your current loop.
Ouch!
The moral of the story is that, when recording a control sequence, each
button that you press should start with a long press to reset it to its
default state.
Example 4.6: Creating a Sequence to Set SamplerStyle to One
1. Connect the MIDI Out from the Echoplex Digital Pro to the MIDI In of
your sequencer.
2. Hit Record on your sequencer.
3. Hold down the Parameter button for a second or two. The Echoplex
Digital Pro will shift into Play mode if it didn’t start out there.
4. Press Parameter 4 times
5. Hold down the NextLoop button for a second or two. The SamplerStyle
will change to Run if it didn’t start out there.
6. Press the NextLoop button once.
7. Press the Stop button on your sequencer to end recording.
See also: Source #, Channel, MIDI Control Chapter
Reference - Parameters 4-9
FeedBkCont
Default: 1
Parameter Row: MIDI
Choose a MIDI Controller for Feedback
Values: 0-99
This function lets you pick which MIDI Continuous Controller will
control feedback. The feedback value can be controlled by MIDI, by the
Feedback Knob on the front panel, or by a volume pedal connected
to the Feedback Jack on the back panel.
See the explanation of the Feedback Knob in this chapter for the most
detailed explanation of feedback.
See also: Channel, Feedback, Feedback Knob, Feedback Jack
4-10 Echoplex Digital Pro Plus User’s Manual
InsertMode
Default: Rehearse
Parameter Row: Switches
Affects the behavior of the Insert button
Values: Rehearse (rhr), Replace (rPL), Substitute (Sub), HalfSpeed
(h.SP), Reverse (rEV), Insert (InS), Sustain (SUS)
InsertMode redefines the function of the Insert button so that different
functions can be available from the front panel according to your needs.
All of these functions are also available independently by MIDI.
INSERTMODE=REHEARSE
When used in Play mode, Rehearse has the same meaning as if
InsertMode=Insert, described fully under the Insert heading.
The effect of InsertMode=Rehearse is felt when you end a Record with the
Insert button. The cycle that you’ve just recorded will be played back
exactly once, regardless of the feedback setting. The underlying timing of
the cycle will continue and any new audio played is fed into the loop. If
you play something that you really like and want to keep for more
repetitions, press Insert again immediately after you’ve played it. One
cycle’s worth of material prior to that point will be kept as the loop, and
will repeat according to the feedback setting.
Rehearse is useful for practicing an idea before keeping it as the loop.
See Rehearse in the Functions section for more information.
INSERTMODE=INSERT
When used in Play mode, this causes you to go into Insert mode when
the Insert button is pressed, fully described under the Insert heading in
this chapter.
Reference - Parameters 4-11
InsertMode
Continued
If InsertMode=Insert, pressing Insert at the end of a Record ends the
recording and immediately inserts a second cycle (as it continues
recording); in other words, it puts you into Insert mode. The insertion
continues until memory runs out or you end it with Insert or an
alternate ending for the Insert operation. This is very useful for dividing a
longer loop into multiple cycles as you record it. This can allow you to
easily set a tempo for an external sequencer when using MIDI clock out,
for example.
See Insert in the Functions section for more information.
INSERTMODE=REPLACE
When InsertMode=Replace, the Insert button becomes the Replace
button. Each press and release of the Replace button during Play mode
will replace a segment of the loop with new material for as long as
Replace is held down. The overall loop length is not changed.
If Quantize=On and Replace is pressed during a cycle, the function will
begin at the end of the current cycle, and will continue to the next cycle
point after Replace is released again.
When InsertMode=Replace and Insert is used as an alternate ending
during a Record, the Record ends as if you’d pressed the Record button
and the Replace function immediately begins as explained above.
See Replace in the Functions section for more details.
INSERTMODE=SUBSTITUTE
When InsertMode=Substitute, the Insert button becomes the Substitute
button during Play mode. Substitute has some similarity to the Replace
function. However, with Substitute the original loop playback continues
4-12 Echoplex Digital Pro Plus User’s Manual
InsertMode
Continued
while you are playing the new material. On the next repetition, only the
new audio will remain in the loop and the old portion will be removed.
See Substitute in the Functions section for more details.
INSERTMODE=HALFSPEED
When InsertMode=HalfSpeed, the Insert button becomes the
HalfSpeed button during Play mode. Pressing HalfSpeed switches
the current loop an octave lower, to half speed. The Insert LED turns red
and the display says H.SP briefly. Press HalfSpeed again and the loop
returns to FullSpeed. The LED turns green and F.SP is displayed for a
moment.
See HalfSpeed in the Functions section for more details.
INSERTMODE=REVERSE
When used in Play mode, Reverse causes the current loop to be played
backwards.
When InsertMode=Reverse and Insert is used as an alternate ending
during a Record, the Record ends and reversed playback starts
immediately.
See Reverse in the Functions section for more details.
Reference - Parameters 4-13
InsertMode
Continued
I N S E R T M O D E = S U S TA I N
InsertMode=Sustain changes the way the Insert and Multiply buttons
work. SUS turns Insert and Multiply into Unrounded functions with
Sustain action on the button. In other words, they start when the button
is pressed and end immediately when it is released, just like Record or
Overdub do when RecordMode or OverdubMode=SUS. When the function
ends it does so as if Record had been pressed as an alternate ending to
the Insert. This is what we call an Unrounded Multiply or Unrounded Insert,
because instead of rounding off to the next Cycle point it is ended
immediately and the loop time is redefined.
See SUS Commands in the Functions section for more details.
See also: Insert, Record, HalfSpeed, Reverse, Replace, Substitute, SUS Commands
4-14 Echoplex Digital Pro Plus User’s Manual
Default: Loop
Loop/Delay (InterfaceMode)
Parameter Row: Timing
Switch between loop and digital delay applications.
Values always available:
Loop (LOP), Delay (dEL), Expert (EXP), Stutter (Stu)
Values also available with a pedal inserted:
Out (Out), Input (In), Replace (rPL), Flip (FLI)
The Loop/Delay parameter determines how feedback, Loop Input Volume,
and Loop Output Volume are controlled during various states. The
parameter affects how you interact with and control the loop, and
different settings will be more or less useful to different players and
different styles of looping. We call these InterfaceModes.
Basically, InterfaceModes reroute the control signals from the Feedback
Knob on the front panel and the Feedback Pedal Jack on the back,
and determine when they are active and which parameters they control.
In some cases these settings end up affecting Insert in interesting ways
as well.
There were only three settings in previous versions of the Echoplex –
LoopMode, DelayMode, and OutMode. LoopMode has always been the
default setting and most people use it. DelayMode is there to give a
familiar style of operation to people accustomed to using delays.
OutMode was only available if a pedal was inserted in the Feedback
Pedal Jack, and is really just like LoopMode but with Loop Output
Volume controlled by the pedal while Feedback was controlled by the
Feedback Knob.
Now we have added several new options to allow new ways to interact
with the loop, for a total of eight. Four of the InterfaceModes are available
at any time, and four require a pedal to be inserted in the Feedback
Pedal Jack. Those four are not visible in the parameter selection
unless the pedal is connected.
These InterfaceModes are really expert functions, for experienced users
to find subtle new ways to interact with loops. For newer or less
experienced users, we recommend that you stay with LoopMode until
you feel ready to experiment with the other InterfaceModes.
Reference - Parameters 4-15
Loop/Delay (InterfaceMode)
Continued
L O O P M O D E ( L O O P / D E L AY = L O P )
LoopMode is the default setting for the Loop/Delay parameter, and is the
most common way of using the Echoplex. This is the InterfaceMode we
recommend people to start with, and most people stay with it.
In LoopMode the Feedback control is always active, whether Overdubbing
or not. Feedback is controlled by the front panel Feedback Knob if
there is no pedal inserted, or by a pedal in the Feedback Pedal Jack.
Loop Input Volume and Loop Output Volume are fixed all the way on or off
depending on the function, so these are being set for you according to
what you are doing.
The following table shows how Feedback, Loop Input Volume, and Loop
Output Volume are set in various states.
Table 4.x: LoopMode
State
(Pedal/NoPedal)
Feedback
Loop
Input
Loop
Output
Playing
Pedal/Knob
0
100%
Overdubbing
Pedal/Knob
100%
100%
Substituting
0
100%
100%
Recording
NA
100%
0
Multiplying
Pedal/Knob
100%
100%
Inserting
0
100%
0
Replacing
0
100%
0
Mute
100%
0
0
4-16 Echoplex Digital Pro Plus User’s Manual
Loop/Delay (InterfaceMode)
Continued
D E L AY M O D E ( L O O P / D E L AY = d E L )
DelayMode operation is like a traditional delay, and is useful for people
familiar with that style of looping. In a traditional delay, the input to the
delay line is always open and Feedback is always being applied. When a
“Hold” button is pressed, the input to the delay is closed, and the
Feedback is set to 100%.
Therefore, when the Echoplex is in DelayMode it acts much like a
traditional delay. You set (and reset) the delay time by a pair of presses
on the Record button. The Loop Input Volume is always open and
Feedback is controlled by the front panel Feedback Knob. You’ll
probably want to keep the Feedback Knob set fairly low when you use
the delay function.
In DelayMode, some actions have different effects than in LoopMode.
■
The Overdub button becomes the Hold button. When you press
Overdub the Feedback is set to 100% for infinite repeats and the Loop
Input Volume is closed so that no new material is recorded into the delay.
This is different from the LoopMode style, where Feedback is always
available to control independently of whether Overdub is on or not.
■
Hold also works while Multiplying and while the loop is Muted.
■
Any pedal attached to the Feedback Jack will control the Loop Input
Volume to the delay rather than Feedback. This is useful as a way to do
volume swells into the delay line.
■
Feedback will only be controllable with the front-panel Feedback
Knob.
The following table shows how Feedback, Loop Input Volume, and Loop
Output Volume are set in various states.
Reference - Parameters 4-17
Loop/Delay (InterfaceMode)
Continued
Table 4.x: DelayMode
State
(Pedal/NoPedal)
Feedback
Loop
Input
Loop
Output
Playing
Knob
Pedal
100%
Overdub (hold)
100%
0
100%
Substituting
0
Pedal
100%
Recording
NA
Pedal
0
Multiplying
Knob
Pedal
100%
Multiplying (hold)
Knob
0
100%
Inserting
0
Pedal
0
Replacing
0
Pedal
0
Mute
100%
Pedal
0
Mute (hold)
100%
0
0
E X P E R T M O D E ( L O O P / D E L AY = E X P )
ExpertMode uses the pedal for Feedback during play and the front panel
FeedBack Knob for Feedback during Overdub, Multiply, and Substitute.
This allows you to have different Feedback settings between playing and
overdubbing. When there is no pedal connected to the Feedback
Pedal Jack, the Feedback during play is always set to maximum
(100%).
The following table shows how Feedback, Loop Input Volume, and Loop
Output Volume are set in various states.
4-18 Echoplex Digital Pro Plus User’s Manual
Loop/Delay (InterfaceMode)
Continued
Table 4.x: ExpertMode
State
(Pedal/NoPedal)
Feedback
Loop
Input
Loop
Output
Playing
Pedal/100%
0
100%
Overdubbing
Knob
100%
100%
Substituting
0
100%
100%
Recording
NA
100%
0
Multiplying
Knob/100%
100%
100%
Inserting
0
100%
0
Replacing
0
100%
0
Mute
100%
0
0
SamplePlay
100%
0
Pedal
S T U T T E R M O D E ( L O O P / D E L AY = S t u )
StutterMode is just like LoopMode, except that Insert works as what we
call a SingleCycleMultiply.
SingleCycleMultiply works as follows. When you have done a Multiply and
have several Cycles in a loop, pressing Insert will insert repetitions of
the next Cycle. As the inserts are made you can overdub a longer phrase
over the repetitions of the Cycle. The results will be inserted into the
loop when you press Insert again. If you press Undo instead, the loop
will return to its original form.
Using Insert-Undo like this lets you alter the flow of a loop by having
one of the Cycles Stutter in a way similar to a skipping CD, and then
return to the original. This can make very interesting results when
working with very short Cycles, and that is why it is called StutterMode.
Reference - Parameters 4-19
Loop/Delay (InterfaceMode)
Continued
STUTTER
AND
LOOPCOPY
Stutters can be done into a new loop as a LoopCopy function when in
StutterMode. With multiple loops set up in MoreLoops, and
SwitchQuant=On, pressing Next-Insert will do the stutter into a new
loop. Any new material you play will be overdubbed on this loop as it
stutters. And as before, you keep it with another press of Insert.
Pressing Undo sends you back to where you were in the previous loop.
Copying a stutter is a good way to preserve the original loop while
making stuttered variation out of a fragment from it.
MANAGING MEMORY
IN
STUTTERMODE
If you perform a very large number of repetitions of Insert and Undo
button presses to trigger and cancel the SingleCycleMultiply, you may
eventually notice bits of the loop being erased by the Undo presses as
well. This is a result of the way the Echoplex processes its memory. If
you're planning to do heavy Insert + Undo button combinations with
SingleCycleMultiply, you should be aware of this, and consider copying
your loop via NextLoop and LoopCopy before doing intensive Stutter
work, so you can return to the original loop fully intact if you wish.
Another trick you can do to avoid the loss of the overdubs is to first fill a
bit of memory reserve by letting the loop repeat a few times without
AutoUndo. (Without the left green dot AutoUndo LED blinking.) You
can do this by reducing Feedback a little bit for a few repetitions, say to
120 – 125. That is small enough that the fading will not be obvious over a
couple of repetitions, but you will force the Echoplex to copy the loop a
few times into new memory. Obviously by doing this you lose some of
the older stuff in memory, which you will note if you later want to go
backwards with Undo. The reasons why this works are very
complicated, but suffice to say that you will not find bits of your loop
disappearing when doing heavy stuttering effects!
SUBSTITUTE
AND
STUTTERMODE
Substitute gains more advanced control in StutterMode. If you have a
Pedal inserted in the Feedback Pedal Jack for Feedback control, the
pedal controls the Feedback during normal use and the knob setting is
4-20 Echoplex Digital Pro Plus User’s Manual
Loop/Delay (InterfaceMode)
Continued
not used. However, during Substitute the FeedBack Knob becomes
active for Feedback control. This lets you have two different Feedback
settings between normal playing and Substituting. If you do not have a
pedal inserted, Substitute operates the way it normally does in LoopMode
and has Feedback set to 0 while active. See the Substitute section to learn
more about this function.
The following table shows how Feedback, Loop Input Volume, and Loop
Output Volume are set in various states.
Table 4.x: StutterMode
State
(Pedal/NoPedal)
Feedback
Loop
Input
Loop
Output
Playing
Pedal/Knob
0
100%
Overdubbing
Pedal/Knob
100%
100%
Substituting
Knob/0
100%
100%
Recording
NA
100%
0
Multiplying
Pedal/Knob
100%
100%
Inserting
Pedal/Knob
100%
100%
Replacing
0
100%
0
Mute
100%
0
0
O U T M O D E ( L O O P / D E L AY = O u t )
The Out choice for the Loop/Delay parameter is only available when a
pedal is plugged into the Feedback Pedal Jack. This state is identical
Reference - Parameters 4-21
Loop/Delay (InterfaceMode)
Continued
to normal LoopMode, except that the pedal will now control the Loop
Output Volume, and Feedback will be controllable only from the front
panel FeedBack Knob.
The following table shows how Feedback, Loop Input Volume, and Loop
Output Volume are set in various states.
Table 4.x: OutMode
State
(Pedal/NoPedal)
Feedback
Loop
Input
Loop
Output
Playing
Knob
0
Pedal
Overdubbing
Knob
100%
Pedal
Substituting
0
100%
Pedal
Recording
NA
100%
0
Multiplying
Knob
100%
Pedal
Inserting
0
100%
0
Replacing
0
100%
0
Mute
100%
0
0
I N P U T M O D E ( L O O P / D E L AY = I n )
The In choice for the Loop/Delay parameter is only available when a
pedal is plugged into the Feedback Pedal Jack. InputMode behaves
just like LoopMode except that the pedal controls the Loop Input Volume
in the states where the input is open. Feedback is only controlled by the
4-22 Echoplex Digital Pro Plus User’s Manual
Loop/Delay (InterfaceMode)
Continued
front panel FeedBack Knob. InputMode does not exist without a Pedal
connected.
The following table shows how Feedback, Loop Input Volume, and Loop
Output Volume are set in various states.
Table 4.x: InputMode
State
Feedback
(Pedal/NoPedal)
Loop
Input
Loop
Output
Playing
Knob
0
100%
Overdubbing
Knob
Pedal
100%
Substituting
0
Pedal
100%
Recording
NA
Pedal
0
Multiplying
Knob
Pedal
100%
Inserting
0
Pedal
0
Replacing
0
Pedal
0
Mute
100%
0
0
R E P L A C E M O D E ( L O O P / D E L AY = r P L )
In ReplaceMode the pedal controls Loop Output Volume and Feedback
simultaneously. The result is similar to LoopMode, except that you hear
the reduction for Feedback immediately instead of on the next loop pass.
ReplaceMode makes it easier to "sculpt" the loop using the Feedback
control. If you have Overdub on, the pedal serves as a Replace function
Reference - Parameters 4-23
Loop/Delay (InterfaceMode)
Continued
with smooth level control. This allows you to add new material and
smoothly drop out the loop underneath you as it is Overdubbed,
allowing for a smooth real-time Replace.
The disadvantage of ReplaceMode is that if the pedal is in the toe-up
position, the Loop Output Volume is also zero, so it is not possible to
create loops with only single repetitions. ReplaceMode is also less
interesting for any loops relying on reduced Feedback settings, since the
output is affected.
ReplaceMode does not exist without a Pedal connected to the Feedback
Pedal Jack.
The following table shows how Feedback, Loop Input Volume, and Loop
Output Volume are set in various states.
Table 4.x: ReplaceMode
State
Feedback
Loop
Input
Loop
Output
Playing
Pedal
0
Pedal
Overdubbing
Pedal
100%
Pedal
Substituting
Knob
100%
100%
Recording
NA
100%
0
Multiplying
Pedal
100%
Pedal
Inserting
0
100%
0
Replacing
0
100%
0
Mute
100%
0
0
4-24 Echoplex Digital Pro Plus User’s Manual
Loop/Delay (InterfaceMode)
Continued
F L I P M O D E ( L O O P / D E L AY = F L I )
FlipMode is an unusual and interesting InterfaceMode, in that the pedal
controls both Loop Input Volume and Feedback simultaneously. The
interesting thing is that Feedback on the pedal is reversed! When the
pedal is all the way in the toe-up position, the Loop Input level is zero
and the feedback is at 100%. When the pedal is all the way in the toedown position, the loop input is at 100%, but the feedback goes to 0.
In use this is like a Hold pedal, but with a more fluid action. You can also
think of the pedal as a “soft replace” since operating the pedal lets you
smoothly crossfade a replacement section into your loop.
USING FLIPMODE
To get the hang of FlipMode, use loops of about 1 second, keep the pedal
in the toe-up position most of the time, and turn the front panel
FeedBack Knob to zero. Set the loop time with a couple presses of
Record, and experiment with the pedal as you play new material.
To record an ordinary loop in FlipMode, put the pedal in the toe-down
position and end Record with Overdub.
In Overdub the Feedback is taken from the front panel FeedBack Knob
(which also operates in reverse!), so once you've made an interesting
loop by crossfading in Play, you can keep it by pressing Overdub. You
can then Overdub onto it using the pedal to control the Loop Input
Volume.
By setting the front panel FeedBack Knob you can make the Overdub
state into a simple delay, which can be used as a contrast to the unusual
crossfade effect.
Other functions interact with FlipMode as follows.
Reference - Parameters 4-25
Loop/Delay (InterfaceMode)
Continued
■
Multiply allows you to continue to crossfade over repetitions of your
loop.
■
Insert does a SingleCycleMultiply (as described under StutterMode), so
you can Overdub onto repeats of the next Cycle in the loop. (Remember
you can hit Undo to end the SingleCycleMultiply and not keep the
stutters in the loop).
■
Mute allows you to build up a crossfaded loop without hearing it and
then bring it in at once.
FlipMode does not exist without a Pedal connected.
The following table shows how Feedback, Loop Input Volume, and Loop
Output Volume are set in various states.
Table 4.x: FlipMode
State
Feedback
(reversed)
Loop
Input
Loop
Output
Playing
Pedal
Pedal
100%
Overdubbing
Knob
Pedal
100%
Substituting
0
Pedal
100%
Recording
NA
Pedal
0
Multiplying
Pedal
Pedal
100%
Inserting
Pedal
Pedal
100%
Replacing
0
100%
0
Mute
Pedal
Pedal
0
4-26 Echoplex Digital Pro Plus User’s Manual
Loop/Delay (InterfaceMode)
Continued
U S I N G T H E I N T E R FA C E M O D E S
STEREO ECHOPLEX SETUP
WITH A
Many of the InterfaceModes require a pedal connected to the Feedback
Pedal Jack in order to be available at all, and use that pedal as a key
part of their functionality. This causes a problem with the traditional
Echoplex Stereo setup, where a pedal is only connected in the Master
side, and all value changes made with it are sent to the Slave Echoplex by
MIDI. With the alternate InterfaceModes, the slave in such a setup will
not have a pedal inserted and it can not be set to the InterfaceModes
requiring a pedal. The slave will only cycle through the first four
InterfaceModes, while the master cycles through all 8.
There are a few ways to work around this problem.
One way is to use a stereo volume pedal for the Feedback Pedal Jack.
Connect the two channels of the pedal to the two Echoplexes, and then
each will have a pedal inserted with the control coming from the same
place. Both can be set to all InterfaceModes, and be controlled
appropriately. If you are really picky, you may find that your pedal is not
exact between channels, so you may find values are not set exactly the
same between the two Echoplexes. Fixing this will either mean finding a
pedal that is better matched, or soldering a wire between the two
potentiometer wipers inside your pedal to force them to have the same
voltage. (This makes the pedal useless as a true stereo volume pedal, so
make sure you understand what you are doing before attempting such a
modification.)
A second approach is to use a single mono pedal connected to the
Feedback Pedal Jack of both units with a Y connector. For this to
work, the potentiometer in the pedal must be half the resistance of the
pedal requirement for a single Echoplex. This means it will have to be
approximately 10 KOhms or greater, but you may need to experiment a
bit to find a pedal that uses the full range of the pedal in the best way.
For some Echoplex units, values as low as 5 KOhm may work better.
Reference - Parameters 4-27
Loop/Delay (InterfaceMode)
Continued
A third way which is less useful is to insert a dummy connector into the
Feedback Pedal Jack of the slave, without connecting it to anything.
Then you will be able to at least set the slave to any of the InterfaceModes
and use some of their functionality, but on the slave you will not be able
to control some parameters that the pedal controls in some of the
InterfaceModes. Any Feedback settings controlled by the pedal will be
sent by MIDI from the Master, so InterfaceModes that use the pedal for
Feedback will work fine. But Loop Input Volume and Loop Output Volume
will not be transmitted, so any InterfaceModes that use the pedal for
those will not work very well this way for Stereo.
See also: Feedback Knob, Feedback Pedal Jack, Overdub, Substitute, Replace, Record,
Multiply, Insert, Mute, Undo, LoopCopy
4-28 Echoplex Digital Pro Plus User’s Manual
LoopCopy
Default = off
Parameter Row: Loops
Copies the current loop into the next, in several ways
Values: Off, Timing, Sound
When LoopCopy is set to Sound (Snd) or Timing (ti), The Echoplex will do a
copy function anytime you switch into a reset loop.
COPY
THE
AUDIO
TO A
NEW LOOP
If LoopCopy=Sound it will cause the audio content of the current loop to
be automatically copied into every empty (reset) loop that you enter.
The sound copy occurs in real time, and works just like doing a Multiply
into the new loop. If you let it keep going, your previous loop will be
repeated into multiple cycles in the new loop, which will be counted in
the Multiple Display. Any new material that you play during this copy
will be overdubbed on top. When you want to complete the copy, press
the Multiply button to end. The copy will round off to the next cycle,
exactly as it does when using the Multiply function.
COPY
THE
TIME BASE
TO A
NEW LOOP
Similarly, if LoopCopy=Timing the length of the current loop will be
automatically copied into every reset loop that you enter. This also
happens in real time, and works just like doing an Insert into the new
loop. If you let it continue you will see additional cycles counted in the
Multiple Display. Any new material that you play will be added to the
new loop. When you want to complete the copy, press Insert to end.
The copy will round off to the next cycle, exactly as it does when using
the Insert function.
Reference - Parameters 4-29
LoopCopy
Continued
THE
EFFECT OF
AUTORECORD
If AutoRecord=On and LoopCopy is not Off, LoopCopy will take
precedence, and the Echoplex will behave as if AutoRecord=Off.
OTHER COPY METHODS
Another way to perform copies is to use Multiply, Insert, or Overdub
as alternate endings to a NextLoop press when SwitchQuant=On. See
the discussion under the SwitchQuant heading in this chapter for a full
explanation and examples.
See also: NextLoop, SwitchQuant, AutoRecord
4-30 Echoplex Digital Pro Plus User’s Manual
LoopTrig
Default: 84
Parameter Row: Loops
Determines which MIDI note numbers will trigger loops.
Values: 0-127
When multiple loops are set up using the MoreLoops parameter,
incoming MIDI NoteOn messages can trigger any loop’s playback. This
function is called LoopTriggering, and is described in more detail in the
functions section.
The LoopTrig parameter sets the value of the MIDI note number that will
trigger Loop 1. The other loops are triggered by successive note
numbers; i.e., if Loop 1 is triggered by note 84, then Loop 2 will be
triggered by note 85, Loop 3 will be triggered by note 86, etc.
Note: The default value of 84 will be displayed in your sequencer either
as C5 or C6.
See also: Channel, LoopTriggering, SamplerStyle, Velocity, MoreLoops
Reference - Parameters 4-31
MoreLoops
Default: 1
Parameter Row: Loops
Divides memory into multiple loops.
Values: 1-16
This function lets you divide the Echoplex Digital Pro’s memory into up
to 16 separate loops. You can switch among them with the NextLoop
button or with incoming MIDI messages.
The Echoplex Digital Pro’s memory will be divided evenly among the
loops; for instance, if you have 198 seconds of memory installed, then
setting MoreLoops=4 will give you 4 loops of 49.5 seconds each.
Changing the number of loops with the MoreLoops parameter will reset
all existing loops since the memory must be reconfigured.
When you first turn on the Echoplex Digital Pro, the rightmost two
characters of the display (above the word “Multiple”) tell you how many
loops are set up.
If the number of loops is more than one, than the leftmost digit in the
display (above the word “Loop”) tells you which loop is current. On the
Loop Display the numbers above 9 are shown with letters, due to the
lack of a leading 1. So they go 1, 2, 3…9, A, b, C, d, E, F, G.
All recording and overdubbing operations affect the current loop only.
You can Reset all the loops at once by a long press of Record (to reset
the current loop) followed by a long press of Multiply. This is called a
GeneralReset. Both types of Reset are also available as DirectMIDI
commands.
See Also: LoopCopy, NextLoop, AutoRecord, LoopTrig, SamplerStyle, Velocity, Multiply,
SwitchQuant
4-32 Echoplex Digital Pro Plus User’s Manual
MuteMode
Default: Continuous
Parameter Row: Switches
Determines how sound is restarted after it is muted.
Values: Continuous (Cnt), Start (StA)
MuteMode determines where loop playback starts the second time you
press the Mute button to UnMute a loop. Whichever approach you
choose, the Undo button takes the opposite viewpoint, so you’ll always
have both ways to end a Mute readily available.
MuteMode=Star t
When MuteMode=Start, a second press of the Mute button will always
restart the current loop at the beginning. This is probably the most
useful setting for solo playing.
When MuteMode=Start, the end of the Mute is affected by the setting of
Quantize. If Quantize=On, then sound won’t restart until the end of the
current cycle.
Be aware that restarting the loop can move your StartPoint in relation to
external sequencers or other musicians. This could be a problem if you
wish to keep things tight with a sequencer, but it can also be very useful
if the band’s time has shifted and you need to line your loop up again
with everybody else.
MuteMode=Continuous
When the MuteMode=Continuous, the loop continues counting even
when it is silenced by pressing Mute. Then, when you press Mute a
second time to allow audio output again, the loop will become audible
wherever it happens to be at that time. This is probably most useful if
you want to silence the loop for just a beat or two to play a fill, or have
your loop stay in time with other musicians even while it is not heard.
See Also: Mute, SamplePlay, Quantize
Reference - Parameters 4-33
OverdubMode
Default: Toggle
Parameter Row: Switches
Affects the behavior of the Overdub button
Values: Toggle (tog), Sustain (SUS)
When OverdubMode is set to Toggle, the Overdub button toggles the
Overdub function on and off. In other words, tap Overdub once to turn
it on, and tap it again to turn it off.
However, when OverdubMode is set to Sustain, you can only layer sounds
while you hold down the button—as soon as you release it, the
overdubbing stops. This is similar to using the long presses of the
Overdub button, except it is guaranteed to always operate in Sustain
fashion no matter how short or long you press it. There are many
situations when you’re likely to want to set OverdubMode to Sustain, for
example:
■ You want to overdub extremely short excerpts from a sound source. If
OverdubMode=Toggle you have to press Overdub twice, which can be
difficult to do quickly. With OverdubMode=Sustain you can capture very
short fragments of sound into your loop.
■ You want to guard against inadvertently putting yourself into an
extended Overdub, so you decide to overdub only when your foot is
holding down the button.This is extremely useful if you are playing
without looking at the Echoplex. You will always know the state of
Overdub by whether you are pressing it or not.
See Also: Overdub
4-34 Echoplex Digital Pro Plus User’s Manual
Overflow
Default: Stop
Parameter Row: Switches
Determines how Record handles memory overflows.
Values: Stop(StP), Play (PLY)
An overflow occurs when you attempt to use more memory than you
have during Record operations.
When Overflow=Stop, exceeding the memory capacity of your unit will
cause the Record operation to be immediately cancelled, and will reset
(erase) the current loop.
When Overflow=Play, exceeding the memory capacity of your unit will
cause the cycle length to be set to the full time available to the current
loop. Everything that you’ve played from the start of the Record to the
instant just before the overflow will be looped, and everything that
you’ve played after that instant will be ignored.
If you’re trying to create rhythmic loops, neither of these options will
produce very satisfactory results: you’re best off avoiding overflows in
the first place.
See Also: Record
Reference - Parameters 4-35
Quantize
Default: Off
Parameter Row: Timing
Defines whether certain functions are executed at the end of
the the current loop, current cycle, the current sub-cycle or
immediately.
Values: Off (OFF), Cycle (CYC), Sub-Cycle (8th), Loop (Lop).
Functions affected: Multiply, Insert, Reverse, Mute, Substitute,
HalfSpeed, Replace.
Quantize forces a function to wait for a designated point before
executing. This is very useful for forcing functions to occur precisely in
rhythm. When Quantize=off, all functions execute immediately.
When Quantize is on and you press a function button prior to the
Quantize point, you will see “ooo” on the LoopTime Display to
indicate the Echoplex is waiting.
See the entries for the functions affected for detailed explanations and
examples.
QUANTIZE OPTIONS
The Quantize values mean the following:
QUANTIZE = LOOP
When Quantize=Loop, the Echoplex waits until the entire loop completes
before executing the function. This is meaningful if you have used
Multiply or Insert to add cycles to the loop. When you press a function in
the middle of the loop, it will wait until the Loop StartPoint to execute.
4-36 Echoplex Digital Pro Plus User’s Manual
Quantize
Continued
QUANTIZE = CYCLE
When Quantize=Cycle, the Echoplex waits until the current Cycle
completes before executing the function. This is more meaningful if you
have used Multiply or Insert to add cycles to the loop, otherwise the Cycle
and the overall Loop are the same.
QUANTIZE = SUB-CYCLE (8TH)
When Quantize=8th, functions are Quantized to the next Sub-Cycle as
determined by the 8ths/Cycle parameter. This is very useful for giving a
close to instant feel for operating the Echoplex, while maintaining
precise overall rhythm. With the default value of 8ths/Cycle=8, the SubCycles are equal to 8th notes. However, 8ths/Cycle can be set to divide
the loop anyway you want.
This setting for Quantize is essential for the concept of LoopDividing,
described in the Functions section of this chapter.
SYNC
AND
QUANTIZED RECORDING
When an external clock is available for Sync, the Echoplex can force the
loop length to match so that the loops will be in perfect sync with the
clock. However, we don’t have to start recording at the downbeat
defined by this clock if we don’t want to. This is the feature called
SyncRecord. When Quantize=Off, the SyncRecord function lets you press
Record anytime to start recording, but Quantizes the ending of the
Record so that the loop length exactly matches the length defined by the
clock and 8ths/Cycle.
If you set Quantize = Loop, Cycle, or Sub-Cycle, the Echoplex will Quantize
the start of the Record to the downbeat of the external clock. When you
press Record, you will see the “ooo” display. When the external
StartPoint is reached, Record will begin.
Reference - Parameters 4-37
Quantize
Continued
E S C A P I N G Q U A N T I Z AT I O N
If you use Quantize, you may find that sometimes you want to execute a
function Unquantized. You could do this by changing the Quantize
parameter to Off, executing your function, and then turning it back on
again, but that is hardly convenient or economical.
Instead, the Echoplex allows you an easy way to break free of the
Quantization when you choose to. Anytime you have pressed a function
and gone into the Quantizing Mode with “ooo” on the display, all you
have to do is press the same function again and it will execute
immediately. If you like, you can think of this as “double-clicking” the
function.
See also: Multiply, Insert, Mute, Reverse, Substitute, HalfSpeed, SyncRecord, 8ths/Cycle,
LoopDivide, LoopTime Display.
4-38 Echoplex Digital Pro Plus User’s Manual
Presets
Presets Editor
Parameter Row: Switches
Enters the Preset Editor.
Pressing the Presets in the Parameter Matrix puts you into the Preset
Editor. More information is available in the Presets section.
See also: Parameter Presets, Preset Editor
Reference - Parameters 4-39
RecordMode
Default: Toggle
Parameter Row: Switches
Affects the behavior of the Record button.
Values: Toggle (tOG), Sustain (SUS), Safe (SAF)
RECORDMODE = TOGGLE
When RecordMode=Toggle, the Record button works as described in the
Record section. Press Record once to begin recording, and press it again
to stop.
RECORDMODE = SUSTAIN
However, when RecordMode=Sustain, you can only record sounds while
you hold down the Record button—as soon as you release it, the
recording stops.
When RecordMode=Sustain, you lose the ability to Reset a loop from the
Echoplex front panel or EFC-7 Pedal, normally accomplished by a long
press of the Record button. This may not be a great loss for you, since a
short press of Record while you play nothing will create a short loop
with no contents. However, there are two consequences of this
approach:
■
A loop that is pseudo-cleared this way will not go into AutoRecord if you
enter it with NextLoop.
■
There is no way to do a GeneralReset of all loops in this situation, except
to enter a loop (with AutoRecord=Off) that has not been recorded since
power-up. The orange light under the Multiply button, signifying that a
long press of that button will execute GeneralReset and clear all loops,
does not go on unless the current loop is completely empty.
If you are using MIDI, both Reset and GeneralReset are available
independently as DirectMIDI commands. So with MIDI, reset is not a
problem.
4-40 Echoplex Digital Pro Plus User’s Manual
RecordMode
Continued
Also note that if you are using MIDI there is a DirectMIDI command for
independent sustain action Record. This command is called
SUSRecord and is located at Source# + 14.
RECORDMODE = SAFE
RecordMode=Safe is just like RecordMode=Toggle except that after a
Record the Feedback is always set to 100%. This will be true regardless of
the Feedback Knob or Feedback Pedal position. When the
feedback is changed the Echoplex starts to respond as normal.
This setting is useful for people who change Feedback but then tend to
forget to set it back to 100% before recording a new loop. This can be
frustrating if you recorded something perfectly and then a little while
later realize it is gone because you left the Feedback down.
RecordMode=Safe is meant to protect you from that.
The disadvantage is that if you want to start a loop with the Feedback
down, you can’t do it with RecordMode=Safe. In that case you would
probably just continue to use RecordMode=Toggle.
RecordMode=Safe is disabled when Loop/Delay=DelayMode.
Reference - Parameters 4-41
Reserved
Now Presets
Parameter Row: Switches
This is now called Presets on current Echoplexes, and it
accesses the Preset Editor. If you have an older Echoplex with a
“Reserved” parameter, see the Preset section.
4-42 Echoplex Digital Pro Plus User’s Manual
RoundMode
Default: Off
Parameter Row: Switches
Determines whether certain material will be recorded.
Values: Off (OFF), Round (rnd)
During Multiply and Insert operations, which always are active for an
exact number of cycles (unless ended with the Record button), this
parameter determines whether new material played after the second
press of the button but before the end of the current cycle will be
recorded. Diagrams under the Multiply and Insert headings elsewhere in
this chapter demonstrate the effects of this parameter explicitly.
See also: Overdub, Multiply, Insert
Reference - Parameters 4-43
SamplerStyle
Default: Run
Parameter Row: Loops
Determines how multiple loops are triggered with MIDI or the
NextLoop button.
Values: Run, One, Attack
This is primarily useful when you are using multiple loops.
As you can read in the discussion of LoopTrig, an incoming MIDI Note
On can trigger any loop. If Velocity=On, the velocities of the incoming
notes will control the volume at which the loop is played. There are four
different types of responses to one of these triggers, corresponding to
the values of this SamplerStyle parameter, as follows:
RUN (run)
The loop will start and play continuously, just as if you had pressed
NextLoop to trigger it. The loop always begins where it was last left.
START (StA)
The loop will trigger from the StartPoint and play forever. This is true
whether the loop is entered with NextLoop or triggered by MIDI.
ONCE (OnE)
When triggered with MIDI, the loop will trigger from the beginning to
play just once, and then go into Mute mode.
When triggered with the NextLoop button the Echoplex plays the next
loop once and then returns to the previous loop automatically. This is
very helpful as a way to improvise the form of your music. You could
have the ‘A’ section looping in Loop 1, and at some point decide you
want the ‘B’ or ‘C’ section to drop in for one repetition before returning
to the main loop. With SamplerStyle=One you can do this with one press
on NextLoop and let the Echoplex take care of everything for you.
4-44 Echoplex Digital Pro Plus User’s Manual
SamplerStyle
Continued
ATTACK (Att)
When SamplerStyle=Attack, a MIDI note will cause the loop will trigger
from the beginning play as long as the triggering note is held down; i.e.,
until a NoteOff or a different triggering note is received.
This type of action with SamplerStyle=Attack only makes sense when
loops are triggered by MIDI. This gives a keyboard like “play as long as
you press” function, but it doesn’t make sense with NextLoop. So instead,
when the NextLoop button is pressed (or MIDI-NextLoopButton), it
operates the same as SamplerStyle=run. The loop starts in the same place
where you last left it.
A LT E R N AT E F U N C T I O N S W I T H
NEXTLOOP AND SAMPLERSTYLE=ONE
When you have SamplerStyle=One and you are using NextLoop to
change loops, there are a few differences in functionality while the new
loop is playing once:
■
Undo: If you decide you want to stay in the new loop instead of
bouncing back, you just have to press Undo while it is playing the
single repetition. Instead of bouncing back to the first loop when it
reaches the end, it will keep repeating the new one.
■
Mute: If you press Mute during the second loop, it will Mute and stay
in that loop.
■
Insert: If you press Insert while the second loop is playing, it will
retrigger. You can retrigger it as much as you like, and when you let it go
to the end it will return to the first loop.
■
Multiply: Multiply is not available while the second loop is playing.
■
Overdub: If you turn on Overdub while the second loop is playing, it
will be assumed that you want to make some change to the new loop
and it will not switch back to the first one. If you have the SwitchQuant
parameter on and press Overdub while you are still waiting for the first
Reference - Parameters 4-45
SamplerStyle
Continued
loop to finish, Overdub will be on when you go to the second loop.
Again, it will not return to the first loop after it is done, and the overdub
is kept.
■
NextLoop: NextLoop is interesting. If you press NextLoop again while
the second loop is playing, you will go to a third loop. When the third
loop is finished playing once, it returns to the second loop. When the
second loop finishes playing one more time, it returns to the first loop!
So you can stack up a sequence of jumps and then return to the
beginning, all automatically! There is a limit to this, in that you can’t
NextLoop through the same loop several times and automatically jump
back to it that many times. It will stop the first time it returns to that
loop and ignore previous steps in the sequence.
■
Record: If you press Record while the second loop is playing, you will
record a new one. It will continue repeating instead of jumping back to
the first loop.
■
AutoRecord: If the loop you jump to with SamplerStyle=Once is in reset
and AutoRecord=on, you record the B part and immediately jump back to
the previous loop when you tap Record to finish. If you press some
additional function during recording for an alternate ending (like
Multiply or Insert), it will go ahead and do that function and stay in
the second loop. There is a limitation with AutoRecord and several loops.
If you use AutoRecord to record several loops it will only jump back one
loop at the end instead of jumping back through all of them.
■
LoopCopy and TimeCopy: If you have LoopCopy on or if you engage
a LoopCopy by pressing Multiply, Insert, or Overdub when using
SwitchQuantize to change loops, the copy will be made into the new
loop. When you finish the copy with a press of Multiply (or Insert) it
will jump back to the first loop. This is an interesting way to make
copies into a new loop and not necessarily listen to it repeat
immediately.
■
Similarly, if you press any additional function during the quantizing
period, it does not switch back to the previous loop. The Echoplex
assumes you want to elaborate on the B part.
See also: LoopTrig, Velocity, NextLoop, SwitchQuant
4-46 Echoplex Digital Pro Plus User’s Manual
Source #
Default: 36
Parameter Row: MIDI
Determines the starting note number, or controller number, for
MIDI control of Echoplex operations.
Values: 0-99
The Source# parameter determines the base note or controller number
from which all the other MIDI commands are referenced. All buttons
and functions are assigned to notes or controllers based on this
parameter value. The table below shows all the MIDI commands
available and their offset from the Source# value.
See also: ControlSource, Channel, MIDI Command List, DirectMIDI, MIDI VirtualButtons,
Receiving MIDI Commands, Transmitting MIDI Commands
Reference - Parameters 4-47
SwitchQuant
Default: Off
Parameter Row: Loops
Lets you quantize loop switches. Makes it possible to jump to
specific loops, copy the current loop to another, or set up
specific functions to begin in a new loop.
Values: Off (OFF), Confirm (CnF), Cycle (CYC), ConfirmCycle
(CCY), Loop (LOP), ConfirmLoop (CLP)
The SwitchQuant parameter applies when you are using multiple loops.
(Multiple loops are set up in advance with the MoreLoops parameter.)
SwitchQuant determines when the switch to the next loop will occur
after the NextLoop button has been pressed. Loop switching can occur
immediately (SwitchQuant = Off), after a confirming press of the Undo
button (SwitchQuant = Confirm), at the end of the current cycle or loop
(SwitchQuant = Cycle or Loop), or a combination of these (SwitchQuant =
ConfirmCycle or ConfirmLoop).
Quantizing loop switches is useful for maintaining a tight rhythm when
you are working with multiple loops.
SwitchQuant=Cycle, Loop, Confirm, ConfirmCycle, and ConfirmLoop are
also very useful because they give you time to take additional actions
before the move to the next loop takes effect. For the sake of this
discussion, we’ll call the time interval between the pressing of the
NextLoop button and the end of the current loop the quantize period.
SWITCHQUANTIZE OPTIONS
OFF (SWITCHQUANT = OFF)
When NextLoop is pressed the Echoplex immediately switches to the
next loop with no quantizing. For example, if you are currently on loop
2, pressing NextLoop will instantly put you in loop 3.
4-48 Echoplex Digital Pro Plus User’s Manual
SwitchQuant
Continued
CONFIRM (SWITCHQUANT = CNF)
When NextLoop is pressed the Echoplex goes into the quantize period
but then waits indefinitely with the current loop playing until a
confirming action is made. During this waiting period you may
continue to press NextLoop to select different loops without actually
switching to them. The display shows the loop you will switch to when
the confirming action is made. The simplest type of confirm action is to
press the Undo button, which will send you immediately to the loop
you have selected. You can also confirm the loop switch with Record,
Overdub, Multiply, Insert, or Mute, which will switch you to the
selected loop and immediately execute that respective function.
CYCLE (SWITCHQUANT = CYC)
When NextLoop is pressed, the Echoplex will wait until the next Cycle
point to switch loops. During the quantize period you may select a
different loop to switch to by pressing NextLoop additional times. You
may also “arm” another function to execute in the new loop when the
switch occurs. For example, if you press Record during the waiting
period the Echoplex will wait until the current cycle of the current loop
ends, switch to the next loop, and immediately begin recording.
CONFIRMCYCLE (SWITCHQUANT = CCY)
ConfirmCycle is a combination of the Confirm and Cycle values. When
you press NextLoop, the Echoplex goes into an indefinite waiting
period while the current loop plays, just like with Confirm. After a
confirming action is done, the Echoplex additionally quantizes the loop
switch to the next Cycle point as it does when SwitchQuant=Cycle.
LOOP (SWITCHQUANT = LOP)
When NextLoop is pressed, the Echoplex will wait until the next Loop
point to switch loops. During the quantize period you may select a
Reference - Parameters 4-49
SwitchQuant
Continued
different loop to switch to by pressing NextLoop additional times. You
may also “arm” another function to execute in the new loop when the
switch occurs. This value is useful when you have used Multiply or
Insert and wish to always quantize to the overall loop length.
CONFIRMLOOP (SWITCHQUANT = CLP)
Similar to ConfirmCycle. After a confirming action is done, the Echoplex
additionally quantizes the loop switch to the next loop StartPoint.
Example 4.x: Using Confirm Cycle (CCY)
1. Set SwitchQuant=CCY
2. Set MoreLoops=2 and record two loops.
3. Press NextLoop, it waits for you to do some action.
4. Press the function you want (Record, Overdub, Multiply, Insert,
etc...)
5. The action will begin in the new loop after the next Cycle point of the
current loop.
D I S P L AY D U R I N G S W I T C H Q U A N T I Z I N G
With SwitchQuant on, a press of the NextLoop button will turn the
front-panel LEDs under the Record, Overdub, Multiply, Insert,
Mute, and Undo buttons orange, while the LED under NextLoop will
be red. The orange color indicates that all of these buttons take on
interesting functions during the quantize period, as the explanations
and examples on the following pages will illustrate.
During the quantize period the LoopTime Display changes to show
the destination loop. It will be displayed as “L 1”, “L 2”, etc. This is the
4-50 Echoplex Digital Pro Plus User’s Manual
SwitchQuant
Continued
loop you will go to when the quantize period ends. If you continue
pressing NextLoop during this time, you will see the destination
increment.
BUTTONS ACTIVE DURING
QUANTIZE PERIOD
THE
NextLoop
Pressing NextLoop during the quantize period increments the
destination loop without switching you there. This skips over the next
loop, allowing you to move to any other loop without activating the ones
in-between. The current destination loop is displayed in the LoopTime
display.
Example 4.16: Switching to a Loop Other Than the Next One
When SwitchQuant is on, you can move directly from any loop to any
other, without passing through the intermediate loops. For instance, to
switch from Loop 1 to Loop 3, take the following steps:
1. Set MoreLoops to 3 or more
2. Set SwitchQuant=Loop
3. Record something a few seconds long into Loop 1, then end recording.
4. Near the beginning of the loop, press NextLoop twice. Notice that the
display shows “L 3” in red, indicating that you are going to loop 3 next.
5. When your loop ends, note that you will be switched immediately into
Loop 3. If AutoRecord=On, then the Echoplex Digital Pro will start
recording as soon as you enter that loop.
Reference - Parameters 4-51
SwitchQuant
Continued
You can also switch to a loop other than the next one with MIDI
messages, whether SwitchQuant is On or Off. See LoopTrig for more
information.
Multiply/LoopCopy
Pressing Multiply during the quantize period will put you into
SoundCopy mode when you move to the next loop. This is an alternate
method of doing copies to the LoopCopy parameter. This SwitchQuant
method of copying gives you more direct control over copying instead of
the automated method using the LoopCopy parameter.
LoopCopy is essentially the same as multiplying your current loop into
the new one, so it all happens seamlessly in real-time. The audio from
the first loop will be copied to the new loop, and the Echoplex will
continue to add multiple cycles for as long as you let it run. You end the
copy by pressing the Multiply button again. The timing of this next
press of Multiply will determine how many cycles from the first loop
are kept. While the copy is happening, any new material that you play
will be added over the top of the new loop, just as with Multiply. This is a
great way to create a variation of your first loop into a new loop, and
then switch back and forth between them later.
Caution: LoopCopy erases the existing contents of the next loop!
Example 4.17: Copying the Current Loop Prior to Switching
When SwitchQuant is on, you can take advantage of the quantize period
to copy the current loop into the next one by pressing the Multiply
button. This can be handy when you want to create a single backing
track for several distinct loops, which you’ll later embellish differently
with overdubbing and other actions. To see this in action, take the
following steps:
1. Set MoreLoops to 2 or more
2. Turn SwitchQuant On
3. Record something a few seconds long into Loop 1, then end recording.
4-52 Echoplex Digital Pro Plus User’s Manual
SwitchQuant
Continued
4. Near the beginning of the loop, press NextLoop, then press Multiply.
5. When your current loop ends, you will be switched immediately into
Loop 2, and you will be in Multiply mode. You won’t hear the transition
as it will sound like your current loop continues to play.
6. Keep playing, as you layer more sounds on top of the sounds being
copied from Loop 1. When you press Multiply again, the Copying will
end and the new loop with the added overdubs will begin repeating.
Multiples of Loop 1 will be copied as long as Multiply is active. If Loop 1
contains multiple cycles, then you may not get all of them if you end the
Multiply function prematurely. Another example can clarify this.
Example 4.18: Copying a Portion of the Current Loop to the Next
Loop
1. Set MoreLoops to 2 or more.
2. Set SwitchQuant=Loop.
3. Record a few seconds of chordal background in Loop 1.
4. Use Multiply to record a short solo that lasts for 4 cycles or so, then end
the Multiply function.
5. Press NextLoop, then press Multiply.
6. When you enter the next loop (after all 4 cycles of the current loop have
completed), watch the Multiply counter in the right side of the display,
and press the Multiply button again when this counter reaches 2.
7. Listen to the truncated solo as it loops.
One final observation: you can achieve other effects by ending this
Multiply function with any of the “Alternate Endings” listed under
Multiply in the Functions section.
Reference - Parameters 4-53
SwitchQuant
Continued
Inser t
Pressing Insert during the quantize period will execute a TimeCopy in
the new loop. This copies the timing (but not the audio contents) of the
current loop cycle into the next loop, in real-time. This is essentially the
same as putting you into Insert mode in the new loop, using the base
cycle time of the starting loop. You will see the cycle count incrementing
according to the cycle length of the starting loop, and any material you
play will be added to the new loop. When you are ready to end, press
Insert again and the Echoplex will round off to the next cycle point.
This technique gives you a seamless method to quickly create a new
loop based on the timing of an existing loop, so they maintain the same
rhythm. This is similar to using the more automated method with
LoopCopy=time, except you can more directly control it and the copy will
proceed whether the destination loop is in reset or not.
Caution: TimeCopy erases the existing contents of the next loop.
Mute
Pressing Mute during the quantize period will cause the Echoplex to
toggle Mute mode when it switches to the new loop.
Overdub
Pressing Overdub during the quantize period has two possible results,
depending on whether the next loop is reset or not.
If the destination loop is reset, pressing Overdub will execute a
SimpleCopy. This function creates exactly one copy of the current loop in
the new loop, without doing any multiplying. It ends by itself when it
reaches the end of the loop, so you do not have to do anything. Overdub
is on automatically upon entering the new loop, so new material can be
immediately added while the copy occurs.
4-54 Echoplex Digital Pro Plus User’s Manual
SwitchQuant
Continued
If the destination loop has material in it already, pressing Overdub
during the quantize period will turn Overdub on when you switch to the
new loop.
Record
Pressing Record during the quantize period will cause the Echoplex to
begin recording immediately as soon as it enters the next loop. This is
like having AutoRecord=on, except that AutoRecord will only start
recording when you move into an empty loop, and it always happens in
such a case automatically. In this case, pressing Record during the
quantize period lets you choose when to record in a new loop, and it will
work whether there is a loop recorded there already or not.
Caution: This erases the existing contents of the next loop.
SWITCHQUANT AS A QUANTIZE
A LT E R N AT E F O R T H E C U R R E N T L O O P
ConfirmCycle and ConfirmLoop also give you an alternate method to
quantize actions in the current loop, similar to the way you might use
the standard Quantize parameter. After you press NextLoop to enter
the quantize period, continue pressing it until the current loop is
displayed as the destination. Now, any function you press will begin
according to the Confirm setting, regardless of the Quantize parameter
setting. This can be an easy way to have both quantized and
unquantized actions readily available to you without needing to change
parameter settings while you play. You can even start Overdub
quantized this way!
Example 4.x: Quantizing Overdub in the Current Loop
1. Set MoreLoops to 2 or more.
Reference - Parameters 4-55
SwitchQuant
Continued
2. Set SwitchQuant=CLP and Quantize=OFF
3. Record a loop in loop number 1
4. Press NextLoop until next loop number 1 is displayed
5. In the middle of your current loop, press Overdub.
6. The Echoplex will show “ooo” to indicate it is quantizing the Overdub.
7. When the loop restarts, Overdub will come on.
See also: NextLoop, Quantize, LoopCopy, AutoRecord
4-56 Echoplex Digital Pro Plus User’s Manual
Sync
Default: Out
Parameter Row: Timing
Synchronizes the Echoplex Digital Pro with another Echoplex
Digital Pro, a MIDI sequencer, a pulse trigger device, or a
sound source.
Values: Off (OFF), Out, OutUserStart (OuS), In
OFF (OFF)
No synchronization signals are received or sent.
OUT (OUT)
MIDI: MIDI clocks are sent out the MIDI Out port when a loop is
recorded or a Tempo is preset. MIDI StartSong and StopSong messages
are sent automatically when you record your loops. If 8ths/Cycle is large
and your loop is short, the effective tempo may be over 400 or so beats
per minute, in which case the clocks will be turned off. See 8ths/Cycle
for a full discussion.
BeatSync: A pulse is sent out the BeatSync Jack a the start of every
cycle. These pulses can be used to trigger or affect another device that
accepts pulse inputs. It can also be listened to as a basic metronome.
BrotherSync: All Echoplexes using BrotherSync should set Sync=Out.
OUT USER START (OUS)
MIDI: MIDI clocks are sent out the MIDI Out port when a loop is
recorded or a Tempo is preset. MIDI StartSong messages are not sent
automatically when you record your loops. StartSong and StopSong
commands must be sent manually by executing the various functions
available for sending them.
Reference - Parameters 4-57
Sync
Continued
BeatSync: A pulse is sent out the BeatSync jack a the start of every
cycle. These pulses can be used to trigger or affect another device that
accepts pulse inputs. It can also be listened to as a basic metronome.
BrotherSync: All Echoplexes using BrotherSync should set Sync=Out.
IN (IN)
MIDI: MIDI clocks are received at the MIDI In port. MIDI clock
received is piped from the MIDI In Port to MIDI Out by the MIDIpipe
function. MIDIclock is not sent based on recording a loop.
BeatSync: The Echoplex will receive impulses from a footswitch, a
other pulse trigger source, or an audio source. It "slaves" its cycle time
to that of the "master". This is described in detail in the BeatSync entry.
If a BeatSync pulse is received during Reset while Sync=In, MIDI Clock is
sent out at the corresponding tempo. The purpose of this is to receive a
Sync at the BeatSync of the Echoplex and send the Sync on to other
devices as MIDI clock.
BrotherSync: Sync=In should not be used for BrotherSync unless there is
an external sync source for all the units to follow. In general, all
Echoplexes using BrotherSync should set Sync=Out.
If you are also using MIDI Clock from another device, note that if a MIDI
clock is received at the MIDI In Port, BrotherSync input is ignored
See also: 8ths/Cycle, MIDI, The Synchronization Section, BrotherSync, BeatSync,
ControlSource
4-58 Echoplex Digital Pro Plus User’s Manual
Threshold
Default: 0
Parameter Row: Timing
Tells the Echoplex to wait until you play before starting to
record.
Values: 0-8
When a non-zero value for the Threshold parameter is set, the Record
function waits until a large enough audio signal appears at the Input
jack before it actually starts recording. When Threshold=0, this waiting
is disabled and Recording begins immediately.
Each successive number represents a 6dB increase in the volume
necessary to trigger recording, so 1 is very sensitive, while 8 requires
Pete Townshend-like moves.
The next example illustrates the use of Threshold.
Example 4.19: Using Threshold
1. Set Threshold to a medium value, like 3.
2. Return to Play mode.
3. Press Record. The display will read "ooo" (this symbol means the
Echoplex is waiting for something).
4. Begin playing. Recording will start with your first note.
5. Press Record to stop recording.
See also: Record
Reference - Parameters 4-59
Velocity
Default: Off
Parameter Row: Loops
Determines the effect of MIDI velocity on loops triggered by
MIDI Note messages.
Values: Off (OFF), On (On)
If Velocity=Off, loops that are triggered by MIDI NoteOn messages will
be played back at their full volume.
If Velocity=On, loops that are triggered by MIDI NoteOn messages will be
played back with their volume scaled according to the velocity portion
of the NoteOn messages: velocity 127 will play back a loop at full
volume, while velocity 1 will play it back so quietly that it may be
inaudible.
See also: LoopTrig, LoopTriggering, SamplerStyle
4-60 Echoplex Digital Pro Plus User’s Manual
VolumeCont
Default: 7
Parameter Row: MIDI
Determines which Continuous Controller will control the
output level.
Values: 1-99
Incoming MIDI Continuous Controller messages can be used to control
the Loop output level of the Echoplex Digital Pro. Only messages that
are on the MIDI channel specified by the Channel parameter will be
recognized. This only affects the volume of the loop output, not the
direct signal.
See also: Channel, FeedbkCont
Reference - Parameters 4-61
4-62 Echoplex Digital Pro Plus User’s Manual
C
H
A
P
T
E
R
5
Functions
Reference - Functions 5-1
Dump
Immediate Action
Parameter Row: MIDI
Sends the contents of the current loop, in MIDI Sample Dump format.
The dump travels out the MIDI Out port. It’s a good way to save your
best loops to a sampler or sequencer. Later, you can use the Load
function to load the loop back into the Echoplex Digital Pro. Dump and
Load are digital data transfers that will not degrade the audio quality of
your loops at all.
There are subtle differences about the way MIDI sample dump
operations work with different instruments and sequencers. You always
need a MIDI cable connecting the dumping instrument and the
receiving (loading) instrument. A cable in the other direction, which
allows both instruments to send "handshaking messages" that
communicate instrument status and confirmations, are sometimes
required by samplers and sometimes not. Even in those cases when a
second cable is optional, adding one can speed up the dump and load
processes.
Example 4.7: Dumping the Current Loop to a Sequencer
1. Record a loop.
2. Connect a MIDI cable from the MIDI Out port on the Echoplex Digital
Pro to the MIDI In port on your sequencer.
3. If your sequencer has a special area for System Exclusive dumps, enter
that area and press the “Receive” button. Otherwise, select a track to
receive the dump and press the Record button on your sequencer.
4. Press the Parameter button on the Echoplex Digital Pro until the light
next to the word “MIDI” is lit, and then press the Undo (Dump) button
to start the dump. As the dump progresses, the numbers in the display
on the Echoplex Digital Pro will change to indicate dump progress. This
type of exchange over MIDI is never fast, unfortunately. Transmission
time will be 10 to 15 times the length of the current loop.
5. You can cancel the dump at any time by pressing any button.
5-2 Echoplex Digital Pro Plus User’s Manual
Dump
Continued
Example 4.8: Responding to a Sample Dump Request
1. Record a loop.
2. Connect a MIDI cable from the MIDI Out port on the Echoplex Digital
Pro to the MIDI In port on your sequencer, and connect a second cable
from the MIDI In port on the Echoplex Digital Pro to the MIDI Out port
on your sampler.
3. Press the Parameter button on the Echoplex Digital Pro until the light
next to the word “MIDI” is lit, and then press the NextLoop (Load)
button to start the dump. The Echoplex will go into a waiting state
where it is ready to respond to Sample Dump Requests.
4. Send a Sample Dump Request from your sampler. The current loop will
be sent to the sampler. As the dump progresses, the numbers in the
display on the Echoplex Digital Pro will change to reflect the percent of
the dump already transmitted.. This type of exchange over MIDI is
never fast, unfortunately. Transmission time will be 10 to 15 times the
length of the current loop.
5. You can cancel the dump at any time by pressing any button.
See also: Load, Sample Dump Chapter
Reference - Functions 5-3
Feedback
Immediate Action
Play Mode
Enables fadeouts and evolution of your loops.
The Feedback level is the amount of signal that is fed from one pass
through the loop (or delay) to the next. This is a familiar feature from
the world of delays. For most looping operations, Feedback is set to
100%, meaning that the loop will go on forever.
Unlike a traditional delay, the Feedback control in the Echoplex is
available at all times, whether you are Overdubbing new material or not.
If you wish to have the Echoplex behave like a traditional Delay in this
regard, try setting Loop/Delay=Delay. When you have Loop/Delay=Loop
you can also emulate a traditional delay by reducing the Feedback level
and leaving Overdub on.
Because Feedback occurs at the end of a loop, you won’t generally hear
the effects of changing the Feedback level immediately. If you set the
Feedback to 0, for instance, the current loop will play out to its end
before you hear the volume drop to 0.
CONTROLLING FEEDBACK
Feedback can be set by the Front Panel Feedback Knob, by a footpedal
inserted in the Feedback Jack in the rear of the unit, or by MIDI
Continuous Controller messages. The specific MIDI Continuous
Controller used is set by the FeedBkCont parameter.
F E E D B A C K D I S P L AY
While you change the Feedback setting, the value appears briefly on the
LoopTime Display so you can easily see where you are setting it. The
value range is displayed as 0 - 127, with 0 being 0% and 127 being 100%.
This value range corresponds to MIDI continuous controller values.
5-4 Echoplex Digital Pro Plus User’s Manual
Feedback
Continued
FEEDBACK CONTROL
IS
CONTINUOUS
Feedback is a continuously variable control. You can change it freely
right in the middle of a loop, and you will hear that change in the levels
on the next repetition. This allows you to selectively apply Feedback to
one portion of your loop, by dropping the Feedback when that section
comes by and returning it to 100% for the sections you wish to keep.
FEEDBACK DURING OVERDUB
M U L T I P LY
AND
While you are Overdubbing or Multiplying and Feedback is set to 100%,
the Feedback level is automatically scaled back to about 95% to prevent
overloading the Echoplex with the combination of the old signal and the
new. It returns to 100% as soon as you complete your Overdub.
Setting the Feedback to an intermediate level is a good way to create a
smooth fadeout. If you use Overdub and Feedback control together, you
can steadily evolve your loops from one place to another by adding new
material as the old material steadily disappears. This type of loop
evolution is an important technique in looping.
UNDOING FEEDBACK
After Feedback has been applied to your loop, it is possible to Undo the
effect. If you turn down Feedback to allow you loop to fade away for a
while, pressing the Undo button will fade it back in again by stepping
back through the previous loop passes.
Reference - Functions 5-5
Feedback
Continued
This happens because the Echoplex considers any pass over the loop
with Feedback set less than 100% to be a change of the loop. Just as
when the loop is changed by Overdub, the Echoplex writes this new
version of the loop into a new section of memory. Undo is then able to
take you back to the previous versions of the loop that are still in
memory.
U N D E R S TA N D I N G F E E D B A C K
Control over Feedback is one of the most fundamental looping
techniques, and has been a part of looping for decades. Without
Feedback control your loops just develop to a certain point, abruptly
disappear, and you start a new loop. Loops only grow as new material is
added, but they don't decay and they don’t evolve. So the loop only gets
bigger and bigger until you kill it completely. You don't have any
continuity, so your loops can't grow and evolve into something else.
Using Feedback changes all of this.
Feedback comes from the old universe of delay effects. The Feedback
setting causes the delayed sound to be reduced in volume by a certain
amount each time it repeats. In delay effects it is generally used to set
how long the delay would last. That concept was applied to looping in
some devices, like the Echoplex. When dealing with longer loops
Feedback control becomes a very powerful technique for making your
loop evolve into something new over time.
When you've built up a loop, it will have certain elements that dominate
and give it a particular character. If you then turn Feedback down a bit,
those things slowly begin getting quieter. Then you begin adding new
elements to the loop, which will be relatively louder since they have not
had any feedback applied. With each repetition you add a little bit more
to evolve the loop in a new direction. Those new elements will then
begin dominating the loop, and the character will steadily change.
When it has changed to something you like, you set the Feedback up to
maximum so the level does not reduce with each repeat anymore.
5-6 Echoplex Digital Pro Plus User’s Manual
Feedback
Continued
This technique gives a nice evolving effect to the loop, and is a very
powerful and expressive tool. By actively controlling the feedback, you
can control how quickly this evolution occurs.
See Also: FeedBkCont, Feedback Knob, Feedback Jack, LoopTime Display, Record, Overdub,
Undo
Reference - Functions 5-7
GeneralReset
Immediate Action
Play Mode
Reset all Loops.
When the number of loops (the value of MoreLoops) is greater than one,
the GeneralReset command can be used to reset all the loops at once.
From the front panel, GeneralReset is done with a Long-Press of the
Multiply button while you are in a loop that is already Reset. In other
words, first you have to Reset the current loop, then you hold down
Multiply for half a second to do a GeneralReset. The extra steps are there
by design, to reduce the likelihood of accidentally destroying your loops.
When you are in a Reset loop and multiple loops are set up, the Multiply
LED turns Orange to indicate this special function.
GeneralReset is also available immediately through MIDI, using the
DirectMIDI command for GeneralReset. This is located at Source#+26.
If you are using the TempoSelect feature, GeneralReset additionally exits
the TempoSelect state so that your next loop recordings will not follow
your preselected Tempo. If you re-enter TempoSelect, your previous
tempo is recalled and you can record in sync to it again.
Although GeneralReset erases the audio in all the loops, it does not cause
the Echoplex to lose sync with external devices. The Echoplex will
continue to track the Global MIDI StartPoint (or Beat 1 of the sequencer),
so that your next Recording can begin in Sync.
The following example illustrates how to do a GeneralReset from the
front panel.
See Also: Reset, Record, Multiply, MIDI Command List, Global/Local MIDI Clock,
TempoSelect
5-8 Echoplex Digital Pro Plus User’s Manual
HalfSpeed
Immediate Action
Play Mode
Play back the loop a half normal speed.
HalfSpeed switches the playback speed of the loop to half the normal
speed, making it an octave lower and twice as long.
HalfSpeed is an InsertMode option, making it available from the front
panel on the Insert Button. HalfSpeed is also available by MIDI.
When InsertMode=H.SP, the Insert Button becomes the HalfSpeed
button. Pressing HalfSpeed switches the current loop an octave lower,
to half speed. The Insert LED turns red and the display says H.SP briefly.
Press HalfSpeed again and the loop returns to FullSpeed. The LED
turns green and F.SP is displayed for a moment.
The function is reset to Full Speed with Reset, but it can be selected
while still in Reset. This allows you to start a loop in half speed with the
audio sounding normal, and then switch to full speed. It ends up as
double speed, one octave higher!
All other functions work normally in HalfSpeed. The speed can be
switched anytime during playing or Reset, even while in the middle of
overdubbing or multiplying! So as you are overdubbing you can switch
freely between HalfSpeed and FullSpeed to get interesting octave and
speed jumps in the middle of the overdub.
The sound quality is somewhat reduced during HalfSpeed because the
sampling rate for the audio is cut in half. Also note that MIDI piping is
slowed down by HalfSpeed, so it is possible to see to see slight delays in
very dense MIDI streams. See the MIDI chapter for more details on
MIDIpipe.
See Also: InsertMode
Reference - Functions 5-9
Insert
Immediate Action
Play Mode
Inserts cycles, replaces sections, reverses playback, and lets you
rehearse.
This is a redefinable button, capable of inserting sound into a loop in
several different ways, and also capable of reversing the current loop.
The behavior is set with the InsertMode parameter.
INSERTMODE=INSERT
OR
REHEARSE
When InsertMode=Insert, the Insert button performs its basic function of
inserting segments, or “cycles” into an existing loop. When
InsertMode=Rehearse, all the functions in this section work the same—
the only difference is in the way that Insert behaves as an alternate
ending button for the Record operation. That behavior is described in
detail under the "Alternate Endings" section of the Record entry.
There are a number of variations to examine here.
Example 4.9: Basic Behavior: InsertMode=Insert, Quantize Off
The Insert function is started by pressing the Insert button. There are
several ways to end the function, but the most natural and common is
to press the Insert button a second time. When you do this, you will
always insert an exact number of cycles; in other words, you’ll change
the loop length but not the underlying cycle length. Figure 4.1
demonstrates this behavior when Quantize=Off.
When you examine Figure 4.1, you’ll see that there are two possible
results shown, depending on the RoundMode. If RoundMode=Round,
then the timing of your second press of the Insert button isn’t critical—
everything in the current cycle (measured from the first press of Insert)
is recorded. In contrast, if RoundMode=Off, then a section of silence
(marked "A" in the figure) is inserted to fill out the time from the Insert
press to the end of the insertion cycle.
5-10 Echoplex Digital Pro Plus User’s Manual
Insert
Continued
FIGURE 4.1
Basic operation of the
Insert button.
InsertMode=Insert or
Rehearse
Quantize=Off
Cycle 1
Cycle 2
Cycle 3
Cycle 4
Existing Loop
1 cycle
New Performance
Button Actions
I
I
Results when
RoundMode=rnd
Results when
RoundMode=Off
A
Time
Example 4.10: The Effect of Quantization
When Quantize=On, a press of the Insert button will cause insertion to
start at the beginning of the next cycle. As in the previous example,
ending the insertion with a second press of Insert will cause an exact
number of cycles to be inserted—the insertion will end at the end of the
current cycle (see Figure 4.2).
Unlike Example 4.9, the setting of RoundMode will not have any affect
when Quantize=On. Any music played after the second press of the
Insert button will be recorded until the Insert ends.
Reference - Functions 5-11
Insert
Continued
Cycle 1
FIGURE 4.2
Quantized operation of the
Insert button.
InsertMode=Insert or
Rehearse
Quantize=On
Cycle 2
Cycle 3
Cycle 4
Existing Loop
New Performance
Button Actions
I
I
Results when
RoundMode=rnd
Results when
RoundMode=Off
Time
A LT E R N AT E E N D I N G S
The simplest way to end an Insert operation is to press the Insert button
a second time. You’ll get the results illustrated in examples above.
However, you can also end the Insert by pressing any of the buttons
whose front-panel lights are on during the Insert. You’ll get some
interesting results, as illustrated in the next few examples.
UNDO
If you end an Insert operation by pressing Undo, the loop will be
returned to its state before you pressed Insert. See the Undo heading in
this chapter for more information.
5-12 Echoplex Digital Pro Plus User’s Manual
Insert
Continued
RECORD
Ending an Insert operation with the Record button causes the insert to
end immediately, without waiting for the end of the current insertion
cycle. Since the loop can’t contain fractional cycles, the entire new loop
will be considered a single cycle. This is called an Unrounded Insert.
Figure 4.3 illustrates this behavior.
FIGURE 4.3
Ending Insert with Record
changes the cycle length.
InsertMode=Insert or
Rehearse
Quantize=Off
Existing Cycles
Cycle 1
Cycle 2
Cycle 3
Existing Loop
New Performance
Button Actions
I
R
Results
New Cycle
Cycle 1
Time
OVERDUB
Ending an Insert with Overdub is exactly like ending it with Insert,
except that you also toggle Overdub mode. If you had Overdub off
before the Insert, it will now be on. It’s the equivalent of ending the
insertion by pressing Insert a second time, and then pressing
Overdub immediately.
Reference - Functions 5-13
Insert
Continued
MULTIPLY
Ending an Insert with Multiply is exactly like ending it with Insert,
except that you are immediately put into Multiply mode. It’s the
equivalent of ending the insertion by pressing Insert a second time,
and then pressing Multiply immediately.
MUTE
Ending an insertion with Mute is exactly like ending it with Insert,
except that you will go immediately into the Mute mode once the Insert
has ended. The audible sound from the loop will remain off as Insert
ends. Once you’re in Mute mode, you can restart the sound with the
mute button or with the Alternate Endings listed for the Mute entry
later in this chapter.
LONG PRESS = REPLACE
The Insert button can also be used to replace material that is in the
loop. This is accomplished by holding down Insert as you play the new
material, instead of pressing and releasing it, as shown in Figure 4-4. The
Replace will continue as long as you hold Insert down.
5-14 Echoplex Digital Pro Plus User’s Manual
Insert
Continued
FIGURE 4.4
Replacing with a long press
of the Insert button.
InsertMode=Insert.
Existing Loop
New Performance
Button Actions
I
I
Resulting Loop
Time
INSERTMODE=REHEARSE
When InsertMode=Rehearse, the behavior of the Insert button as a way
to end recording changes. Rehearse allows you to practice a part before
committing it to a loop.
See Rehearse in the Functions section for more information.
INSERTMODE=REPLACE
When InsertMode=Replace, the Insert button becomes the Replace
button. Each press and release of the Replace button during Play mode
will replace a segment of the loop with new material for as long as
Replace is held down. The overall loop length is not changed.
Reference - Functions 5-15
Insert
Continued
If Quantize=On and Replace is pressed during a cycle, the function will
begin at the end of the current cycle, and will continue to the next cycle
point after Replace is released again.
When InsertMode=Replace and Insert is used as an alternate ending
during a Record, the Record ends as if you’d pressed the Record button
and the Replace function immediately begins.
See Replace in the Functions section for more details.
INSERTMODE=SUBSTITUTE
When InsertMode=Substitute, the Insert button becomes the Substitute
button during Play mode. Substitute has some similarity to the Replace
function. However, with Substitute the original loop playback continues
while you are playing the new material. On the next repetition, only the
new audio will remain in the loop and the old portion will be removed.
See Substitute in the Functions section for more details.
INSERTMODE=HALFSPEED
When InsertMode=HalfSpeed, the Insert button becomes the
HalfSpeed button during Play mode. Pressing HalfSpeed switches
the current loop an octave lower, to half speed. The Insert LED turns red
and the display says H.SP briefly. Press HalfSpeed again and the loop
returns to FullSpeed. The LED turns green and F.SP is displayed for a
moment.
See HalfSpeed in the Functions section for more details.
5-16 Echoplex Digital Pro Plus User’s Manual
Insert
Continued
INSERTMODE=REVERSE
When InsertMode=Reverse, the Insert button performs the same
function as the Reverse button on the front panel, but more
conveniently.
See Reverse in the Functions section for more details.
I N S E R T M O D E = S U S TA I N
InsertMode=Sustain changes the way the Insert and Multiply buttons
work. SUS turns Insert and Multiply into Unrounded functions with
Sustain action on the button. In other words, they start when the button
is pressed and end immediately when it is released, just like Record or
Overdub do when RecordMode or OverdubMode=SUS. When the function
ends it does so as if Record had been pressed as an alternate ending to
the Insert. This is what we call an Unrounded Multiply or Unrounded Insert,
because instead of rounding off to the next Cycle point it is ended
immediately and the loop time is redefined.
See SUS Commands in the Functions section for more details.
See Also: InsertMode, Multiply, Reverse, SUS Commands, Rehearse, Replace, Substitute,
HalfSpeed, Record, Undo
Reference - Functions 5-17
Load
Immediate Action
Parameter Row: MIDI
Loads the current loop from a MIDI Sample Dump
This replaces the current loop with the contents of a dump received at
the MIDI In port. It’s a good way to restore your best loops from a
sampler or sequencer. Dump and Load are digital data transfers that will
not degrade the audio quality of your loops at all.
Pressing Load puts you in a mode where there are several possibilities
for transferring samples. Any samples that are received will be put in the
current loop, erasing anything that was there.
Even though MIDI Sample Dump is a standard, many manufacturers
have implemented it with slight variations. The Echoplex was designed
to handle a wide range of difference.
When you’re in Load mode, the Echoplex will respond to MIDI Sample
Dump Requests. See Example 4.8 under the Dump heading for more
information.
Example 4.11: Loading the Current Loop from a Sequencer or
Sampler without Handshaking
1. Load the contents of a previous dump into your sequencer, or load a
sample into your sampler.
2. Connect a MIDI cable from the MIDI Out port on your sampler or
sequencer to the MIDI In port on the Echoplex Digital Pro. If you also
connect the MIDI Out of the Echoplex to the MIDI In of the sampler,
then a faster dump can occur (provided that your sampler supports
handshaking protocols).
3. Press the Parameter button on the Echoplex Digital Pro until the light
next to the word “MIDI” is lit, and then press the NextLoop (Load)
button to wait for the dump. The display will show moving dashes to
indicate a wait state, along with the numbers 00 that indicate that no
bytes have been received.
5-18 Echoplex Digital Pro Plus User’s Manual
Load
Continued
4. Start a dump on your sequencer or sampler. As the dump progresses,
the numbers in the display on the Echoplex Digital Pro will change.
5. You can cancel the Load at any time by pressing any button.
Example 4.12: Loading a Sample with Handshaking, Echoplex
Initiates
Handshaking allows the transmission to occur faster and more reliably. It
is possible with a 2-way MIDI connection, if your sampler supports it.
1. Load the contents of a previous dump into your sequencer, or load a
sample into your sampler.
2. Connect a MIDI cable from the MIDI Out port on your sampler or
sequencer to the MIDI In port on the Echoplex, and connect another
one from the MIDI In port on your sampler or sequencer to the MIDI
Out port on the Echoplex.
3. Press the Parameter button on the Echoplex until the light next to the
word “MIDI” is lit, and then press the NextLoop (Load) button to wait
for the dump. The display will show moving dashes to indicate a wait
state, along with the numbers 00 that indicate that no bytes have been
received.
4. If your sampler recognizes MIDI Sample Dump Requests, then a second
press of the Load button will initiate a dump. As the dump progresses,
the numbers in the display on the Echoplex will change.
5. You can cancel the Load at any time by pressing any button.
See also: Sample Dump Chapter, Dump
Reference - Functions 5-19
LoopDivide
Quantizing Action
Play Mode
Allows a loop to be divided up into discrete quantizing points,
so that functions can be executed perfectly in rhythm.
The Quantize parameter has an important value, 8th. With Quantize=8th,
functions automatically shift to execute at subdivisions of the loop
cycles, giving us LoopDividing.
The 8th/Cycle parameter normally determines how the loop is divided.
For example, if 8th/Cycle=8 the subdivisions are on 8th note boundaries
of the Loop time. Any function you press will wait until the next 8th note
before it starts. When you stop the function, the Echoplex again waits for
the next 8th note point to stop. If 8th/Cycle=4, the subdivisions are on
quarter notes. With the values available in the 8th/Cycle parameter, you
have a wide range of options for dividing your loop.
The exception is when Sync=In and a MIDI clock is being received. MIDI
clock specifically defines 8th notes, so the MIDI clock information is
used for Quantizing to 8th notes in this case.
LoopDividing appears simple at first, but offers powerful new
techniques when combined with other functions. For example, the
Replace and Substitute functions can be used to easily change exactly
one eighth note in a loop. Or you can press Reverse and have it
precisely aligned to the nearest quarter note, which feels almost
immediate but keeps your loop in tempo as you switch in and out of
Reverse.
See also: Quantize, 8th/Cycle
5-20 Echoplex Digital Pro Plus User’s Manual
Immediate MIDI Action
LoopTriggering
Play Mode
Switch to any loop using MIDI commands.
When multiple loops are set up using the MoreLoops parameter,
incoming MIDI NoteOn messages can trigger any loop’s playback. This
function is called LoopTriggering.
The LoopTrig parameter sets the value of the MIDI note number that will
trigger Loop 1. The other loops are triggered by successive note
numbers; i.e., if Loop 1 is triggered by note 84, then Loop 2 will be
triggered by note 85, Loop 3 will be triggered by note 86, etc.
This is especially useful when you’ve recorded a number of loops and
want “random access”—the ability to jump directly from any loop to
any other without passing through the intervening loops. You can, of
course, accomplish this without MIDI (see SwitchQuant), but MIDI
provides a much faster way to accomplish this, and even works when
SwitchQuant=Off. You can send the NoteOn messages from a keyboard,
sequencer, MIDI footcontroller, guitar controller, or any other MIDI
controller.
Triggering loops in this way turns the Echoplex into a limited sampler,
with the unique ability to easily record and modify the samples in real
time. With Velocity=On the echoplex will use the velocity information in
the Note On message to control the loop volume. The harder you play
your controller, the louder the loop plays.
Use the SamplerStyle parameter to determine if your loops play from
where it was last left, trigger from the beginning and play once, trigger
for the beginning and play as long as the note is held, or trigger from the
beginning and continue playing.
Note: The default value of 84 will be displayed in your sequencer either
as C5 or C6.
See also: Channel, LoopTriggering, SamplerStyle, Velocity, MoreLoops
Reference - Functions 5-21
LoopWindowing
Immediate Action
Play Mode
Define a Window for your loop and shift it over the audio
stored in memory.
LoopWindowing originally started as an obscure bug in the LoopIIIv5.0
software for the Echoplex Digital Pro. People liked it so much they
insisted we not fix it, and instead turn it into a feature! The “bug” has
now been cleaned up to work predictably and in a consistent manner
with other functions. So now it really is an interesting function called
LoopWindowing.
U N D E R S TA N D I N G L O O P W I N D O W I N G
LoopWindowing lets you define a short segment, or Window, out of a
longer loop and let that short segment repeat as a loop. This Window is
defined on the fly, in real time.
Once you have defined a LoopWindow, you then have the ability to move
that window through the larger loop as it exists in memory. In fact, it is
more than just moving the window over the loop as it currently exists,
you really move back through the memory, through all of the changes
that have been recorded to the loop by overdubbing or multiplying or
any other functions you have used.
The LoopWindow can be moved backwards until you reach the very
initial point where the first tap of Record happened.
LoopWindowing can give a variety of interesting effects, depending on
the size of the Window and how much material is in the memory to
Window through. You can even resize the Window on the fly, to capture
different sized chunks of memory!
5-22 Echoplex Digital Pro Plus User’s Manual
LoopWindowing
Continued
C R E AT I N G
THE
LOOPWINDOW
The LoopWindow is created by either Re-Multiplying a loop or doing an
Unrounded Multiply. Both of these are standard techniques that are are
quite useful in many cases.
Re-Multiplying is done on a loop that has already had Multiplies or Inserts
done on it, so you can see the Multiple display counting the cycles. If
you press Multiply again on this loop, and then press Multiply again
to end it somewhere well before the end of the loop, you will get a new
loop of just that section. In this case it will be neatly rounded off to the
previous cycle length. This technique allows you to chop out Cycles
from the larger loop. You may want to experiment with setting
Quantize=Cycle or Quantize=8th as a way to get rhythmically aligned
LoopWindows.
Unrounded Multiply is when you start a Multiply on a loop, and then end
it with a press of Record. Instead of rounding off the cycle, it will stop
immediately and redefine the new loop length at exactly that point.
Unrounded Multiply is a great way to change rhythms by chopping out a
completely new loop lengths. Using the InsertMode=SUS function is also
an interesting way to create Unrounded Multiples.
Either one of these techniques let you chop out a segment of your loop,
either maintaining rhythm or not depending on what you want to do.
The resulting loop is your LoopWindow.
MOVING
THE
LOOPWINDOW
Once a LoopWindow has been defined, we can move it backwards
through the loop memory by pressing Undo. With each Undo press,
the LoopWindow jumps back in memory by the size of the window, and
Reference - Functions 5-23
LoopWindowing
Continued
then loops over that section. You can continue moving the window
backwards to the point where the initial loop was started with the first
tap of Record. If a Reverse has been done on the loop, then you can only
move it back to the point where Reverse was tapped.
Moving the LoopWindow works in the same way as Undo works, so it is
useful to understand the distinction between a ShortUndo and a
LongUndo. (See the Undo section of this chapter for more discussion on
Undo.) Basically, a long-press of Undo will jump you back a complete
LoopWindow length before your current window, and is the most
obvious to use. A short-press of Undo sets the LoopWindow to end at
the spot where you press it and begin a LoopWindow length before that.
For example: if you redefine the length of the LoopWindow from 8
seconds to 2 seconds, and then tap a short-press of Undo at 1.5
seconds, it is only the last .5 seconds that change in that window. The
previous 1.5 seconds of the window remain intact in the new window
after that initial Undo button press, except they will now be coming at
the end of the LoopWindow. Your new loop will start .5 seconds before
the previous LoopWindow StartPoint, and end at the 1.5 second point
where you tapped Undo.
Using ShortUndo is more complicated to understand, but is also more
flexible. If you want to scroll through different sections of the loop
cleanly with ShortUndo, press Undo right at the beginning of the
window. This way you will really jump back a whole Window length. If
you hit Undo somewhere within the boundaries of the window, you'll
find that you get a blend between different memory window sections,
with that blend happening at the exact point you hit Undo. So the
timing of the Undo button press becomes a powerful tool for playing
with the distinction between window fragments. It is especially
powerful in rhythmic loops.
MODIFYING
THE
LOOPWINDOW
You can define new LoopWindow sizes at any time by doing more ReMultiplies or Unrounded Multiplies, and then move the new LoopWindow
over the loop.
5-24 Echoplex Digital Pro Plus User’s Manual
LoopWindowing
Continued
Once you have a LoopWindow defined, you can do any other loop
function on it that you like. For example, you can Overdub new material
onto it. Pressing Undo after that will first remove the new overdubs,
and then begin jumping backwards through memory of the larger loop.
See also: Undo, Multiply
Reference - Functions 5-25
MultiIncrease
Immediate Action
Play Mode
Predetermine the final cycle count of a Multiply or Insert.
Multiply has a feature to aid in creating very long multiplies, called
MultiIncrease. MultiIncrease is also useful when you know exactly how
many multiples you want to do in advance.
Instead of waiting until the end of the Multiply to make the second press
of the Multiply button, now you can immediately tap in as many
Multiples as you want in the beginning of the multiplying. The Echoplex
will automatically complete that many multiply Cycles for you. This
same function is also available for Insert, however for simplicity we will
just describe it in terms of Multiply.
MultiIncrease is very helpful for situations where you want to have a large
number of multiples and you don’t want to wait to the very end to
remember to press Multiply a second time. This way you can set up in
advance how far it will multiply and let it go while you continue playing.
MultiIncrease is in addition to the normal Multiply operation, so the
standard use is not affected.
HOW
TO
U S E M U LT I I N C R E A S E
Once you have started Multiply with a tap of the Multiply button,
immediately tap the Multiply button again to signal you want to end.
The Echoplex begins Rounding off the Multiply, just as it normally does.
During the Rounding period, continue tapping Multiply to increase the
number of Cycles you want to add. The number of Cycles where Multiply
will be stopped is briefly displayed as C <number> while you are
tapping Multiply.
If you like, you can tap them in very quickly right from the beginning.
Or, if you have had Multiply going for a while, using MultiIncrease simply
adds to the number of multiples you already have.
5-26 Echoplex Digital Pro Plus User’s Manual
MultiIncrease
Continued
If you are tapping the Cycles in quickly, it is helpful to remember that
the first tap of Multiply is just starting the Multiply. The second tap is
where you start counting the total number of Cycles you will get. This
can throw you off when you count the Multiply taps quickly, because
you need to tap one extra time than the number of Cycles you want. So
if you want 4 Cycles total, you need to tap five times. You might count it
start – 1 – 2 – 3 – 4.
Example 4.x: Basic Operation of MultiIncrease
1. Record a loop.
2. Tap Multiply 4 times and you get:
Tap 1:
Start Multiply
Tap 2:
Stop Multiply, begin Rounding
Tap 3:
MultiIncrease (Cycles = 2)
Tap 4:
MultiIncrease (Cycles = 3)
3. You’ve set it to Multiply by 3
4. At the third Cycle, the Multiply will stop automatically.
M U LT I I N C R E A S E
WITH
QUANTIZE=LOOP
When Quantize=Loop, MultiIncrease adds entire loops. For example, if the
loop consisted of 4 Cycles, MultiIncrease counts C 8, C12, C16, etc.
See Also: Multiply, Insert
Reference - Functions 5-27
Multiply
Immediate Action
Play Mode
Lets you overdub passages that are longer than the existing
cycle.
Multiply makes it easy to layer a 4-measure melody over a repeating 1measure rhythm pattern, for instance. It’s called "Multiply" because the
original cycle is "multiplied"—copied multiple times—while the new
material is added to it. The result is a loop whose length is an integer
multiple of the length of the original cycle (unless you use the Record
button to end the multiplication—see "Alternate Endings" below).
U N Q U A N T I Z E D M U LT I P L I C AT I O N
The Multiply function is started by pressing the Multiply button. There
are several ways to end the function, but the most natural and common
is to press the Multiply button a second time. When you do this, you
will always create a loop that consists of an integer (1, 2, 3, etc.) number
of cycles. The existing cycle is repeated and mixed with the new playing,
which may be several cycles long. Figure 4.5 demonstrates this behavior
when Quantize=Off.
Multiply doesn’t restart the loop the instant you press it the second
time—it always “rounds off” so that the original loop isn’t cut-off in the
middle. Normally it rounds up to the next cycle point. However, if you
press Multiply the second time within 150ms after the cycle point, it
will round down.
When you examine Figure 4.5, you’ll see that there are two possible
results shown, depending on the value of the RoundMode parameter. If
RoundMode is set to Round, then the timing of your second press of the
Multiply button isn’t critical—everything in the current cycle
(measured from the first press of Multiply) is recorded. In contrast, if
RoundMode is Off, then the overdubbing of the new performance stops
immediately, although it still rounds off so the entire copy of the original
cycle is included in the loop.
5-28 Echoplex Digital Pro Plus User’s Manual
Multiply
Continued
Cycle 1
FIGURE 4.5
Basic operation of the
Multiply button.
Quantize=Off
Cycle 2
Cycle 3
Cycle 4
Existing Loop
1 cycle
1 cycle
1 cycle
New Performance
Button Actions
M
M
Results when
RoundMode=rnd
A
Results when
RoundMode=Off
Time
Q U A N T I Z E D M U LT I P L I C AT I O N
When Quantize=On, a press of the Multiply button will cause
multiplication to start at the beginning of the next cycle. As in the
previous example, ending the multiplication with a second press of
Multiply will cause an exact number of cycles to be mixed with copies
of the existing cycle—the loop will end at the end of the current cycle
(see Figure 4.6).
Unlike before, the setting of RoundMode will not have any effect. When
Quantize=On, music played after the second press of the Multiply
button is overdubbed until the Multiply ends at the next cycle point.
Reference - Functions 5-29
Multiply
Continued
FIGURE 4.6
Quantized operation of the
Multiply button.
Cycle 1
Cycle 2
Cycle 3
1 cycle
1 cycle
Existing Loop
New Performance
Button Actions
M
M
Results when
RoundMode=rnd
A
Results when
RoundMode=Off
Time
OVERFLOW HANDLING
Watch the time counter when you’re doing a multiply that might extend
longer than your unit’s memory capacity. If you exceed this capacity, the
multiply operation will be undone and three dashes will appear in the
display. The Overflow parameter has no effect during Multiply—it is only
relevant when you Record your first cycle.
The Echoplex always keeps your current loop in memory when you do
another function like Multiply. This way it is always possible to Undo
back to the original if you go into a function by mistake. This means that
the memory available for Multiply is reduced by the size of your
current loop.
For example, say you had 10 total seconds of memory available for a
loop, and recorded a 1 second loop. When you Multiply this loop you
can only go to 9 cycles, since 1 second is used to store the existing loop.
It is useful to pay attention to this so you know how far you can go with
Multiply.
5-30 Echoplex Digital Pro Plus User’s Manual
Multiply
Continued
A LT E R N AT E E N D I N G S
The simplest way to end a Multiply operation is to press the Multiply
button a second time. You’ll get the results illustrated in the examples
above. However, you can also end the Multiply by pressing any of the
buttons whose front-panel lights are on during the Multiply. You’ll get
some interesting results, as illustrated in the next few examples.
RECORD
Ending a Multiply operation with the Record button causes the
operation to end immediately, terminating the loop at the exact time of
the button press. Since the loop can’t contain fractional cycles, the
entire new loop will be considered a single cycle. This is called an
UnroundedMultiply. Figure 4.7 illustrates this behavior.
FIGURE 4.7
Ending Multiply with
Record changes the cycle
length.
Quantize=Off
Existing Cycles
Cycle 1
Cycle 2
Cycle 3
Existing Loop
New Performance
Button Actions
M
R
Results
New Cycle
Cycle 1
Time
Reference - Functions 5-31
Multiply
Continued
Unrounded Multiply is an important function. It allows you to change
the length of the loop on the fly, either shorter or longer. For example,
you can edit out a small portion of a larger loop as a means to quickly
transition to something new. Unrounded Multiply also changes the
rhythm of the loop, including the output of any synchronization pulses.
In this way you can easily manage tempo changes while looping, either
generating a new clock tempo for other devices, or fitting your loop to a
tempo change otherwise in the music.
OVERDUB
Ending a multiplication with Overdub is exactly like ending it with
Multiply, except that you immediately toggle Overdub mode after the
Multiply rounds off. It’s the equivalent of ending the multiplication by
pressing Multiply a second time, and then pressing Overdub
immediately. If Overdub was on before the multiply, this action will turn
it off. If it was off it will now be on.
INSERT
Ending a multiplication with Insert is exactly like ending it with
Multiply, except that you are immediately put into Insert mode. It’s the
equivalent of ending the multiplication by pressing Multiply a second
time, and then pressing Insert immediately.
MUTE
Ending a multiplication with Mute is exactly like ending it with
Multiply, except that the audible sound will shut off as soon as the
Multiply ends. Once you’re in Mute mode, you can restart the sound with
the Mute button or with the Alternate Endings listed for the Mute entry
later in this chapter.
5-32 Echoplex Digital Pro Plus User’s Manual
Multiply
Continued
UNDO
If you end a Multiply operation by pressing Undo, the loop will be
returned to its state before you pressed Multiply.
REVERSE
Ending a multiplication with Reverse is exactly like ending it with
Multiply, except that you immediately toggle Overdub mode after the
Multiply rounds off. It’s the equivalent of ending the multiplication by
pressing Multiply a second time, and then pressing Reverse
immediately. If the loop was in Reverse before the Multiply, this action
will put it back into Forward.
CHANGING THE NUMBER
AN EXISTING LOOP
OF
CYCLES
IN
Do you want to change the number of cycles in a loop? In particular,
would you like to keep a couple of the cycles and throw away the others?
Do you want to add 1 cycle to make your repetition structure
appealingly asymetrical? You can do this by initiating a Multiply
operation on a loop that’s already been multiplied.
Example 4.13: Dropping Cycles
Here’s an example that illustrates one way to use Multiply to alter an
existing loop. If you connect a microphone to the Echoplex’s Audio
Input, you can use it to illuminate the effects of this procedure, as you’ll
see. Whether you have a microphone or not, it can be instructive to
follow along with this example, referring to Figure 4.8 to see the effects
of each step.
Reference - Functions 5-33
Multiply
Continued
1. Record a single tap or note into a short loop to provide a pulse. Make it
slow enough so that you can carry out the following steps without the
need for practice.
2. Set Quantize=On.
3. Press Multiply right after you hear a pulse. Count "One-TwoThree_Four" together with the pulses, and hit Multiply again,
immediately after the word "Four."
4. Now you have a loop that counts from 1 to 4, as shown in the figure.
Press Multiply right after the word "One," and again after the word
"Three." Note that the loop now consists of the words "Two" and
"Three."
FIGURE 4.8
This diagram accompanies
Example 4.13. It illustrates
how you can use Multiply
to change the number of
cycles in an existing loop.
Cycle 1
First cycle
After Step 2
Actions In Step 3
Cycle 2
Cycle 3
Cycle 3
(tap)
(tap)
"One"
(tap)
"Two"
(tap)
"Three"
M
Results
(tap)
"Four"
M
(tap)
"Two"
(tap)
"Three"
Cycle 1
Cycle 2
New Loop
Time
Example 4.14: Adding Cycles
Here’s an example that shows how to use Multiply to change a 2-cycle
loop to a 3-cycle loop. Follow along in Figure 4.9.
5-34 Echoplex Digital Pro Plus User’s Manual
Multiply
Continued
1. Record a single tap or note into a short loop to provide a pulse. Make it
slow enough so that you can carry out the following steps without the
need for practice.
2. Set Quantize=On.
3. Press Multiply right after you hear a pulse. Count "One-Two" together
with the pulses, and hit Multiply again immediately after the word
"Two."
4. Now you have a loop that counts from 1 to 2, as shown in the figure.
Press Multiply right after the word "One," and again after the 1st
repetition of the word "Two," as illustrated. Note that the loop now
consists of the words "Two-One-Two."
FIGURE 4.9
This diagram accompanies
Example 4.14. It illustrates
how you can use Multiply
to increase the number of
cycles in an existing loop.
1 cycle
First cycle
(tap)
Loop
After Step 2
Button Actions In Step 3
Results
(tap)
"One"
Loop
(tap)
"Two"
(tap)
"One"
M
(tap)
"Two"
M
(tap)
"Two"
(tap)
"One"
Cycle 1
Cycle 2
(tap)
"Two"
Cycle 3
New Loop
Time
We’ve shown these examples with Quantize=On. Try the same ideas with
Quantize=Off to see the difference. You may find the Quantize is very
useful when you want to keep your loops rhythmically precise. When
Quantize=Off on the other hand, you have the freedom to define exactly
where things happen as they fit your sense of the music.
Now try similar ideas using Unrounded Multiply, as described above
in the Alternate Endings section. You do this by using Record as an
alternate ending to Multiply. With Unrounded Multiply you can
Reference - Functions 5-35
Multiply
Continued
easily create a new loop length that is unrelated to the previous cycle
lengths. This is very useful for changing tempos, or editing out a small
fragment of a larger loop for the basis of something new.
Your taste and the musical situation will determine which of these
different techniques is most appropriate at any given time.
F O R C I N G U N R O U N D E D M U L T I P LY
ROUNDING
WHILE
UnroundedMultiply can be executed while a Multiply is Rounding by
pressing Record during the Rounding period.
This means that in addition to doing an UnroundedMultiply by pressing
Multiply to start and ending with Record, you can press Multiply to
start, then Multiply again to finish Multiplying and start Rounding, and
then press Record while it is rounding to force it to stop Unrounded.
This is especially interesting when you use alternate functions to end
Multiply. Since ending Multiply with an alternate function does a rounded
ending, pressing Record after that forces it to go into that function
immediately and end the multiply Unrounded.
For example, you could press Multiply to multiply your loop out as you
add something over it, press Reverse to end the Multiply and start it
Rounding, and then press Record to have it immediately start Reversing
with the loop length redefined to that point.
Or, you could chop out a short reversed snippet of your current longer
loop in a new loop. With SwitchQuant on, you press Next-MultiplyReverse-Record to create a reversed snippet. The Next-Multiply
portion begins a copy of the current loop into the new loop (which is
really the same as a multiply into the new loop). The Reverse starts it
Rounding with the Reverse command armed, and the Record executes it
immediately and redefines the new loop at that length.
This Rounding action also applies for using Insert.
5-36 Echoplex Digital Pro Plus User’s Manual
Multiply
Continued
THE LONG PRESS
Pressing and holding down the Multiply button has the same effect as
a pair of press-and-releases, regardless of the state of Quantize.
RESETTING ALL LOOPS
When the number of loops (the value of MoreLoops) is more than one,
the Multiply button can be used to reset all the loops at once. First,
however, you must reset the current loop. The following example
illustrates that.
Example 4.15: Resetting All Loops
1. Set the number of loops to be more than 1 (see MoreLoops)
2. Record something in the first two loops.
3. Use NextLoop to move to Loop 1. Note that the light under the
Multiply button is green.
4. Press and hold the Record button to reset the current loop. The
Multiply light turns orange.
5. Press and hold the Multiply button to reset all loops.
See Also: Record, Insert, Quantize, Overflow, RoundMode
Reference - Functions 5-37
Mute
Immediate Action
Play Mode
Silences the loop output.
This mutes (silences) and unmutes the output of the Echoplex Digital
Pro. Mute works very simply—it always silences the output immediately.
However, there are a number of options for restarting the output.
THE EFFECT
OF
MUTEMODE
MuteMode determines where loop playback starts the second time you
press the Mute button. As you’ll see under "Alternate Endings" below,
whichever approach you choose, the Undo button takes the opposite
viewpoint, so you’ll always have both ways to end a Mute readily
available.
MuteMode=Star t
When MuteMode=Start, a second press of the Mute button will always
restart the current loop at the beginning. This is probably the most
useful setting for solo playing.
When MuteMode=Start, the end of the Mute is affected by the setting of
Quantize. If Quantize=On, then sound won’t restart until the end of the
current cycle.
Be aware that restarting the loop can move your StartPoint in relation to
external sequencers or other musicians. This could be a problem if you
wish to keep things tight with a sequencer, but it can also be very useful
if the band’s time has shifted and you need to line your loop up again
with everybody else.
5-38 Echoplex Digital Pro Plus User’s Manual
Mute
Continued
MuteMode=Continuous
When the MuteMode=Continuous, the loop continues counting even
when it is silenced by pressing Mute. Then, when you press Mute a
second time to allow audio output again, the loop will become audible
wherever it happens to be at that time. This is probably most useful if
you want to silence the loop for just a beat or two to play a fill, or have
your loop stay in time with other musicians even while it is not heard.
A LT E R N AT E E N D I N G S
You can also end Mute with a number of other buttons, as follows:
UNDO
Acts like the second press of the Mute button, except that it uses the
opposite value of MuteMode. In other words, if MuteMode=Start, then the
Undo ending behaves like the Mute button would if MuteMode were
Continuous. Similarly, if MuteMode=Continuous, then the Undo ending
behaves like the Mute button would if MuteMode were Start.
INSERT
Plays the loop once and then goes back into Mute state. If you press it
again it will retrigger. Useful for stuttering effects.
This ending is affected by Quantize. If Quantize=On, the loop will be
played once, starting at the end of the current cycle.
MULTIPLY
Executes ReAlign, which allows you to get lined up with external devices
that have been stopped and restarted. See ReAlign for more info.
Reference - Functions 5-39
Mute
Continued
THE LONG PRESS
When you press and hold the Mute button, the loop output will be
silenced until you release the button, at which time it will continue
playing. During this operation, the loop will continue running even
when silenced, regardless of the setting of MuteMode—releasing the
button will not start the loop at the beginning, except by coincidence.
See Also: MuteMode
5-40 Echoplex Digital Pro Plus User’s Manual
NextLoop
Immediate Action
Play Mode
Moves to the next loop.
NextLoop is primarily used when multiple loops are set up with the
MoreLoops parameter. Pressing NextLoop will switch you to the next
loop.
The setting of SwitchQuant will affect when this happens—see the
discussion of SwitchQuant for a detailed explanation.
RECORD -
TO
- NEXTLOOP
If you have the MoreLoops parameter set greater than one, ending a
recording with NextLoop immediately ends the recording and puts
you immediately into the next loop.
If AutoRecord=On, the Echoplex immediately continues recording in the
new loop. You can continue playing without any interruption, and have
what you play split into the two loops. This is especially useful for filling
the loops with the various parts of a song while playing continuously.
You just keep pressing Next as you play! This is a great way to record a
verse loop and chorus loop in one pass, as you play them live. If you
continue to press NextLoop at the end of each part, you can use this
method to record into all of the loops you have set up.
Similarly, if LoopCopy=Sound or LoopCopy=Time, you can continuously
copy the audio or the time base into new loops as you record them in
one pass.
When MoreLoops=1, ending Record by pressing NextLoop stops
recording and begins playing the loop, just as if the recording had been
ended with another press of Record. Note however, that when
MoreLoops = 1, NextLoop becomes a retrigger button, so Record-toNextLoop can be an interesting way to immediately go into stutters of
your loop.
Reference - Functions 5-41
NextLoop
Continued
See also: MoreLoops, SwitchQuant, AutoRecord, LoopTrig, LoopCopy, SamplerStyle
5-42 Echoplex Digital Pro Plus User’s Manual
Overdub
Immediate Action
Play Mode
Lets you add layers of sound.
Overdub is the basic magic wand of the Echoplex Digital Pro. It allows
you to add layer after layer of sound to any existing loop. As you play,
the level of the sound in the existing loop is subtly lowered to prevent a
gradual accumulation of signal that would overload the system. You can
leave Overdub on for extended periods of time, but we recommend that
you turn it off if you aren’t adding new sonic material to the mix.
See the Quick Start, page 1-1, for the fastest introduction to
overdubbing.
Overdub is related to the Insert and Multiply functions, but its behavior is
simpler. Unlike those operations, Overdub never changes the length of
the cycle or loop. Overdub is also not affected by the settings of Quantize
or RoundMode—overdubbing starts when you press down the Overdub
button, and ends either when you press it a second time or when you
release it (see "The Long Press" below). Overdub is, however, affected by
the setting of OverdubMode (also discussed under "The Long Press"
below).
BASIC OVERDUBBING
The Overdub function is started by pressing the Overdub button. The
existing cycle is mixed with the new playing. Every time the cycle
reaches its start point, you’ll be adding another layer over that which
you’ve just recorded. Figure 4.10 demonstrates this behavior.
Reference - Functions 5-43
Overdub
Continued
FIGURE 4.10
Basic operation of the
Overdub button.
In the Results row, each
cycle is the result of mixing
the contents of the previous
measure with the current
measures’ new
performance.
1 cycle
Existing Loop
New Performance
Button Actions
O
O
Results
A LT E R N AT E E N D I N G S
The only way to end an overdub operation is to press the Overdub
button a second time. You’ll get the results illustrated in the example
above. However, you can execute other functions while Overdubbing by
pressing any of the buttons whose front-panel lights are on during the
Overdub. The function will execute as normal, and when you end it
Overdub will still be on.
THE LONG PRESS
Pressing and holding down the Overdub button for longer than half a
second has the same effect as a pair of short press-and-releases. In
other words, overdubbing will start when you press and hold the button
and end when you release it.
5-44 Echoplex Digital Pro Plus User’s Manual
Overdub
Continued
Overdub can be held on in a sustain fashion with a long press while
simultaneously pressing other buttons to execute other functions. This
is true whether Overdub is activated from the front panel buttons, from
the foot pedal, or with a momentary switch in the Overdub Jack.
For example, you can keep Overdub long-pressed and then press
Reverse simultaneously to go in and out of Reverse while Overdubbing.
Simultaneous Overdub is useful when using Overdub as a SUS
function. Note this only works with the Overdub button, and no other
functions. Also, it does not work to do long-press functions on other
buttons while holding Overdub. They will be treated as short-presses.
THE EFFECT
OF
OVERDUBMODE
When OverdubMode is set to Toggle, the Overdub button works as
described above. However, when OverdubMode is set to Sustain, you can
only layer sounds while you hold down the button—as soon as you
release it, the overdubbing stops. This is similar to using the long
presses of the Overdub button, except it is guaranteed to always
operate in Sustain fashion no matter how short or long you press it.
There are many situations when you’re likely to want to set
OverdubMode to Sustain, for example:
■ You want to overdub extremely short excerpts from a sound source. If
OverdubMode=Toggle you have to press Overdub twice, which can be
difficult to do quickly. With OverdubMode=Sustain you can capture very
short fragments of sound into your loop.
■ You want to guard against inadvertently putting yourself into an
extended Overdub, so you decide to overdub only when your foot is
holding down the button.This is extremely useful if you are playing
without looking at the Echoplex. You will always know the state of
Overdub by whether you are pressing it or not.
See Also: Record, Insert, Quantize, Overflow
Reference - Functions 5-45
PreviousLoop
Immediate Action
Play Mode
DirectMIDI only command for switching to the previous loop.
An interesting feature that falls out of the DirectMIDI function called
SUSNextLoop is the PreviousLoop function. With SUSNextLoop the NoteOn
portion sends you forward one loop and the NoteOff portion sends you
back one loop. If you only use the NoteOff command for SUSNextLoop,
it only sends you backwards through the loops, and becomes the
PreviousLoop command!
If you set one button on a MIDI controller to only send the NoteOn for
SUSNextLoop, and another button to only send the NoteOff for
SUSNextLoop, you have a convenient way to go forward and backwards
through your loops.
PreviousLoop is only available through MIDI, and is located at
Source#+20.
See Also: NextLoop, MoreLoops, MIDI Command List, SUSNextLoop, Receiving MIDI
Commands.
5-46 Echoplex Digital Pro Plus User’s Manual
Record
Immediate Action
Play Mode
Records a new cycle.
This is where it all starts. This button lets you record your first layer in a
loop or erase (reset) the current loop. You press it once to start
recording, and press it a second time to end recording and start looping.
A step-by-step example is given in the Quick Start.
If you go over the amount of memory available for the current loop
while recording, one of two actions can occur depending on the setting
of the Overflow parameter. See the description of that parameter for
more information.
A LT E R N AT E E N D I N G S
The simplest way to stop recording is to press the Record button a
second time. However, you can also end the recording by pressing any
of the buttons whose front-panel lights are on during the recording.
UNDO
If you end a Record operation by pressing Undo, the loop will be
returned to its state before you pressed Record. This is particularly
useful if you accidentally press Record and don’t want to lose the
existing loop.
If the Echoplex doesn’t have enough memory to hold both the existing
loop and the new loop, you won’t be able to Undo the Record. See the
discussion under the Undo heading in this chapter for a full
explanation.
INSERT
The effect of ending a recording with Insert depends on the setting of
InsertMode.
Reference - Functions 5-47
Record
Continued
If InsertMode=Insert, then pressing Insert at the end of a recording ends
the recording and immediately inserts a second cycle (as it continues
recording); in other words, it puts you into Insert mode. The insertion
continues until memory runs out or you end it with Insert or an
alternate ending for the Insert operation. This is very useful for dividing a
longer loop into multiple cycles as you record it. This can allow you to
easily set a tempo for an external sequencer when using MIDI clock out,
for example.
If InsertMode=Replace, then pressing Insert at the end of a recording
ends the Record as if you’d pressed the Record button. The Replace
function immediately begins as explained in the InsertMode section.
If InsertMode=Rehearse, then pressing Insert at the end of a recording
puts you in Rehearse mode. The cycle that you’ve just recorded will be
played back exactly once, regardless of the Feedback setting. The
underlying timing of the cycle will continue and any new audio played
is fed into the loop. If you play something that you really like and want
to keep for more repetitions, press Insert again immediately after
you’ve played it. One cycle’s worth of material prior to that point will be
kept as the loop, and will repeat according to the Feedback setting.
Rehearse is useful for practicing an idea before keeping it as the loop.
If InsertMode=Reverse, then pressing Insert at the end of a recording will
end the Record and immediately start playing the loop backwards.
MUTE
Ending a recording with Mute is exactly like ending it with Record,
except that the audible sound will shut off as soon as you press the
Mute button. Once you’re in Mute mode, you can restart the sound with
the mute button or with the Alternate Endings under the "Mute"
heading in this chapter.
OVERDUB
Ending a recording with the Overdub button ends the recording
immediately and toggles Overdub mode. It’s the equivalent of ending
the Record by pressing Record a second time, and then pressing
5-48 Echoplex Digital Pro Plus User’s Manual
Record
Continued
Overdub immediately. If Overdub was on before the Record this action
will turn it off. If Overdub was off it will now be on.
NEXTLOOP
If you have the MoreLoops parameter set greater than one, ending a
recording with NextLoop immediately ends the recording and puts
you immediately into the next loop.
If AutoRecord=On, the Echoplex immediately continues recording in the
new loop. You can continue playing without any interruption, and have
what you play split into the two loops. This is especially useful for filling
the loops with the various parts of a song while playing continuously.
You just keep pressing Next as you play! This is a great way to record a
verse loop and chorus loop in one pass, as you play them live. If you
continue to press NextLoop at the end of each part, you can use this
method to record into all of the loops you have set up.
Similarly, if LoopCopy=Sound or LoopCopy=Time, you can continuously
copy the audio or the time base into new loops as you record them in
one pass.
When MoreLoops=1, ending Record by pressing NextLoop stops
recording and begins playing the loop, just as if the recording had been
ended with another press of Record. Note however, that when
MoreLoops = 1, NextLoop becomes a retrigger button, so Record-toNextLoop can be an interesting way to immediately go into stutters of
your loop.
THE LONG PRESS
Pressing and holding down the Record button erases the entire current
loop. This is also called a Long Press Record. The loop will then be in
Reset, and ready for a new recording.
Reference - Functions 5-49
Record
Continued
THE EFFECT
OF
RECORDMODE
When RecordMode=Toggle, the Record button works as described
above. However, when RecordMode=Sustain, you can only record sounds
while you hold down the button—as soon as you release it, the
recording stops.
When RecordMode=Sustain, you lose the ability to reset a loop, normally
accomplished by a long press of the Record button. This may not be a
great loss for you, since a short press of Record while you play nothing
will create a short loop with no contents. However, there are two
consequences of this approach:
USING
■
A loop that is pseudo-cleared this way will not go into AutoRecord if you
enter it with NextLoop.
■
There is no way to reset all loops in this situation, except to enter a loop
(with AutoRecord=Off) that has not been recorded since power-up. The
orange light under the Multiply button, signifying that a long press of
that button will reset all loops, does not go on unless the current loop is
completely empty.
AN
AUDIO THRESHOLD
When a non-zero value for the Threshold parameter is set, the Record
function waits until a large enough audio signal appears at the Input
jack before it actually starts recording. When Threshold=0, this waiting
is disabled and Recording begins immediately.
5-50 Echoplex Digital Pro Plus User’s Manual
Record
Continued
SYNCHRONIZED RECORDING
When a sync signal is being received by the Echoplex, and Sync=In, the
Echoplex will Record loops in sync with the external device’s tempo. Sync
signals can be in the form of MIDI Clock, BrotherSync from another
Echoplex, or pulses at the BeatSync input.
During Reset, the Overdub LED turns yellow to indicate that a Sync has
arrived. When the second Sync point arrives to define the Cycle length,
the LoopTime Display shows the resulting Cycle time. This cycle time
is determined by the 8ths/cycle setting and the tempo of the incoming
clock. Whenever the Overdub LED is yellow like this, the next Record
press will be Synchronized.
Loops recorded in sync will be either exactly this Cycle length, or an
integer multiple of it. You can decide in real-time how many cycles to
Record. You simply let the Echoplex continue Recording and it will keep
adding cycles until you stop the Record, at which point it will round off
to the next Cycle point and begin playing back the loop. This is very
similar to the way Multiply works, so it should be familiar if you have
used Multiply.
QUANTIZED SYNC
When Quantize=Cycle, 8th, or Loop, the Cycles are tracked and counted
properly when recording in sync. When Record is pressed, it will be
quantized to the next sync point defined by the incoming sync signal
before it starts, and again quantized when Record is pressed to end. This
means that if the incoming clock defines a Cycle length of 2 seconds and
you let Record continue to 8 seconds, you will see the multiple counter
counting from 1 to 4. The Cycle boundaries will be set at 2.0 seconds,
and the startpoint will be aligned with the startpoint defined by the
incoming sync.
Reference - Functions 5-51
Record
Continued
UNQUANTIZED SYNC – SYNCRECORD
SyncRecord is a variation of Record that is automatically done when a
Sync of any type is being received, Sync=In, and Quantize=OFF.
Instead of always quantizing Record when a sync is being received, the
Echoplex will do a kind of “Multiply over nothing” for this unquantized
case. This means SyncRecord starts immediately when you press
Record, counts the Cycles on the green multiple display, and rounds off
at the end to fit the loop time defined by the sync. SyncRecord gives you
freedom from quantization so you can begin recording anytime you
like, while still allowing tight synchronization to an external clock
source.
With SyncRecord, you only need to have received the first sync event to
begin Recording in sync. As you are Recording, the Echoplex will
continue watching the sync to determine what the right cycle times are.
When you press Record again to end, the Echoplex will automatically
round off to the right point so that your loop is exactly the correct length
to match the sync. This is useful to let you start recording immediately
without waiting for an entire sync period to occur.
See Also: RecordMode, Overflow, Threshold, Sync, SyncRecord, Quantize, Reset
5-52 Echoplex Digital Pro Plus User’s Manual
Rehearse
Immediate Action
Play Mode
Rehearse a part before committing it to the loop.
When InsertMode=Rehearse, pressing Insert at the end of a recording
puts you in Rehearse mode.
To use Rehearse, begin by tapping the Record button to start recording
a loop. Instead of ending the recording with a second press of the
Record button, press the Insert button. You will now be in Rehearse
mode. The cycle that you’ve just recorded will be played back exactly
once, regardless of the Feedback setting. The underlying timing of the
cycle will continue and any new audio played is fed into the loop and
repeated one time. This gives you an opportunity to practice ideas for
your loop.
When you play something you really like and want to keep for more
repetitions, press Insert again immediately after you’ve played it. This
will exit Rehearse mode and put you in the normal Play mode. You don’t
have to worry about where the Echoplex thinks the StartPoint is located.
One cycle’s worth of material prior to the point where you pressed
Insert will be kept as the loop, and will repeat according to the Feedback
setting.
Make sure you press Insert to exit Rehearse mode after you play the
material you wish to keep, and not after it repeats.
Rehearse is useful for practicing an idea before keeping it as the loop.
See also: Record, Insert, InsertMode
Reference - Functions 5-53
Replace
Immediate Action
Play Mode
Replaces a section of the current loop.
When InsertMode=Replace, the Insert button becomes the Replace
button. Each press and release of the Replace button during Play mode
will replace a segment of the loop with new material for as long as
Replace is held down. The overall loop length is not changed.
If Quantize=On and Replace is pressed during a cycle, the function will
begin at the end of the current cycle, and will continue to the next cycle
point after Replace is released again.
When InsertMode=Replace and Insert is used as an alternate ending
during a Record, the Record ends as if you’d pressed the Record button
and the Replace function immediately begins.
FIGURE 4.X
Replacing with the
Insert button.
InsertMode=Replace.
Existing Loop
New Performance
Button Actions
I
I
Resulting Loop
Time
5-54 Echoplex Digital Pro Plus User’s Manual
Reset
Immediate Action
Play Mode
Resets the Current Loop.
To Reset the current loop, press and hold down the Record button for
about half a second. Reset erases the contents of the current loop. This is
also called a Long-Press Record. The loop will then be in the Reset
State, and ready for a new recording.
You can also execute Reset immediately using MIDI. The DirectMIDI Reset
command is located at Source#+25.
Although Reset erases the audio of the loop, it does not cause the
Echoplex to lose sync with external devices. The Echoplex will continue
to track the Global MIDI StartPoint (or Beat 1 of the sequencer), so that
your next Recording can begin in Sync.
Reset will also leave intact any tempos you have set using the TempoSelect
feature and keeps you in the TempoSelect state. This means if you have
recorded a loop to a preselected BPM tempo, and then Reset it, the next
loop you record will still follow that tempo. If you do a GeneralReset, the
Echoplex exists the TempoSelect state, although your Tempo will be
recalled if you enter it again.
See also: Record, GeneralReset, MIDI Command List, TempoSelect, Global/Local MIDI Clock
Reference - Functions 5-55
Retrigger
Immediate Action
Play Mode
Restart a loop from the StartPoint and continue playing.
The Retrigger command instantly restarts the current loop from it’s
StartPoint and then continues looping. This is useful for manually
triggering a loop so that it starts in time with other music.
This is similar to the function called SamplePlay. The difference is that
Retrigger will continue playing the loop, while SamplePlay plays it once
and then stops.
There are several ways to access Retrigger.
MUTE-UNDO
Press Mute to put the loop into the Mute state. When you want to
Retrigger the loop, press Undo. The loop will trigger from the beginning
and continue playing.
Note that the MuteMode parameter affects this behavior. When
MuteMode=Start, pressing Mute to leave the Mute state executes the
Retrigger function. In other words, MuteMode swaps the roles of the
Mute button and Undo button for leaving Mute. This is useful when
you always want to Unmute with a Retrigger command, and prefer a
simpler way to remember it.
NEXTLOOP
WITH
MORELOOPS=1
When MoreLoops=1, the otherwise unused NextLoop button does the
Retrigger function. Its LED becomes yellow to indicate it has a different
function than normal. When you press it, the current loop will retrigger
from the start, and then continue looping. This is similar to doing MuteUndo to retrigger a loop, but without silence from having to mute first.
This is only available when you have one loop set up in MoreLoops,
since the NextLoop button obviously changes loops otherwise.
5-56 Echoplex Digital Pro Plus User’s Manual
Retrigger
Continued
MIDI RETRIGGER COMMAND
The Retrigger command can be executed directly from MIDI. The
Retrigger DirectMIDI command is located at Source# + 37. So if you have
Source#=36 and ControlSource=Notes, the Retrigger command will be at
MIDI Note# 73.
MIDI SUS MUTE-RETRIGGER
Another way to execute Retrigger with MIDI is the SUS Mute-Retrigger
command. With this command, when you press the appropriate MIDI
button down on your MIDI controller and the loop will immediately go
into Mute. When you release the button, it will Retrigger the loop.
SUS Mute-Retrigger is located at Source# + 30. So if Source#=36 and
ControlSource=Notes, the SUS Mute-Retrigger command will be at MIDI
Note# 66. NoteOn 66 will put the loop into Mute, and NoteOff 66 will
Retrigger it.
See also: Mute, MuteMode, SamplePlay
Reference - Functions 5-57
Reverse
Immediate Action
Play Mode
Reverses the direction of the current loop.
Reverse reverses the playback direction of the current loop, so that the
audio plays backwards. Reverse can be accessed at most times, and
most functions are available even while the loop is in Reverse.
Since there is no LED specially designated for Reverse, the Insert LED
comes on when Reverse is engaged.
Whenever you engage Reverse, the front panel LoopTime Display will
briefly display “rE” to indicate that Reverse has started. When you press
Reverse again to go forward, the display will briefly show “Fd”.
ACCESSING REVERSE
There are several different ways to access the Reverse function.
There is no direct Reverse button on the front panel, however you can
bring this function to the front panel and down to the footpedal by
setting InsertMode=Reverse. The Insert button then becomes the
Reverse button, and Reverse will take the place of the Insert function.
If you only need to access Reverse occasionally and want the Insert
button available for a different function, there is an indirect method
from the front panel to control Reverse. In the Parameter Matrix there
is a space labeled Reverse, in the Timing Row under the Undo
button. At any time if you want to access Reverse, press Parameter
once, and then press Undo.
Reverse is also available by MIDI. There are several different flavors of
MIDI Reverse:
■
The MIDI VirtualButton ReverseButton is Source# + 13. This behaves
exactly like the front panel buttons do, in this case as if there were a
front panel Reverse button.The NoteOn message presses the button,
and the NoteOff message releases the button. If you do a short-press tap
5-58 Echoplex Digital Pro Plus User’s Manual
Reverse
Continued
of the ReverseButton, you go into Reverse, and then into Forward
when you tap it again. If you do a long-press of the ReverseButton, it
will become SUS action and stay in Reverse as long as you hold the
button, and then go back to Forward when you release it.
REVERSE
■
DirectMIDI SUSToggleReverse is Source# + 23. This is Reverse with
SUS action, so Reverse will be engaged as long as the midi button is held.
When it is released the loop will go Forward again. If you are already in
Reverse when you use this command, it will actually use SUS action to
put you into Forward, and then back to Reverse when you release it.
■
DirectMIDI Reverse is Source# + 33. This command always puts the
loop into Reverse. If the loop is already in Reverse it does nothing.
■
DirectMIDI Forward is Source# + 32. This command always puts the
loop into Forward. If the loop is already in Forward it does nothing.
AND
OTHER FUNCTIONS
OVERDUB
If you Overdub while a reversed loop is playing and then press the
Reverse button a second time, you’ll hear your original loop play back
forwards and your overdubbed part play backwards. You can easily have
audio going forwards and backwards in loop by combining Reverse and
Overdub. This is great for backwards guitar solos or secret messages.
Reverse and Overdub are independent, so you can Reverse the loop
while Overdubbing, and the Overdub will continue.
RECORD
Reverse can be used to end Record, so that the Record stops and the loop
immediately plays backwards. This is very useful for doing backwards
audio tricks live. You may find this works especially well with the
Feedback Knob set to 0 and the Mix Knob set to Loop. Note that this
Reference - Functions 5-59
Reverse
Continued
only works with the Reverse button (InsertMode=Reverse) or the
Reverse VirtualButton. the DirectMIDI Reverse has no effect while
Recording.
MULTIPLY
AND INSERT
Loops that have had cycles added to them using Multiply or Insert can
be Reversed. You will notice the green Multiple Display counts the
cycles backwards while the loop is Reversed. You can also engage
Multiply and Insert while the loop is Reversed, and they work
normally.
The Multiply and Insert functions can be ended with a press of Reverse.
The Multiply (or Insert) will round off exactly like it normally would.
When it reaches the end of the cycle, the whole loop will immediately
play backwards. In this way you can go directly from Multiply into
Reverse without extra button presses.
THE
EFFECT OF
QUANTIZE
Reverse is affected by the setting of Quantize. If Quantize=Cycle, Loop, or
8th, the reverse playback will not begin until the end of the current
quantize period, and proceeds backwards from the end of the quantize
period towards the beginning of the loop. If Quantize=Off, then reverse
playback begins as soon as you press Reverse, and proceeds from the
time of the button press back towards the start of the loop.
UNDO
AND
REVERSE
It is possible to press Undo while in Reverse. Undo during Reverse works
normally back to the point where Reverse happened. This means any
overdubs you do while Reversing can be Undone. However, it is not
possible to Undo past a Reverse, since memory really does get used in
5-60 Echoplex Digital Pro Plus User’s Manual
Reverse
Continued
the other direction and overdubs made prior to Reverse get destroyed by
overdubs made after the Reverse.
Record-Undo is also possible in Reverse. So if you press Record by
mistake while in Reverse, pressing Undo returns you to where you were.
As a consequence, starting Record does not automatically force you to
be Forward, but leaves the loop in Reverse.
All of this means that Reverse and Forward are really equal, with the
exception that the green Multiple Display counts backwards when
you are in Reverse.
See also: InsertMode, Quantize, Multiply, Insert, Undo, Record
Reference - Functions 5-61
SamplePlay
Immediate Action
Play Mode
Trigger a loop to play once. Can be used to retrigger loops for
stuttering effects.
The SamplePlay function triggers a loop from the StartPoint, plays it one
time, and then stops by putting the loop into Mute.
While SamplePlay is running, the loop can be retriggered repeatedly to
give stuttering effects.
Pressing Undo during a SamplePlay puts you seamlessly back into
PlayMode, so your loop keeps going instead of stopping at the end. This
is really useful if you are doing a lot of retriggers for stutter effects, and
then finally decide to let the loop keep playing. You just have to press
Undo and it seamlessly continues!
A C C E S S I N G S A M P L E P L AY
MUTE-INSERT
Mute-Insert allows you to do a SamplePlay from the basic front panel or
footpedal controls. Using this method is simple. First press Mute.When
you want to trigger the loop, press the Insert button. The loop will
trigger from the StartPoint and play once, and then return to the Mute
state. Repeatedly pressing Insert button will retrigger the loop.
MIDI NOTE TRIGGERS
MIDI NoteOn messages can be used to trigger any of the loops you have
created by setting the MoreLoops parameter greater than 1. If you have
SamplerStyle=One, the loops will be triggered in SamplePlay. When the
NoteOn message corresponding to a loop is received, the loop will
trigger from its StartPoint, play once, and go to Mute. Repeatedly
5-62 Echoplex Digital Pro Plus User’s Manual
SamplePlay
Continued
playing the same note will retrigger the loop. The LoopTrig parameter
determines which NoteOn messages correspond to a given loop.
MIDI SAMPLEPLAY COMMAND
The DirectMIDI command SamplePlay will trigger the current loop and
play it once, exactly as if you had pressed Mute-Insert. The MIDI
location for SamplePlay is Source# + 36.
BEATSYNC JACK TRIGGER
The Echoplex can be set so any trigger received through the BeatSync
Jack triggers the loop in SamplePlay. This is useful for triggering loops
from a pulse trigger from an external device, an external switch, a drum
trigger, or even an audio signal with a sharp attack. See the BeatSync
section for more information on the types of triggers that can be used in
this flexible input.
To set up the Echoplex to do a SamplePlay from a BeatSync trigger, first
set Sync=In. Record your loop as normal, and press Mute. Then press
Multiply. This will arm the Echoplex to wait for a trigger to do a
SamplePlay. When a trigger is received at the BeatSync Jack, the loop
will trigger from the beginning to play once. Repeated triggers will
retrigger the loop.
See also: Mute, Retrigger, SamplerStyle, MoreLoops, LoopTrig, Sync, BeatSync
Reference - Functions 5-63
StartPoint
Immediate Action
Parameter Row: Timing
Changes the logical starting point of a loop.
The logical starting point of a loop is the beginning of the first cycle. You
can see when this point comes around by looking at the display—the
green decimal point in the lower-right-corner of the display flashes
briefly at the start of each loop.
Pressing this button makes the instant of the press the new StartPoint for
the loop.
There are several reasons that you might want to change the starting
point. For one thing, various operations that you perform might set the
starting point to a value that doesn’t make musical sense to you. In a
rhythmic loop with multiple cycles, this would be most evident if the
cycle numbers don’t appear to change on the beat.
The position of the beginning of the loop is important for several
reasons, among them:
■
You can create arhythmic, textural loops where the startpoint isn’t
immediately obvious. At some point, additions to the loop might give it
a rhythmic character. At that point, you may want to redefine the
StartPoint so that other functions behave sensibly, in step with the
rhythm.
■
When you restart the loop from the beginning after muting it, the
StartPoint is where it begins.
■
Quantized activities occur on multiples of cycles, counted from the
logical starting point.
■
It’s easier to relate to the display if the logical starting point makes
musical sense.
See also: Quantize, Mute, MuteMode
5-64 Echoplex Digital Pro Plus User’s Manual
Substitute
Immediate Action
Play Mode
Replaces a section of the current loop, beginning in the next
repetition.
When InsertMode=Sub, the Insert button becomes the Substitute
button. Substitute has some similarity to the Replace function. With
Replace the original loop playback is cut while the replace is done. So
while you are playing something new to replace what was there, you
don’t hear the old loop. Replace is useful when the new material would
clash with what was there, but oftentimes the result is not very tight
since you don’t have any guide to play along to as you are doing the
Replace.
With Substitute the original loop playback continues while you are
playing the new material. On the next repetition, only the new audio
will remain in the loop and the old portion will be removed. This helps
keep the groove going while substituting and gives you something to
play along to, as well as giving an overlap between the old portion and
the new portion for continuity.
Substitute is the same as if you were doing an Overdub with the Feedback
turned down to zero only during the Overdub. However, it is much
easier to just press Substitute!
USING SUBSTITUTE
Substitute can be used in several ways:
■
an Insert button press when InsertMode=Sub.
■
a LongMultiply (less accurate, see below).
■
a Record-Insert combination when InsertMode=rhr.
■
the Substitute MIDI VirtualButton
■
the SUS Substitute DirectMIDI command
Reference - Functions 5-65
Substitute
Continued
THE
EFFECT OF
QUANTIZE
When Quantize=Off, Substitute is an instant function with Sustain action,
same as Replace. This means it is active while the Insert button is
pressed down and turns off when you release the button.
When Quantize=Loop, Cycle, or 8th, pressing Substitute down puts the
Echoplex into the waiting state until the next Quantizing point. Once
the Substitute function starts, releasing it also goes into a waiting state
until the next Quantizing point is reached. If you simply tap the
Substitute button, it will be active for exactly one Quantize period.
This is very useful for replacing an exact rhythmic element, and letting
the Echoplex keep everything precisely lined up.
SUBSTITUTE
USING
L O N G M U L T I P LY
One way to activate Substitute is by doing a Long-Press on the Multiply
button. This is convenient if you have the Insert button set for another
function, and are not using MIDI.
However, there is a problem when using the LongMultiply option for
Substitute. During the first 400ms until the switch action is detected as a
long press, it is treated like a Multiply. This means the old loop will still
be present in the loop for those 400ms, and only after that it mutes for
the Substitute.
If you have Quantize on you will not have this problem, since the long
press can happen completely during the ooo waiting phase. When the
Cycle point comes Substitute is started directly.
5-66 Echoplex Digital Pro Plus User’s Manual
Substitute
Continued
SUBSTITUTE
FOR
REHEARSING
Substitute can be used in similar fashion to the Rehearse function.
As long as Substitute is active, all playing is repeated once. This can be
useful to find the groove to start a loop. Just hold Substitute down as
you play, and when you’ve played something you like let it go!
A D VA N C E D U S E
OF
SUBSTITUTE
If a Feedback Pedal is connected and you are using some of the
advanced InterfaceModes, Substitute has some extended functionality that
makes it even more powerful. Loop/Delay=StutterMode and
Loop/Delay=ReplaceMode have this capability.
While the Feedback Pedal continues to do Feedback during normal
playing, the front panel Feedback Knob controls the Feedback just for
the Substitute function. So you can have different Feedback settings for
each!
If you have the Feedback Knob all the way up, The existing audio is
completely preserved as you are adding more. So it turns into
Overdubbing. With the Feedback Knob turned all the way down, the
existing audio completely disappears on the next repetition, so it is the
normal Substitute. In between is where it is interesting, because you can
choose how much the level of the existing audio should decay each time
you do an "overdub" with Substitute .
Reference - Functions 5-67
Substitute
Continued
In ReplaceMode the loop output level is also set to 100% during Substitute
instead of being set by the Pedal as it is otherwise. See the section on the
Loop/Delay parameter for more details on the InterfaceModes .
See also: Replace, Insert, Multiply, Rehearse, InsertMode, Loop/Delay
5-68 Echoplex Digital Pro Plus User’s Manual
Immediate Action
SUS Commands
Play Mode
Changes Multiply and Insert into Real-Time Granular Loop
commands.
One of the values on the InsertMode parameter is called SUS. This is
short for Sustain.
InsertMode=Sustain changes the way in which the Insert and Multiply
buttons work. SUS turns Insert and Multiply into Unrounded functions
with Sustain action on the button. In other words, they start when the
button is pressed and end immediately when it is released, just like
Record or Overdub do when RecordMode or OverdubMode=SUS.
When the function ends it does so as if Record had been pressed as an
alternate ending to the Insert. This is what we call an “Unrounded”
Multiply or Insert, because instead of rounding off to the next Cycle
point it is ended immediately and the loop time is redefined.
UNQUANTIZED SUS COMMANDS
With Quantize=Off the effect of SUS with Multiply and Insert allows you to
splice together fragments of sound into a loop.
One use of this is to create very short loops and splice short "grains" of
sound together in real time by tapping on the multiply or insert buttons
as sounds are played into the input. If you hold the button down, the
Multiply or Insert goes on as long as you hold it, but if you just tap the
button lightly the functions will only be active for as long as the switch is
contacting. This can be as short as a few milliseconds, allowing you to
splice together very short fragments. The result is a “Granular” loop
where all the fragments, or Grains, of sound together become a new
sound.
Combine InsertMode=SUS with RecordMode=SUS and OverdubMode=SUS,
as well as the SUS MIDI commands to access other functions as a
sustain action. (like SUSReplace and SUSSubstitute).
Reference - Functions 5-69
SUS Commands
Continued
SUS techniques give exciting new timbre and glitch effects, all created in
real-time. Real-Time Granular!
QUANTIZED SUS COMMANDS
With other settings of the Quantize parameter, the SUS Insert and SUS
Multiply start and stop quantized. There will always be an Insert or
Multiply of at least one time period as determined by the quantize
setting (Loop, Cycle or 8th). Even if you quickly tap the button such that
it is actually released before the start of the function, you will still get
one time period worth of the function. This is very useful when working
with short loops where it is important to maintain a rhythmic length.
With SUS you can get much quicker Inserts and Multiplies than you
could if you had to press the button twice. Note that this quantized
behavior is true with other SUS functions, like Replace and Substitute.
With Quantize = CYC it's easy to create rhythmic sequences of sounds
when using SUS commands.
With Quantize = 8th a short press of Multiply will change the loop length
to one Cycle divided by the value of 8th/Cycle.
See also: Multiply, Insert, RecordMode, OverdubMode, Quantize, SUS MIDI Commands,
MIDI Command List
5-70 Echoplex Digital Pro Plus User’s Manual
SUSNextLoop
Sustain Action
Play Mode
Jump to the Next Loop and back.
SUSNextLoop is an interesting special case of the SUS MIDI Commands
described in the MIDI section. SUSNextLoop is only available as a MIDI
command, and is located at Source# + 20.
With SUSNextLoop, pressing it puts you into the Next Loop and releasing
it returns you to the previous loop. In other words, NoteOn puts you into
the Next Loop and the NoteOff brings you back. This allows you to
bounce in and out of an alternate loop from your main loop.
Combining SUSNextLoop with functions like AutoRecord and LoopCopy
can give many interesting possibilities for creating alternate loops to
bounce in and out of.
Note that only sending the NoteOff component of SUSNextLoop gives
you the command PreviousLoop.
See also: NextLoop, PreviousLoop, SUS MIDI Commands, MIDI Command List
Reference - Functions 5-71
Undo
Immediate Action
Play Mode
Cancels the previous action or erases the previous Overdub
pass.
Undo can be used to cancel a function that you’ve already started or to
erase your last few Overdub passes, Multiply cycles, or Insert operations.
In situations when your loop length is short compared to the total
amount of memory available in the loop, Undo is easy to use. When
memory gets short, you may be limited in the number of steps that you
can Undo.
B A S I C U N D O O P E R AT I O N
The basic operation of Undo is simple:
■
If you have pressed a button by mistake, press Undo to cancel the
operation. The loop will be restored to the state it was in before you
started the operation, if possible. In this way, if you accidentally press
something like Record, you can recover your loop. The Echoplex even
keeps track of where in the original loop you would have been, so you
can go back to it without even falling out of rhythm!
■
After an operation like Overdub that changes the loop, a Long-Press of
Undo will erase the entire last layer of sound added (if possible).
Additional long presses will erase as many layers of sound as memory
permits, from the most recent to the most remote.
■
A Short-Press of Undo will only remove the tail end of the last layer,
beginning at the time of the button press. In this way, if you Overdub a
passage and play a bad note at the end, you can Undo just that note and
keep the rest of the Overdub.
■
Undo can even remove passes of Feedback. If you reduce Feedback and
let your loop fade down, each press of Undo will take away one layer of
Feedback reduction, so your loop fades back up to the original. If you
combine this with Overdub you can get very creative results, where you
5-72 Echoplex Digital Pro Plus User’s Manual
Undo
Continued
evolve your loop in one direction with Overdub and Feedback, Undo it
back a ways, and then evolve it in a different direction.
Operation of Undo depends on memory availability. The Echoplex
monitors this for you. When Undo is possible, you will see the Undo
LED is green. When it is not possible, the Undo LED will be off.
A LT E R N AT I V E R O L E S
FOR
UNDO
The Undo button serves some alternate roles in certain cases.
■
The Undo button can be used to escape from SamplePlay. SamplePlay is
where a loop has been triggered to play once like a sampler, and allows
retriggering and stuttering effects. Pressing Undo during a SamplePlay
puts you seamlessly back into PlayMode, so your loop keeps going
instead of stopping at the end. This is really useful if you are doing a lot
of retriggers for stutter effects, and then finally decide to let the loop
keep playing. You just have to press Undo and it seamlessly continues!
■
When a loop is in Mute, pressing Undo triggers the loop to come out of
Mute and start playing from the StartPoint. Normally when you come out
of Mute by pressing Mute again, the loop comes back on where it
would be if it had continued playing. Note that the MuteMode parameter
reverses these roles.
■
The Undo button is how you access the TempoSelect function while in
Reset. See the TempoSelect section in this chapter for more information
on using this feature.
CONTROLLING UNDO WITH MIDI
Several MIDI commands are available for controlling Undo. These can
give you more flexibility than the front panel Undo button alone.
■
The Undo VirtualButton MIDI command is located at Source# + 7.
This command emulates the action of the front panel Undo button, and
Reference - Functions 5-73
Undo
Continued
is exactly equivalent to using it in every way. For example, holding the
Undo VirtualButton down for half a second will do a Long-Press of
Undo.
■
The DirectMIDI ShortUndo command is located at Source# + 19. This
command is the same as doing a Short-Press of the Undo button, and
will Undo material in an Overdub from the point where the command is
sent to the end of the loop.
■
The DirectMIDI LongUndo command is located at Source# + 31. This
command is the same as doing a Long-Press of the Undo button, and
will immediately Undo an entire Overdub pass. With the LongUndo
command there is no need to hold it down for a long press, it happens
immediately.
UNDER THE HOOD
If you really want to understand the way that Undo interacts with
memory limitations, you have to take a look at the way memory is used
and understand the concept of the Playback Loop, all of which we’ll
explain in the next few paragraphs.
When Memory Is Ample
Figure 4.11 shows the normal operation of Overdub in a situation where
memory is ample. When the Overdub button is first pressed, the
Echoplex copies the beginning of the loop to a new memory area
(marked "A" in the diagram). It then mixes the previously-recorded
material with the new material into area B. When the Overdub ends, it
copies the remainder of the original loop to area C. This fills out seconds
40-80 of memory with a complete loop, the result of the Overdub. The
Echoplex then alters its playback loop so that the new recording is heard,
even though the original recording also resides in memory.
5-74 Echoplex Digital Pro Plus User’s Manual
Undo
Continued
FIGURE 4.11
Basic operation of
Overdub when memory is
ample.
1 loop
40 seconds
Existing Loop
New Performance
Button Actions
O
O
Audible Results
A
Memory
0
After Overdub
B C
Empty
80
40
100
Playback loop
If, instead of completing the Overdub normally, you press the Undo
button to terminate it, the Echoplex simply resets the playback loop to
play back the first 40 seconds and marks the memory area that it was
using for the Overdub as available for the next operation.
When Memory Is Tight
Now let’s look at what happens in a tight memory situation. Figure 4.12
shows the course of an Overdub/Undo when the original loop is 40
seconds long, and total memory is 50 seconds. As before, when you first
press the Overdub button, the Echoplex copies the beginning of the
existing loop to a free area at the end of memory. In this case, that
segment occupies all of free memory (the original loop was 40 seconds
long, Overdub is pressed at 10 seconds into the loop, so 10 seconds is
copied to free memory, filling it).
Reference - Functions 5-75
Undo
Continued
FIGURE 4.12
The difficulty of Undoing in
tight memory situations
Existing Loop
New Performance
Button Actions
O
U
Memory
1st 10 seconds of Overdub
recording
Final 20 seconds of Overdub
recording. The total length of
newly-recorded material is 30
seconds, from the start of the
loop until the time Undo was
pressed).
Remnants of original loop
Playback loop
0
10 20 30 40 50
At this point, there’s nowhere to put the new material mixed with the
old. So the Echoplex starts overwriting the original loop. By the time the
Undo button is pressed, 30 seconds of material have been newlyrecorded: the 10 seconds copied from the first loop, plus 20 seconds of
mixed material. This mixed material has overwritten the first 20 seconds
of the original loop. There’s no way to Undo, because the original loop is
gone.
In this case, that press of the Undo button will set the playback loop to
play back seconds 0-40 of memory. But what you will hear will not be
the original loop; instead, it will be the final 20 seconds of the Overdub
followed by the final 20 seconds of the original loop. It’s an interesting
effect, but it may not be what you were shooting for.
5-76 Echoplex Digital Pro Plus User’s Manual
Undo
Continued
Undoing Multiple Layers
When you leave Overdub on for a long time, recording moves to a new
area of memory each time you pass the loop’s start point. If your loop is
short compared to the amount of memory available, then a number of
Overdub cycles can pass before overwriting of memory starts to occur. If
you end the Overdub before any overwriting occurs, then you’ll be able
to Undo each layer in succession, until you return to your original
recording. If overwriting occurs, then you’ll only be able to Undo back to
the last fully-intact recording.
Arming Undo
Undo can be executed even when the Undo LED is not green. It will be
executed as soon as the Undo LED lights up, so you can easily Undo the
maximum possible without struggling to press Undo at the right
moment. This is an improvement over previous versions of the
Echoplex, where you could have a loop with only a short area containing
an overdub that was undoable. The Undo LED turns on and off in such
a case to indicate when you are in the Undoable section. In older
versions you could only tap Undo during that time for it to work. Now
you can tap it any time and it will be done for you.
Preventing Extra Undo Presses
Undo checks whether there may be a whole loop length in memory
without changes. If there is, Undo acts twice when you press it. This
eliminates the potentially frustrating cases where you might press
Undo and it appears that nothing happens. You would have to press
Undo twice to get rid of a bit you had just listened to. This makes Undo
feel a lot more responsive for some users.
The Echoplex also monitors whenever a pass of the loop has completed
and nothing has been done to change it. When this happens the
Echoplex automatically does what we call an AutoUndo.
Reference - Functions 5-77
Undo
Continued
Ordinarily, the Echoplex is always preparing for the possibility that you
might make a change at some point in the loop by writing the current
loop data into a new section of memory. Then if you do an Overdub at
the end of the loop, your previous version is safely stored for future uses
of Undo. The new version is already in memory and becomes the new
loop that is played. However, if we get to the end of the loop and no
changes have been made we don’t want to waste new memory with an
exact copy of the previous section of memory. We also don’t want you to
have to press Undo numerous times to find the last section where a
change was made. So the Echoplex does an AutoUndo, which
effectively puts it back in the previous memory area with the latest
version of the loop.
AutoUndo is even done if you leave on Overdub but do not actually
play anything. The Echoplex saves you from accidentally wasting
memory in this way, so that the next time you press Undo you really
Undo something from your loop.
The AutoUndo LED allows you to see AutoUndo in action. This LED is
the decimal point at the lower right of the Loop Display. Every time an
AutoUndo occurs, it will blink faintly. This can be a useful way to
monitor the Echoplex if you ever feel that Undo is not doing what you
expect.
All of this occurs behind the scenes, and is certainly not necessary to
understand in order to use the Echoplex. It is presented here for those
who wish to understand a bit more about how it all works.
See also: Record, Overdub, Feedback
5-78 Echoplex Digital Pro Plus User’s Manual
C
H
A
P
T
E
R
6
Synchronization
Reference - Synchronization 6-1
AutoStartPoint
Synchronization
The Echoplex automatically corrects the StartPoint in certain
situations where Sync cannot be maintained.
The Echoplex maintains sync to an external clock by retriggering the
loop at the Global MIDI StartPoint defined by the clock. An old problem
with this method is that true sync cannot be maintained when either
FeedBack is reduced or Overdub is on, because an early arriving sync
would erase the change made in that pass of the loop or cause glitches
to record in the loop. Because of this the Echoplex has to “free run”
during that time to prevent such problems.
There is no fix for this really, as it is a fundamental issue of how sync
works in the Echoplex. Once Overdub is turned off and/or FeedBack
brought back up, true sync returns. In most cases you would not have
noticed anything at all unless you left Overdub on or Feedback down for
a long time will receiving Sync, and the clock drifted significantly during
that time.
We developed a trick to help this situation for some cases, and it runs
automatically in the background. It is called AutoStartPoint. This runs for
the case where you reduce FeedBack a lot ( resulting in a total change of
the song for example).
In that case you probably do not really care to have your old fading loop
stay in sync with the clock anymore, but you will want to stay in sync
with whatever new things you overdub. So when FeedBack is reduced
enough and the Echoplex detects that the sync has drifted considerably
off, we do an automatic StartPoint function. This sets the internal
StartPoint of our loop to the time of the Global MIDI StartPoint defined by
the external clock, and that point is then used for sync. Then when you
bring FeedBack up again the StartPoint of the Loop and the external
sequencer will be very close together and syncing resumes easily.
See also: StartPoint, Global/Local MIDI Clock
6-2 Echoplex Digital Pro Plus User’s Manual
Synchronization
BeatSync
Back Panel
Accepts and transmits a pulse that can synchronize to external
devices or trigger loop playback. Good for producing stuttering
effects.
The BeatSync jack accepts a 1/4" mono phone plug.
When Sync=Out, a pulse that is the equivalent of a switch closure will be
sent out this jack at the start of every cycle. This can be used to
synchronize older devices that accept pulse triggers. If you connect the
BeatSync output to an audio system the pulse will be audible and can
serve as a click track for your loop.
When Sync=In and no incoming MIDI clocks are present, record
operations will be quantized to incoming pulses at the BeatSync jack.
The incoming pulses can be generated by another Echoplex, an ordinary
footswitch, the pulse trigger output used on many older devices, or a
line-level audio signal.
If a BeatSync pulse is received during Reset while Sync=In, MIDI Clock is
sent out at the corresponding tempo. The purpose of this is to receive a
Sync at the BeatSync of the Echoplex and send the Sync on to other
devices as MIDI clock.
Applications of BeatSync include rhythmically-relating the cycle times
of the Echoplex to older devices with pulse trigger outputs, letting a
trigger or footswitch control synchronized recording, synchronizing to
external audio signals from a metronome or a live musician, and
creating stuttering playback effects.
If you want to use a pair of Echoplexes to loop recordings from a stereo
source, you would be best off using BrotherSync instead of BeatSync.
BrotherSync is also the best way for synchronizing two or more
Echoplexes used independently by multiple musicians. See the
BrotherSync section for more details.
Reference - Synchronization 6-3
BeatSync
Continued
Example 4.4: Synchronizing the Echoplex to a Pulse Trigger
1. Connect a 1/4" mono cable between pulse trigger output of the external
device and the BeatSync jack of the Echoplex.
2. Set Sync=In on the Echoplex. Put its current loop into reset.
3. Start the external device so it is sending a pulse. You should see the Sync
LED on the display blink with each pulse.
4. Somewhere in between the pulses, press Record on the Echoplex. The
display will show "ooo," indicating that the Echoplex is waiting for a
sync pulse before recording.
5. When the next pulse arrives, the Echoplex will start recording.
7. Press Record again to stop recording. The display will show "ooo," and
recording will continue until the next pulse comes.
Example 4.4: Synchronizing the Echoplex to a Footswitch or
Audio Signal
1. Connect a 1/4" mono cable between a footswitch and the BeatSync
jack of the Echoplex. Or, connect an audio source with a sharp attack
directly to the BeatSync jack.
2. Set Sync=In on the Echoplex. Put its current loop into reset.
3. Tap the switch. (Or play the sound source.) You should see the Sync LED
on the display blink with each pulse.
4. Somewhere in between the taps (or audio pulses), press Record on the
Echoplex. The display will show "ooo," indicating that the Echoplex is
waiting for a sync pulse before recording.
5. When you tap again, the Echoplex will start recording.
7. Press Record again to stop recording. The display will show "ooo," and
recording will continue until the next tap (or audio pulse) comes.
Example 4.x: Synchronizing an External Device to the Echoplex
with Pulse Triggers
6-4 Echoplex Digital Pro Plus User’s Manual
BeatSync
Continued
1. Many older devices can us a pulse trigger for synchronizing, triggering,
or other interesting effects. If you have one, try connecting the
BeatSync jack of your Echoplex to its trigger input so the Echoplex can
control it.
2. Set Sync=Out.
3. Record a loop on the Echoplex.
4. The Echoplex will begin sending pulse triggers out to the other device. A
pulse will be sent at each cycle point of your loop.
Example 4.5: Foot-Controlled Stuttering (Mute/Multiply)
1. Connect a footswitch to the BeatSync jack.
2. Set Sync=In.
3. Record a loop.
4. Press Mute, then Multiply.
5. Press the footswitch. The loop you’ve just recorded will start playing
back from the beginning and play once. Every time you press the
footswitch, the loop will restart from its beginning.
Example 4.x: Audio-Controlled Stuttering (Mute/Multiply)
1. Connect a microphone to the BeatSync jack. (You could also use an
aux send of a mixer that has the microphones connected to it.)
2. Place the mic near an appropriate sound source that can give a sharp
attack, like a drum for example.
3. Set Sync=In.
4. Record a loop.
5. Press Mute, then Multiply.
6. Every time the drum is struck, your loop will trigger and play once.
Reference - Synchronization 6-5
BeatSync
Continued
7. This can also be done with guitars, bass, drum machines, audio outputs
of metronomes, etc. Any audio source that can give a sufficient pulse
will work.
See also: BrotherSync, Sync
6-6 Echoplex Digital Pro Plus User’s Manual
BrotherSync
Synchronization
Back Panel
Synchronizes multiple Echoplexes at the sample level, while
allowing any one of them to define the basic cycle length for the
group. Especially useful for stereo recording, multi-track
looping, and jamming with multiple Echoplex users.
The BrotherSync jack accepts a 1/4" stereo (TRS) phone plug.
BrotherSync provides the tightest possible synchronization among
multiple Echoplexes. It maintains synchronization at the sample level.
Among other things, this enables you to use two Echoplexes to record
the separate halves of a stereo signal. When locked together with
BrotherSync, the units will remain in lockstep, without even shifting
phases between them over 198-second loops. Figure 2.4 on page 2-8 is a
diagram of exactly how best to accomplish this.
You can use stereo Y-cords to connect the BrotherSync jacks of many
Echoplexes. On each unit, set Sync=out and reset the current loop. From
then on, any unit can define the basic cycle time just by recording a
loop. The other units can then be synchronized to that loop time or a
multiple of it. Have an Echoplex jam session! If you think that the
Echoplex opens up a lot of possibilities for a single player, imagine the
possibilities for multiple performers.
If you are also using MIDI Clock from another device, note that if a MIDI
clock is received at the MIDI In Port, BrotherSync input is ignored
Example 4.x: Synchronizing Two Echoplexes with BrotherSync
1. Connect a 1/4" stereo (TRS) cable between the BrotherSync jacks of
the two Echoplexes.
2. Set Sync=Out on both Echoplexes.
3. Put the current loop of both units into reset.
4. Record a loop in one of the Echoplexes. You will see the Sync LED flash
on the other.
Reference - Synchronization 6-7
BrotherSync
Continued
5. Somewhere in the middle of the master loop, press Record on the 2nd
Echoplex. The display will show "ooo," indicating that the Echoplex is
waiting for a sync pulse before recording.
6. When the loop on the first reaches its start point, the second will start
recording.
7. Press Record again to stop recording. The display will show "ooo," and
recording will continue until the next pulse comes in. You can wait
longer than one cycle to press Record the second time. The second unit
will count cycles in the Multiple display and round off when you do
press Record. In this way you can have synchronized loops on different
units that are multiples of each other.
8. Now repeat the above, but this time start with the second unit. Notice
how any of the units can create the basic cycle for the others to follow.
This is why it is called BrotherSync!
Comparison of BeatSync and BrotherSync
When connecting Echoplexes to each other, BrotherSync synchronizes
loop times and start points. It provides a tight, sample-level sync
between units. It is peer-to-peer, in that any of the Echoplexes can define
the loop time for the others.
BeatSync allows you to synchronize loops to external sync pulses from
other devices or send sync pulses out to them. It can also sync to audio
pulses, like a kick drum. It is not intended for synchronizing to other
Echoplexes and only operates in one direction at a time.
See also: BeatSync
6-8 Echoplex Digital Pro Plus User’s Manual
Global/Local MIDI Clock
Synchronization
Clock mechanism that allows synchronization magic in the
Echoplex.
The Echoplex uses a Global/Local MIDIclock system that allows the slaved
unit to lock up with an external sequencer without drifting, even if the
loop start point on the Echoplex is moved by one of the following dealigning functions:
■
StartPoint
■
Sample Triggering
■
Mute-Undo (restart loop)
■
Reverse
■
HalfSpeed
■
NextLoop (Each loop keeps its own local MIDIclock
counter)
■
Stopping and restarting the sequencer or drum machine
This feature lets you shift the loop freely away from the downbeats of an
external sequencer for interesting rhythmic effects. All the while, the
Echoplex keeps track of the external sequencer’s downbeat and clock as
a “Global” clock, and the local Loop’s StartPoint as a “Local” clock. This
allows for incredible new capabilities in the Echoplex to shift loops out
of alignment from each other without losing sync, and then ReAlign
them perfectly with each other again at will!
After de-aligning the loop, the original alignment of the Loop StartPoint
with MIDI beat 1 can be restored with the new ReAlign functions or with
Reset. ReAlign is available as the Mute-Multiply combination on the
front panel, or directly by MIDI. See the ReAlign section for more details.
All the following functions serve to bring the loop together with the
sequencer again, once the loop has been de-aligned by one of the
functions above:
■
Reset (start a new loop with the StartPoint at MIDI beat 1)
■
ReAlign (Restart the current loop at the next MIDI beat 1)
Reference - Synchronization 6-9
Global/Local MIDI Clock
Continued
■
MuteReAlign (same as ReAlign, but the loop is muted while
waiting to ReAlign)
■
QuantMIDIStartSong (stop the sequencer and restart it at next
Loop StartPoint)
■ MuteQuantMIDIStartSong (same as QuantStartSong but loop is
muted while waiting)
Each of those functions is available separately from DirectMIDI (in any
state, not just Mute.)
From the front panel the cross-function Mute-Multiply offers some of
those functions, depending on the Sync parameter and Sync events
coming in to the Echoplex.
See Also: ReAlign, MuteReAlign, QuantMIDIStartSong, StartPoint, Retrigger, SamplePlay,
NextLoop
6-10 Echoplex Digital Pro Plus User’s Manual
Synchronization
MIDI Sync Indicators
Play Mode
MIDI output indicators help you track key synchronization
points.
The MIDI Sync Indicators are MIDI notes are transmitted out at various
synchronization points related to the current loop. These are shown at
the top of the MIDI Command List in the MIDI section.
MIDI notes are sent to indicate each Loop StartPoint, Global MIDI
StartPoint, Cycle StartPoint, and 8th Note.
The Global MIDI StartPoint note is only sent if it is different from the Local
StartPoint, which happens if the loop has been De-Aligned from the
external clock.
The 8th Note Indicator note is sent at points determined by the 8th/Cycle
parameter and the loop length.
The purpose of these notes is to provide a convenient marker point
when recording the Echoplex output into an audio sequencing or hard
disk recording program. If you also record the midi output at the same
time as the audio output, you can easily see the Loop StartPoints, Cycle
StartPoints, and 8th Notes of your loops in the track windows.
Another use of these notes is a metronome. You can use them to trigger
sounds on a synthesizer or sampler to serve as an audible tempo
indicator for your loops.
See Also: MIDI Command List, Source#, StartPoint, Global/Local MIDI Clock, ReAlign,
8th/Cycle
Reference - Synchronization 6-11
MuteQuantMIDIStartSong
Synchronization
Mutes the Loop until the next StartPoint, then UnMutes and
sends a StartSong at the same time.
MuteQuantMIDIStartSong is a variation of QuantMIDIStartSong that first
Mutes the loop until the StartSong is sent at the next loop StartPoint. This
is a DirectMIDI command only. The MIDI location for
MuteQuantMIDIStartSong is Source# + 41.
MuteQuantMIDIStartSong is useful for having the loop drop out and then
everything start up together and in time.
MuteQuantMIDIStartSong is also equivalent to using the Mute-Multiply
combination from the front panel when Sync=OuS. A key advantage
MuteQuantMIDIStartSong is the function can be executed at any time,
independent of the Sync parameter setting. This allows you to always
have a way to send a StartSong message in sync with the loop StartPoint,
even if the Echoplex is not the clock master.
See Also: ReAlign, MuteReAlign, QuantMIDIStartSong, Source#, StartPoint
6-12 Echoplex Digital Pro Plus User’s Manual
Synchronization
QuantMIDIStartSong
Send a StartSong at the next Loop StartPoint
QuantMIDIStartSong is a MIDI command for “Send a MIDI StartSong at
next loop StartPoint.” This is a DirectMIDI command only. The MIDI
location for QuantMIDIStartSong is Source# + 40.
When QuantMIDIStartSong is executed, the Echoplex sends a MIDI
StartSong message at the next StartPoint of the loop. The LoopTime
Display shows “St.S" momentarily when QuantMIDIStartSong is
executed.
This similar to what happens when you press Mute-Multiply from the
front panel when Sync=OutUserStart (OuS).
This command is very useful for restarting a sequencer or drum
machine so it is in time with the loop. The function can be executed at
any time, independent of the Sync parameter setting.
QuantMIDIStartSong allows you to always have a way to send a StartSong
message in sync with the loop StartPoint, even if the Echoplex is not the
clock master.
Unfortunately we did not find a reasonable way to do a Quantized
StartSong from the front panel without muting first. Therefore
QuantMIDIStartSong is only available as a MIDI command.
See Also: ReAlign, MuteReAlign, MuteQuantMIDIStartSong, Source#, StartPoint
Reference - Synchronization 6-13
QuantStartPoint
Synchronization
Reset the StartPoint to match the Global MIDI StartPoint.
If Sync=In and an external clock is present, a long press on StartPoint
executes the QuantStartPoint function. QuantStartPoint moves the internal
loop StartPoint to the next Global MIDI StartPoint defined by the external
clock. (the “Beat 1” of the sequencer). The internal sync counters are
realigned to the sequencer’s beat 1. The actual loop audio does not
change.
The result is the same as if you had built the current loop from the
beginning with all operations Quantized to the external clock.
QuantStartPoint is another way to “ReAlign” the loop to MIDI, although
you are really redefining the internal StartPoint according to the external
sync instead of retriggering the loop to it.
QuantStartPoint is especially interesting if you start with a non-rhythmic
loop, then bring the drums in later to define the rhythm and sync for
further development of the loop.
The QuantStartPoint function is also available as a DirectMIDI
command. The MIDI location for QuantStartPoint is Source# + 43.
See Also: ReAlign, Global/Local MIDI Clock, Source#, StartPoint
6-14 Echoplex Digital Pro Plus User’s Manual
ReAlign
Synchronization
Play Mode
Puts your loop back in alignment with an external device.
THE REALIGN FUNCTION
ReAlign allows the loop to be aligned again with an external loop or
sequencer that it was in sync with, after it has been brought out of
alignment by the use of functions like Reverse, Triggering, HalfSpeed,
SamplePlay, etc.
ReAlign is very useful in allowing you to create rhythmic variations by
shifting loops to run out of phase with each other, and then perfectly
recover to have them back in perfect sync. ReAlign is also very helpful
when composing with a sequencer, where you frequently need to stop
the sequencer and restart it. Being able to restart the sequencer and the
Echoplex in sync becomes necessary, and ReAlign allows you to do just
that. ReAlign works when the Echoplex is the clock master or the clock
slave.
ReAlign makes use of the Global-Local MIDIclock system described
elsewhere in this section. The Echoplex uses that mechanism to keep
track of the “Global StartPoint” defined by an external sync source and
our “Local StartPoint” as they are split apart. ReAlign essentially gives you
a variety of simple ways to bring them back together again.
ACCESSING REALIGN FUNCTIONS
T H E F R O N T PA N E L W I T H M U T E M U L T I P LY
FROM
Mute-Multiply is the button combination for executing ReAlign from
the front panel. When using this combination, the loop is first put into
Reference - Synchronization 6-15
ReAlign
Continued
Mute, and then the ReAlign is armed by pressing Multiply. When the
next Global StartPoint comes, the ReAlign is executed. (There are also
several MIDI commands for ReAlign, detailed in a few pages.)
What exactly happens at the point when ReAlign executes depends on
the setting of the Sync parameter and whether or not we have clock. The
LoopTime Display will show what specifically happens, whether it is
ReAligning our loop to an external sync, or sending out a MIDI StartSong
to an external sequencer. A ReAlign of the local loop is displayed as “AL”
and sending a StartSong is “St.S.” The Multiply LED will be red during
this waiting time, to indicate the ReAlign is armed.
If you want to cancel ReAlign after it is armed, another press of Multiply
switches it off and we don’t wait for anything anymore. This is helpful if
you find yourself stuck there with no sync coming.
Here are the different cases that can happen with the Mute-Multiply
state and various sync conditions:
Mute-Multiply with Sync=In:
Sync Event
Function
Description
BeatSync
TriggerSample
The loop is triggered to play once from the start. Repeated
pulses on BeatSync retrigger the loop for stuttering effects.
BrotherSync
MuteReAlign/
No reaction
The loop is triggered out of Mute to play from the start
and continue playing. This ReAligns the loop while
BrotherSyncing to other Echoplexes. If a MIDI clock has
been received BrotherSync is ignored.
Global MIDI
StartPoint
MuteReAlign
If MIDI clock is already being received when Mute-Multiply
is pressed, the Echoplex waits for the Global MIDI StartPoint
and then retriggers the loop out of Mute.
MIDI StartSong
MuteReAlign
If no MIDI clock is present and a MIDI StartSong is received,
followed by MIDI clock, the loop triggers immediately from
the start and continues playing in sync.
Local StartPoint
N/A
No reaction to Local StartPoint
6-16 Echoplex Digital Pro Plus User’s Manual
ReAlign
Continued
Mute-Multiply with Sync=Out:
Sync Event
Function
Description
BeatSync
N/A
BrotherSync
MuteReAlign
Global MIDI
StartPoint
N/A
MIDI clock input is ignored when Sync=Out
MIDI StartSong
N/A
MIDI StartSong input is ignored when Sync=Out
Local StartPoint
N/A
No reaction to Local StartPoint when Sync=Out
No response to BeatSync.
The loop is triggered out of Mute to play from the start and
continue playing. This ReAligns the loop while BrotherSyncing
to other Echoplexes.
Mute-Multiply with Sync=Out User Star t
(OUS):
Sync Event
Function
Description
BeatSync
N/A
No response to BeatSync
BrotherSync
N/A
No response to BrotherSync
Global MIDI
StartPoint
N/A
MIDI clock input is ignored when Sync=OuS
MIDI StartSong
N/A
MIDI StartSong input is ignored when Sync=OuS
Local StartPoint
N/A
A StartSong is sent at the next Loop StartPoint so the sequencer
aligns to the Echoplex. The Loop comes out of Mute at the
same time so both start together, in sync.
Reference - Synchronization 6-17
ReAlign
Continued
ACCESSING REALIGN FUNCTIONS
MIDI
WITH
There are several MIDI commands in support of ReAlign, which give us
much more flexibility than we have from just the front panel. With MIDI
the ReAlign commands can be accessed at any time with a single button
press, and don’t necessarily require going into Mute first. (See the MIDI
commands section for more info on other MIDI commands.)
QUANTMIDISTARTSONG (SOURCE# + 40)
QuantMIDIStartSong waits until the next Loop StartPoint, and then sends a
StartSong message out the MIDI port. The Loop continues playing the
whole time, and “St.S” is displayed during the waiting period to indicate
what is happening.
QuantMIDIStartSong is useful when the Echoplex is the clock master and
the external sequencer has been stopped. The sequencer can be
restarted right in time with the loop. QuantMIDIStartSong can be
executed at any time, independent of the Sync parameter setting. This
allows you to always have a way to send a StartSong message in sync
with the Loop StartPoint, even if the Echoplex is not the clock master.
MUTEQUANTMIDISTARTSONG (SOURCE# + 41)
When the MuteQuantMIDIStartSong command is received, the Loop is
muted instantly and then waits until the next StartPoint. The display will
show “St.S.” When it reaches the StartPoint a MIDI StartSong message is
sent out the MIDI port to start up the sequencer and the Loop comes
out of Mute.
6-18 Echoplex Digital Pro Plus User’s Manual
ReAlign
Continued
This is similarly useful for when the Echoplex is the clock master and we
need to restart the sequencer. In this case, both the loop and the
sequencer can be muted and brought back on together.
MuteQuantMIDIStartSong works the same as the Mute-Multiply
combination from the front panel when Sync is set to OuS, but provides
a more direct access since it only requires a single command instead of
the two button combination.
Unlike the front panel function, MuteQuantMIDIStartSong works for any
setting of the Sync parameter and can be executed at any time. This
allows you to always have a way to send a StartSong message in sync
with the Loop StartPoint, even if the Echoplex is not the clock master.
MIDIREALIGN (
SOURCE#
+ 38)
MIDIReAlign executes ReAlign with a single MIDI command. The loop is
not muted prior to the ReAlignment.
If Sync=In, the display shows “AL” until the Global StartPoint defined by
the sequencer’s clock arrives, at which point the loop is retriggered
automatically from its StartPoint.
When Sync=Out, the loop is retriggered when a BrotherSync is received.
MIDIMUTEREALIGN (SOURCE# + 39)
MIDIMuteReAlign is exactly like using ReAlign from the front panel,
except it directly does the function without requiring double button
combinations. When the command is received, the loop is muted and
“AL” appears on the display.
If Sync=In, when the next Global StartPoint arrives the loop is retriggered
back in time with the external sequencer.
When Sync=OUS, the loop is retriggered when a BrotherSync is received.
Reference - Synchronization 6-19
ReAlign
Continued
BROTHERSYNC
AND
REALIGN
As shown in the tables on the previous pages, ReAlign also works when
BrotherSyncing two or more Echoplexes together.
When one Echoplex has had it’s StartPoint shifted off from the other,
ReAlign can bring them back together. Send a ReAlign command to one
of the units and it will wait for a Sync with “AL” on the LoopTime
Display. When the BrotherSync pulse comes from the other Echoplex, it
will retrigger its loop so they are both back in alignment with each other.
BrotherSync is usually done with Sync=Out, so ReAlign to BrotherSync is
available with that combination, as shown in the previous table.
There can be some confusion when DeAligning and ReAligning to
BrotherSync with more than two Echoplexes. If you have two Echoplexes
in BrotherSync and shift one unit’s StartPoint away from the other, you
will have them both sending pulses on the BrotherSync line at different
times. Those two are able to tell which pulse is theirs and which is from
the other unit, so they can stay in sync with each other just fine. They
can be ReAligned later at the user’s command.
However, if you try to add a third unit to the sync it will see the two
different pulses coming and be unable to tell the correct loop StartPoint
and loop length. It will not be able to SyncRecord to the others correctly.
The best way to deal with this is to have the third unit record a loop in
sync before having any of them shift their StartPoints. Then the third unit
will be in sync already and not have to worry about joining the sync
later. Or ReAlign the other two first before the third unit joins.
An alternative would be to use the QuantStartPoint command on the unit
that has been shifted, so that it will reset its StartPoint to the next
BrotherSync coming in from the other Echoplex. Then they will both have
their StartPoints in the same spot and be sending BrotherSync pulses at
the same time, so there will not be any confusion for the third unit. Of
6-20 Echoplex Digital Pro Plus User’s Manual
ReAlign
Continued
course this means ReAlign can no longer be used on the second
machine to put it back in the original alignment with the first.
See also: Mute, Global/Local MIDI Clock, Sync, BrotherSync, BeatSync, StartPoint
Reference - Synchronization 6-21
SongPositionPointer and Continue
Synchronization
The Echoplex can receive and use MIDI SongPositionPointer
and Continue messages from a sequencer or drum machine.
MIDI SongPositionPointer and Continue messages are received according
to the MIDI spec when Sync=In. Since the Echoplex cannot reproduce
the entire sequence of how the loop was built throughout the song, we
just put the current state of the loop in the correct timing with any
position of the song, assuming that the loop length and the sequencer
timing stayed the same.
The positioning happens through ReAlign after you press Continue on
the sequencer. You use it as follows:
■
After the sequencer has been stopped, put the Echoplex into the ReAlign
state. You can do this by press Mute-Multiply on the front panel, or
using the MIDI ReAlign commands.
■
The Echoplex will wait for a sync event.
■
Press Continue on the sequencer.
■
The sequencer will send a MIDI SongPositionPointer message to the
Echoplex to indicate where in the sequence it is starting from.
■
The sequencer will then send a MIDI Continue message and begin
sending MIDI clocks again.
■
The Echoplex will use the SongPositionPointer information to determine
where the Global MIDI StartPoint should be.
■
When the next Global StartPoint occurs, the Echoplex will automatically
trigger the loop at the beginning so that it is back in sync with the
sequencer.
See also: ReAlign, Global/Local MIDI Clock, Sync, StartPoint, StartSong, StopSong, and
Continue
6-22 Echoplex Digital Pro Plus User’s Manual
Synchronization
StartSong, StopSong, Continue
The Echoplex can send and receive MIDI StartSong, StopSong,
and Continue messages in various ways.
MIDI includes three important messages for controlling synchronized
devices. These are called StartSong, StopSong, and Continue and are part
of the “System Real Time” commands in MIDI. These commands are
commonly used with devices like sequencers, drum machines,
recording equipment and software, arpeggiators, and loopers. The
Echoplex uses all three in a variety of different ways to give you
maximum flexibility and control in synchronizing your loops to other
devices.
The MIDI StartSong message commands slaved devices to start at the
beginning of their material, and begin playing as soon as the next clock
pulse is received. They should proceed in tempo with the MIDI Clock
after that. The MIDI StopSong message commands slaved devices to stop
their playback immediately. The MIDI Continue message tells a device to
restart playback from the position where it was last stopped, or from a
position defined by another type of MIDI command called
SongPositionPointer.
In this section we will deal primarily with StartSong and StopSong.
Please see the section called “SongPositionPointer and Continue” for more
details on how the Echoplex uses the MIDI Continue command.
S TA R T
AND
STOP
AT Y O U R C O M M A N D
One of the values for the Sync parameter allows you to command
directly how MIDI StartSong and StopSong messages are sent when the
Echoplex is the clock master. This is Sync=OutUserStart, or OuS.
This choice can be very useful in different circumstances when
controlling external sequencers. For example, some sequencers need to
have the clock sent in advance to set the tempo, with the StartSong sent
later.
Reference - Synchronization 6-23
StartSong, StopSong, Continue
Continued
In other cases you may want to have the StartSong sent immediately
with the MIDI clock when the loop is recorded so that a sequencer starts
right up with the clock. In that situation, use Sync=Out.
THE
EFFECT OF THE
S Y N C PA R A M E T E R
The possible Sync parameter settings and their effect on StartSong and
StopSong are as follows:
SYNC = OUT
StartSong and StopSong messages are sent in most instances
automatically. MIDI Clock is also sent based on the Cycle length of the
loop and the setting of the 8th/Cycle parameter. The Echoplex does not
send Continue.
SYNC = OUTUSERSTARTSONG (OUS)
MIDI clock is sent, but no StartSong or StopSong messages unless the user
specifically commands it. The Echoplex does not send Continue.
SYNC = IN
MIDI clock, StartSong, StopSong, and Continue messages are only
received, not sent. They are piped through from the MIDI In Port to the
MIDI Out Port by the MIDIpipe function.
SYNC = OFF
MIDI clock, StartSong, StopSong and Continue messages are neither sent
or received. They are piped through from the MIDI In Port to the MIDI
Out Port by the MIDIpipe function.
6-24 Echoplex Digital Pro Plus User’s Manual
StartSong, StopSong, Continue
Continued
The exception is for one situation where we send StopSong in both
Sync=Out and Sync=OuS cases: When the MIDI Clock is stopped at Reset
we send a StopSong. This avoids the case of the sequencer or drum
machine waking up in the middle of a pattern when the MIDI Clock
happens to get restarted again.
WHEN
SENT?
IS
S TA R T S O N G
AND
STOPSONG
The following lists all cases where StartSong and StopSong messages are
sent, depending on the state of the Sync parameter:
SYNC = OUT
StartSong is sent at:
StopRecord (finishing a loop with Record)
Start SyncRecord (in the case where we come from TempoSelect)
SetTempo in TempoSelect
UnroundedMultiply (Multiply-Record)
UnroundedInsert (Insert-Record)
UnMute ReTrigger (when MuteMode= StA)
Mute-Undo ReTrigger (when MuteMode = Cnt)
NextLoop (when SamplerStyle = STA)
ReAlign
MuteReAlign
MIDIReAlign
MIDIMuteReAlign
QuantMIDIStartSong (only at next loop start)
MuteQuantMIDIStartSong (only at next loop start)
StartPoint
MIDI StartPoint
Undo Record (only at next loop start)
StopSong is sent at:
Reference - Synchronization 6-25
StartSong, StopSong, Continue
Continued
Reset
GeneralReset
Start Record
Mute (if MuteMode=StA)
SYNC = OUTUSERSTARTSONG (OUS)
StartSong is sent at:
QuantMIDIStartSong (only at next loop StartPoint)
MuteQuantMIDIStartSong (only at next loop StartPoint)
Mute-Multiply ReAlign
StopSong is sent at:
Reset
GeneralReset
Start Record
IF SYNC = IN
StartSong is sent at:
Undo in Reset
QuantMIDIStartSong (only at next loop start)
MuteQuantMIDIStartSong (only at next loop start)
StopSong is sent at:
never
6-26 Echoplex Digital Pro Plus User’s Manual
StartSong, StopSong, Continue
Continued
COMMANDING
SYNC=IN
A
S TA R T S O N G
WHEN
StartSong can be sent in Reset with a press of Undo. This can be useful if
you have another source of sync upstream of the Echoplex, but have
stopped something downstream from it. Pressing Undo on the
Echoplex is a convenient way to send a StartSong message to the
downstream device and start it up. This also restarts the internal clock
counters used to keep track of the “beat 1” of the external sequencer. So
if you get off from the sequencer somehow, or if you want to have a
different point in the sequence considered as Beat one, tapping Undo
lets you redefine the downbeat.
See also: Sync, TempoSelect, ReAlign, SongPositionPointer and Continue, StartPoint,
8th/Cycle, MIDIpipe, SyncRecord, Multiply, Insert, ReTrigger, MuteMode
Reference - Synchronization 6-27
StopSync
Synchronization
Play Mode
Temporarily ignore Sync.
Sometimes you may wish to temporarily ignore a Sync signal being
received by the Echoplex so that you can Record free from it.
If a Sync has been received, pressing Overdub in Reset switches off
reception of incoming Sync events. This is called StopSync. The
Overdub LED turns red to indicate that sync reception is disabled.
Once StopSync is done you can freely Record a loop of any length.
Another Overdub press in Reset makes the Echoplex receptive to Sync
again. This is called ContinueSync. The Overdub LED is turned off until
the next sync comes.
This means if you have a loop in sync and do a Reset, you continue in
sync with the incoming clock. But with an Overdub press in Reset you
can then Record a new Cycle length, unrelated to the external clock. This
is mainly useful for working with other devices that send clock all the
time.
StopSync also disables Tempo, so if you have used TempoSelect to set a
Tempo you can temporarily escape from it and then return to it later.
See also: Sync, TempoSelect
6-28 Echoplex Digital Pro Plus User’s Manual
SyncStartPoint
Synchronization
Play Mode
Define a new Global StartPoint and send a StartSong.
Pressing Undo in Reset when Sync=In defines a new Global StartPoint for
Sync just like switching on a MIDI clock or sending a MIDI StartSong to the
Echoplex does. This is called SyncStartPoint. The Global MIDI clock
counter is also restarted at this point. Reset does not do this.
When SyncStartPoint is pressed, we also send out a MIDI StartSong
message. This allows you to have a clock source upstream of the
Echoplex, and be able to stop a downstream device and restart it in
alignment with the Echoplex’s new Global StartPoint.
If the Echoplex is in a state where we are waiting for a sync, pressing
Undo stops it from waiting so recording can be done normally.
SyncStartPoint is also useful when working with units that send clock all
the time.
See also: Sync, StartPoint, Global/Local MIDI Clock
Reference - Synchronization 6-29
SyncRecord
Synchronization Action
Play Mode
Allows spontaneous Recording in sync with external devices.
When a sync signal is being received by the Echoplex, and Sync=In, the
Echoplex will Record loops in sync with the external device’s tempo. Sync
signals can be in the form of MIDI Clock, BrotherSync from another
Echoplex, or pulses at the BeatSync input.
During Reset, the Overdub LED turns yellow to indicate that a Sync has
arrived. When the second Sync point arrives to define the Cycle length,
the LoopTime Display shows the resulting Cycle time. This cycle time
is determined by the 8ths/cycle setting and the tempo of the incoming
clock. Whenever the Overdub LED is yellow like this, the next Record
press will be Synchronized.
Loops recorded in sync will be either exactly this Cycle length, or an
integer multiple of it. You can decide in real-time how many cycles to
Record. You simply let the Echoplex continue Recording and it will keep
adding cycles until you stop the Record, at which point it will round off
to the next Cycle point and begin playing back the loop. This is very
similar to the way Multiply works, so it should be familiar if you have
used Multiply.
SYNCRECORD – SYNCHRONIZED
RECORDING WITHOUT QUANTIZING
SyncRecord is a variation of Record that is automatically done when a
Sync of any type is being received, Sync=In, and Quantize=OFF.
Instead of always quantizing Record when a sync is being received, the
Echoplex will do a kind of “Multiply over nothing” for the unquantized
case. This means SyncRecord starts immediately when you press
Record, counts the Cycles on the green multiple display, and rounds off
at the end to fit the loop time defined by the sync. SyncRecord gives you
freedom from quantization so you can begin recording anytime you
6-30 Echoplex Digital Pro Plus User’s Manual
SyncRecord
Continued
like, while still allowing tight synchronization to an external clock
source.
With SyncRecord, you only need to have received the first sync event to
begin Recording in sync. As you are Recording, the Echoplex will
continue watching the sync to determine what the right cycle times are.
When you press Record again to end, the Echoplex will automatically
round off to the right point so that your loop is exactly the correct length
to match the sync. This is useful to let you start recording immediately
without waiting for an entire sync period to occur.
SYNC
WITH
QUANTIZING
When Quantize=Cycle, 8th, or Loop, the Cycles are tracked and counted
properly when recording in sync. When Record is pressed, it will be
quantized to the next sync point defined by the incoming sync signal
before it starts, and again quantized when Record is pressed to end.
This means that if the incoming clock defines a Cycle length of 2
seconds and you let Record continue to 8 seconds, you will see the
multiple counter counting from 1 to 4. The Cycle boundaries will be set
at 2.0 seconds, and the startpoint will be aligned with the startpoint
defined by the incoming sync.
See also: Record, Sync, Quantize, 8ths/cycle
Reference - Synchronization 6-31
TempoSelect
Synchronization Action
Play Mode
Set Tempos and Loop Lengths in Advance, in Beats per Minute
(BPM)
TempoSelect is a way to set up the tempo of a loop in Beats Per Minute
(BPM) before you record it. Once you set the BPM, the basic loop length
is determined by the 8ths/Cycle parameter. You can also think of this as
setting the loop time ahead of recording the loop.
The tempo is set with the FeedBack Knob or by MIDI. While still in
reset and before a loop is recorded, you enter the TempoSelect state with
a press of the Undo button. From there you can set the Tempo.
After setting the tempo the loop can be recorded. When you press
Record, the Echoplex actually does a SyncRecord to the clock tempo that
has been set. (See the SyncRecord section or the Sync chapter for more
details on SyncRecord). This allows you to start the Record at any time.
When you press Record again to finish, it will continue to the precise
loop time determined by your tempo and the 8ths/Cycle parameter, and
end the Record automatically.
Once the tempo is set in the TempoSelect state, MIDI clock is sent out.
This allows you to start a sequencer or drum machine in time with your
loop length before you even record the loop! Or similarly, it allows you
to start a sequencer at the exact time you start recording a loop, instead
of when you finish Recording it. TempoSelect gives you a lot more
flexibility for working with sequencers and other synchable devices over
direct recording of loops.
HOW
TO
USE TEMPO SELECT
TempoSelect requires that the Sync Parameter be set to Out or OuS. When
you have Sync=Out or OuS, the Undo LED will be green in reset to
indicate the TempoSelect function is available.
6-32 Echoplex Digital Pro Plus User’s Manual
TempoSelect
Continued
To select the Tempo, first press the Undo button in Reset. This will put
you into the TempoSelect State. From there you will see the display
change and you will have several different commands available from the
front panel.
T H E T E M P O S E L E C T D I S P L AY
When you enter the TempoSelect State, the Undo LED will turn red and
the BPM will appear on the LoopTime display. The tempo LEDs will
begin flashing to the beat.
You will also see that the Record LED is green and the Overdub,
Insert, and Mute LEDs will be Orange to indicate they have special
functions.
TEMPO SELECT COMMANDS
■
Record – Record a loop in tempo. It will automatically do a SyncRecord
to the selected tempo.
■
Overdub – Press to disregard the Tempo without erasing it. If you press
it again later or reenter the TempoSelect function, the tempo returns.
■
Feedback Knob – sets the Tempo.
■
Insert and Mute – use to fine tune the tempo.
■
Short press of Undo – locks the tempo and triggers a StartSong
message.
■
Long press of Undo – exits from the TempoSelect state and switches
the feature off. Any time a tempo has been set, a Long Undo during
reset will clear it.
Reference - Synchronization 6-33
TempoSelect
Continued
SETTING
THE
TEMPO
Select the tempo with the FeedBack Knob. You can select a tempo
between 26 and 278 BPM. Tempo can also be set by MIDI using the
DataWheel continuous controller. (controller #6)
While the knob is being turned, the Tempo is displayed in BPM on the
LoopTime display. Once you’ve stopped turning it for a moment, the
resulting loop time is displayed in place of the BPM. The loop time
depends on Tempo and the 8th/Cycle parameter. We assume that a beat
is a quarter note, so at Tempo 120 BPM and 8th/Cycle=8, the Cycle time
results in 2.0 seconds. If 8th/Cycle=16, you get 4.0 seconds, and so on.
FINE TUNING
THE
TEMPO
With the Feedback Knob the tempo is adjusted coarsely, in 2 BPM
increments. The Insert and Mute buttons can be used to fine tune the
tempo from there. Insert reduces the LoopTime (increase BPM) and
Mute increases the LoopTime (reduces BPM). Each press changes the
loop time by approximately 3 milliseconds. Fine tuning changes are not
shown in BPM, it only changes while the LoopTime is displayed.
Unfortunately, the LoopTime usually shows the time in 100ms
resolution! So you might not be able to see anything change on the
display as you fine tune the tempo, until you have changed it by 100ms.
But you can hear it.
Since the MIDI clock is being sent out during this time, any device
following the clock will be slowly changing in tempo as it follows the
fine tuning.
A long press of Undo clears the Tempo and exits from Tempo Select.
6-34 Echoplex Digital Pro Plus User’s Manual
TempoSelect
Continued
DIFFERENCES BETWEEN SYNC=OUT
AND SYNC=OUS
TempoSelect behaves slightly differently depending on whether the Sync
parameter is set to Out or OuS. With Sync=Out, MIDI StartSong
messages are sent when you start Recording or when you Set the tempo
with Undo. When Sync=OuS, MIDI StartSong is only sent at user
command with the press of Undo in the TempoSelect state, but not sent
when you start or stop Recording. If you have recorded a loop without
StartSong, you need to do one of the new Quantized StartSong functions
to send a MIDI StartSong message. This can give you more freedom in
controlling when the sequencer starts.
See the Synchronization chapter for more details on the differences
between Sync=Out and Sync=OuS. Details on the Quantized StartSong
functions can be found in the Synchronization chapter and in the MIDI
chapter.
MIDICLOCK
AND
S TA R T S O N G S
MIDIclock is sent out immediately when you enter the TempoSelect state,
but without a MIDI StartSong message. Some devices like to have MIDI
clock in advance, and for some cases this allows you to get a feel for the
rhythm. But to really start things, you need to send a MIDI StartSong
message!
Reference - Synchronization 6-35
TempoSelect
Continued
RECORDING
IN
TEMPO
There are three ways to send the MIDI StartSong and get things started:
1. Start up the sequencer before recording any loops
The first option for starting the sequencer is to start it in tempo before
recording any loops. After you have entered TempoSelect and set the
Tempo, press the Undo button again. This press of Undo sends a
StartSong message to the sequencer and locks in your tempo. We call it
SetTempo. The sequencer will receive the MIDI StartSong message and
start playing at your tempo using the MIDI clock out from the Echoplex,
and the Echoplex and sequencer will be aligned from then on. If you
don’t like the tempo you can press Undo to set it again with the
Feedback Knob or the fine tune buttons. This StartSong is sent if
Sync=Out or Sync=OuS.
If you are not using a pedal for Feedback, make sure you set the
Feedback Knob back to where you want it for Feedback before
recording! Since you have locked the tempo, changing the knob position
at this point will not change tempo, only Feedback. You may also find the
RecordMode=Safe parameter helpful here.
Whenever you are ready to record your loop, you can simply tap Record
to begin. You will actually do a SyncRecord. After the second press of
Record to end recording, the Echoplex will round off the recording to
the next sync point as determined by your tempo. Your loop will end at
exactly the right length and in time with the sequencer.
2. Start up the Sequencer as you begin Recording your Loop
The second option for starting the sequencer is to trigger it immediately
as you start Recording. You can do this by pressing Record directly
6-36 Echoplex Digital Pro Plus User’s Manual
TempoSelect
Continued
when the Undo LED is still red, right after you have dialed in the tempo.
A MIDI StartSong message is sent, and the sequencer will start at the
same instant as you start recording your loop. In this case the press of
Record is the SetTempo moment. When you press Record again to
finish, the Echoplex rounds off the recording to the correct loop time,
same as before. For this to work you have to have Sync=Out.
3. Record a Loop to a Tempo and Start the Sequencer Later
The third option lets you record a loop without starting up the
sequencer immediately. This requires the Sync parameter to be set to
OuS. Set the tempo in the TempoSelect state, and then record your loop
to it as above. With OuS, the MIDI StartSong message is not sent out
when recording is started or stopped, so the Sequencer will not start up.
When you are ready to start the sequencer, you need to send a MIDI
StartSong message with the QuantStartSong command executed by
pressing Mute and then Multiply while the loop is playing. At the next
StartPoint of your loop a MIDI StartSong message will be sent
automatically and your Sequencer will start. You can also use one of the
MIDI StartSong commands which don’t necessarily require you to mute
your loop first. More details about the quantized StartSong commands
can be found in the Synchronization chapter and the MIDI chapter.
SETTEMPO
AND
PRESETS
The SetTempo moment when the tempo is locked in is important. At
SetTempo the tempo you have defined with the Feedback Knob is
stored as a parameter value in memory. You can then save it as a Preset
and recall it again later. This allows you to have predefined tempos
stored in different Presets and jump to them immediately. See the
Presets section for more information on Presets. SetTempo also means
that the tempo is remembered if you go out of TempoSelect and then
come back. For example, after SetTempo and while still in Reset you
press Overdub to disable sync. At that point you can record a loop out
of sync if you like. After reset, press Overdub again to re-enable sync,
Reference - Synchronization 6-37
TempoSelect
Continued
and then press Undo again to go back into the TempoSelect state. Your
old tempo is still there!
SYNC=IN
AND
SYNC=OFF
If Sync=In, the TempoSelect function can not be selected. The Undo LED
is actually orange, indicating an alternate function. In this case a
different function is available, where StartSong can be sent in Reset with
a press of Undo. See the Synchronization chapter for more details on
this.
If Sync=Off, TempoSelect is not available and StartSong messages are not
sent. The Undo LED is off during Reset.
STORING TEMPO
IN
PRESETS
Tempo can be saved in a Preset. Whenever you recall that preset it will
immediately come up with the saved tempo. To do this, you simply save
to a Preset while you have a tempo set, and it will be stored. See the
Presets section for more information on how to save and recall Presets.
When you recall a Preset where no tempo has been set, it is just as if this
feature did not exist at all. It comes up without any tempo and behaves
normally.
When the TempoSelect state is activated with Undo, it first displays the
tempo value in the preset currently loaded.
If there is no tempo saved in the current preset, it defaults to 120 BPM.
From then on, as soon as the Feedback Knob is moved, the new value
is activated.
See also: Sync, SyncRecord, 8ths/cycle, Presets
6-38 Echoplex Digital Pro Plus User’s Manual
C
H
A
P
T
E
R
7
MIDI Control
Reference - MIDI Control 7-1
DirectMIDI
Immediate Action
Play Mode
Directly access any Echoplex command by MIDI.
A large set of commands in the MIDI command list are called DirectMIDI
commands. Please see the MIDI command list under the Source#
parameter section to see them.
DirectMIDI commands do specific functions unavailable from the front
panel or reach functions directly that would take several button presses
from the front panel.
There are some limits to this, in that ReAlign, Half-Speed, and Quantize
DirectMIDI functions can execute at any time, but the others can only be
executed while the loop is playing, overdubbing, or substituting.
Unlike MIDI VirtualButtons, in most cases DirectMIDI commands only
require the NoteOn message, or the single continuous controller
message. They do not need the NoteOff. This is not true for the SUS
DirectMIDI commands. These use the NoteOn message to start their
function and the NoteOff message to end it, similar to the way SUS
commands work from the front panel.
See also: MIDI In, MIDI Out, Channel, ControlSource, Source#, MIDI VirtualButtons
7-2 Echoplex Digital Pro Plus User’s Manual
MIDI Command List
Immediate Action
Play Mode
Complete list of MIDI Commands available for controlling the
Echoplex through MIDI.
In the tables below, the Offset is the number that should be added to
Source# to get the listed command. For example, the midi command for
the Record button is an offset of 2. If Source#=36, the message number
for Record would then be 38. If you have ControlSource=Notes, you
would then use NoteOn 38 to command Record.
The note listed is assuming the default value of Source# =36. This is the
note of the resulting NoteOn message when you and Source# and the
offset together. If you played that note on a keyboard you will trigger
that function.
The tables are divided into three sections for the three types of MIDI
commands – MIDI Sync Indicators, MIDI VirtuaLButtons, and
DirectMIDI.
MIDI VirtualButtons and DirectMIDI are described elsewhere in this
section. MIDI Sync Indicators are in the Synchronization section.
MIDI Sync Indicators
Note Source#
offset
G#
Function
Short descriptions
-4
8thSync out
a short note out at each 8th note (output only)
A
-3
LoopSync out
a short note out at each Loop StartPoint (output only)
A#
-2
MIDISync out
a short note out at each Global MIDI StartPoint (output only)
B
-1
CycleSync out
a short note out at each Cycle StartPoint (output only)
Reference - MIDI Control
7-3
MIDI Command List
Continued
MIDI Vir tualButtons
Note Source#
offset
Function
Short descriptions
Virtually presses the Parameter Button
C
0
ParameterButton
C#
1
empty
D
2
RecordButton
Virtually presses the Record Button
D#
3
OverdubButton
Virtually presses the Overdub Button
E
4
MultiplyButton
Virtually presses the Multiply Button
F
5
InsertButton
Virtually presses the Insert Button, depends on InsertMode
F#
6
MuteButton
Virtually presses the Mute Button
G
7
UndoButton
Virtually presses the Undo Button
G#
8
NextButton
Virtually presses the Next Button
A
9
ReplaceButton
Virtually presses the “Replace Button”
A#
10
SubstituteButton
Virtually presses the “Substitute Button”
B
11
InsertOnlyButton
Virtually presses the Insert Button, regardless of InsertMode
C
12
SpeedButton
Virtually presses the “HalfSpeed Button”
C#
13
ReverseButton
Virtually presses the “Reverse Button”
DirectMIDI
Note Source#
offset
Function
Short descriptions
D
14
SUSRecord
Sustain Action Record
D#
15
SUSOverdub
Sustain Action Overdub
E
16
SUSRoundMultiply
Sustain Action Rounded Multiply
F
17
SUSRoundedInsert
Sustain Action Rounded Insert
F#
18
SUSMute
Sustain Action Mute
G
19
ShortUndo
Immediately execute the ShortUndo function (Undo to end)
G#
20
SUSNextLoop
Sustain Action NextLoop (NoteOn = NextLoop, NoteOff = PreviousLoop)
A
21
SUSReplace
Sustain Action Replace
A#
22
SUSSubstitute
Sustain Action Substitute
7-4 Echoplex Digital Pro Plus User’s Manual
MIDI Command List
Continued
B
23
SUSToggleReverse
Sustain Action Reverse
C
24
SUSToggleSpeed
Sustain Action HalfSpeed
C#
25
Reset
Immediately reset current loop
D
26
GeneralReset
Immediately reset all loops
D#
27
Exit Parameters
Exit Parameter editing and return to Play state
E
28
SUSUnroundedMultiply
Sustain Action Unrounded Multiply
F
29
SUSUnroundedInsert
Sustain Action Unrounded Insert
F#
30
SUSMute-Retrigger
Sustain Action Mute-Retrigger (NoteOn = Mute, NoteOff=Retrig.)
G
31
LongUndo
Immediately execute the LongUndo function
G#
32
Forward
Go into Forward
A
33
Reverse
Go into Reverse
A#
34
FullSpeed
Go into FullSpeed
B
35
HalfSpeed
Go into HalfSpeed
C
36
SamplePlay
Immediately restart the loop and play once
C#
37
ReTrigger
Immediately restart the loop and play forever
D
38
ReAlign
Restart the loop at next Global MIDI StartPoint
D#
39
MuteReAlign
Immediately Mute and restart the loop at next Global MIDI StartPoint
E
40
QuantMIDIStartSong
Wait to next Local Loop StartPoint and then send a StartSong
F
41
MuteQuantMIDIStartSong
Immediately Mute, then wait to next StartPoint and send StartSong
F#
42
StartPoint
Set the StartPoint to the current spot in the loop
G
43
QuantStartPoint
Wait to next Global MIDI StartPoint and then set the local StartPoint there
G#
44
BeatTriggerSample
Mute and wait for BeatSync, then trigger loop to play once. Repeated BeatSyncs
retrigger the loop.
A
45
MIDIBeatSync
Virtually send a BeatSync pulse by MIDI
L o o p Tr i g g e r s
When multiple loops have been set up with the MoreLoops parameter,
you can trigger them directly with MIDI Note messages. The LoopTrig
parameter defines the base Note for Loop 1. The consecutive Loops
occupy the notes above that, so Loop 2 is LoopTrig+1, Loop 3 is
LoopTrig+2, etc.
Reference - MIDI Control
7-5
MIDI Command List
Continued
Preset Change
MIDI Program Change commands are used to change Presets on the
Echoplex. There are 15 Preset locations available, corresponding to MIDI
Program Change 1 - 15.
See also: MIDI In, MIDI Out, Channel, ControlSource, Source#, MIDI VirtualButtons,
DirectMIDI, MIDI Sync Indicators, Transmitting MIDI, Receiving MIDI, LoopTriggering,
LoopTrig, Presets
7-6 Echoplex Digital Pro Plus User’s Manual
Immediate Action
MIDI DataWheel
Parameter Editing Mode
MIDI DataWheel can be used for editing parameters.
The Feedback Knob value is transmitted by the MIDI continuous
controller DataWheel (Continuous Controller #6) when in Parameter
Editing Mode and TempoSelect.
Likewise, the Echoplex receives the DataWheel control for changing the
parameter values from MIDI.
This is normally used when multiple Echoplexes are chained together by
MIDI. Some of the parameters have many values available, and during
editing the Feedback Knob becomes available as a DataWheel so they
can be set faster. This control value is sent from the master unit to the
slaves by way of the DataWheel controller in MIDI. The normal
Continuous Controller you have set for Feedback is not used, because
that would just change the Feedback setting on the slaves instead of the
parameter value. Separating this functionality to the DataWheel
controller keeps everything straight.
If you are using another MIDI controller, you can easily use the
DataWheel function for quickly editing parameters.
See also: DataWheel, Channel, Feedback Knob, Parameter Button
Reference - MIDI Control
7-7
MIDIpipe
Immediate Action
Any Mode
MIDI commands at the MIDI In port are intelligently filtered,
merged, and sent to MIDI Out.
All incoming MIDI commands received at the MIDI In Port are
automatically monitored by the Echoplex and selectively sent to the
MIDI Out Port, depending a bit on the state of the Echoplex. We call
this function “Piping”.
MIDIpipe makes it possible to have multiple Echoplexes chained together
and easily switch between using them independently or together as
stereo pairs, without needing to reconfigure the MIDI cabling. MIDIpipe
also makes it simple to work with multiple devices sharing the same
MIDI clock. MIDIpipe is similar to a MIDI merge function, except with
Piping the Echoplex is intelligently deciding which MIDI messages
should be piped to the output or not. A MIDI Merge function would
send everything through, which can cause major problems in some
situations. MIDIpipe intelligently prevents such problems.
MIDIpipe works with very low latency, so you will not notice any
significant difference between a command that is piped and one that
went direct or used the MIDI Thru Port.
MIDIPIPE
AND
MIDI SYNC
MIDI clock is piped when Sync=In or Sync=Off with a maximum delay of
2ms. This makes it easy to chain together several Echoplexes with the
same source clock as sync, while still maintaining other interesting
control options between them via MIDI. MIDI clock is not piped when
Sync=Out or Sync=OuS, because the Echoplex will also be generating
MIDI clock internally. If they both went out you would have double
clocks. MIDIpipe automatically prevents that situation.
MIDI StartSong, StopSong, and Continue messages are piped in all
cases, so an upstream MIDI controller at the beginning of the MIDI
chain can send commands to a downstream sequencer that is receiving
7-8 Echoplex Digital Pro Plus User’s Manual
MIDIpipe
Continued
clock from the Echoplex. When the Echoplex is piping StartSong,
StopSong, and Continue messages it intelligently checks whether it has
already sent the message itself within the last 10ms, and does not pipe if
it has. This prevents multiple Echoplexes in parallel from stacking up the
StartSong messages when they are all Recording simultaneously.
MIDIPIPE PREVENTS COMMAND
D U P L I C AT I O N
Echoplex functions that normally send out a MIDI command do not
duplicate the command if it is being piped. For example, if a MIDI
command is received for Record, the command is piped to the output
and used internally to start the Record function. The Record function
does not then send another MIDI command for Record as it normally
would, so the commands do not get doubled by piping.
MIDIPIPE
OF
SYSEX
MIDI Sysex commands are also piped immediately, which is convenient
for controlling multiple Echoplexes from a computer using a sysex
librarian utility. Unfortunately, while piping Sysex commands the audio
is stopped due to the complexity of handling the sysex commands in
real time. This is not audible for short commands like changing a single
parameter, but you may hear it for long Sysex strings.
See also: MIDI In, MIDI Out, Channel, ControlSource, Source#
Reference - MIDI Control
7-9
MIDI VirtualButtons
Immediate Action
Play Mode
Midi Commands can be used to emulate the Front Panel
Buttons
A set of MIDI commands in the Echoplex are called MIDI VirtualButtons,
because they behave exactly the same way the corresponding front
panel buttons do.
With MIDI VirtualButtons you can press the front panel buttons virtually
by MIDI, and do things like long presses and short presses and cross
functions.
If the ControlSource parameter is set to Notes, then a NoteOn message is
the same as pressing the button, and a NoteOff message is the same as
releasing the button. If the ControlSource Parameter is set to Continuous
Controllers, a controller with a positive value is the same as pressing a
button, and a controller message with a value of 0 is the same as
releasing the button.
This press and release concept is important to remember when
programming a MIDI controller. When using VirtualButtons you have to
make sure you send both the NoteOn and the NoteOff, so that you both
press and release the button!
The VirtualButtons emulate the front panel interface in MIDI. However,
there are more VirtualButtons than front panel buttons because we offer
all the InsertMode options simultaneously from MIDI as if they were
separate buttons. The MIDIInsertButton is the exception, it still does what
is selected in InsertMode for consistency.
VirtualButtons allow you to use MIDI to take advantage of the economical
design of the front panel interface, which lets you get a lot of
functionality out of a few buttons.
See the Source# section in the Parameters chapter for the command list
and specific note or controllers needed for each VirtualButton.
See also: MIDI In, MIDI Out, Channel, ControlSource, Source#, DirectMIDI
7-10 Echoplex Digital Pro Plus User’s Manual
Immediate Action
Receiving MIDI Commands
Play Mode
Use a MIDI controller to command the Echoplex.
Receiving MIDI commands is similar to transmitting. There are two
primary types of MIDI commands, VirtualButtons and DirectMIDI. They
are described in more detail in the under their own headings in this
section.
VirtualButtons always require two MIDI messages. When
ControlSource=Notes, a NoteOn message indicates pressing the button,
and a NoteOff (or NoteOn velocity 0) indicates releasing it. When
ControlSource=Controllers, the appropriate Controller with a non-zero
value indicates pressing the button. Sending the controller again with a
value of 0 indicates releasing the button.
Unlike MIDI VirtualButtons, in most cases DirectMIDI commands only
require the NoteOn message, or the single continuous controller
message with a non-zero value. They do not need the NoteOff. This is
not true for the SUS DirectMIDI commands. These use the NoteOn
message to start their function and the NoteOff message to end it,
similar to the way SUS commands work from the front panel.
See also: ControlSource, Channel, MIDI Command List, DirectMIDI, MIDI VirtualButtons,
Transmitting MIDI Commands
Reference - MIDI Control
7-11
SysEx
Immediate Action
Play Mode
MIDI SysEx messages can be used to backup and edit
Parameters and Presets.
All Parameters and Presets in the Echoplex can be edited by MIDI
System Exclusive messages, or SysEx.
SysEx is a useful way to backup your settings and Presets, send song
parameters from a sequencer, or control single parameters from a
capable MIDI controller. Since the sound is interrupted during this edit,
you may hear a pause for a longer sequence of SysEx commands. For a
single parameter change the dropout is not audible.
All SysEx information is piped by the MIDIpipe functionality. This
enables you to set two Echoplexes to different Device IDs and set them
up independently, even with MIDI connected simply from the MIDI In
Port to the MIDI Out Port. Make certain you have set the Echoplex
device ID to something. If the Device ID is left at 0, SysEx will not be
received.
See also: SysEx Chapter, MIDI Pipe
7-12 Echoplex Digital Pro Plus User’s Manual
Immediate Action
SUS MIDI Commands
Play Mode
MIDI Commands that execute functions with Sustain Pedal
action.
The concept of Sustain action, or “SUS” commands available for the
front panel buttons is greatly expanded through DirectMIDI.
Every Play Mode function has a SUS version separately available through
MIDI, allowing each to be accessed at any time through a MIDI
controller using NoteOn and NoteOff messages.
The SUS MIDI commands are detailed in the MIDI Command List.
USING SUS MIDI COMMANDS
With the SUS MIDI Commands, the NoteOn message starts the function
and the NoteOff ends it. This opens up a whole new range of expressive
possibilities with the Echoplex that are quite different from the standard
toggling action. For example, it is possible to jump in and out of a
function very rapidly with this feature, enabling glitchy effects
impossible to do otherwise.
The SUS commands can also be controlled with Continuous Controller
messages, where a positive value turns the function on, and a 0 value
turns it off.
THE SUSNEXTLOOP SPECIAL CASE
SUSNextLoop is an interesting special case of the SUS MIDI Commands
described in the MIDI section. SUSNextLoop is only available as a MIDI
command, and is located at Source# + 20.
Reference - MIDI Control
7-13
SUS MIDI Commands
Continued
With SUSNextLoop, pressing it puts you into the Next Loop and releasing
it returns you to the previous loop. In other words, NoteOn puts you into
the Next Loop and the NoteOff brings you back. This allows you to
bounce in and out of an alternate loop from your main loop.
Note that only sending the NoteOff component of SUSNextLoop gives
you the command PreviousLoop.
See also: MIDI Command List, DirectMIDI, MIDI VirtualButtons, SUS Commands,
SUSNextLoop, PreviousLoop
7-14 Echoplex Digital Pro Plus User’s Manual
Immediate Action
Transmitting MIDI Commands
Play Mode
MIDI Commands are transmitted with each button press.
When ControlSource is set to Notes, each press of an Echoplex button
will send that button’s specific NoteOn message out the MIDI Out
Port. The NoteOn message is sent when the button is pressed, and the
corresponding NoteOff message is sent when the button is released.
Similarly, when ControlSource is set to Controllers, a pair of MIDI Control
Change messages will be sent for each button press. Pressing the button
in sends the specific MIDI Continuous controller with value 64.
Releasing the button sends the controller with value 0.
See also: ControlSource, Channel, MIDI Command List, DirectMIDI, MIDI VirtualButtons,
Receiving MIDI Commands
Reference - MIDI Control
7-15
7-16 Echoplex Digital Pro Plus User’s Manual
C
H
A
P
T
E
R
8
Parameter Presets
Reference - Parameter Presets 8-1
Parameter Presets
All Modes
Save and recall your favorite Echoplex parameter setups.
Echoplex parameter settings can be stored and recalled as Presets. There
are 15 memory spaces to save sets of all local parameters, plus Tempo.
The presets are stored in non-volatile memory so they are still there
even if you turn off the power.
For example, if you like to switch Quantize on and off quickly, you could
switch it on through the Parameter Matrix, then save to Preset 1, then
switch it off and save to Preset 2. From then on you just have to call
those two Presets with a MIDI Program Change from a MIDI controller
while you continue to play. This is much easier than editing from the
front panel every time!
SELECTING PRESETS
The 15 Presets can be chosen by one of the following methods:
■
From within the Preset Editor, accessed with the Presets
parameter
■
Using the Mute and Insert buttons while in Reset
■
Sending MIDI Program Change commands at any time
■
MIDI SysEx
Note that When InsertMode=HalfSpeed, HalfSpeed takes precedence over
the Preset control on the Insert button while in Reset. So only the Mute
button is available for changing Presets in that case.
8-2 Echoplex Digital Pro Plus User’s Manual
Parameter Presets
Continued
PA R A M E T E R S
S AV E D I N
PRESETS
Some Parameters are considered Global and are not stored in Presets.
Those will be noted shortly. The following Parameters are saved in
Presets:
■
■
■
■
■
■
■
■
■
■
■
■
■
■
■
■
Loop/Delay
Quantize
8ths/Cycle
Sync
Threshold
RecordMode
OverdubMode
RoundMode
InsertMode
MuteMode
MoreLoops
AutoRecord
LoopCopy
SwitchQuant
Velocity
SamplerStyle
In addition, Tempos set by using the TempoSelect feature are saved in the
Presets.
G L O B A L PA R A M E T E R S
BY PRESETS
NOT
CHANGED
The MIDI parameters plus a few others are set globally and independent
of the Presets. They will always retain the value set no matter which
Preset is loaded. The following are Global:
Reference - Parameter Presets 8-3
Parameter Presets
Continued
■
■
■
■
■
■
■
■
MORELOOPS
MIDI Channel
ControlSource
Source#
VolumeCont
FeedBkCont
LoopTrig
Device ID for Sysex and Sample Dump
Last Preset
IS A
SPECIAL CASE
Normally, when the MoreLoops parameter is changed a GeneralReset is
done automatically. This is necessary because the memory must be
reorganized to support the new number of loops, but it unfortunately
means current loops are lost.
When you change MoreLoops from the front panel we assume you are
doing it consciously and are aware that any loops you have currently in
memory will get Reset. However, we found it was very easy to change to
a Preset while you are playing without realizing that it had a different
number of loops setup in the MoreLoops parameter, and consequently
destroy the loops you are currently playing.
We developed a simple system to protect against this situation.
Whenever you change Presets while in a loop with something recorded,
any change in the MoreLoops parameter due to the Preset change is
ignored. The rest of the changes in that Presets are loaded, and your
loops are not be destroyed by the Preset change.
If you are in a Reset loop when you make the Preset change, we go ahead
and implement the MoreLoops change as well and do the GeneralReset.
If you changed the Preset while playing and you really did want the
MoreLoops to change and have everything Reset, you will need to Reset
the current loop and then reload that Preset.
8-4 Echoplex Digital Pro Plus User’s Manual
Parameter Presets
Continued
U N D E R S TA N D I N G
“PRESET”
THE
P L AY I N G S T A T E
Preset 0 is the Preset used and edited while playing. These are the
Parameters active while you use the Echoplex.
When one of the fifteen presets is loaded for use, what really happens is
the values in that saved Preset are copied into Preset 0 to be used while
playing. When you save a Preset using the Preset Editor, what really
happens is the values in the Preset 0 playing state are copied into the
Preset location you are saving to.
If you make a change in a parameter value while you are playing, it is
only changed in Preset 0, and the Preset you loaded is not affected. This
is really helpful because it means you can freely reach over and change
something as you play, without affecting any Presets. When you decide
you like a setup, you can then go into the Preset Editor and save it. Or you
can load up another preset you have saved to get back to a known state.
Changes made in Preset 0 are preserved when the power is turned off.
When you turn the Echoplex back on again, it will be setup the way you
left it.
We call the playing state “Preset 0” because that is the actual location in
memory where it lives. This will matter to you if you use SysEx or a
preset librarian program to edit the parameter values saved in your
presets. If you want to edit the active playing state parameters with
SysEx, you simply edit the reset 0 location. See the SysEx chapter for
more information on SysEx control.
Reference - Parameter Presets 8-5
Parameter Presets
Continued
SELECTING PRESETS
PA N E L
FROM THE
FRONT
In Reset, the Mute and Insert buttons can be used to select and load
Presets 1 - 15. Mute scrolls up and Insert scrolls down.
The Preset number is displayed on the LoopTime Display as the Presets
are selected. Once you stop on one Preset for longer than 400ms, it will
be loaded. The display briefly shows “LOA” when the Preset loads. The
Mute LED and Insert LED will be Orange to indicate they are available
for Preset selection.
There are two important things to note about the front panel Preset
selection feature. For one, if InsertMode=HalfSpeed you do not have the
Insert button available to scroll down through the Presets. This is
because we want to be able to start loops in HalfSpeed, so the Insert
button is dedicated to selecting HalfSpeed while in Reset. You will be able
to tell this is the case because the Insert LED will be green or red
(FullSpeed and HalfSpeed, respectively). It is Orange if it is available for
changing Presets. You will also be able to tell if you press Insert anyway,
because the display will show H.SP or F.SP instead of the Preset number.
The second important thing to note is the front panel Preset selection is
not available at all until you have saved your first preset! This was done
to make the user interface friendlier to new users. We didn’t want
somebody to accidentally press the button, select a Preset, and lose any
other parameter changes they had made before they understood how
the Preset feature worked. So until they’ve read this section and learned
how the Presets work, we save them from that mistake.
In any case, there is no point in loading Presets if you haven’t saved any,
so we don’t clutter the interface with it.
8-6 Echoplex Digital Pro Plus User’s Manual
Parameter Presets
Continued
SELECTING PRESETS
PROGRAM CHANGE
WITH
MIDI
Selecting presets with MIDI is very straight forward. MIDI Program
Change messages 1 – 15 select presets 1 – 15. Remember, MoreLoops
value changes are not made unless we are already in Reset.
If you have edited parameters on the fly and want to return to what you
had, MIDI Program Change 16 reloads the original saved preset.
See also: Parameter Button, Channel, MIDI Command List, MoreLoops
Reference - Parameter Presets 8-7
Preset Editor
Parameter Editing Mode
Edit, select, save, load, and restore presets.
ACCESSING
THE
PRESET EDITOR
The Preset Editor is accessed by the Preset parameter location. This is in
the Switches Row of the Parameter Matrix, under the NextLoop
Button. When you press it you are in the Preset Editor. There, all the other
buttons get a new function.
PRESET EDITOR COMMANDS
Once you are in the Preset Editor, the front panel buttons take on the
following roles:
Mute
counts up Preset#
Insert
counts down Preset#
Multiply
Sets selected Preset and Preset 0 to factory default
Overdub
long press saves the playing state settings (Preset 0) to
the Preset displayed
Record
loads the Preset displayed to the playing state setting
(Preset 0) for use.
8-8 Echoplex Digital Pro Plus User’s Manual
Preset Editor
Continued
P R E S E T E D I T O R D I S P L AY
The Display shows the Preset number as “Pr #”. No dot after “Pr”
indicates that this Preset is the last one that has been loaded into the
Playing state Preset 0. If there is a dot after “Pr”, it is not the one loaded.
When the display shows “PrE” it means that the Preset 0 parameter
settings have been modified since the preset was loaded to them. With
the display indicators it should be easy to tell in the editor which preset
you are currently using, and if there are new changes made that you
may want to save.
TIME REQUIRED
FOR
S AV I N G P R E S E T S
Please note that the saving of a Preset to the non-volatile memory in the
Echoplex takes about 400ms. if the unit is power cycled before that, it
may come back on with different parameter values than expected. Make
certain you wait a second after saving for the Parameters to be fully
saved before turning off the power.
See also: Parameter Button, Parameter Presets
Reference - Parameter Presets 8-9
8-10 Echoplex Digital Pro Plus User’s Manual
C
H
A
P
T
E
R
9
User Interface
Reference - User Interface 9-1
DataWheel
Front Panel
The Feedback Knob becomes the DataWheel during Parameter
Editing mode.
The Parameters that have many values can be edited with the
Feedback Knob on the front panel while that parameter is being
viewed. The Feedback Knob becomes the DataWheel.
USING
THE
D ATAW H E E L
Select the parameter as usual and then turn the Feedback Knob to
edit the value instead of pushing the button repeatedly. Parameters with
less than 127 values have them spread over the range of the knob.
Note this only works from the actual Feedback Knob on the front
panel. A pedal connected to the Feedback Pedal Jack does not have
this function.
DataWheel works with:
■
8th/Cycle
■
MIDI channel
■
Source #
■
LoopTrig #
■
VolumeCont
■
FeedBkCont
■
MoreLoops
9-2 Echoplex Digital Pro Plus User’s Manual
DataWheel
Continued
AV O I D I N G C O N F L I C T S
WITH
FEEDBACK
Since the DataWheel is the Feedback Knob in Play Mode, the
Echoplex makes some effort to avoid conflicts between Feedback
settings and DataWheel settings.
The value for Feedback is stored and maintained when you enter the
Parameter Editing Mode. Using the Feedback Knob as the DataWheel
for editing a Parameter value does not change the actual Feedback
setting. When you leave Parameters, Feedback is still set the same as you
left it.
However, you should still be careful because the Feedback Knob will
now be in a different position. The next time you change the Feedback
with the Feedback Knob the value will jump to the knob position.
Usually it is best to remember setting it back where you want before
returning to Play Mode. The Echoplex helps you with this if you forget,
by providing a short time gap after you start moving the Feedback
Knob before the knob is read. So if you turn the knob quickly you can
return to the value you want without getting a strange Feedback setting.
See also: Feedback Knob, Feedback, Parameter Button
Reference - User Interface 9-3
Feedbk Indicator
Front Panel
Displays the volume of the material in the loop.
When this light is dark, it is measuring very little (or no) signal. When it
is green, the signal is healthy. Orange indicators are fine too, with the
signal at a good level. Levels that cause the indicator lights to glow red
will cause distortion.
9-4 Echoplex Digital Pro Plus User’s Manual
Feedback Pedal Jack
Back Panel
Plug a volume pedal into this jack to control feedback levels
with your foot.
This jack lets you use a passive volume pedal (one with no power supply
or battery) to control the Feedback parameter. Use a standard guitar
cord to connect a volume control’s "Amplifier" output to this jack in
order to use the pedal as a Feedback controller.
This jack has been calibrated to work well with most passive volume
pedals. If your pedal has a significantly-different resistance, it may not
be able to span the full range of Feedback levels.
The Feedback value can be controlled by MIDI, by the Feedback Knob
on the front panel, or by a volume pedal connected to the Feedback
Jack.
See the explanation of the Feedback Knob in this chapter for the most
detailed explanation of Feedback.
THE EFFECT
OF
L O O P / D E L AY
The Loop/Delay parameter determines if the pedal in the Feedback
Jack is routed to Feedback, Loop Input Volume, or Loop Output Volume.
There are eight different options for different styles of looping. Below
are three common ones, please see the Loop/Delay section in the
Parameters Chapter for more info.
■
When Loop/Delay=Loop, the pedal controls the Feedback.
■
When Loop/Delay=Delay, the pedal controls the Loop Input Volume.
■
When Loop/Delay=Out, the pedal controls the Loop Output Volume.
See also: Feedback Knob, Loop/Delay
Reference - User Interface 9-5
Feedback Knob
Front Panel
Sets the feedback level.
The Feedback level is the amount of signal that is fed from one pass
through the loop (or delay) to the next. For most looping operations,
Feedback is set to 100%, meaning that the loop will go on forever. While
you’re overdubbing or multiplying, the Feedback level is scaled back to
about 95% to prevent overloading the Echoplex with the combination of
the old signal and the new.
Because Feedback occurs at the end of a loop, you won’t generally hear
the effects of changing the Feedback level immediately. If you set the
Feedback to 0, for instance, the current loop will play out to its end
before you hear the volume drop to 0.
Setting the Feedback to an intermediate level is a good way to create a
smooth fadeout.
See also: Feedback
9-6 Echoplex Digital Pro Plus User’s Manual
Footpedal Jack
Back Panel
A place to plug in a cord to connect to the EFC-7 footpedal.
Use a standard guitar cord, with 1/4" mono phone plugs on each end, to
connect this jack to the optional EFC-7 footpedal.
You can also attach an ordinary momentary footswitch to this jack, and
it will function just like the Record button.
See Chapter 2 for information on the footpedal.
Reference - User Interface 9-7
Input Indicator
Front Panel
Displays the level of the input.
When this light is dark, it is measuring very little (or no) signal. When it
is green, the signal is healthy. Orange indicators are fine too, with the
signal at a good level but nearing the maximum headroom. Levels that
cause the indicator lights to glow red will be engaging the limiter, which
may affect sound quality. The limiter is there to prevent a surprising
loud input from causing ugly digital distortion, but it still affects the
sound by squashing the dynamics. You should avoid inputs loud
enough to turn the Input Indicator red.
Set the Input Level Knob so that the loudest levels cause the Input
Indicator Light to turn orange, but never red.
See also: Quick Start, Input Knob, Input Jack
9-8 Echoplex Digital Pro Plus User’s Manual
Input Jack
Back Panel
Plug in your instrument, mixer send, or microphone.
This back-panel jack accepts 1/4” phone plugs carrying the audio signal
to be recorded or delayed. It is a high-impedance input designed to
accept a wide range of audio levels, including high-impedance
microphone outputs, signals from electric guitars and basses (with
either passive or active electronics), and line-level signals from
electronic instruments and mixers.
Reference - User Interface 9-9
Input Knob
Front Panel
Controls the master input volume level.
Set this so that the loudest levels cause the Input Indicator Light to
turn orange, but never red.
See also: Input Indicator Light
9-10 Echoplex Digital Pro Plus User’s Manual
Loop Display
Front Panel
Indicates the current Loop.
The Loop Display shows the current Loop selected. This is mainly
meaningful when more than one loop has been set up using the
MoreLoops parameter.
The Echoplex can have its memory divided into as many as 16 different
loops. In order to save front panel space and use a single digit for the
Loop Display, some of the loops are labeled with letters instead of
numbers. If you set up 16 loops, you will see they are labeled 1 - 9,
followed by A, b, C, d, E, F, G.
See also: NextLoop, MoreLoops
Reference - User Interface 9-11
Loops LED
Front Panel
Indicates the Loops Row of the Parameter Matrix is selected.
The Loops LED is illuminated when the Loops Row of the Parameter
Matrix has been selected for editing with the Parameter Button. The
Multiple Display will also show P4 when this row is selected in the
Parameter Editing Mode.
The Loops Row consists of the Parameters related to multiple loops.
These are MoreLoops, AutoRecord, LoopCopy, SwitchQuant, LoopTrig,
Velocity, and SamplerStyle.
The Loops LED is not used in Play Mode.
See also: Parameter Button, Multiple Display, Parameter Matrix
9-12 Echoplex Digital Pro Plus User’s Manual
LoopTime Display
Front Panel
Displays length of the current loop. Alternately shows other
information depending on context.
S T A N D A R D L O O P T I M E D I S P L AY
When you are in a Record, Multiply, or Insert operation, the LoopTime
Display will keep track of how much time you’ve recorded so far. You
will see it counting the time as the operation progresses. Once
something has been recorded into a loop, the time display will show the
length of the current loop.
When you have reset a loop, the LoopTime Display will be blank until
you record some material in the loop.
A L T E R N A T E D I S P L AY S
SYNC TIME DISPLAY
After the second Sync pulse is received, or a sync is established by MIDI
Clock, the resulting Cycle Time is displayed on the LoopTime Display.
This only appears while in Reset.
FEEDBACK DISPLAY
Changes to FeedBack are displayed briefly on the LoopTime Display
while it is being changed. The value appears as a red number (0 - 127) in
place of the LoopTime. The display shows the change whether it is made
by the front panel Feedback Knob, a footpedal in the Feedback
Jack, or through MIDI continuous controller.
Reference - User Interface 9-13
LoopTime Display
Continued
This is very helpful in controlling Feedback, since it is often difficult to
tell exactly what you have set when using a foot pedal. In the case of
Feedback you don’t know the result until the next repetition of the loop,
which can be frustrating if you didn’t really set it where you wanted. The
visual display makes this much easier to manage.
VOLUME CONTINUOUS CONTROLLER DISPLAY
When the MIDI continuous controller for Loop Output Volume is sent to
the Echoplex, the value appears on the LoopTime Display in the same
way as with Feedback.
COMMAND DISPLAY
Several functions that do not have their own obvious LED indicator are
displayed briefly with some letters on the red LoopTime Display.
These are:
Display
rE
Fd
H.SP
F.SP
S.Un
L.Un
AL
St.S
S.Pt
cS.P
Pr.E
Pn
LOA
SAF
RES
Command
Reverse
Forward
HalfSpeed
FullSpeed
Short Undo
Long Undo
ReAlign
QuantMIDIStartSong
StartPoint sent
QuantStartPoint
Preset Editor
Preset Change received
Load Preset
Save Preset
Revert Preset to default
These become especially useful with the DirectMIDI commands that can
directly access many of these functions.
9-14 Echoplex Digital Pro Plus User’s Manual
LoopTime Display
Continued
MEMORY SIZE DISPLAY
The size of the memory is only shown for a short time after startup and
after GeneralReset. To see it again, just do a Short-Press Multiply in
Reset and it will appear briefly on the LoopTime Display.
PARAMETER EDITING DISPLAY
When you are editing parameters, the value of the current parameter is
displayed in the LoopTime Display.
QUANTIZING DISPLAY -
OOO
When Quantize=Cycle, Loop, or 8th, most command actions are
Quantized, meaning the wait until a designated point before they
execute. During the Quantize Period while it is waiting to execute, the
LoopTime Display will change to “ooo” to indicate we are waiting.
Similarly, if we are waiting for a Sync event to start Recording, the
LoopTime Display will show “ooo”.
If Threshold is set to something other than 0, Record will wait until an
audio signal reaches the threshold before it will start recording. During
this wait time the LoopTime Display will also show “ooo”.
SWITCHQUANTIZE DISPLAY
When SwitchQuantize = Cycle, Loop, Confirm, ConfirmCycle, or
ConfirmLoop, the Echoplex waits for the designated point or action
before switching loops after NextLoop is pressed or a MIDI
LoopTrigger is received.
During this waiting period the LoopTime Display changes to show
which loop we are about to switch in to. It will display this as “L 1”, “L 2”,
“L 3”, etc. Additional presses of NextLoop or received MIDI
LoopTriggers will update the display to show the target Loop.
Reference - User Interface 9-15
LoopTime Display
Continued
PRESET DISPLAY
When you are in the Preset Editor, the LoopTime Display shows the
Preset number as “Pr #”. No dot after “Pr” indicates that this Preset is
the last one that has been loaded into the playing state Preset 0. If there
is a dot after “Pr”, it is not the one currently loaded. When the display
shows “PrE” it means that the Preset 0 parameter settings have been
modified since the preset was loaded to them.
With the display indicators it should be easy to tell in the editor which
Preset you are currently using, and if there are new changes made that
you may want to save.
When a MIDI Program Change command is received or when you use the
front panel buttons to select a Preset, the LoopTime Display briefly
changes to show the preset you are selecting. It displays it as “P n”,
where n is the preset number.
See the Preset section for more details.
See also: Record, Multiply, Insert, Sync, Feedback, FeedBkCont, VolumeCont, Parameter
Button, Quantize, SwitchQuantize, NextLoop, Presets
9-16 Echoplex Digital Pro Plus User’s Manual
MIDI LED
Front Panel
Indicates the MIDI Row of the Parameter Matrix is selected;
Indicates Loop StartPoint during Play Mode.
PA R A M E T E R E D I T I N G M O D E
The MIDI LED is illuminated when the MIDI Row of the Parameter
Matrix has been selected for editing with the Parameter Button. The
Multiple Display will also show P3 when this row is selected in the
Parameter Editing Mode.
The MIDI Row consists of the Parameters related to MIDI control of the
Echoplex. These are Channel, ControlSource, Source#, VolumeCont,
FeedBKCont, Dump, and Load.
P L AY M O D E
During Play Mode the MIDI LED is part of the Visual Tempo Guide. It
blinks at each Loop StartPoint. This will only blink if your loop has
multiple cycles. When there is only one cycle only the Switches LED
blinks to indicate the Cycle StartPoint.
See also: Parameter Button, Multiple Display, Parameter Matrix, Visual Tempo Guide
Reference - User Interface 9-17
MIDI Ports
Back Panel
Enable communication with other MIDI devices.
The MIDI In, Out, and Thru ports are standard equipment on most
MIDI-capable devices. These ports are connected to other devices with
standard MIDI cables available at any music store.
The MIDI Out port is used to send messages originating at the Echoplex
Digital Pro. These include the messages generated by button pushes (if
ControlSource is not Off; see ControlSource for more information),
sample dumps (see Dump) and a single Note On message sent at the
start of each loop (see Sync).
The MIDI In port is used to received messages from other MIDI
instruments. These include the messages to remotely control button
pushes (see ControlSource), sample dumps (see Load) and a MIDI clocks
(see 8ths/Cycle).
The MIDI Thru port echoes incoming information for the benefit of
additional MIDI devices that may be "daisy-chained" with the Echoplex
Digital Pro. Messages originating at the Echoplex are sent out the MIDI
Out port only, and are not transmitted out the MIDI Thru port.
One variation worth noting is the situation when several Echoplexes are
daisy-chained, with the MIDI Out of each connected to the MIDI In of
the next. In this case, it may appear that incoming MIDI messages are
relayed out the MIDI Out port in addition to the MIDI Thru port, which
may seem puzzling. The logic behind this is not inconsistent, however.
Incoming MIDI messages from the master Echoplex are causing actions
to occur in each slave. Each of these actions generates a new MIDI
message, which is transmitted out the MIDI Out port of the slave.
See Chapter 3 for a summary of the many MIDI functions of the
Echoplex Digital Pro.
9-18 Echoplex Digital Pro Plus User’s Manual
Mix Knob
Front Panel
Controls the mix between the input and the loop.
This controls the mix between the input signal and the loop. If you are
using the Echoplex Digital Pro in an effects loop, then you will probably
want to set this so that the input and loop are evenly balanced, or so
that the input is a little louder than the loop (this will facilitate soloing
over the loop). If you are using the Echoplex Digital Pro in conjunction
with a mixer, so that you can hear the input signal whether or not the
Echoplex is on, then set the Mix control all the way clockwise to “Loop.”
Reference - User Interface 9-19
Multiple Display
Front Panel
Displays the current cycle. Alternately shows other information
depending on context.
After Multiply or Insert has been used to add cycles to a loop, the
Multiple Display will show the current Cycle. You will see it increment
as the loop progresses through the cycles.
The Multiple Display will be empty after the initial loop is recorded,
since there is only one cycle. Only after Multiply or Insert will it show
anything.
If you put the loop into Reverse, you will see the cycles count backwards.
In the Parameter Editing Mode, the Multiple Display shows the current
row selected in the Parameter Matrix.
In the Preset Editor, the Multiple Display shows the current Preset being
edited.
See also: Multiply, Insert, Parameter Button, Presets.
9-20 Echoplex Digital Pro Plus User’s Manual
Output Jack
Back Panel
Audio output. Connect it to your amplifier or preamp.
This line-level output jack accepts standard 1/4” mono phone plugs.
The output is a mix of the input and the current loop, with relative
volumes determined by the position of the Mix knob, and overall
volume determined by the Output knob.
See also: Mix Knob, Output Knob.
Reference - User Interface 9-21
Output Knob
Front Panel
Controls the overall output volume.
9-22 Echoplex Digital Pro Plus User’s Manual
Overdub Jack
Back Panel
A normally-open footswitch plugged into this jack can trigger
Overdub operations.
This jack is provided for those who want to use their own footswitches
to control Overdub operations. Some may prefer piano-style pedals to
the Overdub button on the supplied footpedal.
Reference - User Interface 9-23
Parameter Button
Front Panel
Enters Parameter editing mode, selects row in Parameter
Matrix.
When the Parameter Button is pressed the Echoplex enters the
Parameter Editing Mode. In this state you can edit the various Parameters
described in the Parameters section of this manual. Your loop will
continue playing while you are in the Parameter Editing Mode.
PA R A M E T E R E D I T I N G
The Parameters are arranged in a matrix so you can easily find and
access the parameter you wish to edit. The Parameter Matrix is
shown in the text on the front panel of the Echoplex. When you first
press the Parameter Button to enter the Parameter Editing Mode the
Timing LED will be illuminated and P1 will be displayed in the Multiple
Display. This indicates that the row of timing related parameters next
to the Timing LED are available for editing.
Each successive press of the Parameter Button selects the next row of
the matrix. The second press selects the Switches Row, with the
Switches LED illuminated and P2 in the Multiple Display. The third
press selects the MIDI Row, and the fourth press selects the Loops Row.
Once you have selected the row with the Parameter you wish to edit,
press the Function Button over that Parameter to select it. The current
value of that Parameter will be displayed in the LoopTime Display.
Continue pressing that Function Button to change the value of that
Parameter.
When you have finished editing, press the Parameter Button to cycle
back to Play Mode. A Long-Press of the Parameter Button always
puts you back in Play Mode, which is convenient for when you are not
looking directly at the Echoplex.
Your new Parameter setting will be saved, even if you turn off the power.
9-24 Echoplex Digital Pro Plus User’s Manual
Parameter Button
Continued
P R E S S I N G PA R A M E T E R
WITH
MIDI
The Parameter Button can be virtually pressed with a MIDI
command. The MIDI VirtualButton command for the Parameter Button
is located at Source# + 0. The Parameter VirtualButton works exactly
like pressing the Parameter Button on the front panel.
You can also change Parameters on the fly by using Parameter Presets and
MIDI Program Change commands.
R E S E T T I N G PA R A M E T E R S
The Parameters can be reset to the factory defaults. To do this, hold
down the Parameter Button when you turn on the power to the
Echoplex. Once the start up screen displays, you can release it. When the
Echoplex has fully booted up, all of the Parameters will be reset.
See also: Chapter 2
Reference - User Interface 9-25
SmartButtons
Immediate Action
Play Mode
SmartButton control offers a quick way to access several
common functions when using MIDI control.
SmartButtons are only available when using MIDI to control the
Echoplex. They allow you a convenient way to access several
common functions by “double-clicking” the MIDI NoteOn trigger
for a given loop. This can be convenient in performance or in the
studio, as it allows you to switch loops and execute functions with
the same buttons on your MIDI controller.
With this feature you have many functions under control simply
by connecting a MIDI keyboard or other MIDI controller
programmed with the notes from 84 to 99.
DOUBLE-CLICK COPYING
When you are triggering loops with MIDI NoteOn messages and
SwitchQuant is on, repeating (double-clicking) the same note
during the quantizing period will do a LoopCopy from the current
loop into the triggered loop. This is similar to using NextMultiply, but is much quicker and simpler to use from a
keyboard.
DOUBLE-CLICK RECORD
If the current loop is in reset, and you double-click the NoteOn
trigger for the current loop, the Echoplex will start Record.
DOUBLE-CLICK MULTIPLY
If you have a loop playing and you double-click the NoteOn
trigger for the current loop, you will do a Multiply.
9-26 Echoplex Digital Pro Plus User’s Manual
SmartButtons
Continued
DOUBLE-CLICK STOPRECORD
AND
STOPMULTIPLY
If Record or Multiply is running and you press the same NoteOn
message again, we end the Record or Multiply and do nothing else.
In this way you can start Recording or Multiplying by doubleclicking the NoteOn for the loop, and then end it with another
press of the same NoteOn message.
LONG PRESS RESET
If you do a long-press of the NoteOn trigger for the current loop,
the loop will be Reset. This is not the case when SamplerStyle=Att.
In that case the currently loop is just retriggered and played as
normal for SamplerStyle=Att.
See also: LoopCopy, SwitchQuant, SamplerStyle, LoopTrig, Multiply, Record
Reference - User Interface 9-27
Switches LED
Front Panel
Indicates the Switches Row of the Parameter Matrix is selected;
Indicates Cycle StartPoint during Play Mode.
PA R A M E T E R E D I T I N G M O D E
The Switches LED is illuminated when the Switches Row of the
Parameter Matrix has been selected for editing with the Parameter
Button. The Multiple Display will also show P2 when this row is
selected in the Parameter Editing Mode.
The Switches Row mainly consists of the Parameters related to how the
various Function Buttons operate. These are RecordMode,
OverdubMode, RoundMode, InsertMode, MuteMode, Overflow, and Presets.
P L AY M O D E
During Play Mode the Switches LED is part of the Visual Tempo Guide. It
blinks at each Cycle StartPoint. This is helpful for you to get a visual
indication of the tempo of your loop.
See also: Parameter Button, Multiple Display, Parameter Matrix, Visual Tempo Guide
9-28 Echoplex Digital Pro Plus User’s Manual
Timing LED
Front Panel
Indicates the Timing Row of the Parameter Matrix is selected;
Indicates 8th notes during Play Mode.
PA R A M E T E R E D I T I N G M O D E
The Timing LED is illuminated when the Timing Row of the
Parameter Matrix has been selected for editing with the Parameter
Button. The Multiple Display will also show P1 when this row is
selected in the Parameter Editing Mode.
The Timing Row mainly consists of the Parameters related to Timing and
Synchronization of the Echoplex. These are Loop/Delay, Quantize,
8ths/Cycle, Sync, Threshold, Reverse, and StartPoint.
P L AY M O D E
During Play Mode the Timing LED is part of the Visual Tempo Guide. It
blinks at each Sub-Cycle Point as determined by the 8ths/Cycle parameter
and the Global Clock. Usually this is set to indicate 8th notes, but it can
be set for any rhythmic division of the loop. This is helpful for you to get
a visual indication of the tempo of your loop.
See also: Parameter Button, Multiple Display, Parameter Matrix, Visual Tempo Guide,
8ths/Cycle
Reference - User Interface 9-29
Visual Tempo Guide
Front Panel
Blinking LEDs to indicate Loop Tempo and Synchronization
points.
It is often difficult in looping to feel the length of a loop before there are
any good rhythmic clues recorded into it. This can make it frustrating to
overdub new material that is intended to be in rhythm. To aid in this the
Visual Tempo Guide of the Echoplex user interface is there to help
you find the tempo.
The Visual Tempo Guide makes use of several LEDs on the Echoplex
front panel that are otherwise not used during Play Mode. They work as
follows:
Timing LED
Blinks at each Sub-Cycle Point as determined by the
8ths/Cycle parameter and the Global Clock. Usually
indicates 8th notes.
Switches LED
Blinks at local Cycle StartPoints.
MIDI LED
Blinks with the local Loop StartPoint. (only shown if
multiples established)
Multiple Right Dot
Blinks at the Global MIDI StartPoint ( Beat 1 of the external
clock). Only shown if local loop is not aligned.
Multiple Left Dot
Blinks when a Sync correction happens, as follows:
Loop Display Dot
9-30 Echoplex Digital Pro Plus User’s Manual
bright:
Sync came early, the Echoplex jumps back
almost the whole loop. This means the
external sequencer was a little fast.
faint:
Sync came late, the Echoplex jumps a little.
This means the external sequencer was a little
slow.
AutoUndo executed (loop was not changed in last pass)
Visual Tempo Guide
Continued
The following figure shows the location of each Visual Tempo Guide LED.
Number of the
current loop
Time display
Flashes to indicate
Loop StartPoint
Current Cycle
(from Multiply or Insert)
Flashes to indicate
Cycle StartPoint
Loops
MIDI
•
•
LOOP
LOOPTIME
Flashes to indicate
AutoUndo
FIGURE 4.X:
•
•
MULTIPLE
Indicates Sync
Correction
Switches
Timing
Flashes to indicate
Global MIDI StartPoint
Flashes to indicate
Sub-Cycle (8th note)
The Visual Tempo Guide display
EXTERNAL CLOCKS
When Sync=In and an external clock source is present, the Tempo LEDs
will initially reflect the StartPoints defined by the external clock.
If the loop is shifted out of alignment with the external clock, the
Tempo LEDs will then reflect our internal loop StartPoints. The Global
MIDI StartPoint LED (lower right dot on the Multiple display) will then
blink in time with the StartPoints of the external clock. This gives a visual
indication of how the loops are aligned. When a ReAlign is done to bring
them back together, the Global MIDI StartPoint LED stops blinking.
Reference - User Interface 9-31
Visual Tempo Guide
Continued
GLOBAL CLOCKS
SWITCHING
AND
LOOP
The Timing LED for 8th note Sub-Cycles counts on 8th notes
determined by the global clock. The Switches LED for Cycles, on the
other hand, blinks at the local StartPoints based on the local clock.
If multiple loops are used and the loops are switched Unquantized, it is
possible to see these move out of alignment with each other. This can be
a little disconcerting, but it can also be helpful as a reference of where
the Global Clock is in relation to your Local Cycle StartPoints as you switch
loops.
TEMPO LIMITS
If the tempo is above 400 BPM, the 8th note Sub-Cycle LED stops
blinking since it becomes useless as a visual indicator at such speeds.
This is also the point where MIDI clock is no longer sent for similar
reasons. You can still make loops as short as you like.
V I S U A L B E AT M AT C H I N G I N D I C AT O R
The Multiple Left Dot LED showing the Sync correction can be useful
for tuning the tempo on a sequencer to match with an existing loop on
the Echoplex. By watching the frequency and intensity of this LED you
can quickly speed or slow the tempo of the sequencer to match the loop
in the Echoplex, at which point the dot stops blinking. This technique
9-32 Echoplex Digital Pro Plus User’s Manual
Visual Tempo Guide
Continued
allows you to start a loop without the sequencer, then start the
sequencer and tune its tempo to match.
Reference - User Interface 9-33
9-34 Echoplex Digital Pro Plus User’s Manual
C
H
A
P
T
E
R
1 0
MIDI Sample
Dump
Reference - MIDI Sample Dump 10-1
Introduction
MIDI Sample Dump
The Echoplex uses the MIDI Sample Dump Standard to transfer the loop
you recorded to another Echoplex, sampler, or even your computer.
MIDI Sample Dump is an extension of the MIDI standard which has been
used by many samplers in the past 20 years. It uses SysEx to transmit the
audio data. Unfortunately, not all samplers implement sample dump
exactly the same way. To give you the possibility of transferring samples
between a wide range of samplers we have provided a flexible variety of
of settings for the MIDI sample dump parameters in the Echoplex.
The following sections give a short introduction into some details of the
MIDI Sample Dump that may help you.
GENERAL SAMPLE DUMP INFO
Connections
The minimal MIDI patch is to connect the MIDI Out Port of the
sending unit to the MIDI In Port of the receiving unit.
MIDI In
MIDI Out
Unit A (sender)
MIDI In
Unit B (receiver)
Figure x.1: MIDI Dump open loop connection
10-2 Echoplex Digital Pro Plus User’s Manual
MIDI Out
Introduction
MIDI Sample Dump
Continued
Unit A sends a header first, containing general information about the
sample to be sent. Then it divides the sound data into packets and
sends one packet at a time.
Unit A (sender)
Unit B (receiver)
Dump Header
Data #1
Data #2
...
Data #8265
Figure x.2: MIDI dump transfer with open loop connection
MIDI In
MIDI Out
Unit A (sender)
MIDI In
MIDI Out
Unit B (receiver)
Figure x.3: MIDI dump closed loop connection
This allows unit B to acknowledge each package as it arrives. This is
faster and safer than the open loop method.
Reference - MIDI Sample Dump 10-3
Introduction
MIDI Sample Dump
Continued
Unit A (sender)
Unit B (receiver)
Dump Header
ACK
Data #1
ACK
Data #2
...
ACK
...
Data #8265
ACK
Figure x.4: MIDI Dump transfer with closed loop
This gives the receiving unit B an opportunity to check each incoming
packet and ask for a retransmit if necessary.
Unit A (sender)
Unit B (receiver)
Dump Header
ACK
Data #1
ACK
Data #2
NAK!
Data #2
...
ACK
...
Data #8265
ACK
Figure x.5: MIDI Dump closed loop allows packet checking
10-4 Echoplex Digital Pro Plus User’s Manual
Introduction
MIDI Sample Dump
Continued
Who star ts sending?
The previous section showed the case where the sample dump was
initiated from the sending unit A. This is not always possible or easy.
Some samplers don’t even have a sample dump button or menu
command. They completely rely on the other unit to initiate the
transfer. This means the receiving unit has to send a sample dump
request first. The sending unit then reacts by sending the desired dump.
Unit A (sender)
Unit B (receiver)
Request
Dump Header
ACK
Data #1
ACK
Data #2
...
ACK
...
Data #8265
ACK
Figure x.5: MIDI Dump request initiates dump
Of course, this works only with a closed loop connection.
Sample Number
The Sample Dump header and request contain several pieces of
information about the sample. The most important one for the user is
the sample number.
Reference - MIDI Sample Dump 10-5
Introduction
MIDI Sample Dump
Continued
A sampler can store many samples. These samples are usually indexed.
In a MIDI sample dump the sender tells the receiving unit what sample
number it is sending. Correspondingly the receiving unit can request a
specific sample number. The sample number can range from 0 to 16383.
Usually not all numbers are accessible to the user.
Unfortunately some samplers start numbering the samples with 0 and
others with 1, while still others show you a 1 but actually send them as
sample number 0! You have to find out what numbering system your
sampler uses. If you can’t find it in your manual you have to try it out.
Send a sample as #10 and see whether it arrives as #9, #10 or #11.
See the following sections for information on how sample numbers are
used in the Echoplex.
Device ID
The device ID of Sysex messages (sample dumps are Sysex messages)
are used to make sure that the message is received only by the device
that you wanted to send it to.
Two units have to have the same ID in order to talk with each other.
The name “Device ID” is somewhat misleading. “Sysex channel” would
be more appropriate. Think of it as the equivalent of the MIDI channel.
But be careful, MIDI channel and Device ID don’t have to be the same
value!
It is possible to have the MIDI notes go through channel 1 to one unit
and the MIDI sysex through device ID 114 to another unit.
Device IDs can be in the range from 0 to 127.
A device ID of 127 has a special meaning. If you set the receiving unit
to 127, all device IDs are accepted. If you set the sending unit to 127, all
receiving units should therefore accept your SYSEX data. This is called
broadcasting.
See the following sections for information on how device IDs are used in
the Echoplex.
10-6 Echoplex Digital Pro Plus User’s Manual
MIDI Sample Dump
Introduction
Continued
ECHOPLEX SAMPLE DUMP
Connections
The Echoplex allows you to transfer the sound data through open loop
connections (one cable) and closed loop connections (two cables). If
you have a choice always use closed loops. The transmission will be
approximately twice as fast.
Who star ts sending?
The Echoplex can either initiate a sample dump itself (with the Dump
button in parameter mode P3) or respond to a sample dump request.
Responding to a request is only possible while in Upload-mode. Enter
this state by pressing the Load button in parameter mode P3. During
normal operation all Sample Dump messages are ignored.
Loop Numbers and Sample Numbers
Many samplers have sample numbers up to 999. Since the Echoplex
has a maximum of 16 loops we have a problem in how to match an
incoming sample (e.g. #254) with a loop number.
The Echoplex gives you the possibility to set a current loop number and
a “current” sample number as special Sample Dump parameters. While
in Upload-mode press Record to edit the loop number and Overdub to
edit the sample number.
Reference - MIDI Sample Dump 10-7
Introduction
MIDI Sample Dump
Continued
When you send the current loop it is always sent with the sample
number you defined on the Echoplex.
Receiving a sample number in a header or a request is somewhat more
complex. To give a maximum of flexibility the following scheme is
applied to incoming sample numbers:
Sample Number
Accessed Loop (sent or received)
0
access current loop number.
1-16
access corresponding loop number 1-16.
(if you have that many loops)
17-16383
access current loop number.
(>999 are clipped to 999)
The current sample number is then set to this value. Sample numbers
on the Echoplex range from 0 to 999.
Device ID
The device ID of the Echoplex can be changed while in Upload-mode.
Press Multiply to see the device ID. Press it again to start incrementing
the value. The longer you press, the faster the value will be
incremented. Broadcasting (device id=127) is implemented.
10-8 Echoplex Digital Pro Plus User’s Manual
Sample Dump User Guide
MIDI Sample Dump
SENDING
A
DUMP (DUMP BUTTON)
The Dump button in the MIDI (P3) parameters of the Echoplex is used
to send a dump to another device.
■
You see a 'd' blinking, indicating that data is dumped.
■
Pressing the Parameter button while dumping aborts the
transmission.
■
The device ID is 1.
■
The sample number is the same as the loop number.
SENDING & RECEIVING (UPLOAD
BUTTON)
Press Load to enter the Upload-Mode.
■
You see a '-' blinking, indicating that the Echoplex waits for
specific commands, which can come from the buttons or via
MIDI.
■
The Upload-mode allows much more than just uploading.
You can also send a dump from it or change sample dump
parameters.
Reference - MIDI Sample Dump 10-9
Sample Dump User Guide
MIDI Sample Dump
Continued
Button commands in Upload-mode
PARAMETER
Exits the Upload-mode. You will see the P3 display again. If you received
a loop it may be stored in a loop other than the one that you are hearing
now. Leave the parameter mode and select the loop with the Next
button.
RECORD
Changes current loop number. The default is the loop you where
listening to. Maximum range from 0 to 16 (depends on the number of
loops). Ln is shown in the green display.
MULTIPLY
Changes the device ID. The default is 1. Range from 0 to 127. 127 is
used to broadcast to all receivers/accept all senders. Id is shown in the
green display.
OVERDUB
Changes current sample number. The default is the current loop
number. Range from 0 to 999. Sn is shown in the green display
INSERT
Reserved.
MUTE
Reserved.
10-10 Echoplex Digital Pro Plus User’s Manual
Sample Dump User Guide
MIDI Sample Dump
Continued
UNDO
(=DUMP)
Send the current loop. The receiving unit will store it as the current
sample number.
NEXT (=UPLOAD)
Request a dump from the other unit. The current sample number will be
sent by the other unit and stored in the current loop. This works only in
a closed loop (2 MIDI cables).
The three value buttons (Record, Overdub, Multiply) work the same way.
The first press shows the current value. Subsequent presses increment
the value. If you press the button for a long time it starts repeating. The
repeat rate speeds up the longer you press. The maximum speed is
reached after approximately 100 increments. When the maximum value
is reached, the value is set to minimum (usually 0 or 1) and the repeat
rate slows down to give you the possibility to release the button.
Commands received via MIDI
While in Upload-mode the following MIDI Sysex commands are
accepted:
SAMPLEHEADER (SAMPLENUMBER)
Samples with the Sample Numbers 1-16 are stored in the corresponding
loop. All other Sample Numbers are ignored and the sample is stored in
the current loop number.
Reference - MIDI Sample Dump 10-11
Sample Dump User Guide
MIDI Sample Dump
Continued
SAMPLEREQUEST (SAMPLENUMBER)
If Sample Numbers 1-16 are requested the corresponding loop is sent.
All other Sample Numbers are ignored and the current loop is sent as
the requested Sample Number.
Examples
The Echoplex is capable of starting the transmission and of passively
waiting until the other unit takes control. The following examples give a
few examples for transmitting loops from one Echoplex to another one.
ECHOPLEX A -> ECHOPLEX B
(OPEN
LOOP)
■ AB
Connect MIDI-Out of Echoplex A with MIDI-In of Echoplex B.
■ AB
Press Parameters on both units, until they are both in the MIDI
parameter mode.
(A shows 'P3')
(B shows 'P3')
■B
Press Load on Echoplex B.
(goes into Upload-Mode showing '-')
■A
Press Dump on Echoplex A.
(A starts dumping showing 'd')
(B starts uploading showing 'U')
■
Wait until the entire loop is sent
(A shows 'P3' again)
(B shows '-' again)
■B
Press Parameters on B to exit Upload-Mode
(B shows 'P3' again)
■
Echoplex B has now uploaded the loop.
10-12 Echoplex Digital Pro Plus User’s Manual
MIDI Sample Dump
Sample Dump User Guide
Continued
ECHOPLEX A => ECHOPLEX B
(CLOSED
LOOP,
A
INITIATES)
■ AB
Set MIDI ControlSource to “Off” to avoid MIDI loops
Connect MIDI-Out of Echoplex A with MIDI-In of Echoplex B.
Connect MIDI-Out of Echoplex B with MIDI-In of Echoplex A.
■ AB
Press Parameters on both units, until they are both in the
MIDI parameter mode.
(A shows 'P3')
(B shows 'P3')
■B
Press Load on Echoplex B.
(goes into Upload-Mode showing '-')
■A
Press Dump on Echoplex A.
(A starts dumping showing 'd')
(B starts uploading showing 'U')
■
Wait until the entire loop is sent
(A shows 'P3' again)
(B shows '-' again)
■B
Press Parameters on B to exit Upload-Mode
(B shows 'P3' again)
■
Echoplex B has now uploaded the loop.
ECHOPLEX A => ECHOPLEX B
(CLOSED
LOOP,
■B
Press Load on Echoplex B.
(goes into Upload-Mode showing '-')
■A
Press Load on Echoplex A.
(goes into Upload-Mode showing '-')
■B
Press Load again on Echoplex B.
(B sends a SampleRequest to A)
(A starts dumping showing 'd')
(B starts uploading showing 'U')
B
INITIATES)
Reference - MIDI Sample Dump 10-13
Sample Dump User Guide
MIDI Sample Dump
Continued
■
Wait until the entire loop is sent
(A shows '-' again)
(B shows '-' again)
■A
Press Parameters on A to exit Upload-Mode
(A shows 'P3' again)
■B
Press Parameters on B to exit Upload-Mode
(B shows 'P3' again)
■
Echoplex B has now uploaded the loop.
Not all samplers or computer programs are capable of all of these
possible protocols. Some implement only the open loop protocol, some
require a closed loop and don't operate on an open loop. It is even
possible that your sampler has no Dump button, but can still handle
MIDI Sample Dump when the Echoplex is sending the appropriate
commands via MIDI.
How long will it take?
Your Sample Dump will probably take a long time. MIDI is slow and
samples used in looping tend to be big. The Sample Dump Standard
adds a lot of overhead to that to make it even slower. The exact time
depends on how long the sample is and whether the receiving unit
acknowledges the data packages or not (the Echoplex does).
Here are a few estimates for the open loop (no acknowledges):
Sample Length
0.1 sec
1.0 sec
10.0 sec
100.0 sec
10-14 Echoplex Digital Pro Plus User’s Manual
Transmission Time
50 sec
8 min 20 sec
1 hour 24 min
13 hours 54 min
MIDI Sample Dump
Sample Dump User Guide
Continued
And here the closed loop (with acknowledges):
Sample Length
0.1 sec
1.0 sec
10.0 sec
100.0 sec
Transmission Time
5.5 sec
55 sec
9 min 10 sec
1 hour 32 min
Reference - MIDI Sample Dump 10-15
Other Device Implementations
MIDI Sample Dump
Here are some known details about other devices implementing MIDI
Sample Dump and how they interact with the Echoplex. This is not a
complete list. If the device you use is not on here, consult that device’s
manual or the manufacturer for more information on their Sample
Dump implementation.
ECHOPLEX
Sending MIDI Sample Dumps from one Echoplex to another one is
simple.
If you are connecting two Echoplexes make sure they don't use the
same MIDI channel and/or the MIDI parameter "ControlSource" is
switched off on the sending machines (both machines in a closed loop).
This is especially necessary now with the MIDI pipe feature when using
closed loop, since any MIDI command received is immediately sent out
again. If you forget this, the two machines will send every button you
press back and forth to each other in an infinite loop.
Unhook them and do one of the following:
■
Choose another MIDI channel on one of them.
■
Switch the MIDI parameter "ControlSource" on the sending
machine to off. This is necessary for closed loop, and both
must have ControlSource off.
■
Select another MIDI parameter "Source #" for one of them,
so they send on another octave.
SOUNDDESIGNER ®
SoundDesigner subtracts 2 from the device ID number.
10-16 Echoplex Digital Pro Plus User’s Manual
MIDI Sample Dump
Other Device Implementations
Continued
SOUNDDESIGNER -> ECHOPLEX
SoundDesigner and the Echoplex do not agree on how to calculate the
checksum. The Echoplex sends a NAK (=Not Acknowledge) after every
data-package. Luckily SoundDesigner ignores all handshake messages
and the Echoplex stores it anyway so you will end up with the correct
sample in your Echoplex.
ALCHEMY ™
Alchemy™ needs to initiate sample dumps in both directions.
Alchemy™ actually sends the sample number off by one. When you ask
for sample #5 it actually requests #4 from the Echoplex.
ECHOPLEX -> ALCHEMY™
Go into Upload-mode on the Echoplex.
Send a request from Alchemy (menu: Network: Get Sound).
ALCHEMY™ -> ECHOPLEX
Go into Upload-mode on the Echoplex.
Start the dump from Alchemy™ (menu: Network: Put Sound)
Make sure the sample length actually has the number of samples that
you want to transmit. Sometimes Alchemy stores short sounds in huge
files filling the end with zeroes.
Reference - MIDI Sample Dump 10-17
Other Device Implementations
MIDI Sample Dump
Continued
K2000 ™
The K2000™ reserves the samples 1-199 for ROM samples which can
not be dumped or overwritten.
It automatically adds 200 to incoming samples with sample numbers
<200.
Sample number 0 writes an incoming sample to the first free place.
The K2000™ always adds 1 to the sample number.
You have to set the device ID (called Sysex ID) to the same as on the
Echoplex. Setting it to 127 doesn’t do the standard behavior (accepting
all IDs), so make sure they are equal on both units.
ECHOPLEX -> K2000™
Start sending from the Echoplex at any time. Make sure the sample you
write to is free.
You need to go into the Edit Keymap to see your new sample. It is
probably best if you add a new Keymap with your new sample.
K2000 ™-> ECHOPLEX
Go into Upload-mode on the Echoplex.
Select the right sample number and send a Request (Undo-button).
You can also start the dump from the K2000™. The function is well
hidden in the sample editor. Press <Dump>. The Echoplex will ignore
10-18 Echoplex Digital Pro Plus User’s Manual
MIDI Sample Dump
Other Device Implementations
Continued
the sample number you send and store it in the loop number you
defined in the Echoplex Upload-mode (Record-button).
E-MU
E64™
The device ID of the E-MU™ is set to 127 and cannot be changed. It
therefore will always accept all samples, independent of your Device ID.
ECHOPLEX -> E-MU E64™
The E-MU™ accepts dumps at any time. Just start sending from the
Echoplex.
E-MU E64™ -> ECHOPLEX
Send a Request from the Echoplex at any time. (faster)
or
Start the dump from the E-MU. This is very slow!
Reference - MIDI Sample Dump 10-19
Sample Dump Trouble Shooting
MIDI Sample Dump
MIDI Sample Dump is a standard. However, not all samplers implement
this standard the same way. This can lead to problems. The Echoplex
displays information during the Sample Dump process that can help
you understand what is going on.
S A M P L E D U M P D I S P L AY
Display for received messages
H
header received
I
header received but ignored (e.g. too long)
L
data received (load data packet)
?
wrong packet received (e.g. Sysex for other machines)
A
ACK received
N
NAK received
W
WAIT received
C
CANCEL received
J
junk received (e.g. notes, ignored)
-
nothing received
Display for sent messages
d
data sent (dump data packet)
10-20 Echoplex Digital Pro Plus User’s Manual
MIDI Sample Dump
Sample Dump Trouble Shooting
Continued
r
dump request sent
c
Cancel sent
H
Header sent
Error values
In case of an error (display 'E') the red display shows an error number.
These mean the following:
1
overrun (data was sent too fast)
2
buffer overflow (too much data too fast)
3
timeout (aborted transmission in the midst of a packet)
4
received value out of range
5
unexpected value (expected a specific value but received
something else)
6
checksum error
Reference - MIDI Sample Dump 10-21
10-22 Echoplex Digital Pro Plus User’s Manual
C
H
A
P
T
E
R
1 1
MIDI SysEx
Reference - MIDI SysEx 11-1
MIDI SysEx Detailed Reference
MIDI SysEx
PROTOCOL FOR ECHOPLEX PARAMETER DUMP
=====================================
1) GENERIC ECHOPLEX SYSEX FORMAT
-------------------------------SYSEX AURISIS_ID ECHOPLEX_ID device_id version command {data} [checksum]
SYSEXEND
SYSEX
AURISIS_ID
ECHOPLEX_ID
device_id
version
command
{data}
SYSEXEND
= 240 = $F0
= 00 01 48
= $00 $01 $30
= 11
= $0B
= value [0..127] set in the MIDI Upload mode. 0 is off (no
communication)
= format of this message (for backward compatibility)
= see below
= depends on version and command
= 247 = $F7
2) VERSION
---------All Echoplex units are backwards compatible.
The version numbers start with 1 (=LD4.0 revision 95/96)
If data is requested in a known version, the answer will be in this format.
Version 0 (=zero) is interpreted as the current version of this unit.
Unknown version numbers are ignored (error message ???)
The format of the data bytes of the following commands depends on this
version number.
3) COMMANDS
----------3.1) COMMANDS VERSION 1
----------------------Overview:
F0
00 01 30 0B dev vers cmd {data} F7
11-2 Echoplex Digital Pro Plus User’s Manual
MIDI SysEx
MIDI SysEx Detailed Reference
Continued
INFO_REQUEST
F0 00 01 30 0B dev vers 0 F7
240 00 01 48 11 dev vers 0 247
INFO_DATA
F0 00 01 30 0B dev vers 1 vers (mem_1 mem_2 mem_3) F7
240 00 01 48 11 dev vers 1 vers (mem_1 mem_2 mem_3) 247
GLOBAL_PARAM_REQUEST
F0 00 01 30 0B dev vers 10 from length pset F7
240 00 01 48 11 dev vers 16 from length pset 247
GLOBAL_PARAM_DATA
F0 00 01 30 0B dev vers 11 from length pset val_1 .. val_n F7
240 00 01 48 11 dev vers 17 from length pset val_1 .. val_n 247
LOCAL_PARAM_REQUEST
F0 00 01 30 0B dev vers 12 from length pset F7
240 00 01 48 11 dev vers 18 from length pset 247
LOCAL_PARAM_DATA
F0 00 01 30 0B dev vers 13 from length pset val_1 .. val_n F7
240 00 01 48 11 dev vers 19 from length pset val_1 .. val_n 247
ALL_PARAM_REQUEST
F0 00 01 30 0B dev vers 14 F7
240 00 01 48 11 dev vers 20 247
GLOBAL_PARAM_RESET
F0 00 01 30 0B dev vers 20 pset F7
240 00 01 48 11 dev vers 32 pset 247
LOCAL_PARAM_RESET
F0 00 01 30 0B dev vers 21 pset F7
240 00 01 48 11 dev vers 33 pset 247
3.1.1) COMMANDS: INFORMATION GROUP
---------------------------------3.1.1.1) COMMAND: INFO REQUEST
------------------------------
= $0
= 0
The info request contains no data bytes.
The header contains already all necessary information.
Reference - MIDI SysEx 11-3
MIDI SysEx Detailed Reference
Continued
Returns an INFO command.
F0 00 01 30 0B dev vers 0 F7
240 00 01 48 11 dev vers 0 247
3.1.1.1.1) COMMAND: INFO
---------------------Essentially ignored.
= $1
= 1
F0 00 01 30 0B dev vers 01 vers (mem_1 mem_2 mem_3) F7
240 00 01 48 11 dev vers 01 vers (mem_1 mem_2 mem_3) 247
_____________________________________________________________
|byte# | bits | description
|_______|______|_____________________________________________
|0
|
| vers | version number of this unit
|1-3
| 21
| mem
| soundmemory size
|_______|______|_____________________________________________
The version number of the sending unit may be used in further
communications.
3.1.2) COMMANDS: PARAMETER GROUP
-------------------------------The global parameters are accessed by indexes.
The indexes in version 1 are:
0 VGPrmPrevParamSet
1 VGPrmParamSet
2 VGPrmMIDIChannel
3 VGPrmMIDIReceiveCommand
4 VGPrmMIDIFirstKey
5 VGPrmMIDIVolCtrlr
6 VGPrmMIDIFBCtrlr
7 VGPrmMIDIFirstLoop
8 VGPrmMIDIDevID
9 VGPrmMIDISampleNumHi
10 VGPrmMIDISampleNumLo
The local parameters are accessed by indexes.
The indexes in version 1 are:
11-4 Echoplex Digital Pro Plus User’s Manual
MIDI SysEx
MIDI SysEx
MIDI SysEx Detailed Reference
Continued
1
2
3
4
5
6
7
8
9
10
11
12
13
14
15
16
17
18
Loop/Delay
Timing Quantize
8th/Cycle
SyncMode
TrigThreshold
RecordMode
OverdubMode
RoundMode
InsertMode
MuteMode
Overflow
MoreLoops
AutoRecord
Next LoopCopy
SwitchQuant
Velocity
SamplerStyle
Tempo
(4
(2
(7
(3
(4
(2
(1
(1
(4
(1
(1
(4
(1
(2
(3
(1
(2
(7
bits)
bits)
bit)
bit)
bits)
bit)
bit)
bit)
bits)
bit)
bit)
bits)
bit)
bits)
bits)
bit)
bits)
bits)
(real NLoops-1)
The local parameter data values in version 1 are as follows:
Loop/Delay (4 bits):
$00
LoopMode
$01
DelayMode
$02
ExpertMode
$03
StutterMode
$04
OutMode
$05
InputMode
$06
ReplaceMode
$07
FlipMode
LOP
DEL
EXP
Stu
Out
In
rPL
FLI
Time Quantize (2 bits):
$00
Off
$01
Cycle
$02
8th Notes
$03
Loop
OFF
CYC
8th
LOP
8ths/Cycle (7 bits):
$00
8ths/Cycle
$01
"
$02
"
$03
"
$04
"
$05
"
=
=
=
=
=
=
8
4
2
6
12
16
Reference - MIDI SysEx 11-5
MIDI SysEx Detailed Reference
Continued
$06
$07
$08
$09
$0A
$0B
$0C
. . .
$69
SyncMode (3 bits):
$00
$01
$02
$03
"
"
"
"
"
"
"
"
Off
OutUserStartSong
SyncIn
SyncOut
=
=
=
=
=
=
=
.
=
32
64
128
256
1
2
3
. .
96
Off
Ous
In
Out
TrigThreshold (4 bits):
xxxx
value 0-8
RecordMode (2 bits):
$00
Toggle
$01
Sustain
$02
Safe
$03
NA
toG
SUS
SAF
NA
OverdubMode (1 bit):
$00
Toggle
$01
Sustain
toG
SUS
RoundMode (1 bit):
$00
$01
OFF
RND
Off
Round
InsertMode (4 bits):
$00
InsertOnly
$01
Rehearse
$02
Replace
$03
Substitute
$04
Reverse
$05
Half Speed
$06
Sustain
INS
rhr
rPL
Sub
rEV
h.SP
SUS
MuteMode (1 bit):
$00
$01
Cnt
STA
Continuous
Start
11-6 Echoplex Digital Pro Plus User’s Manual
MIDI SysEx
MIDI SysEx Detailed Reference
MIDI SysEx
Continued
Overflow (1 bit):
$00
$01
Play
Stop
MoreLoops (4 bits):
$00
number of loops
$01
number of loops
. . .
. . .
$0F
number of loops
PLY
StP
=1
=2
=16
AutoRecord (1 bit):
$00
Off
$01
On
OFF
On
Next LoopCopy (2 bits):
$00
Off
$01
Timing
$02
Sound
$03
NA
OFF
ti
Snd
NA
SwitchQuant (3 bits):
$00
Off
$01
Confirm
$02
CycleQuantize
$03
ConfirmCycle
$04
LoopQuant
$05
ConfirmLoop
OFF
CnF
CYC
CCY
LOP
CLP
Velocity (1 bit):
$00
$01
OFF
On
Off
On
SamplerStyle (2 bits):
00
Run
01
Once
10
Start
11
Attack
run
One
StA
Att
Tempo (7 bits):
$00
$01
$02
$03
$04
$05
off (tempo select off)
26
28
30
32
34
value of tempo
"
"
"
"
"
Reference - MIDI SysEx 11-7
MIDI SysEx Detailed Reference
Continued
. . .
$7f
"
. . .
278
3.1.2.1) COMMAND: GLOBAL_PARAM_REQUEST
= $10 = 16
---------------------------------------------------Reads a range of global param values and returns them
as a GLOBAL_PARAM_DATA command.
F0 00 01 30 0B dev vers 10 from length pset F7
240 00 01 48 11 dev vers 16 from length pset 247
_____________________________________________________________
|byte# | bits | description
|_______|______|______________________________________________
|0
| 7
| from
| param index range start
|1
| 7
| length | param index range end
|2
| 7
| pset
| param set (for future use, so far 127)
|_______|______|_____________________________________________
3.1.2.2) COMMAND: GLOBAL_PARAM_DATA
= $11 = 17
-------------------------------------------------Sets a range of global param values to new values.
F0 00 01 30 0B dev vers 11 from length pset val_1 .. val_n F7
240 00 01 48 11 dev vers 17 from length pset val_1 .. val_n 247
_____________________________________________________________
|byte# | bits | description
|_______|______|_____________________________________________
|0
| 7
| from
| param index range start
|1
| 7
| length | param index range end
|2
| 7
| pset
| param set (for future use, so far 127)
|3..n
| 7
| value | param value(s)
|_______|______|_____________________________________________
If there are less values than defined by 'from' and 'length',
then these parameters will be reset to their default value.
3.1.2.3) COMMAND: LOCAL_PARAM_REQUEST
11-8 Echoplex Digital Pro Plus User’s Manual
= $12
= 18
MIDI SysEx
MIDI SysEx
MIDI SysEx Detailed Reference
Continued
---------------------------------------------------Reads a range of local param values and returns them
as a LOCAL_PARAM_DATA command.
F0 00 01 30 0B dev vers 12 from length pset F7
240 00 01 48 11 dev vers 18 from length pset 247
_____________________________________________________________
|byte# | bits | description
|_______|______|_____________________________________________
|0
| 7
| from
| param index range start
|1
| 7
| length | param index range end
|2
| 7
| pset
| param set number. 127 means the current
|
|
|
| preset selected in the Echoplex
|_______|______|________|____________________________________
3.1.2.4) COMMAND: LOCAL_PARAM_DATA
= $13 = 19
---------------------------------------------------Sets a range of local param values to new values.
F0 00 01 30 0B dev vers 13 from length pset val_1 .. val_n F7
240 00 01 48 11 dev vers 19 from length pset val_1 .. val_n 247
_____________________________________________________________
|byte# | bits | description
|_______|______|_____________________________________________
|0
| 7
| from
| param index range start
|1
| 7
| length | param index range end
|2
| 7
| pset
| param set number. 127 means the pset
|
|
|
| actually selected in the Echoplex
|3..n
| 7
| value | param value(s)
|_______|______|_____________________________________________
If there are less values than defined by 'from' and 'length',
then these parameters will be ignored.
3.1.2.5) COMMAND: ALL_PARAM_REQUEST
= $14
= 20
---------------------------------------------------Reads a range of local param values and returns them
as a sequence of one GLOBAL_PARAM_DATA command and
as many LOCAL_PARAM_DATA commands as there are ParamSets.
Reference - MIDI SysEx 11-9
MIDI SysEx Detailed Reference
Continued
F0 00 01 30 0B dev vers 14 F7
240 00 01 48 11 dev vers 20 247
3.1.3) COMMANDS: RESET GROUP (not implemented in version 1)
---------------------------------------------------Resets the global or the current local set.
3.1.3.1) COMMAND: GLOBAL_PARAM_RESET
-------------------------------
= $20
= 32
Resets the global parameters to the factory defaults.
F0 00 01 30 0B dev vers 20 pset F7
240 00 01 48 11 dev vers 32 pset 247
3.1.3.2) COMMAND: LOCAL_PARAM_RESET
-------------------------------
= $21
= 33
Resets the current local parameter set to the factory defaults.
F0 00 01 30 0B dev vers 21 pset F7
240 00 01 48 11 dev vers 33 pset 247
4) CHECKSUM CALCULATION
----------------------THE CHECKSUM IS REMOVED!
IT MAKES IT TOO HARD TO USE MIDI SOFTWARE LIKE 'MAX'.
MAYBE AN OPTIONAL SYSTEM IN THE FUTURE.
The checksum calculation is the same as in the MIDI Sample Dump.
All bytes AFTER the SYSEX (=$F0) are XORed. This checksum is then
transmitted as the
last data byte before SYSEXEND (=$F7).
5) COMMUNICATION EXAMPLES
-------------------------
11-10 Echoplex Digital Pro Plus User’s Manual
MIDI SysEx
MIDI SysEx
MIDI SysEx Detailed Reference
Continued
UNIT A (version 1)
UNIT B (version 2)
InfoRequest( version 1)
-------->
<--------
LocalData( version 1, 4, 4)
-------->
// stores l_param[4]
LocalData( version 1, 4, 127)
-------->
// stores l_params[4..last]
Info( version 2) // in format
vers 1
LocalRequest( version 1, 0, 127) -------->
/* stores l_params[4..last] */
<--------
LocalParam( version 1, 0, last)
LocalRequest( version 0, 0, 127) -------->
/* error: unknown version */
<--------
LocalData( version 2, 0, last)
LocalParam( version 1, 0, 10)
<--------------->
<-------LocalData( version 1, 0, 10) /*or error ???*/
LocalRequest( version 1, 0, 10)
// stores l_params[0..10]
LocalRequest( version 2, 0, 10)
-------->
// stores params[0..10]
Similar behavior for global parameters.
Please note the special global variable (VGParamSet at index 0)
which switches between the local sets.
Note: This example fully uses the info commands to find out the
version of the different units.
In most cases this will not be necessary and the two units will
simply assume to use the same protocol version.
Reference - MIDI SysEx 11-11
11-12 Echoplex Digital Pro Plus User’s Manual