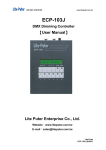
Download DMX Tester 【User Manual】
Transcript
ISO 9001 CERTIFIED
www.liteputer.com.tw
CX-1C
DMX Tester
【User Manual】
Lite-Puter Enterprise Co., Ltd.
Website: www.liteputer.com.tw
E-mail:[email protected]
Lite-Puter
CX-1C [EUM-A]
ISO 9001 CERTIFIED
www.liteputer.com.tw
CONTENTS
Chapter 1 Introduction
1-1 Feature -----------------------------------------------------------------------------------------------2
1-2 Specification ---------------------------------------------------------------------------------------2
1-3 Panel Introduction -------------------------------------------------------------------------------3
Chapter 2 Operation Description
2-1
2-2
2-3
2-4
2-5
2-6
2-7
2-8
2-9
2-10
DMX Out ---------------------------------------------------------------------------------------------4
Auto Fade -------------------------------------------------------------------------------------------6
DMX In -----------------------------------------------------------------------------------------------8
Cable Test Mode ----------------------------------------------------------------------------------9
Code Mode ----------------------------------------------------------------------------------------11
LCD Backlight ------------------------------------------------------------------------------------12
Battery Display ----------------------------------------------------------------------------------13
DIN Protocol --------------------------------------------------------------------------------------14
DOUT Protocol -----------------------------------------------------------------------------------15
Synchronal Signal Output------------------------------------------------------------------ 17
1
Lite-Puter
CX-1C [EUM-A]
ISO 9001 CERTIFIED
Chapter 1
1-1
www.liteputer.com.tw
Introduction
CX-1C Feature
Synchronic DMX signal output for testing.
DMX input/ output level display and DMX waveform shown on an oscilloscope.
LCD readout in Decimal, Percent or Hex.
Light, handy and portable.
LCD backlight power saving mode.
Rechargeable lithium battery.
Operating without the AC adaptor.
Battery charge time: 2 hours
Continuous operating time: 6 hours
1-2
Specification
Power supply:DC 12V/1A
DMX Input:DMX512
DMX Output Channel:512 channels
DMX Signal Connector:XLR 5PIN (×2)、PHONE JACK RJ11 (×2)
Dimension:97(W)*135(H)*37(D)mm
Weight:750g
2
Lite-Puter
CX-1C [EUM-A]
ISO 9001 CERTIFIED
1-3
www.liteputer.com.tw
Panel Introduction
1
2
6
3
4
5
7
9
8
10
1
Power Switch
6
Hex/ Decimal/ Percent Button
2
LCD Display
7
DMX Signal Output: XLR 5 PIN
3
LEVEL UP Key
8
DMX Signal Input: XLR 5 PIN
4
LEVEL DOWN Key
9
DMX Signal Input/ Output
5
Function Keys
10
Power Supply Input: DC12V 1A
3
Lite-Puter
CX-1C [EUM-A]
ISO 9001 CERTIFIED
Chapter 2
2-1
www.liteputer.com.tw
Operation Description
DMX OUT
1.Setting Signal channel or a range of consecutive channels at the same DMX level.
STEP-1Press 【DMX OUT】, the LCD will display:
DMX Send Frequency
DMX Level
DMX Channel
STEP-2 Press 【►】and【◄】keys to select channel.
STEP-3 To set a range of consecutive channels at the same level, use the 【-】key.
For example, to set channel 1 through 5, press 【-】 and the LCD will display:
Press 【►】key until LCD displays:
Press【►】and【◄】keys to set the DMX channel.
You can also hold【►】and press【◄】key or hold【◄】and press【►】to increase or decrease
DMX channel quickly.
STEP-4 Press【▲】and【▼】to adjust the DMX level.
4
Lite-Puter
CX-1C [EUM-A]
ISO 9001 CERTIFIED
www.liteputer.com.tw
You can also hold【▲】and press【▼】key or hold【▼】and press【▲】to increase or decrease
DMX level quickly.
C001 to C005 are output at 1BH.
Hold【▲】and press【▼】key or hold 【▼】and press【▲】key to set level at 0%, 50% and 100%
quickly.
STEP-5 LCD readout in DMX level: Hex, Decimal or Percent. Press 【HEX/%】 button to select.
STEP-6 Three DMX send frequencies are available when generating DMX from the tester.
DMX send frenquency 20/S
DMX send frenquency 40/S
DMX send frenquency 44/S
20/s DMX Send Frequency: 20 times per second. (20/s)
40/s DMX Send Frequency: 40 times per second. (40/s),
can be used to test devices at a faster rate should that rate be required for your application.
44/s DMX Send Frequency: 44 times per second. (44/s),
can be used to test devices at a faster rate should that rate be required for your application.
(For more information, please refer to 2-9 DOut protocol.)
STEP-7 When DMX OUT mode, if there is a DMX signal input, LCD will display:
Above means the received DMX IN channel 1 is 2FH and channel 2-5 is 00H.
This function can be used to test the cable.
Plug the male and female ends of the data cable into the DMX OUT and DMX IN ports individually, if
the data was received is the same with the data was sent, it means the cable is in good condition.
LCD readout for DMX IN is in Hex. It is irrelevant for FadeOut.
5
Lite-Puter
CX-1C [EUM-A]
ISO 9001 CERTIFIED
2-2
www.liteputer.com.tw
AutoFade
1. Setting Signal channel or a range of consecutive channels automatically fade
STEP-1 In DMX OUT mode,press 【DMX OUT】 to enter AutoFade function and the LCD will
display:
DMX Send Frequency
DMX Level
DMX Channel
STEP-2 DMX level automatically ramping from 0 to 100% and back.
STEP-3 Press【▲】and 【▼】keys to set autofade speed.
STEP-4 Press【►】and【◄】keys to select AutoFade channel.
STEP-5 To AutoFade a range of successive channels, follow below:
Press【-】key and the LCD will display:
The operation for AutoFade will be:C002:0%→100%→0%→ C003:0%→100%→0%→ C002:
0%→100% →0%.
STEP-6 Press 【►】and【◄】keys to select AutoFade end channel,
If press【►】, the LCD will display as below:
6
Lite-Puter
CX-1C [EUM-A]
ISO 9001 CERTIFIED
www.liteputer.com.tw
You can also hold【►】and press【◄】key or hold【◄】and press【►】to increase or decrease
DMX channel quickly.
STEP-7 Press【◄】 to decrease the AutoFade end channel. The LCD will display as below:
2. Setting AutoFade Send Frequency
※ Three AutoFade send frenquency are available: 20/s,40/s and 44/s.
DMX send frenquency:20/s
DMX send frenquency:40/s
(For more information, please refer to 2-9 DOut protocol.)
DMX send frenquency:44/s
3.DMX IN in AUTO FADE Mode
STEP-1 In AUTO FADE mode, if there is a DMX signal input, LCD will display:
Above means channel 2 to 4 for DMX IN are 34H (20%)
LCD readout for DMX IN is in Hex. It is irrelevant for FadeOut.
7
Lite-Puter
CX-1C [EUM-A]
ISO 9001 CERTIFIED
2-3
www.liteputer.com.tw
DMX IN
STEP-1 Press【DMX IN】and the LCD will display:
Start Code
DMX IN Receiving Frequency
H / % / D display
DMX IN Start Channel
Start Code: DMX IN start code level which is received.
DMX IN Receiving Frequency:It shows how many times DMX IN signal are received. When DMX
IN signal is received over than 99 times, it will switch to Frequency. (How many times per second.)
%/H/D:Percent/ Hexadecimal or Decimal.
C001:DMX IN start channel.
(While receiving DMX IN data, the LCD on 【DMX IN】button will be lighted.
STEP-2 Press【►】and【◄】or【▲】and【▼】keys to select start channel.
Press【▼】and the LCD will display:
20/s means the DMX IN receiving
frequency is 20 times/ per second.
Clearing DMX IN levels
To clear DMX IN levels, first remove the DMX IN XLR then press 【DMX IN】and the LCD will display:
8
Lite-Puter
CX-1C [EUM-A]
ISO 9001 CERTIFIED
2-4
www.liteputer.com.tw
Cable Test Mode
STEP-1 Press 【FUNC】to enter Menu and the LCD will display:
STEP-2 Press 【▲】and 【▼】to select F1: Cable Test
STEP-3 Press【FUNC】again to enter and the LCD will display:
STEP-4 Plug the male and female ends of the data cable into the DMX OUT and DMX IN ports
individually, the LCD will display:
STEP-6 Press【▼】to test next cable and the LCD will display:
the cable (D-) is connected.
the cable (D-) is disconnected.
the signal cable is abnormal.
9
Lite-Puter
CX-1C [EUM-A]
ISO 9001 CERTIFIED
www.liteputer.com.tw
STEP-7 If the male and female ends of the data cable can not plug into the DMX OUT and DMX IN
ports, you can use a test module, please find as below:
(Plug the male end of the data cable into the DMX OUT ports and plug the female end of the
data cable into the test module.)
STEP-8 Connecting with a test module and choose “1:GND”, if the first LED is lighted (as above
picture), it means the connection is correct. You can use the same way to test D+ and D-.
10
Lite-Puter
CX-1C [EUM-A]
ISO 9001 CERTIFIED
2-5
www.liteputer.com.tw
Code Mode
STEP-1 Press 【FUNC】to enter Menu and the LCD will display:
STEP-2 Press 【▲】and 【▼】to select F2: Code Mode
STEP-3 Press【FUNC】again to enter and the LCD will display:
STEP-4 If Connecting a EDX-610 and press scene 【1】 key, EDX-610 will send two codes. Press
scene【OFF】key and CX-1C LCD will display:
STEP-5 Press 【►】and【◄】to choose a code.
STEP-6 Press【▲】to clear and the LCD will display.
11
Lite-Puter
CX-1C [EUM-A]
ISO 9001 CERTIFIED
2-6
www.liteputer.com.tw
LCD Backlight
STEP -1 Press 【FUNC】to enter Menu and the LCD will display:
STEP-2 Press 【▲】and 【▼】to select F3: Backlight
STEP-3 Press【FUNC】again to enter and the LCD will display:
1 minute: If stop operating, backlight will automatically turn off after 1 minute.
20 minute: If stop operating, backlight will automatically turn off after 20 minutes.
Always on: Backlight always ON
Always off: Backlight always OFF
12
Lite-Puter
CX-1C [EUM-A]
ISO 9001 CERTIFIED
2-7
www.liteputer.com.tw
Battery Display
STEP-1 Press【FUNC】to enter Menu and the LCD will display:
STEP-2 Press 【▲】and 【▼】to select F4: Battery
STEP-3 Press【FUNC】again and the LCD will display:
13
Lite-Puter
CX-1C [EUM-A]
ISO 9001 CERTIFIED
2-8
www.liteputer.com.tw
Din Protocol
STEP-1 Press【FUNC】to enter Menu and the LCD will display:
STEP-2 Press 【▲】and 【▼】to select F5: DIN Protocol
STEP-3 Press【FUNC】again and the LCD will display:
STEP-4 When extending a DMX IN signal and the LCD will display:
14
Lite-Puter
CX-1C [EUM-A]
ISO 9001 CERTIFIED
2-9
www.liteputer.com.tw
DOut protocol
STEP-1 Press【FUNC】to enter Menu and the LCD will display:
STEP-2 Press【▲】and 【▼】to select F6: DOut Protocol
STEP-3 Press【FUNC】again and the LCD will display:
STEP-4 Press【▲】and 【▼】to adjust Break time.
Press【▲】to increase Break time, up to 300Us,Press【▼】to decrease Break time, down to 60uS.
STEP-5 Press【►】and【◄】and the LCD will display:
15
Lite-Puter
CX-1C [EUM-A]
ISO 9001 CERTIFIED
www.liteputer.com.tw
STEP-6 Press 【▲】and 【▼】keys to adjust DMX send frequency: 20/s, 40/s and 42/s.
DMX Send Frequencies: 20s
DMX Send Frequencies: 40s
16
Lite-Puter
CX-1C [EUM-A]
ISO 9001 CERTIFIED
www.liteputer.com.tw
2-10 Synchronal Signal Output
STEP-1 For further analysis of the DMX signal, the tester can be connected to a scope.
STEP-2 If CX-1C received a CH001 = 42H DMX IN signal, you can measure from SYNC of TO
SCOPE
to RX ground, the wave as below:
CH-00 in circle is the DMX wave of RX ground.
CH-01 in circle is the synchronal signal wave of SYNC.
STEP-3 If CX-1C sent a CH001 = 42H DMX IN signal, you can measure from SYNC of TO SCOPE
to
TX ground, the wave as below:
CH-00 in circle is the DMX wave of TX ground.
CH-01 in circle is the synchronal signal wave of SYNC.
17
Lite-Puter
CX-1C [EUM-A]


