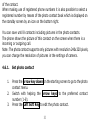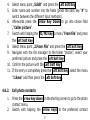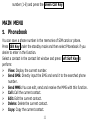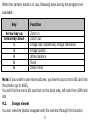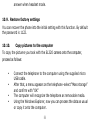
1
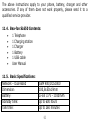
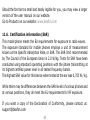
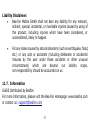
SL650 User Manual , 1 Dear Customer Thank you for choosing Bea-fon SL650 Please read this manual carefully before using the phone. The Manufacturer reserves the ultimate right for the interpretation of this manual. The Manufacturer reserves the right for the changes in the technical specification without advanced notice. 2 Table of Contents 1. ............ Security ................................................................. 8 2. ............ Phone Layout ....................................................... 14 2.1. ......... Key and Parts ....................................................... 14 2.2. ......... Display symbols .................................................... 17 3. ............ Getting Started ..................................................... 19 3.1. ......... Batteries .............................................................. 19 3.2. ......... Connecting to the Network ..................................... 22 3.2.1........ SIM card .............................................................. 22 3.2.2........ Installing and uninstalling the SIM card ................... 23 3.2.3........ Unlock the SIM card .............................................. 23 3.2.4........ Connecting to the network ..................................... 24 4. ............ Call Function ........................................................ 25 4.1. ......... Phone power on/off ............................................... 25 4.2. ......... Dial ................................................................... 26 4.2.1........ Direct dial ............................................................ 26 4.2.2........ Dial from the Phonebook ........................................ 27 4.2.3........ Unanswered call .................................................... 27 4.3. ......... Answer call........................................................... 27 3 4.4. ......... During a phone call ............................................... 28 4.5. ......... Emergency service ................................................ 29 4.6. ......... Photo contacts ...................................................... 29 4.6.1........ Set photo contact .................................................. 30 4.6.2........ Call photo contacts ................................................ 31 5. ............ Phonebook ........................................................... 32 6. ............ Messages ............................................................. 34 6.1. ......... Write message ...................................................... 34 6.1.1........ Word recognition: ................................................. 35 6.1.2........ Activate or deactivate the automatic........................ 35 6.1.3........ SMS ................................................................... 35 6.1.4........ MMS ................................................................... 36 6.2. ......... Inbox .................................................................. 37 6.3. ......... Drafts .................................................................. 37 6.4. ......... Outbox ................................................................ 38 6.5. ......... Sent messages ..................................................... 38 6.6. ......... Broadcast messages .............................................. 38 6.7. ......... Message settings .................................................. 39 7. ............ Call history ........................................................... 39 8. ............ Organizer ............................................................. 41 4 8.1. ......... Alarm .................................................................. 41 8.2. ......... Calendar .............................................................. 41 8.3. ......... Tasks .................................................................. 42 8.4. ......... Calculator ............................................................ 43 8.5. ......... Stopwatch ............................................................ 43 8.6. ......... Services ............................................................... 43 8.6.1........ Facebook ............................................................. 43 8.6.2........ Twitter ................................................................. 44 9. ............ Multimedia ........................................................... 44 9.1. ......... Camera................................................................ 44 9.2. ......... Image viewer ....................................................... 45 9.3. .... FM radio ................................................................... 46 9.4. ......... File manager ........................................................ 48 10. .......... Settings ............................................................... 48 10.1.Profiles ................................................................... 48 10.2.Phone settings .............................................................. 49 10.3.Network settings ........................................................... 50 10.4.SOS Setting .................................................................. 50 10.5.M1, M2, M3 .................................................................. 51 10.6.Security settings ........................................................... 51 5 10.6.1. ..... SIM security ......................................................... 52 10.6.2. ..... Phone security ...................................................... 52 10.7.Connectivity ................................................................. 53 10.7.1. ..... Bluetooth ............................................................. 53 10.7.2. ..... Data account settings ............................................ 54 10.8.Call settings.................................................................. 54 10.8.1. ..... SIM call settings ................................................... 54 10.9.Restore factory settings ................................................. 56 10.10. ...... Copy pictures to the computer ................................ 56 11. .......... Appendix ............................................................. 57 11.1.FAQ .. ................................................................... 57 11.2.Error Message ............................................................... 58 11.3.Care and maintenance ................................................... 60 11.4.Bea-fon SL650 Contents: ............................................... 62 11.5.Basic Specifications: ...................................................... 62 11.6.Certification information (SAR)........................................ 63 11.7.Information .................................................................. 64 6 GENERAL INFORMATION Thank you for selecting our Bea-fon SL650 mobile phone. This user guide will provide you with the general information and operation instructions. This color screen phone is designed for the 2G GSM network environment. Enjoy good call connecting quality and high speed data access over the network. The package includes a chargeable battery, a charger and other accessories. Please refer to the Accessory section for details. Note: Use only accessories approved by the phone manufacturer to ensure safety. Failing to comply with this will violate the terms and conditions of the warranty. If the contents and displays described in this user guide do not match the actual operation of the phone set, please use the display of the actual phone set. We reserved the rights to change the mechanisms of the phone without notice. 7 1. This user guide is subject to change without notice. Security Emergency call In any country, you can dial 112 (or other emergency call number) for emergency help. Note: Based on the nature of cellular networking, the success of the emergency call cannot be guaranteed. For your safety Switch off the phone in hospitals and aircraft. Obey any restrictions. Wireless devices can affect the medical treatment and cause interference in aircraft. Some medical devices such as hearing aids and pacemaker may be sensitive to external radio frequency emissions. Consult the device manufacturers or your doctor before using the phone around the medical devices. Pay special attention to the ring tone volume and vibration settings if you have a heart problem. In areas with potentially explosive atmosphere, such as gas stations, fuel or chemical transfer or storage facilities, obey all signs and instructions. You phone will emit radio frequency even in the standby mode. Turn off you phone 8 when so instructed. Always obey all the local laws and regulations. Do not use your phone while driving. Use Hands-free operation, if available, and give full attention to driving and to the road. Pull off the road and park before making or answering a call if driving conditions so require. If your phone is lost or stolen, notify your service provider immediately to stop the SIM card from being used. When you contact your service provider, they will need your IMEI number. It is printed on the back of your phone set (you can find it when you remove your battery), or call *#06# to look up your IMEI number. Copy this number and save it for future need. To prevent your phone from misuse, lock your SIM card or phone, and change passwords when necessary. Do not remove the battery without turning off the phone. Failure to follow this instruction may result in data lost. When you leave your vehicle, take the phone with you or place it in the glove compartment to avoid theft. Keep the phone, battery or charger out of reach of children. 9 Notices for your phone use Do not keep the phone near magnetic cards and other object with magnetism. The phone’s magnetism may clear the information stored on floppy disk, pre-paid phone card and credit card. Use the phone near land phone, television, radio and office automatic devices may cause interference and affect the function of the mobile phone. Keep the phone dry, all kinds of liquid can erode the electronic circuit. Keep the phone away from extreme temperatures. Keep the phone away from hot places where the temperature may exceed 60C, such as the dash board, windowsill, near fire or a lighted cigarette. Do not paint the phone. Do not drop the phone or violently crush or shake the phone. Do not disassemble or modify your phone. This can damage the phone, cause leakage and break the internal circuit. Use only damp cloth or non-static cloth to clean your phone. Do not use alcohol, thinner, benzene or other chemicals or abrasive cleaner to clean your phone. The phone will become warm under normal use and while in battery charging. Do not leave the phone with battery uninstalled or with the battery empty for a long period of time. This may cause data loss. 10 The metal parts of the phone may irritate your skin depending on your health condition. Do not put the phone in the back pocket. Sitting on it may damage the phone. Do not put the phone on the bottom of a bag. You may crush it. When the vibrate mode is on, place the phone carefully to avoid it being dropped from a height or being moved to a heat source due to the vibrating. Notice for batteries use Do not disassemble or modify your batteries, otherwise it can cause leakage, over heat, fire or explosion. Disposing battery in a fire can cause fire or explosion. Old batteries should be returned to your dealer or be disposed according to local regulations. Do not dispose the battery as household waste. Do not short the circuit of the battery with wires, needles or other metal objects, or store the batteries with necklace or other metal objects, otherwise it can cause leakage, over heat, fire or explosion. There is a risk of blinding if the liquid of the batteries gets into your eyes. In case of this, do not rub your eyes, you should rinse your eyes well with fresh water and go to the hospital immediately. 11 If the leaked liquid of the battery touches the skin, it can burn the skin. Please wash your skin with fresh water and go to the hospital immediately. Never put the battery in your month. The liquid of the battery can be toxic. Stop using the battery when you find it became hotter, and change color and shape abnormally during use, charging or storing. Keep the batteries dry. Do not use or store batteries near fire, heater and other place with high temperature, otherwise it can result in leakage, over heat, fire or explosion. Store the battery in a cool and ventilated place without direct sun light. Do not charge the battery for more than 24 hours. The battery can be charged and discharged for hundreds of times but it will eventually wear out. The battery life is shortened with each charging. When replacing the battery, use only the batteries approved by the phone manufacturer. Damage resulting from using un-authorized batteries will not be covered by warranty. Traffic safety Do not use your phone when driving a vehicle. Give full attention to driving and to the road. Provided there is an emergency, stop your vehicle in a safe place and then use 12 your phone. Please obey all the local traffic laws and regulations. Normally the electronic systems in the vehicle should not be affected by the RF (Radio Frequency) signals from your wireless phone. However if you suspect any damage is resulting from the RF of your phone, contact your car dealer. Stop using your phone in the car until a qualified technician clears the problem. Turn off your phone when in the gas station or any place where using wireless equipment is prohibited. Do not place or transport your phone with inflammables or explosives, the internal sparkle may cause fire. Airplane safety Power off your phone before boarding, the use of a wireless phone in an airplane will be dangerous to the operation of the airplane and disrupt the wireless telephone network and maybe illegal. Failure to observe these instructions may lead to law suit or denial of GSM cellular network service to the offender. Should there be an emergency situation, contact crew member. 13 2. 2.1. Phone Layout Key and Parts 14 1 2 3 4 5 6 7 8 9 10 11 12 13 Receiver Camera Menu Key left - Left Soft Key Menu Key right - Right Soft Key Dialing Power/End Key Arrow key (up), On the idle screen this button takes you to the Messages menu. Arrow key (down), On the idle screen this button takes you to the Photo contacts Direct dialing numbers (M1,M2,M3) * Key, Press this button on the starting screen to enter the following symbols : * /+ /P / W. # Key, Long press can switch between in silent mode with general modes; In edit mode, change the input method. Volume key Torch key, Long press the flashlight 15 14 15 16 17 18 19 20 21 22 23 Volume key Vice screen The low battery LED (flashing) and charging status LED Text message and missed call LED (flashing) Camera Flashlight SOS key Loudspeaker Headset Charger port 16 2.2. Display symbols Signal Strength The vertical bars show the network connection strength. Phone has a signals. New messages This icon shows when you receive a new message. SIM Card has an unread message The inbox is full. This icon flickers when the inbox is full and you need to delete messages to receive new messages. Earphone This icon shows when you plug the earphone in. Voice will be heard from the earphone. Missed Calls This icon shows when you are viewing the missed call. SIM card has a missed call. Turn alarm on This icon shows when you turn alarm on. 17 Alert Type Ring Silent Silent mode on and Vibration only Vibrate and ring Call Divert This icon shows when you divert all calls unconditionally. SIM card has been set up call divert. GPRS This icon shows when the GPRS connection is available or active. Roaming This icon shows when your phone is in roaming state. SIM card is roaming. Bluetooth This icon shows when the Bluetooth is active. 18 Battery capacity This icon’s colour changes according to the status of battery capacity: 3. , , , Getting Started 3.1. Batteries The battery is included in the package. It is not fully charged out of factory but it may still be able to power on your phone. Please completely use up the power of the battery and then charge it for at least 12 hours with your phone turned off. You battery will reach its optimal state after three cycles of charge and discharge. 3.1.1. Installing and uninstalling the battery To install the battery, remove the back cover from the phone by pressing firmly on the cover and slide it down. Align the golden contacts of the battery to the contacts in the phone, and then gently snap down the battery into place. Re-assemble the back cover. 19 To uninstall the battery, flip the battery out from the bottom of the battery. 3.1.2. Charging the battery Plug the charger into the socket on the side of your phone. Connect the charger to an AC wall socket. The blinking of the battery level icon indicates the battery is being charged. When the blinking stops, it indicates the charging is finished During charging, the phone and charger will feel warm to the touch. This is normal. 3.1.3. Turn ON/ OFF the phone For switching ON : press for several seconds, the red call end key For switching OFF : press for several seconds, the red call end key until the screen is switched off. Warning: 20 The operating ambient temperature of the charger is 0C-50C. Do not use it when the temperature exceeds this limit. Use only chargers approved by the phone manufacturer to ensure safety. Failing to comply with this will violate the terms and conditions of the warranty. 3.1.4. Using the battery The waiting time and calling time capacities specified by the phone manufacturer are obtained under the ideal operating environment. The actual values will vary with the network condition, operating environment and operation method. Please comply with the local regulations of disposing the battery (such as recycling). Do not dispose it as household waste. 3.1.5. Battery level indicator When the phone is on, the battery level indicator is located at the upper right corner of the screen. 21 3.2. 3.2.1. Connecting to the Network SIM card Please insert available Subscriber Identity Module (SIM) card into your phone before using it. SIM card is supplied by your network carrier. All the information related to network connection is recorded on the SIM card, so are the contact information such as names, phone numbers and SMS that you set to store on the SIM. You can take out the SIM card from the phone and insert it into another GSM phone to use it. Most new phones will recognize the SIM card automatically. Do not touch the golden contacts of the SIM card and place it away from electricity and magnetism to avoid damage. You will not be able to use the phone if the SIM card is damaged. Note: 22 Before inserting and taking out the SIM card, always make sure that the phone is switched off and disconnected from any external power source; otherwise both the phone and the SIM card may be damaged. 3.2.2. Installing and uninstalling the SIM card The SIM card usually comes attached to a special card. The metal contacts of SIM card is easily damaged by scratching, so take it out carefully before assembling it into the phone. Switch off the phone; remove the back cover, battery and other external power source. Fit the SIM card into the SIM card slot. Align the angled corner of the SIM card with the slot. Slide in the SIM card, make sure it is in place, install the battery, and restore the back cover. Likewise, to remove the SIM card, switch off the phone, remove the battery and then take out the SIM card. 3.2.3. Unlock the SIM card 23 PIN code Your Personal Identification Number (PIN) code protects the SIM card against unauthorized use. Your PIN code is usually supplied with the SIM card. If this security function is enabled, you need to enter the PIN code every time you turn on the phone. You can also disable this function. To unlock the SIM card, press and hold the power button to turn on the phone. Enter the PIN code. After three consecutive incorrect PIN code entries, the code is blocked, and you need the PUK code to unblock it. PUK code This code is required to change a locked PIN code. If the code is not supplied with the SIM card, contact your service provider. After ten consecutive incorrect PUK code entries, the SIM card cannot be used any more. Please contact your service provider to buy a new SIM card. You cannot edit PUK code. If it is lost, Please contact your service provider. 3.2.4. Connecting to the network After the SIM card is unlocked, you phone will automatically search for the 24 registered network or other local available network. Once connected, the name of the network carrier will appear on the top of the screen. You phone is now in Standby mode, ready for making and receiving calls. 4. Call Function After the setup described in the previous sections is completed, you are ready to make and receive calls using the basic information provided in this section. Note: When you are using headset, please plug/unplug the headset gently to avoid damaging the headset jack. 4.1. Phone power on/off Power on Press and hold to turn on the phone. If PIN code is required, please refer to the previous section in this guide. Power off 25 In Standby mode, press 4.2. to turn off the phone. Dial When the network carrier is shown on the screen, your phone has entered the Standby mode and you may make or receive calls. If you have installed SIM cards, the network carriers will both appear on the screen. 4.2.1. Direct dial Press any number key to enter the Dial screen. You can assign the quick dial numbers (2-9) to the 8 frequently-used phone numbers. Menu: Phonebook—Options—Phonebook settings—Speed dial Domestic call Press the number keys and then press the to make the phone call. The screen will show the name and phone number of the person that you are calling. After the call goes through, the screen will show a time meter in 26 addition to the phone number and/or the name of the person you are calling. International call Key in the symbol “+” by Press-and-hold * key, followed by the desired country code and the phone number. For example, to make a call to China, Press and hold * key until “+” appears then enter “49” (the country code for Germany) and the phone number. 4.2.2. Dial from the Phonebook Enter Phonebook from the Main Menu. You may use alphabet for quick search of the names. 4.2.3. Unanswered call If you have set up Auto Redial, your phone will automatically re-dial the last number that you called but unanswered. 4.3. Answer call When there’s an incoming call, the phone will notify you through vibration, 27 ringing, vibration plus ringing, etc. The name and phone number of the caller is shown on the screen if the network supports the service. You may answer or reject the call. If call waiting is on, (You need to apply for this service to your network carrier.) when you are on the phone and there is another incoming call, your phone will notify you with a short tone. You may answer or reject that second call. If you choose to answer the second call, the current call will be on hold. 4.4. During a phone call When you are on the phone, the following functions can be used: Note: The functions can vary with the SIM card and Network. Hold: The current call is on hold and both you and the person you are calling will not hear each other. When the call is on hold, you may pick it up again or end the call through the Options menu. End single call: End the current call. 28 New Call: Call the opposite party to build a Call to Many. Phonebook: Enter the phonebook and do the related operations. This function is convenient for searching phone numbers during a phone call. Call history: Enter call records menu operation. Messages: Enter the message screen and do the related functions. Mute: Open or closed send local voice. DTMF: Open or close the DTMF function during the call. You may enter Dial or Phonebook screens to make a new phone call while the current phone call is still on-going. 4.5. Emergency service In any GSM network system, if you are in the region covered by the network, you should be able to use the emergency service even without a SIM card. 4.6. Photo contacts A photo contact is a name/telephone number registered in addition the photo 29 of the contact. When making use of registered phone numbers it is also possible to select a registered number by means of the photo contact book which is displayed on the standby screen by an icon on the bottom right. You can save until 8 contacts including pictures in the photo contacts. The phone shows the picture of this contact on the screen when there is a incoming or outgoing call. Note: The photo contact supports only pictures with resolution 240x320 pixels, you can change the resolution of pictures in the settings of camera. 4.6.1. 1. 2. 3. Set photo contact Press the arrow key down on the starting screen to go to the photo contact menu. Switch with helping the arrow keys to the preferred contact number (1-8). Press the Left Soft Key to edit the photo contact. 30 4. 5. Select menu point „5.Edit“ and press the Left Soft Key. Enter name and number into the fields (press the hash key “#” to switch between the different input methods). 6. Afterwards press the Arrow Key Down to go into choice field „“Caller picture“. 7. Switch with helping the M1/M3 key to menu “From file” and press the Left Soft Key 8. Select menu point „2.From File“ and press the Left Soft Key 9. Navigate with the file manager to the folder “photos”, select your preferred picture and press the Left Soft Key. 10. Confirm the picture with the Left Soft Key“. 11. If the entry is completely press the Left Soft Key, select the menu "1.Save" and then press the Left Soft Key . 4.6.2. 1. 2. Call photo contacts Press the arrow key down on the starting screen to go to the photo contact menu. Switch with helping the arrow keys to the preferred contact 31 number (1-8) and press the Green Call Key. MAIN MENU 5. Phonebook You can save a phone number in the memories of SIM cards or phone. Press RSK Key under the standby mode and then select Phonebook if you desire to enter in the function. Select a contact in the contact list window and press Left Soft Key to perform: View: Display the current number. Send SMS: Directly input the SMS and send it to the searched phone number. Send MMS: You can edit, send and receive the MMS with this function. Call: Call the current contact. Edit: Edit the current contact. Delete: Delete the current contact. Copy: Copy the current contact. 32 Add to Blacklist: Add the number to black list and block the same number to call you. Phonebook settings:You can manage the phonebook with this function. Preferred storage: You can select preferred storage in SIM, phone or Both. Speed dial: You can assign the quick dial numbers (2-9) to the 8 frequently-used phone numbers. Memory status: View the quantity of phone saved in the SIM cards or phone memories. Copy contacts: You can use the function to copy the phonebook from phone to SIM, from SIM to phone. Move contacts: You can use the function to move the phonebook from phone to SIM, from SIM to phone. Delete all contacts: You can use the function remove all the phonebook from SIM1 or phone. 33 6. Messages You can send and receive the SMS and MMs as well as use Cell Location Display with this function. This chapter introduces the message services provided by the GSM network. Some services may not be supported by the local network. 6.1. Write message You can edit and send the SMS with this function. The following functions are available: Press 0 to add a space. Press the * key to add special characters; using the “Arrow keys”, “*” and “#” keys, you can navigate to the desired symbols. Press the M1/M3 key to move the position indicator to the left or right. Press Delete (M2) to delete a letter; to delete the entire text, press and hold Delete (M2). Press the # key to switch between upper and lower case and word recognition: Smart DE, DE, de, 123 and pay attention to the symbol in the top left of the display. 34 6.1.1. Word recognition: Enter the desired word by pressing the keys for each individual letter only once. The word changes depending on which key is pressed. For example: To write “Hello”, press the “43556” key. Note: If the suggested words are not correct you have the possibility to save the missing word. For this you can save the new word by pressing the M1/M3 keys and then you choose "new word" and press OK, enter the new word and press save. 6.1.2. Activate or deactivate the automatic word recognition When you write a text, press Options, and select Input method options. To activate or deactivate automatic word recognition, select Auto. Word recognition and press OK 6.1.3. SMS Send to: Input number and then send SMS to the input number. Input symbol: Change the Input symbol. 35 Input method: Change the input method. Input method options: You can choose writing language. Advanced: Insert pictures, melody, phone number and bookmark. Insert number: Insert the number of the contacts. Insert name: Insert the phone book name. Save: Save the SMS in the Draft box. 6.1.4. MMS The MMS function allows you to send text and multimedia such as pictures, audio and video to the other phone. After creating the message, you have the follow options: Send To: Send the message. Insert Symbol: Enter punctuation interface, select the symbol that you want. Input Method: Change the input method. Input method options: You can choose writing language. Add Picture: Insert picture. Add Sound: Insert the audio file. Add Video: Insert the video file. 36 Add Subject:Editing MMS theme. Preview MMS: Preview the current MMS. Slide Options: Insert a new page before or after the current page. Advanced: Insert attachment: From file manager, select insert attachments. Save: Save to Draft box. 6.2. Inbox The Inbox lists the received SMS and MMS. You have the following options: View, Reply by SMS and MMS, Call Sender, Forward, Delete, Delete all, Delete several; In the Advanced option: Copy to Phone/SIM, Move to Phone/SIM, Copy all and Move all; View Details; Note: The new message icon keeps flickering in the standby mode when your inbox is full. Please delete some messages for receiving new messages. 6.3. Drafts By Drafts you can view the draft SMS messages you have saved. 37 You can choose the following options while reading your draft: View, Send, Edit, Delete, Delete all, Delete several; In the Advanced option: Copy to Phone/SIM, Move to Phone/SIM, Copy all and Move all; View Details; 6.4. Outbox The Outbox to view the messages you don’t sent but saved. You can choose the following options while reading you’re sent SMS: Resend, Edit, Delete, Delete all and Details. 6.5. Sent messages Here you can see the messages which you have sent. 6.6. Broadcast messages Look up the broadcast messages. Your options include: Receive mode: Turn on or turn off cell broadcasting. Channels: You can add, edit channel and can delete the current channel and cancel the read. 38 6.7. Languages: set the cell broadcast language. Read messages: Save read cell broadcast information. Message settings You can adjust the various settings of the message functions including SMS, MMS, Service Message. 7. Call history In the call history, you can carry out the following operations: view the call history, edit the call history, save the call history to phonebook, add the call history to the blacklist, delete the call history, you can also view the call time. From the Missed calls/Dialed calls/Received calls menu select any a log, Press Left Soft Key to enter the Option list: View: View the detail of the current call. Call: Call the current number. Send SMS: Directly input the SMS and send it to the searched phone number. 39 Send MMS: You can edit, send and receive the MMS with this function. Save to Phonebook: Save to phonebook. Add to Blacklist: Add the number to black list and block the same number to call you. Edit before call:Call to edit the number before the call record contacts. Delete: Delete the current logs. Mark Several: Use to delete marked call History. Delete call logs: You can choose to delete Missed calls/Dialed calls/Received calls and All calls. Call Timers: You can view the last call, dialed calls, received calls Call time records. Can also reset the record. Last call: view the last call duration. Dialed calls: View dialed numbers, the total. Received calls: to view the caller total duration. Reset All: all call time record to zero. GPRS counter You can view the tolls of last sent and all sent in SIM cards, or zero the GPRS toll meter in SIM cards or set up the toll restriction upon entering the function. 40 8. 8.1. Organizer Alarm You can set up that the alarm clock will ring at a specific time with this function. Setup of Alarm Clock Set up the alarm clock with the following options: Set the alarm clock status as opened or closed. Set the alarm clock time. Set the repeat, once, Everyday, Days. Select the snooze time. Set the Alert type. After setting please save the change. 8.2. Calendar The screen will highlight the date of today after displays the monthly calendar when you enter in the calendar function. Press M1 Key or M3 Key to move by day. Press up Key or Down Key to move by week. 41 Options will include View: View the day’s event View All: View all the to-do-list. Add Event: The editor will be displayed. You can add an appointment or an all-day event. Available input fields are: Subject, Location, Repeat, Start date, Start time, End date, end time, alarm, description. The display and reminder will be executed according to your setting. Delete Event: Delete the selected affair. Jump To Date: Return to the calendar window after inputting the designated date with the cursor stopping on the inputting date. Go To Today: View today‘s calendar. Go To Weekly View: View the calendar by week. Start Of Week: You can set each week begins with Sunday or Monday. 8.3. Tasks Press LSK to enter Option, performing: View, Add, Edit, Delete, Delete overdue, Delete All, Jump to date, View Uncompleted, Send vCalendar and Save As File. 42 8.4. Calculator You can conduct the basic arithmetic operations with this function. Input the first number. Press one of M1, M3, UP and DOWN directional keys to select the arithmetic operation sign. Input the second number. Press M2 Key to view the calculation results. 8.5. Stopwatch Here you can Split, lap and see the records of timings. Note: M1 and M2 are left and right direction keys. 8.6. Services With this function, you can perform the network-based service. 8.6.1. Facebook It is Face book application; hope you have fun with it. 43 8.6.2. Twitter It is Twitter application; hope you have fun with it. 9. 9.1. Multimedia Camera With this function, you can snap. Press Camera Key to snap under the view-finding window. Enter Camera Option, Your options include: Photos: Enter in the album folder. Camera settings: Set up the camera. Image settings: Set up the photo parameters. White balance: Adjust the color balance of the photo. Scene mode: Set up the scene mode. Storage: Select phone or memory card as the default storage location. Restore default: Recover all settings into the initial values. 44 When the camera mode is in use, following keys during the program are available: Key Arrow key up Arrow key down 1 2 4 5 6 Function Zoom in Zoom out Image size respectively image resolution Image quality White balance Flash Delay timer Note: If you want to save more pictures, you have to put a micro SD card into the phone (up to 8GB), You will find the micro SD card slot on the back side, left side from SIM card slot. 9.2. Image viewer You can view the photos snapped with the camera through this function. 45 Select a photo file and press <Option> under the photo list window View: view the selected image. Browse style: You can select list style or matrix style. Send: Send the selected image to MMS or Bluetooth. Use as: Send the selected image file to the wallpaper. Rename: Change the name of the image. Delete: Delete the selected image. Image information: Show some information of image. Sort By: Sort the images by name, type, time and size. Delete all files: Delete all files Storage: Select the photos storage. Note: M1 and M2 keys to implement paging functionality. 9.3. FM radio You can select radio option to hear the FM broadcast with this function. When Hearing FM broadcast program, you can use the following keys during the program-hearing process 46 Key M1 Key M3 Key Up Key M2 Key Down Key Your Function Switch to the previous channel Switch to the next channel Switch to the previous band Press to play/pause the FM. Switch to the next band options include: Channel list: play, edit or delete the saved channels. Manual input: manually input the channel to search. Auto search: automatically search the channel. Settings: Set up the record format and voice quality. Background play: Turn on or off background playback FM Loudspeaker: Set loudspeaker on or off. Audio quality: You can set sound quality as high or low. Record storage: Select the default storage location. Record: record the currently-hearing FM. File list: list all recorded files. 47 9.4. File manager The File Manager lists the all the files stored in your phone or memory card. 10. Settings You can set up various functions for the phone with this function. 10.1. Profiles Enter in the function; display the profile mode list including General, Silent, Meeting, Outdoor. Select one mode and enter the option menu: Activate: Activate the profile mode. Customize: Customize the profile mode as following: Alert type: Set the alert type such as Ring only、Vib only, Vib. And ring, Vib. Then ring. Ring type: Set the ring type such as Repeat、Beep once. Ringtone: Set the ringtone for the SIM incoming call. You can also select ringtone from T card. Ringtone volume: Set the ringtone volume of the incoming call. 48 Message: Select the ringtone for the SIM message. Message volume: Set the volume for message ringtone. Keypad: Select the ringtone for keypad. Key tone volume: Set the volume for the keypad. System Alert: On /off the system alert. Reset: Reset the setting to the default. After plugging in the headset, ringtone will output from the headset as well as the phone, when there is incoming call or message. 10.2. Phone settings Date and time: You can set time and date, set format for your phone. Language:Set the current system language English or Hindi. Writing language: Select input language. Display Settings Wallpaper: Select your favorite picture as the wallpaper of the standby window. LCD backlight: Here are set LCD brightness. 49 10.3. Network settings You can set up the phone network with this function. Network selection: choice the modes of searching the phone network, including Auto and Manual modes. GPRS connection: When needed and always. GPRS transfer pref.: You can select data prefer or call prefer. 10.4. SOS Setting The SOS function is a simple function which can save lives at the deciding moment. In all, you can save 5 SOS Contact, and one SMS. These numbers, previously saved in order of sequence, will be automatically dialed in an SOS by pressing the SOS button on the back of the mobile phone. During the SOS call, a warning tone sounds so the person that you rang knows that it is an emergency! If you cannot get through on the first number, the second number will be called automatically. If no emergency number is saved or your phone card has run out, or you are not allowed under a foreign network (e.g. Roaming not activated), you can dial 112 or another emergency number on the numerical keypad. By pressing the SOS button, the SL650 will send an SOS SMS person (in case mobile number or telephones with SMS function is available for emergency contact) to the emergency numbers you have previously saved and will be automatically dialled in the given sequence. (The SOS button also functions when the phone is close). The mobile 50 phone switches on the hands free function at full volume and at the same time. SOS description: Press the SOS button on the back of the mobile phone for 3 seconds. If you want to stop or cancel the SOS call, press the right Menu Key. SOS Settings: SOS Mode settings: Set On or Off the SOS function. Set SOS numbers: There you can edit and save at most five SOS number in your phone. SOS message: Edit the content of the SOS message which will be sent out automatically when the SOS function is using. 10.5. M1, M2, M3 Add 3 shortcut dial; in the idle screen long press M1/M2/M3 button, you can call directly. 10.6. Security settings You can manage your phone safely with this function. The phone lock password, SIM card password and PIN2 support 4-8digit 51 numbers, do not support other characters. The original password of the phone when leaving the factory is 1122. The password and PIN2 and SIM card are provided by the network operator. When the PIN/PIN2 is input wrongly in successively three times, the SIM card will be locked. The PUK /PUK2 are required to input if you want to unlock the SIM card. The PUK/PUK2 is provided by the network operator. If the PUK is input wrongly in successively 10 times, the SIM card will be locked and discarded permanently. 10.6.1. SIM security PIN lock: open or close the PIN lock function. When PIN lock is launched, the PIN shall be input upon each power-on. Change PIN: PIN lock must be enabled, Just can be change. Change PIN2: input the correct PIN 2. Just can be change. 10.6.2. Phone security Phone lock Open or close the phone lock function. When the phone lock is launched, the 52 phone lock password shall be input upon each power-on. Change password You can change the phone password. Note: The default password is 1122. 10.7. Connectivity 10.7.1. Bluetooth Your options include: Power: Open or close the Bluetooth Visibility: Open or close the visibility. My device: Show the device which is connected Search audio device: Search for the audio device. My name: Show off the name of Bluetooth. Advanced: Set up Audio path and view the address of Bluetooth. Audio path: You can select leave in phone or forward to Bluetooth headset. Storage: Select the default storage location. 53 My address: View Bluetooth address. 10.7.2. Data account settings This is MMS data account. You can select an entry of data account and press <Option> under the list window to perform: Edit : Edit data account Add PS account: Add new data account Delete: Delete the selected the data account; Set as default: Selected change default value. 10.8. Call settings 10.8.1. SIM call settings Caller ID : there are 3 options Set by Network Hide ID Send ID 54 Call waiting: The network will inform you for a newly incoming call during the call. Please contact with your network operator to launch or close the function because the function requires the network support. Call divert: Divert an incoming call to a designated phone number under the presetting condition. This function can be launched or closed. Call barring: Set up the right of calling and answering. This function requires the network support. You can launch or close the function. Call time reminder: Select to release prompt tone during the call in each integral minute time. Advanced settings Blacklist: blacklist open the blacklist contact could not be called a native. Auto redial: Set up whether the phone is tempted to redial when the call fails in connection. Auto quick end: Set a time limit. The call will automatically interrupt when the call time reaches the time limit. Reject by SMS: You can also reject the call by SMS, enable this option to send a text message to the caller after rejecting the call. Answer Mode: You can select Cover answer, Any key or Auto 55 answer when headset mode. 10.9. Restore factory settings You can recover the phone into the initial setting with this function. By default the password is 1122. 10.10. Copy pictures to the computer To copy the pictures you took with the SL320 camera onto the computer, proceed as follows: Connect the telephone to the computer using the supplied micro USB cable. After that, a menu appears on the telephone -select “Mass storage” and confirm with “OK” The computer will recognize the telephone as removable media. Using the Windows Explorer, now you can process the data as usual or copy it onto the computer. 56 Note: The photos are located in the telephone in the folder “Photos” 11. Appendix 11.1. FAQ The phone cannot be turned on When the battery is very low, the phone may not be turned on properly. Please charge the battery. Cannot make certain calls Check if Call Barring is set. If it is set, you may not be able to make calls or only certain calls are allowed. My call is picked up by another phone Check if call divert is set. If it is set, your incoming calls may be diverted to other numbers or devices. 57 How can I use the memory card If you want to use a memory card please note that the SL650 supports SD micro cards up to 8GB. To use the installed memory card, please make following steps: 1. Press the camera key on the starting screen then press the left menu key "Options" 2. Go to menu point"6.Memory" and press the left menu key "OK". 3. Select the "Memory Card" and press the left menu key "OK". 4. From now all images will be saved to the memory card into the folder "Photos". 11.2. Error Message Please insert SIM card Make sure you have inserted SIM card. If you have installed it but it cannot be detected, please try clean the golden contacts of the SIM card by using a dry cloth. If it still is not working, please contact your network carrier. No service If you are in an area not covered by your network, or if a physical obstacle is 58 present, such as in an enclosed area, the message “No service” will be displayed on your Standby screen and you will not be able to make or receive calls. You can try move closer to a window for better reception. For emergency only When you are outside your network but inside other network, you can only make emergency call. No Valid SIM card Your SIM card is locked or it has an error. Please insert the right SIM card or contact your service provider. Enter PUK code After three consecutive incorrect PIN code entries, the code is blocked, and you need the PUK code to unblock it. Contact your service provider. After seven consecutive incorrect PUK code entries, the SIM card cannot be used any more. Please contact your service provider to buy a new SIM card. SMS send failed 59 Please check the SMSC-address and go to menu point: “Messages - Message settings - SMS – SIM – Profile settings – Profil1 –Edit – SMSC-Address” Note: Please contact your network operator, for information about the SMSC address 11.3. Care and maintenance Thank you for choosing our phone. Should you encounter any problem with the phone, please contact our dealer or qualified service provider. Your phone is a finely designed and crafted product. Please use it with care. The following instructions will help you comply with the terms of the warranty and enjoy this product for many years: Keep the phone and all its parts and accessories out of the reach of children. Keep the phone dry, all kinds of liquid will erode the electronic circuit. Do not use or store the phone in a dusty place to avoid damaging the 60 removable parts. Keep the phone away from hot places, high temperature can shorten the life of electronic device, warp or melt certain plastic and damage batteries. Do not attempt to open or disassemble the phone, non-expert handling may damage it. Do not drop, crush or shake the phone to avoid damaging the internal circuit board. Do not use harsh chemicals, cleaning solvents or strong detergent to clean the phone. Do not paint the phone or the paint may obstruct the removable parts and affect operation. Use only the supplied or an approved replacement antenna. Unauthorized antennas, modifications, or attachments could damage the phone Do not hold the external antenna when the phone is in use. Holding the external antenna affects call quality and may cause the phone to operate at a higher power level than needed. In addition, use of unauthorized antennas may result in non-compliance with the local regulatory requirements in your country. 61 The above instructions apply to your phone, battery, charger and other accessories. If any of them does not work properly, please send it to a qualified service provider. 11.4. Bea-fon SL650 Contents: 1 Telephone 1 Charging station 1 Charger 1 Battery 1 USB cable User Manual 11.5. Basic Specifications: Network – Dual-Band Dimension: Battery: Standby time: Talk time: GSM 900/DCS1800 100,8x50x19mm Li-ion 3.7V - 1100mAh Up to 600 hours Up to 260 minutes 62 Should the font be too small and hardly legible for you, you may view a larger version of the user manual on our website. Go to Products on our website: www.beafon.com 11.6. Certification information (SAR) This model phone meets the EU requirements for exposure to radio waves. The exposure standard for mobile phones employs a unit of measurement known as the Specific Absorption Rate, or SAR. The SAR limit recommended by The Council of the European Union is 2.0 W/kg. Tests for SAR have been conducted using standard operating positions with the phone transmitting at its highest certified power level in all tested frequency bands. The highest SAR value for this device when tested at the ear was 0,703 W / kg. While there may be differences between the SAR levels of various phones and at various positions, they all meet the EU requirements for RF exposure. If you want a copy of the Declaration of Conformity, please contact us: [email protected] 63 Liability Disclaimer: Bea-fon Mobile GmbH shall not bear any liability for any relevant, indirect, special, incidental, or inevitable injuries caused by using of this product, including injuries which have been considered, or unconsidered, likely to happen. For any losses caused by natural disasters (such as earthquake, flood, etc.) or any acts or accidents (including deliberate or accidental misuses by the user under these accidents or other unusual circumstances) which are beyond our liability scope, non-responsibility should be accounted on us. 11.7. Information SL650 distributed by Beafon For more Information, please visit the Bea-fon Homepage: www.beafon.com or contact us: [email protected] 64 Address BEAFON MOBILE GmbH 4722 Peuerbach Enzing 4 Austria v.3.0 65