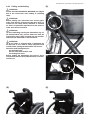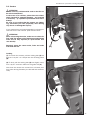
1
User Manual for sport frame and swing-away frame User Manual Jump beta Sport Frame and Swing-Away Frame 1 Jump beta Impressum: Responsible according to press law: SORG Rollstuhltechnik GmbH + Co.KG Benzstraße 3-5 68794 Oberhausen-Rheinhausen Germany Fon +49 7254 9279-0 Fax +49 7254 9279-10 [email protected] Webwww.sorgrollstuhltechnik.de 2 We are a member of rehaKIND e.V. International support group for the rehabilitation of children and adolescents. © by SORG Rollstuhltechnik GmbH + Co.KG Benzstraße 3-5, D-68794 Oberhausen-Rheinhausen. All texts and images are subject to international copyright protection and must not be published - neither in their entirety nor in extracts - without our explicit permission! User Manual for sport frame and swing-away frame Table of contents Impressum:2 Table of contents 3 Wheelchair4 1 Introduction 5 2 Safety Instructions 8 1.1General Information 5 1.2Legend to Symbols 5 1.3Indication Jump beta 5 5 1.4Counter-indication Jump beta 1.6Usage6 1.7Reception6 1.5Specification Jump beta 6 1.8Documentation7 7 1.9Service and Maintenance 2.1 General Indications 8 2.2Driving Characteristics9 9 2.2.1 Getting in and out 2.2.2 Starting and Braking 10 2.2.3 Danger of Tipping Over 10 2.2.4 Up- and Downgrade Slopes 12 2.3 Independent Transfer 13 2.4 Reaching for Obstacles 14 2.5 Overcoming Obstacles 15 2.6 Locking Brake 17 2.7 Anti-tipper17 2.8 Angle-Adjustable Back, Seat Tilt 18 2.9 Casters18 2.10 Folding and Unfolding 19 2.11 Loading and Transportation 20 20 2.11.1 Transportation in Public Transport 2.11.2 Transportation in a Passenger Car 20 21 2.12 Further Dangers 3 General Handling 22 3.1 Usage Guidelines 22 3.1.1 General Instructions 22 3.1.2 When Driving 22 3.1.3Adjustments 23 3.1.4 Getting In and Out 23 3.2 Folding and Unfolding 24 3.2.1 with Seat and Back Covers 24 3.2.2 with SeatFix and/or Moulded Back 25 3.3 Wheels26 3.3.1 Quick-Release Axle Wheels 26 3.3.2 Drum Brake Wheels 27 3.3.3 Double Hand Rim 27 3.3.4 Transit Safety Wheels 28 3.4 Casters29 3.5 One-hand Steering 30 3.6 Special Hand Rim Versions 30 3.6.1 Nubby Hand Rims 30 3.6.2 Hand Rim Covers / Maxgrepp Hand Rims 30 3.7Seat and Back Covers 31 3.8 Firm Seat Plate (SeatFix) and Moulded Back 31 3.9Push Handles32 3.9.1 Extendible Push Handles 32 3.9.2 Push Handles with Push Bars 33 3.10Side Parts34 3.10.1 Standard Side Parts 34 3.10.2 Desk Side Parts/Long Side Parts 34 3.11 Arm Rests 34 3.12 Leg Supports 35 3.12.1 Leg Support with Foot Rest, Pivoting, Undivided or Divided 35 3.12.3 Leg Support, Removable and Pivoting 36 3.12.4 Leg Support, Pivoting (side- and upwards) 36 3.13 Locking Mechanism for One-piece Foot Rest 37 3.14Brakes 37 3.14.1 Braking while Driving 37 3.14.2 Locking Brake 38 3.14.3 Driving Brakes 38 38 3.14.4 Locking the locking brake 3.14.5 Recoil Blocking 38 3.15Anti-tipper 39 3.16Back 39 3.16.1 Standard Back 39 39 3.16.2 Back Angle, Alterable 3.17Back Extension, Retractable 40 3.18Head Rests40 3.19Therapy Table41 3.20 Abduction Wedge 41 3.21 Lateral Support41 3.22Tipping Bar41 3.23Stick Holder41 3.24 Pushing aid for outdoor areas (Outdoor Front End) 42 3.25Caddy 42 4. Reparation and Maintenance 4.1Reparations 4.2 Replacement Parts 4.3Disposal 4.4 Tyre Change 4.5Maintenance 4.5.1 Cleansing and Care 4.5.2 Disinfection 4.5.3Reuse 4.6Maintenance/Inspection 4.6.1Checklists 4.6.2 Checklist for Yearly Inspections 4.6.3 Maintenance Plan 4.7 Technical Data 4.7.1 Measures and Dimensions 4.7.2 Meaning of Labels 4.7.3 Meaning of type plate 43 43 43 43 43 44 44 44 44 44 44 45 45 47 47 47 47 3 Jump beta Wheelchair Jump beta - Frame Version Sport 1 2 3 4 5 6 1. 2. 3. 4. 5. 6. 7. 8. 9. 7 8 9 10. 11. 12. 13. 14. 15. 16. 16 15 14 13 12 11 Push handles Back Side guard Clothes guard Seat Locking brake (Knee lever brake) Brake lever Center mounting bolt Frame version Sport with integrated leg support Foot plate (undivided) Caster fork Caster wheel Crossbrace Wheel Handrim Quick-release axle 10 Jump beta - Frame Version Swing-Away 1 2 3 4 5 6 7 4 14 13 12 11 10 9 8 1. 2. 3. 4. 5. 6. 7. 8. 9. 10. 11. 12. 13. 14. Push handles Back Clothes guard Desk side guard Seat Locking brake (Knee lever brake) Frame version Swing-away with swingaway and completely detachable leg support Foot plate (undivided) Caster fork Caster wheel Anti-tipper Wheel Handrim Quick-release axle User Manual for sport frame and swing-away frame 1Introduction 1.1 General Information Like any other medical aid, a wheelchair is a technical device which may bear certain dangers if used inappropriately. This brochure was written to help you make yourself thoroughly familiar with your wheelchair and its potentials. ATTENTION For this purpose, please read the following manuals and instructions provided with your wheelchair: User Manual General Usage and Safety Advice Information Brochure Crash Test ISO 7176-19 ATTENTION If the user of the wheelchair is a child or a person with impaired competence, it lies in the responsibility of the parents or authorised supervisor to ensure that the user has understood and internalised the wheelchair’s handling and safety instructions. If you have any questions, your sanitary supply store or our competent team will be glad to help (+49 7254 9279-0). This user manual is directed to you as well as to your rehab technician. It contains instructions on how to ideally adjust your wheelchair according to your physiological and motoric situation. 1.3 Indication Jump beta Thanks to its wide spectrum of sizes, Jump is particularly suitable for long-term therapy concepts. Thus, Jump is indexed for the following clinical impairments: • (infantile) cerebral palsy • spina bifida • all kinds of palsy • all kinds of plegia • multiple sclerosis • all kinds of muscle weakness (myasthenia; atrophy or dystrophy) • amputation of the lower extremities • cardiovascular insufficiency • rheumatic illnesses Jump supports the following therapeutic aims: • preservation, development and/or strengthening of the patient’s entire tonicity, • stimulation, stabilisation and strengthening of metabolism and circulation, • preservation, development and/or strengthening of the patient’s (auto-)mobility, • stabilisation and straightening of the patient’s trunk (positioning), • skeletal stabilisation and strengthening of the spine, • development and improvement of the patient’s sensorial perception, • participation in the patient’s social surroundings (inclusion). 1.4 Counter-indication Jump beta 1.2 Legend to Symbols ATTENTION This is how we indicate safety aspects of utmost importance relevant to people. � PLEASE NOTE This is how we indicate NOTES or rules of great importance. INFORMATION This is how we indicate INFORMATION on installations or adjustments. READ Refers to additional reading material. BOLD PRINT Texts in bold print highlight important passages. ATTENTION Under the following circumstances and/or symptoms, please consult your treating doctor or therapist prior to any passive or active use of Jump: •Users whose skin is not intact (especially around the areas of buttocks, back, thighs, hands, etc.) may experience dermatological complications (pressure marks, irritations, open traumata) • if the user is suffering from grave tonicity dysregulation • patients with extremely impaired competence or perception canNOT participate in road traffic without assistance. � PLEASE NOTE We are NOT liable for any damage to persons or objects resulting from using Jump under above circumstances. 5 Jump beta 1.5 Specification Jump beta 1.6Usage Jump beta is a lightweight, versatile activity wheelchair for indoor and outdoor use (flat, school, workplace, leisure time, travels). It is equipped with two different frame versions with two different leg supports each: • firmly integrated with the frame (sports-frame) • or pivoting and removable (PLS-frame). Both frames are available with straight or abducted (6 cm) leg supports and two frame heights: • standard height and • XL-height (+4 cm) for very tall people with particularly long lower legs. The wheelchair serves the sole purpose of active or passive transportation of the person to whom it has been adjusted by a qualified specialised trade. It may be used without restrictions indoors, and on firm ground outdoors. If the wheelchair is to be used on uneven grounds, such as sand, gravel, cobblestone, etc., a suitable upgrade (e.g. outdoors power steering device) is necessary. Jump beta is suitable for adolescents and adults from a seat width of 28 cm and up to a maximum payload of 120 kg. 3 frame sizes are available depending on the seat depth chosen: • frame size 4 (for wheel sizes 22“/24“) • frame size 5 (for wheel sizes 24“/26“) • frame size XL (for wheel size 26“) Thanks to its double cross-brace, Jump provides freedom of twisting and driving comfort comparable to that of a wheelchair with a rigid frame. In order to support long-term and sustainable therapy concepts, all equipment components are compatible with any frame version and may be converted or upgraded at any time. The wheelchair is perfectly adjustable to the user’s physiognomic needs. Jump’s seat/back area provides manifold options, enabling a highly differentiated positioning of the user: • seat and back covers/belts, • firm seat plate and firm moulded back, • anatomic seat/back unit, • suitable for all kinds of seat shells (type 1-3) Casters are available in various versions in sizes from 4’’ to 7’’. The side-parts are available in various versions as well: from welted aluminium (height-adjustable) to retractable and pivoting versions, with or without arm rest (also height-adjustable). Foot rest(s) are available in both versions (on the inside or outside): divided or persistent. They all fold upwards, and in the case of the sports-frame versions they are pivoting as well. For the PLS-frame, an upward-folding leg rest with physiological pivotal point and leg support is available. Furthermore, Jump beta offers a wide range of equipment options (cf. order sheet). 6 ATTENTION The wheelchair must not be used in extremely wet areas (shower, sauna, etc.), and it should not be exposed to wetness in any excessive fashion. ATTENTION The wheelchair must not be used as means of transportation of goods, objects, and the like. INFORMATION Regular tending and maintenance (cf. maintenance plan in chapter 6) extend the wheelchair’s service life and is strictly mandatory. 1.7Reception � PLEASE NOTE DELIVERY All our wheelchairs are built entirely in our factory where they are also tested for functional efficiency and freedom from defects. Then they are packed into special cartons by trained members of our dispatch section. FORWARDING For reasons of liability, we must ask you to check the wheelchair for possible damage caused by transportation immediately upon reception and in the presence of the bearer (forwarding company). DAMAGE IN TRANSIT In the event of damage, please proceed in the following fashion: • write a brief damage- or factual report and, if possible, include informative photos. • collect personal data from the bearer (drivers licence etc.), • inform us immediately. � PLEASE NOTE Do not sign the bearer’s receipt until you have thoroughly assessed the wheelchair’s freedom from damage. � PLEASE NOTE Belatedly reported damage cannot, according to applicable law, be asserted - neither to us nor to the forwarding company. User Manual for sport frame and swing-away frame 1.8Documentation 1.10 Accessory - and Attachment Drives � PLEASE NOTE Please keep this manual in a safe place and have all work/reparation done on your wheelchair documented in the maintenance plan by your medical store. If the wheelchair is ever to be reused by a different person, the manual needs to be handed back to your benefactor as well. ATTENTION Accessory- and/or attachment drives of other manufacturers may only be attached to the wheelchair models specifically released for this purpose. � PLEASE NOTE In the event of the wheelchair being reused, the service booklet is an important source of information for your benefactor. It serves to verify regular inspections, which might be of importance in the event of warranty claims. ATTENTION Please have all safety-relevant works on your wheelchair conducted and documented exclusively by your qualified specialised trade. 1.9 Service und and Maintenance INFORMATION Amongst the numerous available manufacturers, we provide here an exemplary list of possible and tested models by Ulrich Alber GmbH, Albstadt. Please consult the manufacturer for the respective requirements. • e-fix E25 •e-motion • viamobil eco V14 • viamobil V25 • scalamobil S35 ATTENTION The attachment of those accessory- and attachment drives is to be conducted either by the respective manufacturer or a medical store charged with that purpose. In either case, the attachment lies in their sole responsibility. READ The German clause § 33 Abs. 1, Satz 4, SGB V states that maintenance, restoration, and replacements are part of the benefactor’s responsibility. Please have all safety-relevant inspections, maintenance, and, if necessary, reparations conducted regularly and upon prior agreement with your benefactor in order to keep your wheelchair in serviceable condition. INFORMATION Your qualified rehab technician will perfectly adjust the wheelchair according to your individual needs and forward it in ready-to-operate condition. ATTENTION Please mind the DANGER OF BRUISING your fingers when doing any work concerning movable parts of the wheelchair. ATTENTION It is only through regular check-ups of all safety-relevant parts by a qualified rehab workshop that you may reliably be protected from harm and that our manufacturer’s warranty stays intact. ATTENTION For any service and maintenance work, original replacement parts are to be used exclusively. INFORMATION Please proceed in accordance with the maintenance plan in chapter 6 of this user manual. 7 Jump beta 2 Safety Instructions 2.1 General Indications ATTENTION All rotating and pivoting parts pose a certain risk of injury. This is also the case for adjustment and reparation works. READ Before putting your wheelchair into service, please read the enclosed brochure “General Usage and Safety Advice”. ATTENTION The wheelchair may exclusively be used according to its specification. Any other inappropriate use may put you and your surroundings into serious danger. Furthermore, any disregard of appropriate use may lead to the expiry of our warranty and product liability! Make yourself thoroughly familiar with your wheelchair after adjustments have been done or before putting it into service for the first time. Practise on even ground and with the help of an assistant at first. Only then can you, with an assistant, try to tackle slopes. Removing or attaching items of equipment changes the wheelchair’s measurements, weight, driving characteristics, and tendency to tip over. Please consider that a strong seat inclination and very active rear wheel position combined with a disadvantageous posture may cause the wheelchair to tip backwards even on level ground. Only very experienced wheelchair users should make such extreme adjustments. ATTENTION Any constructional changes of your wheelchair must be discussed with, and conducted by, the manufacturer or your rehab technician. ATTENTION Do not conduct any adjustments, reparations, and/ or maintenance work yourself. Please turn to your qualified medical store for this purpose. READ Please mind the advice on maintenance and inspection of your wheelchair at the end of this user manual. 8 User Manual for sport frame and swing-away frame 2.2 Driving Characteristics 2.2.1 Getting in and out (1) ATTENTION (1) Only get into or out of your wheelchair while on even ground and with the LOCKING BRAKE TIGHTENED. Always activate the anti-tipper and turn the casters forwards in order to enhance the wheelchair’s stability. If necessary/possible, have someone help you get in or out. Make your assistant aware of any possible dangers, such as tripping points, hems, or the nature of your disability. ATTENTION (2) NEVER use the foot rest(s) to get into or out of your wheelchair for it may tip forwards. If possible, please fold the foot rest away in order to get closer to the wheelchair. (2) 8 PLEASE NOTE (3) In some cases, it might be therapeutically desirable that a child gets into or out of the wheelchair independently via the foot rest. In this case, always do the following: • turn the casters forwards, • secure the wheelchair against rolling away, • activate the anti-tipper, • do not let the child get in or out without supervision, • always be ready to help. (3) (3) 9 Jump beta 2.2.2 Starting and Braking (1) ATTENTION Always avoid a jerky start for the wheelchair might tip backwards. So, if possible, lean forwards when starting. For children, we generally recommend using the anti-tipper whenever possible. ATTENTION When driving actively, you may brake by gradually excreting pressure on the hand rims with your palms and fingers. Please keep in mind that you are going to have to use considerably more force when braking on downward slopes. Always ride very slowly on such slopes so you can bring your wheelchair to a standstill at any moment. ATTENTION Also keep in mind that the hand rims may heat up through friction. ATTENTION If necessary, wear gloves with leather palms (like the ones used in cycling), but NEVER woollen gloves. 2.2.3 Danger of Tipping Over ATTENTION There is a general risk of the wheelchair tipping over: (1) when faced with any kind of offset or curb, (2) (2) when faced with staircases (never try to overcome them alone!), (3) when participating in road traffic under the influence of medication, drugs, alcohol, etc. (4) when faced with slopes and/or when you have objects attached to the back of the wheelchair, which change its centre of gravity, (5) when leaning out of the wheelchair, (6) when crossing transverse ribs, e.g. tram rails only do so from a 90° angle, otherwise there is a high risk of getting stuck and flipping over (if possible, try to find a different spot to cross). 10 (3) User Manual for sport frame and swing-away frame (4) (6) (5) 11 Jump beta 2.2.4 Up- and Downgrade Slopes (1) ATTENTION Please consider the considerably higher force necessary to ride and brake on slopes (cf. 2.2.1). ATTENTION (1) When tackling upgrade slops, always lean your upper body forwards. When riding on downgrade slopes or offsets, lean backwards as much as possible. ATTENTION When tackling an up- or downgrade slope with an inclination of more than 6%, only do so with an assistant! ATTENTION NEVER tackle up- or downgrade slopes WITHOUT the anti-tipper activated! ATTENTION (2) NEVER ride on slopes and offsets crossways. The wheelchair might tip over to one of its sides. (2) 12 User Manual for sport frame and swing-away frame 2.3 Independent Transfer ATTENTION Independent transfer from or to the wheelchair is dangerous and some experience is required. So please practise this with an assistant several times before attempting to transfer by yourself. ATTENTION The foot rests are in the leg area, which may cause a risk of tripping! Make sure the foot rest is NOT in the area of your movement when transferring! Otherwise please transfer from a different side. If possible, fold the foot rest(s) and leg supports away. (1) To transfer independently, get as close as possible (frontal, in a 45° angle) to the other seat and make sure the wheelchair stays steady. If possible, fold the side part to the back. Lock the locking brake and prop up on the new, steady seat. (2) A sliding board or the like would be of advantage. Make sure that the board rests firmly on the target seat so it won’t slip and proceed as described above. (1) (2) 13 Jump beta 2.4 Reaching for Obstacles (2) With the help of an experienced and strong assistant, test the wheelchair’s proneness to tipping to all sides. In order to do this, carefully lean out of your wheelchair as far as possible to the sides, front, and back respectively, to, for instance, grab an object from the ground. Observe carefully at what point the wheelchair starts tipping over and remember that point well. ATTENTION (1) Never grab obstacles situated behind your wheelchair while facing it backwards - DANGER OF FLIPPING OVER! Turn your wheelchair around first and approach the obstacle from a frontal or lateral position. ATTENTION Before reaching for objects situated next to or in front of your wheelchair, secure it against rolling away! Do not lean out too far. 8 PLEASE NOTE You are on the safe side if you are using a gripping aid. (2) When leaning out to one of the wheelchair’s sides, please hold on to the opposite side and try to shift your weight as little as possible. (3) If you have to lean forwards, NEVER put ANY weight on the leg support - DANGER OF FLIPPING OVER! Turn the casters forwards for a firmer stand. If possible, place both feet on the ground and as far away from yourself as possible. Here, too, you are advised to use a gripping aid. Your medical supply store will be glad to advise you. (1) 14 (3) User Manual for sport frame and swing-away frame 2.5 Overcoming Obstacles (1) Avoid using staircases! Whenever possible, please use ramps or lifts to overcome any kind of height differences. ATTENTION (1) NEVER TACKLE STAIRCASES ALONE. ATTENTION (2) If you do have to use a staircase, only do so with the help of two experienced assistants. Make sure the anti-tipper is deactivated and keep in mind that the wheelchair may only be touched on metal parts which are firmly screwed onto the frame. ATTENTION (3) The plastic caps on the push handles may come off under unfavourable circumstances (heat, moisture, extreme straining, etc.). Please inform your assistants about this danger. (2) ATTENTION (3) NEVER pull (or let alone carry!) the wheelchair over an obstacle holding on to the extendible push handles. ATTENTION The same goes for removable leg supports, foldable side parts and/or foot rests. ATTENTION NEVER use escalators - not even with assistants!!! Shopping malls or any public buildings with escalators always provide lifts as well. (3) 15 Jump beta ATTENTION Do not approach offsets (such as curbs) at a fast pace - DANGER OF TIPPING! (2) ATTENTION (1) As a general rule, you have to deactivate your anti-tipper before tackling offsets or using lifts or lifting ramps. Otherwise you may be unable to manoeuvre. (2) In order to overcome curb offsets, your assistant should tip you backwards slightly (tipping aid), lift the casters above the curb and then carefully roll the wheelchair over via the rear wheels. The anti-tipper must be deactivated. (3) To ride off a curb offset, please proceed analogically. (3) ATTENTION The casters must remain in the air until the rear wheels have passed the offset. UNDER NO CIRCUMSTANCES should you have the casters touch the ground first - DANGER OF TURNING OVER. (4) Experienced users may be able to overcome offsets without an assistant using the so-called ‘tilting’ method (cf. below). ATTENTION This manoeuvre requires a lot of practise and skill on the part of the user! • Carefully approach the curb in a 90°-angle and slightly tilt the chair backwards until the casters no longer touch the ground. • With the casters in the air, move them across the offset and approach the curb as closely as possible. • Now drive across the curb with your upper body leaned forwards as far as you can. (1) 16 (4) User Manual for sport frame and swing-away frame 2.6 Locking Brake 2.7Anti-tipper ATTENTION The knee-lever brake is a locking brake and NOT suitable for braking while driving. At a fast pace (especially on downgrade slopes), it could bring the wheelchair to an abrupt stop, which might cause you to fall out. With a driving brake, such as a drum brake, on the other hand, gradual deceleration is possible. ATTENTION We recommend that young and inexperienced wheelchair users use the anti-tipper whenever possible. ATTENTION Before any (longer) trip, make sure that... • the tyre air pressure is correct (cf. indications on tyre covers), • the braking bolt is in good condition, • that the cable pulls (if present) are in good condition. (1) In order to activate the anti-tipper without an assistant, first secure the wheelchair against rolling away. Then carefully reach backwards without leaning out too far and push the anti-tipper down and turn it by 180° until it snaps into the guide slot. If possible, please hold on to the rear wheel/grip-tyre during this procedure. ATTENTION Cable pulls need a lot of maintenance! The clamp screws on the Bowden cable in particular need to be checked and readjusted regularly. These cable pulls are used for: • drum brakes, • cable brakes (integrated in the side parts), • assistant brake, • single-hand brake. ATTENTION (2) Deactivate the anti-tipper before overcoming offsets or using lifts and lifting ramps. 8 PLEASE NOTE All our wheelchair models can be subsequently equipped with anti-tippers at any time. ATTENTION The recoil blocking is effective on slopes with an inclination of max. 6% and with a maximum payload (user incl. seat shell and the like) of max. 90 kg. ATTENTION Please clean the braking bolt from dirt and fluff regularly. ATTENTION Please keep in mind that dirt, moisture, ice, snow, mud, etc. may inhibit the function of the locking brake considerably. ATTENTION Do not conduct any reparations of the locking brake yourself. Please turn to your rehab technician! (2) ATTENTION Upon making any changes concerning the rear wheels (position in the perforated plate, tyre change, etc.), please check the function of the locking brake and readjust if necessary. 17 Jump beta 2.8 Angle-Adjustable Back, Seat Tilt (1) ATTENTION (1) For wheelchairs with a back adjustable in angle or a seat tilt, the anti-tipper must be activated for angle-adjustments above 90°! ATTENTION For active driving, the back or seat tilt must ALWAYS be in upright position (90°)! When changing the back angle or seat tilt, please make sure the head is sufficiently supported by a head support or the like. ATTENTION NEVER activate the seat tilt or back angle adjustment while driving! (2) For cases of amputated or elevated legs, we recommend using a wheel base extension to improve the wheelchair’s stability when leaning backwards. At the very least, however, the anti-tipper must be activated. ATTENTION A wheel base extension does NOT replace the anti-tipper! 2.9Casters ATTENTION If the casters are adjusted incorrectly or the wheelchair is riding at too high a pace (especially on downgrade slopes), the casters may judder and lead the wheelchair to a dangerous, abrupt halt. (2) 8 PLEASE NOTE Regularly clean the casters’ axes and axis covers from dirt and fluff. INFORMATION After making any changes affecting the rear wheels, the casters must be readjusted. Please have this done by an experienced rehab-technician. 8 PLEASE NOTE (3) When transferring into or out of the wheelchair, turn the casters forwards in order to improve stability. You can do this by briefly riding forwards. 18 (3) User Manual for sport frame and swing-away frame 2.10 Folding and Unfolding (1) ATTENTION Please mind the DANGER OF BRUISING your fingers due to the cross-brace when folding or unfolding Jump. ATTENTION Before putting your wheelchair into service again, make sure that all components that have been removed are now firmly locked, attached, or screwed on. This is of particular importance for the quick-release axles and rear wheels! ATTENTION (1) Upon unfolding/opening the wheelchair (e.g. after transportation etc.), please make sure that the cross-braces have firmly snapped into the trestles. Otherwise the wheelchair is not functional. ATTENTION (2) If your Jump is equipped with a stabilising bar on the back, it, too, must be firmly snapped in and locked before putting the wheelchair into service. The same holds analogically for the moulded back, the firm seat plate SeatFix, and the folding side parts. Before putting the wheelchair into service, above components must be firmly attached and/or locked/ screwed on. (2) (1) (2) 19 Jump beta 2.11 Loading and Transportation When transporting your wheelchair in a motor vehicle, please mind the following: • fold the anti-tipper inwards (if present). • remove the push handle(s) (if present). • If possible, remove the moulded back and fold the back onto the seat. • If possible, fold the wheelchair and keep it safely in place using fixating folding tape. • loosen the locking brakes and remove the rear wheels. • secure the wheelchair inside the vehicle using tension belts. • The tension belts may only be attached to the firm frame. Foot rest, side parts, back or seat are not suitable for this purpose. • Store all detached wheelchair components in a safe place inside the vehicle so they cannot injure anyone in the event of abrupt braking. ATTENTION There is danger of injury due to loose objects spinning around in the vehicle, such as leg rests, seat plates, wheels, sticks, bags, etc. Please turn to the manufacturer of your motor vehicle for information on safe securing of the wheelchair with lash loops or other suitable safety precautions in your vehicle. 2.11.1 Transportation in Public Transport According to the EG directive 2001/85/EG, every vehicle of public transport (buses, trams, etc.) must provide a space for wheelchairs. ATTENTION This space is meant for EMPTY wheelchairs only. ATTENTION Place the wheelchair on the designated space with the back facing in driving direction, so both the back and one of the side parts firmly rest on the borders of the wheelchair area. In the event of an accident, the wheelchair must not slip away. Lock the locking brake. Get out of the wheelchair while on the vehicle and use the seat next to the wheelchair area provided for this purpose. If present, please use the vehicle’s safety belts! 20 Have someone help you transfer in and out of the public vehicle • so you do not get caught in the gap between door and platform, • so you do not panic, • so your assistant can help you claim the wheelchair space you are entitled to on the vehicle if necessary, • so your assistant can help you transfer onto a seat and fixate your wheelchair. 2.11.2 Transportation in a Passenger Car Due to their purpose and light-weight construction, wheelchairs can never provide your with the stable characteristics of a firmly built-in car seat. ATTENTION This is why we do NOT recommend using a wheelchair as a seat in a passenger car. READ Please read our information brochure „Crash Test ISO 7176-19“ where we describe the risk factors and norms of ISO 7176-19 in detail. ATTENTION The only wheelchair models that may be used as a seat in a passenger car are those that have passed the crash test according to ISO 7176-19. Our wheelchair models that have been successfully tested are designated with this international anchor symbol on their type plate. On the order sheets, they are additionally highlighted with our “Crash-Test” button. If in doubt, please turn to your manufacturer or consult www.sorgrollstuhltechnik.de to find out whether your model is released for use as a seat in passenger cars. User Manual for sport frame and swing-away frame 2.12 Further Dangers 8 PLEASE NOTE Avoid exposing your wheelchair to direct sunlight. Dark parts of the wheelchair may heat up and cause skin burns. ATTENTION IGNITION HAZARD of textile components (seat/back covers, seat cushions, plastic parts). Keep away any potential sources of ignition from your wheelchair. ATTENTION Hand rims may heat up due to strong friction, especially when braking a fast ride or when driving on long downgrade slopes. 8 PLEASE NOTE If you have sensitive skin, we recommend wearing gloves with leather palms (like the ones used in cycling), but NEVER woollen gloves. ATTENTION DANGER OF HAND INJURY due to rotating parts. Do not place your hands on the spokes of the rear wheel or into the gap between rear wheel and knee-lever brake. ATTENTION Avoid using the wheelchair in wet rooms or in water as various components are prone to corrosion. This affects the driving characteristics as well as the service life of the wheelchair negatively. 21 Jump beta 3 General Handling 3.1 Usage Guidelines 3.1.1 General Instructions All our wheelchair models are suitable for both indoor and outdoor use. The following models are excluded from this rule: the mobile standing frames Pablo mini, Pablo II and III, as well as wheelchairs with the mechanic single-hand gear UNO. Those can only be used indoors. All components and construction materials fulfil the requirements of EN 1021-1:2006 and EN 10212:2006. All our wheelchairs serve the sole purpose of active or passive usage by the one person (child, adolescent, or adult) to whom the wheelchair has been adjusted by a qualified medical supply store. Any other kind of usage is inappropriate and may seriously harm you or the people around you. ATTENTION Do not exceed the maximum payload! The wheelchair does not serve as a means of transportation for goods or the like. No more than one person must sit in it at a time. Please follow these points: • children must NOT sit in the wheelchair user’s lap, • the wheelchair user should NOT carry shopping bags in his/her lap, • children must NOT stand on the wheelchair’s foot rests... When parking or when transferring into or out of your wheelchair, make sure you are on firm, even ground. Secure the wheelchair against rolling away and activate the locking brake(s). Never leave the wheelchair unattended or in a freely accessible place to avoid misuse or unauthorised usage. Neither should you ever leave children and adolescents unattended in their wheelchairs. ATTENTION Do not let (other) children “play” with the wheelchair – not even under supervision – for they are not trained in using such devices. If you have adjusted a high seat angle (higher at the front than at the back), if you are leaning backwards, or if you are resting your legs on a chair (or the like), the centre of gravity changes. This increases the risk of your wheelchair tipping backwards. Always use the anti-tipper in situations like these. ATTENTION All equipment parts need to be handled appropriately. Do not throw or drop any removable parts such as arm rests or leg supports etc.! 22 ATTENTION RISK OF BURNNG! If exposed to direct sunlight, some parts of the wheelchair may heat up to over 42°C. Therefore it is advisable to park your wheelchair in a shaded area whenever possible or to cover it with e.g. a blanket. ATTENTION In the event of a collision, please check the carriage and frame as well as all Bowden cables afterwards for potential damage. Turn to a specialised workshop for maintenance immediately! The following works may only be conducted by a qualified workforce: Reparations and changes concerning safety-relevant building parts or -groups (frame, foot rest, back pipes, gas pressure spring, wheel base, anti-tipper, etc.). Attachment of any third-party building parts. Please stick to the indicated intervals for maintenance and cleaning. With some technical skill, you may be able to conduct some of them by yourself. They mainly serve the operational safety and maintenance of the wheelchair. 3.1.2 When Driving The wheelchair user may only drive (passively or actively) while on even ground and sitting in the seat or seat shell So please mind the following: • Do not drive in water, sand, gravel, mud, swamp, snow or slush! • Please use the outdoor pushing aid for such conditions (outdoor front end). This helps, above all, protect the sensitive caster axes. • Salt water in particular harms functionally important parts of the wheelchair. • Do not use or park you wheelchair in wet rooms! Risk of corrosion! Please exercise particular caution when confronted with the following: • sunk rail shafts (trams), • ruts or similar sources of danger. • Always tackle such obstacles in a right angle. • exception: so-called “manhole covers”! • If you have adjusted a non-vertical back angle or if you are using a tilted seat, ALWAYS use the anti-tipper and a suitable head rest! • Before using your wheelchair, always check whether the removable parts are correctly attached/screwed on (quick-release axles, leg supports, head rests, arm rests, push handles or push bars, etc.) • Most importantly, check the function of the brakes (pull cables, tyre air pressure - cf. indication on tyre covers) before each ride User Manual for sport frame and swing-away frame • Depending on the situation, always drive slowly and carefully enough so you could bring the wheelchair to a quick halt at any time if need be. • In the event of an accident, it is useful to have another person with you to fetch help. ATTENTION All driving manoeuvres described here may exclusively be undertaken with a vertical back (90°)! Tiltable wheelchairs or seat shell under frames as well as backs with an altered angle must be put into a vertical position before undertaking any of these manoeuvres! 3.1.3Adjustments For safety reasons, please have any adjustment works done by a medical store. Your specialist trade and/or therapist will inform you about the various options for your wheelchair (or mobile standing frame) and familiarise your with its handling and appropriate usage. ATTENTION RISK OF BRUISING Handling adjusting parts (back, side parts, leg rests, locking brake, brake lever, brake lever fixation, leg support, positioning aids, therapy tables, push handles, push bars, etc.) poses a risk of injury or bruising if you reach into the pivoting area of these building parts. Similarly, all adjustments and reparations pose this risk of bruising within the pivoting area of above components. Inform your assistant about these potential dangers. READ see LEGAL NOTICE chapter 1.9. 3.1.4 Getting In and Out To get in or out, always proceed in the following fashion: • bring the wheelchair as close as possible to the point of transfer, • turn the casters forwards (by briefly driving backwards), • secure the wheelchair against rolling away using the locking brake, • activate the anti-tipper, • (if possible) fold the foot rest(s) or the entire leg support away from your area of transfer, • (if possible) fold the side parts back, • still while seated (if possible), transfer your weight with both hands onto your target seat area and then carefully pull the rest of your body with you, • When getting into the wheelchair, transfer your weight onto its seat. • If necessary, seek someone’s help to do the transfer. ATTENTION NEVER use the foot rest(s) to transfer; RISK OF TIPPING OVER! ATTENTION Never use the side parts and/or wheels or hand rims to support yourself when transferring. ATTENTION When transferring, please follow all relevant points from chapter 2 “Safety Instructions”. For some users it might be therapeutically advantageous to independently transfer via the foot rest. In this case, please proceed as described in “Safety Instructions” (chapter 2). At the end of this user manual, the chapter on maintenance provides a maintenance plan developed in accordance with rehaKIND and all associated manufacturers. It is only through regular inspections of all safety-relevant building parts by a qualified rehab technician (in accordance with aforementioned maintenance plan) that you or your child may reliably be protected from harm. 23 Jump beta 3.2 Folding and Unfolding 3.2.1 with Seat and Back Covers (3) Folding: If your Jump is equipped with seat and back covers, please proceed in the following fashion: • secure your wheelchair against rolling away, • loosen the stabilising bar (if present/necessary), •(1+2) loosen Velcro of back and seat covers and pull them back, •(3) remove seat and back cushions, • swing up the foot rest(s), • remove the leg support if present/necessary (Jump beta PLS-frame), • (3) grab the seat cover at front and back and pull it up to fold Jump, • (4) secure the folded wheelchair with a fixating tape, • (5) remove the wheels for transportation, • remove the casters via the quick-release axles. • Safely store away ALL parts in the car so they cannot spin around in the event of abrupt braking. 24 (1) (4) (2) (5) User Manual for sport frame and swing-away frame Unfolding: • (1) insert the side parts (Jump beta) and make sure, they have firmly snapped in at the front, • firmly attach casters and rear wheels, • tilt the wheelchair towards yourself (the rear wheel furthest away from you should not touch the ground), • loosen the fixating tape, • pull the cross brace pipes apart until they have snapped into their bearing blocks, • place the wheelchair on both sides and secure it against rolling away, • lock the stabilising bar firmly, • place back/seat Velcro onto the seat, • insert seat and back cushions, •(2) reinsert side parts and leg supports (Jump beta PLS); make sure that the locking bolts have firmly snapped into place, • get into the wheelchair and close/lock the foot rest(s) 3.2.2 with SeatFix and/or Moulded Back If your wheelchair is equipped with SeatFix and/or a firm moulded back, please proceed analogically to fold/unfold: • secure the wheelchair against rolling away, • (3) loosen the stabilising bar, •(4) unlock and remove the moulded back, • (5) unlock and remove SeatFix (if present), • open foot rest(s), • grab the cross brace pipes at both front ends and pull them up to fold Jump, • secure the folded wheelchair with fixating tape, • remove the casters via the quick-release axles. Safely store away ALL parts in the car so they cannot spin around in the event of abrupt braking. To unfold Jump (equipped with SeatFix and/or moulded back), please proceed analogically. (3) (1) (4) (2) (5) 25 Jump beta 3.3 Wheels 3.3.1 Quick-Release Axle Wheels All our rear wheels (apart from Pablo) are equipped with quick-release axles to enable quick removal. (1+2) To remove or insert the quick-release axles, press the arresting button (A) in the centre of the wheel hub. After insertion, the arresting ball (3) at the end of the axle must be completely exposed and the wheels must not be removable. Please mind the following points: • Wheels rotate and may cause finger injury. • Check the axles for firm hold upon inserting the wheels! • Regularly check the small arresting ball (tension spring) at the end of the axle (3) for functionality. • Regularly check the air pressure of the rear wheels in order to maintain the functional efficiency of the brakes! • Regularly check the firm attachment of the spokes (cf. maintenance plan). ATTENTION NEVER change the rear wheels’ position in the perforated plate without authorisation! They very strongly influence the functional efficiency of the locking brake as well as the centre of gravity (proneness to tipping). During transportation in a passenger car, please make sure that the removed wheels are safely stored away so they cannot injure anyone in the car. There is a RISK OF BRUISING in the area of the locking brake when driving the wheelchair via the tyre covers. Do not put your fingers near the rotating spokes. (Spoke covers may prevent this.) Do not put your fingers in between hand rims and rear wheels. (Profiled wheels with integrated hand rims make this impossible.) Beware of narrow gaps: You may bruise your fingers (4) and/or damage the hand rims (5)! Braking via the hand rims produces heat through friction. If necessary, wear leather gloves (like the ones used in cycling). In keeping with the maintenance plan, please regularly check whether the screw joints of the hand rims are tightened properly. In keeping with the maintenance plan, please regularly check whether the spokes are tightened properly. (1) (2) When exposed to strong sunlight, the wheels might heat up to over 42°C, which might cause you skin burns. (A) (3) 26 (4) (5) User Manual for sport frame and swing-away frame 3.3.2 Drum Brake Wheels 3.3.3 Double Hand Rim (1) The drum brakes, too, may be removed via a quick-release axle. To remove or insert, proceed as described above for the rear wheels. Driving a wheelchair via a double hand rim requires some practice. Familiarise yourself with the handling of this technique with the help of an experienced assistant and preferably in surroundings well known to you. ATTENTION (2) The brake pads of the drum brake wheels are extremely sensitive and they may lose their functional efficiency due to dirt or scratches on the brake pads. Regularly remove dirt and fluff from the brake pad using a soft brush. (3) The drum brake wheels are operated by the assistant via both levers on the push bar or push handles. To decelerate the wheelchair, evenly apply pressure to both levers (A). To lock the wheelchair in position, pull both levers up until the small arresting levers (B) have snapped in. The drum brakes are now blocked. To unblock, pull both brake levers (A) up a little further in order to unlock the small arresting levers (B). (4) Before transportation etc., remove the telescopic tube (A) by pushing both ends together. Unlock and remove the rear wheels (B). (5) To reinsert, proceed in the same fashion and put the telescopic tube over the wheel axle (C). Make sure it fits correctly and is free from play. The locking (B) must be intact when using the wheelchair again. ATTENTION Please apply even pressure onto both hand rims (inner and outer sides). Otherwise you may drive in involuntary turns and thus endanger yourself and your surroundings. ATTENTION When on downgrade slopes, always drive slowly enough so you could bring your wheelchair to a halt at any time; or have someone help you. (4) (1) (A) (2) (B) (5) (C) (3) (A) (B) 27 Jump beta 3.3.4 Transit Safety Wheels (1) The transit safety wheels (TSW) save you the trouble of changing, transferring, detaching and reattaching when faced with narrow spaces on the bus, train, plane, toilets, etc. There are three functions corresponding with the holes: (A) inactive anti-tipper (B) active anti-tipper (C) transit wheels (1) Now you may pass the narrow space. Afterwards, reinsert the rear wheels via the quick-release axles and then unlock the TSW. The wheelchair will now drop by 1 cm and rest on its own wheels again. Bring the TSW into an inactive/anti-tipping position by pulling both wheels up - with the red lever pushed - until they have snapped into the desired holes. (D) (A) (B) (C) ATTENTION Please make sure you are on even ground when changing to, or back from, transit mode since the lack of rear wheels renders the locking brakes ineffective. In transit mode, both TSW must have snapped into the lowest hole on the plate (2, C). Remove the rear wheels only after having ensured that your wheelchair has a firm stand on both transit wheels and the rear wheels are freely rotatable. Mind the risk of bruising your fingers when transferring in narrow spaces! Application (2) In order to transfer your TSW from a deactivated state into the anti-tipper-position, loosen the red lever (1, D) on both sides (this may also be done by an assistant). Let the TSW slide downwards until they have snapped into the next, middle, hole (1, B) on the perforated plate. (3) In order to use the TSW as transit wheels, both wheels have to be unlocked via the red levers (1, D). Let both TSW slide to the ground (the levers cannot lock in this position!). Now, jack up the wheelchair by around 1 cm - this can be done by your assistant placing his/her foot as a resistance behind the wheel and simultaneously pulling the chair towards him-/herself. The red levers will automatically snap into the lowest position (1, C). If the rear wheels are freely rotatable, they can be removed at this point. 28 Alternatively, you may independently relieve one half of the wheelchair by pushing your own pelvis to the right/left side (while seated in the chair), so the TSW may snap into the desired position. User Manual for sport frame and swing-away frame 3.4Casters (7) ATTENTION Please avoid any collisions with curbs or the like under all circumstances! In the event of a collision, please have the wheelchair checked for potential damage - and repaired if necessary - by a qualified specialised store immediately! As soon as you notice that the casters are juddering, decelerate your ride (especially when driving very fast or on downgrade slopes)! If your casters have an interchangeable kit, please proceed like for the rear wheels’ quick-release axles. (B) ATTENTION When reinserting the axles, make sure to check for firm hold! The button which had been pushed down must now be fully exposed (cf. quick-release axle rear wheels). Regularly clean the caster axles, forks and axles from fluff and dirt. Locking (7) To unlock the casters, pull the locking bolt (A) out and turn it by 90° so it snaps into the arresting notch (B). (8) To lock, pull the locking bolt (A) out slightly more, turn it by 90° and let it slide into the guide slot (C). (A) (8) Next time the casters are turned into a forward position (when driving forwards), the bolt will lock automatically. (C) 29 Jump beta 3.5 One-hand Steering Adjusting the steering lever: • (1+2) pull the safety clamp (A) upwards, • (3) remove the steering lever (B) by pulling it up, • (4) pick the desired position along the notches provided (C), • push the steering lever (B) back down • and secure it using the clamp (A) as shown in (1). (1) Activating one-hand steering (OHS): • turn the casters forwards (only then can the OHS be activated or deactivated), • (5) unlock the snap-action mechanism (A) by pulling out the locking device (B) and turning it by 90°, • (6) push down the entire mechanism (A) until it snaps in and then lock it. To deactivate the OHS, please proceed analogically. (5) (B) (6) (A) (A) (A) (2) 3.6 Special Hand Rim Versions 3.6.1 Nubby Hand Rims ATTENTION RISK OF INJURY! Keep in mind that nubby hand rims may still turn while you are being pushed! Especially when driving downhill, braking via exerting pressure on the hand rims is virtually impossible. Please have an experienced and strong assistant help you! (3) (B) 3.6.2 Hand Rim Covers / Maxgrepp Hand Rims ATTENTION All hand rim covers as well as the Maxgrepp hand rim consist of black materials which may heat up to over 42° when exposed to sunlight! Under unfavourable circumstances, the black covers might stretch when heated up and come off of the hand rims. (4) Please wear suitable leather gloves when driving at high speed and/or when driving down hill; or have someone help you! (C) 30 User Manual for sport frame and swing-away frame 3.7 Seat and Back Covers (1) For adjusted seat and back covers, the fluff (A) and Velcro (B) components must overlap 8 cm min. on both sides. (1) (A) (B) (A) (3) To unlock the moulded back: • pull both locking levers (A) outwards • and turn by 90°. • The levers remain in this position. • Pull the bolts (B) upwards out of their retainers (C). (4) To lock: • first, place the bolts (A) of the moulded back into the retainer (B), • then guide it downwards until the upper bolts (C) rest in the retainer as well. • Now lock the moulded back as described above. ATENTION The wheelchair is only safe and ready for use if seat and/or back are firmly locked. min. 8 cm je Seite min. 8 cm je Seite (3) (C) (B) 3.8Firm Seat Plate (SeatFix) and Moulded Back (2) To unlock the firm seat plate (SeatFix): • pull both levers (A) underneath the seat inwards • and turn by 90°. • The levers remain in this position. To lock: • first, place the seat plate onto the seat pipes at the leading edge, and • then push it down at the rear edge until it snaps in. • Then lock SeatFix as described above. (A) (4) (C) (2) (A) (B) 31 Jump beta 3.9 Push Handles (1) ATTENTION All push aids (push handles and bars) serve the sole purpose of PUSHING the person using the wheelchair. (A) (C) For all variants of push aids, please mind the following: ATTENTION NEVER CARRY the wheelchair/passenger over an obstacle (staircases, steps, offsets etc.) holding on to the push aids! ATTENTION Extendible push handles may loosen under unfavourable circumstances. Before tackling any kind of obstacle, please check the eccentric clamp for firm lock. (B) ATTENTION The stand spring must ALWAYS protrude from the lower end of the pipe below the clamp and be well visible. ATTENTION Do not attach any objects (bags etc.) to the push aids! DANGER OF TIPPING OVER 3.9.1 Extendible Push Handles (2) Removing/inserting the push handles: (1) At the bottom end of the push handles (A), there is one safety button (stand spring) each (B) which prevent the push handle from accidentally sliding off the fixture (C) when adjusting the height. (2) To remove: • open the eccentric clamp (A) • press the safety button (B) on the push handle • hold in this position while simultaneously pulling the push handle out of its fixture (C). (A) (C) (D) To insert: • open the eccentric clamp, • press the safety button into the receiver, • guide the push handle into the fixture • and close the eccentric clamp. ATTENTION Make sure that the push handles have a very firm hold and that the stand springs at the bottom end of the pipe are well visible. If necessary, readjust the tension force via the set screw (D). 32 (B) User Manual for sport frame and swing-away frame 3.9.2 Push Handles with Push Bars All wheelchairs can be equipped with a push bar attached to the long handles. The wheelchair is still foldable. The push bar makes the back more stable and provides benefits comparable to those of a stabilising bar. (1) To remove the push bar, loosen the star screw (A) and swing it down. To close, guide the push bar underneath the open star screw as far as it goes and then tighten. ATTENTION Please mind the warning notices discussed in chapter 3.9! (1) (A) Standard Push Handles long handles Standard Push Handles Short handles Extendable Push Handles long handles Extendable Push Handles short handles 33 Jump beta (2) 3.10 Side Parts 3.10.1Standard Side Parts All side parts - with the exception of the retractable ones (Desk- and long side part) - will be attached and adjusted to your needs by your rehab technician. ATTENTION There is a RISK OF BRUISING in between side parts/ wheel guard and the rear wheels. Do not reach into the gap between side parts/wheel guard and the rear wheels. (3) 3.10.2Desk Side Parts/Long Side Parts The desk- and long side parts may be folded away to the back, retracted (inwards) or removed altogether. (1) To open, fold away or remove the side parts, push the lever (A) and adjust the desired position (2-4). Upon closing, make sure that the side parts’ lever (A) has properly snapped into the notch (B). (4) 3.11 Arm Rests All arm rests adjustable in height will be tightly screwed on at your required height. (5) Those arm rests with flexible height adjustment you may adjust yourself in the following fashion: unlock the arm rest via the lever (A) underneath the arm pads and pull the pads into the desired position. Now let go of the lever and let the arm rest snap into place. (1) (5) (A) (B) (A) 34 User Manual for sport frame and swing-away frame 3.12 Leg Supports The leg support is the part of the wheelchair which holds your legs. Jump bet offers twelve different kinds: Sport frame: (1) Interior attachment with undivided foot plate, pivoting sidewards (2) Exterior attachment with undivided foot plate, pivoting sidewards (3) Interior attachment with undivided foot plate, pivoting sidewards and backwards (4) Exterior attachment with undivided foot plate, pivoting sidewards and backwards (5) Interior attachment with divided foot plate, pivoting sidewards (6) Exterior attachment with divided foot plate, pivoting sidewards (7) Exterior attachment with undivided foot plate, pivoting sidewards and additionally pivoting outwards (1) (2) At the BSA frame the foot plates N° 1, 2, 5 and 6 are attached to a pivoting outwards and completely removable leg support (like Sport frame). The 5th option is the divided foot plate (5) with external attachment and pivoting upwards (cf. 3.12.4, Leg support, Pivoting). INFORMATION The leg support is perfectly adjusted (A) with the leg standing right-angled on the foot plate and the complete thigh lying evenly on the seat cushion/ anatomical cushion up to approx. 2 finger breadth in front of the hollow of the knee. A foot plate being adjusted to high leads to a permanent bended posture in the pelvis area. The opposite, a foot plate being adjusted to low, can cause unpleasant congestion in the thighs as well as cramps. ATTENTION THE FOLLOWING DANGER INDICATIONS SHOULD BE CONSIDERED FOR ALL KINDS OF LEG SUPPORTS! UNDER NO CIRCUMSTANCES SHOULD THE WHEELCHAIR WITH PASSENGER BE LIFTED (LET ALONE CARRIED) HOLDING ON TO THE PIVOTING AND/OR REMOVABLE LEG SUPPORTS AND/OR FOOT REST(S)! (3) (4) THE DIVIDED FOOT REST IS NOT SUITABLE FOR USERS WITH TONICITY DEREGULATIONS (SPASMS). 3.12.1 Leg Support with Foot Rest, Pivoting, Undivided or Divided (5) (6) Thanks to snap-action mechanism, the foot rest stays in a vertical position upon opening. Before getting into or out of the wheelchair, please unlock the foot rest and fold it away. 3.12.2. Leg Support, Pivoting, with Foot Rest, Undivided or Divided (7) (7) The foot rest may be folded away to the side and, additionally, swung up, in order to achieve more leg room for sports-frame models. Thanks to a snapaction mechanism, the foot rest stays in a vertical position when swung up. ATTENTION RISK OF INJURY Before folding the foot rest to the sides, swing it up first to avoid injuring your ankles. 35 Jump beta 3.12.3 Leg Support, Removable and Pivoting Jump’s leg support can be folded away or removed in order to approach everyday obstacles more closely. INFORMATION Adjustments in depth or angle as well as any vernier adjustments of the respective foot rests may exclusively be conducted by your rehab technician. Removing the leg support (1+2) Unlock the leg support by pushing the lever (A) inwards. Now turn the leg support outwards by 90°. It is only in this position that the leg support can be taken out of its pipe (B). Inserting the leg support (3) The leg support can only be inserted while turned in an outward position. Insert the locking pin (A) into the guide pipe (B). Place the locking mechanism (C) onto the arresting bolt (D) from behind. The mechanism locks through snapping when you turn the leg support towards the front. 3.12.4 Leg Support, Pivoting (side- and upwards) As described above, this version of the leg support can be folded away to the sides and removed as well. Both systems can be combined. Removing the leg support (4) Pull the leg support out of its guide pipe, turn it outwards and remove it (as described above). Inserting the leg support (5+6) Insert the leg support with the locking pin (A) about halfway into the guide pipe (B). Make sure the leg support is turned by 90°. Then turn it towards the front until it has sunken into the guide pipe. The arresting bolt (C) then snaps into the bolt (D) and thus prevents the leg support from turning. ATTENTION The leg support is not functional until the locking mechanism (C) has snapped into the arresting bolt (D). In this position, it can neither be folded away nor removed. (1) (4) (2) (5) (B) (A) (C) (D) (6) (3) (A) (B) (C) (D) 36 (A) (B) (D) User Manual for sport frame and swing-away frame Height adjustment (1) Loosen the clamp lever (A), place the leg support into the desired position, and retighten the clamp lever (A) firmly. Adjusting the leg rest surface Remove the screw joint (B) and/or (C) and place the leg rest surface into the desired position. Now reinsert and tighten the screw joint (B+C) firmly. (1) Vernier adjustment of distance and angle Loosen the set screws (C+D) and adjust the desired position. Now (A)tighten the screws (C+D) firmly. (B) (D) 3.14Brakes 3.14.1Braking while Driving (4) Each wheelchair is equipped with two locking brakes (so-called knee-lever brakes). They consist of: • brake bolt (A), • brake lever (B), and • adjusting screws (C). ATTENTION The SOLE function of the locking brakes is to secure the wheels in a resting position! ATTENTION The act of braking results in forces which you must know and be able to control. So please mind the following: (4) (C) (B) 3.13 Locking Mechanism for One-piece Foot Rest We strongly recommend using a locking mechanism in order to prevent the one-piece foot rest from accidentally opening and potentially injuring you. (2+3) To open/unlock, pull the snap lock (A) towards the front while simultaneously lifting up the foot rest. • To close/lock, first pull the snap lock (A) again. • Lock the foot rest using the claw (B) inside the joint bolt (C) so the snap lock snaps in audibly. • Now let go of the snap lock. ATTENTION Be careful not to injure yourself when handling the locking mechanism, and not to lean out too far out of your wheelchair: RISK OF TIPPING OVER (2) (B) (A) (C) (A) (C) As a general rule, please brake by evenly applying pressure to both hand rims (if physiologically possible). Different levels of pressure result in uneven braking force and thus to (involuntary) turning. When riding downhill, you are going to need a lot more force to brake. Do not hesitate to seek help! (3) 37 Jump beta 3.14.2Locking Brake 3.14.4Locking the locking brake ATTENTION THE LOCKING BRAKE IS NOT SUITABLE FOR DECELERATING YOUR RIDE! (3) The locking brake can be locked in an opened or closed position. This applies regardless of whether the wheelchair is equipped with drum brakes or not. To decelerate, please use the hand rims or, if present, the drum brake. Please remember that aluminium hand-rims may heat up through friction. ATTENTION Before going on a ride with your wheelchair, always check the functionality of the brakes first. Potential damage or functional defects may arise from the following: • insufficient air pressure, • moisture, snow, mud, etc., • worn-out tyre-profile, • worn-out brake bolt, • loose brake bolt screws, • dirty drum brake, • defected Bowden cable (for drum- and single-hand brake), • too big a distance between brake and tyres. ATTENTION Never leave a wheelchair with passenger to stand unattended on a downgrade slope. Under unfavourable circumstances, the brake may become inoperative and put you into danger. 3.14.3Driving Brakes Drum brakes may only be used as driving/service brakes if they are fully functional. ATTENTION Always keep the drum brake’s brake shores clean and regularly check the Bowden cable’s functional efficiency. (2) Evenly pull up both operating levers (A). Exert the same pressure on both brake levers, otherwise your wheelchair will make involuntary turns. (3) To lock the drum brake, pull up both operating levers (A), so you can have the locking lever (B) snap into the notch (C). To unlock the drum brake, pull up the operating levers a bit further so the locking lever unlocks automatically. (1) 38 (2) (B) (A) (B) (C) Unlocking Pull out the locking bolts (A) of the holders (B) on both sides and turn them by 90° so they slide out of the guiding slots (C). Adjust the brakes to the desired function. (3) Locking Turn back the bolts (A) by 90° so they slide back into the guiding slots (C) and snap into place. (B) (A) (C) 3.14.5Recoil Blocking The recoil blocking device prevents the wheelchair (max. payload 90kg, inclination of up to max. 6%) from rolling backwards without inhibiting the ride forwards. To activate: Fold the locking bolts (B) onto the rear wheels on both sides via the red levers (A). To deactivate: Fold back both locking bolts (B). (4) (B) (A) (B) User Manual for sport frame and swing-away frame 3.15Anti-tipper 3.16.2Back Angle, Alterable (1) To activate, push the anti-tipper (A) down using the tread element (B). Then turn the anti-tipper (A) by 180° and let go so the positioning slot snaps into the arresting bolt (C) inside the pipe. To alter the back angle: (5+6) loosen the arresting bolts (A) on both sides via the cable pull and alter the back angle in small steps (B) from 80° to 120° to your desired angle. To deactivate, push the anti-tipper on the pipe (A) slightly further down, turn it by 180° and let go so it snaps into the positioning slot. To fold the back over: Pull the string via the ring (C) and thus loosen the arresting bolts on both sides. Now fold the back over. The bolts must have snapped into the last hole. ATTENTION Please read the respective chapters of the SAFETY INSTRUCTIONS. ATTENTION Make sure that the extension is always firmly snapped into its final position because a loose anti-tipper cannot fulfil its function properly and may cause injuries of the assistant’s ankle area. (1) Make sure that both bolts (A) have snapped into the respective holes (B). They have to protrude well visibly from the angle piece (D). To undo the angle change, please proceed in the same fashion. ATTENTION Please consider that, by altering the back angle, the wheelchair’s centre of gravity changes (DANGER OF TIPPING). (C) (A) (B) 3.16Back (5) (C) There are three back versions: • (2) Standard • (3) Back angle, adjustable • (4) Back angle, alterable (A) 3.16.1Standard Back For the standard as well as the adjustable version, you do not need to make any changes. (2) (3) (4) (C) (B) (6) (C) (A) 39 Jump beta 3.17 Back Extension, Retractable 3.18 Head Rests (1-3) To extract or retract the back extension, please proceed in the following fashion: There are two versions of the head rest - with a squaretype tube (4) or a special section tube (5). Both kinds can be adjusted to the user in the same way: • • • • • • remove the head cushion (A), loosen the star knobs (B) on both sides, pull the back extension upwards, (Attention: do not twist!), tighten the star knobs (B) firmly, attach the head cushion (A) using the Velcro stripes provided for this purpose. ATTENTION The retractable back extension is NOT suitable for use as a head rest in a passenger car! (4+5) Height adjustment: • open the eccentric clamps (A)/star screw (A), • adjust the desired height, • tighten screws/clamps (A) firmly. Adjustment of distance: • open clamp lever (B), • adjust the desired distance, • tighten clamp lever firmly. ATTENTION The head rest is only suitable for transportation in a passenger car to a certain degree. The reservations and requirements described in our “crash test” brochure concerning the use of the head rest in a passenger car are absolutely binding! ATTENTION We recommend using a head support firmly installed in the vehicle (not part of the wheelchair) for transportation in a passenger car. (1) (2) (A) (B) (A) (4) (B) (B) (A) (5) (3) (B) (A) (A) 40 User Manual for sport frame and swing-away frame 3.19 Therapy Table 3.21 Lateral Support The therapy table is inserted into the fixture underneath the arm rests. (1) Both versions of lateral support pads may be opened and closed by pressing the red button (A) and simultaneously folding the pad bar backwards/forwards respectively. They will snap into their respective positions when you let go of the red button (A). (1) Simultaneously guide both pipes (A) of the therapy table into the fixtures (B) - do not twist! Now fixate them at the desired distance using the star screw (C). (1) (2) In order to fixate the individual bar elements (B) or extension elements in a particular position, tighten the screws (C) at the joints using a suitable hexagon socket wrench (Allen key). (2) You can adjust the position of the pads via the screws (D). (3) (A) (A) (B) (C) (A) (4) (C) 3.20 Abduction Wedge (C) The abduction wedge is attached underneath the SeatFix. Its height may be adjusted in 1.5 cm steps; the distance is steplessly variable. Height adjustment: • Remove the entire star screw (A), • place the wedge into the desired position along the row of holes (B), • reinsert and tighten the star screw (A). Distance adjustment: • Loosen the star screw (A) only slightly, • slide the wedge back and forth via the star knob until you have reached the desired position, • retighten the star screw (A). (2) (B) (D) (B) (D) 3.22 Tipping Bar ATTENTION RISK OF TIPPING This manoeuvre should only be conducted by a strong and experienced assistant. In order to pull a wheelchair user in their wheelchair over a threshold/curb, please proceed in the following fashion: • deactivate the anti-tipper, • firmly grab both push handles or the push bar of the wheelchair, • push the tipping bar with one foot while SIMULTANEOUSLY AND CAREFULLY tilting the wheelchair towards yourself and pulling it across the obstacle in this position. 3.23 Stick Holder (A) (B) ATTENTION Secure your stick onto the wheelchair’s back using the available Velcro stripe so it cannot get caught in between the spokes. 41 Jump beta 3.24 Pushing aid for outdoor areas (Outdoor (1) Front End) (C) ATTENTION Please do only mount the pushing aid when there´s no user sitting in the wheelchair. ATTENTION The pushing aid is designed for a speed of max. 8 km/h. A higher speed is not permitted. ATTENTION Please take particular care when driving on downgrades. Make sure that you drive with an appropriate speed in order to bring the wheelchair safely to a halt at any time. (A) (2) (1-4) Mounting the pushing aid • close the wheelchair´s locking brakes. • tilt the wheelchair slightly backwards and/or set it with the caster wheels at the jacks (A). • lock the snap locks (B) on the left and right side in an opened position (pull outwards and turn by 90°), • insert both bows (C) from the front up to the stop on both sides into the adaption (D) • close the snaps locks, (the snap locks (B) have to snap into place on the right and left side), • Remove the aids for jacking up the wheelchair. ATTENTION Please make sure that the construction is tightly fitted and securely locked after mounting. (B) (3) Dismounting the pushing aid For dismoutning the pushing aid please proceed in inverse order. (4) Widen the pushing aid • remove the screw connections (E) on both • sides, • adjust the desired width, • mount all previously dismounted screws and tight firmly the screw connections. 3.25Caddy ATTENTION When possible, do always fold back the caddy in order to prevent injuring somebody. ATTENTION Do not load the caddy until you are sitting in the wheelchair. 42 (D) (C) (4) (E) User Manual for sport frame and swing-away frame 4. Reparation and Maintenance 4.1Reparations ATTENTION Never conduct reparation and/or maintenance work yourself, but turn trustfully to your medical supply store. The staff there is familiar with the conduction of such work and possess all necessary tools and trained rehab technicians. If you have any questions or need help, our qualified rehab consultants are happy to assist you. Or turn to your specialised trader, who is trained according to our regulations and who is capable of resuming consultation, service, and reparations. 4.2 Replacement Parts ATTENTION Given the risk of accidents, security-relevant parts or component groups are only to be installed or altered by a medical supply store qualified for this purpose. � PLEASE NOTE Our packaging materials are 100% recyclable. Metal parts may be put to scrap metal recycling or sent to our factory. 4.4 Tyre Change With a little bit of technical skill and suitable tools, you may be able to fix a flat tyre yourself. It is advisable to always carry a reparation-set and an air pump for emergencies. You may purchase suitable air pumps at your specialised trade. An alternative would be a puncture repair spray which fills your tyre with setting foam (available at your specialised trade). Detaching the tyre: In the event of a flat tyre, carefully detach the tyre from the rim using suitable tools. Make sure not to damage the rim or the tube in the process. ATTENTION Original replacement parts are to be used exclusively. These should be available at your specialised trade. Repairing the tyre: Repair the tube following the indications given on the reparation-set, or replace it with a new tube. Now examine the rim and the interior of the tyre for foreign objects which might have caused the flat tyre. Only use rim bands which are in perfect condition in order to protect the tube from damage by spoke ends. � PLEASE NOTE Parts from other companies may cause faults and become a safety risk. Lists of replacement parts with the respective order numbers and drawings are available at your specialised trade, may be downloaded at www.sorgrollstuhltechnik.de, or be requested directly from us. Reattaching the tyre: Push the rim band over the valve and place the valve into the rim. Then unscrew the valve screw nut. Now you may draw up the rim band effortlessly. Make sure that all spoke ends are covered For correct delivery of the replacement parts, the respective serial number of the wheelchair needs to be indicated! It can be found on the type plate on the frame of the wheelchair. � PLEASE NOTE Any changes or modification on the wheelchair done by your medical supply store need to be documented in the service book enclosed to this user manual. Please include all information, such as attachments and/or application indications and the respective date of alteration. Now push the lower tyre part over the edge of the rim and inflate the tyre until round. Insert the weakly inflated tube into the tyre cover and check the tube for smooth fit. Then you can easily attach the upper part of the tyre behind the edge of the rim with both hands. Start with the part of the valve which is faced away from you. Inflating the tyre: Please check whether the tube is perfectly clamped in between tyre cover and rim on both sides. Check fit of the valve. 4.3Disposal First, inflate the tyre just enough so you can still impress it with your thumb. Then check the fit of the tyre on the rim. If the tyre cover is not yet centric on the rim, deflate the tyre a bit, and readjust it. � PLEASE NOTE The wheelchair may only be disposed of with the consent of your benefactor. Now inflate the tyre to maximum operating pressure (cf. indications on tyre cover) and close the valve with the protection cap. As a general rule, the disposal of the wheelchair must conform to the respective national legal regulations. You may seek information about local disposal organisations from your urban or communal administration. 43 Jump beta 4.5Maintenance 4.5.1 Cleansing and Care � PLEASE NOTE Never treat the wheelchair with a high-pressure cleaner! Please use silicon-free, water-based detergents. The indications on application given by the manufacturer are to be strictly followed. Do not use any aggressive cleaning supplies such as dissolvers or hard brushes etc. SURFACE COATING To tend the paint, we recommend using customary, branded paint care products. Should the coating still be damaged by scratches, crushes, etc., you may correct those spots with a touch-up applicator available in the specialised trade (apart from metallic and dormant colours). PLASTIC PARTS The clothe guard and similar parts consist of high quality plastics. Only clean these parts using warm water and neutral detergents or soft soap. � PLEASE NOTE When using customary plastic cleaners, the indications on application given by the manufacturer are to be followed. PADS AND COVERS The covers of the moulded firm seat and back parts may be removed via the zips. We recommend washing them regularly with a mild detergent and at low temperatures in the washing machine. � PLEASE NOTE Please clean other pads and covers (e.g. from seat shells) with warm water and hand flush fluid. Many stains may be removed with a sponge or a soft brush. If in doubt, please consult the medical supply store which has built your seat shell for advice on cleaning the cover. CARRIAGE The carriage (frame) and the wheels should regularly be cleaned wetted with a mild detergent. Please dry well afterwards. CASTERS Please remove rough dirt from the casters regularly, clean them wetted with a mild detergent and dry well. Also, grease the wheel bearings and similar parts with customary lubrication greases. � PLEASE NOTE Please check the carriage for corrosion damage as well as other damage regularly. Greasing all versatile parts lightly and regularly helps prevent such damages and enables you to profit from your wheelchair for a 44 long time. 4.5.2Disinfection � PLEASE NOTE Water-based detergents should be used for disinfection, such as: Terralin, Quartamon, Med or Sagrotan. The indications on application given by the ma nufacturer are to be minded and strictly followed. INFORMATION Please clean all pads and handles in the indicated fashion prior to disinfecting your wheelchair. INFORMATION Neither aggressive detergents and solutions nor hard brushes should be used for this purpose. 4.5.3Reuse � PLEASE NOTE The wheelchair must undergo complete, thorough, and qualified inspection and disinfection before it can be reused by a different person. � PLEASE NOTE The measurements required for a potential reuse are to be conducted in accordance with an approved, validated hygiene plan. 4.6Maintenance/Inspection 4.6.1Checklists Regular, yearly inspection conducted by a qualified medical supply store is an essential component of the wheelchair’s product liability/safety and long service life. Moreover, the inspections serve as verification of the service ability for the benefactor in case of the wheelchair being reused. � PLEASE NOTE For safety reasons as well as to prevent accidents resulting from unnoticed wear, we usually prescribe inspections once a year. These inspections are to be conducted in accordance with the following maintenance list, and they need to be documented in the service book. According to applicable law, this inspection is part of the commitment of the benefactor towards the user of the wheelchair and has to be borne by him. For detailed coordination, we recommend that you arrange agreements with your benefactor prior to supplying medical aids. The workforce in the factory is familiar with the technique of this medical aid and can recognise beginning wear and conduct the necessary reparations in due time. User Manual for sport frame and swing-away frame 4.6.2 Checklist for Yearly Inspections PREPARATORY WORK Remove seat and back parts, push handles, wheel cover and foot rest. If necessary, clean the wheelchair or individual components prior to inspection. VISUAL INSPECTION Check frame, attachment and accessory parts for damage, paint damage, and corrosion. GENERAL CHECK-UP Check all fixing screws for firm fit and retighten if necessary. Check fixation of all attachment parts and readjust if necessary. Check fixation of all plastic parts, handles, attachment parts, spoke guard covers etc. and readjust if necessary. Check the brake lever feature and its extension for distortions and readjust if necessary. Check all spring-loaded devices (quick-release axle, stand spring on push handle etc.) for functional efficiency and replace if necessary. ATTENTION For this reason, please keep in mind that even having maintenance conducted regularly according to this plan is no guarantee for the wheelchair’s permanent usage- and traffic safety. Individual reparations and/or adjustments may need to be done immediately in order to protect you from danger. In the event of the wheelchair being reused, this maintenance plan is a valuable source of information for the respective benefactor. ATTENTION Being a participant in public traffic, the wheelchair driver is responsible for maintaining the vehicle in functional, fail-safe condition. ATTENTION Insufficient or negligent care and maintenance of the wheelchair entails a considerable safety risk and provokes limitations on our product liability! CARRIAGE Check fixation of casters and rear wheels. Check function of the quick-release axles. Check tyres, tyre covers as well as air pressure and valve and exchange if necessary. Check caster bearing, caster fork, and caster bracket for condition, functional efficiency, and running characteristics. Check fixation and functional efficiency of the anti-tipper. BRAKES Check functionality of the brakes. Check the Bowden cables for functionality and replace if necessary. Check the brake lever extension for functional efficiency. OILING AND GREASING Clean and grease all pivoting points of control levers and versatile parts as well as all bearings. FINAL CHECK-UP General functional check-up of all mechanical adjusting devices. Test braking, steering, and driving characteristics on upgrade and downgrade paths. 4.6.3 Maintenance Plan The following is a maintenance plan based on our longstanding experience. It is a binding guideline which helps you to keep your wheelchair in good, operative condition for as long as possible. The plan does not, however, provide information on the actual maintenance and reparations required in any concrete case. 45 Jump beta WHEN WHAT COMMENTS Before each ride Check wheels/quick-release axles for firm fit You must not be able to pull the wheel out of the quick-release axle. The arrestor button must protrude from the hub by several millimetres ATTENTION Insufficient tyre air pressure and/or dirty tyres significantly reduce the function of the brakes and hence puts you into danger. Such defects need to be fixed immediately - either by you or an experienced assistant. Check tyre air pressure according to the manufacturer’s indications on the tyre covers Before each ride if possible ATTENTION Check brakes for flawless function On a ramp with 6% inclination, the rear wheels must not slide through with the locking brake tightened and the user seated in the wheelchair. Check screw joints for perfect fit Check frame- and back pipes for damage Every 4 weeks Every 2-3 months (depending on driving performance) At the very least every 6 months (depending on driving performance) Please check: -fixation of quick-release axle fitting for wheel adapter -fixation of foot rest -fixation of firm seat and back plate / seat shell and belts -connection between seat adapter and back -fixation of wheel guard cover -fixation of anti-tipper ATTENTION If deformations and/or cracks occur in the area of the weld seams, turn to your medical supply store for qualified maintenance immediately. Retighten all screw joints Through daily usage and permanent vibration, the screws may loosen. This is why we recommend systematically retightening ALL screw joints once a month. Check tyre profile Clean and grease all versatile parts All moving parts, such as brake joints, quick-release axles, anti-tipper adapter, etc. Retighten spokes Check the frame for cracks, corrosion, and damage Maintain the locking brake 46 If the brake does not function properly (worn-out profile or brake bolt, loose brake lever, etc.), turn to your medical supply store for qualified maintenance immediately. Please clean all components thoroughly and remove any leftover grease (from last time) before greasing them again. Then apply a few drops of oil and wipe off excess grease. If possible, have this done by a medical supply store!!! Please have this done by a medical supply store! For visual inspection, please remove the seat/back unit, leg support and side parts/clothe guards. Exclusively to be conducted by a medical supply store! Check all components of the brake for signs of wear and corrosion. User Manual for sport frame and swing-away frame 4.7 Technical Data 4.7.1 Measures and Dimensions Measurements Jump beta Labelling Measurements Seat width (SW) Dimension tolerance ±5° Seat depth (SD) in 2 cm steps Abbreviations: SW = seat width SD = seat depth BH =back height SH = seat height LLL = lower leg length Data Model: Jump beta German aid index N°:18.50.03.0xxx or German aid index N°.: 18.50.03.1xxx German aid index N° requested Type:485 Type plate on frame pipe Back height (BH) in 2.5 cm steps From upper edge (UE) seat to upper edge foot rest Frame size 4 Frame size 5 Frame size XL ETRTO wheel size 22“ Supporting points for transport: -seat pipes when folded -frame front-end left/right -NOT the removable leg supports (remove them before carrying/transportation!) Sports frame PLS frame XL frame Sports frame PLS frame XL frame 28-50 cm 28-50 cm 38-50 cm 34-46 cm 38-46 cm 44-50 cm 4,5 - 32,5 cm 31,5-48 cm 8,5- 36 cm 35,5-52 cm Sports frame 57,4 cm Sports frame PLS frame Sports frame PLS frame Ø 25-540 Ø 28-590 Camber inclination 2°, 5°, 8° min. max. 415 mm Seat height (SH) front Seat height (SH) back min. 340 mm Seat height (SH) back max. 580 mm 4.7.2 Meaning of Labels Total wheelchair width min max. SB + 200 mm The meaning of the individual labels is explained in the texts at the respective place. Total wheelchair length 4.7.3 Meaning of type plate The type plate on the frame of Jump beta has the following meanings: Manufacturer logo Address of manufacturer 575 mm SB + 405 mm min. Total wheelchair length max. 620 mm Total wheelchair height min. 620 mm Total wheelchair height max. 1480 mm 1080 mm Permitted inclination (upwards) Permitted inclination (downwards) Safety from tipping 6% = 3,5° Turning radius ca. 100 cm Payload (max.) 120 kg min. empty weight fit for use = SW 24, 20“ wheels, 4“ polyurethane Individual weights 9,25 kg Tyres The lower leg length (LLL) is the distance between UE of the seat and UE of the foot rest PLUS thickness of the seat cushion 59,4 cm 61,5 cm 63,5 cm 66,1 cm Ø 25-489 ETRTO wheel size 26“ Total wheelchair width Optional: growable (adjustable) max. 4 cm per SD 25-50 cm Attachment interior Attachment exterior XL attachment interior XL attachment exterior ETRTO wheel size 24“ Seat height (SH) front Comments SH is the distance between UE of the seat and the ground WITHOUT seat cushion! Dependent on the camber inclination, tyres and hand rim attachment (WITHOUT outdoor front-end) Dependent on push handles With height-adjustable push handles in max. position 6% = 3,5° 6% = 3,5° Rear wheels 1,2 – 2 kg customary pneumatic tyres, sizes 1“ or 1 3/8“ or breakdown-proof tyres (same dimensions) Dependent on wheelchair size Frame, side parts, rear wheels, casters, leg support, back and seat covers Depending on size and version Optional: „Schwalbe Marathon Plus“ (pneumatic tyres 1‘‘ with breakdown-proof padding) Type-number Model name Reference to: Product literature available. max. weight capacity Reference to: Crash Test according to ISO 7176-19 passed. German Aid Index-Nr. CE-sign Serial number The serial number consists Seat width of: XXX X X X X X X X X Type-Nr Order-Nr Year Seat depth Back height 47 Jump beta Your specialist supplier Stamp specialist supplier SORG Rollstuhltechnik GmbH + Co. KG Benzstraße 3-5 D-68794 Oberhausen-Rheinhn. Fon +49 7254 9279-0 Fax +49 7254 9279-10 48 [email protected] www.sorgrollstuhltechnik.de Technical alterations and misprints excluded.