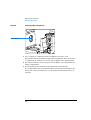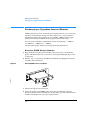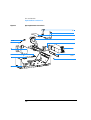
1
Agilent 8453 UV-visible Spectroscopy System Service Manual sa Copyright Agilent Technologies 2000 All rights reserved. Reproduction, adaption, or translation without prior written permission is prohibited, except as allowed under the copyright laws. Part No. G1103-90004 Edition 02/00 Printed in Germany Warranty WARNING The information contained in this document is subject to change without notice. For details of safety, see Safety Information on page 154. Agilent Technologies makes no warranty of any kind with regard to this material, including, but not limited to, the implied warranties or merchantability and fitness for a particular purpose. Agilent Technologies shall not be liable for errors contained herein or for incidental or consequential damages in connection with the furnishing, performance, or use of this material. Warning Symbols Used In This Book ! The apparatus is marked with this symbol when the user should refer to the instruction manual in order to protect the apparatus against damage. Eye damage may result from directly viewing the light produced by the deuterium lamp used in this product. Always turn off the deuterium lamp before opening the metal lamp door on the side of the instrument. Agilent Technologies Deutschland GmbH Hewlett-Packard-Strasse 8 76337 Waldbronn Germany Agilent 8453 UV-visible Spectroscopy System Service Manual In This Book This handbook is intended for the technical reader who needs background information about the Agilent 8453 spectrophotometer and potential repairs. The handbook contains specifications of the spectrophotometer as well as descriptions of front and back panels, for example, where to connect accessories. Electronics are explained at block-diagram level. There is a detailed section about troubleshooting to help find a defective subassembly, such as an electronic board, in case the spectrophotometer does not operate any more. Part replacement procedures as well as an exploded view with part numbers are given for ordering and replacing assemblies. For information about installation of the system including the spectrophotometer, computer and accessories, see the Installing Your UV-Visible Spectroscopy System handbook. Use Chapter 1 “Specifications” to check the specifications of the spectrophotometer. Use Chapter 2 “Theory of Operation” if you want an overview of the optics, front and rear panel functions or if you need explainations about the electronics or pin assignment of cables. Use Chapter 3 “Diagnostics and Troubleshooting” to find explainations of status and error messages and a logical approach to troubleshooting. Use Chapter 4 “Maintenance and Repair” for exchanging parts, such as lamps and electronical or mechanical items and cleaning lenses, Use Chapter 5 “Parts and Materials” to locate parts and find out their part numbers. Use Chapter 6 “Interfacing” to set the 8-bit switch for RS232 comunication and to reset the spectrophotometer in case of problems when loading a new firmware. Use the Installing Your UV-Visible Spectroscopy System handbook for information about GPIB settings. 4 Contents 1 Specifications Specifications of the Agilent 8453 UV-visible spectrophotometer 9 Physical Specifications 11 Performance Specifications Source of Standards 14 12 2 Theory of Operation An overview of the instrument, the theory of operation and control, as well as external communication and internal connections 15 Instrument Overview 18 Optical System Overview 19 Instrument Description 22 Instrument Layout and Construction 26 Theory of Operation and Control 28 Electronics Overview 29 The Main Power Supply Assembly 32 Spectrophotometer Processor Main (SPM) Board 34 Spectrophotometer Data Acquisition (SDA) Board 37 Spectrophotometer Lamp Supply (SLS) Board 39 Spectrophotometer Interface (SSI) Board 42 Firmware Description 43 External Communication External Cables 51 50 5 Contents External Connectors 56 Internal Connections 62 Connector Definitions 63 3 Diagnostics and Troubleshooting Explainations of status and error messages and a logical approach to troubleshooting 67 Front Panel Status and Power Switch LEDs Error Messages 71 General Troubleshooting Hints 80 69 4 Maintenance and Repair Procedures for exchanging parts, such as lamps and electronic or mechanical items, and for cleaning lenses 93 Maintenance 94 Cleaning the Instrument 95 Exchanging the Deuterium or Tungsten Lamp 96 Cleaning the Stray Light Filter 101 Cleaning the Lenses 103 Repair Procedures 108 Removing and Replacing Covers 109 Exchanging Keyboard and Key Pad 116 Exchanging or Upgrading Internal Memory 118 6 Contents Exchanging the SPM Board 120 Exchanging the Optical Unit 122 Exchanging the Shutter Assembly 124 Exchanging the Fan Assembly 126 Exchanging SDA Board 128 Exchanging SLS Board 130 Exchanging the Main Power Supply 133 5 Parts and Materials Exploded views of repairable parts and part number listings for ordering replacement and exchange parts 137 Exploded Views and Part List 138 6 Interfacing Communicating and interfacing through GPIB and RS-232C 145 Setting the 8-Bit Configuration Switch 146 7 Contents 8 1 1 Specifications Specifications of the Agilent 8453 UV-visible spectrophotometer Specifications The Agilent 8453 spectrophotometer is a single-beam, microprocessor-controlled, UV-visible spectrophotometer with collimating optics. With its diode-array technology, the spectrophotometer is much faster than comparable conventional instruments—with more precision, more sensitivity and more reproducible results. Accessories include special cell holders, peristaltic pumps, autosampler, a multicell transport, a Peltier temperature control accessory, and valve unit and valve-pump controller. The spectrophotometer can be either controlled from HP and non-HP personal computers equipped with Agilent ChemStation software for UV-visible spectroscopy (personal computers used should be certified by UL1950), or from the dedicated handheld controller that comes with the Agilent 8453E UV-vis spectroscopy system. 10 Specifications Physical Specifications Physical Specifications Table 1 Physical Specifications Type Specification Dimensions 34.4 cm (13.5 inches) wide 56.0 cm (22.0 inches) deep 18.5 cm (7.3 inches) high Weight 16.5 kg (36.3 lbs) Line voltage 90–264 V AC Line frequency 47–63 Hz Power consumption 220 VA Maximum Ambient operating temperature 0–55 °C (32–131 °F) See WARNING on page 11 Ambient non-operating temperature -40–70 °C (-4–158 °F) Humidity <95%, at 25–40 °C (77–104 °F) Operating altitude Up to 2000 m (6,500 ft) Non-operating altitude Up to 4600 m (14,950 ft) Safety standards: IEC, CSA, UL Installation Category II, Polution Degree 2 WAR NI N G Comments Wide-ranging capability Non-condensing For storing the instrument If you use the spectrophotometer at environmental temperatures higher than 50 °C (122 °F) the backplane may get hot. 11 Specifications Performance Specifications Performance Specifications Performance specifications are measured after a minimum 1 hour from cold start or from lamp turn-on, with no cell or filter unless specified, see Table 2. Cold start in this context means that the spectrophotometer had been stored for some hours at room temperature. Table 2 Performance Specifications Type Specification Wavelength range 190–1100 nm Slit width 1 nm Resolution > 1.6 Toluene in hexane, ratio of absorbances at 269 and 266 nm Stray light < 1.0 % At 200 nm, solution of 1.2% KCl, blank scan on air, 5 s integration time; (EP* method)** < 0.05 % At 220 nm, solution of 10 g/l NaI, blank scan on air, 5 s integration time; (ASTM method) < 0.03 % At 340 nm, solution of 50 g/l NaNO2, blank scan on air, 5 s integration time; (ASTM method) Wavelength accuracy < ± 0.5 nm NIST 2034 standard, using transmittance peak minima; wavelength in NIST certificate are interpolated for 1.5 nm bandwidth from the values given for 2 nm and 1 nm bandwidth; uncertainty of standard from NIST certificate (typically ±0.1 nm) is added to the specification; 99-point spline function is used; 0.5 s integration time Wavelength reproducibility < ± 0.02 nm Ten consecutive scans with NIST 2034 standard; 0.5 s integration time Photometric accuracy < ± 0.005 AU NIST 930e standard at 1 AU, at 440.0, 465.0, 546.1, 590.0, and 635.0 nm, the expanded uncertainty from NIST certificate is added to the specification; 0.5 s integration time Photometric accuracy < ± 0.01 AU Potassium dichromate in 0.01 N H2SO4 at 235, 257, 313, 350 nm; blank scan on 0.01 N H2SO4; 0.5 s integration time (EP method) 12 Comments Specifications Performance Specifications Table 2 Performance Specifications, continued Type Specification Comments Photometric noise < 0.0002 AU rms Sixty consecutive scans on air with 0.5 s integration time at 0 AU, 500 nm; 11-point moving average: using equation: Noise(rms)=SQRT((SUM(X-x)^2)/n) where x are measured values, X is a 11-point moving average, n is the number of points Photometric stability < 0.001 AU/h Scan on air at 0 AU, 340 nm, after 1-hour warm up, measured over 1 hour, every 60 s, integration time 5 s; difference between maximum and minimum values are compared to specification; at constant ambient temperature Baseline flatness < 0.001 AU rms Scan on air at 0 AU, 340 nm, 0.5 s integration time Typical scan time 1.5 s Full range Shortest scan time 0.1 s Full range Time until next scan 0.1 s Full range, 0.1 s scan, at least 150 consecutive scans * EP stands for European Pharmacopoeia Apparent absorbance is strongly affected by dissolved oxygen. According to ASTM, bubble pure nitrogen through liquid for several minutes immediately before use. Use only recently distilled water (not demineralized water). ** 13 Specifications Source of Standards Source of Standards Wavelength Accuracy The NIST 2034 Holmium Oxide solution is available from: U.S. Department of Commerce National Institute of Standards and Technology Standard Reference Materials Program Bldg. 202, Room 204 Gaithersburg MD 20899 USA Tel. (301) 975 6776 Photometric Accuracy The NIST 930e standard is available from NIST, see above address. Other Standards All other standards can be prepared using the appropriate material recommended in the EP or ASTM procedures. Agilent Technologies Standards Kit All liquid standards required by the EP or ASTM are available in snap-open ampules from Agilent Technologies. These standards are easy to handle, inexpensive and traceable. The OQ/PV chemical standards kit I (order number 5063-6503) contains potassium dichromate, sodium nitrite, sodium iodide and toluene in hexane. The OQ/PV chemical standards kit II (order number 5063-6521) contains holmium oxide in perchloric acid. 14 2 2 Theory of Operation An overview of the instrument, the theory of operation and control, as well as external communication and internal connections Theory of Operation This chapter has four sections: • “Instrument Overview” on page 18, • “Theory of Operation and Control” on page 28, • “External Communication” on page 50, and • “Internal Connections” on page 62. 16 Theory of Operation 17 Instrument Overview This section gives an overview of the optical system and explains the instrument front and back panel. It also explains the layout and construction of the instrument including the electronic and mechanical assemblies inside the instrument. 18 Theory of Operation Optical System Overview Optical System Overview Optical System The optical system of the spectrophotometer is shown in Figure 1. Its radiation source is a combination of a deuterium-discharge lamp for the ultraviolet (UV) wavelength range and a tungsten lamp for the visible (VIS) and short wave near-infrared (SWNIR) wavelength range. The image of the filament of the tungsten lamp is focused on the discharge aperture of the deuterium lamp by means of a special rear-access lamp design which allows both light sources to be optically combined and share a common axis to the source lens. The source lens forms a single, collimated beam of light. The beam passes through the shutter/stray-light correction filter area then through the sample to the spectrograph lens and slit. In the spectrograph light is dispersed onto the diode array by a holographic grating. This allows simultaneous access to all wavelength information. The result is a fundamental increase in the rate at which spectra can be acquired. Figure 1 Optical System of Spectrophotometer Shutter/stray light filter Cuvette Tungsten lamp Source lens Slit Deuterium lamp Grating Source lens Photodiode array Lamps The light source for the UV wavelength range is a deuterium lamp with a shine-through aperture. As a result of plasma discharge in a low pressure deuterium gas, the lamp emits light over the 190 nm to approximately 800 nm wavelength range. The light source for the VIS and SWNIR wavelength range is a low-noise tungsten lamp. This lamp emits light over the 370 nm to 1100 nm wavelength range. 19 Theory of Operation Optical System Overview Source Lens The source lens receives the light from both lamps and collimates it. The collimated beam passes through the sample (if one is present) in the sample compartment. Shutter The shutter is electromechanically actuated. It opens and allows light to pass through the sample for measurements. Between sample measurements it closes to limit exposure of sample to light. If the measurement rate is very fast, you can command the shutter to remain open (ChemStation software) or it stays open automatically (handheld controller software). Stray-Light Correction Filter In a standard measurement sequence, reference or sample intensity spectra are measured without and then with the stray-light filter in the light beam. Without the filter the intensity spectrum over the whole wavelength range from 190–1100 nm is measured. The stray-light filter is a blocking filter with 50 % blocking at 420 nm. With this filter in place any light measured below 400 nm is stray light. This stray-light intensity is then subtracted from the first spectrum to give a stray-light corrected spectrum. Depending on the software, you can switch off the stray light correction (ChemStation software) in case you want to do very fast repetitive scans or it is switched off automatically (handheld controller software). Sample Compartment The spectrophotometer has an open sample compartment for easier access to sample cells. Because of the optical design a cover for the sample area is not required. The spectrophotometer is supplied with a single-cell cell holder already installed in the sample compartment. This can be replaced with the Peltier temperature control accessory, the thermostattable cell holder, the adjustable cell holder, the long path cell holder or the multicell transport. All of these optional cell holders mount in the sample compartment using the same quick, simple mounting system. An optical filter wheel is also available for use with the spectrophotometer and most of the accessories. Spectrograph The spectrograph housing material is ceramic to reduce thermal effects to a minimum. It main components of the spectrograph are the lens, the slit, the grating and the photodiode array with front-end electronics. The mean 20 Theory of Operation Optical System Overview sampling interval of the diode array is 0.9 nm over the wavelength range 190 nm to 1100 nm. The nominal spectral slitwidth is 1 nm. Spectrograph Lens The spectrograph lens is the first of the parts which are collectively known as the spectrograph. It is mounted on the housing of the spectrograph. The spectrograph lens refocuses the collimated light beam after it has passed through the sample. Slit The slit is a narrow aperture in a plate located at the focus of the spectrograph lens. It is exactly the size of one of the photodiodes in the photodiode array. By limiting the size of the incoming light beam, the slit makes sure that each band of wavelengths is projected onto only the appropriate photodiode. Grating The combination of dispersion and spectral imaging is accomplished by using a concave holographic grating. The grating disperses the light onto the diode array at an angle proportional to the wavelength. Diode Array The photodiode array is the heart of the spectrograph. It is a series of 1024 individual photodiodes and control circuits etched onto a semiconductor chip. With a wavelength range from 190 nm to 1100 nm the sampling interval is nominal 0.9 nm. 21 Theory of Operation Instrument Description Instrument Description Your spectrophotometer is very easy to use. It has a line power indicator, a status indicator and some push buttons. All electrical connections are made at the rear of the instrument. Front View The front view of the spectrophotometer is shown in Figure 2. Notice that the sample compartment is open. Unlike conventional instruments the Agilent 8453 does not suffer from ambient stray light. The open sample area makes it easier to access for cuvette handling and to connect tubing to a flow cell or thermostattable cell holder. The spectrophotometer is shipped with the standard single-cell cell holder. Standard and accessory cell holders can be removed and replaced in seconds with few or no tools. Figure 2 Front View of Spectrophotometer Indicator Pushbuttons Line power switch with green light The line power switch is located at the lower-left part of the instrument. Pressing it in turns on the instrument. It stays pressed in and shows a green light when the instrument is turned on. When the line power switch stands out and the green light is off, the instrument is turned off. On the front panel of the spectrophotometer is a status indicator which will display different colors depending of the actual condition of the instrument. 22 Theory of Operation Instrument Description • Green—the instrument is ready to measure. • Green, blinking—the instrument is measuring. • Yellow—the instrument is in not-ready state, for example, turning one of the lamps on or if both lamps are switched off. • Red—error condition, that is, the spectrophotometer does not pass one of the self-tests which are run when the spectrophotometer is turned on or an error occurred during operation. In this case the UV-Visible operating software gives a detailed error message and possible explanations are in the online help system and in Chapter 3 “Diagnostics and Troubleshooting”. • Red, blinking—error condition of the spectrophotometer processor system. Because in this case there is no communication with the computer there will be no error message. The online help system and Chapter 3 “Diagnostics and Troubleshooting” give more information about troubleshooting. NOTE When using an Agilent 8453E UV-vis spectroscopy system, you will only have access to the online help of the handheld controller, when there is no power loss at the CAN interface of the Agilent 8453 spectrophotometer. The four measure push buttons on the front panel cause the following actions to be performed and the resulting data being sent to the computer. • BLANK—the instrument takes a blank measurement. This comprises a reference measurement that is used in all subsequent sample measurements until a new blank measurement is taken. Following the reference measurement the baseline spectrum is measured and displayed on the PC. • SAMPLE—the instrument takes a sample measurement or starts a series of measurements. This depends on the parameters set in your software. • STANDARD—the instrument takes a measurement of a standard. Additional information such as concentration and so on, have to be entered in the operating software. • STOP—the instrument and/or software aborts any ongoing activity and returns to a to ready state. The stop button is not supported when the handheld controller of the Agilent 8453E UV-vis spectroscopy system is used to control the spectrophotometer. 23 Theory of Operation Instrument Description Rear View All connections are made at the rear of the spectrophotometer, see Figure 3. Figure 3 Rear View of Spectrophotometer GPIB connector and switches Remote connector Accessory board slot MIO board slot Multicell transport connector GP-IO connector Line connector Two CAN connectors RS 232 connector • The multicell connector allows you to connect the cable which comes from the multicell transport. • The GPIO (general-purpose input/output) connector allow you to control a sipper and autosampler or other accessories depending on the software you are using. • The remote connector may be used in combination with other analytical instruments from Agilent Technologies if you want to use features such as common shut down and so on. • The RS232C connector may be used to control the spectrophotometer from a computer through RS232 connection, using appropriate software (for future use). This connector needs to be defined by the configuration switch module next to the GPIB connector. The software needs the appropriate drivers to support this comunication which is intended for future use. The RS232C port is used as printer interface to connect the printer, using a serial/parallel cable, of the Agilent 8453E UV-visible spectroscopy 24 Theory of Operation Instrument Description system. • The right CAN bus is used to connect the handheld controller of the Agilent 8453E UV-visible spectroscopy system to the spectrophotometer. • The GPIB connector is used to connect the spectrophotometer with a computer. The 8-bit configuration switch module next to the GPIB connector determines the GPIB address of your spectrophotometer. The switches are preset to a default address recognized by the operating software from Agilent Technologies. The GPIB port is not used when the handheld controller of the Agilent 8453E UV-visible spectroscopy system is connected to the spectrophotometer. However, the 8-bit configuration switch of the port must be set for GPIB communication. • The MIO board slot is reserved for a LAN interface board. • The accessory board slot is reserved for future use. • The power input socket does not have a voltage selector because the power supply has wide-ranging capability, for more information see Chapter 1 “Specifications”. There are no externally accessible fuses, because automatic electronic fuses are implementeded in the power supply. The security lever at the power input socket prevents that the spectrophotometer cover is taken off when line power is still connected. Side of the Instrument On the right side of the instrument there is a door for exchanging the lamps. Behind this plastic door there is another sheet-metal door. Two independant safety light switches are implemented. They automatically turn off the lamps when the sheet metal door is opened. 25 Theory of Operation Instrument Layout and Construction Instrument Layout and Construction The industrial design of the spectrophotometer incorporates several innovative features. It uses the E-Pak concept for the packaging of electronics and mechanical assemblies. This concept is based upon the use of layers foam plastic spacers in which the electronic boards of the spectrophotometer are placed. This pack is then housed in a metal internal cabinet which is enclosed by a plastic external cabinet. The advantages of this packaging technology are: • the plastic layers have air channels molded in them so that cooling air can be guided exactly to the required locations, • the plastic layers help cushion the electronical and mechanical parts from physical shock, and • the metal inner cabinet shields the internal electronics from electromagnetic interference and also helps to reduce or eliminate radio frequency emissions from the instrument itself. 26 Theory of Operation Instrument Layout and Construction 27 Theory of Operation and Control This section explains the function of the electronics of the spectrophotometer on block-diagram level. Each board and/or functional group is described in a separate module. 28 Theory of Operation Electronics Overview Electronics Overview Figure 4 line power Electronics Block Diagram MPS spectrophotometer main power shutter SPM spectrophotometer processor main board fan interfaces deuterium lamp tungsten lamp SLS spectrophotometer lamp supply board SDA spectrophotometer data acquisition board SSI spectrophotometer sipper interface switches LED spectrograph SCI spectrograph connector interface PDA photodiode array The spectrophotometer includes a spectrograph which utilizes a processor-controlled photodiode array. Several processing steps and hardware boards are required to form spectra from the intensity counts derived from the diode array. Full spectra can be acquired, processed and transmitted every 0.1 s continuously, the only bottleneck being the PC speed. The instrument has its own onboard real-time clock and this allows the instrument to perform a series of time-based accessory control actions and 29 Theory of Operation Electronics Overview measurements without control from the PC and buffer the data until the PC wants to take it. SPM—Spectrophotometer Processor Main Board The spectrophotometer processor main (SPM) board receives DC power from the main power supply (MPS) and distributes it to a number of other modules. These include the spectrophotometer lamp supply (SLS) board, spectrophotometer data acquisition (SDA) board and from there the spectrophotometer sipper interface (SSI) board and the spectrograph with the diode array. The SPM board interfaces to the controller, that is, the computer and other devices, such as pumps, valves, the multicell transport, RS232 and other peripheral devices. Shutter control allows for dark current or sample measurements and utilizes the stray light filter. Stray-light correction is calculated by combining information of two spectra, a spectrum measured with the stray-light correction filter and a spectrum without the stray-light correction filter in the light path. Memory for approximately 100 full spectra is available and two SIMM sockets for extending the memory (to be able to store several hundred spectra) are available. SLS—Spectrophotometer Lamp Supply Board The SLS board provides control and regulation for both, the tungsten and deuterium lamps. Spectrograph The spectrograph contains the PDA (photodiode array) which gives an analog signal proportional to the light level which falls on the individual photodiode during a defined period of time. The photodiode array is connected to the spectrophotometer data acqisition (SDA) board through the spectrograph connector interface (SCI) board. A temperature sensor is located on the diode-array for temperature compensation, that is, to reduce drift. This is especially important for the SWNIR part of the spectrum where drift with temperature is significant due to variation in the quantum efficiency of the photodiodes. 30 Theory of Operation Electronics Overview SDA—Spectrophotometer Data Acquisition Board On the SDA board, the signals from the photodiode array are adjusted to an appropriate level and converted to digital values by a 16-bit A/D converter. In addition, the SDA board controls the timing of the photodiode array. The firmware automatically converts data points which are taken at a 0.9-nm sampling interval from the diode array to deliver values at 1-nm interval to the controller. SSI—Spectrophotometer Sipper Interface Board This board collects the signals from the push buttons and controls the three-color LED located on the front panel of the spectrophotometer. 31 Theory of Operation The Main Power Supply Assembly The Main Power Supply Assembly The main power supply (MPS) comprises a closed assembly (no onsite repair possibility). The power supply provides all DC voltages used in the spectrophotometer except for the voltages supplied by the lamp power supply to the deuterium and tungsten lamps. Figure 5 Main Power Supply (MPS) Block Diagram M P S + 3 6 V s u p p ly lin e v o lta g e + 2 4 V s u p p ly p rim a ry c irc u its se n se + 5 V s w itc h in g re g u la to r lin e a r v o lta g e re g u la to rs WAR NI N G + 3 6 V (n o t u s e d ) + 2 4 V / 4 .5 A + 5 V / 3 A + 1 5 V / .3 A -1 5 V / .3 A To disconnect the instrument from line, pull out the power cord. The power supply still uses some power, even if the power switch on the front panel is turned off. No accessible hardware fuse is needed because the main power supply is safe against any shortages or overload conditions on the output lines. When overload conditions occur, the power supply turns off all output voltages. 32 Theory of Operation The Main Power Supply Assembly Turning the line power off and on again resets the power supply to normal operation if the cause of the overload condition has been removed. An overtemperature sensor in the main power supply is used to turn off output voltages if the temperature exceeds the acceptable limit (for example, if the cooling fan of the instrument fails). To reset the main power supply to normal operating conditions, turn the instrument off, wait until it is approximately at ambient temperature and turn the instrument on again. Table 3 gives the specifications of the main power supply. Table 3 Main Power Supply Specifications Function Specification Comment Line input 100–120 or 220–240 V AC ±10% Wide-ranging Line frequency 50 or 60 Hz ±5% Output 1 +24 V / 4.5 A Output 2 +36 V Output 3 +5 V / 3 A Output 4 +15 V / 0.3 A Output 5 -15 V / 0.3 A Not used 33 Theory of Operation Spectrophotometer Processor Main (SPM) Board Spectrophotometer Processor Main (SPM) Board SPM Board SPM 4 control LEDs and switches LEDs 8-bit SDA board Figure 6 switch HPIB PWM driver driver shutter ASIC CAN application driver specific APG remote integrated sense fan circuit GPIO driver RS232 driver memory battery microprocessor real time clock control lines serial bus SSP serial bus spectra and signal processor SDA board main SLS board multicell transport driver SSP bus ASIC SIMM memory module 34 RAM MPS mainpower supply Theory of Operation Spectrophotometer Processor Main (SPM) Board Main Microprocessor The main microprocessor exchanges data with the ASIC through the core bus as well as with the memory, consisting of the battery backed-up, non-volatile random access memory (NVRAM), the system memory and the program memory. The program memory includes the firmware which can be updated by a download procedure from the computer. The battery for the NVRAM and the real-time clock is designed to last for more than 25 years under normal operating conditions. Control lines provide communication to the SLS board, which in turn controls the deuterium and tungsten lamps. The main microprocessor comunicates to the SSP (spectra and signal processor) through a parallel bus. ASIC—Application-Specific Integrated Circuit The 304-pin application specific integrated circuit (ASIC) provides interfacing to external devices through drivers, including GPIB, CAN, APG Remote, and GPIO. It is also connected to the four control LEDs located near the connectors on the SPM board and the 8-bit configuration switch which is used to configure the address for the GPIB communication, baud rate for RS232 transfer, and so on. For switch settings, refer to the Installing Your UV-Visible Spectroscopy System handbook. In addition it controls the shutter and cooling fan through the PWM (pulse width modulation) driver. Operation of the cooling fan is sensed by the microprocessor. SSP—Spectra and Signal Processor The spectra and signal processor (SSP) uses a dedicated ASIC and RAM of 3 × 128 KB and converts the 1024 raw data values from the SDA board to intensity and absorbance values. Conversion and subsequent calculation to achieve absorbance values include the following tasks, listed in the sequence of processing: 1 dark current correction, 2 offset correction, 3 PDA temperature compensation, 4 stray-light correction, 5 absorbance calculation, 6 signal averaging (over integration time), and 35 Theory of Operation Spectrophotometer Processor Main (SPM) Board 7 variance calculation. Communication between the spectra and signal processor (SSP) and the PDA front end processor (PFP) on the SDA board is established by a serial communication link. Processed data and synchronization signals for the PFP clock frequency are exchanged through the serial bus. SIMM Memory Module The SIMM memory module controlled by the dedicated ASIC is used to expand the memory to 2 MB (add 1 MB module, part number 1818-4271) or 2 × 4 MB (part number 1818-5784) to accomodate more spectra. Firmware For an outline of the firmware, see “Firmware Description” on page 43. 36 Theory of Operation Spectrophotometer Data Acquisition (SDA) Board Spectrophotometer Data Acquisition (SDA) Board Figure 7 SDA Board S D A E P LD R A M P FP P D A fro n t e n d p ro c e s s o r s e ria l b u s S P M b o a rd c o n tro l lin e s d a ta b u s S C I b o a rd 1 6 b it/ 1 6 0 k H z A /D c o n v e rte r S S I b o a rd lo w p a s s filte r c o n tro l lin e s P D A s ig n a l c o n d itio n in g e le c tro n ic s P D A s ig n a l P D A te m p e ra tu re s e n s o r 37 Theory of Operation Spectrophotometer Data Acquisition (SDA) Board SCI—Spectrograph Connector Interface Board The PDA, which includes control electronics for readout of the individual photodiodes, is mounted on the SCI (spectrograph connector interface) board. Gain switching is used to optimize the signal level to the dynamic range of the A/D converter on the SDA board. In addition, wavelength calibration data from the manufacturing process are stored in the resident EEPROM to provide both wavelength precision and accuracy. PDA Signal Conditioning Electronics Data is transferred from the photodiode array (PDA) through the spectrograph connector interface (SCI) board to the PDA signal conditioning electronics. The PDA signal conditioning electronics adjusts the signal levels to provide an appropriate output signal. A/D Converter The output signal from the PDA signal conditioning electronics is directed to the 16 bit /160 kHz A/D converter. Multiplexing is used to monitor the signal from the PDA temperature sensor which is used for temperature compensation. PFP–PDA Front-End Processor The PDA front end processor (PFP) utilizing an on board RAM and the EPLD (electronically programmable logic device) forwards the data from the 16 bit A/D converter to the SPM board. It provides timing and control for the photodiode readout and the A/D conversion. Low-Pass Filter Signals between the SPM board and the switches and LED on the spectrophotometer sipper interface (SSI) board are routed through a low-pass filter for RFI (radiated frequency interference) improvement. 38 Theory of Operation Spectrophotometer Lamp Supply (SLS) Board Spectrophotometer Lamp Supply (SLS) Board Figure 8 SLS Board S LS s a fe ty lig h t s w itc h e s d e u te riu n la m p fila m e n t c o n tro l fila m e n t sh u t d o w n c o n tro l b u s d e u te riu m la m p c u rre n t c o n tro l a n o d e b o a rd d e u te riu m la m p s e n s e S P M tu n g s te n la m p v o lta g e c o n tro l c o n tro l b u s d ia g n o s tic A /D c o n v e rte r tu n g s te n la m p se n se 39 Theory of Operation Spectrophotometer Lamp Supply (SLS) Board Deuterium Lamp Filament Control During the ignition cycle two different voltage levels are applied to the filament of the deuterium lamp by the deuterium lamp filament control circuit. This control circuit is enabled by the processor on the SPM board. Deuterium Lamp Current Control The deuterium lamp current control circuit comprises two parts. One generates an ignition pulse of 600 V DC for the lamp, resulting in lamp ignition. After the ignition process this voltage is disabled. The second is a constant current source of 320 mA at an operating voltage between 50 and 105 V DC for stable operating conditions and light emission of the deuterium lamp. The deuterium lamp current control circuit is supervised by the processor on the SPM board. Igniting the Deuterium Lamp The deuterium lamp is heated with a voltage of 1.7 V DC for 1 s and afterwards a voltage 2.5 V DC for 9 s with currents between 2–10 A prior to ignition. The deuterium lamp current control circuit provides an ignition pulse to the lamp, resulting in lamp ignition. The filament control circuit disables the filament voltage if the lamp has been successfully ignited. If the deuterium lamp has failed to ignite, the whole sequence is repeated. If after the second attempt the deuterium lamp did not ignite, an error message occurs. Tungsten Lamp Voltage Control Voltage to the tungsten lamp is generated by the tungsten lamp voltage control circuit which is enabled by the processor, resident on the SPM board. This circuit provides a constant voltage of 6 V DC with currents between 0.7– 0.9 A to light the tungsten lamp. Diagnostic A/D Converter The diagnostic A/D converter senses currents and voltages of the deuterium and tungsten lamps and converts the analog signals into digital values. The digital values are transferred via the control bus to the SPM board. When values are outside of the normal range, an appropriate error message is generated. 40 Theory of Operation Spectrophotometer Lamp Supply (SLS) Board Safety Light Switches When the sheet metal lamp door is removed and the instrument is still on, the safety light switches are activated and result in turn off of the deuterium and tungsten lamps. The safety light switches provide shutdown in two different ways. One is a direct line to the deuterium lamp filament and current control circuits as well as the tungsten lamp voltage control circuit. The second is through the processor on the SPM board. The different ways are used to provide maximum reliability and safety. 41 Theory of Operation Spectrophotometer Interface (SSI) Board Spectrophotometer Interface (SSI) Board The SSI board controls the push buttons and the LED located at the front panel of the instrument. Figure 9 SSI Board S S I V C C tric o lo r L E D S D A b o a rd 2 4 4 s w itc h e s G N D Switches are pulled to GND when pressed, and provide a signal to the SPM board through the low-pass filter on the SDA board. The LED is driven from the SPM board through the low-pass filter on the SDA board. 42 Theory of Operation Firmware Description Firmware Description The firmware of the instrument comprises two parts. One part is used by the MP 68332 processor on the SPM board, that is, to boot the instrument and use the basic functions of the processor for memory control and input-output control. The other part for the DSP on the SPM board is used to make the instrument operate as a spectrophotometer. Firmware updates of the instrument-specific part can be done by a download procedure from the computer. Updates will be provided on flexible disk. Resident Part of the Firmware If the instrument is configured to stay in the resident part of the firmware, it does not react as a spectrophotometer but uses only the basic functionality of the microprocessor system. In this case the firmware is used to establish the communication to the computer, that is, for data communication through the GPIB, CAN and RS232 interfaces. For reseting the instrument that it stays in the resident part of the firmware and forced cold start, see Chapter 6 “Interfacing”. Instrument-Specific Part of the Firmware The instrument-specific part of the firmware is used to supervise: • interface control for multicell transport, GPIO lines and APG remote, • MIO board and accessory board control, • internal events such as lamp turn-on cycle and shutter and filter movements, • diagnostic functions, and • raw data conversion to absorbance. Raw Data Conversion to Absorbance The raw data flow (from the photodiode array) and conversion to absorbance spectra with variance for each data point is a multiple-step process. This process is outlined in this section 43 Theory of Operation Firmware Description Figure 10 Firmware Flow Diagram ra w d a ta in te n s ity s u b tra c t d a rk c u rre n t te m p e ra tu re g a in c o rre c tio n te m p e ra tu re filte r te m p e ra tu re c o rre c tio n ye s a p p ly s tra y lig h t c o rre c tio n ? in te n s ity a v e ra g in g a b s o rb a n c e c a lc u la tio n a n d a v e ra g in g in te n s ity ru n b u ffe r a b s o rb a n c e ru n b u ffe r s tra y lig h t c o rre c tio n a b s o rb a n c e c a lc u la tio n d e u te riu m lin e d a ta w a v e le n g th c a lib ra tio n ta b le w a v e le n g th a x is lin e a riz a tio n a b s o rb a n c e s p e c tra w ith v a ria n c e 44 n o Theory of Operation Firmware Description Subtract Dark Current Raw data coming from the photodiode array through the signal conditioning electronics (which includes a variable gain amplifier) are read from the A/D converter, see on page 37. This raw data are intensity values of each photodiode of the array. During a blank measurement a dark current and electronic offset measurement is performed for every diode on the photodiode array. This offset spectrum is stored and subtracted from all subsequent intensity spectra to give dark-corrected intensity spectra. Gain Correction Also during a blank measurement every photodiode is assigned a gain value, depending of the amount of light falling on the diode array. These gain values are stored in a table. They are used to adjust the amplification factor in the signal conditioning electronics, see “Spectrophotometer Data Acquisition (SDA) Board” on page 37. This process is used to adjust the signal level to the optimum range of the A/D converter on the SDA board. The DSP firmware uses the gain table to adjust the dark-corrected intensity spectra. Temperature Correction The quantum efficiency of the photodiode array depends on the temperature and is different for each wavelength. The temperature dependency follows an e-function over the wavelength scale, for example, it increases with the longer wavelengths. To correct the intensity spectrum for temperature effects, the temperature on the photodiode array is averaged over 5–10 s. With the help of a table which stores correction coefficients for each wavelength, correction factors for the current temperature are calculated and used for the temperature correction of the intensity spectrum. Temperature Filter The temperature filter determines if temperature correction has to be applied. If temperature changes of more than 0.004 K occur, update is performed at a minimum interval of 5–10 s. 45 Theory of Operation Firmware Description Apply Stray-Light Correction By default a stray-light correction is always used. However, for very fast measurements stray-light correction can be turned off by the user interface of the ChemStation software. The stray light correction is automatically turned off by the software of the handheld controller whenever low cycle times are set for data acquisition. Absorbance Calculation and Averaging In case stray-light correction is not applied, this part of the firmware is used to calculate an absorbance spectrum, the logarithm of the intensity spectrum of the reference is subtracted from the logarithm of the intensity spectrum of the sample. Spectral averaging is used for noise reduction. If an integration time of more than 100 ms is used, multiple spectra—dependent upon the selected integration time—are measured. Absorbance values of each wavelength are averaged to form one absorbance spectrum with variance for each wavelength. Absorbance Run Buffer Absorbance spectra with their variances are intermediately stored here if the acquisition of spectra is faster than the processing and data communication to the ChemStation (intensity values can also be stored for special purposes, for example, diagnostic reasons.) or handheld controller. Intensity Averaging In case stray-light correction is applied, this part of the firmware is used. Averaging of the intensity spectra is used for noise reduction. If an integration time of more than 100 ms is used, multiple spectra—dependent upon the selected integration time—are measured. Intensity values of each wavelength are averaged to form one intensity spectrum with variance for each wavelength. 46 Theory of Operation Firmware Description Intensity Run Buffer ChemStation Software Intensity spectra with their variances are intermediately stored in the intensity run buffer if the acquisition of spectra is faster than the processing and data transfer to the ChemStation. Handheld Controller Software The intensity run buffer is not used by the Agilent 8453E UV-visible spectroscopy system, because measuring time resolved intensity spectra is not supported by the handheld controller software. Stray-Light Correction Two intensity spectra are used for stray-light correction, one is measured with the stray-light filter in the light path and one without. Both spectra are combined to form one stray light corrected, temperature corrected, gain corrected, dark current corrected intensity spectrum. Absorbance Calculation To form an absorbance spectrum, the stray-light corrected intensity spectrum of the reference is divided by the stray-light corrected intensity spectrum of the sample and the logarithm is calculated, see “Optical System Overview” on page 19. Wavelength Axis Linearization, Deuterium Line Data, Wavelength Calibration Table Photodiodes are located on the array to give a sampling interval of nominal 0.9 nm over the whole wavelength range in the UV wavelength range. In the visible and short wave near infrared wavelength ranges the sampling interval is slightly higher. To correct for this optical non-linearity and to convert from discrete diode distances to a continous, linear scale, an interpolation algorithm is applied. This algorithm uses a wavelength calibration table and actual wavelength data, derived from the deuterium emission lines at 486 nm and 656 nm. • Wavelength calibration is done for each individual spectrograph during the production process using emission lines of a mercury lamp, deuterium lamp, and a zinc-argon lamp. The individual calibration coefficients are 47 Theory of Operation Firmware Description stored in the wavelength calibration table in an EEPROM (electrically-erasable PROM) which is part of the spectrograph electronics. During each start-up of the spectrophotometer, each discrete wavelength value is assigned to a photodiode of the array. • Recalibration of the wavelength scale can be performed to compensate for minor deviations from initial production conditions. Recalibration is achieved using the deuterium line data, that is, the exactly-known positions of the deuterium emission lines at 486.0 nm and 656.1 nm. Because of the real-pass band function of the spectrophotometer, which is different from the theoretical one, the maximum positions of the two emission lines cannot be used. Instead the line centroids are used for the calibration/recalibration process. A description of this method is given in section Wavelength Calibration in Appendix A of NBS Publication 260-66 from NIST (National Institute of Standards and Technology). For the address of NIST, see “Source of Standards” on page 14. Upon request of the operator through the user interface of the software the new parameters are used together with the wavelength calibration table to calculate a table of correction coefficients which are applied to each spectrum. 48 Theory of Operation Firmware Description 49 External Communication This section gives the definition of the connections to the computer and peripherals of the spectrophotometer. Connectors with pin assignments and cables are described in detail. WAR NI N G Only use cables supplied by Agilent Technologies to make sure the instrument functions properly and complies with safety or EMC regulations. The signal levels are defined as: • standard TTL levels (0 V is logic true, + 5 V is false) • Input load is 2.2 kOhm against + 5 V Output are open collector type, inputs/outputs (wired-or technique). 50 Theory of Operation External Cables External Cables Sipper-GPIO Cable The sipper-GPIO cable (part number G1103-61609) is used to connect the single-channel peristaltic pump to the GPIO connector at the rear of your spectrophotometer. Table 4 Sipper-GPIO Cable (G1103-61609) GPIO Connector Pump Connector Function 1 1 Direction, counter-clockwise (-)* 2 2 Pump on, clockwise (-) 14 15 * Status, jumper to 15 3 DGND (-) means active low (negative true logic) Sipper/Sampler-GPIO Cable The sipper/sampler-GPIO cable (part number G1103-61608) is a cable with three connectors. It is used to connect the single-channel peristaltic pump 51 Theory of Operation External Cables and the autosampler to the GPIO connector at the rear of your spectrophotometer. Table 5 Sipper/Sampler-GPIO Cable (G1103-61608) Out In GPIO Connector Pump Connector Autosampler Connector Function 1 1 Direction, counter-clockwise (-)* 2 2 Pump on, clockwise (-) 3 2 Advance tray (-) 4 3 Raise pipette (-) 5 4 Lower pipette (-) 6 5 Pipette to sample (-) 7 6 Pipette to wash (-) 9 10 Rack in motion 10 11 Stop position 11 12 Pipette up 12 13 Pipette down 13 14 Pipette to sample 14 15 * Status, jumper to 15 3 (-) means active low (negative true logic) 52 1 DGND Theory of Operation External Cables Multichannel Pump-GPIO Cable The multichannel pump-GPIO cable (part number G1103-61607) is used to connect the 8-channel peristaltic pump to the GPIO connector at the rear panel of your spectrophotometer. Table 6 Multichannel Pump Cable (G1103-61607) GPIO Connector Pump Connector Function 1 4 Direction, counter-clockwise (-)* 2 3 Pump on, clockwise (-) 14 15 * Status, jumper to 15 1–2, connected DGND (-) means active low (negative true logic) 53 Theory of Operation External Cables Valve Controller-GPIO Cable The valve controller-GPIO cable (part number G1103-61610) is used to connect the valve/pump controller to the GPIO connector at the rear panel of your spectrophotometer. Table 7 Valve Controller-GPIO Cable (G1103-61610) Out In * Valve Connector GPIO Connector Function 1 15 DGND 2 1 A0 3 2 A1 4 3 A2 5 9 D0IN 6 10 D1IN 7 11 D2IN 8 4 R/W(-)* 9 5 DV(-) 12 12 Rdy(-) 13 6 D0OUT 14 7 D1OUT 15 8 D2OUT (-) means active low (negative true logic) General-Purpose-GPIO Cable The general-purpose-GPIO cable (part number G1103-61611) has only a connector on the spectrophotometer side. It is used to connect any custom made device with parallel I/O to the GPIO connector at the rear panel of your spectrophotometer. 54 Theory of Operation External Cables Table 8 General Purpose Cable (G1103-61611) Pin Function Pin Function 1 OUT [0] 9 IN [0] 2 OUT [1] 10 IN [1] 3 OUT [2] 11 IN [2] 4 OUT [3] 12 IN [3] 5 OUT [4] 13 IN [4] 6 OUT [5] 14 IN [5] 7 OUT [6] 15 DGND 8 OUT [7] 55 Theory of Operation External Connectors External Connectors GPIB Connector The GPIB core design is used as talker/listener and a controller which is usually the computer with Agilent ChemStation software loaded. It supports all GPIB functionality except passing control between different devices. The connector needs to be activated and configured by the 8-bit configuration switch next to the GPIB connector. For switch settings, refer to the Installing Your UV-Visible Spectroscopy System handbook. APG Remote Connector Remote control allows easy connection between single instruments or systems to ensure coordinated analysis with simple coupling requirements. A subminiature D connector is used. The module provides one remote connector which is inputs/outputs (wired-or technique). To provide maximum safety within a distributed analysis system, one line is dedicated to SHUT DOWN the system’s critical parts in case any module detects a serious problem. To detect whether all participating modules are switched on or properly powered, one line is defined to summarize the POWER ON state of all connected modules. Control of analysis is maintained by signal readiness READY for next analysis, followed by START of run and optional STOP of run triggered on the respective lines. In addition PREPARE and START REQUEST may be issued. Table 9 APG Remote Signal Distribution Pin Signal Function 1 DGND Digital ground 2 PREPARE (L) Request to prepare for analysis (e.g. calibration, detector lamp on). Receiver is any module performing preanalysis activities. 3 START (L) Request to start run / timetable. Receiver is any module performing runtime controlled activities. 56 Theory of Operation External Connectors Table 9 APG Remote Signal Distribution Pin Signal Function 4 SHUT DOWN (L) System has serious problem. Receiver is any module capable to reduce safety risk. 5 Not used 6 POWER ON (H) All modules connected tosystem are switched on. Receiver is any module relying on operation of others. 7 READY (H) System is ready for next analysis. Receiver is any sequence controller. 8 STOP (L) Request to reach system ready state as soon as possible (e.g. stop run, abort or finish and stop injection). Receiver is any module performing runtime controlled activities. 9 START REQUEST (L) Request to start injection cycle (e.g. by start key on any module). Receiver is the autosampler. Multicell Transport Connector Table 10 Multicell Transport Connector Pin Function Pin Function 1 Status 9 Limit switch (nc) 2 OUT [4] 10 Case 3 OUT [4] 11 OUT [2] 4 OUT [1] 12 OUT [2] 5 OUT [1] 13 OUT [3] 6 DGND 14 OUT [3] 7 DGND 15 Shield 8 Limit switch (no) 57 Theory of Operation External Connectors CAN Connector The CAN is a high speed communication interface. It is a two-wire serial bus system supporting data communication with realtime requirements. This CAN interface is used to connect the handheld controller of the Agilent 8453E UV-visible spectroscopy system to the spectrophotometer. RS232C Connector The RS232 is designed as DCE (Data Communication Equipment) with a 9 pin male SUB-D type connector. When controlling the spectrophotometer through the RS232 interface, the connector needs to be activated and configured by the 8-bit configuration switch next to the GPIB connector. For switch settings, refer to Chapter 6 “Interfacing”. Table 11 RS232 Connector Pin Function Pin Function 1 DCD 6 DSR 2 RxD 7 RTS 3 TxD 8 CTS 4 DTR 9 RI 5 GND Using a serial/parallel printer cable, an HP printer can be connected to the spectrophotometer. This option is only used by the Agilent 8453E UV-visible spectroscopy system. The 8-bit configuration switch has to be set to GPIB communication and not to RS232 communication. 58 Theory of Operation External Connectors GPIO Connector The GPIO port is a TTL Input/Output port which is used to control accessories like the pumps. Table 12 GPIO Connector Pin Function Pin Function 1 Out bit 0 9 In bit 0 2 Out bit 1 10 In bit 1 3 Out bit 2 11 In bit 2 4 Out bit 3 12 In bit 3 5 Out bit 4 13 In bit 4 6 Out bit 5 14 In bit 5 7 Out bit 6 15 DGND 8 Out bit 7 If no other accessory is used, the GPIO port can be used to trigger a measurement from an external device. The trigger lines use the GPIO connector pins as shown in Table 13. Table 13 Trigger Inputs Pin Function 9 Trigger blank measurement 10 Trigger sample measurement 11 Trigger standard measurement 12 Trigger stop 13 Trigger kinetics measurement 15 Ground 59 Theory of Operation External Connectors UV-vis ChemStation Software Measurements are activated on contact closure to ground (pin 15). By default these trigger lines are inactive. To activate the GPIO lines as trigger lines, type the following command on the command line of the Agilent ChemStation: EnableGPIOButtons 1 This activation is not resident and has to be done every time the ChemStation is started or the Agilent 8453 is switched on again. The general purpose cable G1103-61611 is recommended for connecting external hardware devices to the GPIO interface of the spectrophotometer. Handheld Controller Software Measurements are activated on contact closure to ground (pin 15). By default these trigger lines are active. Pin 12 (Trigger Stop) and Pin 13 (Trigger kinetics run) are not supported by the software of the handheld controller. The general purpose cable G1103-61611 is recommended for connecting external hardware devices to the GPIO interface of the spectrophotometer. 60 Theory of Operation External Connectors 61 Internal Connections This section gives the definition of the connections inside the instrument including pin assignments of the connectors. Only those connectors are described which may be important for troubleshooting. 62 Theory of Operation Connector Definitions Connector Definitions Main Power Supply Connector The main power supply is connected to the spectrophotometer processor main (SPM) board by a cable that is fixed to the main power supply. Table 14 Power Supply Cable to SPM Board Pin Function Pin Function 1 Power failure 7,8 +24 V 2 Analog ground (AGND) 9,10 +36 V (not used) 3 -15 V 11 Digital ground (DGND) 4 +15 V 12 +5 V 5,6 Power ground (PGND) Fan Connector The fan is connected to the spectrophotometer processor main (SPM) board. Table 15 Fan Connector Pin Function 1 Fan Power 2 Fan Rotation Sensor 3 GND 63 Theory of Operation Connector Definitions Shutter Assembly Connector The shutter assembly is connected to the spectrophotometer processor main (SPM) board. Table 16 Shutter Assembly Connector Pin Function 1,2 Coil Filter 3,4 Coil Dark 5,6 GND 7,8 Coil Common 9,10 GND Deuterium Lamp Connector The deuterium lamp is connected to the spectrograph lamp supply (SLS) board. Table 17 Deuterium Lamp Connector Pin Function 1 Heater 2 Cathode 3 Anode 64 Theory of Operation Connector Definitions Tungsten Lamp Connector The tungsten lamp is connected to the spectrograph lamp supply (SLS) board. Table 18 Tungsten Lamp Connector Pin Function 1 Vis Sense + 2 Vis Lamp + 3 Vis Lamp - 4 Vis Sense - 65 Theory of Operation Connector Definitions 66 3 3 Diagnostics and Troubleshooting Explainations of status and error messages and a logical approach to troubleshooting Diagnostics and Troubleshooting For different stages of troubleshooting, the startup test of the spectrophotometer, instrument self-test, and various diagnostic tests are used. Instrument start-up tests are implemented in the spectrophotometer firmware. They are used to check if the instrument electronics are functioning during start up and operation of the instrument and create error messages or symptoms on the front panel status LEDs. Self-test and diagnostic tests are implemented in the operating software. For explanation of these tests, see your software documentation and online help in the software. This chapter covers the following topics related to troubleshooting the spectrophotometer: • front panel status and power switch LEDs, • error messages, and • general troubleshooting hints. This chapter gives information about how to troubleshoot the instrument. For detailed procedures about cleaning lenses, disassembling the spectrophotometer and exchanging individual electronic items, see Chapter 4 “Maintenance and Repair”. 68 Diagnostics and Troubleshooting Front Panel Status and Power Switch LEDs Front Panel Status and Power Switch LEDs A general description of the functionality of the status and power switch LEDs is given in Chapter 2 “Theory of Operation”. This section describes typical LED symptoms in case of failures of the instrument. Power switch LED off The line power switch with the power switch LED is located at the lower left part of the instrument. If the line power switch is pressed in but the green light is off: • the instrument may not be connected to line power, or • the main power supply (MPS) is defective. Refer to Table 20 through Table 34 for detailed troubleshooting information. Red front panel LED The spectrophotometer does not pass one of the self-tests which are run when the spectrophotometer is turned on or an error occurred during operation. Most of the causes have to do with ignition of lamps, open lamp door, multicell transport problems or spectrophotometer hardware problems. If your controller is running (personal computer or handheld controller) and connected to the spectrophotometer, you may get an error message. This message will tell you more about the cause of the error. For details about error messages, see Table 20 through Table 34 or the help system. Red, blinking front panel Error condition of the spectrophotometer processor system. Because in this LED case there is no communication with the computer there will be no error message. Turn the instrument off and on again. If the error appears again, possible causes are shown in Table 19. 69 Diagnostics and Troubleshooting Front Panel Status and Power Switch LEDs Table 19 Error Condition of Spectrophotometer Processor System Possible Causes Action Spectrophotometer main processor (SPM) board defective Exchange SPM board Spectrophotometer data acquisition (SDA) board defective Exchange SDA board 70 Diagnostics and Troubleshooting Error Messages Error Messages Error messages are a series of text messages which appear in your software. These messages notify you that either the spectrophotometer is not functioning correctly or, in case you are using your own customized programs, that you have made a mistake in the commands which you have given to the spectrophotometer. The following is an overview of the error messages. For suggestions regarding causes and courses of action, see Table 20 through Table 34. • Multicell Transport Home Position Not Found • No Filament Current On Deuterium Lamp • Deuterium Lamp Ignition Failed • No Current Sensed On Deuterium Lamp • No Voltage Sensed On Deuterium Lamp • No Current Sensed On Tungsten Lamp • No Voltage Sensed On Tungsten Lamp • Cooling Fan Defective • Lamp Door Open (Lamps are switched off) • Digital Signal Processor Error • Wavelength Calibration Data Rejected • Excessive Dark Current Detected On Photodiodes • Raw Data Buffer Overflow • Power Fail Most of these error messages are stored with the Agilent 8453 spectrophotometer logbook and can be recalled through the operating software. Table 20 through Table 34 show the error messages with their meanings. The tables explain the instrumental conditions required to generate the message and potential causes which lead to generation of the message. There is a list of suggested actions to correct the instrument state when necessary. 71 Diagnostics and Troubleshooting Error Messages Table 20 Multicell Transport Home Position Not Found Possible Causes Action The multicell transport mechanism is jammed. Make sure the carriage can move freely along its entire path and that there are no obstructions Check that the two screws which fix the multicell transport in the spectrophotometer are not pushed up into the path of the mechanism (e.g. this is the case when putting the transport beside the instrument). Electronics failed. Table 21 Check for defective HOME-switch, defective multicell transport cable, defective motor, or defective spectrophotometer processor main (SPM) board. Lamp Door Open (Lamps Are Switched Off) Possible Causes Action Lamp door is open. Close lamp door. Lamp door is bent. Light switch tab is positioned incorrectly. Bend light switch tab on lamp door to correct tab position. Light switch or electronics have failed. Replace spectrophotometer lamp power supply (SLS) board. 72 Diagnostics and Troubleshooting Error Messages Table 22 Invalid Data Points In Spectrum Possible Causes Action Blank has higher absorbance than sample Ensure sample and blank use the same measurement. Solvent or chemical matrix of solvent or chemical matrix. blank has higher absorbance than Measure blank on water. solvent/matrix of sample. In kinetics mode of ChemStation software: 1 Under Options & Information in the Method menu, select Adjust gains separately from blank measurement. 2 Under Set Gains in the Measure menu, select water or air Bubble in flow cell absorbing during blank. Use cell cleaning fluid to prevent air bubbles sticking on the window surface of the flow cell. Floating particle(s) in cell Clean cell or wait untill particle(s) have settled Variation in sample absorbance during the measurement process due to chemical or physical processes. Select a shorter integration time. Fluorescent sample. Use fixed gain settings in your advanced software for the Agilent ChemStation. This feature is not implemented in the software of the handheld controller. Electronics failed. Replace the spectrophotometer data acquisition (SDA) board. Replace optical unit. Bad blank. Repeat blank measurement. 73 Diagnostics and Troubleshooting Error Messages Table 23 Table 24 Table 25 No Filament Current Through Deuterium Lamp Possible Causes Action Lamp is defective. Replace deuterium lamp. Electronics failed. Replace spectrophotometer lamp power supply (SLS) board. Deuterium Lamp Ignition Failed Possible Causes Action Lamp is defective. Replace deuterium lamp. Electronics failed. Replace spectrophotometer lamp power supply (SLS) board. No Current Through Deuterium Lamp Possible Causes Action If diagnostics in your software indicate that lamp voltage is available, the lamp is defective. Replace deuterium lamp. Electronics failed. Replace spectrophotometer lamp power supply (SLS) board. 74 Diagnostics and Troubleshooting Error Messages Table 26 Table 27 Table 28 No Voltage At Deuterium Lamp Possible Causes Action Lamp is defective. Replace deuterium lamp. Electronics failed. Replace spectrophotometer lamp power supply (SLS) board. No Current Through Tungsten Lamp Possible Causes Action If diagnostics in your software indicate that lamp voltage is available, the lamp is defective. Replace tungsten lamp. Electronics failed. Replace spectrophotometer lamp power supply (SLS) board. No Voltage At Tungsten Lamp Possible Causes Action Lamp is defective. Replace tungsten lamp. Electronics failed. Replace spectrophotometer lamp power supply (SLS) board. 75 Diagnostics and Troubleshooting Error Messages Table 29 Cooling Fan Defective Possible Causes Action Number of cycles per minute sensed at fan is Replace cooling fan. too low. Fan is defective. Number of cycles per minute sensed at fan is Replace spectrophotometer processor main too low. Electronics failed. (SPM) board. Table 30 Digital Signal Processor Error Possible Causes Action SIMM memory module on SPM board missing or in wrong position. Make sure a module of minimum 1 MB is plugged into the position located towards the front panel of the instrument. Communication error between the main Reconnect or replace cable. processor and one of the digital signal processors located on the SPM or SDA board. Cable between SDA board and SPM board disconnected or defective. Communication error between the main Replace spectrophotometer processor main processor and one of the digital signal (SPM) board. processors located on the SPM or SDA board. Replace the spectrophotometer data Electronics failed. acquisition (SDA) board. 76 Diagnostics and Troubleshooting Error Messages Table 31 Wavelength Calibration Data Invalid Possible Causes Action Communication error between EEPROM of Reconnect or replace cable. spectrograph and SDA board. Cable between spectrograph and SDA board disconnected or defective. Wavelength calibration data from EEPROM of Replace the spectrophotometer data spectrograph rejected or communication of acquisition (SDA) board. calibration data disrupted. Wavelength calibration data in EEPROM of spectrograph corrupted. Table 32 Replace optical unit Wavelength Recalibration Data Lost Possible Causes Action 8-bit configuration switch sets the instrument Correct 8-bit configuration switch settings to resident mode. and turn instrument off, then on again. Perform a wavelength recalibration with your software. When doing a firmware upgrade, wavelength Perform a wavelength recalibration with your recalibration data are lost. The factory software. wavelength calibration is still valid. When exchanging the SPM board, wavelength recalibration data are lost. The factory wavelength calibration is still valid. Perform a wavelength recalibration with your software. 77 Diagnostics and Troubleshooting Error Messages Table 33 Table 34 Excessive Dark Current Detected On Photodiodes Possible Causes Action Spectrophotometer data acquisition (SDA) board failure. Replace spectrophotometer data acquisition (SDA) board. Photodiode array electronics failure. Replace optical unit. Raw Data Buffer Overflow Possible Cause Action Attempting to acquire large amounts of data Change data acquisition rate, and/or change within too short of a time period. cycle time, and/or change wavelength range. 78 Diagnostics and Troubleshooting Error Messages Table 35 Power Fail Possible Causes Action Instrument power fail. Check that instrument power indicator in on. No interface link to PC Check that the GPIB cable is properly connected to both Agilent 8453 and PC. Incorrect interface settings. Check that the GPIB interface setting on the spectrophotometer (see section “Installing your Agilent 8453 Spectrophotometer“ in the handbook Installing Your UV-visible Spectroscopy System), on the GPIB interface in PC (see section “Installing an GPIB Interface Board in the PC“ in the handbook Installing Your UV-visible Spectroscopy System), and in the software configuration (see section “Installing the UV-visible Operating Software“ in the handbook Installing Your UV-visible Spectroscopy System) are correct. Loss of communication This may occur because of exceptional power line conditions (spikes or drop-outs). Check that the power supply to the instrument is good. 79 Diagnostics and Troubleshooting General Troubleshooting Hints General Troubleshooting Hints Instrument problems may not always result in error messages. Proper instrument performance is determined by the quality of the results. Even if your instrument turns on, passes its self tests, and operates without generating error messages, it may not be functioning perfectly. The results of measurements can provide hints for troubleshooting if measurement results are less than optimal. Typical power on sequence failed During a typical power on sequence the following events occur: • the power switch LED will ignite and remain on, • the front panel LED will turn yellow, then flash red, green, and stay yellow, • the fan speed will decrease, • the shutter will close, if you listen carefully you may here a click, • the front panel LED will turn green. The green front panel LED indicates successful completion of the self test sequence. NOTE Your software may be set so that lamp ignition does not automatically occur during power on. In this case use your software to ignite the deuterium and tungsten lamps. 80 Diagnostics and Troubleshooting General Troubleshooting Hints If any or all of the above listed actions do not occur, there may be a problem with your instrument. Refer to Table 36 through Table 41 for further troubleshooting information. Table 36 Power Switch LED Off — Front Panel LED Off Possible Causes Action Instrument power disconnected. Connect instrument to power. Overcurrent or overvoltage condition. Spring Remove optical unit. Bend spring back and below optical unit may be bent. This may turn instrument off and on again to reset result in a short circuit on the SDA board. main power supply. Table 37 Table 38 Overcurrent or overvoltage condition. Electronics failure. Turn instrument off and on again to reset main power supply. If the error condition remains, disconnect internal boards one by one, repetitively turning the instrument off and on, to find the defective board. Main power supply (MPS) defective. Replace main power supply (MPS). Power Switch LED Off — Front Panel LED On Possible Cause Action LED in main power supply (MPS) defective. Replace main power supply (MPS). Power Switch LED On — Front Panel LED Off — Shutter Clicks Possible Causes Action Front panel keyboard (SSI board) disconnected or cable defective. Reconnect or replace cable. Front panel keyboard (SSI board) defective. Replace front panel keyboard (SSI board). 81 Diagnostics and Troubleshooting General Troubleshooting Hints Table 39 Power Switch LED On — Front Panel LED Off — Shutter Does Not Click Possible Causes Action 8-bit configuration switch sets the instrument Correct 8-bit configuration switch settings to resident mode. and turn instrument off, then on again. Because the wavelength recalibration is lost, perform a wavelength recalibration with your software. Table 40 Spectrophotometer data acquisition (SDA) board disconnected or defective. Connect or replace spectrophotometer data acquisition (SDA) board. Main power supply (MPS) not connected to spectrophotometer processor main (SPM) board. Connect main power supply (MPS) to spectrophotometer processor main (SPM) board. Main power supply (MPS) or spectrophotometer processor main (SPM) board defective. Replace main power supply (MPS) or spectrophotometer processor main (SPM) board. Power Switch LED Flickering — Front Panel LED Off — Shutter Does Not Click Possible Cause Action Main power supply (MPS) not connected to spectrophotometer processor main (SPM) board. Connect main power supply (MPS) to spectrophotometer processor main (SPM) board. 82 Diagnostics and Troubleshooting General Troubleshooting Hints Table 41 Front Panel LED Red Possible Cause Action An appropriate error message should occur in your software. For explanation of error messages, see “Error Messages” on page 71. Lamp door open or missing. Close or replace door. Lamp door sensor defective. Replace spectrophotometer lamp power supply (SLS) board. Shutter failed or disconnected. Connect or replace shutter. Spectrograph disconnected or defective. Connect or replace spectrograph. Spectrophotometer lamp power supply (SLS) Connect or replace spectrophotometer lamp board disconnected or defective. power power supply (SLS) board. 83 Diagnostics and Troubleshooting General Troubleshooting Hints Measurement Results Indicate Excessive Noise Over The Whole Spectral Range Ensure that the lamps are turned on when making measurements. Measurements taken with both lamps off exhibit excessive noise over the whole wavelength range. In addition, the self test (only Agilent ChemStation software), lamp intensity, and stability diagnostics within the software can aid in diagnosing problems within the optical system which contribute to excessive noise. Causes and solutions for excessive noise over the whole wavelength range are shown in Table 42. Table 42 Excessive Noise Over Whole Wavelength Range Possible Causes Action Light path is blocked. Ensure that the light path is free and clear of all obstructions Cuvette or flow cell not installed correctly. Check and correct cell installation. Air bubble sticking on the quartz window of the flow cell. Use cell cleaning fluid to passivate flow cell. Source lens or spectrograph lenses dirty or fogged. Clean lenses. Shutter not functioning or partly blocking light. Exchange shutter assembly. Spectrophotometer data acqusition (SDA) board may be defective. Exchange SDA board. Spectrophotometer lamp supply (SLS) board may be defective. Exchange SLS board. Main power supply (MPS) may be defective. Exchange MPS. Spectrograph electronics may be defective. 84 Exchange the optical unit. Diagnostics and Troubleshooting General Troubleshooting Hints Measurement Results Indicate Excessive Noise in Part of the Spectrum The selftest (only Agilent ChemStation software), lamp intensity, and stability diagnostics within the software can aid in diagnosing problems within the optical system which contribute to excessive noise. Low intensity in one wavelength range may not preclude you from using the spectrophotometer at another wavelength range where the intensity is acceptable. Causes and solutions for excessive noise in part of the spectrum are shown in Table 43. Table 43 Excessive Noise in Part of Spectrum Possible Causes Action One of the lamps may be turned off when Switch on proper lamp. making measurements. Measurements taken with the deuterium lamp off exhibits excessive noise in the UV wavelength range. Measurements taken with the tungsten lamp off exhibits excessive noise in the visible wavelength range. Noise in the UV wavelength range may be caused by a weak or defective deuterium lamp. Exchange the lamp. Lifetime of the deuterium lamp may be influenced by the number of ignitions. Flow cells and cuvettes, which reduce and/or distort the colimated light beam used in the spectrophotometer, can result in low lamp intensity at the spectrograph. Change cell to standard type. Glass absorbs in the low UV region and causes high noise. Make sure that your flow cells and cuvettes are made from quartz. Solvent or buffer blocks light in a certain wavelength range. If information is required in such a wavelength range, a solvent or buffer that is transparent in that range should be used. Fingerprints on cuvettes or flow cells typically Clean your flow cells or cuvettes with a lens absorb light in the UV range of the spectrum. cleaning tissue. Source lens or spectrograph lenses dirty or fogged. Clean lenses. Spectrophotometer lamp supply (SLS) board Exchange SLS board. may be defective. 85 Diagnostics and Troubleshooting General Troubleshooting Hints Table 43 Excessive Noise in Part of Spectrum, continued Possible Causes Action Spectrophotometer data acqusition (SDA) board may be defective. Exchange SDA board. Spectrograph electronics may be defective. Exchange optical unit. 86 Diagnostics and Troubleshooting General Troubleshooting Hints Measurement Results Indicate Excessive Drift The selftest (only Agilent ChemStation software), lamp intensity, and stability diagnostics within the software can aid in diagnosing problems within the optical system which contribute to excessive drift. Causes and solutions for excessive drift are shown in Table 44. Table 44 Excessive Drift Possible Causes Action Variations in temperature. Ensure that the environment in which the spectrophotometer is being used is stable. The photodiode array temperature may be monitored from within the software to verify PDA temperature stability. Sample degrades with time and/or exposure Use the spectrophotometer without sample. to light. If the problem is found to be sample related, i.e. sample exposure to light, limit the amount of light by the environment and/or shorten the integration time to limit the amount of light during the measurement or use filter wheel to cut out the energetic low UV range. Floating particles in the cell. Filter sample before measurement. Deuterium lamp may burn unstable. Exchange lamp. Tungsten lamp may burn unstable Exchange lamp. Spectrophotometer lamp supply (SLS) board Exchange SLS board. may supply unstable power. Spectrophotometer data acqusition (SDA) board may be defective. Exchange SDA board. Main power supply (MPS) may supply unstable power. Exchange MPS. Spectrograph electronics may be defective. Exchange optical unit. 87 Diagnostics and Troubleshooting General Troubleshooting Hints Excessive Spikes or Glitches on Spectra Causes and solutions for excessive spikes or glitches on spectra are shown in Table 45. Table 45 Excessive Spikes or Glitches on Spectra Possible Causes Action BLANK on air, SAMPLE on cuvette. Measure Blank on the same solvent as used for the sample. Dramatic changes in the refractive index from Measure Blank on the same solvent as used BLANK to SAMPLE. for the sample. Wedge shaped cuvettes (low quality Use high quality quartz cuvettes. cuvettes, mostly (not always) plastic cuvettes; there are non-wedge shaped plastic cuvettes available). Bubbles in the cell (even very small ones are Try to get rid of the bubbles by gently sufficient to create spikes). knocking the cell on a desk. Rinsing the cells with a cleaning and pasivating solution makes the bubbles less sticky to the windows. Sometimes the use of degassed solvent prevents the building of bubbles and make to time between filling the cells and the measurement as short as possible. Floating particles in the cell (from cleaning tissues, or the application, or other kind of dirt). Cells have to be cleaned using cleaning and pasivating solution. Use optical tissues to wipe the outer surface of the cells. Any kind of addionally mounted optical devices put into the light path of the instrument. The manipulation of the optical characteristics can cause some decrease in optical performance. No corrective action execpt the remove of the optical active device can change the behavior. Turbid samples (especially in kinetics when a Avoid turbidity, e.g. by filtration. mixing process occurs during measurement). 88 Diagnostics and Troubleshooting General Troubleshooting Hints Table 45 Excessive Spikes or Glitches on Spectra, continued Possible Causes Action Apertured cells For single cell holder: For cells with apertures of 2 mm or smaller, always use flow cells and avoid removing it between measurements. For multicell transport: Never use a multicell transport as a single cell holder when apertured cuvettes are in use (BLANK on position number 1 and SAMPLE on all other positions) without doing a zero cells measurement. Avoid removing and replacing the cells during a series of measurements. Be sure that the clamp of the multicell (89075D) is always closed then doing a measurement. In general use only cells with blackened walls. 89 Diagnostics and Troubleshooting General Troubleshooting Hints Excessive Stray Light or Nonlinearity Causes and solutions for excessive stray light or nonlinearity are shown in Table 46. Table 46 Excessive Stray Light or Nonlinearity Possible Causes Action Non-blackened apertured cells (so called flourescence cells or plastic cells) Use only cells with blackened walls. Weak intensity in the UV region of the spectrum. Check Deuterium lamp intensity. 90 Diagnostics and Troubleshooting General Troubleshooting Hints Measurements are not Reproducible Causes and solutions for measurements not being reproducible are shown in Table 47. Table 47 Measurements are not Reproducible Possible Causes Action Very low sample concentration Increase integration time to improve signal-to-noise ratio. Variations in the sample Check that the sample does not: • contain particulates that float in and out of the light beam (filter if necessary) • shows signs of bubble formation though chemical reaction or degassing • show signs of thermal or photochemical degradation. One lamp switched off Check that both lamps are switched on if measurement over whole spectral range is required. If spectra in the UV range only are being measured then deuterium lamp must be on. If spectra in the Visible range only are being measured then tungsten lamp must be on. Weak lamp Use diagnostics intensity test to check if lamp intensity is too low and change lamp if necessary. 91 Diagnostics and Troubleshooting General Troubleshooting Hints Measured Values are Different to those of Another Instrument Causes and solutions for measured values being different to those of another instrument are shown in Table 48. Table 48 Measured Values are Different to those of Another Instrument Possible Causes Action Very low sample concentration Increase integration time to improve signal-to-noise ratio. Variations in the sample Check that the sample does not: • contain particulates that float in and out of the light beam (filter if necessary) • shows signs of bubble formation though chemical reaction or degassing • show signs of thermal or photochemical degradation. One lamp switched off Check that both lamps are switched on if measurement over whole spectral range is required. If spectra in the UV range only are being measured then deuterium lamp must be on. If spectra in the Visible range only are being measured then tungsten lamp must be on. Weak lamp Use diagnostics intensity test to check if lamp intensity is too low and change lamp if necessary. 92 4 4 Maintenance and Repair Procedures for exchanging parts, such as lamps and electronic or mechanical items, and for cleaning lenses Maintenance This section describes maintenance procedures such as cleaning the instrument, exchanging the deuterium and tungsten lamps and cleaning lenses. Always disconnect the instrument from line power before maintenance. WAR NI N G To disconnect the instrument from line, pull out the power cord. The power supply still uses some power, even if the power switch on the front panel is turned off. 94 Maintenance and Repair Cleaning the Instrument Cleaning the Instrument The spectrophotometer case and sample compartment should be kept clean. Cleaning should be done with a soft cloth slightly dampened with water or a solution of water and a mild detergent. Do not use an excessively damp cloth that liquid can drip into the spectrophotometer. WAR NI N G Do not let liquid drip into the instrument. It could cause shock hazard and it could damage the instrument. 95 Maintenance and Repair Exchanging the Deuterium or Tungsten Lamp Exchanging the Deuterium or Tungsten Lamp You exchange the deuterium or the tungsten lamp when the intensity test, which is executed through your software, falls below the specified level or when one of the lamps no longert ignites. Removing the Deuterium or Tungsten Lamp 1 Turn off the spectrophotometer and disconnect the power cord. 2 Open the plastic lamp door at the right side of the instrument. Figure 11 Opening the Plastic Lamp Door 3 To open the metal door behind the plastic door, slide the lock mechanism down and simultaneously pull the door out. 96 Maintenance and Repair Exchanging the Deuterium or Tungsten Lamp Figure 12 Opening the Metal Lamp Door 4 Slide the metal door out to have access to the lamps. WAR NI N G The light emitted by the deuterium lamp in this instrument may cause damage to the naked eye. Always turn off the deuterium lamp before removing the deuterium lamp. Figure 13 Sliding Out the Metal Lamp Door 5 To disconnect the lamp cables, press the plug which connects the tungsten or deuterium lamp to the printed circuit together on both sides and lift it up. 97 Maintenance and Repair Exchanging the Deuterium or Tungsten Lamp Figure 14 Disconnecting the Lamp Cables and Removing the Lamps Tungsten lamp Deuterium lamp WAR NI N G If you have been using the instrument, the lamp may be hot. Wait five minutes until the lamp cools down. Further, a hot lamp collects dust when taking it out. In case you reuse the lamp this dust would enter the optical system. 6 Use a Pozidriv screwdriver to open the two screws that hold each lamp and take it out holding it at the lamp ring. 7 Place the lamp(s) on a clean optical tissue or another place where it cannot collect dust. CA UT IO N Never touch the quartz envelope of the deuterium lamp with your fingers. Fingerprints absorb UV light and may be burnt in, thus reducing lifetime of the lamp. If you have accidentally touched it, use isopropanol to wipe the fingerprint off. 98 Maintenance and Repair Exchanging the Deuterium or Tungsten Lamp Replacing the Deuterium or Tungsten Lamp 1 Holding the lamp(s) at the lamp ring, carefully slide it into the lamp housing, and avoid touching the quartz envelope of the deuterium lamp, see CAUTION on page 98. The tungsten lamp ring has a flat part which has to show towards the deuterium lamp location. The deuterium lamp has a recessment for a location pin on the lamp housing. Figure 15 Replacing the Lamps Recessment at deuterium lamp Flat part at tungsten lamp 2 Take a Pozidriv screwdriver and fix the two screws which fix each lamp. 3 Connect the plug(s) of the lamp(s) to the electronic board, see Figure 14. There is only one way to get the plug(s) in. 4 Slide in the metal door and close so that it is locked. Close the plastic door. Figure 16 Sliding In and Closing the Metal Door and Closing 99 Maintenance and Repair Exchanging the Deuterium or Tungsten Lamp 5 Reconnect line power and turn on the instrument. Check that the spectrophotometer passes its self-test, this means that the green light on the front panel comes on and that you can do a blank measurement from your software. 100 Maintenance and Repair Cleaning the Stray Light Filter Cleaning the Stray Light Filter Cleaning the stray light filter is recommended at one-yearly intervals, or more frequently when you operate the spectrophotometer in particularly dirty environment. An indication for a dirty stray light filter is when • —after exchanging the lamps—the intensity test executed by your operating software still falls below the specified level, • one of the stray light tests fails, • the photometric accuracy test fails. Removing the Shutter Assembly 1 Turn off the spectrophotometer and disconnect the power cord. Take the plastic and sheet metal rear covers off, see “Removing and Replacing Covers” on page 109. 2 Remove any accessory board or MIO board that may be plugged in from the rear side of the instrument. 3 Remove the upper rear foam block 4 Disconnect the shutter cable from the SPM board. Open the screw that fixes the shutter assembly to the optical unit and remove the shutter assembly. Figure 17 Removing the Shutter Assembly Shutter assembly Shutter screw Stray light filter 101 Maintenance and Repair Cleaning the Stray Light Filter Cleaning the Stray Light Filter 1 Dampen a lint-free, surgical cotton swab with reagent grade isopropanol (isopropyl alcohol) and gently swab the surface of the stray light filter. Repeat several times with clean swabs and alcohol each time. 2 Use a canister of compressed oil-free air (like those used to clean photographic lenses) to further clean the stray light filter. If you do not have a compressed air canister, you can use a photographic lens cleaning brush. Replacing the Shutter Assembly 1 Position the shutter assembly above the source lens and fix the screw that holds it at the optical unit, see Figure 39. Connect the shutter cable to the SPM board. 2 Replace the upper rear and upper front foam blocks. 3 If available, replace any accessory board or MIO board (plugged in from the rear side of the instrument). 4 Replace the plastic and sheet metal rear covers. Push the plastic rear cover down so that it locates on both sides, see “Removing and Replacing Covers” on page 109. 5 Reconnect line power and turn on the instrument. Check that the spectrophotometer passes its self-test, this means that the green light on the front panel comes on and that you can do a blank measurement from your software. 102 Maintenance and Repair Cleaning the Lenses Cleaning the Lenses Cleaning the lenses which are accessible from the sample compartment is recommended at one-yearly intervals, or more frequently when you operate the spectrophotometer in a particularly dirty environment. An indication for dirty lenses is when—after exchanging the lamps—the intensity test executed by your operating software still falls below the specified level. Cleaning the Source Lens The source lens is a lens system which has one optical surface accessible from inside the lamp housing. The other optical surface is behind the shutter, thus accessible from the sample compartment. Cleaning the Source Lens from the Sample Compartment Side 1 Turn-off the spectrophotometer and disconnect the power cord. 2 Remove any cuvette holder from the sample compartment. 3 To have better access you may want to take the plastic and metal rear covers off, see “Removing and Replacing Covers” on page 109. 4 Dampen a lint-free, surgical cotton swab with reagent grade isopropanol (isopropyl alcohol) and gently swab the surface of the source lens. Repeat several times with clean swabs and alcohol each time. 103 Maintenance and Repair Cleaning the Lenses Figure 18 Cleaning the Source Lens from the Sample Compartment Side Source lens 5 Use a canister of compressed oil-free air (like those used to clean photographic lenses) to further clean the source lens. If you do not have a compressed air canister, you can use a photographic lens cleaning brush. 6 If you have taken the covers off, replace them. 7 Replace the cuvette holder. Reconnect line power and turn on the instrument. Check that the spectrophotometer passes its self-test, this means that the green light on the front panel comes on and that you can do a blank measurement from your software. Cleaning the Source Lens from the Lamp Side It is not recommended to clean this lens at regular intervals, because the lamp housing is sealed against dust. Therefore the source lens is not very likely to get dirty from this side. However, if you have cleaned the other lenses and your intensity test in your operating software still falls below the specified level, try the procedure below. 1 Turn-off the spectrophotometer and disconnect the power cord. 2 To remove the Deuterium lamp, see “Exchanging the Deuterium or Tungsten Lamp” on page 96. 3 Dampen a lint-free, surgical cotton swab with reagent grade isopropanol (isopropyl alcohol) and gently swab the surface of the source lens. Repeat several times with clean swabs and alcohol each time. 104 Maintenance and Repair Cleaning the Lenses Figure 19 Cleaning the Source Lens from the Lamp Side Source lens 4 Use a canister of compressed oil-free air (like those used to clean photographic lenses) to further clean the source lens. If you do not have a compressed air canister, you can use a photographic lens cleaning brush. 5 To replace the Deuterium lamp, see “Exchanging the Deuterium or Tungsten Lamp” on page 96. 6 Reconnect line power and turn on the instrument. Check that the spectrophotometer passes its self-test, this means that the green light on the front panel comes on and that you can do a blank measurement from your software. Cleaning the Spectrograph Lens 1 Turn off the spectrophotometer and disconnect the power cord. 2 Remove any cuvette holder from the sample compartment. 3 To have better access you may want to take the plastic and metal front covers off, see “Removing and Replacing Covers” on page 109. 4 Dampen a lint-free, surgical cotton swab with reagent grade isopropanol (isopropyl alcohol) and gently swab the surface of the spectrograph lens. Repeat several times with clean swabs and alcohol each time. 105 Maintenance and Repair Cleaning the Lenses Figure 20 Cleaning the Spectrograph Lens Spectrograph lens 5 Use a canister of compressed oil-free air (like those used to clean photographic lenses) to further clean the spectrograph lens. If you do not have a compressed air canister, you can use a photographic lens cleaning brush. 6 If you have taken the covers off, replace them. Replace the cell holder in the sample compartment. 7 Reconnect line power and turn on the instrument. Check that the spectrophotometer passes its self-test, this means that the green light on the front panel comes on and that you can do a blank measurement from your software. 106 Maintenance and Repair Cleaning the Lenses 107 Repair Procedures This section gives detailed descriptions of procedures to repair the instrument. Always disconnect the instrument from line power before repair. WAR NI N G To disconnect the instrument from line, pull out the power cord. The power supply still uses some power, even if the power switch on the front panel is turned off. For exchange of electronic assemblies we recommend to use an antistatic grounding kit (part number 9300-0933) to prevent the electronics from damage by electrostatic discharge. • Before you unpack any electronic replacement parts, connect yourself electrically to the instrument with the help of a wrist strap. • Connect the packing material with the electronic replacement part to the instrument. • Touch electronic boards only on the corners and avoid touching the metal traces and electronic items on the board. • When you remove electronic assemblies from the instrument, always put them back into the antistatic bags or place them on a material that has an electrical connection to the instrument. 108 Maintenance and Repair Removing and Replacing Covers Removing and Replacing Covers Use the following procedures to access the electronic items in case of a repair and for troubleshooting reasons. Removing the Front Covers 1 Turn off the spectrophotometer and disconnect the power cord. 2 To remove the plastic front cover, hold the plastic cover on the lower edge with two hands from the left and right of the instrument. Pull the lower edges of the cover in opposite directions and simultaneously lift up. Figure 21 Removing the Plastic Front Cover 3 Remove the keyboard cable from the spectrophotometer-sipper interface (SSI) board, located inside the plastic front cover. 109 Maintenance and Repair Removing and Replacing Covers Figure 22 Removing the Keyboard Cable 4 Remove the cuvette holder and sample pan from the sample compartment. Figure 23 Removing Cuvette Holder and Sample Pan 5 To remove the sheet metal front cover, untighten the screw near the top of the cover using a Pozidriv screwdriver. 110 Maintenance and Repair Removing and Replacing Covers Figure 24 Removing the Sheet Metal Front Cover 6 Slide the sheet metal front cover towards the rear of the instrument and lift it up. Replacing the Front Covers 1 Slide in metal front cover so that it locates on the bottom first. Slide it in further so that it locates on top. Figure 25 Replacing the Metal Front Cover 2 Tighten the screw near the top of the cover using a Pozidriv screwdriver. 3 Replace the sample pan and cuvette holder in the sample compartment. 111 Maintenance and Repair Removing and Replacing Covers Figure 26 Replacing the Sample Pan and Cuvette Holder 4 Place the plastic front cover on top of the sheet metal cover so that you are able to connect the cable to the keyboard (SSI board). Figure 27 Connecting the Keyboard Cable 5 Push the plastic cover down so that it locates on both sides. 6 Reconnect line power and turn on the instrument. Check that the spectrophotometer passes its self-test, this means that the green light on the front panel comes on and that you can do a blank measurement from your software and the keyboard of the spectrophotometer. 112 Maintenance and Repair Removing and Replacing Covers Removing the Rear Covers 1 Turn off the spectrophotometer and disconnect the power cord. 2 To remove the plastic rear cover, hold the plastic cover on the lower edge with two hands from the left and right of the instrument. Pull the lower edges of the cover in opposite directions and simultaneously lift up. Figure 28 Removing the Plastic Rear Cover 3 Remove the cuvette holder and sample pan from the sample compartment. Figure 29 Removing Cuvette Holder and Sample Pan 4 To remove the sheet metal rear cover, untighten the screw near the top of the cover using a Pozidriv screwdriver. 113 Maintenance and Repair Removing and Replacing Covers Figure 30 Removing the Sheet Metal Rear Cover 5 Slide the sheet metal rear cover towards the front of the instrument and lift it up. Replacing the Rear Cover 1 Slide in metal rear cover so that it locates on the bottom first. Slide it in further so that it locates on top. Figure 31 Replacing the Metal Rear Cover 2 Tighten the screw near the top of the cover using a Pozidriv screwdriver. 3 Replace the sample pan and cuvette holder in the sample compartment. 114 Maintenance and Repair Removing and Replacing Covers Figure 32 Replacing Sample Pan and Cuvette Holder 4 Replace the plastic cover and push it down so that it locates on both sides. 5 Reconnect line power and turn on the instrument. Check that the spectrophotometer passes its self-test, this means that the green light on the front panel comes on and that you can do a blank measurement from your software. 115 Maintenance and Repair Exchanging Keyboard and Key Pad Exchanging Keyboard and Key Pad The keyboard is part of the plastic front cover and comprises the key pad (part number G1103-44901) and the spectrophotometer-sipper interface (SSI) board (part number G1103-66505). Removing Keyboard and Key Pad 1 Turn off the spectrophotometer and disconnect the power cord. Take the plastic front cover off, see“Removing and Replacing Covers” on page 109 and disconnect the cable to the SSI board. 2 Open the screws that hold the SSI board in place and remove the SSI board and the keypad. Figure 33 Exchanging Keyboard and Keypad Keyboard Key pad Replacing Keyboard and Key Pad 1 Position the key pad and the keyboard inside the front cover and tighten the screws that hold the keyboard in place, see Figure 33. 2 Connect the cable to the SSI board. Replace the plastic cover and push it down so that it locates on both sides, see “Removing and Replacing Covers” on page 109. 116 Maintenance and Repair Exchanging Keyboard and Key Pad 3 Reconnect line power and turn on the instrument. Check that the spectrophotometer passes its self-test, this means that the green light on the front panel comes on and that you can do a blank measurement from your software and the keyboard of the spectrophotometer. 117 Maintenance and Repair Exchanging or Upgrading Internal Memory Exchanging or Upgrading Internal Memory Additional memory can be used in the spectrophotometer in case of very fast repetitive measurements of huge amounts of spectra, e.g. for fast kinetics measurements. Two sizes of memory are available, 1 MByte memory (part number 1818-4271) and 4 Mbyte memory (part number 1818-5784). You can use the following combinations of memory modules: 1 × 1 MByte, 2 × 2 MByte, 1 × 4 MByte or 2 × 4 MByte. Use the following procedure for removing and replacing memory. Removing SIMM Memory Modules 1 Turn off the spectrophotometer and disconnect the power cord. Take the plastic and sheet metal rear covers off, see “Removing and Replacing Covers” on page 109. 2 Remove any accessory board or MIO board that may be plugged in from the rear side of the instrument. Figure 34 Removing MIO or Accessory Boards 3 Remove the upper rear foam block. 4 On the two sides of the SIMM socket, move the two springs in opposite directions that the memory module is released and you can move the memory module towards the rear of the spectrophotometer.. 118 Maintenance and Repair Exchanging or Upgrading Internal Memory Figure 35 Removing SIMM Memory Modules SIMM memory modules 5 Remove the memory module and repeat the last step in case there is a second memory module installed. Replacing SIMM Memory Modules 1 Place the memory module in the SIMM socket on the SPM board that the components of the memory module are facing to the rear of the spectrophotometer. The memory module is now positioned at an angle in the SIMM socket. 2 Press the memory module towards the front of the spectrophotometer that it snaps in behind the two springs on either side of the SIMM socket. 3 Replace the upper rear foam block. 4 If available, replace any accessory board or MIO board (plugged in from the rear side of the instrument). 5 Replace the plastic and sheet metal rear cover. Push the plastic rear cover down so that it locates on both sides, see “Removing and Replacing Covers” on page 109. 6 Reconnect line power and turn on the instrument. Check that the spectrophotometer passes its self-test,this means that the green light on the front panel comes on and that you can do a blank measurement from your software. 119 Maintenance and Repair Exchanging the SPM Board Exchanging the SPM Board The spectrograph processor board (SPM) board (part number G1103-69500) is located in the top rear part of the spectrophotometer. Removing the SPM Board 1 Turn off the spectrophotometer and disconnect the power cord. Take the plastic and sheet metal rear covers off, see “Removing and Replacing Covers” on page 109. 2 Remove any accessory board or MIO board that may be plugged in from the rear side of the instrument. Figure 36 Removing MIO or Accessory Boards 3 Remove the upper rear foam block. 4 Disconnect the connector from the power supply to the SPM board (right), the flat ribbon cables from the SDA and LPS boards which are above each other, the shutter cable and the fan cable. 120 Maintenance and Repair Exchanging the SPM Board Figure 37 Removing Connectors and Screws from SPM Board SPM board 5 Unscrew two screws each, at the GPIB connector, at the APG remote connector and at the multicell connector and remove the SPM board. Replacing the SPM Board 1 Position the SPM board on the middle rear foam block. 2 Connect the connector from the power supply to the SPM board (right), the flat ribbon cables from the SDA and LPS boards which are above each other, the shutter cable and the fan cable, see Figure 37. 3 Fix two screws each, at the GPIB connector, at the APG remote connector and at the multicell connector. 4 Replace the upper rear foam block. 5 If available, replace any accessory board or MIO board (plugged in from the rear side of the instrument). 6 Replace the plastic and sheet metal rear cover. Push the plastic rear cover down so that it locates on both sides, see “Removing and Replacing Covers” on page 109. 7 Reconnect line power and turn on the instrument. Check that the spectrophotometer passes its self-test, this means that the green light on the front panel comes on and that you can do a blank measurement from your software. 121 Maintenance and Repair Exchanging the Optical Unit Exchanging the Optical Unit The optical unit (part number G1103-69002) includes spectrograph, optics bench, shutter and lamp housing and it is exchanged as one item. Removing the Optical Unit 1 Turn off the spectrophotometer and disconnect the power cord. Take the plastic and sheet metal rear and front covers off, see “Removing and Replacing Covers” on page 109. 2 Remove any accessory board or MIO board that may be plugged in from the rear side of the instrument. 3 Remove the upper rear and upper front foam blocks. 4 Remove the Deuterium and Tungsten lamps, see “Exchanging the Deuterium or Tungsten Lamp” on page 96. 5 Disconnect the shutter cable from the SPM board and the flat ribbon cable from the spectrograph. Figure 38 Removing the Optical Unit 6 Remove the three hexagonal screws that hold the optical unit on the chassis of the instrument. Take the screws out to be able to lift up the optical unit. 7 Lift the optical unit out of the instrument and place it on the bench. 122 Maintenance and Repair Exchanging the Optical Unit Replacing the Optical Unit 1 Place the optical unit onto the bottom chassis of the instrument. Tighten the three hexagonal screws that hold the optical unit on the chassis of the instrument, see Figure 38. 2 Connect the shutter cable to the SPM board and the flat ribbon cable to the spectrograph, see Figure 38. 3 Replace the deuterium and tungsten lamps, see “Exchanging the Deuterium or Tungsten Lamp” on page 96. 4 Replace the upper rear and upper front foam blocks. 5 If available, replace any accessory board or MIO board (plugged in from the rear side of the instrument). 6 Replace the plastic and sheet metal front and rear covers. Push the plastic front and rear covers down so that they locate on both sides, see “Removing and Replacing Covers” on page 109. 7 Reconnect line power and turn on the instrument. Check that the spectrophotometer passes its self-test, this means that the green light on the front panel comes on and that you can do a blank measurement from your software. 123 Maintenance and Repair Exchanging the Shutter Assembly Exchanging the Shutter Assembly The shutter assembly (part number G1103-61904) is located in the top rear part of the spectrophotometer. Removing the Shutter Assembly 1 Turn off the spectrophotometer and disconnect the power cord. Take the plastic and sheet metal rear covers off, see “Removing and Replacing Covers” on page 109. 2 Remove any accessory board or MIO board that may be plugged in from the rear side of the instrument. 3 Remove the upper rear foam block 4 Disconnect the shutter cable from the SPM board. Open the screw that fixes the shutter assembly to the optical unit and remove the shutter assembly. Figure 39 Removing the Shutter Assembly Shutter assembly Shutter screw 124 Maintenance and Repair Exchanging the Shutter Assembly Replacing the Shutter Assembly 1 Position the shutter assembly above the source lens and fix the screw that holds it at the optical unit, see Figure 39. Connect the shutter cable to the SPM board. 2 Replace the upper rear and upper front foam blocks. 3 If available, replace any accessory board or MIO board (plugged in from the rear side of the instrument). 4 Replace the plastic and sheet metal rear covers. Push the plastic rear cover down so that it locates on both sides, see “Removing and Replacing Covers” on page 109. 5 Reconnect line power and turn on the instrument. Check that the spectrophotometer passes its self-test, this means that the green light on the front panel comes on and that you can do a blank measurement from your software. 125 Maintenance and Repair Exchanging the Fan Assembly Exchanging the Fan Assembly The fan assembly (part number 3160-1103) is located in the top rear part of the spectrophotometer. Removing the Fan Assembly 1 Turn off the spectrophotometer and disconnect the power cord. Take the plastic and sheet metal rear covers off, see “Removing and Replacing Covers” on page 109. 2 Remove any accessory board or MIO board that may be plugged in from the rear side of the instrument. 3 Remove the upper rear foam block. 4 Disconnect the fan cable from the SPM board and remove the fan assembly. Figure 40 Removing the Fan Assembly Fan assembly Replacing the Fan Assembly 1 Position the fan assembly in its recessment in the middle rear foam block and connect the fan cable to the SPM board. 2 Replace the upper rear and upper front foam blocks. 3 If available, replace any accessory board or MIO board (plugged in from the rear side of the instrument). 126 Maintenance and Repair Exchanging the Fan Assembly 4 Replace the plastic and sheet metal rear cover. Push the plastic rear cover down so that it locates on both sides, see “Removing and Replacing Covers” on page 109. 5 Reconnect line power and turn on the instrument. Check that the spectrophotometer passes its self-test, this means that the green light on the front panel comes on and that you can do a blank measurement from your software. 127 Maintenance and Repair Exchanging SDA Board Exchanging SDA Board The SDA board (part number G1103-69504) is located below the optical unit of the spectrophotometer. Removing the SDA Board 1 Turn off the spectrophotometer and disconnect the power cord. Take the plastic and sheet metal front and rear covers off, see “Removing and Replacing Covers” on page 109. 2 To remove the optical unit, see “Removing the Optical Unit” on page 122. 3 Remove the lower front foam block. 4 Disconnect the three cables from the SDA board and remove the five scews that hold the board in place. Figure 41 Removing the SDA Board SDA board 128 Maintenance and Repair Exchanging SDA Board Replacing the SDA Board 1 Position the SDA board on the bottom chassis of the instrument and fix the three scews that hold the board in place. 2 Connect the three cables to the SDA board, see Figure 41. 3 On the side which is near the front of the instrument, feed the broader cable through the hole in the lower front foam block and place the foam block on the chassis of the instrument. Figure 42 Replacing SDA Board and Cables Hole in foam block Lower front foam block SDA board 4 To replace the optical unit, see “Replacing the Optical Unit” on page 123. 5 Replace the plastic and sheet metal rear cover. Push the plastic rear cover down so that it locates on both sides, see “Removing and Replacing Covers” on page 109. 6 Reconnect line power and turn on the instrument. Check that the spectrophotometer passes its self-test, this means that the green light on the front panel comes on and that you can do a blank measurement from your software. 129 Maintenance and Repair Exchanging SLS Board Exchanging SLS Board The SLS board (part number G1103-69502) is located below the SPM board in the rear part of the spectrophotometer. Removing the SLS Board 1 Turn off the spectrophotometer and disconnect the power cord. Take the plastic and sheet metal front and rear covers off, see “Removing and Replacing Covers” on page 109. 2 To remove the optical unit, see “Removing the Optical Unit” on page 122. 3 To remove the fan, see “Removing the Fan Assembly” on page 126. 4 To remove the SPM board, see “Removing the SPM Board” on page 120. 5 Remove the middle rear foam block. Figure 43 Removing the Middle Rear Foam Block middle rear foam 6 To slide the SLS board out of the tab on the right side, lift up the SLS board on the left side a little and slide it to the left. 130 Maintenance and Repair Exchanging SLS Board Figure 44 Removing the SLS Board SLS board Tab to hold SLS board Replacing the SLS Board 1 Slide the SLS board into the tab on the right side and push it down, see figure above. 2 Connect the flat ribbon cable that leads to the SPM board. 3 Replace the middle rear foam block. Figure 45 Replacing the Middle Rear Foam Block 131 Maintenance and Repair Exchanging SLS Board 4 To replace the SPM board, see “Replacing the SPM Board” on page 121. 5 To replace the fan, see “Replacing the Fan Assembly” on page 126. 6 To replace the optical unit, see on page 123. 7 Replace the plastic and sheet metal rear cover. Push the plastic rear cover down so that it locates on both sides, see “Removing and Replacing Covers” on page 109. 8 Reconnect line power and turn on the instrument. Check that the spectrophotometer passes its self-test, this means that the green light on the front panel comes on and that you can do a blank measurement from your software. 132 Maintenance and Repair Exchanging the Main Power Supply Exchanging the Main Power Supply The main power supply (MPS) (part number 0950-2528) is located below the SPM board in the rear part of the spectrophotometer. The main power supply (MPS) is in a separate housing. It does not contain any servicable parts inside. In case it is defective, it must not be opened but has to be exchanged as a complete assembly. Removing the Main Power Supply 1 Turn off the spectrophotometer and disconnect the power cord. Take the plastic and sheet metal front and rear covers off, see “Removing and Replacing Covers” on page 109. 2 To remove the fan, see “Removing the Fan Assembly” on page 126. 3 To remove the SPM board, see “Removing the SPM Board” on page 120. 4 Remove the middle rear foam block. Figure 46 Removing the Middle Rear Foam Block middle rear foam 5 To remove the light pipe, take the snap mechanism between two fingers and press it together to release the light pipe from the coupler on the main power supply. Remove the light pipe with the power button. 133 Maintenance and Repair Exchanging the Main Power Supply Figure 47 Removing the Light Pipe Light pipe 6 Open the two screws from the rear panel of the instrument that hold the main power supply in place and slide the main power supply out. Figure 48 Removing the Main Power Supply Screws Replacing the Main Power Supply 1 Place the main power supply on the bottom foam in the rear part of the instrument and fix the two screws from the rear panel of the instrument that hold the main power supply in place, see figure above. 2 Attach the power button to the light pipe and slide the light pipe with the power button into the hole of the bottom foam part that the power button comes out of the hole at the base of the instrument. 134 Maintenance and Repair Exchanging the Main Power Supply Figure 49 Sliding in the Light Pipe 3 Take the snap mechanism between two fingers and press it together to get the light pipe end into the coupler on the main power supply. Figure 50 Attaching Light Pipe to Main Power Supply Coupler 4 Replace the middle rear foam block. 135 Maintenance and Repair Exchanging the Main Power Supply Figure 51 Replacing the Middle Rear Foam Block 5 To replace the SPM board, see “Replacing the SPM Board” on page 121. 6 To replace the fan, see “Replacing the Fan Assembly” on page 126. 7 Replace the plastic and sheet metal rear cover. Push the plastic rear cover down so that it locates on both sides, see “Removing and Replacing Covers” on page 109. 8 Reconnect line power and turn on the instrument. Check that the spectrophotometer passes its self-test, this means that the green light on the front panel comes on and that you can do a blank measurement from your software. 136 5 5 Parts and Materials Exploded views of repairable parts and part number listings for ordering replacement and exchange parts Parts and Materials Exploded Views and Part List Exploded Views and Part List Parts are listed in the respective tables with their part numbers. Assemblies shown do not contain any parts around them, unless otherwise specified. Figure 52 Spectrophotometer Upper Parts 2 1 — inside parts shown in detail on next pages 4 3 5 25 6 7 12 8 11 9 13 27 10 14 15 16 138 Parts and Materials Exploded Views and Part List Table 49 Instrument Parts Breakdown Item Description Part Number 1 Plastic cover front G1103-44101 2 Plastic cover rear G1103-68706 Name plate (not shown in Figure 52) G1103-44300 Sheet metal kit, containing: Metal top front, metal top rear, metal lamp door, (chassis bottom is included and shown in Figure 53) G1103-68701 Metal cover screw (not shown in Figure 52) 5022-2112 5 Metal lamp door G1103-00301 6, 7, 16 EPP foam parts kit, containing: Foam front top, foam rear top, foam rear middle, (foam front bottom and foam rear bottom are included and shown in Figure 53) G1103-68702 8 Sample pan G1103-44501 9 SPM board (spectr. proccessor main board) G1103-69500 10 Tungsten lamp G1103-60001 11 Screw M8 × 30 mm 0515-2520 12 Shutter assembly G1103-61904 13 1 MB memory for SPM board 1818-4721* 13 4 MB memory for SPM board 1818-5784** 14 Deuterium lamp 2140-0605 15 Optical unit (including spectrograph, optical bench and shutter) G1103-69002 3, 4, 5 * ** Part number may be subject to change. Part number may be subject to change. 139 Parts and Materials Exploded Views and Part List Figure 53 Spectrophotometer Lower Parts 36 34 35 18 17, 19 21 32 30 29 20, 22, 24, 26 23 31 28 33 140 Parts and Materials Exploded Views and Part List Table 50 Instrument Parts Breakdown Item Description Part Number 17 Power switch coupler 5041-8383 18 Fan assembly 3160-1103 19 PWR switch light pipe G1103-44602 20 Accessory slot cover 5001-3772 21 Power push button 5041-8381 22 GPIB standoff, 0.255 inch (not shown in Figure 53) 0380-0643 Washer (not shown in Figure 53) 3050-0893 23 Screw M3 × 8 mm 0515-1105 24 Remote standoff (not shown in Figure 53) 1251-7788 25, 27, 34, 36 Cable assembly kit G1103-68704 26 Screw set (not shown in Figure 53) 1251-0218 28 Screw M4 x 8 mm 0515-0910 Washer (not shown in Figure 53) 2190-0409 29, 32 EPP foam parts kit, containing: G1103-68702 foam front bottom, foam rear bottom, (foam front top, foam rear top, foam rear middle are included and shown in Figure 52) 30 Main power supply 0950-2528 31 SDA board (spectr. data acquisition board) G1103-69504 33 Sheet metal kit, containing: G1103-68701 chassis bottom, (metal top front, metal top rear, metal lamp door are included and shown in Figure 52) 35 Metal cover screw (not shown in Figure 53) 5022-2112 SLS board (spectr. lamp supply board) G1103-69502 141 Parts and Materials Exploded Views and Part List Figure 54 Front Cover Parts 37 38 39 40 Table 51 Front Cover Parts Breakdown Item Description Part Number 37 Plastic Cover Front G1103-44101 38 Tapping Screw 0515-2734 39 SSI Board G1103-66505 40 Key Pad G1103-44901 142 Parts and Materials Exploded Views and Part List Parts not shown in the illustrated parts breakdown are given in Table 52. Table 52 Additional Parts Description Part Number Standard cell holder 08451-60104 Sipper/sampler-GPIO cable G1103-61608 Multichannel pump-GPIO cable G1103-61607 Controller-GPIO cable G1103-61610 General purpose-GPIO cable G1103-61611 Waste tubing 0890-1711 GPIB cable (1m) 10833A APG remote cable (start, stop, error, 5061-3378 ready,shut down, power on) Handheld controller with flexible CAN interface cable and documentation G1819A 143 Parts and Materials Exploded Views and Part List 144 6 6 Interfacing Communicating and interfacing through GPIB and RS-232C Interfacing Setting the 8-Bit Configuration Switch Setting the 8-Bit Configuration Switch The 8-bit configuration switch is located next to the GPIB connector. Switch settings provide configuration parameters for GPIB address, serial comunication protocol and instrument specific initialization procedures Figure 55 8-Bit Configuration Switch. 1 2 3 4 5 6 7 8 If you just want to change the GPIB address and need a detailed procedure, refer to the Installing Your UV-Visible Spectroscopy System handbook. Default GPIB address is set to 25 equal to a binary setting of 0 0 0 1 1 0 0 1 (where 0 means that the switch is down and 1 means that the switch is up; the binary code of the address starts with the least significant bit at switch number 8). Table 53 8-Bit Configuration Switch Mode Select 1 2 3 GPIB 0 0 RS-232 0 1 Baudrate Reserved 1 0 Reserved TEST/BOOT 1 1 RSVD 4 5 6 7 8 GPIB Address Data Bits Parity SYS RSVD RSVD FC Switches 1 and 2 define which set of parameters (for example, for GPIB, RS232 and so on) will be changed. Once the change has been completed, the instrument must be powered up again in order to store the values in the non-volatile memory. In the non-volatile random access memory (NVRAM) the parameters are kept, independantly if you turn the instrument off and on again. They will be kept until the same set of parameters is subsequently changed and power is 146 Interfacing Setting the 8-Bit Configuration Switch reset. All other previously stored configuration settings are still being kept in non-volatile random access memory (NVRAM). In this manner you can store more than one set of parameters, for example, for GPIB and RS232, using the same 8-bit configuration switch twice. Forced Cold Start Settings Firmware update procedures may require this mode in case of firmware loading errors. Unlike GPIB and RS232C settings, using these settings does not force storage of this set of parameters in non-volatile random access memory (NVRAM). Returning the switches 1 and 2 to other positions (other than being both up) will allow for normal operation. CA UT IO N Forced cold start erases all methods and data stored in non-volatile memory. Exceptions are diagnose and repair log books which are save from being erased. If you use the following switch settings and power the instrument up again, a forced cold start has been completed. Table 54 Forced Cold Start Settings Mode Select 1 2 3 4 5 6 7 8 TEST/BOOT 1 0 0 0 0 0 1 1 To return to normal operation, set switches back to your GPIB or RS 232 configuration settings. Stay Resident Settings Firmware update procedures may require this mode in case of firmware loading errors. Unlike GPIB and RS232C settings, using these settings does not force storage of this set of parameters in non-volatile random access memory (NVRAM). Returning the switches 1 and 2 to other positions (other than being both up) will allow for normal operation. 147 Interfacing Setting the 8-Bit Configuration Switch If you use the following switch settings and power the instrument up again, the instrument firmware stays in the resident part, that is, it is not operable as a spectrophotometer, but only uses basic functions of the operating system, for example, for comunication and so on. Table 55 Stay Resident Settings Mode Select 1 2 3 4 5 6 7 8 TEST/BOOT 1 0 0 1 0 0 0 1 To return to normal operation, set switches back to your GPIB or RS 232 configuration settings. Comunication Settings for RS232 Comunication The comunication protocol used in this instrument supports only hardware handshake (CTS/RTR). Switches 1 in down and 2 in up position define that the RS232 parameters will be changed. Once the change has been completed, the instrument must be powered up again in order to store the values in the non-volatile memory. Table 56 Communication Settings for RS232 Communication Mode Select 1 2 3 RS-232 1 Baudrate 0 4 5 6 7 8 Data Bits Parity Use the following tables for selecting the setting which you want to use for RS232 comunication. The number 0 means that the switch is down and 148 Interfacing Setting the 8-Bit Configuration Switch 1 means that the switch is up. Please note that there are two possible switch settings for 9600 baud Table 57 Baudrate Settings Switches Table 58 Table 59 Baud Rate 3 4 5 0 0 0 0 0 0 0 Switches Baud Rate 3 4 5 9600 1 0 0 9600 1 1200 1 0 1 14400 1 0 2400 1 1 0 19200 1 1 4800 1 1 1 38400 Data Bit Settings Switch 6 Data Word Size 0 7 Bit Comunication 1 8 Bit Comunication Parity Settings Switches Parity 7 8 0 0 No Parity 1 0 Odd Parity 1 1 Even Parity 149 Interfacing Setting the 8-Bit Configuration Switch 150 Warranty Statement Warranty Statement All Chemical Analysis Products Agilent Technologies (Agilent) warrants its chemical analysis products against defects in materials and workmanship. For details of the warranty period in your country, call Agilent. During the warranty period, Agilent will, at its option, repair or replace products which prove to be defective. Products that are installed by Agilent are warranted from the installation date, all others from the ship date. If buyer schedules or delays installation more than 30 days after delivery, then warranty period starts on 31st day from date of shipment (60 and 61 days, respectively for products shipped internationally). Agilent warrants that its software and firmware designed by Agilent for use with a CPU will execute its programming instructions when properly installed on that CPU. Agilent does not warrant that the operation of the CPU, or software, or firmware will be uninterrupted or error-free. Limitation of Warranty Onsite warranty services are provided at the initial installation point. Installation and onsite warranty services are available only in Agilent service travel areas, and only in the country of initial purchase unless buyer pays Agilent international prices for the product and services. Warranties requiring return to Agilent are not limited to the country of purchase. For installation and warranty services outside of Agilent’s service travel area, Agilent will provide a quotation for the applicable additional services. If products eligible for installation and onsite warranty services are moved from the initial installation point, the warranty will remain in effect only if the customer purchases additional inspection or installation services, at the new site. The foregoing warranty shall not apply to defects resulting from: 1 improper or inadequate maintenance, adjustment, calibration, or operation by buyer, 2 buyer-supplied software, hardware, interfacing or consumables, 3 unauthorized modification or misuse, 151 Warranty Statement 4 operation outside of the environmental and electrical specifications for the product, 5 improper site preparation and maintenance, or 6 customer induced contamination or leaks. THE WARRANTY SET FORTH IS EXCLUSIVE AND NO OTHER WARRANTY, WHETHER WRITTEN OR ORAL, IS EXPRESSED OR IMPLIED. AGILENT SPECIFICALLY DISCLAIMS THE IMPLIED WARRANTIES OF MERCHANTABILITY AND FITNESS FOR A PARTICULAR PURPOSE. Limitation of Remedies and Liability THE REMEDIES PROVIDED HEREIN ARE BUYER’S SOLE AND EXCLUSIVE REMEDIES. IN NO EVENT SHALL AGILENT BE LIABLE FOR DIRECT, INDIRECT, SPECIAL, INCIDENTAL, OR CONSEQUENTIAL DAMAGES (INCLUDING LOSS OF PROFITS) WHETHER BASED ON CONTRACT, TORT OR ANY OTHER LEGAL THEORY. Responsibilities of the Customer The customer shall provide: 1 access to the products during the specified periods of coverage to perform maintenance, 2 adequate working space around the products for servicing by Agilent personnel, 3 access to and use of all information and facilities determined necessary by Agilent to service and/or maintain the products (insofar as these items may contain proprietary or classified information, the customer shall assume full responsiblity for safeguarding and protection from wrongful use), 4 routine operator maintenance and cleaning as specified in the Agilent operating and service manuals, and 5 consumables such as paper, disks, magnetic tapes, ribbons, inks, pens, gases, solvents, columns, syringes, lamps, septa, needles, filters, frits, fuses, seals, detector flow cell windows, and so on. 152 Warranty Statement Responsibilities of Agilent Technologies Agilent Technologies will provide warranty services as described in the following table. Table 60 Warranty Services Services During Warranty* Warranty Period** Type Agilent CE instruments, Agilent 1100 Series LC modules, Agilent 8453 UV-visible spectrophotometers 1 Year Onsite CE, LC, UV-visible supplies and accessories 90 Days Onsite Columns and consumables*** 90 Days Return to Agilent Gas discharge and tungsten lamps 30 Days Return to Agilent Repairs performed onsite by Agilent**** 90 Days Onsite * This warranty may be modified in accordance with the law of your country. Please consult your local Agilent office for the period of the warranty, for shipping instructions and for the applicable wording of the local warranty. ** Warranty services are included as specified for chemical-analysis products and options purchased concurrently provided customer is located within a Agilent-defined travel area. Agilent warranty service provides for 8 a.m. to 5 p.m. onsite coverage Monday through Friday, exclusive of Agilent holidays. *** Columns and consumables are warranted to be free from defects for a period of 90 days after shipment and will be replaced on a return-to-Agilent basis if unused. **** Agilent repair warranty is limited to only the item repaired or replaced. 153 Safety Information Safety Information The following general safety precautions must be observed during all phases of operation, service, and repair of this instrument. Failure to comply with these precautions or with specific warnings elsewhere in this manual violates safety standards of design, manufacture, and intended use of the instrument. Agilent Technologies assumes no liability for the customer’s failure to comply with these requirements. General This is a Safety Class I instrument (provided with terminal for protective earthing) and has been manufactured and tested according to international safety standards. Operation Before applying power, comply with the installation section. Additionally the following must be observed. Do not remove instrument covers when operating. Before the instrument is switched on, all protective earth terminals, extension cords, auto-transformers, and devices connected to it must be connected to a protective earth via a ground socket. Any interruption of the protective earth grounding will cause a potential shock hazard that could result in serious personal injury. Whenever it is likely that the protection has been impaired, the instrument must be made inoperative and be secured against any intended operation. Make sure that only fuses with the required rated current and of the specified type (normal blow, time delay, and so on) are used for replacement. The use of repaired fuses and the short-circuiting of fuseholders must be avoided. Some adjustments described in the manual, are made with power supplied to the instrument, and protective covers removed. Energy available at many points may, if contacted, result in personal injury. Any adjustment, maintenance, and repair of the opened instrument under voltage should be avoided as much as possible. When inevitable, this should be carried out by a skilled person who is aware of the hazard involved. Do not attempt internal service or adjustment unless another person, capable of 154 Safety Information rendering first aid and resuscitation, is present. Do not replace components with power cable connected. Do not operate the instrument in the presence of flammable gases or fumes. Operation of any electrical instrument in such an environment constitutes a definite safety hazard. Do not install substitute parts or make any unauthorized modification to the instrument. Capacitors inside the instrument may still be charged, even though the instrument has been disconnected from its source of supply. Dangerous voltages, capable of causing serious personal injury, are present in this instrument. Use extreme caution when handling, testing and adjusting. Safety Symbols Table 61 Safety Symbols used on Instruments and in Manuals Symbol ! Description The apparatus is marked with this symbol when the user should refer to the instruction manual in order to protect the apparatus against damage. Indicates dangerous voltages. Indicates a protected ground terminal. Eye damage may result from directly viewing light produced by deuterium lamps used in detectors and spectrophotometers. Always turn off the deuterium lamp before opening the lamp door on the instrument. WAR NI N G A warning alerts you to situations that could cause physical injury or damage to the equipment. Do not proceed beyond a warning until you have fully understood and met the indicated conditions. CA UT IO N A caution alerts you to situations that could cause a possible loss of data. Do not proceed beyond a caution until you have fully understood and met the indicated conditions. 155 Solvent Information Solvent Information Observe the following recommendations on the use of solvents. Flow Cells Avoid the use of alkaline solutions (pH > 9.5) which can attack quartz and thus impair the optical properties of flow cells. Solvents Always filter solvents, small particles can permanently block capillaries. Avoid the use of the following steel-corrosive solvents: • Solutions of alkali halides and their respective acids (for example, lithium iodide, potassium chloride, and so on). • High concentrations of inorganic acids like nitric acid, sulfuric acid especially at higher temperatures (replace, if your analysis method allows, by phosphoric acid or phosphate buffer which are less corrosive against stainless steel). • Halogenated solvents or mixtures which form radicals and/or acids, for example: 2CHCl3 + O2 → 2COCl2 + 2HCl This reaction, in which stainless steel probably acts as a catalyst, occurs quickly with dried chloroform if the drying process removes the stabilizing alcohol. • Analysis-grade ethers, which can contain peroxides (for example, THF, dioxane, di-isopropylether) such ethers should be filtered through dry aluminium oxide which adsorbs the peroxides. • Solutions of organic acids (acetic acid, formic acid, and so on) in organic solvents. For example, a 1-% solution of acetic acid in methanol will attack steel. • Solutions containing strong complexing agents (for example, EDTA, ethylene diamine tetra-acetic acid). • Mixtures of carbon tetrachloride with 2-propanol or THF. 156 Radio Interference Radio Interference Manufacturer’s Declaration This is to certify that this equipment is in accordance with the Radio Interference Requirements of Directive FTZ 1046/1984. The German Bundespost was notified that this equipment was put into circulation, the right to check the series for compliance with the requirements was granted. Test and Measurement If test and measurement equipment is operated with equipment unscreened cables and/or used for measurements on open set-ups, the user has to assure that under operating conditions the radio interference limits are still met within the premises. 157 Sound Emission Sound Emission Manufacturer’s Declaration This statement is provided to comply with the requirements of the German Sound Emission Directive of 18 January 1991. This product has a sound pressure emission (at the operator position) < 70 dB. • Sound Pressure Lp < 70 dB (A) • At Operator Position • Normal Operation • According to ISO 7779:1988/EN 27779/1991 (Type Test) 158 Lithium Batteries Information Lithium Batteries Information WAR NI N G Danger of explosion if battery is incorrectly replaced. Replace only with the same or equivalent type recommended by the equipment manufacturer. Do not dispose of lithium batteries in domestic waste. Transportation of discharged lithium batteries through carriers regulated by IATA/ICAO, ADR, RID, IMDG is not allowed. Discharged lithium batteries must be disposed of locally according to national waste disposal regulations for batteries. 159 Agilent Technologies on Internet Agilent Technologies on Internet For the latest information on products and services visit our worldwide web site on the Internet at: http://www.agilent.com/go/chem 160 Index Numerics 1 MByte memory, 118 16-bit A/D converter, 31 4 Mbyte memory, 118 8-bit configuration switch, 146 8-channel peristaltic pump, 53 A A/D converter, 31 absorbance averaging, 46 calculation, 35, 46, 47 conversion of raw data to, 43 run buffer, 46 spectra, 46 accessing lamps, 25 accessory boards control, 43 removing, 118, 120 accessory slot, 25 accuracy photometric, 12 wavelength, 12 acquisition of spectra, 46 additional memory, 118 air (compressed), 104 altitude, 11 analog-to-digital converter, 31 antistatic bags, 108 grounding kit, 108 APG remote connector, 56 application-specific integrated circuit (ASIC), 35 ASIC, 35 attaching the light pipe to main power supply, 135 the power button, 134 autosampler, 52 connector, 52 averaging of intensity spectra, 46 of signal data, 35 B baseline flatness, 13 battery for NVRAM, 35 baudrate settings, 149 binary code of GPIB address, 146 blank push button, 23 block diagram of electronics, 29 of main power supply, 32 of SLS board, 39 of SPM board, 34 of SSI board, 42 boards spectrograph connector interface (SCI), 38 spectrophotometer data acquisition (SDA), 30 spectrophotometer interface (SSI), 42 spectrophotometer lamp supply (SLS), 30 spectrophotometer processor main (SPM), 30 spectrophotometer sipper interface (SSI), 30, 31, 38, 109, 116 burn hazard, 98 C cabinet, 26 cables, 51 general-purpose-GPIO, 54 multichannel pump-GPIO, 53 power supply, 63 sipper/sampler-GPIO, 51 sipper-GPIO, 51 valve controller-GPIO, 54 calculation of absorbance, 35, 46, 47 of variance, 36 CAN connector, 25, 58 certification of computers, 10 chassis of instrument, 122, 123 cleaning lenses, 94 the Instrument, 95 the instrument, 94 the lenses, 103 the source lens, 103 the spectrograph lens, 105 clock, 35 collimated beam, 19 compartment for sample, 20 compensation for photodiode array temperature, 35 compressed air, 104 computers, 10 connections to, 50 comunication protocol, 148 comunication settings for RS232 comunication, 148 connecting plugs of lamps, 99 connections internal, 62 to computer, 50 to peripherals, 50 connector APG remote, 56 autosampler, 52 CAN, 25, 58 definitions, 63 fan, 63 GPIB, 25 GPIO, 24, 51, 52, 53 main power supply, 63 multicell transport, 24, 57 pump, 51, 52, 53 remote, 24 RS232, 24 RS232C, 58 shutter assembly, 64 tungsten lamp, 65 valve, 54 construction and layout of instrument, 26 control of interfaces, 43 of MIO and accessory boards, 43 conversion of raw data to absorbance, 43 to absorbance spectra with variance, 43 converter, A/D, 31 correction factors for temperature, 45 for dark current, 35, 45 for gain, 45 for offset, 35 161 Index for stray light, 19, 20, 35, 46, 47 for temperature, 45 covers, 109 removing, 109, 113 replacing, 111, 114 CTS/RTR hardware handshake, 148 D damage to eyes, 97 dark current correction, 35, 45 dark-corrected intensity spectra, 45 data bit settings, 149 description of firmware, 43 of instrument, 22 detergent, 95 deuterium lamp, 19, 47, 64, 96 connecting plugs, 99 connector, 64 current control, 40 exchanging, 94, 96 filament control, 40 fixing, 99 ignition, 40 light emission, 40 removing, 96 replacing, 99 deuterium line data, 47 diagnostic A/D converter, 40 functions, 43 dimensions, 11 diode array, 21 disconnecting the lamp cables, 97 door to access lamps, 25 E EEPROM, 38 eight-bit configuration switch, 146 eight-channel peristaltic pump, 53 electromagnetic interference, 26 electronically-programmable logic device (EPLD), 38 electronics overview, 29 electrostatic discharge, 108 emission of deuterium lamp, 40 of radio frequencies, 26 162 emission lines of deuterium lamp, 47 of mercury lamp, 47 of zinc-argon lamp, 47 E-Pak packaging, 26 EPLD (electronically-programmable logic device), 38 European Pharmacopoeia, 13 exchanging internal memory, 118 key pad, 116 keyboard, 116 the deuterium lamp, 94, 96 the fan assembly, 126 the main power supply, 133 the optical unit, 122 the SDA board, 128 the shutter assembly, 124 the SLS board, 130 the SPM board, 120 the tungsten lamp, 94, 96 exploded views, 138 external cabinet, 26 cables, 51 communication, 50 eye damage, 97 F fan assembly, 126 exchanging, 126 removing, 126 replacing, 126 fan cable, 120, 121, 126 fan connector, 63 filament control of deuterium lamp, 40 filter for stray-light correction, 19, 20, 47 fingerprints on lamp, 98 firmware description, 43 loading errors, 147 resident part of, 43 update procedures, 147 updates, 43 fixing lamps, 99 flatness of baseline, 13 flow of raw data, 43 forced cold start settings, 147 front covers parts, 142 removing, 109 replacing, 111 front panel, 42 front view of spectrophotometer, 22 fuse, 32 G gain correction, 45 table, 45 general-purpose-GPIO cable, 54 GPIB address, 146 connector, 25 GPIO connector, 24, 51, 52, 53 grating, 19, 21 grounding kit, 108 H hardware fuse, 32 hardware handshake (CTS/RTR), 148 hazard eye damage, 97 skin burn, 98 holographic grating, 19, 21 humidity, 11 I ignition of deuterium lamp, 40 indicator, 22 industrial design of spectrophotometer, 26 input load, 50 instrument description, 22 layout and construction, 26 parts breakdown, 139, 141 integration time, 46 intensity averaging, 46 run buffer, 47 test, 96 interface control, 43 interference, 26 internal Index cabinet, 26 connections, 62 events, 43 internal memory exchanging, 118 upgrading, 118 isopropanol, 102, 103 isopropyl alcohol, 102, 103 K key pad, 116 exchanging, 116 removing, 116 replacing, 116 keyboard, 112, 116 exchanging, 116 removing, 116 replacing, 116 keyboard cable removing, 109 kinetics measurements, 118 L lamps, 19 access through door, 25 deuterium, 19, 40, 47, 96 do not ignite, 96 fixing, 99 lifetime, 98 mercury, 47 tungsten, 19, 40, 96 zinc-argon, 47 layout and construction of instrument, 26 lens, 19, 21 lenses cleaning, 103 photographic, 102, 104 lifetime of lamp, 98 light emission of deuterium lamp, 40 light pipe, 133, 134 removing, 134 line centroids, 48 line frequency, 11 line power input socket, 25 switch, 22 line voltage, 11 lock mechanism, 96 logarithm of intensity spectrum, 46 logic true, 50 low-pass filter, 38, 42 LPS board, 120, 121 M main microprocessor, 35 main power supply, 32 block diagram, 32 connector, 63 exchanging, 133 removing, 133 replacing, 134 reset, 33 maintenance, 94 procedures, 94 materials, 138 measure push buttons, 23 memory, 36 exchanging, 118 non-volatile random access, 35 program, 35 system, 35 upgrading, 118 mercury lamp, 47 metal front cover, 111 internal cabinet, 26 lamp door, 96, 99 microprocessor, 35 system, 43 MIO board control, 43 removing, 118, 120 slot, 25 mode select, 146 multicell transport connector, 24, 57 multichannel pump-GPIO cable, 53 N NIST 2034 standard, 12, 14 NIST 930e standard, 12, 14 noise, 13 nominal spectral slit width, 21 non-volatile random access memory (NVRAM), 35, 146 NVRAM, 35 O offset correction, 35 open collector type, 50 operating altitude, 11 temperature, 11 optical system, 19 optical tissue, 98 optical unit, 122 exchanging, 122 removing, 122 replacing, 123 overload, 32 overtemperature sensor, 33 overview of electronics, 29 of optical system, 19 P parity settings, 149 parts, 138 breakdown, 139, 141 front cover, 142 list, 138 numbers, 138 PDA (photodiode array), 38 front end processor (PFP), 38 signal conditioning electronics, 38 performance specifications, 12 peripherals connections to, 50 peristaltic pump, 51 personal computers, 10 photodiode array, 21, 30, 38, 45 quantum efficiency, 45 temperature compensation, 35 photographic lenses, 102, 104 cleaning brush, 102, 104, 105 photometric accuracy, 12 noise, 13 stability, 13 physical specifications, 11 plasma discharge, 19 plastic door, 25 163 Index external cabinet, 26 front cover, 109, 112 lamp door, 96, 99 potassium dichromate, 12 power button, 134 power consumption, 11 power supply cable, 63 program memory, 35 pulse width modulation driver (PWM), 35 pump connector, 51, 52, 53 push buttons, 23 blank, 23 sample, 23 standar, 23 stop, 23 Q quantum efficiency of the photodiode array, 45 quartz envelope, 98 R radiated frequency interference (RFI), 38 radiation source, 19 radio frequency emissions, 26 random access memory, non-volatile, 35 range of wavelengths, 12 raw data, 45 conversion to absorbance, 43 flow from photodiode array, 43 real-pass band function, 48 real-time clock, 35 rear cover removing, 113 replacing, 114 rear view of spectrophptometer, 24 recalibration, 48 remote connector, 24 removing accessory boards, 118, 120 connectors and screws from SPM board, 121 covers, 109 key pad, 116 keyboard, 116 164 MIO board, 118, 120 SIMM memory modules, 118 the deuterium lamp, 96 the fan assembly, 126 the front covers, 109 the keyboard cable, 109 the light pipe, 134 the main power supply, 133 the middle rear foam block, 130 the optical unit, 122 the rear cover, 113 the sample pan, 110, 113 the SDA board, 128 the shutter assembly, 101, 124 the SLS board, 130 the SPM board, 120 the tungsten lamp, 96 repair procedures, 108 repairing the instrument, 108 replacing, 109 covers, 109 key pad, 116 keyboard, 116 SIMM memory modules, 119 the deuterium lamp, 99 the fan assembly, 126 the front covers, 111 the main power supply, 134 the middle rear foam block, 131 the optical unit, 123 the rear cover, 114 the sample pan, 111, 114 the SDA board, 129 the shutter assembly, 102, 125 the SLS board, 131 the SPM board, 121 the tungsten lamp, 99 the upper rear foam block, 121 reproducibility, 12 reset of power supply, 33 resident EEPROM, 38 part of firmware, 43, 148 resolution, 12 RFI (radiated frequency interference), 38 ribbon cables on SDA and LPS boards, 120, 121 RS232C connector, 24, 58 settings, 148 S safety light switches, 41 shutdown, 41 sample compartment, 20, 110, 111, 113, 114 pan, 110, 111, 113, 114 push button, 23 sampling interval, 21 scan time, 13 SCI board, 38 SDA board, 30, 120, 121 exchanging, 128 removing, 128 replacing, 129 security lever, 25 sensor for overtemperature, 33 setting the 8-bit configuration switch, 146 sheet-metal door, 25 rear cover, 114 shine-through aperture, 19 shortest scan time, 13 shutdown, 41 shutter, 19, 20 shutter assembly connector, 64 exchanging, 124 removing, 101, 124 replacing, 102, 125 shutter cable, 101, 102, 120, 121, 124, 125 signal averaging, 35 conditioning electronics, 45 level, 50 SIMM memory module, 36 memory modules, 118, 119 socket, 118 sockets, 30 single-channel peristaltic pump, 51 sipper/sampler-GPIO cable, 51 Index sipper-GPIO cable, 51 slit, 19, 21 slit width, 12, 21 slots for MIO and accessory boards, 25 SLS board, 30 exchanging, 130 removing, 130 replacing, 131 source lens, 19, 20 cleaning, 103 surface, 102, 103 source of radiation, 19 specifications performance, 12 physical, 11 spectra and signal processor (SSP), 35 spectral acquisition, 46 averaging, 46 spectrograph, 20, 30 connector interface board (SCI), 38 lens, 19, 21 lens, cleaning, 105 slit, 19 spectrophotometer data acquisition board (SDA), 30 front view, 22 industrial design, 26 interface board (SSI), 42 lamp supply board (SLS), 30 processor main board (SPM), 30 rear view, 24 sipper interface board (SSI), 30, 31, 38, 109, 116 SPM board, 30 block diagram, 34 exchanging, 120 removing, 120 removing connectors and screws, 121 replacing, 121 SSI board, 30, 31, 38, 42, 109, 116 block diagram, 42 stability, 13 standard push button, 23 standard TTL levels, 50 standards, 14 for photometric accuracy, 14 for wavelength accuracy, 14 NIST 2034, 12, 14 NIST 930e, 12, 14 potassium dichromate, 12 status indicator, 22 stay resident settings, 147 stop push button, 23 stray light, 12, 22 stray-light correction, 19, 20, 30, 35, 46, 47 filter, 47 subtract dark current, 45 surface of source lens, 102, 103 system memory, 35 W wavelength accuracy, 12 axis linearization, 47 calibration table, 47 range, 12 reproducibility, 12 weight, 11 width of slit, 12, 21 wired-or technique, 50 wrist strap, 108 Z zinc-argon lamp, 47 T temperature compensation of photodiode, 35 correction, 45 effects, 45 filter, 45 operating, 11 sensor, 33 TEST/BOOT mode select, 146 time for shortest scan, 13 for typical scan, 13 until next scan, 13 tungsten lamp, 19, 96 connecting plugs, 99 connector, 65 exchanging, 94, 96 fixing, 99 removing, 96 replacing, 99 voltage control, 40 typical scan time, 13 U upgrading internal memory, 118 V valve connector, 54 valve controller-GPIO cable, 54 variance, 43 calculation, 36 165 Index 166 sa In This Book This handbook is intended for the technical reader who needs background information about the Agilent 8453 spectrophotometer and potential repairs. The handbook contains specifications of the spectrophotometer as well as descriptions of front and back panels, for example, where to connect accessories. Electronics are explained at block-diagram level. There is a detailed section about troubleshooting to help find a defective subassembly, such as an electronic board, in case the spectrophotometer does not operate any more. Part replacement procedures as well as an exploded view with part numbers are given for ordering and replacing assemblies. For information about installation of the system including the spectrophotometer, computer and accessories, see the Installing Your UV-Visible Spectroscopy System handbook.