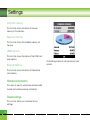
Download User Guide
Transcript
U8380 U8380 User Guide ENGLISH MMBB0161402 Rev. 1.0 Disposal of your old appliance 1. When this crossed-out wheeled bin symbol is attached to a product it means the product is covered by the European Directive 2002/96/EC. 2. All electrical and electronic products should be disposed of separately from the municipal waste stream via designated collection facilities appointed by the government or the local authorities. 3. The correct disposal of your old appliance will help prevent potential negative consequences for the environment and human health. 4. For more detailed information about disposal of your old appliance, please contact your city office, waste disposal service or the shop where you purchased the product. LIMITED WARRANTY LG Electronics warrants to the original purchaser (end user) that the cellular product and its enclosed accessories will be free from defects in material and workmanship, according to the following terms and conditions: 1. WHAT THIS WARRANTY COVERS: (1) The limited warranty for the handset remains in effect for a period of 12 (twelve) months based on the date of purchase (except for the battery, where the Warranty Period shall be 6 months). (2) The limited warranty extends only to the original purchaser (end user) and is not assignable or transferable to any subsequent purchaser/end user. (3) During the warranty period LG or officially appointed service agent will repair or replace any defective product or parts thereof at its discretion. (4) This limited warranty is applicable to the customer/end user that purchased the product from an official dealer in the United Kingdom. (5) The purchaser (end user) must retain the original purchase invoice/till slip in order to enforce this limited warranty. 2. WHAT THIS WARRANTY DOES NOT COVER: (1) Defects or damages resulting from the misuse of this product. (2) Defects or damages from abnormal use, abnormal conditions, improper storage, exposure to moisture or dampness, unauthorized modifications, unauthorized repair, neglect, abuse, accident, alteration, improper installation, blown fuses, food or liquid spillage, acts of God and shipping damage. (3) Breakage or damage to antennas unless caused directly by defects in material or workmanship. (4) The cost of delivery or transportation of the product to the dealer or officially appointed service center will be borne by the purchaser (end user). (5) Products received for repair by the dealer or authorized service center after the product warranty has expired. (6) Products that have had the serial number removed or defaced. (7) THIS LIMITED WARRANTY IS IN LIEU OF ALL OTHER WARRANTIES, EXPRESSED OR IMPLIED IN TERMS OF MARKETABILITY OR FITNESS FOR A PARTICULAR USE. SPECIFICALLY THE COMPANY WILL ACCEPT NO RESPONSIBILITY OR LIABILITY FOR CONSEQUENTIAL, INDIRECT, INCIDENTAL AND SPECIAL LOSS OR DAMAGE CAUSED BY OR DUE TO FAILURE OF OPERATION OR MALFUNCTION OF THE PRODUCT, OR ARISING FROM THE USE OR INABILITY TO USE THE PRODUCT. (8) Damage resulting from the use of non-LG approved accessories. (9) Scratches and damage caused by normal use. (10) Products used outside published maximum ratings. (11) Consumables such as fuses. (12) Products that have been subject to an unauthorised removal or deactivation of the network operator-lock function. Thank you for purchasing this LG U8380 handset. In the unlikely event that your handset needs to be repaired, please contact 3 Customer Services for information on how to return your handset for repair by dialing 0870.7330.333 or 333. Please have your IMEI number ready when you call (this can be found under the battery). Welcome to your LG U8380 handset User guides can be daunting things, can’t they? But don’t worry, we’ve made this one as simple as possible. U8380 User Guide Your guide is designed to do two things. First, there’s an explanation on how to use your new LG U8380, so finding your way around the handset will soon become the second nature. Then there’s an introduction to the wide range of services offered, to make sure you get the best from them. If all you want to do is power up and get going, that’s fine. U8380 Table of Contents Emergency Services and Safety Precautions.............10 Getting Started ............................................................. 31 Using the Battery, Charger and USIM Card............... 31 Installing the Battery....................................................... 31 Removing the Battery..................................................... 32 Charging the Battery ...................................................... 33 Disconnecting the Charger............................................. 34 Battery Information and care.......................................... 35 Installing the USIM Card ................................................ 36 Getting to know your LG U8380 ................................. 37 Familiarise yourself with its features.......................... 37 Your handset’s home screen ...................................... 39 Display Information ...................................................... 40 Your handset’s keys and navigation........................... 41 Function of keys when phone is idle .......................... 42 General Functions ........................................................ 43 Turning your handset on.............................................. 43 Turning your handset off ............................................. 43 Access Codes ............................................................... 43 PIN code (4 to 8 digits)................................................... 43 PIN2 code (4 to 8 digits)................................................. 43 PUK code (4 to 8 digits) ................................................. 43 PUK2 code (4 to 8 digits) ............................................... 43 Security code (4 to 8 digits)............................................ 44 Barring Password......................................................... 44 04 Making and Answering calls ....................................... 45 Making and Answering a video call................................ 45 Making a voice/video call ............................................... 46 Making a voice/video call from Contacts ...................... 46 Making International Calls .............................................. 46 Adjusting the Volume ..................................................... 47 Answering a Call............................................................. 47 Signal Strength............................................................... 47 Entering Text .................................................................. 47 Changing the Text Input Mode....................................... 48 Using the T9 Mode ......................................................... 49 Using the ABC Mode...................................................... 49 Using the 123(Numbers) Mode ...................................... 50 Using the Symbol Mode................................................. 50 Character chart............................................................... 51 Menu tree ...................................................................... 52 Screen............................................................................ 58 Screen theme ............................................................... 58 Home screen .................................................................. 58 Outgoing call .................................................................. 58 Sending message .......................................................... 58 Switch on........................................................................ 58 Switch Off....................................................................... 58 Front screen theme ...................................................... 58 Home screen .................................................................. 58 Outgoing call .................................................................. 59 Table of Contents Menu style ..................................................................... 59 Font................................................................................ 59 Backlight ....................................................................... 59 Handset theme ............................................................. 60 Greeting message ........................................................ 60 Reserved memory ......................................................... 70 USIM memory ............................................................... 70 External Memory ............................................................ 70 Handset information .................................................... 70 Reset settings .............................................................. 70 Profiles .......................................................................... 62 Settings ........................................................................ 66 Date & Time................................................................... 66 Time................................................................................ 66 Date ................................................................................ 66 Auto update date/time ................................................... 66 Daylight saving ............................................................... 67 Browser ........................................................................ 72 Home ............................................................................. 72 Bookmarks.................................................................... 73 Connect .......................................................................... 73 Send as message ........................................................... 73 Add new ........................................................................ 73 Edit ................................................................................. 73 Mark/Unmark.................................................................. 73 Delete ............................................................................. 73 Saved pages.................................................................. 73 Go to URL...................................................................... 73 Home screen softkeys ................................................. 67 Network ......................................................................... 67 Network selection........................................................... 67 Preferred list ................................................................... 67 Access points ............................................................... 67 Security ......................................................................... 68 PIN code request ........................................................... 68 Handset lock ................................................................. 68 Change codes ............................................................... 68 Language ...................................................................... 69 Memory status ............................................................. 69 Common memory .......................................................... 70 Security ......................................................................... 74 Settings ........................................................................ 74 Profiles ........................................................................... 74 Character encoding........................................................ 74 Scrolling control ............................................................. 74 Show Image.................................................................... 74 Cache ............................................................................ 75 Cookies .......................................................................... 75 Clear cache .................................................................... 75 Clear cookie ................................................................... 75 05 U8380 Table of Contents Messages ...................................................................... 80 New message ............................................................... 80 Text message ................................................................. 80 Multimedia message ...................................................... 80 Email............................................................................... 83 Inbox .............................................................................. 84 Mailbox .......................................................................... 86 Drafts ............................................................................. 87 Sent items ..................................................................... 87 Templates...................................................................... 88 Settings ..........................................................................88 Text message ................................................................. 88 Multimedia message ...................................................... 88 Email .............................................................................. 90 Videomail ....................................................................... 90 Voicemail ....................................................................... 91 ExpressLink ................................................................... 91 Info.Service .................................................................... 91 My stuff.......................................................................... 94 Images ........................................................................... 94 Videos ........................................................................... 95 Sounds .......................................................................... 98 Applications ............................................................... 100 External memory ....................................................... 100 Multimedia................................................................... 102 06 Video camera .............................................................. 102 Camera ........................................................................ 103 Voice recorder ........................................................... 104 Play lists ..................................................................... 104 Settings ....................................................................... 104 Video camera .............................................................. 104 Camera ........................................................................ 104 Voice recorder ............................................................. 104 Memory status ............................................................. 104 Contacts ...................................................................... 106 Add new........................................................................106 Search.......................................................................... 106 Speed dials.................................................................. 106 Group ........................................................................... 107 Service dial numbers.................................................. 107 Own number................................................................ 107 Settings ....................................................................... 107 Display data ................................................................. 107 Show image/avatar ...................................................... 107 Copy all ........................................................................ 107 Move all ....................................................................... 108 Clear contacts ............................................................. 108 Applications ................................................................ 110 My applications........................................................... 110 Download applications .............................................. 110 Settings ....................................................................... 110 Table of Contents Organiser..................................................................... 114 Calendar ...................................................................... 114 To do............................................................................ 117 Memo........................................................................... 118 Saved Memo’s ............................................................. 118 Memo Add.................................................................... 118 Memo Lock/Unlock ...................................................... 118 Memo Edit .................................................................... 118 Memo Delete ................................................................118 Secret memo............................................................... 119 Date finder................................................................... 119 Dateulator.................................................................... 119 Settings ....................................................................... 120 Calendar ...................................................................... 120 Memory info. ................................................................ 120 Clear all ........................................................................ 120 Tools ............................................................................ 122 Quick menu ................................................................. 122 Alarm clock ................................................................. 123 Connectivity ................................................................ 124 Bluetooth ...................................................................... 124 Server synchronisation................................................. 125 Calculator.................................................................... 126 World time ................................................................... 127 Unit converter ............................................................. 127 Currency ....................................................................... 127 Surface ......................................................................... 128 Length .......................................................................... 128 Weight .......................................................................... 128 Temperature ................................................................ 129 Volume ......................................................................... 129 Velocity ......................................................................... 129 Calling.......................................................................... 132 Video calls .................................................................. 132 My picture size ............................................................. 132 My picture position ...................................................... 132 Hide my picture ............................................................ 132 Mirror ............................................................................ 132 Substitute Picture ........................................................ 132 Call history .................................................................. 132 Missed calls.................................................................. 133 Received calls .............................................................. 133 Dialled calls ................................................................. 133 All calls ........................................................................ 133 Call duration ............................................................... 133 Last call ........................................................................ 133 Received calls .............................................................. 133 Dialled calls .................................................................. 134 All calls ......................................................................... 134 Call costs .................................................................... 134 07 U8380 Table of Contents Call divert ................................................................... 134 Voice calls .................................................................... 134 Video calls .................................................................... 135 All fax calls.................................................................... 135 Call barring ................................................................. 135 Voice calls .................................................................... 135 Video calls .................................................................... 136 Deactivate all ................................................................ 136 Fixed dial numbers ................................................... 136 Call waiting ................................................................ 136 Settings ....................................................................... 137 Call reject...................................................................... 137 Send my number .......................................................... 138 Auto redial .................................................................... 138 Answer mode ............................................................... 138 Minute minder .............................................................. 138 Troubleshooting ......................................................... 140 Accessories................................................................. 142 Glossary....................................................................... 144 Index ............................................................................ 148 08 Guidelines for safe and efficient use Read these simple guidelines. Breaking the rules may be dangerous or illegal. Further detailed information is given in this manual. Emergency Services and Safety Precautions For Your Safety Caution Read these simple guidelines. Breaking the rules may be dangerous or illegal. Further detailed information is given in this manual. A Switch off the phone in any area where required by special regulations. For example, do not use your phone in hospitals or it may affect sensitive medical equipment. Warning A Emergency call may not be available under all cellular networks. Therefore, you should never depend solely on the phone for emergency calls. A Mobile Phones must be switched off at all times in an aircraft. A Do not hold the phone in your hand while driving. A Do not use your phone near petrol stations, fuel depots, chemical plants or blasting operations. A For your safety, use ONLY specified ORIGINAL batteries and chargers. A Do not handle the phone with wet hands while it is being charged. It may cause an electric shock or seriously damage your phone. A Keep the phone in a safe place out of children’s reach. It includes small parts which if detached may cause a choking hazard. 10 A Only use ORIGINAL accessories to avoid damage to your phone. A All radio transmitters carry risks of interference with electronics in close proximity. Minor interference may affect TVs, radios, PCs, etc. A Batteries should be disposed of in accordance with relevant legislation. A Do not dismantle the phone or battery. Emergency Services and Safety Precautions Exposure to radio frequency energy A The highest SAR value for this model phone tested by DASY3 for use at the ear is 0.671 W/kg (10g) Radio wave exposure and Specific Absorption Rate (SAR) information A The SAR limit recommended by the Institute of Electrical and Electronics Engineers (IEEE), which is 1.6 W/kg averaged over one (1) gramme of tissue (for example USA, Canada, Australia and Taiwan). A This handset model U8380 has been designed to comply with safety, requirements for exposure to radio waves. This requirement is based on scientific guidelines that include safety margins designed to assure the safety of all persons, regardless of age and health A The radio wave exposure guidelines employ a unit of measurement known as the Specific Absorption Rate, or SAR. Tests for SAR are conducted using a standardized method with the phone transmitting at its highest certified power level in all used frequency bands A While there may be differences between the SAR levels of various LG phone models, they are all designed to meet the relevant guidelines for exposure to radio waves A The SAR limit recommended by the International Commission on Non-Ionizing Radiation Protection (ICNIRP), is 2W/kg averaged over ten (10) gramme of tissue 11 Emergency Services and Safety Precautions FCC Part 15 Class B Compliance Bodily Contact During Operation This device and its accessories comply with part 15 of FCC rules. Operation is subject to the following two conditions: (1) This device and its accessories may not cause harmful interference, and (2) this device and its accessories must accept any interference received, including interference that causes undesired operation. This device was tested for typical use with the back of the phone kept 3/4 inches (2 cm) from the body. To comply with FCC RF exposure requirements, a minimum separation distance of 3/4 inches (2 cm) must be maintained between the user’s body and the back of the phone, including the antenna, whether extended or retracted. Third-party belt-clips, holsters, and similar accessories containing metallic components should not be used. Avoid the use of accessories that cannot maintain 3/4 inches (2 cm) distance between the user’s body and the back of the phone and have not been tested for compliance with FCC RF exposure limits. FCC RF Exposure Information WARNING!Read this information before operating the phone. In August 1996, the Federal Communications Commission (FCC) of the United States, with its action in Report and Order FCC 96-326, adopted an updated safety standard for human exposure to radio frequency (RF) electromagnetic energy emitted by FCC regulated transmitters. Those guidelines are consistent with the safety standard previously set by both U.S. and international standards bodies. The design of this phone complies with the FCC guidelines and these international standards. 12 Vehicle-Mounted External Antenna (Optional, if available.) A minimum distance of 8 inches (20 cm) must be maintained between the user / bystander and the vehicle-mounted external antenna to satisfy FCC RF exposure requirements. For more information about RF exposure, visit the FCC website at www.fcc.gov. Emergency Services and Safety Precautions Caution ANSI C95.1 (1992) * Use only the supplied and approved antenna. Use of unauthorized antennas or modifications could impair call quality, damage the phone, void your warranty and/or result in violation of FCC regulations. NCRP Report 86 (1986) Do not use the phone with a damaged antenna. If a damaged antenna comes into contact with the skin a minor burn may result. Contact your local dealer for a replacement of antenna. TIA Safety Information The following is the complete TIA Safety Information for wireless handheld phones. Exposure to Radio Frequency Signal Your wireless handheld portable phone is a low power radio transmitter and receiver. When it is ON, it receives and also sends out radio frequency (RF) signals. In August, 1996, the Federal Communications Commissions (FCC) adopted RF exposure guidelines with safety levels for handheld wireless phones. Those guidelines are consistent with the safety standards previously set by both U.S. and international standards bodies: ICNIRP (1996) American National Standards Institute; National Council on Radiation Protection and Measurements; International Commission on Non-Ionizing Radiation Protection Those standards were based on comprehensive and periodic evaluations of the relevant scientific literature. For example, over 120 scientists, engineers, and physicians from universities, government health agencies, and industry reviewed the available body of research to develop the ANSI Standard (C95.1). The design of your phone complies with the FCC guidelines (and those standards). Antenna Care Use only the supplied or an approved replacement antenna. Unauthorized antennas, modifications, or attachments could damage the phone and may violate FCC regulations. 13 Emergency Services and Safety Precautions Phone Operation Electronic Devices NORMAL POSITION: Hold the phone as you would any other telephone with the antenna pointed up and over your shoulder. Most modern electronic equipment is shielded from RF signals. However, certain electronic equipment may not be shielded against the RF signals from your wireless phone. Tips on Efficient Operation For your phone to operate most efficiently: Do not touch the antenna unnecessarily when the phone is in use. Contact with the antenna affects call quality and may cause the phone to operate at a higher power level than otherwise needed. Driving Check the laws and regulations on the use of wireless phones in the areas where you drive and always obey them. Also, if using your phone while driving, please observe the following: A Give full attention to driving - driving safely is your first responsibility; A Use hands-free operation, if available; A Pull off the road and park before making or answering a call if driving conditions or the law so require. 14 Pacemakers The Health Industry Manufacturers Association recommends that a minimum separation of six (6) inches be maintained between a handheld wireless phone and a pacemaker to avoid potential interference with the pacemaker. These recommendations are consistent with the independent research by and recommendations of Wireless Technology Research. Persons with pacemakers: A Should ALWAYS keep the phone more than six (6) inches from their pacemaker when the phone is turned ON; A Should not carry the phone in a breast pocket; A Should use the ear opposite the pacemaker to minimize the potential for interference; Emergency Services and Safety Precautions A Should turn the phone OFF immediately if there is any reason to suspect that interference is taking place. Hearing Aids Some digital wireless phones may interfere with some hearing aids. In the event of such interference, you may want to consult your service provider (or call the customer service line to discuss alternatives.) Optional for each phone manufacturer. Other Medical Devices If you use any other personal medical device, consult the manufacturer of your device to determine if it is adequately shielded from external RF energy. Your physician may be able to assist you in obtaining this information. Health Care Facilities Turn your phone OFF in health care facilities when any regulations posted in these areas instruct you to do so. Hospitals or health care facilities may use equipment that could be sensitive to external RF energy. Vehicles RF signals may affect improperly installed or inadequately shielded electronic systems in motor vehicles. Check with the manufacturer or its representative regarding your vehicle. You should also consult the manufacturer of any equipment that has been added to your vehicle. Posted Facilities Turn your phone OFF in any facility where posted notices so require. Aircraft FCC regulations prohibit using your phone while in the air. Switch OFF your phone before boarding an aircraft. Blasting Areas To avoid interfering with blasting operations, turn your phone OFF when in a “blasting area” or in areas posted: “Turn off two-way radio”. Obey all signs and instructions. 15 Emergency Services and Safety Precautions Potentially Explosive Atmosphere Adapter and Charger Safety Turn your phone OFF when in any area with a potentially explosive atmosphere and obey all signs and instructions. Sparks in such areas could cause an explosion or fire resulting in bodily injury or even death. Areas with a potentially explosive atmosphere are often, but not always marked clearly. Potential areas may include: fueling areas (such as gasoline stations); below deck on boats; fuel or chemical transfer or storage facilities; vehicles using liquefied petroleum gas (such as propane or butane); areas where the air contains chemicals or particles (such as grain, dust, or metal powders); and any other area where you would normally be advised to turn off your vehicle engine. A The adapter and charger are intended for indoor use only. For Vehicles Equipped with an Air Bag An air bag inflates with great force. DO NOT place objects, including either installed or portable wireless equipment, in the area over the air bag or in the air bag deployment area. If in-vehicle wireless equipment is improperly installed and the air bag inflates, serious injury could result. 16 A Do not expose the adapter or battery pack charger to direct sunlight or use it in places with high humidity, such as a bathroom. A Insert the battery pack charger vertically to wall power outlet. A If you use the battery pack charger out of USA, use an attachment plug adaptor for the proper configuration. Battery Information and Care A Please dispose of your battery properly or take it to your local wireless carrier for recycling. A Do not dispose of your battery in fire or with hazardous or flammable materials. A Never store your phone in temperatures less than -4° F or greater than 122° F. A Never use an unapproved battery since this could damage the phone and/or battery and could cause the battery to explode. Emergency Services and Safety Precautions A The battery does not need to be fully discharged before recharging. A Use only LG-approved chargers specific to your phone model since they are designed to maximize battery life. A Do not disassemble or short-circuit the battery. A Keep the battery’s metal contacts clean. A Replace the battery when it no longer provides acceptable performance. The battery can be recharged several hundred times before replacement. A Recharge the battery after long periods of non-use to maximize battery life. A Battery life will vary due to usage patterns and environmental conditions. A Use of extended backlighting, MiniBrowser, and data connectivity kits affect battery life and talk/standby times. Safety Information Please read and observe the following information for safe and proper use of your phone and to prevent damage. Also, keep the user’s guide in an accessible place at all the times after reading it. Explosion, Shock, and Fire Hazards A Unplug the power cord and charger during lightning storms to avoid electric shock or fire. A Make sure that no sharp-edged items such as animal’s teeth, nails, come into contact with the battery. There is a risk of this causing a fire. A Do not use harsh chemicals(such as alcohol, benzene, thinners, etc.) or detergents to clean your phone. There is a risk of this causing a fire. A When riding in a car, do not leave your phone or set up the hands-free kit near to the air bag. If wireless equipment is improperly installed and the air bag is activated, you may be seriously injured. 17 Emergency Services and Safety Precautions A Do not handle the phone with wet hands while it is being charged. It may cause an electric shock or seriously damage your phone. A Do not drop, strike, or shake your phone severely. Such actions may harm the internal circuit boards of the phone. A Be careful that children do not swallow any parts such as rubber plugs (earphone, connection parts of the phone, etc.). This could cause asphyxiation or suffocation. A Do not use your phone in high explosive areas as the phone may generate sparks. A Do not put your phone in a place subject to excessive dust and keep the minimum required distance between the power cord and heat sources. A Unplug the power cord prior to cleaning your phone, and clean the power plug pin when it is dirty. A Do not damage the power cord by bending, twisting, pulling, or heating. Do not use the plug if it is loose as it may cause a fire or electric shock. 18 A When using the power plug, ensure that it is firmly connected. If it is not, it may cause excessive heat or fire. A Do not place any heavy items on the power cord. Do not allow the power cord to be crimped as it may cause fire or electric shock. A Do not disassemble the phone. A Do not place or answer calls while charging the phone as it may short-circuit the phone and/or cause electric shock or fire. A If you put your phone in a pocket or bag without covering the receptacle of the phone (power plug pin), metallic articles (such as a coin, paperclip or pen) may short-circuit the phone. Always cover the receptacle when not in use. A Do not short-circuit the battery. Metallic articles such as a coin, paperclip or pen in your pocket or bag may short-circuit the + and – terminals of the battery (metal strips on the battery) upon moving. Short-circuit of the terminal may damage the battery and cause an explosion. A Never place your phone in a microwave oven as it will cause the battery to explode. Emergency Services and Safety Precautions General Warnings and Cautions A Only use the batteries, antennas, and chargers provided by LG. The warranty will not be applied to products provided by other suppliers. A Store the battery in a place out of reach of children. A Using a damaged battery or placing a battery in your mouth may cause serious injury. A Do not place items containing magnetic components such as a credit card, phone card, bank book or subway ticket near your phone. The magnetism of the phone may damage the data stored in the magnetic strip. A Do not hold or let the antenna come in contact with your body during a call. A Talking on your phone for a long period of time may reduce call quality due to heat generated during use. A When the phone is not used for a long period time, store it in a safe place with the power cord unplugged. A Using the phone in proximity to receiving equipment (i.e., TV or radio) may cause interference to the phone. A Only authorized personnel should service the phone and its accessories. Faulty installation or service may result in accidents and consequently invalidate the warranty. A Do not use the phone if the antenna is damaged. If a damaged antenna contacts skin, it may cause a slight burn. Please contact an LG Authorized Service Center to replace the damaged antenna. A Do not use the phone in areas where its use is prohibited. (For example: aircraft). A Do not immerse your phone in water. If this happens, turn it off immediately and remove the battery. If the phone does not work, take it to an LG Authorized Service Center. A The power cord on this product will expose you to lead, a chemical known to the State of California to cause (cancer, and) birth defects or other reproductive harm. Wash hands after handling. 19 Emergency Services and Safety Precautions FDA Consumer Update The U.S. Food and Drug Administration’s Center for Devices and Radiological Health Consumer Update on Mobile Phones: 1. Do wireless phones pose a health hazard? The available scientific evidence does not show that any health problems are associated with using wireless phones. There is no proof, however, that wireless phones are absolutely safe. Wireless phones emit low levels of radiofrequency energy (RF) in the microwave range while being used. They also emit very low levels of RF when in the standby mode. Whereas high levels of RF can produce health effects (by heating tissue), exposure to low level RF that does not produce heating effects causes no known adverse health effects. Many studies of low level RF exposures have not found any biological effects. Some studies have suggested that some biological effects may occur, but such findings have not been confirmed by additional research. In some cases, other researchers have had difficulty in 20 reproducing those studies, or in determining the reasons for inconsistent results. 2. What is the FDA's role concerning the safety of wireless phones? Under the law, the FDA does not review the safety of radiation-emitting consumer products such as wireless phones before they can be sold, as it does with new drugs or medical devices. However, the agency has authority to take action if wireless phones are shown to emit radiofrequency energy (RF) at a level that is hazardous to the user. In such a case, the FDA could require the manufacturers of wireless phones to notify users of the health hazard and to repair, replace, or recall the phones so that the hazard no longer exists. Although the existing scientific data do not justify FDA regulatory actions, the FDA has urged the wireless phone industry to take a number of steps, including the following: A Support needed research into possible biological effects of RF of the type emitted by wireless phones; Emergency Services and Safety Precautions A Design wireless phones in a way that minimizes any RF exposure to the user that is not necessary for device function; and A Cooperate in providing users of wireless phones with the best possible information on possible effects of wireless phone use on human health. The FDA belongs to an interagency working group of the federal agencies that have responsibility for different aspects of RF safety to ensure coordinated efforts at the federal level. The following agencies belong to this working group: A National Institute for Occupational Safety and Health A Environmental Protection Agency The FDA shares regulatory responsibilities for wireless phones with the Federal Communications Commission (FCC). All phones that are sold in the United States must comply with FCC safety guidelines that limit RF exposure. The FCC relies on the FDA and other health agencies for safety questions about wireless phones. The FCC also regulates the base stations that the wireless phone networks rely upon. While these base stations operate at higher power than do the wireless phones themselves, the RF exposures that people get from these base stations are typically thousands of times lower than those they can get from wireless phones. Base stations are thus not the subject of the safety questions discussed in this document. A Occupational Safety and Health Administration A National Telecommunications and Information Administration The National Institutes of Health participates in some interagency working group activities, as well. 21 Emergency Services and Safety Precautions 3. What kinds of phones are the subject of this update? The term “wireless phone” refers here to handheld wireless phones with built-in antennas, often called “cell”, “mobile”, or “PCS” phones. These types of wireless phones can expose the user to measurable radiofrequency energy (RF) because of the short distance between the phone and the user’s head. These RF exposures are limited by FCC safety guidelines that were developed with the advice of the FDA and other federal health and safety agencies. When the phone is located at greater distances from the user, the exposure to RF is drastically lower because a person's RF exposure decreases rapidly with increasing distance from the source. The so-called “cordless phones,” which have a base unit connected to the telephone wiring in a house, typically operate at far lower power levels, and thus produce RF exposures far below the FCC safety limits. 4. What are the results of the research done already? The research done thus far has produced 22 conflicting results, and many studies have suffered from flaws in their research methods. Animal experiments investigating the effects of radiofrequency energy (RF) exposures characteristic of wireless phones have yielded conflicting results that often cannot be repeated in other laboratories. A few animal studies, however, have suggested that low levels of RF could accelerate the development of cancer in laboratory animals. However, many of the studies that showed increased tumor development used animals that had been genetically engineered or treated with cancer-causing chemicals so as to be pre-disposed to develop cancer in the absence of RF exposure. Other studies exposed the animals to RF for up to 22 hours per day. These conditions are not similar to the conditions under which people use wireless phones, so we don’t know with certainty what the results of such studies mean for human health. Three large epidemiology studies have been published since December 2000. Between them, the studies investigated any possible association between the use of wireless phones and primary brain cancer, glioma, meningioma, or acoustic neuroma, tumors of the brain or salivary gland, Emergency Services and Safety Precautions leukemia, or other cancers. None of the studies demonstrated the existence of any harmful health effects from wireless phone RF exposures. However, none of the studies can answer questions about long-term exposures, since the average period of phone use in these studies was around three years. 5. What research is needed to decide whether RF exposure from wireless phones poses a health risk? A combination of laboratory studies and epidemiological studies of people actually using wireless phones would provide some of the data that are needed. Lifetime animal exposure studies could be completed in a few years. However, very large numbers of animals would be needed to provide reliable proof of a cancer promoting effect if one exists. Epidemiological studies can provide data that is directly applicable to human populations, but 10 or more years follow-up may be needed to provide answers about some health effects, such as cancer. This is because the interval between the time of exposure to a cancer-causing agent and the time tumors develop — if they do — may be many, many years. The interpretation of epidemiological studies is hampered by difficulties in measuring actual RF exposure during day-to-day use of wireless phones. Many factors affect this measurement, such as the angle at which the phone is held, or which model of phone is used. 6. What is the FDA doing to find out more about the possible health effects of wireless phone RF? The FDA is working with the U.S. National Toxicology Program and with groups of investigators around the world to ensure that high priority animal studies are conducted to address important questions about the effects of exposure to radio frequency energy (RF). The FDA has been a leading participant in the World Health Organization International Electromagnetic Fields (EMF) Project since its inception in 1996. An influential result of this work has been the development of a detailed agenda of research needs that has driven the establishment of new research programs around the world. The project has also helped develop a series of public information documents on EMF issues. The FDA and the 23 Emergency Services and Safety Precautions Cellular Telecommunications & Internet Association (CTIA) have a formal Cooperative Research and Development Agreement (CRADA) to do research on wireless phone safety. The FDA provides the scientific oversight, obtaining input from experts in government, industry, and academic organizations. CTIA-funded research is conducted through contracts with independent investigators. The initial research will include both laboratory studies and studies of wireless phone users. The CRADA will also include a broad assessment of additional research needs in the context of the latest research developments around the world. 7. How can I find out how much radio frequency energy exposure I can get by using my wireless phone? All phones sold in the United States must comply with Federal Communications Commission (FCC) guidelines that limit radio frequency energy (RF) exposures. The FCC established these guidelines in consultation with the FDA and the other federal health and safety agencies. The FCC limit for RF exposure from wireless telephones is set at a Specific 24 Absorption Rate (SAR) of 1.6 watts per kilogram (1.6 W/kg). The FCC limit is consistent with the safety standards developed by the Institute of Electrical and Electronic Engineering (IEEE) and the National Council on Radiation Protection and Measurement. The exposure limit takes into consideration the body’s ability to remove heat from the tissues that absorb energy from the wireless phone and is set well below levels known to have effects. Manufacturers of wireless phones must report the RF exposure level for each model of phone to the FCC. The FCC website (http://www.fcc.gov/oet/rfsafety) gives directions for locating the FCC identification number on your phone so you can find your phone’s RF exposure level in the online listing. 8. What has the FDA done to measure the radio frequency energy coming from wireless phones? The Institute of Electrical and Electronic Engineers (IEEE) is developing a technical standard for measuring the radio frequency energy (RF) exposure from wireless phones and other wireless handsets with the participation and leadership of FDA scientists and engineers. Emergency Services and Safety Precautions The standard, “Recommended Practice for Determining the Spatial-Peak Specific Absorption Rate (SAR) in the Human Body Due to Wireless Communications Devices: Experimental Techniques,” sets forth the first consistent test methodology for measuring the rate at which RF is deposited in the heads of wireless phone users. The test method uses a tissue-simulating model of the human head. Standardized SAR test methodology is expected to greatly improve the consistency of measurements made at different laboratories on the same phone. SAR is the measurement of the amount of energy absorbed in tissue, either by the whole body or a small part of the body. It is measured in watts/kg (or milliwatts/g) of matter. This measurement is used to determine whether a wireless phone complies with safety guidelines. take a few simple steps to minimize your exposure to radio frequency energy (RF). Since time is a key factor in how much exposure a person receives, reducing the amount of time spent using a wireless phone will reduce RF exposure. If you must conduct extended conversations by wireless phone every day, you could place more distance between your body and the source of the RF, since the exposure level drops off dramatically with distance. For example, you could use a headset and carry the wireless phone away from your body or use a wireless phone connected to a remote antenna. Again, the scientific data do not demonstrate that wireless phones are harmful. But if you are concerned about the RF exposure from these products, you can use measures like those described above to reduce your RF exposure from wireless phone use. 9. What steps can I take to reduce my exposure to radio frequency energy from my wireless phone? 10. What about children using wireless phones? If there is a risk from these products - and at this point we do not know that there is - it is probably very small. But if you are concerned about avoiding even potential risks, you can The scientific evidence does not show a danger to users of wireless phones, including children and teenagers. If you want to take steps to lower exposure to radio frequency energy (RF), 25 Emergency Services and Safety Precautions the measures described above would apply to children and teenagers using wireless phones. Reducing the time of wireless phone use and increasing the distance between the user and the RF source will reduce RF exposure. Some groups sponsored by other national governments have advised that children be discouraged from using wireless phones at all. For example, the government in the United Kingdom distributed leaflets containing such a recommendation in December 2000. They noted that no evidence exists that using a wireless phone causes brain tumors or other ill effects. Their recommendation to limit wireless phone use by children was strictly precautionary; it was not based on scientific evidence that any health hazard exists. 11. What about wireless phone interference with medical equipment? Radio frequency energy (RF) from wireless phones can interact with some electronic devices. For this reason, the FDA helped develop a detailed test method to measure electromagnetic interference (EMI) of implanted cardiac pacemakers and defibrillators from 26 wireless telephones. This test method is now part of a standard sponsored by the Association for the Advancement of Medical instrumentation (AAMI). The final draft, a joint effort by the FDA, medical device manufacturers, and many other groups, was completed in late 2000. This standard will allow manufacturers to ensure that cardiac pacemakers and defibrillators are safe from wireless phone EMI. The FDA has tested hearing aids for interference from handheld wireless phones and helped develop a voluntary standard sponsored by the Institute of Electrical and Electronic Engineers (IEEE). This standard specifies test methods and performance requirements for hearing aids and wireless phones so that no interference occurs when a person uses a “compatible” phone and a “compatible” hearing aid at the same time. This standard was approved by the IEEE in 2000. The FDA continues to monitor the use of wireless phones for possible interactions with other medical devices. Should harmful interference be found to occur, the FDA will conduct testing to assess the interference and work to resolve the problem. Emergency Services and Safety Precautions 12. Where can I find additional information? For additional information, please refer to the following resources: FDA web page on wireless phones (http://www.fda.gov/cdrh/phones/index.html) Federal Communications Commission (FCC) RF Safety Program (http://www.fcc.gov/oet/rfsafety) International Commission on Non-lonizing Radiation Protection (http://www.icnirp.de) behind the wheel of a car, practice good common sense and remember the following tips: 1. Get to know your wireless phone and its features such as speed dial and redial. Carefully read your instruction manual and learn to take advantage of valuable features most phones offer, including automatic redial and memory. Also, work to memorize the phone keypad so you can use the speed dial function without taking your attention off the road. National Radiological Protection Board (UK) (http://www.nrpb.org.uk/) 2. When available, use a hands-free device. A number of hands-free wireless phone accessories are readily available today. Whether you choose an installed mounted device for your wireless phone or a speaker 10 Driver Safety Tips phone accessory, take advantage of these devices if available to you. World Health Organization (WHO) International EMF Project (http://www.who.int/emf) Your wireless phone gives you the powerful ability to communicate by voice almost anywhere, anytime. An important responsibility accompanies the benefits of wireless phones, one that every user must uphold. When operating a car, driving is your first responsibility. When using your wireless phone 3. Position your wireless phone within easy reach. Make sure you place your wireless phone within easy reach and where you can reach it without removing your eyes from the road. If you get an incoming call at an inconvenient time, if possible, let your voicemail answer it for you. 27 Emergency Services and Safety Precautions 4. Suspend conversations during hazardous driving conditions or situations. Let the person you are speaking with know you are driving; if necessary, suspend the call in heavy traffic or hazardous weather conditions. Rain, sleet, snow and ice can be hazardous, but so is heavy traffic. As a driver, your first responsibility is to pay attention to the road. 5. Do not take notes or look up phone numbers while driving. If you are reading an address book or business card, or writing a “to-do” list while driving a car, you are not watching where you are going. It is common sense. Don’t get caught in a dangerous situation because you are reading or writing and not paying attention to the road or nearby vehicles. 6. Dial sensibly and assess the traffic; if possible, place calls when you are not moving or before pulling into traffic. Try to plan your calls before you begin your trip or attempt to coincide your calls with times you may be stopped at a stop sign, red light or otherwise stationary. But if you need to dial while driving, follow this simple tip -- dial only 28 a few numbers, check the road and your mirrors, then continue. 7. Do not engage in stressful or emotional conversations that may be distracting. Stressful or emotional conversations and driving do not mix; they are distracting and even dangerous when you are behind the wheel of a car. Make people you are talking with aware you are driving and if necessary, suspend conversations which have the potential to divert your attention from the road. 8. Use your wireless phone to call for help. Your wireless phone is one of the greatest tools you can own to protect yourself and your family in dangerous situations -- with your phone at your side, help is only three numbers away. Dial 911 or other local emergency number in the case of fire, traffic accident, road hazard or medical emergency. Remember, it is a free call on your wireless phone! 9. Use your wireless phone to help others in emergencies. Your wireless phone provides you a perfect opportunity to be a “Good Samaritan” in your community. If you see an Emergency Services and Safety Precautions auto accident, crime in progress or other serious emergency where lives are in danger, call 911 or other local emergency number, as you would want others to do for you. 10. Call roadside assistance or a special wireless non-emergency assistance number when necessary. Certain situations you encounter while driving may require attention, but are not urgent enough to merit a call for emergency services. But you can still use your wireless phone to lend a hand. If you see a broken-down vehicle posing no serious hazard, a broken traffic signal, a minor traffic accident where no one appears injured or a vehicle you know to be stolen, call roadside assistance or other special non-emergency wireless number. For more information, please call to 888-901-SAFE, or visit our website www.wow-com.com Consumer Information on SAR (Specific Absorption Rate) This Model Phone Meets the Government’s Requirements for Exposure to Radio Waves. Your wireless phone is a radio transmitter and receiver. It is designed and manufactured not to exceed the emission limits for exposure to radio frequency (RF) energy set by the Federal Communications Commission of the U.S. Government. These limits are part of comprehensive guidelines and establish permitted levels of RF energy for the general population. The guidelines are based on standards that were developed by independent scientific organizations through periodic and thorough evaluation of scientific studies. The standards include a substantial safety margin designed to assure the safety of all persons, regardless of age and health. The exposure standard for wireless mobile phones employs a unit of measurement known as the Specific Absorption Rate, or SAR. The SAR limit set by the FCC is 1.6 W/kg. Tests for SAR are conducted using standard operating positions specified by the FCC with the phone transmitting at its highest certified power level in all tested frequency bands. Although SAR is determined at the highest certified power level, the actual SAR level of the phone while operating can be well below the maximum 29 Emergency Services and Safety Precautions value. Because the phone is designed to operate at multiple power levels to use only the power required to reach the network, in general, the closer you are to a wireless base station antenna, the lower the power output. Before a phone model is available for sale to the public, it must be tested and certified to the FCC that it does not exceed the limit established by the government-adopted requirement for safe exposure. The tests are performed in positions and locations (e.g., at the ear and worn on the body) as required by the FCC for each model. The highest SAR value for this model phone when tested for use at the ear is 0.639 W/kg and when worn on the body, as described in this user guide, is 0.713 W/kg (body-worn measurements differ among phone models, depending upon available accessories and FCC requirements). While there may be differences between SAR levels of various phones and at various positions, they all meet the government requirement for safe exposure. The FCC has granted an Equipment Authorization for this model phone with all reported SAR levels evaluated as in compliance 30 with the FCC RF emission guidelines. SAR information on this model phone is on file with the FCC and can be found under the Display Grant section of http://www.fcc.gov/oet/fccid after searching on FCC ID BEJU8380. Additional information on Specific Absorption Rates (SAR) can be found on the Cellular Telecommunications Industry Association (CTIA) website at http://www.wow-com.com. * In the United States and Canada, the SAR limit for mobile phones used by the public is 1.6 watts/kg (W/kg) averaged over one gram of tissue. The standard incorporates a substantial margin of safety to give additional protection for the public and to account for any variations in measurements. Getting Started Using the Battery, Charger and USIM Card Installing the Battery 1 2 To install the battery, insert the bottom of the battery into the opening on the back of the phone. Then push the battery down until the latch clicks and then install battery cover. 1 31 Getting Started Removing the Battery Turn the power off. (If power is left on, there is a chance you could lose the stored telephone numbers and messages.) Press the latches 1 and open the battery cover 2. Then remove the battery. 1 1 1 2 32 2 Getting Started If the backlight of sub-display is red when you connect charger: The battery is fully discharged and it will take sometime(under 30 minutes) to charge the battery to minimum operating level. When the red light is on, the handset can not be powered on. The red light will be turned off if the battery is charged to minimum operating level. Warning You can make video call with charger connected. But if the battery capacity is under 10% the battery can be discharged when you use video call even though the charger is connected. 2. Connect the charger to a standard AC wall outlet. Only use the charger that comes included with the package. Warning Do not force the connector as this may damage the phone and/or the charger. Charging the Battery To use the charger provided with your phone: 1. With the battery in position on the phone, connect the lead from the charger to the bottom of the phone. Check that the arrow on the lead connector is facing towards the front of the phone. 33 Getting Started Disconnecting the Charger Sub-display Sub-display When charging is finished, disconnect the charger from the power outlet and from the phone by pressing on the gray tabs on both sides of the connector while pulling the connector out. If the battery fails to charge completely: After turning the phone on and off, please attempt to recharge the battery. After detaching and reattaching the battery, please attempt to recharge the battery. Notice The battery delivered with your phone has to be fully charged before using it. Do not remove the battery or the USIM card while charging. If your phone is being charged, the display will show the charging status. 34 Getting Started Battery Information and Care 1. Never use an unapproved battery since this could damage the phone and / or battery and could cause the battery to explode. 2. The battery does not need to be fully discharged before recharging. 10. Battery life will vary due to usage patterns and environmental conditions. 11. The use of extended backlighting, Browser, and data connectivity kits affect battery life and talk/standby time. 3. Use only LG approved chargers specific to your phone model since they are designed to maximize battery life. 4. Do not disassemble or short-circuit the battery. 5. Keep the battery’s metal contacts clean. 6. Replace the battery when it no longer provides acceptable performance. The battery can be recharged several hundred times before replacement. 7. Recharge the battery after long periods of non-use to maximize battery life. 8. Do not expose the battery charger to direct sunlight or use it in areas of high humidity such as a bathroom. 9. Battery life will decrease if exposed to extremely hot or cold temperatures. 35 Getting Started Installing the USIM card Notice Your USIM card contains your phone number, service details and contacts and must be inserted into your handset. When you need to remove the USIM card, slide it towards the top of the phone and take it out of the holder. If your USIM card is removed then your handset becomes unusable until a valid one is inserted. Always disconnect the charger and other accessories from your handset before inserting and removing your USIM card. Your USIM card may only be used in handsets which are enabled for 3 services. Any attempt to use the USIM card in other handsets may result in serious damage to the handset and may prevent you from being able to use it, including the making of emergency calls. U SI M Notice U SI M 36 Before installing always make sure that the phone is switched off and remove the battery. The metal contact of the USIM card can be easily damaged by scratches. Pay special attention to the USIM card while handling and installing. Follow the instructions supplied with the USIM card. Getting to know your LG U8380 Familiarise yourself with its features Earpiece Main screen Left soft box Right soft box displays a variety of prompts. displays a variety of prompts. 4-way navigation key Left soft key Right soft key activates the prompts displayed on screen in the left soft box. activates the prompts displayed on screen in the right soft box. Send key OK key Menu key Clear key / Speakerphone End key On/Off takes you to the task menu from any screen. Send key for video calls Triangle key Alpha numeric keys opens the browser to 3 services connecting you to a world of communications, information and entertainment. Microphone 37 Getting to know your LG U8380 Speakerphone Handstrap hole Antenna Camera Stereo headset jack Battery lock Light Battery cover Front screen Memory Card Slot USIM card socket Battery terminals Cable connector/ Battery charging connector 38 Battery Getting to know your LG U8380 Your handset’s home screen Your handset’s home screen is divided into three basic displays: the icon indicator bar; a central window that includes the home screen; and the prompt bar. Each of these is described below: The icon indicator bar The icon indicator bar shows what operations are taking place and reminds you of battery and signal strength. This appears through all activities. The table beiow gives a brief explanation of the icons and their function. The home screen The central window of your start screen displays an image of your choice, when in use, this screen will display all of your functions and services. The prompt bar The prompt bar displays in the soft boxes. These are activated by pressing the appropriate soft key under each one. 39 Getting to know your LG U8380 Display Information The table below describes various display indicators or icons that appear on the phone’s display screen. On-Screen Icons Icon Description Battery level - indicates the amount of power in your battery. The greater the amount of solid colour the greater the power. Call diverting - indicates call divert option has been selected. Call reject - indicates call reject option has been selected. Voice message - indicates when you have a new voice message. Text - indicates when you have a new new text message. Multimedia - indicates when you have a new Multimedia message. 3G network - indicates whether you are in the 3 video service area. When you leave the 3 video service area, your handset roams onto the voice & picture network or when abroad onto another network(2G/3G) 2G network - indicates the strength of your handset’s connection with a 2G network. 40 Icon Description No-service area - indicates you are in the no-service area. Roaming service - indicates that you are using a roaming service. ExpressLink message - indicates that there is new ExpressLink content. Indicates the Bluetooth connection is activated. Indicates when you have a new Bluetooth message. Alarm - indicates an Alarm. Normal - indicates the General profile is activated Silent - indicates the silent menu in Profile. Vibrate only - indicates whether the vibrate function is on or off. Headset - indicates the headset menu in Profile. Outdoor - Indicates the loud profile is activated. Getting to know your LG U8380 Your handset’s keys and navigation (1) The Triangle key (6) The End key (On/Off) This key is your one-touch access to Today on 3, a world of communications, information and entertainment. This key is used to end calls and close down applications. Use for quick access to phone functions. This key has two functions. It will take you back to your previous screen and when in a text entry screen, it acts as a delete key. (3) The OK key (8) The soft keys The button in the centre of the Navigation key allows you to select objects on the screen. Once you have scrolled to your desired choice use the OK key to select it. This function can be used in the majority of screens. The left and right soft keys activate the prompts that appear in the soft boxes directly above them. These prompts change according to the screen content. (2) The navigation key (8) (2) (10) (3) (5) (9) (7) (6) (4) (1) (7) The Clear key , (9) The Video call key (4) The Menu key This key takes you to the main menu from any screen. (5) The Send key To make and answer a video call. (10) The Back key This key takes you back to the previous screen. This key is used to make and answer voice calls. 41 Getting to know your LG U8380 Function of keys when phone is idle Side of handset Keys Navigation key Up Video/Camera key (short press) Video recorder (long press) Camera : Quick Menu Down: Search contacts Right : (short press) Messages menu (long press) New message (long press) Light (only activates once flip is close) Left : (short press) Profiles popup window (long press) Profile vibrate mode Volume of key tone Call history BACK: Back to previous screen. C : In a text entry screen, it acts as a delete key. Extra keys Video call: To make and view call history Menu: (short press) Main menu (long press) Multitasking history Triangle key: Access to Today on 3. 42 General Functions Turning your handset on PIN code (4 to 8 digits) Ensure that your USIM card is in your handset and the battery is charged. The PIN (Personal Identification Number) code protects your USIM card against unauthorized use. The PIN code is usually supplied with the USIM card. When the PIN Code Request is set to Enable, your phone will request the PIN code every time it is switched on. When the PIN Code Request is set to Disable, your phone connects to the network directly without the PIN code. Press and hold the key until power is on. Enter the USIM PIN code that was supplied with your USIM card if PIN code setting is on. After a few seconds you will be registered on the network. Turning your handset off Press and hold the key until power is off. There may be some delay while the handset powers down. PIN2 code (4 to 8 digits) The PIN2 code, supplied with some USIM cards, is required to access functions such as Fixed Dial Number. These functions are only available if supported by your USIM card. Do not re-power the handset during this time. PUK code (4 to 8 digits) Access Codes The PUK (PIN Unblocking Key) code is required to unlock a blocked PIN code. Contact 3 Customer Services for the code. You can use the access codes described in this section to avoid unauthorized use of your phone. The access codes (except PUK and PUK2 codes) can be changed by using the Change codes feature [Menu 3.5.3]. PUK2 code (4 to 8 digits) The PUK2 code, is required to unlock a blocked PIN2 code. Contact 3 Customer Services. 43 General Functions Security code (4 to 8 digits) The security code protects the unauthorized use of your phone. The default security code is set to ‘0000’ and the security code is required to delete all phone entries and to restore the handset to factory setting. Barring Password The barring password is required when you use the call barring function. The password is obtained from the 3 Customer Services when you subscribe to this function. 44 General Functions Making and Answering calls Ensure you tell the other party before recording a voice call. Making and Answering a video call You can make/answer a video call to a 3G video phone the other party must have a 3G video phone and be in a video service area. To make/answer a video call, do the following. 1. Input the phone number using the keypad, or select the phone number from the calls made/received lists. Note To correct mistakes, press the key briefly to delete the last number, or press and hold the key to delete all numbers. 2. If you do not want to use the speakerphone, ensure you have the headset plugged in. Note The video call may take some time to connect. Please be patient. The connection time will also depend on how quickly the other party answers the call. While the video call is connecting, you will see your own images; after the other party has answered, their image will be displayed on screen. 3. Adjust the camera position if necessary. 4. Press the end key to finish the call, or close the handset. 45 General Functions Making a voice/video call Scroll to your chosen contact and press the key. To make a voice call press the key. 1. Make sure your handset is powered on. 2. Enter the number including the full area code. a To delete a digit press the key. To delete all digits press and hold the key. Press key. 3. Press the key to make a voice call. Press the key to make a video call. Making International Calls 4. Press the key to finish the call, or close the handset. 1. Press and hold the key for the international prefix. The ‘+’ character can be replaced with the international access code. Note 2. Enter the country code, area code, and the phone number. To activate the speakerphone during a Voice call, you have to press and hold the key for at least 2 secs. Making a voice/video call from Contacts It is easy to call anyone whose number you have stored in your Contacts. Press the down navigation key to access contact list. 46 To make a video call press the the key to finish the call. 3. Press the key. General Functions Adjusting the Volume During a call, if you want to adjust the earpiece volume, use the side keys of the handset. In idle mode with the flip cover open, you can adjust the key volume using the side keys. Answering a Call When you receive a call, the phone rings and the flashing phone icon appears on the screen. If the caller can be identified, the caller’s phone number (or name if stored in your Contacts) is displayed. a If the Open flip menu option ((Menu #.9.4) is simply by opening) is on , you can answer the call simply by opening the flip. 2. End the call by closing the handset or pressing the key. Notice You can answer a call while using the Contacts or other menu features. Signal Strength 1. Open the flip and press the key to answer an incoming call. If the Press any key menu option has been set to key, Press any key will answer a call except for the key. If you are inside a building, being near a window may give you better reception. You can see the strength of your signal by the signal indicator see the strength ( ) on your handset’s display screen. Notice Entering Text a To reject an incoming call, press and hold down the side key on the left side twice of the handset without opening the flip(See page 137). If the flip is open, press the key or the right soft key twice. You can enter alphanumeric characters using the keypad. For example, storing names in the Contacts, writing a message, creating a personal greeting or scheduling events in the calendar all require entering text. 47 General Functions Following text input methods are available in the handset. Changing the Text Input Mode 1. When you are in a field that allows characters to be entered, you will notice the text input mode indicator in the upper right corner of the display. 2. Short pressing the , , , Press 4, 3, 5, 5, 6, to type Hello key cycles between and . Short pressing twice the key Press 0(space), 2, 6, 6, 6, 6 To type ann Note Please refer to the Using the ABC Mode on page 49. 48 Short pressing twice the key General Functions Using the T9 Mode The T9 predictive text input mode allows you to enter words easily with a minimum number of key presses. As you press each key, the handset begins to display the characters that it thinks you are typing based on a built-in dictionary. As new letters are added, the word changes to reflect the most likely candidate from the dictionary. 2. Enter the whole word before editing or deleting any keystrokes. 3. Complete each word with a space by pressing the key. To delete letters, press the Press and hold down the words. Using the ABC Mode 1. When you are in the T9 predictive text input mode, start entering a word by pressing keys to . Press one key per letter. Use the a The word changes as letters are typed ignore what’s on the screen until the word is typed completely. a Once for the first letter a If the word is still incorrect after typing completely, press the key once or more to cycle through the other word options. Example Press Press the key. key to erase entire to keys to enter your text. 1. Press the key labeled with the required letter: a Twice for the second letter a And so on 2. To insert a space, press the key once. To delete letters, press the key. Press and hold down the key to clear the display. to type Good key to get Home a If the desired word is missing from the word choices list, add it by using the ABC mode. 49 General Functions Using the 123 (Number) Mode The 123 Mode enables you to enter numbers in a text message(a telephone number, for example). Press the keys corresponding to the required digits before manually switching back to the appropriate text entry mode. Using the Symbol Mode The symbol mode enables you to enter various symbols or special characters. To enter a symbol, press the right soft key [Symbol] or key. Use the navigation and numeric keys to select the desired symbol and press the key. 50 General Functions Character chart Notice General text entry rules for use with the abc mode. Refer to the table below for more information on the characters available using the keys. Use the keypad to enter letters, numbers, symbols, and other characters with the abc mode. Press the same key repeatedly to cycle through available characters. If you do not press a key for 2 seconds, the character in the block cursor is accepted, and the cursor moves to the next position. Key Characters in the Order Display Lower case Upper case @:/. @:/. 1 .,?!‘“1-()@/:_ .,?!‘“1-()@/:_ 2 a b c 2 à á â ã ä a˙ æ ç A B C 2 À Á Â Ã Ä A˙ Æ Ç 3 def3èéêë DEF3ÈÉÊË 4 ghi4ìíîï GHI4ÌÍÎÏ 5 jkl5£ JKL5£ 6 mno6ñòóôõöøœ MNO6ÑÒÓÔÕÖØŒ 7 pqrs7ß$ PQRS7ß$ 8 tuv8ùúûü TUV8ÙÚÛÜ 9 wxyz9 WXYZ9 0 space 0 space 0 51 Menu tree Your handset offers a set of functions that allow you to use and customise the handset. These functions are arranged in menus and sub-menus, accessed via the two soft keys marked left soft key and right soft key . Press the left soft key to access the available My stuff. Each menu and sub-menu allows you to view and alter the settings of a particular function. The roles of the soft keys vary according to the applications and services; the label on the bottom line of the display just above each key indicates its current role. Press the right soft key to access the available Contacts. Note The left and right soft keys activate the prompts that appear in the soft boxes directly above them. These prompts change according to the screen content. 52 Menu tree 1. Screen (see page 58) 1.1 Screen theme 1.1.1 Home screen 1.1.2 Outgoing call 1.1.3 Sending message 1.1.4 Switch on 1.1.5 Switch off 1.2 Front screen theme 1.2.1 Home screen 1.2.2 Outgoing call 1.3 Menu style 2. Profiles (see page 62) 2.1 Normal 2.2 Silent 2.3 Vibrate only 2.4 Headset 2.5 Outdoor 2.6 Customsied 1 2.7 Customsied 2 2.8 Customsied 3 3. Settings (see page 66) 3.1 Date & Time 3.1.1 Time 3.1.2 Date 3.1.3 Auto update date/time 3.1.4 Daylight saving 3.2 Home screen softkeys 3.3 Network 3.3.1 Network seletion 3.3.2 Preferred list 3.4 Access points 1.3.1 Arc style 3.4.1 Add new 1.3.2 Grid style 3.4.2 View 1.4 Font 1.5 Backlight 1.6 Handset theme 1.6.1 Normal 1.6.2 Disco 1.7 Greeting message 1.7.1 On 1.7.2 Off 3.4.3 Edit 3.5 Security 3.5.1 PIN code requset 3.5.2 Handset lock 3.5.3 Change codes 3.6 Language 3.7 Memory status 3.8 Handset information 3.9 Reset settings 3.9.1 Clear memory 3.9.2 Default setting 53 Menu tree 4. Browser (see page 72) 4.1 Home 4.2 Bookmarks 4.3 Saved pages 4.4 Go to URL 4.4.1 Enter address 4.4.2 Recent pages 4.5 Security 4.5.1 Certificates 4.5.2 Session clear 4.6 Settings 5. Messages (see page 80) 5.1 New message 5.1.1 Text message 5.1.2 Multimedia message 5.1.3 Email 5.2 Inbox 5.3 Mailbox 5.4 Drafts 5.5 Sent items 5.6 Templates 5.7 Settings 6. My stuff (see page 94) 6.1 Images 6.2 Videos 6.3 Sounds 6.4 Applications 6.5 External memory 7. Multimedia (see page 102) 7.1 Video camera 7.2 Camera 7.3 Voice recorder 7.4 Play lists 7.5 Settings 4.6.1 Profiles 5.7.1 Text message 4.6.2 Character encoding 5.7.2 Multimedia message 4.6.3 Scrolling control 5.7.3 Email 4.6.4 Show Image 5.7.4 Videomail 4.6.5 Cache 5.7.5 Voicemail 4.6.6 Cookies 4.6.7 Clear cache 5.7.6 ExpressLink 7.5.1 Video camera 5.7.7 Info.Service 7.5.2 Camera 4.6.8 Clear cookie 7.5.3 Voice recorder 7.5.4 Memory status 54 Menu tree 8. Contacts (see page 106) 8.1 Add new 8.2 Search 8.3 Speed dials 8.4 Group 8.5 Service dial numbers 8.6 Own number 8.7 Settings *. Organiser (see page 114) *.1 Calendar *.2 To do *.3 Memo *.4 Secret memo *.5 Date finder *.6 Dateulator *.7 Settings 8.7.1 Display data *.7.1 Calendar 8.7.2 Show image/avatar *.7.2 Memory info. 8.7.3 Copy all *.7.3 Clear all 0. Tools (see page 122) 0.1 Quick menu 0.2 Alarm clock 0.3 Connectivity 0.3.1 Buletooth 0.3.2 Server synchronisation 0.4 Calculator 0.5 World time 0.6 Unit converter 8.7.4 Move all 8.7.5 Clear contacts 9. Applications (see page 110) 9.1 My applications 9.2 Download applications 9.3 Settings 55 Menu tree #. Calling (see page 132) #.1 Video calls #.2 Call history #.2.1 Missed calls #.2.2 Received calls #.2.3 Dialled calls #.2.4 All calls #.3 Call duration #.4 Call costs #.5 Call divert #.5.1 Voice calls #.5.2 Video calls #.5.3 All fax calls #.6 Call barring #.6.1 Voice calls #.6.2 Video calls #.6.3 Deactivate all #.7 Fixed dial numbers #.7.1 On/Off:Off 56 #.8 Call waiting #.8.1 Activate #.8.2 Deactivate #.8.3 View sataus #.9 Settings #.9.1 Call reject #.9.2 Send my number #.9.3 Auto redial #.9.4 Answer mode #.9.5 Minute minder 1.Screen Screen In this menu, you can configure screen display options including Screen settings and themes. Screen theme Home screen You can select a wallpaper (animated or static) to display in idle mode. Outgoing call You can select an image to display when dialing a call. The configuration is applied to both voice and video calls. Sending message You can select an image to display when sending a message. Switch on You can select an image to display when turning on the handset. 58 Switch Off You can select an image to display when turning off the handset. Front screen theme You can configure the background of the front screen by themes. Home screen You can select a wallpaper to display in idle mode. Screen Outgoing call You can select an image to display when dialing a call. The configuration is applied to both voice and video calls. Item Main screen duration Off 5 seconds 10 seconds 15 seconds 30 seconds 1 minute 2 minutes 3 minutes On Front screen duration Off 5 seconds 10 seconds 15 seconds 30 seconds 1 minute 2 minutes 3 minutes Keypad duration Off 5 seconds 10 seconds 15 seconds 20 seconds On Menu style You can configure the menu style to Grid style or Arc style. Font You can configure the font size and colour of the numbers which appear in the home screen when you make a call. Backlight Use this to select whether or not the phone uses the backlight. Default Value 59 Screen Handset theme You can change the Wallpaper of the menu, soft key area, title bar area, and cursor by changing the menu theme. Greeting message Set a message that is displayed when the handset is turned on. 60 2.Profiles Profiles You can configure Voice/Video ringtune, key tone, flip tone, sound effects, switch on, switch off, and volume. The ringtune type supports MP3, .3gp, AAC, MIDI, WAV and AMR. Supported profiles are Normal, Silent, Vibrate only, Headset, Outdoor, Customised 1, Customised 2 and Customised 3 profile. Select a desired profile, and press the key to activate the profile. When the cursor is moved to a profile, the corresponding menu appears on the soft bar. If you select View/Edit menu, you can view the settings of the profile, or can edit settings of the profile. Profiles menu have the submenus as shown below. a Alert by This option determines the incoming call and the message notification mode. You can select from Ring, Vibration, Silent, Ring & vibration Ring after vibration and Max ring & Vibration. a Voice ringtune This option determines the Voice ringtune for incoming call notification. 62 a Video ringtune This option determines the Video ringtune for incoming call notification. a Volume This option determines the ringtune volume for incoming call notification. a Message alert This option determines the message alert that sounds when a message has arrived. You can select one of None, Once, Every 1 minute, Every 2 minutes, Every 5 minutes, and Every 10 minutes mode. Profiles a Message tone This option determines the message tone that sounds when a new message has arrived. a Key tone This option determines the key tone that is sounded when a key is pressed. a Key tone volume This option determines the volume of the key tone. a Flip tone a Switch on file This option allows you to selecet a melody that is sounded when the the phone is switched on. a Switch off sound This option determines the switch off effect that is sounded when the handset is turned off. a Switch off file This option allows you to selecet a melody that is sounded when the the phone is switched off. This menu option allows you to select a melody that the phone sounds when it is filp open and closed. a Confirmation tone This option determines if warning alerts are on or off. a Switch on sound This option determines the switch on effect that is sounded when the handset is turned on. 63 3.Settings Settings Date & Time You can change the format of the time and date display as well as the actual time and date using the Time settings menu. Time 1. Select the Time item from the handset settings list and then press the key. 2. Input the current time using the numeric keys. 3. Select the time format using the left and right navigation keys. 4. Press the 4. Press the key to save the date. key to save the time. Note Note To change AM/PM, you have to press the key [am/pm]. Please make sure that you set the exact date and time to ensure that all 3 services operate correctly. Date Auto update date/time 1. Select the Date item from the handset settings list, and then press the key. When Auto Update is configured to On, the time and date are automatically updated according to the current time zone. If Confirm first is selected, time and date update are confirmed before the automatic update. 2. Input the date using the numeric keys. 3. Select the date format using the left and right navigation keys. 66 Settings Daylight saving This function enables Summer time. Configuring Daylight saving to On immediately applies summer time (For example, if the current time is 04:53, summer time is then 05:53). Home screen softkeys The left and right soft keys activate the prompts that appear in the soft boxes directly above them. These prompts change according to the screen content. Network Network selection a Automatic reselection This function automatically searches for the network and registers the handset to the network. a Manual reselection This function enables you to search the network list and specify which network to attempt registration with. Preferred list You can select preferred lists to display it saved in the current USIM card and can edit the current preferred list. Access points This menu shows the Access Point List. Select the key [Edit]. Access Point has the following items. a Connection title: Profile Name a Bearer: UMTS/CSD/GPRS a Username: User name 67 Settings a Password: Password a APN: APN information of the service provider To modify these settings please call 3 Customer Service. Security You can set a PIN code. When it is activated, a window asking you to enter the PIN code appears when you turn on the handset so as to prevent unauthorized use of the handset. 5. The maximum number of attempts at PUK code input permitted is 10. Entering an incorrect PUK code 10 times will restrict use of the handset. In this case, ask 3 Customer Service to unlock your handset. Press the Back key in the PIN code input window to return to the previous step. PIN code request Handset lock You can activate a PIN (Personal Identification Numeric). You can use security code to avoid unauthorized use of your handset. You can check the current status of configuration from the status bar. When you switch on your handset, your handset will request security code always if you set phone lock to “Power on”. 1. Select PIN code request from the security menu and press the key. 2. Configure this item to On or Off. If it is On, a PIN code will be required whenever the handset is turned on. 3. Input the current PIN code and press the key. 68 4. Entering an incorrect PIN code 3 times in the PIN code input window invalidates the PIN code. In this case, the PUK code must be entered in order to reset the PIN code. You can select the menu from When switching on, If USIM changed, Lock now, and None. Change codes You can change PIN, PIN2 and the security code. Settings Note If you change the code and then forget it you will need to contact your place of purchase to unlock it or solve this problem. a PIN/PIN 2 code This menu allows you to change the PIN or PIN2 code. 1. Select Change codes from the Security Settings List and press the key. 2. Select PIN or PIN2 Code and press the key. 3. Input the current PIN or PIN2 code, and then a new PIN or PIN2 code. Entering an incorrect PIN code 3 times invalidates the PIN code. In this case, you will need to enter the PUK or PUK2 code in order to reset the PIN code. 4. Entering an incorrect PUK code 10 times will restrict use of the handset. In this case, ask 3 Customer Service to unlock your phone. a Security code This menu allows you to change the handset password. The maximum allowed numeric of attempts of security code input is not limited like PIN and PIN2. Language This function allows you to set the language used in the handset. Memory status This menu is used to view the memory use of the phone and USIM card. You can obtain information about the amount of memory used by the contacts, the calendar, to do, memos, secret memos and text message and multimedia messages. 69 Settings Common memory This function shows the status of the user memory of the handset. Reserved memory This function shows the available memory for the user. USIM memory This function shows the status of the USIM card user memory. External Memory This function shows the status of the external card memory. Handset information This menu is used to view phone number,model number and software version information. Reset settings This function allows you to restore factory settings. 70 Undertaking a reset will not remove any user content. 4.Browser Browser 3 brings you a whole world of communications, information and entertainment services. You can ask for directions within major cities, get the latest news, keep up to date with Premier League action and much, much more. The browser is available in the 3G coverage area. To launch the browser in standby mode, press the key. Home a Settings: You can set the Browser related things such as Clear cache, Session info., Clear cookies, etc. If you want to reload current page, press the right soft key [Reload]. a Back: Moves to the previous page. a Forward: Moves to the previous page. The following options are available. Press the left soft key [Options]. The following example shows the functionality of browser menu ‘Foward’. a Home: Moves to the initial homepage. a Reload: Loads the current page again. 1. Navigation Page A > Page B > Page C > Page D a Bookmark: You can add or save the current page to the Bookmark or view the list saved under Bookmark. Select Home in the Internet Menu and then press the key. 72 2. On Page D, select a menu ‘Back’, it will place a user in Page C. Browser 3. On Page C, if select a menu ‘Back’, move to Page B. Else if select a menu ‘Forward’, move to Page D again. a Go to URL: Connect to the specific URL after editing. Bookmarks This function allows you to store and edit frequently accessed sites. The following options are available. Press the left soft key [Options]. Connect Allows you to access the selected site. Mark/Unmark Allows you to mark or unmark the selected site. Delete Send as message Delete the selected bookmark. Selected bookmark URL can be sent via text message or multimedia message. Saved pages Add new Saves the page on display as an off-line file. A maximum of 37 pages can be saved. Adds a new site to the bookmarks list. Edit You can edit and save the name and address of the selected bookmark. Go to URL Connect to the specific URL after editing. 73 Browser Security a Certificates A list of the available certificates is shown. a Session clear Allows you to close the security connection. Settings Profiles Select the profiles by press browser. key to launch Character encoding Select the character set one of the following list : Automatic, English(ASCII), English(ISO), English(LATIN), Unicode(UCS2 BE), Unicode(UCS2 LE), Unicode(UCS2 Auto), Unicode(UTF-16 BE), Unicode(UTF-16 LE), Unicode(UTF-16 Auto), Unicode(UTF-8). Scrolling control Allows you to determine the scroll speed and select from 1 Line, 2 Lines and 3 Lines. Show Image Choose if you want to view pictures when you are browsing. Note If you set to activate this function, the WAP page have images may be delayed until the transmission is completed. To fast transmission, the Show image should be deactivated. 74 Browser Cache Choose if you want to store the WAP (network) pages that you have accessed. If you set to activate this function, you can search the accessed WAP page quickly in cache memory. Cookies Choose if you want to store cookies received from the WAP site. If you set to deactivate this function, cookies never come in your phone. Clear cache Deletes the data saved in the cache memory. When you press streaming icon, the mobile terminal shows a live streaming automatically Clear cookie VCR Control Deletes the data saved in the cookie memory. If the streaming is in live, the mobile terminal shows VCR control skin with live bar. Live Streaming 1. This application plays streaming in live. To have a pleasure time with this, you must launch browser first, access to entertainment services and find live streaming menu. Press streaming icon to enjoy yourself a world of live streaming. 2. mute/unmute Key: mute/unmute the sound temporally. : Play and Pause alternately. 75 Browser OPTION Press the left soft key [Options] to display the following popup menu items. 1. Mute/unmute : mute/unmute the sound temporally 2. Video Size: Normal/Landscape (for normal video) or Normal/Zoom/Landscape (for small size video) 3. Content Info : Shows information about the current content provided by streaming server Normal Streaming Normal streaming is very similar to live streaming. To enjoy with this , you must launch browser, access to entertainment services and select the normal streaming menu like as news, stock, music, weather etc. VCR Control If the streaming is not in live, the mobile terminal shows VCR control skin with current play time 76 1. : Play and Pause alternately. 2. Navigation left/right key: You can go forward/back with this key more rapidly. The following example shows the functionality of streaming menu “FF/REW” Apress FF/REW Key during playing streaming, the mobile terminal paused video. Apress more FF/REW Key , the mobile terminal display the new time and progress bar immediately. ( user can select new time with FF/REW Key ) Aif there is no press Key more, then the mobile terminal start streaming with new time. Browser 3. mute/unmute Key: mute/unmute the sound temporally. The OPTION is same as live streaming. 77 5.Messages Messages New message Text message Press the Message shortcut key to display Messages menu, select New message and then select Text message. You can write and edit a single text message up to 160 characters. You can write and edit up to 10 concatenated messages. 1. Press the left soft key [Options]/ [Search contacts] or use the key [Contacts] to specify the recipient from Contacts. 2. When you input content, a new window allowing you to input content appears. By using the left soft key [Options], you can input emoticons, templates, and phone numbers through the Contacts. By using the key on the bottom, you can input various symbols. 3. When the message has been sent, it will be saved in the Sent items automatically. If the message has not been sent, it wll be saved in the Draft automatically. 80 Multimedia message Creating a Multimedia message Select Messages from the top menu or pressing the Message shortcut key displays the message menu. In the menu, select Write message, and then select Multimedia message and create a Multimedia message. You can simply send picture with a Multimedia message attaching the picture from your album or directly from the multimedia menu. Messages Multimedia message 1. You can create a Multimedia message. 2. Select Multimedia message from the New message menu and then press the key. 3. You can edit a Multimedia message field using the Down navigation Key. 4. Move the highlight to the To field, and input the recipient of the message. You can specify the recipient by either phone number or Email address. You can search the Contacts by pressing the left soft key [Options] or the key [Contacts]. When a recipient has been specified, another field where you can specify another recipient appears. 5. Move the highlight to the title field, and write a title. You can select and input a template or emoticon by pressing the left soft key [Options]. 6. You can add, delete, or edit by each slide by moving the highlight to the text field. 7. You can save the message in the Drafts by using the left soft key [Options] while creating a message. 8. You can preview the message by using the left soft key [Options] while creating a message. 9. When you have completed creating a message, press the key. You can send the message by selecting the right soft key [Send]. 10. You can select the following functions using the left soft key [Options]. a Insert: You can insert slide, image, video, audio, template, the name or phone number saved in the contacs. a Send: Sends the created Multimedia message at the time you wanted. a Save as draft: Saves the created Multimedia message to Drafts a Preview: Shows the created Multimedia message before sending it a View attachment: Views the attachment file list. a Slide duration: Changes the slide duration of each slide. a Remove: Removes attachment file or slide in the seleceted slide 81 Messages a Goto: Move the slide you want to select. a Dictionary: Selects dictionary mode. a Add to dictionary: Adds the writing string in dictionary Viewing Mulitimedia messages in the Preview and Drafts 1. You can preview a created Multimedia message. 2. If the message is too long to be displayed on screen, you can scroll the contents of the message by using the up and down navigation key. 3. Press the key to pause playback of the message, and press the key to resume playing the message. 4. If an audio or video file is attached to a Multimedia message, press the right soft key [Mute] to cancel the unmute function. Viewing Multimedia messages in the Inbox and Sent items 1. Select a Multimedia message to view its contents. 82 2. If the message is too long to be displayed on a screen, you can scroll the contents of the message by using the up and down navigation key. 3. Press the key to pause playback of the message, and press the key to resume playing the message. 4. If an audio or video file is attached to a Multimedia message, press the right soft key [Mute] to activate the mute function. Press the right soft key [Mute] to cancel the unmute function. When the multimedia message includes URL, you can try to connect the site. If the slide Messages includes URL, you can connect the URL by long press key. On the other hand, when you try to press up or down navigation key, the slide show is paused automatically, and the screen shows the menu "Link" on the right soft key if URL is included in the slide. You can connect the URL for browsing, downloading, and streaming. 5. Move to a desired message by using the left and right navigation keys. 6. Press the key to reply the message. 7. You can select the following functions using the left soft key [Options]. a Pause/Play: Pauses/Plays the selected message. a Reply: Creates reply to the selected message. a Use: Extracts the phone number, Email address or web address included in the text of the message. a Delete: Deletes the selected message. a Go to header page: Displays information about the selected message. Email To send the email, you should set up the email account. Refer to Email at page 90 first. Message edit 1. Select Email from the Write Message menu. 2. You can input up to 20 addresses in the To, Cc fields and You can input up to 10 addresses in the Bcc field. a Forward: Forwards the selected message. Tip a Save address: Saves the telephone numeric in the Contacts. To input @, select the key [Symbol], and then press 9 numeric key pad to input or press video call key. a View attachment: Shows the attahment file list. a New message: You can create a new message. 3. Input the title of the mail to be sent in the Subject field. 83 Messages 4. Input the content of the mail to be sent in the Message field. 5. Specify up to 4 files to attach in the Attach field. 6. When you have finished writing a message, press the key. You can send the message instantly. Inbox 1. You can view saved messages. Select a message and then press the key to view the message. 2. You can view the previous or next message by using the left and right navigation keys. 3. To view an Multimedia message, select Retrieve in the message view screen. Then the file is transmitted, and you can view the file when the message is received. 4. You can use the following functions by using the left soft key [Options]. a Reply: Creates reply to the selected message. a Forward: You can forward a selected message. a View: You can view a selected message. a New message: You can write a new message. a Save address: You can save the sender's address to the contacts. a Mark/Unmark: You can mark or unmark the selected message. a Delete: You can delete a selected message. a Copy: You can copy a selected message. 84 Messages a Move: You can move a selected message. a Message Info.: Displays information about the selected message. Viewing Bluetooth messages in the Inbox and the message popup window 1. You can view vCalendar, vCard, Image and play audio/video messages received by bluetooth. up and scroll down to view message content that are beyond visible area. 7. You can use View (center) key to view full screen image. 8. You can use Play (center) key to play audio /video file. 9. You can use the following functions by using the left soft key [Options]. 2. You can view saved bluetooth messages. Select a bluetooth message and then press OK key in the inbox to view it. a Copy to Calendar/Phonebook: You can copy vCalendar/vCard message to your calendar/phonebook. 3. You can view most recently recieved bluetooth message directly. Select Yes in the bluetooth message alert popup to view most recently recieved bluetooth message. a Save Image, Audio and Video files: You can save Images, audio and videos files to the phone for further use. 4. You can view the previous or next message of inbox by using the left and right navigation keys, if you are viewing bluetooth message via inbox. 5. You cannot view the previous or next message, if you are viewing most recent bluetooth message via bluetooth message alert popup. a New message: You can write a new Text/ Multimedia/ Email message. a Forward: You can forward bluetooth vCalendar/vCard message via SMS/ Email. a Delete: You can delete bluetooth message that you are viewing currently. 6. You can use the Up and Down key to scoll 85 Messages Mailbox 1. Select Mailbox. 2. Select 3mail to retrieve messages from the Server List. 3. To retrieve new messages in the Mail Header screen, select Retrieve to retrieve the new Mail Header List. 4. Select your desired message from the retrieved mail headers to retrieve the mail contents from the server. You can use the following functions by using the left soft key [Options]. a Reply: You can reply a selected message. a Forward: You can forward the selected message. a Save address: You can save the sender's address to the contacts. - Web address: View URL up to 10 in the received message containing text. You can browser web or save as bookmark by selected number. a New message: You can write a new message via SMS, MMS and Email. a View attachment: Shows the attachment file list. a Use a Delete: You can delete a selected message. - Number: Extracts the phone number included in the text of the message. 86 - Email address: View Email addresses up to 10 in the received message containing text. You can send a message or save as a contact by selected number. a View to address: Shows information in To/Cc/Bcc filed. Messages a Message info.: Displays information about the selected message. Drafts 1. You can edit saved messages. Select a message and then press the key to edit the message. 2. You can use the following functions by using the left soft key [Options]. Sent items 1. You can view sent messages. Select a message and then press the key to view the message. 2. You can view the previous or next message by using the left and right navigation keys. 3. You can use the following functions by using the left soft key [Options]. a Edit: You can edit a selected message. a Forward: You can forward a selected message. a Send: You can send a selected message. a View: You can view a selected message. a New message: You can write a new message. a Edit: You can edit a selected message. a Mark/Unmark: You can mark or unmark the selected message. a Delete: You can delete a selected message. a Message info.: Displays information about the selected message. a New message: You can write a new message. a Save address: You can save the sender's address to the contacts. a Mark/Unmark: You can mark or unmark the selected message. a Delete: You can delete a selected message. a Message Info.: Displays information about the selected message. 87 Messages Templates You can add, edit, and delete frequently-used useful phrases. You can save frequently-used phrases in the input window in advance. Settings Text message Delivery report Allows you to activate or deactivate the report function. When this function is activated, the network informs you whether or not your message has been delivered. Validity period Allows you to set the length of time for which your text messages will be stored at the Text message center while attempts are made to deliver them to the recipient. Text message centre The number of the Text message gateway is 88 pre-loaded in your 3 handset and you should not change this. If you delete or change this by mistake contact 3 Customer Services for support. Multimedia message Select Multimedia message from the Settings menu to configure Multimedia message related options. Delivery report This menu allows you to determine whether to request a delivery confirmation mail to a recipient, and whether to allow sending delivery confirmation mail to a sender. Messages - Request report: Determines whether to request a delivery confirmation mail for a Multimedia message. Validity period - Allow report: Determines whether to allow sending a delivery confirmation mail for a delivery confirmation mail request. This menu allows you to configure the term of validity for a message when transmitting a Multimedia message. The message would be saved in the Multimedia server only for the configured term. Read reply Slide duration This menu allows you to determine whether to request a read confirmation mail to a recipient, and whether to allow sending read confirmation mail to a sender. This menu allows you to configure the duration of each page when writing the message. - Request reply: Determines whether to request a read confirmation mail for a Multimedia message. This menu allows you to configure the maximum size of a Multimedia message when writing the message. - Allow reply: Determines whether to allow sending a read confirmation mail for a read confirmation mail request. Auto retrieve This menu allows you to determine whether to automatically download a Multimedia message when a Multimedia message notification message arrives. Message size Multi. msg centre The details for the Multimedia gateway are pre-loaded onto your handset and should not be changed. If you change or delete these by mistake contact 3 customer services for support. You can add or edit the profile of multimedia message except the default profile. 89 Messages Email This menu allows you to edit, delete and add an Email account. To set up an Email account, do the follows. 1. Select Messages/Settings/Email after pressing the key in the idle screen. 2. Press the right soft key [Edit]. 3. Enter details Username (your phone number with Country code without + eg 447782227302), Password, Email address, Reply email address, etc. 4. You can authenticate by pressing the right soft key [Done]. 3. Press the right soft key [Retrieve]. 4. Press the key. Videomail Once you have set up details of your other accounts, you can collect mail from those accounts by selecting Check for new mail from the Mail home page. To retrieve an email, do the following: 1. Select the mail server you want to retrieve in the Mailbox. 2. Choose the email by using the navigation key. 90 This menu allows you to get the video mail if this feature is supported by the network service provider. Please check with your network service provider for details of their service in order to configure the handset accordingly. Messages Voicemail This menu allows you to get the voice mail if this feature is supported by the network service provider. Please check with your network service provider for details of their service in order to configure the handset accordingly. the info service message will be displayed directly. ExpressLink You can order ExpressLink from WAP service providers. ExpressLink is notifications of, for example, news headlines and it may contain a text message or address of a WAP service. For availability and subscription, contact your WAP service provider. Info.Service Info service messages are text messages sent by the network to GSM phone users. They provide general information such as weather reports, traffic news, taxis, pharmacies, and stock prices. Each type of information is associated with a number, which can be obtained from the service provider. When you receive an info service message, a popup message will indicate a new message receipt or 91 6.My stuff My stuff Images This application enables you to view still images. The image files saved in the handset are represented by thumbnails. Select the desired image to view the enlarged image. Notice Features within the Edit Image might not work due to large image size or lack of internal phone resource. For example, Rotate will not work for images greater than 640x480. Press the left soft key [Options] to display the following popup menu items (in 1. Image list). a View: Moves to the camera application for taking still image photographs. a Create new folder: You can create new folder. a Send as message: Enables the selected image to be sent via MMS, Email and Bluetooth. a Files - Move: Enables the file to be moved other folder. 94 - Copy: Enables the file to be copied other folder. - Rename: Enables the image to be renamed. - Edit: Enables the image to be edited. - Info: Shows information about the selected image file. a Delete: Deletes the selected image. a Mark/Unmark: You can mark or unmark the selected file. a Main screen theme: You can set an image as the screen theme (Home screen, Outgoing call, Sending message, Switch on, Switch off). My stuff a Front screen theme: You can set an image as the screen theme (Home screen, Outgoing call) a Slide Show: You can start the slide show. a Sort by: Sorts images. a List/ Grid view: You can set the view style. a Memory status: Shows the current memory usage. Press the left soft key [Options] to display the following popup menu items (in 2. Picture Viewer). a Go to list: moves to the application list. a Send as message: Enables the selected image to be attached to a message and the message sent. a Files a Main screen theme: You can set an image as the screen theme (Home screen, Outgoing call, Sending message, Switch on and Switch off). a Front screen theme: You can set an image as the screen theme (Home screen, Outgoing call) a Slide show: You can start the slide show. Videos This application plays recorded video (.3gp or MPEG4 files). Select a desired video. The following options are provided by the Video Player. There are two scenarios; 1) Mute/Unmute status and 2) Pause status - Edit picture: You can edit the image. - File info.: Shows information about the selected image file. a Delete: Deletes the selected image. a Zoom: You can zoom in and out the image. Press the left soft key [Options] to display the following popup menu items (when 1. Unmute/Mute status). a Send as message: Enables the selected video to be sent via MMS, Email and Bluetooth. 95 My stuff a Delete: Deletes the selected video file. a File info.: Shows information about the selected video file. a Sound theme: You can set an audio file as the sound theme (Voice ringtune, Video ringtune). a Video Size: Enables the selected video to be shown as Normal and Landscape. In Play mode, you can change the video size to press key. a Mute/Unmute:Mutes/Unmutes the sound temporarily. a File info.: Shows information about the selected video file. a Previous file: Plays the previous video file. a Next file: Plays the next video file a Sound theme: You can set an audio file as the sound theme (Voice ringtune, Video ringtune). Press the left soft key [Options] to display the following popup menu items (when 2. Pause status). a Video Size: Enables the selected video to be shown as Normal and Landscape. In Play mode, you can change the video size to press key. a Send as message: Enables the selected video to be sent via MMS, Email and Bluetooth. a Delete: Deletes the selected video file. a Capture: Captures an image from the video file. a Previous file: Plays the previous video file. a Next file: Plays the next video file. 96 My stuff Press the left soft key [Options] to display the following popup menu items a Play: Moves to the camera application for taking still image photographs. a Create new folder: You can create new folder. a Send as message: You can attach the selected video file to a message and send the message if not content protected. a Sound theme: You can set an audio file as the sound theme (Voice ringtune, Video ringtune). a Sort by: Sorts video files. a List/ Grid view: You can set the view style. a Memory status: Shows the current memory usage. a Files - Move: Enables the file to be moved other folder. - Copy: Enables the file to be copied other folder. - Rename: Enables the video to be renamed. - Info: Shows information about the selected video file. a Delete: Deletes the selected video file. a Mark/Unmark: You can mark or unmark the selected file. 97 My stuff Sounds This application plays MP3, MIDI and AAC files so that you can listen to them. Select your desired audio file in the list mode showing audio files.The following options are provided by the My sounds in the Audio Player. There are two scenarios: 1) Unmute status and 2) Mute status. Press the left soft key [Options] to display the following popup menu items (when 1. Unmute status). a Send as message: Enables the selected audio file to be sent via MMS, Email and Bluetooth a Delete: Deletes the selected video file. a File info.: Shows information about the selected audeo file. a Sound theme: You can set an audio file as the sound theme (Voice ringtune, Video ringtune, Message tone, Switch on and Switch off). a Mute: Mutes the sound temporarily. 98 a Set repeat: Repeats the audio file. a Play in background: If the function is activated it is still possible to listen to background music without a headset even though the flip is closed. The music can also be heard when switching menus using the key in the state of flip open, but not using the key nor the key. The Call and alarm having higher priority than a background music will make it paused and resumed, but such a message tone, flip tone, key tone, and confirmation tone never happen during background music. My stuff a Equalizer: You can set the equalizer. a Previous file: Plays the previous audieo file. a Next file: Plays the next audieo file. Press the left soft key [Options] to display the following popup menu items (when 2. Mute status). a Send as message: Enables the selected audio file to be sent via MMS, Email and Bluetooth a Delete: Deletes the selected video file. a File info.: Shows information about the selected audeo file. a Sound theme: You can set an audio file as the sound theme (Voice ringtune, Video ringtune, Message tone, Switch on and Switch off). a Unmute: Unmutes the sound temporarily. a Set repeat: Repeats the audio file. a Play in background: If the function is activated it is still possible to listen to background music without a headset even though the flip is closed. The music can also be heard when switching menus using the key in the state of flip open, but not using the key nor the key. The Call and alarm having higher priority than a background music will make it paused and resumed, but such a message tone, flip tone, key tone, and confirmation tone never happen during background music. a Equalizer: You can set the equalizer. a Previous file: Plays the previous audieo file. a Next file: Plays the next audieo file. Press the left soft key [Options] to display the following popup menu items a Play: Plays the selected audio file. a Create new folder: You can create new folder. a Send as message: Enables the selected image to be sent via MMS, Email and Bluetooth. a Files - Move: Enables the file to be moved other folder. 99 My stuff - Copy: Enables the file to be copied other folder. - Rename: Enables the image to be renamed. - Info: Shows information about the selected audio file. a Delete: Deletes the selected image. a Mark/Unmark: You can mark or unmark the selected file. a Sound theme: You can set an audio file as the sound theme (Voice ringtune, Video ringtune, Switch on, Message tone, Switch off). a Play in background: If the function is activated it is still possible to listen to background music without a headset even though the flip is closed. The music can also be heard when switching menus using the key in the state of flip open, but not using the key nor the key. The Call and alarm having higher priority than a background music will make it paused and resumed, but such a message tone, flip tone, key tone, and confirmation tone never happen during background music. 100 a Sort by: Sorts audio files. a Memory status: Shows the current memory usage. Applications For futher details. see the page 110, (Menu 9 Applications) External memory If your phone is installed the multimedia memory card in the card slot, you can save images, sounds, and videos on the memory card. You can check the current status of the external memory in Memory status menu. 7.Multimedia Multimedia Video camera This application enables you to record a video clip. You can play and watch a saved video file while using this function. Once recorded, a video clip can be sent by Multimedia message or Email. Press the left soft key [Options] to display the following popup menu items. a Quality: Determines the quality of a video clip. a Light: Determines the light operation. a Mirror: Determines the Mirror. a Zoom: Determines the zoom rate. a Memory: Determines the memory. a Brightness: Determines the brightness. a WB: Determines the white balance. a Night mode: Determines the night mode. a Effect: Determines the special effect to the video clip. a SwapCam: Determines the switch camera(internal&External). a Duration: Determines the duration. a Sound: Determines the sound when the video carmera is recorded 102 Multimedia Camera This application enables you to take a still picture. You can take a picture in your desired size, and use it for the contacts photo, home screen and other more general purposes. Once taken, a still image can be sent by Multimedia msg or Email. Press the left soft key [Options] to display the following popup menu items. a Size: Determines the size of an image. a Quality: Determines the quality of an image. a Light: Determines the light operation. a SwapCam: Determines the switch camera(internal&External). a Multishot: Determines whether to enable multi-shot photography. a Sound: Determines the sound when the shutter is pressed. a Zoom: Determines the zoom rate. a Memory: Determines the memor a Brightness: Determines the brightness. Notice a WB: Determines the white balance. When you take a picture in 1280x960, 640x480, 320x240 and 160x120 size, you can see the added area on both sides of the screen compare with the preview image . a Night mode: Determines the night mode. a Timer: Determines the delay time. a Effect: Determines the special effect to the picture. a Mirror: Determines the Mirror 103 Multimedia Voice recorder a Edit: You can edit the selected file. This function allows you to record a voice memo. You can record voice messages with each message up to 60 seconds. a Delete: Deletes the selected file. Press the left soft key [Options] to display the following popup menu items. a Set repeat: Select desired repeat mode using the navigation key. a Quality: Determines the quality of a recorded voice. a Rename: You can rename the selected file a New recording: Determines the recording a new voice. Settings a My stuff: Show the voice lists recorded. Video camera a Delete all: Deletes all the stored audio files in the list. For further details, see the page 102. Play lists This option enables you to view a list of saved audio files. Camera For further details, see the page 103. You can add an audio file stored in your phone and memory card. Voice recorder Press the left soft key [Options] to display the following popup menu items. Allows you to set the duration and quality for recording the voice by using the left/right navigation key. a Play: Plays the selected audio file. a Add new: You can add a new file from the sound list. 104 Memory status For further details, see the page 69. 8.Contacts Contacts This menu allows you to save and manage contact address information. The Contacts functions provide functions to add a new address or search saved contact addresses by name, phone number and group information. Add new This menu allows you to add a new contact address. You can input contact address information including name, phone numbers, email addresses, group information items, memo, homepage address, ringtune, and avatar or image (photograph). You have to select Handset or USIM card memory using the left and right navigation keys. Search This menu allows you to search your contact addresses. Generally the search operation is performed by name & number. In the search window, the current search function and results for the search condition are displayed. On the screen, a saved image or avatar is displayed for the selected contact address. You 106 can change the configuration in the Show image/avatar(Menu 8.7.2) menu so that no image or avatar is displayed. You can also make a phone call or send a message to the selected phone number. Speed dials This menu allows you to configure speed dial numbers. You can select a number as a speed dial from 3 to 9. You can configure speed dial numbers for any of the 7 numbers for a specific contact address so that a contact address may have multiple speed dial numbers. 
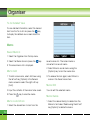
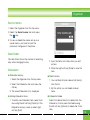
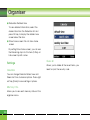
Contacts Group This menu allows you to manage group information. By default, there are 4 groups: family, friends, colleagues and school. You can also configure ringtune for a group so that the group ringtune sounds when a call from a specific contact address within that group arrives and there is no ringtune configured for the contact address. Service dial numbers This menu allows you to make a call to one of the numbers provided by 3 Customer Service by moving the highlight to the desired number and pressing the key. (E.g. 3 customer service, mail, 3 customer finance, etc.) Display data Handset & USIM / Handset / USIM Show image/avatar On / Off Own number Copy all Allows you to display your phone number in the USIM card. This menu allows you to copy all information from your USIM card, e.g. name, handset number, etc., to your handset. If a name is duplicated during the copying operation, the information is duplicated. Settings Allows you to set the display way as for the following items. 107 Contacts AHandset to USIM: You can copy the entry from the handset memory to the USIM card (not all the data will be copied). AUSIM to handset: You can copy the entry from the USIM card to phone memory. Move all This menu allows you to move all the information from your USIM card, e.g. name, handset number etc., to your handset. This differs from the Copy all operation in that the target information is saved only in the destination location. AHandset to USIM: You can move the entry from the phone memory to the USIM card. AUSIM to handset: You can move the entry from the USIM card to phone memory. Clear contacts This menu deletes contact address information. You can delete contact addresses saved in the handset memory and you can delete the numbers saved on the USIM card. 108 9.Applications Applications This Handset supports JavaTM so that you can download games from Today on 3, and play them on your handset. Games can be downloaded from the game page of the H3G portal site. Users can go to that page using the key. The key loads the H3G portal page. Select the services icon before users should select the game icon in the main page. (usually it is the page that appears when a user selects the tab beside "Today on 3") In the game page, users can view the game list, select, and download games. Or, users can use the Download applications menu to go to the game page. This menu is used to go directly to the game download page, so that users can browse and select the games to download. This is possible because the Internet browser is launching with the game portal URL setting. This URL is specified in the Settings menu - Java Portal URL. By default, the setting is on the game page of the H3G portal (or, it can be left blank if the Operator does not specify the URL). If users want to change the default setting, the game portal URL can be modified in the Settings menu. Note Settings Please note that downloading a game usually requires additional charge. This menu is used to configure the Java Internet portal site to connect to in order to download applications. My applications If this menu is selected, the list of currently saved Java Internet portal sites and the configured displayed. This menu is used to locate and run downloaded applications, e.g. games. Select Download to view the list of applications that have been downloaded to the handset. 110 Download applications The first Settings screen: Shows the item list if there are saved items. Applications 1. Select an item using the up or down navigation keys. 2. Press the key to activate the selected item service. 3. Press the left soft key [Options] to display the popup menu. Press the left soft key [Options] to display the following popup menu items. a Activate: Activates the selected item. a Add new: New profile is added. a View: Shows the contents of the selected item. 111 *.Organiser Organiser Calendar Monthly Schedule Management 1. Select the Organiser from the top menu. 2. Select Calendar and press the key. 3. The monthly schedule view is displayed. 4. Initially, the cursor appears on today’s date according to your handset settings. 5. You can move the date cursor to the desired location using the up, down, left and right navigation keys. 6. On a date where a schedule item, anniversary or birthday is saved, corresponding icons and the number of saved schedule items are displayed on the bottom left of the screen. Adding a New Schedule Item 1. Select the left soft key [Options] in the Monthly schedule management screen, select the Add new from the popup menu and then press the key. Alternatively, select the right soft key [Add] in the Monthly schedule management screen. 114 2. Input the desired date using the numeric keys. 3. Input the desired time using the numeric keys. 4. Input the subject and press the key. 5. Select the schedule item type using the left and right navigation keys. 6. Select the repeat type using the left and right navigation keys. 7. Select the alarm type using the left and right navigation keys. 8. Press the item. key to save the new schedule Organiser Deleting a Schedule Item 1. Select the left soft key [Options] in the Monthly schedule management screen, select Delete, and then press the key. 2. Popup menus including Previous entries and All entries will be displayed. 3. Select Previous entries and press the key to delete all schedule items prior to today. 4. Select All entries, and press the delete all of the schedule items. key to Set holiday 1. Select the left soft key [Options] in the Monthly schedule management screen, select Set holiday and then press the key to display the Holiday configuration popup window. 4. The date corresponding to the configured holiday is represented in green in the Monthly schedule management screen. 2. Supported holiday types include On the day, Weekly, Monthly, Annually and Multiple setting. 3. Select the holiday configuration type and press the key to configure the holiday. 115 Organiser Searching for a Schedule Item Select the left soft key [Options] in the Monthly schedule management screen, select Search and then press the key to display the Search schedule items screen. 1. Input the desired subject of the schedule item to find. 2. Select the In type to find. 3. Press the key. 4. If there are schedule items that meet the search criteria, the schedule items are displayed. If there is no schedule item satisfying the search criteria, No match schedule Item message appears. Moving to a Specific Date 1. Select the left soft key [Options] in the Monthly schedule management screen, select Go to date and then press the key to display Go to date window. 2. Input the desired date to move to and press the key. 116 3. The date cursor of the Monthly schedule management screen will then move to the specified date. Organiser To do To do Enquiry 1. Select the Organiser from the top menu. 2. Select the To do item and press the key. 3. The saved To do list is displayed. Adding To do Items 1. To add a new To do item, select Add new using the left soft key [Options] in the To do enquiry screen or select the right soft key [Add]. 2. Input Date, notes and priority when you add an item. 3. Press the right soft key [Done] to save the To do item. To do Delete 1. Select the desired item(s) to delete from the To do list and press the Delete using the left soft key [Options] to delete the To do item. Finished/Not finished 1. If you wish to mark an item in the saved To do list as done, select the item from the To do list. 2. Select the Done using the left soft key [Options] to draw a line over the schedule item to mark it as done. 3. To cancel Done, select the Not yet done. Mark/Unmark 1. You can Mark/Unmark desired (all) item(s) from the list. 2. By this option you can delete marked items. 117 Organiser To do Detailed View To view detailed information, select the desired item from the To do list and press the key to display the detailed view screen about the item. Memo Saved Memo’s 1. Select the Organiser from the top menu. 2. Select the Memo item and press the key. 3. The saved memo list is displayed. 2. Select Move to secret memo using the [Options] key to lock the memo item. Memo Add 3. To release the lock again, select Move to memo in the Secret memo item. 1. To add a new memo, select Add new using the left soft key [Options] in the General memo screen or select the right soft key [Add]. Memo Edit 2. Input the contents of the memo to be saved. You can edit the selected memo. 3. Press the key to save the memo. Memo Lock/Unlock 1. Select the desired item to lock from the 118 saved memos list. The locked memo is converted to a secret memo. Memo Delete 1. Select the desired item(s) to delete from the Memo list and select Delete using the left soft key [Options] to delete the memo. Organiser Secret memo 1. Select the Organiser from the top menu. 2. Select the Secret memo item and press the key. 3. To view or delete the memo set up as a secret memo, you have to input the password configured in the phone. Date finder The date finder shows the number of remaining days while changing the day. Dateulator a Dateulator enquiry 1. Select the Organiser from the top menu. 2. Select the Dateulator item and press the OK key. 3. The saved Dateulator list is displayed. a Adding Dateulator items 1. To add a new Dateulator item, select Add new using the left soft key [Options] in the Dateulator enquiry screen or select right soft key [Add]. 2. Input the Date, and notes when you add an item. 3. Press the right soft key [Done] to save the item. a Mark/Unmark 1. You can Mark/Unmark desired (all) item(s) from the list. 2. By this option you can delete marked items. a Dateulator Delete Select the desired item(s) to delete from the Dateulator list and press the Delete using the left soft key [Options] to delete the To do item. 119 Organiser a Dateulator Detailed View To view detailed information, select the desired item from the Dateulator list and press OK key to display the detailed view screen about the item. a Show home screen/ Do not show home screen By setting Show home screen, you can see the Remaining days for this item (D-Day) on Idle screen top left corner. Settings Calendar You can change Calendar Default view and Week start time to desired options. Press right soft key [Done] to save settings in phone. Memory info. Allows you to view each memory status of the organiser menu. 120 Clear all Allows you to delete all the saved items, you need to input the security code. 0.Tools Tools Quick menu Quick menu allows you to add your own favourites to the list already provided. Once you create your own menu, you can access the desired function quickly in the idle screen by pressing the up navigation key. To move to your desired menu directly, select your desired menu from the Favourites menu press the up and down navigation keys. a Add new: In the [Empty] list, press the right soft key [Add]. Select the item from the menu and save the desired menu item. a Open: In the added menu items list, press the left soft key [Options]or the center soft key. To move to your desired menu directly. a Edit: In the added menu items list, press the right soft key [Edit] or the left soft key [Options]. Select Edit from the menu to edit a saved menu item. a Delete: In the added menu items list, press the left soft key [Options]. Select Delete from the menu to delete a saved menu item. a Delete all: In the added menu items, press the left soft key [Options]. Select Delete all 122 from the menu to delete Quick menu items 7 to 0. a View info.: In the added menu item list, press the left soft key [Options]. Select View info. from the menu to view the information about the actual location of the added menu item. Tools Alarm clock The alarm function allows you to set up multiple separate alarms. You can also set the time, repetition interval and alarm sound. a Select your desired alarm to configure in the alarm list. If there is no alarm, press the right soft key [Add] to add a new alarm. a Set/Cancel alarm: Select desired set time mode using the navigation key. a Input alarm time: Input your desired alarm time by specifying hour and minute. If the time format is 12 hours-based format, you have to select either ‘am’ or ‘pm’ using the key. Note The alarm function does not work if the handset is turned off. a Select repeat mode: Select desired repeat mode using the navigation key. a Select bell: Select the bell to use for the alarm using the navigation key. a Input memo: Input alarm name. When you have completed configuration, press the key to save the changed alarm configuration. 123 Tools Connectivity Bluetooth Paired devices Select the Paired devices by pressing the OK key. This function allows you to view the list of all devices that are paired with your phone at once. AAdding a new device 1. Select the Add New to search the device can be connected in range. 2. If you want to stop the searching , press the right soft key [Cancel]. Note 3. All of the serched devices are displayed the popup menu. This options is appeared when the device connected with your phone is the headset. Select the desired device by pressing the OK key, and input the password. ADeleting devices AAssigning a short name Press the OK key, to rename the paired device. AConnecting/Disconnecting the device 1. Select the Connect, allows you to active to the bluetooth connection. 124 2. If you want to close the connection to the selectde device, select the Disconnect. Select Yes to delete the selected device. ADeleting all the devices Select Yes to delete all the devices in the list. Tools Settings This menu allows you to configure the profile for a bluetooth. ABluetooth usage Set on or off the bluetooth using the left/right navigation key. AMy handset's visibility: 1. Select the Shown to all, shows your phone to other bluetooth devices. 2. Select the Hidden, shows your phone olny to the paired device. Select the Connect item and then press the key. AMy Handset's name Allows to you change the handset's name can be seen by other bluetooth devices. Server synchronisation The Server sync function synchronises the data in a phone and the data on a server such as contact address information, schedule items, etc. via a wireless network. Connect Connect to the server with the selected server profile and the synchronization animation is displayed while the synchronization is performed. Log Select a Server sync item in the Tools menu and then press the key. Select Log item and then press the key to view the log for the last synchronisation operation performed. Select Server sync from the Tools menu and then press the key. 125 Tools Server synch centre This menu allows you to configure the profile for a Sync Server. AAdding a new profile 1. Input and choose the Profile name, Host address, Username, Password, Contacts, Contact name, Calendar, Calendar name, To do, To do name and Access point. 2. Press the key to save the new profile. 3. In the Settings screen, press the left soft key [Options] key and select Add new to add a new profile. in the Settings screen and then press the key. AEditing a profile 1. Select a profile to edit. 2. Press the left soft key [Options], select Edit, and edit the selected profile. ADeleting profiles 1. Press the left soft key [Options] and select Delete. 2. Select Yes to delete the selected profile. ASelecting a server Select a desired server profile to synchronise 126 Calculator The calculator function allows you to add, subtract, multiply and divide. You can input numbers using the number keys, and operators using the up, down, left, and right navigation key. You can input a decimal point by pressing the key. Whenever you press the key, characters are sequentially deleted in reverse direction. Tools World time The World time function provides time information on major cities worldwide. 1. You can view the time of desired country or city using the navigation or [List]. 2. You can select a desired city as a base using the right soft key [set]. Unit converter This function converts any measurement into a unit you want. There are 7 types of units that can be converted: Currency, Surface, Length, Weight, Temperature, Volume, and Velocity. Note You can input a decimal number by pressing the key. 3. Input standard unit to view converted value. 4. You can view the value in home country currency unit in Domestic by inputting standard unit in Foreign. 5. Press the right soft key [Reset] to clear the current input field, and locate the cursor in the input field. 6. To exit currency conversion function, press the key. Currency 1. Select the Currency menu. 2. Users can set a currency exchange rate using the right soft key [Rate]. 127 Tools Surface 1. Select Surface menu. 2. Select desired unit to convert using the key [Unit]. 3. Input standard unit to view converted value. 4. Press the right soft key [Reset] to clear the current input field, and locate the cursor in the input field. 5. To exit area conversion function, press the key. Weight Length 1. Select Length menu. 2. Select the desired unit to convert using the key [Unit]. 3. Input the standard unit to view converted value. 4. Press the right soft key [Reset] to clear the current input field, and locate the cursor in the input field. 5. To exit length conversion function, press the key. 128 1. Select Weight menu. 2. Select desired unit to convert using the key [Unit]. 3. Input the standard unit to view converted value. 4. Press the right soft key [Reset] to clear the current input field, and locate the cursor in the input field. 5. To exit weight conversion function, press the key. Tools Temperature 1. Select Temperature menu. 2. Input the standard unit to view converted value. 3. Press the right soft key [Reset] to clear the current input field, and locate the cursor in the input field. 4. To exit temperature conversion function, press the key. Volume Velocity 1. Select Volume menu. 1. Select Velocity menu. 2. Select desired unit to convert using the key [Unit]. 2. Select desired unit to convert using the key [Unit]. 3. Input the standard unit to view converted value. 3. Input the standard unit to view converted value. 4. Press the right soft key [Reset] to clear the current input field, and locate the cursor in the input field. 4. Press the right soft key [Reset] to clear the current input field, and locate the cursor in the input field. 5. To exit volume conversion function, press the key. 5. To exit velocity conversion function, press the key. 129 #.Calling Calling Video calls My picture size This menu allows you to configure your own picture size to either Large, Medium or Small. My picture position This menu allows you to configure your screen alignment to bottom right or bottom left. Hide my picture This menu allows you to hide your picture. Mirror This menu allows you to configure mirroring of your picture. Substitute Picture This menu allows you to substitute your picture with another picture. Call history You can access the call register by pressing the key or the key. Different icons show you the type of the recent calls registered in the list (see following page for icon description). a You can view missed, received, dialled and entire call records. Each call record menu provides the following functions. a You can make a voice or video call to the number in the call record. a You can save the number in the call record to the Contacts. 132 Calling a You can send a message to the number in the call record. a You can view detailed information about the call records such as the date, time and call duration. a You can clear call records. you have selected from the records. You can also save the number in the Contacts. Received video call Dialled video call Missed video call Reject video call Missed calls Allows you to view missed call records, make a call, send a message and save the number in the Contacts. Received calls Allows you to view received call records, make a call, send a message and save the number in the Contacts. Received voice call Dialled voice call Missed voice call Reject Call Call duration Dialled calls Shows call duration time by type. Press the right soft key [Reset] to reset. A security code will be requested. Allows you to view dialled call records, make a call, send a message and save the number. Last call All calls Displays the duration of the last call made in hours/minutes/seconds. This menu allows you to view all of the missed, received, and dialled call records. You can make a call, or send a message to the number Received calls Displays received call duration. 133 Calling Dialled calls Displays dialled call duration. All calls Displays overall call duration. Call costs This network service allows you to check the last call cost, the total call cost and the remaining call cost. The call cost is displayed on the bottom of the LCD screen. To reset the call cost, select Reset all. You are requested to enter the PIN2 code. Call divert This menu allows you to configure the call divert service which diverts incoming calls to a user-specified number. 1. Press the key in the idle screen. 2. Press the navigation key down to select Calling and press Call divert. 134 Voice calls a All voice calls Diverts all incoming voice calls unconditionally. a If busy Diverts incoming voice calls when the line is busy. a If no answer Diverts incoming voice calls when there is no answer. a If unreachable Diverts incoming voice calls when the handset is turned off or the handset is out of the network service coverage Calling Video calls You can divert video calls to other 3 handsets that support video calling. a All video calls Diverts all incoming video calls unconditionally. a If busy Diverts incoming video calls when the line is busy. a If no answer Diverts incoming video calls when there is no answer. a If unreachable Diverts incoming video calls when the handset is turned off or the handset is out of the network service coverage. All fax calls Diverts fax calls unconditionally. Call barring Call barring allows you to restrict from making and receiving calls with your handset. For this function, you need the barring password, which you can obtain from 3 Customer Service. Voice calls The following options are available: a All outgoing: Calls cannot be made. a Outgoing international: International calls cannot be made. a Outgoing international calls except home country: When abroad, calls can be made only to numbers within the current country and to your home country, which is where your home network provider is located. 135 Calling a All incoming: Calls cannot be received. a Incoming when abroad: Calls cannot be received when you are using your handset outside your home service area. Video calls The following options are available: a All outgoing: Calls cannot be made. a Outgoing international: International calls cannot be made. a Outgoing international calls except home country: When abroad, calls can be made only to numbers within the current country and to your home country, which is where your home network provider is located. a All incoming: Calls cannot be received. a Incoming when abroad: Calls cannot be received when you are using your handset outside your home service area. Fixed dial numbers You can fix dialling to specified phone numbers only. This information is saved on the USIM card. You must enter your PIN2 code for authentication. a On: Enables Fixed Dial Numbers. a Off: Disables Fixed Dial Numbers. a Number list: You can view and edit the Fixed Dial Number list. Deactivate all All call barring settings are deactivated; calls can be made and received normally. 136 Call waiting The network will notify you of a new incoming call while you have a call in progress. Select Calling Activate to request the network to activate call waiting, Deactivate to request the network to deactivate call waiting, or View status, to check if the function is active or not. Settings Call reject This menu allows you to enable or disable rejection of all calls or calls categorized as Unregistered, Contacts or Groups. a Reject On/Off To Enable or Disable the Call Reject a Reject List To select the category of call reject numbers. You can select any of the following categories: z All Calls If this category is selected, all calls will be rejected z Contacts If this category is selected, all numbers in contacts list will be rejected z Groups If this category is selected, all numbers belonging to the selected groups will be rejected. z Unregistered If this category is selected, all un-registered numbers will be rejected. a Reject Group If the Reject Category ‘Groups’ is selected from the Reject List, the group, which has to be rejected, can be selected here. All the available groups will be listed here. Up to three groups can be selected for rejection. 137 Calling Press the right soft key [Done] after configuring the Call rejection to save the changes and go back to previous menu. Send my number This network service allows you to set your phone number to be displayed (On) or hidden (Off) from the person whom you are calling. Select Set by network to reset the handset to the setting that you have agreed upon with 3 Customer Service. a Open flip: This option allows you to answer a call simply by opening the flip. Auto redial The menu enables you to configure the auto redial function when a call attempt has failed. This function sounds an alert notification every 1 minute after call connection. Answer mode Allows you to determine when to answer the handset. a Press send key: You can answer an incoming call by only pressing the key. a Press any key: You can answer an incoming call by pressing any key, except the key, soft keys and side keys. 138 Minute minder And so on... Troubleshooting Please check to see if any problems you have encountered with the phone are described in this section before calling 3 Customer Service. Q Why is there an echo when a connection is made with certain telephones in a certain area? Q How do I view the list of outgoing calls, incoming calls and missed calls? A This is called the ‘Echo Phenomenon’, where it occurs if connection volume is too high or caused by special properties (semi electronic telephone exchange) of the equipment on the other end. A Press the key. Q How do I view all numbers stored in memory? Q Why does the handset heat up? A Press right soft key[Contacts] and then or press the down navigation key. A The phone may get hot when there is a very long call duration or when games are played or when using the browser. This has no effect upon the life of the product or performance. Q Why is the connection inconsistent or not audible in certain areas? A When frequency environment is unstable in a certain area, connection may be inconsistent and not audible. Relocate to another area and try again. Q Why does the display not turn on? A Remove and insert the battery, then attempt to power-on. If there is no change, fully charge the battery and try again. 140 Q Why is there no ringtune, but only a blinking LCD screen? A Phone may be set to ‘Vibrate only’ or in ‘Silent’ mode. In the Profiles menu, please select 'Normal’ or ‘Outdoor. Troubleshooting Q Why does the battery life get shorter in standby mode? A The battery is worn out. As time passes, the battery life gradually becomes shorter. If the battery lasts about half the amount of time as when first purchased, it’s time to purchase a new battery. Q Incoming calls do-not reach me. A Is your phone switched on ( pressed for more than three seconds)? Are you accessing the right cellular network? Or, you may have set an incoming call barring option. Q I cannot find the lock, PIN, or PUK code. What is my PIN? Q Why does the battery run out so quickly during normal use? A It is due to the user environment or a large number of calls or weak signal. A The default lock code is ‘0000’. If you forget or lose the lock code, contact your phone dealer. If you forget or lose a PIN or PUK code, or if you have not received such a code, contact 3 Customer Services. Q Why is no number dialed when you recall a Contacts entry? Q What happens to the handset if it is dropped? A Check that the number has been stored correctly by using the Contacts feature. Re-store them, if necessary. A The handset could power off or reset, but this does not necessarily imply any permanent damage. 141 Accessories Charger This adapter allows you to charge the battery. It supports standard Europe/Australia/U.K. and Hongkong (100-240 Volt 50/60Hz outlets). It takes 3.5 hours to charge a completely discharged battery. Europe 142 Australia U.K and Hongkong Accessories Headset USB cable Connects to your phone, allowing hands-free operation. Includes earpiece, microphone, and integrated call answer/termination button. Connects your phone to a PC. Hand strap Battery 143 Glossary 2G AMR Second Generation wireless communication system. 2G system supports low quality voice and low-rate packet-data service. 2G refers to GSM in European countries, and CDMA in America. Adaptive Multirate codec. A voice codec developed by ETSI for GSM. AMR supports 8 coding rates (from 4.75 to 12.2Kbps) so as to adaptively provide the quality of voice service in various radio channel conditions. 3G Download Third Generation wireless communication system. 3G means next generation wireless communication system developed based on the second generation wireless communication systems. 3G system supports real-time communication service and high-rate packet-data service. 3G refers to UMTS developed based on GSM in European countries, Download means transmitting files from one computer system to another. Downloading usually means transmitting files from a big system to a small system. Access point Access point refers to a point through which users can connect to the network so that the users can use the network services. 144 IrDA (Infrared Data Association) A standard defined by the IrDA consortium. It specifies a way to wirelessly transfer data via infrared radiation. The IrDA specifications include standards for both the physical devices and the protocols they use to communicate with each other. Glossary JavaTM Programming language generating applications that can run on all hardware platforms, whether small, medium or large, without modification. It has been promoted for and geared heavily to the Web, both for public Web sites and Intranets. When a Java program runs from a Web page, it is called a Java applet. When it is run on a mobile phone or pager, it is called a MIDlet. Line Identification Services (Caller ID) Service allowing subscribers to view or block the telephone numbers of callers. MIDI Musical Instrument Digital Interface. A file format to save digitized musical instrumental data. The original meaning of MIDI, or Music Instrument Digital Interface is a protocol to exchange data between a computer and electric instruments. MMS (Multimedia Message Service) A message service for the handset environment, standardized by the WAP Forum and the 3rd Generation Partnership Program (3GPP). For phone users, MMS is similar to Short Message Service (SMS)-it provides automatic, immediatedelivery of user-created content from phone to phone. The message addressing used is primarily phone numbers, thus the traffic goes from phone to phone. MMS also provides support for e-mail addressing, so that messages can also be sent by email. In addition to the text content of SMS, MMS messages can contain still images, voice or audio clips, and later also video clips and presentation information. MP3 Moving Picture Experts Group Layer-3 Audio. A file format to provide high-quality audio whose quality is equal to that of CD. MP3 is a digital audio standard developed by MPEG, or Moving Picture Experts Group and is widely used for digital audio files. MPEG4 Motion Picture Experts Group 4. A digital video standard developed by MPEG, or Moving Picture Experts Group. MPEG4 compresses video data so that a large video file can be transmitted, and saved more easily. MPEG4 is suitable especially for mobile environment. 145 Glossary Multimedia SMTP Multimedia means media that include various media data such as voice, character string, image, and video data. Currently, the meaning of multimedia includes services provided through multimedia. Simple Mail Transfer Protocol. A protocol to transfer e-mails between computers over the Internet. SMTP defines the format of control messages between computers, and interaction procedures between them to send e-mails. Multiparty Calls Quick play Ability to establish a conference call involving up to five additional parties. Quick play means a new type of service that enables users to listen to an audio or watch video without downloading complete audio or video file so that contents providers can provide audio or video data such as movie or news over the network in real-time on users' demand. Roaming Use of your phone when you are outside your home area (when traveling for example). SDN (Service Dial Number) Telephone numbers supplied by your network provider and giving access to special services, such as voice mail, directory inquiries, customer support and emergency services. 146 Sync Sync means synchronizing PIM (Personal Information Management) data such as contact information, schedule, to-do, and memo with a PC or an external server. Glossary UMTS Video call Universal Mobile Telephony System. UMTS refers to asynchronous 3G wireless technology of WCDMA that is developed based on GSM, the 2G wireless technology. A communications service that enables users to talk watching each other over a 64Kbps data channel. Real-time video call service is a new type of service provided by WCDMA wireless communication system that is developed based on GSM+GPRS technology. USB Universal Serial Bus. A bus type interface that provides fast and flexible connection between devices and a computer. USIM Universal Subscriber Identity Module. An IC card used for UMTS the shape of which is the same as that of the SIM card of GSM. USIM is provided by network operator, and carries the authentication and service grade data for the network operator as well as user-specific data. Voice mail Computerised answering service that automatically answers your calls when you are not available, plays a greeting and records a message. 147 Index A C E Access Codes........................... 43 Calculator............................... 126 Access points ........................... 67 Calendar ................................ 114 Add new ........................... 73, 106 Call barring............................. 135 Alarm clock ............................ 123 Call divert............................... 134 Fixed dial numbers .................. 136 AMR ...................................... 144 Call diverting ............................ 40 Light........................................ 38 Answer mode .......................... 138 Caller ID ................................. 145 Flip tone .................................. 63 Camera .................................. 103 Font ........................................ 59 B Backlight.................................. 59 F Change codes .......................... 68 Charger.................................. 142 Barring Password ...................... 44 Charging the Battery.................. 33 Battery .................................... 38 Confirmation tone...................... 63 H Handset lock ............................ 68 Headset ................................. 143 Home ...................................... 72 Battery Information.................... 16 Battery cover ............................ 38 Entering Text ............................ 47 D Battery level ............................. 40 Dialled calls ..................... 133, 134 Browser ................................... 72 Display Information.................... 40 Download ............................... 144 I Inbox ....................................... 84 Infrared Data Association.......... 144 IrDA ....................................... 144 148 Index J Java ...................................... 145 MMS..................................... 145 PUK code ............................... 43 MP3 ..................................... 145 PUK2 code.............................. 43 MPEG4 ................................. 145 K Multimedia ...................... 102, 146 Multimedia Message Service ..... 145 Key tone ................................. 63 Key tone volume ...................... 63 L Language ................................ 69 Quick play ............................. 146 N Network .................................. 67 M Received calls........................ 133 New messages ........................ 86 Roaming ............................... 146 Roaming service ...................... 40 O Open flip .......................... 47, 138 Own number .......................... 107 Memo ................................... 118 Memo Add............................. 118 Memo Delete .......................... 118 Memory status ................... 69, 104 Message alert .......................... 62 Message tone .......................... 63 MIDI ..................................... 145 Missed calls........................... 133 R Network selection .................... 67 Line Identification Services ...... 145 Mailbox................................... 86 Q Quick menu ........................... 122 S Screen .................................... 58 Screen theme .......................... 58 P SDN ..................................... 146 PIN code................................. 43 Search .................................. 106 PIN code request ..................... 68 Secret memo ......................... 119 PIN2 code ............................... 43 Security ............................. 68, 74 Press any key ........................ 138 Security code ..................... 44, 69 Press send key........................ 138 Service dial numbers............... 107 Profiles .............................. 62, 74 Signal Strength ........................ 47 149 Index SMTP ................................... 146 V Vibrate only......................... 40, 62 3G network ............................. 40 Switch on sound ...................... 63 Video calls ............... 132, 135, 136 2G network ............................. 40 Switch off sound ...................... 63 Video camera.................. 102, 104 Video ringtune ......................... 62 T Voice call ....................... 134, 135 T9 .......................................... 49 Voice mail ............................. 147 Templates ............................... 88 Voice message ........................ 40 To do .................................... 117 Voice recorder ....................... 104 To do Delete ........................... 117 Voice ringtune........................... 62 To do Enquiry ......................... 117 Volume ................................. 129 Triangle key ........................ 37, 41 W U UMTS ................................... 147 Unit converter ........................ 127 USB ..................................... 147 USB cable ............................. 143 USIM .................................... 147 USIM memory.......................... 70 150 3G ........................................ 144 Speed dials ........................... 106 World time............................. 127