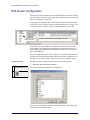
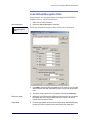
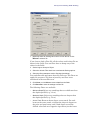
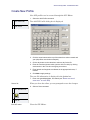
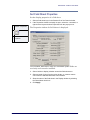
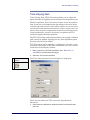
1
HIPS and SIPS 6.1 SP2
User Guide
Trademarks
CARIS software and the CARIS logo are registered trademarks of CARIS.
Other brands and product names are registered trademarks or trademarks of their
respective holders.
Data courtesy of the Shallow Survey Conference Common Data Set 2001 (CCOM UNH).
CARIS
(Global Headquarters)
115 Waggoners Lane
Fredericton, NB
Canada
E3B 2L4
CARIS bv
Mgr. van Oorschotstraat 13
PO Box 47 5473 ZG
Heeswijk, NETHERLANDS
Phone: 1 (506) 458-8533
(English/French/Spanish)
Fax: 1 (506) 459-3849
Email: [email protected]
Assistance: [email protected]
Web site: www.caris.com
Phone: +31 (0)413 296 010
Fax: +31 (0)413 296 012
Email: [email protected]
CARIS USA
CARIS Asia Pacific
415 N. Alfred Street
Alexandria, VA
United States
22314
Suite 1, Innovation House
Mawson Lakes Boulevard
Mawson Lakes SA 5095
Australia
Phone: 1 (703) 299-9712
Fax: 1 (703) 299-9715
Email: [email protected]
Phone: +61.(0).8.8260.8180
Fax: +61.(0).8.8260.8100
Copyright 2008 CARIS
The material in this manual is for information purposes only and is subject to change without notice. CARIS
assumes no responsibility for any errors that may appear in this manual. CARIS hereby grants licensees of CARIS
software the right to reprint this document for internal use.
June 2008
Preface
Who should use
this guide?
This user’s guide describes how to operate the Hydrographic
Information Processing System (HIPS) and the Sonar
Information Processing System (SIPS) and should be read by
all users.
Prerequisites
It is assumed you are familiar with hydrographic surveying
concepts and the Windows NT/2000/XP operating systems.
Some knowledge of digital hydrographic processing concepts
is also assumed.
No prior experience of CARIS operations is required. However,
HIPS and SIPS concepts are more easily grasped if you are
familiar with other CARIS products.
What’s in this
guide?
The HIPS and SIPS User’s Guide is divided into the following
sections:
•
Introduction: This section gives an overview of HIPS
and SIPS.
•
HIPS Interface: This section gives an overview of the
interface, its windows and toolbars. It describes display
options, how to select colours, modify toolbars and
create custom keyboard commands.
•
Options: This section describes the available options
for modifying the interface, directories and environment
variables.
•
Data Directories: This section gives a brief description
of the data directory structure in HIPS/SIPS.
•
HIPS Vessel File: This section describes the various
components in a vessel file. It also describes how to use
the Vessel Editor to create new vessel files and edit
existing files.
•
New Projects: This section describes how to create a
new Project-Vessel-Day directory structure for a HIPS/
SIPS project.You will also learn about the various
project options available in HIPS and SIPS.
3
4
•
File Conversion: This section describes how to convert
survey acquisition data into HIPS/SIPS format. The
section explains how to use the File Conversion Wizard
to convert data. It also describes the conversion options
for each data format available in the wizard.
•
Survey Line Processing: This section describes how
to select track lines. The section gives an overview of
the various editors and the commands for applying tide
and sound velocity files. You will also learn about the
Merge command for creating final position and depth
files.
•
Navigation Editor: This section describes the
Navigation Editor and how to use it to clean the vessel’s
position data.
•
Attitude Editor: This section describes how to use the
Attitude Editor to clean and filter data from the vessel’s
motion sensors.
•
Sound Velocity Editor: This section describes how to
use the Sound Velocity Editor to revise Sound Velocity
Profiles.
•
Swath Editor: This section describes the various
features found in the Swath Editor. It describes how to
select and clean data. The section concludes with a
description of the Refraction Editor.
•
Single Beam Editor: This section describes the various
features found in the Single Beam Editor. The section
also includes a description of the barcheck function.
•
Tide Editor: This section describes how to use the TidE
Editor to revise tide files.
•
Field Sheets: This section describes the function of the
field sheet. It also describes the steps necessary to
create one, and how to open and close field sheet data.
The section also describes the options available for tile
display.
•
BASE Surfaces: This section describes the steps
necessary to create a Bathymetry and Statistical Error
(BASE) Surface. It also describes the property options
of BASE Surfaces and the options available for editing
BASE Surfaces.
•
Subset Editor: This section describes how to create
subsets and how to use the Subset Editor to view and
clean sounding data.
•
CUBE Processing: This section describes how to
create a Combined Uncertainty and Bathymetry
Estimator (CUBE) Surface. It also describes how to edit
CUBE hypotheses data in the Subset Editor. The
section concludes with a description of how to use
CUBE filtering to reject outlier soundings.
•
Statistical Surface Cleaning: This section describes
how to divide selected areas into tiles and apply the
statistical surface cleaning options to clean data. The
section also describes the tiling and surface cleaning
query options.
•
Lidar Data: This section describes how to view and
clean lidar data in both the Subset and Swath Editors.
•
Calibration: This section describes how to use the
calibration tool in HDCS (Hydrographic Data Cleaning
System) to compare the effects of sensor offsets on
calibration survey lines.
•
Side Scan Data: This section describes the workflow
needed to process side scan data in SIPS. The section
also describes the Side Scan Editor and how to use this
tool to create slant-range corrected data from raw side
scan data. The section concludes with a description of
mosaics.
•
Export Data: This section describes how to export
HIPS and SIPS data to other formats.
•
Batch Processor: This section describes how to use
the Batch Processing tool to automatically process
data.
•
Appendices: These provide reference material
relevant to using the software.
•
Glossary: This section contains an alphabetical listing
of terms found in this guide.
Also see the CARIS Field Sheet Editor User’s Guide for more
information about processing field sheets.
5
6
Table of Contents
1
2
Introduction . . . . . . . . . . . . . . . . . . . . . . . . . . . . . . . . . . . . 1
Purpose of HIPS and SIPS . . . . . . . . . . . . . . . . . . . . . . . . . . . . . .
Development Partners . . . . . . . . . . . . . . . . . . . . . . . . . . . . . . . . .
Design Principles . . . . . . . . . . . . . . . . . . . . . . . . . . . . . . . . . . . . .
Licensing . . . . . . . . . . . . . . . . . . . . . . . . . . . . . . . . . . . . . . . . . . . .
HIPS I/O Library . . . . . . . . . . . . . . . . . . . . . . . . . . . . . . . . . . . . . .
2
3
4
5
6
HIPS and SIPS Interface . . . . . . . . . . . . . . . . . . . . . . . . . . 7
Opening HIPS and SIPS . . . . . . . . . . . . . . . . . . . . . . . . . . . . . . . . 8
Configuration Report. . . . . . . . . . . . . . . . . . . . . . . . . . . . . . . . . . . 9
Main Display . . . . . . . . . . . . . . . . . . . . . . . . . . . . . . . . . . . . . . . . 10
Display Window . . . . . . . . . . . . . . . . . . . . . . . . . . . . . . . . . . . . . 11
Control Window. . . . . . . . . . . . . . . . . . . . . . . . . . . . . . . . . . . . . . 12
Properties Window . . . . . . . . . . . . . . . . . . . . . . . . . . . . . . . . . . . 14
Worksheet Window . . . . . . . . . . . . . . . . . . . . . . . . . . . . . . . . . . . 15
Output Tab . . . . . . . . . . . . . . . . . . . . . . . . . . . . . . . . . . . . . . . 15
Query Tab . . . . . . . . . . . . . . . . . . . . . . . . . . . . . . . . . . . . . . . 16
Graph Tab . . . . . . . . . . . . . . . . . . . . . . . . . . . . . . . . . . . . . . . 18
QC Reports Tab . . . . . . . . . . . . . . . . . . . . . . . . . . . . . . . . . . . 21
Profile Tab . . . . . . . . . . . . . . . . . . . . . . . . . . . . . . . . . . . . . . . 21
Reposition and Resize Windows . . . . . . . . . . . . . . . . . . . . . . . . 22
Status Bar . . . . . . . . . . . . . . . . . . . . . . . . . . . . . . . . . . . . . . . . . . 23
Status Bar options . . . . . . . . . . . . . . . . . . . . . . . . . . . . . . . . . 23
Toolbars . . . . . . . . . . . . . . . . . . . . . . . . . . . . . . . . . . . . . . . . . . . 24
Modify Existing Toolbars . . . . . . . . . . . . . . . . . . . . . . . . . . . . 25
Create a Custom Toolbar . . . . . . . . . . . . . . . . . . . . . . . . . . . . 26
Mouse Information . . . . . . . . . . . . . . . . . . . . . . . . . . . . . . . . . . . 28
Open Projects and Background Data . . . . . . . . . . . . . . . . . . . . . 29
Open a Project . . . . . . . . . . . . . . . . . . . . . . . . . . . . . . . . . . . . 29
Set Track Line Properties. . . . . . . . . . . . . . . . . . . . . . . . . . . . 30
Open Background Data . . . . . . . . . . . . . . . . . . . . . . . . . . . . . 31
Set Image Properties . . . . . . . . . . . . . . . . . . . . . . . . . . . . . . . 32
Display S-57 Data . . . . . . . . . . . . . . . . . . . . . . . . . . . . . . . . . 34
Display Tools . . . . . . . . . . . . . . . . . . . . . . . . . . . . . . . . . . . . . . . 37
Zoom . . . . . . . . . . . . . . . . . . . . . . . . . . . . . . . . . . . . . . . . . . . 37
Zoom In . . . . . . . . . . . . . . . . . . . . . . . . . . . . . . . . . . . . . . . . . 37
Zoom Out . . . . . . . . . . . . . . . . . . . . . . . . . . . . . . . . . . . . . . . . 38
Zoom/Pan Previous . . . . . . . . . . . . . . . . . . . . . . . . . . . . . . . . 38
Zoom/Pan Forward. . . . . . . . . . . . . . . . . . . . . . . . . . . . . . . . . 38
Zoom To . . . . . . . . . . . . . . . . . . . . . . . . . . . . . . . . . . . . . . . . . 39
Pan . . . . . . . . . . . . . . . . . . . . . . . . . . . . . . . . . . . . . . . . . . . . . 39
CARIS HIPS and SIPS User’s Guide
vii
Refresh Display . . . . . . . . . . . . . . . . . . . . . . . . . . . . . . . . . . .
Overview Display . . . . . . . . . . . . . . . . . . . . . . . . . . . . . . . . . .
Show/Hide Layers . . . . . . . . . . . . . . . . . . . . . . . . . . . . . . . . .
Selection Tools . . . . . . . . . . . . . . . . . . . . . . . . . . . . . . . . . . . . . .
Select by Range . . . . . . . . . . . . . . . . . . . . . . . . . . . . . . . . . . .
Select All in Display . . . . . . . . . . . . . . . . . . . . . . . . . . . . . . . .
Select All . . . . . . . . . . . . . . . . . . . . . . . . . . . . . . . . . . . . . . . .
Select By Lasso . . . . . . . . . . . . . . . . . . . . . . . . . . . . . . . . . . .
Select Next Line . . . . . . . . . . . . . . . . . . . . . . . . . . . . . . . . . . .
Select Previous Line. . . . . . . . . . . . . . . . . . . . . . . . . . . . . . . .
Select Lines From the Control Window . . . . . . . . . . . . . . . . .
Clear All . . . . . . . . . . . . . . . . . . . . . . . . . . . . . . . . . . . . . . . . .
Screen Captures . . . . . . . . . . . . . . . . . . . . . . . . . . . . . . . . . . . . .
3-D Display Window . . . . . . . . . . . . . . . . . . . . . . . . . . . . . . . . . .
Set 3-D Window . . . . . . . . . . . . . . . . . . . . . . . . . . . . . . . . . . .
3-D Display Properties . . . . . . . . . . . . . . . . . . . . . . . . . . . . . .
Control Axes. . . . . . . . . . . . . . . . . . . . . . . . . . . . . . . . . . . . . .
Vertical Exaggeration . . . . . . . . . . . . . . . . . . . . . . . . . . . . . . .
Navigate 3-D Display . . . . . . . . . . . . . . . . . . . . . . . . . . . . . . .
3-D Display Fly-through options . . . . . . . . . . . . . . . . . . . . . . .
Cut, Copy and Paste . . . . . . . . . . . . . . . . . . . . . . . . . . . . . . . . . .
Cut . . . . . . . . . . . . . . . . . . . . . . . . . . . . . . . . . . . . . . . . . . . . .
Copy . . . . . . . . . . . . . . . . . . . . . . . . . . . . . . . . . . . . . . . . . . . .
Paste . . . . . . . . . . . . . . . . . . . . . . . . . . . . . . . . . . . . . . . . . . .
Measure Distance . . . . . . . . . . . . . . . . . . . . . . . . . . . . . . . . . . . .
Keyboard Shortcuts . . . . . . . . . . . . . . . . . . . . . . . . . . . . . . . . . .
Save, Close and Exit. . . . . . . . . . . . . . . . . . . . . . . . . . . . . . . . . .
Save Projects . . . . . . . . . . . . . . . . . . . . . . . . . . . . . . . . . . . . .
Close a Project . . . . . . . . . . . . . . . . . . . . . . . . . . . . . . . . . . . .
Exit HIPS and SIPS . . . . . . . . . . . . . . . . . . . . . . . . . . . . . . . .
3
viii
40
40
40
42
42
42
42
44
45
45
46
46
47
48
49
53
58
59
60
63
66
66
67
68
69
70
72
72
72
72
Options . . . . . . . . . . . . . . . . . . . . . . . . . . . . . . . . . . . . . . . 73
Introduction . . . . . . . . . . . . . . . . . . . . . . . . . . . . . . . . . . . . . . . . .
General . . . . . . . . . . . . . . . . . . . . . . . . . . . . . . . . . . . . . . . . . . . .
Display . . . . . . . . . . . . . . . . . . . . . . . . . . . . . . . . . . . . . . . . . . . .
Display window. . . . . . . . . . . . . . . . . . . . . . . . . . . . . . . . . . . .
Geographic Grid . . . . . . . . . . . . . . . . . . . . . . . . . . . . . . . . . . .
IHO Standards . . . . . . . . . . . . . . . . . . . . . . . . . . . . . . . . . . . .
Lidar . . . . . . . . . . . . . . . . . . . . . . . . . . . . . . . . . . . . . . . . . . . .
Projected Grid . . . . . . . . . . . . . . . . . . . . . . . . . . . . . . . . . . . .
Scale Bar . . . . . . . . . . . . . . . . . . . . . . . . . . . . . . . . . . . . . . . .
Sensor Editors . . . . . . . . . . . . . . . . . . . . . . . . . . . . . . . . . . . .
Side Scan Editor. . . . . . . . . . . . . . . . . . . . . . . . . . . . . . . . . . .
Single Beam Editor. . . . . . . . . . . . . . . . . . . . . . . . . . . . . . . . .
Status . . . . . . . . . . . . . . . . . . . . . . . . . . . . . . . . . . . . . . . . . . .
Swath Editor . . . . . . . . . . . . . . . . . . . . . . . . . . . . . . . . . . . . . .
Tide/SVP . . . . . . . . . . . . . . . . . . . . . . . . . . . . . . . . . . . . . . . .
74
75
78
78
80
82
83
84
86
87
89
90
92
93
94
CARIS HIPS and SIPS User’s Guide
Units . . . . . . . . . . . . . . . . . . . . . . . . . . . . . . . . . . . . . . . . . . . . 95
Directories . . . . . . . . . . . . . . . . . . . . . . . . . . . . . . . . . . . . . . . . . . 97
Environment . . . . . . . . . . . . . . . . . . . . . . . . . . . . . . . . . . . . . . . . 99
S-57 Environment . . . . . . . . . . . . . . . . . . . . . . . . . . . . . . . . . . . 101
S-52 Display . . . . . . . . . . . . . . . . . . . . . . . . . . . . . . . . . . . . . . . 103
4
Data Directories . . . . . . . . . . . . . . . . . . . . . . . . . . . . . . . 107
5
HIPS Vessel Editor . . . . . . . . . . . . . . . . . . . . . . . . . . . . . 113
Introduction . . . . . . . . . . . . . . . . . . . . . . . . . . . . . . . . . . . . . . . .
Projects . . . . . . . . . . . . . . . . . . . . . . . . . . . . . . . . . . . . . . . . . . .
HIPS and SIPS Data . . . . . . . . . . . . . . . . . . . . . . . . . . . . . .
VesselConfig Directory. . . . . . . . . . . . . . . . . . . . . . . . . . . . .
Raw Data . . . . . . . . . . . . . . . . . . . . . . . . . . . . . . . . . . . . . . . . .
SVP and Tide . . . . . . . . . . . . . . . . . . . . . . . . . . . . . . . . . . . . . .
SVP . . . . . . . . . . . . . . . . . . . . . . . . . . . . . . . . . . . . . . . . . . .
Tide . . . . . . . . . . . . . . . . . . . . . . . . . . . . . . . . . . . . . . . . . . .
Vessel Files. . . . . . . . . . . . . . . . . . . . . . . . . . . . . . . . . . . . . . . .
Working With the Vessel Editor . . . . . . . . . . . . . . . . . . . . . . . .
Open the Vessel Editor . . . . . . . . . . . . . . . . . . . . . . . . . . . .
Open, Close and Save Files. . . . . . . . . . . . . . . . . . . . . . . . .
3-D Controls . . . . . . . . . . . . . . . . . . . . . . . . . . . . . . . . . . . . .
Create Vessel Outline . . . . . . . . . . . . . . . . . . . . . . . . . . . . .
Options Dialog Box. . . . . . . . . . . . . . . . . . . . . . . . . . . . . . . .
Exit the Vessel Editor . . . . . . . . . . . . . . . . . . . . . . . . . . . . . .
Create a New HVF . . . . . . . . . . . . . . . . . . . . . . . . . . . . . . . . . .
Vessel Information . . . . . . . . . . . . . . . . . . . . . . . . . . . . . . . .
Type of Survey . . . . . . . . . . . . . . . . . . . . . . . . . . . . . . . . . . .
Single Beam . . . . . . . . . . . . . . . . . . . . . . . . . . . . . . . . . . . . .
Multibeam. . . . . . . . . . . . . . . . . . . . . . . . . . . . . . . . . . . . . . .
Multi-Transducer . . . . . . . . . . . . . . . . . . . . . . . . . . . . . . . . .
Motion Sensors . . . . . . . . . . . . . . . . . . . . . . . . . . . . . . . . . .
Configuration Options. . . . . . . . . . . . . . . . . . . . . . . . . . . . . .
Sound Velocity Corrections . . . . . . . . . . . . . . . . . . . . . . . . .
Edit Sensor Configuration . . . . . . . . . . . . . . . . . . . . . . . . . . . . .
Swath . . . . . . . . . . . . . . . . . . . . . . . . . . . . . . . . . . . . . . . . . .
Navigation . . . . . . . . . . . . . . . . . . . . . . . . . . . . . . . . . . . . . .
Gyro . . . . . . . . . . . . . . . . . . . . . . . . . . . . . . . . . . . . . . . . . . .
Heave . . . . . . . . . . . . . . . . . . . . . . . . . . . . . . . . . . . . . . . . . .
Pitch . . . . . . . . . . . . . . . . . . . . . . . . . . . . . . . . . . . . . . . . . . .
Roll . . . . . . . . . . . . . . . . . . . . . . . . . . . . . . . . . . . . . . . . . . . .
Dynamic Draft. . . . . . . . . . . . . . . . . . . . . . . . . . . . . . . . . . . .
Single Beam . . . . . . . . . . . . . . . . . . . . . . . . . . . . . . . . . . . . .
SVP . . . . . . . . . . . . . . . . . . . . . . . . . . . . . . . . . . . . . . . . . . .
Sweep . . . . . . . . . . . . . . . . . . . . . . . . . . . . . . . . . . . . . . . . .
CARIS HIPS and SIPS User’s Guide
108
109
109
110
111
112
112
112
114
117
117
118
119
121
123
124
125
125
126
126
127
128
129
130
131
132
134
135
135
137
138
139
140
141
142
143
ix
Towed Sensors . . . . . . . . . . . . . . . . . . . . . . . . . . . . . . . . . . 145
Waterline . . . . . . . . . . . . . . . . . . . . . . . . . . . . . . . . . . . . . . . 146
Total Propagated Error. . . . . . . . . . . . . . . . . . . . . . . . . . . . . 147
x
6
Starting a New Project . . . . . . . . . . . . . . . . . . . . . . . . . . 149
7
File Conversion . . . . . . . . . . . . . . . . . . . . . . . . . . . . . . . 169
Define Project . . . . . . . . . . . . . . . . . . . . . . . . . . . . . . . . . . . . . .
New Project (Step 1) . . . . . . . . . . . . . . . . . . . . . . . . . . . . . .
New Project (Step 2) . . . . . . . . . . . . . . . . . . . . . . . . . . . . . .
New Project (Step 3) . . . . . . . . . . . . . . . . . . . . . . . . . . . . . .
New Project (Step 4) . . . . . . . . . . . . . . . . . . . . . . . . . . . . . .
Rename Day and Line Folders . . . . . . . . . . . . . . . . . . . . . . . . .
View Project or Vessel Properties. . . . . . . . . . . . . . . . . . . . . . .
Session Files. . . . . . . . . . . . . . . . . . . . . . . . . . . . . . . . . . . . . . .
Recycle Bin . . . . . . . . . . . . . . . . . . . . . . . . . . . . . . . . . . . . . . . .
Archive Project . . . . . . . . . . . . . . . . . . . . . . . . . . . . . . . . . . . . .
Converting Files to HIPS/SIPS Format . . . . . . . . . . . . . . . . . . .
Select Data Format . . . . . . . . . . . . . . . . . . . . . . . . . . . . . . .
Select Files for Conversion . . . . . . . . . . . . . . . . . . . . . . . . .
Select Project-Vessel-Day . . . . . . . . . . . . . . . . . . . . . . . . . .
Select Coordinate System . . . . . . . . . . . . . . . . . . . . . . . . . .
Select Basic Filters. . . . . . . . . . . . . . . . . . . . . . . . . . . . . . . .
Enter Data Parameters. . . . . . . . . . . . . . . . . . . . . . . . . . . . .
Convert Data . . . . . . . . . . . . . . . . . . . . . . . . . . . . . . . . . . . .
Data Format Options. . . . . . . . . . . . . . . . . . . . . . . . . . . . . . . . .
Atlas . . . . . . . . . . . . . . . . . . . . . . . . . . . . . . . . . . . . . . . . . . .
Chirpscan3D. . . . . . . . . . . . . . . . . . . . . . . . . . . . . . . . . . . . .
CMAX . . . . . . . . . . . . . . . . . . . . . . . . . . . . . . . . . . . . . . . . . .
Coda. . . . . . . . . . . . . . . . . . . . . . . . . . . . . . . . . . . . . . . . . . .
EdgeTech . . . . . . . . . . . . . . . . . . . . . . . . . . . . . . . . . . . . . . .
EIVA . . . . . . . . . . . . . . . . . . . . . . . . . . . . . . . . . . . . . . . . . . .
Elac . . . . . . . . . . . . . . . . . . . . . . . . . . . . . . . . . . . . . . . . . . .
Furuno . . . . . . . . . . . . . . . . . . . . . . . . . . . . . . . . . . . . . . . . .
GeoAcoustics . . . . . . . . . . . . . . . . . . . . . . . . . . . . . . . . . . . .
GSF . . . . . . . . . . . . . . . . . . . . . . . . . . . . . . . . . . . . . . . . . . .
Hypack . . . . . . . . . . . . . . . . . . . . . . . . . . . . . . . . . . . . . . . . .
Imagenex . . . . . . . . . . . . . . . . . . . . . . . . . . . . . . . . . . . . . . .
LADS . . . . . . . . . . . . . . . . . . . . . . . . . . . . . . . . . . . . . . . . . .
LAS. . . . . . . . . . . . . . . . . . . . . . . . . . . . . . . . . . . . . . . . . . . .
MarineSonics . . . . . . . . . . . . . . . . . . . . . . . . . . . . . . . . . . . .
Navitronics . . . . . . . . . . . . . . . . . . . . . . . . . . . . . . . . . . . . . .
Qmips . . . . . . . . . . . . . . . . . . . . . . . . . . . . . . . . . . . . . . . . . .
Reson PDS. . . . . . . . . . . . . . . . . . . . . . . . . . . . . . . . . . . . . .
Scripps . . . . . . . . . . . . . . . . . . . . . . . . . . . . . . . . . . . . . . . . .
150
150
153
154
155
156
157
159
161
163
170
171
172
173
174
175
176
177
178
179
180
180
180
180
181
181
182
183
185
186
187
188
188
189
189
189
189
189
CARIS HIPS and SIPS User’s Guide
SDF . . . . . . . . . . . . . . . . . . . . . . . . . . . . . . . . . . . . . . . . . . .
Seabeam . . . . . . . . . . . . . . . . . . . . . . . . . . . . . . . . . . . . . . .
Seafalcon . . . . . . . . . . . . . . . . . . . . . . . . . . . . . . . . . . . . . . .
SEGY . . . . . . . . . . . . . . . . . . . . . . . . . . . . . . . . . . . . . . . . . .
SHOALS. . . . . . . . . . . . . . . . . . . . . . . . . . . . . . . . . . . . . . . .
Simrad . . . . . . . . . . . . . . . . . . . . . . . . . . . . . . . . . . . . . . . . .
SWATHPlus . . . . . . . . . . . . . . . . . . . . . . . . . . . . . . . . . . . . .
UNB . . . . . . . . . . . . . . . . . . . . . . . . . . . . . . . . . . . . . . . . . . .
Winfrog . . . . . . . . . . . . . . . . . . . . . . . . . . . . . . . . . . . . . . . . .
XTF. . . . . . . . . . . . . . . . . . . . . . . . . . . . . . . . . . . . . . . . . . . .
Convert Bathymetric data . . . . . . . . . . . . . . . . . . . . . . . .
Convert Side Scan data . . . . . . . . . . . . . . . . . . . . . . . . .
8
190
190
190
191
191
193
194
194
194
195
196
199
Survey Line Processing. . . . . . . . . . . . . . . . . . . . . . . . . 203
Select Survey Lines . . . . . . . . . . . . . . . . . . . . . . . . . . . . . . . . .
Query Line Data . . . . . . . . . . . . . . . . . . . . . . . . . . . . . . . . . . . .
Set Line Classification. . . . . . . . . . . . . . . . . . . . . . . . . . . . . . . .
View Rejected Soundings . . . . . . . . . . . . . . . . . . . . . . . . . . . . .
Designated Soundings . . . . . . . . . . . . . . . . . . . . . . . . . . . . . . .
Critical Soundings . . . . . . . . . . . . . . . . . . . . . . . . . . . . . . . . . . .
Reject Line . . . . . . . . . . . . . . . . . . . . . . . . . . . . . . . . . . . . . . . .
Correct for Tide . . . . . . . . . . . . . . . . . . . . . . . . . . . . . . . . . . . . .
Tide Files . . . . . . . . . . . . . . . . . . . . . . . . . . . . . . . . . . . . . . .
Tide Zone Files. . . . . . . . . . . . . . . . . . . . . . . . . . . . . . . . . . .
Load Tide . . . . . . . . . . . . . . . . . . . . . . . . . . . . . . . . . . . . . . .
Attitude Sensor Data . . . . . . . . . . . . . . . . . . . . . . . . . . . . . . . . .
Attitude Filter . . . . . . . . . . . . . . . . . . . . . . . . . . . . . . . . . . . .
TrueHeave Data . . . . . . . . . . . . . . . . . . . . . . . . . . . . . . . . . .
Load Attitude/Navigation Data . . . . . . . . . . . . . . . . . . . . . . .
Sound Velocity Processing . . . . . . . . . . . . . . . . . . . . . . . . . . . .
SVP Files . . . . . . . . . . . . . . . . . . . . . . . . . . . . . . . . . . . . . . .
Sound Velocity Correction . . . . . . . . . . . . . . . . . . . . . . . . . .
View SVP positions . . . . . . . . . . . . . . . . . . . . . . . . . . . . . . .
Navigation . . . . . . . . . . . . . . . . . . . . . . . . . . . . . . . . . . . . . . . . .
Swath Cleaning. . . . . . . . . . . . . . . . . . . . . . . . . . . . . . . . . . . . .
Swath Filtering. . . . . . . . . . . . . . . . . . . . . . . . . . . . . . . . . . .
Apply Filters . . . . . . . . . . . . . . . . . . . . . . . . . . . . . . . . . .
Total Propagated Error . . . . . . . . . . . . . . . . . . . . . . . . . . . . . . .
Compute TPE. . . . . . . . . . . . . . . . . . . . . . . . . . . . . . . . . . . .
TPE Filtering. . . . . . . . . . . . . . . . . . . . . . . . . . . . . . . . . . . . .
Load Error Data . . . . . . . . . . . . . . . . . . . . . . . . . . . . . . . . . .
Update Backscatter. . . . . . . . . . . . . . . . . . . . . . . . . . . . . . . . . .
Single Beam Cleaning . . . . . . . . . . . . . . . . . . . . . . . . . . . . . . .
Single Beam Filtering . . . . . . . . . . . . . . . . . . . . . . . . . . . . . .
Moving Average Filter . . . . . . . . . . . . . . . . . . . . . . . . . . .
Depth . . . . . . . . . . . . . . . . . . . . . . . . . . . . . . . . . . . . . . .
Beam-to-Beam Slopes . . . . . . . . . . . . . . . . . . . . . . . . . .
CARIS HIPS and SIPS User’s Guide
204
205
206
207
208
210
211
212
213
213
215
217
217
219
221
223
224
225
228
229
230
230
233
234
235
236
240
242
243
243
245
246
246
xi
Apply Filters . . . . . . . . . . . . . . . . . . . . . . . . . . . . . . . . . .
Restart Cleaning . . . . . . . . . . . . . . . . . . . . . . . . . . . . . . . . . . . .
Delta Draft . . . . . . . . . . . . . . . . . . . . . . . . . . . . . . . . . . . . . . . . .
GPS Tide . . . . . . . . . . . . . . . . . . . . . . . . . . . . . . . . . . . . . . . . .
Merge . . . . . . . . . . . . . . . . . . . . . . . . . . . . . . . . . . . . . . . . . . . .
Quality Control . . . . . . . . . . . . . . . . . . . . . . . . . . . . . . . . . . . . .
QC Report - Step 1. . . . . . . . . . . . . . . . . . . . . . . . . . . . . . . .
QC Report - Step 2. . . . . . . . . . . . . . . . . . . . . . . . . . . . . . . .
QC Report - Step 3. . . . . . . . . . . . . . . . . . . . . . . . . . . . . . . .
Quality Control Statistics . . . . . . . . . . . . . . . . . . . . . . . . . . .
Side Scan Processes . . . . . . . . . . . . . . . . . . . . . . . . . . . . . . . .
Line Calibration . . . . . . . . . . . . . . . . . . . . . . . . . . . . . . . . . . . . .
xii
246
247
249
250
253
255
255
256
257
258
259
260
9
Navigation Editor . . . . . . . . . . . . . . . . . . . . . . . . . . . . . . 261
10
Attitude Editor . . . . . . . . . . . . . . . . . . . . . . . . . . . . . . . . 271
11
Sound Velocity Editor . . . . . . . . . . . . . . . . . . . . . . . . . . 287
Navigation Editor Interface . . . . . . . . . . . . . . . . . . . . . . . . . . . .
Line Interpolation . . . . . . . . . . . . . . . . . . . . . . . . . . . . . . . . . . .
Examine Navigation Data . . . . . . . . . . . . . . . . . . . . . . . . . . . . .
Reject, Accept and Query Data . . . . . . . . . . . . . . . . . . . . . . . .
Reject Data. . . . . . . . . . . . . . . . . . . . . . . . . . . . . . . . . . . . . .
Accept Data . . . . . . . . . . . . . . . . . . . . . . . . . . . . . . . . . . . . .
Query Data . . . . . . . . . . . . . . . . . . . . . . . . . . . . . . . . . . . . . .
Attitude Editor Interface . . . . . . . . . . . . . . . . . . . . . . . . . . . . . .
Display Options . . . . . . . . . . . . . . . . . . . . . . . . . . . . . . . . . .
Time . . . . . . . . . . . . . . . . . . . . . . . . . . . . . . . . . . . . . . . . . . .
Scale Data . . . . . . . . . . . . . . . . . . . . . . . . . . . . . . . . . . . . . .
Vertical view . . . . . . . . . . . . . . . . . . . . . . . . . . . . . . . . . . . . .
Other Display Options . . . . . . . . . . . . . . . . . . . . . . . . . . . . .
Colour Display . . . . . . . . . . . . . . . . . . . . . . . . . . . . . . . . . . .
Smooth Data . . . . . . . . . . . . . . . . . . . . . . . . . . . . . . . . . . . .
Cleaning Data . . . . . . . . . . . . . . . . . . . . . . . . . . . . . . . . . . . . . .
Reject data . . . . . . . . . . . . . . . . . . . . . . . . . . . . . . . . . . . . . .
Accept Data . . . . . . . . . . . . . . . . . . . . . . . . . . . . . . . . . . . . .
Query data . . . . . . . . . . . . . . . . . . . . . . . . . . . . . . . . . . . . . .
Query line . . . . . . . . . . . . . . . . . . . . . . . . . . . . . . . . . . . . . . .
Filter Sensor Data . . . . . . . . . . . . . . . . . . . . . . . . . . . . . . . .
Overview . . . . . . . . . . . . . . . . . . . . . . . . . . . . . . . . . . . . . . . . . .
Open an Existing File . . . . . . . . . . . . . . . . . . . . . . . . . . . . . .
Depth Scale . . . . . . . . . . . . . . . . . . . . . . . . . . . . . . . . . . . . .
Create a New SVP File . . . . . . . . . . . . . . . . . . . . . . . . . . . .
262
265
267
269
269
269
270
272
274
275
276
276
276
277
278
281
281
282
283
283
284
288
289
289
290
CARIS HIPS and SIPS User’s Guide
Options . . . . . . . . . . . . . . . . . . . . . . . . . . . . . . . . . . . . . . . . . . .
Show/hide toolbar. . . . . . . . . . . . . . . . . . . . . . . . . . . . . . . . .
Show/hide status bar . . . . . . . . . . . . . . . . . . . . . . . . . . . . . .
Edit SVP Data . . . . . . . . . . . . . . . . . . . . . . . . . . . . . . . . . . . . . .
Create New Profile . . . . . . . . . . . . . . . . . . . . . . . . . . . . . . . . . .
291
292
292
293
295
12
Swath Editor . . . . . . . . . . . . . . . . . . . . . . . . . . . . . . . . . . 297
13
Single Beam Editor . . . . . . . . . . . . . . . . . . . . . . . . . . . . 325
Overview . . . . . . . . . . . . . . . . . . . . . . . . . . . . . . . . . . . . . . . . . .
Swath Editor Interface. . . . . . . . . . . . . . . . . . . . . . . . . . . . . . . .
Plan View . . . . . . . . . . . . . . . . . . . . . . . . . . . . . . . . . . . . . . .
3-D View. . . . . . . . . . . . . . . . . . . . . . . . . . . . . . . . . . . . . . . .
Side View . . . . . . . . . . . . . . . . . . . . . . . . . . . . . . . . . . . . . . .
Rear View. . . . . . . . . . . . . . . . . . . . . . . . . . . . . . . . . . . . . . .
Profile View . . . . . . . . . . . . . . . . . . . . . . . . . . . . . . . . . . . . .
Amplitude View. . . . . . . . . . . . . . . . . . . . . . . . . . . . . . . . . . .
Data Display in Views. . . . . . . . . . . . . . . . . . . . . . . . . . . . . .
Swath Editor Display Options . . . . . . . . . . . . . . . . . . . . . . . . . .
Vertical Exaggeration . . . . . . . . . . . . . . . . . . . . . . . . . . . . . .
Specified Min-Max . . . . . . . . . . . . . . . . . . . . . . . . . . . . . . . .
Soundings . . . . . . . . . . . . . . . . . . . . . . . . . . . . . . . . . . . . . .
Colour By Depth . . . . . . . . . . . . . . . . . . . . . . . . . . . . . . . . . .
Examine Swath Data . . . . . . . . . . . . . . . . . . . . . . . . . . . . . . . .
Swath Coverage Outline . . . . . . . . . . . . . . . . . . . . . . . . . . .
Changing Track Lines . . . . . . . . . . . . . . . . . . . . . . . . . . . . .
Examine 3-D Data . . . . . . . . . . . . . . . . . . . . . . . . . . . . . . . .
Swath Cleaning. . . . . . . . . . . . . . . . . . . . . . . . . . . . . . . . . . . . .
Reject Data. . . . . . . . . . . . . . . . . . . . . . . . . . . . . . . . . . . . . .
Reject Swaths . . . . . . . . . . . . . . . . . . . . . . . . . . . . . . . . . . .
Accept Data . . . . . . . . . . . . . . . . . . . . . . . . . . . . . . . . . . . . .
Designated Soundings . . . . . . . . . . . . . . . . . . . . . . . . . . . . .
Query Data . . . . . . . . . . . . . . . . . . . . . . . . . . . . . . . . . . . . . .
Auto Cursor Mode . . . . . . . . . . . . . . . . . . . . . . . . . . . . . . . .
Middle-Mouse Button Selection . . . . . . . . . . . . . . . . . . . . . .
The Refraction Editor . . . . . . . . . . . . . . . . . . . . . . . . . . . . . . . .
Introduction . . . . . . . . . . . . . . . . . . . . . . . . . . . . . . . . . . . . . . . .
Display Options . . . . . . . . . . . . . . . . . . . . . . . . . . . . . . . . . .
Primary and Secondary Data . . . . . . . . . . . . . . . . . . . . . . . .
Change Sounding Depths . . . . . . . . . . . . . . . . . . . . . . . . . . . . .
Change Depths . . . . . . . . . . . . . . . . . . . . . . . . . . . . . . . . . .
Add Depths. . . . . . . . . . . . . . . . . . . . . . . . . . . . . . . . . . . . . .
Single Beam Cleaning . . . . . . . . . . . . . . . . . . . . . . . . . . . . . . .
Reject Data. . . . . . . . . . . . . . . . . . . . . . . . . . . . . . . . . . . . . .
Accept Data . . . . . . . . . . . . . . . . . . . . . . . . . . . . . . . . . . . . .
CARIS HIPS and SIPS User’s Guide
298
299
301
301
302
302
302
302
303
304
304
305
306
306
307
310
311
312
317
317
318
318
318
320
321
321
322
326
327
329
330
330
331
332
332
333
xiii
Query Data . . . . . . . . . . . . . . . . . . . . . . . . . . . . . . . . . . . . . . 333
Auto-Cursor Mode . . . . . . . . . . . . . . . . . . . . . . . . . . . . . . . . 334
Barcheck Function . . . . . . . . . . . . . . . . . . . . . . . . . . . . . . . . . . 335
xiv
14
Tide Editor. . . . . . . . . . . . . . . . . . . . . . . . . . . . . . . . . . . . 337
15
Field Sheets . . . . . . . . . . . . . . . . . . . . . . . . . . . . . . . . . . 347
16
Subset Editor . . . . . . . . . . . . . . . . . . . . . . . . . . . . . . . . . 373
Introduction . . . . . . . . . . . . . . . . . . . . . . . . . . . . . . . . . . . . . . . .
Editing Tide Data . . . . . . . . . . . . . . . . . . . . . . . . . . . . . . . . . . .
Create a New Tide File . . . . . . . . . . . . . . . . . . . . . . . . . . . . . . .
Options . . . . . . . . . . . . . . . . . . . . . . . . . . . . . . . . . . . . . . . . . . .
Exit the Tide Editor . . . . . . . . . . . . . . . . . . . . . . . . . . . . . . . . . .
Overview . . . . . . . . . . . . . . . . . . . . . . . . . . . . . . . . . . . . . . . . . .
Create a Field Sheet . . . . . . . . . . . . . . . . . . . . . . . . . . . . . . . . .
Open and Close Field Sheets . . . . . . . . . . . . . . . . . . . . . . .
Set Field Sheet Properties . . . . . . . . . . . . . . . . . . . . . . . . . .
CARIS Field Sheet Editor . . . . . . . . . . . . . . . . . . . . . . . . . . . . .
Tiling . . . . . . . . . . . . . . . . . . . . . . . . . . . . . . . . . . . . . . . . . . . . .
Open and Close Tiles. . . . . . . . . . . . . . . . . . . . . . . . . . . . . .
Set Tile Properties . . . . . . . . . . . . . . . . . . . . . . . . . . . . . . . .
Tile Display Query . . . . . . . . . . . . . . . . . . . . . . . . . . . . . . . .
Query Tiles . . . . . . . . . . . . . . . . . . . . . . . . . . . . . . . . . . . . . .
Profiles . . . . . . . . . . . . . . . . . . . . . . . . . . . . . . . . . . . . . . . . . . .
Create Profile . . . . . . . . . . . . . . . . . . . . . . . . . . . . . . . . . . . .
Display Properties . . . . . . . . . . . . . . . . . . . . . . . . . . . . . . . .
Export Profile . . . . . . . . . . . . . . . . . . . . . . . . . . . . . . . . . . . .
Display Profile . . . . . . . . . . . . . . . . . . . . . . . . . . . . . . . . . . .
Selected Soundings . . . . . . . . . . . . . . . . . . . . . . . . . . . . . . . . .
Sounding Colour Options . . . . . . . . . . . . . . . . . . . . . . . . . . .
Overview . . . . . . . . . . . . . . . . . . . . . . . . . . . . . . . . . . . . . . . . . .
Workflow . . . . . . . . . . . . . . . . . . . . . . . . . . . . . . . . . . . . . . . . . .
Subset Tiles . . . . . . . . . . . . . . . . . . . . . . . . . . . . . . . . . . . . . . .
Subset Tile Properties . . . . . . . . . . . . . . . . . . . . . . . . . . . . .
Subset Tile Tracking. . . . . . . . . . . . . . . . . . . . . . . . . . . . . . .
Subset Editor Interface . . . . . . . . . . . . . . . . . . . . . . . . . . . . . . .
Open Subset Editor . . . . . . . . . . . . . . . . . . . . . . . . . . . . . . .
Subset Editor Tab. . . . . . . . . . . . . . . . . . . . . . . . . . . . . . . . .
Toolbar . . . . . . . . . . . . . . . . . . . . . . . . . . . . . . . . . . . . . . . . .
View Subset Information . . . . . . . . . . . . . . . . . . . . . . . . . . .
Measure Distance . . . . . . . . . . . . . . . . . . . . . . . . . . . . . . . .
Colour Options . . . . . . . . . . . . . . . . . . . . . . . . . . . . . . . . . . .
338
340
342
343
345
348
349
352
353
354
355
356
357
359
361
362
362
363
368
370
371
371
374
375
376
377
379
380
380
381
384
384
385
386
CARIS HIPS and SIPS User’s Guide
Size and Resize Subset . . . . . . . . . . . . . . . . . . . . . . . . . . . .
The 3-D View . . . . . . . . . . . . . . . . . . . . . . . . . . . . . . . . . . . .
The 2-D View . . . . . . . . . . . . . . . . . . . . . . . . . . . . . . . . . . . .
Close Subset Editor . . . . . . . . . . . . . . . . . . . . . . . . . . . . . . .
Subsets and BASE Surfaces . . . . . . . . . . . . . . . . . . . . . . . . . .
Subset Cleaning . . . . . . . . . . . . . . . . . . . . . . . . . . . . . . . . . . . .
Reject . . . . . . . . . . . . . . . . . . . . . . . . . . . . . . . . . . . . . . . . . .
Accept . . . . . . . . . . . . . . . . . . . . . . . . . . . . . . . . . . . . . . . . .
Designated Soundings . . . . . . . . . . . . . . . . . . . . . . . . . . . . .
Outstanding . . . . . . . . . . . . . . . . . . . . . . . . . . . . . . . . . . . . .
Examined . . . . . . . . . . . . . . . . . . . . . . . . . . . . . . . . . . . . . . .
Query . . . . . . . . . . . . . . . . . . . . . . . . . . . . . . . . . . . . . . . . . .
17
387
389
393
396
397
398
398
399
399
400
400
400
BASE Surfaces . . . . . . . . . . . . . . . . . . . . . . . . . . . . . . . . 401
Overview . . . . . . . . . . . . . . . . . . . . . . . . . . . . . . . . . . . . . . . . . .
Range Weight. . . . . . . . . . . . . . . . . . . . . . . . . . . . . . . . . . . .
Uncertainty Weight . . . . . . . . . . . . . . . . . . . . . . . . . . . . . . . .
Swath Angle Weight . . . . . . . . . . . . . . . . . . . . . . . . . . . . . . .
BASE Surfaces and Weighted Grids . . . . . . . . . . . . . . . . . .
Create BASE Surface . . . . . . . . . . . . . . . . . . . . . . . . . . . . . . . .
BASE Surface (Step 1). . . . . . . . . . . . . . . . . . . . . . . . . . . . .
BASE Surface (Step 2). . . . . . . . . . . . . . . . . . . . . . . . . . . . .
BASE Surface (Step 3). . . . . . . . . . . . . . . . . . . . . . . . . . . . .
View BASE Surfaces . . . . . . . . . . . . . . . . . . . . . . . . . . . . . . . .
Properties . . . . . . . . . . . . . . . . . . . . . . . . . . . . . . . . . . . . . . . . .
View Surface Properties. . . . . . . . . . . . . . . . . . . . . . . . . . . .
Set Attribute Properties . . . . . . . . . . . . . . . . . . . . . . . . . . . .
Colour Map Editor . . . . . . . . . . . . . . . . . . . . . . . . . . . . . .
Colour Range Editor . . . . . . . . . . . . . . . . . . . . . . . . . . . .
Update BASE Surfaces. . . . . . . . . . . . . . . . . . . . . . . . . . . . . . .
BASE Surface Commands . . . . . . . . . . . . . . . . . . . . . . . . . . . .
Open. . . . . . . . . . . . . . . . . . . . . . . . . . . . . . . . . . . . . . . . . . .
Close . . . . . . . . . . . . . . . . . . . . . . . . . . . . . . . . . . . . . . . . . .
Recompute . . . . . . . . . . . . . . . . . . . . . . . . . . . . . . . . . . . . . .
Add to BASE Surface . . . . . . . . . . . . . . . . . . . . . . . . . . . . . .
Remove From BASE Surface. . . . . . . . . . . . . . . . . . . . . . . .
Interpolate BASE Surface . . . . . . . . . . . . . . . . . . . . . . . . . .
Delete . . . . . . . . . . . . . . . . . . . . . . . . . . . . . . . . . . . . . . . . . .
Finalize BASE Surface . . . . . . . . . . . . . . . . . . . . . . . . . . . . .
Combine . . . . . . . . . . . . . . . . . . . . . . . . . . . . . . . . . . . . . . . .
New Layer . . . . . . . . . . . . . . . . . . . . . . . . . . . . . . . . . . . . . .
QC Report . . . . . . . . . . . . . . . . . . . . . . . . . . . . . . . . . . . . . .
Surface Filtering . . . . . . . . . . . . . . . . . . . . . . . . . . . . . . . . . . . .
CARIS HIPS and SIPS User’s Guide
402
404
405
406
407
408
408
409
410
412
413
413
414
417
419
421
422
422
422
423
423
424
425
427
427
429
431
432
436
xv
xvi
18
CUBE Processing. . . . . . . . . . . . . . . . . . . . . . . . . . . . . . 437
19
Statistical Surface Cleaning . . . . . . . . . . . . . . . . . . . . . 457
20
Lidar Data . . . . . . . . . . . . . . . . . . . . . . . . . . . . . . . . . . . . 469
21
Calibration. . . . . . . . . . . . . . . . . . . . . . . . . . . . . . . . . . . . 481
Introduction . . . . . . . . . . . . . . . . . . . . . . . . . . . . . . . . . . . . . . . .
Generating CUBE Surfaces . . . . . . . . . . . . . . . . . . . . . . . . . . .
CUBE Surface (Step 1) . . . . . . . . . . . . . . . . . . . . . . . . . . . .
CUBE Surface (Step 2) . . . . . . . . . . . . . . . . . . . . . . . . . . . .
CUBE Surface (Step 3) . . . . . . . . . . . . . . . . . . . . . . . . . . . .
CUBE Surface (Step 4) . . . . . . . . . . . . . . . . . . . . . . . . . . . .
Advanced Options . . . . . . . . . . . . . . . . . . . . . . . . . . . . . . . .
Hypothesis Editing . . . . . . . . . . . . . . . . . . . . . . . . . . . . . . . . . .
Nominate Alternative Hypotheses . . . . . . . . . . . . . . . . . . . .
Hypotheses Cleaning . . . . . . . . . . . . . . . . . . . . . . . . . . . . . .
Update CUBE Surface . . . . . . . . . . . . . . . . . . . . . . . . . . . . .
Overview . . . . . . . . . . . . . . . . . . . . . . . . . . . . . . . . . . . . . . . . . .
Tiling. . . . . . . . . . . . . . . . . . . . . . . . . . . . . . . . . . . . . . . . . . .
Surface Cleaning . . . . . . . . . . . . . . . . . . . . . . . . . . . . . . . . .
Creating Tiles and Cleaning Data . . . . . . . . . . . . . . . . . . . . . . .
Query Options. . . . . . . . . . . . . . . . . . . . . . . . . . . . . . . . . . . . . .
Query Tile Surface . . . . . . . . . . . . . . . . . . . . . . . . . . . . . . . .
Query Tile Soundings. . . . . . . . . . . . . . . . . . . . . . . . . . . . . .
Tile Histogram . . . . . . . . . . . . . . . . . . . . . . . . . . . . . . . . . . . . . .
Overview . . . . . . . . . . . . . . . . . . . . . . . . . . . . . . . . . . . . . . . . . .
Sounding Quality and Status Flags . . . . . . . . . . . . . . . . . . .
Lidar Data in HIPS . . . . . . . . . . . . . . . . . . . . . . . . . . . . . . . . . .
Toolbar . . . . . . . . . . . . . . . . . . . . . . . . . . . . . . . . . . . . . . . . .
Waveforms View . . . . . . . . . . . . . . . . . . . . . . . . . . . . . . . . .
Selecting Data. . . . . . . . . . . . . . . . . . . . . . . . . . . . . . . . . . . . . .
Selecting Detected and Alternative Data . . . . . . . . . . . . . . .
Cleaning Sounding Data . . . . . . . . . . . . . . . . . . . . . . . . . . . . . .
Reject Data. . . . . . . . . . . . . . . . . . . . . . . . . . . . . . . . . . . . . .
Accept data . . . . . . . . . . . . . . . . . . . . . . . . . . . . . . . . . . . . .
Overview . . . . . . . . . . . . . . . . . . . . . . . . . . . . . . . . . . . . . . . . . .
Workflow . . . . . . . . . . . . . . . . . . . . . . . . . . . . . . . . . . . . . . . . . .
Create Subsets in HDCS . . . . . . . . . . . . . . . . . . . . . . . . . . . . .
Perform Calibration . . . . . . . . . . . . . . . . . . . . . . . . . . . . . . . . . .
Sample Calibration Procedure . . . . . . . . . . . . . . . . . . . . . . . . .
438
441
441
442
443
444
446
449
452
454
455
458
458
459
461
464
464
465
466
470
470
472
473
473
475
477
479
479
479
482
483
484
486
488
CARIS HIPS and SIPS User’s Guide
22
Side Scan Data . . . . . . . . . . . . . . . . . . . . . . . . . . . . . . . . 491
Overview . . . . . . . . . . . . . . . . . . . . . . . . . . . . . . . . . . . . . . . . . .
Workflow. . . . . . . . . . . . . . . . . . . . . . . . . . . . . . . . . . . . . . . .
Side Scan Editor . . . . . . . . . . . . . . . . . . . . . . . . . . . . . . . . . . . .
Side Scan Editor Interface . . . . . . . . . . . . . . . . . . . . . . . . . .
Side Scan Editor window . . . . . . . . . . . . . . . . . . . . . . . .
Side Scan Editor controls . . . . . . . . . . . . . . . . . . . . . . . .
Toolbar . . . . . . . . . . . . . . . . . . . . . . . . . . . . . . . . . . . . . . . . .
Navigate in Side Scan Editor . . . . . . . . . . . . . . . . . . . . . . . .
Zoom . . . . . . . . . . . . . . . . . . . . . . . . . . . . . . . . . . . . . . . . . .
Selection. . . . . . . . . . . . . . . . . . . . . . . . . . . . . . . . . . . . . . . .
Colour Mapping . . . . . . . . . . . . . . . . . . . . . . . . . . . . . . . . . .
Measure Distance . . . . . . . . . . . . . . . . . . . . . . . . . . . . . . . .
Measure Shadow . . . . . . . . . . . . . . . . . . . . . . . . . . . . . . . . .
Edit Side Scan Data . . . . . . . . . . . . . . . . . . . . . . . . . . . . . . .
Side Scan Editor and Swath Editor . . . . . . . . . . . . . . . . . . .
Signal Display Window . . . . . . . . . . . . . . . . . . . . . . . . . . . . . . .
Processing . . . . . . . . . . . . . . . . . . . . . . . . . . . . . . . . . . . . . . . .
Recompute Towfish Navigation . . . . . . . . . . . . . . . . . . . . . .
Digitizing Sonar Altitude . . . . . . . . . . . . . . . . . . . . . . . . . . . .
Automatic digitizing . . . . . . . . . . . . . . . . . . . . . . . . . . . . .
Manual digitizing . . . . . . . . . . . . . . . . . . . . . . . . . . . . . . .
Interpolate Selection . . . . . . . . . . . . . . . . . . . . . . . . . . . .
Slant Range Correction . . . . . . . . . . . . . . . . . . . . . . . . . . . .
Apply Slant Range Correction . . . . . . . . . . . . . . . . . . . . . . .
Revert/Reapply. . . . . . . . . . . . . . . . . . . . . . . . . . . . . . . . . . .
Beam Pattern Correction . . . . . . . . . . . . . . . . . . . . . . . . . . .
Create Beam Pattern Correction File . . . . . . . . . . . . . . .
Apply Beam Pattern Correction . . . . . . . . . . . . . . . . . . .
Angle-Varying Gain . . . . . . . . . . . . . . . . . . . . . . . . . . . . . . .
Time-Varying Gain . . . . . . . . . . . . . . . . . . . . . . . . . . . . . . . .
Despeckle. . . . . . . . . . . . . . . . . . . . . . . . . . . . . . . . . . . . . . .
Contacts . . . . . . . . . . . . . . . . . . . . . . . . . . . . . . . . . . . . . . . . . .
Create Contacts . . . . . . . . . . . . . . . . . . . . . . . . . . . . . . . . . .
Editing Contacts . . . . . . . . . . . . . . . . . . . . . . . . . . . . . . . . . .
Recompute Contact Position . . . . . . . . . . . . . . . . . . . . . . . .
Mosaics . . . . . . . . . . . . . . . . . . . . . . . . . . . . . . . . . . . . . . . . . . .
Create Mosaics . . . . . . . . . . . . . . . . . . . . . . . . . . . . . . . . . .
Create Mosaic - Step 1 . . . . . . . . . . . . . . . . . . . . . . . . . .
Create Mosaic - Step 2 . . . . . . . . . . . . . . . . . . . . . . . . . .
Create Mosaic - Step 3 . . . . . . . . . . . . . . . . . . . . . . . . . .
Create Mosaic - Step 4 . . . . . . . . . . . . . . . . . . . . . . . . . .
Create Mosaic - Step 5 . . . . . . . . . . . . . . . . . . . . . . . . . .
Mosaic Attributes . . . . . . . . . . . . . . . . . . . . . . . . . . . . . . . . .
Intensity Properties. . . . . . . . . . . . . . . . . . . . . . . . . . . . . . . .
Add To Mosaic . . . . . . . . . . . . . . . . . . . . . . . . . . . . . . . . . . .
Remove From Mosaic . . . . . . . . . . . . . . . . . . . . . . . . . . . . .
Recompute . . . . . . . . . . . . . . . . . . . . . . . . . . . . . . . . . . . . . .
Image Classification . . . . . . . . . . . . . . . . . . . . . . . . . . . . . . .
SIPS Template Wizard . . . . . . . . . . . . . . . . . . . . . . . . . . . . . . .
CARIS HIPS and SIPS User’s Guide
492
492
494
495
496
497
500
501
503
504
507
509
510
510
513
515
518
519
521
522
524
525
525
526
528
529
529
533
534
535
538
539
539
542
544
545
546
546
547
549
550
551
552
553
554
554
555
555
557
xvii
SIPS Template Wizard (Step 1) . . . . . . . . . . . . . . . . . . . . . .
SIPS Template Wizard (Step 2) . . . . . . . . . . . . . . . . . . . . . .
SIPS Template Wizard (Step 3) . . . . . . . . . . . . . . . . . . . . . .
SIPS Template Wizard (Step 4) . . . . . . . . . . . . . . . . . . . . . .
SIPS Template Wizard (Step 5) . . . . . . . . . . . . . . . . . . . . . .
SIPS Template Wizard (Step 6) . . . . . . . . . . . . . . . . . . . . . .
xviii
557
559
560
561
562
563
23
Batch Processing . . . . . . . . . . . . . . . . . . . . . . . . . . . . . . 565
24
Create Publications . . . . . . . . . . . . . . . . . . . . . . . . . . . . 573
25
Export Data . . . . . . . . . . . . . . . . . . . . . . . . . . . . . . . . . . . 585
Overview . . . . . . . . . . . . . . . . . . . . . . . . . . . . . . . . . . . . . . . . . .
Open Batch Processor . . . . . . . . . . . . . . . . . . . . . . . . . . . . .
Running the Batch Processor . . . . . . . . . . . . . . . . . . . . . . . . . .
Open HBP File . . . . . . . . . . . . . . . . . . . . . . . . . . . . . . . . . . .
New HBP File . . . . . . . . . . . . . . . . . . . . . . . . . . . . . . . . . . . .
Save/Save As. . . . . . . . . . . . . . . . . . . . . . . . . . . . . . . . . . . .
Select Process . . . . . . . . . . . . . . . . . . . . . . . . . . . . . . . . . . .
Process Data . . . . . . . . . . . . . . . . . . . . . . . . . . . . . . . . . . . .
Batch Processor Tasks . . . . . . . . . . . . . . . . . . . . . . . . . . . . . . .
Overview . . . . . . . . . . . . . . . . . . . . . . . . . . . . . . . . . . . . . . . . . .
Publication utilities . . . . . . . . . . . . . . . . . . . . . . . . . . . . . . . .
Open a Template . . . . . . . . . . . . . . . . . . . . . . . . . . . . . . . . .
Apply Image Settings . . . . . . . . . . . . . . . . . . . . . . . . . . . . . .
Apply Scale Bar settings . . . . . . . . . . . . . . . . . . . . . . . . . . .
Enter text values. . . . . . . . . . . . . . . . . . . . . . . . . . . . . . . . . .
Publication Viewer . . . . . . . . . . . . . . . . . . . . . . . . . . . . . . . . . .
Publication Viewer commands . . . . . . . . . . . . . . . . . . . . . . .
Template Editor. . . . . . . . . . . . . . . . . . . . . . . . . . . . . . . . . . . . .
Introduction . . . . . . . . . . . . . . . . . . . . . . . . . . . . . . . . . . . . . . . .
Select Format (Step 1) . . . . . . . . . . . . . . . . . . . . . . . . . . . . . . .
Select Files (Step 2) . . . . . . . . . . . . . . . . . . . . . . . . . . . . . . . . .
BASE Surface To ASCII . . . . . . . . . . . . . . . . . . . . . . . . . . . . . .
BASE Surface to ASCII (Step 3) . . . . . . . . . . . . . . . . . . . . .
BASE Surface To ASCII (Step 4) . . . . . . . . . . . . . . . . . . . . .
BASE Surface to BAG . . . . . . . . . . . . . . . . . . . . . . . . . . . . . . .
BASE Surface to BAG (Step 3) . . . . . . . . . . . . . . . . . . . . . .
BASE Surface to BAG (Step 4) . . . . . . . . . . . . . . . . . . . . . .
BASE Surface To Image . . . . . . . . . . . . . . . . . . . . . . . . . . . . . .
BASE Surface to Image (Step 3) . . . . . . . . . . . . . . . . . . . . .
Contacts . . . . . . . . . . . . . . . . . . . . . . . . . . . . . . . . . . . . . . . . . .
Contacts (Step 3) . . . . . . . . . . . . . . . . . . . . . . . . . . . . . . . . .
566
566
568
568
568
568
569
570
571
574
574
576
577
578
579
580
580
583
586
588
589
591
591
592
593
593
594
595
595
597
597
CARIS HIPS and SIPS User’s Guide
Contacts (Step 4) . . . . . . . . . . . . . . . . . . . . . . . . . . . . . . . . .
GSF to CARIS Map/HOB . . . . . . . . . . . . . . . . . . . . . . . . . . . . .
GSF to CARIS/HOB (Step 3) . . . . . . . . . . . . . . . . . . . . . . . .
GSF to CARIS (Step 4) . . . . . . . . . . . . . . . . . . . . . . . . . . . .
GSF to HOB (Step 4) . . . . . . . . . . . . . . . . . . . . . . . . . . . . . .
HIPS Tide to ASCII . . . . . . . . . . . . . . . . . . . . . . . . . . . . . . . . . .
HIPS Tide to ASCII (Step 3). . . . . . . . . . . . . . . . . . . . . . . . .
HIPS To ASCII . . . . . . . . . . . . . . . . . . . . . . . . . . . . . . . . . . . . .
HIPS to ASCII (Step 3). . . . . . . . . . . . . . . . . . . . . . . . . . . . .
HIPS to ASCII (Step 4). . . . . . . . . . . . . . . . . . . . . . . . . . . . .
HIPS To ASCII (Step 5) . . . . . . . . . . . . . . . . . . . . . . . . . . . .
HIPS To CARIS Map . . . . . . . . . . . . . . . . . . . . . . . . . . . . . . . .
HIPS to CARIS (Step 3) . . . . . . . . . . . . . . . . . . . . . . . . . . . .
HIPS to CARIS (Step 4) . . . . . . . . . . . . . . . . . . . . . . . . . . . .
HIPS to CARIS (Step 5) . . . . . . . . . . . . . . . . . . . . . . . . . . . .
HIPS To GSF . . . . . . . . . . . . . . . . . . . . . . . . . . . . . . . . . . . . . .
HIPS to GSF (Step 3). . . . . . . . . . . . . . . . . . . . . . . . . . . . . .
HIPS To HOB . . . . . . . . . . . . . . . . . . . . . . . . . . . . . . . . . . . . . .
HIPS to HOB (Step 3) . . . . . . . . . . . . . . . . . . . . . . . . . . . . .
HIPS to HOB (Step 4) . . . . . . . . . . . . . . . . . . . . . . . . . . . . .
HIPS To HTF . . . . . . . . . . . . . . . . . . . . . . . . . . . . . . . . . . . . . .
HIPS to HTF . . . . . . . . . . . . . . . . . . . . . . . . . . . . . . . . . . . . .
HIPS to HTF . . . . . . . . . . . . . . . . . . . . . . . . . . . . . . . . . . . . .
SIPS To UNISIPS . . . . . . . . . . . . . . . . . . . . . . . . . . . . . . . . . . .
SIPS TO UNISIPS (Step 3) . . . . . . . . . . . . . . . . . . . . . . . . .
Mosaic To Image . . . . . . . . . . . . . . . . . . . . . . . . . . . . . . . . . . .
Mosaic to Image (Step 3) . . . . . . . . . . . . . . . . . . . . . . . . . . .
Projection . . . . . . . . . . . . . . . . . . . . . . . . . . . . . . . . . . . . . . . . .
Export . . . . . . . . . . . . . . . . . . . . . . . . . . . . . . . . . . . . . . . . . . . .
599
600
600
602
603
604
604
605
605
606
607
608
608
610
611
612
612
613
613
614
615
616
617
618
618
619
619
620
621
A
HIPS Status Flags. . . . . . . . . . . . . . . . . . . . . . . . . . . . . . 623
B
Generic Data Parser . . . . . . . . . . . . . . . . . . . . . . . . . . . . 627
Status Flags and Values . . . . . . . . . . . . . . . . . . . . . . . . . . . . . . 624
Introduction . . . . . . . . . . . . . . . . . . . . . . . . . . . . . . . . . . . . . . . .
Data Parsing Components . . . . . . . . . . . . . . . . . . . . . . . . . .
Configuration File . . . . . . . . . . . . . . . . . . . . . . . . . . . . . . . . . . .
Open a Configuration File . . . . . . . . . . . . . . . . . . . . . . . . . .
New Configuration Files . . . . . . . . . . . . . . . . . . . . . . . . . . . .
Save a Configuration File . . . . . . . . . . . . . . . . . . . . . . . . . . .
Raw Data Files . . . . . . . . . . . . . . . . . . . . . . . . . . . . . . . . . . . . .
Data Types . . . . . . . . . . . . . . . . . . . . . . . . . . . . . . . . . . . . . . . .
File Header. . . . . . . . . . . . . . . . . . . . . . . . . . . . . . . . . . . . . .
File Date . . . . . . . . . . . . . . . . . . . . . . . . . . . . . . . . . . . . . . . .
Time Stamp . . . . . . . . . . . . . . . . . . . . . . . . . . . . . . . . . . . . .
CARIS HIPS and SIPS User’s Guide
628
629
631
631
632
632
633
635
636
636
637
xix
Sound Velocity . . . . . . . . . . . . . . . . . . . . . . . . . . . . . . . . . . .
Depth . . . . . . . . . . . . . . . . . . . . . . . . . . . . . . . . . . . . . . . . . .
Navigation . . . . . . . . . . . . . . . . . . . . . . . . . . . . . . . . . . . . . .
Attitude/Navigation/Tide . . . . . . . . . . . . . . . . . . . . . . . . . . . .
Event . . . . . . . . . . . . . . . . . . . . . . . . . . . . . . . . . . . . . . . . . .
Generic Data Parser Wizard . . . . . . . . . . . . . . . . . . . . . . . . . . .
xx
637
638
638
639
640
641
C
Tide File Formats . . . . . . . . . . . . . . . . . . . . . . . . . . . . . . 647
D
Contact File Formats . . . . . . . . . . . . . . . . . . . . . . . . . . . 657
Overview . . . . . . . . . . . . . . . . . . . . . . . . . . . . . . . . . . . . . . . . . .
Tide files (*.tid) . . . . . . . . . . . . . . . . . . . . . . . . . . . . . . . . . . . . .
COWLIS . . . . . . . . . . . . . . . . . . . . . . . . . . . . . . . . . . . . . . . . . .
NOS Preliminary Tide Data. . . . . . . . . . . . . . . . . . . . . . . . . . . .
NOS Final Tide . . . . . . . . . . . . . . . . . . . . . . . . . . . . . . . . . . . . .
Tide Zone Definition Files . . . . . . . . . . . . . . . . . . . . . . . . . . . . .
Introduction . . . . . . . . . . . . . . . . . . . . . . . . . . . . . . . . . . . . . . . .
ContactLine . . . . . . . . . . . . . . . . . . . . . . . . . . . . . . . . . . . . . . . .
ContactSingle . . . . . . . . . . . . . . . . . . . . . . . . . . . . . . . . . . . . . .
ContactMulti . . . . . . . . . . . . . . . . . . . . . . . . . . . . . . . . . . . . . . .
ContactMultiPoints . . . . . . . . . . . . . . . . . . . . . . . . . . . . . . . . . .
648
649
650
651
652
653
658
659
660
662
664
CARIS HIPS and SIPS User’s Guide
1
1. Introduction
Purpose of HIPS and SIPS
HIPS and SIPS are designed to receive bathymetric and side scan
sonar data from a variety of industry standard data-logging
formats. HIPS and SIPS contain tools for interactively and
automatically identifying bathymetric outliers. Also, there is a
wide range of proven and powerful algorithms for applying valueadded processes to the data. The result of all these operations is
a clean and final dataset that is ready for the creation of wide
range of data products available within the HIPS and SIPS
software and other integrated CARIS products.
2
•
The HIPS and SIPS products share a common Windows
interface containing editors for vessel, attitude, navigation,
single beam bathymetry, swath bathymetry, side scan sonar,
and other data sensors. The program also contains a
georeferenced project view window for displaying the spatial
location of these observed data with other georeferenced
data. Examples include orthophotos, raster charts, CARIS
vector map files, and S-57 Edition 3.1 data.
•
The products also share a common application program
called the CARIS Field Sheet Editor (FSE). This module
performs the tasks necessary to generate finished field
sheets that can be used for presentation. FSE can generate
contours and make shoal soundings selections. It can also
add cartographic data to the field sheet and define a
customized plot layout.
CARIS HIPS and SIPS User Guide
Development Partners
The development of a modern and powerful bathymetric and side
scan sonar processing system was made possible through the
cooperation of several organizations:
•
The Canadian Hydrographic Service (CHS)
•
The Ocean Mapping Group of the University of New
Brunswick
•
The National Oceanic and Atmospheric Administration
(NOAA)
•
University of New Hampshire
CARIS HIPS and SIPS User Guide
3
Design Principles
HIPS and SIPS are the result of an effort to develop software
tools that efficiently process large quantities of data being
produced by modern bathymetric and side scan sonar systems.
Underlying the design are a number of principles:
4
•
Retain all collected information without thinning measured
data.
•
Ensure cleaned data is quantitatively correct.
•
Measured quantities should not be unreasonably altered
(e.g., depths should not be smoothed) during cleaning.
•
Offer fast, automatic algorithms. This “power tools” approach
can reliably clean large quantities of measurements in a
short time where the nature of errors is well understood and
where it can be automatically determined what
measurements are in error.
•
Allow the hydrographer to check or override the automatic
tools using interactive methods. This can be useful when
confronted with data whose errors are not easily modelled.
As part of this approach, powerful visualization techniques
let the hydrographer quickly spot potential problems.
•
Supply statistical and reporting functions to allow the
hydrographer to control the quality of cleaning.
•
Provide a clean, intuitive Graphical User Interface (GUI) to
make the cleaning procedure efficient, interesting and stress
free.
•
Develop a generic data structure for measurements, which
can accommodate all known measurement types and which
is efficient for the cleaning procedure.
•
Efficiently transfer cleaned data to a hydrographic database,
retaining all required information about the survey and its
soundings.
•
Provide a wide range of output products.
CARIS HIPS and SIPS User Guide
Licensing
HIPS and SIPS are divided into three distinct products, each
with its own license. You can purchase the product with the
functionality best suited to your situation. Below is a table that
outlines each licensing level and the options that are included
with each level.
Product
HIPS Singlebeam
HIPS Multibeam
Professional
SIPS Professional
Supported Formats
Data Cleaning
Data Processing
•
•
•
•
•
• Interactive single beam
depth cleaning
• Automatic single beam
spike filters
• Subset area cleaning
• Automatic TPE filtering
• tide zoning,
• sound velocity corrections
• batch processing
HIPS Singlebeam plus
• Elac
• Furuno
• LADS
• Seabeam
• Seafalcon
• Simrad
• UNBReson
• XTF
HIPS Singlebeam plus
• interactive swath cleaning
• automatic swath filters
• refraction repair,
• integrated side scan display
• 3-D subset area cleaning
• statistical surface cleaning
HIPS Singlebeam plus
• tide zoning,
• sound velocity corrections
• BASE surfaces
•
•
•
•
•
•
•
•
•
•
•
• side scan viewing and
cleaning
• digitize towfish altitude
• Recompute towfish navigation
• slant-range correction
• mosaics
• generate side scan contacts
Atlas
GSF
Hypack
Winfrog
generic ASCII data
Atlas
CMAX
Coda
EdgeTech
MarineSonics
Qmips
Seabeam
Seafalcon
SEGY
Simrad
XTF
All HIPS and SIPS products include the following features:
•
vessel configuration
•
tide/sound velocity preparation
•
attitude/navigation cleaning
•
GPS RTK tide
•
background displays
•
variable depth tiling
•
contouring
•
plotting
CARIS HIPS and SIPS User Guide
5
HIPS I/O Library
HIPS and SIPS processes hydrographic data from raw data to
finished products by using a number of built-in applications.
These applications meet the requirements for most hydrographic
agencies. Some users, however, might wish to process the data
using external or customized applications, including external
data viewers and statistical algorithms. To satisfy these needs, a
separate software development package called the HIPS and
SIPS I/O Library can be purchased. This library is a collection of
basic functions that let you extract data from the HIPS and SIPS
format or create new datasets. You can also update existing files.
6
CARIS HIPS and SIPS User Guide
2
2.
HIPS and SIPS Interface
HIPS and SIPS Interface: Opening HIPS and SIPS
Opening HIPS and SIPS
1. To open HIPS from the Windows interface, select Start > Programs >
CARIS > HIPS and SIPS 6.1 > CARIS HIPS and SIPS
During installation you were prompted to place a HIPS
icon on the desktop. If you selected this option you can
then open HIPS and SIPS by double-clicking the icon.
8
CARIS HIPS and SIPS User’s Guide
HIPS and SIPS Interface: Configuration Report
Configuration Report
The configuration report is a text file containing a list of program,
environment and system resources used by HIPS and SIPS.
1. From the Windows main menu, select Start > Caris >
Utilities > Configuration Reporter.
The Configuration Reporter is displayed.
The CARIS Product Configuration Reporter contains a list of
CARIS products already installed on your computer. This list is
inactive until you select a path and name for the configuration
report
2. Type a file path and name for the configuration report file, or click
Browse and select a file path and type a name.
The list of CARIS products is now active.
3. Select HIPS and SIPS (version number) from the list.
4. Click Create to create a report in the selected folder, or click
Email Report to create the report and send it as an email attachment
to CARIS support.
The Configuration Report contains the following information:
•
version program files
•
HIPS and SIPS environment settings
•
Field Sheet Editor environment settings
•
CARIS kernel registry
•
system information
•
system and user’s environment
CARIS licensing report
CARIS HIPS and SIPS User’s Guide
9
HIPS and SIPS Interface: Main Display
Main Display
The interface has four windows:
Control window
Properties window
•
Display window
•
Worksheet window
•
Properties window
•
Control window
Display window
Worksheet window
Status bar
The windows can be displayed, hidden, or resized and moved to
another location (see “REPOSITION AND RESIZE WINDOWS” ON PAGE 22).
The interface includes toolbars (see “TOOLBARS” ON PAGE 24) and a
status bar (see “STATUS BAR” ON PAGE 23).
10
CARIS HIPS and SIPS User’s Guide
HIPS and SIPS Interface: Display Window
Display Window
The Display window shows a graphical representation of the
survey area.
Tools
Menu
1. Select the Display window command.
Window > Display
You can perform the following functions in this window:
•
select track lines (see “SELECT SURVEY LINES” ON PAGE 219)
•
zoom and pan data (see “ZOOM” ON PAGE 37 and “PAN” ON
PAGE 39)
•
open graphic files (see “OPEN BACKGROUND DATA” ON PAGE 31)
and S-57 data (see “DISPLAY S-57 DATA” ON PAGE 34)
•
close track lines (see “CLOSE A PROJECT” ON PAGE 72)
•
edit navigation data (see “EXAMINE NAVIGATION DATA” ON
PAGE 267).
•
define a field sheet area (see “CREATE A FIELD SHEET” ON
PAGE 349).
•
save screen captures of the display in the window (see
“SCREEN CAPTURES” ON PAGE 47)
For options for the display and colour features for the ship and
towfish track lines see “DISPLAY WINDOW” ON PAGE 78.
CARIS HIPS and SIPS User’s Guide
11
HIPS and SIPS Interface: Control Window
Control Window
The Control window is divided into three tabs: the Project tab, the
Session tab, and the Extended Query tab.
Window > Control
Tools
Menu
1. Select the Control window command.
The Project tab displays the currently open project files. Files
are organized in a Project-Vessel-Day-Line hierarchy.
Expand a file tree by clicking the plus sign (+) beside a folder.
You can perform the following operations in this tab:
•
open and close lines (see “CLOSE A PROJECT” ON PAGE 72)
•
select track lines (see “SELECT SURVEY LINES” ON PAGE 219)
The Session tab lists layers that are open in the Session. By
selecting or clearing layer check boxes, you can control what is
viewed in the Display window.
Examples of layers include field sheets, BASE Surfaces,
background data (CARIS maps and images), and field sheet
products such as contours, selected soundings, tiles, etc.
The Session tab lists the order that objects are drawn to the
Display window. Objects are drawn in order, from top to bottom,
as they appear in the Session tab. You can change the draw order
by dragging an object to another position on the list.
The Extended Query tab displays totals for the selected data.
For example, the total rejected soundings for a line.
Editor tab
12
The Control window is also used in conjunction with HIPS and
SIPS editors
CARIS HIPS and SIPS User’s Guide
HIPS and SIPS Interface: Control Window
You can perform the following functions in this window
(depending on the editor that is open at the time):
•
modify Swath Editor windows (see “SWATH EDITOR” ON
297)
PAGE
•
repair refraction problems (see “THE REFRACTION EDITOR” ON
322)
PAGE
•
display field sheet information (see “OPEN AND CLOSE FIELD
SHEETS” ON PAGE 352)
•
display BASE surface information (see “OPEN” ON PAGE 422)
•
filter attitude data (see “FILTER SENSOR DATA” ON PAGE 284)
•
examine navigation data (see “EXAMINE NAVIGATION DATA” ON
PAGE 267).
•
control the display of subset data (see “SUBSET EDITOR
INTERFACE” ON PAGE 380)
•
control the Side Scan Editor display (see “SIDE SCAN EDITOR” ON
494)
PAGE
•
control contact information (see “CONTACTS” ON PAGE 539).
CARIS HIPS and SIPS User’s Guide
13
HIPS and SIPS Interface: Properties Window
Properties Window
The Properties window controls the display properties of layers
such as colour display, filtering options, etc. The Properties
window can undocked and moved around the interface.
The display options shown in the window are determined by the
selected layer type (not all layers contain display properties).
1. Select the Properties window command.
2. Select a layer in the Session tab of the Control window.
Window > Properties
The display properties for that layer are shown in the window.
Pop-up
Tools
Menu
Properties window
Properties
Example of an undocked Properties window for a BASE Surface attribute layer.
3. Click Apply to implement the property changes.
See the following topics for more information on using the
Properties window with specific layers.
14
•
“SET TRACK LINE PROPERTIES” ON PAGE 30
•
“SET IMAGE PROPERTIES” ON PAGE 32
•
“SET FIELD SHEET PROPERTIES” ON PAGE 353
•
“SET TILE PROPERTIES” ON PAGE 357
•
“VIEW SURFACE PROPERTIES” ON PAGE 413
•
“SET ATTRIBUTE PROPERTIES” ON PAGE 414
CARIS HIPS and SIPS User’s Guide
HIPS and SIPS Interface: Worksheet Window
Worksheet Window
Tools
Menu
1. Select the Worksheet window command.
Window > Worksheet
The Worksheet window is divided into five tabs:
•
Query (for viewing information on selected data)
•
Output View (for viewing the result of a command or
process).
•
Quality Control (for displaying quality control reports)
•
Graphs (for displaying graph information)
•
Profile (for displaying cross-sectional views of the BASE
Surface or Tile area).
The Query and Output are visible all the time while HIPS and
SIPS is open. The Quality Control, Graph, Profile tabs are only
displayed as needed.
Output Tab
In this tab you can view the results of a command or process.
Information in this tab is read-only and cannot be modified.
If you want to remove the information in this tab, right-click the
mouse and select Clear from the pop-up menu.
CARIS HIPS and SIPS User’s Guide
15
HIPS and SIPS Interface: Worksheet Window
Query Tab
The Query tab is used for viewing selected data in the Display
window.
The data is shown in tabular format. You can invert the order of
data by double-clicking a column header.
The type of data fields displayed in the Worksheet window and
the order in which these fields are displayed is controlled by the
Query Fields dialog box.
1. Right-click the Query tab in Worksheet window and select the Query
Fields command from the pop-up menu.
The Query Fields dialog box is open.
The data types listed in the dialog box are determined by the
editor currently open in the application.
2. To add data fields to the Worksheet window, select a data type in the
Available Fields list and click the Add button.
The data field is now listed in the Active Fields list.
16
CARIS HIPS and SIPS User’s Guide
HIPS and SIPS Interface: Worksheet Window
3. To remove a data field from the Worksheet window, select a data field
in the Active Fields list and click the Remove button.
The data field is now in the Available Fields list.
4. To change the display order of data, select a data field in the Active
Fields list and click the up or down arrow buttons.
The data field is now in a different position on the list.
5. Click OK.
The fields in the Active Fields list are visible in the Worksheet
window. The order in which the fields are displayed is
determined by the order in the Active Fields list.
Graph data
Data shown in the Query and QC Report tabs can also displayed
in graphical format. See “GRAPH TAB” ON PAGE 18
Query options
The following options are also available in the Query tab.
1. To save the data as a text file, position the cursor in the Query tab,
right-click the mouse and select Save As from the menu.
Edit > Copy
Key Pop-up
3. To copy data, position the cursor over the field you want to copy (or
right-click the mouse and use the Select All command to highlight all
data) and use the Copy command.
4. To remove row(s) from the table, select the rows so they are
highlighted, right-click the mouse in tab and select Remove Selected
from the pop-up menu.
Tool
Menu
2. To print the data, position the cursor in the Query tab, right-click the
mouse and select Print from the menu.
Copy
<Ctrl+C>
CARIS HIPS and SIPS User’s Guide
17
HIPS and SIPS Interface: Worksheet Window
Graph Tab
The Graph tab displays tables in the Query and QC Reports tabs
in graphical format.
The graph can be rotated. Zoom and pan operations can also be
applied. A legend is automatically generated when more than one
data type is displayed.
Create Graph
1. While the cursor is in the Query and QC Report tabs of the Worksheet
window, right-click the mouse and select New Graph from the pop-up
menu.
The New Graph dialog box is displayed.
The fields in the tab of the Worksheet window determine the
available values for creating the x- and y-axes of the graph.
2. Type a name for the graph in the Title field.
3. Select values for the x- and y-axes. You can select more than one
value for the y-axis.
18
CARIS HIPS and SIPS User’s Guide
HIPS and SIPS Interface: Worksheet Window
Data is displayed in the graph according to the list order. If you
select more than one data type for the y-axis, the first data type
may hide the other types in the graph. You can avoid this by
using the mouse to move a data type up or down on the list.
4. Select a data type, press and hold the mouse button while moving the
data type to a new position on the list.
5. Click OK.
A graph is created in the tab.
Graph Controls
The display and control options are located on the left side of the
tab.
1. Choose a display mode from the Chart Type drop-down list. Generally,
you can select from points, lines or bars.
2. Graph positioning and other movement is controlled using the left
mouse button. Select a mouse operation (rotate, pan, or zoom) from
the Mouse drop-down menu.
CARIS HIPS and SIPS User’s Guide
19
HIPS and SIPS Interface: Worksheet Window
3. Change the size of points, stars, diamond, crosses, diagonal crosses,
and tubes
4. Select 3D to display the graph showing depth, or select 2D to display
the graph in an orthographic display without depth.
5. To flatten the chart, click the Snap to 2D button.
More detailed control graph control options are available from a
pop-up menu in the graph area
A separate help file is available for these options.
20
CARIS HIPS and SIPS User’s Guide
HIPS and SIPS Interface: Worksheet Window
QC Reports Tab
The QC Reports tab contains statistical data generated from the
QC Reports tool. For more information on QC Reports, see
“QUALITY CONTROL” ON PAGE 274.
The same options are available from the QC Reports tab as in the
Query tab, see “QUERY TAB” ON PAGE 16 for more information.
You can also create graphs using data from the table, see “GRAPH
TAB” ON PAGE 18 for more information.
Profile Tab
View a cross-sectional diagram (profile) of a BASE Surface,
weighted grid, or tile.
For more information on the options available in this tab, see
“PROFILES” ON PAGE 362.
CARIS HIPS and SIPS User’s Guide
21
HIPS and SIPS Interface: Reposition and Resize Windows
Reposition and Resize Windows
Repositioning
All windows can be undocked from their default positions and
moved anywhere on the screen.
1. Position the cursor at the top of the window, or double-click the handle.
2. Press and hold the mouse button and drag the cursor.
As you drag the cursor, the window un-docks from its current
location and moves with the cursor. To prevent a window from
automatically docking, hold the <Ctrl> key while dragging the
window.
3. Release the mouse button when you want to dock the window in its
new location.
Resizing
Windows can also be sized to a new length and width.
1. Position the cursor on any edge of the window.
The cursor becomes a two-headed arrow.
2. Press and hold the mouse button and use the cursor to drag the edge
of the window to a new position.
As you drag the cursor, the edge of the window expands or
contracts, depending on whether you are pulling or pushing the
window edge.
3. Release the mouse when you resized the window to the desired
length and width.
Restore default
windows layout
This command will close all open editors and reset the interface
windows to the same appearance as when the application was
first installed.
You will be prompted to save changed data as editors are closed.
Menu
1. Select the Restore Default Window Layout command.
22
Window > Restore
Default Window
Layout
CARIS HIPS and SIPS User’s Guide
HIPS and SIPS Interface: Status Bar
Status Bar
The status bar at the bottom of the interface displays the
following information:
•
message about the operation currently taking place, or the
information in the tool tip for the command button or menu
item your cursor is on
•
number of track lines selected out of the total lines open in
the interface
•
scale of the current display in the Display window
•
coordinates of the current cursor position in the units chosen
in Tools > Options
•
disk usage for a selected data repository
Depending on which editor you have open the status bar will also
display information such as the day the survey was conducted,
profile and beam number, etc.
Status Bar options
You can hide the status bar:
Menu
1. Select the Status Bar command.
View > Status Bar
Cursor coordinates
The check mark beside the Status Bar option is gone and the
status bar is no longer visible in the desktop.
The units for the coordinates of the cursor’s current position are
set in the Options dialog box of the Tools menu. You can use the
Units option to set the type of unit e.g. Geographic or Ground.
The Position Precision option is used to set the number of places
to the right of decimal point in the coordinate display.
For further information see “UNITS” ON PAGE 95.
CARIS HIPS and SIPS User’s Guide
23
HIPS and SIPS Interface: Toolbars
Toolbars
Toolbars allow swift access to commonly used commands.
Toolbars can undocked and moved about the interface by
grabbing the handle on the left side of the toolbar with the cursor.
When moving a toolbar, press and hold the <Ctrl> key to stop the
toolbar from automatically docking.
The following is a list of toolbars.
•
Standard: Access standard Windows commands such as
opening and saving files.
•
Edit: Access functions used for editing data.
•
Window: Access commands for toggling windows to on or off.
•
View: Access functions for controlling the view in the
Display window.
•
Tools: Access functions to open editors and functions used
for processing data.
•
Process: Access functions for executing processes such as
creating BASE surfaces and merging.
•
Filter: Access functions defining and executing automatic
filters.
•
Select: Access functions for selecting objects in the Display
window.
•
Swath Editor: Access functions for examining and cleaning
pre-merged sounding data.
•
Single Beam Editor: Access functions for examining and
cleaning single-beam data.
•
Subset Editor: Access functions for examining and cleaning
sounding data in the subset mode.
•
Side Scan Editor: Access functions for examining data,
slant-range correcting raw side data, and creating contacts.
•
Lidar: Access functions for selecting and examining
soundings recorded by a lidar system.
•
Surface Cleaning: Access functions for surface cleaning
and tiling.
You can also create a custom toolbar (see “CREATE A CUSTOM
TOOLBAR” ON PAGE 26).
24
CARIS HIPS and SIPS User’s Guide
HIPS and SIPS Interface: Toolbars
Modify Existing Toolbars
Most toolbars are visible when the application is opened. You can
remove toolbars from the desktop.
Menu
1. Select the Toolbars command.
View > Toolbars
2. Select the a toolbar name from the Toolbars sub-menu so it is no
longer checked.
The toolbar is removed from the desktop.
To make a toolbar visible again, select the toolbar name from the
sub-menu so it is checked.
Move toolbars
Toolbars can be moved to any location on the desktop.
1. Position the cursor over any area of the toolbar not covered by a
button, or double-click the double bar grab handle on the left side of
the toolbar.
2. Press and hold the mouse button while dragging the toolbar to a new
location.
Modify appearance
You can alter the buttons’ size and appearance.
Menu
1. Select the Customize command.
View > Toolbars >
Customize
The Customize dialog box is displayed.
2. Select any of the following three options by checking a box.
•
Tool Tips: Display the name of a command button when the cursor
is placed over it.
•
Cool Look: Remove the border outline from the buttons.
•
Large Buttons: Display buttons with 32 x 32 pixel icons instead of
16 x 16 pixel icons.
3. Click OK.
CARIS HIPS and SIPS User’s Guide
25
HIPS and SIPS Interface: Toolbars
Create a Custom Toolbar
Create a custom toolbar by combining commonly used buttons
from other toolbars.
Menu
1. Select the Customize command.
View > Toolbars >
Customize
The Customize dialog box is displayed.
2. Click the Toolbars tab.
3. Click New.
The New Toolbar dialog box is displayed.
4. Type a name for the toolbar.
5. Click OK.
A new toolbar is displayed in HIPS/SIPS.
6. Click the Commands tab.
7. Select a toolbar name in the Categories list.
The buttons associated with that toolbar are displayed on the
right side of the dialog box.
8. Select a button so it is highlighted.
9. Press the mouse button and drag the highlighted button to the new
toolbar.
10. Repeat Steps 7 to 9 until you have all the required buttons.
26
CARIS HIPS and SIPS User’s Guide
HIPS and SIPS Interface: Toolbars
Delete a toolbar
Remove a new toolbar.
The Delete option can only be applied to new toolbars and
cannot be applied to default toolbars.
Menu
1. Select the Customize command.
View > Toolbars >
Customize
The Customize dialog box opens.
2. Select the Toolbars tab (if the tabbed window is not already visible).
3. Select the new toolbar’s name in the Toolbar section, so the name is
highlighted.
The Reset button becomes a Delete button.
4. Click the Delete button.
The toolbar is removed from the desktop and is no longer listed in
the Customize dialog box.
CARIS HIPS and SIPS User’s Guide
27
HIPS and SIPS Interface: Mouse Information
Mouse Information
Mouse button use varies according to the location of the cursor in
the interface. Below is an overview of the most important
functions.
Left button
The left mouse button is used for general manipulation of the
interface, such as placing cursor in text fields, selecting objects in
the Display window, selecting menu commands, and selecting
data in the editor views.
Right button
The right mouse button displays context sensitive pop-up menus
in any of the windows.
Middle button
The middle mouse button is used to pan the display using a press
and drag action. Note that while panning the cursor changes to a
four-pointed arrow.
Mouse wheel
The mouse wheel can be used to zoom in or out of Display window.
It can also be used to move along a track line when an editor is
active (Attitude Editor, Swath Editor, Side Scan Editor, etc.).
28
CARIS HIPS and SIPS User’s Guide
HIPS and SIPS Interface: Open Projects and Background
Open Projects and Background Data
Open a Project
File > Open Project
Key
The Open Project dialog box is displayed.
2. Select a Project folder so it is highlighted.
Tool
Menu
1. Select the Open Project command.
<Ctrl + O>
If the project contains both bathymetric and side scan data—you
can open either the vessel or towfish navigation, or open both.
The setting is saved in the registry and the session file for future
use. This option is inactive while a project is open.
3. Select either the Side Scan Only, Ship Only or Both options to open
the appropriate track lines in the Display window.
4. Click Open.
The track lines associated with the project are opened in the
Display window. The Project/Vessel/Day/Line file tree is
displayed in the Control window.
Open individual track
lines
Specific track lines can also be opened in Display window.
1. Choose the Open Project command.
The Open Project dialog box is displayed.
2. Select a Project folder so it is highlighted.
3. Expand the folder tree by clicking the + icon so that the Vessel and
Day folders are visible.
4. Select a Day folder.
The Line folders are displayed in the Contents window of the
dialog box.
5.
Select a line folder so it is highlighted.
6. Select either the Side Scan Only, Ship Only or Both options to open
the appropriate track lines in the Display window.
7. Click Open.
CARIS HIPS and SIPS User’s Guide
29
HIPS and SIPS Interface: Open Projects and Background Data
Combining project data
using Windows
shortcuts
You can use a Windows shortcut to link HDCS
Project\Vessel\Day\Line data on different drives or network
locations. The project, plus the shortcut to the other data, is
displayed in the Open Project dialog box. The data folders must
contain a Vessel Configuration File.
1. Create a Windows shortcut in any P\V\D\L directory.
2. Copy the shortcut to the project where you want to place the shortcut.
Remember that the shortcut must be copied to the appropriate folder.
A Project folder shortcut must be copied to a HDCS data folder, a
Vessel folder shortcut must be copied to a Project folder, etc.
3. Open the data in using the Open Project command.
Set Track Line Properties
Change the colour and symbology of ship and towfish track lines.
2. Select the Properties window command if the window is not open, or
right-click the layer and select Properties from the pop-up menu.
Window > Properties
Pop-up
Tools
Menu
1. Select the ship or towfish track lines layer in the Session tab of the
Control window.
The Properties window for ship or towfish track lines is
displayed. The following window is for ship track lines, but the
Properties window for towfish track lines is similar.
Properties
Ship track lines can be coloured by whether data has been Merged
(combined into a position/depth file) or Not Merged.
Tow fish track lines can be coloured as Slant-Range Corrected or
Raw Side Scan.
30
CARIS HIPS and SIPS User’s Guide
HIPS and SIPS Interface: Open Projects and Background
3. Select a colour from the colour palette, or create a custom colour from
the standard Windows colour picker.
The following steps are applicable to both ship and towfish track
lines.
4. Select the Symbolize Lines check box to add symbolization according
to a selected feature code.
5. Select a Feature Code for line symbolization from the drop-down list.
The Use Multiple Colours option uses a set of 10 distinct colours to
colour the track lines in the Display window. This is useful if the
data was logged as multiple files along the same runline.
6. Select the Use Multiple Colours check box to implement this option
and select a colour map from the drop-down list.
7. Click Apply.
Open Background Data
HIPS and SIPS can open any of the following data types as
background in the Display window:
•
AutoCAD files (DXF, DWG)
•
geo-referenced TIFF (GeoTIFF, TIFF/TFW, TIFF/IGA)
•
JPEG 2000 (JP2)
•
Shapefiles (SHP)
•
raster charts (BSB, HCRF)
•
CARIS maps (DES)
•
S-57 Ed 3.11 (000)
•
Hydrographic Object Binary (HOB) files (including Edit and
Marker layers created in CARIS Notebook).
•
MrSid image files (SID)2
•
Bathymetric Attributed Grid files (BAG)
Menu
1. Select the Open Background Data command.
File > Open
Background Data
The Open dialog box is displayed. More than one data type can be
selected while the dialog box is open.
1. Update files included with the .000 file are automatically opened with the
original S-57 file
2. MrSID image files can only be opened if you have installed the CARIS
plugin for MrSID images. This free plugin can be downloaded from
http://www.caris.com/products/mrsid.cfm.
CARIS HIPS and SIPS User’s Guide
31
HIPS and SIPS Interface: Open Projects and Background Data
2. Select a file or group of files by one of three methods:
•
Select an individual file by highlighting it.
•
Select a group of files by pressing the Ctrl key and selecting each
file.
•
Select a range of files by pressing the Shift key and selecting the
first and last file in the range. All files between the first and last file
are highlighted.
3. Click Open.
The files are opened in the Display window and are listed as
layers in the Control window.
Set Image Properties
Set the display options for image files (TIFF, TWF, IGA, raster
images etc.).
2. Select the Properties window command if the window is not open, or
right-click the layer and select Properties from the pop-up menu.
Window > Properties
The Properties window is displayed.
Pop-up
Tools
Menu
1. Select the Image layer in the Session tab of the Control window.
Properties
3. Select a colour map for a raster image, if applicable, from the dropdown list. A preview of the colour map is displayed to the right of the
list.
The Shading and Vertical Exaggeration options are applied to
GIS raster images where height values are available.
32
CARIS HIPS and SIPS User’s Guide
HIPS and SIPS Interface: Open Projects and Background
The Shading option controls the lighting angles of the raster
image. Using this option may highlight fine scale features in the
image that would not normally be seen.
The sundial control sets the shading effect in the image. The
elevation varies from 90 to 0 degrees starting from the middle of
sundial. The azimuth varies from 0 to 360 degrees in a clockwise
direction.
4. Select the Shading check box to activate the sundial and Vertical
Exaggeration options.
5. Position the cursor over the button in the sundial and press and hold
the mouse button to drag the button to a new position.
6. Change the exaggeration of the illuminated sea floor by selecting a
Vertical Exaggeration value. Increasing the exaggeration may improve
the view of finer features in the image.
7. Select the See Through Pixel option to make a pixel value totally
transparent. Type the value in the field.
8. To choose a transparency level for the entire image, click the up or
down arrow buttons to select a Transparency percentage.
You can re-project a georeferenced raster image to a project
projection using two methods:
•
The Full Raster option is a pixel-by-pixel reprojection to the
project coordinate system. This option can take a long time if
the image file size is large.
•
The Rubber Sheet option uses the centre coordinate in the
Display window as a starting point for image reprojection.
This is done by aligning the same coordinate in the
georeferenced image to the centre coordinate in the window.
The raster image is then reprojected out from the centre
coordinate. This means that the image is reprojected every
time you pan or zoom the Display window.
9. Select either the Full Raster or Rubber Sheet options.
10. Click Apply to implement the changes.
CARIS HIPS and SIPS User’s Guide
33
HIPS and SIPS Interface: Open Projects and Background Data
Display S-57 Data
HIPS and SIPS is capable of displaying S-57 Ed 3.1 and HOB
(Hydrographic Object Binary) files. How the data is displayed is
controlled by the settings in the Options dialog box (see “S-52
DISPLAY” ON PAGE 103) and Object Filter controls.
1. Select the Open Background Data command (see “OPEN BACKGROUND
DATA” ON PAGE 31) and open an S-57 dataset.
The S-57 dataset is opened in the interface and the file is listed in
the Session data tree in the Control window.
You can determine what objects are shown in the Display
window.
1. Select the S-57 file in the Session tab of the Control window.
Pop-up Menu
2. Right-click the mouse and select the Object Filter command.
34
View > Object Filter
The S-57 Object Filter dialog box is displayed.
Object Filter
CARIS HIPS and SIPS User’s Guide
HIPS and SIPS Interface: Open Projects and Background
The Available list contains all objects in the S-57 file. The Active list
contains the S-57 objects that are currently shown in the Display
window.
3. Move objects between the lists, as needed.
•
To move objects from the Active list to the Available list, select the
object(s) and click the left-arrow button.
•
To move objects from the Available list to the Active list, select the
objects and click the right-arrow button.
•
To move all objects from the Active list to the Available list, click
the double left-arrow button.
•
To move all objects the from the Available list to the Active list,
click the double right-arrow buttons.
•
To move all Skin of the Earth objects to the Active list, click Group
1.
4. Select the Include or Exclude options to show or hide objects in the
Active list.
•
Select the Include option to show objects in the Active list.
•
Select the Exclude option to hide objects in the Active list.
5. Click Apply to save the settings.
Data about selected S-57 objects can be displayed in the
Worksheet window using the Query command.
1. Select the S-57 file name in the Control window.
2. Select the S-57 objects in the Display window that you want to query.
CARIS HIPS and SIPS User’s Guide
35
HIPS and SIPS Interface: Open Projects and Background Data
Edit > Query
Information about the selected S-57 objects is displayed in the
Worksheet window.
Further information about an object (if available) can be accessed
by selecting the Extended Query tab.
Tool
Menu
3. Select the Query command.
Key
4. Select an object and select the Extended Query tab.
36
<Q>
CARIS HIPS and SIPS User’s Guide
HIPS and SIPS Interface: Display Tools
Display Tools
Zoom
The Zoom tool lets you enlarge or reduce the viewing area in the
Display window.
View > Zoom
Key
The cursor changes to a magnifying glass icon.
2. Press and hold the mouse button and drag the cursor diagonally
across the area of the Display window you want to enlarge.
Tool
Menu
1. Select the Zoom command.
<F10>
The display is enlarged or reduced according to the zoom factor in
the General Options dialog box (see “GENERAL” ON PAGE 75). The
window is recentred on the location you selected.
Once the area has been zoomed, the Zoom option is no longer
active. To keep the Zoom tool active, select the Enable Constant
Zoom function in the Options dialog box (see “GENERAL” ON PAGE 75).
Zoom In
Enlarge the viewing area in the Display window.
View > Zoom In
The display is automatically enlarged by the zoom factor set in
the General tab of the Options dialog box (see “GENERAL” ON
PAGE 75).
Key
Tool
Menu
1. Select the Zoom In command
<Ctrl+Down>
CARIS HIPS and SIPS User’s Guide
37
HIPS and SIPS Interface: Display Tools
Zoom Out
Reduce the viewing area in the Display window.
View > Zoom Out
The display is automatically reduced by the zoom factor set in the
General tab of the Options dialog box (see “GENERAL” ON PAGE 75).
Key
Tool
Menu
1. Select the Zoom Out command.
<Ctrl+Up>
Zoom/Pan Previous
Go to the previous zoom/pan view.
View > Zoom/Pan
Previous
Tool
Menu
1. Select the command.
Zoom/Pan Forward
Go the zoom/pan view that was displayed prior to using the
Reverse command.
View > Zoom/Pan
Forward
Tool
Menu
1. Select the Zoom/Pan Forward command.
38
CARIS HIPS and SIPS User’s Guide
HIPS and SIPS Interface: Display Tools
Zoom To
Recentre the view in the Display window and zoom into an area.
Menu
1. Select the Zoom To command.
View > Zoom To
The Zoom To dialog box is displayed.
2. Type the new coordinates in their respective fields to recentre on an
area of the Display window.
3. Type a new scale to zoom into or out of the display.
4. Click OK.
Pan
The Pan tool allows you to move up, down or across the current
display in the Display window.
Tool
Menu
1. Select a Pan command:
View > Pan > Up/
Down/Left/Right
•
Pan Up: Recentre the display at a position that is above the
current display area.
•
Pan Down: Recentre the display at a position that is below the
current display area.
•
Pan Left: Recentre the display at a position that is left of the
current display area.
•
Pan Right: Recentre the display at a position that is right of the
current display area.
CARIS HIPS and SIPS User’s Guide
39
HIPS and SIPS Interface: Display Tools
Refresh Display
1. Select the Refresh command, or click the middle mouse button when
the cursor is in the Display window.
View > Refresh
The display is redrawn.
<F5>
Overview Display
Key
Tool
Menu
Redraw the view in the Display window.
Redraw the Display window to the full extent of all the data that
is currently open.
View > Overview
Key
Tool
Menu
1. Select the Overview command.
<F9>
Show/Hide Layers
Layers are objects that can be viewed in the Display window.
Examples of layers include CARIS maps, images, and field sheet
products such as contours, selected soundings, tiles, etc.
You can show or hide objects in the Display window.
2. Select the Session tab if it is not already displayed.
Window > Control
Tool
Menu
1. Make sure the Control window is open.
The Session tab contains a list of objects available for display in
the Display window.
3. If necessary, expand an object file tree by clicking the + icon beside it.
View > Refresh
5. Select the Refresh command, or make sure the Automatic Refresh
option in the General Options dialog box is selected (see “GENERAL”
ON PAGE 75).
The object is displayed or hidden.
Key
Tool
Menu
4. Show/hide objects by selecting or clearing the check box beside the
object file name.
40
<F5>
CARIS HIPS and SIPS User’s Guide
HIPS and SIPS Interface: Display Tools
Change draw order
Objects are drawn in order from top to bottom as they appear in
the Session tab.
You can change the draw order by moving the object to another
position on the list.
1. Select an object in the Control window so it is highlighted.
2. Press and hold the mouse button, and use the cursor to drag the
object to another position in the list.
3. Release the mouse button when the object is moved.
The object is now shown in its new location in the data list.
CARIS HIPS and SIPS User’s Guide
41
HIPS and SIPS Interface: Selection Tools
Selection Tools
You can select an individual track line or object in the display by
clicking on it with the mouse so it is highlighted.
While you can select a group of objects by holding down the
<Ctrl> key while clicking on each object in turn, the following
tools make selection of multiple objects easier.
Select by Range
Select one or more objects.
1. Select a layer in the Control window.
Select > By Range
3. Press and hold the mouse button while dragging the cursor to define a
rectangular area.
The selected objects from the layer are highlighted.
Tool
Menu
2. Choose the Select by Range command.
Select All in Display
Select objects that are totally or partially in the current viewing
extent of the Display window.
This command is useful for selecting a single object or group of
objects in an enlarged section of the Display window.
1. Select a layer in the Control window that contains the objects you want
to select.
2. Use the zoom tool to enlarge a section of the Display window
(see “ZOOM” ON PAGE 37).
Select > All in Display
Objects that cross or are within the current view of the Display
window are highlighted.
Tool
Menu
3. Choose a Select All in Display command.
Select All
Select all objects.
42
CARIS HIPS and SIPS User’s Guide
1. Select a layer in the Control window that contains the objects you want
to select.
Select > Select All
Key
2. Choose the Select All command.
All objects are highlighted.
Tool
Menu
HIPS and SIPS Interface: Selection Tools
<Ctrl+A>
CARIS HIPS and SIPS User’s Guide
43
HIPS and SIPS Interface: Selection Tools
Select By Lasso
In the Swath Editor, Subset, Navigation and Attitude Editors,
use the By Lasso tool to select objects by enclosing an area.
The area is defined by the mouse in one of two ways: either by
dragging the mouse around the area to be selected or by inserting
a series of points to create an outline. All objects inside the
defined area are selected when the lasso is closed.
Select > By Lasso
1. Select the Lasso command.
2. Click and hold down the left mouse button, and drag the mouse in any
of the editor windows. The lasso outline is updated as you move the
mouse.
OR
Tool
Menu
Use Lasso in HIPS and
SIPS editors
3. Repeatedly click the left mouse button in the editor window to define a
point-to-point outline.
Note: These two nodes can be used together in the editor
windows.
Menu
Select > Close Lasso
Key
To complete the selection area, you must close the lasso outline.
This can be done in one of three ways:
<C>
Use Lasso in Display
window
•
release the left mouse button and right-click.
•
select Close Lasso from the Select menu
•
press the “C” key.
The first and last points will be connected and the lasso shape
will be closed. The objects within the enclosed area are selected.
To use the lasso tool to select objects in the Display window
1. Select the layer in the Control window that contains the objects you
want to select.
2. Select the Lasso command.
3. Use the mouse to insert a series of points around the area in the
Display window that you want to select.
The points are connected by a line as you continue clicking. When
you have outlined the area
4. Press “C” to close the lasso outline.
44
CARIS HIPS and SIPS User’s Guide
HIPS and SIPS Interface: Selection Tools
Select Next Line
Select track lines by ascending file order. This command is
enabled only when the Attitude, Navigation, Swath and Single
Beam Editors are open.
The file order can be sorted according to time or name by rightclicking in the Display window and selecting Sort > By Name/
By Time from the pop-up menu.
Select > Next Line
The track line directly below the currently selected line in the
project data tree is highlighted.
Tool
Menu
1. Select the Next Line command.
Select Previous Line
Select track lines by descending file order. This command is
enabled only when the Attitude, Navigation, Swath and Single
Beam Editors are open.
The file order can be sorted according to time or name by rightclicking in the Display window and selecting Sort > By Name/
By Time from the pop-up menu.
1. Select the Previous Line command.
Tool
Menu
When you select the command, the track line directly above the
currently selected line in the project data tree is highlighted.
Select > Previous
Line
CARIS HIPS and SIPS User’s Guide
45
HIPS and SIPS Interface: Selection Tools
Select Lines From the Control Window
Window > Control
2. Select the Project tab.
3. Click a track line file so it is highlighted.
The track line in the Display window is highlighted.
Tool
Menu
1. Make sure the Control window is open.
You can also select more than one file.
•
To select a Project, Vessel or Day folder, click the folder. All
files in that folder are highlighted.
•
To select multiple files, press and hold the <Ctrl> key while
clicking the files with the mouse.
•
To select a range of files, click the first file in the range, press
and hold the <Shift> key while clicking the last file in the
set. This highlights all adjacent files between the first and
last file.
Clear All
Tools
Menu
Deselect track lines or objects.
46
1. Select the Clear All command, or click anywhere in the display away
from the lines.
Select > Clear All
The previously selected track lines or objects are no longer
highlighted.
CARIS HIPS and SIPS User’s Guide
HIPS and SIPS Interface: Screen Captures
Screen Captures
Pop-up Menu
You can take a screen capture of the current display in the
Display window or 3-D Display window and save it as an 8-bit or
24-bit GeoTiff image.
1. Right-click in the Display window or 3-D Display window and select
Save Image command.
View > Save Image
The Save As dialog box is displayed.
2. Select a directory for saving the image.
Save Image
3. Type a name for the image in the File Name field.
4. Select to either save the image as an 8-bit or 24-bit image by selecting
the appropriate option.
5. Select a Dots Per Inch (DPI) setting from the drop-down list.
The file size of the image is shown in the dialog box. If you select
a large dpi setting, the image is resampled to that setting.
6. Click Save.
The image is saved to the selected directory.
CARIS HIPS and SIPS User’s Guide
47
HIPS and SIPS Interface: 3-D Display Window
3-D Display Window
The 3-D Graphics window, configured in the 3-D Panel, shows
project-level information in three dimensions. An example of the
3-D Graphics window is shown below (note that this display has
been adjusted—see “SET 3-D WINDOW” ON PAGE 49).
In the 3-D Display window, georeferenced imagery is projected
as an image layer (or layers) onto a height source. The BASE
Surface is used as the terrain (or height source).
The layers that are visible in the Display window are shown in
the 3-D display. The following layers can be viewed in the 3-D
Display window:
• raster layers (BASE Surfaces, GeoTIFF images, BSB
charts, etc.)
• ship track line vectors
• solid models
The 3-D Display is enhanced with a “fly-through” effect that
makes it seem like you are gliding through the display.
Movement is controlled by the mouse buttons. As you become
more comfortable with manipulating the mouse buttons you will
be able to apply seamless panning and zooming operations in
this window.
48
CARIS HIPS and SIPS User’s Guide
HIPS and SIPS Interface: 3-D Display Window
Set 3-D Window
View a 3-D representation of the dataset in the Display window
by setting parameters on the 3-D Window tab in the Control
window.
1. Adjust the Display window by turning layers on or off.
Window > 3-D
Graphics Window
The 3-D Graphics window is now visible in the Control window.
This tabbed window provides the scene options for a 3-D view.
Tool
Menu
2. Select the command.
3. To add a scene, click Add.
CARIS HIPS and SIPS User’s Guide
49
HIPS and SIPS Interface: 3-D Display Window
A list of source types is displayed.
4. Select the Terrain option. You must select the Terrain option prior to
selecting any other options in the list.
The following dialog box is displayed.
5. Select a terrain from a layer.
6. [Optional] Choose a source option:
Image
50
•
If you select Image, go to step 8;
•
If you select Solid Model, go to step 14; or,
•
if you select Track Lines, go to step 16.
The Select Image dialog box is displayed.
CARIS HIPS and SIPS User’s Guide
HIPS and SIPS Interface: 3-D Display Window
Select Image dialog box.
7. Select an image from the drop-down list. The image must already be
opened in the Display window.
8. Select Drape over terrain to cover the selected terrain.
9. Select Create image plane to create a flat plane where there is no
terrain.
10. Select Clip to terrain to constrain the image extents to that of the
extents of the terrain area.
11. Type the Elevation to place the image on the same axis as the
surface.
12. Click OK.
Solid Model
The standard Open dialog box is displayed.
13. Select a 3-D Studio Max File file to open.
The 3-D Graphics window display is updated with a scene
attributes tree.
Track Lines
14. Select the Track Lines option to view track lines in the 3-D display.
CARIS HIPS and SIPS User’s Guide
51
HIPS and SIPS Interface: 3-D Display Window
You may choose to show or hide each layer or attribute by
selecting or de-selecting the Scene options.
52
CARIS HIPS and SIPS User’s Guide
HIPS and SIPS Interface: 3-D Display Window
3-D Display Properties
You may change the properties settings, displayed in the
Properties tab, for each attribute according to its type.
When selected, properties may be set for the following:
• Heads Up Display (HUD)
• Colour Map Panel
• Camera Information Panel
• Controller Panel
• Vertical Exaggeration Panel
• Scene Root
• Terrain
• Terrain Axes
After you change an attribute, update the display by clicking the
mouse on the scene in the Display window.
Colour Map Panel
1. Select the Colour Map Panel attribute.
The Colour Map Panel properties are displayed (Properties tab).
2. Select the desired settings for the following properties:
•
Panel Position: the position of the colour map in the Display
window
•
Panel Size: the size of the colour map in the Display window
•
Show Scale: display the depth values for the colour map
3. Select the properties settings for the Colour Map Panel.
Camera Information
Panel
1. Select the Camera Information Panel
CARIS HIPS and SIPS User’s Guide
53
HIPS and SIPS Interface: 3-D Display Window
The Camera Information Panel properties are displayed
(Properties tab).
2. Select the settings for the following properties:
Controller Panel
•
Panel Position: the position of the Camera Information Panel in
the Display window
•
Panel Size: the size of the Camera Information Panel in the
Display window
•
Font Colour: select colour for the font in the Camera Position
window of the Camera Information panel (default is black)
•
Video State Visibility: select whether to have the video state
portion of the Information panel on or off
•
Camera Position Visibility: select whether to have the camera
position indicator on or off
•
Pitch Visibility: select whether to have the pitch indicator on or off
•
Compass Rose Visibility: select whether to have the compass rose
on or off.
1. Select the Controller Panel attribute.
The Controller Panel properties are displayed (Properties tab).
2. Select the desired settings for the following properties:
54
•
Panel Position: the position of the controller in the Display window
•
Panel Size: the size of the controller in the Display window
CARIS HIPS and SIPS User’s Guide
HIPS and SIPS Interface: 3-D Display Window
Vertical Exaggeration
1. Select the Vertical Exaggeration Panel
The Vertical Exaggeration properties are displayed (Properties
tab).
2. Set the following properties for the vertical exaggeration slider:
•
Set a Minimum and Maximum scale for the vertical exaggeration.
•
Select a Label Colour from the colour picker or create a custom
colour from the palette.
•
Show or hide labels or the slider background by selecting or
clearing the Show Labels or Show Background check boxes,
respectively.
3. Select the Terrain attribute.
The Terrain properties are displayed (Properties tab).
4. Select the settings for the following properties:
•
Vertical Exaggeration (Terrain): the amount of vertical, or shoal
and depth, exaggeration to apply to the terrain display
•
Draped Image Visibility (Terrain): display an image file (e.g.,
GeoTIFF) relative to the selected surface
•
Level of Detail (Grid Terrain): determines how much detail is
displayed as you zoom into the surface. A high value means a
highly detailed surface is displayed. As you move out from the
surface, the display is down-sampled so less detail is shown.
CARIS HIPS and SIPS User’s Guide
55
HIPS and SIPS Interface: 3-D Display Window
Terrain Axes
1. Select the Terrain Axes attribute.
The Terrain Axes properties are displayed (Properties tab).
2. Select the desired settings for the following properties:
•
Axes Style: choose display option for the axes (grid lines)
•
Font Colour: colour for the displayed labels
•
Line Colour: colour for the grid plane lines
For the selected Colour option, you may type in RGB values in
the field or select a pre-defined colour value from the drop-down
list. To type in a colour value, go to step 22, or to select a colour
value from the list, go to step 16.
3. Select a pre-defined colour.
4. [Optional] To create a colour, click Custom Colour.
The colour palette tool is displayed.
56
CARIS HIPS and SIPS User’s Guide
HIPS and SIPS Interface: 3-D Display Window
5. Select a colour picking scheme from the Colours list.
6. In the Custom Colour dialog box, the colour tool is on the left-hand
side and the colour fields are on the right-hand side.
7. Select a colour or a setting from the colour tool;
OR,
type values into the appropriate colour fields.
8. To finish, click OK.
• Use Round Numbers: select this option to have all values
displayed as whole numbers (e.g., 0.8 is displayed as 1, the
nearest whole number).
To focus the view on a specific location of the surface, doubleclick your mouse button at the selected location.
CARIS HIPS and SIPS User’s Guide
57
HIPS and SIPS Interface: 3-D Display Window
Control Axes
The control axes are displayed as an overlay to the surface on
the grid. These controls allow you to rotate the view along the X,
Y, or Z axes
1. To show or hide the control axes, click the Axis button on the
3-D toobar.
2. Select the end points of any of the axes to manipulate the view.
58
•
To rotate the view of the surface horizontally, click and hold the left
mouse button on the end of the X or Y axis and move the mouse
to the left or right of the Z axis in the display.
•
To rotate the view of the surface vertically, click and hold the left
mouse button on the end of the Z axis and move the mouse up or
down in the display.
CARIS HIPS and SIPS User’s Guide
HIPS and SIPS Interface: 3-D Display Window
Vertical Exaggeration
Vertical exaggeration is the ratio of the vertical scale to the
horizontal scale. Increasing the vertical exaggeration can
improve the display of features on the surface.
Controlling the vertical exaggeration is done using the vertical
exaggeration scale slider. The slider is automatically displayed
when the 3-D window is activated.
To use the slider:
1. Position the cursor over the button in the slider.
2. Press and hold the mouse to move button up or down the slider. As
the button is moved the vertical exaggeration in the 3-D Display
window is changed. The vertical exaggeration value is shown at the
bottom of the slider.
CARIS HIPS and SIPS User’s Guide
59
HIPS and SIPS Interface: 3-D Display Window
Navigate 3-D Display
In the 3-D Display window, you can zoom and pan to create a
flying effect.
The flying effect is accomplished by using the Controller, the
mouse (pressing and holding one or both of the mouse buttons
while simultaneously moving the mouse pointer in the direction
you want to move) or the keyboard keys.
You may use the Controller directional pad and slider controls to
modify the view. The controls for the Controller are as follows:
60
CARIS HIPS and SIPS User’s Guide
HIPS and SIPS Interface: 3-D Display Window
Steer the view (clockwise from the top:
forward, rotate right, reverse, rotate left)
Move view position forward
Change
viewing
height:
up (“+”)/
down (“-”)
Pan view left
Pan view right
Move view position
backward (reverse)
Tilt viewing angle: (“-”, look down)/
back (”+”, look up)
When using the mouse pointer to navigate the speed you travel
through the display or pan the view varies with the pointer’s
distance from the centre (stationary) point.
The pointer position in the display indicates the direction you will
move. The mouse button determines what operations are
available to you.
You may also use the navigation icon displayed in the 2-D
Display window of the selected surface.
Camera Information
Panel
As you zoom and pan, the Camera Information Panel reflects the
position and orientation of the camera. The panel is comprised of
various indicators, as follows:
Video State
CARIS HIPS and SIPS User’s Guide
Camera Position
Pitch
Compass Rose
61
HIPS and SIPS Interface: 3-D Display Window
2-D Display icon
The display icon in the Display window shows the location and
view direction you are currently at in the 3-D window.
Icon (indicates location
Arrow (point indicates direction faced
in 3-D Display view)
You can use this icon to navigate through the 3-D Display
window by “grabbing” the icon (pressing and holding the mouse
button) and moving it in the 2-D Display. The display in the 3-D
window “flies” to the location where the icon is positioned. The
direction of the arrow indicates the compass direction you are
facing.
62
CARIS HIPS and SIPS User’s Guide
HIPS and SIPS Interface: 3-D Display Window
The following table lists the available actions.
Cursor
Mouse
position Button
Key
Action (view)
Centre
—
—
None.
Up
Left
W
Pan forward in a straight line (horizontal to grid).
Right
Down
Tilt back (viewing angle goes up).
Left+Right
R
Pan up in a straight line (vertical to grid).
Right
S
Pan backward in a straight line (horizontal to grid).
Left
Tilt forward (viewing angle goes down).
Left+Right
F
Pan down in a straight line (vertical to grid).
Left
Left+Right
A
Pan left in a straight line (horizontal to grid).
Right
Left+Right
D
Pan right in a straight line (horizontal to grid).
Left
Left
Rotate left.
Right
Left
Rotate right.
—
Scroll forward
C
Zoom in
—
Scroll reverse
V
Zoom out
—
Double-click
—
Zoom into the double-clicked point on the display
1. Use the cursor position and mouse buttons, keyboard keys or
Controller Panel to navigate (pan and zoom) through the display in the
3-D Display window.
3-D Display Fly-through options
You may make and save movies of a 3-D Display scene flythrough for playback at a later time. The controls for creation
and playback of your movies are located in the 3-D Display
toolbar.
Record a fly-through
1. With a scene open in the 3-D Panel and shown in the Display window,
select a starting point for your fly-through.
2. On the 3-D Display toolbar, click the
(Record Flight) button.
3. Use the controls to navigate through the 3-D Display window.
CARIS HIPS and SIPS User’s Guide
63
HIPS and SIPS Interface: 3-D Display Window
4. To stop recording your fly-though, click the Record Flight button again.
Your fly-through is ready for playback.
Play the fly-through
1. Click the
(Play Flight) button.
2. [Optional] To pause the playback, click the
(Pause Flight) button.
The flight playback stops after the recording is finished playing.
Record a movie
1. Click the
(Record Movie) button.
The Record Movie dialog box is displayed.
2. Choose the format of the video file.
•
If you select AVI format, go to step 5; or,
•
if you select WMV format, go to step 3.
You may select a bit rate for the recorded data as a variable
(percentage of the total) or a constant (kilobits per second) value.
3. Select a bit rate option.
4. Type a value for the selected bit rate and go to step 6.
5. [Optional] To see the advanced playback options for your AVI movie
before it is saved, select the Show Advanced Options option.
You must select image size and FPS (Frames-Per-Second) options
for the playback of your movie.
6. Select a Size option.
7. Select a FPS option.
8. To select the save name and location for your movie file, click the
Browse button (...).
A Save As dialog box is displayed.
9. Type a save name.
10. Select a save folder.
64
CARIS HIPS and SIPS User’s Guide
HIPS and SIPS Interface: 3-D Display Window
11. Click Save.
The Save As dialog box is closed, returning you to the Record
Movie dialog box.
12. If you clicked the WMV format option, click Save and go to step 19;
OR,
if you clicked the AVI format option, click Save and go to step 13.
The Video Compression dialog box is displayed.
13. Select a Compressor.
Some video compressors do not allow you to set the
following options (in steps 14 to 17) for your movie files.
14. Use the slider control to select the compression quality (displayed as a
value in the range of 0 and 100 percent).
15. [Optional] To insert key frames, select the Key Frame option and type
a frames value.
16. [Optional] To set the data rate, select the Data Rate option and type a
KB/sec (kilobits per second) value.
With some compressors, you may also choose the configuration settings
to use for your AVI movie.
17. [Optional] To configure the selected compressor, click Configure
(select from the available configuration options).
18. Click OK.
*A file saved message is displayed.
19. To finish, click OK.
The process is finished.
CARIS HIPS and SIPS User’s Guide
65
HIPS and SIPS Interface: Cut, Copy and Paste
Cut, Copy and Paste
The Cut, Copy and Paste commands are useful for manipulating
files in the Control window. These commands are similar to those
used in other Windows applications.
Line folders can only be moved or copied between Day
folders and Day folders can only be moved or copied
between Vessel folders.
Cut
The Cut command moves selected Vessel, Day, or Line folders to
the clipboard.
1. Select the object you want to cut.
Edit > Cut
The file names in the Control window are dimmed.
3. You can undo the Cut command by pressing the <Esc> key.
Key Pop-up
Tool
Menu
2. Select the Cut command.
66
Cut
<Ctrl+X>
CARIS HIPS and SIPS User’s Guide
HIPS and SIPS Interface: Cut, Copy and Paste
Copy
The Copy command reproduces the selected object without
removing it from the Control window.
1. Click the object you want to copy.
Edit > Copy
Key Pop-up
Tool
Menu
2. Select the Copy command.
Copy
<Ctrl+C>
Select All and Copy
(Worksheet window)
Select and copy data in the Query tab of the Information to the
clipboard. The data can then be placed in another application.
1. Click inside the Worksheet window and select the Select All
command.
2. Select the Copy command.
The data is copied to the Windows clipboard.
CARIS HIPS and SIPS User’s Guide
67
HIPS and SIPS Interface: Cut, Copy and Paste
Paste
The Paste command takes an object that has been cut or copied
and places it in another location.
1. Make sure you have cut or copied an object.
2. Place the cursor at the location you want to place the object.
Edit > Paste
The object is pasted into the application at the selected location.
Key Pop-up
Tool
Menu
3. Select the Paste command.
68
Paste
<Ctrl+V>
CARIS HIPS and SIPS User’s Guide
HIPS and SIPS Interface: Measure Distance
Measure Distance
Measure the distance between two points in a survey area or in
the 2-D Subset View. The distance is shown according to the units
you selected in the Display tab of the Options dialog box (see
“UNITS” ON PAGE 95).
Tool
Menu
1. Select the Measure Distance command.
Tools > Measure
Distance
The Measure Distance cursor icon is displayed.
2. Press and hold the mouse button and drag the cursor along
the Display window.
As the cursor is dragged across the window, a line is drawn from
the start point to the point where the mouse button is released.
The distance between the two points is shown along the line.
CARIS HIPS and SIPS User’s Guide
69
HIPS and SIPS Interface: Keyboard Shortcuts
Keyboard Shortcuts
You can customize existing shortcuts, or create new shortcuts for
menu commands that do not possess one. The keyboard shortcut
definitions are stored, by default, in …\\Hips\bin\Hips.mac.
Menu
1. Select the Shortcut Keys command.
Tools > Shortcut
Keys
The Shortcut Keys dialog box is displayed.
2. Click a menu command in the Select a Macro list box.
Modify existing
shortcuts
•
If the command already has a shortcut, the keys are displayed in
the Assigned Shortcuts box. A brief explanation of the shortcut is
displayed in Description field.
•
If the command does not have a shortcut then these two sections
are empty.
3. To delete an existing shortcut, highlight the shortcut in the Assigned
Shortcuts area and click Remove.
The shortcut is no longer active in the project.
Create a new shortcut
You can create new shortcuts to replace current shortcuts or
create shortcuts for commands without one.
4. Click Create Shortcut.
The Assign Shortcut dialog box is displayed.
70
CARIS HIPS and SIPS User’s Guide
HIPS and SIPS Interface: Keyboard Shortcuts
You can create a shortcut using function keys, control keys or
regular keys. You can also combine keys.
5. Type a new shortcut in the text area. As you type the keys are
displayed in the text area. Already assigned shortcuts are displayed
below the text box.
6. Once you have selected the key(s), click OK to close the dialog box.
The shortcut is displayed in the Shortcut Keys dialog box.
7. If you want to restore previous shortcuts, click Reset All.
The new shortcut is deleted and the previous default command is
re-assigned.
8. Click OK to save the settings and close the dialog box.
CARIS HIPS and SIPS User’s Guide
71
HIPS and SIPS Interface: Save, Close and Exit
Save, Close and Exit
Save Projects
Save changes to data after cleaning or when the display in a
session file is changed.
File > Save
You can automatically save data-cleaning changes at regular
intervals by selecting the Auto Save option (see “GENERAL” ON
PAGE 75).
Key
Tool
Menu
1. Select the Save command.
<Ctrl + S>
1. Select the Close Project command, or click the Windows close icon on
the top right of the window.
File > Close Project
Key
You are prompted to save any changes.
2. Click OK to save changes.
Tool
Menu
Close a Project
<Ctrl > F4>
Close individual track
lines
1. Select a track line file in the Control window, or select a track line in
the Display window.
Pop-up
2. Right-click the mouse and select a Close Lines command.
The track line closes.
Close Lines
Exit HIPS and SIPS
Key Menu
1. Choose the Exit command.
72
File > Exit
<Alt + F4>
2. You are prompted to save any changes, if necessary.
3. Click OK.
HIPS and SIPS is closed.
CARIS HIPS and SIPS User’s Guide
3
3.
Options
Options: Introduction
Introduction
The Options dialog box has a number of parameters to help you
control the appearance of the interface, the behaviour of some
commands, and the system environment.
Menu
1. Select the Options command.
Tools > Options
The Options dialog box is displayed. The dialog box contains the
following five tabs:
2. Click Apply to implement the changes without closing the dialog box,
or OK to implement the changes and close the dialog box.
74
CARIS HIPS and SIPS User’s Guide
Options: General
General
On the Options - General tab you can set parameters that
determine how you want to work with data.
1. Set the parameters described in the table below.
Field
Description
To assign a value...
Zoom Factor
Set the percentage to increase or
decrease the display scale when using
the Zoom functions.
Select a percentage rate for the zoom tool by
clicking the up or down arrows beside the Zoom
Factor box.
Pan Factor
Set the percentage used to move up,
down, left, or right while using the Pan
tools.
Select a percentage by clicking the up or down
arrow keys beside the Pan Factor box.
Pick Aperture
The Pick Aperture determines the
maximum distance (in pixels) that a
cursor must be from an object to select
it. For example, if the Pick Aperture is
set to five, the cursor must be a
distance of five pixels (or less) to select
an object.
Select the pixel area for the Pick Aperture by
clicking the up and down arrow buttons.
Sounding Size
Display sounding digits in a field sheet
or tiled area at a selected size
(millimetres at map scale).
CARIS HIPS and SIPS User’s Guide
Enter a sounding size value in the Sounding
Size box.
75
Options: General
Field
Description
To assign a value...
Engineer Sounding
Precision
Set the number of places to the right of
the decimal point that digits are shown
for engineering sounding display.
Select the precision value by clicking the up or
down arrow buttons.
Editor Outline
Transparency
Control the transparency levels of fills
for Swath, Side Scan and Subset
Editor outlines in the Display window.
Select a percentage value for transparency (0
equals no transparency, 100 equals total
transparency) by clicking the up or down arrow
buttons.
SVP Location
Symbol
Select a feature code for the symbol
that shows the location where SVP
data was recorded.
Select a feature code from the drop-down list.
Navigation Point
Symbol
Select a feature code for the symbol
display of points in the Navigation
Editor.
Select a feature code from the drop-down list.
Symbolize CARIS
Map
This option draws the background
CARIS map with its associated line
patterns and symbolization.
Make sure the Symbolize CARIS Map box is
checked to implement this option.
Auto Save
Automatically save all status flag
changes at set intervals.
Select the Auto Save check box to implement
this function.
Enter the interval (in minutes) that work is to be
saved.
Enable Constant
Zoom
Control whether the Zoom function
allows repeated Zoom commands until
the Zoom function is turned off.
Make sure the Enable Constant Zoom box is
checked to implement this option.
Detailed Line
Query
Display all data fields for a track line
when it is queried.
Select the Detailed Line Query command.
Automatic
Recentre
Redraw the Display window so that the
sounding coverage outline is always
displayed in the centre when scrolling
along the line.
Select the Automatic Recentre check box.
Automatically
Update Projects
Save the UTM zone setting in a project
so HIPS/SIPS does not have to search
for the zone when a project is
reopened. This option is only available
with Auto UTM.
Make sure the Automatically Update Projects box
is checked to implement this option.
Automatic Refresh
Refresh the Display window
automatically when layers are turned
on or off, or when the drawing order is
changed in the Control window.
Make sure the Automatic Refresh box is
checked to implement this option.
Enable Tool Tip
Show/hide the display of ToolTips when
the cursor is over a BASE surface or
toolbar button.
Make sure the Show Tool Tip box is checked to
implement this option.
Automatic BASE
Surface Update
Automatically update BASE Surfaces
after cleaning sounding data in the
Swath and Subset Editors, or after
cleaning CUBE data in the Subset
Editor.
Select or clear the Automatic BASE Surface
Update check box.
76
CARIS HIPS and SIPS User’s Guide
Options: General
Field
Description
To assign a value...
Show Line
Display a diagonal line inside the
bounding box that is drawn when the
mouse button is pressed down and the
cursor is dragged across the screen.
Click the Show Line check box.
Show Distance
Display the distance that the bounding
box covers when it is drawn on the
screen.
Click the Show Distance check box.
2. Click Apply to implement the changes without closing the dialog box,
or OK to implement the changes and close the dialog box.
CARIS HIPS and SIPS User’s Guide
77
Options: Display
Display
Menu
1. Select the Options command.
Tools > Options
The Options - Display dialog box is displayed.
2. Select the Display tab.
The Display tab has a list of various display controls.
The controls for the selected editor or window are displayed on
the right side of the window. Refer to the appropriate section
below for instructions to set the parameters for each window or
editor.
Display window
The Tools >Options - Display Window tab controls the display
and colour features for the ship and towfish track lines.
1. Select Display Window from the Category list.
2. Set the parameters described in the table below.
Field
Description
To assign a value...
Display Window fields:
78
CARIS HIPS and SIPS User’s Guide
Options: Display
Field
Description
To assign a value...
Background
Control the background colour.
Select a colour for the background from
the colour palette, or create a custom
colour from the standard Windows colour
picker.
Show Side Scan Outline The side scan outline marks the extent of
the data currently visible in the Side Scan
Editor.
Select the Show Side Scan Outline
check box to display the marker in the
Display window while the Side Scan
Editor is open.
Enable during playback
Move the side scan outline along the track
line during the Playback option in the Side
Scan Editor.
Select the Enable During Playback
check box to make this option active.
Show Swath Outline
The swath outline marks the extent of the
data currently visible in the Swath Editor.
Select the Show Swath Outline check
box to display the marker in the Display
window while the Swath Editor is open.
Measure Distance
Select a font to display measurements
when the Measure Distance command is
used.
Click Font and select a type face, font
size and colour from the dialog box.
Not Merged
The colour for track lines that have not
been merged into a position/depth file
Merged
The colour of track lines that have been
merged into a position/depth file.
Select a colour from the colour palette,
or create a custom colour from the
standard Windows colour picker.
Ship Track Lines fields
Towfish Track Lines fields
Raw Side Scan Only
The colour used to display track lines
when side scan data is still in raw mode.
Slant Range Corrected
The colour used to display track lines
when side scan data has been slant range
corrected.
Use Multiple Colours
This option uses a set of ten distinct
colours to colour the track lines in the
Display window. This is helpful if the
survey data was logged as multiple files
along the same runline.
Click the Use Multiple Colours check
box to enable this option for ship track
lines or towfish lines.
3. Click Apply to implement the changes without closing the dialog box,
or OK to implement the changes and close the dialog box.
CARIS HIPS and SIPS User’s Guide
79
Options: Display
Geographic Grid
The Options - Geographic Grids tab controls the options for
displaying grids based on geographic units.
1. Select Geographic Grid from the Category List.
2. Set the parameters described in the table below.
Field
Description
To assign a value...
Visible
Show a grid based on geographic
coordinates in the Display window.
Select the check box.
Labels:
Top/Left/Bottom/
Right
Display geographic coordinates at
selected locations in the Display
window
Select the check boxes.
Colour
Set a colour for the grid labels.
Select a colour from the colour picker, or create a
custom colour from the standard Windows colour
palette.
Font
Typeface and point size for grid labels
Click the Font button to open the standard
Windows Font dialog box to select a font type
and size.
Type
The type of markings for the
geographic grid.
Select a type from the drop-down list.
Length
The length of the markings (mm at map
scale).
Type the length.
80
CARIS HIPS and SIPS User’s Guide
Options: Display
Field
Description
To assign a value...
Line Attribute
Colour
Colour for the geographic grid
markings.
Select a colour from the colour picker, or create a
custom colour from the standard Windows colour
palette.
Weight
Thickness of the markings
Type a value into the field.
Custom Spacing
Position the grid markings at selected
locations in the workspace.
Select the check box.
Grid Spacing
Spacing of grid markers in mm at map
scale.
Type a value in the provided field.
3. Click Apply to implement the changes without closing the dialog box,
or OK to implement the changes and close the dialog box.
CARIS HIPS and SIPS User’s Guide
81
Options: Display
IHO Standards
The Options - IHO Standards tab controls the colour options in
the Subset Editor to display data according to International
Hydrographic Organization (IHO) standards. Colours can be set
for each S-44 survey order and S-57 Zone of Confidence
(CATZOC). The Rejected option sets the colour for soundings that
exceed defined limits of the selected standard
1. Select IHO Standards from the Category list.
2. Set the parameters described in the table below.
Field
Description
To assign a value...
IHO S-44
Colours for displaying soundings
according to S-44 survey order.
IHO S-57
Colours for displaying soundings
according to the S-57 CATZOC zones
of confidence attributes.
Select a colour from the appropriate colour
palette, or create a custom colour from the
standard Windows colour picker.
3. Click Apply to implement the changes without closing the dialog box,
or OK to implement the changes and close the dialog box.
82
CARIS HIPS and SIPS User’s Guide
Options: Display
Lidar
The Tools> Options - Lidar tab controls the colour options for
lidar data in the Swath and Subset Editors.
1. Select Lidar from the Category list.
2. Set the parameters described in the table below.
Field
Description
To assign a value...
Waveform view:
Waveform
Selected colour for displaying waveform data.
Detected
Selected colour for displaying soundings.
Alternative
Selected colour for displaying soundings with
an alternative depth.
Select a colour from the appropriate colour
palette, or create a custom colour from the
standard Windows colour picker.
QA/QC:
No Decision
Display soundings that have a detected and
alternative depth (Quality 1 flag)
Kept Detected
Display soundings where the detected depth
is retained over the alternative depth (Quality
2 flag)
Swap to
Alternative
Display soundings where the detected depth
has been replaced by the alternative depth
(Quality 3 flag)
Display or hide soundings with specific
quality flag by selecting or clearing any of
the quality flag check boxes.
Select a new colour for each of the lidar
flags from the colour palette, or create a
custom colour from the standard windows
palette.
3. Click Apply to implement the changes without closing the dialog box,
or OK to implement the changes and close the dialog box.
CARIS HIPS and SIPS User’s Guide
83
Options: Display
Projected Grid
The Options - Projected Grid tab controls options for displaying a
grid based on the selected projection.
1. Select Projected Grid from the Category list.
2. Set the parameters described in the table below.
Field
Description
To assign a value...
Visible
Show a grid based on geographic
coordinates in the Display window.
Select the check box.
Top/Left/Bottom/
Right
Display geographic coordinates at
selected locations in the Display
window
Select the check boxes.
Colour
Colour for the grid labels.
Select a colour from the colour picker, or create a
custom colour from the standard Windows colour
palette.
Font
Typeface and point size for grid labels
Click the Font button to open the standard
Windows Font dialog box to select a font type
and size.
Type
The type of markings for the
geographic grid.
Select a type from the drop-down list.
Length
The length of the markings (mm at map
scale).
Type the length.
84
CARIS HIPS and SIPS User’s Guide
Options: Display
Field
Description
To assign a value...
Line Attribute
Colour
Colour for the geographic grid
markings.
Select a colour from the colour picker, or create a
custom colour from the standard Windows colour
palette.
Weight
Thickness of the markings
Type a value into the field.
Custom Spacing
Position the grid markings at selected
locations in the workspace.
Select the check box.
Grid Spacing
Spacing of grid markers in mm at map
scale.
Type a value in the provided field.
3. Click Apply to implement the changes without closing the dialog box,
or OK to implement the changes and close the dialog box.
CARIS HIPS and SIPS User’s Guide
85
Options: Display
Scale Bar
The Options - Scale Bar tab controls the options for the scale bar.
1. Select Scale Bar in the Category list.
.
Field
Description
To assign a value...
Visible
Show a scale bar in the Display window.
Select the check box.
Location
Position of the scale bar in the window.
Select a location from the drop-down list.
Colour
Colour of the scale bar.
Select a colour from the colour picker, or create a
custom colour from the standard Windows colour
palette.
Font
Select the font type, style and size from
the Font dialog box.
Click the Font button to open the standard
Windows Font dialog box to select a font type
and size.
Background
Colour
Display a colour fill for the scale bar area. Select the check box to implement this option.
Select a colour from the colour picker, or create a
custom colour from the standard Windows colour
palette.
Draw Border
86
Draw a border line around the scale bar
area.
Select the check box to implement this option.
CARIS HIPS and SIPS User’s Guide
Options: Display
Sensor Editors
The Tools >Options - Sensor Editors tab controls some of the
colour settings for the editors.
1. Select Sensor Editor from the Category list.
2. Set the parameters described in the table below.
Field
Description
To assign a value...
Labels
Labels display the horizontal and
vertical scale lines and annotations in
the editors.
Show or hide labels (the labels are
toggled to on when the Label box is
checked).
Select a colour for the labels from the
colour palette, or create a custom colour
from the standard Windows colour
selector.
Background
This feature controls the background
colour in the editors.
Selected
The colour for highlighted data in the
Display window and in the editors.
Superselection
The colour for superselected lidar data
in the Swath and Subset Editors.
CARIS HIPS and SIPS User’s Guide
Select a colour from the colour palette,
or create a custom colour from the
standard Windows colour selector.
87
Options: Display
Field
Description
Moving Average
The colour for the Moving Average line
in the Attitude and Single Beam
Editors.
Difference
The colour for Difference line in the
Attitude and Single Beam Editors.
Threshold
The colour for the Threshold line in the
Attitude and Single Beam Editors.
Show Sensor
ToolTips
ToolTips are used in the Attitude and
Navigation Editors for displaying data
values as the cursor moves over the
graphs.
To assign a value...
Select a colour from the colour palette,
or create a custom colour from the
standard Windows colour selector.
Show or hide tools tips by clicking the
Tool Tips check box (checked means
this feature is visible).
3. Click Apply to implement the changes without closing the dialog box,
or OK to implement the changes and close the dialog box.
88
CARIS HIPS and SIPS User’s Guide
Options: Display
Side Scan Editor
The Tools >Options - Side Scan Editor Display tab controls the
colours used for the Side Scan Editor.
1. Select Side Scan Editor from the Category list.
2. Set the parameters described in the table below.
Field
Description
To assign a value...
Altitude
The colour of the digitized line along the seabed that is
used determine the height of the towfish from nadir
when slant-range correction is performed.
Outline Port
The colour for the port side of the side scan coverage
outline in the Display window.
Select a colour from the appropriate
colour palette, or create a custom
colour from the standard Windows
colour picker.
Outline Starboard
The colour for the starboard side of the coverage
outline in the Display window.
Measure /Offset
Tools
The colour for displaying the values when using the
Measure Distance and Measure Shadow tools, and
the colour of the range display.
Contact Image
Outline
The colour for displaying the outline of a contact.
Show Rejected
The colour of rejected pings. (visible when the Show
Rejected button on the Toolbar is activated)
Display contacts
during playback
Make contacts visible in waterfall window during
scrolling or playback.
CARIS HIPS and SIPS User’s Guide
Select the check box.
89
Options: Display
3. Click Apply to implement the changes without closing the dialog box,
or OK to implement the changes and close the dialog box.
Single Beam Editor
The Options - Single Beam Editor tab controls the colours for the
Single Beam Editor.
1. Select Single Beam Editor from the Category list.
90
CARIS HIPS and SIPS User’s Guide
Options: Display
2. Set the parameters described in the table below.
Field
Description
Primary
Colour of primary frequency soundings
in a dual-frequency system.
Secondary
Colour for secondary frequency
soundings in a dual-frequency system.
Selected
Colour for soundings that are selected
for further processing. Selected data
begins as a copy of primary frequency
data, but can be modified to include
secondary frequency data.
Track Line
Highlight
The colour in the Display window for
the section of track line visible in the
editor.
Event Marks
A unique marker placed at regular
intervals in the survey.
To assign a value...
Select a colour from the appropriate
colour palette, or create a custom colour
from the standard Windows colour
picker.
3. Click Apply to implement the changes without closing the dialog box,
or OK to implement the changes and close the dialog box.
CARIS HIPS and SIPS User’s Guide
91
Options: Display
Status
The Tools > Options - Status tab controls the status colours for
soundings.
1. Select Status from the Category list.
2. Set the parameters described in the table below.
Field
Description
To assign a value...
Accepted
Colour for data that is flagged as ready for
processing.
Rejected
Colour for data that is flagged as rejected and
excluded from further processing.
Select a colour from the
colour palette, or create a
custom colour from the
standard Windows colour
selector.
Reject - With
Interpolation
Colour for attitude and navigation data that has
been flagged as rejected but where associated
soundings can still be processed.
Reject - Break
Interpolation
Colour for attitude and navigation data that has
been flagged as rejected and where associated
soundings are also rejected.
Outstanding
Colour for soundings in the Subset Editor that have
been flagged as needing further examination.
Examined
Colour for soundings in the Subset Editor that have
been flagged as examined and verified.
Designated
Colour for the sounding that has been flagged in
the Swath or Subset Editors as being the shoalest
sounding on a feature.
3. Click Apply to implement the changes without closing the dialog box,
or OK to implement the changes and close the dialog box.
92
CARIS HIPS and SIPS User’s Guide
Options: Display
Swath Editor
The Options - Swath Editor tab is for selecting colours for the
Plan View display. Soundings can be coloured by location in the
swath or by detection method. Soundings in the Rear, Side, and
Profile Views are always coloured by their location in the swath.
1. Select Swath Editor from the Category list.
2. Set the parameters described in the table below.
Field
Description
To assign a value...
By Beam Number
Colour soundings in the Plan View by
location in the swath (port and
starboard).
Optional: Click the By Beam Number box so
the port and starboard colour options are
enabled.
Use the Port and Starboard colour palettes to
select a colour, or create a custom colour from
the standard Windows colour selector.
By Detection
Method
Colour soundings in the Plan by
detection method used by the sonar.
Click the By Detection Method box so the
amplitude and phase colour options are enabled.
Use the Phase and Amplitude colour palettes
to select a colour, or create a custom colour from
the standard Windows colour selector.
3. Click Apply to implement the changes without closing the dialog box,
or OK to implement the changes and close the dialog box.
CARIS HIPS and SIPS User’s Guide
93
Options: Display
Tide/SVP
The Options - Tide/SVP tab controls colour options for Sound
Velocity Profile location symbols and tide zone lines.
1. Select Tide/SVP from the Category list.
2. Set the parameters described in the table below.
Field
Description
To assign a value...
SVP Positions
Colour for Symbols and text labels
show the positions of sound velocity
profiles.
Select a colour from the appropriate colour
palette, or create a custom colour from the
standard Windows colour picker.
Tide Zones
Colour for outline of tide zone areas.
3. Click Apply to implement the changes without closing the dialog box,
or OK to implement the changes and close the dialog box.
94
CARIS HIPS and SIPS User’s Guide
Options: Display
Units
The Options - Units tab controls the measurement units that are
used in all HIPS and SIPS applications (except the Field Sheet
Editor).
1. Select Units from the Category list.
2. Set the parameters described in the table below.
Field
Description
To assign a value...
Units
There are five types of units:
• Geographic DMS (Degrees, Minutes, Seconds) Example: 45-10-39.970N; 68-5801.979W
• Geographic DD (Decimal Degrees). Example: 45.170486; -68.964844
• Ground (ground units). Example: 548.73;
2116.24
• Pixel (units in pixels)
• Geographic DM (Degrees, Minutes) Example: 45-10.970N; 68-58.97W
Select a unit from the pull-down menu.
Precision
Select how many places to the right of the
decimal point that numbers are displayed for
the cursor position.
Click the up or down arrow buttons beside
the Precision field, or type a value in the
field.
Horizontal Length
Length, height and area settings in metric or
imperial units.
Select a unit setting from the pull-down
menus.
Vertical Length
Area
CARIS HIPS and SIPS User’s Guide
95
Options: Display
Field
Description
To assign a value...
Vessel Speed
Speed units for Navigation Editor.
Select a unit setting from the pull-down
menu.
Sounding
Rounding
Select the depth and method that soundings
are rounded/truncated.
Select a rounding/truncating rule from the
drop-down list. A brief description of each
rule is displayed when it is selected.
3. Click Apply to implement the changes without closing the dialog box,
or OK to implement the changes and close the dialog box.
96
CARIS HIPS and SIPS User’s Guide
Options: Directories
Directories
The Directories tab lets you select the directories to be used by
the system for finding and processing data.
The Active Profile options control where the directory settings are
written to and read from in the Windows registry. The default
setting for directory locations is Administrator. When this profile is
selected, all environment settings are written to and read from
the system-wide settings in the Windows registry. Changing
these settings effects all users on the same machine who are
using the Administrator option.
Only persons with a Power User or Administrator Groups
account can make changes to directories while this option is
selected. However, you can select your login name to override the
Administrator settings and select the directories you want to access.
When your user name is selected as the Active Profile, all
environment settings are written to and read from your account
settings in the Windows registry. Changes made using this
option effects only the user that is currently logged in.
Menu
Options
Tools > Options
1. Select the Options command.
The Options - Directories dialog box is displayed.
2. Select the Directories tab.
3. Select the login name option to access directory locations in the
application. The default setting is Administrator.
CARIS HIPS and SIPS User’s Guide
97
Options: Directories
The Root Path option lets you select a file path to access a complete
set of HIPS/SIPS directories. When this box is first checked, you
are prompted to enter a path on your computer. This location is
remembered by the program.
4. Select the Root Path check box if you want to switch to another set of
directories on a network.
5. Type the path for the directory or enter the path by clicking Select.
The list in the directories tab is updated to show the new location.
If a directory is not available then the directory at the previous
location is used.
6. To change an individual directory, select it and double-click or click
Select.
The Browse for Folder dialog box is displayed.
7. Click the expand icon to view the file that you want to select, if needed.
8. Select the file or folder.
9. Click OK to close the Browse for Folder dialog box.
10. The selected file path is displayed in the Options dialog box.
11. If you want to view the amount of disk use by a selected repository,
click the appropriate check box.
12. The percentage of disk use is shown in the status bar.
13. Click Apply to implement the changes without closing the dialog box,
or OK to implement the changes and close the dialog box.
98
CARIS HIPS and SIPS User’s Guide
Options: Environment
Environment
The Environment tab controls the files or values used by
HIPS and SIPS for ellipsoids, colour maps, feature codes, etc. All
files are by default located in the System directory.
The Active Profile options control where the directory settings are
written to and read from in the Windows registry. The default
setting for directory locations is Administrator. When this profile is
selected, all environment settings are written to and read from
the system-wide settings in the Windows registry. Changing
these settings effects all users on the same machine using the
Administrator option.
Only persons with a Power User or Administrator Groups
account can make changes to directories while this option is
selected. However, you can select your login name to override the
Administrator settings and select the directories you want to
access. When your user name is selected as the Active Profile, all
environment settings are written to and read from your account
settings in the Windows registry. Changes made using this
option will affect only the user that is currently logged in.
Menu
Options
Tools > Options
1. Select the Options command.
The Options - Environment dialog box is displayed.
2. Select the Environment tab.
3. Select your login name option to change files and values. The default
setting is Administrator.
CARIS HIPS and SIPS User’s Guide
99
Options: Environment
Change default
environment settings
1. Select the file path displayed in the window.
2. Click Select.
The Open dialog box is displayed.
3. Select another file and click Open.
The selected file is displayed in the Environment tab.
4. Click Apply to implement the settings without closing the dialog box,
or click OK to save the settings and close the dialog box.
100
CARIS HIPS and SIPS User’s Guide
Options: S-57 Environment
S-57 Environment
The S-57 Environment tab controls the files and values used for
displaying S-57 data in the Display window. The default
directory for S-57 display files is \HIPS\System\S57Config.
The Active Profile options control where the directory settings are
written to and read from in the Windows registry. The default
setting for directory locations is Administrator. When this profile is
selected, all environment settings are written to and read from
the system-wide settings in the Windows registry. Changing
these settings effects all users on the same machine using the
Administrator option.
Only persons with a Power User or Administrator Groups
account can make changes to directories while this option is
selected. However, you can select your login name to override the
Administrator settings and select the directories you want to access.
When your user name is selected as the Active Profile, all
environment settings are written to and read from your account
settings in the Windows registry. Changes made using this
option will effect only the user that is currently logged in.
Menu
Options
Tools > Options
1. Select the Options command.
The Options - S-57 Environment dialog box is displayed.
2. Select the S-57 Environment tab.
3. Select your login name option to change files and values. The default
setting is Administrator.
CARIS HIPS and SIPS User’s Guide
101
Options: S-57 Environment
1. Select the file path displayed in the window.
2. Click Select.
The Open dialog box is displayed.
3. Select another file and click Open.
The selected file is displayed in the S-57 Environment tab.
4. To change back to the original file path that was used when HIPS and
SIPS was installed, click Default.
5. Click Apply to implement the settings without closing the dialog box,
or click OK to save the settings and close the dialog box.
102
CARIS HIPS and SIPS User’s Guide
Options: S-52 Display
S-52 Display
The S-52 Display tab controls the appearance of S-57 Ed. 3.1 data
shown as background data in the Display window
Menu
Options
Tools > Options
1. Select the Options command.
The Options - S-52 dialog box is displayed.
2. Select the S-52 tab.
3. Set the parameters described in the table below..
Field
Description
To assign a value...
Presentation
Display S-57 and HOB data in S-52 or INT1
format.
Select a presentation format from the
drop-down list.
Refresh Symbology
Automatically refresh the display to show the
symbology associated with the selected
presentation library.
Select the check box to make this
option active.
CARIS HIPS and SIPS User’s Guide
103
Options: S-52 Display
Field
Description
To assign a value...
Colours
Select the time-of-day colour scheme in
which to display S-57 data: Day Bright, Day
Dark, Day White, Dusk, Night Filtered, Night
No Filter.
Select the appropriate item from the
drop-down list.
Points
Select Simplified (default), which means to
symbolize using the S-52 Presentation
Library; or Full Chart, which means to
symbolize using IHO (International
Hydrographic Organization) chart
specifications (the way an IHO-compliant
paper chart appears).
Depths
Select the number of depth shades to use: 2
or 4 (default). This value works in
conjunction with Safety Contour Depth,
Shallow Water and Deep Water
Areas
Select Plain Boundaries (default), which
means to symbolize using the S-52
Presentation Library; or Symbolized
Boundaries, which means to symbolize
using IHO chart specifications (the way an
IHO-compliant paper chart appears).
Transparency
Select a transparency setting (none, 25, 50,
75, or 100 percent) for polygon fills in the
display.
Safety Contour
The areas that have sufficient depth for safe
navigation. The safety contour is symbolized
as a thick solid line. It also defines the
boundary of shallow and deep-water areas
for the purpose of area symbolization.
Shallow Water
The contour boundary between the two
darker colours used for water shallower than
the Safety Contour.
Safety Soundings
The safety depth is used in the symbolization
of soundings. Soundings whose depth is
less than the safety depth are displayed in
bold text.
Deep Water
Define the contour boundary between the
two lighter colours used for water deeper
than the Safety Contour.
Categories
Pre-defined categories of objects to be
displayed
104
Type a value in the appropriate field.
Select a category from the drop-down
menu.
CARIS HIPS and SIPS User’s Guide
Options: S-52 Display
Field
Description
To assign a value...
SCAMIN
Select this option to filter features from the
Display window display that have SCAMIN
values less than the display scale. These
features are however, still drawn in the
selection/superselection colours if they are
selected or superselected.
Select or clear the check box to turn the
display on or off
Safety Contour Labels/
Contour Labels
Show labels on safety contours and/or other
contours.
Soundings
Control the display of soundings.
Text
Control the display of text.
Error Ellipses
Enable the display of the Errell (error ellipse)
attribute.
4. Click Apply to implement the changes without closing the dialog box,
or OK to implement the changes and close the dialog box.
CARIS HIPS and SIPS User’s Guide
105
Options: S-52 Display
106
CARIS HIPS and SIPS User’s Guide
4
4.
Data Directories
Data Directories: Introduction
Introduction
The structure of the HIPS and SIPS data directories is designed
to maximize data access efficiency during processing. By
definition, these directories include only those used to store raw
or processed data and products, not the HIPS and SIPS
applications nor their associated system files and libraries. The
data directories are listed in the following table.
Data Type
Default Directory Location
Projects
..\Caris\Hips\HDCS_Data
Raw data
..\Caris\Hips\Preprocess
Session files
..\Caris\Hips\Session
Field sheets
..\Caris\Hips\Fieldsheets
Tide
..\Caris\Hips\Tide
SVP
..\Caris\Hips\Svp
For reasons of consistency with older code contained within HIPS
and SIPS, directory names and paths should not contain any
spaces or special Windows characters (\, /, :, *,?,”,<,>, and |).
108
CARIS HIPS and SIPS User’s Guide
Data Directories: Projects
Projects
The Projects directory holds all of the converted data. The Project
directory contains two main components:
•
HIPS and SIPS data (“HIPS AND SIPS DATA” ON PAGE 109)
•
Vessel files (“VESSELCONFIG DIRECTORY” ON PAGE 110)
HIPS and SIPS Data
Converted data in HIPS and SIPS is stored in a Project/Vessel/
Day/Line (P/V/D/L) structure. Each survey project is divided into
one or several vessels (for example, survey launches),
contributing to the same project. The data can be from different
generations of surveys, or different hardware collection
platforms. Each vessel folder is divided into separate survey days
and each survey day contains one or more survey lines.
Below is an outline of the P/V/D/L structure for a project called
Gilligan with a vessel called Minnow. The project contains three
line files.
HIPS Project File
(Gilligan.hpf)
Project
Gilligan
Vessel
Minnow
VesselConfig
Day
2003-001
Line
Line001
CARIS HIPS and SIPS User’s Guide
Line002
Line003
109
Data Directories: Projects
In the Project directory, in addition to the folder(s) containing the
vessel(s), there is also a HIPS Project file (HPF) that contains the
projection information used by the HIPS and SIPS interface to
define the default projection for that project. When HIPS and
SIPS accesses the navigation data (which is stored in unprojected
latitude and longitude), the data is projected using the projection
stored in this file. The HPF is given the same name as the project.
For more information on creating a new project see “DEFINE
PROJECT” ON PAGE 150.
The name of the vessel in the P/V/D/L path provides the link to
the actual HIPS Vessel File and therefore must be spelled the
same as the HVF in the VesselConfig directory. The data cannot
be processed if the HVF is not present or if the vessel name in the
P/V/D/L path is misspelled.
The survey day in the P/V/D/L structure is composed of two
components separated by a hyphen—the four-digit year and the
three-digit Julian date. The date used in the Day directory name
does not actually play a role in data processing—it is used as a
convenient mechanism for organizing survey data.
When a new project is created, this directory structure is built
and the HPF is generated. The vessel file must exist in the
VesselConfig directory at the time the project is defined, however
it can be modified at any time (providing the name is not
changed).
VesselConfig Directory
The VesselConfig directory contains the HIPS Vessel File (HVF)
used in the vessel component of the P/V/D/L path. The name of
this directory must not be changed and it always has to be located
inside the Raw Data directory on the same level as the project
directories.
For more information about the HVF see “VESSEL FILES” ON
PAGE 5-2.
110
CARIS HIPS and SIPS User’s Guide
Data Directories: Raw Data
Raw Data
The raw data directory is used to store unprocessed files that are
used as input into HIPS via the Conversion Wizard. Unprocessed
files can be stored in any order and in any location on your
system. However it is recommended that you store these files in
a folder structure that mimics the P/V/D/L structure of the
Projects folder.
Not only does the P/V/D/L structure provide a consistent path for
data retrieval. You can also take advantage of a feature in the
Conversion Wizard that lets you open for conversion at any level
of the P/V/D/L folder structure and maintain that structure
through conversion.
For example, a new project called "Gilligan" is created by the New
Project wizard without adding a vessel or survey days to the
project definition.
Raw data is then converted to HIPS and SIPS format through the
Conversion Wizard. The File Selection Type is set to "Project" in
Step 2 of wizard. The converter then knows that data is stored in
the P/V/D/L structure and that you are loading from the Project
level. All folders on the next level are interpreted as vessel names
and the level after that as survey days.
Each vessel name must exist in the VesselConfig directory,
otherwise the converter will report errors. In this example, there
is only one vessel folder, called "Minnow" and it contains several
survey days. There happens to be a HVF in the VesselConfig
directory called "Minnow," so the converter creates the vessel
folder beneath the project name "Gilligan" in the Project directory
and also all of the survey days that are necessary. If the survey
days or the vessel are already present, the converter uses them.
Finally, all of the lines found are converted.
To convert raw data that is not stored in the P/V/D/L structure,
simply set the file selection type to "Raw" and select the files
individually.
For more information on converting data to HIPS/SIPS format
see “RENAME DAY AND LINE FOLDERS” ON PAGE 156.
CARIS HIPS and SIPS User’s Guide
111
Data Directories: SVP and Tide
SVP and Tide
SVP
The SVP directory contains all of the sound velocity profile files.
They can be stored in subdirectories of this directory if desired.
Tide
The Tide directory contains all of the tide files. They can be stored
in subdirectories if desired.
112
CARIS HIPS and SIPS User’s Guide
5
5.
HIPS Vessel Editor
HIPS Vessel Editor: Vessel Files
Vessel Files
The HIPS Vessel Editor is an application for viewing and editing
HIPS vessel information. Vessel information is contained in the
HIPS Vessel File (HVF).
The HVF is an Extensible Mark-up Language (XML) file that
describes the installation and calibration of equipment installed
on the survey vessel. The information in the HVF is used by
multiple processes including merging, mosaicking, and
calculating sounding uncertainty.
The HVF is divided into a number of distinct sections, each
describing one type of sensor. The sections are time-tagged and
multiple entries can be defined for different time periods. The
HVF for a ship is stored in the default directory
…\Hips\HDCS_Data\VesselConfig.
NOTE: In previous versions of HIPS and SIPS, a text file
called the Vessel Configuration File (VCF) was used in
place of the HVF. VCF files can still be opened in the Vessel
Editor and edited, but when the file is re-saved it is
converted to an HVF format.
The following sections describe common features in the HVF.
Vessel Coordinate
System
Vessel configuration is based on an instantaneous threedimensional coordinate system, which is used to locate sensors
and other equipment. Below is an example of various sensor
equipment locations on board a vessel.
The vessel coordinate system locates equipment with an
X-Y-Z axis that uses a Reference Position (RP) as a point of origin.
The location of the RP depends upon the type of sonar system
used in the survey.
The axes are defined as follows:
114
CARIS HIPS and SIPS User’s Guide
HIPS Vessel Editor: Vessel Files
•
The Y-axis is oriented along the vessel’s fore/aft axis, positive
forward.
•
The X-axis is oriented along the vessel’s port/starboard axis,
perpendicular to the Y-axis, positive to the starboard.
•
The Z-axis is perpendicular to the X-Y plane, and positive
into the water.
To ensure that the correct signs are used when entering
X-Y-Z sensor offsets into the Vessel Editor, the sensor
location must be described relative to the Reference Point.
Imagine standing at the location of the Reference Point and
describing how far and in what direction the sensor is away
from you.
The location of the vessel’s coordinate system within the local
fixed coordinate system is determined by the navigation system
and tide. The orientation of the coordinate system is defined by
the vessel’s gyro and attitude sensors (pitch and roll). Gyro, pitch
and roll observations are defined as follows:
Reference Position
•
A positive gyro observation is defined as the clockwise
rotation of the vessel (from 0 and 360 degrees) within the
navigation coordinate system.
•
A positive pitch is observed when the bow of the vessel is
down (bow down).
•
A positive roll is observed when the starboard side of the
vessel is up (starboard up).
The Reference Position (RP) is a location from which all other
offsets are derived. Its location is usually at the centre of the
ship’s gravity. This position is used as the centre of the ship’s
rotation when applying the pitch/heave/roll parameters, and
must be applied as accurately as possible.
CARIS HIPS and SIPS User’s Guide
115
HIPS Vessel Editor: Vessel Files
Time Stamp
A vessel’s configuration changes over time: Different draft
settings may be used in a survey, or the position of the
transducers on a boom may change, or a different ellipsoid is
used. A time stamp is used to keep track of these changes. The
time stamp records the time from which a configuration is valid
and is recorded with each entry to the HVF.Below is an example
of time stamps and vessel configuration.
new nav.
antenna
position
new draft
error
1999-127
14:10:1
1999-263
09:23:0
datum
new nav.
antenna
position
2000-149
17:10:3
2000-170
10:0:0
new ellipsoid/
Time in HIPS is based on the recorded reference time. No
distinction is made for UTC.
Time Correction
In the HVF, most sensors have a Time Correction field that
contains the time difference between the sensor clock and the
reference clock. Sensors are time tagged and all clocks are
compared to the reference clock so sensor readings can be
synchronized.
The Time Correction field is specified in seconds and is positive if
ahead of the reference clock:
Time Correction = Recorded Time - Reference Time
The following figure shows time correction with respect to the
sensor clock.
tr
origin of reference
clock axis
origin of sensor
clock axis
116
clock error =
time
td – t r
td
CARIS HIPS and SIPS User’s Guide
HIPS Vessel Editor: Working With the Vessel Editor
Working With the Vessel Editor
Open the Vessel Editor
The Vessel Editor is launched from the HIPS and SIPS interface.
Edit > Vessel Editor
Tool
Menu
Vessel Editor
Overview
1. Select the Vessel Editor command.
The Vessel Editor is displayed.
Below is an example of the Vessel Editor with a vessel file
displayed.
The vessel is displayed in 3-D format. The display can be
manipulated using the 3-D display compass. Sensor location is
represented by a coloured dot or line.
Above the vessel outline is a drop list containing all the unique
time stamps in the vessel file. Because the graphical display can
only display the configuration at a single point in time, select one
of the time stamps for viewing the vessel outline.
CARIS HIPS and SIPS User’s Guide
117
HIPS Vessel Editor: Working With the Vessel Editor
Below the outline are the tables where you enter information on
the sensors used in the survey.
Open, Close and Save Files
Open a saved file in the Vessel Editor.
File > Open
Key
The Open File dialog box is displayed.
2. Click a file so it is displayed in the File Name text box.
Tool
Menu
1. Select a Open command.
3. Click OK.
<Ctrl + O>
The file opens in the Vessel Editor with the vessel’s outline
displayed in the editor, and a list of active sensors displayed in
the Sensors list box.
Vessel Configuration Files, created in previous versions of
HIPS and SIPS, can be opened and edited in the Vessel
Editor. The files are automatically re-saved as HIPS Vessel
Files.
Save changes to an already existing file.
File > Save
Changes made to file are automatically saved.
To save the file under a new name, select File > Save As.
Key
Tool
Menu
1. Select a Save command.
<Ctrl + S>
File > Close
You are prompted to save changes made in the Vessel Editor.
2. Click OK.
Create a text file listing the parameters entered in Vessel Editor.
Tool
Menu
1. Select the Close command.
Key
1. Make sure a HVF is open in the editor.
<Ctrl + F4>
Menu
2. Select the Vessel Report command.
Tools > Vessel
Report
The Save As dialog box is displayed. The default directory is
Hips\6.1\HDCS_Data\VesselConfig.
3. Type a name for the file in the File Name field.
118
CARIS HIPS and SIPS User’s Guide
HIPS Vessel Editor: Working With the Vessel Editor
4. Click Save.
3-D Controls
The display in the editor can be rotated, zoomed and panned
using the compass, keyboard, and mouse.
Compass
Rotation along the X-Y-Z axis is handled by moving the arrow
heads at the ends of the compass.
Z-axis rotation arrow
1. To rotate the image along the Z-axis, position the cursor on the middle
arrow head, press and hold the mouse button, and drag the cursor
upward so that the image is rotated. The compass can be rotated 90º.
2. To rotate the image along the X-Y axis, position the cursor on any of
the other arrow heads, press the mouse button and drag the arrow
head in a left-right or up-down direction. The compass can be rotated
360º.
3. Alternatively, the image can be rotated in the horizontal plane by
grabbing the Z-arrow, then pressing the <Ctrl> key and the left-mouse
button and moving the cursor up and down in the view. Rotation
around the Z-axis can be performed by pressing the <Shift> key and
moving the cursor left and right in these windows.
CARIS HIPS and SIPS User’s Guide
119
HIPS Vessel Editor: Working With the Vessel Editor
Pan
Zoom
There are three pan options:
•
To pan along the X-Y axis: place the cursor in the 3-D area,
press the middle mouse button and drag the display to a new
location.
•
To pan along the Z-axis: place the cursor in the 3-D area,
press and hold both the <Shift> key and middle mouse
button and move the cursor in the window.
•
To centre the 3-D Display window on a selected point:
position the cursor over the point and click the middle mouse
button.
The zoom option is similar to pan
1. Press and hold both the <Ctrl> key and right-mouse button while
dragging the mouse up or down to zoom in or zoom out.
120
CARIS HIPS and SIPS User’s Guide
HIPS Vessel Editor: Working With the Vessel Editor
Create Vessel Outline
The Vessel Shape command creates a 3-D vessel outline that is
displayed in the Editor. You may want to make revisions to an
existing vessel outline or create a new outline if one does not exist
in the HVF.
The Vessel Shape command opens three dialog boxes that define
the length, width and height of the vessel.
Edit > Vessel Shape
The Vessel Shape - Step 1 dialog box is used for entering width
and length.
Tool
Menu
1. Select the Vessel Shape command.
1. Enter a width for the vessel (port to starboard).
2. Enter a length for the vessel (stern to the base of the bow).
3. Enter a length for the vessel (stern to the tip of the bow).
4. Click Next.
The Vessel Shape - Step 2 dialog box is displayed.
CARIS HIPS and SIPS User’s Guide
121
HIPS Vessel Editor: Working With the Vessel Editor
The length and width to the Reference Position (RP) is calculated
from the values you entered in the previous dialog box. If you
have to change these values, complete the following steps.
1. Type the length (from the stern to RP).
2. Type the width (from the starboard side to the RP).
3. Click Next.
The Vessel Shape - Step 3 dialog box sets the height
measurements for the vessel.
1. Type the height value in the box.
2. Type the height of vessel RP from the keel.
3. Click Finish.
The Vessel Editor opens with the vessel outline displayed in the
interface.
122
CARIS HIPS and SIPS User’s Guide
HIPS Vessel Editor: Working With the Vessel Editor
Options Dialog Box
Default ellipsoid
Select a ellipsoid for a new vessel file. The ellipsoid should be the
same as the one used in the survey. The ellipsoid is displayed in
the Navigation section of the editor.
The list of available ellipsoids is maintained in the datum.dat file
referenced by the environment variable, uslXdatum. By default,
this file is located in the System directory.
Menu
1. Select the Options command.
Tools > Options
The Options dialog is displayed.
2. Select the Options - General tab.
3. Select an ellipsoid from the pull-down menu.
4. Click Apply to apply and save the setting to the file.
5. Click OK to close the dialog box.
Colours
The locations of sensors and other equipment are shown by a
colour markers. You can select another colour for a sensor
marker.
Menu
1. Select the Options command.
Tools > Options
The Options dialog box is displayed.
2. Select the Options - Colours tab.
3. Select a colour from the pull-down palette, or create a custom colour
from the standard Windows colour picker.
4. Click Apply to activate the changes but not close the Options dialog.
5. Click OK to activate the changes and close the Options dialog.
CARIS HIPS and SIPS User’s Guide
123
HIPS Vessel Editor: Working With the Vessel Editor
Exit the Vessel Editor
Close the Vessel Editor and all files.
Key Menu
1. Select an Exit command.
124
File > Exit
You are prompted to save any changes that have not yet been
saved.
<Alt + F4>
2. Click OK.
The Vessel Editor closes.
CARIS HIPS and SIPS User’s Guide
HIPS Vessel Editor: Create a New HVF
Create a New HVF
Use the HIPS and SIPS Vessel Wizard to set the parameters
needed to create a new file. Additional information is entered in
the Vessel Editor after the file has been created.
Tool
Menu
1. Select the New Vessel File command.
File > New
The Vessel Wizard Step 1 dialog box is displayed.
(The dialog boxes displayed by the wizard are contingent on the
type of sonar used in the survey.)
Vessel Information
1. Type a name similar to the vessel used in the survey. Make sure the
name does not include any spaces.
2. Click the Calendar button to insert the year and date from which the
vessel file is valid.
3. Click Next.
CARIS HIPS and SIPS User’s Guide
125
HIPS Vessel Editor: Create a New HVF
Type of Survey
The second dialog box prompts you to enter the sonar type used
in the survey.
There are four sonar types:
•
Singlebeam
•
Multibeam
•
Multi-transducer
•
Side Scan Sonar
1. Select a sonar type by clicking the appropriate check box.
2. Click Next to go to the next step in the Vessel Wizard, or if you
selected Side Scan Sonar, click Finish.
Single Beam
If you select Single Beam as the type of survey in Step 2, then the
remaining steps in the creation of a new HVF are “MOTION
SENSORS” ON PAGE 129 and “CONFIGURATION OPTIONS” ON PAGE 130.
126
CARIS HIPS and SIPS User’s Guide
HIPS Vessel Editor: Create a New HVF
Multibeam
1. Select the appropriate check box to indicate if one or two transducers
are used in the survey.
2. Enter the number of beams in each transducer.
3. Select the sonar model.
4. Click Next to open the Motion Sensor step dialog box.
CARIS HIPS and SIPS User’s Guide
127
HIPS Vessel Editor: Create a New HVF
Multi-Transducer
1. Enter the Number of Transducers on a boom.
2. Select Yes if the transducers are mounted to a fixed boom or to the
hull of the vessel, or select No if the transducers are on a movable
(decoupled) boom.
3. Type the default Alongtrack value of all the transducers relative to the
ship's reference point.
4. Type the default Depth of all the transducers relative to the ship's
Reference Point.
5. Select the sonar model from the Model drop-down list.
The following parameters are necessary to calculate Total
Propagated Error.
6. Type the distances from the positioning system to the centre of the
boom in the Navigation to Boom X-Y-Z fields.
7. Type the distance from the motion recording unit to the centre of the
boom in the MRU to Boom X-Y-Z fields.
The Roll and Gyro misalignment values are needed for fixed-boom
system. However, for a decoupled boom, only a Gyro misalignment
value is needed.
The Squat and Heave percentage values are transducer responses
to overall heave and squat. For fixed-boom transducers this
should be 100% and less than 100% for decoupled-boom
transducers.
8. Type a degree offset in the Roll and Gyro fields.
9. Type a percentage value in the Squat and Heave fields.
10. Click Next to open the Configuration Options step.
128
CARIS HIPS and SIPS User’s Guide
HIPS Vessel Editor: Create a New HVF
Motion Sensors
This dialog box determines what attitude sensors are displayed
in the HVF.
1. Create entries for any (or all) of the following sensors by clicking the
appropriate box:
•
heave
•
pitch
•
roll
The Apply in Post Processing option means that the data is applied
in the Merge process or in Sound Velocity Correction.
2. Click any of the check boxes if you want to apply the attitude sensor
data in post processing.
3. Click Next.
CARIS HIPS and SIPS User’s Guide
129
HIPS Vessel Editor: Create a New HVF
Configuration Options
The Configuration Options dialog box is displayed
This dialog box lets you enable three options:
•
the SVP (Sound Velocity Profile) pole parameters
•
dynamic draft values
•
waterline height variation
1. To include sound velocity corrections, click the Define Parameters for
Sound Velocity Corrections check box.
2. To apply dynamic draft values to vessel speeds, click the Apply
Dynamic Draft check box.
A draft-versus-speed table is created in the Vessel Editor. You
can enter values in this table once the vessel file is created.
3. If you want to apply long period variations in the waterline height in
processing data, click the Define Vessel Waterline Height Variation
check box.
4. Click the appropriate Apply in Post Processing check boxes, as
needed.
5. If you selected the Define Parameters for Sound Velocity Corrections
check box, click Next, or click Finish if did not select this option.
130
CARIS HIPS and SIPS User’s Guide
HIPS Vessel Editor: Create a New HVF
Sound Velocity Corrections
The Sound Velocity Corrections dialog box is displayed only if you
selected the Define parameters for sound velocity corrections
check box in the previous dialog box.
This dialog box records any transducer pole offsets.
Transducer head offsets must be taken into account when the
SVP is applied to the data.
1. Select the 180-degree Azimuth box if the transducer is reverse
mounted.
2. If the transducer is mounted with a large roll offset for use under
wharves or along banks, then select the Roll Offset check box
3. Type the amount of offset (in degrees) in the Roll Offset box.
4. If the transducer is mounted with a large pitch offset such that it is
pointed forward or backwards, then select the Pitch Offset check box.
5. Type the amount of offset (in degrees) in the Pitch Offset box.
6. Repeat the above steps for the second transducer if there are two
poles.
7. Click Finish.
A new HIPS Vessel File is created. You can create an outline for
the vessel (see “CREATE VESSEL OUTLINE” ON PAGE 121).
CARIS HIPS and SIPS User’s Guide
131
HIPS Vessel Editor: Edit Sensor Configuration
Edit Sensor Configuration
The active sensors shown in the Vessel Editor list (shown below)
are determined by the sensor and other parameters you selected
when creating the vessel file.
If you want to add data for a sensor not already included in the
vessel file, you can add a sensor to the list and enter its data. You
can also remove a sensor and its values from the vessel file.
Active sensors
Table of values related to the highlighted sensor.
In general, if sensor offsets or calibration values have already
been applied to logged data during data acquisition, then the
same offsets and calibration parameters must not be entered in
the Vessel Editor.
Also, if compensation for heave, pitch, and roll has already been
made to the recorded sounding data during data acquisition, for
example as in Simrad data, then it must not be applied again.
Toggle data fields
To add or remove sensors from the list of active sensors
Edit > Active Sensors
The Active Sensors dialog box is displayed.
Tool
Menu
1. Select the Active Sensors command.
If a box is checked, the sensor is included in the vessel file and
displayed in the Editor table.
132
CARIS HIPS and SIPS User’s Guide
HIPS Vessel Editor: Edit Sensor Configuration
2. Make sure a sensor box is checked to enable the sensor, or cleared to
remove the sensor.
3. Click OK.
The list is refreshed to show the selected active sensors.
The following sections explain the individual sensor data fields.
CARIS HIPS and SIPS User’s Guide
133
HIPS Vessel Editor: Edit Sensor Configuration
Swath
The swath sonar, also known as multibeam, typically has beams
that are formed in a fan shape, radiating from the centre of the
transducer.
1. Click Swath 1 in the Sensors list box so the selection is highlighted
and the swath data fields are displayed.
2. Type data (as needed) in the following fields:
•
Date: The year and Julian day of current swath time stamp.
•
Time: The hour and minute of the current swath time stamp.
•
Time Correction: The time correction value.
The X-Y-Z fields set the location of the transducer from the
Reference Point (0).
•
X: The athwart-ship distance of the transducer, positive to
starboard.
•
Y: The along-ship distance of the transducer, positive to the bow.
•
Z: The vertical distance of the transducer, positive into the water.
The Pitch, Roll and Yaw fields refer to misalignment of the
transducer, during mounting, from the vessel coordinate system.
•
Pitch: The offset is positive when rotating the transducer towards
the bow (bow up).
•
Roll: The offset is positive when rotating the transducer away from
starboard (starboard down).
•
Yaw: Indicates the horizontal rotational offset and is positive for a
clockwise rotation.
•
Manufacturer: The maker of the transducer.
•
Model: The make of the transducer. The model information is
necessary for the calculation of Total Propagated Error.
•
Serial Number: The serial number of the transducer.
Since the Simrad data read into HIPS is already corrected, the
Swath values in the HVF must be set as follows:
134
•
The X/Y/Z offsets are zero because the Simrad data
acquisition has already applied static draft and shifted the
swath profile to the vessel reference point.
•
The Roll / Pitch / Yaw transducer mounting rotations are
typically zero because the Simrad data acquisition has
already applied patch test calibration results.
CARIS HIPS and SIPS User’s Guide
HIPS Vessel Editor: Edit Sensor Configuration
Navigation
The navigation section of the HVF describes the location of the
navigation source (for example, antenna or motion sensor). This
section is used as a link between the fixed positioning coordinate
system and the instantaneous vessel coordinate system.
1. Click Navigation in the Sensors list box so the selection is highlighted
and the navigation data fields are visible.
2. Type data (as needed) in the following fields:
•
Date: The year and Julian day of the current navigation time
stamp.
•
Time: The hour and minute of the current navigation time stamp.
•
Time Correction: The time correction value.
The X-Y-Z fields set the location of the navigation source from the
Reference Point (0).
•
X: The athwart-ship distance of the source, positive to starboard.
•
Y: The along-ship distance of the source, positive towards the
bow.
•
Z: The vertical distance of the source, positive into the water.
•
Ellipsoid: Select an ellipsoid on which the navigation is based. The
ellipsoid should be the same as the one used in the survey.
•
Manufacturer: The maker of the navigation equipment.
•
Model: The make of the navigation equipment.
•
Serial Number: The serial number of the navigation equipment.
Gyro
The gyro sensor refers to any device providing a heading
orientation of the vessel.
1. Click Gyro in the Sensors list box so the selection is highlighted and
the gyro data fields are displayed.
2. Type data (as needed) in the following fields:
•
Date: The year and Julian day of the current gyro sensor time
stamp.
•
Time: The hour and minute of the gyro sensor time stamp.
•
Time Correction: The time correction value.
The Gyro Error is measured in degrees and is the difference
between the recorded sensor value and the applied heading of the
vessel: Applied Heading = Recorded value - Gyro Error.
3. Click an Edit button in the Error column to open the Gyro Error Table.
CARIS HIPS and SIPS User’s Guide
135
HIPS Vessel Editor: Edit Sensor Configuration
4. Type new values in the Gyro or Error fields and click OK to close the
dialog box.
5. Type data (as needed) in the following fields.
136
•
Manufacturer: The maker of the sensor equipment.
•
Model: The make of the sensor equipment.
•
Serial Number: The serial number of the sensor equipment.
CARIS HIPS and SIPS User’s Guide
HIPS Vessel Editor: Edit Sensor Configuration
Heave
The heave sensor records the vertical motion of the vessel.
Although the heave sensor has its own section in the Vessel
Editor, it is usually part of the same sensor package as Pitch and
Roll in most survey configurations.
1. Click Heave in the Sensors list box so the selection is highlighted and
the data fields are displayed.
2. Type data (as needed) in the following fields:
•
Date: The year and Julian day of the current heave sensor time
stamp.
•
Time: The hour and minute of the current heave sensor time
stamp.
•
Time Correction: The time correction value.
The X-Y-Z fields set the location of the heave sensor from the
Reference Position (0).
The X-Y-Z location of the heave sensor must be defined ONLY
when you intend to apply heave data during Merge AND when
remote heave compensation is necessary.
•
X: The athwart-ship distance of the sensor, positive to starboard.
•
Y: The along-ship distance of the sensor, positive to the bow.
•
Z: The vertical distance of the sensor, positive into the water.
•
Error: The applied instantaneous values for the heave sensor are
computed by subtracting the appropriate errors from the recorded
values:
Applied Heave = Recorded Heave - Heave Error.
•
Apply: Select Yes to apply heave data in the merge process.
•
Manufacturer: The maker of the sensor equipment.
•
Model: The make of the sensor equipment.
•
Serial Number: The serial number of the sensor equipment.
The location of the heave sensor is shown in the Vessel Editor by
a coloured dot.
Note: Simrad systems apply dynamic Heave, Pitch, and Roll
values to the swath data during survey. Therefore, the HVF
must be set up with the Apply switches for Heave, Pitch, and
Roll set to '”No” so these values are not applied twice.
CARIS HIPS and SIPS User’s Guide
137
HIPS Vessel Editor: Edit Sensor Configuration
Pitch
Pitch refers to the rotational motion of the vessel around the X
(port/starboard) axis. Although the pitch sensor has its own
section in the Vessel Editor, it is usually part of the same sensor
package as roll and heave in most survey configurations.
1. Click Pitch in the Sensors list box so the selection is highlighted and
the data fields are displayed.
2. Type data (as needed) in the following fields:
•
Date: The year and Julian day of the current pitch time stamp.
•
Time: The hour and minute of the current pitch time stamp.
•
Time Correction: The time correction value.
•
Error: The applied instantaneous values for the pitch sensor are
computed by subtracting the appropriate errors from the recorded
values:
Applied Pitch = Recorded Pitch - Pitch Error.
•
Apply: Select Yes to apply the pitch data in the merge process.
•
Manufacturer: The maker of the sensor equipment.
•
Model: The make of the sensor equipment.
•
Serial Number: The serial number of the sensor equipment.
The location of the pitch sensor is indicated in the Vessel Editor
by a coloured dot.
Note: Simrad systems apply dynamic Heave, Pitch, and Roll
values to the swath data during survey. Therefore, the HVF
must be set up with the Apply switches for Heave, Pitch, and
Roll set to '”No” so these values are not applied twice.
138
CARIS HIPS and SIPS User’s Guide
HIPS Vessel Editor: Edit Sensor Configuration
Roll
Roll refers to the rotational motion of the vessel around the Y
(fore/aft) axis. Although the roll sensor has its own section in the
Vessel Editor, it is usually part of the same sensor package as
pitch and heave in most survey configurations.
1. Click Roll in the Sensors list box so the selection is highlighted and the
roll data fields are displayed.
2. Type data (as needed) in the following fields:
•
Date: The year and Julian day of the current roll time stamp.
•
Time: The hour and minute of the current roll time stamp.
•
Time Correction: The time correction value.
•
Error: The applied instantaneous values for the roll sensor are
computed by subtracting the appropriate errors from the recorded
values:
Applied Roll = Recorded Roll - Roll Error.
•
Apply: Select Yes to apply the roll data in the merge process.
•
Manufacturer: The maker of the sensor equipment.
•
Model: The make of the sensor equipment.
•
Serial Number: The serial number of the sensor equipment.
The location of the roll sensor is indicated in the Vessel Editor by
a coloured dot.
Note: Simrad systems apply dynamic Heave, Pitch, and Roll
values to the swath data during survey. Therefore, the HVF
must be set up with the Apply switches for Heave, Pitch, and
Roll set to '”No” so these values are not applied twice.
CARIS HIPS and SIPS User’s Guide
139
HIPS Vessel Editor: Edit Sensor Configuration
Dynamic Draft
The squat and lift of a vessel changes as the speed changes. For
some vessels, if the squat/lift is not accounted for, significant
errors are introduced into the soundings. In this section, you can
specify up to 10 speed-draft value pairs. During merge, the
difference between the instantaneous draft and the static draft is
computed and the final depth compensated.
Draft is measured in metres/feet, and speed is measured in knots.
All draft values entered should be relative to the same reference,
but what that reference is, is not important. The first Speed-Draft
pair must correspond to a state where no draft correction is
necessary. The delta draft values, relative to the initial draft, are
computed and used to correct observed soundings.
The following formula is used to correct soundings for dynamic
draft:
Depth = observed depth – waterline + delta draft.
Delta draft is computed from the present vessel speed, as derived
from the navigation system.
You can also create your own dynamic draft model and load Delta
Draft information directly which will override the Dynamic Draft
table in the HVF.
1. Click Dynamic Draft in the sensors list box so the selection is
highlighted and the dynamic draft data fields are displayed.
2. Type data (as needed) in the following fields:
•
Date: The year and Julian day of the current time stamp for the
draft table.
•
Time: The hour and minute of the current time stamp for the draft
table.
•
Apply: Select Yes to apply the table during merge (or No to not
apply the table).
3. Click the Dynamic Draft field. A dialog box containing a table with up to
10 speed-draft pairs is displayed.
140
CARIS HIPS and SIPS User’s Guide
HIPS Vessel Editor: Edit Sensor Configuration
4. Click inside the Speed cell and type a speed value (in knots).
5. Click inside the Draft cell and type a corresponding draft value.
6. Continue entering as many speed /draft pairs as needed.
7. Click OK.
The speed-draft table is saved in the HVF.
•
Comments: Any additional comments.
Single Beam
The Single beam section refers to a vertical beam echo sounder
with one transducer mount. It can be a single or dual frequency
sounder defined as one beam with one transducer.
1. Click Single Beam in the Sensors list box so the selection is
highlighted and the data fields are displayed.
2. Type data (as needed) in the following fields:
•
Date: The year and Julian day of the current single beam time
stamp.
•
Time: The hour and minute of the current time stamp.
•
Time Correction: The time correction value.
The X-Y-Z fields set the location of the transducer from the
Reference Point (0).
•
X: The athwart-ship distance of the transducer, positive to
starboard.
•
Y: The along-ship distance of the transducer, positive to the bow.
•
Z: The vertical distance of the transducer, positive into the water.
•
Manufacturer: The maker of the transducer.
•
Model: The make of the transducer.
•
Serial Number: The serial number of the transducer.
CARIS HIPS and SIPS User’s Guide
141
HIPS Vessel Editor: Edit Sensor Configuration
SVP
A sound velocity profile (SVP) records the speed of sound at
various depths in the water column. One of the processes
available in HIPS is the application of SVP data in sound velocity
corrections. However, this procedure is not available for all types
of sonars because some sonars and their data logging systems
compensate for sound velocity during data acquisition.
To ensure the SVP is accurately applied in HIPS, the transducer
X-Y-Z offset values must be entered.
1. Click SVP 1 in the Sensors list box so the selection is highlighted and
the SVP transducer data fields are visible. If there is a second
transducer then click SVP 2 and complete the same procedures as
listed below.
2. Type data (as needed) in the following fields:
•
Date: The year and Julian day of the current SVP pole time stamp.
•
Time: The hour and minute of the current SVP pole time stamp.
3. Select Yes if there are dual transducers (or No if there is only a single
transducer).
The following three fields are for entering the pole’s X-Y-Z
coordinates. All coordinates are measured from the Reference
Point
4. Type the transducer’s X-Y-Z offsets in the following fields:
•
X: The athwart-ship distance of the transducer, positive to
starboard.
•
Y: The along-ship distance of the transducer, positive to the bow.
•
Z: The vertical distance of the transducer, positive into the water.
Note: The Reference Point for Simrad data is the
centre of rotation. It should be possible to retrieve
offset values from the Simrad Installation Datagram.
The next three fields refer to the alignment of the transducer. The
values you entered in the wizard when creating the HVF are
displayed in these fields. The fields are only to be used for large
transducer mounting offsets.
•
Pitch: Pitch offsets of the transducer.
•
Roll: Roll offsets of the transducer.
•
Yaw: Rotation of the transducer (either 0 or 180 degrees).
For information on applying SVP in processing see “SOUND
VELOCITY PROCESSING” ON PAGE 223.
142
CARIS HIPS and SIPS User’s Guide
HIPS Vessel Editor: Edit Sensor Configuration
Sweep
Sweep systems typically contain multiple vertical beam
transducers mounted on a boom and pointed straight down. The
reference point for a sweep system can be anywhere on the X-Y
plane, but must be on the water surface.
1. Click Sweep in the Sensors list box so the selection is highlighted and
the data fields are visible.
2. Type data (as needed) in the following fields:
•
Date: The year and Julian day of the current sweep time stamp.
•
Time: The hour and minute of the current sweep time stamp.
•
Time Correction: The time correction value.
•
Beams: Number of beams mounted on the boom.
3. Click the Edit button in the Beam Status field to view a table for
entering data for individual beams on the boom.
4. Type values in the fields and click OK.
5. Click Edit in the TPE Settings field to enter TPE values for each beam
on the boom and to edit values entered in the new vessel wizard.
CARIS HIPS and SIPS User’s Guide
143
HIPS Vessel Editor: Edit Sensor Configuration
6. Type values as needed and click OK.
144
CARIS HIPS and SIPS User’s Guide
HIPS Vessel Editor: Edit Sensor Configuration
Towed Sensors
If a towed sensor—such as a side scan sonar—is used on a survey,
then SIPS can compute the sensor’s position as from the ship's
position by calculating the horizontal layback and a direction to
the sensor.
1. Click Towed in the Sensors list box so the selection is highlighted and
the Towed data fields are displayed.
2. Type data (as needed) in the following fields:
•
Date: The year and Julian day of the current towed sensor time
stamp.
•
Time: The hour and minute of the current towed sensor time
stamp.
•
Time Correction: The time correction value.
•
Layback Error: The error in the computed or recorded horizontal
layback. This can be used, for example, to compensate the
recorded layback data or tow cable length for the distance
between the origin of the measurements and the defined tow point
location in the tow cable length. This value is subtracted from the
computed horizontal layback.
•
X: Offset of the tow point from the vessel’s reference position.
•
Y: Offset of the tow point from the vessel’s reference position.
•
Z: Height of the tow point (negative upwards) in relation to the
datum that is referenced to the sensor depth (in most cases, this is
the waterline).
•
Manufacturer: The maker of the towed sensor.
•
Model: The make of the towed sensor.
•
Serial Number: The serial number of the towed sensor.
CARIS HIPS and SIPS User’s Guide
145
HIPS Vessel Editor: Edit Sensor Configuration
Waterline
The purpose of this section is to define long-period changes in the
vessel's draft due to fuel burn or other loading changes.
Specifically, you can enter the height of the waterline below the
Reference Point.
If the Waterline section of the vessel configuration is not defined
then the default of zero is used by the software as the height of
the waterline below the RP. The Waterline section must be
present in the HVF for use in sound velocity corrections.
1. Click Waterline in the Sensors list box so the selection is highlighted
and the waterline data fields are displayed.
2. Type data (as needed) in the following fields:
•
Date: The year and Julian day of the current waterline time stamp.
•
Time: The hour and minute of the current waterline time stamp.
•
Waterline: The distance from the RP, positive when below the RP.
•
Apply: Select Yes to apply the waterline data in the merge
process.
For Simrad data, the Waterline value must be set to the same
value recorded as WLZ in the Simrad Installation Datagram.
The Waterline value will only be used during Sound Velocity
Correction.
The Apply switch must be set to “No”. It must not be set to
“Yes”, because it must not be used by Merge.
146
CARIS HIPS and SIPS User’s Guide
HIPS Vessel Editor: Edit Sensor Configuration
Total Propagated Error
This section defines the values for calculating Total Propagated
Error (TPE). TPE is derived from a combination of all individual
error sources. The TPE Configuration section of the vessel file
contains the following errors (among others):
•
nav/gyro/heave/pitch/roll/tide errors
•
latency error estimate
•
sensor offset error estimates.
These errors are combined with individual sonar model
characteristics in the DeviceModels.xml file to calculate
horizontal and vertical uncertainty values for every sounding
along a track line when TPE is applied.
1. Expand the TPE section by clicking + icon.
2. Type data (as needed) in the Offsets section:
•
MRU to Transducer: The physical offset in three dimensions from
the motion recording unit to transducer 1 on the vessel.
•
MRU to Transducer2: The physical offset in three dimensions from
the motion recording unit to transducer 2 on the vessel.
•
Navigation To Transducer: The physical offset in three dimensions
from the navigation antenna to transducer 1 on the vessel.
•
Navigation To Transducer2: The physical offset in three
dimensions from the navigation antenna to transducer 2 on the
vessel.
•
Transducer Roll: The mounting roll offset for transducer 1. The
offset is positive when rotating the transducer away from starboard
(starboard down).
•
Transducer Roll 2: The mounting roll offset for transducer 2. The
offset is positive when rotating the transducer away from starboard
(starboard down).
3. Type data (as needed) in the Standard Deviation section:
•
Motion Gyro: The measurement standard deviation of the heading
data in degrees.
•
Heave % Amplitude: An additional heave standard deviation
component that is the percentage of the instantaneous heave.
•
Heave (m): The measurement for standard deviation of the heave
data. Most heave manufacturers quote heave error as being
determined from StaticHeave or PercentageOfHeave depending
on which value is larger.
•
Roll: The measurement standard deviation of the roll data in
degrees.
•
Pitch: The measurement standard deviation of the pitch data in
degrees.
CARIS HIPS and SIPS User’s Guide
147
HIPS Vessel Editor: Edit Sensor Configuration
148
•
Position Nav: The standard deviation associated with the
measurement of positions for the vessel. This is usually the error
of the GPS sensor being used.
•
Timing Trans: Standard deviation in transducer time stamp
measurement.
•
Nav Timing: Standard deviation in navigation time stamp
measurement.
•
Gyro Timing: Standard deviation in gyro time stamp measurement.
•
Heave Timing: Standard deviation in heave time stamp
measurement.
•
Pitch Timing: Standard deviation in pitch time stamp
measurement.
•
Roll Timing: Standard deviation in roll time stamp measurement.
•
Offset X: Standard deviation for the X measured offset on the
vessel.
•
Offset Y: Standard deviation for the Y measured offset on the
vessel.
•
Offset Z: Standard deviation for Z measured offset on the vessel.
•
Vessel Speed: The standard deviation for the vessel speed
measurements.
•
Loading: Vertical changes during the survey because of fuel
consumption, etc.
•
Draft: The standard deviation in the vessel draft measurements.
•
Delta Draft: The standard deviation in the dynamic vessel draft
measurements.
•
MRU Align StdDev Gyro: This value is the uncertainty of the
motion recording unit placement within the vessel fixed coordinate
frame.
•
MRU Align StdDev Roll/Pitch: This value is the uncertainty of the
motion recording unit placement within the vessel fixed coordinate
frame.
•
Comments: Any additional information.
CARIS HIPS and SIPS User’s Guide
6
6.
Starting a New Project
Starting a New Project: Define Project
Define Project
All projects are organized in a Project-Vessel-Day folder
hierarchy. The default directory for projects is
…\Hips\HDCS_Data, however you can modify this setting using
the Options dialog box (see “DIRECTORIES” ON PAGE 97).
A project can be created with new Project-Vessel-Day folders, or
new Vessel-Day folders can be added to an existing project.
All projects must contain a vessel file. Make sure that an
appropriate vessel file has been created. See “DEFINE VESSEL FILE”
ON PAGE 104).
If your raw data files are set up in a Project/Vessel/Day/Line
structure and a HIPS Vessel File exists for that data, you can
skip this step and use the Conversion wizard to create the HIPS
directory structure. See “RAW DATA” ON PAGE 111 and “RENAME DAY
AND LINE FOLDERS” ON PAGE 156 for more information.
New projects are created through a wizard. Once all the data is
entered into the wizard dialog boxes, a HIPS Project File (.hpf) is
created.
Tool
Menu
1. Select the New Project command.
File > Project > New
New Project (Step 1)
The New Project (Step 1) dialog box is displayed.
150
CARIS HIPS and SIPS User’s Guide
Starting a New Project: Define Project
Add a new Project folder
1. To create a new project folder, click Add Project.
The New Project Name dialog box is displayed
2. Type a name for the Project.
3. Click OK.
A new Project folder is created and displayed in the dialog box.
Add a new Vessel folder
The Vessel folder contains the Day folders for the project.
4. Select a Project folder to select a location for the Vessel folder.
5. Click Add Vessel.
6. The Add Vessel dialog box is displayed.
7. Select a vessel file.
8. Click OK.
The Vessel folder is created and added to the Project folder.
Add a new Day folder
The Day folder contains track line data after raw data has been
converted to HIPS/SIPS format (see “RENAME DAY AND LINE FOLDERS”
ON PAGE 156). The Day folder should be named with the date that
the survey lines were recorded. However, for most formats, this
is not necessary because the date is typically recorded with the
raw data. In some cases the date of the Day folder will provide the
date of the time reference in the HIPS/SIPS format.
9. Click a Vessel folder to select a location for the Day folder.
10. Click Add Day.
The Calendar is displayed at the current year-month-day.
11. Select a new year or month, if needed, by clicking the arrow buttons at
the top of the dialog box.
CARIS HIPS and SIPS User’s Guide
151
Starting a New Project: Define Project
12. Select a new day, if needed, by double-clicking a day button in the
calendar dialog box.
13. Click Add Day again to create the Day folder with the selected dates.
Day folders are shown in Julian Day format.
14. To delete an empty Day or Vessel folder, click Delete.
The Delete button is disabled if a Vessel or Day folder already
has data converted into it.
15. Click Next.
Select an existing
project folder
New Vessel and Day folders can be added to an existing project.
1. Click an existing project from the list in the dialog box.
2. Add vessel and day folders as need.
If a HIPS Project File (HPF) already exists for a project, the Finish
button is displayed. You can enter a new Vessel or Day folder, but
cannot enter information from the other wizard dialog boxes.
3. Click Finish to close the wizard.
152
CARIS HIPS and SIPS User’s Guide
Starting a New Project: Define Project
New Project (Step 2)
The New Project (Step 2) dialog box is displayed.
1. Type any comments about the project in the Description text area, if
needed.
2. Enter the name of the person working with the project data in the
Owner field. The default name that is displayed is taken from the
current Windows NT logon name.
3. Click Next.
CARIS HIPS and SIPS User’s Guide
153
Starting a New Project: Define Project
New Project (Step 3)
The New Project (Step 3) dialog box is displayed.
The world-wide map projection coordinate systems are
defined in the file …\Hips\System\mapdef.dat.
1. Select the Select UTM Zone Automatically check box if you want to
apply this projection. UTM is the default projection for HIPS and SIPS.
The country and zone options are dimmed.
If you are working with geographic projections, complete Steps 2
to 4.
2. Click the UTM option so the box is no longer checked.
3. Select a country or area from the Group Name list box.
4. Select a zone from the Entry Name list box.
The key name is automatically displayed once the country and
zone have been selected.
5. Click Next.
154
CARIS HIPS and SIPS User’s Guide
Starting a New Project: Define Project
New Project (Step 4)
The New Project (Step 4) dialog box is displayed.
1. Enter the geographic coordinates for the project area (degreesminutes-seconds) by clicking a section in a box and typing the
information, or using the arrow keys to toggle the values into the entry
fields.
2. If you want to use the geographic coordinates of a currently open
project, click Current View.
3. Click Finish.
New Project-Vessel-Day folders have been created according to
the options selected in the wizard. The HPF is now located in the
Project folder.
CARIS HIPS and SIPS User’s Guide
155
Starting a New Project: Rename Day and Line Folders
Rename Day and Line Folders
You can rename existing Day and Line folders.
1. Select a Day folder or Line folder in the Control window, or select a
track line in the Display window.
Pop-up Menu
2. Select the Rename command.
Edit > Rename
Rename
The Rename dialog box is opened with the selected file or folder
name displayed.
3. Enter a new name in the box.
4. Click OK.
The changed file name is displayed in the Control window.
156
CARIS HIPS and SIPS User’s Guide
Starting a New Project: View Project or Vessel Properties
View Project or Vessel Properties
View essential project and vessel information. You can also use
this dialog box to change the coordinate system, if needed.
1. Select a Project or Vessel folder from the Project tab in the Control
window.
Pop-up Menu
2. Select the Properties command.
View > Properties
The Properties dialog box is displayed.
Properties
The General tab displays information about the project or vessel.
The information is read-only and cannot be modified.
If you selected to display project properties, then the a Coordinate
System tab is included in the dialog box.
CARIS HIPS and SIPS User’s Guide
157
Starting a New Project: View Project or Vessel Properties
You can select another coordinate system for the project using
this tab.
3. Select either the Auto UTM option or the Select Manually option.
4. If you selected Auto UTM, click Recompute to compute the UTM zone.
5. If you want to manually select a coordinate system, select a projection
and zone.
6. Click Apply to assign the new coordinate system to the project.
7. Click OK to close the dialog box.
158
CARIS HIPS and SIPS User’s Guide
Starting a New Project: Session Files
Session Files
Session files are used for re-opening all data that was processed
the last time the project was open. The data types that are
recorded in the session file include:
•
lines
•
field sheets
•
background data
•
last geographic view extents of the Display window
All session files have an .hsf file extension and are stored by
default in …\Hips\Session. The previous format of the session
file (.ses) can be opened and automatically upgraded to the new
session file format.
Menu
Save a session
File > Save Session/
Save Session As
1. Select the Save Session command, or select the Save Session As
command if the session has not been saved before, or if you want to
save an existing session under a new name.
•
If this is an already saved file, the program re-saves the existing
.hsf file.
•
If this is a new file, then the Save As dialog box is displayed.
Select a folder where you want to save the .hsf file and type a
name in the File Name text box.
If a project contains a large number of track lines, you can make
data processing more manageable and reduce the time it takes to
load data into the application by selecting specific track lines for
a session file.
1. Select the track lines you want to save in the session file.
2. Choose the Save Session As command and select the
Save Selected Lines Only check box.
3. Type a name for the session file and click Save.
The Session file is saved.
Open a session
Menu
1. Select the Open Session command.
File > Open Session
The Open Session File dialog box is displayed.
2. Select a session file.
3. Click Open.
The data listed in the Session file is opened and the layers are
shown in the Session tab in the Control window.
CARIS HIPS and SIPS User’s Guide
159
Starting a New Project: Session Files
Close a session
Menu
1. Select the Close Session command.
File > Close Session
2. If you have made changes to the session since the last save, you are
prompted to save the current changes.
3. Click OK.
Session file shortcut
The session file extension (.hsf) is a registered Windows
extension. Therefore, you can create a shortcut on the desktop for
the session and then double-click the shortcut to start the Hips
application and automatically reopen the session file.
Add Session Files
While a session file is open, you can display data from another
session file in the already open one.
Menu
1. Select the command.
File > Add Session
The standard Open dialog box is displayed.
2. Select a directory and file.
3. Click Open.
The file is opened in the application.
160
CARIS HIPS and SIPS User’s Guide
Starting a New Project: Recycle Bin
Recycle Bin
You can “delete” Project, Vessel, Day, or Line folders from an
active project by moving them to the Recycle Bin. These folders
are no longer part of the active project, but can be restored to the
project or permanently deleted. All folders in the Recycle Bin are
located in …\Hips\Recycler.
The Recycle Bin recreates the same directory structure as the
active project.
Move items
Window > Control
2. Select the folder(s) you want to delete.
Tool
Menu
1. Ensure the Control window is open and the Project tab is visible.
Key Pop-up Menu
3. Select the Delete command.
Edit > Delete
4. A dialog box asks if you want to delete the folder(s).
5. Click Yes.
Delete
6. [Optional] You can also select the folders and, while pressing the
mouse button, drag them to the Recycle Bin.
The folders are moved to the Recycle bin.
<Delete>
Restore an item
You can move a previously deleted folder from the Recycle Bin to
the active project.
1. Select the folders in the Recycle Bin.
CARIS HIPS and SIPS User’s Guide
161
Starting a New Project: Recycle Bin
Pop-up Menu
2. Select the Restore command.
Edit > Restore
The folders are now restored to the active project. If all folders are
removed from the Recycle Bin then the directory structure is
deleted.
Restore
Empty Recycle Bin
Emptying the Recycle Bin permanently deletes the folders from
the project.
You cannot restore folders that have been deleted from the
Recycle Bin.
Pop-up Menu
3. Select the Empty Recycle Bin command.
162
Edit > Empty Recycle
Bin
Empty Recycle Bin
4. A dialog box asks you if you want to continue.
5. Click Yes.
The folders are removed from the Recycle Bin.
CARIS HIPS and SIPS User’s Guide
Starting a New Project: Archive Project
Archive Project
Archive projects and related data using the Project Archive
wizard.
The projects and data are converted to a ZIP format and must be
decompressed if used again. The directory structures for the
compressed files are as follows:
•
Line files are in ../Projects/<ProjectName>/<VesselName>/
<DayName>/<LineName>
•
Fieldsheet files are in ../FieldSheets/<ProjectName>/
<FieldSheetName>
•
Other files related to data processing are in ../Preprocess/
<ProjectName>
•
Additional background files are in .. /Background/
<ProjectName>
To archive a project.
Menu
1. Select the Archive Project command.
File > Project >
Archive
The New Archive (Step 1) dialog box is displayed.
2. Type the file path for the new archived file in the New Archive Name
field; or click Browse to select a directory and type the name of the
archived project file.
3. Click Next.
CARIS HIPS and SIPS User’s Guide
163
Starting a New Project: Archive Project
The New Archive (Step 2) dialog box is displayed.
4. The directory path for the projects is shown in the Project Directory
field. If necessary, click Browse and select another directory.
The projects in that directory are displayed in the Projects list.
5. Select a project n the list.
6. Click Next.
The New Archive (Step 3) dialog box is displayed.
7. The directory path for field sheets is shown in the Field Sheet
Directory field. If necessary, click Browse to select another directory.
The field sheets contained in the directory are displayed in the
Field Sheet list.
164
CARIS HIPS and SIPS User’s Guide
Starting a New Project: Archive Project
8. Select a field sheet associated with the project using three methods:
•
Select a single field sheet by clicking on it.
•
Select a group of field sheets by pressing and holding the <Ctrl>
key while clicking on each field sheet.
•
Select a range of field sheets by pressing and holding the <Shift>
key while clicking on the first and last field sheets in the range so
that all field sheets in between are highlighted.
9. Click Next.
•
The New Archive (Step 4) dialog box is displayed.
This dialog box is used for archiving related files necessary for the
successful processing of data. Examples of these files would be
tide files, sound velocity files, delta draft, TrueHeave files, etc.
10. Click Add to view a standard Open dialog to select auxiliary data.
The auxiliary files are shown in the Auxiliary Data list.
11. To remove a file, select it and click Remove, or click Clear to remove
all listed files.
12. Click Next.
CARIS HIPS and SIPS User’s Guide
165
Starting a New Project: Archive Project
The New Archive (Step 5) dialog box is displayed.
This dialog box is used for archiving data that is associated with
the project, but is not necessary for processing data. Examples of
this type of data would be background images, associated charts,
etc.
13. Click Add to view a standard Open dialog to select auxiliary data.
The auxiliary files are shown in the Auxiliary Data list.
14. To remove a file, select it and click Remove, or click Clear to remove
all listed files.
15. Click Next.
166
CARIS HIPS and SIPS User’s Guide
Starting a New Project: Archive Project
The New Archive (Step 6)dialog box is displayed.
This dialog box lists the selections you made in the previous
dialog boxes.
16. Click Back to go to a previous dialog box to make changes.
17. Click Start to begin the archiving process.
The New Archive (Final) dialog box is displayed.
The Status list displays the files that have archived. A progress
bar displays the amount of archiving that has been accomplished.
18. Click Close to exit the wizard once archiving is completed
CARIS HIPS and SIPS User’s Guide
167
Starting a New Project: Archive Project
168
CARIS HIPS and SIPS User’s Guide
7
7.
File Conversion
File Conversion: Converting Files to HIPS/SIPS Format
Converting Files to HIPS/SIPS Format
HIPS and SIPS files are created from survey data using the
Conversion Wizard.
Data that is converted to HIPS/SIPS format may be in varying
stages of completion, depending on the data format options.
Survey data may or may not have been corrected for factors such
as heave/pitch/roll or sound velocity.
All HIPS and SIPS data is organized in a Project/Vessel/Day/Line
directory structure. (see “DEFINE PROJECT” ON PAGE 150).
If you organize the raw data files according to this structure, then
you can convert line data from entire Project or from multiple
Vessel and Day folders contained in a common Project folder. Use
the File Selection Type option in Step 2 of the wizard to do this
(see “SELECT FILES FOR CONVERSION” ON PAGE 172).
When entire project data has been converted, a Project-VesselDay-Line directory is created for the converted data. If there is
already a Project folder that is identical to the preprocess folder,
then the line data in the existing folder is over-written with the
new data.
You must organize your raw data files in a HIPS/SIPS
Project-Vessel-Day structure to convert complete Project,
Vessel and/or Day data files.
To start the conversion process, activate the HIPS Conversion
Wizard:
1. Select the Conversion Wizard command in the HIPS and SIPS main
interface.
File >Import >
Conversion Wizard
Tool
Menu
The first Conversion dialog box is displayed.
170
CARIS HIPS and SIPS User’s Guide
File Conversion: Converting Files to HIPS/SIPS Format
Select Data Format
The Step 1 dialog box lists the data acquisition systems for which
data can be converted to HIPS and SIPS files.
This list is created dynamically by searching the Hips\Bin
directory for all format libraries with the name convert_*.dll.
1. Select the survey data type to be converted by clicking the appropriate
name.
2. Click Next.
The next dialog box is displayed to select the files for conversion.
CARIS HIPS and SIPS User’s Guide
171
File Conversion: Converting Files to HIPS/SIPS Format
Select Files for Conversion
Raw data being converted into HIPS and SIPS can also be
located on a read-only media such as a CD-ROM, except for
Atlas SURF data, which at this time, does not support
conversion from read-only files.
To convert data directly to a new or existing project directory,
1. Select the appropriate File Selection Type from the drop-down list:
•
Project to convert all files in the Vessel and Day folders
•
Vessel to convert all files in the Day folders
•
Day to convert all line files in a specific Day folders
•
Raw Data to convert individual line files in a Day folder.
2. Click Select to choose the files you want to convert.
The Select Files dialog box is displayed. The default directory is
…\Hips\Preprocess, or you can browse to locate the files you
want to convert.
3. Select the Project/Vessel/Day or raw data files and click Open.
The selected file are listed in the dialog box.
4. [Optional] To remove a file, select it and click Remove.
5. Click Next.
If you selected Project as the File Selection Type, then a ProjectVessel/Day/Line directory that is identical to the preprocess
directory is created, and the wizard displays the Select
172
CARIS HIPS and SIPS User’s Guide
File Conversion: Converting Files to HIPS/SIPS Format
Coordinate Type dialog box (see “SELECT COORDINATE SYSTEM” ON
PAGE 174).
Otherwise, the Select Project-Vessel-Day dialog box (Step 3 of the
Conversion Wizard) is displayed.
Select Project-Vessel-Day
Select a Project/Vessel/Day directory to save the converted data.
1. Click the Expand (+) icon on the Project file tree so it is expanded and
the Day folder is visible.
If you want to add Vessel or Day folders or to delete a folder,
continue with Steps 2 to 6 in this procedure, otherwise go to Step
7.
2. To add a vessel folder, make sure the project directory is highlighted
and click Add Vessel.
The Available Vessels dialog box is displayed.
3. Select a vessel folder and click OK.
The new Vessel folder is displayed in the selected project
directory.
4. To add a day folder, click the Vessel folder and click Add Day.
The Calendar dialog box is displayed.
5. Select a year/month/day from the calendar, and click OK.
A Day folder with the selected date is stored in the Vessel folder.
CARIS HIPS and SIPS User’s Guide
173
File Conversion: Converting Files to HIPS/SIPS Format
6. To remove an empty Day or Vessel folder from the wizard, highlight
the folder and click Delete.
If a Vessel or Day folder is in a Project which already has data
converted into it, it cannot be deleted using the Delete button.
7. Click the Day folder so it is highlighted.
8. Click Next.
Select Coordinate System
The next step is to define the type of coordinates that were used
to record the navigation data in the raw data files.
To indicate the type of coordinate system that was used for
navigation data during data logging,
1. Select one of the following options:
•
Geographic: navigation data is recorded as latitude and longitude
coordinates.
•
Ground: navigation data is recorded as eastings and northings.
If you select Ground, complete the following steps:
2. Select an area from the Group list.
3. Select a zone.
4. Click Next.
174
CARIS HIPS and SIPS User’s Guide
File Conversion: Converting Files to HIPS/SIPS Format
Select Basic Filters
This dialog box defines basic filters to automatically reject
extremely large errors in the recorded navigation and depth data.
During the conversion process, some soundings may be
automatically rejected due to disabled beams. This is controlled
by the beam status settings in the vessel configuration. Also,
several multibeam formats pre-flag some soundings as being
failed detects. These soundings are also automatically rejected
during conversion.
Navigation and depth filters can be applied during conversion
with the following steps:
1. Select the Navigation check box to enable the navigation filter.
The extents of the filter can be defined either by setting them
manually in the dialog box or by using the extents in the HIPS
Project File (HPF). The HPF is from the project you selected in
Step 3 of the Conversion wizard.
2. Select either Manual option or the Project File option.
3. If you selected the Manual option, enter the extents in the fields. You
can use the <Tab> key to move between fields and use the arrow keys
to move between values in a field.
4. Select the Depth check box to enable the depth filter.
5. Enter the minimum acceptable depth.
6. Enter a maximum acceptable depth.
7. Click Next.
CARIS HIPS and SIPS User’s Guide
175
File Conversion: Converting Files to HIPS/SIPS Format
Enter Data Parameters
Depending on the data acquisition format you selected in the Step
1 of the wizard, one or more dialog boxes, appropriate to the data,
will be displayed. For example, the image below shows the
information for conversion of Hypack data.
1. Choose the settings appropriate to the data format being converted.
See “DATA FORMAT OPTIONS” ON PAGE 178 for more information on
options for different raw data formats.
2. Click Next.
176
CARIS HIPS and SIPS User’s Guide
File Conversion: Converting Files to HIPS/SIPS Format
Convert Data
The final step is to launch the conversion process with the
settings and parameters you have selected.
To convert raw data to HIPS/SIPS format,
1. Click the Convert button.
A progress indicator bar along the bottom of the box is activated
as the files are converted. When the operation is complete the
results of the conversion process are displayed in the dialog box.
The converted files are saved in the directory you selected in Step
2 of the conversion process (see “SELECT FILES FOR CONVERSION” ON
PAGE 172).
2. Click Close to close the wizard.
3. [Optional] to return to the initial step of the conversion process click
Restart.
CARIS HIPS and SIPS User’s Guide
177
File Conversion: Data Format Options
Data Format Options
Beginning with Step 6 of the HIPS and SIPS Conversion Wizard,
one or more dialog boxes with specific format options is displayed.
The number of options depends on the raw data format that was
selected in Step 1 of the wizard.
The various data acquisition formats and their conversion
options are presented below.
178
CARIS HIPS and SIPS User’s Guide
File Conversion: Data Format Options
Atlas
1. Select one of the following SURF data types from the pull-down menu:
•
multibeam
•
single beam (low frequency)
•
single beam (medium frequency)
•
single beam (high frequency)
•
dual frequency (low-medium)
•
dual frequency (low-high)
•
dual frequency (medium-high)
2. Click the Convert Side Scan check box to include side scan data in the
conversion process.
Critical line name information can be fitted into 12 characters
provided by the CARIS Source ID attribute for soundings in a
CARIS map.
3. Select the Shorten line names check box to modify the file name to a
12-character name (YYDDD_HHMMDD).
4. Select the higher frequency data as the primary soundings (if data
format is dual-frequency).
At the time of this writing, the Atlas SURF library cannot be
converted from read-only files. Therefore, the Atlas files must
be located on a read-write media before they can be
converted into HIPS.
CARIS HIPS and SIPS User’s Guide
179
File Conversion: Data Format Options
Chirpscan3D
There are no options for the Chirpscan3D format.
CMAX
There are no options for the CMAX format.
Coda
1. Select a sonar channel.
2. Click the Decimate Imagery check box to apply a decimation routine to
the side scan data. Decimation reduces side scan data to 1024 or
fewer intensities per side for each swath.
3. Click the Correct Imagery check box to increase contrast in the side
scan imagery.
4. Select the Cable Out is Horizontal Layback option to omit sensor
depth during conversion. If there is no sensor depth and the towpoint
has a Z-offset of zero, the cable out value is treated as the horizontal
layback value during processing.
EdgeTech
1. Select a side scan system:
•
Midas
•
260
•
JSF
2. If Midas is enabled, select a sonar frequency channel:
•
100 KHz
•
500 KHz
3. If JSF is enabled, select a sonar frequency channel:
•
All data
•
Low Frequency
•
High Frequency
Edgetech side scan data can be imported in 16-bit format or
converted to an 8-bit format.
4. Select either the Preserve 16-bit option or Convert to 8-bit option.
180
CARIS HIPS and SIPS User’s Guide
File Conversion: Data Format Options
If the Convert to 8-bit option is selected, the Scale and Shift options
are enabled. The Scale option averages the data and the Shift
option selects a initial bit value (between 0 and 8) and includes
the next seven bit values for export. For example, if you typed 8
as your initial value, then bits 8 to 15 are included in the export
process.
5. Select the Scale option to average the data into 8-bit format, or select
Shift and type the value for the first bit.
EIVA
There are no options for this format.
Elac
During conversion, XSE-format beams are numbered according
to the sounding’s position along the swath (in relation to the
vessel).
1. To number the converted beams along the swath from starboard to
port, select the Starboard to Port check box.
2. To number the converted beams along the swath from port to
starboard, select the Port to Starboard check box.
If a single Sound Velocity value was used during the survey:
3. Select the Manual option and type the sound velocity value.
If a Sound Velocity Profile was recorded and used by the logging
system, then the Interpolate option must be selected.
4. Select Interpolate to read surface sound velocity values from a
datagram.
5. To convert side scan data, select the Convert Side Scan check box.
ELAC XSE data can be recorded as 108 beams or 126 beams
(depending on the survey mode). The Pad Transducer 1 with NULL
beams writes 63 beams to Transducer 1 so that the same HIPS
Vessel File (HVF) can be used for both survey modes.
6. Click the Pad Transducer 1 with NULL beams check box so that the
soundings associated with transducer 1 are padded to have 63
beams.
7. Click Next.
CARIS HIPS and SIPS User’s Guide
181
File Conversion: Data Format Options
Furuno
1. Make sure the Convert Side Scan option is checked to include side
scan data with the bathymetric data.
182
CARIS HIPS and SIPS User’s Guide
File Conversion: Data Format Options
GeoAcoustics
If you selected the Geographic in Step 4 of the wizard, you can
obtain the latitude/longitude readings from GPS strings.
1. Select Any GPS String or GGK, GGA, or GGL.
The Amplitude Filtering option filters soundings according to
amplitude value. For each ping (port and starboard pings are
handled separately), the min/max amplitude values are obtained,
and samples that fall below the selected percentage (0-50%) are
rejected.
2. Select the Amplitude Filtering check box to implement this option.
3. Click the up or down arrow buttons to select a percentage for rejecting
soundings.
The Range Filtering option converts soundings within a specified
distance. Soundings outside of this range are not converted.
4. Select the Range Filtering check box to implement this option.
5. Click the up or down arrow buttons to select a minimum and maximum
distance.
The Pre-Filtering option controls which soundings in each swath
are considered for conversion. This option calculates the mean
depth and standard deviation within a swath sector or horizontal
bin. It then prevents any soundings that fall outside a multiple of
the standard deviation from being converted.
If Pre-filtering is used, then the mean within the sector is recomputed. Ultimately, the soundings are sorted by their residual
from the mean and those closest to the mean are converted. The
actual number of soundings converted from within each sector is
determined by the thinning factor (if used).
6. Select the Pre-Filtering check box to implement this option.
7. Determine a Threshold (multiples of the standard deviation) value by
clicking the up and down arrow buttons.
The equivalent confidence value is displayed as a percentage.
The filtering and thinning methods are executed within a sector
angle interval or a horizontal bin size. The sector angle option
divides the swath into sectors according to degree angles while
the horizontal bin size divides the swath into horizontal sectors
based on a specified across-track distance.
Vessel motion and transducer mounting angles are considered
when sector angle and horizontal bin locations are determined.
1. Select the Sector Angle Interval option and choose a degree level (to a
maximum of 10º) by clicking the up or down arrow buttons.
2. As an alternate method, Select the Horizontal Bin Size option choose
an across-track distance by clicking the up or down arrow buttons.
CARIS HIPS and SIPS User’s Guide
183
File Conversion: Data Format Options
The thinning factor reduces the number of soundings converted
on a per swath basis. The thinning factor uses a power of two
reduction control (1/2, 1/4, 1/8, etc.) so that one of two, one of four
or one of eight soundings can optionally be converted per swath
sector.
3. Select the Data Thinning check box to implement the thinning option.
4. Select a Thinning Factor value by clicking the up or down arrow
buttons.
5. Click Next.
184
CARIS HIPS and SIPS User’s Guide
File Conversion: Data Format Options
GSF
Data recorded during line turns it is marked as Offline data in
GSF. This data can be included or excluded during conversion.
When included it can also be automatically rejected. One purpose
for including the Offline data would be to maintain the same
swath profile numbers in HIPS format.
1. Make sure the Include Offline Data box is checked to convert data
recorded during turns between track lines. Otherwise select the
Reject Offline Data check box.
When offline data is converted, it can be rejected automatically.
Horizontal and depth uncertainty values in the GSF file are also
included during conversion.
CARIS HIPS and SIPS User’s Guide
185
File Conversion: Data Format Options
Hypack
The Hypack format supports recording bathymetry from single
beam, multibeam, and multiple transducer systems. It also
supports reading side scan data from Hypack Max format.
For dual-frequency single beam data, you must indicate if the
data records in Hypack are recorded as primary/secondary or
secondary/primary. The primary frequency, by default, becomes
the selected data for use in the field sheet.
If the conversion wizard detects records containing 12-bit data,
they will be converted to 16-bit format. Otherwise they are
converted to 8-bit data.
1. Select the type of data to be converted: Bathy, Side Scan or both.
2. Select a sounding data type:
•
single frequency
•
dual frequency (primary, secondary or secondary, primary)
•
multibeam
•
multiple transducers
3. If you wish to a apply the static draft during conversion, click the Apply
During Conversion check box.
The Device Numbers section is used if sensor data was recorded
from more than one device. To import data from a specific sensor,
186
CARIS HIPS and SIPS User’s Guide
File Conversion: Data Format Options
you must type the number for that device. If no number is entered
then all sensor data is imported. The following sensors are
effected by the device number setting:
•
Navigation for positional records.
•
Gyro for heading records.
•
Motion Sensor for roll, pitch and/or heave settings.
•
Port transducer for port multibeam records.
•
Starboard transducer for starboard multibeam records.
•
SOW Sensor for speed over water records.
4. If data is recorded from more than one sensor device, click the sensor
check box and enter a device number.
5. Enter the sound velocity value that is used to compute the original
travel time data from the recorded depths. This allows sound velocity
corrections to be applied in HIPS.
The HS2 format does not store day and year values with the
timestamp (it does store a time value). When the data is
converted to HIPS, the Day folder is used for reading the date. If
you want to include another date value, you must complete the
following Year and Day fields.
6. Select the Use HS2 Survey Date check box to enable the Day and
Year fields.
7. Type the year and day in the fields.
Imagenex
To read GPS height data from Imagenex files:
1. Select the height string to be read: GGA, GGK or Any.
CARIS HIPS and SIPS User’s Guide
187
File Conversion: Data Format Options
LADS
LADS data is contained in two files that are copied into the HIPS
survey line folder: An ASCII CAF file that contains the
bathymetry data, and a binary CBF file that contains the
waveform data. The CAF file can contain data from more than
one survey line (or “run”). When this is the case, the converter
splits the file into separate line folders for each run. The .caf and
.cbf prefixes are retained in the HIPS Line folder.
There are four sounding classifications in the LADS format:
•
S (Secondary sounding): the best soundings
•
P (Primary sounding): an unreliable result
•
N (No bottom found at depth): potentially a useful depth
result
•
X (No bottom detected): no result
When the data is converted, each sounding is given a status flag
according to its classification. The following table outlines
classification and matching HIPS status flag.
LADS
HIPS Sounding
Classification Flag
Definition
S
Accepted
Good soundings until they are flagged as
rejected during cleaning in HIPS.
P
Rejected by
disabled beam
A reject flag in HIPS that can be changed
to Accepted, if necessary.
N
Examined
A special flag for an Accepted sounding.
The sounding can be filtered out when
creating a BASE Surface or exporting. It
can also be flagged as Rejected during
cleaning in HIPS
X
Rejected by Depth
Gate
A type of Reject flag that can be changed
to Accepted, if desired.
There are no dialog box options for the LADS format.
LAS
There are no options for the LAS format.
188
CARIS HIPS and SIPS User’s Guide
File Conversion: Data Format Options
MarineSonics
There are no options for the MarineSonics format.
Navitronics
1. Select one of the following data types to be converted:
•
Multibeam
•
Singlebeam
•
Multiple Transducer
2. Select the Convert Side Scan check box to convert side scan data.
Navitronic side scan data can be imported in 16-bit format or
converted to an 8-bit format.
3. Select either the Preserve 16-bit option or Convert to 8-bit option.
If the Convert to 8-bit option is selected, the Scale and Shift options
are enabled. The Scale option averages the data and the Shift
option selects a initial bit value (between 0 and 8) and includes
the next seven bit values for export. For example, if you typed 8
as your initial value, then bits 8 to 15 are included in the export
process.
4. Select the Scale option if you want to average the data into 8-bit
format, or select Shift and type the value for the first bit.
5. Click Next.
Qmips
1. Choose a pair of sonar channels by clicking one of two options (1,2 or
3,4).
Reson PDS
There are no options for the Reson PDS format.
Scripps
There are no options for the Scripps format.
CARIS HIPS and SIPS User’s Guide
189
File Conversion: Data Format Options
SDF
1. Select a Klien 3000 High or Low frequency.
2. Select a pressure sensor reading to set the depth of the towfish.
3. Hidden data consists of repeated pings over the same area. Select the
Convert Hidden check box to include hidden data in conversion.
4. Select the Convert SSGyro check box to include side scan sonar gyro
data.
5. Select the Cable Out is Horizontal Layback option to omit sensor
depth during conversion. If there is no sensor depth and the towpoint
has a Z-offset of zero, the cable out value is treated as the horizontal
layback value during processing.
SDF side scan data can be in 16-bit or 8-bit format. If the data is
in 16-bit format, you can choose to convert to an 8-bit format.
6. Select either the Preserve 16-bit option or Convert to 8-bit option.
If the Convert to 8-bit option is selected, the Scale and Shift options
are enabled. The Scale option averages the data and the Shift
option selects a initial bit value (between 0 and 8) and includes
the next seven bit values for export. For example, if you typed 8
as your initial value, then bits 8 to 15 are included in the export
process.
7. Select the Scale option if you want to average the data into 8-bit
format, or select Shift and type the value for the first bit.
Seabeam
1. Make sure the Convert Side Scan option is checked to include side
scan data with bathymetric data.
2. Select the Shorten Line Names check box to modify the file name to a
12-character CARIS name (YYDDD_HHMMDD).
Seafalcon
Seafalcon allows the option of importing a full-sounding dataset
or a thinned dataset. The thinning options are based on reducing
the number of beams per profile that are imported. All profiles
are imported.
1. Select the thinning option, if needed.
The following two options are enabled if the thinning option is
selected.
190
CARIS HIPS and SIPS User’s Guide
File Conversion: Data Format Options
2. Select the amount of data to be processed.
•
half the number of beams are imported
•
one fourth the number of beams from each profile are imported
3. Select the sounding type to be imported into HIPS format.
•
shoal
•
average
•
deep
You can select the swaths per ping that you want to import. In
deep water, the Seafalcon sonar produces five swaths with each
firing of the transducer. These five swaths are in an along-track
position to the ship—with swath 1 forward of the sonar and
swath 5 aft of the vessel. In shallow water only one swath per
ping is generated.
By default all five swaths are selected for import, but you can
decide which swaths to import.
4. Select the swath number(s) for import.
SEGY
There are no options for the SEGY format.
SHOALS
All soundings in the SHOALS format are given a confidence
value during acquisition. These confidence values are used to flag
soundings during conversion so that soundings with certain
confidence values are rejected. The following status flags are
assigned to soundings. These can be changed in HIPS.
•
Rejected by disabled beam: This flag rejects soundings
with a negative confidence value.
•
Rejected by depth gate: This flag is for soundings with
confidence values that range from 0 to 70. The 0 to 50 range
represents soundings where no bottom was found, and the 51
to 70 represents soundings of questionable confidence.
•
Accepted: This flag is for soundings with confidence values
from 71 to 99.
When converting to HIPS, all soundings with a confidence value
less than the Confidence Cutoff Value will be automatically rejected.
The default cutoff value is 70.
1. Use the mouse to select a cutoff value.
CARIS HIPS and SIPS User’s Guide
191
File Conversion: Data Format Options
If the dataset contains land data, you can select the topographic
format (TOF) options to convert this data too.
2. Select either the First Pulse check box to convert the return from the
top of the vegetation canopy or the Second Pulse check box to convert
the return from the ground.
192
CARIS HIPS and SIPS User’s Guide
File Conversion: Data Format Options
Simrad
1. If you are using the EM3000 sonar, select the channel used for the
primary position.
2. Select Manual Override to read data from the navigation system that is
marked inactive by Simrad.
3. Click the Side Scan/Backscatter box if you want to convert this data.
You can fit critical line information into the 12 characters
provided by the CARIS Source ID attribute for soundings.
4. Select the Shorten Line Names check box to modify the file name to a
12-character CARIS name (YYDDD_HHMMDD).
Large attitude data files can result if there is a straight one-toone import into HIPS. The Attitude Data Decimation option downsamples the data so that a smaller attitude dataset is converted.
The Decimation Factor determines the ratio of attitude data. For
example, if you select 10 as the Decimation Factor, then one out
every tenth attitude record is converted.
5. Select the Attitude Data Decimation check box to implement this
option.
6. Select a Decimation Factor to set the ratio for down-sampling attitude
data.
Motion data (heading, heave, roll, and pitch) is automatically
read from the active motion reference unit. However, you can
select another motion reference unit to read the data. Gyro data
can also be read from the headings datagram.
7. For Heading, select the Auto option to read gyro data from the active
motion reference unit, or select an inactive unit by selecting MRU1/
MRU2 options. Select the H. Diagrams option to read gyro from the
headings datagram.
8. For Heave, Roll, and Pitch, select the Auto option to read data from
the active motion reference unit, or select an inactive unit by selecting
AutoMRU1/MRU2 options.
9. For GPS Height, select a source from either the EM Height datagrams
or the GPS String in the navigation datagrams.
Navigation time stamps can be selected from either the logging
system or from a source specified by Simrad Installation
datagram (the GPS string in the navigation datagram or the
logging system).
10. Choose System to select the logging system or choose Automatic to
select the timestamp specified by the Installation datagram.
11. If you are converting single beam data from the dual frequency
EA400\600 system, select Primary to use the primary sounding as the
selected sounding in the HIPS file, or select Secondary to use the
secondary sounding as the selected sounding.
CARIS HIPS and SIPS User’s Guide
193
File Conversion: Data Format Options
SWATHPlus
1. Type a value in the Speed of sound field to apply sound velocity to the
imported data.
UNB
1. Select one or two transducers.
2. Select the Convert Sonar option, if you want to import side scan data.
Winfrog
1. Select Single or Dual Frequency.
2. Select attitude records to be converted.
3. Specify the speed of sound, so that slant range data can be generated
from the measured sounding depths.
4. Choose the navigation records to be converted.
194
CARIS HIPS and SIPS User’s Guide
File Conversion: Data Format Options
XTF
The XTF format conversion has two sections: bathymetry and
side scan.
.
For both sonar types, you must indicate the field used as the
source for navigation and gyro/heading data.
For side scan, there are additional options for converting
horizontal tow fish layback or tow cable length distances. There
are also options for reading the dynamic depth information for a
remote operated vehicle (ROV).
1. Click one of following options to select a source for reading the
navigation data fields:
•
Raw navigation datagram
•
Position
•
Bathy datagram
If you select Bathy datagram, the Ship and Sensor fields are enabled.
2. Select either the ship or sensor as a source for reading navigation
data.
Note: Navigation data for the ship can now be read from the new
XTFRAWNAVIGATION datagram that is available for Reson
MBES data stored in XTF format by Triton ISIS.
CARIS HIPS and SIPS User’s Guide
195
File Conversion: Data Format Options
If you select the Raw navigation option, the option to read the
ship attitude data from the historical XTF attitude datagram or
the new XTFRAWNAVIGATION datagram is activated.
3. Select one of the following options:
•
attitude datagram
•
raw navigation datagram
Convert Bathymetric data
To convert bathymetry data
4. Click the Convert Bathymetry check box.
5. Select a bathymetric data format from the Convert drop-down list:
•
Multibeam
•
Multi-transducer
•
Single beam from records {Prim=0} or {Prim=1}:
If there are two channels of data, you can identify which
channel contains the primary data
•
Single beam from AUX (1,2,3, or 4).
Note: Benthos C3D data will be converted to two lines:
multibeam and single beam.
The singlebeam HIPS line (with the addition of _SingleBeam
to the line name) will have the same set of navigation and
attitude data as the multibeam line, but the sounding depths
will be single beam data from the XTF sensor AuxAltitude
field.
Select gyro data field
The Gyro data field source fields are enabled. One source is CMG
(Course Made Good) from Navigation. Other options in the pulldown list are determined by the selections made in the previous
steps.
If you previously selected the Raw navigation datagram
option to read navigation and attitude data then the
option to use the same datagram for ship gyro data is
available on the drop-down list.
If you previously selected the Attitude datagram option
then the option to use that datagram is available.
If you selected either the Position or Bathy datagram
options at Step 1, you can select from the following
options:
196
•
ship
•
sensor
CARIS HIPS and SIPS User’s Guide
File Conversion: Data Format Options
Set reject soundings
flags
•
attitude packet
•
Course Made Good (CMG) from Navigation
•
Course Made Good from SSS Navigation
The XTF format attaches quality flags to soundings. For example,
with Reson sonars, 0 represents the lowest quality and 3
represents the highest quality. You can reject soundings with a
specific flag. These soundings are flagged as Rejected by Disabled
Beam in HIPS.
6. Select a quality flag so the soundings with that specific flag value are
rejected when converted to HIPS format.
If you are converting C3D or QPS data, you can apply filtering
before moving to the next step.
If you do not want to apply filtering
7. Click Next to continue with the import process.
Filtering
To apply filters for Benthos C3D or QINSy QPS data
8. Select the Multibeam Filtering check box and click Parameters to
select filtering options.
The Filtering options dialog box is displayed.
Benthos C3D data can be filtered so that only the best quality
data is imported into HIPS. You can apply the filter to port/
starboard beam angles.
1. Type a range of beam angles to select the cleanest data from the port
and starboard beams.
All other options are applied to QPS data only.
The Range Filtering option converts soundings within a specified
distance (in metres). Soundings outside of this range are not
converted.
CARIS HIPS and SIPS User’s Guide
197
File Conversion: Data Format Options
2. Select the Range Filtering check box to implement this option.
3. Click the up or down arrow buttons to select a minimum and maximum
distance.
The Amplitude Filtering option filters soundings according to
amplitude value. For each ping (port and starboard pings are
handled separately), the min/max amplitude values are obtained,
and samples that fall below the selected percentage (0-50%) are
rejected.
4. Select the Amplitude Filtering check box to implement this option.
5. Click the up or down arrow buttons to select a percentage value for
rejecting soundings.
The Statistical Filtering option controls which soundings in each
swath are considered for conversion. This option calculates the
mean depth and standard deviation within a swath sector or
horizontal bin. It then prevents any soundings that fall outside a
multiple of the standard deviation from being converted.
If Statistical Filtering is used, then the mean within the sector is
re-computed. Ultimately, the soundings are sorted by their
residual from the mean and those closest to the mean are
converted. The actual number of soundings converted from
within each sector is determined by the thinning factor (if used).
6. Select the Statistical Filtering check box to implement this option.
7. Determine a Threshold (multiples of the standard deviation) value by
clicking the up and down arrow buttons.
The equivalent confidence value is displayed as a percentage.
The filtering and thinning methods are executed within a sector
angle interval or a horizontal bin size. The sector angle option
divides the swath into sectors according to degree angles while
the horizontal bin size divides the swath into horizontal sectors
based on a specified across-track distance.
Vessel motion and transducer mounting angles are considered
when sector angle and horizontal bin locations are determined.
1. Select the Sector Angle Interval option and choose a degree level (to a
maximum of 10º) by clicking the up or down arrow buttons.
2. As an alternate method, Select the Horizontal Bin Size option choose
an across-track distance by clicking the up or down arrow buttons.
The thinning factor reduces the number of soundings converted
on a per swath basis. The thinning factor uses a power of two
reduction control (1/2, 1/4, 1/8, etc.) so that one of two, one of four
or one of eight soundings can optionally be converted per swath
sector.
3. Select the Data Thinning check box to implement the thinning option.
4. Select a Thinning Factor value by clicking the up or down arrow
buttons.
198
CARIS HIPS and SIPS User’s Guide
File Conversion: Data Format Options
5. Click Next to go to the Convert Side Scan Data dialog box.
Convert Side Scan data
The XTF dialog box for converting side scan is displayed.
If you do not want to convert side scan data then click Next and
go to “CONVERT DATA” ON PAGE 177.
Note: Contact records created in Triton ISIS are also imported
into HIPS when associated XTF data is imported.
To convert side scan data,
6. Click the Convert Side Scan check box.
7. Select one of four sonar channels by clicking an option.
8. Select one of following options to select a source for reading the
navigation data for the towfish:
•
ship
•
sensor
•
raw
•
position
9. Select one of the following options from the pull-down list as a source
for reading the gyro fields for the towfish:
•
ships
•
sensor
•
attitude packet
CARIS HIPS and SIPS User’s Guide
199
File Conversion: Data Format Options
•
raw navigation
•
Course Made Good from Navigation
•
Course Made Good from SSS Navigation
The XTF format flags repeated pings over an area as hidden data.
10. Select the Convert Hidden Data check box to include this data type in
the SIPS project.
11. To enhance the image by scaling the intensity values, click the Apply
Image Enhancement check box.
XTF side scan data can be in 16-bit or 8-bit format. If the data is
in 16-bit format, you can choose to convert it to 8-bit format.
12. Select either the Preserve 16-bit option or Convert to 8-bit option.
If the Convert to 8-bit option is selected, the Scale and Shift options
are enabled. The Scale option averages the data and the Shift
option selects a initial bit value (between 0 and 8) and includes
the next seven bit values for export. For example, if you typed 8
as your initial value, then bits 8 to 15 are included in the export
process.
13. Select the Scale option if you want to average the data into 8-bit
format, or select Shift and type the value for the first bit.
14. Click Next.
The third XTF conversion dialog box is displayed.
15. If you want to recompute side scan towfish positions in HIPS with the
recorded horizontal layback or tow cable length data, make sure the
Cable Out/Layback box is checked.
16. Select one of the following options:
•
200
from Layback field: The distance from the vessel towpoint to the
towfish.
CARIS HIPS and SIPS User’s Guide
File Conversion: Data Format Options
•
from Cable Out field: The length of the tow cable to the towfish
17. If you selected Cable Out, enter a number in the Multiplier box to
correct for integer value recording, if necessary.
18. Select the Calculate Sensor Depth check box to enable options for
calculating the depth of the towfish below the waterline.
19. Type a number of the Auxiliary field that contains the total measured
depth.
The total measured depth and the digitized height of the towfish
are used to compute the depth of the towfish below the waterline.
The towfish depth can then be combined with the tow cable
length data and the vessel's tow point configuration to compute
the position of the towfish.
When ship navigation is being read from the bathymetry packet,
then the options available for the source of GPS ellipsoid height
data are the RTK Packet and the Ocean Tide field in XTF.
However, if the ship navigation is being read from the new
XTFRAWNAVIGATION datagram then the GPS ellipsoid
height, if available, will always come from this new raw
navigation datagram.
20. Convert the GPS height of the antenna or navigation sensor from:
•
RTK packet
•
Ocean Tide
21. If data is being collected from an ROV (Remote Operated Vehicle),
click the check box to enable the source options for measurement of
vehicle depth.
The auxiliary and sensor depth fields are enabled.
22. Click the appropriate check box to select a source for reading ROV
depth data:
•
Auxiliary
•
Sensor Depth
23. Type the number of the Auxiliary field (from 1 to 6), if this option is
selected.
24. Click Next to go to the step to “CONVERT DATA”
Conversion Wizard.
CARIS HIPS and SIPS User’s Guide
ON PAGE
177 of the
201
File Conversion: Data Format Options
202
CARIS HIPS and SIPS User’s Guide
8
8.
Survey Line Processing
Survey Line Processing: Select Survey Lines
Select Survey Lines
See “SELECTION TOOLS” ON PAGE 42 for more information on selecting
track lines.
You must select a survey line to use these editor tools:
•
Attitude Editor
•
Navigation Editor
•
Single Beam Editor
•
Swath Editor
•
Side Scan Editor
You can select one or more survey lines to use these tools and
processes:
•
single beam filters
•
swath filters
•
Total Propagated Error (TPE) filters
•
restart cleaning
•
load tide
•
sound velocity corrections
•
compute GPS tide
•
compute TPE
•
load delta draft
•
load TrueHeave
•
close track lines
•
merge
•
recompute towfish navigation
•
slant range correction
You can let the program automatically select survey lines for
these functions:
204
•
BASE Surface
•
mosaicking
CARIS HIPS and SIPS User’s Guide
Survey Line Processing: Query Line Data
Query Line Data
Examine information about one or more selected track lines.
1. Select track lines in the Display window or in the Project tab of the
Control window.
Edit > Query
Key Pop-up
Tool
Menu
2. Select the command.
Query
The Query view in the Worksheet window can display more than
40 different fields of data about each line. You can view all query
fields by selecting Detailed Line Query in the General Options dialog
box (see “GENERAL” ON PAGE 75) or just the most important fields by
de-selecting this option. The information is read-only and cannot
be modified.(see “WORKSHEET WINDOW” ON PAGE 15).
<Q>
CARIS HIPS and SIPS User’s Guide
205
Survey Line Processing: Set Line Classification
Set Line Classification
Set or change a classification flag for a track line.
1. Make sure the Ship Track Lines layer is selected in the Control
window.
2. Select a track line in the Display window or Control window.
Menu
3. Select the command.
Edit > Classify Lines
The Classify Lines dialog box is displayed.
4. Select from four options for setting the line classification flag:
•
Check Line: A line that is run perpendicular to the survey and is
used to check the validity of survey data.
•
Patch Test Line: A line that is run over a surveyed area to calibrate
sensor and sonar offsets.
•
Shoal Examination Line: A line that is run over a surveyed area to
re-check possible shoals on the sea floor.
•
Track Line: A line that is part of the main survey grid.
5. Click OK.
The line is now flagged according to one of four categories.
206
CARIS HIPS and SIPS User’s Guide
Survey Line Processing: View Rejected Soundings
View Rejected Soundings
You can show or hide rejected data in the Attitude, Navigation,
Single Beam, Swath, and Subset Editors. Data that was rejected
in the Subset Editor can be viewed in the Swath Editor.
View > Show Rejected
You can also control which type of rejected data is displayed in
the Single Beam, Swath, and Subset Editors.
Key
Tool
Menu
1. Select the command.
<F4>
Menu
2. Select the View command.
View > Rejected Flag
Types
The Rejected Flag Types dialog box opens.
3. Place a check mark beside the box with the type of rejected data you
want to view.
•
Rejected by Swath/Single Beam Editor: View sounding data
rejected in the Swath or Single Beam Editors or by the Swath or
Single Beam filters.
•
Rejected by Hydrographer: View data rejected interactively in the
Subset Editor by the hydrographer.
•
Rejected by TPE: View data rejected through the Total Propagated
Error filtering process.
•
Rejected by Surface Cleaning: View data rejected through the
Surface Cleaning process.
•
Rejected by Surface Filter: View data rejected through surface
filtering.
•
Rejected by Depth Filter: View data rejected by the depth filter in
the Conversion Wizard or the Generic Data Parser when it was
converted to HIPS format.
•
Rejected by Disabled Beam: View data rejected due to a disabled
beam status during conversion. This occurs when the beam is
disabled in the vessel configuration or if the sonar system flagged
the beam as a bad detection in the raw data file.
4. Click OK.
The rejected data types you selected are displayed in the editors.
CARIS HIPS and SIPS User’s Guide
207
Survey Line Processing: Designated Soundings
Designated Soundings
The Designated Sounding flag identifies the shallowest sounding
on important features. For example, in a cluster of soundings
surrounding an outcrop of rocks, the shallowest sounding among
that cluster would be identified as Designated.
The purpose of the Designated Sounding flag is to ensure that the
shallowest depths over significant seabed features are
maintained for standard hydrographic products.
When these soundings are applied to a Bathymetry Associated
with Statistical Error (BASE) Surface, the Surface is regenerated
so that the Designated Sounding’s depth value is applied to the
nearest node (see “FINALIZE BASE SURFACE” ON PAGE 427).
The Designated Sounding option is available in the Swath and
Subset Editors. Designated Soundings can exported to ASCII,
CARIS, GSF, and HOB formats. The location of designated
soundings can be viewed in the Display window (see “CRITICAL
SOUNDINGS” ON PAGE 210).
1. Select the shallowest sounding from a cluster of soundings around a
feature in the Swath or Subset Editors.
Edit > Status Flag >
Designated
When a sounding is flagged as Designated, it is displayed in the
Subset or Swath Editor by a special symbol as shown below.
Key
Tool
Menu
2. Select the Designated Soundings command.
<D>
Find Designated
Sounding
The Find Designated Sounding command automatically selects
the shallowest sounding in cluster of highlighted soundings. This
feature reduces the time needed to select a Designated Sounding.
1. Use the cursor to highlight soundings in the Swath, Single Beam or
Subset Editors.
208
CARIS HIPS and SIPS User’s Guide
Survey Line Processing: Designated Soundings
Edit > Status Flag >
Find Designated
The shallowest sounding among the cluster of highlighted
soundings is flagged as Designated.
Tool
Menu
2. Select the Find Designated Soundings command.
CARIS HIPS and SIPS User’s Guide
209
Survey Line Processing: Critical Soundings
Critical Soundings
Display soundings with Designated, Examined and Outstanding
status flags.
For more information on sounding status flags, see “HIPS STATUS
FLAGS” ON PAGE 623.
The Display Critical Soundings command reduces the time
needed to locate Designated, Examined and Outstanding
soundings when working with large datasets. These soundings
are displayed using a HCSIDX file that contains the line, profile,
beam number and depth of all special soundings in the project.
The HCSIDX file is a project-level file that includes all special
soundings. You do not need to select a track line to generate or
update the file.
Menu
1. Select the Display Critical Soundings command.
View > Display
Critical Soundings
If you are selecting this command for first time, a message is
displayed informing you that the file has not yet been built and
that building this file might take time. If a file already exists,
then it is automatically compiled.
When the file is built or rebuilt a critical soundings layer is
created and displayed in the Session tab of the Control window.
2. Select the Critical Soundings layer and select the Refresh command.
Edit > Query
Key Pop-up
Tool
Menu
The soundings are drawn in the Display window according to the
colour settings for each sounding flag (see “STATUS” ON PAGE 92).
Menu
Tool
Information about the soundings is displayed in the Query tab of
the Worksheet window.
Query
<Q>
Critical Sounding
Properties
210
3. To view information on specific soundings, select the soundings in the
Display window and select a Query command.
Window > Properties
Critical soundings can be colour-coded according to their specific
status flags using the Options dialog box (see “STATUS” ON PAGE 92)
or the Properties window. You can also change the font and type
size for soundings from the Properties window.
1. To colour code the soundings, select the Display tab in the Options
dialog box and select Status from the list, or select the Properties
window.
2. To change the type face and font size of the soundings, click the Font
tab in the Properties window to view the standard Windows Font
dialog box.
CARIS HIPS and SIPS User’s Guide
Survey Line Processing: Reject Line
Reject Line
Use the Reject Line command to remove an entire track line from
data processing.
When a rejected line is merged, the profiles are marked as
rejected, which prevents the soundings from being used in BASE
surfacing, surface cleaning, and mosaicking. However, status
flags on the individual soundings are maintained. A rejected line
is not processed in the tiling operations in the CARIS Field Sheet
Editor or exported to a CARIS map or ASCII file.
Menu
Menu
1. Select a track line.
Edit > Reject Line
2. Select the Reject Line command.
The rejected line is displayed in the Project tab in the Control
window with a red X beside the file name.
3. To change a rejected line back to accepted, select the Accept Line
command.
Edit > Accept Line
The line is displayed in the Project tab of the Control window
with a red exclamation point ( ! ) beside the file name. This
indicates the line has been flagged as outdated. You must merge
the soundings again before they are available for further
processing (see “MERGE” ON PAGE 253).
CARIS HIPS and SIPS User’s Guide
211
Survey Line Processing: Correct for Tide
Correct for Tide
Tidal observation data must be loaded for every track line before
the Merge process can be executed. Tide data is used to generate
final depths relative to the tide datum by subtracting the tide
from the sounding depth.
There are two options for tide loading:
•
Apply tide observations from a single station to a track line
or lines using the time extent of the line(s).
The illustration below shows the tide values from a single station
that would be applied to three selected lines, based on the time
each line was recorded.
•
212
Apply tide observations from multiple tide stations to a line
or lines, using tide zones. Where a survey line falls within
two or more tide zones, the tide data to be loaded for each
part of a line is determined by the zone it falls in (as
illustrated below).
CARIS HIPS and SIPS User’s Guide
Survey Line Processing: Correct for Tide
The tide data file must span the entire time frame of the track
line. The time zone of the tidal observation data must match the
time zone of the survey data to which it will be applied.
The output from the Load Tide function (see “LOAD TIDE” ON
PAGE 215) attaches a binary HIPS tide-time series to each track
line
Tide Files
Tide data from a single station is loaded from files with the
extension *.tid. These files can be created or edited in a text
editor (such as Notepad), or with the Tide Editor.
HIPS supports a standard Canadian Hydrographic Service tide
format called COWLIS as well as two NOS/NOAA formats. HIPS
also supports a basic format consisting of just the required date,
time, and tide values.
Track lines in areas without water level changes, such as rivers
or lakes, must also have a tide file. In this case, or if tidal data
cannot be obtained, a “zero tide” file—where all tide/time values
are zero—is used so merging can proceed.
All tide files, including zerotide.tid, are located by default
in…\Hips\ver\Tide.
For more detail, see “TIDE FILE FORMATS” ON PAGE 647.
Tide Zone Files
The tide zone option assigns tide observations to track lines from
multiple tide stations based on the time period in defined
geographic zones.
Each tide zone is defined by a closed polygon with tide, time and
range corrections for a primary station, plus up to three backup
secondary tide stations.
HIPS uses a Zone Definition File (with the extension .zdf) for
defining tide zone data. This is an ASCII file and can be prepared
with any text editor.
For complete description of the ZDF format, see “TIDE ZONE
DEFINITION FILES” ON PAGE 653.
Display tide zones
Tide zones and station locations can be displayed. To view an
outline of tide zones:
CARIS HIPS and SIPS User’s Guide
213
Survey Line Processing: Correct for Tide
Menu
1. Select the Display Tide Zones command.
View > Display Tide
Zones
The Open Tide Zone Definition File dialog box is displayed.
2. Select a tide zone file, or type the file name and path in the File Name
field.
3. Click Open.
The outlines of the tide zones, and their labels, are drawn in the
Display window. The Tide Zones layer is listed in the Session tab
of the Control window.
Tide stations and
weighted average
214
When an average tide is calculated from multiple tide stations,
the weight given to a tide station’s data is inversely proportional
to its distance from the vessel at that time. In other words—the
further a station is from the survey line, the less weight is
accorded to the data from that station.
CARIS HIPS and SIPS User’s Guide
Survey Line Processing: Correct for Tide
Load Tide
Apply tidal observation data to selected HIPS track lines. A tide
zoning option is available with or without weighted averaging
from multiple tide stations.
1. Select the track line(s).
Process > Load Tide
The Load Tide dialog box is displayed.
Tool
Menu
2. Select the Load Tide command.
Select tide files
Choose a tide file containing tidal observations from a single tide
station for loading into the currently selected lines.
1. Choose the Single Tide Station Observations option.
2. Click Select to choose a tide (.tid) file.
The Open Tide File dialog box is displayed.
3. Select a tide file or type the file path and name in the field.
4. Click Open.
5. The tide file name is displayed in the Select Tide File field.
6. To revise the tide file, click Edit to open the Tide Editor.
7. Click Load to associate the file with the selected track line(s).
Select tide zone files
Choose a tide zone file to be opened into the currently selected
lines.
1. Choose the Multiple Tide Stations Using Tide Zones option.
CARIS HIPS and SIPS User’s Guide
215
Survey Line Processing: Correct for Tide
2. To choose a tide zone (.zdf) file, click Select.
The Load Zone Definition File dialog box is displayed.
3. Select a tide file or type the file path in the field.
4. Click Open.
5. The tide zone file is displayed in the Select Zone Definition File field.
6. To revise data in the zone definition file, click Edit to open a text editor.
7. Select the Weighted Averaging check box to apply this option
(see “TIDE STATIONS AND WEIGHTED AVERAGE” ON PAGE 214).
8. Select the Compute Errors check box to apply the uncertainty value in
the tide zone file. The uncertainty value is used to create a tide zone
error.
9. Click Load.
The tidal observation is loaded into the selected track lines using
the tide zone definition file.
216
CARIS HIPS and SIPS User’s Guide
Survey Line Processing: Attitude Sensor Data
Attitude Sensor Data
You can examine and clean the motion data of the vessel or towed
transducer using the Attitude Editor. For more information on
editing attitude data see “ATTITUDE EDITOR” ON PAGE 271.
Attitude Filter
Apply changes to attitude data across entire track line(s). The
filter can be used to accomplish two tasks:
•
Smooth data: The Smooth function is used to smooth out
localized variability. The parameters for creating the
smoothed data are saved to the SmoothedCoefficients file in
the HCDS_Data\Project\Vessel\Day\Line folder. This file
is applied to the track line during any process that supports
smoothing.
•
Filter data: The Filter function is used to reject attitude
that falls outside of defined boundaries. Soundings with the
same time stamp as the rejected data are also flagged as
rejected. You can choose to reject attitude data with
interpolation.
These options are also found in the Attitude Editor (see “ATTITUDE
EDITOR” ON PAGE 271).
1. Select a track line.
Tools > Set Filters
The Set Filters dialog box is displayed.
Tool
Menu
2. Select the Set Filters command.
CARIS HIPS and SIPS User’s Guide
217
Survey Line Processing: Attitude Sensor Data
1. [Optional] Select an existing HIPS Filter File from the list or click
Browse to select a file.
If you chose to load a filter file, all the values used in that file are
shown in the fields. You can filter data or change any of the
values in the fields.
2. Select the Include Filter option to make the list of data types that can
be processed by the Attitude filter.
3. Select the Filter or Smooth check boxes (or both) to activate the
options. If you select the Filter check box, the Reject with Interpolation
check box is also active.
4. Select Reject with Interpolation check box so that soundings with the
same time stamp as the rejected attitude data are available for
processing. If this check box is cleared, the soundings are flagged as
rejected (break interpolation). This check box is active only if the Filter
option is selected.
5. Filter/Smooth data by selecting either the Moving Average or Fast
Fourier methods:
218
•
The Moving Average function calculates an average sensor value
over a window of data using the Box Size parameter. The window
is defined as a number of data points or seconds centred on a
point. The average value for all of the values in the window is
calculated and will be given to the central point.
•
The Fast Fourier transformation performs a low-pass filter on the
selected sensor. You select a Box Size in either points or seconds.
CARIS HIPS and SIPS User’s Guide
Survey Line Processing: Attitude Sensor Data
This value is converted into seconds and then inverted to become
the cut-off frequency.
6. Select the Box Size parameter by clicking the up or down arrow
buttons. When using the Moving Average, the Box Size determines
the size of the window for averaging the data point. When using the
Fast Fourier, the Box Size determines the cut-off frequency that is
applied to all data.
7. Determine if the Box Size is in (data) points or time, by selecting the
Points or Seconds options.
8. Set the Threshold for smoothing or filtering data by clicking the up or
down arrow buttons. The Threshold is a multiple of the standard
deviation (sigma).
9. Click Close, or click Clear to remove data from the fields.
10. Click Save As to save the settings to a filter file, or click Save to
settings to an existing file.
TrueHeave Data
Load TrueHeave data to a survey track line.
Applanix’s TrueHeave values are computed from real-time heave
data and stored in a separate binary file along with the
corresponding heave data. This file is not imported into HIPS
during regular data conversion and has to be separately loaded to
the track line. The location of TrueHeave files can be set from the
Directories tab of the Options dialog box (see “DIRECTORIES” ON
PAGE 97).
Process > Load
TrueHeave
2. Select the Load TrueHeave command.
The Load TrueHeave dialog box is displayed.
Tool
Menu
1. Select a track line.
CARIS HIPS and SIPS User’s Guide
219
Survey Line Processing: Attitude Sensor Data
3. Click Add and select the TrueHeave file.
The file name is displayed in the dialog box.
4. To remove a file, select it and click Remove.
5. Select the Apply Time Offset if the time stamps in the TrueHeave files
do not match the time stamps for the rest of the project.
6. Type the offset to synchronize the time stamps in TrueHeave files to
the project.
7. If you are loading files logged over the GPS week number rollover, use
the drop-down box to select a reference date for the files to be loaded.
8. To apply the TrueHeave data to the track line, click Load.
220
CARIS HIPS and SIPS User’s Guide
Survey Line Processing: Attitude Sensor Data
Load Attitude/Navigation Data
Load attitude and navigation data from Applanix POS MV or
POSProc files to selected track lines.
1. Select one or more track lines.
Menu
Attitude/Navigation
Process > Load
Attitude/Navigation
Data
2. Select the Attitude/Navigation command.
The Load Attitude/Navigation Data dialog box is displayed.
.
3. Click Add to select the files by browsing to their location. You can load
either POS MV files OR load POSProc files, but not both at the same
time.
4. To remove a file from the File List, select the file and click Remove.
Reference Week
5. [Optional] To accommodate a GPS week rollover event, you can select
the Julian date of the day the data files were created. The rollover
cannot span more than 7 days.
Import Data
6. Click the appropriate check boxes to choose which attitude/navigation
records you want to import into the track line(s) from these files.
CARIS HIPS and SIPS User’s Guide
221
Survey Line Processing: Attitude Sensor Data
7. To reduce the volume of large attitude records to a manageable level,
enter an output interval (in seconds).
8. The Apply to all lines that are partially covered option will load the
navigation data even if the data does not cover the entire line.
9. Select the Allow gap between records check box to limit the interval
allowed between consecutive data records in the file. If an interval
exceeds the amount specified in the Maximum field, the data will not
be loaded and the process will stop.
10. If the time stamp in the file does not match the time stamps in the
project, you select the Apply Time Offset option and type a time value
(in seconds).
11. Click Load.
222
CARIS HIPS and SIPS User’s Guide
Survey Line Processing: Sound Velocity Processing
Sound Velocity Processing
HIPS can perform post-processing of sound velocity profiles
(SVP) to raw travel time and angle data. The result is a recomputation of the across-track/along-track/depth-coordinate
triplet for soundings as seen in the Swath Editor and Single
Beam Editor. For effective sound velocity correction, the SVP
section of the HIPS Vessel file must be defined. (see “SVP” ON
PAGE 142)
It is recommended that sound velocity correction be executed
before cleaning the data. This is because the process applies
the vessel motion data to the bathymetry, which makes
cleaning the data easier in the interactive editors.
Sound velocity processing is not available for all types of
multibeam and single beam sonar data. Only those sonar formats
that provide raw travel time and angle from the transducer are
currently supported. This includes multibeam bathymetry from
the XTF, XSE and Hypack formats.
For all other multibeam sonar formats, it is assumed that sound
velocity corrections were applied during data acquisition.
CARIS HIPS 6.1 provides sound velocity corrections for
Simrad EM format data.
Single beam bathymetry converted into HIPS using the HIPS
Generic Data Parser (see “INTRODUCTION” ON PAGE 628) can recover
the raw travel time data. This allows you to apply sound velocity
profiles to the single beam data in HIPS.
Sound velocity information converted to HIPS format can be
viewed and modified in the SVP Editor. (see “SOUND VELOCITY
EDITOR” ON PAGE 287)
CARIS HIPS and SIPS User’s Guide
223
Survey Line Processing: Sound Velocity Processing
SVP Files
Sound Velocity Profile files are in text format and can contain
more than one profile. SVP files are similar to one shown below.
[SVP_VERSION_2]
E:\HIPS\Svp\sampleSvp_v2.svp
Section 2000-198 22:37:00 47:15:04 -54:19:51
1.00 1405.00
5.00 1440.00
10.00 1456.00
15.00 1480.00
20.00 1490.00
25.00 1494.00
40.00 1500.00
70.00 1505.00
130.00 1510.00
Section 2000-198 23:00:00 47:15:03 -054:19:52
1.00 1408.00
5.00 1430.30
10.00 1440.56
15.00 1456.00
20.00 1475.00
25.00 1485.00
40.00 1500.00
70.00 1550.00
The SVP file has the following characteristics (starting from the
top):
•
The section labelled [SVP_VERSION_2] specifies the version
of the SVP file.
•
The path and name of the file.
•
A section heading for each profile. The section heading
contains:
•
224
•
the year and day (Julian date) that the profile was
recorded
•
time that the profile was recorded
•
the latitude and longitude of the profile location.
A list of depth/speed values.
CARIS HIPS and SIPS User’s Guide
Survey Line Processing: Sound Velocity Processing
Sound Velocity Correction
The sound velocity correction process uses a ray tracing
algorithm to apply the sound velocity profiles. This means that
the SVP section of the vessel configuration be defined. You can
use either regular attitude data or smoothed data for applying
vessel motion data to the ray-tracing algorithm (see “SMOOTH
DATA” ON PAGE 278).
1. Select a track line or group of track lines.
Process > Sound
Velocity Correction
The Sound Velocity Correction dialog box is displayed.
Tool
Menu
2. Select the Sound Velocity Correction command.
3. Select the Load New SVP File check box.
4. Click Select to choose an SVP file.
The Open an SVP File dialog box is displayed.
5. Select the file you want, or type the file path in the File Name text box.
The default directory is …\Hips\Svp.
6. Click Open.
The file name and path is displayed in the text box.
CARIS HIPS and SIPS User’s Guide
225
Survey Line Processing: Sound Velocity Processing
7. If you want to edit the data with the SVP editor, click Edit (see “SOUND
VELOCITY EDITOR” ON PAGE 287). .
When there is more than one sound velocity profile, the program
can use one of four options for selecting an SVP at the time of each
swath:
•
Previous in Time: Select the profile with a time stamp prior and
•
Nearest in Time: Select the profile with a time stamp nearest to
nearest to the time of the swath.
the time of the swath. This can either be prior to or after the
time.
•
Nearest in Distance: Select the profile with a position nearest
•
Nearest Distance Within Time: Select the profile with a position
nearest to the swath and has a timestamp nearest the time
of the swath within a selected range.
the position of the swath. This requires that positions be
included in the SVP file.
The following diagram demonstrates the relationship of the four
SVP options to the swath.
3
/LQH
3
3
/LQH
3
226
P1=Previous in Time
P3=Nearest Distance Within Time
P2=Nearest in Time
P4=Nearest in Distance
CARIS HIPS and SIPS User’s Guide
Survey Line Processing: Sound Velocity Processing
7LPHZLQGRZIRUVZDWK
6ZDWK
7LPH
3
3
3
3
The above two graphics demonstrate the relationship of the
profile options to the time/location of the swath. P1, P2 and P3 all
are calculated within a time period. P4 is calculated
independently of the time period.
8. Select one of above options by clicking the appropriate check box. If
you select the Nearest in Distance and Time option, make sure you
select a time range for the timestamp.
Simrad EM data
For Simrad EM data, the Sound Velocity Correction function
requires the range/angle datagram to be recorded. The function,
at a minimum, provides a re-computation of the across-track/
along-track/observed depth solution based on the new sound
velocity profile starting with the recorded range/angle data for
each beam.
An additional option switch is provided on the dialog box to
perform an optional re-computation of the steered beam angles
when you believe the recorded surface sound velocity is not
reliable. In this case, a new surface sound velocity will be
interpolated for each swath from the new sound velocity profile.
9. Select this check box to perform an additional re-computation of the
steered beam angles based on a new surface sound speed that is
interpolated from the sound velocity profile.
10. Select which smoothed sensor data is to be applied during sound
velocity correction. Sensor data can be smoothed in the Attitude Editor
(see “SMOOTH DATA” ON PAGE 278).
11. Click Process to apply the SVP file to the selected data.
CARIS HIPS and SIPS User’s Guide
227
Survey Line Processing: Sound Velocity Processing
View SVP positions
To see the positions of the sound velocity profiles in the Display
window.
Menu
1. Select the Display SVP Positions command.
View > Display SVP
Positions
The Open SVP File dialog box is displayed.
2. Select a file and click Open.
The SVP symbols are displayed in the Display window. The
symbols use the CARIS feature code selected in the Options
dialog, and text of the SVP date and time.
Menu
An SVP Positions data layer is displayed in the Session layer
tree:
228
View > Close SVP
Positions
1. To remove the SVP layers from the display, select the Close SVP
Positions command.
CARIS HIPS and SIPS User’s Guide
Survey Line Processing: Navigation
Navigation
Navigation data can be examined and cleaned for positioning
outliers. This should be performed before merging to produce
final position and depth files. However, you are not required to
examine navigation data.
For more information, see “NAVIGATION EDITOR” ON PAGE 261.
The default interpolation method for navigation data is linear.
However, you can optionally define one of three levels of Bezier
Curve fitting.
1. Select a line.
Menu
2. Select the Set Interpolation command.
Tools > Set
Interpolation
The Set Interpolation dialog box is displayed.
3. Select an interpolation option: Linear or Bezier Curve (see “LINE
INTERPOLATION” ON PAGE 265).
4. Click OK.
CARIS HIPS and SIPS User’s Guide
229
Survey Line Processing: Swath Cleaning
Swath Cleaning
During data conversion, the original data file is separated into a
number of distinct files, each storing a different types of
information. All are related by time. One of these files is the
Observed Depths file. This file contains measured single beam,
sweep, or swath soundings as reported by the data acquisition
system.
The Swath Editor displays the contents of the file for sweep and
swath systems on the screen in graphic form and lets you to
perform cleaning and filtering operations on the data.
For more information on the Swath Editor see “SWATH EDITOR” ON
297.
PAGE
Swath Filtering
When dealing with high-volume bathymetric datasets, it is
advantageous to be able to reject outliers automatically. To do
this, HIPS has a set of swath filters. There are three basic types
of filters:
•
Spike detection: The minimum and maximum depth filters
and the beam-to-beam slope filters.
•
Swath reduction: Across-track distance filters and nadir
angle filters.
•
Sonar quality: Quality values set by the sonar and missing
neighbours.
The parameters for filtering are set through the Set Filters dialog
box. These parameters can be saved in a HIPS Filter File (.hff)
that can be reopened in the Set Filters dialog box for use in
another track line.
Tools > Set Filters
The Swath/Sweep tab of the Set Filters dialog box is displayed
Tool
Menu
1. Select the Set Filters command.
230
CARIS HIPS and SIPS User’s Guide
Survey Line Processing: Swath Cleaning
1. [Optional] Select an existing HIPS Filter File from the list or click
Browse to select a file.
If you chose to load a filter file, all the values used in that file are
shown in the fields. You can filter data or change any of the
values in the fields.
2. Set the logic to Accept or Reject.
3. Select the Include Filter check box to activate the filtering options.
4. Select the filter parameters used to flag data (see below).
You can define and apply more than one filter test. The filters are
applied in sequence. Any data rejected by one filter is not
considered in the next filter test.
5. Click Close, or click Clear to remove data from the fields.
6. Click Save As to save the settings to a filter file.
The following filters are available.
•
Minimum Depth.Reject any soundings that are shallower than
the depth specified (e.g., 10 m).
•
Maximum Depth. Reject any soundings that are deeper than
•
Across Track. Beam-to-beam slopes, across-track. For each
beam on the same swath, calculate the slopes in degrees to
the prior and post beams, and if both slopes exceed the
defined value and are of opposite sign then reject the beam.
the depth specified (e.g., 50 m).
CARIS HIPS and SIPS User’s Guide
231
Survey Line Processing: Swath Cleaning
The Include Rejected option includes previously rejected
soundings when recalculating the slopes during multiple
runs of the filter.
•
Across track distance: X Nadir Depth. Any soundings with an
•
Across track distance: Port. Filter a sounding if the across track
•
Across track distance: Starboard. Filter a sounding if the across
track distance on the starboard side is greater than the value
entered in this field.
•
Beam Numbers. Specify beams to be rejected. Separate
individual beams with a space and specify a range of beams
with a hyphen. For example, entering 12 32 56-60 72 rejects
beams 12, 32, 56, 57, 58, 59, 60, and 72.
•
Angles from Nadir: Port and Starboard. Filter beams that are
•
across-track distance, from the centre beam, greater than the
nadir depth times this number (e.g,. 3.0) are rejected. For
example, in 30 metres of water, with a setting of 3.0, all
soundings with an across-track distance greater than 90.0
metres are rejected.
distance on the port side is greater than the value entered in
this field.
outside of the designated angles (e.g., 60 degrees). Angles are
computed from the nadir using depths and across-track
distances (roll corrected).
Quality Flags. If your system attaches quality codes to
soundings, and those codes are transferred to HIPS during
conversion, a sounding can be rejected according to its value.
Quality flags are currently supplied by Reson, Elac, Hypack,
and GSF multibeam systems/formats.
Missing neighbours are beams rejected during the conversion
process into HIPS. This occurs if the beam is disabled in the
vessel configuration or if the sonar system flags the beam as a
bad detect in the raw data file.
•
Port-Starboard. Beams are rejected if beams on each side of the
•
Forward-Aft. Beams are rejected if the adjacent beams in the
•
Any 2 of 4. Beams are rejected if two of the four neighbouring
swath are rejected.
previous and next swath are rejected.
beams are rejected.
During filtering, only accepted soundings are used; therefore, the
soundings rejected after one pass are not considered in the next.
232
CARIS HIPS and SIPS User’s Guide
Survey Line Processing: Swath Cleaning
Apply Filters
Tool
Menu
The last step is applying the automatic depth filter to the swath
data.
Tool > Apply Filters >
1 Screen/To End of
Line/Selected Lines/
All Lines
1. Select an Apply Filter command to apply the criteria set by the Set
Filters dialog box.
You have four options for applying the filters.
•
Filter 1 Screen: Apply the filters only to the swaths that
are currently visible in the Plan View of the Swath Editor.
•
To End of Line. Apply the filters to the track line currently
open in the Swath Editor, from the first swath currently
visible in the Plan view to the end of the line.
•
Selected Lines. Apply the filters to all of the currently
selected track lines. This function does not require that the
Swath Editor be open.
•
All Lines. Apply the filters to all track lines currently open
in the Display window. This function does not require that
the Swath Editor be open.
CARIS HIPS and SIPS User’s Guide
233
Survey Line Processing: Total Propagated Error
Total Propagated Error
Total Propagated Error (TPE) is used to assign a horizontal error
estimate (HzTPE) and a depth error estimate (DpTPE) to each
sounding.
TPE is essential for the following functions:
•
creating S-44 or S-57 compliant datasets (see “TPE FILTERING”
ON PAGE 236)
•
calculating Bathymetry Associated with Statistical Error
(BASE) Surfaces weighted by uncertainty (see “UNCERTAINTY
WEIGHT” ON PAGE 405)
TPE is derived from a combination of all individual error sources.
The following errors (among others) contribute to TPE:
•
nav/gyro/heave/pitch/roll/tide errors
•
latency error estimate
•
sensor offset error estimates
•
individual sonar model characteristics
Error values are located in the vessel file for the survey and the
DeviceModels.xml file in …\HIPS\System. Other errors are
directly entered in the Compute TPE dialog box.
The following sonar error-models in the DeviceModels.xml have
been tested by the University of New Hampshire (UNH).
•
Simrad EM300
•
Simrad EM1000
•
Simrad EM1002
•
Simrad EM3000
•
Simrad EM3000D
•
Reson SeaBat 8101
•
Reson SeaBat 9001
•
Reson SeaBat 9003
•
Reson SeaBat 8125
•
Atlas Hydrosweep DS
•
Elac Nautik 1180
•
Seabeam 2112
Other sonars listed in the file may make assumptions that could
produce less rigorous results than the error models supplied by
UNH.
234
CARIS HIPS and SIPS User’s Guide
Survey Line Processing: Total Propagated Error
Compute TPE
The Compute TPE (Total Propagated Error) command applies
HzTPE and DpTPE values to each sounding along the track line.
The HzTPE and DpTPE values are stored line-by-line with
indexing to profiles and beams. You can find specific error values
for individual soundings by querying the soundings in the Swath,
Single Beam, and Subset Editors. The HzTPE and DpTPE values
are displayed in the Query View.
Static errors (such as those related to sensor position) that are
used to compute the TPE are read directly from the project’s
vessel file and the DeviceModels.xml file. These errors are
directly entered in the TPE computation.
Dynamic errors due to tide and sound velocity values, which can
change from time to time, due to a variety of reasons, are entered
via the dialogue box, to make it easy for the user to change them.
1. Select a track line in the Display window so it is highlighted.
Process > Compute
TPE
The Compute TPE dialog box is displayed.
Tool
Menu
2. Select the Compute TPE command.
3. In the Tide Values fields, enter the error offsets to be applied to all
lines being processed.
•
The Measured offset is the error value for the tide station.
•
The Zoning offset is the error value in range calculation for a tide
zone file.
4. Enter error offsets for Sound Speed Values.
•
The Measured offset value is to compensate for inaccuracies in
SVP measurements.
•
The Surface offset value is used to account for errors in surface
sound speed measurements.
CARIS HIPS and SIPS User’s Guide
235
Survey Line Processing: Total Propagated Error
Transducer motion offsets for sweep surveys are entered in the
following three fields.
5. Type the estimated observed heave offset in the Peak-to-Peak Heave
field.
6. Type the roll values for the transducers in the Max Roll field.
7. Type the pitch values for the transducers in the Max Pitch field.
8. Click Compute.
The results are displayed in the Output tab of the Worksheet
window. A log file is also created showing the results.
You should update TPE if the observed depths have been
modified.
TPE Filtering
The TPE filtering option rejects (or accepts) soundings with
uncertainty values that fall outside limits set by International
Hydrographic Organization (IHO) standards.
These parameters can be saved in a HIPS Filter File (.hff) that
can be reopened for use on another track line.
1. Select a track line.
Tools > Set Filters
The TPE tab of the Set Filters dialog box is displayed.
Tool
Menu
2. Select the Set Filters command.
236
CARIS HIPS and SIPS User’s Guide
Survey Line Processing: Total Propagated Error
3. Select the TPE tab.
4. [Optional] Select an existing HIPS Filter File from the list or click
Browse to select a file.
If you load a filter file, all the values used in that file are shown
in the fields. You can change any of the values.
5. Select either a Reject or Accept logic command to apply to the filtered
data.
6. Complete all data in the necessary fields (see below).
7. Click Close, or click Clear to remove data from the fields.
8. Click Save As to save the settings to a filter file.
9. Apply the filters to the data.
The filter compares each sounding’s HzTPE and DpTPE values
against the depth and horizontal error limits for a specific S-44
survey order or S-57 zone of confidence (CATZOC) attribute. All
soundings with HzTPE and DpTPE values outside those limits
are rejected (or accepted).
When you select an S-44 or S-57 CATZOC standard, the dialog
box is refreshed to display the options associated with that
standard. The options for the IHO S-44 survey orders and S-57
CATZOC attribute are shown below.
CARIS HIPS and SIPS User’s Guide
237
Survey Line Processing: Total Propagated Error
Each survey order or zone of confidence contains the following
fields:
Depth error limit
•
a: constant depth error (i.e. the sum of all constant errors)
•
b: factor of the depth dependent error
•
m: position limit for horizontal errors
•
%: percentage of depth used to calculate horizontal error (S-
44 only).
To calculate the error limits for depth accuracy, the constant
depth error (a) and the factor of the depth dependent error (b) are
combined with depth (d) and the depth dependent error (b * d) in
the following formula:
Error limit for depth accuracy =
2
± a + (b × d )
2
When the filter is run, soundings with a vertical uncertainty
outside the error limit for the survey order or zone of confidence
are rejected (or accepted).
Horizontal error limit
238
To calculate horizontal accuracy, the limit for horizontal
error (m) and (if applicable) the depth percentage (%) for the
selected survey order or zone of confidence are compared against
CARIS HIPS and SIPS User’s Guide
Survey Line Processing: Total Propagated Error
a sounding’s HzTPE. Soundings with a horizontal uncertainty
outside the limits are rejected (or accepted).
Run Filter
1. Select either the ISO 2-44 or S-57 CATZOC options.
The IHO frame of the TPE tab is refreshed to display the S-44
survey order options or the zones of confidence (see above).
You can apply filtering to a selected depth range by entering the
maximum and minimum soundings for that range. Leave these
fields empty to apply filtering to every sounding along the track
line.
2. Select the Depth Limit check box to apply the filters to a depth range.
3. Type depth levels in the Minimum and Maximum fields to set a range
for the filters.
4. Select a survey order or zone of confidence option.
All fields in the User defined option are activated when this option
is selected.
5. Type Depth and Horizontal values.
Tool
Menu
6. Run one of the Filtering commands.
Tools > Apply Filters
> Selected Lines/All
Lines
CARIS HIPS and SIPS User’s Guide
239
Survey Line Processing: Total Propagated Error
Load Error Data
Override error values in the HIPS Vessel File with real-time
error values.
Applanix POS MV files and Applanix POSProc files contain realtime attitude and navigation error values recorded during the
survey. This means that different error values are recorded for
different conditions. This results in more precise error estimates
than the static error values recorded in the HIPS Vessel File.
The files must be timestamped with valid GPS entries to
determine the time of the data.
The imported files must contain the Julian date of the day the
data was acquired in the form: YYYY-JJJ-filename or filename
YYYY-JJJ
1. Select a track line in the Display window.
Menu
2. Select the command.
Process > Load Error
Data
The Load Error Data dialog box is displayed.
3. Click Add to select files. You can load either POS MV files OR load
POSProc files, but not both at the same time.
240
CARIS HIPS and SIPS User’s Guide
Survey Line Processing: Total Propagated Error
4. To remove a file from the File List field, select the file and click
Remove.
Reference Week
5. [Optional] To accommodate a GPS week rollover event, you can select
the Julian date of the day the data files were created. The rollover
cannot span more than 7 days.
Import Data
6. Choose which error records in the Applanix files you want to import
into the line by clicking on the appropriate check boxes.
7. To reduce the volume of large attitude records to a manageable level,
enter an output interval (in seconds).
Options
8. The Apply to all partially covered line option will load the error data
even if the data does not cover the entire line.
9. Select the Allow gap between records check box to limit the interval
allowed between consecutive data records in the file. If an interval
exceeds the amount specified in the Maximum field, the data will not
be loaded and the process will stop.
10. If the time stamp does not match the time stamps in the project, you
can select the Apply Time offset option and enter a time value (in
seconds).
11. Click Load.
CARIS HIPS and SIPS User’s Guide
241
Survey Line Processing: Update Backscatter
Update Backscatter
This function updates the backscatter imagery for a line after
swath cleaning is complete. This is because the backscatter data
is referenced directly to the individual beams of the bathymetry.
Thus, after soundings have been rejected, this function removes
their intensity values from the backscatter image.
1. Select a track line.
Menu
2. Select the Update Backscatter command.
242
Tools > Update
Backscatter
CARIS HIPS and SIPS User’s Guide
Survey Line Processing: Single Beam Cleaning
Single Beam Cleaning
Using the Single Beam Editor you can perform cleaning and
filtering on single beam data converted from single and dual
frequency echo sounders. This tool inherits some of the functions
of the Swath Editor such as vertical exaggeration and filtering
functions.
For more information about the Single Beam Editor see “SINGLE
BEAM EDITOR” ON PAGE 325.
Single Beam Filtering
When dealing with bathymetric datasets, it is advantageous to
reject outliers automatically. To do this, the Single Beam Editor
has a set of filters.
The parameters for these filters are set through the Set Filters
dialog box. The parameters can be saved in a HIPS Filter File
(.hff) that can be reopened for use in another track line.
1. Select a track line.
Tools > Set Filters
Tool
Menu
2. Select the Set Filters command.
CARIS HIPS and SIPS User’s Guide
243
Survey Line Processing: Single Beam Cleaning
The Single Beam Filters tab of the Set Filters dialog box is
displayed.
3. Make sure the Single Beam tab is displayed.
4. [Optional] Select an existing HIPS Filter File from the list or click
Browse to select a file.
If you chose to load a filter file, all values in that file are shown in
the fields. You can go to Step 7 or change any of the values.
5. Select either a Reject or Accept logic command to apply to the filtered
data.
6. Select the Include Filter check box to activate the filtering options.
7. Select from three filtering options:
•
Moving Average (see “MOVING AVERAGE FILTER”
•
Depth (see “DEPTH”
•
ON PAGE
245)
246)
Beam-to-beam slopes (see “BEAM-TO-BEAM SLOPES” ON
PAGE 246)
ON PAGE
You can define and apply more than one filter test. The filters are
applied in sequence. Any data rejected by one filter is not
considered in the next filter test.
8. Select the frequency to apply to the filters by making sure the
appropriate box is checked.
9. Click Close, or click Clear to remove data from the fields.
10. Click Save As to save the settings to a filter file.
244
CARIS HIPS and SIPS User’s Guide
Survey Line Processing: Single Beam Cleaning
Moving Average Filter
The Moving Average Filter rejects (or accepts) data with
difference values that fall outside of defined threshold limits. To
view the Moving Average filtering options in the Single Beam
Editor, see “DISPLAY OPTIONS” ON PAGE 327.
A moving average is calculated for each sounding (data point) by
using the adjacent soundings. The amount of adjacent data is
specified either as the number of points or as a time period.
1. Select the Moving Average check box to enable the associated fields.
Set the moving average
using seconds
This option uses a time range (in seconds) to calculate a mean
average for each data point.
For example, if you select 10 seconds as the moving average, the
filter calculates a mean average for any data point using itself
and any data points in the five-second range either side of it.
Setting the moving
average using points
This option uses a range of adjacent data points to calculate a
mean average for each data point.
For example, if the moving average is set to five data points. A
mean for any data point is calculated using itself and the two
data points on either side of it (if available).
2. Select how you want the moving average to be calculated by selecting
either Points or Seconds.
3. Use the arrow buttons to select the number of seconds or data points.
A difference value for each sounding is calculated for each
sounding from the adjacent soundings.
Thresholds
The thresholds indicate what difference values are rejected (or
accepted) during filtering.
The upper threshold is determined by the following formula:
original mean value + (threshold value X the
standard deviation)
The lower threshold is determined by the following formula:
original mean value – (threshold value X the
standard deviation)
4. Select a threshold value by clicking the arrow buttons.
CARIS HIPS and SIPS User’s Guide
245
Survey Line Processing: Single Beam Cleaning
Depth
1. Enter the depth values for filtering soundings. There are two options:
•
Minimum Depth: Reject (or accept) any soundings that are
shallower than the depth specified (e.g., 10 m).
•
Maximum Depth: Reject (or accept) any soundings that are
deeper than the depth specified (e.g., 50 m).
Beam-to-Beam Slopes
For each sounding, calculate the slopes, in degrees, to the
previous and next soundings. If both slopes exceed the defined
value and are of opposite sign, then reject the sounding.
1. Enter the degree value for the slope.
2. Select the Include Rejected option to include previously rejected
soundings when recalculating the slopes during multiple runs of the
filter.
Apply Filters
Tool
Menu
The last step is applying the automatic depth filter to the data.
Tool > Apply Filters >
1 Screen/To End of
Line/Selected Lines/
All Lines
1. Select a Filter command to apply the criteria set by the Set Filters
dialog box.
You have four options for applying the filters.
Filter 1 Screen. Apply the filters only to the soundings that are
currently visible in the Single Beam Editor.
To End of Line. Apply the filters to the track line currently open
in the Single Beam Editor, from the first sounding currently
visible in the editor to the end of the line.
Selected Lines. Apply the filters to all of the currently selected
track lines. This function does not require that the editor be open.
All Lines. Apply the filters to all track lines currently open in the
Display window. This function does not require that the editor be
open.
246
CARIS HIPS and SIPS User’s Guide
Survey Line Processing: Restart Cleaning
Restart Cleaning
The Restart Cleaning function resets status flags from rejected to
accepted for sounding, attitude, and navigation data.
Warning: All previous depth cleaning is lost once this
command is implemented.
1. Select the track line(s).
Edit > Restart
Cleaning
The Restart Cleaning dialog box is displayed.
Tool
Menu
2. Select the Restart Cleaning command.
3. Select any of the following check boxes to select a rejected data
criteria.
•
Rejected by Swath Editor/Single Beam Editor: Reset to accepted
sounding data that was rejected in the Swath or Single Beam
Editors, or by the Swath or Single Beam filters.
•
Rejected by Hydrographer: Reset to accepted the sounding data
that was interactively rejected in the Subset Editor.
•
Rejected by TPE: Reset to accepted the data that was rejected
during Total Propagation Error (TPE) filtering.
•
Rejected by Surface Cleaning: Reset to accepted data that was
rejected during Surface Cleaning.
•
Rejected by Surface Filter: Reset to accepted data that was
rejected during CUBE filtering.
•
Rejected by Depth Filter: Reset to accepted data that was rejected
by the depth filter during conversion.
CARIS HIPS and SIPS User’s Guide
247
Survey Line Processing: Restart Cleaning
•
Rejected by Disabled Beam: Reset to accepted data that was
rejected due to the disabled beam flag during conversion.
•
Rejected with Interpolation (Navigation): Reset to accepted
navigation data that was rejected without interpolation.
•
Rejected break Interpolation (Navigation): Reset to accepted
navigation data that was rejected without interpolation.
•
Rejected with Interpolation (Attitude): Reset to accepted attitude
data that was rejected with interpolation.
•
Rejected break Interpolation (Attitude): Reset to accepted attitude
data that was rejected without interpolation.
4. Click OK.
The selected data is now flagged as accepted.
248
CARIS HIPS and SIPS User’s Guide
Survey Line Processing: Delta Draft
Delta Draft
The Load Delta Draft function lets you import your model for
dynamic changes in draft and have these changes applied to the
soundings during the Merge process. Delta Draft represents a
change in draft that is positive as draft increases and negative as
draft decreases. The data, which is loaded from a ASCII text file,
overrides the Dynamic Draft information in the vessel file. The
Delta Draft value is interpolated between timestamps in Merge
and added to the Observed Depth to obtain the Final Depth.
The input format for the Delta Draft text file is similar to the
COWLIS tide format. Each record is in the following format:
YYYY/MM/DD HH:MM:SS.SSS 1.234
The Delta Draft function can also be used to load recorded depth
versus time data for an underwater platform on which the
multibeam sonar is mounted, such as a ROV (Remote Operated
Vehicle) or AUV (Autonomous Underwater Vehicle), or towed
vehicle.
1. Select the track line(s).
Tool Menu
2. Select the Load Delta Draft command.
Process > Load Delta
Draft
The Load Delta Draft dialog box is displayed.
3. Type the path of the file or click Select to locate the file.
4. To make changes to the file, click Edit.
The file is opened in the default text editor (such as Notepad).
Make any changes and save the file.
5. Click Load.
The delta draft is loaded into the line folder.
CARIS HIPS and SIPS User’s Guide
249
Survey Line Processing: GPS Tide
GPS Tide
The Compute GPS (Global Positioning System) Tide function
provides an alternative to normal tidal observation for reducing
soundings to the sounding datum
It is based on the recorded GPS ellipsoid height of the navigation
antenna and uses the recorded vessel motion, if available, to
reduce the ellipsoid height measurements to water level.
The following image demonstrates how GPS tide is calculated.
The arrows indicate the positive sense of the values.
The full formula for GPS tide is shown below.
GPS Tide = GPS Height - Datum Height + Antenna
Offset - Heave + Dynamic Draft - Waterline Offset
The above diagram and equation show the complete formula for
GPS tide where GPS Height needs to be motion corrected.
However, in some systems, GPS Height may already be motion
corrected. Applying sensor values (such as dynamic heave) again
will only distort the final GPS Tide. The Compute GPS Tide
command lets you include or omit selected sensor values.
250
CARIS HIPS and SIPS User’s Guide
Survey Line Processing: GPS Tide
There are two options for applying the sounding datum height(s)
(distance from the ellipsoid to the sounding datum) to the track
line.
•
apply a single height to a track line, or
•
apply a binary or ASCII text file containing a grid of
sounding datum heights.
Two binary sounding datum models can be used for computation
of GPS tide:
•
GEOID99
•
EGG97 (European Gravimetric Geoid 1997)
Alternatively, an ASCII sounding datum model can also be used.
The data must be in the following format: Lat,Long,Z. Values are
delimited using a comma.
An example of the file is shown below.
-33.848326,151.192435,20.4
-33.849484,151.192370,20.1
-33.849237,151.193173,19.7
-33.849506,151.194227,19.8
-33.848298,151.193916,20.0
-33.848402,151.193149,20.2
ASCII datum model files must follow a specific format:
•
Latitude and longitude must be in decimal degrees.
•
The hyphen symbol (-) must be used to designate coordinates
in the Southern or Western hemispheres.
•
All files must be saved with a TXT or XYZ file extension.
To compute GPS tide, complete the following steps:
1. Select a track line or group of track lines.
Menu
2. Select the Compute GPS Tide command.
Process > Compute
GPS Tide
The Compute GPS Tide dialog box is displayed.
CARIS HIPS and SIPS User’s Guide
251
Survey Line Processing: GPS Tide
3. Enter the Sounding datum height to apply a single height to a track
line.
4. To apply a file containing a grid of sounding datum heights, type the
path and name for the Sounding Datum Model file, or click Browse to
select a file.
5. Select the Smooth Height check box to apply smoothed GPS heights
to the track line (see “SMOOTH DATA” ON PAGE 278).
The following check boxes apply sensor values to GPS tide if GPS
Height needs to be motion corrected.
6. Select Apply Dynamic Heave to apply dynamic heave (regular vessel
heave, or true heave if exists).
7. Select Apply MRU Remove Heave to apply remote heave resulting
from vessel roll/pitch on an offset mounted MRU.
8. Select Apply Antenna Offset to apply vertical offsets as a result of
rotating GPS antenna by vessel roll/pitch.
9. Select Apply Dynamic Draft to apply dynamic draft (as a result of
interpolating the draft table in HVF, or stored in HIPS as time series
data).
10. Select Apply Waterline Offset to apply the waterline offset in the HIPS
Vessel File (HVF).
11. Select Apply Height Correction to apply a static offset to the GPS
antenna and type the value in the Offset field.
12. Select From Installation XML to apply the waterline value from the
InstallationParameters.xml generated by the Simrad converter.
13. Click Compute.
The GPS Tide is calculated for the selected line(s). The settings
in the dialog box are remembered by the application. You can
open and view the GPS tide data in the Attitude Editor (“ATTITUDE
EDITOR” ON PAGE 271).
252
CARIS HIPS and SIPS User’s Guide
Survey Line Processing: Merge
Merge
Lines must have tide loaded before they can be merged.
The following operations take place when merging:
•
Recorded sensor information is compensated for constant
time errors as noted in the vessel file.
•
For each time-tagged depth record, the position for the centre
of the swath profile is calculated based on the interpolated
position fix at that time.
•
For each depth record, the position of the sounding is
calculated, based on the profile centre position and any gyro/
heave/pitch/roll corrections that are appropriate (this is
echosounder system dependent).
•
Tide is interpolated and applied to each depth record.
•
Draft is applied.
A processed depths file is created for each line. This file contains
the final computed geographic position for each depth record.
7LGH
1DYLJDWLRQ
*\UR
+HDYH
9HVVHO&RQILJXUDWLRQ
2EVHUYHG
'HSWKV
'HSWKWR
FKDUWGDWXP
,QWHUSRODWHG
1DYLJDWLRQ
,QWHUSRODWHG
*\UR
,QWHUSRODWHG
+HDYH
3LWFK
,QWHUSRODWHG
3LWFK
5ROO
,QWHUSRODWHG
5ROO
CARIS HIPS and SIPS User’s Guide
7UDQVIRUP
'HSWK3RVLWLRQV
$FURVV7UDFN
$ORQJ7UDFN
WR
/DW/RQJ
F
l
Z
253
Survey Line Processing: Merge
1. Select a line or group of lines.
Process > Merge
The Merge dialog box is displayed.
Tool
Menu
2. Select the Merge command.
3. Click the Apply refraction coefficients check box to apply refraction
coefficients.
4. Click the Apply GPS tide check box to use GPS tide data instead of
tidal observation data.
If you have a SmoothedCoefficients file (see “SMOOTH DATA” ON
PAGE 278) for a sensor, you can apply this file during merge to
smooth selected sensor data.
5. Click a check box beside a sensor to select the appropriate data that is
to be smoothed during merge.
6. Click Merge.
You can view the progress of the merge process in the Worksheet
window.
The merge is now complete. Other functions requiring
georeferenced soundings can now be used such as the Subset
Editor, Surface Cleaning, BASE Surfacing and others. The
settings in the dialog box are remembered by the application.
Once a line is merged and changes are made to the sensor
data used by merge, the track line is marked as Outdated. An
Outdated track line must be remerged.
254
CARIS HIPS and SIPS User’s Guide
Survey Line Processing: Quality Control
Quality Control
The Quality Control (QC) process in HIPS is typically used to
statistically compare soundings recorded from check lines
against selected attribute values from a BASE Surface or
weighted grid in the same survey area.
Statistical variances between the check-line soundings and the
attribute values are shown in a table in the Worksheet window
once the QC tool is run.
1. Make sure that the Project tab of the Control window is visible.
2. Select a survey line. You can also, if needed, select a Project, Vessel,
or Day folder.
Menu
Quality Control
3. Select the Quality Control command.
Process > QC Report
QC Report - Step 1
The QC Report - Step 1 dialog box is displayed.
1. Select a BASE Surface attribute or weighted grid from the
Select Reference Surface list.
A template file is an XML file that contains output from the
Quality Report. You can save the output as a template file or open
an existing template file. If you open an existing template file, the
settings saved in that file are applied to the options in the other
dialog boxes.
2. Select the Use template file check box to create or open a template
file.
3. Click Browse to select a location and name for the file; or select an
existing file.
CARIS HIPS and SIPS User’s Guide
255
Survey Line Processing: Quality Control
4. Click Next.
QC Report - Step 2
The QC Report - Step 2 dialog box is displayed.
This dialog box selects the IHO standard for determining what
percentage of soundings fall within a selected error limit for
depth accuracy. You can use the S-44 Ed. 4 survey orders or
S-57 CATZOC zones of confidence. For more information on how
error limit for depth accuracy is calculated, see “TPE FILTERING” ON
PAGE 236).
1. Select either the S-44 or S-57 option.
The dialog box is refreshed to show the categories relevant to the
selected option.
2. To display a category in the QC report, select it in the Available list and
click Add to move to the Active list.
256
CARIS HIPS and SIPS User’s Guide
Survey Line Processing: Quality Control
If you are using the user defined (User Def) category, the a
(constant depth error) and b (factor of the depth dependent error)
fields become active once it is moved to the Active list.
3. [Optional] Type the values for the user defined category in the a and b
fields.
4. To remove a category, select it in the Active list and click Remove to
move it back to the Available list.
5. Select a category and click the up or down arrow buttons at the top of
the Active list to determine its order in the Active list. This will
determine the order that data is displayed in the Worksheet window
when the QC Report is generated.
6. Click Next.
QC Report - Step 3
The QC Report - Step 3 dialog box is displayed.
This dialog box defines how soundings are grouped in the QC
Report. There are three options available:
•
Beam number: Soundings are grouped according to across-
•
Angle: Soundings are grouped according to beam angle from
nadir.
•
Distance: Soundings are grouped according to across-track
track beam number.
distance from nadir.
1. Select a method for grouping soundings from the drop-down list.
Soundings can be further organized by range. The range values
must correspond to grouping method selected above.
CARIS HIPS and SIPS User’s Guide
257
Survey Line Processing: Quality Control
2. Type the range in the Minimum and Maximum fields.
Ranges are incremented according to the value entered in the
In steps of: field. For example, for beam numbers 1 to 100 with an
increment of 10, the beams are then displayed in the QC Report
tab in 10 rows.
3. Type a value to increment the ranges.
4. Click Add to display the range in the Defined Ranges list.
5. To remove a range, select it in the Defined Ranges list and click
Remove.
6. To include rejected soundings, select the Include Rejected check box.
7. Click Finish to complete the wizard and close the dialog box, or click
Cancel to close the wizard without implementing changes.
Quality Control Statistics
The quality control report is displayed in the QC Reports tab of
the Worksheet window.
The fields are explained in the following table.
258
Field
Definition
Beam Number
Range grouping as defined in the third dialog box
in the wizard.
Count
Total soundings in range.
Max
Maximum distance of soundings above surface.
Min
Maximum distance of soundings below surface.
Mean
Mean difference of soundings to surface.
Std Dev
Standard deviation of mean differences is
presented at one sigma or 68% Confidence
Interval.
(Selected S-44 or S-57
categories)
Percentage of soundings that fall within the
selected S-44 survey orders or S-57 CATZOC
zones of confidence categories.
CARIS HIPS and SIPS User’s Guide
Survey Line Processing: Side Scan Processes
Side Scan Processes
A number of side scan processing options can be applied by
selecting a track line without opening the Side Scan Editor.
These processes can be used on one or more track lines.
If you use these commands, you should remember two important
points:
•
The process is applied to the entire line.
•
Some of the signal graph options available in the Side Scan
Editor are not available.
The following side scan processing options are available:
•
•
Slant Range Correction (see “SLANT RANGE CORRECTION” ON
PAGE 525)
Beam Pattern Correction (see “BEAM PATTERN CORRECTION” ON
529)
PAGE
•
Angle-Varying Gain Correction (see “ANGLE-VARYING GAIN” ON
PAGE 534)
•
Time-Varying Gain Correction (see “TIME-VARYING GAIN” ON
PAGE 535)
•
Despeckle (see “DESPECKLE” ON PAGE 538
•
Pure Rejected Contacts (see “EDITING CONTACTS” ON PAGE 542)
•
SIPS Template Wizard (see “SIPS TEMPLATE WIZARD” ON
557)
PAGE
CARIS HIPS and SIPS User’s Guide
259
Survey Line Processing: Line Calibration
Line Calibration
Open the HDCS (Hydrographic Data Cleaning System) to
examine calibration lines for parameters such as transducer
mounting offsets (pitch, roll, yaw), navigation latency or heave
latency.
For more information about the Line Calibration function
see “CALIBRATION” ON PAGE 481
260
CARIS HIPS and SIPS User’s Guide
9
9.
Navigation Editor
Navigation Editor: Navigation Editor Interface
Navigation Editor Interface
The Navigation Editor lets you examine and clean the position
data for both the ship and towfish.
1. Select a track line.
Tool
Menu
2. Select the Navigation Editor command.
262
Tools > Navigation
Editor
The Navigation Editor is displayed in the interface
(see below).
The Navigation Editor shows the track lines as a series of
continuous symbols, with each point representing a navigation
fix. The CARIS feature code used to represent the navigation
symbols is selected in the Options dialog box (see “GENERAL” ON
PAGE 75).
CARIS HIPS and SIPS User’s Guide
Navigation Editor: Navigation Editor Interface
The editor contains three time-series graph views of information
that is calculated between points in the recorded navigation data:
•
Speed: Calculated speed.
•
Distance: Calculated distance.
•
Course Made Good: Calculated direction (in degrees) from
one navigation fix to the next.
The amount of data displayed in the three views is determined by
the number of navigation points visible in the Display window.
Resize data points
The point symbols can be resized to a maximum of 10 pixels.
Window > Control
Tool
Menu
1. Open the Control window.
Time Stamps
2. Select the Navigation tab.
3. Click the up or down arrow buttons beside the Point Size box to
change the size of the symbols.
The view in the Display window is refreshed so the navigation
data is shown in the new point size.
Display lines to represent time stamps in the Navigation Editor
windows. The time stamp interval is displayed in seconds and can
be changed.
1. Select the Time Stamp check box to display time stamp lines.
2. Click the up or down arrow buttons beside the Interval to select the
gap (in seconds) between time stamps.
Set minimum/maximum
of line
When this option is selected the vertical scaling of the graphs fits
the maximum and minimum range of values for the entire line.
Otherwise the vertical scaling of the graphs fits the max-min
range of the data currently in view.
1. Open the Control window.
2. Select the Navigation tab.
3. Select the Max-Min of Line check box.
Number of points
displayed
This option determines the number of points visible in the
Display window.
•
When Manual is selected, use the zoom tools to determine how
many navigation points are visible in the Display window.
•
When Fixed is selected, a set number of points are displayed
in the window.
1. Open the Control window.
2. Select the Navigation tab.
3. Select either the Manual or Fixed check boxes (Manual is selected by
default).
4. If you selected the Fixed check box, enter the number of navigation
points to be displayed by clicking the up or down arrow buttons.
CARIS HIPS and SIPS User’s Guide
263
Navigation Editor: Navigation Editor Interface
Connect points
Join the displayed navigation point symbols with a line
representing the current interpolation method.
1. Open the Control window.
2. Select the Navigation tab.
3. Select the Connect Points check box.
The navigation points are connected by line drawn according to
the current interpolation method of the line.
Gyro indicator line
A gyro indicator line that shows vessel heading can also be
displayed in the Navigation Editor. This feature is useful for
detecting dramatic changes in heading that could effect data
acquisition.
1. Select the Gyro Indicators check box to display the gyro line in the
Display window.
2. Click the up or down arrow buttons to select the size (in pixels) of the
gyro indicator line.
3. Select a colour for the line from the Colour picker, or create a custom
colour using the standard Windows Colour Palette.
264
CARIS HIPS and SIPS User’s Guide
Navigation Editor: Line Interpolation
Line Interpolation
The merge and mosaic functions combine the cleaned bathymetry
and imagery data with other sensors and the navigation data. At
this stage, the navigation data must be interpolated based on the
time of the soundings and side scan data. You can interpolate
positions in linear or Bezier fashion.
•
Linear: Calculate new positions by connecting consecutive
positions using straight lines.
•
Bezier: Calculate new positions by connecting points using a
Bezier curve that does not necessarily connect all navigation
positions. Bezier curves are available in three types: tight,
medium and loose.
If you do not select an interpolation method then the default is
linear. Linear interpolation is suitable if the original navigation
positions are clean and do not significantly deviate from
neighbouring positions. Bezier interpolation is suitable if the
original data is noisy.
Below are examples of the interpolation options.
Linear Interpolation.
CARIS HIPS and SIPS User’s Guide
265
Navigation Editor: Line Interpolation
Bezier Interpolation:
Loose
Bezier Interpolation:
Medium
Bezier Interpolation:
Tight
Select a line
interpolation option
Tool
Menu
1. Make sure the Control window is open.
Window > Control
2. Select the Navigation tab.
3. Select the Connect Points check box.
A line is drawn through the points in the Display window.
4. Select either Linear or Bezier Curve by selecting the appropriate
check box.
5. If the Bezier Curve option is enabled, select either a Loose, Medium or
Tight format from the drop-down menu.
The line connecting the points is displayed according to the
selected options.
The Set Interpolation command lets you select an interpolation
option for one or more survey lines without opening the
Navigation Editor. See “NAVIGATION” ON PAGE 248.
266
CARIS HIPS and SIPS User’s Guide
Navigation Editor: Examine Navigation Data
Examine Navigation Data
Navigation outliers can affect the final positions of the soundings
during the Merge process. Therefore, the navigation data should
be (but is not required to be) examined and cleaned for any
outliers. You can examine the track line to accept, reject or query
data, as necessary. There are two methods for locating navigation
outliers:
Individual position fixes
•
Examine the track lines and time graphs that show the
computed speed, distance, and course made good between
navigation points.
•
Find speed and time jumps using the search functions in the
Control window.
1. Click the scroll bar at the bottom of the Navigation Editor windows, or
select a Pan command (see “PAN” ON PAGE 39).
The view in the Display window is refreshed to accommodate the
location along the track line. The relevant speed, distance, and
course-made-good data is displayed in the Navigation Editor time
graphs.
2. Select data, if necessary, in either the Display window or the time
graphs by pressing and holding the mouse button while dragging the
cursor across the data.
The selected data is highlighted.
3. Release the mouse button when finished.
4. Select a reject (see “REJECT DATA” ON PAGE 269), accept (see
“ACCEPT DATA” ON PAGE 269) or query (see “QUERY DATA” ON
PAGE 270) option.
Tool
Menu
Speed jumps
The Speed Jump option searches the track line for changes in
vessel speed that are same as, or greater than, the Speed Jump
value.
1. Ensure that the Control window is open and the Navigation tab is
displayed.
Window > Control
2. Select the Automatic Query check box if you want to display the
selected position fixes in the Query tab of the Worksheet window.
3. Enter a value in the Speed Jump check box.
4. Click the List Buffer up or down arrow keys to select the number of
adjacent position fixes that are highlighted when a jump is found. For
example if you choose 5, the two position fixes to the right and left of
the selected fix are also selected.
5. Click Find.
6. Select Accept (“ACCEPT DATA” ON PAGE 269), Query (“QUERY DATA”
ON PAGE 270) or one of the Reject “REJECT DATA” ON PAGE 269)
options.
7. Click Find again to move along the track line.
CARIS HIPS and SIPS User’s Guide
267
Navigation Editor: Examine Navigation Data
Time jumps
The Time Jump option searches the track line for changes in time
(in seconds) that are the same as, or greater than, the Time Jump
value.
1. Ensure that the Control window is open and the Navigation tab is
displayed.
2. Select the Automatic Query check box if you want to display selected
position fixes in the Query tab of the Worksheet window.
3. Enter a value in the Time Jump box.
4. Click the List Buffer up or down arrow keys to select the number of
adjacent position fixes that are highlighted when a jump is found. For
example if you choose 5, the two position fixes to the right and left of
the selected fix are also selected.
5. Click Find.
6. Select one of the Reject options (“REJECT DATA” ON PAGE 269), Query
(“QUERY DATA” ON PAGE 270) or Accept (“ACCEPT DATA” ON
PAGE 269).
268
CARIS HIPS and SIPS User’s Guide
Navigation Editor: Reject, Accept and Query Data
Reject, Accept and Query Data
Reject Data
Select from two reject data options:
•
Reject-With Interpolation: Soundings associated with this
navigation data are processed further since they have
positions interpolated for them.
•
Reject-Break Interpolation: Soundings associated with
this navigation data are flagged as rejected and cannot be
processed.
1. Select the data so it is highlighted.
Edit > Status Flag >
Reject-With
Interpolation/RejectBreak Interpolation
The selected data is now flagged as rejected.
Pop-up
Tool
Menu
2. Select a Reject command.
Reject > Reject-With
Interpolation/RejectBreak Interpolation
Accept Data
All data is marked as accepted until flagged otherwise. Use this
option to change the status of rejected data.
1. Select the data so it is highlighted.
Edit > Status Flag >
Accept
The previously rejected navigation data is now flagged as
accepted.
Key Pop-up
Tool
Menu
2. Select the Accept command.
Accept
<A>
CARIS HIPS and SIPS User’s Guide
269
Navigation Editor: Reject, Accept and Query Data
Query Data
Examine data for further information.
1. Select the data so it is highlighted.
Edit > Query
Key Pop-up
Tool
Menu
2. Select the Query command.
Information about the position fixes is displayed in the
Worksheet window. The fixes can be rejected or accepted in this
window.
Query
<Q>
Query Line
The Query Line command lets you view navigation data for an
entire track line.
1. Select a track line.
Pop-up Menu
2. Select the Query Line command.
270
Edit > Query Line
Query Line
Navigation points for the selected line are displayed in the
Worksheet window. You can change the status of a navigation
point by right-clicking the mouse and selecting a reject or accept
option.
CARIS HIPS and SIPS User’s Guide
10
10.
Attitude Editor
Attitude Editor: Attitude Editor Interface
Attitude Editor Interface
The Attitude Editor displays sensor data related to the
movement of a vessel or towed sensor. It also displays data from
other auxiliary sensors that use a simple time/value data model.
The data is plotted in chronological order and is time stamped.
You can edit data directly in the editor or set filter parameters to
reject unwanted data.
1. Select a track line so it is highlighted.
Tools > Attitude
Editor
Pop-up
Tool
Menu
2. Select the Attitude Editor command.
The Attitude Editor is displayed in the interface (as shown
below). You can open the Attitude Editor while the Swath Editor
is active and examine attitude and sounding data at the same
time (see “SWATH EDITOR” ON PAGE 297).
Attitude Editor
The Project-Vessel-Day directory and file name of the selected
track line is displayed on the title bar.
Data is graphed in the windows according to an X-Y axis. In the
default layout, the X-axis represents time and the Y-axis
represents data.
272
CARIS HIPS and SIPS User’s Guide
Attitude Editor: Attitude Editor Interface
By default, the following data is displayed in the editor:
•
Gyro: Gyro observations are displayed in degrees from
positive 1 to 360.
•
Heave: Heave observations are displayed according to the
Units setting in the Options dialog box and are positive as
the vessel moves upward.
•
Pitch: Pitch observations are displayed in degrees and are
positive when the bow is down.
•
Roll: Roll observations are displayed in degrees and are
positive when the starboard side is up.
However, this is not the only data that can be displayed in the
editor. All sensor data in HIPS/SIPS format can be displayed
except for depths, navigation, and side scan data.
Besides the above sensors, the following sensors can be displayed
(if available):
•
loaded tide
•
side scan gyro
•
side scan cable out
•
side scan depth
•
side scan height
•
delta draft
•
GPS height
•
GPS tide
•
speed on water
Applanix’s MS POV systems calculate TrueHeave values from
real-time heave values. The computed TrueHeave data and realtime heave values are stored in a binary file that is not converted
to HIPS/SIPS format when other data is imported. These files
have to be separately loaded to the track line. For more
information, see “ATTITUDE SENSOR DATA” ON PAGE 235.
CARIS HIPS and SIPS User’s Guide
273
Attitude Editor: Attitude Editor Interface
Display Options
Show/hide sensor data
You can control which attitude sensors are displayed.
Menu
1. Select the Sensor Layout command.
Tools > Sensor
Layout
The Sensor Layout dialog box is displayed.
2. To remove a sensor from the Active Sensors list, select the sensor and
click Remove.
3. To add a sensor to the Active Sensors list, select a sensor from the
Available Sensors list and click Add.
4. Set the order that sensor windows are displayed by selecting a sensor
and clicking the up or down arrow buttons, or by selecting the sensor
and dragging it to a new position.
5. Click OK to apply settings.
The Attitude Editor is displayed according to the selected
settings.
The display of data in the Attitude Editor windows is controlled
through the Attitude Editor tab in the Control window. This tab
is visible when the Attitude Editor is opened.
Window > Control
2. Select the Attitude Data tab if the tab is not already displayed.
Tool
Menu
1. Open the Control window.
274
CARIS HIPS and SIPS User’s Guide
Attitude Editor: Attitude Editor Interface
Time
By default, time is displayed on the X-axis. As the time scale is
increased, more data is displayed in the graphs; as the time is
decreased, less data is displayed.
3. Click the up or down arrows beside the Time Period box to set time in
minutes and/or seconds.
4. Select the Time Stamp check box to display the time stamp in the
windows.
5. Click the Time Interval up or down arrow buttons to select an interval
for time stamp display.
The display in all graphs is adjusted to the new time setting.
CARIS HIPS and SIPS User’s Guide
275
Attitude Editor: Attitude Editor Interface
Scale Data
By default, the data scale is shown on the Y-axis. The scale of the
data axis can be based on the minimum and maximum values of
data in the entire line, the minimum and maximum values of the
data currently in view, or by a user-defined axis.
1. Select a sensor from the Data list.
2. Select from one of three scaling options:
•
Select Max-Min of Line to scale data according to the minimum
and maximum data values of the entire line.
•
Select Max-Min of View to scale data according the minimum and
maximum values currently in view.
•
Select User-defined Max-Min to define maximum and minimum
scale and type the values in the maximum and minimum fields.
Vertical view
The Vertical option switches the data graph windows from a
horizontal layout to a vertical layout. In this mode, the X-axis
represents the data values and the Y-axis represents time.
1. To view the Attitude Editor in vertical mode, click the Vertical check
box.
The Attitude Editor windows are displayed in vertical mode.
Other Display Options
Invert view
The Invert command displays the data in a “mirror-image” view.
This function is useful for viewing towfish depth in the water
column.
1. Select an attitude data type in the Data list.
2. Select the Invert command.
The data is shown as inverted in the appropriate section.
Draw bars
The Draw Bars function displays vertical bars for each sensor
value in the graphs. This option makes it easier to see time gaps
between sensor values.
1. Select the Draw Bars check box in the Attitude Data tab of the Control
window.
276
CARIS HIPS and SIPS User’s Guide
Attitude Editor: Attitude Editor Interface
The Smooth/Filter Line, Difference and Threshold options are
described in the Shows Graphs section of “SMOOTH DATA” ON
PAGE 278
Colour Display
The colour for displaying the various graph lines can be changed.
Menu
1. Select the Options command.
Tools > Options
The Options dialog box is displayed.
2. Click the Display tab and click the Sensor Editors category so it is
highlighted.
3. Select a colour for the sensor filter line from the drop-down colour
palette, or create a custom colour from the standard Windows colour
picker.
4. Click OK.
See “DISPLAY” ON PAGE 78 for more information on colour options for
the Attitude Editor.
CARIS HIPS and SIPS User’s Guide
277
Attitude Editor: Attitude Editor Interface
Smooth Data
The Smooth Sensor function is used to smooth out localized
variability. Any sensor data that can be viewed in the Attitude
Editor can be smoothed.
Below is an example of GPS height and tide.
The blue line represents the original data and the yellow line
represents the smoothed data. The parameters for creating the
smoothed data are saved to the SmoothedCoefficients file in the
HCDS_Data\Project\Vessel\Day\Line folder. The file is in XML
format. This file is applied to the track line during the merge
process and SVP Correction.
Moving Average and
Fast Fourier Transform
There are two methods available for smoothing: Moving Average
and Fast Fourier Transform (or FFT).
•
278
The Moving Average function calculates an average sensor
value over a window of data using the Box Size parameter.
The window is defined as a number of data points or seconds
centred on a point. The average value for all of the values in
the window is calculated and will be given to the central
point.
CARIS HIPS and SIPS User’s Guide
Attitude Editor: Attitude Editor Interface
•
Box size
The Fast Fourier Transformation performs a low-pass filter on
the selected sensor. You select a Box Size in either points or
seconds. This value is converted into seconds and then
inverted to become the cut-off frequency. Increasing the Box
Size results in greater smoothing.
The Box Size (Step 6) determines how many neighbouring data
points are used in the smoothing calculation. The number of
neighbouring data points can determined using time or a set
number of points.
Note the different ways the Moving Average and the FFT use the
Box Size parameter. The Moving Average function uses the Box
Size to determine the window that is used to calculate the
average for the new “smoothed” centre point. The FFT algorithm
uses the Box Size to define the cut-off frequency that is then
applied to all data.
In the following example, the box size is set to five data points. A
FFT value or mean for any data point is calculated from itself and
‘the two data points on either side of it (if available).
FFT value or mean calculated for data point
Adjacent data points used for calculation of value
Box Size = 5
1. Make sure that the Control window is open and the Attitude Data tab is
visible.
2. Select a sensor in the Data list box, or click inside a sensor window in
the Attitude Editor.
3. Select the Smooth option.
4. Select either the Moving Average or Fast Fourier smoothing options.
5. Select either the Points or Seconds check boxes.
6. Click the Box Size up or down arrow buttons to select the number of
adjacent data points or a time range.
CARIS HIPS and SIPS User’s Guide
279
Attitude Editor: Attitude Editor Interface
Show graphs
7. Show any of the four graphs by selecting the appropriate check boxes:
•
Data graphs the raw sensor data. This box is checked by default.
•
Filter/Smooth Line graphs the computed values derived from the
adjacent data points as described above.
•
Difference graphs the difference between the original data values
and the moving average or FFT value for each data point.
•
Thresholds display horizontal lines in the graph indicating the
difference values that are clipped during smoothing. Threshold is
a multiple of the standard deviation (sigma).
The upper threshold signal is determined by the following
formula:
original mean value + (threshold value X the
standard deviation)
The lower threshold signal is determined by the following
formula:
original mean value - (threshold value X the
standard deviation
The smoothing function applies the results only to the Data
graph and Filter/Smooth Line graph.
The line is smoothed according to the parameters set above.
When you close the Attitude Editor, you are prompted to save any
changes. This saves any smoothing changes to the
SmoothedCoefficients file.
8. Click Yes to save smoothed data.
280
CARIS HIPS and SIPS User’s Guide
Attitude Editor: Cleaning Data
Cleaning Data
You can examine the attitude data to determine if it should be
rejected, accepted, or queried for further information.
Reject data
1. In any of the Attitude Editor windows, press and hold the mouse button
while dragging the cursor across the data to be examined.
The selected data is highlighted.
Edit > Reject-Break
Interpolation/RejectWith Interpolation
Pop-up
Tool
Menu
2. Select one of the following Reject options:
Reject-Break
Interpolation/RejectWith Interpolation
•
Reject- Break Interpolation: When the files are merged, the
Break Interpolation option rejects all soundings recorded at the
same time as the rejected sensor data.
•
Reject - With Interpolation: When the files are merged, the With
Interpolation option rejects the highlighted sensor data but uses
neighbouring data points for interpolation so sounding data is not
rejected.
Below is a graphical representation of the reject options and
sounding data.
5HMHFW:LWK
,QWHUSRODWLRQ
5HMHFW%UHDN
,QWHUSRODWLRQ
+HDYH
RU*\UR
3LWFK5ROO
1DYLJDWLRQ
WLPH
6DPSOH
6RXQGLQJV
WLPH
7KHVHVRXQGLQJV
FDQEHSURFHVVHG
IXUWKHU
CARIS HIPS and SIPS User’s Guide
7KHVHVRXQGLQJVFDQQRWEH
SURFHVVHGIXUWKHU
7KH\DUHIODJJHGDVUHMHFWHG
281
Attitude Editor: Cleaning Data
For some multibeam sonars, the data converted into HIPS has
already been compensated for heave, pitch, and roll. Therefore
heave, pitch, and roll are not applied during Merge as indicated
by the “Apply” options in the vessel configuration. However, it is
still possible to use Reject–Break Interpolation on the recorded
heave, pitch, and roll data which results in the sounding data
during the same time period being rejected by Merge.
You can show or hide rejected data. When the rejected data is
turned off, these soundings are no longer visible in the Attitude
Editor.
View > Show
Rejected
At any time, attitude data that has been flagged as rejected can
be converted to accepted again by selecting the Restart Cleaning
command (see “RESTART CLEANING” ON PAGE 266).
Key
Tool
Menu
1. Select the Show Rejected command.
<F4>
Accept Data
All data is considered as accepted until explicitly rejected.
However, sometimes it is necessary to change previously rejected
soundings to accepted again.
1. Click and hold the left mouse button while dragging the cursor across
the data to be selected.
The data is highlighted.
Edit > Accept
Previously rejected sensor data is now flagged as accepted.
Key Pop-up
Tool
Menu
2. Select the Accept command.
282
Accept
<A>
CARIS HIPS and SIPS User’s Guide
Attitude Editor: Cleaning Data
Query data
Querying displays information about selected data.
1. Press and hold the left mouse button while dragging the cursor across
the data to be queried.
The data is selected.
Edit > Query
Key Pop-up
Tool
Menu
2. Select the Query command.
Query
<Q>
The following data is displayed in the Worksheet window:
•
time stamp
•
d-time difference in seconds from last time stamp
•
sensor value in either degrees or metres/feet
•
d-value difference from last value
•
status
The following two data values are related to the smoothing and
filtering options (see “SMOOTH DATA” ON PAGE 278 and “FILTER SENSOR
DATA” ON PAGE 284):
•
averages derived from adjacent data points
•
difference between original data values and moving average
or FFT value for each data point
Change data status flag to rejected or accepted.
1. Select the data in the Worksheet window so it is highlighted.
2. Select a Reject or Accept command.
The data is marked as accepted or rejected, depending to the
option you selected.
Query line
Display all attitude sensor data for a line.
1. Select one of the attitude sensors.
Pop-up Menu
2. Select the Query Line command.
View > Query line
Information about the selected sensor is displayed in the
Worksheet window. You select data and right-click the mouse to
choose an accept or reject command.
Query Line
CARIS HIPS and SIPS User’s Guide
283
Attitude Editor: Cleaning Data
Filter Sensor Data
The Attitude Editor filters reject data with residual values that
fall outside user-defined threshold limits.
1. Make sure that the Control window is open and the Attitude Editor tab
is visible.
2. Select a sensor in the Data list, or click inside a sensor window in the
Attitude Editor.
3. Select the Filter check box.
By default, data is rejected without interpolation so that
soundings with the same time stamp as the rejected data are also
flagged as rejected. You can choose to reject data with
interpolation
4. Clear the Reject with Interpolation check box so that soundings
associated with the rejected sensor data are also rejected.
There are two filtering options: Moving Average and Fast Fourier.
The Moving Average calculates a mean for each data point and
Fast Fourier applies a common wave-smoothing algorithm to a data
point.
5. Select either the Moving Average or Fast Fourier filtering option.
The Box Size, Time and Point options work in exactly the same
manner as in the Smoothing function. See “SMOOTH DATA” ON
PAGE 278 for more information.
6. To select how the average is calculated, select either the Points or
Seconds check boxes.
7. Click the Box Size up or down arrow buttons to select the number of
adjacent data points or to set a time range.
8. Show any of the four filter graphs by selecting the appropriate check
boxes (see “SMOOTH DATA” ON PAGE 278))
9. Click the Threshold up or down arrow keys until you reach a desired
value.
The Thresholds are indicated by lines positioned above and below
the Difference graph.
Reject data
284
Reject all Difference data that falls outside the Thresholds by
selecting a filter option.
CARIS HIPS and SIPS User’s Guide
Attitude Editor: Cleaning Data
The corresponding attitude data is rejected.
Tool
Menu
10. Select a Filter command.
Tools > Apply Filters
> 1 Screen/To End of
Line/Selected Lines
CARIS HIPS and SIPS User’s Guide
285
Attitude Editor: Cleaning Data
286
CARIS HIPS and SIPS User’s Guide
11
11.
Sound Velocity Editor
Sound Velocity Editor: Overview
Overview
Sound velocity processing in HIPS is available for sonar formats
that provide raw uncorrected travel time and angles from the
transducer. Multibeam formats that meet these requirements
include the XTF, XSE and Hypack formats. Also, single beam
data converted using the HIPS Generic Data Parser can be
corrected for sound velocity.
The SVP Editor helps you to edit existing SVP data, or create new
data. The editor is a separate program that is launched from
HIPS and SIPS.
Edit > Sound Velocity
Profiles
The SVP Editor is displayed.
Tool
Menu
1. Select the SVP Profiles command.
The editor contains a section with a list of profiles. The profiles
include a latitude and longitude position for applying the Nearest
288
CARIS HIPS and SIPS User’s Guide
Sound Velocity Editor: Overview
in Distance option. Below the Profiles section is a table of the depth/
speed values for a selected profile. The left-hand side of the editor
contains a graphical representation of the depth/speed data.
Open an Existing File
File > Open
Key
The Open dialog box is displayed. All SVP files are located, by
default, in ..\Hips\Svp.
2. Select an SVP file so it is highlighted, or type the file path in the File
Name text box.
Tool
Menu
1. Select the Open File command.
3. Click OK.
<Ctrl+O>
A list of profiles is displayed. Data in the first profile is displayed
in the Profile Data table and the speed/depth graphed area.
4. To navigate between profiles, click the time stamps in the Profiles list
box.
Depth Scale
The Depth Scale slider determines the view for the depth/speed
graphed area by setting a maximum depth value. You can change
the vertical display of data by adjusting the depth scale.
1. Position the cursor over the Depth Scale slider and press and hold the
mouse button, while dragging the cursor up or down so the slider
moves with the cursor.
As the slider is moved, the view of the depth/speed data adjusts
to the new depth scale.
CARIS HIPS and SIPS User’s Guide
289
Sound Velocity Editor: Overview
Create a New SVP File
You can create a new SVP file.
File > New
Key
2. Create new SVP profiles (see “CREATE NEW PROFILE”
ON PAGE
3. Create new depth/speed values, as needed (see “ENTER
SPEED DATA” ON PAGE 293).
Tool
Menu
1. Select the New File command.
295).
NEW DEPTH/
<Ctrl+N>
Menu
4. Select the Save As command.
File > Save As
5. Type a name for the SVP file in the file name box.
6. Click Save.
The file is saved the directory you selected.
290
CARIS HIPS and SIPS User’s Guide
Sound Velocity Editor: Options
Options
You can select the colours used for the graphical display.
Menu
1. Select the Options command.
Tools > Options
Colour Options
The Options dialog box is displayed.
2. Select a colour from the drop-down palette; or create a custom colour
from the standard Windows colour picker.
3. Click OK.
The display is refreshed to show the selected colours.
Draw points
Show or hide the depth/speed data points in the graphical
display.
4. Select the Draw Points check box.
If the box is checked, the data points are visible in the graphical
display.
5. Click Apply to apply and save changes to the current file.
6. Click OK.
Show/hide tool tips
A tool tip is a label containing the depth/time position for a data
point in the graphical display. The label becomes visible when the
mouse cursor is moved in the graphical display.
7. Select the Tool Tips check box to show or hide the tool tips.
If the box is checked, the depth/time labels are visible.
8. Click Apply to apply and save changes to the current file.
9. Click OK.
Show Julian date
Switch the date fields in the SVP editor between the regular
calendar format and Julian calendar format.
10. Make sure the Julian Date box is checked if you want to select this
feature.
CARIS HIPS and SIPS User’s Guide
291
Sound Velocity Editor: Options
11. Click Apply to apply and save changes to the current file.
12. Click OK to close the dialog box.
Show/hide toolbar
Display or hide the toolbar.
Menu
1. Select the Toolbar command.
View > Toolbar
If the menu item is checked then the toolbar is visible; if it is not
checked, the toolbar is not visible.
Show/hide status bar
Display or hide the status bar.
Menu
1. Select the Status Bar command.
292
View > Status Bar
If the menu item is checked, the status bar is visible; if it is not
checked, the status bar is hidden.
CARIS HIPS and SIPS User’s Guide
Sound Velocity Editor: Edit SVP Data
Edit SVP Data
You can use the SVP Editor to modify existing speed/depth
values, append new data to an existing file, delete data or delete
a complete profile.
Change depth/speed
values
Individual values in the depth/speed table can be changed.
1. Position the cursor over any Depth or Speed cell in the table.
2. Click inside the cell.
3. Type a new value.
4. Click outside the cell.
The table is changed to reflect the new data.
Enter new depth/speed
data
Append new data to an existing profile.
1. Click a profile to display the data in the editor.
You must enter all new depth/speed data in pairs. There are two
options for entering data:
•
separate the depth/speed data with a space: 15 1200
•
separate the data with a comma: 15, 1200
1. Type new depth and speed values in the text box beside the Add
button.
2. Click Add.
3. Repeat Steps 1 through 3 until all necessary values are entered.
Edit geographic
coordinates
Enter new latitude and longitude positions for SVP data. This
information is important if you want to use the Nearest in Distance
option for sound velocity correction (see “SOUND VELOCITY
PROCESSING” ON PAGE 241).
1. Click a time stamp beside a profile.
Menu
2. Select the Edit Position command.
Edit > Edit Position
The Edit Position dialog box is displayed.
3. Click the latitude coordinates and type new ones.
CARIS HIPS and SIPS User’s Guide
293
Sound Velocity Editor: Edit SVP Data
4. Click the longitude coordinates and type new ones.
5. Click OK.
The new geographic coordinates are displayed in the Latitude and
Longitude sections of the Profiles area.
Delete speed/depth
data
1. Press and hold the mouse button, while dragging the cursor over the
data points in the graphical display; or click a row number in the table.
The selected data is highlighted.
Key Menu
2. Select the Delete command.
Edit > Delete
The Speed/Depth data points are removed from the graphical
display and the values are no longer displayed in the table.
<Delete>
Remove Profiles
Remove a currently open profile from the SVP editor.
1. Select a profile by clicking the time stamp in the Profiles list box.
The depth/speed values are displayed in the editor.
Key Menu
2. Select the Remove Profile command.
294
Edit > Remove
Profile
The profile is removed from the editor.
<Ctrl+Delete>
CARIS HIPS and SIPS User’s Guide
Sound Velocity Editor: Create New Profile
Create New Profile
New SVP profiles can be created through the SVP Editor.
Key Menu
1. Select the Add Profile command.
Edit > Add Profile
The Add SVP Profile dialog box is displayed.
<Ctrl+Insert>
2. Click the arrow buttons at the top of the calendar to select a month and
year (all profiles must be time stamped).
3. Click a day button on the calendar to select a day for the file.
4. Enter the new hour/minute values (use the 24-hour clock) by clicking
each section in the Time box and typing new values.
5. Enter latitude and longitude coordinates in the appropriate boxes, if
needed.
6. Click Add to apply settings.
The new file information is displayed in the Profiles box.
7. Enter new speed/depth data, as needed (see “ENTER
SPEED DATA” ON PAGE 293).
Save a file
NEW DEPTH/
When you close the editor, you are prompted to save the changes.
File > Save/Save As
Key
Tool
Menu
8. Select a Save command.
<Ctrl+S>
Exit SVP editor
Close the SVP Editor.
CARIS HIPS and SIPS User’s Guide
295
Sound Velocity Editor: Create New Profile
Menu
1. Select the Exit command.
296
File > Exit
2. If you have not saved any changes you are prompted to do so.
The SVP Editor is closed.
CARIS HIPS and SIPS User’s Guide
12
12.
Swath Editor
Swath Editor: Overview
Overview
The Swath Editor provides data-cleaning tools for multibeam
data, multi-transducer data and Lidar data (see “LIDAR DATA” ON
PAGE 469).
The Swath Editor is a graphical tool containing multiple views of
the data with many controls for scaling, exaggeration, colours,
and so on.
Data cleaning consists of interactively selecting and rejecting
soundings and using proven and efficient filtering functions to
automatically detect and reject outliers.
You can also use the Swath Editor to flag Designated Soundings
(“DESIGNATED SOUNDINGS” ON PAGE 223).
298
CARIS HIPS and SIPS User’s Guide
Swath Editor: Swath Editor Interface
Swath Editor Interface
A track line must be selected before the Swath Editor editor can
be opened (see “SELECT SURVEY LINES” ON PAGE 219).
Tools > Swath Editor
> Open
Pop-up
Tool
Menu
1. Select the Open Swath Editor command.
The Swath Editor opens with all views displayed.
The Project-Vessel-Day directory and file name of the selected
track line is displayed on the title bar.
HIPS is shown below with the Swath Editor open.
Tools > Swath Editor
The Swath Editor consists of six views:
•
Plan View
•
Side View
•
Rear View
•
Profile View
•
3-D View
•
Amplitude View
CARIS HIPS and SIPS User’s Guide
299
Swath Editor: Swath Editor Interface
Views can be displayed, hidden or positioned anywhere on the
interface. They can also be adjusted to any size you want.
(See “REPOSITION AND RESIZE WINDOWS” ON PAGE 22). The layout of the
views is remembered by the application when you exit HIPS.
If the dataset contains side scan data, you can also open the Side
Scan Editor while the Swath Editor is open (for more information
on the Side Scan Editor, see “SIDE SCAN EDITOR” ON PAGE 494).
The tabbed pages in the Control window set the various Swath
Editor features.
Toolbars
The display of the views is controlled from the Swath Editor
toolbar.
This is a floating toolbar that is automatically displayed when the
editor is opened. The toolbar can be docked or floated over any
area of the interface. Its appearance is controlled from the
Toolbar dialog box (see “MODIFY EXISTING TOOLBARS” ON PAGE 25).
Tool
Menu
1. Select the Close Swath Editor command.
300
Tools > Swath Editor
> Close
All Swath Editor views close and you are prompted to save any
changes.
2. Click OK to save changes.
CARIS HIPS and SIPS User’s Guide
Swath Editor: Swath Editor Interface
Plan View
The Plan View presents an overhead view of the swath profiles
and beams. All profiles are spaced equally in the along-track
direction. Across-track beam spacing is to correct scale. Each
beam is represented by a square.
Tools >Swath Editor
>Plan
Tool
Menu
1. Select the Plan View command.
The number of swath profiles displayed in the Plan View is
determined by three factors:
•
height of the view
•
point size of the beams
•
distance (in points) between swath profiles (see “DATA DISPLAY
VIEWS” ON PAGE 303)
IN
You can apply a number of colour options:
•
colour by port and starboard beams (see “SWATH EDITOR” ON
PAGE 93)
•
colour by sonar detection method (not supported by all
sonars) (see “SWATH EDITOR” ON PAGE 93)
•
colour by depth interval
•
sun illumination (see “EXAMINE SWATH DATA” ON PAGE 307).
3-D View
The three-dimensional (3-D) View shows all soundings currently
visible in the Plan View in three-dimensional format. The data in
this window can be rotated and moved around (see “EXAMINE 3-D
DATA” ON PAGE 312).
Tools > Swath Editor
> 3D View
Tool
Menu
1. Select the 3-D View command.
CARIS HIPS and SIPS User’s Guide
301
Swath Editor: Swath Editor Interface
Side View
The Side View presents the survey as seen from the side of the
vessel with the vessel travelling from left to right. Each line
represents soundings from the same beam.
Tools > Swath Editor
> Side
You can change the display (see “DATA DISPLAY IN VIEWS” ON
PAGE 303) and depth label settings for this view (see “SOUNDINGS” ON
PAGE 306).
Tool
Menu
1. Select the Side View command.
Rear View
The Rear View presents the survey as seen from behind the
vessel. Each line represents one swath.
Tools > Swath Editor
> Rear
Tool
Menu
1. Select the Rear View command.
Profile View
The Profile View displays a single swath.
Tools > Swath Editor
> Profile
The time stamp and profile number of the swath are shown in the
status bar.
Tool
Menu
1. Select the Profile View command.
Amplitude View
The Amplitude View displays the beam-averaged amplitude data
that is recorded with the swath bathymetry data.
Tools > Swath Editor
> Amplitude
Beam-averaged amplitude data are intensity values for each
sounding depth created by a multibeam sonar system.
Tool
Menu
1. Select the Amplitude View command.
302
CARIS HIPS and SIPS User’s Guide
Swath Editor: Swath Editor Interface
Data Display in Views
You can show or hide the display of data in the Rear, Side and
Profile Views:
•
show or hide port beams
•
show or hide starboard beams
•
show both port and starboard beams (default setting)
Tools > Swath Editor
> Port Beams/
Starboard Beams
The display is refreshed to show only the data that is visible.
Tools > Swath Editor
> Port and Starboard
Beams
2. To view both starboard and port beam data, select the Port and
Starboard Beams command.
Both Port and Starboard beams are displayed in the Rear, Side
and Profile Views.
Tool
Menu
Tool
Menu
1. Choose the Port or Starboard Beams command.
CARIS HIPS and SIPS User’s Guide
303
Swath Editor: Swath Editor Display Options
Swath Editor Display Options
The display options for the views are controlled through the
General tab in the Control window.
The following sections describe the options in this tab. The
Middle button select option is described in “EXAMINE SWATH DATA” ON
PAGE 307.
Vertical Exaggeration
The vertical exaggeration is the ratio of the vertical scale versus
the horizontal scale used in the Rear and Side Views.
The vertical exaggeration can be determined automatically by
including all visible depths or it can be manually set.
When Auto mode is on, the Include Rejected option controls whether
or not the rejected data is used to determine the minimum and
maximum sounding depth in the Rear and Side Views.
304
CARIS HIPS and SIPS User’s Guide
Swath Editor: Swath Editor Display Options
1. Deselect the Auto mode by clearing the check box.
2. Click the up or down arrow buttons beside the Vertical Exaggeration
box to set the vertical exaggeration.
You can set the vertical and horizontal scale of the view to control
the amount of rejected data in the view
3. Select the Include Rejected option to resize the display in the view to
include rejected data.
This deTrend option is used when the general slopes of the sea
floor topography makes it difficult to see individual depth spikes.
DeTrend removes the general slope of the sea floor from the Rear
and Side views and redraws the swath and beam profiles making
it easier to locate depth spikes.
4. Select the deTrend check box to view data; select the command by
selecting from Tools > Swath Editor > deTrend.
Specified Min-Max
Use a constant scale as an alternative to vertical exaggeration by
setting a minimum and maximum range for displaying data.
1. Select the Specified Min-Max check box to implement this option.
2. Type the minimum and maximum ranges for the scale.
The views are automatically refreshed to show data according to
the scale.
CARIS HIPS and SIPS User’s Guide
305
Swath Editor: Swath Editor Display Options
Soundings
By default, beams in the Side, Rear, and Profile Views are
connected by lines. Sometimes, beams can be more clearly
distinguished if displayed as points.
1. Select the General tab in the Control window.
2. Select the View as Points option to change the lines to points.
3. Click the up or down buttons beside the Point Size box to set a size
value between one and five points.
Increase or decrease the beam display size in the Plan View.
4. Click the up or down buttons beside the Point Size box to set a size
value between one and five points.
Beams are resized as determined by the point size setting. The
Number of Profiles box displays a value for the maximum amount of
profiles that can be shown in the Plan View. This value is
incremented up or down as the beam display size values are
changed.
Colour By Depth
Display soundings as colour coded by depth interval.
1. Select the Plan View tab in the Control window.
2. Select the Colour by Depth box so it is checked.
3. Click the up or down buttons beside the Depth Interval box to select a
depth interval for the colour band.
The soundings are now displayed by depth level.
306
CARIS HIPS and SIPS User’s Guide
Swath Editor: Examine Swath Data
Examine Swath Data
The scroll bar in the Plan View represents the time period of the
entire line. Each click on an arrow button moves the screen
forward or backward one swath. Clicking the grey area of the
scroll bar moves the screen forward or backward for a set of
swaths. As you move along the track line, all the views refresh to
display the same data as in the Plan View window.
Dragging the scroll bar brings in swaths from any location (see
example below).
Click here to
move forward
or back a set of
swaths
Move scroll
bar to view
any location
on the line
Click here to
move forward
or back one
swath
As you move up or down the track line, all the views refresh to
display the data from the swaths that are visible in the Plan view.
The geographic location of the swaths currently in view is shown
by the sounding coverage outline in the Display window.
As an alternative, use the following methods to scroll through a
track line:
Using the middle mouse
button
•
Press the space bar to move up the track line.
•
Use the mouse wheel (if available) to move up or down the
track line.
•
Press <Ctrl + spacebar> to move down the track line.
•
Use the mouse wheel (if available) to move up or down a
track line.
•
Press the <Home> or <End> buttons to move to the start or
end of the track line.
You can select individual swath or beam profiles and see their
location in the Display window by moving the cursor in the Plan,
CARIS HIPS and SIPS User’s Guide
307
Swath Editor: Examine Swath Data
Rear, 3-D or Side Views while holding down the middle mouse
button.
1. Make sure the General tab in the Control window is displayed.
2. Place the cursor in either the Plan View, Rear View or Side View and
click the middle mouse button.
The selected swath is highlighted.
3. To view both beam and swath profiles, select the Beam and Swath
check box in the Middle Mouse Select section.
Individual swaths and beams are highlighted as you move the
cursor across the view. The other views are updated to reflect the
same beam and swath location. The positions of the swaths and
beams are also displayed in the sounding coverage outline.
If the Attitude Editor is open, you can view the sounding’s
position in relation to attitude data by the yellow line in any of
the sensor windows (see “ATTITUDE EDITOR” ON PAGE 271).
Search a survey line for a specific swath or beam.
1. Select the Find Soundings command, or right-click and select Find
from the pop-up menu in the Plan View.
Edit > Find
The Find Soundings dialog box is displayed.
Key Pop-up
Tool
Menu
Find soundings
Find
<Ctrl+F>
2. To search by the swath or beam number, select the Profile and/or
Beam option.
3. Type the swath or beam number in the Profile Number or Beam
Number field.
4. To search for a swath that was recorded at a specific time, select the
Time option.
5. Click inside the Profile Time box and type the time in the relevant
fields (hour:minutes:seconds:decimal fractions of a second). Make
sure you use the 24-hour clock.
6. Click Find.
308
CARIS HIPS and SIPS User’s Guide
Swath Editor: Examine Swath Data
The selected beam or swath is highlighted in the Plan, Rear and
Side Views.
CARIS HIPS and SIPS User’s Guide
309
Swath Editor: Examine Swath Data
Swath Coverage Outline
The swath coverage outline is a marker in the Display window
that shows the location of data currently visible in the Swath
Editor (see example below) The display of the outline is controlled
from the Options dialog box (see “SENSOR EDITORS” ON PAGE 87).
Automatic Recentre
310
The automatic recentre option ensures that when the coverage
outline reaches the edge of the Display window (when scanning
along the track line), the display redraws with the coverage
outline in the centre. This options is available in the General
Options dialog box. (see “GENERAL” ON PAGE 75).
CARIS HIPS and SIPS User’s Guide
Swath Editor: Examine Swath Data
Changing Track Lines
After examining a track line, you may want examine another
line.
•
Select the Next Line command
•
Select the Previous Line command
•
Click a line in the Display window so that the line is opened
in the Swath Editor at that location
•
Select a track line file name Project data tree in the Control
window.
Select > Next Line
Tool
Menu
Tool
Menu
There are four options for navigating between track lines in the
Swath Editor:
Select > Previous
Line
CARIS HIPS and SIPS User’s Guide
311
Swath Editor: Examine Swath Data
Examine 3-D Data
Swath data displayed in the Plan View can be shown in 3D
format. The 3-D feature provides greater flexibility for examining
and cleaning data.
Tools > Swath Editor
> 3D View
The 3-D view is displayed in the Swath Editor.
Tool
Menu
1. Select the 3-D View command.
The 3-D display is manipulated by three controls:
•
the compass
•
the vertical exaggeration slider
•
the light control.
The display of data and 3-D controls is handled through the 3-D
View tab, shown below.
312
CARIS HIPS and SIPS User’s Guide
Swath Editor: Examine Swath Data
The line thickness of these controls can be altered by changing
the Line Weight value in the 3-D View tab.
Compass
Rotation along the X-Y-Z axis is handled by moving the arrow
heads at the ends of the compass. The compass is visible in both
the 3-D View and the 3-D View tab.
CARIS HIPS and SIPS User’s Guide
313
Swath Editor: Examine Swath Data
Z-axis rotation arrow
1. To rotate the image along the Z-axis, position the cursor on the middle
arrow head, press and hold the mouse button, and drag the cursor so
that the image is rotated. The compass can be rotated 90º.
2. To rotate the image along the X-Y axis, position the cursor on any of
the other arrow heads, press the mouse button and drag the arrow
head in a left-right or up-down direction. The compass can be rotated
360º.
3. Alternatively, the image can be rotated in the horizontal plane by
grabbing the Z-arrow, then pressing the left-mouse button and moving
the cursor up and down. Rotation around the Z-axis can be performed
by pressing the <Shift> key and moving the cursor left and right in
these windows.
The image is rotated in the same direction as the arrow heads.
4. To return the image to its original position, click Overview in the
3-D View tab.
The image is restored to its original position.
Vertical Exaggeration
Slider
By changing the vertical exaggeration, you can display seabed
features more clearly.
Vertical exaggeration is controlled by the scale slider in the 3-D
View. The slider can be displayed or hidden by selecting (or
clearing) the Show Vertical Exaggeration check box in the 3-D
Controls tab.
314
CARIS HIPS and SIPS User’s Guide
Swath Editor: Examine Swath Data
1. To change vertical exaggeration, position the cursor over the ball on
the vertical exaggeration scale.
2. Press and hold the mouse button, and move the ball up or down the
scale.
You can also change the vertical exaggeration using a dialog box.
3. Double-click the ball in the vertical exaggeration slider.
The Vertical Exaggeration dialog box is displayed.
4. Type a value in the Vertical Exaggeration field and click OK.
The display is refreshed to show the image according to the
selected exaggeration scale. The scale value is displayed below
the slider.
Lighting Control
The lighting control handles shading effects by controlling the
position and angle of the light.
The elevation value (on the bottom right of the compass) varies
from 90º to 0º starting from the middle of sundial. The azimuth
value (on the bottom left of the compass) varies from 0º to 360º in
a clockwise direction. The lighting control can be displayed or
hidden by selecting (or clearing) the Show Light Control check box
in the 3-D View tab.
CARIS HIPS and SIPS User’s Guide
315
Swath Editor: Examine Swath Data
Azimuth
Elevation
1. Position the cursor over the ball in the lighting control.
2. Press and hold the mouse button, and move the lighting control ball
with the cursor.
As the ball is moved, the elevation and azimuth values change.
You can also change the shading effect using a dialog box.
3. Double-click the ball in the lighting control.
The Set Sun Position dialog box is displayed.
4. Type new values in the Sun Elevation and Sun Azimuth fields and click
OK.
The image is refreshed to the new lighting angle.
Pan and Zoom
There are three pan options for the 3-D View:
•
To pan along the X-Y axis: place the cursor in the 3-D View,
press the middle mouse button and drag the display to a new
location.
•
To pan along the Z-axis: place the cursor in the 3-D View,
press and hold the <Shift> key and middle mouse button and
move the cursor in the window.
•
To centre the 3-D View window on a selected point: position
the cursor over the point and click the middle mouse button.
There are three zoom options:
316
•
Press and hold the <Ctrl> key and right-mouse button and
drag the cursor up in the display to zoom into display.
•
Press and hold the <Ctrl> key and right-mouse button and
drag the cursor down in the display to out of display
•
Rotate the mouse wheel in a counter-clockwise direction to
zoom into the display, or rotate the mouse wheel in clockwise
direction to zoom out of the display.
CARIS HIPS and SIPS User’s Guide
Swath Editor: Swath Cleaning
Swath Cleaning
Sounding outliers can be rejected interactively or by applying
automatic swath filters (see “SWATH FILTERING” ON PAGE 249).
This section examines how to interactively modify or query data
in the Plan, Rear, Side, 3-D, and Profile Views.
Reject Data
Each sounding in the HIPS format carries several status flag
switches that the software turns on and off as needed. Each
sounding begins as an Accepted sounding and can be rejected for
any reason during processing. A rejected sounding it can always
be returned to the accepted status without loss of data.
A sounding rejected within the Swath Editor has the Rejected by
Swath Editor flag turned on.
To reject a sounding, complete the following steps:
1. Select the data you want to reject.
Edit > Status Flag >
Reject
Key Pop-up
Tool
Menu
2. Select the Reject command.
The Rejected by Swath Editor status flag is now on and the
sounding may or may not be displayed depending if the rejected
data is toggled to visible.
(See “VIEW REJECTED SOUNDINGS” ON PAGE 222)
Reject
<R>
CARIS HIPS and SIPS User’s Guide
317
Swath Editor: Swath Cleaning
Reject Swaths
In some instances it may be necessary to reject all soundings in
one or more swaths. This can be done with the Reject Swaths
function without having to select all of the data in the swaths.
1. Select some sounding in the swath you want to reject.
Edit > Status Flag >
Reject Swaths
Key
Tool
Menu
2. Select the Reject Swaths command.
All soundings in the swath (whether selected or not) now have the
Rejected by Swath Editor status flag turned on. The sounding
may or may not be displayed (see “VIEW REJECTED SOUNDINGS” ON
PAGE 222).
<S>
Accept Data
Change rejected soundings back to the Accepted status.
1. Select the rejected data so it is highlighted.
Edit > Status Flag >
Accept
The soundings are now flagged as accepted.
Key Pop-up
Tool
Menu
2. Select the Accept command.
Accept
<A>
Designated Soundings
The Designated Sounding flag identifies the shoalest sounding in
a feature. The purpose of the Designated Sounding flag is to
ensure that the shoalest depths over significant seabed features
are maintained in charts and other standard hydrographic
products. For example, in a cluster of soundings surrounding an
outcrop of rocks, the shoalest sounding among that cluster is
identified as Designated.
For more information, see “DESIGNATED SOUNDINGS” ON PAGE 223.
1. Select the shoalest sounding from a cluster of soundings around a
feature in the Swath Editor.
318
CARIS HIPS and SIPS User’s Guide
Swath Editor: Swath Cleaning
The sounding is flagged as Designated.
Key
Tool
Menu
2. Select the Designated Soundings command.
Edit > Status Flag >
Designated
<D>
CARIS HIPS and SIPS User’s Guide
319
Swath Editor: Swath Cleaning
Query Data
Select soundings to view status and other information.
3. Select the data you want to query.
Edit > Query
Key Pop-up
Tool
Menu
4. Select the Query command.
Query
<Q>
Change sounding status
The following data about the selected soundings are displayed in
the Worksheet window. You can control the amount of data that
is opened in the Worksheet window through the Query Fields
dialog box (see “WORKSHEET WINDOW” ON PAGE 15).
•
time of the swath profile
•
d-time from the previous profile
•
profile number
•
beam number
•
across track distance
•
along track distance
•
depth
•
d-depth from the previous profile
•
d-depth from the previous beam
•
amplitude / phase detect
•
quality value
•
status flag
•
horizontal error value
•
vertical error value
Once data information is displayed, you can change the status of
the sounding.
1. Click the sounding data in the Worksheet window.
2. Select an Accept or Reject command.
320
CARIS HIPS and SIPS User’s Guide
Swath Editor: Swath Cleaning
Auto Cursor Mode
The auto cursor combines the select and Accept/Reject/Query
functions into a single procedure.
Tool
Menu
1. Select the Auto Cursor command.
Edit > Auto Cursor
2. Select a Reject/Accept/Query command.
3. Press the mouse button and draw a bounding box over the data.
4. Release the mouse button.
Middle-Mouse Button Selection
Soundings can also be selected and highlighted using the middle
mouse button. This method is used to select specific swath
profiles as well as beam profiles.
1. Select the General tab in the Control window.
2. Select the Beam and Swath check box to select both profiles.
3. Position the cursor over the Plan, Side or Rear Views.
4. Press and hold the middle mouse button while dragging the cursor
across the soundings until you have selected the data you want to
edit.
5. Right-click the mouse button and select a reject (see “REJECT DATA”
ON PAGE 317), accept (see “ACCEPT DATA” ON PAGE 318), or query
(see “QUERY DATA” ON PAGE 320) command.
CARIS HIPS and SIPS User’s Guide
321
Swath Editor: The Refraction Editor
The Refraction Editor
Since it is not possible to completely control the sound speed
variations in water we apply sound velocity profiles to correct for
this. However, refraction artifacts may still remain, especially if
incorrect or insufficient sound velocity profiles are applied either
during acquisition or during post processing.
To correct for this, you could choose to limit the usable swath
angle (and therefore survey more lines), or you can use the
Refraction Editor, which simulates the effects of altering the SVP
to derive a better refraction solution.
Since refraction errors are most pronounced in the outer parts of
the survey line coverage, they tend to create characteristically
curved (upward or downward) refraction artifacts.
Apply the velocity correction at a user-defined depth. As you
adjust the values, you can observe the changes in the shape of the
swath profiles. When you arrive at the values which give you the
desired correction, you can save these coefficients. Later, during
the Merge process, you can apply these Refraction Editor
coefficients that are recorded here.
To open the Refraction Editor,
Tools > Swath Editor
> Refraction Editor
The Refraction Editor dialog box is displayed in the Control
window.
Tool
Menu
1. Open the Swath Editor, then select the Refraction Editor command.
322
CARIS HIPS and SIPS User’s Guide
Swath Editor: The Refraction Editor
As you change the values in the dialog box you will be able to see
the effects of these changes in the Swath Editor display.
2. Select the Preview check box to be able view the effects of your
changes.
If the Preview option is selected, you can also enable the Apply
Roll option. When you first open the Refraction Editor, this
control is set to be the same as the setting in the Roll section of
the Vessel file (HVF). This control allows you to quickly observe
the effects of applying (or not applying) dynamic roll to the
sounding data.
NOTE: If there is no roll data, or if the appropriate Roll section
cannot be found in the HVF, or if the survey line has already been
sound velocity corrected, toggling the "Apply Roll" switch will
have no effect.
3. Select the Apply Roll check box to see the effects of roll on the data.
4. Adjust the values for velocity correction and depth until the desired
effect is observed.
5. Click Add to add the new entry to the list of coefficients.
6. To change an existing coefficient, adjust the settings and click
Replace to update the list.
7. To remove an entry from the list select it and click Delete.
8. Click Save to save your entries.
The velocity correction and depth are recorded with the current
swath profile number. While paging through the track line
during cleaning, new swath/correction/depth values can be
recorded.
Interpolation
When you add the first Refraction Coefficient, the correction
starts at that profile and goes to the end of the line with that
same correction. If you add a second Refraction Coefficient after
the first, the correction applied between the two profiles is
actually interpolated. This is done so that there is no “jump” in
the profile when the correction at the second Refraction
Coefficient is applied to the data.
This interpolation is linear. That is, if the selected profile is
between two refraction entries, the depth and delta velocity are
both interpolated from these entries.
Querying
Querying the data in the Swath Editor will always give the
results from the display, so if you change the display with the
Preview option of the Refraction Editor turned on, the query will
return the results of the change.The Observed Depth data
(across-track, along-track and depth) does not change.
The effects of the Refraction Editor can be turned on or off using
the Calibration Module (see “CALIBRATION” ON PAGE 481). The effects
of the Refraction Editor on the final merged depths can be
modified any time by editing the coefficients and re-merging. The
CARIS HIPS and SIPS User’s Guide
323
Swath Editor: The Refraction Editor
effects can be removed by re-merging and choosing not to apply
the coefficients.
324
CARIS HIPS and SIPS User’s Guide
13
13.
Single Beam Editor
Single Beam Editor: Introduction
Introduction
Open the Single Beam
Editor
1. Select a survey line in the Display window.
Tools > Single Beam
Editor
The Single Beam Editor is opened in the HIPS interface.
Tool
Menu
2. Select the Single Beam Editor command.
The Single Beam Editor is located (by default) below the Display
window. The editor can be undocked and moved to another
location like other windows in HIPS.
The display and events options are controlled from the Single
Beam Editor tab in the Control window.
The soundings are shown in the editor as dots connected by lines.
The horizontal scale represents distance or time. Distances are
are derived from the navigation data. The first sounding with an
associated position is considered the start of the line. All
subsequent distances are computed from this point using
sounding positions interpolated from navigation data.
326
CARIS HIPS and SIPS User’s Guide
Single Beam Editor: Introduction
When the horizontal scale is by time, the sounding timestamps
are used.
You can move up or down the track line by clicking the scroll bar
or turning the mouse wheel (if available).
Toolbar
The Single Beam toolbar is automatically
displayed when the editor is opened. This toolbar
is used for selecting primary or secondary data
as Selected data (see “PRIMARY AND SECONDARY
DATA” ON PAGE 329). The toolbar can moved and
docked in the interface like other toolbars (see “MODIFY EXISTING
TOOLBARS” ON PAGE 25).
Display Options
Change horizontal scale
The range of data that is visible along the horizontal scale can
controlled by distance or time. As you increase these values more
data is displayed in the editor.
The purpose is to provide a scaling method that simulates the
echo sounder paper speed controls so that the digital profiles can
resemble the analogue records.
1. Make sure the Control window is open and that the Single Beam
Editor tab is displayed.
2. Select either the By Time or By Distance options.
3. Select a range of data by clicking the Horizontal Scale arrow buttons.
Adjust vertical scale
The vertical scale displays the distance values. The Auto setting
uses the maximum and minimum soundings in the current view
to set the depth values for that view. As you move along the track
line, the depth values change to accommodate the visible
sounding data.
You can set a scale as a ratio of the vertical scale to the horizontal
scale. As the ratio is increased, the vertical display of data
becomes more exaggerated.
To set a vertical scale:
1. Clear the Auto check box.
2. Click the Vertical Scale arrow buttons to select an appropriate scale.
The display in the Single Beam Editor View is refreshed to
accommodate the selected scale.
CARIS HIPS and SIPS User’s Guide
327
Single Beam Editor: Introduction
Adjust horizontal labels
The horizontal labels show the depth or time values at regular
intervals along the survey line. The Auto selection spaces the
labels far enough apart so you can see them clearly. You can
determine the spacing you want for the labels.
1. Clear the Auto check box in the Horizontal Labels section.
2. Click the arrow buttons to select a new scale for the labels. If you
select By Distance for the horizontal scale, then the labels are
displayed as metres/feet. If you select By Time, the labels are
displayed hours/minutes/seconds/fractions of a second.
The display in the Single Beam Editor is refreshed to show the
labels according to the selected settings.
Events
Event marks are commonly generated by the logging system at
periodic intervals. Each event mark contains a unique identifier
and time stamp.
Display all event marks in a table.
1. Select the Event tab in the Control window.
2. Select the Show Event Marks check box.
The event marks are displayed in a table format.
View moving average
data
328
You can see the moving average data in the Single Beam Editor
by selecting any of the following check boxes in the Single Beam
Editor tab in the Control window. For more information on
applying Moving Average filtering to single beam data, see
“SINGLE BEAM CLEANING” ON PAGE 262.
•
Data graphs the raw sounding data. This box is checked by
•
Moving Average graphs the computed moving average from the
•
Difference graphs the difference between the original data
values and the moving average for each data point.
•
Thresholds displays horizontal lines in the graph indicating
default.
adjacent data points as described above.
the difference values that are rejected during filtering.
Threshold is a multiple of the standard deviation (sigma).
CARIS HIPS and SIPS User’s Guide
Single Beam Editor: Introduction
Primary and Secondary Data
Dual frequency data can be imported through the Generic Data
Parser, the Hypack converter and the Winfrog converter.
These frequencies (and the associated data) are designated as
Primary or Secondary. By default, all Primary frequency data is
designated as Selected. Selected data can be processed further in
HIPS and other CARIS products.
Show/Hide data
1. Make sure the Single Beam Editor tab in the Control window is
displayed.
2. Select or de-select the following check boxes to show or hide data.
When the box is checked, the sounding data associated with that
frequency is visible in the editor.
•
Primary
•
Secondary
•
Selected
The Single Beam Editor is refreshed to show the selected
frequencies.
Select Primary/
Secondary data
Although Primary data is automatically designated as Selected,
you can, if needed, flag the Secondary data as Selected data. The
two frequencies cannot be averaged.
1. Make sure that all frequency data is visible in the editor by selecting
the Primary, Secondary, and Selected check boxes.
2. Press and hold the mouse button and drag the cursor to highlight both
the Primary and Secondary data.
Edit > Single Beam >
Primary/Secondary
The highlighted Primary or Secondary data is now marked as
Selected.
Key Pop-up
Tool
Menu
3. Select a Primary or Secondary command.
Primary/Secondary
<1>/<2>
CARIS HIPS and SIPS User’s Guide
329
Single Beam Editor: Change Sounding Depths
Change Sounding Depths
The Single Beam Editor lets you modify the digital depths
created by the echo sounder's digitizer. Sometimes when fish or
other obstructions in the water column trigger the digitizer, the
sea bottom may still be visibly detectable on the analog sounding
graph. This function lets you set the echo sounder’s depth values
to the analog sounding depth values.
Change Depths
1. Select the Selected check box, if needed.
2. Press and hold the mouse button, and drag the cursor to highlight the
Selected soundings.
Pop-up Menu
3. Select the Change Depths command.
Edit > Single Beam >
Change Depths
The Change Depths dialog box is displayed.
Change Depths
The Depth Offset value is always set at 0.0. To move the sounding
to a deeper depth level, enter a positive value (for example, 5.5);
to move the sounding to a shallower depth level, enter a negative
value (for example, -5.5).
4. Click Preview to view the sounding at the new level.
5. Click Apply to set the sounding at the new depth and close the dialog
box.
You can also change depth values directly in the editor. This
option omits the preview function of the dialog box.
1. Press and hold the mouse button and drag the cursor to highlight the
Selected data sounding.
330
CARIS HIPS and SIPS User’s Guide
Single Beam Editor: Change Sounding Depths
When the mouse is positioned over the selected data, the cursor
becomes a two-headed arrow with a Z symbol beside it.
2. Press and hold the mouse button, and drag the cursor either up or
down.
The highlighted soundings move with the cursor.
3. Release the mouse button when the soundings are at the new depth.
Add Depths
Add a new sounding by supplying time and depth. The position of
the new sounding is interpolated from the existing navigation
data (using the supplied time). A quality code can also be entered.
If you enter a new depth, a new observed depths file and a new
slant range (travel time) file is generated.
You can add depths by selecting an existing sounding and
inserting a new depth or by creating a new time stamp without
selecting an existing sounding.
Pop-up Menu
1. Select the Add Depths command.
Tools > Single Beam
Editor > Add Depths
Add Depths
The Worksheet window is displayed, if it is not already open.
2. Select the Time field and type a new timestamp value.
3. Select the Depth field and type a new depth value.
4. Select a new quality flag, if needed.
5. Press <Enter> to add the new depth value to the file, or press <Esc>
to undo the change.
CARIS HIPS and SIPS User’s Guide
331
Single Beam Editor: Single Beam Cleaning
Single Beam Cleaning
Sounding data can rejected interactively or by applying the single
beam filters (see “SINGLE BEAM CLEANING” ON PAGE 262).
This section covers how to interactively reject, accept and query
data in the Single Beam Editor. These processes are similar to
the Swath Editor.
Reject Data
Each sounding carries several status flag switches that the
software turns on and off as needed. Each sounding begins as an
Accepted sounding and if rejected for any reason during
processing it can always be returned to the accepted status
without loss of data.
A sounding rejected within the Single Beam Editor has the
Rejected by Swath Editor flag turned on (the same status flag is
used for both swath and single beam data).
To reject a sounding, complete the following steps.
1. Select the data to be rejected so it is highlighted.
Edit > Status Flag >
Reject
The Rejected by Swath Editor status flag is now on and the
sounding may or may not be displayed depending if the rejected
data is visible.
Key Pop-up
Tool
Menu
2. Select the Reject command.
Reject
<R>
Show/Hide rejected
data
332
You can show or hide rejected data. When the rejected data is
turned off, these soundings are no longer visible in the Single
Beam Editor.
CARIS HIPS and SIPS User’s Guide
Single Beam Editor: Single Beam Cleaning
View > Show
Rejected
When the rejected soundings are visible, the display is adjusted
accordingly.
Key
Tool
Menu
1. Select the Show Rejected command.
<F4>
Accept Data
Change rejected soundings back to the accepted status.
1. Select the rejected data so it is highlighted.
Edit > Status Flags >
Accept
The soundings are now flagged as accepted.
Key Pop-up
Tool
Menu
2. Select the Accept command.
Accept
<A>
Query Data
View data on selected soundings.
1. Select the data to be queried.
Edit > Query
Key Pop-up
Tool
Menu
2. Select the Query command.
Query
<Q>
Change sounding status
The following data is displayed in the Worksheet window. The
data is colour coded depending on whether it is Primary,
Secondary or Selected frequency data.
•
Record
•
Type (primary, secondary, or selected)
•
Timestamp
•
d-Time
•
Approximate Position
•
Distance
•
d-Distance
•
Depth
•
d-Depth
•
Status
Once data information is displayed, you can change the status of
the sounding.
1. Select the sounding data in the Worksheet window.
CARIS HIPS and SIPS User’s Guide
333
Single Beam Editor: Single Beam Cleaning
2. Select Accept or Reject commands.
Change sounding
position
You can also change a sounding’s position using the Worksheet
window.
1. Select a sounding in the Worksheet window so it is highlighted.
2. Double-click the depth value.
3. Type a new depth value.
4. Click away from the highlighted area to de-select the sounding data.
Auto-Cursor Mode
The auto cursor combines the select and Accept/Reject/Query
functions into a single procedure.
Tool
Menu
1. Select the Auto Cursor command.
Edit > Auto Cursor
2. Select a Reject/Accept/Query command.
3. Press and hold the mouse button and drag the cursor over the data so
it is highlighted.
4. Release the mouse button.
The data is marked as rejected/accepted or it is queried.
334
CARIS HIPS and SIPS User’s Guide
Single Beam Editor: Barcheck Function
Barcheck Function
The barcheck function lets you generate a Sound Velocity Profile
(SVP) file based on a list of measured depths against a list of
actual depths. The file can then be used to perform sound velocity
corrections.
1. Make sure the Selected data is visible.
2. In the Single Beam Editor, press and hold the mouse button and use
the cursor to highlight the sounding(s).
Pop-up Menu
3. Select an Add to Barcheck command.
Edit > Single Beam >
Add to Barcheck
The Add to Barcheck dialog box is displayed.
Add to Barcheck
•
The Measured Depth field displays the depth that was
recorded by the sounder.
•
The Actual Depth field displays the depth that was recorded by
the barcheck.
If more than one sounding is selected, then a mean is calculated
from the selected soundings.
4. Enter new depth values, if necessary.
5. Click Add.
6. Repeat Steps 2 to 5, as needed.
7. Click the Barcheck tab in the Control window.
The table shows the Measured Depth, the Actual Depth and the
sound velocity.
8. If you want to delete a section, highlight it and click Remove.
9. Click Save.
The Save dialog box is displayed. The default location for the file
is ..\Hips\Svp.
10. Type a name for the file and click Save.
CARIS HIPS and SIPS User’s Guide
335
Single Beam Editor: Barcheck Function
336
CARIS HIPS and SIPS User’s Guide
14
14.
Tide Editor
Tide Editor: Introduction
Introduction
The Tide Editor presents information from a selected tide file in
both graphical and tabular formats. You can use the editor to edit
existing data or to create a new tide file, to apply to survey lines
before the Merge process.
Tide files are located by default in …\Hips\Tide and have a .tid
file extension.
Edit > Tide Editor
The Tide Editor is displayed.
Tool
Menu
1. Select the Tide Editor command in the HIPS and SIPS interface.
File > Open
Key
Tool
Menu
1. Select the Open File command to display the Open dialog box.
338
<Ctrl+O>
2. Select a tide file and click Open, or type the file name and path in
the field.
The selected tide file is displayed in the editor. The graphical
display shows a tide versus time graph of the data. Tide-level
values are represented on the vertical axis; time is represented on
the horizontal axis. The tide data is also displayed in a table
below the graphical display.
CARIS HIPS and SIPS User’s Guide
Tide Editor: Introduction
Adjust tide scale
To control the vertical scale of the graphical display:
•
Adjust time interval
Move the Tide Scale slide bar to select a range for the
height of the vertical tide axis.
Change the horizontal scale by adjusting the Time Interval
setting.
•
The day option lets you view data by 24-hour increments.
•
The hour/minute option lets you view data in increments
of less than 24 hours.
1. Click the Day arrow buttons to select the range of days for
displaying data.
2. If the Day value is set to zero then move the slide bar to select the
minute/hour range for the display of data.
The display of tide data is adjusted for the new time interval
along the horizontal axis.
Save a tide file
Save changes to an existing tide file.
File > Save
The file is saved with the changes.
Pop-up
Tool
Menu
1. Select the Save command.
<Ctrl+S>
CARIS HIPS and SIPS User’s Guide
339
Tide Editor: Editing Tide Data
Editing Tide Data
Edit table data
Edit data in an existing tide file.
1. Select a Date/Time/Tide cell in the tide table.
The cursor is displayed in the cell.
2. Remove the existing data and type a new entry.
The graphical display refreshes to show the new data.
Delete a tide entry
1. Press and hold the mouse button while dragging the cursor over
data in the graph, or click the appropriate number cell in the tide
table.
The data is highlighted.
Key Menu
2. Select the Delete command.
Edit > Delete
The tide data is removed from the graphed line and the table.
<Delete>
Search time gaps
Tide gauges, recording tidal height observations, may be subject
to occasional outages resulting in gaps in the tidal time series.
The time gaps option lets you search for these gaps. You can enter
new data, if needed.
Menu
1. Select the Options command.
Tools > Options
The Options dialog box is displayed.
2. Select the General tab if it is not already displayed.
3. Enter a value (in minutes) in the Time Gaps box.
Tools > Next Time
Gap
Key
Tool
Menu
4. Click OK.
5. Select the Next Time Gap command.
When the interval (in minutes) between adjacent data points is
the same as, or greater than, the Time Gaps value, the adjacent
data points are highlighted.
6. Repeat the process, if necessary, by selecting the Next Time Gap
command for each tide data point on the graphed line.
<Ctrl+G>
Enter new data
You can enter new data between two values.
Enter data for a new or existing tide file.
Key Menu
1. Select the Add Tide command.
Edit > Add Tide
<Insert>
The Add Tide dialog box is displayed.
2. Change the date (if necessary) by clicking the arrow buttons at the
top of the calendar until you have selected the desired month and
year.
3. Click the appropriate day button on the calendar.
The selected date (year and day) is displayed below the calendar.
340
CARIS HIPS and SIPS User’s Guide
Tide Editor: Editing Tide Data
The default time is the time of the currently selected tide record.
4. Click any of the three sections (00:00:00) in the Time box so they
are highlighted and type the desired time (use the 24-hour clock).
The Input Interval option lets you quickly enter a series of tide
values at a regular time interval, using the <Enter> key. You do
not need the mouse to move the cursor between fields.
5. If you want to regularly increment the times for tide data, click the
Input Interval check box.
6. Enter the minutes that the time value is to be incremented.
7. Enter a tide value.
8. Click OK.
The new tide data is displayed in the editor. If you selected the
Input Interval option, the time is incremented by the value set in
the Input Interval box.
CARIS HIPS and SIPS User’s Guide
341
Tide Editor: Create a New Tide File
Create a New Tide File
You can create new tide file.
File > New
Key
Any tide file that is currently open in the editor is closed.
2. Select the Add Tide command and type a new tide entry
(see “ENTER NEW DATA” ON PAGE 340).
Tool
Menu
1. Select the New command.
The data is displayed in graph format in the editor.
<Ctrl+N>
3.
Repeat until all values are entered.
File > Save/Save As
The Save As dialog box is displayed.
5. Type a name for the file and click OK.
Key
Tool
Menu
4. When ready, select the Save or Save As command.
342
<Ctrl+S>
CARIS HIPS and SIPS User’s Guide
Tide Editor: Options
Options
You can adjust the colour display of graphical data.
Menu
1. Select the Options command.
Tools > Options
Colour
The Options dialog box is displayed.
2. Select a colour from the drop-down colour palettes, or create a
custom colour from the standard Windows colour picker.
3. Click Apply to apply and save the settings for the project.
4. Click OK to close the dialog box.
The display is now refreshed to show the selected colours.
Show/Hide tide points
1. Select the Options command.
The Options dialog box is displayed.
2. Select the Draw Points check box.
When the Draw Points check box is selected, the data points are
visible.
3. Click Apply to apply and save the settings for the project.
4. Click OK to close the dialog box.
Show/Hide tool tips
A tool tip is a label that displays a specific tide level on the graph,
when the cursor is positioned over it. You can show or hide tool
tips.
1. Select the Options command.
2. Select the Tool Tips check box. If this option is checked then it is
enabled.
3. Click Apply to apply and save settings for this project.
4. Click OK to close dialog box.
Set date display
The date in tide file table can be displayed in either Julian Day
format or regular calendar format.
CARIS HIPS and SIPS User’s Guide
343
Tide Editor: Options
Menu
1. Select the Options command.
Tools > Options
The Options dialog box is displayed.
2. Click the Julian Date box, if the box is checked, this option is
selected.
3. Click Apply to apply and save settings for this project.
4. Click OK to close dialog box
Show/Hide toolbar
Display or hide the toolbar.
Menu
1. Select the Toolbar command.
View > Toolbar
Toggle status bar
2. Click the Toolbar menu item. When the check mark is displayed,
the toolbar is visible.
Display or hide the status bar.
Menu
1. Select the Status Bar command.
344
View > Status Bar
2. Click the Status Bar check box. When the check mark is
displayed, the status bar is visible.
CARIS HIPS and SIPS User’s Guide
Tide Editor: Exit the Tide Editor
Exit the Tide Editor
Close the Tide Editor.
Menu
1. Select the Exit command.
File > Exit
You are prompted to save any unsaved changes.
2. Click Yes to save the changed file.
The Tide Editor is closed.
CARIS HIPS and SIPS User’s Guide
345
Tide Editor: Exit the Tide Editor
346
CARIS HIPS and SIPS User’s Guide
15
15.
Field Sheets
Field Sheets: Overview
Overview
The field sheet system for HIPS and SIPS is used for organizing
data products created from the cleaned and processed
bathymetry and side scan data.
The field sheet consists of a data directory with a field sheet
definition file and a CARIS file for storing vector products.
A field sheet can be used for the following purposes:
•
to create a BASE surface
•
to create a side scan mosaic
•
to create a layer of tiled soundings
•
to create a layer of contours from a BASE surface or a layer
of tiles
•
to select soundings from a layer of tiles
•
to generate a profile from a BASE surface
•
to create layers of mark-up data
Note: this chapter describes the creation and use of field sheets
in HIPS and SIPS.
For information on using the CARIS Field Sheet Editor to add
contours, suppressed soundings and other layers to field
sheets, see the Field Sheet Editor User’s Guide. The Field
Sheet Editor is a separate program opened from HIPS and
SIPS.
348
CARIS HIPS and SIPS User’s Guide
Field Sheets: Create a Field Sheet
Create a Field Sheet
Define an area for a new field sheet.
Process > New Field
Sheet
The New Field Sheet (1) dialog box is displayed.
Tool
Menu
1. Select the new New Field Sheet command.
2. Type a name for the field sheet in the Name text box.
3. Define the scale of the field sheet.
The Horizontal Resolution field sets the minimum distance between
two adjacent coordinate values in the field sheet. The first time
you create a field sheet this field will contain the default value of
0.020 (the minimum allowable resolution for S-57). You can reset
this field to default to a different value.
4. Type a new value in the Horizontal Resolution field, if needed.
The Depth Resolution sets the minimum distance between two
adjacent depth values. The Depth Resolution field contains a
default value of 0.0010 (default resolution used in CARIS maps
for heights/depths).
5. Type a new value in the Depth Resolution field, if needed.
6. Click Next.
The New Field Sheet (2) dialog box is displayed.
CARIS HIPS and SIPS User’s Guide
349
Field Sheets: Create a Field Sheet
7. Select a map projection and zone for the field sheet. The pre-defined
map projection parameters are located in ..\Hips\System\mapdef.dat.
The mapdef.dat is a text file so you can append or edit the projections,
as needed.
8. The Projection Key is automatically displayed when the Zone is
selected.
9. Click Next.
The New Field Sheet (3) dialog box is displayed.
10. Select either the Geographic or Ground coordinates option.
11. Define the field sheet extents by one of three methods:
350
•
enter the geographic or ground coordinates
•
use the current extents of the Display window
•
use the mouse to create a rectangle defining the extents.
CARIS HIPS and SIPS User’s Guide
Field Sheets: Create a Field Sheet
Coordinates
12. Enter the northeast and southwest extents by clicking a section in a
box and typing the information; or by using the arrow keys to toggle
the values into the entry fields.
13. Make sure that the Display window only displays the area that is
selected for the field sheet.
Tool
14. Click the Display Window Extents button.
Tool
15. Click the Bounding Box button.
The cursor in the Display window is shown as a crosshair.
16. Press and hold the mouse button, and drag the cursor across the area
where you want to create the field sheet.
A rectangular box is drawn across the area where the cursor was
dragged.
•
If you want to move the bounding box, position the cursor
inside the box so it becomes a four-headed arrow. Press and
hold the mouse button, and then drag the box to a new
location.
•
If you want to resize the bounding box, position the cursor on
any of the box handles so the cursor becomes a two-headed
arrow. Press and hold the mouse button and drag the handle
to resize the box.
17. After the area for the field sheet has been defined, click Finish.
A new field sheet is created. The new field sheet data and files are
located, by default, in
..\Hips\Fieldsheets\ProjectName\FieldSheetName.
CARIS HIPS and SIPS User’s Guide
351
Field Sheets: Create a Field Sheet
Open and Close Field Sheets
Open a field sheet in a project or session.
If a session file is opened then all field sheets that were open
when the session file was last saved are automatically opened as
well.
Menu
1. Select the Open Field Sheets command.
File > Open Field
Sheets
The Open Field Sheets dialog box is displayed.
2. Select an existing field sheet.
3. Click Open.
The field sheet outline is displayed in the Display window. The
field sheet file tree is displayed in the Session tab of the Control
window.
Layers produced in the Field Sheet Editor (for example, contours,
soundings values or text), can be displayed by expanding the field
sheet file tree and selecting a layer check box (you may have to
select the Refresh command to view the data).
Pop-up Menu
Set as active field sheet
Process > Set as
Active Field Sheet
Set as Active Field
Sheet
It is possible to create field sheets with different coordinate
systems and to have them open in the same session. But only one
field sheet can control the coordinate system used in the Display
window. The Set as Active Field Sheet function identifies the field
sheet that controls the coordinate system in the Display window.
1. Select a field sheet file in the Control window and select the Set as
Active Field Sheet command.
The field sheet is highlighted.
1.
Select a field sheet from the Field Sheets tab in the Control window.
Close all field sheets
Menu
2. Select the Close Field Sheets command.
File > Close Field
Sheets
Pop-up
Close a single field
sheet
352
The field sheet outline is removed from the Display window and
the file name is no longer displayed in the Control window.
1. Select a field sheet file in the Control window.
2. Right-click the mouse and select the Close command from the pop-up
menu.
Close
The field sheet is no longer open in the interface.
CARIS HIPS and SIPS User’s Guide
Field Sheets: Create a Field Sheet
Set Field Sheet Properties
Set the display properties of a field sheet.
2. If the Properties window is already not open, select the command, or
right-click the layer and select Properties from the pop-up menu.
Window > Properties
The Properties window for field sheets is displayed.
Pop-up
Tools
Menu
1. Select a field sheet layer in the Session file of the Control window.
Properties
The File Name, Dimensions, Scale and Coordinate System fields are
read-only and cannot be modified.
3. Select Outline to display a border around the field sheet area.
4. Select a border Colour from the colour picker, or, create a custom
colour from the standard Windows Colour Palette.
5. Show the name of the field sheet in the Display window by selecting
the Show Name check box.
6. Click Apply.
CARIS HIPS and SIPS User’s Guide
353
Field Sheets: CARIS Field Sheet Editor
CARIS Field Sheet Editor
The Field Sheet Editor is a separate program opened from HIPS
and SIPS.
Using the CARIS Field Sheet Editor you can add contours,
suppressed soundings and other layers to field sheets. These data
layers can be displayed in HIPS/SIPS by expanding the field
sheet file tree in the Control window and selecting the layer check
box.
For more information, see the Field Sheet Editor User’s Guide or
the on-line help in the application.
Open the Field Sheet
Editor
1. Make sure that you have saved the project as a Session file
(see “SESSION FILES” ON PAGE 159).
2. In the Session tab, select the field sheet that you want to open in the
editor.
Tools > Field Sheet
Editor
The Field Sheet Editor is open.
Tool
Menu
3. Select the Field Sheet Editor command.
354
CARIS HIPS and SIPS User’s Guide
Field Sheets: Tiling
Tiling
Tiles are created in the Field Sheet Editor and are used in that
application to create selected soundings, contours and other data
layers. To learn how more about the tiling process, see the CARIS
Field Sheet Editor User’s Guide.
Generally, the tiling process splits a selected area into four cells
(tiles) and continues subdividing each cell until two user-set
parameters are satisfied:
•
the minimum number of points in the tile, and
•
the minimum size of the tile.
When you close the Field Sheet Editor and return to HIPS and
SIPS, the you are prompted to save the tile and associated layers
created in the Field Sheet Editor.
Tiles can also be created in HIPS and SIPS for performing
statistical surface cleaning on sounding data (see “STATISTICAL
SURFACE CLEANING” ON PAGE 457).
CARIS HIPS and SIPS User’s Guide
355
Field Sheets: Tiling
Open and Close Tiles
Menu
1. Select the Open Field Sheets command.
File > Open Field
Sheets
The field sheet file name is displayed in the Session tab of the
Control window.
2. Expand the field sheet file tree by clicking the Expand ( + ) icon beside
the field sheet so the tile file name is visible
3. Select the check box beside the file name. If the box is selected, the
tile is visible in the Display window; if the box is cleared, the tile is not
visible.
Below is an example of a tiled area with all the colour and border
options displayed.
Close a tile file in the Display window.
Menu
1. Select the Close Field Sheets command.
356
File > Close Field
Sheets
All tiles associated with the field sheet are closed.
CARIS HIPS and SIPS User’s Guide
Field Sheets: Tiling
Set Tile Properties
Set the display properties for tiles.
1. Select a tile layer in the Session tab of the Control window.
Window > Properties
The Properties window showing the display options for tiles is
open.
Pop-up
Tools
Menu
2. Select the Properties window command, or right-click the layer and
select Properties from the pop-up menu.
Properties
The Active Attribute list contains all attributes included in the tile
(such as the Profile number). When you select an attribute, the
tile is displayed according to the attribute values
1. Select an attribute from the drop-down Active Attribute list.
2. Select a colour map from the drop-down list. A preview of the colour
map is displayed below the list.
Change the display of tiles in the Display window.
3. Change how tiles are rendered to the Display Window by selecting
from three Display Level options:
•
Maximum: Draw all tiles
•
Size: Draw all tiles at the selected tile size level or higher. Select a
minimum tile size by clicking the arrow buttons
•
Automatic: Draw tiles to fit the current extents of the Display
window.
The Colour Fill check boxes determine how attribute values are
drawn in the Display window.
•
If the Colour Fill check box is cleared, these values are drawn
according to the selected colour map, but the tiles are left
blank.
CARIS HIPS and SIPS User’s Guide
357
Field Sheets: Tiling
•
If the Colour Fill check box is selected, then the individual tiles
are filled according the colour map, but the attribute values
are shown in black.
4. Select Colour Fill to colour code tiles according to the colour map.
5. Select a Transparency percentage to make features visible through
the tiles.
6. Select the Display Tile Value check box to draw the selected attribute
values.
7. Click Font to select a typeface and font size for the value.
The Show Tile Border check box determines how the border lines
dividing the tile areas are displayed.
•
If the Show Tile Border check box is cleared, the lines are
colour coded according to the colour map and attribute
values.
•
If Border Colour is selected, then choose a single colour to
display tile border lines.
8. Select the Show Tile Border check box to choose a single colour to
display tile border lines.
9. Select a colour from the standard Windows colour picker; or click
Other and create a custom colour from the palette.
10. Click Apply to implement the changes.
358
CARIS HIPS and SIPS User’s Guide
Field Sheets: Tiling
Tile Display Query
Using the Tile Display Query dialog box you can create an SQLtype query based on selected tile attributes and defined values.
Only those tiles that meet the query are displayed.
Menu
1. Select the Tile Display Query command.
View > Tile Display
Query
The Tile Display Query dialog box is open.
2. Select an attribute from the list.
3. Click one of the following operator buttons:
•
less than (<)
•
greater than (>)
•
less than or equal to (<=)
•
equals (=)
•
greater than or equal to (>=)
•
not equal to (!=)
4. Type a value for the attribute in the Value field.
5. Click Enter.
The search criteria you selected in the dialog box is displayed in
the Query section.
6. To add another search criteria, click any of the following two logic
operators:
•
AND: This operator combines two queries together so the results
of both are shown in the Display window.
•
OR: This operator searches and displays either one of two search
criteria in the Display window.
Repeat Steps 2 through 5.
CARIS HIPS and SIPS User’s Guide
359
Field Sheets: Tiling
7. Enter as many search criteria as you want.
8. Click OK.
The Display window is refreshed so only tiles that meet the
search criteria are shown.
360
CARIS HIPS and SIPS User’s Guide
Field Sheets: Tiling
Window >
Information
1. Select the Worksheet window command if this window is not already
open.
2. Make sure the tiles are open in the Display window.
3. Select the tile layer in the Session tab of the Control window.
Tool
Menu
Query Tiles
4. Press and hold the mouse button while dragging the cursor over the
tiles to be queried.
The selected tiles are highlighted.
Tool
Menu
5. Select the Query Tiles command.
Edit > Query Tiles
The following tile data is displayed in the Worksheet window
(from left to right):
•
East: easting coordinate for the centre of the tile.
•
North: northing coordinate for the centre of the tile.
•
Z_Mean: mean depth value for tile.
•
Z_Min: minimum depth value for tile.
•
Z_Max: maximum depth value for tile.
•
Residuals_Mean: mean value for residuals from
polynomial.
•
Residuals_Sigma: standard deviation for residuals.
•
Count: number of points in the tile.
•
Rejected: number of points rejected during surface cleaning.
•
NumberOfCoefficients: the number of polynomial
coefficients used.
CARIS HIPS and SIPS User’s Guide
361
Field Sheets: Profiles
Profiles
A profile is a cross-sectional view of a BASE Surface, weighted
grid, or tile. The profile contains two axes: the attribute values
from the grid, tile, etc. (vertical axis) and distance (horizontal
axis). While in digitizing mode, the view can be rotated, zoomed
or panned. Profiles are saved as field sheet layers.
Create Profile
1. Make sure that a field sheet is open and a BASE Surface or tile is
visible in the Display window.
2. Select a field sheet layer in the Session tab of the Control window.
Tools > New Profile
The New Profile Layer dialog box is displayed.
Pop-up
Tool
Menu
3. Select a Display Profile command.
New Profile (Control
window)
4. Type a name for the profile layer.
5. Type a CARIS feature code for the profile. The default code is
PROFILE.
6. Type a layer number.
7. Select a tile or BASE Surface attribute as a height source. To expand
the file tree, click the + icon beside the layer.
8. Enter a Step Size value so that depth data is extracted at regular
increments along the profile.
362
CARIS HIPS and SIPS User’s Guide
Field Sheets: Profiles
9. Click OK.
Digitize the profile
You can now digitize a two-point profile or multi-point profile in
the Display window using the Edit Line options.
Pop-up
10. Click in the Display window where you want to start your profile.
Edit Line > Point-toPoint Line/Cubic
Spline/B Spline
11. Right-click and from the Edit Line pop-up menu determine the type of
line to be drawn:
•
Point-to-Point: Connect the points as a straight line. This is the
default option.
•
Spline: Connect more than two points with a slightly curved line.
•
Stream Line: Connect more than two points by dragging the
cursor to draw a line.
•
Fitted Curve: Connect points in a curve based on polynomials.
12. Click in another section of the BASE Surface or tile to join the points
with a line.
13. Continue entering as many points as needed.
14. To remove the last entered point right-click and select Remove last.
The Profile tab in the Worksheet window displays the graphed
attribute and distance data between the points. The attribute
values (vertical axis) and distance levels (horizontal axis) are
measured in metres or feet. You may want to expand the
Worksheet window to get a better view of the data.
The profile expands as more points are entered.
To stop the profile line digitizing process
15. Right-click in the Display window and select End Line from the Edit
Line menu.
The profile line is drawn in the Display window and can be
selected.
Display Properties
Once a profile is created you can modify its properties, including
vertical and horizontal exaggeration, colour, legend display, etc.
Exaggeration
Setting the vertical and horizontal exaggeration renders a clearer
display of the profile.
1. Right-click in the Profile tab and select Set Axis Scale from the pop-up
menu.
The Axis Scale dialog box is displayed.
CARIS HIPS and SIPS User’s Guide
363
Field Sheets: Profiles
The Axis Window Properties sets the profile scale in the Profile tab;
the Axis Publication Properties sets the profile scale for printing.
2. Type the horizontal and vertical exaggeration scales and click OK.
The Profile tab is refreshed to display the profile at the new scale
(see below).
Profile Colour
Set a single colour for the profile.
1. Right-click in the Profile tab and select Profile Colour from the pop-up
menu.
The Profile Colour Selection dialog box is displayed.
364
CARIS HIPS and SIPS User’s Guide
Field Sheets: Profiles
2. Select a profile name from the Profile Colours list.
The profile is shown in the Profile Name field.
3. Select a colour from the pull-down menu or create a custom colour
using the palette.
The selected colour is shown in the dialog box.
4. Click Update.
The selected colour is shown in the Profile Colour list.
5. [Optional] Click Default Colours to reset the colour back to the
previous one.
6. Click OK.
The profile is changed to the selected colour.
Axis Settings
Select the display for the X and Z axes.
1. Right-click in the Properties tab and select Graph Axis from the pop-up
menu.
The Axis Settings dialog box is displayed.
CARIS HIPS and SIPS User’s Guide
365
Field Sheets: Profiles
2. Type the labels for the X and Z axes in the X-Axis and Z-Axis fields.
3. Select the X-axis and Z-axis increments as Automatic (derived from
the maximum and minimum values in the profile) or as User Defined.
4. If you selected User Defined, type the Step Size value in the field.
5. Select the Display Min/Max Value check boxes to show the minimum
depth value (Z-axis) or maximum distance value (X-axis).
6. Select Automatic to scale data according to the minimum and
maximum values in the profile; or select User Defined to enter scale
data according to selected depth and distance values.
7. If you selected User Defined, type the Minimum and Maximum Values
for the data range.
8. Click OK.
366
CARIS HIPS and SIPS User’s Guide
Field Sheets: Profiles
Legend
Display a legend and set the location of the legend.
1. Right-click in the Profile tab and select Legend Properties from the
pop-up menu.
The Legend Properties dialog box is displayed.
2. Select the Display Legend check box to show the legend in the Profile
tab.
3. Select the location of the legend in the tab by selecting a Origin Corner
from the drop-down list.
4. Select an offset from the selected edge by typing the X and Y offsets.
5. Click OK.
The legend is displayed in the Profile tab.
Zoom/Pan/Rotate
You can rotate, zoom, and pan the display. These options are
available while in digitizing mode from a pop-up menu in the
Profile tab of the Worksheet window. The profile can be rotated
to a maximum of 180°.
1. Right-click in the Profile tab of the Worksheet window and select
Mouse Mode > Rotate from the pop-up menu.
2. Press and hold the mouse button while dragging the cursor in
Worksheet window up or down, or sideways.
The profile display is rotated according to the position where you
release the mouse button.
CARIS HIPS and SIPS User’s Guide
367
Field Sheets: Profiles
3. Zoom in or out of the profile by right-clicking in the Profile tab and
selecting Mouse Mode > Zoom from the pop-up menu.
4. Pan the profile by right-clicking in the Profile tab and selecting Mouse
Mode > Pan from the pop-up menu.
The zoom and pan operations require you to press and hold the
mouse button while dragging the cursor in the Worksheet
window.
You can view the profile with vertical and horizontal grid lines in
front of profile.
5. Right-click in the Profile tab and select Wall Lines > Show Horizontal
Front Line or Show Vertical Front Line from the pop-up menu.
6. Select Snap to 2D from the pop-up menu to return the profile to its
original position.
Export Profile
Create a text file containing position and depth data from a
selected profile.
368
CARIS HIPS and SIPS User’s Guide
Field Sheets: Profiles
1. Right-click in the Profile tab and select Export Graph to ASCII from the
pop-up menu.
The Export Settings dialog box is displayed.
2. Click Browse to select a directory for the file.
3. Type the file name prefix in the Filename field. All files will have the
profile name appended to the end of it.
•
For example, a text file for Profile 21 with the prefix HBC4 will be
named HBC4-Profile21.txt.
4. Enter a Step Size value so position and depth data is extracted at
regular increments along the profile.
5. Select the Ground Coordinates:
•
X, Y (values are derived from the reference coordinate system in
the field sheet)
•
Distance (from the start of the profile), Z
6. Click OK.
The profile data is exported to a text file in the selected directory.
CARIS HIPS and SIPS User’s Guide
369
Field Sheets: Profiles
Display Profile
Display an existing profile in the Worksheet window.
1. Make sure that the Worksheet window is open.
2. Select a profile layer in the Control window.
Pop-up Menu
3. Select the command.
Tools > Display
Profile
The Display Profile dialog box is shown.
Display
(Control window)
4. Select a height source (tile layers or BASE surface) by clicking the +
icon and selecting the layer you want to use.
5. Type a Step Size to extract position and depth data from the profile
line.
6. Click OK.
The profile is loaded into the Profile tab of the Display window.
370
CARIS HIPS and SIPS User’s Guide
Field Sheets: Selected Soundings
Selected Soundings
A selection of soundings for display can be created in the Field
Sheet Editor and opened in HIPS and SIPS as a sub-layer of the
field sheet. The sounding selection is generated from a tile, grid
or BASE Surface attribute layer. The selection mechanism is
shoal- or deep-biased and allows control over the final density of
the selected sounding layer. The sounding layer can be written to
a CARIS file or to a Hydrographic Object Binary (HOB) file.
You can colour code the selected soundings according to depth, if
necessary. See “SOUNDING COLOUR OPTIONS” ON PAGE 371.
Sounding Colour Options
The Colour Table Editor lets you colour code soundings for easier
display and interpretation.
Pop-up
1.Select a sounding layer in the Control window.
2.Select the Sounding Colours command.
Sounding Colours
Single colour
The Colour Table Editor dialog box is displayed.
Use this option to display a soundings in a single colour.
CARIS HIPS and SIPS User’s Guide
371
Field Sheets: Selected Soundings
1.Select the Single Colour option.
2.Select a colour from the colour picker, or create a custom colour
from the standard Windows colour palette.
3.Click OK to save and apply settings.
Sounding colour table
1.Select the Sounding Colour Table option.
2.Select a colour from the colour palette, or create a custom colour
from the standard Windows colour picker.
3.Type a minimum range depth in the field beside the palette.
4.Type a maximum range depth in the next field
5.Click Insert Range.
The colour and range values are displayed in the Colour Table
dialog box.
6.Repeat Steps 2 to 5 to continue adding colours.
7.To remove a single colour range, select a range so it is highlighted
and click Remove Range.
8.To remove all selected ranges, click Clear.
9.Click OK to save and apply settings.
The soundings are colour coded according to the range values you
selected earlier.
Standard colour map
Use this option to select a standard colour map.
1.Select the Colour Map option.
2.Select a colour map from the drop-down menu.
3.Type the minimum and maximum range values for the colour map.
4.Click OK to save and apply settings.
The layer objects are displayed according to the colour map
settings.
372
CARIS HIPS and SIPS User’s Guide
16
16.
Subset Editor
Subset Editor: Overview
Overview
The Subset Editor is a tool for viewing and editing georeferenced
sounding and lidar data (see “LIDAR DATA” ON PAGE 469). The Subset
Editor differs from the Swath Editor in that soundings no longer
only have an across-track and along-track relationship—but are
now corrected for navigation, vessel heading, and other auxiliary
sensors, so that each sounding has a latitude and longitude value
attached to it.
Some of the feature of the Subset Editor are as follows:
•
view data in a three-dimensional mode so features such as
depressions and rises are visible.
•
rotate data to view it from different angles
•
flag soundings as needed:
•
rejected
•
accepted
•
outstanding
•
examined
•
designated
•
query data
•
view BASE Surface areas in the 3-D window
•
create and modify subset tiles to track the areas that have
been completed.
•
view and edit CUBE Surfaces
To find out about creating Designated Soundings in the Subset
Editor, see “DESIGNATED SOUNDINGS” ON PAGE 223.
374
CARIS HIPS and SIPS User’s Guide
Subset Editor: Workflow
Workflow
The following workflow is a suggested method for cleaning data
with the Subset Editor.
The Subset Tiles options (Steps 1 and 2) can be excluded, and the
Subset Editor can be directly opened into the track lines.
However, if you are processing large areas of data, the subset
tiling method is a useful way to track changes.
1. Make sure a field sheet (with BASE surface data) is open.
(See “CREATE A FIELD SHEET” ON PAGE 349)
2. Create a Subset Tile in the field sheet area.
(See “SUBSET TILES” ON PAGE 376)
3. Select the Subset Editor command and create a subset area with the
subset bounding box in the tiled area.
(See “SUBSET EDITOR INTERFACE” ON PAGE 380 and “SIZE AND
RESIZE SUBSET” ON PAGE 387)
4. Use the 3D View Controls to adjust the view of the data.
(See “THE 3-D VIEW” ON PAGE 389, “THE 2-D VIEW” ON
PAGE 393)
5. Clean subset data.
(See “SUBSET CLEANING” ON PAGE 398)
6. Classify data in subset area.
(See “SUBSET TILE TRACKING” ON PAGE 379)
CARIS HIPS and SIPS User’s Guide
375
Subset Editor: Subset Tiles
Subset Tiles
Subset Tiles are used to track areas within the project that have
been examined and completely cleaned using the Subset Editor.
Each tile within a Subset Tile layer has one of three settings:
Incomplete, Partially Complete, or Completed (see“SUBSET TILE
TRACKING” ON PAGE 379).
The extents of the subset tile area can be determined in two ways:
•
The tiles cover the entire field sheet area.
•
The tiles cover areas of the field sheet that contain a height
source (weighted grid or BASE Surface).
The option to cover the entire field sheet area is useful when you
are surveying an area while also cleaning newly acquired data
with the Subset Editor. You do not have to create a new subset
tile layer because of additional data in your project.
Create a subset tile
1. Select the field sheet in the Layers tab of the Control window.
Pop-up Menu
2. Select the New Subset Tiles command.
Tools > New Subset
Tiles
The New Subset Tiles dialog box is displayed.
New Subset Tiles
The Control Coverage by Surface option constrains the subset tile
area to a BASE Surface or weighted grid. When the check box is
cleared, the subset tiles cover the entire field sheet area.
3. Select the Control Coverage by Surface check box to apply the subset
tiles to a BASE Surface or weighted grid (If the check box is cleared,
the section of the dialog box for selecting a height source is dimmed).
4. If you choose the Control Coverage by Surface option, select the
BASE surface to be used as a template for a subset tile.
5. Type the tile size.
6. Click OK.
A Subset Tile layer is created and displayed in the field sheet
area.
376
CARIS HIPS and SIPS User’s Guide
Subset Editor: Subset Tiles
The Subset Tile layer name is added to the Session tab. The
names are automatically generated beginning with SubsetTiles1.
You can show or hide the layer with the check box beside the
Subset Tile file name in the Session tab.
View subset data in a
tile
Subset data can examined and edited by selecting the Subset
Editor command and dragging a box to define the area (see “OPEN
SUBSET EDITOR” ON PAGE 380). You can clean data from the open
subset (see “SUBSET CLEANING” ON PAGE 398).
Subset Tile Properties
Set subset tile properties for Subset Snapping and Subset
Tracking. The properties are found in the Subset Editor tab of the
Control window (see “SUBSET EDITOR TAB” ON PAGE 381), which is
displayed when the Subset Editor is opened.
1. Make sure the Subset Editor tab is displayed.
2. Select the Tracking layer.
The bottom of the tab is refreshed to display the property options.
CARIS HIPS and SIPS User’s Guide
377
Subset Editor: Subset Tiles
3. Select the Subset Snapping check box to activate the snapping
options.
4. Select the Tile Overlap check box so that the subset bounding box
overlaps the tile by a selected percentage. This option is useful when
you have data that overlaps the tile area.
5. Click Apply.
6. Select the Automatically Mark as Complete check box to flag the data
as examined and cleaned. This can be changed later (see “SUBSET
TILE TRACKING” ON PAGE 379).
When the Automatically Mark as Complete check box is selected, two
other options are made active.
7. Select the Mark all Subset Tile layers option to flag the tiles in ALL tile
layers as completed, or select Mark only snap target to select tiles only
in the selected tile layer as completed.
378
CARIS HIPS and SIPS User’s Guide
Subset Editor: Subset Tiles
Subset Tile Tracking
Once you have examined and cleaned a subset, the area can be
assigned one of three classifications.
Tool
Menu
1. While the subset is still open, select a Cleaning Status command:
Tools > Subset Editor
> Complete/Partially
Complete/Incomplete
•
Complete: All data in the selected area is clean and ready for
further processing or export.
•
Partially Complete: Not all the data within the area has been
viewed and verified as clean in the Subset Editor.
•
Reset: Data has not been verified or cleaned.
The area is assigned the selected cleaning status. The area is
shown in the Subset Tile as colour-coded according to the selected
status classification:
•
Complete = green
•
Partially Complete = yellow
•
Incomplete or not processed = red.
Only tiles totally encompassed by the subset bounding box
are flagged with the selected status command. Tiles partially
covered by the bounding box are flagged as Partially
Complete (see “THE 3-D VIEW” ON PAGE 389).
CARIS HIPS and SIPS User’s Guide
379
Subset Editor: Subset Editor Interface
Subset Editor Interface
Open Subset Editor
Track lines must be merged before the Subset Editor can be
opened.
Tools > Subset Editor
2. Press and hold the mouse button, and drag the cursor across the area
of the Display window where you want to create the subset.
As the cursor is dragged across the Display window, a bounding
box is drawn to show the subset area.
Pop-up
Tools > Subset Editor
> Load Subset
The subset is generated and displayed in the Subset Editor
windows.
3. If no subset is displayed, select the Load Subset command to Below
is an example of HIPS and SIPS with the Subset Editor.view
the data in the Subset Editor windows.
Tool
Tools > Subset Editor
Menu
Tool
Menu
1. Select the Subset Editor command.
380
CARIS HIPS and SIPS User’s Guide
Subset Editor: Subset Editor Interface
The Subset Editor has the following components:
•
Subset bounding box: The bounding box selects an area
where the subset is generated. Each time the box is moved or
resized, a new subset is generated. The 2D slice box shows
the area in the 2D window.
•
The 3D View: The 3D (three-dimensional) View shows all
soundings in the subset area. The view in the window can be
rotated or changed.
•
The 2D View: The 2D (two-dimensional) View displays
soundings from the subset area that are within the 2D
slicing box.
Subset Editor Tab
The Subset Editor tab is opened in the Control window when the
Editor is started. The tab controls the data properties in the
Editor. The tab is shown below.
CARIS HIPS and SIPS User’s Guide
381
Subset Editor: Subset Editor Interface
The top part of the tab are the layers representing the data types.
When you select a layer, the bottom part of the tab is refreshed to
display the controls for the data properties.
The check boxes beside the layers control the display of data in
the 3D and 2D Views. When the check boxes are selected and the
layers are highlighted, data associated with that layer are shown
in the 3D Display; when the check boxes are cleared, the data is
no longer displayed.
The following layers are listed in the Subset Editor tab:
•
HIPS Data: This layer controls the properties for sounding
selection and display. The 3D and 2D sublayers control the
display in their respective views.
For more information on the controls related to these layers, see the following sections:
•
382
•
“VIEW SUBSET INFORMATION” ON PAGE 384.
•
“COLOUR OPTIONS” ON PAGE 386
•
“THE 3-D VIEW” ON PAGE 389
•
“THE 2-D VIEW” ON PAGE 393
Reference Surface: This layer controls the properties
related to the display of BASE Surfaces in the 3D View. For
CARIS HIPS and SIPS User’s Guide
Subset Editor: Subset Editor Interface
more information related to this layer, see the following
section:
•
•
CUBE Hypothesis: This layer controls the display and
editing properties related to CUBE data. For more
information related to this layer, see the following section:
•
•
“SUBSETS AND BASE SURFACES” ON PAGE 397.
“HYPOTHESIS EDITING” ON PAGE 449
Tracking: This layer controls the properties for subset tiles.
For more information on the controls related to this layer,
see the following section:
•
CARIS HIPS and SIPS User’s Guide
“SUBSET TILES” ON PAGE 376.
383
Subset Editor: Subset Editor Interface
Toolbar
Commands related to the Subset Editor can be accessed from the
Subset Editor toolbar. This is a floating toolbar that is
automatically opened when the editor is started. It can moved
and docked like other toolbars (see “MODIFY EXISTING TOOLBARS” ON
PAGE 25).
View Subset Information
Each time a subset is generated, the following information is
shown in the General layer of the Subset Editor tab:
384
•
total soundings in the current subset
•
total memory used by subset
•
total accepted soundings
•
total rejected soundings
•
width
•
height
•
minimum depth level
•
maximum depth level
CARIS HIPS and SIPS User’s Guide
Subset Editor: Subset Editor Interface
Measure Distance
You can use the Measure Distance tool in the 2-D and 3-D Views
to evaluate data problems, such as timing offsets, heave
problems, etc.
Tool
Menu
1. Select the Measure Distance command.
Tools > Measure
Distance
A ruler icon is displayed next to the cursor.
2. Press and hold the mouse button and drag the cursor along the 2-D
View or 3-D View. To maintain a straight horizontal line, press and hold
the <Shift> key while drawing the line. To maintain a straight vertical
line, press and hold the <Ctrl> key while drawing the line.
As the cursor is dragged across the View, a line is drawn from the
start point to the point where the mouse button is released. The
distance between the two points is shown along the line.
CARIS HIPS and SIPS User’s Guide
385
Subset Editor: Subset Editor Interface
Colour Options
You can control how soundings are displayed in the subset.
1. Make sure the Control window is open.
2. Select the General layer in the Subset Editor tab.
The tab is refreshed to show the options related to soundings.
3. Select one of the following attributes from the drop-down list to colour
code soundings:
Colour Map
•
Depth: The recorded depth level of the soundings.
•
Amplitude: Backscatter intensity values.
•
Depth Uncertainty: The vertical uncertainty values accorded to
soundings.
•
Position Uncertainty: The horizontal uncertainty values accorded
to soundings.
•
IHO S-44: The S-44 Survey Order ranking applied to soundings.
•
IHO S-57: The S-57 Zones of Confidence (CATZOC) attributes
ranking applied to soundings.
•
Project: The project where the data was saved.
•
Vessel: The vessel(s) used on the survey.
•
Day: The day the sounding data was recorded.
•
Line: The track line in the project.
•
Amplitude: The sonar’s wave pattern.
•
Detection Method: The phase detection method.
You can represent a range of values using a colour map. The
colour ranges can be applied to other subsets so you have a
standard colour code for displaying data.
•
The colour at the top end of the selected map represents the
minimum value (and all values less than the minimum
value).
•
The colour at the bottom of the map represents maximum
value (and all values greater than the maximum value).
•
The colours in between the minimum and maximum colours
represent the depths and uncertainties between the defined
range.
4. To set a minimum and maximum values, select these two check boxes
and type the values in the respective fields. If these values are not set,
then they are automatically read from the subset.
5. [Optional] Select the Reverse Colours check box to reverse the order
in the colour map.
The display in the Views is refreshed to show the subset in the
selected colours.
386
CARIS HIPS and SIPS User’s Guide
Subset Editor: Subset Editor Interface
Size and Resize Subset
The size of the subset is determined by the bounding box. As the
bounding box area is changed, a new subset is generated and the
displays in the 2-D and 3-D Views are refreshed to show the new
area.
Below is an example of the subset bounding box. Note that the
shape has been altered for display purposes and does not match
the box shape as it is first shown in the interface.
The arrow helps maintain a
sense of direction when the
subset is rotated.
The 3D bounding box
determines the subset area.
The area inside this box is
displayed in the 3D View.
The 2D slice box determines
the area that is displayed in
the 2D Subset View.
To resize the subset areas:
1. Position the cursor over any of the grips on the side of the boxes.
2. Press and hold the mouse button and drag the grip.
As the grip moves with the cursor, the box is resized to a new
area.
You can also move the 2-D Subset slice up or down in the
bounding box by pressing the arrow keys. The arrow at the top of
the box shows the direction of the 2-D slice when the up arrow key
is pressed.
When the box is resized, a new subset is generated.
To rotate the subset:
1. Press and hold the <Ctrl> key.
2. Position the cursor over any of the grips on the side of the box.
3. Press and hold the mouse button to rotate the bounding box to the
desired angle.
Auto load subset
The Auto Load Subset option automatically loads subset data in the
3-D and 2-D Views when a subset area is created or changed. To
create or adjust a subset area without immediately loading data,
turn this option off.
CARIS HIPS and SIPS User’s Guide
387
Subset Editor: Subset Editor Interface
Tools > Subset Editor
> Load Subset
Data is loaded to the subset.
Tools > Subset Editor
> Lock
1. Select the Lock command after creating a new subset or resizing a
existing one.
The subset area is now locked into place and cannot be adjusted
until the lock is removed.
Key
Tool
Menu
2. If you de-selected the Auto Load Subset option and want to load data
manually, draw the subset and select the Load Subset command.
The Lock option locks the subset area so you do not accidentally
resize or move the subset while moving it in the Display window.
A new subset cannot be created while the lock is active.
Tool
Menu
1. In the General layer of the Subset Editor tab, select or clear the Auto
Load Subset check box to turn this option to on or off (the default
status is selected).
388
<L>
CARIS HIPS and SIPS User’s Guide
Subset Editor: Subset Editor Interface
The 3-D View
The 3-D View displays the entire subset. You can use this view to
examine and clean data.
Open/Close the 3D
View
Tools > Subset Editor
> 3D View
The view is displayed or removed from the HIPS interface.
Below is an example of the 3D View.
Tool
Menu
1. Select the 3D View command.
All controls for the 3D View are contained in the 3D View sublayer of the Subset Editor tab.
1. Click the Expand ( + ) icon beside the HIPS Data layer and select the
3D sub-layer in the Subset Editor tab.
The properties for the 3D View are displayed.
CARIS HIPS and SIPS User’s Guide
389
Subset Editor: Subset Editor Interface
3-D Subset Display
Soundings are shown in the 3-D View according to the display
type list at the top of the 3-D tab.
1. Select the display type from the list.
When the display type is selected, the 3-D View is refreshed to
show the soundings according to the display type. The options for
display type are shown in the tab when the display type is
selected.
The options for each display type is explained in the following
table.
Display Type
Definition
Options
Surface
The soundings are shown as a smooth
surface.
Surface Wireframe
The soundings are shown as a
Triangulated Irregular Network (TIN)
that connects soundings.
Soundings are drawn to the 3-D View either by
selecting the shoalest sounding in a userdefined area (or bin), or by selecting all
soundings.
390
1. Select the Shoal Bin Size to select the shoalest sounding in an area (bin), or select
Use All Points to display every sounding.
2. If you selected the Shoal Bin Size option,
type the size of the area for selecting the shoalest sounding.
3. Click Regenerate.
CARIS HIPS and SIPS User’s Guide
Subset Editor: Subset Editor Interface
Display Type
Definition
Options
Points
Soundings are shown as unconnected
points.
Spheres
Soundings are shown as unconnected
spheres.
3D Dynamic Skip option determines how many
sounding profiles and beams are displayed. For
example, the value 6 means that only every 6th
profile and 6th beam are shown in the view.
Cylinders
Soundings are shown as cylinders. If
the soundings contain horizontal and
vertical uncertainty values, then the
cylinders are sized according to those
values. For example, soundings on the
outer edge of a swath have a larger
radius than soundings on the inner
edge because of the greater horizontal
uncertainty. Soundings without TPE
values are drawn to a set size.
1. Select a skip value by clicking the up or down
arrow buttons, or directly typing a value in the
3-D Dynamic Skip field.
2. Click Regenerate.
Rotation, illumination
and exaggeration
options
The compass controls rotation, the sun dial controls illumination,
and the vertical exaggeration slider controls exaggeration.
Pan and zoom
The pan, zoom and rotation functions are the same as in the 3-D
View in the Swath Editor. See “PAN AND ZOOM” ON PAGE 316 for more
information.
Shading
Darken the image in the 3-D View.
2. Select or clear the Compass, Lighting and Vertical Exaggeration
check boxes to show or hide these controls in the 3D View.
3. Select the Shading check box.
Symbolize critical
soundings
Display soundings with Outstanding, Critical and Designated
flags.
4. Select the Symbolize Critical Soundings check box.
Overview
Reset the View so the entire subset area is visible (default).
5. Click Overview.
Show subset outline
Display an outline of the subset bounding box.
6. Select the Show Subset Outline option. When this option is checked,
the outline is displayed in the 3D View.
Show 2D slice
Display an outline of the 2D slice area.
7. Select the Show 2D slice option. When this option is checked, the 2D
slice outline is displayed in the 3D View.
Allow rotation under
data
This option rotates the 3D display by 180º to view soundings
underneath the subset. When this option is not selected, the
subset can only be rotated by 90º.
8. Select the Allow Rotation Under Data option to rotate the subset
display by 180º.
Centre on sounding
Recentre the display on a sounding.
9. Select a sounding in 3-D View by clicking on it with the middle-mouse
button.
CARIS HIPS and SIPS User’s Guide
391
Subset Editor: Subset Editor Interface
The display in the 3-D View is re-centred to the selected
sounding.
Wireframe colours
Select a colour to display 3-D and 2-D outline in the 3-D View.
10. Select a colour from the picker, or click Other and create a custom
colour from the palette.
392
CARIS HIPS and SIPS User’s Guide
Subset Editor: Subset Editor Interface
The 2-D View
The 2D View displays a profile of soundings within the 2D slicing
box. You can use this view to examine and clean data.
The location and size of the cutaway view is determined by the
size of the 2D slice box (see “SIZE AND RESIZE SUBSET” ON PAGE 387).
As the slice box is re-sized or moved to another position in the
subset, the display in the View changes accordingly.
Open/Close the 2D
View
Tools > Subset Editor
> 2D View
Below is an example of the 2D View.
Tool
Menu
1. Select the 2D View command.
All controls for the 2D View are in the 2D View sub-layer in the
Subset Editor tab.
2. Click the Expand ( + ) icon beside the General layer and select the 2D
sublayer in the Subset Editor tab
CARIS HIPS and SIPS User’s Guide
393
Subset Editor: Subset Editor Interface
The 2D View tab contains the following information:
•
number of soundings in the 2D slice
•
dimensions of the slice (height x width)
When the 2D slice bounding box is resized, the information in the
tab is refreshed with new data.
Change view
perspective
When the 2D View is first displayed, the view perspective is
determined by the dimensions of the 2D Slice Box.
•
If the height of the slice box is greater than the width, the
view is automatically shown from the left side.
•
If the width of the slice box is greater than the height, the
view is automatically shown from the bottom.
3. Select any of the following options from the View Perspective dropdown list to change the view angle:
•
top (view data from the front of the slice box)
•
right (view data from the right side of the slice box)
•
centre (view data from above the slice box)
•
bottom (view data from the back of the slice box)
•
left (view data from the left side of the slice box)
The 2D View is refreshed to show the data from selected angle.
4. To return to the default view, select Automatic from the drop-down list.
2D vertical exaggeration
The vertical exaggeration is the ratio of the vertical scale versus
the horizontal scale. You can set the vertical exaggeration scale
with the vertical exaggeration scale in the 2D View.
1. Position the cursor over the ball on the vertical exaggeration scale.
394
CARIS HIPS and SIPS User’s Guide
Subset Editor: Subset Editor Interface
2. Press and hold the mouse button, and move the ball up or down the
scale.
3. To change scale values, click the arrows at either end of the vertical
exaggeration scale in increase or decrease the scale by a value of 10.
As you move the ball, the data in the 2D View is rescaled.
The Auto Exaggeration option determines the scale automatically
by using all visible depths.
When Auto Exaggeration mode is on, the Include Rejected option
controls whether or not the rejected data is used to determine the
minimum and maximum sounding depth to be displayed in the
2D View.
4. Select the Auto Exaggeration check box.
5. Select the Include Rejected option to resize the display in the view to
include rejected data.
The 2D View is adjusted to display data according to the
maximum and minimum settings.
Display options
The display can also be modified to draw sounding values in the
View and display a grid with depth and distance values.
1. Select the Show Sounding Digits check box to draw sounding values
in the View.
2. Select the Show Graticule check box to display a grid representing
depth and distance. If the Show Graticule check box is cleared, the
grid is removed from the 2-D View, but the values representing
distance and depth are still displayed. The vertical scale represents
depth and the horizontal scale represents distance. The values shown
in the 2D View are determined by the display option:
Move 2-D Display
•
If the top/bottom/left/right display options are selected, both the
depth and distance are shown.
•
If the centre display option is selected, distance in both directions
are displayed.
You can move the 2-D Slice box within the subset by pressing the
arrow keys.
The 2-D Slice Box is moved up as the up arrow key is
pressed.
1. Press the arrow keys to move the 2-D Slice Box within the subset.
CARIS HIPS and SIPS User’s Guide
395
Subset Editor: Subset Editor Interface
2. Select an Overlap Percent to determine how much of the 2-D Slice
Box overlaps the previous area in the 2-D View when the box is
moved.
Pan and zoom options
The pan and zoom functions are the same as in the 3D View in
the Swath Editor. See “PAN AND ZOOM” ON PAGE 316 for more
information.
You can also pan in the Subset Editor Views by clicking on a
sounding with the middle-mouse button. This will shift the
subset so that the sounding is centred in the View.
To return the display in the View to original setting before zoom
and pan operations, click Overview.
Close Subset Editor
Tools > Subset Editor
Pop-up
396
2. If changes were made to the data, you are prompted to save them.
When data in the Subset Editor is changed and saved, the
ProcessedDepths and ObservedDepths files are updated to reflect
the changes.
Tool
Menu
1. Select the Subset Editor command.
3. Click OK to save changes.
Tools > Subset Editor
The Subset Editor is closed and no longer visible in the HIPS
interface.
CARIS HIPS and SIPS User’s Guide
Subset Editor: Subsets and BASE Surfaces
Subsets and BASE Surfaces
BASE Surfaces can be shown in the 3-D View. This feature is
used for the following quality assurance measures:
•
Determine the position of Designated soundings against an
existing BASE Surfaces.
•
Determine if Designated soundings have been correctly
applied to a Finalized BASE Surface.
A BASE Surface is displayed by depth attribute.
1. Select the Reference Surface layer to view the properties.
The tab is refreshed to show the property options for the a BASE
Surface layer.
2. Select the BASE Surface from the file tree.
3. Determine the height of the BASE Surface (relative to the subset)
using an attribute by selecting the attribute from the Height from
Attribute drop-down list.
4. Although the depth attribute is used to display the Surface, you can
colour the Surface by other attributes by selecting the attribute from
the Colour by Attribute drop-down list.
5. Display the surface as a points, wireframe or a complete surface by
selecting an option from the Display drop-down list.
6. Select a transparency level for the Surface, by moving the up or down
arrow buttons.
7. Click Load.
The BASE Surface is displayed in the 3-D View according to the
above options.
8. [Optional] Click Unload to remove the BASE Surface from the 3-D
View.
CARIS HIPS and SIPS User’s Guide
397
Subset Editor: Subset Cleaning
Subset Cleaning
Soundings in the 2D and 3D Views can be interactively examined
and their status flags can be modified.
When selecting data in the 3D View, remember that all data
in the highlighted area is selected, not just the visible data.
Reject
Each sounding in the HIPS format carries several status flags
that the software turns on and off as needed. Each sounding
begins as an Accepted sounding and if rejected, for any reason
during processing, it can always be returned to the accepted
status without loss of data.
A sounding rejected within the Subset Editor has the Rejected by
Hydrographer status flag turned on.
1. Select the data you want to reject so it is highlighted.
Edit > Status Flag >
Reject
The sounding status flag, Rejected by Hydrographer, is now on
and the sounding may or may not be displayed depending if the
rejected data is toggled to visible.
Key Pop-up
Tool
Menu
2. Select the Reject command.
398
Reject
<R>
CARIS HIPS and SIPS User’s Guide
Subset Editor: Subset Cleaning
Accept
Change rejected soundings back to the accepted status.
1. Select the rejected data that you want to accept.
Edit > Status Flag >
Accept
The soundings are now marked as accepted.
Key Pop-up
Tool
Menu
2. Select the Accept command.
Accept
<A>
Designated Soundings
The Designated Sounding flag identifies the shoalest sounding in
a feature. The purpose of the Designated Sounding flag is to
ensure that the shoalest depths over significant seabed features
are maintained in charts and other standard hydrographic
products. For example, in a cluster of soundings surrounding an
outcrop of rocks, the shoalest sounding among that cluster is
identified as Designated.
For more information, see “DESIGNATED SOUNDINGS” ON PAGE 223.
1. Select the shoalest sounding from a cluster of soundings around a
feature in the Subset Editor.
The sounding is flagged as Designated.
Key
Tool
Menu
2. Select the Designated Soundings command.
Edit > Status Flag >
Designated
<D>
CARIS HIPS and SIPS User’s Guide
399
Subset Editor: Subset Cleaning
Outstanding
Flag a sounding as requiring further examination.
1. Select the data that you want flag as Outstanding.
Edit > Status Flag >
Outstanding
Pop-up
Tool
Menu
2. Select the Outstanding command.
Outstanding
Examined
Flag questionable soundings as having been examined and
verified.
1. Select the data that you want to flag as Examined.
Edit > Status Flag >
Examined
Pop-up
Tool
Menu
2. Select the Examined command.
Examined
Query
View information on selected data.
1. Select the data that you want to query.
Edit > Query
The data is displayed in the Worksheet window.
Key Pop-up
Tool
Menu
2. Select the Query command.
400
Query
<Q>
CARIS HIPS and SIPS User’s Guide
17
17.
BASE Surfaces
BASE Surfaces: Overview
Overview
The Bathymetry Associated with Statistical Error (BASE)
Surface is a georeferenced image of a multi-attributed, weightedmean surface. A BASE Surface can also contain a visual
representation of horizontal and vertical uncertainty.
A BASE Surface file is saved with a HNS extension (HIPS
Navigation Surface). An XML file with the same name as the
BASE Surface is also generated when the Surface is created. This
file contains the metadata for the Surface.
You can select specific track lines to include in the BASE Surface
or let the wizard select them for you automatically. You can
generate as many Surfaces as necessary within a field sheet. An
example of a BASE Surface image is shown below
The BASE Surface meets the needs of various users. The primary
focus of current survey products is chart production by creating a
shoal-biased bin where shoals are exactly preserved but finer
seafloor features are omitted. Other users—marine geologists,
coastal zone management, fisheries habitat management, and
ocean engineering—require a more detailed view of the seafloor.
The BASE Surface can be generated to provide either safety of
navigation or a detailed examination of the seafloor.
402
CARIS HIPS and SIPS User’s Guide
BASE Surfaces: Overview
The BASE Surface is used for the following purposes:
•
A background visual aid when cleaning data interactively
and automatically.
•
A georeferenced TIFF that can be exported to other software
such as real-time navigation systems.
•
Data can be exported as an XYZ text file and imported as
soundings in a CARIS map or used to build digital terrain
models in other software.
•
A Product Surface that can be used in the Field Sheet Editor
to build contours, sounding selections, profiles, and other
data layers. This data can later be used to create an ENC or
raster chart.
•
A quality control feature for data. By viewing the
uncertainty values for nodes, you can identify bad data and
determine if an area needs to be re-surveyed.
All BASE Surfaces use range weighting to determine how a
sounding is applied to a node. Range weighting is based on
distance—soundings close to a node are given greater weight
than soundings further away. The calculated node positions are
determined by the corner coordinates of the field sheet.
Three optional surface types are used in creating BASE Surfaces:
•
Uncertainty uses a weighting scheme based on depth
uncertainty as specified by a selected S-44 survey order.
•
Grazing angle uses a weighting scheme based on a beam's
intersection angle with the seafloor.
•
Combined Uncertainty and Bathymetry Estimator (CUBE)
surface uses multiple hypotheses to represent potential
depth variances along the seafloor (see “CUBE PROCESSING” ON
PAGE 437).
CARIS HIPS and SIPS User’s Guide
403
BASE Surfaces: Overview
Range Weight
The range weight is inversely proportional to distance from the
node: soundings closer to a node are given a greater weight than
soundings further away.
The number of nodes each sounding is applied to is determined
by the size of the beam footprint. The beam footprint is calculated
using depth, sonar beam width, and the grazing angle.
The sonar that is used, with the appropriate beam width, is
defined in the BASE Surface wizard.
A list of multibeam systems and corresponding beam widths is
listed in ..\Hips\System\DeviceModels.xml. You can modify this
file.
The following graph demonstrates range weighting using
distance from a node in units of pixels (multiples of the BASE
Surface resolution).
404
CARIS HIPS and SIPS User’s Guide
BASE Surfaces: Overview
Uncertainty Weight
The weight that a sounding contributes to a node is inversely
proportional to the predicted depth uncertainty of the sounding.
The sounding’s depth uncertainty is scaled as a function of the
sounding’s distance from the node. The propagation of the depth
uncertainty to the node takes into account the sounding’s
distance from the node AND the sounding’s horizontal
uncertainty. Thus, both depth uncertainty and horizontal
uncertainty play a role in determining the weight a sounding
contributes to a node.
The sounding’s area of influence is a radius that determines the
number of nodes to which the sounding can be applied. This
radius is determined by the depth uncertainty of the selected IHO
S-44 survey order (see formula below).
Depth Uncertainty =
2
a + ( b × d )2
Once the depth uncertainty is propagated beyond the selected
S-44 survey order requirement for depth accuracy, then it has
reached its area of influence limit.
All distance computations are based on the ground coordinate
system defined for the BASE Surface—they are not simplified to
cell distances. All of the nodes within a sounding’s area of
influence are located rigorously. No simplified weight matrix
scheme is used.
CARIS HIPS and SIPS User’s Guide
405
BASE Surfaces: Overview
Swath Angle Weight
The weight a sounding contributes to the Surface also varies with
the sounding's grazing angle with the seabed.
This weighting value is important in areas with adjacent or
overlapping track lines. The swath angle weight ensures that
higher weight is given to beams from the inner part of a swath
than to outer beams from adjacent track lines.
In the following graph, beams with a grazing angle between 90
and 75 degrees are given a weight of 1.0. The weight decreases
linearly to 0.01 as the angle with the sea floor decreases to
15 degrees. This is the default swath angle weight scheme as
defined by the file ..\Hips\System\GrazingAngleWeights.txt.
The default file can be customized to the weighting scheme you
want.
406
CARIS HIPS and SIPS User’s Guide
BASE Surfaces: Overview
BASE Surfaces and Weighted Grids
Weighted grids are mean-averaged seabed surfaces generated
from processed bathymetry in previous versions of HIPS. While
grids share many similarities with BASE Surfaces, there are
fundamental differences between the two products:
•
Horizontal and vertical uncertainty data are not available in
weighted grids.
•
Attribute values that can be displayed in BASE Surfaces are
not available in weighted grids.
•
Range Weighting and Swath Angle Weighting schemes were
both applied when the grid was generated while Swath Angle
Weighting is optional for BASE Surfaces.
You can open weighted grids in HIPS 6.1 and grids can be used to
create tiles, selected soundings, contours and other data products
in the Field Sheet Editor. Grids can also be exported to an ASCII
file format or a georeferenced TIFF image. However, you cannot
apply BASE Surface functionality (Finalize, Combine, Rebuild,
etc.) to a grid.
BASE Surface operations cannot be applied to weighted
grids.
To build a BASE Surface with the same depth values as a
weighted grid, you should select the field sheet that contains the
grid and create a BASE Surface using the Swath Angle
Weighting option (see “CREATE BASE SURFACE” ON PAGE 408).
CARIS HIPS and SIPS User’s Guide
407
BASE Surfaces: Create BASE Surface
Create BASE Surface
BASE Surfaces are created using a wizard. All track lines must
be merged before a BASE Surface can be created.
1. Select the area for the BASE Surface:
•
To create a BASE Surface for the entire field sheet area, select a
field sheet in the session data tree in the Control window.
•
To create a BASE Surface for a single track line, select a track line
in a field sheet and then select the field sheet layer in the data
tree.
Process > BASE
Surface > New
The number of dialog boxes displayed in the wizard is determined
by the type of surface you are creating.
Tool
Menu
2. Select the New Base Surface command.
BASE Surface (Step 1)
The BASE Surface Wizard (Step 1) dialog box opens.
1. Type a Name for the BASE Surface.
2. Select an Image Colour Map file for the TIFF image that is created
after the Surface has been computed. You can change the colour map
later.
3. Type any Comments (if necessary) in the text box.
4. Click Next.
408
CARIS HIPS and SIPS User’s Guide
BASE Surfaces: Create BASE Surface
BASE Surface (Step 2)
The BASE Surface Wizard (Step 2) dialog box is displayed.
The Resolution value(s) sets the distance(s) between BASE
Surface nodes. You can use a single resolution for the entire
surface, or, use multiple resolutions for a range of depths.
To enter a range of values, you must select the select the Multiple
option. Values are entered in the following format:
minimum depth - maximum depth, resolution.
For example, 0.0-10.0,5
5. Select the Single field and enter a resolution value, or select the
Multiple option and enter a range of values.
6. Select either Uncertainty Weighting, Swath Angle or CUBE. The next
dialog box is determined by the weighting option you choose.
7. Click Next.
CARIS HIPS and SIPS User’s Guide
409
BASE Surfaces: Create BASE Surface
BASE Surface (Step 3)
The third dialog box is displayed.
Swath Angle Weighting
If you selected the Swath Angle Weighting option, the following
BASE Surface Wizard (Step 3) dialog box is displayed.
The Max Footprint Size defines the maximum area in the Surface to
which a sounding is applied. Use this value to prevent overexpansion of the footprint due to large depth spikes or very
shallow grazing angles.
1. Click the up and down arrow buttons in the Max Footprint Size.
If one or more track lines were selected before the BASE Surface
process was started, the Use Selected Lines check box is enabled.
2. Clear this check box if you want apply a BASE Surface to the field
sheet area.
The Accepted check box is selected by default.
3. Select either the Examined or Outstanding check boxes to include
data with these status flags in the BASE Surface process.
4. Select Additional Attributes to be displayed in the BASE Surface.
5. Click Finish.
410
CARIS HIPS and SIPS User’s Guide
BASE Surfaces: Create BASE Surface
Uncertainty weighting
If you selected the Uncertainty option, the following BASE Surface
Wizard (Step 3) dialog box is displayed.
1. Select an IHO S-44 Order from the drop-down list.
The a (constant depth error) and b (factor of depth dependent
errors) fields are automatically filled when a survey order is
selected. The values are read from
..\HIPS\System\IHO_Standards.xml.
2. If one or more track lines were selected before the BASE Surface
process was started, the Use Selected Lines check box is enabled.
Clear this check box if you want to apply the BASE Surface to the field
sheet area.
3. Select either the Examined or Outstanding check boxes to include
data with these status flags in the BASE Surface process. The
Accepted check box is selected by default.
4. Select the attributes to be displayed in the BASE Surface.
5. Click Finish.
The BASE Surface is created.
CARIS HIPS and SIPS User’s Guide
411
BASE Surfaces: View BASE Surfaces
View BASE Surfaces
In the HIPS interface, A BASE Surface layer is created and
displayed in the Session tab of the Control window. Attributes
are displayed as sub-layers of the BASE Surface.
1. Make sure the Session tab of the Control window is open.
2. Click Expand ( + ) icon beside the Field Sheet file name to expand the
directory tree.
3. Display the BASE Surface by selecting the check box beside the layer.
The following attributes can be displayed in the BASE Surface
(depending on the weighting method you selected in Step 6 and
the selected attributes in Step 7):
•
Depth: Depth at the node.
•
Density: The number of soundings contributing to a node.
•
Standard Deviation: The number of standard deviations
that the node is from the mean.
•
Uncertainty: The depth uncertainty assigned to each node.
•
Mean: The mean depth calculated from all soundings
contributing to a node.
•
Shoal: The shoalest sounding contributing to a node.
•
Deep: The deepest sounding contributing to a node.
4. To view or hide layers, select or clear the check boxes beside the
layer.
When an attribute layer is checked, a ToolTip containing the
attribute’s value at the node is displayed when running the
cursor across the area of the Surface.
412
CARIS HIPS and SIPS User’s Guide
BASE Surfaces: Properties
Properties
You can use the Properties window to view basic information
about a BASE Surface or to set the display options for a BASE
Surface attribute layer.
View Surface Properties
1. Select a BASE Surface layer in the Session tab of the Control window.
Window > Properties
The Properties window for a BASE Surface is displayed.
Pop-up
Tools
Menu
2. Select the Properties window command, or right-click the layer and
select Properties from the pop-up window.
Properties
The File Name, Resolution and area fields displayed in the window.
These are read-only and cannot be modified.
CARIS HIPS and SIPS User’s Guide
413
BASE Surfaces: Properties
Set Attribute Properties
1. Select a BASE Surface attribute layer (depth, shoal, mean, etc.) in the
Session tab of the Control window.
Window > Properties
The Properties window for the BASE Surface attributes layer is
displayed.
Pop-up
Tools
Menu
2. Select the Properties window command, or right-click the layer and
select Properties from the pop-up window.
Properties
3. Select any of the following colour map options:
•
Colour Map: A list of pre-defined colour maps available for
images. These colour maps are located in the ..\Hips\System
directory.
•
Colour Range: Custom colour ranges showing variances in
attribute properties. Colour ranges can be saved as CRF files.
If you select Colour Map, the following controls are displayed:
•
Minimum: All attribute values equal to or less than this value are
assigned the shallow end of the colour map.
•
Maximum: All attribute values equal to or greater than this value
are assigned the deep end of the colour map.
•
Reverse Colours: Change the order in the colour map.
•
Transparency: A percentage level for viewing other features
through the Surface area.
If you select Colour Range, the window is refreshed to not display
the controls associated with the colour map.
4. Select a colour map or colour range file from the File drop-down list.
414
CARIS HIPS and SIPS User’s Guide
BASE Surfaces: Properties
5. If necessary, click Browse to modify existing colour maps or colour
ranges, or create new ones (see “COLOUR MAP EDITOR” ON PAGE 417
and “COLOUR RANGE EDITOR” ON PAGE 419).
The Raster Legend option displays a scale of ranges in the selected
colour map.
6. Select from any of the following legend options:
•
Raster Legend: Display a legend containing the colour map for an
attribute and corresponding attribute values.
•
Location: Position of the legend in the Display window.
•
Background: Colour for the background area of the legend.
•
Font: The type, style and size of font used for text and values in
the legend. These values are selected from the standard Windows
Font dialog box that is displayed when the Font button is clicked.
7. Select Background and Font colours from the respective colour
pickers, or create custom colours from the Windows colour palettes.
The Shading option controls the lighting angles of the BASE
Surface. Using this option may highlight fine scale features of the
Surface that would not normally be seen.
The sundial control sets the shading effect in the image. The
Elevation value varies from 90 to 0 degrees starting from the
middle of sundial. The Azimuth value varies from 0 to 360
degrees in a clockwise direction.
8. Select the Shading check box to activate the sundial and Vertical
Exaggeration options.
9. Position the cursor over the button in the sundial and press and hold
the mouse button to drag the button to a new position. The Elevation
and Azimuth values change as the button is dragged.
10. Change the exaggeration of the illuminated sea floor by selecting a
Vertical Exaggeration value. Increasing the exaggeration may improve
the view of the fine scale features on the seabed.
The Range Filter option controls the value ranges that are
displayed in the BASE Surface. An example of using the filter
controls is displayed below.
CARIS HIPS and SIPS User’s Guide
415
BASE Surfaces: Properties
BASE Surface before filtering. All depth values ranging from 0
metres to 24 metres are displayed.
BASE Surface after filtering. Only depths between 0 metres
and 18 metres are displayed
Example of filtering
11. Select the Range Filter check box to activate the filtering options.
12. Type the range of attribute values that displayed once the filter is
applied.
13. Click Apply to implement changes.
416
CARIS HIPS and SIPS User’s Guide
BASE Surfaces: Properties
Colour Map Editor
The Colour Map Editor dialog box allows you to modify colour
maps and create new colour maps from existing maps.
The table on the top left section of the dialog box displays the
colours and index values that represent the minimum depth for
that the colour in the map.
The bottom part of the dialog box shows a histogram with the
horizontal axis representing the colour range used in the image
and vertical axis representing the number of pixels used to
display the colour.
The first colour is the background and is always assigned to pixel
value 1. The custom colour bar is filled from pixel values 1 to 255.
Pixel value 0 is always assumed to be transparent.
Below the histogram is a slider control with each slider
representing a colour in the map.
The dialog box also includes the following commands:
•
Add Colour: Add a custom colour to the colour list.
•
Delete Colour: Remove a newly selected colour.
•
Clear: Remove a colour from the colour list.
•
Reverse: Reverse the shallow and deep ends of the colour
•
Save As: Save a new colour map.
•
Blend: Merge colours together.
map.
CARIS HIPS and SIPS User’s Guide
417
BASE Surfaces: Properties
Change colour range
You can change the range of an individual colour using the table
or slider control.
1. To change a colour range using the table, double-click a colour in the
table.
The Add Colour dialog box is displayed.
2. Type a new number in the Value field and click OK.
3. Alternately, you can position the cursor on the slider representing the
colour in the histogram and use the mouse to move the slider.
As the value is changed, the histogram and Value column in the
table are refreshed to show the new colour value and range.
Add Colour
You can add or remove colours from an existing map, or create a
new colour map.
1. Click Add Colour or click directly on the slide bar.
The Add Colour dialog box is displayed.
The number in the Value field shows the pixel value of the
displayed colour.
2. Select a colour from the colour palette or click Other to create a
custom colour from the standard Windows colour picker.
3. Click OK.
The selected colour is displayed in the dialog box.
4. Repeat the process to insert more colours.
As you select more colours, the colour values and the depths are
displayed in a table. Each colour also has a slider control
associated with it.
5. Move the slider to adjust the pixel value of that colour.
The Value and Depth data in the box adjusts as you move the
sliders.
6. If you want to blend the colours, click the Blend check box.
7. If you want to remove a colour, click the colour value and click Delete
Colour.
8. If you want to remove all the colours, click Clear.
9. Click Save to retain the settings as a colour map.
The Save As dialog box is displayed.
418
CARIS HIPS and SIPS User’s Guide
BASE Surfaces: Properties
10. Type a file name for the colour map. All colour maps have a .cma
extension and the directory always is ..\Hips\System.
11. Click Save.
The colour map is saved to the directory.
Colour Range Editor
The Colour Range Editor dialog box allows you to modify or create
new colour range files.
The top part of the dialog box contains a table showing the range
of depths and the colours used to represent those depths.
The bottom part of the dialog box shows a histogram with the
horizontal axis representing the colour range used in the image
and vertical axis representing the number of pixels used to
display the colour.
1. To add a colour range, click Add.
The Add Range dialog box is displayed.
CARIS HIPS and SIPS User’s Guide
419
BASE Surfaces: Properties
2. Type the minimum and maximum values in the Min and Max fields.
3. Select a colour to represent the minimum and maximum values from
the colour picker, or create a custom colour using the standard
Windows colour palette.
4. Click OK.
The colour range is listed in the table and displayed in the
histogram.
5. Repeat Steps 1 to 4 until all needed ranges are represented.
6. To remove a single colour range, select the range and click Remove.
7. To clear all colour ranges, click Remove All.
8. To save the ranges as a CRF for future use, click Save As to open the
standard Windows Save As dialog box.
9. Click OK to close the Editor.
420
CARIS HIPS and SIPS User’s Guide
BASE Surfaces: Update BASE Surfaces
Update BASE Surfaces
Update BASE Surfaces created in HIPS 5.4 to HIPS 6.1 format.
BASE Surfaces created in HIPS 5.4 can only display attribute
units in metres.
The BASE Surfaces are updated using a command-line utility
(UpdateBASEunits.exe) located in the Bin directory. After the
surfaces are updated, the unit settings in the Options dialog box
can be applied.
1. From the Start button in the main Windows taskbar, select Start >
Programs > Accessories > Command Prompt.
The Command Prompt is displayed.
2. Type the utility name (UpdateBASEunits) and the path where the
surfaces are located. For example,
C:\Caris\HIPS\61\Bin\updatebaseunits C:\Caris\HIPS\61\Fieldsheets\Old
3. Press <Enter>
The BASE Surfaces are updated.
CARIS HIPS and SIPS User’s Guide
421
BASE Surfaces: BASE Surface Commands
BASE Surface Commands
Open
Open a saved Field Sheet.
Menu
1. Select the Open Field Sheets command.
File > Open Field
Sheets
The Open Field Sheets dialog box is displayed.
2. Select one or more field sheet files.
3. Click Open.
The field sheet file is displayed in the Session tab of the Control
Window and the field sheet outline is shown in the Display
window.
4. Click the Expand ( + ) icon to expand the field sheet file tree.
5. Select the BASE Surface check box.
The BASE Surface is now visible in the Display window.
You can switch the BASE Surface to on or off by clicking the
check box.
Close
Close one or all open field sheets.
1. Select a field sheet file in the Control Window
Pop-up Menu
2. Select Close from the right-click menu, or,
422
File > Close Field
Sheets
Close
3. Select the Close Field Sheets command to close all open field sheets.
The field sheet(s) and associated BASE Surface(s) are closed. The
field sheet outline is removed from the Display window and the
file names are no longer displayed in the Control window.
CARIS HIPS and SIPS User’s Guide
BASE Surfaces: BASE Surface Commands
Recompute
The recompute function rebuilds a BASE Surface and
regenerates the Surface image.
1. Select a Surface name in the field sheet file tree so it is highlighted.
Only the track lines used previously in the Surface are processed
during rebuilding.
The Recompute operation checks to see if the surface makes use
of HIPS data that is no longer present.
Tool
Menu
2. Select the Recompute BASE Surface command.
Process > BASE
Surface >
Recompute
If data is missing, a dialog box lists what is missing. You then
have the option of terminating the Recompute process, or
continuing without the missing data.
NOTE: If you choose to continue, the replacement surface will
have the missing data lines removed from its list of contributing
lines.
Add to BASE Surface
The Add to BASE Surface command applies new track lines to an
existing Surface. You can add specific lines to the Surface or you
can let the program select the lines to be added automatically.
1. Select the track line layer in the Control window.
2. Select the track line(s) you want to add to the BASE Surface so it is
highlighted.
3. Select the BASE Surface layer in the field sheet file tree so it is
highlighted.
Tool
Menu
4. Select the Add to BASE Surface command.
Process > Add to
BASE Surface
The BASE Surface Wizard dialog box (Step Two) is displayed.
5. Fill in the fields as needed.
6. Click Next.
The BASE Surface Wizard dialog box (Step 3) is displayed.
7. Fill in the fields as needed (see “THE
ON PAGE 410).
THIRD DIALOG BOX IS DISPLAYED.”
8. Click Finish.
The BASE Surface is updated to include new track lines.
CARIS HIPS and SIPS User’s Guide
423
BASE Surfaces: BASE Surface Commands
Remove From BASE Surface
Remove a survey line from a BASE Surface.
1. Select the survey line in the Project tab of the Control window.
2. Select a BASE Surface layer in the Session tab of the Control window.
Process > Remove
From BASE Surface
The BASE Surface is regenerated without data from the selected
survey line.
Tool
Menu
3. Select the Remove from BASE Surface command.
424
CARIS HIPS and SIPS User’s Guide
BASE Surfaces: BASE Surface Commands
Interpolate BASE Surface
The Interpolate Surface command eliminates small holes that
appear in areas of sparse data. This sometimes happens in the
outermost beams along the outside edges of surveyed areas
where there is little or no overlapping coverage.
This command examines each BASE Surface node to determine if
it contains a pixel value. If the node does not contain a value, the
neighbouring pixels are examined to determine if enough of them
contain pixel values to justify interpolating a value for the hole.
This limits the interpolation to holes in the BASE Surface and
prevents it from expanding the surface outward from the survey
area. A copy of the BASE Surface, with these gaps filled, is then
created.
In the following example, in a 3 x 3 BASE Surface node area, five
nodes have pixel values (shown in red).
This node does not
contain a pixel value.
This node does contain a
pixel value and can be
used to interpolate a value
for nodes without a pixel
value.
This means if you selected the Number of Neighbours value (see
dialog box below) as being five or less, a pixel value is created for
the node without a value from the neighbouring nodes.
1. Select a surface layer in the Control window so it is highlighted.
Pop-up Menu
2. Select the Interpolate Surface command.
Process > BASE
Surface > Interpolate
Interpolate BASE
Surface
CARIS HIPS and SIPS User’s Guide
425
BASE Surfaces: BASE Surface Commands
The Interpolate Surface dialog box is displayed.
The Destination BASE Surface field displays the file name of the
copy that is created from the original surface. The default name
is the original BASE Surface name with _Interp appended to it.
You can change the name, if necessary.
3. [Optional] Type a new name in the Destination BASE Surface field.
The Matrix Size determines the number of nodes closest to the node
that can be used to interpolate a pixel value.
4. Select either the 3 x 3 or the 5 x 5 option.
The Number of Neighbours field is a threshold level used to
determine the minimum pixels in the matrix area that must be
present to interpolate a new pixel value. The matrix size
determines the maximum and minimum values for the
neighbours field. For example, if you select 3 x 3 for the matrix
size, then the possible maximum number of neighbouring nodes
with pixels is 9 and the minimum number is 3.
5. Type the number of neighbouring nodes used to interpolate pixels.
6. Click OK.
A copy of original BASE Surface is created and displayed in the
field sheet data tree in the Control window. Note that the
interpolated BASE Surface cannot be updated with the
Automatic Update command in the Options dialog box.
As you can continue to re-interpolate the Surface, the effects
accumulate to remove any remaining gaps. To do this, select the
interpolated surface in the Control window and select the
Interpolate Surface command again. The second interpolation is
applied to the selected surface layer, you cannot create a new
BASE Surface layer.
Every time an interpolated BASE Surface is re-interpolated, the
parameters are stored. Therefore, when using the Rebuild
command (see “RECOMPUTE” ON PAGE 423) on an interpolated BASE
Surface, all interpolations are performed on the BASE Surface
layer.
426
CARIS HIPS and SIPS User’s Guide
BASE Surfaces: BASE Surface Commands
Delete
Permanently delete a BASE Surface from a field sheet.
1. Select a BASE Surface layer in the Control Window.
Pop-up
2. Right-click and select the Delete command from the pop-up menu.
Delete
The BASE Surface layer is permanently deleted from the field
sheet.
Finalize BASE Surface
The finalized BASE Surface is a finished version of the Surface
that is ready for export or for further processing (for example, a
Product Surface). The automatic update function in the Options
dialog box (see “GENERAL” ON PAGE 75) cannot be applied to a
finalized Surface if soundings are re-cleaned in the Swath or
Subset Editors.
Any of the following three operations can be applied to finalize a
BASE Surface:
•
Minimum uncertainty: Vertical uncertainty can fall to
almost zero if a node contains too many soundings. This
function applies a user-defined vertical uncertainty to each
node to compensate for this situation.
•
Designated soundings: If the dataset contains designated
soundings, the Surface is regenerated and the designated
soundings’ depth values are applied to the nearest nodes.
(See “DESIGNATED SOUNDINGS” ON PAGE 223).
•
Depth thresholds: A Finalized BASE Surface can be
modified to represent a range of depths levels in the field
sheet. When the Finalized Surface is generated, only these
depths are displayed.
Too create a finalized BASE Surface:
1. Select a BASE Surface layer in the Session tab of the Control window.
Menu
2. Select the Finalize BASE Surface command.
Process > BASE
Surface > Finalize
CARIS HIPS and SIPS User’s Guide
427
BASE Surfaces: BASE Surface Commands
The Finalize BASE Surface dialog box is displayed.
3. The default name for the Finalized Surface is the name of the source
BASE Surface with _Final appended to the end. You can change this
by typing a new name.
The values for calculating the uncertainty of the finalized surface
can be selected from three sources:
•
Uncertainty: The vertical uncertainty values in the source
•
Std Deviation: The standard deviation values from the source
•
Greater of two: The larger of the two above values.
Surface.
Surface (scaled to 95% confidence interval).
4. Select the Final Uncertainty from the drop-down list (this option is
dimmed if source Surface does not contain uncertainty values).
5. Select the Minimum Uncertainty check box to enable this option.
6. Type a depth value to represent the minimum uncertainty.
7. Select the Apply Designated Soundings check box to use this option.
8. Select the Depth Threshold check box to create a finalized Surface
that displays only node depths between the minimum and maximum
depth values.
9. Type the minimum and maximum depth values in their respective
fields.
10. Click OK.
A finalized BASE Surface is generated and visible in the Display
window. The finalized BASE Surface is listed in the Session tab
of the Control window.
428
CARIS HIPS and SIPS User’s Guide
BASE Surfaces: BASE Surface Commands
Combine
The Combine options stitches two or more BASE Surfaces
together to form one surface. This option is used when you have
created finalized BASE Surfaces with different depth thresholds
(see “FINALIZE BASE SURFACE” ON PAGE 427), or when you have two
adjacent Surfaces with different resolutions. The following
diagram demonstrates how the Combine function works.
A
Surface A displays
depths between 0 and
16 m. Surface B
displays depths greater
than 16 m. The
Combine function joins
these two Surfaces into
one Surface.
B
1. Select field sheet in the Session tab of the Control window that contain
the BASE Surfaces you want to combine.
Pop-up Menu
2. Select the Combine command.
Process > BASE
Surface > Combine
Combine (Control
window only)
CARIS HIPS and SIPS User’s Guide
429
BASE Surfaces: BASE Surface Commands
The Combine Surfaces dialog box is displayed.
3. Select the BASE Surfaces from the file tree by two methods (you may
have to click the expand icon to view all the available Surfaces):
•
Press <Ctrl> and select individual surfaces with the mouse.
•
Press <Shift> and select a range of surfaces by clicking the first
and last surface in the range. All surfaces between the first and
last surface are selected.
4. The Output Folder field is read-only and displays the directory path of
the selected field sheet. The combined BASE Surface is saved to this
folder.
5. Type a name for the combined Surface.
6. Type a resolution for the combined Surface
7. Click OK.
A new BASE Surface that combines the selected Surfaces is
generated. The combined Surface is listed in the Session tab of
the Control window. The combined BASE Surface reproduces all
the attribute layers contained in the source Surfaces.
430
CARIS HIPS and SIPS User’s Guide
BASE Surfaces: BASE Surface Commands
New Layer
Create a new sub-layer in an existing BASE Surface. The layer is
created using existing attributes and mathematical operators to
create SQL-style queries.
1. Select a BASE Surface layer in the Control window.
Pop-up
2. Select the command.
New Layer (Control
window only)
The Add Extended Layer to Surface dialog box is displayed.
3. Type a name for the new surface layer in the Layer Name field.
The following steps create the criteria for the new surface. The
criteria is determined by attributes and mathematical operators.
You can insert as many attributes and operators needed to create
the criteria.
4. Double-click any of the attributes in the Available Attributes list to
insert the attribute into the field below.
5. Click any of the operators to add it to the field.
6. To remove the criteria from the field, click Clear.
7. Click OK.
The new layer is drawn in the Display window and is listed as a
BASE Surface sub-layer in the Control window.
CARIS HIPS and SIPS User’s Guide
431
BASE Surfaces: BASE Surface Commands
QC Report
The BASE Surface Quality Control report lists significant data
gaps (“holidays”) within the surface and analyzes how much of
your data conforms to the S-44 standard for survey orders.
1. Select a BASE Surface layer in the Control window.
Pop-up Menu
QC Report
Process > BASE
Surface > QC Report
2. Select the QC Report command.
The BASE Surface QC Report dialog box is displayed.
QC Report (Control
window only)
The top section of the dialog box sets the criteria for finding
significant data gaps (known as “holidays”). A holiday is formed
when enough gaps are clustered together within a specified
radius. A layer that displays these holidays can also be created.
This layer does not display every gap in the surface, but only
those gaps that meet the criteria.
1. Type the number of nodes to use as a radius for searching for gaps in
the Holiday Search Radius field.
432
CARIS HIPS and SIPS User’s Guide
BASE Surfaces: BASE Surface Commands
2. Type the Minimum number of nodes that must contain data so that a
holiday is not formed. For example, if the value is 6, then a node
without data must be surrounded by five or less nodes with data to be
included (with other empty nodes) in a holiday.
3. Select the Create holiday layer check box to create a layer displaying
the data holidays selected by the search criteria.
The bottom section compares uncertainty values contained in the
surface to the S-44 standard. This determines how many nodes
within the surface meet the S-44 criteria.
The depth levels shown in the dialog box are the minimum and
maximum depth levels for each survey order. You can change
these to conform with depths in your surface.
4. [Optional] Type new depth levels for any of the survey orders. You can
have overlapping depth levels.
A text file of the QC report can be saved to a text format and
viewed later.
5. Click Browse to select a directory path and name for the QC report.
The path and name is shown in the Output File field.
6. Click OK.
The report is shown in the Output window and, if selected, saved
to a text file. The Holiday layer is displayed in the Control
window.
Holiday sub-layer for a BASE Surface
The following section describes the sections in the QC report file.
CARIS HIPS and SIPS User’s Guide
433
BASE Surfaces: BASE Surface Commands
QC Report File
The following is an example of a QC report file.
BASE Surface QC Report
---------------------Date and Time: 11/9/2006 10:59:09 AM
Surface: d:\hips\FieldSheets\HIPSTraining\smallsheet\asdfasdf.hcs
Holiday Search Radius: 1
Holiday Minimum Number of Nodes: 6
Holiday layer created: Yes
Number of nodes processed: 6,181
Number of nodes populated: 6,131
Percentage of nodes populated: 99.191
Number of holidays detected: 5
IHO S-44 Special Order:
Range: 0.0 to 10.0
Number of nodes considered: 620
Number of nodes within: 0
Residual mean: 0.307
S-44 Order 1:
Range: 10.0 to 100.0
Number of nodes considered: 5,511
Number of nodes within: 0
Residual mean: 0.035
S-44 Order 2:
Range: 10.0 to 5000.0
Number of nodes considered: 5,511
Number of nodes within: 5,511
Residual mean: -0.484
No depths within IHO S-44 Order 3
The first section contains information about the report file and
the options the data holiday options set in the dialog box:
•
The data and time that the QC report file was created.
•
The BASE Surface on which the QC report is based
•
The holiday search radius.
•
The minimum number of nodes required to omit a node
(without data) from being included in a holiday.
•
If a holiday layer was created or not.
The second section contains information on the number of nodes
containing data:
434
•
The total number of nodes processed in the surface
•
The total number of nodes that contained data
•
Percentage of the surface that contains data.
CARIS HIPS and SIPS User’s Guide
BASE Surfaces: BASE Surface Commands
•
Number of data holidays located.
The third section contains information about each S-44 survey
order:
•
The depth range for the survey order (set in the dialog box).
•
The number of nodes within that depth range with
uncertainty values that were considered for the survey order.
•
The number of nodes that fall within the depth error limits
for that survey order.
•
The residual mean is derived from the computed and
reported uncertainty. If the value is negative, the
uncertainty values meet the requirements for the selected
survey order. If the value is positive, the uncertainty values
do not meet the requirements for the selected survey order.
Therefore, if no nodes were considered for the survey order,
the residual mean would have to be above zero.
CARIS HIPS and SIPS User’s Guide
435
BASE Surfaces: Surface Filtering
Surface Filtering
Surface filtering uses a scaled standard deviation or uncertainty
threshold to reject soundings that fall outside that threshold.
Soundings that fall outside the threshold are assigned a Rejected
by Surface Filter flag and are no longer available for processing
(unless they are given an Accepted flag again).
1. Select a BASE surface layer in the Control window.
2. Select the Surface Filter command.
Menu
r
Tools > Apply Filters
> Surface Filter
The Surface Filter dialog box is displayed.
3. Select the error values from either Standard Deviation or Uncertainty
to set the threshold for the filter.
4. Select the Confidence Level from the drop-down list to scale the
standard deviation or uncertainty thresholds.
5. Select the check box to include rejected data when running the filter.
6. Select the check box to reject soundings that are offset from the
surface.
7. Click OK.
436
CARIS HIPS and SIPS User’s Guide
18
18.
CUBE Processing
CUBE Processing: Introduction
Introduction
The Combined Uncertainty and Bathymetry Estimator (CUBE)
generates a surface that contains multiple hypotheses
representing potential depth variances on the seafloor.
After a CUBE Surface is generated, you can examine the
hypotheses in the Subset Editor to determine if they are valid or
not. The hypotheses can be replaced by alternative hypotheses (if
necessary). A filtering tool is provided to reject soundings that fall
outside specified parameters and another CUBE Surface can
then be generated. Thus, CUBE is used in an iterative process to
filter data to produce the best-possible representation of the
surveyed area.
Horizontal and vertical uncertainty values are necessary to
create BASE Surfaces using CUBE.
The CUBE process uses sounding propagation along with
disambiguation to create and select hypotheses.
When soundings are propagated to a grid of estimation nodes:
•
Soundings with a low vertical uncertainty are given more
influence than soundings with high vertical uncertainty
•
Soundings with a low horizontal uncertainty are given more
influence than soundings with a high horizontal uncertainty.
•
Soundings close to the node are given a greater weight than
soundings further away from the node.
Generally, as soundings are propagated to a node, a hypothesis
(depth value) is developed at that node. If a sounding’s value is
not significantly different from the previous sounding then the
same or modified hypothesis is used. If the value does change
significantly, a new hypothesis is created. A node can contain
more than one hypothesis.
In the above graphic, two soundings—S1 and S2—have similar
values and therefore are part of the same hypothesis at the
438
CARIS HIPS and SIPS User’s Guide
CUBE Processing: Introduction
estimation node. However, sounding three (S3) has a significantly
different value so it forms a new hypothesis.
The final process in CUBE is disambiguation. Disambiguation
selects one hypothesis over others. There are four disambiguation
options:
•
Density: Select the hypothesis with the greatest number of
sounding samples.
•
Locale: Select the hypothesis that is most consistent with the
surrounding nodes that have only one hypothesis.
•
Locale and Density: Select the hypothesis the contains the
greatest number of soundings and is also consistent with
neighbouring nodes.
•
Initialization: Select the hypothesis that is nearest to a node
value of a previously created BASE Surface. Initialization
differs from the other methods because it filters potential
outlier soundings just prior to disambiguation.
When a surface using the density and locale options is generated,
two layers specific to the CUBE Surface are displayed.
•
The Hypothesis Count layer is a visual representation of
hypothesis density at a node. A Surface with a Hypotheses
Count layer is displayed below.
Areas with multiple
hypotheses are shown in
a brighter colour than
areas with only one
hypothesis.
•
The Hypothesis Strength layer is a visual representation of
the mathematical confidence of a chosen hypothesis. Each
node is given a value ranging from 0.0 (high confidence) to
5.0 (low confidence). Nodes with one hypothesis have a
confidence value of 0.0 while nodes with multiple hypotheses
will have confidence values greater than 0.0. A Hypothesis
Strength layer is displayed below.
CARIS HIPS and SIPS User’s Guide
439
CUBE Processing: Introduction
The brightly coloured areas
represent nodes with more
than one hypothesis.
More than one hypothesis or a low confidence value does not
necessarily mean an error. Uneven areas (slopes, for example)
show more than one hypothesis because of the changing terrain.
Nodes with multiple hypothesis should be examined in the
Subset Editor. See “HYPOTHESES CLEANING” ON PAGE 454.
When you select the Initialization method of disambiguation, two
additional layers are created:
•
Guide_Depth: Depths from the initialization surface.
•
Guide_Uncertainty: Vertical uncertainty values from the
initialization surface.
The User Nominated layer displays the nominated hypotheses
that were chosen over the hypotheses selected by CUBE
disambiguation (see “NOMINATE ALTERNATIVE HYPOTHESES” ON
PAGE 452).
440
CARIS HIPS and SIPS User’s Guide
CUBE Processing: Generating CUBE Surfaces
Generating CUBE Surfaces
CUBE Surfaces are created using the BASE Surface wizard. All
track lines must be merged and TPE must be computed before a
CUBE Surface can be created.
1. Select the field sheet area for the CUBE Surface:
•
To create a CUBE Surface for the entire field sheet area, select a
field sheet in the session data tree in the Control window.
•
To create a CUBE Surface for a single track line, select a track
line in a field sheet and then select the field sheet layer in the data
tree.
Tool
Menu
2. Select the New Base Surface command.
Process > BASE
Surface > New
CUBE Surface (Step 1)
The BASE Surface Wizard (Step 1) dialog box opens.
1. Type a Name for the BASE Surface.
2. Select an Image Colour Map file for the TIFF image that is created
after the Surface has been computed. You can change the colour map
later.
3. Type any Comments (if necessary) in the text box.
4. Click Next.
CARIS HIPS and SIPS User’s Guide
441
CUBE Processing: Generating CUBE Surfaces
CUBE Surface (Step 2)
The BASE Surface Wizard (Step 2) dialog box is displayed.
The Resolution value(s) sets the distance(s) between CUBE
Surface nodes. You can use a single resolution for the entire
surface, or, use multiple resolutions for a range of depths.
To enter a range of depth values, you must select the Multiple
option. Values are entered in the following format:
depth-depth,resolution. For example 0.0-10.0,5
5. Select the Single field and enter a resolution value, or select the
Multiple option and enter a range of values.
6. Select CUBE.
7. Click Next.
442
CARIS HIPS and SIPS User’s Guide
CUBE Processing: Generating CUBE Surfaces
CUBE Surface (Step 3)
The BASE Surface Wizard (Step 3) dialog box is displayed.
A sounding’s area of influence (the number of nodes to which a
sounding is applied) is determined by the vertical uncertainty
limit in a selected S-44 survey order. When a sounding’s vertical
uncertainty increases beyond the requirement for the survey
order then it cannot contribute to the node.
1. Select an IHO S-44 Order from the drop-down list.
The a (constant depth error) and b (factor of depth dependent
errors) fields are automatically filled when a survey order is
selected. The values are read from
..\HIPS\System\IHO_Standards.xml.
If one or more track lines were selected before the BASE Surface
process was started, the Use Selected Lines check box is enabled.
2. Clear this check box if you want to apply the BASE Surface to the field
sheet area.
The Accepted check box is selected by default.
3. Select either the Examined or Outstanding check boxes to include
data with these status flags in the BASE Surface process.
4. Click Next.
CARIS HIPS and SIPS User’s Guide
443
CUBE Processing: Generating CUBE Surfaces
CUBE Surface (Step 4)
The BASE Surface Wizard (Step 4) dialog box is displayed.
Disambiguation is the process of selecting hypotheses at the
nodes. There are four disambiguation options:
•
Density: Select the hypothesis with the greatest number of
sounding samples.
•
Locale: Select the hypothesis that is most consistent with its
surrounding nodes that has only one hypothesis.
•
Density & Locale: Select the hypothesis that contains
greatest number of soundings and is also consistent with
neighbouring nodes.
•
Initialization: Select the hypothesis that is closest to an
initialization surface (i.e., a previously created BASE
Surface).
5. Select a Disambiguation option from the drop-down list.
6. Click Advanced to view more options for CUBE display. For more
information, see “ADVANCED OPTIONS” ON PAGE 446.
The Initialization Surface check box activates filtering tests to
remove potential outliers from CUBE Surface processing. If you
select the Initialization disambiguation method then you must
complete the following fields. Otherwise, select Initialization Surface
as an optional filtering method used in conjunction with other
disambiguation methods.
7. Select the Initialization Surface check box to activate the filtering
options.
444
CARIS HIPS and SIPS User’s Guide
CUBE Processing: Generating CUBE Surfaces
8. Type the path and name of an existing BASE Surface, or click Select
and choose the BASE Surface.
Initialization Surface filtering uses depth and vertical uncertainty
values in an existing BASE Surface (the Initialization Surface) to
exclude potential outliers from the new surface. There are three
filtering tests:
•
Minimum Difference is a set distance from an existing BASE
Surface node. For example, if the Minimum Distance is set at 10
metres, all soundings that are not within 10 metres of the
node are excluded when a new Surface is generated.
•
Filter Percentage is a percentage of depth at a node. For
•
Variance Scaler is a multiplier of vertical uncertainty at a
example, if the depth at a node is 20 metres and the
percentage value is 0.25, all soundings that are more than 5
metres from the node (20x0.25) are excluded from the new
Surface.
node. For example, if the scaler is set to three and depth
uncertainty for a node is one metre then soundings more
than three metres (1x3) from the node are excluded from the
processing of the new BASE Surface.
The shoalest values from the three tests are then used as the
threshold to filter outlier soundings.
9. Select any of the three tests to filter soundings during disambiguation.
10. Click Finish.
A CUBE Surface is shown in the Display window and the layers
associated with the Surface are listed in the Control window. See
“VIEW BASE SURFACES” ON PAGE 412 for more information on display
options.
CARIS HIPS and SIPS User’s Guide
445
CUBE Processing: Generating CUBE Surfaces
Advanced Options
The Advanced Options dialog box displays more detailed
configuration settings for the CUBE surface. These settings are
contained in the CUBEparams.xml file. You can use the settings
in this file or select a custom configuration file. If you use a
custom file, make sure that you use the same syntax and
structure as the CUBEparams.xml file.
Changes made in this dialog box are saved to the
CUBEparams.xml file or to the configuration file you selected.
When the Advanced button is clicked in the
CUBE Surface (Step 4) dialog box, the Advanced Options dialog
is displayed.
1. [Optional] Click Browse to select another configuration file. The file
path is displayed in the Template File field.
2. Select a configuration setting from the Configuration drop-down list. If
you select New, the New CUBE Configuration dialog box is displayed.
446
CARIS HIPS and SIPS User’s Guide
CUBE Processing: Generating CUBE Surfaces
3. [Optional] Type the name for the new configuration setting and click
OK.
4. [Optional] Type any additional information in the Comments field.
5. Complete the following fields, as needed:
•
Estimate Offset: The threshold for significant offset from current
estimate to warrant an the creation of a new hypothesis. The value
must be between 0.1 and 10.0.
•
Capture Distance Scale: Scale on predicted or estimated depth for
how far out to accept data. Value is a percentage of depth used to
limit the radius of influence a sounding may have on the grid.
Value must be between 1.00 and 100.00.
•
Capture Distance Minimum: The minimum value (in metres) on
predicted or estimated depth for how far out to accept data. This
value is used in conjunction with Capture Distance Scale to limit
the radius or influence of a sounding. Value must be between 0.0
and 100.00.
•
Horizontal Error Scalar: The value used to scale the horizontal
error of each sounding when used in the radius of influence
computation. Value must be between 0.0 and 10.00.
•
Density Strength Limit: The strength value used to switch from the
'density' disambiguation method to the 'locale' version when using
the density & locale algorithm. Value must be between 0.00 and
5.00.
•
Locale Strength Maximum: The maximum strength value allowed
as part of the mean in the locale algorithm. Value must be
between 0.00 and 5.00.
•
Locale Search Radius: The radius of the search when computing
the trimmed mean. The values are in pixels and must be greater
than zero. The original system default value is 1.
•
Null Hypothesis Test: Flag used to control the application of the
NULL hypothesis test. Value must be either True or False. Default
value is False.
•
Minimum Number of Neighbours: During the Null Hypothesis test,
this controls the minimum number of neighbours that a node must
have in order to be considered for the Standard Deviating Ratio
test. If the node has less the specified number, it is automatically
marked as 'Null'. Values must be between 2 and 8.
•
Standard Deviation Ratio: During the Null Hypothesis test, this
represents the cut-off limit for the standard devotion ratio including
the node in question to the standard deviation of the qualified
CARIS HIPS and SIPS User’s Guide
447
CUBE Processing: Generating CUBE Surfaces
neighbouring nodes. If the computed ratio exceeds the specified
value, the node is marked as 'Null'. Values must be between 0.0
and 10.0.
•
Neighbour Strength Maximum: The maximum strength value that
is allowed to be considered as part of the standard deviation
computations in the NULL hypothesis test. Value must be between
0.00 and 5.00.
6. Click OK to save and apply settings.
448
CARIS HIPS and SIPS User’s Guide
CUBE Processing: Hypothesis Editing
Hypothesis Editing
CUBE surfaces can be displayed in the Subset Editor for further
examination and editing.
1. Select the r command.
Tools > Subset Editor
2. Use the mouse to adjust the size of the Subset Editor bounding box by
moving the handles.
Data contained in the bounding box area is loaded into the 3-D
Subset view.
Tool
Menu
r
Pop-up
3. In the Subset Editor tab, select the CUBE Hypothesis layer.
Tools > Subset Editor
The property options for the CUBE surface are displayed.
4. Expand the data tree and select a BASE Surface containing CUBE
data.
5. Click Load to view the CUBE surface.
6. To return to the normal display in the 3-D and 2-D Views, click Unload.
Below is an example of a section of a CUBE surface in the 3-D
View.
CARIS HIPS and SIPS User’s Guide
449
CUBE Processing: Hypothesis Editing
Hypotheses are represented as squares. Squares are shown with
different dimensions to reflect the confidence level given to each
hypothesis. These confidence levels range from 0.0 (the highest
value) to 5.0 (the lowest value). The size of a square is related to
the numerical confidence level: large squares represent nodes
with the high confidence values while smaller squares represent
nodes with low confidence values.
The thickness of the square represents the vertical uncertainty
assigned a node (to a 95% confidence interval). The thicker the
square, the greater the vertical uncertainty.
Hypotheses squares can also be displayed without a fill so that
they are transparent except for the outlines of the squares.
450
CARIS HIPS and SIPS User’s Guide
CUBE Processing: Hypothesis Editing
7. Select the Wireframe Hypotheses check box.
The 3-D View is refreshed to display the squares without fill.
The Fixed Size Hypotheses option flattens the hypotheses squares
and redraws them to a standard size. This option is useful if you
want to examine the dataset for holes or to see the exact position
of a square in the subset.
8. Select the Fixed Size Hypotheses check box.
The 3-D View is refreshed to display the squares as flattened and
in a standard size.
CARIS HIPS and SIPS User’s Guide
451
CUBE Processing: Hypothesis Editing
Nominate Alternative Hypotheses
Some nodes have alternative hypotheses that were not selected
during disambiguation You can view alternative hypotheses and
compare them against the selected ones. If needed, the
alternative hypotheses can be nominated to replace the
established hypotheses.
9. Select the Show Alternative Hypotheses check box and click Apply.
The 3-D and 2-D Views are refreshed to display the alternative
hypothesis. The following graphic shows the 3-D View with the
alternative hypotheses displayed.
The red squares represent hypotheses that were not selected
during disambiguation. The vertical lines that run between the
nodes are viewing aides to match the alternative hypotheses to
the selected ones.
1. To replace an hypothesis, select the alternative hypothesis.
The alternative hypothesis is highlighted. The Nominate and
Clear commands are now active.
Tool
Menu
2. Select the Nominate command.
452
Tools > Subset Editor
> Nominate
The alternative hypothesis is highlighted in blue. This means
that the nominated hypothesis has replaced the established one.
All nominated hypotheses are given the highest confidence value
of 0.0.
CARIS HIPS and SIPS User’s Guide
CUBE Processing: Hypothesis Editing
3. To compare nominated nodes against the existing nodes, clear the
Show Alternative Hypotheses check box and select the
Show Only Selected Alternatives check box.
The Views are refreshed to show only the nominated and
established hypotheses. The following image shows the 3-D View
with only nominated and established hypotheses displayed.
Tools > Subset Editor
> Clear
5. When you have completed nominating alternative hypothesis data,
select the save command.
Tool
Menu
4. To remove the nomination flag, select the Clear command.
CARIS HIPS and SIPS User’s Guide
453
CUBE Processing: Hypothesis Editing
Hypotheses Cleaning
Like soundings in the Swath and Subset Editors, hypotheses can
be given a rejected flag. When a hypothesis is rejected, it is
retained in the Surface but is excluded from processing when
disambiguation is run again or when filtering is applied.
Reject
1. Select a hypothesis
Tools > Subset Editor
> Reject
Tool
Menu
2. Select the Reject command.
Accept
The hypothesis is now flagged as rejected.
To change rejected back to the accepted status (and therefore
available for further processing).
3. select a hypothesis.
Tools > Subset Editor
> Accept
The hypothesis is now flagged as accepted and is available for
further processing.
Tool
Menu
4. Select the command.
Reject Node
To reject all hypotheses at a node:
1. Select a hypothesis.
Tools > Subset Editor
> Reject Node
All hypotheses associated with the node are rejected.
Tool
Menu
2. Select the command.
Accept Node
To return hypotheses associated with a node to their normal
status.
1. Select a hypothesis
Tools > Subset Editor
> Accept
All hypotheses associated with the node are flagged as accepted.
Tool
Menu
2. Select the command.
454
CARIS HIPS and SIPS User’s Guide
CUBE Processing: Hypothesis Editing
Update CUBE Surface
If changes are made, the CUBE Surface can be rebuilt to show
these changes using the following methods:
•
Select the Recompute BASE Surface command (see
“RECOMPUTE” ON PAGE 423
•
Select the Automatic BASE Surface Update check box in the
Options dialog box (see “GENERAL” ON PAGE 75)
CARIS HIPS and SIPS User’s Guide
455
CUBE Processing: Hypothesis Editing
456
CARIS HIPS and SIPS User’s Guide
19
19.
Statistical Surface Cleaning
Statistical Surface Cleaning: Overview
Overview
The surface cleaning function is used to perform area-based
statistical data cleaning on multibeam data in HIPS.
The process uses advanced tiling technology for subdividing the
entire area into variable size and density cells. It then applies
rigorous polynomial regression statistics to compute the surface.
Tiling
In surface cleaning, tiling is used to subdivide the area into
manageable cells where each tile is considered separately during
the polynomial regression and statistical threshold testing. The
tile split criteria is based either on the density of soundings
within the tile or the tile size, or both.
The Surface Cleaning function automatically creates a Starting
Level Tile set (even if you do not select the tiling option). The
Starting Level Tile Set is created by taking the largest dimension
of the field sheet and dividing the area by 3 (to the nearest power
of two, starting at 0.02). If your field sheet is 75x93, take 93/3=31,
and the nearest tile size is 20.48 (look for the nearest tile
rounding down).
458
CARIS HIPS and SIPS User’s Guide
Statistical Surface Cleaning: Overview
Surface Cleaning
For each tile, a polynomial solution is computed using iterative
least-squares re-weighted regression. The objective of the
regression is to generate a surface defined by a set of polynomial
terms, which closely matches most of the real depths. However,
since the number of terms defining the polynomial surface are
less than the number of points considered, then the points do not
fit the surface exactly. Using the residual values of each point as
a goodness measure, outliers can be detected by testing for high
residual values.
The process is iterative within each tile, and for each new
iteration the soundings are re-weighted inversely proportional to
their previous residual. You can fix the re-weighting scheme to
apply full weight to all soundings within a defined limit from the
surface. This re-weighting limit can be based on a fixed distance
or a multiple of the standard deviation of the residuals within the
tile.
You can also define the maximum number of iterations. The
buffer around each tile determines how much extra data is used
to compute the tile polynomial surface. This helps eliminate edge
effects during statistical testing.
The second stage of surface cleaning is the testing of the residuals
once the surface has been computed. The relevant parameters are
the rejection threshold scaling values in both the positive and
negative directions (above and below the surface), and the
minimum absolute residual of an outlier. The latter parameter
specifies that no point within this distance (either above the
surface or below) are rejected. This is an important parameter if
the local standard deviation of a tile is small, because the scaling
values are multiplied by a small standard deviation and may
reject points which are only slightly removed from the surface.
This parameter is location dependent and maybe used, for
example, to prevent the rejection of rocks of a specific height. The
rejection threshold values are also location dependent and
surface dependent.
The following table lists each of the polynomial surface types with
the corresponding equation and a graphical example of each
surface type.
CARIS HIPS and SIPS User’s Guide
459
Statistical Surface Cleaning: Overview
Polynomial Surface
Types
Polynomial Surface Types
Surface
Equation
Mean
– f ( xy ) = b0
Tilted Plane
– f ( xy ) = b0 + b1x + b2y
Curved Tilted
Plane
– f ( xy ) = b0 + b1x + b2x + b3xy
Quadratic
Cubic
460
Example
f ( xy ) = b0 + b1x + b2x + b3xy + b4x2 + b5y2
f ( xy ) = b0 + b1x + b2x + b3xy + b4x2 + b5y2 +
b6x2y + b7xy2 + b8x3 + b9y3
CARIS HIPS and SIPS User’s Guide
Statistical Surface Cleaning: Creating Tiles and Cleaning
Creating Tiles and Cleaning Data
Data must be merged before surface cleaning can be
performed.
1. Select a field sheet.
Tools > Surface
Cleaning
The Surface Cleaning dialog box is displayed.
Pop-up
Tool
Menu
2. Select the Surface Cleaning command.
Surface Cleaning
3. Enter tiling parameters, as needed, in the following fields:
•
By Density: When this box is checked, each tile is continuously
sub-divided until one of the sub-tiles has less than the minimum
number of soundings.
•
Minimum soundings per tile: The minimum number of soundings
in a tile.
•
By Size: When this check box is selected, each tile is continuously
sub-divided until the sub-tiles reach the minimum size (this size
cannot be larger than the Starting-Level Tile Set.
•
Minimum size of tile: The minimum size for a tile.
4. Type a name for the tile file. All tile files are assigned an .mts
extension. Also created is a .mmi file that records the list of track lines
used to create the tiles.
5. Select the Cleaning check box to enable the surface cleaning
functions.
CARIS HIPS and SIPS User’s Guide
461
Statistical Surface Cleaning: Creating Tiles and Cleaning Data
6. Enter cleaning parameters, as needed, in the following fields:
•
Shallow threshold: The threshold above the polynomial surface.
The value is selected by clicking the up and down arrow buttons
beside shallow threshold field. The sigma value is a multiple of the
standard deviations of residuals in the tile.
•
Deep threshold: The threshold below the polynomial surface. The
value is selected by clicking the up and down arrow buttons
beside deep threshold field. The sigma value is a multiple of the
standard deviations of residuals in the tile.
•
Sigma: The equivalent confidence values are displayed as a
percentage.
•
Minimum residual required for rejection: A sounding that fails the
threshold test will not be rejected if the absolute value of the
residual is less than the minimum.
7. Click Advanced to view more cleaning options.
The Surface Cleaning dialog expands to display more cleaning
options.
462
CARIS HIPS and SIPS User’s Guide
Statistical Surface Cleaning: Creating Tiles and Cleaning
8. Enter advanced tiling parameters, as needed.
•
Degree of polynomial: Selection of available polynomials. Select
the type that matches the expected complexity of the sea floor.
•
Maximum iterations: The number of times the least squares
computation of the polynomial processes the soundings. The
computing continues until there are no additional rejected
soundings or the maximum number of iterations is reached.
•
By residual surface: The full re-weighting of soundings for each
iteration can be fixed as a distance from the surface.
•
By standard deviation: The full re-weighting of soundings for each
iteration can be a multiple of the standard deviation of the
residuals.
•
Perpendicular to surface: When this option is checked, the
residual is calculated as the perpendicular distance between the
sounding and the nearest point on the polynomial surface. The
default calculation for the residual uses the depth difference
between the sounding and the polynomial surface at the location
of the sounding.
•
Tile buffer: The extra area around the tile that is included in the
surface computation. The value is a percentage of the tile size and
describes the width of the buffer around the tile.
9. Click OK.
New tiles are stored in the file that was selected in Step 6.
CARIS HIPS and SIPS User’s Guide
463
Statistical Surface Cleaning: Query Options
Query Options
You can use two query commands to view attributes of tile data.
•
Query Tile Surface: Display the polynomial surface
parameters of selected tiles.
•
Query Tile Soundings: Display information on all the
soundings plus the residuals of selected tiles.
Other tile query and display options are discussed in the section
on field sheets (see “TILING” ON PAGE 355).
Query Tile Surface
1. Make sure the tiles are open in the Display window.
2. Select the tile layer in the Session tab of the Control window.
3. Press and hold the mouse button while dragging the cursor over the
tiles to be queried.
Tool
Menu
4. Select the Query Tile Surface command.
464
Edit > Query Tile
Surface
The tile surface information is displayed in the Worksheet
window.
•
Count: number of points in the tile
•
Rejected: the number of points rejected during surface
•
Z Mean: the mean depth in the tile.
•
Residual_Sigma: standard deviation for residuals.
•
Polynomial terms: the number of terms with values depends on
cleaning.
the degree of polynomial you selected in the Surface
Cleaning dialog box.
CARIS HIPS and SIPS User’s Guide
Statistical Surface Cleaning: Query Options
Query Tile Soundings
1. Make sure the tiles are open in the Display window.
2. Select the tile layer in the Session tab of the Control window.
3. Press and hold the mouse button while dragging the cursor over the
tiles to be queried.
The selected tiles are highlighted.
Tool
Menu
4. Select the Query Tile Soundings command.
Edit > Query Tile
Soundings
The following data is displayed in the Worksheet window.
•
East: easting coordinate for soundings.
•
North: northing coordinate for soundings.
•
Depth: depth of sounding.
•
Surface Depth: depth of polynomial surface at the location of
the sounding.
•
Residual: difference between the sounding and the
polynomial surface.
•
Shallow Threshold: depth of rejection threshold above the
polynomial surface.
•
Deep Threshold: depth of rejection threshold below the
surface.
•
Status: status of the sounding.
CARIS HIPS and SIPS User’s Guide
465
Statistical Surface Cleaning: Tile Histogram
Tile Histogram
The Tile Histogram dialog box displays the distribution of
residuals within a tile.
If the histogram resembles a bell curve then the selected
polynomial is well suited for the area. However, if the histogram
has many peaks or a wide centre, then the polynomial surface is
not suited to the area. If there are severe shifts in data
distribution, then the area may have to re-tiled using a higher
degree of polynomial.
You can also use the histogram to change the threshold values
and reject soundings.
Open the histogram
1. Select the tiles that you want to examine using the tile selection
command.
Edit > Tile Histogram
The Histogram dialog box is displayed.
Tool
Menu
2. Select the Tile Histogram command.
Information about the tile is displayed on the right-hand side of
the dialog box.
3. To view other tile data, click Next Tile or Previous Tile
466
CARIS HIPS and SIPS User’s Guide
Statistical Surface Cleaning: Tile Histogram
Change threshold levels
1. Position the cursor over the Shallow Threshold or Positive Threshold
slide bars and while pressing the mouse button move the bars to a
new position.
The corresponding confidence intervals and Maximum Residual
Distance values change as the bars are moved.
2. Click Apply.
The rejected residuals are displayed in red.
CARIS HIPS and SIPS User’s Guide
467
Statistical Surface Cleaning: Tile Histogram
468
CARIS HIPS and SIPS User’s Guide
20
20.
Lidar Data
Lidar Data: Overview
Overview
Light direction and ranging (Lidar) uses laser technology to
measure bathymetry. In such surveys, laser wavelengths are
transmitted to the water from a transceiver mounted on a plane
or helicopter. Sounding data is returned to the transceiver in a
continuous stream that forms a swath-like pattern.
HIPS currently supports the Laser Airborne Depth Sounder
(LADS) system and the Scanning Hydrographic Operational
Airborne Lidar Survey (SHOALS) system.
Soundings are recorded in an bathymetry file. Each sounding has
•
a latitude and longitude position
•
a depth value
•
a timestamp
•
an across-track and along-track position
•
a quality flag
•
a status flag.
Waveform data is also included for each sounding. This data is
stored in a waveform file (see “WAVEFORMS VIEW” ON PAGE 473).
Sounding Quality and Status Flags
Quality flags
When a lidar sounding is converted into HIPS, it is given a
quality flag that can be changed during processing. The following
table outlines the quality status that can be attached to a
sounding.
Quality Flag Description
470
0
The sounding has a detected depth only. The alternative depth is
invalid.
1
The sounding has both a detected and a valid alternative depth. A
quality control/assurance decision has not yet been made.
2
The sounding has a detected depth and a valid alternative depth,
and the user has decided to keep the detected depth.
3
The sounding has both a detected and alternative value, but the
alternative value has been swapped with the detected value.
CARIS HIPS and SIPS User’s Guide
Lidar Data: Overview
Status flags
Status flags are assigned to soundings during conversion, these
status are determined from information provided by the specific
acquisition format.
CARIS HIPS and SIPS User’s Guide
471
Lidar Data: Lidar Data in HIPS
Lidar Data in HIPS
Lidar projects are organized in the same Project-Vessel-Day-Line
hierarchy as sonar projects. Each project contains the following
files:
•
HIPS Vessel File
•
an Observed Depths file (along-track and across-track
sounding positions before merge)
•
a Processed Depths file (lat/long sounding positions after
merge)
•
a bathymetry file
•
a waveform file
•
gyro data
•
navigation data
•
tide data
The default location of all the above files is ..\Hips\HDCS_Data.
To open Lidar data, see “SELECTING DATA” ON PAGE 475.
Swath Editor displaying SHOALS lidar data with the Waveform view and Lidar tab visible.
472
CARIS HIPS and SIPS User’s Guide
Lidar Data: Lidar Data in HIPS
Toolbar
The toolbar controls the display and status options for soundings
and associated waveform data in the Swath and Subset Editors.
This is a floating toolbar that can moved or docked anywhere in
the HIPS main window. The toolbar is not automatically
displayed when the Swath Editor or Subset Editor is opened.
Pop-up Menu
1. Select the Lidar Toolbar command.
View > Toolbars >
Lidar
Lidar
Waveforms View
The Waveform view displays the waveform data for a superselected sounding (see “SELECTING DATA” ON PAGE 475 for more
information on superselection). The display in the Waveform
view is determined by whether the data is in SHOALS or LADS
format.
1. Select data in any of the Swath Editor or Subset Editor views.
Edit > Lidar > View
Waveforms
The first sounding in the selection is superselected when the
Waveforms window is opened.
Tool
Menu
2. Select the View Waveforms command.
SHOALS
There are four panels in the view. Each panel shows a graphed
view of specific waveform data for the superselected sounding.
The X axis represents time and Y axis represents amplitude.
LADS
The LADS waveform window contains one panel that shows a
graphed view of specific waveform data for the super selected
sounding. One line represents the detected depth sounding and
the other line represents the alternative depth sounding (if
applicable).
To view the complete waveform for SHOALS data, the Y-axis
scale may have to be increased. The default value is 255.
CARIS HIPS and SIPS User’s Guide
473
Lidar Data: Lidar Data in HIPS
1. Click the Max Y-Axis Value up or down arrow buttons until the entire
wave form is within view.
Point display
The points that describe the waveform graphs can be increased or
decreased.
1. Select the Lidar tab in the Control window if it is not already displayed.
2. Click the Point Size up and down arrow buttons.
As the value changes, the displays in the four windows are
redrawn to show the points at the selected size.
3. To draw a line through the points in the view, select the
Connect Points check box.
474
CARIS HIPS and SIPS User’s Guide
Lidar Data: Selecting Data
Selecting Data
Open data
Lidar data can be viewed and cleaned in the Swath and Subset
Editors.
1. Open either the Swath Editor or the Subset Editor.
Pop-up Menu
2. Select the Lidar Toolbar command.
View > Toolbars >
Lidar
The Lidar toolbar is visible.
Lidar
Tool
Menu
3. Select the View Waveforms command.
Edit > Lidar > View
Waveforms
The Waveforms window (see “WAVEFORMS VIEW” ON PAGE 473) is
displayed and the Lidar tab is displayed in the Control window.
No data is visible in the Waveforms window yet.
There are two levels of selection in Lidar mode: regular selection
and superselection.
•
Selection refers to all highlighted soundings in any of the
Views.
•
A superselected sounding is a subset of the selected
soundings and is highlighted in a different colour from the
regular selection. When a group of soundings are selected,
the first in the selection (i.e. the lowest beam and profile
number) is automatically super-selected.
All selected soundings can be queried or rejected, but you can
only view waveform data and sounding attributes for a
superselected sounding. Make sure that the Waveforms window
is displayed. When this window is closed, the superselection
option is inactive.
4. Choose an Editor Selection mode (see “QUERY LINE DATA” ON
PAGE 220). The Edit By Range option is selected by default.
5. Select data in any of the views.
The data is highlighted in the selection colour determined in the
Options dialog box (see “LIDAR” ON PAGE 83). The superselected
sounding is displayed in the Plan View (Swath Editor) and the 2D and 3-D Views (Subset Editor).
The waveform data for the superselected sounding is displayed in
the Waveforms window.
The following attributes for superselected sounding are displayed
in the Lidar tab in the Control window:
•
HIPS Time Stamp: Year-Month-Day-Hour-Minute-Seconds-
Milliseconds.
CARIS HIPS and SIPS User’s Guide
475
Lidar Data: Selecting Data
•
LIDAR Time Stamp: Half milliseconds since midnight (SHOALS
•
Profile number: The along-track position of the sounding
•
Beam number: The across-track position of the sounding.
•
Detected depth: If this depth is selected for the Observed
Depth file (depths prior to merge), then an asterisk is
displayed beside the field.
•
Alternative depth: If this depth is selected for the Observed
•
Processed depth: The depth value for the sounding after the
•
Confidence value: The confidence value for the sounding
(SHOALS only).
•
Tide: Tide data for the sounding. Data must be merged before
•
Status: Current status flag for the sounding.
only).
depth file (depths prior to merge), then an asterisk is
displayed beside the field.
Merge process
this value can be displayed.
You can use the Lidar tab to superselect a neighbouring
sounding.
6. To view another sounding in the current selection, click the Next or
Previous button in the Lidar tab of the Control window. This moves
you to the next or previous selected sounding by ping and beam
number.
The graphs in the Waveforms dialog box is refreshed to show the
new data and the new superselected sounding’s attributes are
shown Lidar tab data fields.
Find sounding
You can also super select soundings by locating it by the time
stamp (SHOALS data only).
1. Type the Lidar time stamp in the Time Stamp field.
2. Click Find.
The sounding with that time stamp is highlighted as super
selected and the sounding data is displayed in the Lidar tab
fields.
476
CARIS HIPS and SIPS User’s Guide
Lidar Data: Selecting Data
Super select data in the
Worksheet window
Queried data can also be superselected.
1. Select data in any of the views.
Edit > Query
Key Pop-up
The selected data is displayed in the Query tab of the Worksheet
window.
3. To superselect a sounding, click a row so it is highlighted.
Tool
Menu
2. Select the Query command.
The beam is highlighted as super selected in the Plan View.
Query
<Q>
Selecting Detected and Alternative Data
In some instances, two depth values (detected and alternative)
are returned. You can decide which depth value is most relevant
and change the sounding's quality flag accordingly (see “SOUNDING
QUALITY AND STATUS FLAGS” ON PAGE 470).
Depth values can be selected and changed in both the Swath
Editor and the Subset Editor.
Edit > Lidar >
Highlight Alternative
Depths
Tool
Menu
Highlight alternative
soundings
This command highlights soundings that contain valid
alternative depths. It does not select or superselect soundings.
1. Select the Highlight Alternative Depths command. This command
highlights only data in the Plan View.
Soundings with a Quality flag of 1, 2, or 3 are highlighted in
colour that is selected in the Options dialog box (see “LIDAR” ON
PAGE 83).
You can select from three options.
View all alternative
depths
This command refreshes the display so that the alternative
depths for soundings with a Quality 1 flag are shown. This is a
useful tool for viewing the position of alternative depths in
relation to neighbouring soundings.
Edit > Lidar > View
Alternative Depths
The data in the Views refresh to display the alternative
soundings.
Tool
Menu
1. Select the View Alternative Depths command.
CARIS HIPS and SIPS User’s Guide
477
Lidar Data: Selecting Data
Swap to alternative
This command applies an alternative depth in a superselected
sounding to the detected depth. With SHOALS data, the depth is
swapped; and with LADS data, the depth and position are
swapped.
1. Select soundings and super select a sounding with a Quality 1 flag.
Edit > Lidar > Swap
to Alternative
An asterisk beside the depth value indicates whether the
detected or alternative depth is currently in the HIPS depth file.
Tool
Menu
2. Select the Swap to Alternative command.
Keep detected
This command is used to verify that the detected depth is
preferred over the alternative depth. The Quality flag is changed
to 3. (see “SOUNDING QUALITY AND STATUS FLAGS” ON PAGE 470).
1. Select soundings and super select a sounding with a Quality 3 flag.
Edit > Lidar > Keep
Detected
Tool
Menu
2. Select the Keep Detected command.
478
CARIS HIPS and SIPS User’s Guide
Lidar Data: Cleaning Sounding Data
Cleaning Sounding Data
Reject Data
Soundings can be assigned an Rejected by Disabling Sounding
flag. These soundings are not included in the merge or any postprocessing operations. Data can rejected in the Swath and Subset
Editors.
1. Select a sounding or group of soundings.
Edit > Lidar > Reject
by Disabling
Sounding
The soundings are now flagged as rejected.
Tool
Menu
2. Select the Reject by Disabling Sounding command.
Accept data
View > Show
Rejected
1. Select the Show Rejected command so the disabled soundings are
visible.
2. Select the soundings.
Key
Tool
Menu
You can return soundings to the accepted status.
<F4>
Edit > Status Flag >
Accept
Key Pop-up
Tool
Menu
3. Select the Accept command.
Accept
<A>
CARIS HIPS and SIPS User’s Guide
479
Lidar Data: Cleaning Sounding Data
480
CARIS HIPS and SIPS User’s Guide
21
21.
Calibration
Calibration: Overview
Overview
In HIPS and SIPS 6.1, the Calibration module still resides within
the Subset mode of the HDCS program from past releases of
HIPS. Calibration is performed by visually comparing the effects
of various sensor offsets on calibration survey lines. The initial
parameters are extracted from the HIPS Vessel File (HVF) and
modifications can be written to the same HVF.
Calibration surveys are performed to allow adjustments of the
survey data for parameters such as transducer mounting offsets
(pitch, roll, yaw), and navigation latency. Other parameters, such
as heave latency, can also be adjusted.
Calibration lines
482
Calibration lines are a set of survey lines specifically designed to
allow for calculation of minor sensor deviations from established
parameters. By running the vessel over known sea bottom
topography, at different speeds and directions, correction factors
can be derived for various devices on the ship. These corrections
are then used for the duration of the survey mission to ensure
correct processing of data.
CARIS HIPS and SIPS User’s Guide
Calibration: Workflow
Workflow
In HIPS and SIPS, Calibration is a six-stage process.
1. Open the calibration lines in HIPS and SIPS.
2. Select a pair of lines that were surveyed for a specific parameter.
3. Use the Calibration function to launch the Hydrographic Data Cleaning
System (HDCS) directly into the Subset mode.
4. Create the subset in HDCS.
5. Use the Calibration tool in HDCS to measure and view the effects of
the adjustments.
6. Make a note of the final adjustment values or save them directly into
the HVF.
CARIS HIPS and SIPS User’s Guide
483
Calibration: Create Subsets in HDCS
Create Subsets in HDCS
1. In HIPS and SIPS, select the track line(s) you want to calibrate.
Menu
2. Select the Calibration command.
The HDCS interface is opened in Subset mode.
Tools > Calibration
Overview window
Statistics window
Magnification window
Message window
Operation window
The track lines are shown in the HDCS interface. The
Magnification window controls the track line display in the
Operation window
3. Position the cursor in the Magnification window.
4. Press and hold the mouse button while dragging the bounding box
corners to the edge of the window so all the track line area is displayed
in the Operation window.
484
CARIS HIPS and SIPS User’s Guide
Calibration: Create Subsets in HDCS
Key Pop-up
Define a subset
5. In the Operation window, right-click the mouse and select the Define
Subset command from the pop-up menu.
Define Subset
The Subset Definition dialog box is displayed and a subset area
bounding box is opened in the Operation window.
<Insert>
6. To determine the subset area, position the cursor on the Size slider
control; press and hold the mouse button and move the slider to the
desired position.
As the slider is moved, the subset area is resized.
7. To determine the subset angle, position the cursor on the Rotation
From North slider control; press and hold the mouse button and move
the slider to the desired angle.
As the slider is moved, the subset is rotated.
8. Register the subset by positioning the cursor in the subset area of the
Operation window and right-clicking the mouse button.
The subset area is highlighted in blue and automatically
numbered.
9. If you are creating more than one subset area, position the cursor on
the subset; press and hold the mouse button and drag the subset
bounding box to an adjacent survey area (make sure there is some
overlap between the two areas).
10. Repeat Steps 8 and 9 until all the survey area is registered as subsets.
Clean subset
Data must be displayed in the spatial subset mode before
calibration can begin.
1. Click a subset so it is highlighted in yellow.
Key Pop-up
2. Select the Clean Subset command.
Clean Subset
The soundings are now displayed in spatial subset mode.
<F2>
CARIS HIPS and SIPS User’s Guide
485
Calibration: Perform Calibration
Pop-up
Perform Calibration
1. Right-click in the Operation window and select the Calibration
command.
Calibration
The Calibration dialog box is displayed.
When Calibration mode is in effect, the display in the Operations
window reflects the locations of soundings as if they were merged
using the on-screen parameters.
In the Operations window, you retain the ability to switch view
points, pixel sizes, and depth range, but not the ability to select
soundings for query or rejection.
The Magnification display is not updated with calibrationadjusted soundings until the parameters are saved to the HVF,
and the lines are re-merged. You can still generate mean and
standard deviation maps, but only with unadjusted soundings.
When Calibration mode is started, the current values from the
HVF are accessed and displayed.
2. Select any of the following options:
486
•
Current Line: Select the line to apply calibration adjustments.
Usually all calibration lines are from the same vessel (and,
therefore, the same HVF). However, you are not restricted to
using lines with the same HVF. Other lines can also be opened in
dialog box. If the parameters with that line are associated with
other lines then those lines are updated too.
•
Apply Refraction Coefficients: Select this option to apply refraction
coefficients. The effects of the Refraction Editor data on the final
depths can be changed at any time by editing the coefficients and
re-merging. The effects can removed by re-merging and choosing
not to apply the coefficients.
CARIS HIPS and SIPS User’s Guide
Calibration: Perform Calibration
•
Apply GPS Tide: Select this option to apply GPS tide. The effects
of GPS tide data on the final depths can be changed at any time
by editing the Sounding Datum Height and re-merging. The effects
can be removed by re-merging and choosing not to apply the GPS
Tide.
•
Up/Down Arrow Buttons: Use these buttons to increment/
decrement parameter values. The first row of buttons adjusts the
integer portion of the value; the second column adjusts in 0.1
increments, and the third column adjusts in 0.01 increments.
3. Once data has been selected or modified, you can select from among
the following options:
•
Apply: Effect all changes immediately.
•
Reset: Reset all HVF parameters to their original settings.
•
Compute Average: Append the settings to an internal buffer to
compute the average settings. This is done because one set of
parameters may work well in one area of a survey, but not in
another area of the same survey. You can then have a set of
averaged settings for the entire line.
•
•
When calibration mode is started, the buffer is
empty. Values extracted from the HVF are not put
into it.
•
If selected without any changes being made, the
buffer is not updated (i.e., it remains empty).
•
The first value entered (not the value extracted
from the HVF) is the first value put into the buffer
(after Compute Average is selected), and
subsequent values is averaged with it.
•
You are prompted to save settings in the HVF only
if you submitted values for averaging. Even if only
one number was entered, you must select
Compute Average if you want the setting to be
saved in the HVF when you exit.
Quit: Submit the values to the buffer for averaging; or close the
calibration session. A calibration session remains in effect until
Quit is selected. You cannot leave Subset mode while in
Calibration mode.
If Quit is selected, a dialog box prompts you to update the HVF
with the modified values.
4. Click Yes, to confirm the modification.
When you exit the Calibration mode, you must merge the line(s)
again for the calibration adjustments to take effect (see “MERGE”
ON PAGE 272).
CARIS HIPS and SIPS User’s Guide
487
Calibration: Sample Calibration Procedure
Sample Calibration Procedure
The following are sample calibration procedures1 for adjusting
sensor offsets. In this procedure Navigation Time Error,
transducer Pitch offset, transducer Roll offset, and transducer
Azimuth (or Yaw) offset are adjusted. Initially, all offsets are set
to zero (in the HVF).
Take care in cleaning position and attitude data. Depth
cleaning is not as vital because you are looking at data trends
and not individual spikes. Navigation Time Error, Pitch offset,
Roll offset, and Azimuth (Yaw) offset should be set to zero in
the HVF. Merge all lines.
Navigation time error
The Navigation Time Error adjustment is performed on sets of
two coincident lines, run at different velocities, over sloping
terrain or a conspicuous topographic feature. You must view a
profile of the two centre beams.
1. In Subset Edit determine the along-track horizontal displacement
between the two centre beam profiles of one set of coincident lines.
Repeat this at several locations.
2. Compute the mean displacement.
3. Determine the Navigation Time Error as displacement / (high speed –
slow speed).
4. Enter Calibration mode and enter the mean value (select Apply if
necessary).
5. View result of correction, if it is not to your satisfaction, use the arrow
buttons to adjust the value.
6. Select Compute Average.
7. Move to another location within the subset and repeat Steps 5 and 6.
8. Once the subset is to your satisfaction quit the calibration, confirm the
update of the HVF and merging of all lines.
9. If calibration data covers more than one subset, repeat Steps 1
through 8 for all other subsets. Be sure to write down the final
correction from each subset.
10. Manually average corrections from all subsets
11. Update the HVF.
12. Re-merge all lines (see “MERGE”
ON PAGE
272).
1. These procedures are taken from the document “Field Procedures for the
Calibration of Multibeam Echo-sounding Systems”, by André Godin
(available from CARIS).
488
CARIS HIPS and SIPS User’s Guide
Calibration: Sample Calibration Procedure
Transducer pitch offset
This adjustment is performed on sets of two coincident lines, run
at the same velocity, over sloping terrain or a conspicuous object,
in opposite directions. Of the above mentioned offsets, only the
Navigation Time Error should be set in the HVF. You must view
a profile of the centre beams.
1. In Subset Edit determine the along-track horizontal displacement
between the two centre beam profiles of one set of coincident lines.
Note the depth.
2. Determine the Pitch offset as arctan ((displacement / 2) / depth).
3. Enter Calibration mode and input the offset (select Apply if
necessary).
4. View result of correction, if it is not to your satisfaction use the arrows
to adjust the value.
5. Select Compute Average.
6. Move to another location within the subset and repeat Steps 4 and 5.
7. Once the subset is to your satisfaction quit the calibration, update the
HVF and merge of all lines.
8. If calibration data covers more than one subset, repeat Steps 1
through 7 for all other subsets. Be sure to write down the final
correction from each subset.
9. Manually average corrections from all subsets.
10. Update the HVF.
11. Re-merge all lines.
Transducer azimuth
(yaw) offset
This adjustment is performed on sets of two lines, run over a
conspicuous topographic feature. Lines should be run in opposite
directions, with the same outer beams crossing the feature. Of
the above mentioned offsets, only the Navigation Time Error and
Pitch offset should be set in the HVF. You must view a profile of
the same outer beams.
1. In Subset Edit find the desired topographic feature.
2. Observe an along-track profile that shows the same outer beams
(from both passes) and the topographic feature.
3. Determine the along-track horizontal displacement between the two
representations of the topographic feature.
4. Change bounding box orientation and view perspective in order to
measure the across track distance for the observed outer beams.
5. Determine the Azimuth offset as arcsin ((displacement / 2) / acrosstrack).
6. Enter Calibration mode and input the offset (select Apply if
necessary).
7. View result of correction, if it is not to your satisfaction use the arrow
buttons to adjust the value.
8. Select Compute Average.
CARIS HIPS and SIPS User’s Guide
489
Calibration: Sample Calibration Procedure
9. Move to another set of lines within the subset and repeat Steps 7 and
8.
10. Once the subset is to your satisfaction quit the calibration, update the
HVF and merge all lines.
11. If calibration data covers more than one subset, repeat Steps 1
through 10 for all other subsets. Be sure to write down the final
correction from each subset.
12. Manually average corrections from all subsets.
13. Update the HVF.
14. Re-merge all lines.
Transducer roll offset
This adjustment is performed on sets of two coincident lines, run
over flat terrain, in the opposite direction. Of the above
mentioned offsets, the Navigation Time Error, Pitch offset, and
Azimuth offset should be set in the HVF. You must view a profile
of individual swaths.
1. In Subset Edit view the across track profile of the desired lines.
2. Enter Calibration mode and adjust the Roll offset until the two profiles
are coincident.
3. Select Compute Average.
4. Move to another location within the subset and adjust the Roll off-set
until the lies are coincident.
5. Select Compute Average.
6. Once the subset is to your satisfaction quit the calibration, agree to
update the HVF and merge all lines.
7. If calibration data covers more than one subset, repeat Steps 1
through 4 for all other subsets. Be sure to write down the final
correction from each subset.
8. Manually average corrections from all subsets
9. Update the HVF
10. Re-merge all lines.
490
CARIS HIPS and SIPS User’s Guide
22
22.
Side Scan Data
Side Scan Data: Overview
Overview
SIPS provides tools for viewing and processing side scan sonar
and multibeam backscatter data. Sensor editors allow you to
display and edit towfish heading and navigation data.
The side scan data can be slant-range corrected and used to
generate a georeferenced mosaic—in GeoTIFF format—with a
customized colour palette. Various tools, such as Slant Range,
Beam Pattern, Angle Varying Gain and Gain Corrections, are
available to further correct the imagery by removing unwanted
artifacts from the data.
Preferred parameters for these corrections can be saved with the
SIPS Template Wizard, so that processing can be consistently
applied to some or all of the entire survey.
The Signal Display Window provides a plot of signal intensity
against across-track distance (or time, in raw mode). The pre-and
post-processing state of any correction can be compared using the
Revert and Reapply functions.
Side scan contacts can be identified and given attributes for use
in a database. These can also be loaded into a CARIS map as
vector symbols and lines.
Workflow
This is an outline of the steps in a typical side scan processing
session:
1. Define the configuration of the survey vessel.
See “DEFINE VESSEL FILE” ON PAGE 104.
2. Define a new project:
•
Assign one or more vessels to the project.
•
Define the days for which the vessels have data.
•
Store raw measurement files in a pre-processing directory.
See “DEFINE PROJECT” ON PAGE 150.
3. Load and convert raw measurement data for each day into HIPS/SIPS
format. This creates a series of survey lines that are stored in a
generic format that makes it possible to use the same editing tools on
data received from a variety of collection systems.
See “GENERIC DATA PARSER” ON PAGE 112.
See “CONVERT SURVEY DATA” ON PAGE 111
492
CARIS HIPS and SIPS User’s Guide
Side Scan Data: Overview
4. Check and edit the navigation for each line, as well other side scan
sensor data such as gyro/heading, towfish depth, towfish height, and
cable out/layback
See “NAVIGATION EDITOR” ON PAGE 261.
See “ATTITUDE EDITOR” ON PAGE 271.
5. Check and edit sonar records
See “SIDE SCAN EDITOR” ON PAGE 494
6. Correct sonar data
•
Perform bottom digitizing.
•
Perform slant range correction.
•
Perform beam pattern correction.
•
Perform angle-varying gain correction
•
Perform gain correction.
•
Execute Despeckle filter
See “PROCESSING” ON PAGE 518
7. Create and edit contacts
See “CONTACTS” ON PAGE 539.
8. Create a sonar mosaic using one or more processed lines.
See “MOSAICS” ON PAGE 545.
The mosaic image is generated as an image layer within a field
sheet and can also be used in other CARIS products.
CARIS HIPS and SIPS User’s Guide
493
Side Scan Data: Side Scan Editor
Side Scan Editor
Using the Side Scan Editor, you view, edit and process sonar data
in preparation for creating a mosaic.
Data can be viewed in either raw or processed mode. Processing
can be applied to a single ping, a range of pings, or one or more
track lines.
The following sequence reflects a typical SIPS workflow.
1. When you first start the Side Scan Editor, the ping for the selected
trackline is displayed in raw mode (unless slant range corrected data
is available). If you have already slant-range corrected the data, you
can return to raw mode to start again, however, any correction
previously made to processed data will be lost.
2. If desired, the raw data may be edited by selecting, querying, rejecting
or accepting pings. Rejecting pings removes them from consideration
for any mosaics to be created from this data.
3. Once pings are edited, you may need to digitize the “first return” or
altitude if the sonar did not detect and record this data during
acquisition. The altitude is required to perform slant range correction.
If digitized altitude data does exist, it may need to be edited first.
4. With fish altitude and an average sound velocity, the raw data can be
slant range corrected. Slant range correct data is shown in processed
mode, where the across track measurement is horizontal distance. In
this processed mode, you can edit and query pings, make height and
distance measurements, and mark and edit contacts.
5. For conventional side scan data, once the data is slant range
corrected it can be used to generate a mosaic. However, further
processing can greatly enhance the quality of produced mosaics.
6. Use the correction tools such as Beam Pattern Correction, AngleVarying Gain Correction and Despeckle to remove unwanted artifacts.
7. Create a mosaic in the main HIPS and SIPS interface. The side scan
mosaic is stored in an image format similar to a BASE surface. A
custom colour palette can be created and the image exported to other
image formats with the new colours. The exported image file can be
used in other CARIS products and third-party software systems.
494
CARIS HIPS and SIPS User’s Guide
Side Scan Data: Side Scan Editor
Side Scan Editor Interface
The Side Scan Editor consists of a data display window, toolbars
and the Side Scan Editor tabs in the Control window.
To open the Side Scan Editor:
1. Select a towfish track line in the HIPS and SIPS Display window.
Tools > Side Scan
Editor > Open
Pop-up
Tool
Menu
2. Select the Side Scan Editor tool.
Tools > Side Scan
Editor
When the Side Scan Editor is opened, the data for the selected
track line is displayed in the Side Scan Editor window, which has
a default location along the right side of the interface.
As well, a histogram of the sonar file is displayed in the
Worksheet window, and the Side Scan Editor toolbar and the
Beam Correction toolbar are activated.
Side Scan
controls
Sonar
histogram
Range
display
Side Scan Editor window
CARIS HIPS and SIPS User’s Guide
495
Side Scan Data: Side Scan Editor
Side Scan Editor window
The Side Scan Editor data display window (also called the
“waterfall” view) can be undocked and moved to another position,
for example, at the bottom of the interface, as in the figure above
(see “REPOSITION AND RESIZE WINDOWS” ON PAGE 22).
Menu
Tools > Side Scan
Editor > Raw/
Processed
Pop-up
There are two modes to display data in the Side Scan Editor
window:
Raw/Processed
•
Raw: (the unprocessed sonar data). In raw mode the acrosstrack axis represents time, thus the data is shown in the
sequence in which it was received. The central portion of the
image still displays the water column. This mode will always
show the raw data for the selected track line.
•
Processed: (the processed sonar data). In processed mode
the across-track scale represents distance. The water column
is no longer visible as it is removed during the slant range
correction process. The data displayed in this mode will
reflect the last processing done to it.
1. Select a Display mode.
The display is refreshed to show the data in the selected mode.
The selected mode is indicated with a check mark in the menu.
Note: If the data does not fill the entire height of the Editor
window, it will be displayed in the bottom of the window and
can be processed normally. The empty area above the data
will indicate “No data to display”.
Coverage outline
496
A coverage outline in the Display window automatically
highlights the location of the side scan data that is visible in the
Side Scan Editor window. The starboard and port areas of the
coverage outline are appropriately colour coded. The size of the
coverage outline varies with the amount of side scan visible in the
Side Scan Editor window.
CARIS HIPS and SIPS User’s Guide
Side Scan Data: Side Scan Editor
Colours for outlines and selection are controlled from the Tools
>Options dialog box (see “SIDE SCAN EDITOR” ON PAGE 89).
Compression
The number of pixels used to display data in the Side Scan
window is determined by the width of the display window and
screen resolution. However, because the volume of data is often
too great for the window to display all pixels, the imagery must
be compressed.
There are three compression methods to choose from.
Menu
1. Select a Compression command .
Tools > Side Scan
Editor >
Compression >Skip/
Average/Maximum
•
Skip selects pixels for display at regular intervals across the
track.
•
Average compiles average pixel intensity within a group of
pixels spaced at regular across-track intervals.
•
Maximum selects the brightest pixels from groups of pixels
at regular across-track intervals.
The display in the Side Scan Editor is refreshed to show the data
according to the selected compression option. The default display
uses the Skip option.
Side Scan Editor controls
The General tab of the Side Scan Editor contains controls for
navigating and displaying data in the Editor window. This tab is
visible in the Control Window when the Side Scan Editor is
opened.
Across-track display
The width of the ping shown in the Side Scan Editor window can
be increased or decreased by time or distance, using the controls
in the Acrosstrack Display Limit fields.
CARIS HIPS and SIPS User’s Guide
497
Side Scan Data: Side Scan Editor
To set across track display limits:
1. Make sure the Control window is open.
2. Select the General tab from the Side Scan Editor tab.
3. To have the entire width of the ping is shown in the Editor, leave the
Across Track Display Limit box unchecked.
4. To limit the width of ping displayed, check the Across Track Display
Limit box and select which value to use as limiter:
•
Milliseconds: Click the arrow button to change the time value. This
option is automatically selected.
•
Metres/Feet: Click the arrow buttons to change the distance value.
As time or distance is incremented or decreased, the amount of
the data is displayed in the window is changed.
The units of distance units can be changed using the Display tab
in Options on the Tools menu.
Enable Range display
The range display runs across the top and bottom of the Side Scan
Editor window. In Raw mode the range displays time intervals in
milliseconds. In Processed mode, distance is displayed in the
units you have set in the Tools >Options >Display dialog box.
1. Select the Enable Range Display check box in the Side Scan Editor
General tab.
498
CARIS HIPS and SIPS User’s Guide
Side Scan Data: Side Scan Editor
The colour of the range display is set to the same colour used for
measure/offset tools in the Side Scan Display Options of the Tools
menu.
16-Bit Shift Factor
An 8-bit colour display in a 16-bit processed data set can be
enhanced by bit-shifting to select which 8 bits are used to
generate the display. This can create a more even distribution of
pixels.
1. Make sure that 16-bit processed data is displayed in the Side Scan
Editor.
2. Click the up or down arrow keys beside the 16 Bit Shift Factor field to
select a value from 0 to 8.
The display is refreshed.
Ping selection
The two Selection fields display the start and end ping numbers
when you select part of the trackline displayed in the Editor
window. You can use these fields to select specific start and end
pings.
CARIS HIPS and SIPS User’s Guide
499
Side Scan Data: Side Scan Editor
Toolbar
The Side Scan Editor toolbar is displayed in the interface when
the editor is started.
The toolbar can docked or undocked, or removed from the
interface like other toolbars. Below is an example of the toolbar
in the undocked position.
The toolbar contains controls to navigate through the track line
and perform other functions.
Toolbar Buttons
Purpose
Playback (see “NAVIGATE IN SIDE SCAN
EDITOR” ON PAGE 501)
Zoom (see “ZOOM” ON PAGE
503)
Select (see “SELECTION” ON PAGE
504)
Measure distance and shadow (see
“MEASURE DISTANCE” ON PAGE 509
SHADOW” ON
and “MEASURE
PAGE 510)
Digitize (see “DIGITIZING SONAR
ALTITUDE” ON PAGE 521)
Contacts (see “CREATE
PAGE 539)
CONTACTS” ON
View waveform (see “SIGNAL DISPLAY
WINDOW” ON PAGE 515)
Revert and reapply (see “EDIT SIDE
SCAN DATA” ON PAGE 510
500
CARIS HIPS and SIPS User’s Guide
Side Scan Data: Side Scan Editor
Navigate in Side Scan Editor
You can navigate up or down the track line by clicking along the
scroll bar to the right of the Side Scan Editor window.
•
Clicking the scroll arrow buttons moves the view in the
editor forward or backward by a single ping.
•
Clicking the scroll bar, or dragging the scroll box forward or
backward increments your view by a set of pings.
Alternately, you can move up or down the track line by turning
the mouse wheel (if available).
You can also navigate up or down the track line using the
keyboard.
Playback
•
Pressing <Page Up> or the space bar moves the editor
forward by one “page”(the height (# of pings) visible in your
Side Scan Editor window is the increment).
•
Pressing <Page Down> or holding the <Ctrl> key while
pressing the space bar moves the editor back by one “page”.
•
Pressing <Home> takes you to the start of the track line, and
pressing <End> takes you to the end of the track line.
The Side Scan Editor can automatically scroll data from the start
of the track line to the end by using the Playback option.
The view in the Side Scan Editor will scroll at the speed set on the
Side Scan tab of the Control window.
Go to Start
of trackline
Go to End
of trackline
Skip Reverse
Play
Skip Forward
The ping coverage outline in the Display window moves with the
display in the Editor.
Tools > Side Scan
Editor > Playback
Controls>Start
2. Click Play to start scrolling the data.
Tool
Menu
1. Click Start to go to the start of the track line.
CARIS HIPS and SIPS User’s Guide
501
Tools > Side Scan
Editor > Playback
Controls> Play
The Side Scan Editor moves up the track line ping by ping until
it reaches the end of the surveyed data.
3. Reset the Side Scan Editor view to the previous position by clicking
Start.
Tool
Menu
Side Scan Data: Side Scan Editor
Playback speed
You can adjust the scrolling speed for automatic scrolling in the
Playback Speed field.
1. Make sure the Control window is open and Side Scan Editor tab is
displayed.
2. Select speed value from the Playback Speed field in the General tab
by clicking the up or down arrow buttons.
You can also view the data by moving up or down the track line
in larger increments: “pages” the height visible in your Side Scan
Editor window.
1. Click either the Start or End button to move to start or end of the track
line.
Tools > Side Scan
Editor > Playback
Controls>Skip
Forward/Skip Reverse
Tool
Menu
2. Click Skip Forward or Reverse.
View contacts while
scrolling
If you want your contacts to remain visible in the waterfall
display while scrolling or using the Playback functions
1. Select Side Scan Editor from the Tools > Options > Display tab.
2. Select the Display contacts during playback check box, and click
Apply.
502
CARIS HIPS and SIPS User’s Guide
Side Scan Data: Side Scan Editor
Zoom
You can magnify an area in the Side Scan window with the Side
Scan Editor Zoom tool.
Tool
Menu
1. Select the Side Scan Zoom tool.
Tools > Side Scan
Editor > Zoom
2. Press and hold the mouse button and drag the cursor over the area
you want to enlarge.
A new window displaying the enlarged area will open.
You can display the image so that the entire zoomed area fits the
zoom window or you can scale the image according to a selected
percentage.
3. Right-click the mouse in the zoom display window and choose any of
the following options from the pop-up menu:
•
Select the Fit to Window option so that the entire area of the
zoomed image is displayed in the window.
•
Select the Aspect Ratio to keep the same height and width ratio
for the zoomed area. When this option is cleared, the image is
resized so that it fills the entire zoom window.
•
Select the Scale option to resize the zoomed area to a scale. The
scale is selected from the drop-down list. When a scale is
selected, the image is displayed according to the selected
percentage.
•
Select Close to close the window.
4. You can use the Measure Distance and Measure Shadow tools in the
Zoom window (see “MEASURE DISTANCE” ON PAGE 509 and “MEASURE
SHADOW” ON PAGE 510). When you release the mouse button, the
results are shown in the Contacts tab in the Control Window.
5. Deactivate the Zoom tool when finished.
CARIS HIPS and SIPS User’s Guide
503
Side Scan Data: Side Scan Editor
Selection
Data can be selected in the Side Scan Editor using the Side Scan
selection tool. The selection tool can be used to select a range or a
single ping within that range. Selected data can be viewed,
edited, or corrected using a variety of tools.
To range-select data:
Tools > Side Scan
Editor > Select
Tool
Menu
1. Choose the Select Side Scan button on the Side Scan Editor toolbar.
The cursor will become a cross-hair when positioned in the Side
Scan Editor window.
2. Press the mouse button and drag the cursor across the area of the
Editor that you want to select.
When you release the mouse button, the selected range is shown
bounded with a rectangular yellow box.
The range remains selected until you click in the Editor window
again.
To select a single ping:
3. Select a range of side scan (see above).
4. While the range is selected, press the <Up Arrow> key, which
produces a third horizontal line representing the selected ping.
5. Continue pressing the <Up Arrow> key to move the selection up, or
press the <Down Arrow> key to move the selection down.
Select by ping number
504
You can also use the Selection fields on the General tab of the
Side Scan Editor Control window to select a range in the Editor
window.
CARIS HIPS and SIPS User’s Guide
Side Scan Data: Side Scan Editor
When you make a selection in the Editor window the start and
end ping numbers of that selection are displayed in the General
tab. To refine your selection, enter the specific ping numbers
fields to specific start and end pings.
Superselection
Superselection is selecting data within an already selected range.
You can superselect pings from the Worksheet window and
display the superselected data in the Side Scan Editor.
Edit > Query
Key Pop-up
Tool
Menu
1. Select a range of side scan data.
2. Select the Query command.
A table listing the pings in the selection is displayed in the Query
tab of the Worksheet window.
Query
<Q>
3. To superselect a single ping, select the row in the Query tab.
The superselected ping will be highlighted within the selection in
the Side Scan Editor.
3. To superselect a range of pings, click in the first column on the first row
of the range and drag the mouse through to the last row of the range you
want to select.
A rectangle is displayed containing the superselected range of
pings within the selection.
CARIS HIPS and SIPS User’s Guide
505
Side Scan Data: Side Scan Editor
506
CARIS HIPS and SIPS User’s Guide
Side Scan Data: Side Scan Editor
Colour Mapping
Colour maps
Colour maps provide a clear visual representation of sonar
intensity levels along the track line. Colour mapping is applied to
the histograms displayed in the Worksheet window, as well as
the port and starboard sections of ping in the Side Scan Editor
window.
You can select different colour maps for port and starboard
sections, or select a single colour map for both sections. All colour
maps are stored with a .cma extension in the directory
…\Hips\System.
To change the colour mapping from the default setting of
GreyScale:
1. Open the Control window and select the Colour tab from the Side
Scan Editor tab.
2. Select either Port, Starboard or Both to apply new colour to.
3. Select a colour map from the drop-down menu (the default colour map
is GreyScale.cma).
When the colour map is chosen, both the histogram and the ping
window are refreshed, so that the port and starboard sections (or
both) display the selected colour mapping.
In the Histogram, the horizontal axis represents the intensity
range of the pixels in the sonar file and the vertical axis
represents the distribution of pixels in the editor.
Use the slider bar below the histogram in the Worksheet window
to adjust colours. Each colour in the histogram has a slider
control associated with it.
1. Move the slider to adjust the pixel value of that colour in the histogram
and in the ping.
CARIS HIPS and SIPS User’s Guide
507
Side Scan Data: Side Scan Editor
The value shown in the Control window adjusts as you move the
sliders.
Colour display can be adjusted also using the other options:
Custom colour maps
•
Blend will blend the colour borders
•
Delete Colour will remove it from the list, and from the
areas that it colours
•
Clear will remove all colours. To view ping clearly, restore
GreyScale colour map.
You can create custom colour maps using either the Colour tab or
the sliders below the histogram in the Worksheet window.
1. Make sure both the Worksheet and Control windows are open.
2. Click Add Colour, or click on a slider.
The Colour dialog box is displayed.
Colour tab
Colour map
setting name
Values for current
colour selection
Custom colour
mapping controls
The Value field shows the pixel value of the displayed colour.
The pixel values range from 1 to 255 with the first colour always
assigned to pixel value 1. Pixel value 0 is always assumed to be
transparent.
3. Enter a pixel value for the colour, as needed.
4. Click on the button to open a colour palette
508
CARIS HIPS and SIPS User’s Guide
Side Scan Data: Side Scan Editor
5. Select a colour from the colour palette or click Create Custom Colour
to create a custom colour from the standard Windows colour picker.
6. Click OK.
The new colour and its assigned pixel value is added to the listing
in the Control window, and applied to the histogram in the
Worksheet window. The colour of the ping in the Side Scan Editor
also changes to display the new colour in the appropriate areas.
7. Repeat Steps 2 to 6 to insert more colours, as needed.
As you select more colours, the colour values and the depths are
displayed in the Control window.
Reverse
Sonar recorders have traditionally used dark colours to represent
high signal returns. You may want to use the Reverse option to
change the order in the colour map to reflect this practice.
To reverse the colour map order, click Reverse.
8. Click Save As to retain the settings as a colour map.
The Save As dialog box is displayed.
9. Type a file name for the colour map.
Measure Distance
Measure distance
This tool enables you to measure distance between two points
with the mouse. This feature is used in processed mode, in either
the Side Scan Editor window or in the Side Scan Zoom window.
Distance units are determined by the settings in the Display tab
of the Options dialog box (see “UNITS” ON PAGE 95).
Tool
Menu
1. Make sure the side scan display is in processed mode.
Tools > Side Scan
Editor > Measure
Distance
1. From the Side Scan Editor toolbar, select the Measure Distance tool.
2. Press and hold the mouse button, and drag the cursor across the Side
Scan Editor. To measure at right angles from a point, press the <Shift>
key while using the measure tool.
As you drag the cursor across the data, the distance is displayed
at the cursor.
CARIS HIPS and SIPS User’s Guide
509
Side Scan Data: Side Scan Editor
Measure Shadow
Measure Shadow
This tool enables you to determine the height of an object by
measuring its shadow. This feature is only available in processed
mode, and can be measured in either the Side Scan Editor or in
the Side Scan Zoom window.
1. Make sure the side scan display is in processed mode.
Tools > Side Scan
Editor > Measure
Shadow
3. Press and hold the mouse button, and drag the cursor horizontally
across the Side Scan Editor.
The height measurement is shown in the side scan window.
Tool
Menu
2. Select the Measure Shadow tool.
Edit Side Scan Data
The Reject/Accept/Query tools in the Side Scan Editor function as
they do in other HIPS and SIPS editors, except that you select a
ping rather than individual soundings or beams.
You can change the status of an entire ping or change only the
starboard or port sides.
1. From the Side Scan toolbar, choose the Side Scan Selection tool and
select the range of pings (see “SELECTION” ON PAGE 504).
2. Select any of the commands from the following table
Menu
Reject
510
Button
Description
Status Flag >
Apply Edit to >
Both
Edit both the port and starboard sides of the
ping. (This option is chosen by default).
Status Flag >
Apply Edit to >
Port
Edit the port side of the ping.
Status Flag >
Apply Edit to >
Starboard
Edit the starboard side of the ping.
When a ping is rejected in the Side Scan Editor, it is given a
status flag that excludes it from further processing in SIPS.
However, the data is not deleted and can be changed to Accepted
status again.
CARIS HIPS and SIPS User’s Guide
Menu
Side Scan Data: Side Scan Editor
Edit > Status Flag >
Reject
1. From the Side Scan toolbar, choose the Side Scan Selection tool and
select the range of pings to be rejected (see “SELECTION” ON
PAGE 504).
Key Pop-up
Tool
2. Select the Reject tool.
Data marked as rejected can be displayed in one of two
ways:
Reject
as a white gap in the side scan image data, or
<R>
with a coloured overlay over the rejected pings.
Tsible,
Click the Show Rejected button.
Menu
Accept
Edit > Status Flag >
Accept
To make the rejected data available for further processing in
SIPS, it must be restored using the Accept tool.
1. From the Side Scan toolbar, choose the Side Scan Selection tool and
select the rejected pings (see “SELECTION” ON PAGE 504).
Key Pop-up
Tool
2. Select the Accept tool.
The previously rejected data is now flagged as accepted and is
visible in the Side Scan Editor.
Accept
<A>
Menu
Query
Edit > Query
Use the Query function to view information about selected pings.
1. From the Side Scan toolbar, choose the Side Scan Selection tool and
select a range of pings to be queried (see “SELECTION” ON PAGE 504).
Key Pop-up
Tool
2. Select the Query tool.
Information about the selected data is shown in the Worksheet
window. If the window is not open at the time you query the data,
it will open automatically.
Query
<Q>
CARIS HIPS and SIPS User’s Guide
511
Side Scan Data: Side Scan Editor
Auto Cursor
512
You can combine the select and reject/accept/query functions
with the Auto Cursor. See .
CARIS HIPS and SIPS User’s Guide
Side Scan Data: Side Scan Editor
Side Scan Editor and Swath Editor
The Swath Editor can also be open at the same time as the Side
Scan Editor.
Coverage outline for multibeam data
Side Scan Editor
When the Side Scan is open in this mode, the playback functions
used to scroll the track line, are unavailable. You can, however,
move up and down the track line by scrolling the Plan View in the
Swath Editor (see “EXAMINE SWATH DATA” ON PAGE 307).
All other Side Scan functions and tools are available.
When both the Side Scan and Swath Editors are open, a coverage
outline of the multibeam data is displayed in the Side Scan
Editor. This feature is useful when the across-track coverage of
the multibeam is less than that of the side scan.
Swath Time Offset
If the multibeam data was recorded from a vessel and the side
scan from a tow fish, then the coverage outline will not be in the
correct along-track location.
The Swath Time Offset adjusts the along-track locations of the
swath outline in the Side Scan Editor by applying a time
correction value. The time correction value can be either positive
CARIS HIPS and SIPS User’s Guide
513
Side Scan Data: Side Scan Editor
or negative. Negative values are used for track lines where the
side scan sonar is positioned before the multibeam echo sounder.
To adjust the swath time offset:
1. Make sure the Side Scan Editor is open. (The Side Scan Editor tab in
the Control window will be visible.)
2. Click the <Up> or <Down> arrows for the Swath Time Offset field on
the Side Scan editor tab until the correct delay (in seconds) between
the vessel and towfish is displayed.
Swath Time
Offset field
514
CARIS HIPS and SIPS User’s Guide
Side Scan Data: Signal Display Window
Signal Display Window
The Side Scan Editor includes a Signal Display Window for
viewing sonar intensity levels. This window can be used as a
comparative tool when performing corrections. The Signal
Display Window can be used in both the raw and processed
modes.
The Signal Display Window can display a mean of all sonar
intensities in a selection or the sonar intensity values for a single
ping. The display can be switched back and forth between mean
and single profile modes by use of the buttons on the toolbar.
When the Signal Display Window is reopened, it will remember
its previous setting and display either the mean intensity values
for the entire selection or the intensity values of a single profile.
Open Signal Display
Window
1. Select a range in the Side Scan window using the Side Scan Selection
tool (see “SELECTION” ON PAGE 504).
Tools > Side Scan
Editor > Signal Display
Window > Open/Close
Tool
Menu
2. Select the Signal Display Window tool.
View Selection Mean
The Side Scan Signal Display Window is displayed.
The vertical axis on the graph represents intensity level of the
signal(s) being examined. The horizontal axis represents either
time or slant-range distance depending on the display mode of
the Side Scan Editor.
The mean of the intensity values in the selected range can be
displayed.
Tools > Side Scan
Editor > Signal Display
Window > View
Selection Mean
Tool
Menu
3. Select the View Selection Mean tool.
View Single Ping
You can also view signal intensity for a single ping.
CARIS HIPS and SIPS User’s Guide
515
Side Scan Data: Signal Display Window
Tools > Side Scan
Editor > Signal Display
Window > View Single
Ping
The Signal Display Window is refreshed to show the sonar signal
intensities for the single ping selected in the Side Scan window.
Tool
Menu
4. Select the View Single Ping tool.
Pressing the Up Arrow key while an area of the side scan data is
range selected will select a single ping
5. Use the Up and Down arrow key to view the sonar intensities for other
single pings.
As you scroll through the selected range, the Signal Display
Window will refresh to show the intensity values for each ping.
The ping number is displayed in the top-right corner of the Signal
Display Window in this mode. The location of the ping is also
indicated by a new line within the selection. The single ping
selection always defaults to the first ping in the selection.
You can view the position and specific intensity values of points
by clicking on any point in the graph in the Signal Display
Window. The intensity and time/distance values for that point
are shown in a tool tip.
516
CARIS HIPS and SIPS User’s Guide
Side Scan Data: Signal Display Window
CARIS HIPS and SIPS User’s Guide
517
Side Scan Data: Processing
Processing
Side scan data can be processed using a number of carefully
designed process tools. These tools can be divided into two groups
based on the display mode in which they can be used: raw or
processed.
The following diagram displays the suggested order to apply the
corrections and the side scan mode in which they can be used.
Processing can be accomplished using the Side Scan Editor as a
selection and visualization tool, however, if the Side Scan Editor
is closed you can also apply corrections to one or more track lines
in the main Display window.
Processing can be accomplished using the Side Scan Editor as a
selection and visualization tool, however you can also apply
correction to one or more track lines in the main Display window.
518
CARIS HIPS and SIPS User’s Guide
Side Scan Data: Processing
Correction tools that create or modify processed side scan data
may be accessed from the Side Scan Processes toolbar.
The following processing operations are available in this
application:
“RECOMPUTE TOWFISH NAVIGATION” ON PAGE 519
“DIGITIZING SONAR ALTITUDE” ON PAGE 521
“SLANT RANGE CORRECTION” ON PAGE 525
“APPLY SLANT RANGE CORRECTION” ON PAGE 526
“BEAM PATTERN CORRECTION” ON PAGE 529
“ANGLE-VARYING GAIN” ON PAGE 534
“TIME-VARYING GAIN” ON PAGE 535
“DESPECKLE” ON PAGE 538
“EDITING CONTACTS” ON PAGE 542
Recompute Towfish Navigation
Navigation data for towed sensors can come from the following
sources:
•
If computed during data logging and stored in the raw side
scan format, it can be converted directly into the SIPS
towfish navigation data structure. The Recompute Towfish
Navigation process is therefore not required.
•
It can be computed by SIPS if specific sensor data is
available. SIPS requires ship navigation data with cable out
and towfish depth to compute towfish navigation, or, ship
navigation with horizontal layback.
If the towfish navigation data will be computed by SIPS then:
1. Select one or more towfish track lines.
Menu
2. Select the Recompute Towfish Navigation command.
Process >
Recompute Towfish
Navigation
The Recompute Towfish Navigation dialog box is displayed.
CARIS HIPS and SIPS User’s Guide
519
Side Scan Data: Processing
.
Towfish sensor data can be smoothed in the Attitude Editor (see
“SMOOTH DATA” ON PAGE 278) and this data can be applied when the
towfish navigation is computed. Select a check box to apply the
smoothed data.
3. Select the Recompute Contact Positions check box to update the
contact positions based on the new navigation data.
4. Click OK.
If contacts are contained in the track lines where towfish
navigation has been updated, you must update the contact
positions to match the new navigation (see “RECOMPUTE CONTACT
POSITION” ON PAGE 544).
To compute towfish navigation from the ship’s navigation
requires a horizontal distance and direction from the ship’s
towpoint location to the towfish. The towpoint is defined in the
vessel file.
•
Horizontal distance. Recorded horizontal layback data or
actual cable length both share the same data structure in
SIPS called SSS Cable Out. SIPS can distinguish between
the two by the towfish sensor depth data. If the sensor depth
data is zero, the horizontal layback is used. If the sensor
depth data is non-zero it will be combined with the cable out
data using trigonometry to produce horizontal distances. All
distances to the towfish are applied from the towpoint
position on the ship as defined in the vessel configuration
file.
•
Direction. The direction from the ship’s towpoint location to
the towfish is derived using a “follow-the-dog” method. The
average of the first 30 seconds of the ship’s “course-madegood” is used for the initial direction. Thereafter, each
successive position computed for the towfish occurs along the
direction from the next ship’s position to the previous towfish
position.
If horizontal layback or tow cable length data is not available, or
if the Recompute Towfish Navigation step is not executed, then
520
CARIS HIPS and SIPS User’s Guide
Side Scan Data: Processing
the recorded towfish navigation data converted into SIPS is used
for generating the positions of contacts and for mosaics.
If towfish navigation is not available at all then the position of the
side scan imagery data is assumed to be the same as the ship
navigation data.
Digitizing Sonar Altitude
Before side scan data can be processed, the altitude of the sonar
must be known. With some sonars, altitude is logged in the raw
data files and is converted by SIPS. However, in other cases,
altitude is not logged or is logged and needs to be edited. The Side
Scan Editor provides automated and manual tools to digitize the
bottom directly from the side scan trace.
A raw side scan sonar display with a digitized seabed is shown
below.
Digitized
seabed
Offset from nadir
Digitization and colour
maps
Sometimes there is no clear distinction between the water
column and the seabed. You can compensate for this by adjusting
the display of intensity values in the editor so that the seabed and
water column are clearly outlined. Also see “COLOUR MAPPING” ON
PAGE 507.
1. Make sure that only two colours are displayed in the editor (for
example, GreyScale.cma).
2. Use the sliders in the colour histogram to adjust the display in the
editor.
3. Once the there is clear distinction between the water column and
seabed use the digitizing tools to trace the first bottom return.
CARIS HIPS and SIPS User’s Guide
521
Side Scan Data: Processing
Tools > Side Scan
Editor > Altitude >
Clear
Tool
Menu
4. To remove the digitized lines, select the Clear command.
Automatic digitizing
The automatic digitizing method traces the first bottom return
using a sophisticated multi-pass algorithm. Automatic digitizing
is most effective when there is a clear distinction between the
water column and the bottom. This method can be applied to a
range of pings or to the entire line.
Settings for automatically digitizing the side scan return are in
the Altitude tab of the Control window.
The Altitude tab options are described below in the order that
they appear in the tab. While the Contrast Step Size and Max Height
Changes are compulsory for digitizing, the other options can be
applied depending on the specific conditions of your data.
Contrast Step Size
522
The Contrast Step Size and Max Height Change options must be set to
correctly auto digitize the side scan.
CARIS HIPS and SIPS User’s Guide
Side Scan Data: Processing
The Contrast Step Size is the minimum difference in contrast
expected between the intensity values of the water column and
the seafloor. The Signal Display Window may be helpful in
determining a good step size.
Max Height Change
The Max Height Change is the maximum allowable ping-to-ping
change in detected bottom position (in pixels). It is a restriction
on the variation anticipated in detected bottom position. It could
be visualized as error bars guiding the algorithm along the
bottom.
1. Use the <Up> or <Down> arrow buttons to select the percentage for
the Contrast Step Size and Max Height Change values.
Offset from Nadir
Strong solid returns in the water column, such surface
reflections, can be compensated for by setting an offset from nadir
in raw data mode.
2. Set the value in milliseconds for an Offset from Nadir by clicking the up
or down arrow buttons.
3. Select Show Offset from Nadir to display the offset visually as a
dashed line.
Verification
•
The line colour is set to the Measure / Offset tools colour in Tools >
Options > Side Scan Editor.
•
The thickness of the line is set in the Line thickness field on the
General tab in the Side Scan Editor Control tab.
The verification option tests the detected point to see if its
intensity is consistent with nearby values further across-track
that should also represent seafloor.
Its purpose is to detect and ignore anomalous points in the water
column (for example, noise from equipment, reflections off the
surface, marine life), by checking to see if there is water rather
than sea floor on the other side of a detected point.
4. Select the Verification check box.
5. Select a desired strength-level for the verification from the drop-down
list. Choices range from “Very Weak” to “Very Strong”. The default is
“Normal”.
Interpolation
The Interpolation option fills along-track gaps in the detected
bottoms.
6. Select the Interpolation option.
7. Select the size of the gap to be filled by clicking the up or down
buttons beside the Max Gap Size field.
Moving Average Filter
The Filter option smooths the digitized line.
8. Click the Moving Average Filter check box.
9. Click the <Up> or <Down> arrow buttons to select the number of pings
used for averaging in the Filter Width field.
CARIS HIPS and SIPS User’s Guide
523
Tools > Side Scan
Editor > Altitude >
Auto Digitize
Tool
Menu
Side Scan Data: Processing
You can use the Auto Digitize tool, or use the buttons at the
bottom of the Altitude tab to complete digitizing. If you are using
the buttons, continue with Step 8; otherwise, go to Step 11.
10. Choose any of the following digitization options:
•
Click To Start to extend the digitized region to the back of the
entire line.
•
Click To End to extend the digitized region to the end of the line.
•
Click All to digitize the entire selection or the entire line.
11. If you change a value in the tab, click Recalculate to update the
Digitization.
12. Select Overwrite to enable re-digitization of selected areas without
clearing. With Overwrite disabled, only zero-altitude/cleared fish
heights will be available for digitization.
13. Click anywhere on the seabed to select the start and end pings for
digitization and also to indicate the side (port or starboard) on which to
perform the calculations.
Tools > Side Scan
Editor > Altitude >
Clear
Tool
Menu
14. [Optional] You can select the Clear tool to remove the digitization.
Manual digitizing
Add altitude lines by selecting areas along the first bottom.
Tools > Side Scan
Editor > Altitude >
Digitize
2. Press and hold the mouse button and drag the cursor along the
bottom contact.
You can also use the space bar to move along the track line
while in digitizing mode.
Tool
Menu
1. Select the Manual Digitize tool.
As you drag the cursor, a digitizing line is drawn in the window.
When you digitize one side, the other side is automatically
mirrored.
3. Alternatively, create a point-to-point line by clicking carefully along the
first return.
Tools > Side Scan
Editor > Altitude >
Clear
At any time during the digitizing process, you can select the Clear
tool to remove the digitization.
Tool
Menu
4. Cancel the Manual Digitize tool when finished.
524
CARIS HIPS and SIPS User’s Guide
Side Scan Data: Processing
Interpolate Selection
Interpolation digitizes a straight line between the fish height
values found at the start and end of the selection. Any altitude
data within the selection is overwritten during this operation.
1. Use the Side Scan Selection tool to select an area of raw mode data
that has been digitized. (See “SELECTION” ON PAGE 504)
Menu
2. Select the Interpolate Selection command.
Tools > Side Scan
Editor > Altitude >
Interpolate Selection
The pixels between the digitizing points are interpolated and the
digitizing lines are smoothed.
Slant Range Correction
Side scan sonar is initially logged as a series of time-indexed
intensity values for each ping. Slant range correction re-samples
this raw side scan data to produce profiles of image pixels where
the across-track scale is related to distance from nadir instead of
time.
Across-track positioning
using height sources
The standard slant range correction operation applies a sound
velocity estimate to the two-way travel time for each intensity
value. This produces an estimated ray length that when
combined with the known sonar height (from the digitized or
logged bottom) is used to produce the across-track distance to the
pixel using simple trigonometry. This method presupposes that
the bottom is flat across the ping and can result in the acrosstrack misplacement of objects over varied or steeply sloping
terrain.
SIPS can use a height source (such as a BASE Surface, grid, or
tile) in the slant range correction operation to supply depth
values to improve the across-track positioning of pixels.
In the following figure, raw side scan data is represented as a
series of time (t) and pixel intensity values (i).
When a height source is used during slant range correction, a
depth profile is first derived from the source along the path of the
CARIS HIPS and SIPS User’s Guide
525
Side Scan Data: Processing
side scan ping. Then, the two-way travel time to each pixel is
converted to a distance from nadir using the estimated velocity of
sound in water. The distance is then used to calculate the position
of the image pixel along the ping drawn from the height source.
The resulting output is an intensity value indexed to across-track
distance (x) rather than time.
Apply Slant Range Correction
1. Select the track line(s) in the Display window.
526
CARIS HIPS and SIPS User’s Guide
Side Scan Data: Processing
Process > Slant
Range Correct
The Slant Range Correction dialog box is displayed.
Tool
Menu
2. Select the Slant Range Correct tool.
3. Type the resolution (in metres or feet) for the slant range corrected file.
The resolution value defaults to the minimum value appropriate to the
sonar system. If this is not available then it defaults to 0.10 metres or
0.33 feet. A finer resolution generates a larger file.
4. Enter the average speed of sound.
5. Select the Only Create 8-Bit Processed Side Scan check box if you
want to create a slant range file using only eight bits of storage per
pixel. This option is important if the data that you are slant range
correcting was originally 16-bit and all 16 bits were maintained at
conversion. Otherwise it has no effect.
You can use the existing 16-bit factor that is stored with the line
or adjust the bit factor and then slant-range correct the data.
6. To apply a new bit factor to the data, select the 16 Bit Shift Factor
option and select the bit factor by clicking the arrow buttons beside the
bit factor size box.
7. To apply an existing bit factor, select the Use 16-bit Factor From Each
Line option.
8. Select the Use Height Source check box if you want to apply a height
source, and select the height source.
9. Click Process. The slant range corrected data is displayed in the Side
Scan Editor.
CARIS HIPS and SIPS User’s Guide
527
Side Scan Data: Processing
Revert/Reapply
The most recent correction made in processed mode can be
undone or redone using the Revert and Reapply tools.
Tools > Side Scan
Editor > Revert
2. Select the tool to reapply the last correction.
This facility to go back a step without losing your work, in effect
enables you to “toggle” between the before and after of a process.
For example, with the Signal Display Window open, use Revert/
Reapply to see the effect of slant range correction.
Tools > Side Scan
Editor > Reapply
Tool
Menu
Tool
Menu
1. Select the tool to reverse the last correction.
528
CARIS HIPS and SIPS User’s Guide
Side Scan Data: Processing
Beam Pattern Correction
Beam pattern correction uniformly removes along-track banding
inherent to the sonar beam. This effect is produced by each
transducer uniquely.
Beam pattern correction relies on a user-generated beam pattern
file to identify and remove this effect. Tools are provided to
create, view and process beam pattern files. The process uses the
beam pattern file to uniformly correct the selected line(s),
producing a more consistent appearance in mosaics.
Once the beam pattern file is created it can be applied to one or
more lines in the Display window, or to one or more pings in the
Side Scan Editor.
Create Beam Pattern Correction File
All the tools to create a beam pattern file are accessible on the
Beam Pattern Toolbar, while the Side Scan Editor is open.
To create a beam pattern file you must select an area that is as
flat, featureless and homogenous as possible. It is recommended
that a “patch test” be done during a survey over an area known to
have such properties. In order to create a more robust and
accurate beam pattern correction file, it is also important to vary
the fish height over the range expected to be used during the
survey.
Tools > Side Scan
Editor > Beam Pattern
Correction > Create
2. Select the tool.
The Create Beam Pattern file dialog box is displayed.
Pop-up
Tool
Menu
1. Using the Side Scan selection tool, select an area along the track line.
Create Beam
Pattern…
The option is available to alter the range of pings to be included
in the creation of the beam pattern. While this should be done
with care, it is possible to create a beam pattern file from a
selection larger than the range visible in the Side Scan Editor
CARIS HIPS and SIPS User’s Guide
529
Side Scan Data: Processing
display. You may also select the whole line for the creation of the
beam pattern if you wish. It is recommended that only an area
meeting the criteria set forth above be considered for inclusion in
a beam pattern file.
3. Select Process to create the Beam Pattern file.
The Windows Save As dialog box is displayed.
4. Type a name for the Beam Pattern file and select Save.
The Save Beam Pattern, Save Beam Pattern As, View,
Remove Spikes, Smooth, and Reload tools are now active in
the menu and on the toolbar.
View Beam Pattern
Tools > Side Scan
Editor > Beam Pattern
Correction > View
The Beam Pattern Graph window is displayed.This window
shows the intensity levels of the side scan sonar over the selected
area.
Tool
Menu
5. Select the tool.
Remove Spikes
530
The Remove Spikes tool removes anomalies from the Beam
Pattern Graph.
CARIS HIPS and SIPS User’s Guide
Side Scan Data: Processing
Tools > Side Scan
Editor > Beam Pattern
Correction > Remove
Spikes
Tool
Menu
6. Select the Remove Spikes tool.
The next step is to apply the Smooth Beam Pattern tool. The
Smooth Beam Pattern tool uses a moving average filter to reduce
noise in the beam pattern.
An example of the graph before and after using the Smooth tool
is shown below. The left-hand window shows the unsmoothed
graph and right-hand window shows the graph after smoothing.
Tools > Side Scan
Editor > Beam Pattern
Correction > Smooth
The Smooth Beam Pattern tool can be repeated until the
preferred degree of smoothing is reached.
Tool
Menu
7. Select the tool.
Tools > Side Scan
Editor > Beam Pattern
Correction > Reload
The Reload tool reloads saved changes from the active beam
pattern file. Any changes to the beam pattern before the last save
are lost.
For example, if you remove spikes and then Save, then apply
Smooth Beam a few times, the Reload tool will restore the graph
to the point just after you saved it.
8. Select the Reload tool.
Tool
Menu
Reload
CARIS HIPS and SIPS User’s Guide
531
Side Scan Data: Processing
Tools > Side Scan
Editor > Beam Pattern
Correction > Save
When you have completed smoothing the data, you can save these
settings using the Save Beam Pattern or Save Beam Pattern As…
tools.
9. Select Save Beam Pattern to save the filtering and smoothing
changes to the Beam Pattern File.
10. Select the Save Beam Pattern As command to save the file as a new
file.
Tool
Menu
Save/Save As
532
CARIS HIPS and SIPS User’s Guide
Side Scan Data: Processing
Apply Beam Pattern Correction
The Beam Pattern Correction file can be applied to a selection in
the Side Scan Editor or to track line(s) in the Display window.
1. Make a selection in the Editor, or,
1. Select a track line or group of track lines in the Display window.
Process > Beam
Pattern Correction
The Beam Pattern Correction dialog box is displayed.
Tool
Menu
2. Select the command.
The Beam Pattern file will default to the last created, loaded,
saved or executed one. You can use the Browse button to locate a
different file for processing. The default location for Beam
Pattern files is <Data Dir>/Sidescan.
The outer edges of some pings may have been recorded at angles
beyond the extent of the beam pattern file being used. The Outer
Edge option must be specified for handling these cases.
3. Select a method for handling sonar data collected outside the bound of
the beam pattern file:”
•
Extrapolate: Extrapolate the beam pattern to correct angles
beyond the outer edge of the generated beam pattern file.
•
Trim: Remove sonar data that is beyond the extent of the beam
pattern file. Trimmed data will appear as 0 intensity white space in
the Side Scan Editor.
•
Do Nothing: Does not correct sonar data beyond the extent of the
beam pattern file. Uncorrected data will appear the same before
and after Beam Pattern Correction in the Side Scan Editor.
4. Apply the Beam Pattern Correction to the both sides of the side scan
or to either the starboard or port sides.
5. You can apply the Bean Pattern Correction to your entire survey by
selecting all the track lines, or you can open the Side Scan Editor and
select a portion of the data:
CARIS HIPS and SIPS User’s Guide
533
Side Scan Data: Processing
•
Ping: the correction will apply to the single ping selected in the
Side Scan Editor window.
•
Selection: the correction will apply to the range of pings you
selected in the Side Scan Editor window.
•
Line: the correction will apply to the entire trackline you have
selected.
6. Click Process to apply the correction.
Angle-Varying Gain
Angle-Varying Gain (AVG) correction removes the angular
response of sediment from the imagery, normalizing the mean
angular intensities, ping-by-ping, with a moving average filter.
AVG correction can be applied to a selection or a single ping in the
Side Scan Editor or to one or more track lines in the Display
window.
1. Make a selection in the Side Scan Editor. (See “SELECTION”
PAGE 504 for selecting areas and pings).
ON
Process > AVG
Correct
The AVG Correct dialog box is displayed.
Tool
Menu
2. Select the AVG Correct tool.
3. Select the number of adjacent pings to include in the moving average
by clicking Moving Average Window Size up or down arrow buttons.
For example, an average based on a window size of 100 will
include 50 pings before and after the ping being corrected.
4. Apply angle-varying gain to the port, starboard, or both sides of the
side scan.
5. Apply the angle-varying gain correction to either a Ping, Selection, or
Line by selecting the appropriate option.
6. Click Process.
534
CARIS HIPS and SIPS User’s Guide
Side Scan Data: Processing
Time-Varying Gain
Time-Varying Gain (TVG) Correction allows you to adjust the
signal intensity by applying a non-uniform, time-dependent gain.
During acquisition, this is necessary because of the attenuation
that occurs due to absorption and spreading as the sonar beam
travels back to the receiver. Since these returns are received over
a predictable and constant time period, a time-varying curve can
used to increase gain to compensate for the decayed sonar return.
In post-production, it maybe necessary to augment the TVS
correction applied during acquisition.
The TVG Correction command also allows you to apply a uniform
gain correction without applying the any time-dependent gains
by using only the Gain control.
TVG Correction can be applied to a single ping, selection, or the
currently selected line in the Side Scan Editor; or to one or more
track lines in the Display window.
1. Make a selection in the Side Scan Editor. (See “SELECTION”
PAGE 504 for selecting areas and pings).
ON
Process > TVG
Correct
The Time-Varying Gain Correct dialog box is displayed.
Tool
Menu
2. Select the TVG Correct command.
There are two modes for TVG correction: Standard and
Advanced.
3. Select either the Standard or Advanced mode from the Mode dropdown list.
CARIS HIPS and SIPS User’s Guide
535
Side Scan Data: Processing
The options available depend on the mode selected. The dialog
box is refreshed to show the options.
The Preview window is available when a selection or
superselection is made in the Side Scan Editor. The Preview
window is not available when a track line is selected.
The Preview window is divided into three panes:
•
Gain (shown as a percentage)
•
Intensity values before TVG is applied.
•
Intensity value after TVG is applied.
Changes are instantaneously shown in the Preview window.
4. Click Open to view the Preview window. To close the window, click
Close.
5. The TVG correction can be made to port, starboard, or both sides by
selecting the appropriate from the Side drop-down list.
6. The correction can be made to a single ping, a selection, or the entire
line by selecting any of these options from the Range drop-down list.
(The options depend on the selection made in the Side Scan Editor or
in the Display window).
Standard
The Standard mode contains two options for correcting TVG.
7. Increase or decrease the percentage Gain by clicking the up or down
arrow buttons.
8. Increase or decrease the TVG value by clicking the up or down arrow
buttons. This changes the TVG curve.
Advanced
536
The Advanced mode contains more precise options for correcting
TVG.
CARIS HIPS and SIPS User’s Guide
Side Scan Data: Processing
9. Spherical Spreading compensates for the loss of energy caused by
signal displacement along the sea floor. Increase or reduce the signal
intensity by clicking the Spherical Spreading up or down buttons.
10. The Absorption value compensates for attenuation due to energy loss
in water. The scale factor is in dB/unit distances. Click the up or down
arrow buttons to increase or reduce this value.
11. Click Process to apply the TVG correction.
CARIS HIPS and SIPS User’s Guide
537
Side Scan Data: Processing
Despeckle
Despeckling uses a calculated value based on neighbouring
intensity levels to replace the current pixel’s intensity if it is
outside the specified range. The value calculated from the
neighbouring intensities can be derived by one of two methods
mean or median.
The following steps are used for despeckling images:
1. Select a track line.
Process > Despeckle
The Despeckle dialog box is displayed.
Tool
Menu
2. Select the Despeckle tool.
3. Select the Mean or Median Filter from the Method drop-down list.
4. Use the up and down arrows to select a Threshold for defining an
acceptable range in which the pixel value will not be replaced.
For example, if the mean value is 50 and the threshold is +/- 20%
then the acceptable range is 40 to 60. Thus a pixel value of 38
would be replaced by the mean value of 50 as it is outside the
range, but a pixel value of 42 would not be replaced.
5. Select a pattern of neighbouring pixels from the Matrix Size drop down
list be used in calculating the mean/median.
For example
6. Click Process
The line is filtered to remove noise from the sonar image.
538
CARIS HIPS and SIPS User’s Guide
Side Scan Data: Contacts
Contacts
A Contact is the representation of an object or feature on the sea
bottom (for example, a wreck, or a pipeline) that is visible in the
sonar data. Contacts can be georeferenced, have positions
calculated, and have attributes attached to them in the Side Scan
Editor using the Add Point or Add Line Contacts tools.
In SIPS, you can pick individual contacts directly from the Side
Scan Editor interface. A contact record is created for each contact,
and includes sufficient information to be subsequently imported
to a CARIS map or to a database application.
A contact file is created for each survey line and is stored in the
line folder within the project directory structure. Each contact file
is a text file that can be viewed and edited using a text editor.
Each file consists of zero or more contact records.
For more information on contact file structure, see “CONTACT FILE
FORMATS” ON PAGE 657.
Create Contacts
Point type contacts can be created for objects such as rocks,
underwater posts or pile as well as wrecks. Contacts can also be
created for continuous objects such as pipelines or underwater
cables.
Contact information is entered on the General tab of the Control
window and updated on the Contact Details tab.
1. Make sure the Control window is open and the General tab in the Side
Scan Section is displayed.
2. Enter information in the appropriate fields on the General tab.
•
Contact Type: Select a point or line contact type from the
appropriate drop-down list. Each contact type is assigned a
CARIS feature code, and there is an identifying symbol for each
type. The contact types shown in the lists and the corresponding
CARIS feature codes are stored in
…\Hips\system\ContactFeature.txt.
•
User Initials: Type a maximum of three characters to identify the
creator of the contact. The initials are used in the editor as part of
a contact identifier.
•
Prefix: The prefix is usually the line number. It is combined with
the contact number to generate a 12-character key for database
applications.
•
Image Width: (optional) Enter a width for any image file created
from the contact.
CARIS HIPS and SIPS User’s Guide
539
Side Scan Data: Contacts
•
Image Length: (optional) Enter a length for any image file created
from the contact.
•
Display with single colour: Select this to have all contact markers
and their identifiers appear in the same default colour. (The default
colour can be set in Side Scan Editor Display Options on the Tools
menu.) Leave blank to have a one colour apply to the contact
markers and a different colour applied to the bounding box and
contact labels.
Tools > Side Scan
Editor > Contacts >
Add Point Contact
3. To insert a point contact, select the Add Point Contact tool and click
where you want to place the contact.
A marker is placed in the Side Scan Editor at the point where you
clicked.
The type of contact is indicated by the symbol displayed. The
contact is identified by the initials entered in the General tab,
and a four-digit number (starting at 0001). The information
entered in the General tab is assigned to the contact.
Tool
Menu
Point Contact
Point contacts
Line contacts
The image bounding box always snaps to the contact so that the
contact point is in the middle of the box. The bounding box
represents the image area of the contact. You can adjust the size
of the image using the Image Width and Image Length fields on the
Contract Details tab in the Control window.
Line Contact
Tool
Menu
To insert a contact record for a line:
540
Tools > Side Scan
Editor > Contacts >
Add Line Contact
1. Select the Add Line Contact tool and click the point where you want to
insert the contact.
2. Click another section of the Side Scan Editor.
The two points are joined by a line.
3. Continue adding line segments as needed to represent the contact.
CARIS HIPS and SIPS User’s Guide
Side Scan Data: Contacts
4. Select Edit Line> Remove last to delete the line segment just
created.
5. To escape the Line Contact tool, right-click the mouse and select Edit
Line> End from the pop-up menu.
The contact lines are drawn in the Side Scan Editor. Each line is
identified with a number, and each type of line is drawn in a
different style. The information entered in the General tab is
applied to the contact. The contact is identified with the initials
entered in the General tab, along with a four-digit number
(starting at 0001).
Repeat New Feature
When the Repeat New Feature tool is activated, you can add any
number of contacts of the same type and attributes, without
having to set each one separately.
To add multiple similar contacts:
Tool
Menu
1. Select the command.
Tools > Side Scan
Editor > Contacts >
Repeat New Feature
2. Enter contact information in the appropriate fields on the General tab
in the Control window.
3. Use the Add Point Contact tool to place the contacts, one after the
other, into the Side Scan Editor.
The Repeat New Feature tool button will remain depressed while
you add contacts. To change to a different type of contact or to
change contact data, deactivate the Repeat New Feature.
CARIS HIPS and SIPS User’s Guide
541
Side Scan Data: Contacts
Editing Contacts
You can reposition both line and point contacts and update the
data associated with a contact.
The Select Contact tool is used to select point or line contact(s) for
editing.
Select Contact
Tools > Side Scan
Editor > Contacts >
Select Contact
2. To select a single contact, click on or draw a box around the contact so
that it becomes highlighted. Clicking on any part of a line will select the
entire contact.
3. To select a number of contacts, press the mouse button and drag the
cursor across an area so that the contacts within it are highlighted.
Tool
Menu
1. Choose the Select Contact tool.
Move Contact
Tools > Side Scan
Editor > Contacts >
Move Contact
Tool
Menu
1. To move a selected contact, select the Move Contact tool.
2. Position the cursor on top of the selected contact. Press and hold the
mouse button. This will turn the highlighted contact into a red box with
direction arrows.
3. Drag the contact to a new position.
4. Deactivate the Move Contact tool to finalize the new position of this
contact. You are returned to the Select Contact tool.
You can use the Move Contact tool to move an entire line contact,
or to adjust or realign part of the line.
5. To move a selected line contact, position the cursor on any part of the
line, press and hold the mouse button, and drag the whole line to a
new position.
6. To realign part of a selected line, click on the line. This will highlight
nodes which will appear as squares on the line.
7. Click on the node to be adjusted, which will turn the node square red.
Position the cursor on the node. Press and hold the mouse button, and
drag it to a new position. This will pull the attached lines with it.
Changing Contact
Information
You can change the information that is associated with the
contact when it was first created, either by typing it in or with
measurement tools.
1. Choose the Select Contact tool.
2. Select a single contact.
The contact is highlighted and the contact information is
displayed in Contact Details tab in the Control window.
3. Type new information in the fields and/or select a new object type from
the drop-down list.
4. Click Update.
542
CARIS HIPS and SIPS User’s Guide
Side Scan Data: Contacts
Use the Measure Distance and Measure Shadow tools on the Side
Scan Editor toolbar to amend the contact information.
Use Measure tools
5. To update the contact width information, choose the Measure Distance
tool and press and hold <Ctrl> while dragging the cursor across the
area of the contact to be measured.
If measuring in the Side Scan Editor window, the value in the
Contact Width field will reflect the measurement as you are make
it. If measuring in the Zoom tool, the value will be updated when
the mouse button is released.
6. To retain the updated information, release the mouse button and then
the <Ctrl> key.
Tools > Side Scan
Editor > Measure
Shadow
8. To update the Contact Height field, select the Measure Shadow tool
and press <Ctrl> while dragging the cursor across the contact area.
9. Click Update. If you do not click Update, the values will be lost when
the contact is de-selected.
The contact information is updated.
Tool
Menu
7. To update the Contact Length information, choose the Measure
Distance tool and press <Alt> while dragging the cursor across the
contact area.
Set contact status
You can also use the Select Contact tool with the Query, Reject or
Accept tools. A rejected contact can deleted from the track line
using the Purge Rejected Contacts command.
10. Select either an Accept, Reject or Query tool (see “EDIT SIDE SCAN
DATA” ON PAGE 510).
Tools > Side Scan
Editor > Contacts >
Purge Rejected
Contacts
If you selected the Query tool, data relating to that contact is
displayed in the Query tab of the Worksheet window.
•
If you selected Accept or Reject, the contact is assigned the
appropriate status flag.
11. To delete a rejected contact, select the contact (using the Select
Contact tool) and select the Purge Rejected Contacts command.
Tool
Menu
Purge Rejected Contacts
•
CARIS HIPS and SIPS User’s Guide
543
Side Scan Data: Contacts
Recompute Contact Position
Update the geographic position of contacts after towfish
navigation has been recomputed for a track line or group of track
lines (see “SLANT RANGE CORRECTION” ON PAGE 525).
1. Select the ship or towfish track lines layer in the Session tab of the
Control window.
2. Select one or more track lines.
Menu
3. Select the command.
Process > Recompute
Contact Position
Position information for contacts along the selected track lines
are updated to match the new towfish navigation.
The start time, end time and elapsed time for the recompute
process is reported in the Output window. Any error in the
processing will be reported there also.
View contacts while
scrolling
If you want your contacts to remain visible in the waterfall
display while scrolling along a track line or using the Playback
functions
1. Select Side Scan Editor from the Tools > Options > Display tab.
2. Select the Display contacts during playback check box, and click
Apply.
544
CARIS HIPS and SIPS User’s Guide
Side Scan Data: Mosaics
Mosaics
A mosaic is a georeferenced TIFF image file created from one or
more track lines—within a field sheet—that contains slant range
corrected side scan or amplitude data.
The mosaic process combines imagery data with heading and
navigation data to georeference the sonar pings within the
geographic extent of the field sheet.
Below is an example of finished mosaic in the Display window.
Mosaics are displayed as layers in the Session tab of the Control
window:
The mosaic layer is named according to the name given in the
Mosaic Wizard. The mosaic layer also contains a Intensity sublayer. When selected this layer displays a screen tip showing the
intensity values for each section of the mosaic when the cursor is
moved over the mosaic
CARIS HIPS and SIPS User’s Guide
545
Side Scan Data: Mosaics
Create Mosaics
A mosaic is created as a new field sheet layer using the Mosaic
Wizard.
1. Make sure a field sheet has been created for the area to be mosaicked
(see “CREATE A FIELD SHEET” ON PAGE 349)
2. Select the field sheet file in the Control window.
Process > Mosaic >
New…
Pop-up
Tool
Menu
3. Select the New Mosaic tool.
Create Mosaic - Step 1
New Mosaic
The Mosaic Wizard (Step 1) dialog box is displayed.
The width, height and centre coordinates are derived from the
field sheet.
4. Type a name for the mosaic.
5. Click Next.
546
CARIS HIPS and SIPS User’s Guide
Side Scan Data: Mosaics
Create Mosaic - Step 2
The Mosaic Wizard (Step 2) dialog box is displayed.
6. Enter the pixel resolution. For example, if the resolution is 2.00 metres
then one pixel represents two metres. The amount of space needed to
store the mosaic data is shown below the Resolution box. The smaller
the resolution value, the greater the space needed to store the data.
7. Select a colour map from the drop-down list. A preview of the colour
map is provided below the list.
You can pick what orientation source to use from the drop-down
list. If you select Automatic, SIPS uses this order of precedence:
•
SSS Gyro
•
Ship Gyro
•
Calculated CMG from SSS Navigation
•
Calculated CMG from Ship Navigation.
8. Select an orientation source in the Gyro from drop-down list.
When 16-bit data is opened in the Side Scan Editor, the bit shift
value is saved in SIPS. This means that different track lines
might have different bit-shift values and this could affect the
mosaic display. The Use Global Bit Shift Value option applies the
same bit-shift value to all lines.
9. To apply a uniform bit-shift value to 16-bit data, select the Use Global
Bit Shift Value check box and then select a value in the associated
field.
CARIS HIPS and SIPS User’s Guide
547
Side Scan Data: Mosaics
If the data contains bathymetry as well as side scan data, you can
use the information from the depth file to position the side scan
imagery for the mosaic
10. Select Use Bathymetry To Register Imagery to position the side scan
imagery.
11. If you have track lines selected, the Use Selected Lines Only check
box is selected by default. If you do not want to use only the selected
lines, remove the check mark.
12. Click Next.
548
CARIS HIPS and SIPS User’s Guide
Side Scan Data: Mosaics
Create Mosaic - Step 3
The Mosaic Wizard (Step 3) dialog box is displayed.
1. Select either Side Scan or Amplitude to determine the data source for
creating the mosaic.
2. Select Interpolation if you want to fill in any gaps between the sonar
pings.
Sonar, heading and navigation data readings are recorded at
different intervals. Therefore, sonar pings at the start and end of
the track line may be excluded from the mosaic because there is
no heading and/or navigation data to interpolate. The Extrapolate
option extends the heading and/or navigation data at each end of
the line to a maximum specified by the selected value.
3. Select the Extrapolate check box to enable this option.
4. Type a time range (in seconds) to extend heading/navigation to sonar
data within the selected range.
The Method drop down list determines what pixel values are
selected for mosaic creation.
5. Select from the following options in the Method drop-down list:
•
CARIS HIPS and SIPS User’s Guide
Auto Seam: Determine which pixels have higher significance
when pings overlap. A weighting function is constructed for each
ping that assigns lower significance to pixels at the edge of the
ping than to pixels near the centre. The first few pixels near the
nadir are assigned low significance due to the low resolution in
that region.
549
Side Scan Data: Mosaics
•
Shine Thru: Use only the highest-weighted pixels from the
overlapping track lines.
•
Overwrite: Imagery from each successive line is added to the
mosaic to overwrite the previous data.
•
Individual Mosaics: Create single mosaics for each track line
without overlap from other lines.
When the Overwrite option is selected, a list of track lines in the
field sheet is active. This list determines the order that the lines
are processed and also determines the order that data is
overwritten when track lines overlap.
6. Change the track line processing order by selecting a line and clicking
the up or down arrow buttons.
7. Click Next.
Create Mosaic - Step 4
The Mosaic Wizard (Step 4) dialog box is displayed.
The Sun Position option determines the direction of the shadow in
the mosaic. Either port or starboard imagery will not be used in
the mosaic to display shadows correctly. Two-hundred percent
coverage is recommended to reduce gaps in the mosaic. If the Sun
Position option is not checked all imagery is used in the mosaic.
8. Make sure the Sun Position check box is selected to use the lighting
compass.
9. Place the cursor over the icon, press and hold the mouse button, and
drag the sun icon to the desired position.
10. Click Next.
550
CARIS HIPS and SIPS User’s Guide
Side Scan Data: Mosaics
Create Mosaic - Step 5
The Mosaic Wizard (Step 5) dialog box is displayed.
This dialog box applies filtering options to exclude mosaic data
based on across-track distance and/or altitude ratios. The options
can be applied to the inner part of the mosaic (nadir) and/or to the
edges (outside edge).
The Min Acrosstrack/Altitude Ratio excludes data starting from
nadir extending across-track to a distance determined by the
towfish altitude and the given ratio.
The Min Acrosstrack Distance option can also be selected along
with this option.
1. Select the Min Acrosstrack/Altitude Ratio check box to enable this
option.
2. Type the ratio value in the field.
If the Min Acrosstrack/Altitude Ratio option is selected, then the
Min Altitude Limit for Ratio option is available. This option sets
a minimum fish altitude for the Min Acrosstrack/Altitude Ratio.
For fish altitudes less than this limit, the Min Acrosstrack/
Altitude Ratio is NOT applied.
1. Select the Min Altitude Limit for Ratio option, if needed.
2. Type the minimum altitude limit.
3. Select the Min Acrosstrack Distance option to use the minimum
distance from the centre of the side scan ping.
CARIS HIPS and SIPS User’s Guide
551
Side Scan Data: Mosaics
4. Type the across-track distance (from nadir) for the mosaic in the
appropriate field.
The Max Acrosstrack/Altitude Ratio excludes data starting from
the distance determined by the towfish altitude and the given
ratio to the outside edge.
The Max Acrosstrack Distance option can also be selected along
with this option.
1. Select the Max Acrosstrack/Altitude Ratio check box to enable this
option.
2. Type the ratio value in the field.
If the Max Acrosstrack/Altitude Ratio option is selected, then the
Max Altitude Limit for Ratio option is available. This option sets
a maximum fish altitude for the Max Acrosstrack/Altitude Ratio.
For fish altitudes greater than this limit, the Max Acrosstrack/
Altitude Ratio is NOT applied
1. Select the Max Altitude Limit for Ratio option, if needed.
2. Type the maximum altitude limit.
3. Select the Max Acrosstrack Distance option to use the maximum
distance from the centre of the side scan ping.
4. Type the maximum across-track distance for the mosaic in the
appropriate field.
5. Click Finish.
The status bar shows the progress of the mosaic-building process.
Mosaic Attributes
View the attributes of a mosaic.
1. Select the mosaic layer in the Session tab of the Control window.
Window > Properties
Pop-up
Tool
Menu
2. Select the Properties window command, or right-click the layer and
select Properties from the pop-up window.
552
The File Name, Dimensions, Scale, and coordinates fields are
displayed in the window. These are read-only and cannot be
modified.
Properties
CARIS HIPS and SIPS User’s Guide
Side Scan Data: Mosaics
At the bottom of the Properties window you change the colour of
the mosaic outline. You can also turn off the file name so that it
does not show in the mosaic display.
Intensity Properties
Adjust colour settings using the Properties window.
1. Select the Intensity sub layer in the Session tab of the Control window.
2. Select the Properties window command, or right-click the layer and
select Properties from the pop-up window.
The display options for the mosaic are identical to the BASE
Surface display properties, see “SET ATTRIBUTE PROPERTIES” ON
PAGE 414 for more information.
CARIS HIPS and SIPS User’s Guide
553
Side Scan Data: Mosaics
Add To Mosaic
Add a selected track line to an existing mosaic.
1. While a mosaic is open in the Display window, select Track Lines layer
in the Control window.
2. Select the track line you want to add.
Pop-up
Add to and Remove
From Mosaic
3. Right-click the Mosaic layer in the Control window, and then select the
Add to tool.
Add to
The Step 3, Step 4, and Step 5 dialog boxes from the Mosaic
wizard are displayed in sequence (see “CREATE MOSAICS” ON
PAGE 546).
4. Enter data as needed.
5. Click Next to move to the next dialog box.
6. Click Finish to regenerate the mosaic (Step 5).
The mosaic is regenerated to display the new line.
Remove From Mosaic
Remove a selected track line from an existing mosaic.
1. While a mosaic is open in the Display window, select Track Lines layer
in the Control window.
Pop-up
2. Select the track line you want to add.
554
3. Right-click the Mosaic layer in the Control window and select the
Remove from Mosaic command.
Remove From
The selected track line is removed from the mosaic. The mosaic is
flagged as outdated and must be regenerated.
CARIS HIPS and SIPS User’s Guide
Side Scan Data: Mosaics
Recompute
Regenerate a mosaic that has been flagged as outdated.
Pop-up
1. In the Session tab of the Control window, select a mosaic that has
been flagged as outdated.
2. Right-click the Mosaic layer in the Control window and select the
command.
Recompute
The mosaic will be regenerated. The mosaic is no longer flagged
as outdated.
Image Classification
Image classification groups return-signal intensities
(represented in the mosaic as pixel values) into classes. These
classes are displayed in the mosaic using specific colours.
Image classification
Prior to setting image classification, you may need to examine the
mosaic to determine the number of classes needed to represent
pixel values.
1. [Optional] Select the Intensity sublayer of the mosaic in the Session
tab and move the cursor across the mosaic in the Display window. As
you move the cursor, screen tips show the pixel value.
Menu
2. Select the Classify command.
Process > Mosaic >
Classify
The Image Classification dialog box is displayed.
CARIS HIPS and SIPS User’s Guide
555
Side Scan Data: Mosaics
3. Use the Number of classes drop-down list to set the total classes in
the mosaic.
4. Set a range of pixel values for a class by typing Minimum pixel and
Maximum pixel in their respective fields.
5. Select a colour for the class by selecting a class from the
Classification colour drop-down list. A colour is automatically
displayed beside the class name.
6. [Optional] Select another colour from the colour picker, or create a
custom colour from the standard Windows colour palette.
7. Repeat Steps 4 to 7, as needed.
8. Click Classify.
A colour table is generated according to the number of classes you
selected in Step 3. Pixels are grouped according to class starting
from the minimum to the maximum pixel value.
The histogram is refreshed to show the pixels coloured according
to the class designation
.
9. Click Apply to save the classification system to a .CRF (colour range
file).
A Save As dialog displayed. The selected colours can be saved as
a colour map for future use.
10. Type a name for the colour map and click Save.
The colours are displayed in the mosaic.
556
CARIS HIPS and SIPS User’s Guide
Side Scan Data: SIPS Template Wizard
SIPS Template Wizard
The SIPS Template Wizard combines a number of side-scan
correction tools into a single wizard. The SIPS Template Wizard
can be used with the Side Scan Editor open to process a single
line or with the Editor closed to process one or more selected track
lines.
The following operations can be applied using the Template
Wizard:
•
“SLANT RANGE CORRECTION” ON PAGE 525
•
“BEAM PATTERN CORRECTION” ON PAGE 529
•
“ANGLE-VARYING GAIN” ON PAGE 534
•
“TIME-VARYING GAIN” ON PAGE 535
•
“DESPECKLE” ON PAGE 538
The settings entered into the wizard can be saved to a SIPS
Template File (STF) that can be loaded and used again.
1. Select one or more track lines.
Tool
Menu
2. Select the tool.
Process > SIPS
Template Wizard
SIPS Template Wizard (Step 1)
The SIPS Template Wizard (Step 1) dialog box is opened so you
can create a template or load an existing one.
The example below displays the options and values for a loaded
SIPS Template File.
CARIS HIPS and SIPS User’s Guide
557
Side Scan Data: SIPS Template Wizard
To create a new SIPS template file, click Next.
To load an existing SIPS Template file:
1. Click Load and choose an existing file. The file name is displayed in
the Current File field. The Summary provides an overview of the
settings.
2. To remove the selected file, click Clear.
3. To execute the loaded SIPS Template file, click Finish.
This will launch the SIPS Template Executive to execute the
wizard options.
4. Click Process to execute the corrections selected in the SIPS
Template Wizard.
5. If you want to modify the loaded options, click Next.
558
CARIS HIPS and SIPS User’s Guide
Side Scan Data: SIPS Template Wizard
SIPS Template Wizard (Step 2)
The SIPS Template Wizard (Step 2) page of the Wizard displays
all options available for Slant Range Correction.
1. Select Slant Range Correction to enable this correction process.
2. To apply an existing bit factor, select the Use Shift Factor From Each
Line option.
3. To apply a new bit factor to the data, select the Use Shift Factor option
and select the bit factor by clicking the arrow buttons beside the bit
factor size box.
4. Type the Resolution for the slant range corrected file.
5. Type the average speed of sound.
A height source (BASE Surface, grid, or tile) can be used to
perform slant range correction. This can improve the across-track
positioning of pixels especially over varied or steeply sloping
terrain.
6. Select the Use Height Source check box to implement this option, and
select the height source from the list below.
7. Click Next.
For more information, see “SLANT RANGE CORRECTION” ON PAGE 525.
CARIS HIPS and SIPS User’s Guide
559
Side Scan Data: SIPS Template Wizard
SIPS Template Wizard (Step 3)
The SIPS Template Wizard (Step 3) dialog box contains the
options for applying corrections to sonar data.
Beam Pattern Correction removes along-track banding.
1. Select the Beam Pattern Correction check box to enable this option
and browse to select an existing BPC file.
The outer edges of some pings may have been recorded at angles
beyond the extent of the beam pattern file being used. The Outer
Edge option must be specified for handling these cases.
2. Select a method for handling sonar data collected outside the bound of
the beam pattern file:
•
Extrapolate: Extrapolate the beam pattern to correct angles
beyond the outer edge of the generated beam pattern file.
•
Trim: Remove sonar data that is beyond the extent of the beam
pattern file. Trimmed data will appear as 0 intensity white space in
the Side Scan Editor.
•
Do Nothing: Does not correct sonar data beyond the extent of the
beam pattern file. Uncorrected data will appear the same before
and after Beam Pattern Correction in the Side Scan Editor.
Angle-Varying Gain (AVG) removes the angular response of
sediment from the imagery, normalizing the mean angular
intensities, with a moving average filter applied ping by ping to
selected areas of data.
560
CARIS HIPS and SIPS User’s Guide
Side Scan Data: SIPS Template Wizard
3. Select the AVG Correction check box to enable the process.
4. Select the number of adjacent pings to include in the moving average
by clicking Moving Average Window Size up or down arrow buttons.
The Despeckle function removes “noise” in the processed side
scan image. (Noise consists of randomly scattered pixels that are
brighter or darker than their neighbouring pixels).
5. Select a Method from the drop-down list.
6. Select a Matrix Size from the list
7. Specify a Threshold Factor in the box.
8. Click Next.
For further information, see “BEAM PATTERN CORRECTION” ON
PAGE 529, “ANGLE-VARYING GAIN” ON PAGE 534 or “DESPECKLE” ON
PAGE 538.
SIPS Template Wizard (Step 4)
The SIPS Template Wizard (Step 4) dialog box contains options
for applying the time-varying gain correction.
Time-Varying Gain Correction adjusts signal intensities by
applying a non-uniform, time-dependent gain.
CARIS HIPS and SIPS User’s Guide
561
Side Scan Data: SIPS Template Wizard
1. Select the TVG Correction check box to make this option active
2. Select the Standard or Advanced modes from the Mode drop-down
list.
3. For further information, see “TIME-VARYING GAIN”
ON PAGE
535.
4. Click Next.
SIPS Template Wizard (Step 5)
The SIPS Template Wizard (Step 5) dialog box lists the order in
which the options will be processed on the track line(s), and
allows for this order to be adjusted.
The Process Order list contains all options selected in the previous
wizard dialog boxes in the order that the operations will be
processed on the track line.
1. If you want to change the processing order, select a correction and
use the Up or Down arrow buttons to change its position in the list. The
item at the top will be executed first.
2. If selected, Slant Range Correction will be executed first. The order of
this correction cannot be changed.
3. Click Next.
562
CARIS HIPS and SIPS User’s Guide
Side Scan Data: SIPS Template Wizard
SIPS Template Wizard (Step 6)
The SIPS Template Wizard (Step 6) displays the options and
associated values selected in the previous dialog boxes.
The options you have selected in the previous dialog boxes are
displayed in the Summary of Selected Options section. Review the
summary before closing the wizard.
1. If needed, click Back to get a previous dialog box to make changes.
2. If you wish to save this as a template, click Save to overwrite the
currently loaded template file, or click Save As to create a new
template file with these options.
3. If you do not wish to execute your template at this time, click Cancel to
close the wizard. If you have saved your template, then your selection
options will not be lost.
4. To immediately execute the options selected in the Wizard, click
Finish.
This will launch the SIPS Template Executive to execute the
wizard options.
CARIS HIPS and SIPS User’s Guide
563
Side Scan Data: SIPS Template Wizard
I
5. Click Process to execute the corrections selected in the SIPS
Template Wizard.
6. Once processing has commenced, clicking the Cancel button will not
immediately terminate the Executive. The Executive will close once
the current correction is finished.
For example, if you have selected four corrections and you press
cancel during second correction, then the Executive will
terminate at the end of the second correction.
SIPS Template Wizard can also be also activated from the task
list in the Batch Processor.
564
CARIS HIPS and SIPS User’s Guide
23
23.
Batch Processing
Batch Processing: Overview
Overview
Batch processing automates processing by combining a number
of tasks (Tide Correction and SVP Correction, for example) into a
single batch file that can reopened and used on multiple track
lines.
The batch processing function is available in all licensing levels
of HIPS and SIPS, but the processing options available are
determined by the processing functions contained with the
license.
All data entered into the batch processor is saved in a HIPS Batch
Processing File (HPB) file. HPB files are in XML format and can
be viewed in any text editor or XML-compliant browser. Batch
processing files are saved in ..\Hips\Session and can only be
used in the Batch Processor.
HIPS filter files (HFF) can also be opened in filtering options of
the Batch Processor.
The Batch Processor is a separate application that is opened from
the HIPS interface.
Open Batch Processor
Tool
Menu
Batch Processor
566
Tools > Batch
Processor
1. Select the Batch Processor command. A project or session file does
not have to open in HIPS and SIPS.
The Batch Processor is opened.
The following image shows the Batch Processor with a complete
list of tasks.
CARIS HIPS and SIPS User’s Guide
Batch Processing: Overview
The Batch Processor contains three windows.
•
The window on the left contains a list of tasks that are open
in the processor.
•
The window on the right displays the options associated with
a task.
•
The window on the bottom displays the results of the
processing operation.
When the processor is first opened, it ready to create a new HBP
file.
CARIS HIPS and SIPS User’s Guide
567
Batch Processing: Running the Batch Processor
Running the Batch Processor
The following sections outline the workflow for opening or
creating a HPB file and running the HIPS Batch Processor.
Open HBP File
Open an existing HBP file.
File > Open
Key
The Open dialog box is displayed.
2. Select a file and click Open.
The file is displayed in the Batch Processor.
Tool
Menu
1. In the Batch Processor interface, select the Open File command.
<Ctrl+O>
New HBP File
Create a new HPB file.
When the Batch Processor is first opened, it is ready to create a
new HPB file. If a HPB file is already open and you select the New
File command, the Processor is reset for the new file (the already
open file are is closed).
File > New
1. Select the New File command.
A new file is ready to be modified in the Batch Processor.
<Ctrl+N>
Save/Save As
1. In the Batch Processor interface, select a Save command to save a
HBP file for the first time or save an existing file under a new name.
File > Save/Save As
All files are saved to …\Hips\Session.
Key
Tool
Menu
Key
Tool
Menu
New File
568
<Ctrl+S>
CARIS HIPS and SIPS User’s Guide
Batch Processing: Running the Batch Processor
Select Process
A process is a specific order of tasks that are run through the
Batch Processor. Each process is saved to the current HBP file.
Select the Add Process
command.
The Select Task dialog box is displayed.
Remember that the list of tasks in Activated Tasks must be in
the same order as the workflow in HIPS and SIPS: the Compute
TPE task must be listed before the Merge task, and so on.
2. Select tasks for the process in three ways:
•
Select an individual task so it is highlighted.
•
Select a group of tasks by holding the <Ctrl> key and clicking the
required tasks. The selected tasks are highlighted.
•
Select a range of tasks by holding the <Shift> key and clicking the
first and last tasks in the range. All tasks in between are
highlighted.
3. Click Add to move the selected tasks from the Available Tasks list to
the Activated Tasks list, or double-click to move the task(s) to the
Activated Tasks list.
4. Change the order that tasks are listed in the process using two
methods:
CARIS HIPS and SIPS User’s Guide
569
Batch Processing: Running the Batch Processor
•
Highlight a task, and click the arrow buttons to move the task to a
new position on the list.
•
Highlight the task and press and hold the mouse button to drag it
to another location on the list.
5. To remove one or more tasks, select a task in Activated Tasks list
using any of the three methods in Step 2 and click Remove, or doubleclick the list to move the task(s) to the Available Tasks list.
6. Click OK.
Tools > Rename
Process
7. To give a process a different name, select Rename Process the
command.
8. The process name is now ready to edited in the Process List window.
Type a new name for the process.
Rename Process
Tools > Remove
Process
Tool
Menu
Pop-up Menu
The selected tasks are shown in the Process List in the Batch
Processor interface.
9. To remove a task from the Process List, highlight the task and select
the Remove Process command.
10. To move a task to a new position in the Process List, highlight the task
and press and hold the mouse button to drag it to another location on
the list.
11. Select a task to view the options associated with it.
The options associated with the task are displayed in the right
side of the interface. You will notice that many of the options
resemble the dialog boxes used in the main HIPS interface.
12. Fill in as many task options as necessary (see “BATCH PROCESSOR
TASKS” ON PAGE 571).
Process Data
Tool
Menu
1. Select the Run command.
570
Tools > Run
When the Run command is selected, you are prompted to save the
batch processor file if you have not done so already.
2. Save the Batch Process file.
The results of the Run process are displayed in the Output tab of
the Worksheet window.
CARIS HIPS and SIPS User’s Guide
Batch Processing: Batch Processor Tasks
Batch Processor Tasks
When a task in the Process List is highlighted, the options
associated with it are displayed on the right side of the
application The fields are often identical to corresponding task in
HIPS and SIPS.
To find more information on any of the following tasks, click a
link in the Reference column.
Process List tasks
Batch Processor Task
HIPS and SIPS Command
Toolbar
Button
Add to Session
—
—
Add to Mosaic
Process > New Mosaic
Combine Surfaces
Process > BASE Surface
Combine
Compute TPE
Process > Compute TPE
“COMPUTE TPE” ON PAGE 255
Apply Filters to Lines
Tools > Set Filters
“TPE FILTERING” ON PAGE 256 or
“SWATH FILTERING” ON PAGE 249
or
SINGLE BEAM FILTERING ON PAGE 262
Conversion Wizard
Tools > Conversion Wizard
“FILE CONVERSION” ON PAGE 169
Finalize Surface
Process > BASE Surface >
Finalize
—
“FINALIZE BASE SURFACE” ON
PAGE 427
Load Delta Draft
Process > Load Delta Draft
—
“DELTA DRAFT” ON PAGE 268
Compute GPS Tide
Process > Compute GPS Tide
—
“GPS TIDE” ON PAGE 269
Load Tide
Process > Load Tide
“TIDE” ON PAGE 227
Load TrueHeave
Process > Load TrueHeave
“TRUEHEAVE DATA” ON PAGE 237
Merge
Process > Merge
“MERGE” ON PAGE 272
CARIS HIPS and SIPS User’s Guide
Reference
“ADD TO MOSAIC” ON PAGE 554
—
“COMBINE” ON PAGE 429
571
Batch Processing: Batch Processor Tasks
Batch Processor Task
HIPS and SIPS Command
Toolbar
Button
Reference
Modify Queue
—
—
“MODIFY QUEUE” ON PAGE C-22
Recompute BASE
Surface
Process > BASE Surface >
Recompute
Recompute Contact
Position
Process > Recompute Contact
Position
—
“RECOMPUTE CONTACT POSITION” ON
PAGE 544
Recompute Towfish
Navigation
Process > Recompute Towfish
Navigation
—
“RECOMPUTE TOWFISH NAVIGATION”
ON PAGE 519
SIPS Template Wizard
Process >SIPS Template
Wizard
“SIPS TEMPLATE WIZARD” ON
PAGE 557
Sound Velocity
Correction
Process > Sound Velocity
Correction
“SOUND VELOCITY PROCESSING” ON
PAGE 241
Surface Cleaning
Tools > Surface Cleaning
“SURFACE CLEANING” ON PAGE 459
572
“RECOMPUTE” ON PAGE 423
CARIS HIPS and SIPS User’s Guide
24
24.
Create Publications
Create Publications: Overview
Overview
HIPS data can be printed either to paper or Portable Document
Format (PDF) files using templates.
Basically, templates are blank forms where data can be
positioned using object tags that act as place holders for that
data. HIPS contains a group of predefined templates (based on
paper size and orientation) in the Session folder. Templates have
a RPX file extension.
When a template is opened in HIPS (using the Publish
command), the object tags in the template are filled with data
from the currently open field sheet or session. The object tag must
match the object type open in HIPS.
Object tags are contained in a dictionary file (HIPS.dic) located in
the System folder.
You can apply resolution and scale settings for image capture,
and select border, grid and scale bar styles. You can change the
text values in label objects.
View your finished publication in the Publication Viewer, as well
as copy, print and export it.
Publication utilities
Two auxiliary applications for creating and editing templates are
included with this installation:
•
The CARIS Publication Designer is used for building or
modifying templates. Dictionary files can be opened in the
Publication Designer and tags from those files can be
inserted into the template. Other elements such as images or
text can also be added for visual effect. The Publication
Designer is opened from
Start > Programs > CARIS > Utilities > Publication
Designer.
•
The CARIS Template Editor is used for creating or
modifying borders, projected grids, and scale bars that can be
opened with the template. The Template Editor is opened
from Start > Programs > CARIS > Utilities >Template
Editor. It can also be opened from HIPS using Edit >
Template Editor.
Both the Publication Designer and Template Editor include
reference files and help to assist you with these applications.
574
CARIS HIPS and SIPS User’s Guide
Create Publications: Overview
Open a Template
A template contains object tags that act as place holders for data.
When a publication is created in HIPS and SIPS, these tags are
automatically filled with data from the open session.
View > Publish
2. Select the Publication Designer command.
The New Publication dialog box is displayed.
Tool
Menu
1. Make sure that a session file or field sheet is open.
3. Click Browse to select a template file. The file name and path are
displayed in the Template File field.
The Publication Objects list contains object tags from the HIPS.dic
file that were inserted into the template. If an object tag contains
a check mark, then the settings are saved in memory and are
ready to be opened in the document. Tags representing image
objects must always be set before the template is ready to be
opened.
To apply the settings for an image object, see “APPLY IMAGE
SETTINGS” ON PAGE 577.
To apply the settings for a scale bar, see “APPLY SCALE BAR SETTINGS”
ON PAGE 578.
To enter new values for text fields go to “ENTER TEXT VALUES” ON
PAGE 579.
576
CARIS HIPS and SIPS User’s Guide
Create Publications: Overview
4. Otherwise, click Publish to view the finished publication in the
Publication Viewer.
Apply Image Settings
5. Select an unchecked image object tag so it is highlighted.
6. Click Settings.
The Image Settings dialog box is displayed.
7. Select the Resolution (DPI) setting for image capture.
8. Select a scale.
The following steps are for selecting the border and grid features.
Remember: You can use the CARIS Template Editor to
modify existing borders or grids, or, create custom borders or
grids.
9. Select the View contains borders check box to select a border.
10. Choose a border from the Style drop-down list.
11. Select the View contains geographic grid check box to select a grid.
12. Choose a border from the Style drop-down list.
13. Click OK to save the settings and close the dialog box.
The Capture button in the New Publication dialog box is now
active.
CARIS HIPS and SIPS User’s Guide
577
Create Publications: Overview
14. Click Capture to commit the above settings to memory.
The image object now has a check mark beside it.
Apply Scale Bar settings
15. Select an unchecked scale bar tag.
16. Click Settings.
The Scale Bar Settings dialog box is displayed.
17. Select a resolution for the scale bar.
18. Type a scale.
19. Choose a scale bar type from the Style drop-down list.
Remember: You can use the CARIS Template Editor to
modify existing scale bar styles, or, create new scale bar
styles.
20. Select a degree value from the drop-down list. to rotate the scale bar
21. Click OK.
The Capture button in the New Publication dialog box is now
active.
22. Click Capture to commit the above settings to memory.
The scale bar object now has a check mark beside it.
578
CARIS HIPS and SIPS User’s Guide
Create Publications: Overview
Enter text values
23. If you want to change the value in a label object tag, select the object
in the Publication Objects list so that the Text Fields field is active.
24. Type a new value in the field and click Set.
The value for that object is now changed.
(Note that the XML files and Current point capture clipboard options
are not available in this implementation of HIPS and SIPS.)
25. Click Publish to view the finished publication.
The Publication Viewer window is opened.
CARIS HIPS and SIPS User’s Guide
579
Create Publications: Publication Viewer
Publication Viewer
The HIPS and SIPS data is displayed in the Publication Viewer.
Publication Viewer commands
The following table contains an outline of the commands used in
Publication Viewer.
Command
Tool
Purpose and Procedure
Save
—
Save a template file under a new name or to another location.
1. Select the Save command.
The Save dialog box is displayed.
2. Select a directory where you want to save the template file.
3. Type a name for the file.
4. Click Save.
The file is saved.
580
CARIS HIPS and SIPS User’s Guide
Create Publications: Publication Viewer
Command
Tool
Purpose and Procedure
Export
—
Export the template to another format.
1. Select the Export command.
The Export dialog box is displayed.
2. To select a new file path, click Browse and select a network path in the
Save in field.
3. In the File Name field, type a name.
In the Save as type field, select one of the following options:
• Adobe Acrobat (*.pdf)
• Rich Text Format (*.rtf)
• Microsoft Excel (*.xls)
• Hypertext (*.htm)
• Text file (*.txt)
• TIFF image (*.tif)
4. Click Save.
The template is exported to specified location, where you can open and
view it using any software that supports the file type you specified.
Print
The Print command displays the Print dialog box, from which you can print
the template to a printer, plotter or file location.
1. Select the Print command.
The Print dialog box is displayed.
2. Perform one of the following steps:
• To print to a network printer, select a printer in the Select Printer.
• To print to a network storage location, select the Print to file option.
3. In the Page Range section, select one of the following options:
• All
• Selection
• Current Page
• Pages
4. Click Print to print the template to the specified location.
Copy
Send a copy of the template to the operating system’s clipboard. From the
clipboard, you can paste the template in any application that supports the
template’s formatting.
1. Select the Copy command.
A copy of the template is placed on the clipboard.
Find
You can search the template for text that matches specified search criteria.
The Find command displays a dialog box in which you can specify search
criteria.
1. Select the Find command. The Find dialog box appears.
2. In the Find what field, type the text string to use as search criteria.
3. Optional: Select one of the following search refinement tools:
• Match whole word only
• Match case
• Direction:
• Up
• Down
4. Click Find Next.
The Find feature searches the template for text that matches the specified
search criteria. When a text string is encountered that matches the search
criteria, it is highlighted.
5. Perform one of the following steps:
• Click Find Next to search for the next instance that matches the
specified search criteria.
• Click Cancel to close the Find dialog box.
CARIS HIPS and SIPS User’s Guide
581
Create Publications: Publication Viewer
Command
Single Page
Tool
Purpose and Procedure
The Single Page tool displays one template page per display screen.
1. To display the template in single page mode, select the Single Page
command.
Multiple
Pages
The Multiple Page tool displays multiple template pages per screen.
Zoom Out
Zoom out of the template display.
1. To display the template in multiple page mode, select the Multiple Page
command.
The display refreshes to display multiple pages at a time.
1. To zoom out of the template display, select the Zoom Out command.
Zoom In
Zoom into the template display.
1. To zoom into the template display, select the Zoom In command.
The display refreshes to display the template at a larger scale.
Custom Zoom
Previous Page
Zoom into or out of the template display using a preset factor.
To zoom into or out of the display using a preset factor, do one the
following steps:
• Type a percentage value in the custom zoom field;
• select one of the preset Zoom factors in the drop down list.
The display refreshes to re-display the template at its new zoom setting.
The Previous Page tool reverts the display to the previous template page.
1. Select the Previous Page command.
The display reverts to the previous template page.
Next Page
The Next Page tool advances the display to the next template page.
1. Select the Next Page command.
The display advances to the next template page.
Custom Page
Advance the display to a specified page.
1. Type a new page value in the custom page field.
The display refreshes to show the specified template page.
Move
Backward
Using the Move Backward command, you can navigate through the
template pages in non-sequential order. For example, if the previously
displayed template page is page 5 of 11 (5/11) and you are currently
viewing page 10 of 11 (10/11), the Move Backward command displays
page 5 of 11.
1. Select the Move Backward command.
The previously displayed template page is displayed.
Move Forward
582
The Move Forward tool reverts to the page that was displayed before the
Move Backward command was used.
2. Select the Move Forward command.
The page that was displayed before the Move Forward command was
used is displayed again.
CARIS HIPS and SIPS User’s Guide
Create Publications: Template Editor
Template Editor
The Template Editor defines borders, scale bars, and projected
grids that can be saved and applied when creating templates for
publication.
Template Editor files can be saved using any name but must have
the following file extensions.
Template Component
File Extension
Borders
.bsd
Scale Bar
.ssd
Projected Grid
.grd
Default templates are stored in the ..\System directory where
HIPS is installed. Your customized template files can be stored in
any directory you choose
Menu
1. Select the command.
Edit > Template Editor
The Template Editor is displayed.
For more information, see the Template Editor help that is
available in that application.
CARIS HIPS and SIPS User’s Guide
583
Create Publications: Template Editor
584
CARIS HIPS and SIPS User’s Guide
25
25.
Export Data
Export Data: Introduction
Introduction
The Export Wizard converts HIPS data products (soundings,
BASE Surfaces, mosaics, etc.) to the following formats:
•
ASCII text file
•
CARIS map
•
Bathymetric Attributed Grid (BAG)
•
Generic Sensor Format (GSF) files
•
Hydrographic Object Binary (HOB) file
•
Hydrographic Transfer Format (HTF) files
•
TIFF image
•
Unified Sonar Imaging Processing System (UNISIPS) format
The HIPS Export Wizard is a separate application launched from
the HIPS and SIPS interface.
The number of dialog boxes displayed by the Export Wizard
depends on the format selected in the first dialog box.
1. Select the t command.
File > Export
The Export Wizard is displayed.
See the table below to view export options.
Tool
Menu
t
Formats
Format
Description
Refer to...
BASE Surface to
ASCII
Export BASE Surface position and attribute data
to a text file.
“BASE SURFACE TO ASCII” ON
PAGE 591
BASE Surface to
BAG
Export BASE Surface elevation and uncertainty
values to Bathymetric Attributed Grid (BAG) file
“BASE SURFACE TO BAG” ON
PAGE 593
BASE Surface to
Image
Export BASE Surface attribute data as a
georeferenced image for further processing in a
CARIS product or other application.
“BASE SURFACE TO IMAGE” ON
PAGE 595
Contacts
Export contacts to a CARIS map, an ASCII file,
and/or a TIFF image.
“CONTACTS” ON PAGE 597
GSF to CARIS
Export soundings and tracklines from one or
“GSF TO CARIS
more Generic Sensor Format (GSF) files to a
PAGE 600
CARIS map. The GSF data does not have to be
converted to HIPS format prior to using this utility.
586
MAP/HOB” ON
CARIS HIPS and SIPS User’s Guide
Export Data: Introduction
Format
Description
Refer to...
GSF to HOB
Export GSF data to a Hydrographic Object Binary
(HOB) file that stores feature objects and
associated attribute data. The HOB file can
contain links to CARIS spatial objects.
“GSF TO CARIS MAP/HOB” ON
PAGE 600
HIPS Tide to ASCII
Export tide data from track lines to text format.
“HIPS TIDE TO ASCII” ON
PAGE 604
HIPS to ASCII
Export HIPS data to a customized text listing of
soundings that you can load into other software
systems.
“HIPS TO ASCII” ON PAGE 605
HIPS to CARIS
Export HIPS data to a CARIS map. This option
contains three modes of exporting data:
soundings, tracklines and swaths.
“HIPS TO CARIS MAP” ON
PAGE 608
HIPS to GSF
Export processed HIPS data to GSF format. A
new GSF file is created for each trackline that is
exported from HIPS. Conversely, when HIPS
data is created from GSF data, a copy of the
original GSF file is maintained inside the HIPS
directory structure. The Export to GSF function
updates these GSF files.
“HIPS TO GSF” ON PAGE 612
HIPS to HOB
Export HIPS data to HOB files that store feature
objects and associated attribute data. The HOB
file can contain links to CARIS spatial objects.
This option contains three modes of exporting
data: soundings, tracklines and swaths.
“HIPS TO HOB” ON PAGE 613
HIPS to HTF
Export data to a Hydrographic Transfer Format
(HTF) file. The HTF is a text file that contains a
header section and a sounding record. The
Export wizard can save a header section so it can
be loaded into multiple HTF files.
“HIPS TO HTF” ON PAGE 615
SIPS to UNISIPS
Export SIPS data to a Unified Sonar Imaging
Processing System (UNISIPS) format.
“SIPS TO UNISIPS” ON
PAGE 618
Mosaic to Image
Export a mosaic as a TIFF image for further
processing in a CARIS product or other
application.
“MOSAIC TO IMAGE” ON PAGE 619
CARIS HIPS and SIPS User’s Guide
587
Export Data: Select Format (Step 1)
Select Format (Step 1)
The Select Formats dialog box displays the available formats for
exporting data.
1. Select an export format.
2. Click Next.
588
CARIS HIPS and SIPS User’s Guide
Export Data: Select Files (Step 2)
Select Files (Step 2)
The second dialog box lets you select the data for export.
The options in the dialog box and the data that it displays vary
with the product you are exporting, and the export choice you
made at Step 1.
BASE Surface/Mosaic/
Grid/BAG
The dialog box displays all project files with associated field
sheets and layers (grids, contacts, mosaics, etc.).
1. Expand a project file tree and select the layer you want to export
(contact, grid, mosaic, or BASE Surface). If you are exporting a
mosaic to an image, you can select more than one mosaic for export
by holding the Ctrl button while selecting mosaics.
Contacts/HIPS
soundings/Tide/SIPS
The dialog box displays the existing projects. All HIPS and SIPS
projects are organized in a Project/Vessel/Day/Line structure.
1. Select all or some of the files in the Project/Vessel/Day/Line directory.
Click the expand icon (+) icon to view the file tree, if needed.
HIPS to HTF
The dialog box displays either a list of projects and associated
field sheets or the Project/Vessel/Day/Line data structure
depending on whether you select the Export Field Sheet Product or
Export Raw Data options.
1. Select the Export Field Sheet Product option to export layer data or
select the Export Raw Data option to export sounding data from
tracklines.
CARIS HIPS and SIPS User’s Guide
589
Export Data: Select Files (Step 2)
If you selected the Export Raw Data option, the Include Rejected
option is active. This option includes rejected soundings in the
export process.
2. [Optional] Select the Include Rejected option to export rejected data.
If the Export Raw Data option is selected, the file tree is refreshed
to show the Project/Vessel/Day/Line directory structure.
3. Open a project or session file tree and select a layer or trackline data.
GSF
The dialog box displays a section for the file path and name of the
GSF file
1. Click Select to choose the GSF files to be imported to CARIS/HOB
format.
The file path and name is displayed in the dialog box.
2. To remove a file, select it so it is highlighted and click Remove.
The file is no longer visible.
590
CARIS HIPS and SIPS User’s Guide
Export Data: BASE Surface To ASCII
BASE Surface To ASCII
Export BASE Surface attributes to an ASCII text file.
If you exporting attribute data from a BASE Surface or weighted
grid created prior to HIPS and SIPS 6.1, the Step 4 dialog box is
not displayed because the default measurement unit is metres.
BASE Surface to ASCII (Step 3)
1. Type a path and name for the file, or click Browse to select a folder
and then type the file name.
2. Select the position units for data from the drop-down list:
•
ground units (east, north, depth)
•
geographic DMS (latitude, longitude, depth)
•
geographic DMS (no formatting)
•
Geographic DD (decimal degrees)
3. Select how many digits are displayed to the right of the decimal point
by selecting a number using the Precision up or down arrow buttons.
4. Select the BASE Surface attribute values to be recorded in the ASCII
file by selecting the attribute in the Available column and clicking Add
to move it to the Active column.
5. To remove an attribute, select the attribute from the Active column and
click Remove to move it back to the Available column.
6. Choose a Attribute Precision value (number of digits to the right of
decimal point) for attributes in the Active column by selecting an
attribute and clicking the up or down arrow buttons.
CARIS HIPS and SIPS User’s Guide
591
Export Data: BASE Surface To ASCII
7. Select the Headers check box to create print attribute names at the top
of the attribute rows.
8. Select either the Space, Comma, or Tab check boxes to use these
characters as delimiters, or select the Other check box and type a
character to use a delimiter.
9. Click Next.
BASE Surface To ASCII (Step 4)
This dialog box sets the unit type for recording data. The fields
that are active in this dialog are determined by the attributes
selected in the previous dialog box.
1. Select the units for recording BASE Surface data:
•
metres and kilometres
•
fathoms (US and international)
•
feet (US and international)
•
yards (US and international)
•
miles (US, international, and nautical)
2. Click Next.
592
CARIS HIPS and SIPS User’s Guide
Export Data: BASE Surface to BAG
BASE Surface to BAG
Export a BASE Surface to a Bathymetric Attributed Grid file.
BASE Surface to BAG (Step 3)
1. Type the path and name for the BAG file, or click Browse and select a
directory and name.
2. Select the BASE Surface attribute values to export from the dropdown list.
Metadata is general information about the file (the who, what,
where, why, and how).
3. Type any information in the Abstract field.
4. Select a Status from the drop-down menu.
5. Click Next.
CARIS HIPS and SIPS User’s Guide
593
Export Data: BASE Surface to BAG
BASE Surface to BAG (Step 4)
This dialog box is a continuation of the metadata section.
1. Type personal information in the Name, Position, and Organization
fields; select a Role from the drop-down menu.
2. Select a Legal constraint from the drop-down list. If the
otherRestrictions option is selected, you can type it into the Other field.
3. Select a Security constraint from the drop-down list. Type other
information in the Notes field.
4. Type a Vertical Datum. Remember that the values above the vertical
datum are positive.
5. Click Next.
594
CARIS HIPS and SIPS User’s Guide
Export Data: BASE Surface To Image
BASE Surface To Image
Select the following links to export a BASE Surface to an image
file.
BASE Surface to Image (Step 3)
1. Select a BASE Surface attribute to display as a georeferenced image.
If the selected attribute has a legend associated with it, you can
include this legend in the image. The legend will be drawn
according to the property settings. If the cover of the field sheet
matches the cover of the BASE Surface, the field sheet cover can
be expanded to accommodate the legend so it does not cover the
surface.
2. Select the Display Raster Legend check box to draw a raster legend
for the selected attribute.
3. Select the Expand cover to fit the raster legend check box to expand
the area cover so that the legend does not overlay the surface.
4. Click Browse to select the file path and name of the image file.
5. Select a colour format for the image.
•
24 Bit (16 million colours)
•
8 Bit (256 colours)
The Surface can be saved as a TIFF file with either an IGA or a
TFW georeferenced file, or both. You can save the image as a
GeoTIFF image that records the georeferenced information
directly in the .TIFF file.
CARIS HIPS and SIPS User’s Guide
595
Export Data: BASE Surface To Image
6. Select a geo-reference format for the image:
•
GeoTIFF
•
IGA/TIFF
•
TFW/TIFF
7. Click Next.
596
CARIS HIPS and SIPS User’s Guide
Export Data: Contacts
Contacts
Export contacts to a CARIS map and/or an ASCII text file. You
can also export contact snapshot images to TIFF files. The ASCII
files are structured to be easily imported into a relational
database.
If you select ASCII, you will have to browse to a folder location
and type a file name. This name is used as the first component
name of four files that will be created to store the contact
information:
•
filename_ContactLine.txt contains information
identifying the survey line and indexes to the other files.
•
filename_ContactSingle.txt contains all the information
for single point contacts.
•
filename_ContactMulti.txt contains all information for
single point contacts.
•
filename_ContactMultiPoints.txt contains all location
information for multipoint contacts.
For more information on the structure of contact files, see
“CONTACT FILE FORMATS” ON PAGE 657.
Contacts (Step 3)
1. Select the Export Image check box to export the contact(s) in TIFF
image format.
CARIS HIPS and SIPS User’s Guide
597
Export Data: Contacts
2. If you select Export Image, select from the following image formats:
•
Mosaic: This option creates a georeferenced TIFF image from
contact data.
•
Speed Corrected: This option calculates the distance between
profile lines in the contact and corrects for vessel speed.
•
Uncorrected: This option does not correct for vessel speed and
renders a one-to-one correspondence between the side scan
image and the contact.
3. To export the colour map that was selected in the Side Scan Editor,
select the Use Colour Map Specified in Contact File.
4. To export the contact with a new colour map, select the
Use Other Colour Map option and select the map from the drop-down
list.
The selected colour map is displayed in the Preview field.
5. Select the directory location for the contact. You can select from two
options:
•
Save Images in the Line Directory: This option saves the contact
data to the line file in the HIPS/SIPS Project/Vessel/Day directory
structure that you selected in the second dialog box.
•
Save Images in User Defined Directory: This option saves the
contact data in another directory. Click Browse to select the folder
where you want to save the data.
6. Click Next.
598
CARIS HIPS and SIPS User’s Guide
Export Data: Contacts
Contacts (Step 4)
This dialog box contains options for exporting contact data to a
HOB or CARIS file
1. Select either the Export to CARIS Map or Export to ASCII check
boxes. Both can be selected at the same time.
2. Type a file name and path to store the contact data after export, or
click Browse to select the file path (both CARIS data and ASCII text
files are typically stored in ..\Hips\CARIS_Files).
3. Type a layer number for the contact data in the Theme Number field.
4. Type a symbol size for the contact data in the Symbol Size field.
5. Click Next.
CARIS HIPS and SIPS User’s Guide
599
Export Data: GSF to CARIS Map/HOB
GSF to CARIS Map/HOB
The Generic Sensor Format (GSF) to CARIS/HOB function loads
soundings and track lines from one or more GSF files into a
CARIS map or HOB file. GSF data does not have to be converted
to HIPS data prior to using this utility.
GSF to CARIS/HOB (Step 3)
Data can be exported either in the form of soundings or track
lines:
•
Soundings. Export all soundings (subject to the HIPS
Sounding Status and Data Thinning settings) that fit within
the boundaries of the work file.
•
Track Lines. Export a line that connects the centre of each
swath for each survey line, thus showing the track of the
vessel along each survey line. It is not necessary to export
soundings to use this option.
1. Select either the Export Soundings or the Export track lines check box.
2. If you selected Export Soundings, complete any or all of the following
fields:
•
Attributes: Select Basic or Advanced from the drop-down list.
The Basic Attributes option creates mandatory CARIS feature
attributes for the map file, such as feature code, user number
and source ID.
600
CARIS HIPS and SIPS User’s Guide
Export Data: GSF to CARIS Map/HOB
The Advanced Attributes option creates additional CARIS
feature attributes for soundings such as time stamps, launch
identifier and tidal correction.
•
Status: Select soundings flagged as Selected, Accepted or
Accepted and Rejected.
•
Feature Code: Select a feature code for the soundings from the
drop-down list.
•
User Number: Type a number value for layering data in the CARIS
map or HOB file.
•
Group By Beam: Load soundings into user numbers according to
sonar beam number. For example, all soundings from beam 37
are loaded to user number 37 in the CARIS map file or HOB file
3. If you selected Export Tracklines, complete any or all of the following
fields.
•
Feature Code: Select a feature code for the track lines object from
the drop-down list.
•
User Number: Type a number value for layering data in the CARIS
map.
4. Select the Include Offline Data check box to include data recorded
during turns between track lines.
5. Click Next.
The next dialog box is determined by whether you are exporting
to a CARIS map or HOB file.
CARIS HIPS and SIPS User’s Guide
601
Export Data: GSF to CARIS Map/HOB
GSF to CARIS (Step 4)
This dialog box is displayed if you are exporting to a CARIS map.
1. Click Browse to select a CARIS map for data export, or type the name
of a new map.
The map file path and name are displayed in the CARIS Map field.
The CARIS Source ID is a 12-character alphanumeric attribute in
CARIS maps. The ID can be the first or last 12 characters in a
GSF project name.
2. Choose either the first 12 characters or the last 12 characters for the
CARIS Source ID.
3. Click Next.
If you created a new CARIS map in Step 4, a projection list is
displayed in the next dialog box. Otherwise you can begin export
of the data in the next dialog box.
602
CARIS HIPS and SIPS User’s Guide
Export Data: GSF to CARIS Map/HOB
GSF to HOB (Step 4)
This dialog box is for saving the HOB file that contains the
exported GSF data.
1. Click Browse and select a location and name for the HOB file.
2. Click Next.
CARIS HIPS and SIPS User’s Guide
603
Export Data: HIPS Tide to ASCII
HIPS Tide to ASCII
Export HIPS tide data from selected track lines to a TID file. You
can create TID files from single or multiple track lines in a
project. TID files can be viewed in a text editor.
HIPS Tide to ASCII (Step 3)
This dialog box creates the output tide file.
1. Click Browse and use the standard Windows Open dialog box to
select a path and name for the output TID file.
The path and name of the tide file is displayed in the Output File
Name field.
2. Select the Include Rejected Records check box to include tide records
that have been rejected.
3. Select GPS Tide to use tides calculated from a GPS ellipsoid height.
4. Select Smooth data to use tide data that has been smoothed for
localized variability.
604
CARIS HIPS and SIPS User’s Guide
Export Data: HIPS To ASCII
HIPS To ASCII
The HIPS to ASCII function creates a customized text listing of
soundings that you can load into other software systems.
HIPS to ASCII (Step 3)
Each sounding in a cleaned HIPS dataset are stored with bits
that determine the status of that sounding. You can choose to
restrict the export process to soundings with specific status flags.
1. To export soundings with a specific status flag, select any of the
Sounding Status check boxes.
2. Choose the sounding’s unit of measurement by selecting either Metres
or Feet.
The Data Binning option divides the survey area into a grid to select
the shoal- or deep-biased soundings from each cell for export. The
Bin Size option sets the size of the grid cells.
3. To apply a data thinning function, select the Data Binning check box.
4. Type the size for the grid cell in the Bin Size field and select either
Metres or Feet.
5. Select either the Shoal-Biased or Deep-Biased options to export only
the shoalest or deepest soundings, respectively, to the ASCII file.
Soundings can be selected for export from each grid cell in the
entire survey area or by processing each track line in sequence.
6. Select either the By Area or By Line options.
CARIS HIPS and SIPS User’s Guide
605
Export Data: HIPS To ASCII
7. Select One File to export all data to a single file or select Multiple Files
to export data to separate files for each survey line.
8. Select an output location for the data.
•
If you select One File, type a name and file path for the ASCII file,
or click Browse to select a location and name for the file.
•
If you select Multiple Files, click Browse to select a folder to save
the files. The files are automatically named according to
Project_Vessel_Date_SurveyLine.
9. Click Next.
HIPS to ASCII (Step 4)
This dialog box lists the attributes that can exported to the ASCII
file and the delimiters used to separate data in the file.
1. Select the sounding attributes to be included in the ASCII file.
•
To add an attribute, select the attribute in the Available list and
click Add to move it to the Active list.
•
To remove an attribute, select the attribute in the Active list and
click Remove to move it to the Available list.
2. To change the order that attributes are exported, select the attribute in
the Active list and click the up or down arrow buttons.
3. Select the Headers check box to create print attribute names at the top
of the attribute rows.
4. Select either the Space, Comma, or Tab check boxes to use these
characters as delimiters, or select the Other check box and type a
character to use as a delimiter.
606
CARIS HIPS and SIPS User’s Guide
Export Data: HIPS To ASCII
You can define the boundaries of the ASCII map data from the
boundaries of an existing CARIS map. If you do not select this
option, the extents are defined from the ASCII data.
5. Select the Clip to CARIS Map check box to use a CARIS map to
define the boundaries of the ASCII map data.
6. Click Browse to select an existing CARIS map.
7. To use the coordinate system from the selected CARIS map for the
ASCII data, click the check box.
If you selected the Use Coordinate System From CARIS Map option,
the next dialog box prompts you to export the data. If you did not
select this option, the next dialog box prompts you to select a
coordinate system.
8. Click Next.
HIPS To ASCII (Step 5)
This dialog box sets the unit type for recording data. The fields
that are active in this dialog are determined by the attributes
selected in the previous dialog box.
1. Select the units for recording sounding data:
•
metres and kilometres
•
fathoms (US and international)
•
feet (US and international)
•
yards (US and international)
•
miles (US, international, and nautical)
2. Click Next.
CARIS HIPS and SIPS User’s Guide
607
Export Data: HIPS To CARIS Map
HIPS To CARIS Map
Export data to a CARIS map.
HIPS to CARIS (Step 3)
You can select which soundings are to be exported and how they
will be stored in the CARIS map.
The Export Soundings option exports all soundings (subject to the
sounding status and data binning settings).
1. Select the Export Soundings check box if you want to export
soundings to a CARIS map (see the next dialog box for the Export
Tracklines and Export Swaths options).
There are four methods for exporting sounding attributes to a
CARIS map.
608
•
Basic: The basic sounding attributes in the CARIS map.
These include user number, feature code, and source ID. This
information is adequate to generate products such as
sounding plots, contour plots, and DTMs.
•
Extended. Basic attributes plus time stamps, launch identifier
•
Extended with Key: The extended attributes set, plus the profile
(first four letters of the vessel name), and tidal correction.
number and beam number as the CARIS Key. The profile
number and the beam number, in addition to the other
attributes, allow each sounding to be identified uniquely
with respect to the original data set.
CARIS HIPS and SIPS User’s Guide
Export Data: HIPS To CARIS Map
•
Extended with Unique Key: The extended attributes set, plus
every object is given a unique key.
This additional information allows more flexibility for visualizing
and manipulating CARIS files. For example, if time stamps are
associated with each sounding, you can limit the display of
soundings based on a time range.
However, each extra attribute adds to the storage requirements.
More disk space is required to store the work file, and any HIPS
program that processes the file must do more work and use more
time and CPU resources.
2. Select from the four options in the Attributes drop-down list.
3. Select a new feature code for the soundings, if needed.
The Group by Beam Number option layers soundings according to a
beam number in the CARIS file. Soundings belonging to a beam
are assigned to the same user number in the map. User numbers
in CARIS file are similar to layering. This option is used when
exporting soundings from checklines into a separate checkline
map so that a Quality Control Report can be generated. If you do
not select this option, then a single user number will be used to
hold all the exported soundings.
4. Select the Group by Beam Number check box to layer soundings
according to beam numbers in the CARIS map.
The User Number option is available only if you do not select the
Group by Beam Number option.
5. [Optional] Type a User Number to which all soundings are to be
assigned.
6. To export soundings with a specific status flag, select any of the
Sounding Status check boxes.
The Data Binning option divides the survey area into a grid for
sounding selection. The Bin Size sets the size of the grid cells.
7. To apply a data binning function on export, select the Data Binning
check box.
8. Type the size for the grid cell in the Bin Size field and select either
Metres or Feet.
9. Select either Shoal-Biased or Deep-Biased to export only the shoalest
or deepest soundings from each cell, respectively, to the CARIS file.
Soundings can be selected for export from the total survey area or
by processing each track line in sequence.
10. Select either the By Area or By Line options.
11. Click Next.
CARIS HIPS and SIPS User’s Guide
609
Export Data: HIPS To CARIS Map
HIPS to CARIS (Step 4)
This dialog box sets the track line and swath export options.
The Export Track Lines option connects a line along the centre of
each swath, thus showing the track of the vessel along each
survey line. It is not necessary to import soundings to use this
option.
The Export Swaths command connects a set of lines (one per swath)
along the outermost port and starboard beams, thus showing the
coverage of each ping. It is not necessary to import soundings to
use this option.
1. Select the Export Track Lines check box to export a line representing
the track of the vessel along the survey area.
2. Type a new feature code for the vessel, if needed.
3. Type a User Number for the vessel so it is distinguished from other
vessels in the same CARIS map.
4. Select a new Towfish Feature Code, if needed.
5. Type a User Number for the towfish so it is distinguished from other
vessels in the same CARIS map.
6. Select the Exclude Rejected Record(s) check box to not include this
data.
7. Select the Export Swaths check box to export a set of lines that
represents the swaths along the survey.
8. Type a User Number for the swath so it is distinguished from other
swaths in the same CARIS map.
9. Click Next.
610
CARIS HIPS and SIPS User’s Guide
Export Data: HIPS To CARIS Map
HIPS to CARIS (Step 5)
1. Click Browse to select a CARIS map for data export, or type the name
of a new map.
The map file path and name are displayed in the CARIS Map field.
The Source ID is a 12-character alphanumeric attribute in
CARIS maps. The ID can be the first or last 12 characters in a
project name or line name.
2. Select either Project Name or Line Name to use as a Source ID.
3. Choose either the first 12 characters or the last 12 characters for the
Source ID.
The Clip to CARIS Map option cuts the HIPS data at the boundaries
of an existing CARIS map. If this option is not selected, the
geographic extents of the map are extended to accommodate the
HIPS data.
4. Select the Clip to CARIS Map check box to implement this option.
5. Click Next.
If you created a new CARIS map in Step 1, a dialog box for
selecting a projection is displayed. Otherwise you can begin
export of the data in the next dialog box.
CARIS HIPS and SIPS User’s Guide
611
Export Data: HIPS To GSF
HIPS To GSF
The HIPS to GSF function exports processed HIPS data to a GSF
format. A new GSF file is created for each track line that is
exported from HIPS.
Conversely, when HIPS data is created from GSF data, a copy of
the original GSF file is maintained inside the HIPS directory
structure. The Export to GSF function updates these GSF files.
HIPS to GSF (Step 3)
1. Click the Browse button to select a location for the GSF files.
The Browse for Folder dialog box is displayed. The stored GSF file
will have the same name as the track line.
2. Select a directory to store the GSF data and click OK to close the
dialog box.
The file path is displayed in the Output File field.
3. To export entire projects and maintain the HIPS Project/Vessel/Day/
Line structure in the output, click the Maintain PVD Hierarchy check
box.
4. Click Next.
612
CARIS HIPS and SIPS User’s Guide
Export Data: HIPS To HOB
HIPS To HOB
The Hydrographic Object Binary (HOB) file stores feature objects
and associated attribute data. The HOB file can contain links to
CARIS spatial objects.
HIPS to HOB (Step 3)
The Export Soundings option exports all soundings (subject to the
sounding status and data binning settings).
1. Select the Export Soundings check box to export soundings to a
CARIS map (see the next dialog box for the Export Tracklines and
Export Swaths options).
2. To export soundings with a specific status flag, select any of the
Sounding Status check boxes.
The Data Binning option divides the survey area into a grid for
sounding selection. The Bin Size sets the size of the grid cells.
3. To apply data binning, select the Data Binning check box.
4. Type the size for the grid cell in the Bin Size field and select either
Metres or Feet.
5. Select either Shoal- or Deep-Biased to export only the shoalest or
deepest soundings, respectively, to the CARIS file.
Soundings can be selected for export from the total survey area or
by processing each track line in sequence.
6. Select either the By Area or By Line options.
CARIS HIPS and SIPS User’s Guide
613
Export Data: HIPS To HOB
The Export Track Lines option connects a line along the centre of
each swath, thus showing the track of the vessel along each
survey line. It is not necessary to export soundings to use this
option.
The Export Swaths command connects a set of lines (one per swath)
along outermost port and starboard beams, thus showing the
coverage of each ping. It is not necessary to export soundings to
use this option.
7. Select the Export Track Lines and Export Swaths options.
8. Click Next.
HIPS to HOB (Step 4)
1. Click the Browse button to select a location for the HOB files.
The Browse for Folder dialog box is displayed.
2. Select a directory to store the HOB data and click OK to close the
dialog box.
The file path is displayed in the Output File field.
3. Click Next.
614
CARIS HIPS and SIPS User’s Guide
Export Data: HIPS To HTF
HIPS To HTF
The HIPS and SIPS Export Wizard converts field sheet layer data
and soundings to a Hydrographic Transfer Format (HTF) file.
Hydrographic Transfer
Format
The HTF file is an ASCII file that can be opened in any text editor
(such as Notepad). It consists of two sections: a header section
and a sounding data record.
•
The header contains general information about the survey.
•
The sounding data record contains the depths and other
relevant information.
The total number of fields generated in the sounding data record
depends on the survey. At the start of the sounding data record is
a Field Population Key that gives each field a 1 bit to show that
a field is included, or a 0 bit to show if a field is not included.
For example: [0000111110000000000]
In the above Field Population Key, fields 5 to 9 contain data
(hence the 1 bits), while fields 1 to 4 and 10 to 20 contain no data
(hence the 0 bits). Fields without data are not written to the HTF
file when it is generated. There are a total of 20 HTF fields in the
sounding data record. Two additional fields are added by the
Export Wizard for beam and profile number. Extra fields can be
added, if needed. The HTF export automatically exports
TPE depth and TPE position values if these are included in the
track line.
The HTF file contains an ordered list of all possible fields and a
description of each field.
Hydrographic Transfer
Format Template
Sometimes the same header information can be used for multiple
HTF files. The export wizard gives you the option of saving a
header for use in another file. Headers are saved as HTFT files
(Hydrographic Transfer Format Template). The file is in XML
format that can be viewed in a text editor or an XML-compliant
Internet browser.
CARIS HIPS and SIPS User’s Guide
615
Export Data: HIPS To HTF
HIPS to HTF
Enter the necessary header information. You can directly enter
the data or load it from an HTFT (Hydrographic Transfer Format
Template) file.
If you are exporting soundings, you can export all data to a single
file or export data from each survey line to its own file. This
option is not available for field sheet products.
1. Select an output location for the HTF file(s).
•
If you choose Export to One File, type a name and file path for the
HTF file, or click Browse to select a location and name for the file.
•
If you choose Export to Multiple Files, click Browse to select a
folder to save the HTF files. The files are automatically named
according to Project_Vessel_Date_SurveyLine.
2. To enter new header information, click the Value field next to the HTF
Header Field and type the data.
3. Click Load to open data from an existing HTFT file into the Value
fields.
4. Click Clear to remove data from all fields, if needed.
5. Click Next.
616
CARIS HIPS and SIPS User’s Guide
Export Data: HIPS To HTF
HIPS to HTF
1. Select the Include Survey Line Name check box to include this
information in the HTF file.
2. Select the Include Beam and Profile Information check box to include
the beam and profile numbers in the HTF file.
If you entered values in the depth sounder, positioning system,
and tidal station fields in the previous dialog box then the
respective fields in these tabs are enabled. If you did not enter
values, click Back and fill in the fields.
The Positioning Systems tab is for entering navigation systems
information.
3. Type the name and model (and/or any additional information) of the
system in the Name field.
4. Type the system used on the survey (GPS, DGPS, etc.).
The Depth Sounders tab is for entering sonar information.
5. Type the name and model of the sonar system used on the survey.
6. Type the mode of sonar (multibeam, single beam, multi transducer).
The Tidal Stations tab is for entering tide information.
7. Type the name of a tidal station.
8. Type the location.
9. Type the method used to acquire data (predicted, observed, etc.)
10. Click Save to save information to a new or existing HTFT file.
11. Click Next.
CARIS HIPS and SIPS User’s Guide
617
Export Data: SIPS To UNISIPS
SIPS To UNISIPS
Export SIPS data to a Unified Sonar Imaging Processing System
(UNISIPS) format.
SIPS TO UNISIPS (Step 3)
Select a file to store the data.
1. Click Browse to select a location for the UNISIPS files.
The Browse for Folder dialog box is displayed.
2. Select a directory to store the UNISIPS data and click OK to close the
dialog box. The UNISIPS file will have the same name as the track line
with a .u file extension.
3. Type a Sensor Name in the field (up to 10 characters).
The file path is displayed in the Output File field.
4. Click Next.
618
CARIS HIPS and SIPS User’s Guide
Export Data: Mosaic To Image
Mosaic To Image
You can export a mosaic or group of mosaics to an image format
for further processing in a CARIS product or other application.
Mosaic to Image (Step 3)
The field for the directory is labelled either as Output File Name or
Output Folder if there is more than one mosaic for export.
1. Click Browse, and select the file path and name of the image file. Or if
you selected more than one mosaic, select the folder that contains the
mosaics.
2. Select a colour format for the image.
•
24 Bit (16 million colours)
•
8 Bit (256 colours)
You can save the image as a TIFF file with either an IGA or a
TFW georeferenced file, or both. You can save the image as a
GeoTIFF image that records the georeference information
directly in the .TIFF file.
3. Select a georeference format for the image:
•
GeoTIFF
•
IGA/TIFF
•
TFW/TIFF
4. Click Next.
CARIS HIPS and SIPS User’s Guide
619
Export Data: Projection
Projection
All sounding data is stored in HIPS and SIPS as unprojected
longitude and latitude. This dialog selects the appropriate
coordinate system to reference the soundings. All soundings will
be transformed to this coordinate system as they are exported.
1. Choose a coordinate system by selecting a Projection Group from the
list.
2. Select a Zone associated with the Projection Group (the Key field is
filled when the Zone is selected).
3. Click Next.
620
CARIS HIPS and SIPS User’s Guide
Export Data: Export
Export
This dialog box shows the percentage of data exported and the
status of the export process.
1. Click Export.
A progress indicator shows the percentage of files converted to
the selected format.
CARIS HIPS and SIPS User’s Guide
621
Export Data: Export
622
CARIS HIPS and SIPS User’s Guide
A
A.
HIPS Status Flags
HIPS Status Flags: Status Flags and Values
Status Flags and Values
Within HIPS and SIPS data structure each sensor data value has
a series of status flags. Each profile in the depth and side scan
formats also has status flags, and each survey line has status
flags. The status flag settings are determined during data
cleaning and processing. They are used to control the generation
of new data layers such as BASE surfaces, tiles, and selected
soundings.
Status Flag
Value
Accepted
The default status of sounding.
Rejected
True if the sounding is rejected for any
reason.
Examined
Indicates that the sounding was verified.
Designated
Indicates that the sounding is the shoalest in a
cluster of soundings.
Outstanding
Indicates that the sounding needs further
examination.
Rejected by Swath Editor or
Single Beam Editor
True if sounding was rejected in the Swath
Editor or Single Beam Editor, or by the swath
or single beam filters.
Rejected by Hydrographer
True for soundings rejected manually by the
hydrographer within the Subset Editor.
Rejected by Surface Cleaning
True if sounding was rejected during surface
cleaning
Rejected by Depth Gate
True for soundings rejected by the depth gate
during conversion.
Rejected by Disabled Beam
True for soundings rejected at conversion
time because a disabled beam flag in the VCF
or due to a pre-flagged bad sounding in the
original raw data format.
Rejected by TPE
True for soundings rejected during Total
Propagated Error filtering.
Rejected by surface filter.
True for soundings rejected during surface
filtering.
Rejected by Auto Classification
True if the sounding fails the auto
classification tests filter contained in the HIPS
v4.3.3 subset mode. This flag is not used in
v5.x software.
Rejected by Bad Navigation
True if the profile was rejected for bad
navigation.
Rejected by Bad Gyro
True if the profile was rejected for bad gyro.
Rejected by Bad Heave
True if the profile was rejected for bad heave.
Rejected by Bad Pitch
True if the profile was rejected for bad pitch.
Rejected by Bad Roll
True if the profile was rejected for bad roll.
CARIS HIPS and SIPS User’s Guide
624
HIPS Status Flags: Status Flags and Values
Status Flag
Value
Rejected by Bad Tide
True if the profile was rejected for bad tide.
CARIS HIPS and SIPS User’s Guide
625
HIPS Status Flags: Status Flags and Values
626
CARIS HIPS and SIPS User’s Guide
B
B.
Generic Data Parser
Generic Data Parser: Introduction
Introduction
HIPS can convert almost any single beam ASCII file through the
Generic Data Parser. The parser can also be used to add or
replace any sensor data in an existing project, except swath and
sweep bathymetry and side scan imagery.
For example, if high-precision positions were obtained from a
source other than the original raw data files converted into HIPS,
this data could be loaded into an existing project to replace the
original navigation data. The new position data must have a time
stamp and be in ASCII format.
The Generic Data Parser is a separate program launched from
the main HIPS and SIPS interface.
Import > Generic Data
Parser
The Generic Data Parser interface is displayed, as shown in the
example below.
Tool
Menu
1. Select the Generic Data Parser command.
To open raw data to be converted with the parser,
1. Select Open Raw Data from the File menu.
2. Browse to select the *.raw or *.txt data file you want to convert.
B-628
CARIS HIPS and SIPS User’s Guide
Generic Data Parser: Introduction
The Raw Data window will open to display the data. This window
can be sized and repositioned to the top, bottom, right or left sides
of the interface.
Data Parsing Components
The parser must be told where each piece of information is
located in the ASCII text file. This set of parameters is stored in
a configuration file that can be saved, retrieved or modified at any
time. These configuration files are stored in the …\Hips\Session
folder and have a .par extension.
The location of each type of data in the text file is determined
using either the free form or fixed column method. In the raw
data file the data fields are separated by delimiters, and lines of
data are differentiated by identifiers.
Free Form
The free form method is used when data items (separated by
delimiters) have fields of varying lengths. In this case, you specify
a field number to show where a data item is located in the text
file. The field numbering starts at one (1) and is counted from the
first character following one or more delimiters.
For example, in the input string 301.12, 45, 5.66 — field number
three (3) indicates the start of string 5.66.
Quotation marks can be used to offset a text string, for example,
“312, 45, 5.66” is treated a single string field (regardless of any
characters or spaces inside the string).
The following characters are used as delimiters by the parser:
•
tab
•
space
•
single quote ( ‘ )
•
vertical bar ( | )
•
comma ( , )
•
semicolon ( ; )
These delimiters are replaced with spaces when the parser reads
the file.
Fixed Column
This method specifies the absolute location of a data item in the
text file. The location starts at one (1). This method is used when
the location of data items does not change and where there is no
CARIS HIPS and SIPS User’s Guide
B-629
Generic Data Parser: Introduction
obvious separation between fields. You must supply the length of
the field when using the fixed form method.
Identifier
When data items are stored in separate text lines, the program
must differentiate between types of input. This is done with an
identifier, which is a short text string whose location is specified
as an absolute value. If an identifier is specified for a data item,
the input line is tested for the item’s presence to make sure that
it can be extracted.
For example, some depth data lines in a Hypack data file start
with the string EC2. In this case, you specify the identifier as EC2
at the location one (1). You can include spaces and other symbols
in the identifier, as long as the symbols are not classified as
belonging to any of the delimiters.
The use of identifiers is optional for any data item. In this case,
the program extracts the data item on all input text lines.
Multiplier/Offset
Once a value has been extracted from the input text line,
additional operations may be needed to transform it to its final
value.
This may be necessary because:
•
The value is stored with an implied decimal point (for
example 1/100th of a second).
•
The value is stored in a different unit (for example, decimal
radians instead of degrees).
•
The sign of the value is opposite of what HIPS uses.
•
The value is stored with an implied offset.
You may specify additional mathematical operations in terms of
a Multiplier and an Offset. The actual formula used is:
final value = (extracted value x Multiplier)
+ Offset
Pseudo Time
The pseudo time stamp is a user-determined time sequence that
overrides the Data Parser’s time stamp requirement for record
conversion. By default, the time is set to midnight at the current
date, but this can be changed. An increment value attaches a new
time to each record. Make sure that the pseudo time stamps are
comparable with the types of data you are importing.
If you are using this feature, the Time Stamps panel information
must still be completed, but the pseudo time stamp overrides this
information.
B-630
CARIS HIPS and SIPS User’s Guide
Generic Data Parser: Configuration File
Configuration File
The configuration file is a text that contains the settings for
converting data through the Generic Data Parser. All
configuration files have a PAR extension.
“OPEN A CONFIGURATION FILE” ON PAGE 631
“NEW CONFIGURATION FILES” ON PAGE 632
“SAVE A CONFIGURATION FILE” ON PAGE 632
Open a Configuration File
You can open an existing configuration file for editing and then
convert text files with the Generic Data Parser wizard.
File > Open
Key
The Open dialog box is displayed.
2. Select the configuration file you want to open.
3. Click Open.
Tool
Menu
1. Select the Open File command.
<Ctrl+O>
The configuration file is now ready for editing or for proceeding
directly to converting raw data files.
The data types included in the current configuration are shown
by a check mark.
4. Optional: Select a data type and modify any parameters, as needed
(see “DATA TYPES” ON PAGE 635).
5. Optional: Select or de-select a data type by clicking the check box to
include or exclude data types during conversion.
CARIS HIPS and SIPS User’s Guide
B-631
Generic Data Parser: Configuration File
New Configuration Files
You can select data types and enter values for a new
configuration file.
File > New
Key
Pop-up Menu
2. Select a data type and enter values for the parameters.
Remember: You must complete each section before
selecting the next data type.
Tool
Menu
1. Select the New File command.
<Ctrl+N>
Edit > Reset Selected
Sensor
Reset
3. To reset any changes to the data, select the Reset Selected Sensor
command.
4. Select the check box to include the associated data during conversion.
5. Repeat Step 2 and Step 3 until all necessary data types have been
added to the new configuration file.
6. Select a Save/Save As command.
The Save As dialog box is displayed.
7. Type a name for the configuration file and select a directory for the file.
8. Click Save.
Save a Configuration File
9. When finished, select the Save or Save As commands; or start the
conversion wizard (see “GENERIC DATA PARSER WIZARD” ON
PAGE 641).
If you selected the Save or Save As commands, then Save As
dialog box is displayed.
10. Enter a name for the file and select a location to save it.
File > Save/Save As
Key
Tool
Menu
11. Click a Save command.
<Ctrl+S>
B-632
CARIS HIPS and SIPS User’s Guide
Generic Data Parser: Raw Data Files
Raw Data Files
You can open a text file and find the exact column positions of the
data you want parsed.
Menu
1. Select the Open Raw Data command.
File > Open Raw
Data
The Open dialog box is displayed.
2. Select a text file and click Open.
The file is opened in the Editor.
When you position the cursor in the raw data file, the cursor
location is displayed below the window.
Position of cursor in data file.
When a section of the file is highlighted, the length (including
characters and spaces) of the highlighted area is shown.
3. Select a data type from the list so the associated parameter fields are
displayed in the parser.
4. Select the appropriate area in the text file by either placing the cursor
in the file or highlighting a section of it.
CARIS HIPS and SIPS User’s Guide
B-633
Generic Data Parser: Raw Data Files
5. Enter the raw data file information in the parameters area (see “DATA
TYPES” ON PAGE 635).
6. Continue with Steps 3 to 5 until all information has been collected for
the configuration file.
Menu
Close files
File > Close Raw
Data
B-634
7. To close files without saving information, select the Close Raw Data
command.
CARIS HIPS and SIPS User’s Guide
Generic Data Parser: Data Types
Data Types
The data types are listed on the left side of the interface.
If the check box beside the data type is selected then that data is
available for conversion. Each data type has a set of parameters
that are displayed when it is selected. These parameters
determine what parts of the text file are parsed for the
configuration file.
To view the parameters:
1. Select a data item so it is highlighted.
The parameters for the data type are displayed in the Parser.
2. Enter data as needed.
CARIS HIPS and SIPS User’s Guide
B-635
Generic Data Parser: Data Types
When you select another data type, the previous type is now
checked (if it has a check box). This means that when the text file
is parsed, that data is included in the conversion. If you do not
want to include the data in the conversion, make sure the check
box is cleared.
Menu
Reset selection
Edit > Reset Selected
Sensor
3. To remove changed parameters from a data item, select the Reset
Selected Sensor command.
The parameters are reset to the default positions.
You must complete all the fields in each section before
selecting another data type.
File Header
This section indicates the number of lines in the header. These
lines are skipped when the text file is parsed. The default value
is zero.
1. Type the number of lines used for the file header.
File Date
1. Select either a line number or Identifier so the file data can located.
•
If you selected line number, type the number in the text box
provided.
•
If you selected identifier, type a text string for the identifier in the
Name field and the location on the line where the date begins.
2. Define the location of the date values within the field.
B-636
•
If the length of the year field is two (2), then the converter
automatically assigns the year a value between 1951 and 2050.
•
If the length of the day field is three (3), the converter assumes the
extracted value represents a Julian date.
CARIS HIPS and SIPS User’s Guide
Generic Data Parser: Data Types
Time Stamp
Each line must contain a time stamp. The various components in
the time stamp are specified in terms of absolute positions in
relation to the start of the time stamp string.
1. Select the location of the time stamp as a Fixed Column or Free
Form position.
2. Include year/month/day information:
•
Select the Yes check box so the year/month/day fields are
enabled.
•
Type a position for the time stamp and the length of the year
parameter.
3. To add hour and minute, select the appropriate check boxes and type
the position and length information.
4. Enter the start and length values for the seconds parameters.
5. Enter any Multiplier/Offset values.
Sound Velocity
You can enter a sound velocity value directly or parse it from the
input file. When converting single beam depth data, the sound
velocity value can be used to recover the raw travel time from the
recorded depths. This raw travel time can then be used to
perform full sound velocity corrections on the data during post
processing.
1. Select the position for the parser to start reading data by selecting
either the Line Number or Identifier option.
2. Enter a line number to start reading the sound velocity data, or enter
an identifier and start position for the data.
3. Select the location of the SVP data as a Fixed Column or Free
Form position.
4. Enter the relevant free form or column position.
5. Enter any Multiplier/Offset values.
6. Type a default sound velocity value if you want to enter the sound
velocity value directly.
CARIS HIPS and SIPS User’s Guide
B-637
Generic Data Parser: Data Types
Depth
For each depth, indicate the location of the sounding data and
whether any additional operations are needed.
1. Select the Identifier check box if the information is parsed from a
specific line in the text file.
2. Type the name of the identifier and the start position for reading the
depth data.
3. Select the dual frequency check box if the text file contains secondary
single beam data that must also be converted.
The primary and secondary tabs contain identical fields. Enter
data in one or both sections, as needed.
4. Select either Free Form or Fixed Column.
•
If Free Form, enter the field number where the data is located.
•
If Fixed Column, enter the start and length of data in the text file.
5. Enter any Multiplier/Offset values, as needed.
6. Select the Compute Raw Travel Time check box, if you want to
calculate the raw travel time from the sonar to the seabed.
7. Select the Pseudo Time check box.
8. Type a Start date and type an Increment value (in seconds).
Navigation
The converter supports reading both ground and geographic
coordinates. For geographic Latitude and Longitude values,
negative values are supported as well as E/W and N/S tags.
1. Select the Identifier check box if a text string is used to identify
navigation data in the text file.
2. Enter the identifier and start position for the identifier.
3. Select the type of coordinates used: geographic or ground.
The content of tabs below this section is determined by type of
coordinates selected.
•
If Geographic is selected, the Latitude and Longitude tabs are
displayed.
•
If Ground is selected, the North and East tabs are displayed.
4. Complete the following fields for the Latitude/Longitude or the North/
East tabs:
•
B-638
Free Form: The free form method used to locate navigation data.
CARIS HIPS and SIPS User’s Guide
Generic Data Parser: Data Types
•
Field: The field where the data is located, if you selected the Free
Form option.
•
Fixed Column: The fixed position method used to locate data.
•
Position: The absolute location of the latitude or longitude data if
you selected the Fixed Column option.
•
Degrees: These fields contain the start of the coordinate field, the
length of the field and any multiplier and offset values.
•
Min: This check box enables the Start, Length, Multiplier/Offset
fields when selected (geographic coordinates only).
•
Sec: This check box enables the Start, Length, Multiplier/
Offset fields when selected (geographic coordinates only).
•
Tags: A hemisphere tag (N/S/E/W) is parsed with the data when
this option is checked.
•
Position: Position of the tag in the text file.
5. [Optional] Select the Pseudo Time check box.
6. Type a Start date and type an Increment value (in seconds).
Attitude/Navigation/Tide
This section includes the following data types:
•
Gyro
•
Heave
•
Pitch
•
Roll
•
Tide
•
GPS Height
•
GPS Tide
•
Speed on Water
•
SSS Cable Out
•
SSS Gyro
•
SSS Navigation
All the fields in these sections are identical.
1. Select the Identifier check box, if the data is going to be associated
with an Identifier.
2. Enter an identifier and start position for the data.
3. Select the location of the data as a Fixed Column or Free Form
position.
4. Enter the relevant free form or column position.
CARIS HIPS and SIPS User’s Guide
B-639
Generic Data Parser: Data Types
5. Enter any Multiplier/Offset values.
Event
Event marks are sometimes generated automatically by the
logging system to indicate that a certain amount of time has
elapsed, or a certain distance has been travelled. The event
marks can be displayed in the Single Beam Editor. In HIPS,
event mark records consist of one or more unique event numbers
and textual comments. In this dialog box, you must specify where
to look for the event mark number within the data record.
1. Select the Identifier check box, if the data is going to be associated
with an Identifier.
2. Enter an identifier and start position for the data.
3. Select the location of the data as a Fixed Column or Free Form
position.
4. Enter the relevant free form or column position.
5. If the Events marks contain a textual description, check the Comments
check box.
6. Type the Start Position of the comments in the text file.
7. Type the Length of the comment.
8. Select the Time Stamp check box to include the time stamp that is
included with the event. If this option is not checked, the time stamp
parsed from the file is used.
B-640
CARIS HIPS and SIPS User’s Guide
Generic Data Parser: Generic Data Parser Wizard
Generic Data Parser Wizard
Single beam data or sensor data from a text file is converted to
HIPS/SIPS format with a six-step wizard opened from the
Generic Data Parser.
The appropriate configuration file must be open in the Parser
before data can be converted.
Open the wizard
1. Make sure that a configuration file is open in the Parser.
Tools > Run
The GDP Wizard - Step 1 dialog box is displayed.
Tool
Menu
2. Select the Run command.
3. Select one of the following operations:
•
Convert data into new CARIS HIPS/SIPS survey lines.
•
Convert data into existing CARIS HIPS/SIPS survey lines.
4. Click Next.
The GDP Wizard - Step 2 dialog box is displayed.
CARIS HIPS and SIPS User’s Guide
B-641
Generic Data Parser: Generic Data Parser Wizard
You must select a Project-Vessel-Day directory to save the
converted data if creating new survey lines, or select an existing
survey line if you are updating existing data.
5. Click a Project file tree so it is expanded and the Day folder or survey
line is visible.
If you want to add Vessel or Day folders or delete a folder, follow
Steps 5 to 9, otherwise go to Step 10.
6. To add a vessel folder, make sure the project directory is highlighted
and click Add Vessel.
The Available Vessels dialog box is displayed.
7. Click a vessel folder and click OK.
The new Vessel folder is displayed in the selected project
directory.
8. To add a day folder, click the Vessel folder and click Add Day.
The Calendar dialog box is displayed.
9. Select a year/month/day from the calendar, and click OK.
A Day folder with the selected date is stored in the Vessel folder.
10. To remove an empty Day or Vessel folder from the wizard, highlight
the folder and click Delete. A Vessel or Day folder cannot be deleted
using the Delete button, if its branch of the Project already has data
converted into it.
11. Click the Day folder or survey line so it is highlighted.
12. Click Next.
B-642
CARIS HIPS and SIPS User’s Guide
Generic Data Parser: Generic Data Parser Wizard
The GDP Wizard - Step 3 dialog box is displayed.
In this dialog box you select the text files you want to convert.
13. If the file path in the Raw Data Directory box is correct, click Select.
The Select Files dialog box is displayed.
14. Double-click a folder to access the text files.
The files are displayed.
15. Select the files so they are highlighted.
16. Click Open.
The selected files are displayed in the wizard dialog box.
17. To remove files, select the files and click Remove.
18. Click Next.
The GDP Wizard - Step 4 dialog box is displayed.
CARIS HIPS and SIPS User’s Guide
B-643
Generic Data Parser: Generic Data Parser Wizard
In this dialog box you must indicate the type of coordinate system
that was used for the Navigation data during data logging.
19. Select one of the following options:
•
Geographic: navigation data is recorded as latitude and longitude
coordinates.
•
Ground: navigation data is recorded as eastings and northings.
If you select Ground, complete the following steps:
20. Select a projection group from the Group list.
21. Select a zone.
22. Click Next.
The GDP Wizard- Step 5 dialog box is displayed.
B-644
CARIS HIPS and SIPS User’s Guide
Generic Data Parser: Generic Data Parser Wizard
In this dialog box you can reject extremely large errors in the
recorded navigation and depth data. Navigation and depth filters
can be applied during conversion with the following steps:
23. Click the Navigation check box to enable the navigation filter.
24. Enter coordinates in the boxes to define the area:
25. Click the Depth check box to enable the depth filter.
26. Enter the minimum acceptable depth.
27. Enter a maximum acceptable depth.
28. Click Next.
The GDP Wizard - Step 6 dialog box is displayed.
Duplicate navigation points are recorded when the vessel is
stationary. The Filter Duplicate Navigation Points option gives you to
option to remove the duplicate points during import or to include
them in the HIPS file (therefore representing the vessel as
stationary).
29. Select Yes or No to for the Filter Duplicate Navigation Points option.
30. Click Next.
The GDP Wizard - Step 7 dialog box is displayed.
CARIS HIPS and SIPS User’s Guide
B-645
Generic Data Parser: Generic Data Parser Wizard
In this dialog box you convert the text data to HIPS/SIPS format.
31. Click the Convert button.
32. A progress indicator bar along the bottom of the box is activated as the
files are converted.
33. A text box displays the results of the conversion process.
The HIPS files are saved in the directory you selected in the
second dialog box.
34. Click Finish to close the wizard, or click Restart to return to the first
dialog box of the wizard.
B-646
CARIS HIPS and SIPS User’s Guide
C
C.
Tide File Formats
Tide File Formats: Overview
Overview
HIPS supports a standard Canadian Hydrographic Service tide
format called COWLIS as well as two NOS/NOAA formats. HIPS
also supports a basic format consisting of just the required date,
time, and tide values.
HIPS does not use predicted tide tables.
The time zone of the tidal observation data must match the time
zone of the bathymetry to which it will be applied.
C-648
CARIS HIPS and SIPS User’s Guide
Tide File Formats: Tide files (*.tid)
Tide files (*.tid)
TID files are ASCII files consisting of date, time, and tide values
collected from a single tide station. These files can be created or
edited in a text editor (such as Notepad), or in the Tide Editor.
The following tide data file formats are supported by HIPS:
Basic Tide Format
•
CHS Cowlis
•
CHS TMS 50
•
CHS TMS 1000
•
NOS Preliminary Tide Data
•
NOS Final Tide Data
The basic tide format used by HIPS begins with a single line
containing at least 8 dash characters, followed by tidal
observation records consisting of date, time, and tide. Here is a
simple example:
-------2000/11/01 00:00 0.522
2000/11/01 01:00 0.317
2000/11/01 02:00 0.395
2000/11/01 03:00 0.751
2000/11/01 04:00 1.296
2000/11/01 05:00 1.848
2000/11/01 06:00 2.339
2000/11/01 07:00 2.589
For information on using the Tide Editor, see “EDITING TIDE DATA”
ON PAGE 340.
CARIS HIPS and SIPS User’s Guide
C-649
Tide File Formats: COWLIS
COWLIS
--------------------- LIBEX file dump -------------------------------------------- STN?????.OBS ---------------------------------------- Time Zone: GMT ( 0.0) -------------------------------------- Invariant Fields --------------------Name
Type Size
Units Value
-----------------------------------------------------------station_id
CHAR
5
station_name
CHAR
16
Rimouski, Quebec
data_product
CHAR
3
TMS1000
start_time
INTG
4 seconds 93/06/29 18:45:00
end_time
INTG
4 seconds 91/11/16 20:45:00
file_date
INTG
4 seconds 95/12/20 15:24:24
max_water_level REAL
4
metres
1.640
min_water_level REAL
4
metres
0.050
--------------------------------------------------------------------------------- Variant Fields ---------------------Name
Type Size
Units
-----------------------------------------------------------time
INTG
4 seconds
water_level
REAL
4
metres
std_dev
REAL
4
metres
-----------------------------------------------------------1993/06/29 18:45:00
1.95 0.030
1993/06/29 19:00:00
1.84 0.030
1993/06/29 19:15:00
1.74 0.030
1993/06/29 19:30:00
1.63 0.030
1993/06/29 19:45:00
1.55 0.030
1993/06/29 20:00:00
1.48 0.030
1993/06/29 20:15:00
1.41 0.030
1993/06/29 20:30:00
1.37 0.030
1993/06/29 20:45:00
1.34 0.030
-------------------- End Of LIBEX File ---------------------
C-650
CARIS HIPS and SIPS User’s Guide
Tide File Formats: NOS Preliminary Tide Data
NOS Preliminary Tide Data
************************ PRELIMINARY DATA **************************
THIS RAW DATA HAS NOT BEEN SUBJECT TO THE NATIONAL OCEAN SERVICE’S
QUALITY CONTROL OR QUALITY ASSURANCE PROCEDURES AND DOES NOT MEET
THE CRITERIA AND STANDARDS OF OFFICIAL NATIONAL OCEAN SERVICE
DATA. IT IS RELEASED FOR LIMITED PUBLIC USE AS PRELIMINARY DATA TO
BE USED ONLY WITH APPROPRIATE CAUTION.
************************ PRELIMINARY DATA **************************
Water Level Station
-DCP
-SE
Date Time
WL_Value
Sigma
-----
Out
--
Flat
--
ROFC
--
Temp
--
Limit
--
Acoustic (A1)
Unique seven character identifier for the station
A one character identifier for the data collection
platform at a station
A two character identifier for the data sensor
Date and time the data were collected by the DCP
Water level height
Standard deviation of 1 second samples used to
compute the water level height
Count of number of samples that fall outside a
3-sigma band about the mean
A flag that when set to 1 indicates that the flat
tolerance limit was exceeded
A flag that when set to 1 indicates that the rate
of change tolerance limit was exceeded
A flag that when set to 1 indicates that the
temperature difference tolerance limit was exceeded
A flag that when set to 1 indicates that either the
maximum or minimum expected water level height limit
was exceeded
Data are in meters above MLLW
Times are on UTC (GMT)
9453220 1 Yakutat, AK from 19990614 to 19990618
-----------------------------------------------------------------------Station DCP SE Date
Time
WL_Value
Sigma Out Flat RofC Temp
Limit
9453220
1
A1 1999/06/14 00:00
1.881
0.014
0
0
0
0
0
9453220
1
A1 1999/06/14 00:06
1.814
0.025
0
0
0
0
0
9453220
1
A1 1999/06/14 00:12
1.746
0.018
0
0
0
0
0
9453220
1
A1 1999/06/14 00:18
1.692
0.014
0
0
0
0
0
9453220
1
A1 1999/06/14 00:24
1.632
0.013
0
0
0
0
0
9453220
1
A1 1999/06/14 00:30
1.560
0.015
0
0
0
0
0
------------------------------------------------------------------------
CARIS HIPS and SIPS User’s Guide
C-651
Tide File Formats: NOS Final Tide
NOS Final Tide
NOS SIX MINUTE WATER LEVEL HEIGHTS
Data are verified
Station
Date Time
WL_Value
Sigma
-----
Infer
--
Flat
--
RofC
--
T_Flag
--
Unique seven character identifier for the station
Date and time the data were collected by the DCP
Water level height
Standard deviation of 1 second samples used to
compute the water level height
A flag that indicates that the water level value
has been inferred.
A flag that when set to 1 indicates that the flat
tolerance limit was exceeded
A flag that when set to 1 indicates that the rate
of change tolerance limit was exceeded
A flag that when set to 1 indicates that the
temperature difference tolerance limit was exceeded
Data are in meters above MLLW
Times are on UTC (GMT)
9452210 Juneau, Gastineau Channel, Stephens Pass, AK, USA from 19980525 to
19980530
-----------------------------------------------------------------------Station Date
Time
WL_Value
Sigma Infer Flat RofC T_Flag
9452210 1998/05/25 00:00
2.473
0.019
0
0
0
0
9452210 1998/05/25 00:06
2.330
0.022
0
0
0
0
9452210 1998/05/25 00:12
2.200
0.019
0
0
0
0
9452210 1998/05/25 00:18
2.064
0.020
0
0
0
0
9452210 1998/05/25 00:24
1.938
0.019
0
0
0
0
------------------------------------------------------------------------
C-652
CARIS HIPS and SIPS User’s Guide
Tide File Formats: Tide Zone Definition Files
Tide Zone Definition Files
The following is an example of a Zone Definition File (.zdf).
Tide Zone Data
The Zone Definition File has the following components:
•
The mandatory header section must consist of this text
string: [ZONE_DEF_VERSION_3]. This specifies the version
of the Zone Definition File.
•
The section labelled [ZONE] contains the name of the zone(s)
and the coordinates that define the boundary of the zone(s).
All tide zone files must contain this section.
There are two fields in the first line:
•
CARIS HIPS and SIPS User’s Guide
<Zone Label> contains name of the zone (the
name must not be longer than 256 characters).
C-653
Tide File Formats: Tide Zone Definition Files
•
number of points that define the boundary of the
zone. (These are listed starting in the next line of
the section.)
The remaining lines in this section list the geographic
coordinates of these points, (latitude, longitude) in decimal degrees.
The last line in the list must contain the same coordinates as the first line to close the polygon.
If there is more than one zone being defined, this section
is repeated with the definition information for each zone.
•
•
C-654
The section labelled [TIDE_STATION] contains the
definition of the tide stations collecting the tide observations.
There are six fields in each record of this section:
•
station label (the name of the tidal station) - The name
must not be longer than 256 characters.
•
longitude in decimal degrees - Valid ranges are from 180.0 to +180.0. The negative range represents the
Western Hemisphere.
•
latitude in decimal degrees - Valid ranges are from -90.0
to +90.0. The negative range represents the Southern
Hemisphere.
•
max amplitude (in metres) expected from the tidal station
- This value will be used to compute a scaling factor
during the Tidal TPE computation.
•
uncertainty error value associated with the data from the
station (in metres)
•
[optional] full file path and name of the tide file
associated with the station ID - If this is omitted, HIPS
will look for an observation file in the same directory as
the *.zdf, with the file name <Station_Label>.tid.
The section labelled [TIDE_ZONE] contains specific
attributes that define a zone’s tidal parameters. There are
seven fields in this section:
•
tide zone label - this must match the name of the zone(s)
defined in the [ZONE] section.
•
tide station label - name of the tidal station associated
with this entry.
•
priority designation of the tidal station entry: either the
primary (PRIM), secondary (SEC), tertiary (TER) or
preliminary (PRELIM) station for this zone.
•
time correction - the tide offset for this zone (in minutes)
•
range correction - a multiplier (for example, 1.06) used to
scale the tidal value read from the observation file
CARIS HIPS and SIPS User’s Guide
Tide File Formats: Tide Zone Definition Files
•
•
tidal shift - a number in metres added to the values after
range correction has been applied.
•
uncertainty value for the tidal zone (in metres) used to
compute the Tidal Zone Error.
The section labelled [TIDE_AVERAGE] assigns tide stations
to zones for tide-weighted averaging. Each record has at
least two station fields because each zone can be assigned
one or more tide stations for the weighted average
calculation.
The section has the following fields:
•
•
tide zone label - the zone (as defined in the [ZONE]
section) to which the averaging should be applied
•
tide station label, (as defined in the
[TIDE_STATION] section). Enter as many as
needed for averaging.
The last section labelled [OPTIONS] contains options used
during tide zoning or tide averaging.
•
The limit value field contains the outage time in seconds
before switching from the current station to the next
priority station
•
final interval in seconds of tide data loaded into the track
line.
For information on applying the data in a ZDF to survey lines see
“LOAD TIDE” ON PAGE 215.
CARIS HIPS and SIPS User’s Guide
C-655
Tide File Formats: Tide Zone Definition Files
C-656
CARIS HIPS and SIPS User’s Guide
D
D.
Contact File Formats
Contact File Formats: Introduction
Introduction
Contacts in SIPS are stored in ASCII files in each line directory.
SIPS gathers all of these files together and produces a single set
of output files that represent all contacts from all of the survey
lines. The SIPS Contact export function from SIPS produces four
files:
•
filename_ContactLine.txt contains information
identifying the survey line and indexes to the other files.
•
filename_ContactSingle.txt contains all the information
for single point contacts.
•
filename_ContactMulti.txt contains all information for
single point contacts.
•
filename_ContactMultiPoints.txt contains all location
information for multipoint contacts.
•
filename_ContactTiff.gat contains all image files created
during export.
Filename represents the full path and name of the output file.
658
CARIS HIPS and SIPS User’s Guide
Contact File Formats: ContactLine
ContactLine
The filename_ContactLine.txt file contains the names of the
HIPS track lines and the corresponding index number. Each line
in the file is a comma- delimited string terminated by the newline
character (\n). Each line has the following format:
Field Name
Field Description
Description
Line Index
4-digit integer
The index number for the line.
Project Name
256 characters
(maximum)
The name of the HIPS project that the line belongs to.
Vessel Name
256 characters
(maximum)
The name of the HIPS vessel that the line belongs to.
Day Name
256 characters
(maximum)
The name of the HIPS day that the line belongs to.
Line Name
256 characters
(maximum)
The name of the HIPS line that the contact refers to.
CARIS HIPS and SIPS User’s Guide
659
Contact File Formats: ContactSingle
ContactSingle
The filename_ContactSingle.txt file contains the list of single
point contact features from the export. Each line in the file is a
comma (',')delimited string terminated by a newline character
('\n'). Each line in the file has the following format:
660
Field Name
Field Description
Description
Contact Index
4-digit integer
The index number for the contact. Index numbers are assigned
sequentially from 0 when the export is performed. Guaranteed to be
unique for all exported single contacts only.
Key
12 characters
The key for the contact. This is created by concatinating the line name
and the contact number together. The first 8 bytes are the first 8 bytes
in the line name, and the last 4 bytes are the system generated
number assigned to the contact.
Line Index
4 digit integer
The line record number from the corresponding
Filename_ContactLine.txt file.
Contact
Number
4 digit integer
The system generated contact number assigned to the contact when it
was created in the SIPS software (same as the last 4 bytes of the ‘key’
field).
Creation Date
10 characters
The date the contact was created. Has the mm/dd/yyyy format
Creation Time
10 characters
The time the contact was created. Has the following format:
HH:MM:SS.S
Created User
ID
3 characters
The user ID entered in the SIPS software at the time of contact
creation (usually user initials)
Modified Date
10 characters
The last date the contact was modified. It may be the same as the
Creation Date if the contact has not been modified since creation. It
has the following format: mm/dd/yyyy
Modified Time
10 characters
The time of the last modification done to the contact. The time may be
the same as the Creation Time if the contact has not been modified
since it was created. It has the following format: HH:MM:SS.S
Modified User
ID
3 characters
The user ID of the user that last modified the contact. The ID may be
the same as the Created User ID if the contact has not be modified
since it was created.
Contact Prefix
8 characters
The prefix assigned by the SIPS software when the user created the
contact. This is normally used to generate the key for the contact.
Feature Code
12 characters
The CARIS Feature code used to represent the point contact.
Contact Type
1 character
This identifies the contact record as either a single point or multi point
contact. Single point contacts are represented by a ‘1’ and multipoint
contacts are represented by a ‘2’.
Profile Number 4 digit integer
The profile number that the contact was picked from in the SIPS
software.
Across
Distance
6.2 Floating point
The across track distance recorded by the SIPS software that the
point contact was picked from.
Latitude
13.7 Floating point
The latitude of the point contact.
Longitude
13.7 Floating point
The longitude of the point contact.
CARIS HIPS and SIPS User’s Guide
Contact File Formats: ContactSingle
Field Name
Field Description
Description
Target Height
6.2 Floating point
The height of the target (in metres).
Target Width
6.2 Floating point
The width of the target (in metres).
Target Length
6.2 Floating point
The length of the target (in metres).
Image Height
4 digit integer
The height of the contact image as defined by the user in the SIPS
software.
Image Width
4 digit integer
The width of the contact image as defined by the user in the SIPS
software.
Status
1 digit integer
The status of the contact. 0 if the contact is Accepted, 1 if the contact
is Rejected.
Remarks
85 (maximum)
characters
Remarks entered by the hydrographer about the created contact.
CARIS HIPS and SIPS User’s Guide
661
Contact File Formats: ContactMulti
ContactMulti
The filename_ContactMulti.txt file contains the list of
multipoint contact features from the export. Each line in the file
is a comma (',') delimited string terminated by a newline
character ('\n'). Each line in the file has the following format:
662
Field Name
Field Description
Description
Contact Index
4-digit integer
The index number for the contact. Index numbers are assigned
sequentially from 0 when the export is performed. It is
guaranteed to be unique for all exported multi point contacts
only.
Key
12 characters
The key for the contact. It is created by concatenating the line
name and the contact number together. The first 8 bytes are the
first 8 bytes in the line name, and the last 4 bytes are the system
generated number assigned to the contact.
Line Index
4 digit integer
The line record number from the corresponding
Filename_ContactLine.txt file.
Contact Number
4 digit integer
The system generated contact number assigned to the contact
when it was created in the SIPS software (same as the last 4
bytes of the ‘key’ field).
Creation Date
10 characters
The date the contact was created. It has the mm/dd/yyyy format
Creation Time
10 characters
The time the contact was created. It has the following format:
HH:MM:SS.S
Created User ID
3 characters
The user ID entered in the SIPS software at the time of contact
creation (usually user initials)
Modified Date
10 characters
The last date the contact was modified. The data maybe the
same as the Creation Date if the contact has not been modified
since creation. It has the following format: mm/dd/yyyy
Modified Time
10 characters
The time of the last modification done to the contact. The time
maybe the same as the Creation Time if the contact has not
been modified since it was created. It has the following format:
HH:MM:SS.S
Modified User ID
3 characters
The user ID of the user that last modified the contact. The ID
maybe the same as the Created User ID if the contact has not
be modified since it was created.
Contact Prefix
8 characters
The prefix assigned by the SIPS software when the user
created the contact. This is normally used to generate the key
for the contact.
Feature Code
12 characters
The CARIS Feature code used to represent the point contact.
Contact Type
1 character
This identifies the contact record as either a single point or multi
point contact. Single point contacts are represented by a ‘1’ and
multipoint contacts are represented by a ‘2’.
Target Height
6.2 Floating point
The height of the target (in metres).
Target Width
6.2 Floating point
The width of the target (in metres).
Target Length
6.2 Floating point
The length of the target (in metres).
CARIS HIPS and SIPS User’s Guide
Contact File Formats: ContactMulti
Field Name
Field Description
Description
Image Height
4 digit integer
The height of the contact image as defined by the user in the
SIPS software.
Image Width
4 digit integer
The width of the contact image as defined by the user in the
SIPS software.
Status
1 digit integer
The status of the contact—0 if the contact is Accepted, 1 if the
contact is Rejected.
Remarks
85 (maximum)
characters
Remarks entered by the hydrographer about the created
contact.
CARIS HIPS and SIPS User’s Guide
663
Contact File Formats: ContactMultiPoints
ContactMultiPoints
The filename_ContactMultiPoints file contains the list of points
used to construct the geometry of the multi point contacts listed
in the Filename_ContactMulti.txt from the export. Each line in
the file is a comma (',')delimited string terminated by a newline
character ('\n'). Each line in the file has the following format:
664
Field Name
Field Description
Description
Record number
4-digit integer
The record number. It is unique throughout the file.
Contact Record
Number
4-digit integer
The contact record number that this point belongs to. This
corresponds to the Contact Index in the corresponding
Filename_ContactMulti.txt file.
Profile Number
4-digit integer
The profile number that the point was computed from in the SIPS
software.
Across
Distance
6.2 floating point
The across-track distance recorded by the SIPS software that the
point contact was picked from.
Accumulated
Distance
6.2 floating point
The accumulated distance. This is the distance from the first point
in the set, to this point.
Latitude
13.7 floating point
The latitude of the point.
Longitude
13.7 floating point
The longitude of the point.
CARIS HIPS and SIPS User’s Guide
Glossary
Altitude
The height of the side scan sonar transducer above the sea
floor. The transducer is typically mounted on a towed body or
the surface vessel, but can also be mounted on an ROV or
AUV.
Angle-Varying Gain
Angle-Varying Gain (AVG) correction removes the angular
response of sediment from the imagery, normalizing the mean
angular intensities, ping-by-ping, with a moving average filter.
Attitude Data
Commonly used to refer to the orientation of the vessel in three
dimensions as represented by the Gyro, Heave, Pitch, and Roll
sensors. The Attitude Editor displays this data as well as other
sensors that consists of simple “time vs. sensor value” data.
Background Data
Georeferenced vector and raster data providing visual context
to the bathymetry and side scan data being processed.
Examples include CARIS files, BSB raster charts, GeoTIFF
orthophoto images, S-57 electronic chart data.
Backscatter
Intensity of sounding returns collected by swath multibeam
sounding systems. Backscatter data creates an image of the
sea floor that can indicate the bottom type.
BAG
The Bathymetric Attributed Grid (BAG) is an open-source
binary file format for transferring gridded bathymetry and
uncertainty values between software applications and
agencies. The file contains four sections: metadata (in XML
format), elevation, uncertainty, tracking, and certification. For
more information on BAG, go to http://www.opennavsurf.org/.
BASE Surface
The Bathymetry Associated with Statistical Error (BASE)
Surface. A georeferenced TIFF representation of the seabed
derived from processed bathymetry and computed uncertainty
(error) values. The algorithm applies soundings to the grid
based on beam footprint size. A customizable weighting
system allows more emphasis in the mean calculation to be
placed on the inner nadir beams or on soundings with lower
uncertainty values.
Beam
A single depth measurement is produced from a beam. Many
beams make up a profile or a ping.
CARIS HIPS and SIPS User’s Guide
1
Beam Pattern
Correction
Beam pattern correction uniformly removes along-track
banding inherent to the sonar beam. This effect is produced by
each transducer uniquely.
Beam pattern correction relies on a user-generated beam
pattern file to identify and remove this effect.
CARIS File
The format for recording vector map data features such as
lines, symbols, text, soundings, etc. The map actually consists
of set of files.
CATZOC
The zone of confidence (CATZOC) attribute. The CATZOC
attribute is part of the S-57 Quality of Data (M_QUAL) object
class. It indicates that data meets the minimum criteria for
seafloor coverage, and position and depth accuracy as defined
by the attribute classification structure. There are five CATZOC
classifications: A1, A2, B, C, and D.
Contacts
Point and line features identified in side scan sonar data.
Attributes describing the location, size, and description or the
target are recorded. Image snapshots are also generated.
CUBE Surface
A Combined Uncertainty and Bathymetry Estimator (CUBE)
Surface contains multiple hypotheses representing potential
depth variances on the seafloor. As soundings are propagated
to nodes—based on distance and uncertainty—a hypothesis is
developed. If the there is a significant variation of depth at a
node, a new hypotheses is created. A node can contain more
than one hypothesis.
Day
One of the days for which there is survey data. Expressed as
a Julian day.
Delta Draft
A “time vs. delta-draft” data structure that can be loaded into
HIPS and used to model the dynamic squat and lift of the
vessel. Also used to store the recorded depth of towfish and
ROV/AUV mounted multibeam sonars.
Despeckle
Despeckling uses a calculated value based on neighbouring
intensity levels to replace the current pixel’s intensity if it is
outside the specified range. The value calculated from the
neighbouring intensities can be derived by one of two methods
mean or median.
Disambiguation
The process in CUBE of selecting one hypothesis over other
hypotheses to represent the surface. Hypotheses can be
selected or "nominated" by density, locale, locale and density,
or by the nearest value to a previous CUBE Surface.
DpTPE
Depth Total Propagated Error. The difference between the
observed or computed depth value of a sounding and its true
depth value (at a 95% confidence level).
2
CARIS HIPS and SIPS User’s Guide
Edit Layer
A HOB layer created in CARIS Notebook to represent realworld alterations in the survey area.
Field Sheet
A collection of data products, within a defined geographic area,
derived from the processed bathymetry and side scan data. A
common coordinate system reference is used. Some example
products include BASE surfaces, mosaics, tiles, selected
soundings, contours, and plot layouts.
Filtering
The process of detecting outliers in the data and setting the
status flags to Rejected. Data points are not removed from the
HIPS/SIPS format.
Gain
A measure of increase in amplitude of a signal.
GPS Tide
Instantaneous water level height above the sounding datum
derived from the observed GPS ellipsoid heights of the
navigation antenna. Reduced for sensor offsets, vessel
motion, known sounding datum height above the ellipsoid, and
other parameters.
Generic Data
Parser
A program for converting recorded ASCII data sources into the
HIPS/SIPS format. New survey lines can be generated for
single beam bathymetry, or the program can update a sensor
within an existing HIPS or SIPS project.
HOB
The Hydrographic Object Binary (HOB) file is a spatially
referenced dataset that is used to support the internal structure
of S-57 data in CARIS products. The HOB file does not require
a CARIS vector map and contains the point, line, and area
geometry for hydrographic objects.
HzTPE
Horizontal Total Propagated Error. The difference between the
observed or computed position value of a sounding and its true
position value (at a 95% confidence level).
HVF
HIPS Vessel File. A vessel configuration file in XML format that
consists of a list of sensors with their physical and calibration
measured offsets, plus any error values. These are applied to
the observed data during processing. The HVF supersedes the
Vessel Configuration File (VCF).
Hypothesis
A representation of depth in a BASE Surface. The Hypotheses
that are displayed in the Surface are selected or "nominated"
through disambiguation. Hypotheses that were not selected
remain as alternative hypotheses and can be nominated in the
Subset Editor.
Layback
If a towed sensor is used during a survey, the position of that
sensor can be calculated as a horizontal “layback” from the
position of the towing vehicle. The sensor layback is computed
from the tow wire length and sensor depth.
CARIS HIPS and SIPS User’s Guide
3
LADS
Laser Airborne Depth Sounder (LADS) is a lidar system
developed by Tenix Corporation.
Lidar
Light direction and ranging uses laser technology to calculate
bathymetry.
Line
A single pass of the survey vessel over the survey area. Time
referenced sensor data is continuously recorded.
Marker Layer
A HOB layer created in CARIS Notebook for graphically
identifying areas of interest and attaching notes, text and other
information. The Marker layer is created as a sub-layer of an
Edit layer.
Merge
The process of calculating final positions and depths for
soundings, based on all relevant inputs such as observed
depths, navigation information, vessel dynamics such as gyro,
heave, pitch and roll, and tide.
Mosaic
A georeferenced raster image created from one or more side
scan survey lines.
Outliers
Unwanted data resulting, for example, from incorrect sea floor
detection.
Ping
A single output pulse of a sonar system
Profile / Swath
A set of soundings, approximately perpendicular to the ship’s
track, which is produced by the swath or sweep sonar.
Product Surface
A shoal-biased bin generated from a BASE Surface. Data is
down-sampled so that finer details of the seafloor are not
visible, but the shoals are still maintained. Product surfaces
can be used to create navigation products, such as Electronic
Nautical Charts.
Project
A survey area with data collected by one or more survey
vessels over one or more days.
Publication
Designer
The Publication Designer is an application developed by
CARIS for formatting templates. You can use this application
to insert dictionary tags, and add text and graphics. The
application is opened directly from the Start button on the
Windows taskbar or from a shortcut on the desktop.
Raw Side Scan
Time indexed imagery profiles where the across-track scale is
time in milliseconds.
S-44
S-44 is the international standard developed and maintained
by the International Hydrographic Organization (IHO) that sets
the minimum standard for hydrographic surveys. The standard
classifies surveys into survey orders (Special Order, Orders 1,
2, 3) based on an area’s importance for safety of surface
navigation.
4
CARIS HIPS and SIPS User’s Guide
S-57
S-57 is the international standard developed and maintained
by the International Maritime Organization (IMO). It is used by
hydrographic data producers to describe how real-world
entities are stored digitally for transfer among different
computer platforms between the various hydrographic offices.
Session
A record of all data that is currently open in the primary
application. Typically contains a list of survey line names,
background raster images, and field sheets that are currently
open. Used to re-open an integrated dataset from a previous
working session.
SHOALS
Scanning Hydrographic Airborne Lidar Survey (SHOALS) is a
lidar system owned and operated by the Joint Airborne Lidar
Bathymetry Center of Expertise.
Slant Range
Raw travel time used to compute sounding depth
(accompanied by receive angle).
Slant Range
Corrected Side
Scan
Time-indexed imagery profiles generated from raw side scan
data using the measured altitude of the transducer. The across
track scale is distance in metres.
Sounding
A measured depth of water.
Sound Velocity
Correction
The process of applying rigorous refraction corrections to the
raw travel time/angle bathymetry data using recorded sound
velocity profiles.
Status Flag
The indicator of the acceptance or rejection of a data point
during cleaning.
Subset
An area which encloses some or all of a survey project
boundaries. It is used during sounding cleaning to limit the
number and extent of soundings being loaded into memory.
Surface Cleaning
A statistical process of detecting bathymetric outliers within an
area. A least square polynomial regression algorithm is used.
Templates
Templates are forms that display session data. Session data is
added using object tags from in the HIPS dictionary. When the
template is opened in HIPS and SIPS, the object tags are filled
with data from the open session. Other features, including text
and graphics, can also be added. Templates can be built using
the Publication Designer.
Template Editor
The Template Editor is a CARIS application for creating and
modifying borders, geographic grids, and scale bars. The
Template Editor is used in conjunction with the Publication
Designer for creating and editing templates. It is opened as a
separate application from the Start menu on the Windows
taskbar, or from a shortcut on the desktop.
CARIS HIPS and SIPS User’s Guide
5
Tiles
A representation of the sea floor consisting of interlocking tiles
of varying sizes. Tile positions are defined by a Morton Number
scheme. Tiles can carry a variety of attributes generated from
the data within the area of the tile.
Time-Varying Gain
Time-Varying Gain (TVG) adjusts the signal intensity by
applying a non-uniform, time-dependent gain. TVG is used to
compensate for the attenuation that occurs due to absorption
and spreading as the sonar beam travels back to the receiver.
Since these returns are received over a predictable and
constant time period, a time-varying curve can used to
increase gain to compensate for the decayed sonar return.
TrueHeave
A heave filtering function developed by Applanix. TrueHeave
employs a bi-directional heave filter to remove artifacts from
heave data. Values are computed from real-time data and
have to be imported separately to the track line.
TPE
Total Propagated Error. TPE is derived from a combination of
all individual error sources and is used to calculate horizontal
and vertical uncertainties for soundings.
Vessel
A survey platform, whether it be a ship, a towfish, an ROV/
AUV, or an aircraft.
Weighted Grid
A georeferenced TIFF representation of the mean sea floor
depths derived from processed bathymetry. The algorithm
applies soundings to the grid based on beam footprint size. A
customizable weighting system allows more emphasis in the
mean calculation to be placed on the inner nadir beams. The
weighted grid was superseded by the BASE Surface.
6
CARIS HIPS and SIPS User’s Guide
Index
Symbols
*.tid, 213
*.zdf, 213
.bsd, 583
.grd, 583
.ssd, 583
Numerics
16-Bit Shift Facto, in mosaic, 547
16-Bit Shift Factor, 499
16-bit side scan display, 499
2-D Display icon, 62
2-D view in Subset Editor, 393
3-D display
camer informattion panel., 61
camera information panel, 53
colour map panel, 53
control axes, 58
fly through controls, 60
navigate, 60
navigate with 2-D icon, 62
overview, 48
Subset Editor, 389
Swath Editor, 312–316
Vertical exaggeration, 59
vertical exaggeration properties, 55
Vessel Editor, 119
3-D display fly-through options, 63
3-D Display Properties, 53
3-D fly-through
playback, 64
record, 63
A
Across-track display, 497
add line contact, 540
add point contact, 540
angle-varying gain, 534, 560
ASCII file, export data to, 605
Atlas format, conversion options for, 179
attitude data, 272
accept data, 282
difference line, 280
display options for editor, 87
draw bars, 276
filter, 217
filtering, 284–285
CARIS HIPS and SIPS User’s Guide
interface, 272
invert view, 276
load Applanix files, 221
moving average line, 280
open editor, 272
query line, 283
reject-break interpolation, 281
reject-with interpolation, 281
reset rejected data, 247
scale data, 276
select attitude sensors, 274
smoothing, 278–280
threshold lines, 280
time, 275
time frames, 274
TrueHeave, 219
vertical view, 276
view rejected soundings, 207
auto cursor mode, 321
auto save, 76
Automatic BASE Surface Update, 76
automatic depth filtering, 232
automatic recentre, 310
Average compression, 497
AVG correct, 534
B
Background data
open, 31
backscatter, update, 242
barcheck function in Single Beam Editor, 335
BASE surface
add survey data, 423
attribute properties, 414
close, 422
combine surfaces, 429
create, 408
custom layer, 431
delete, 427
finalized surface, 427
holiday layer, 432
Interpolate, 425
open, 422
overview, 402
properties, 413
quality control, 255
quality report, 432
range filters, 415
range weight, 404
recompute, 423
7
remove survey lines, 424
swath angle weight, 406
uncertainy weight, 405
update units, 421
view, 412
weighted grids, comparison with, 407
batch processing
new file, 568
open editor, 566
open HBP, 568
overview, 566
save file, 568
select process, 569
tasks, 571
Bathymetric Attributed Grid, export data to, 593
bathymetry,use data in side scan, 548
beam pattern correction, 529
Benthos C3D data, 197
bounding box, subset, 387
C
calibration
example procedures, 488
overview, 482
perform, 486
subsets, create in HDCS, 484
workflow, 483
camera information panel, for 3-D display, 53
Camera Information Panel, using, 61
CARIS map
export soundings to, 608
GSF data, 600
open, 31
symbolize, 76
CHS (Canadian Hydrographic Service), 3
classify lines, 206
Close
Field Sheets, 352
CMAX format, conversion options for, 180
Coda format, conversion options for, 180
Colour Map Editor, 417
Colour Map Panel, 3-D display, 53
Colour Mapping, side scan data, 507
Colour Range Editor, 419
Colour Table Editor, 371
command access from toolbars, 24
Compression
side scan display, 497
Skip, 497
Compression, image
Average, 497
maximum, 497
configuration file
new, 632
open, 631
save, 632
CARIS HIPS and SIPS User’s Guide
save as, 632
configuration report, 9, 9
contacts
add line contact, 540
add point, 540
change values, 542
create, 539–544
export, 597–599
move, 542
recompute position, 544
select, 542
Contacts, delete, 543
Contacts, view while scrolling, 502
control axes, 58
Control window
overview, 12
select track lines, 46
show or hide layers, 40
track lines, closing, 72
Controller Panel properties,for 3-D display, 54
conversion
Atlas, 179
CMAX, 180
Coda, 180
EdgeTech, 180
Elac, 181
Furuno, 182
Generic Data Parser, 628
GeoAcoustics, 183
GSF, 185
Hypack, 186
Imagenex, 187
LADS, 188
LAS, 188
MarineSonics, 189
Navitronics, 189
Qmips, 189
Reson, 189
Scripps, 189
SDF, 190
Seabeam, 190
Seafalcon, 190
SEGY, 191
SHOALS, 191
Simrad, 193
SWATHPlus, 194
UNB (Reson), 194
Winfrog, 194
XTF, 196
Conversion Wizard, 170–177
coordinates, on status bar, 23
Copy command, 67
Coverage outline, side scan, 496
Create Graph, 18
CUBE
create, 441
hypothesis editing, 449
nominate hypotheses, 452
overview, 438
8
properties in Subset Editor, 449
reject hypotheses, 454
cut command, 66
D
data conversion, 170
decimal point precision, 23
Delete
new toolbar, 27
delete contact, 543
delta draft, loading, 249
designated sounding flag, 318, 399
designated soundings, 208
Despeckle, 561
despeckle side scan display, 538
detrend option, 306
development partners, 3
digitizing sonar altitude, 521
directories, set location for, 97
directory structure for projects, 109–112
Display Critical Soundings, 210
Display options
image files, 32
Display Properties, Profile, 363
Display tide zones, 213
display tide zones, 214
Display window
geographic grid, 80
measure distance, 69
overview, 11
overview display, 40
pan, 39
projected grid, 84
refresh display, 40
screen captures, 47
set background colour, 79
show distance when selecting, 77
show line when selecting, 77
show or hide layers, 40
side scan outline, 79
zoom, 37
distance, measuring in Display window, 69
dynamic draft data in Vessel Editor, 140
E
EdgeTech format, conversion options for, 180
Elac format, conversion options for, 181
Enable during playback, 79
Enable range display in Side Scan editor, 498
environment options
S-57, 101
event marks, 328
export HIPS data, 586
Export Wizard, 586
CARIS HIPS and SIPS User’s Guide
F
Field Sheet Editor, 354
field sheets
close, 352
new, 349–351
open, 352
overview, 348
properties, viewing, 353
set as active, 352
sounding display size, 75
filtering options, mosaic, 551
filters
attitude data, 284–285
single beam, 243–246
swath, 230–232
total propagated error, 236
filters, mosaic, 551
finalized surface, 427
find soundings, 308
fixed column, 629
flag
designated soundings, 208
Fly-through, record, 63
font
set for measure distance display, 79
free form, 629
G
Generic Data Parser, 628–632
GeoAcoustics format, conversion options for, 183
geographic grid, 80
GeoTiff
capture screen as, 47
GPS (Global Positioning System) Tide, 250
Graph Controls, 19
Graph Tab, 18
Graph,create, 18
Graph,display options, 19
graphs, 18
grid
geographic, 80
projected, 84
GSF (Generic Sensor Format)
conversion options for, 185
export HIPS data to, 612
export to CARIS map, 600
export to HOB, 600
gyro sensor data in Vessel Editor, 135
H
HDCS (Hydrographic Data Cleaning System) create
subsets in, 484
heave sensor data in Vessel Editor, 137
9
HOB (Hydrographic Object Binary) files
export GSF to, 600
export soundings to, 613
object filters, 34
open, 34
holiday layer for BASE Surface, 432
HTF (Hydrographic Transfer Format), export layer
data to, 615
HVF (HIPS Vessel File) see Vessel Editor
Hypack format, conversion options for, 186
I
I/O library, 6
identifier, 630
image classification, 555
Imagenex, conversion options for, 187
images
open background, 31
properties, 32
screen captures, 47
Interpolation
side scan data, 525
interpolation
set for navigation data, 229
K
keyboard shortcuts
shortcuts, 70
L
LADS format, conversion options for, 188
LAS data format, conversion options for, 188
lasso
use in Display window, 44
lasso, select by, 44
layers, 40
licensing options, 5
lidar
accept data, 479
detected and alternative data, 477
display options, 83
find soundings, 476
LADS conversion options, 188
open data, 475
overview, 470
quality flags, 470
query data, 477
reject data, 479
Shoals conversion options, 191, 191
status flags, 470
toolbar, 473
waveform views, 473
10
Load
Delta Draft, 249
Load Attitude/Navigation Data, 221
Load Tide, 215
Load TrueHeave, 219
lock subset area, 388
M
Manual digitizing,side scan data, 524
MarineSonics data format, conversion options for, 189
Maximum compression, 497
Measure Distance, 543
Measure Shadow, 543
merge
lines, 253
merge files, 253
middle mouse select, 321
mosaic
16-bit shift factor, 547
add lines to, 554
change outline colour, 553
determine data source, 549
direction of shadow, 550
extrapolate, 549
image classification, 555
Interpolation, 549
new, 546
orientation source, 547
remosaic, 555
remove lines from, 554
set resolution and colour, 547
toggle name, 553
use bathymetry to register side scan imagery, 548
mosaic filtering options, 551
mosaics
create, 545–552
export, 619
intensity properties, 553
properties, 552
mouse information, 28
Move toolbars, 25
multiplier, 630
N
navigate the 3-D window, 60
navigation
accept data, 269
bezier interpolation, 265
connect points, 264
editor interface, 262
linear interpolation, 265
load Applanix files, 221
navigation antenna data in Vessel Editor, 135
point display, 263
CARIS HIPS and SIPS User’s Guide
point symbol selection, 76
query data, 270
reject-break interpolation, 269
reject-with interpolation, 269
reset rejected data, 247
resize points, 263
scaling, 263
set interpolation, 229
speed jumps, 267
time jumps, 268
view rejected soundings, 207
Navitronics data format, conversion options for, 189
new projects, 150–155
New Publication, open template, 576
NOAA (National Oceanic and Atmospheric
Administration), 3
NOS final tide format, 652
NOS preliminary tide file format, 651
O
Ocean Mapping Group, 3
offset, 630
Open
Background Data, 31
file types, 31
Open Project, 29
Options - General, 75
outline colour
mosaic, 553
Output Tab, 15
P
pan
3-D display, 60
commands, 39
forward, 38
previous, 38
set pan factor, 75
Swath and Subset Editors, 316
using coordinates, 39
Vessel Editor, 120
Paste command, 68
pick aperture, 75
ping
select by number, 504
select range, 504
select single, 504
Ping selection,from start and end numbers, 499
pitch data in Vessel Editor, 138
Playback 3-D fly-through, 64
Playback in Side Scan Editor, 501
Playback, view contacts during, 502
Playback,move side scan outline during, 79
processed mode, 496
CARIS HIPS and SIPS User’s Guide
Profile
Display Properties, 363
Profile Tab, 21
profiles
axis settings, 365
colour, 364
create, 362
display, 370
export, 368
horizontal exaggeration, 363
legends, 367
overview, 362
pan, 367
rotate, 367
vertical exaggeration, 363
zoom, 367
project
open, 29
projected grid, 84
projects
auto save, 76
auto update for UTM, 76
batch processing, 566
close, 72
convert raw data, 170
directories, 109–112
export data, 591–618
merge files, 253
new, 150–155
properties, 157
rename folders, 156
save, 72
session files, 159
properties
BASE Surface, 413
field sheets, 353
images, 32
mosaics, 552
tiles, 357
track lines, 30
Properties window, 14
pseudo timestamp, 630
Publication Designer, 574
Publication Objects, 576
publication template, 574–580
Publication Viewer, 580
commands, 580
Publish, 577
purge rejected, 543
Q
QC report, 255
QC Reports tab, 21
Qmips format, conversion options for, 189
QPS, 197
quality control, 255
11
quality report for BASE surface, 432
Query
S-57 data, 35
query line, 270
Query line data, 205
Query tab, 16
query tiles, 361
R
Range display, 498
range weight, 404
range-select side scan data, 504
raw mode, 496
Reapply, 528
Recompute BASE surface, 423
Recompute mosaic, 555
record 3-D fly-through, 63
recycle bin, 161
reference position for sensor equipment, 115
Refraction Editor, 322
refresh
automatic, 76
Refresh command, 40
rejected contact, 543
rejected soundings, view, 207
remosaic, 555
rename folders, 156
Reposition window, 22
resize
subset, 387
Resize window, 22
Reson format, conversion options for, 189
restart cleaning, 247
Revert, 528
roll data in Vessel Editor, 139
root path for directories, 98
S
S-44
quality control, 255
set colour display in Subset Editor, 82
TPE filtering, 236
S-57 data
display in Display window, 34
environment settings, 101
object filters, 34
query data, 35
S-52 display options, 103
set CATZOC colour in Subset Editor, 82
scale bar in Display window, 86
screen captures, 47
Scripps format, conversion options for, 189
SDF format, conversion options for, 190
Seabeam format, conversion options for, 182, 190
12
Seafalcon format, conversion options for, 190
SEGY format, conversion options for, 191
select side scan data, 504
selected soundings, 371
selection tools
Control wndow, 46
current display, 42
deselect, 46
lasso select, 44
next line, 45
previous line, 45
range, 42
select all, 42
Side Scan Editor, 504
session files, 159
SHOALS format, conversion options for, 191
side scan
angle-varying gain, 560
digitize data manually, 524
interpolate data, 525
mosaics, 545–552
signal display, 515
towfish track line colour, 79
side scan data processing workflow, 492
Side Scan Editor
, 494–544
16-bit display, 499
accept data, 511
across track display, 497
add to mosaic, 554
angle-varying gain, 534
automatic scrolling, 501
beam pattern correction, 529
colour mapping, 507
colour options, 507
compression values, 497
Compression, Skip, 497
contacts, 539–544
coverage outline, 496
delete contact, 543
despeckle, 538
digitizing, 521
display modes, 496
fish altitude, 521
measure distance, 509
measure distance or shadow, 543
measure shadow, 510
overview, 492
playback, 501
processed mode, 496
processing, 494
purge rejected contact, 543
query data, 511
range display, 498
raw mode, 496
reapply, 528
recompute contact position, 544
recompute mosaic, 555
recompute towfish navigation, 519
CARIS HIPS and SIPS User’s Guide
reject data, 510
remove from mosaic, 554
revert, 528
select a single ping, 504
select contacts, 542
selection, 504
signal display, 515
SIPS template wizard, 557–564
slant range correction, 525
specify start and end of ping selection, 499
time-varying gain, 535
toolbars, 500
view contacts during playback, 502
window, 496
workflow, 492
zoom, 503
Side Scan Editor display
16-bit shift factor, 499
Simrad format, conversion options for, 193
single beam data
accept data, 333
add depths, 331
auto cursor mode in editor, 334
automatic depth filtering, 243–246
barcheck function, 335
beam-to-beam slopes filter, 246
change depths, 330
change sounding position from the Worksheet
window, 334
change sounding status from Worksheet window,
333
depth filter, 246
event marks, 328
horizontal labels for, 328
horizontal scaling, 327
moving average filter, 245
primary and secondary data, 329
query data, 333
reject data, 332
restart cleaning, 247
toolbar, 327
vertical scaling, 327
view rejected soundings, 207
single beam data in the Vessel Editor, 141
single beam filtering, 243–??
SIPS template wizard, 557–564
Skip, 497
Slant Range Correction, 559
slant range correction, 525
smoothing sensor data, 278–280
Sonar altitude,digitizing, 521
sound velocity correction
see also SVP Editor
nearest in distance option, 226
nearest in time option, 226
previous in time option, 226
sound velocity processing
overview, 223
soundings
CARIS HIPS and SIPS User’s Guide
colour code in Subset editor, 386
designated., 208
display critical, 210
set status in Subset Editor, 398, 398
status bar
cursor coordinates, 23
decimal point precision, 23
overview, 23
precision, 95
subset
drawing bounding box, 387
resize, 387
Subset Editor
2D View, 393
2D view perspective, changing, 394
3D View, 389
close, 396
data status, ??–379
designated soundings, 399
examined status flag, 400
lock subset area, 388
open, 380
outstanding status flag, 400
overview, 374
query, 400
reject data, 398
resize subset, 387
set sounding status, 398, 398
sounding colour options, 386
subset tiles, 376–??
toolbar, 384
vertical exaggeration in 2D View, 394
view information, 384
workflow, 375
Subset Editorsubset tiles, ??–379
subsets
accept data, 399
CATZOC colour settings, 82
CUBE Surfaces, 449
reset rejected data, 247
S-44 survey order colour setting, 82
view rejected soundings, 207
Sun Position, 550
surface cleaning
histogram, 466
overview, 459
parameters, setting, 461–463
query tile soundings, 465
query tile surface, 464
tiling, overview, 458
SVP (Sound Velocity Profile), 223
apply correction, 225
barcheck function, 335
location symbol selection, 76
SVP Editor
depth scale, 289
edit existing data, 293
exit, 296
interface options, 291
13
new files, 290
new profiles, 295
remove profile, 294
SVP files, 224
SVP locations, display, 228
SVP pole offsets in the Vessel Editor, 142
swath angle weight, 406
swath cleaning, 230–??
Swath Editor
3D View, 301
accept data, 318
Amplitude View, 302
auto cursor mode, 321
beam and swath location, 308
beam display size, 306
change sounding status from Worksheet window,
320
close, 300
depth level labels in Side View and Rear Views,
304
detrend option, 306
examine data, 307
find soundings, 308
middle mouse select, 321
open, 299
Plan View, 301
port and starboard beams, displaying, 303
Profile View, 302
query data, 320
Rear View, 302
Refraction Editor, 322
reject data, 317
reject swaths, 318
reset rejected data, 247
Side View, 302
swath coverage outline, 310
swath outline, 79
toolbars, 300
view rejected soundings, 207
swath transducer location in Vessel Editor, 134
SWATHPlus format, conversion options for, 194
sweep transducer location in Vessel Editor, 143
symbology,track line, 30
T
Template
New Publication, 576
Template Editor, 574, 583
Terrain Axes properties, 56
terrain properties, 55
text files (Generic Data Parser), 633
tide
see also Tide Editor
display tide zones, 214
GPS tide, 250
load tide, 215
14
tide zone files, 653
weighted average option, 214
Tide Editor
create new tide files, 342
edit table data, 340
enter new data, 340
exit, 345
open, 338
open file, 338
scale, 339
search time gaps, 340
show or hide points, 343
time interval, 339
tool tips, 343
tide file formats
NOS final, 652
NOS preliminary, 651
Tide Files, 213
Tide files, 213
Tide stations, 214
Tide Zone files, 213
tiles
see also surface cleaning
close, 356
display options for the View window, 357
open, 356
overview, 355
properties, 357
query display, 359
query tiles, 361
Time Correction, 116
time error in Vessel Editor, 116
time stamp in Vessel Editor, 116
time-varying gain, 535
tool tip display, 76
toolbars, 24
about, 24
buttons, modifying appearance of, 25
custom, 26
move, 25
removing from desktop, 25
Side Scan Editor, 500
Single Beam Editor, 327
Subset Editor, 384
Swath Editor, 300
types, 24
undock and float, 25
towed sensors location data in Vessel Editor, 145
towfish navigation, recompute, 519
towfish trackline colour, 79
TPE (Total Propagated Error)
compute, 234
filter, 236
vessel editor values, 147
TPE filtering
S-44, 236
track lines
classify lines, 206
close single lines, 72
CARIS HIPS and SIPS User’s Guide
colour, 31, 79
colour banding, 79
Control window, select from, 46
current display, select by, 42
deselect, 46
lasso select, 44
opening a single line, 29
properties, 30
query line, 205
range, select by, 42
select all, 42
select next line, 45
select previous line, 45
symbology, 30
TrueHeave, 219
TVG, 535
U
UNB (Reson) format, conversion options for, 194
UNISIPS, export data to, 618
units, update BASE Surface, 421
units,decimal point precision, 23
University of New Hampshire, 3
Use Measure tools, 543
UTM, auto update, 76
vessel properties, 157
W
waterfall window, 496
waterline data in Vessel Editor, 146
weighted grids and BASE surfaces, 407
windows
3-D Display, 48
Control, 12
Display, 11
Properties, 14
reposition and resize, 22
Worksheet, 15
Winfrog format, conversion options for, 194
Worksheet window
Graph tab, 18
Output tab, 15
Profile tab, 21
QC reports, 21
Query tab, 16
Worksheet window, overview of, 15
X
XTF format, conversion options for, 196
V
Vertical Exaggeration properties, for 3-D display, 55
Vessel Editor
3-D vessel outline, 119
colour options, 123
coordinate system, 114
dynamic draft, 140
ellipsoid, 123
gyro, 135
heave, 137
navigation, 135
new vessel file, 125–131
open file, 118
pitch, 138
reference position, 115
roll, 139
save file, 118
single beam, 141
swath transducer location, 134
sweep transducers location, 143
time error, 116
time stamp, 116
towed sensors location, 145
TPE, 147
vessel outline, 121
view active sensors, 132
view sensor data, 132
waterline data, 146
CARIS HIPS and SIPS User’s Guide
Z
zerotide, 213
Zone Definition File, 213
zoom
3-D display, 60
constant zoom option, 76
forward, 38
previous, 38
Side Scan Editor, 503
Swath and Subset Editors, 316
using scale, 39
Vessel Editor, 120
zoom factor, 75
zoom in, 37
zoom out, 38
zoom tool, 37
15
16
CARIS HIPS and SIPS User’s Guide