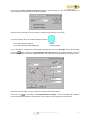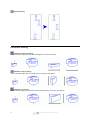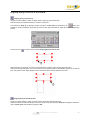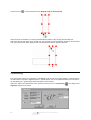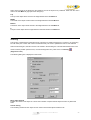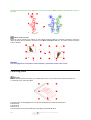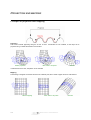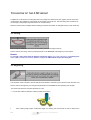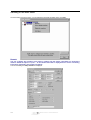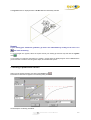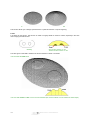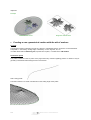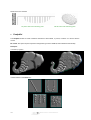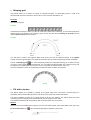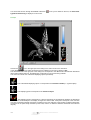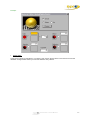
1
USER'S GUIDE Contacts Vision numeric SA (France) RN 89 – 69 690 Brussieu – France Tel. +33 (0) 4 74 70 80 00 Fax +33 (0) 4 74 70 88 53 Web Site http://www.type3.com/ E-mail [email protected] Vision numeric Italia Srl Via B Cairoli, 148 – 30031 Dolo (VE) – Italia Tel. +39 041 51 02 640 Fax +39 041 51 02 608 Sito Web http://www.type3.it/ E-mail [email protected] Vision numeric USA, INC. 1835 Shackelford Court – Suite 320 Norcross, GA 30093 – USA Tel. +1 770 717 1122 Fax +1 770 717 1433 e-mail [email protected] Vision numeric Deutschland GmbH Schelmenwasenstrasse 9 – 70567 Stuttgart – Deutschland Tel. +49 711 72 00 42-0 Fax +49 711 72 00 42-15 Web Site http://www.type3.de/ E-mail [email protected] VERSION PRO - USER'S MANUAL 1 Copyright Information contained in this manual is subject to change without notice and does not represent a commitment by Vision numeric SA. The software described in this manual is provided under license agreement and may be used or copied only in accordance with the terms of such license. No part of this publication may be translated, reproduced or transmitted in any form or by any means (electronic or mechanical) for any purpose without the express permission of Vision numeric SA. Copyright 1991…2000 Vision numeric SA – R 001023 Important Vision numeric SA shan’t be responsible for any loss (including, but not limited to profits) or damages whatsoever arising out of or related to this manual, or the use of the product, or any use thereof. Trademarks Type3, TypeArt and Vision numeric are registered trademarks of Vision numeric SA. Microsoft is a registered trademark of the Microsoft Corporation. Windows is a trademark of the Microsoft Corporation. AutoCad is a trademark of the AutoDesk Corporation. Other trademarks that appear in this publication are the property of their respective holders. 2 VERSION PRO - USER'S MANUAL USER'S GUIDE Welcome to the world of machining and graphical creation! This User's Guide is the reference manual for the widest configuration of Type3. Depending on the optional modules included in your license, some sections may not apply to your case. They will nevertheless allow you to discover the numerous innovative and powerful functions of Type3. VERSION PRO - USER'S MANUAL 3 CONTENTS FUNDAMENTALS 7 OPERATING REQUIREMENTS......................................................................................................................9 INSTALLATION .............................................................................................................................................10 GETTING STARTED......................................................................................................................................12 CONFIGURATION .........................................................................................................................................26 MANAGING FILES.........................................................................................................................................33 PRINTING .......................................................................................................................................................36 CAD MODULE 39 DISPLAYING TOOLS ....................................................................................................................................41 CREATING TEXTS.........................................................................................................................................43 CREATING OBJECTS ....................................................................................................................................59 DRAWING HOLES .........................................................................................................................................70 RULERS AND DIALS .....................................................................................................................................73 SELECTING OBJECTS...................................................................................................................................78 COPYING OBJECTS.......................................................................................................................................79 DELETING OBJECTS.....................................................................................................................................84 POSITIONING OBJECTS ...............................................................................................................................85 TRANSFORMING OBJECTS .........................................................................................................................99 SPECIALS EFFECTS ....................................................................................................................................106 DELETING THE LAST OPERATIONS .......................................................................................................117 COMBINING AND UNCOMBINING OBJECTS ........................................................................................118 SHAPING MODE ..........................................................................................................................................119 REGISTERING MARKERS..........................................................................................................................129 HANDLING SURFACES ..............................................................................................................................130 PROJECTION AND MAPPING....................................................................................................................148 MEASURING TOOLS...................................................................................................................................156 VARIABLES..................................................................................................................................................163 MULTICOPY AND MULTIPLATE MACHINING......................................................................................170 SCANNING ...................................................................................................................................................175 VECTORIZING .............................................................................................................................................177 BITMAP EDITOR .........................................................................................................................................181 PHOTO ..........................................................................................................................................................187 4 VERSION PRO - USER'S MANUAL USING LAYERS............................................................................................................................................189 USING SYMBOLS ........................................................................................................................................191 CAM MODULE 193 STRUCTURE OF THE CAM MODULE.......................................................................................................195 TOOLPATHS: OVERVIEW..........................................................................................................................199 TOOLPATHS OF THE 2D GROUP ..............................................................................................................204 TOOLPATHS OF THE 2.5D GROUP ...........................................................................................................218 TOOLPATHS OF THE 3D / TYPEART GROUPS .......................................................................................223 TOOL PARAMETERS ..................................................................................................................................226 TOOLPATH INFORMATION ......................................................................................................................229 DISPLAY AND SIMULATION ....................................................................................................................231 CALCULATION PARAMETERS OF THE TOOLPATHS ..........................................................................239 MACHINE SETUP ........................................................................................................................................244 START OF MACHINING .............................................................................................................................249 TYPEART MODULE 255 GETTING STARTED WITH TYPEART ......................................................................................................257 TYPEART: MAIN FEATURES.....................................................................................................................263 TYPEART: TRANSFORMATION TOOLS..................................................................................................296 TYPEART: DUPLICATION TOOLS............................................................................................................300 TYPEART: SPECIAL EFFECTS...................................................................................................................301 TYPEART: CAM TOOLS .............................................................................................................................307 TYPEART: VISUALIZATION TOOLS........................................................................................................311 TYPEVIEW ...................................................................................................................................................317 APPENDICES 335 TABLE OF CONTENTS AND INDEX .........................................................................................................351 You will find a detailed table of contents at the end of this Guide. VERSION PRO - USER'S MANUAL 5 6 VERSION PRO - USER'S MANUAL FUNDAMENTALS VERSION PRO - USER'S MANUAL 7 8 VERSION PRO - USER'S MANUAL OPERATING REQUIREMENTS Hardware requirements Microsoft Windows NT 4.0 (at least Service pack 6) or Windows 95 (OSR 2), 98 or 2000. Minimum required: 1 PC Pentium with • 64 MB RAM • one hard disk, 150 MB available (for the fullest license; 250 MB for the full installation) • CD-ROM driver • a 17” Windows compatible, SVGA color monitor 800 x 600 • 1 mouse Windows compatible, • 1 parallel port Equipment recommended: • • • • a 21” screen 1 video card 1 scanner TWAIN compatible 96 MB RAM If you need to free some disk space, you can, once the installation is complete, delete in the Language subdirectory the directories corresponding to interface languages not meaningful to you (e.g. the It directory for Italian). About 30 MB can be recovered by language. Machining equipment Type3 directly drives most of the 2D engraving machines available on the market as well as vinyl cutting or waterjet equipment. For laser cutting and engraving, contact us and receive information about the product LaserType. As an option, Type3 can access 3D engraving, with the sharpening of angles, with modeling (TypeArt module), and in 3, 4, or 5 axes. Any software from the Type3 family has post processors to drive most of the 3D engraving machines. For the 2D engraving machines an adaptation kit for 3D is available: CNC PC 2 (for more information, please contact us). VERSION PRO - USER'S MANUAL 9 INSTALLATION Attaching the dongle • • • • • • Turn your computer off. Remove any cable or any other dongle connected to your printer port (LPT1). Plug the male side of the dongle into the parallel port of the computer. Plug into the back end of the dongle any other cable or other security plugs that were previously connected to the printer port. Turn your computer on. The printer must always be connected and « On line ». Installing the software The software • Insert the CD-Rom in the CD driver (example: "d" if your CD ROM driver is installed on "d"). • Select Start, then Execute and the Browse button. • Open the Type3V42000 directory and double-click on the Setup program. • Follow the instructions of the installation program. The dongle The software has been conceived to detect automatically the dongle whatever the system you are working under (Windows 95 / 98 / 2000 or Windows NT). Nevertheless, in case you had some problems, when the installation is complete • Select Start, then Execute and the Browse button. • Open the C:\Vision\key directory and double-click on the Setup program. • Drivers are installed though nothing appears on screen. Restart Windows. For updating the software, you will need to inform us of the codes of the dongle. For this, in the menu ? of the CAD module, select the option About... and click on the function Order. Print this page after filling in the required information and fax it to us or to your nearest distributor. We will get back to you the same way. See Appendix 3. Installing True Type fonts To use the special fonts, you must first install them in Windows (after complete installation of the software). Start --> Parameters --> Control Panel, then Fonts, In the File menu --> Install fonts, select all True Type fonts in c:\Vision\fonts\ttf directory. 10 VERSION PRO - USER'S MANUAL Choosing the interface language To change the interface language, choose Options in the Edit menu. Select the General tab in the dialog box displayed on the screen and then the desired language in the scroll-down menu. Click on OK to validate. You need to restart the application. Function keys Some function keys are used every day in the drawing module, and you should know about them as soon as possible: F2 : F3 : to specify precise numerical coordinates during an operation. to select a snap mode when working on several elements (Ctrl-F or Ctrl-D allow to change mode without changing the current tool). F4 : to preview the transformation in progress (keep pressed). F10 : to open the Options dialog box, from where you change several working parameters. On-line help The on-line help is accessed with the F1 key. Very comprehensive, it follows the structure of this Guide and will provide relevant information during your work. Many active areas in toolbars and screen shots will launch a direct link to related topics. VERSION PRO - USER'S MANUAL 11 GETTING STARTED Getting started This tutorial takes you step by step through the basic functions and will guide you through the creation of your first machining sample. You are going to create a 3D cutting from Type3 logo: This exercise will take you about 10 or 15 minutes, with the following steps: • • • • • • • • Opening a document Creating a toolpath Defining a tool Simulating the toolpath Configuring the machine Control of the output codes Preparing the machine Launching the machining Running the program To launch the software, double-click on the icon: Remark Unless otherwise stated, clicking and double-clicking are done with the left button of the mouse. 12 VERSION PRO - USER'S MANUAL You are now in the Design Module (drawing and CAD), also called TypeEdit. From here you can import, create and work on the design from which you will make the engraving or cutting. Click on the Open icon in the upper toolbar to load an existing drawing. Click on the file called LogoT3.vnd, then click on the button OK. VERSION PRO - USER'S MANUAL 13 The drawing now appears on your screen, but we will not change it. Sending the object to the CAM module First, you have to select the design you wish to send. Click on a point (point 1 in the illustration) located outside and above the drawing (do not release the mouse button). Drag the pointer towards a point 2, outside and below the drawing. Now release the mouse. Be careful, this logo is made out of two items: the whole drawing must become red! 14 VERSION PRO - USER'S MANUAL Click on the CAM module icon . You see now the logo selected in the machining module, which has a blue background color. You switch back to the CAD module using the same icon. VERSION PRO - USER'S MANUAL 15 Creating a toolpath Click on the Create toolpath box is displayed. icon located in the toolbar of the CAM module. The Create toolpath dialog In the Create toolpath window, double-click on General, then on Group and finally on 2.5D Group to access to 3D Cutting toolpath. Double-click to select it: the corresponding dialog box is displayed on the screen. Note: maybe your software license does not include the 3D Cutting toolpath. Choose then 2D Cutting in the 2D Group: apart from true angles, the toolpath and its parameters are very similar, and you'll be able to perform entirely this Getting started section. For each machining, you must define a tool and a toolpath, in other words a machining method. We will specify the settings of the tool used for the 3D Cutting. 16 VERSION PRO - USER'S MANUAL Creating a conical tool To create a tool, click on the icon in the 3D Cutting dialog box. The Select a tool dialog box is displayed on the screen. Select Tool Database in this window and click on the mouse right button. In the displayed context menu, click on Add a tool…. The dialog box Tool editor appears. To add a tool in the tool database, you have to name it (MyTool in our example), select its geometry, set its parameters and save it. - Diameter: - 1/2 angle: - Tip diameter: - Nominal feed rate: - Rotation speed: 3.000 mm 15.000° 0.100 mm 600.000 mm/min 2000 RPM VERSION PRO - USER'S MANUAL 17 Choosing the depth of cutting Still in the tool editor, in the field Depth of cut situated in the Technologies tab, enter a value of 2 mm. Once all the desired settings are done, validate the choice of your tool by clicking on OK. Remark The created tool is automatically saved once you've clicked on OK in the Select a tool dialog box (after having closed the Tool editor through OK). Then you can use this tool as many times as you want. All dialog boxes being closed, the software calculates the exact toolpath in 3D. It is gradually displayed on the screen with a color different than the drawing. 18 VERSION PRO - USER'S MANUAL Simulating the toolpath When the toolpath is generated, it is ready to be sent to the machine. But before, we will visualize it realistically. Click on the Toolpath list icon of the CAM module toolbar. The corresponding dialog box opens. Select the toolpath you want to visualize, and click the right mouse right button to display the context menu. Click on Simulation… in the context menu. The corresponding window opens. VERSION PRO - USER'S MANUAL 19 By default, the simulation window displays the created toolpath on the top of the cutting (the machined plate). In our example, the height is Z = 0 mm. Section of the tool at Z = 0 Section of the tool at Z = -2 Nevertheless, you can modify the visualization height. Use therefore the view depth's cursor or enter the desired value in the numerical field located below. Visualization at the bottom of the cutting Checking the Theoretical box, the theoretical contour of the drawing is shown in red color, allowing you to compare the machining to the original design. 20 VERSION PRO - USER'S MANUAL Viewing angle in the simulation module To modify the viewing angle of the toolpath simulation, click on the icon toolbar of the view options is displayed on the screen. of the dialog box Simulation. The Double-click on the desired option. The visualization will be automatically refreshed. Remark If you choose like in the example shown above the Free 3D view (symbolized by the icon with arrows), you must enter the values that define the viewing angle in the corresponding numerical fields. Zooming You can enlarge the drawing by positioning the cursor on the drawing and by clicking on the right button of the icon. To go back to the original view, you can either click on the mouse. You can also click on the with the mouse left button, or double-click with the right button. icon Leave the simulation window using the Exit button. Sending the cutting to the machine Setting up the machine Before sending the cutting to your machine, you need to install the machine itself! Select therefore Setup machines… in the Machining menu. VERSION PRO - USER'S MANUAL 21 The Setup machine dialog box is displayed on the screen. Double-click on the Add machine….folder. Select your machine among the different lists of machines available. If you do not know the type of your machine, select the Demo machine in the All machines type list. Click then on the Add… button to register your selection. The dialog box Setup port is displayed on the screen. Choosing the port If your machine is actually plugged to the computer, select the option Use Windows spooler in the dialog box Setup port and click on OK. If your machine is not connected to the computer you are using, you will have to make a machining file and copy this file on a floppy disk, or over a network. The default name of the file generated with the option Series of files is the name of the document with the extension "Uxx" (in our case "LogoT3.U00"), in the same directory as your drawing (i.e. \Vision\Draws). 22 VERSION PRO - USER'S MANUAL Select the option Series of files of the dialog box Setup port and click on OK to validate your choice. Machine parameters For now, just validate the default parameters of the second Setup machine dialog box that appears once you have clicked on OK in the Setup port box. Once you've completed all these operations, click on the Exit button to go back to the CAM module. Verifying the output codes In order to display the instructions sent to your machine, select the toolpath in the Toolpath list dialog box and click on the right button. In the context menu, choose the option Machining…. VERSION PRO - USER'S MANUAL 23 The Machining dialog box is displayed on the screen. Select the Test option in the upper part of the dialog box and click then on the Run button. The corresponding dialog box is displayed on your screen. This dialog box displays what will be sent to the machine. Finally click on the lower bar Close to exit. 24 VERSION PRO - USER'S MANUAL Machining You can now try out your machine. Again click with the right button on your toolpath in the Toolpath list dialog box. In the context menu, select Machining…. To display again the corresponding dialog box. You must now select: • Port: if your machine is connected to your computer and if you have set up the printer connection. • File: if you want to create a machining file and transfer it to the machine later. Click on the Run button in order to output the codes, and finally click on OK. Before starting the machine Make sure you have installed on the machine itself the same tool that you have created in the CAM module during the previous steps. Remark The half angle and the tip diameter are very important! Always check that you are using exactly the same tool on your machine as the one that has been used for the toolpath calculation. Place your material with double side adhesive tape to a bigger plate, which is fastened onto the table of your machine (so you won't damage your engraving table). After that, check your X,Y zero point and Z zero point on the surface of the material. (Z = 0 on the surface of the material when carefully positioning the tool in contact with it). You can now run your machine. Congratulations! You have just created your first cutting of a logo in 3D!!! How to return to the CAD module Click on the icon to go back to the CAD module. We recommend you now to read the next sections of this Guide, and thus discover many other functions of the software. VERSION PRO - USER'S MANUAL 25 CONFIGURATION Plate dimensions To modify the basic configuration and to parameterize the dimension of the plate, click on Material in the Change menu and enter the new value in the corresponding fields of the Material definition dialog box. Plate dimensions The size of the plate is modifiable according to your needs. To modify its dimensions, click in the menu Change Material, and enter in the fields Width, Height, and Depth the desired values. Borders Borders are defined in the Material definition dialog box under the Change menu. The surpassing of an object outside the selected area will activate a warning message before engraving. Zero point It defines the origin of the reference points X, Y, and Z on the active surface. To modify it, enter the corresponding desired values in the fields Zero point X, Y, and Z. Adjust composition When the size of the active area has been modified, this option will automatically adjust in accordance to the new size of the composition. For instance, if the desired size is twice as large (and the height remains unchanged), the dimensions of the object will be doubled in length. Keep ratio Width / Height When the size of the active area has been modified (non proportional modification), this option maintains the geometry of the object without deforming it. 26 VERSION PRO - USER'S MANUAL Displaying options To modify the basic configuration, chose Options… in the Edit menu (or hit the F10 key) and select the displaying options in the Display tab, in accordance with your needs. Show rulers To display the horizontal or vertical rulers as a reference for positioning. Hit F10 and check the option Show ruler. Show bitmap To display the bitmap pictures (TIFF, BMP, etc.). Hit F10 and check the option Show bitmap. If this option is not selected, a crossed rectangle will represent the bitmap picture. VERSION PRO - USER'S MANUAL 27 Show direction To display in color the direction of rotation of the contours. Hit F10 and check the option Show direction. By default, clockwise contours are blue, and anti-clockwise contours are green. The direction of the contours is important for machining, filling in, or cutting. Show starting point To display the starting point of the contours (indicated by a square). Hit F10 and check the option Show start point. In machining, this point will be the starting point of the tool. Show control point To display the control points of the contours. Hit F10 and check the option Show control point. For the points out of the curve: For the points on the curve: Remark In some cases, the points on the curve can be indicated by circles. This is especially the case when points have been manually added on an existing tracing. 28 VERSION PRO - USER'S MANUAL Render TypeArt in 2D view Activate this option to realistically render TypeArt objects in 3D but also in 2D because its is often much easier to work with a 2D view. Arrow move To modify the value of one move each time you move the selected item with the keyboard arrow keys. Hit F10 and enter the desired value in the Arrow move field as shown in the example below. Snap distance This value corresponds to the snap distance of the contours while using the Snap mode initiated by the F3 key. Hit F10 and enter the desired snap value in the Snap distance field. Remark The higher the value, the more limited the snap distance will be. The distance is given in pixels. Surface step This parameter defines the accuracy of the display concerning imported 3D shapes, in other words, the number of isometrics for the display of surfaces of revolution or surfaces described in IGES format. Hit F10 and enter the desired value in the Surface step field. Displaying direction Select Options… in the Edit menu. Choose the Colors tab in the Options dialog box. This displaying mode allows one to recognize the direction of rotation of contours: blue for clockwise contours, green for anti-clockwise contours. VERSION PRO - USER'S MANUAL 29 The modification of this parameter will affect the milling process. Displaying the wire contours In the View menu select the option Wire color. By default, the objects appear in black wire contour. The color of the contour can be modified. Select the object, click on the icon Colors , and double-click on the desired color to validate. Displaying the contours in fill color Colors Select in the View menu the option Fill color. By default, the objects appear in black wire contour. The color of the contour can be modified. Select the object, click on the icon Colors and double-click on the desired color to validate. Remark Visualizing the recess or the relief of a design becomes interesting when using this mode with the Combine function. The recessed areas in machining are displayed in color. Machining with colors This feature allows you to assign a kind of machining to a color defined during the engraving’s creation. Previously, you must assign a color to each contour thanks to the Color dialog box which is displayed on the screen by clicking on the 30 icon. VERSION PRO - USER'S MANUAL Click then on the Colors for CAM icon . The Color machining dialog box is displayed on the screen. You can now create a Color/Toolpath combination. Click on the icon to define a toolpath for the selected color. Click on the icon to delete a created toolpath for the selected color. Once a toolpath is associated with a color, you can modify the name of this color by clicking on it with the right button. In this way you can define in advance the whole machining sequence, changing the order of the color machining (drag and drop with the mouse). The same color can appear several times in the same sequence at different moment of the machining. When you click on Send to machining, all defined toolpaths are launched following the specified order thanks to the associated colors. Click on the Send to CAM module button so that you create the toolpaths in the CAM module to have the possibility to access it later and send to machining. You can also save a group of combinations by clicking on the Save presets button or load existing combinations by clicking on the Load presets button. VERSION PRO - USER'S MANUAL 31 Modifying the origin of axis You can modify the point 0 of the axes, which is by default at the bottom left hand corner of the active surface. Click on the button, drag the mouse, and release the button when you have reached the desired point. Automatic saving To launch the automatic save mode for current projects, go to the menu Edit Options…, choose the General tab in the dialog box Options and enter the number of minutes desired in the Auto save field. 32 VERSION PRO - USER'S MANUAL MANAGING FILES Creating a new file New file You can create a new file with this icon or through the File menu, and New. By default, the new created file is labeled [UNTITLED]. This name is automatically attributed to any new file. When you are creating a new document, we advise you to save it under a new name since the UNTITLED file does not save the tool paths. Opening an existing file Open a file You can open an existing file with this icon or through the File menu, and Open. Select in the dialog box: • • • the drive, the directory where the file is located, the name of the file, and validate. Saving a file Save You can save your drawing at anytime. If the file already exists, you can execute an automatic save; if it is a new file, you need to name it in the Save as dialog box. Select in the dialog box: • • • the drive, the directory where you want to save your file, enter the name of the file, and validate. Information To find a drawing more easily, you can attach to it key words or other information such as a creator's name, a customer's name, or any other comments. Under File Information, enter the desired information and click on OK. Then save the file as described above. Remark To go to the next line within the commentary section, press the Ctrl and Enter keys at the same time. VERSION PRO - USER'S MANUAL 33 Opening a model For repetitive works, a library with pre-registered plate models is at your disposal. You can complete it at any time. Besides the dimensions of the plate, a model can contain a text, a logo, variables, etc. To open a model, select under the File menu the option Open model. In the displayed window, double-click on the selected model. Saving a model Enter the corresponding parameters for the desired plate and select the option Save model under the File menu. Under the window Save as, enter the name of the model in the Name field and click on Save. By default, the directory selected for the saved work is Models. Importing a file Import You can import a file issued from other applications with the following formats: Bitmap *.bmp, *.Tif / Autocad *.dxf, / PostScript *.eps, / Adobe Illustrator *.ai, / Plotters *.hpg, *.plt, / IGES *.igs, / ISO *.iso / Tool path *u?? / Window Metafile *wmf, JPEG *.jpg. This function can also be reached through the File menu, and Import. Select in the File import dialog box: the directory, the name of the drives (A, B, C etc.), the format, the file name, and then validate. Exporting a file Export This function is available in the menu File Export. You can also export a file in several formats: Autocad 2D and 3D *.dxf, / PostScript *.eps, / Adobe Illustrator *.ai, / Plotters *.hpg, *.plt, / ISO *.iso, / Symbols *.syb, / Tool path *.u?? / STL ASCII Files ou STL Binary Files *.stl, to transmit them to other applications, completing the symbol library, for instance. Choose the directory where you want to save the file, then select the format (dxf, eps, ai, etc.) in the scroll down list. Enter the file name in the field File name, and validate. 34 VERSION PRO - USER'S MANUAL Finding a file To find a drawing you can ask for a list of files sorted by either the name of the drawing, by the date of creation or modification, or by the creator’s or customer’s name. Click on the Find command under the File menu and select the searching parameters (name, date of creation or modification...), then choose the document on the screen. You also have at your disposal a general preview of the selected drawing. Copying This function copies the document selected and all the associated files (tool paths, theoretical paths, machining paths, etc.) in the designated directory. Moving This function displaces the document selected and all the associated files (tool paths, theoretical paths, machining paths, etc.) in the designated directory. Erasing This function erases the document selected and all the associated files (tool paths, theoretical paths, machining paths, etc.) VERSION PRO - USER'S MANUAL 35 PRINTING Preview Preview Before printing you can verify whether the parameters of the printer correspond to the desired effect. Click on the shown icon or choose Preview… under the File menu. Printing parameters All To print the whole document. Selection To print only a selected area. Pages If the print job requires more than one page, enter the page number which you want to print (if you do not want to print the whole document). Print to file To send the data to a file so that you can print it later, choose this option (the extension will be .prn). Center The drawing will be centered on the paper. Adjust to page The size of the drawing will be adjusted to the size of the paper. Scale The size will be done according to the scale you enter. This function is used especially for the creation of chemical engravings of stamps. 36 VERSION PRO - USER'S MANUAL Info To print the information about the document at the bottom of the paper (directory, complete name, size, printing scale, etc.). Printing Print To print the drawing with the selected parameters. VERSION PRO - USER'S MANUAL 37 38 VERSION PRO - USER'S MANUAL CAD MODULE VERSION PRO - USER'S MANUAL 39 40 VERSION PRO - USER'S MANUAL DISPLAYING TOOLS Tools for visualization The tools concerning the display of an object are always shown at the top of the screen. You can also find these functions under the View menu. Zoom Click on the icon and define with the cursor the area you want to enlarge. If the zoom is not enough, redo the operation. To cancel, click on the same point. Previous zoom To jump to the previous view. Zoom maximum To display all objects, even if some of them are outside of the active area. Zoom on active area To display automatically the entire active area. Zoom on selection To zoom automatically on the selected object. If there is no object selected, this function is not valid. Quick tip... Clicking on the right button of the mouse will enlarge the view (x 2), without selecting an icon. Double-clicking will give you the maximum zoom. VERSION PRO - USER'S MANUAL 41 3D display The selection of the views can be done either under the View menu or by clicking on the lower status bar in the XY View point field. 4 types of views are available: on the XY axes in front view on the YZ axes in cross section view on the XZ axes in cross section view on the XYZ axes in 3D Iso view. You can also use the following shortcuts to select the available views: 42 Ctrl + 1: front view on the XY axes Ctrl + 2: cross section view on the YZ axes Ctrl + 3: cross section view on the XZ axes Ctrl + 4: 3D Engraver view on the XYZ axes Ctrl + 5: 3D Iso view on the XYZ axes Ctrl + 6: Free 3D view on the XYZ axes through numerical values (dialog box View point). VERSION PRO - USER'S MANUAL CREATING TEXTS Composition tools Text mode Click on the icon Text mode to display the toolbox for the creation of texts. Description of the selector: Rapido Free text To create free text, click on the icon Free text which is located in the toolbox for creation of texts. The Rapido selector is displayed on the screen. Menu selection The circular selector on the left side of the screen, named Rapido, allows you to access quickly, with a simple click on one color, one of several menus: layout, styles, character and line attributes. Validation of the parameters Click on the left button of your mouse, with the cursor on the active surface, to validate the parameters. You can also validate your choices by pressing Enter. VERSION PRO - USER'S MANUAL 43 Yellow Rapido: Simplified Palette • Transforming automatically into uppercase letters / Automatic Caps Uppercase icon Small caps icon Select the text to be capitalized / capitalized in a smaller format, click on the icon, and validate. Example Lowercase letters Uppercase letters Small caps • Transforming automatically into lowercase letters Transforming automatically into lowercase letters Select the text to be transformed into lowercase letters, click on the icon and validate. • Angle Select the text or characters which you wish to rotate, enter the degree of rotation, and validate. Remark By default, the angle of rotation is at zero since all the characters are flat on the baseline. • Underlining texts Underlining text Select the characters to be underlined, click on the icon Underlining text, and validate. The line will appear under the baseline at a distance proportional to the height of the underlined characters. • Writing from right to left If this button is pressed, what you write with the free text tool goes from right to left (for arabic language for instance). • Variables Tool used to enter defined variables. See explanations in the chapter Variables, section Inserting a variable text. 44 VERSION PRO - USER'S MANUAL • Spell check (option) Dictionary Select the text you wish to check and click on the icon Dictionary. The spell checker should be already installed on your PC. • Spacing of characters Proportional Spacing Select the text or characters to be spaced, click on the icon Proportional spacing, and validate. Example Normal at 200 % Remark By default, the given spacing is at 200%, in other words, twice the original spacing. The spacing value can be modified in the Text Attributes box (Blue Rapido). It will become the parameter by default till the exit of the software. • Modifying character spacing Proportional Spacing Select the text or characters to be spaced, click on the icon Proportional spacing, and validate. The spacing by default is 200%. Example: When the height of the character is 10mm and you enter a spacing value of 200%, the spacing obtained is 20mm. • Indices and Exponents Indices Select the character(s) to which you wish to add the index, click on the icon Indices, and validate. By default, the distance between the text or character indexed and the baseline is equal to 50% its height. The size of the indexed character is reduced to 50 %. Exponents Select the character(s) to which you wish to add the exponent, click on the icon Exponents, and validate. By default, the distance between the text or character with the exponent and the baseline is equal to 50% its height. The size of the exponent character is reduced to 50 %. • Positioning the characters in relation to the baseline The text may be placed either above or below the baseline. Select the text to be repositioned, click either on the icon Text above the baseline or on the icon Text below the baseline, and validate. VERSION PRO - USER'S MANUAL 45 Text above the baseline Text below the baseline Green Rapido: Character Attributes • Choosing the text font The library of fonts includes TrueType and Vision Numeric fonts. Other formats are available. Click on the arrow of the scroll down menu to see a list of fonts in the library. Use the scroll bar to select the desired font and click on it. If you know the name of the font, you can rapidly access to it by typing the first letter of its name. To facilitate the selection of fonts frequently used, the 5 last fonts used are displayed at the beginning of that list. 46 VERSION PRO - USER'S MANUAL • Size of characters Height of the character in millimeters (or in the chosen unit) With the mouse, select the text or characters to be raised or lowered, enter the desired height in mm in the corresponding field, and validate. Example on the first letter of the word Rapido The height of R is 25 mm whereas the height of the other letters is 10 mm Width of character in percent With the mouse, select the text or characters to be widened or shortened, enter the desired width in percent in the corresponding field, and validate. Example on the first letter of the word Rapido Widening of R by 500 % • Modifying the height of the character Numerically With the mouse, select the text or characters to be raised or lowered, enter the desired height in mm in the corresponding field, and validate by clicking on the red button. Remark You can also modified the size of the character using the mouse. Selection tool Select the text or character with the selection tool and click on the handle at the top center of the text. Without releasing the button on the mouse, drag the mouse toward the top or bottom of the screen depending on whether you wish to raise or to lower the text. Example: VERSION PRO - USER'S MANUAL 47 Remark You can give the accurate dimensions of the height you wish to apply by hitting the F2 key. • Modifying the width of the character Width of the character in percentage With the mouse, select the text or characters to be widened or shortened, enter the width desired in the corresponding field, and validate. Remark You can also modified the width of the character using the mouse (see hereafter). Selection tool Select the text or character with the selection tool and click on the handle at the right center of the text. Without releasing the button on the mouse, drag the mouse toward the left or the right of the screen depending on whether you wish to shorten or to enlarge the text. Example Remark You can give the accurate dimensions of the height you wish to apply by hitting the F2 key. • Slanting Slanting Select the text or characters to be slanted, click on the icon Slanting, and validate. Example at 15° at -15° Remark By default, the degree of the slant is equal to 15°. Inserting a minus sign "-" before the slant degree inverts its direction.. 48 VERSION PRO - USER'S MANUAL • Previewing fonts Previewing fonts You can preview the fonts before validating your choice. Click on the icon Previewing fonts to open the dialog box List of characters and search in the library of fonts using the scroll down menu. You can also reach this dialog box by using the icon Font edition how to proceed. . See the section Font creation to know • Inserting a symbol or a special character This function allows you to choose a symbol or to search for a special character. Previewing fonts Position the cursor where you would like to insert the character or symbol, and click on the icon Previewing fonts of the Green Rapido. In the library displayed in the dialog box List of characters, use the scroll-down menu to choose a font, select the desired character or symbol, validate your choice by clicking on Insert, and close the dialog box by selecting Close. The chosen character or symbol will have been inserted within the text. • Aligning Text By default the block justification is centered. You can modify it by selecting another justification. Align the text to the left of the starting point. Center the text from the starting point. Align the text to the right of the starting point. Align the text to block with regard to the starting point (fills in the whole available space). VERSION PRO - USER'S MANUAL 49 Blue Rapido: Line attributes The Blue Rapido allows you to position your text, to define the length as well as line spacing and to compress either lines or paragraphs. • Positioning of texts By default, you can position the text where you want on the material. Therefore, you just need to position the cursor on the desired position and to click on the left button of the mouse. The coordinates of the point of beginning for the text can be numerically modified. First select the text. Enter the new values as in the example above (X=25 and Y=20) in the corresponding fields and validate the change by hitting Enter. • Compressing lines This compression can be done one line after each other or globally in such a way that the size of the characters get standardized. Compressing lines The benefit of this function is to compress the characters so that the text will not go over the length of the defined baseline. Example with a 20 mm long text ("Compressed"): Using this function allows to shorten the text "Compress". The length of this text is 20 mm and must be shortened to 15 mm. First select the text to compress, and click on the icon Compressing lines. Modify then the length of the baseline by entering the desired value in the field Maximum length of the Blue Rapido. Validate by hitting Enter or by clicking with the left button of the mouse on the material. The length of the selected text is 15 mm. 50 VERSION PRO - USER'S MANUAL • Compressing paragraphs Compressing paragraphs The benefit of this function is to compress a whole paragraph referring to the shortest line. Example with a text which shortest line is 20 mm long: The length of the shortest text must be decreased to 10 mm without altering the original ratio width/height of the paragraph. First select the paragraph you want to compress. Modify then the length of the baseline by entering the desired value in the field Maximum length of the Blue Rapido. Click then on the icon Compressing paragraphs and validate the operation by pressing the Enter key or by clicking on the left button of the mouse with its cursor on the material. The length of the shortest word has been reduced to 10 mm and the original ratio width/height of the paragraph is kept. • Length of text Distance of the maximum length of the baseline. By default, the line stretches across the whole page between the left and right margins. This distance corresponds to the real size of the text before compression, when the percentage of compression is equal to 100 %. Therefore, since the length of the text cannot be superior to the length of the baseline, the characters will be squeezed and the percentage of compression will become inferior to 100 % when the length of the text is increased. Percentage of compression of the text on the baseline. This value is at 100% before compression and decreases when the length of the text is larger than the distance of the baseline. • Parametrical line spacing Parametrical line spacing Use this function to set the space between lines. The interval expressed in the default value defines the distance between the two baselines without taking the height of the characters into account. • Proportional line spacing The spacing between the lines is expressed in percent and depends on the text font. This line spacing parameter takes into account the height of the superior downstroke i.e. the characters above the base line. By default, it is 75% of the height of the text. Example VERSION PRO - USER'S MANUAL 51 at 75% at 0% The typographic line spacing takes into account the whole height of the characters, superior and inferior downstrokes included. By default, this parameter is 100% of the height of the text. Example at 100% at 0% Red Rapido: Styles To facilitate access to often used texts or characters you can save the styles: font, dimension of the character, slant, etc. To save styles, use the Red Rapido. • Creating a style Define the attributes parameters for characters or paragraphs in such a way that the text appears as desired: font, slant, position, etc. Click on the Red Rapido and enter the name of the style in the field of the scroll down menu. 52 VERSION PRO - USER'S MANUAL Click on Save to save this style. The style includes all the defined parameters at the time when saved. • Finding a style Choose a style from the scroll down menu, validate your choice, and type your text. If the text is already typed, select it, choose the desired style from the scroll down menu, and validate your choice. Remark The last used style is always the one that remains active. Text on a Curve Text on a curve You can bracket a text on any shape: a straight line, a curve, a rectangle, an ellipse, etc. . Trace your baseline with the help of the Sketching tool Then click on the icon Text on a curve. The Rapido is displayed on the screen allowing you to define all the parameters (styles, positioning, etc.). Create your text. Orientation of the text The beginning point of the tracing defines the starting direction of the text. The orientation of the text (from left to right or from right to left) depends of the direction of the tracing chosen when drawing the baseline. Hence, a tracing, no matter how created, if it is drawn from left to right, the text will appear from left to right. Starting point On the other hand, a tracing created from right to left will make the text be positioned in the opposite direction from above, in other words, from right to left. Starting point VERSION PRO - USER'S MANUAL 53 Click on the icon Reverse contour to invert the direction of the contour. Remark In the case of a closed contour, it is the direction of the contour (clockwise or anti-clockwise) which determines the orientation of the text. Clockwise (green) Anti-clockwise (blue) Text inside a rectangle Text inside a rectangle The interest of this function is to define a rectangular area from which the text cannot go beyond. As a consequence, the text contained in this area will be automatically centered and compressed. Remark You can either apply this function to an existing text (you need to select the text) or define the rectangular area before creating the text. Click on the icon Text inside a rectangle. The dialog box Rectangle/Rounded rectangle is displayed. In the example shown above, the rectangular has been defined with a 12 mm width and a 16 mm height. This area is positioned referring to the left inferior corner point which is activated in the dialog box of the example. The coordinates of this left inferior corner point are X=1 mm and Y=2 mm. Click on OK to validate. The rectangular area is displayed on the screen. The cursor is automatically centered vertically. 54 VERSION PRO - USER'S MANUAL Create now your text: this one is automatically compressed to pass into the defined area. Creation / modification of a font The software includes a font editor that allows you to create or modify one by one the characters of an existing font. Modification of a font Click on the Text mode icon to display the toolbar where you can find the Font edition icon dialog box Font edit select is displayed on the screen: . The Choose in the scroll down menu the font you want to modify and click on OK. Then proceed the same way as for the creation of a new font (see further). Creation of a new font to display the toolbar where you can find the Font edition icon Click on the Text mode icon dialog box Font edit select is displayed on the screen: VERSION PRO - USER'S MANUAL . The 55 Click on New font. The following dialog box allows you to name your font: Give a name to the font and click on OK. Your font appears in the library. Click again on OK. The next dialog box allowing you to create your new font and the kerning between characters is displayed on the screen. First of all, draw a guide line that allows to define precisely the height and width of the letters, as well as the spacing before and after the letters. Then, draw you letter with the modeling tools or all other necessary tools. 56 VERSION PRO - USER'S MANUAL button. Whatever is in Layer 1 of your vnd file will be included in the Select the whole letter and push the character, so you have to position the lower left corner of your character at the origin of your layer. Also note that your character should be 100 mm high in order to keep a 1:1 scale when choosing the size of your font. The following dialog box appears on the screen: In the right box, enter the letter you’ve just created (be careful with the small and capital letter!). Nothing appears on the screen. However, the letter code appears in the left box and allows you to identify the character you saved. Confirm with OK. If you wish to save your character, push the button. Do the same for the other letters of the alphabet. Don’t forget to save your work after having created a letter. To erase a letter, push the button. Select the letter you want to erase and close the dialog box. Push the button to save your modification. The icon allows you to visualize the list of available characters The icon allows you to close the font editor. The icon allows you to define the kerning between letters. VERSION PRO - USER'S MANUAL 57 Char 1 and Char 2 allows you to define the letters between which you want to define the kerning. Click on the to choose the first character in the list. Proceed the same way to choose the second one. Both icon Char 1 of the selected characters are displayed on the screen. You can enter the value of the kerning in the middle box. . Confirm your choice by clicking on To refine your evaluation, use the buttons With the scroll-down menu, you can list the kerned letters. The icon allows you to choose the kerning recommended. The icon allows you to erase all kernings. 58 VERSION PRO - USER'S MANUAL . CREATING OBJECTS Drawing geometrical shapes This section deals with creating an object by free hand and with the help of tracing shapes (square, oval, circle, starburst...). Shape tool This icon opens the toolbox with the different geometrical shapes available. Remark The drawing of an object can always be made numerically. The numerical functions are continually active when you create, move, or resize an object with the F2 key. You can put any selected tool back down by hitting the space bar. To draw these geometrical shapes, select the tool corresponding to the shape you want to draw and place the cursor, which represents one of the tops of the shape, on the active area. Marker Marker To create a point, click on the icon Marker. Then place your marker on the material by simply clicking on the left button of the mouse. Ten different kinds of marker are available. They are numerically ordered from 0 to 10. By default, the marker N° 0 is displayed. To modify the graphical representation of the marker, press the Ctrl key at the same time you click on the icon Marker. The dialog box Draw marker is displayed. Enter the ordered number corresponding to the graphical representation of the marker you want to use. Below is the list of the ten markers available: Marker N° 0 Marker N° 1 Marker N° 2 Marker N° 3 Marker N° 4 Marker N° 5 VERSION PRO - USER'S MANUAL 59 Marker N° 6 Marker N° 7 Marker N° 8 Marker N° 9 Validate with OK and position the marker on the material. With F2: gives the accurate coordinates of this point. Rectangle Rectangle Click on the icon Rectangle. Position the cursor on the material, and while holding down the left mouse button, drag the mouse until your rectangle is set. Then release the mouse button. Trace while pressing the Ctrl key Trace while pressing the Ctrl + Shift keys = Square = Centered square You can also draw your rectangle numerically. Therefore, click on the icon Rectangle and then press the F2 key. The dialog box Rectangle/Rounded rectangle is displayed on the screen. First select the point which coordinates X and Y will be defined in the corresponding fields of the dialog box. Then give the width (12 mm in the above example) and the height (16 mm in the same example). Click on OK to validate. Remark or allows to create a rectangle either with rounded corners or with chamfered Clicking on corners (see next section). Rectangle with rounded or chamfered corners To trace a rectangle with rounded or chamfered corners, click on the icon Rectangle with rounded or chamfered corners. 60 VERSION PRO - USER'S MANUAL In the dialog box Draw rounded rectangles that appears, type the radius you want and indicate whether you require rounded or chamfered corners as shown hereafter. Follow the same procedure as for the tracing of a rectangle using either the mouse or F2. If you enter negative values, arcs will be inside the rectangle: Trace while pressing the Ctrl key Trace while pressing the Ctrl + Shift keys = Square = Centered square You can also draw a rectangle with rounded angles by clicking first on the icon Rectangle, then on F2 and finally on the icon within the dialog box Rectangle/Rounded rectangle that is automatically modified. Compared to the original dialog box, there is an added field to fill in. This value represents the radius of the rounded corner. Follow then the same steps as for the creation of a rectangle as described before. Click on the icon in the dialog box Rectangle/Rounded rectangle to draw a rectangle with chamfered corners numerically and follow the same steps as for the creation of a rectangle with rounded corners. VERSION PRO - USER'S MANUAL 61 Polygon Polygon To trace a polygon, click on the icon Polygon and enter the number of sides desired in the dialog box Draw polygons that is displayed on the screen. Example: Remark You need to enter a value greater than or equal to [3]. Trace while pressing the Shift key = 2 opposite points of the included circle Star Starburst To trace a star, click on the icon Starburst. In the dialog box Draw stars, enter the number of vertices desired. Draw a circle corresponding to the external size of the star, then click on the left button of mouse. Drag the cursor towards the inside of the circle and click again on the left button of the mouse to finish. The closer you are to the center, the thinner the vertices of the star will be. 62 VERSION PRO - USER'S MANUAL Sketching tool Sketching tool To draw lines or curves by free hand as well as shapes associating lines and curves, click on this icon Sketching tool. Click once on any point and drag. Each time you release the mouse button, you create a line. Double-click to stop. Trace while pressing the Ctrl key = angular point (segment) Trace while pressing the Shift key = tangent point after a segment You can use the F2 key to draw a segment with exact coordinates. Select the Sketching tool and click on F2. Enter the X1, Y1, and Z1 coordinates for point 1. Then click on F2 to enter the X2, Y2, and Z2 coordinates for point 2. Finally click again on F2 and enter the same coordinates X2, Y2 and Z2 of the point 2 to end the operation. Double line Double line The interest of this function is to trace double lines as well as single line segments (line segments can also be drawn by pressing the Ctrl key while tracing with the Sketching tool). Drawing a double line To draw a double line, click on the icon Double line. You can set the parameters of this tool by pressing the Ctrl key while clicking on the icon Double line. VERSION PRO - USER'S MANUAL 63 The dialog box Creation of simple/double line appears on the screen. First choose the kind of link and its dimensions. Therefore, click on one of the three icons: Creation of sharpened angles Creation of chamfered angles Creation of rounded angles Define then the spacing between each line (of the double line) and the median axis by entering the numerical values in the corresponding fields. Remark In case you create an open contour, you can also define the double line's aspect at its starting point and at its arrival point. To define the double line's aspect at its start and at its end, click on one of the three icons: Open double line Closed double line with sharpened angles Closed double line with rounded angles After having selected the desired options, click on OK to validate. To start drawing the double line, click once on the material and drag using your mouse. 64 VERSION PRO - USER'S MANUAL Click on the mouse each time you want to create an angle. If you want to trace parallel to the axis X or Y, keep pressed the Ctrl key while dragging the cursor. Remark You can numerically define the position and the value of each angle by hitting the F2 key and entering numerical values. To validate an open contour, double-click as soon as you want to end its tracing. The contour is displayed in red. To close a contour, drag the cursor until the starting point. When the contour becomes blue or green, it is closed. Double-click on the mouse's left button to validate your contour. The contour appears in red. Drawing a simple line To trace a simple line, select the option Simple digit of the dialog box Creation of simple/double line. To display this dialog box, keep pressed the Ctrl key while you click on the icon Double line. To start drawing the simple line, click once on the material and drag using your mouse. Click on the mouse each time you want to create an angle. If you want to trace parallel to the axis X or Y, keep pressed the Ctrl key while draging the cursor. Remark You can numerically define the position and the value of each angle by hitting the F2 key and entering numerical values. To validate an open contour, double-click as soon as you want to end its tracing. The contour is displayed in red. To close a contour, drag the cursor until the starting point. When the contour becomes blue or green, it is closed. Double-click on the mouse's left button to validate your contour. The contour appears in red. Circle and ellipse Circle To trace a circle, click on the icon Circle, then on the active area. Drag the mouse maintaining the left button pushed until the object obtains the desired dimensions. Then release the button to finish. VERSION PRO - USER'S MANUAL 65 With F2: enter the accurate dimensions of the circle, its radius (50 mm in the example hereafter) and the coordinates X and Y of a point you can select among the nine points of the dialog box Circle. Ellipse To trace an ellipse, click on the icon Ellipse, then on the active area. Drag the mouse maintaining the left button pushed until the object obtains the desired dimensions. Then release the button to finish. Trace while pressing the Ctrl key Trace while pressing the Ctrl + Shift keys Trace while pressing the Shift key = circle = ellipse centered in its circle = centered ellipse With F2: enter the accurate dimensions of the ellipse in the dialog box Ellipse: The width (20 mm in the example shown hereafter) The height (12 mm in the example shown above) The coordinates X and Y of the selected reference point. Circle (3 points) To trace a circle defined by 3 points, click on the icon Circle (3 points). Indicate the three points on which you want to draw the circle. Then draw the figure by clicking on the first two points to begin the drawing and by validating it on the third point. Remark If you click once on F2, you can directly enter the coordinates of the first point of the arc of the circle. Repeat the operation a second time, then a third time to respectively enter the coordinates of the second and third points of the arc. 66 VERSION PRO - USER'S MANUAL Arc of circle Arc To trace an arc, click on the icon Arc. Draw the circle in which the arc will be formed. Once the circle is drawn, release the button at a certain point which will be the starting point for the arc. Drag the cursor until the arc has the desired dimension, and then validate. Remark While pressing the Ctrl key, the tracing will be in the clockwise direction. Arc (3 points) To trace an arc defined by 3 points, click on the icon Arc (3 points). Indicate the three points on which you want to draw the arc. Then draw the figure by clicking on the first two points to begin the drawing and by validating it on the third point. To define the curvature of the arc at the end, press Shift before validating the third point. Remark If you click once on F2, you can directly enter the coordinates of the first point of the arc of the circle. Repeat the operation a second time, then a third time to respectively enter the coordinates of the second and third points of the arc. Arrow Arrow To draw an arrow, click on the icon Arrow. The dialog box Type of arrow is displayed on the screen. Three kinds of arrows are available. Select one of them and click on OK to validate. VERSION PRO - USER'S MANUAL 67 Arrow Select Arrow in the dialog box Type of arrow and click on OK to validate. Create the arrow's base by clicking on the material (the base is pointed out by the cursor on the picture hereafter). Drag the cursor to define the direction of the arrow, and click a second time when the arrow has got the desired length (from the base to the head). Drag now the cursor to define the global width of the arrow as well as the head's angle. Click a third time when the arrow has got the desired shape and dimensions. Drag the cursor to define at the same time the width of the arrow's tail and the angle of the lateral tips. Click a last time to validate the arrow you just created. The arrow gets displayed in red. Orthogonal arrow This kind of arrow features right angles at the junction of the arrow tail and its lateral tips. Example To draw an orthogonal arrow, follow the same steps as for the creation of a "classical" arrow, after having selected Orthogonal arrow in the dialog box Type of arrow. The created orthogonal arrow gets displayed in red. Remark If you are creating an orthogonal arrow, the last drag of the cursor before validation will not allow to define the angles. Filar arrow This kind of arrow is represented by three segments. Example To draw a filar arrow, follow the same steps as for the creation of a "classical" arrow, after having selected Filar arrow in the dialog box Type of arrow. 68 VERSION PRO - USER'S MANUAL The created filar arrow is displayed in red. Drawing an arrow numerically To draw arrows numerically, click on the icon Arrow. Select the kind of arrow you want to create in the dialog box Type of arrow and click on OK to validate. Click then on the material to begin drawing the arrow and define its direction. Press then the F2 key. The dialog box Arrow is displayed on the screen. Enter the desired numerical values in the dialog box. When finished, click on OK to validate. Remark The dialog box Arrow immediately takes into account the kind of arrow you selected. Nevertheless, this dialog box also features icons allowing you to modify the kind of arrow you want to create simply by clicking on one of them. VERSION PRO - USER'S MANUAL 69 DRAW HOLES Inserting draw holes Draw hole This function allows to geometrically position one to nine draw holes on the active surface. So can you take into account the future positioning of the holes in relation to your composition. Click on the Draw hole icon. The dialog box Draw hole is displayed on the screen. First enter the dimensions (depth and width) in the two fields located in the lower left corner of the dialog box. Select then the positioning of the draw hole(s). Remark The Draw hole function includes nine predefined positions that you may combine or no. Example 1 To center a draw hole on the active surface, click on the 70 icon. VERSION PRO - USER'S MANUAL You can immediately see the result in the dialog box. The draw hole is automatically centered. You can also combine several positioning patterns as well as suppress some holes simply by clicking on the ones that must be deleted. Example 2 To position five draw holes, first click on Click then on the point you want to delete. , then on . VERSION PRO - USER'S MANUAL 71 The dialog box immediately reports your selection. Remark You can also position the points numerically in relation to the horizontal and vertical rulers. Therefore enter the desired numerical values. This function cannot be enabled in case of a single centered point. Once the draw holes are defined, click on OK to validate. The selected points are represented by active surface. on the Free mode The Draw hole function can be used in free mode. Click on the Draw hole icon. The Draw hole dialog box is displayed on the screen. Validate by clicking on OK without having selected a positioning pattern. This allows you to position draw holes by clicking on the active surface (one click per draw hole to position). Do the same numerically by hitting the F2 key and entering the coordinates in the dialog box displayed on the screen. Once the draw holes are defined, click on OK to validate. The selected points are represented by active surface. 72 VERSION PRO - USER'S MANUAL on the RULERS AND DIALS Rulers and dials: parameters To create a vernier, you first have to create the original drawing on which the graduation will be braced. This drawing (support drawing) can be a line, a circle, or a complex shape. The principles of graduation remain the same whatever the original shape may be. The latest evolutions of the software allow you now to directly create the support drawing during the use of this function or to work with an existing drawing. 1. The support drawing doesn't exist Click on the Dial icon support drawing. . The dialog box Basic definition appears on the screen. It will help you in creating the Geometry • Select the option Linear shape to realize a ruler. Define the position of the support drawing's starting point in the numerical fields Origin X and Origin Y. Define also the length of the ruler (100 mm in the example shown below) as well as its skew angle (45 degrees in the example shown below). The biggest square represents the starting point of the drawing. Example • Select the option Circular shape to make a dial. Define the position of the drawing support's (circle or arc of circle) center in the numerical fields Centre X and Centre Y. Define also the radius (100 mm in the example shown below), the positioning and the length of the drawing through its starting and ending angle (180° and 0° in the example shown below). Define this angle in the top field to obtain an arc towards the top (like in the example) or in the lower field to obtain an arc towards the bottom. Both angles are defined in relation with the horizontal axis. The biggest square represents the starting point of the drawing. VERSION PRO - USER'S MANUAL 73 Example The Offset checkbox allows to add a parallel line to the support curve, with an offset you specify. Remark Whatever the chosen shape, the preview window situated in the right bottom corner of the dialog box Basic definition gives you an instantaneous view of the created support drawing before validating. The big square represents the starting point. Click on this zone to immediately refresh the view. Once all parameters are set, click on Next to complete the next steps. Remark Without having defined the graduations until now, you may be unsastified with the final result. In that case, you don't need to redo all the steps one by one. Simply double-click on your composition. The dialog box will be displayed on the screen again: you can modify the parameters. 2. The support drawing already exists Select the contour which you would like to be graduated and click on the icon Dial The dialog box Wizard is displayed on the screen. . General parameters Once you've created the support drawing and clicked on Next, or selected an existing shape, click on the Dial . The dialog box Wizard gets displayed on the screen. It will help you to define the general parameters icon of your dial or ruler. Extract from the Wizard dialog box 74 VERSION PRO - USER'S MANUAL Kinds of ticks Define how many kinds of ticks will be used. Labels Activate this function if you want the labels to appear on your ruler or your dial. Keep curves Activate this function to keep the constructed original shape. Ticks and curve color Use the scroll-down menu to select the display color of curves and graduations. As soon as you have defined these parameters, click on Next to validate. The dialog box Labels is displayed on the screen. Defining labels Once you defined the General parameters, and you validated by clicking on Next, the dialog box Labels is displayed on the screen. Use the Labels dialog box to parameterize the position, the numbering and the size of the labels. Height, position and choice of labels Extract from the Labels dialog box Activate the option Add Labels if you want to see labels on your ruler or dial. A numerical field is located next to the option Add Labels. In the example shown above, two kinds of ticks have been defined during the previous step (Dialog box Wizard → option Kind of ticks). Select the kind(s) of graduations (1 in our example) that must feature labels. Click therefore on each kind while pressing the Ctrl key. Remark Whatever the number of different ticks that have been defined, you can only define one kind of labels. Define then the height of labels in the left field of the box upper part (10 mm in our example). Define also in the right field of the box upper part the distance between the base of the label and the base or the top of the graduation (See a little bit further the section Referencing the label's position…). Position of labels Extract from the Labels dialog box VERSION PRO - USER'S MANUAL 75 In both fields of the upper part of the dialog box, enter the values corresponding to the top the height of the label and the distance that separates it from the original shape. In the example shown above, labels have an height of 10 mm and the distance separating them from the original shape is 5 mm. Label’s slanting Activate this function to align labels vertically. Activate this function to align labels in relation to the original shape. Activate this function to align labels in relation to a slanting angle to be defined in the field next to this icon. Referencing the label's position Select the option Space / base line to define the distance between the base of label and the base line (support drawing). Select the option Space / top to define the distance between the base of label and the top of the graduation. Select the option Space / higher top to define the distance between the base of label and the higher graduation (in case you've got numerous kinds of graduations). Selecting the label's font Use the scroll-down menu to select the font to be used to generate the labels. Selecting the label's display font Use the scroll-down menu to select the label's color to display on the screen (black in our example). Label generation Count for each graduation Activate this option to make the numbering take each graduation into account. A significant example of use of this function is the making of speedometers. Currently, most of the speedometers only feature the tenth of kilometers on the best graduations. Use numbers or Use variables The values on the graduations are either numbers that you define with the three following parameters, either the values of a variable set with the tool. This last choice allows for more flexibility, above all the use of letters and various non-numeric characters. Start Enter in this field the starting value of the numbering. Step (increment) Enter in this field the value defining the step of the numbering. Nb of decimals Define there the number of decimal places if the start value or the incrementation step is not a whole number. Modification of the number of significant digits If your digit includes decimals, you can choose the number of digits after the points by ticking Delete non significant zero and then, by entering the number of decimals (truncated figures). Once you defined all these parameters, click on Next to validate. The dialog box First kind of ticks appears on the screen. 76 VERSION PRO - USER'S MANUAL Graduation parameters Once you've defined the labels and validated by clicking on Next, the dialog box First kind of ticks is displayed on the screen. This dialog box allows you to parameterize the shape, the height, the width and the position (in relation to the support drawing) of the first kind of parameters (red ticks). Shape of the first graduations Select the shape of the first kind of graduations by clicking on , or . Dimensions of the first graduations Enter the height and the width of the first kind of graduations in the two fields containing values in mm. Defining the number of the first graduations Number of spaces There is one space less than the number of graduations. Enter the desired number. Click then in the other field (Number of ticks) to update immediately the corresponding number of graduations. Number of ticks There is one tick (graduation) more than the number of spaces. Enter the desired number. Click then in the other field (Number of spaces) to update immediately the corresponding number of spaces. Position of the first kind of graduations Activate this option to position your ticks (graduations) above the original shape. Activate this option to center the ticks (graduations) on the original shape. Activate this option to position the ticks (graduations) under the original shape. Remark The blue number on the right corner at the bottom of the dialog box First kind of ticks corresponds to the parameterizing level of the different kinds of ticks, you may want to use. In the example shown above, we have chosen to use only one kind of tick. In case we would have liked to use more than one kind of ticks, we should have filled in as many First kind of ticks dialog boxes as used kinds of ticks. VERSION PRO - USER'S MANUAL 77 SELECTING AN OBJECT OR A GROUP OF OBJECTS Selecting an object Selection tool With this tool, you can select, move, resize, scale, or rotate an object. To select an object, click on any point on its shape. The selected shape is displayed in red with handles. Selecting a group of objects To select several objects, move the cursor above and outside of the first object. Click and drag the mouse towards and outside the final object, then release the button. Remark Check that all the objects to be selected are completely included in the window. Handles appear around all selected objects. Click on one shape to move all of them together. Click on the tracing of each of the objects while pressing the Ctrl key = Multiple selection (one by one). Click on the tracing of one selected object while pressing the Ctrl key = De-selection 78 VERSION PRO - USER'S MANUAL COPYING AND DUPLICATING OBJECTS Copy / Paste objects Copy Select the object to be copied, then click on the icon. Remark Before pasting the object and if you are working in the same document, remember to deselect the objects to be duplicated. Quick tip... Ctrl + C Then, click on the Paste icon. If working on the same drawing, the copied object will be exactly on the original. If you wish to paste the object on another page, open the document and click on the Paste icon. The copied object will be positioned at the same coordinates as the original. Quick tip... Ctrl + V Remark To see both objects, under the View menu, choose Redraw and move the second object to the desired position. Quick tip... Ctrl + W Cut / Paste Cut Select the object and click on the icon (the object disappears). Open the file where you want to insert it. Click on Paste icon The copy will be positioned at the same coordinates as the original. Remark You can find these functions Copy, Cut, and Paste in the Edit menu. Copy or Cut / Paste from another software You can also copy an object issued from another graphic or word processing software. Select and copy the object, open the document in which you want to insert the copy and click on the Paste icon . VERSION PRO - USER'S MANUAL 79 Automatic duplication Duplication tools 4 different duplication modes are available: one by one, in rows, on a circle, or on a curve. Duplicating one object Select the object and then the icon. The duplicating symbol appears close to the cursor. Click on the contour of the object to be duplicated and drag the mouse towards the desired position. Release the button. Repeat this step as many times as necessary. Ctrl To move the copy on one axis. F2 to enter an accurate position of the copy. This function can be associated with the snapping mode of F3. Example: duplication with a reference marker. Select a reference marker in your drawing and position the marker. Press the F3 key and select the option Marker. Select the whole drawing (the marker included) and click on the duplication icon. Position the cursor of the mouse on the marker and start to move your drawing on the screen. Check that a circle is drawn close to the cursor. This means that you are in the magnetization field of the marker. Without releasing the button of the mouse, press the F2 key. Enter in the window the desired position for the reference point of the object. For our example, the X and Y values are 0. marker 80 VERSION PRO - USER'S MANUAL Linear duplication Linear duplication To duplicate the object several times along rows and/or columns, select the object to be duplicated and click on the icon. In the dialog box, enter the number of columns and rows. Click on the object to be duplicated and drag the cursor. The copies are displayed with dotted lines. Release the button once you have reached the desired positions. Circular duplication Circular duplication It is the same procedure as the linear duplication. Select the object and then the icon. Enter the number of copies in the dialog box. Click on the contour of the object to be duplicated and drag the cursor. The copies are displayed in dotted lines. Release the button once you have reached the desired positions. With the Rotate option active: the object follows the rotation angle Inactive: the objects stay aligned VERSION PRO - USER'S MANUAL 81 Duplicating an item along a curve Duplicating an item along a curve Position the object to be duplicated on the shape at the starting point of the duplication. Then select the object and the curve, and click on the icon. Be careful to respect this order of selection. There are two ways of duplicating: • • giving the distance between each copy, giving the number of copies. Rotation This option allows you to rotate the duplicated item. Example: Original drawing Simple Duplication Duplication with rotation Duplicating by distortion of an object on a curve Draw the curve along which you want to execute the duplication and place the objects to be duplicated at each extremity of the curve. Select the objects, then the curve, and click on the icon. 82 VERSION PRO - USER'S MANUAL In the window Duplication on curve, enter the number of copies required. Original drawing Result achieved with 7 copies Simultaneous duplication on several curves In order to duplicate an object simultaneously on several curves, you have first to combine all curves. Then, . Indicate the desired number of select the object to be duplicated and next the curves. Click on the icon copies or the distance between copies in the dialog box Duplication on a curve. VERSION PRO - USER'S MANUAL 83 DELETING OBJECTS Deleting an object Select the object, and in the menu Edit, choose Delete. Quick Tip ... Select the object and use the Del key. 84 VERSION PRO - USER'S MANUAL POSITIONING OBJECTS Moving with the mouse Select one or several items, using the selection functions described in the section Selecting an object or a group of objects, position the cursor on a contour, and while holding down the left button, drag the object towards the desired position. Release the button when done. Move while pressing the Ctrl key = horizontal and vertical displacement. Moving with F2 key To move an object accurately, start to displace it with the mouse and click on F2. In the dialog box, give the distance of the displacement on each axis with regards to the current position. Moving with the keyboard The arrows keys allow you to move the selected item horizontally or vertically. The value of each move is given in the menu Edit Option: Arrow move. Aligning against a guideline or grid Grids and Rulers are at your disposal to help you to accurately align objects. These two functions are associated with the magnetization option, which (when activated with the F3 key) forces objects to be aligned against the grid or the ruler. VERSION PRO - USER'S MANUAL 85 Use of guidelines Displaying the rulers If the rulers are not displayed, under the Edit menu select Options…. The dialog box Options is displayed on the screen. Choose Display and select Show rulers. Placing a guideline Click on one of the rulers and keeping the left button of the mouse pressed, drag the cursor towards the active area to the position desired. If you click on a vertical ruler you have a vertical guideline, and if you click on an horizontal ruler you have a horizontal guideline. Remark You can numerically position a guideline using F2. Click on one of the rulers and without releasing the left button of the mouse, drag the cursor towards the active area. Press the F2 key, enter the position of the guideline and validate. You can have an unlimited number of guidelines. To delete, add, or move guidelines, go to Change Guide layer... The modification of guidelines dialog box allows for accurate positioning of the guidelines. You can also add a guideline by choosing the axis and the position. Then select Add. To move a guideline, enter the new numerical values in its field and click on Change. 86 VERSION PRO - USER'S MANUAL Quick tip... Double-clicking on a guideline will display the Edit guide lines dialog box. Snap on guidelines Press the F3 button and select: Grid and Guide. As soon as the displaced object enters into the magnetization field of the guideline, it is snapped onto it. Magnetization field You can reduce or increase the magnetization field in the menu Edit Options…. The dialog box Options is displayed. Choose Display and enter the numerical value of the magnetization field in Snap distance. The default value is [8]. Aligning against a grid Like the guidelines, the grid helps in the positioning of objects. The grid creates magnetic points with an adjustable distance. Displaying the grid To display the grid, go to Change Grid and select Visible. The default value is 100 mm on the 3 axes and the point of origin is 0. Modification of the parameters of the grid The grid is useful for repetitive dispositions of objects at equal distances. You can define the parameters in accordance with your needs and with the type of work undertaken. Magnetization of the grid When you have finished defining the parameters of the grid points, select the Enabled option so that the grid becomes magnetized and Visible, then select one by one the objects and position them against the desired points of the grid. Positioning with special tools Alignment tools The procedure is the same for all the alignment modes (on the left, on the right, at the top, at the bottom). First select the object(s) you want to align with Ctrl key, and then choose the corresponding icon. VERSION PRO - USER'S MANUAL 87 Aligning Align on left All the objects will be aligned according to the X min. value of the first selected object. Align on right All the objects will be aligned according to the X max. value of the first selected object. Align to top All the objects will be aligned according to the Y max. value of the first selected object. 88 VERSION PRO - USER'S MANUAL Align to bottom All the objects will be aligned according to the Y min. value of the first selected object. Vertical and horizontal aligning To align the objects, it is sufficient to define the axis to which you want to align them. Vertical aligning of the objects The objects will be vertically aligned based on the center of the first selected object. Horizontal aligning of the objects The objects will be horizontally aligned based on the center of the first selected object. Remark To reach a perfect aligning, vertically and horizontally, use these two functions one after the other. VERSION PRO - USER'S MANUAL 89 Vertical and horizontal centering of the objects You can place the objects horizontally or vertically at equal distances from the borders of the active area. The spacing created will be an average between the closest object to the vertical or horizontal borders of the active area (depending on the type of alignment desired). Vertical center Horizontal center Remark To obtain an equal distance from each border, check that the points outside of the curve are not outside the tracing as the function will give a different global size compared to the real dimensions of the objects. You just need to add a point on the curve to avoid this phenomenon. 90 VERSION PRO - USER'S MANUAL Example The point outside of the curve is outside the tracing. The global size is more important compared to the real dimensions of the drawing. There is no point outside of the curve. The global size corresponds to the real size. of the drawing Automatic positioning An automatic positioning can be done to get an equal distance, vertically or horizontally, between several objects. Just select the objects and click on the corresponding icon. A medium spacing is automatically generated and the occupied space of the group is not modified. Horizontal spacing VERSION PRO - USER'S MANUAL 91 Vertical spacing Automatic resizing Automatic horizontal resizing The first selected object gives its horizontal length to all of the other objects. Automatic vertical resizing The first selected object gives its vertical length to all of the other objects. Automatic full resizing The first selected object gives its horizontal and vertical lengths to all of the other objects. 92 VERSION PRO - USER'S MANUAL Aligning along a vertical or horizontal Aligning along a vertical axis Using this function allows to make an object rotate to align along the vertical axis. Select the object and strike the F3 key to choose a snap mode. button and The dialog box Snap up is displayed. Select the option Control point symbolized by the validate by clicking on OK let’s quote that the name of each option activated is written above the corresponding button). Click on the icon to make work the function Aligning along a vertical axis. Select the point around which you want to make the object's rotation to align it along the vertical axis. Select then the opposite point on the horizontal axis. This opposite point is automatically aligned on the vertical axis. The position of the object displayed with a dotted line shows that the operation went well. Aligning along an horizontal axis Using this function allows to make an object rotate to align along the horizontal axis. Select the object and strike the F3 key to choose a snap mode. The dialog box Snap up is displayed. Select the option Control point and validate by clicking on OK. VERSION PRO - USER'S MANUAL 93 Click on the icon to make work the function Aligning along an horizontal axis. Select the point around which you want to make the object's rotation to align it along the horizontal axis. Select then the opposite point on the vertical axis. This opposite point is automatically aligned on the horizontal axis. The position of the object displayed with a dotted line shows that the operation went well. Z positioning This new function allows you to reposition on the Z-axis any kind of 2D or 3D object (shape or surface made in the CAD module, imported or digitized surface or TypeArt-object). One of the greatest interests of this function is the repositioning of a TypeArt-object before sending it to the machining. Select the object to be repositioned on the Z-axis and click on the icon Z positioning alignment appears on the screen. 94 VERSION PRO - USER'S MANUAL . The dialog box Z Select in the left part of the dialog box the reference point of the object to be positioned. Enter then the new Z value in the field Move to (right part of the dialog box). Top The top of the object will be moved to the height defined in the field Move to. Middle The middle of the object will be moved to the height defined in the field Move to. Bottom The bottom of the object will be moved to the height defined in the field Move to. Z The point of the object with the height defined in that field will be moved Move to. Nesting This function computerizes an automatic layout of objects in a simple bounding box (a contour) or in a bounding box with holes (one contour with contours combined inside). The room is optimized in order to save material. Select the bounding box, then all contours to be nested in the bounding box. The selected elements have to be closed contours (neither opened curves, nor text with single-line font). Click on the icon Nesting (Alignment toolbar). The following dialog box is displayed on the screen: Mirror effect allowed Enables the rotation of the object in a mirror when needed. It requires that the objects haven’t any distinctive sides. In-hole nesting The remaining material of each object can be used to nest another object inside the hole. VERSION PRO - USER'S MANUAL 95 Example Objects to be nested Result of the nesting by filling the holes Rotation Free rotation Optimized nesting without any rotation angle to be respected. Step angle rotation Optimized nesting with indication of a precise angle of rotation. Enter a step angle: multiples of this angle are accepted (for instance 90°: step angles 0°, 90°, 180° and 270°). Angle list rotation Optimized nesting with two precise angles of rotation or more to be respected. Enter the angle values separated by a semicolon. No rotation Optimized angle without any rotation angle. Cutter diameter Enter the value of the tool diameter used for the machining. Clearance Enter the value of the desired additional distance between objects (includes the tool diameter). 96 VERSION PRO - USER'S MANUAL NOTES The resulting distance between nested objects is not equal to the “Cutter diameter” + the “Clearance”. A distance “delta” is automatically added by the optimization calculation. The Nesting function allows to keep the relatives positions of the letters between them. If you wish to keep the entire word, select and combine it. Accents and other diacritic marks are still combined to the letter they are associated with. Tip the text and convert it into curves. A letter with an accent is grouped. If you desire to nest a letter separated from its accent, select the whole thing and click on the icon Uncombine . Examples Nesting of letters with uncombined diacritic marks VERSION PRO - USER'S MANUAL 97 98 VERSION PRO - USER'S MANUAL TRANSFORMING OBJECTS Transformation tools Transformation tools In this section, you will first learn how to scale, stretch, mirror, rotate, and create an envelope. Then, you will learn how to manipulate shapes; move, add, and delete control points; to disconnect or weld a contour; and to combine or uncombine several contours. Moving an object Move object Select the object to be moved and click on the Moving tools icon. The symbol for displacement will appear close to the cursor. Drag the mouse to displace the object and release the button to validate the position. Ctrl = Displacement on one axis F2 for moving the object with accuracy. Therefore, select the object and place the icon anywhere on it. Click on the left button of the mouse, keep it pressed, start to move the object and strike the F2 key. Enter the desired values in the dialog box as shown below. This function can be used associated to a snapping mode of F3. Example: moving using the control point Press the F3 key and select the snapping mode Control point.. Select the whole drawing and click on the Move object icon. Position the cursor of the mouse on the desired control point and start the displacement on the screen. Check that a circle appears near the cursor of the mouse. It means that you are in the magnetic field of the control point. Without releasing the button of the mouse, press the F2 key. Enter in the window, the desired position of the reference point of the object. VERSION PRO - USER'S MANUAL 99 For this example, the X and Y values are 0. Control point Scaling With the mouse You can scale an object with its handles or with the appropriate icon. Shift Shift + F2 Ctrl = 2 sides at the same time = 2 sides at the same time with an accurate scale = To obtain steps of 100 by 100%. Select the object and click on a handle in a corner. The cursor changes to a sizing pointer; drag the cursor in the desired direction to obtain the required size. Then release the button. Accurate scaling With F2 key Select the object and click on a handle. The cursor changes to a sizing pointer. Press the F2 key and give the numerical scaling factor or the exact dimension desired in the fields of the selected axis. 100 VERSION PRO - USER'S MANUAL Scaling tool Scale After having selected the item and this icon, click anywhere in the active area and drag the cursor: the transformation is centered. Release the button on the mouse when done. Ctrl = To obtain steps of 100 by 100%. Vertical and horizontal stretching You can use the handles or the Stretching icon. With the mouse Select the object and click on a lateral handle. The cursor changes to a sizing pointer. Drag the cursor. A dotted frame which will follow the movements of the cursor, appears around the object. Release the button of the mouse when the object has the desired shape. Accurate scaling Select the object and click on a lateral handle. The cursor changes to a sizing pointer; press the F2 key and give the numerical scaling factor or the exact dimension desired in the field of the selected axis. Shift Shift + F2 Ctrl = 2 sides at the same time = 2 sides at the same time with an accurate stretching = To obtain steps of 100 by 100%. Stretching tool Stretch After having selected the object and this icon, click anywhere in the active area and drag the cursor. The stretch is done by the center, and it can be vertical or horizontal. Shift = 2 sides at the same time Rotating an object With the mouse You can rotate an object with the appropriate tool or with the mouse by clicking the little handle below the selected area. VERSION PRO - USER'S MANUAL 101 The cursor changes into a rotating pointer. Hit: F2 To give numerical values to the angle Ctrl Rotation by 15° at a time. To enter numerically the angle value for the rotation, start rotating as described above and strike the F2 key. Enter the value in the dialog box Rotation displayed on the screen. Rotating tool Rotation Choose a handle and turn the object around its center of rotation in the desired direction. The dotted box outlining the item represents the object during this action. Release the button of the mouse when the position corresponds to the desired angle. To know the angle of rotation during the operation, check the bottom status line. Moving the pivot point The special handle shown in the center of the object is the pivot point. You can move this center where you want by displacing the pivot point. Only the center point will be moved. Then you can pivot the object around its new pivot point by dragging one of the corners of the selected perimeter. 102 VERSION PRO - USER'S MANUAL With F2 and F3 = accurate positioning of the pivot point. Numerically rotating and moving the pivot point Select the object and click on the Rotation icon. The dialog box Precise rotation is displayed on the screen. Enter the rotation angle in the upper field of the dialog box. If the pivot point has to be moved, enter its new coordinates X and Y in the appropriate fields. Click on OK to validate. Mirror of an object Horizontal mirror Select the object and click on the icon Horizontal mirror. The object rotates around a centered vertical axis. Vertical mirror Select the object and click on the icon Vertical mirror. The object rotates around a centered horizontal axis. Remarks: 1. 2. You can keep the original picture by striking the Shift while clicking on the Mirror icon. You can modify the rotation axis by striking the Ctrl key while clicking on the Mirror icon. The rotation axis is not centered anymore: it is on the right side (concerning the horizontal mirror) or on the base (regarding the vertical mirror) of the selection window. VERSION PRO - USER'S MANUAL 103 Example with an Horizontal mirror application (in this case, both keys Shift and Ctrl are pressed while clicking on the icon): Original Result Mirror around an axis Define an axis by inserting two markers on the material. Strike the Ctrl key and keep it pressed to select the object, and then the two markers. Click then on the Mirror around an axis icon. The object rotates around the axis you defined. Remark You can apply the Mirror function to a text. Therefore, you need to convert it into curves. Permuting plans Flip plan You can simply reposition the object you created (this function is very useful for the surfaces) with this tool. To make flip a plan, select the object. Click a first time on the Flip plan icon to invert the coordinates X, Y and Z as shown below: X becomes Z, Y becomes X, Z becomes Y. The consequence is the new positioning of the object (coordinates Z, X, Y): 104 VERSION PRO - USER'S MANUAL Click a second time on the Flip plan icon to invert the coordinates Z, X and Y as shown below: Z becomes Y, X becomes Z, Y becomes X. The consequence is the new positioning of the object (coordinates Y, Z, X): Click a third time on the Flip plan icon to get back to the starting coordinates X, Y and Z as shown below: Y becomes X, Z becomes Y, X becomes Z. The object gets back to the original position (coordinates X, Y and Z): VERSION PRO - USER'S MANUAL 105 SPECIAL EFFECTS Special effects tools Special effects tools The icons available in this box will allow you to transform contours, to weld them or to create a parallel contour. Placing an object inside an envelope Importing an envelope There are different enveloping shapes you can choose. Click on the Symbol icon Envelope, double-click on the desired envelope to select and to display it on the screen. Select the object then the envelope and click on the Envelope icon and in the directory . Placing a text inside an envelope Select the text and convert it into a curve with the Convert into curve icon (Tip: Group the text to select it easily afterwards). . Click on the Symbols icon , then select the Envelope directory. The different shapes are displayed. Select one of them and place it on the active area. 106 VERSION PRO - USER'S MANUAL First select the text (converted into a curve), and then, without deselecting the text, select the shape with the Ctrl key and click on the Envelope icon . Example Segmentation Use this function to cut a contour in segments. You can define the maximal chordal error (distance between the original contour and the created segments) as well as the segment length. Segmentation Select the text or the object. Click on the Segmentation icon. The dialog box Segmentation is displayed on the screen. Enter the values in the appropriate fields. Length max.: maximal length of the created segments. Max chordal error: maximal distance between the original contour and the created segment. VERSION PRO - USER'S MANUAL 107 Remarks: 1. 2. In case of a text, convert it into curves by clicking on the corresponding icon . Otherwise you could not use the Segmentation function. This function is very useful if you want to brace and map tool paths on skewed shapes. It can be used during the calculation or before it (so that you know in advance the number of created segments). Creating an envelope You need to draw 4 open curves oriented as shown below to create an envelope: Then select them in the following order: 1 + 2 + 3 + 4. Combine these curves by clicking on the Combine icon . Export this set with the Syb format by clicking on the Export icon it in the directory Symbols Envelop. or with the menu File Export, and save You can create complex envelopes in order to customize the warping inside the envelope, using 8 curves or more, in the same way as for a simple one. 108 VERSION PRO - USER'S MANUAL Complex envelop with representation of the curve direction and their selection order The instructions mentioned below must be followed: The curves must have the same direction (vertical or horizontal). The curves must be linked together by using in the Snap up mode the Control points or Along the contour (F3 key). First of all, select all horizontal curves, from the one which starting point is linked to the starting point of the first vertical curve (See figure above: first left bottom point) Then, combine the curves before exporting them in the symbol library (format *.syb). Reversing the direction of contours Reverse direction tool With this function, the direction of the contours can be reversed. Select the contour to be reversed and click on the icon. Show the direction of the closed contours The direction of the closed contours is indicated by the color: blue for clockwise contours, and green for the anticlockwise contours. Show the direction of the open contours The open contours appear in black whatever their direction may be. In the Shaping mode , you will notice that the starting point of the contour is indicated by a bigger square (open contour) or by a double square (closed contour). Remark The direction of the rotation can modify the machining order for the cutting or the extrusion of the material. The starting point of the contour = the starting point of the machining. Welding 4 different ways of welding overlapping contours are available: VERSION PRO - USER'S MANUAL 109 Join With this function overlapping contours will be united. The achieved result is a curve assuming the attributes of the original drawing. Select all the contours to be joined and click on the icon. Example Original drawing Result Common From two overlapping groups, a new object will be created by using the Common function. The sketching of this new object will assume the common area of these groups. Group or combine the contours in 2 groups, select them, and click on the icon. Example Original drawing Result Group 1: the combined stripes Group 2: the arrow Subtract This mode will allow you to remove one of two overlapping objects or groups of objects. Depending on the order of selection, the sketching will be different. Examples Original drawing: Group 1: the combined stripes Group 2: the arrow Results Order of selection: 110 GROUP 1 - GROUP2 VERSION PRO - USER'S MANUAL Order of selection: GROUP 2 - GROUP 1 Uncommon By cutting the overlapping objects with the Uncommon function, you will be able to separate the two objects at their intersecting point, and, therefore, create a new object. Select the objects and click on the icon. Example Original drawing Result At first glance, it seems as nothing has changed, but under the shaping mode, zoom on the intersecting area. You will notice that at each intersecting contour, two cutting points are perfectly superimposed. Separate the points by dragging one of them away from the other. This allows you to see the full effects of this mode. Remark Uncombine the whole group to have independent elements. Offset Offset This function automatically generates the inner or outer tracing of the selected contour. The offset and outline angles can be defined depending on the desired result. Select the contour or the object and click on the icon Offset. The dialog box Offset is displayed. VERSION PRO - USER'S MANUAL 111 Remark To maintain the original contour, select the option Keep actual curves in the dialog box. Offset parameters: Offset Enter the offset distance required. Outer The outline is executed outside the contour. Inner The outline is executed inside the contour. Rounded The angles of the outline, whether interior or exterior of the contour, are rounded. Outer 112 Inner VERSION PRO - USER'S MANUAL Sharpened The geometry of the traced angles is kept. Outer Inner Chamfered The traced angles are chamfered. Outer Inner Converting curves Conversion of curves By using this function, you can transform a curve into a circle, an ellipse or a rectangle closest to the original shape. Select the shape to convert and click on the icon Conversion of curves. The dialog box Conversion of curves is displayed. Converting a curve into a circle To convert a curve into a circle, click on in the dialog box Conversion of curves. Example VERSION PRO - USER'S MANUAL 113 Original drawing Result Converting a curve into an ellipse in the dialog box Conversion of curves. To convert a curve into an ellipse, click on Example Original drawing Result Converting a curve into a rectangle in the dialog box Conversion of curves. To convert a curve into a rectangle, click on Example Original drawing Result Vectorizing in arcs and segments This feature is particularly useful: • • For creating toolpaths like plotting, 2D- and 3D-cutting, as far as the machine-codes are G2-Type (i.e. clockwise contours) or G3-type (i.e. anticlockwise contours) codes. This allows you to reduce drastically the number of units in the machining files. Before creating an offset, as far as the offset created on a contour made up of arcs and segments is also a contour made up of arcs and segments with the same number of points as the original contour. Select the curve to be vectorized and click on the Vectorize in arcs and segments icon . The corresponding dialog box, in which you must enter the chordal error (i.e. the tolerance between the created segments and the original curve), is displayed on the screen. Once you defined the cordal error, validate through OK. 114 VERSION PRO - USER'S MANUAL Example Intersection markers This function detects automatically superposed points and curves, crossed contours (intersection) and loops on the same curve. Possible problems can be avoided when toolpaths are calculated. Select the object to be controlled and click on the icon . Intersection points are represented by markers. + CTRL allows the automatic detection of opened contours. These are characterized by markers at each end. This icon is available in the CAM module as well. Ridge This function converts a single-line drawing into a closed contour. This offset curve can be totally parameterized. Select the contour to be converted and click on the icon Ridge . The following dialog box is displayed: VERSION PRO - USER'S MANUAL 115 Keep current curves: the original curve is kept. Dimensions and kind of corners: three types of angles are available: sharp, chamfered and rounded. Ridge radius: enter the value that defines the offset. Start and End of ridge: two geometries are available: flat and rounded. Example Single-line arrow Arrow with contours Zoom (original curve kept - beginning and end of ridge rounded) 116 VERSION PRO - USER'S MANUAL DELETING THE LAST OPERATIONS Undo function Undo Cancel the last action (by default, up to the last 10). Quick tip: Ctrl + Z Redo function Redo Redo / cancel the last undo (by default, up to the last 10). Remark In the Edit menu, you can find a reminder of the last operation executed (that could be canceled with Undo) and of the last operation canceled (that could be redone with Redo). Parameters of the Undo memory It is possible to parameter the number of cancellation of modifications (Undo) done during the composition. In the menu Edit Options..., enter the desired number in the Undo level field. Erasing the Undo memory If you computer is limited in RAM memory, we advise you to erase the content of the Undo memory regularly by selecting the Clear undo stack function in the Edit menu. The last modifications done on the composition and saved in the memory, will be erased and it will not be possible to cancel or to redo them again. VERSION PRO - USER'S MANUAL 117 COMBINING AND UNCOMBINING OBJECTS Combining This function is useful to combine several objects into the same curve, even if there is no link between them. Therefore when clicking on an object belonging to the group, all the objects of the group will be selected. After combining several objects, you can work simultaneously on all the contours of the objects under the shaping mode. Combine The selected objects are converted into curves and become a whole object. Uncombining Uncombine Each object becomes independent of the other. Remark Only elements of the same nature can be combined: curve/curve, text/text... It is therefore not possible to combine a text with a curve (rectangle, circle, etc.) for instance. To do it, you need to convert first the text into a curve. 118 VERSION PRO - USER'S MANUAL SHAPING MODE Shaping This mode (also called modelling mode) is useful to modify the shape of an object or of a character font – when converted into curves – working directly on the points of construction along the contour. Converting into curves This function is used especially with texts. It is useful to create mirror effects, to retouch letters under the shaping mode, etc. Convert into curves Select the text with the selection tool and click on this icon. Shaping tool Shaping tool When clicking on the shaping tool, the outline displays the following: • points located on the curve (indicated by little squares): • control points of the curve (indicated by little circles): The new toolbox for shaping has different options permitting to add or delete a point, to connect or disconnect a contour, to modify the shape of curves, and to change the starting point. Remark You can put any selected tool back down by hitting the space bar. VERSION PRO - USER'S MANUAL 119 Selecting points Two methods can be used to select several points under the shaping mode. Selecting several points one by one To select several points, click on each point while pressing the Ctrl key. The selected points appear in a black square. Example Selecting several points at once To select several points at once, click on the left button of the mouse and keep it pressed. Drag the mouse until all the desired points are selected in the selection window (represented by a dotted line on the screen). Example The selected points appear in a black square. Example 120 VERSION PRO - USER'S MANUAL Adding and deleting points Add a point Click on the shape where you want to add a control point, (a point appears on the contour) and then click on this icon, or press the "+" key on your keyboard. Remark When you add a point, it is always positioned on the curve. Delete a point Select the points to be deleted and click on this icon, or press the "-" or Del key on your keyboard. Remark It is impossible to delete the starting point of a contour (double square). To delete it, it is necessary to define another starting point. Altering the control points Continuous control point This function changes the selected point into a tangent point of the curve. The position of the selected point (point on curve) is not modified. Only the 2 points located outside of the curve are changed to become the tangent point. Example angle point continuous control point Rounded angle Select the points on the angle you want to modify and click on the icon. Enter the value of the radius of the angle in the dialog box Rounded/Chamfered angle. If the value of the radius is positive, the angle will be created outside the contour. If the value of the radius is negative, the angle will be created inside the contour. VERSION PRO - USER'S MANUAL 121 Example Positive radius Negative radius Chamfered angle Select the point on the angle you want to modify and click on the icon. Enter the value of the chamfer in the dialog box Rounded/Chamfered angle. Starting point The starting point on a closed contour is indicated by a double square. The starting point on an open contour is indicated by a big square. Example Closed contour 122 Opened contour VERSION PRO - USER'S MANUAL Modifying the starting point Closed contour Select the new starting point, which must be on the curve, and click on the icon. Open contour To change the starting point of an open contour (indicated by a big square), you need to select first the Reverse direction icon . Remark It is impossible to delete the starting point of a closed contour. To delete it, it is necessary to define another starting point. Aligning points vertically or horizontally Aligning the points vertically While pressing the Ctrl key, select the points to be vertically aligned and click on the icon. The X value of the first selected point will determine the alignment. Example Selected points Aligned points Aligning the points horizontally While pressing the Ctrl key, select the points to be horizontally aligned and click on the icon. The Y value of the first selected point will determine the alignment. VERSION PRO - USER'S MANUAL 123 Example Selected points Aligned points Disconnecting and connecting a contour Disconnect Add a point where you want to disconnect the curve or select an existing point on the curve and click on this icon. Connect Select the two end points and then click on this icon to join the contours. Remark To connect points issuing from different shapes, you first have to select them, and then combine them. Auto-connect Select the points to be connected and click on the icon. A dialog box is displayed by clicking simultaneously on the Connection icon and Ctrl key. Then, you can parameterize the distance allowing the connection and/or the merging of the points, as well as the connection mode (addition of a segment between points, superposition of points before connecting them). The Separately checkbox enables to link points without any merging between them. Therefore, all entities will be kept. Remark We advise you to use this function for the DXF with open contours issued from an Autocad software, for instance. Refine and simplify a curve Select a curve to which you want to add points and click on the Refine curve icon: a new point is created between each pair of existing points. Conversely, the Curve simplification icon reduces the number of control points according to a customized Tolerance. 124 VERSION PRO - USER'S MANUAL Explode a curve Select a curve you wish to split up into simple elements and click on the Explode a curve icon: the curve is broken up at each control point and each portion can be manipulated individually. Shaping straight lines and curves To change a straight line into a curve Add a point on the straight line and double-click on this point. The dialog box Point attribute appears indicating the position of the point you have just created. Select the option Out of curve. The point becomes a control point of the curve. To modify the curvature of the segment with the cursor drag the point where desired. Cut This tool allows to cut one or several combined contours. Click on the Cut icon and drag the mouse to draw a segment passing on the contour. The CAD module automatically creates two cutting points at each intersection of the segment and the contour. VERSION PRO - USER'S MANUAL 125 Example Shift + Cut Associating the Cut function and Shift allows to cut an element and to close automatically the created contours. Click on the Cut icon. Press then the Shift key and keep it pressed meanwhile you drag the mouse to draw a segment passing on the contour of the object you want to cut. The CAD module automatically cuts the contour at the points of intersection and creates closed contours. Example Remark This function can only be used on closed contours. Deleting a contour You can delete a contour independently of other contours of a drawing. Using this function, you don't need to uncombine the contours to delete one of them. Click on the Deleting a contour icon, and select then the contour you want to delete. Moving a contour You can move a contour without having to uncombine it from others. Click on the Moving a contour icon. Select then the contour you want to move, and drag the mouse. Linearization tools The following tools are useful to modify a part of a vectorized contour. Linearize Click on the Linearize icon. Then put the cursor on the contour and click on the segment starting point. Put the cursor on the segment arrival point and click to end this operation. The line between both points is automatically transformed into a straight line. 126 VERSION PRO - USER'S MANUAL Linearize in arc of circle Click on the Linearize in arc of circle icon. Place the cursor on the contour where you want the arc starting point to be. Put the cursor on the arc arrival point and click on it to define the conversion area. Drag then the mouse to define the arc. When the desired arc is obtained, click a last time to end the operation. The area between both points is automatically transformed into an arc of circle. Linearize in curve Click on the Linearize in curve icon. Place the cursor on the contour where you want the curve starting point to be. Put the cursor on the curve arrival point and click on it to define the conversion area. Drag then the mouse to define the curve shape. When the desired curve is obtained, click a last time to end the operation. The area between both points is automatically transformed into a curve. Linearize in angle Click on the Linearize in angle icon. Place the cursor on the contour where you want the curve starting point to be. Put then the cursor on the arrival point and click on it to define the conversion area. Drag then to define the angle of the curve and click a last time once you have got the desired angle. The area between both points is automatically transformed into a broken line. Projecting points This function allows to project one or several points on a defined guide. Normal projection First select the point(s) you want to be projected. Click on the Normal projection icon. Put the cursor on the guide where you want the point(s) to be projected and click on the left button of the mouse. The point is orthogonally projected on the guide. Example Original drawing Result Horizontal projection First select the point(s) you want to be projected. Click on the Horizontal projection icon. Put the cursor on the guide where you want the point(s) to be projected and click on the left button of the mouse. The point is horizontally projected on the guide. VERSION PRO - USER'S MANUAL 127 Example Original drawing Result Vertical projection First select the point(s) you want to be projected. Click on the Vertical projection icon. Put the cursor on the guide where you want the point(s) to be projected and click on the left button of the mouse. The point is vertically projected on the guide. Example Original drawing 128 Result VERSION PRO - USER'S MANUAL REGISTERING MARKERS Positioning registering markers Registering markers The registering markers which allows spotting in Vinyl cutting are available in the symbol library under the directory Markers: hirondel1.syb hirondel2.syb VERSION PRO - USER'S MANUAL 129 SURFACE’S TOOLS Displaying the surface’s toolbar You can get access to the Surface’s toolbar from the CAD module left toolbar by clicking on the Surface’s tools icon . The corresponding toolbar is displayed on the screen (See following sections Handling surfaces and Projection and mapping to know more about the use of these tools). 130 VERSION PRO - USER'S MANUAL HANDLING SURFACES Import of the surface described in IGES Make the drawing in the CAD module. Then create the tool path(s) with CAD module (the blue screen). Each tool path is saved with its own name. The first will be named Name of drawing.000, the second Name of drawing.001, etc. For instance, if your drawing is called "Type3" and is in the ".vnd" path (Type3.vnd), the first tool path will be Type3.000. Importing an IGES surface Click on the shown icon or select Import from the File menu. Choose the format IGES file [*.IGS]. Remark Check to make sure you are only importing a non-trimmed or a non reduced surface (without rotation, nor scale) and without holes or overlapping areas. The matrices are not read. To import surfaces written in IGES format, the software only imports 128 entities. Modifying surfaces To modify or to clean the surfaces if needed, you must first uncombine them. Do not forget to recombine them afterwards. Displaying surface step The surface step corresponds to the number of lines that describes the surface. The default value is 5 isometrics. To modify the display parameter, go to the menu Edit Options… and put the new value in the field Surface step. Importing a digitized surface Importation Click on the shown icon or select Import from the File menu and choose the ISO digitized [*.ISO] format. VERSION PRO - USER'S MANUAL 131 Nb X and Nb Y Number of points on the X and Y axis following the step of digitalization. Sampling To find the number of points in X and Y of a regular digitalization, import the surface in simple ISO. Then go in mode point with the curve shaping tool. Select the points on the X axis of the surface. The status bar found on the bottom of the screen gives you the number of points on the X axis. Repeat the same operation for the Y axis. Remark Avoid selecting the starting point which has 2 points. Import the surface again but this time selecting it in the digitized ISO format. Then enter the corresponding number of points in X and Y in the dialog box. Creating simple 3D surfaces You can create simple 3D surfaces (spheres, cylinders, cones, ellipsoids, cubes and tores) on which you will brace or map. After their creation, simple and complex surfaces can get merged, subtracted, extended, etc. You can also convert any kind of TypeArt object into a surface entity giving you the possibility to export with the IGES format. The corresponding tools are located in the Surfaces toolbar. These tools replace in a more visual way the 3D Bracing functions. Creating a sphere In the Surfaces toolbar, click on the Sphere icon . Position the cursor on the material where you want the sphere center to be and click the mouse left button. Drag the cursor until the sphere has the desired dimensions. Click another time the mouse left button to validate the created shape. Remark By default, you will only create the upper half of the sphere. Hit the Shift key (while you drag your cursor) to create a whole sphere or the Ctrl key (meanwhile you drag the cursor) to create the lower half of the sphere. Hit the F2 key (once you clicked on the Sphere icon) to create the sphere numerically. The dialog box Sphere appears on the screen. 132 VERSION PRO - USER'S MANUAL By default, a whole sphere is created. Click on the desired icon of the dialog box to generate the upper or the lower part of the dialog box or any part of it by stating its start, end and revolution angles. Enter the values corresponding to the sphere radius (20 mm in the example above) and to its center position (0 mm). Click then on OK to validate. Creating a cylinder In the Surfaces toolbar, click on the Cylinder icon . Position the cursor on the material where you want the center of the cylinder's first side to be and click on the mouse left button. Drag the cursor until you reach the desired diameter and click once again. Drag now the cursor until the cylinder has the desired direction and dimensions. During this step, the cylinder is pivoting around the center of the cylinder's first side. Click a last time to validate the created shape. Remark By default, you will only create the upper half of the cylinder. Hit the Shift key (while you drag your cursor) to create a whole cylinder or the Ctrl key (meanwhile you drag the cursor) to create the lower half of the cylinder. Hit the F2 key (once you clicked on the Cylinder icon) to create the cylinder numerically. The dialog box Cylinder appears on the screen. By default, a whole cylinder is created. Click on the desired icon of the dialog box to generate the upper or the lower part of the cylinder, or any part of it by stating its start and end angles. Enter the values corresponding to the coordinates of the center of the cylinder's first side (25 mm in the example above), of the second side's center (0 mm in the example) and of the radius (10 mm in the example). Validate with OK. VERSION PRO - USER'S MANUAL 133 Creating a cone In the Mapping toolbar, click on the Cone icon . Position the cursor on the material where you want the center of the cone's finest end to be and click the mouse left button. Drag the cursor until the diameter of this end is reached. Validate by clicking once again the mouse left button. Drag now the cursor until the cone has the desired direction and dimensions. During this step, the cone is pivoting around the center of its finest end. Click a last time the mouse left button to validate the created shape. Remark By default, you will only create the upper half of the cone. Hit the Shift key (while you drag your cursor) to create a whole cone or the Ctrl key (meanwhile you drag the cursor) to create the lower half of the cone. Hit the F2 key (once you clicked on the Cone icon) to create the cone numerically. The dialog box Cone appears on the screen. By default, a whole cone is created. Click on the desired icon of the dialog box to generate the upper or the lower part of the cone or any part of it by defining its start and end angles. Enter the numerical values in the appropriate fields: • Radius of the finest end (5 mm in the example shown above). • Coordinates of the finest end's center (twice 10 mm in the example). • Coordinates of the widest end's center (twice 25 mm in the example). • Radius of the widest end (20 mm in the example). Click then on OK to validate. Creating a torus In the Surfaces toolbar, click on the Torus icon . Position the cursor on the material where you want the torus center to be and click on the mouse left button. Drag the cursor to define the radius of the torus cross section (it corresponds to the created circle on the screen). Click the mouse left button to validate. Drag now the cursor to define the radius of the torus until the torus reaches the desired dimensions. Click a last time to validate the created shape. Remark By default, you will only create the upper half of the torus. Hit the Shift key (while you drag your cursor) to create a whole torus or the Ctrl key (meanwhile you drag the cursor) to create the lower half of the torus. Hit the F2 key (once you clicked the Torus icon) to create the torus numerically. The dialog box Torus appears on the screen. 134 VERSION PRO - USER'S MANUAL By default, the whole torus is created. Click on the desired icon of the dialog box to generate the upper and lower part of the torus or any part of it by stating its start, end and revolution angles. Enter then the desired values in the corresponding fields: • Radius of the cross section (1 mm in the example shown above). • Radius of the torus (10 mm in the example). • Coordinates of the center of the radius (82 and 134 mm in the example). Click then on OK to validate. Creating an ellipsoid patch In the Surfaces toolbar, click on the Ellipsoid patch icon . Position the cursor on the material where you want the ellipsoid patch center to be and click on the mouse left button. Drag now the cursor until the ellipsoid patch reaches the desired dimensions. Click a last time the mouse left button to validate the created shape. Remark By default, you will only create the upper half of the ellipse. Hit the Shift key (while you drag the cursor) to create a whole ellipse or the Ctrl key (while you drag the cursor) to create the lower half of the ellipse. Hit the F2 key (once you clicked on the Ellipsoid patch icon) to create the ellipsoid patch numerically. The corresponding dialog box is displayed on the screen. By default, a whole ellipsoid patch is created. Click on the desired icon of the dialog box to generate the upper or the lower part of the ellipsoid patch or any part of it by stating its start, end and revolution angles. VERSION PRO - USER'S MANUAL 135 Enter the values corresponding to the radii (40 and 20 mm in the example above) and the position of the shape center (0 mm in the example above). Click then on OK to validate. Creating a box . Position the cursor on the material where you want the box In the Surfaces toolbar, click on the Box icon center to be and click the mouse left button. Drag the cursor until the box reaches the desired dimensions. Click a last time the mouse left button to validate the created shape. Hit the F2 key (once you clicked on the Box icon) to create the box numerically. The Box dialog box is displayed on the screen. Enter the values defining the position of the box (left numerical fields) as well as the ones defining its dimensions (right numerical fields). Click then on OK to validate. Creating a surface of revolution How to create the surface With CAD module tools, draw the section and define the axis of rotation with two perfectly aligned markers. Select the section first, then the two markers. Click on the Surface of revolution icon 136 . The corresponding dialog box is displayed on the screen. VERSION PRO - USER'S MANUAL By default, the upper half of the surface of revolution will be generated. Click on the desired button of the dialog box to generate the lower, the right or the left half, or also the whole surface of revolution (this complete rotation represents 360°). You can also make a partial rotation by clicking on the and the End angle of the surface. button of the dialog box: enter then the Start angle Example 1/2 concave: 180° to 0° 1/2 convex: -180° to 0° Modifying the display of the surface step Default value: 5 isometrics. To modify this display parameter, select Options… in the Edit menu (or hit the F10 key). The dialog box Options is displayed on the screen: click on the Display thumbnail. You can now modify this parameter by entering the desired value in the Surface step field. Creating a surface of Coons Draw a closed contour in the CAD module. Permute to the Point mode. Select the point(s) which altitude must be modified. You can add points on segments to modify their altitude on accurate parts. Double-click on the points you want to modify. The dialog box Point attribute is displayed. Commute then to the 3D ISO view to visualize the shape of your surface of Coons. Therefore, double-click on the icon located in the status bar at the bottom of your screen. In the dialog box displayed on your screen, click on 3D ISO and validate. Example VERSION PRO - USER'S MANUAL 137 Disconnect then the points of the original contour by selecting them and clicking on the Disconnect point of the Point mode toolbar. Once all the points are disconnected, the contour becomes black. It proves it became an open contour. Select the whole contour and click on the Uncombine curves icon in the toolbox. Each curve of the contour is now independent. Contours direction In order to create a surface of Coons and to make then a bracing operation in the best conditions, you must respect this requirement: opposite segments must have the same direction. Ensuring the contours direction has to be made under the point mode. Example Pointed contours don't have the same direction. To invert a curve direction (this can only be made under the point mode), select the curve and click on the icon Reverse contours. Example Pointed contours have now the same direction. Selection order of the contours This is also made under the point mode. First select the upper contour and by pressing and holding down the Ctrl key select the opposite contour, then the left one and last the right one. Surface of Coons Once all contours are selected, click on the Surface of Coons icon. Example Your surface of Coons is created 138 VERSION PRO - USER'S MANUAL Creating a bilinear surface This kind of surface has to be drawn using 4 markers. After selection, these markers are bounded by a bilinear surface if you click on the Bilinear surface icon . The surface shape will be defined by the order of selection of the markers. Clockwise selection of the markers This is also the default selection mode in case you make use of a selection window. Otherwise, click on each marker to be selected while keeping pushed the Ctrl key as shown in the example below. Order of selection Obtained surface Anti-clockwise selection Click on each marker to be selected keeping pushed the Ctrl key as shown in the example below. Order of selection Obtained surface You can also directly use the sketching tool to draw your surface freely. Click therefore on the Sketching tool . Drag your cursor and click once each time you want to create an angle. Hit the F2 key to enter icon accurate numerical values in the displayed dialog box for the creation of this surface. VERSION PRO - USER'S MANUAL 139 Enter the same values as in the example shown above to obtain the result shown below. Creating a ruled surface Ruled surfaces are defined by two cross sections and two guide sections. Each cross sections is associated with a guide section. The surface is then interpolated between the cross sections. Example Remark The selection order of the different elements as well as the direction of the selected curves is of great importance. Generally, the direction of each cross section must remain the same (from left to right or from right to left but never both). This also applies to these guide sections. Selection order First select the first cross section and then the second cross section. Select then the first guide section and finally the second guide section. Once you’ve selected all the elements, click on the Ruled surface icon ruled surface. . The whole selection turned into a Creating a swept surface A swept surface is defined by a path, a cross section and a guide section. The cross section is used all along the path. Remark The selection order of the different elements as well as the direction of the selected curves is of great importance. Generally, the direction of each cross section must remain the same (from left to right or from right to left but never both). This also applies to the guide sections. In the case of a swept surface, cross and guide sections can stand side by side because of the cross section remains the same all along the path. 140 VERSION PRO - USER'S MANUAL Selection order First select the path, then the cross section and finally the guide section. Once you’ve selected the required elements, click on the Swept surface icon . The swept surface is created. Creating skinned surfaces Skinned surfaces are defined by a certain number of cross sections (3 and more) associated with as many guide sections, with one or two paths optionally. Consequently, such surfaces can be very complex. Remark The selection order of the different elements as well as the direction of the selected curves is of great importance. Generally, the direction of cross and guide sections must remain the same (from left to right or from right to left but never both). The way the guide sections are positioned is drastically fundamental. Actually, it defines the modification of the surface section. On the contrary, the way the cross sections are positioned is not important: the only selection order will be taken into account. 1. Simple skinned surfaces Such surfaces are similar to ruled surfaces. The only difference is they can be made by using more than two cross sections and two guide sections. First select the cross sections in their order of succession and finally the guide sections in the same order. Click now on the Skinned surface icon . Example Guide sections Cross sections VERSION PRO - USER'S MANUAL 141 Result with a 2D view Result with a 3D Iso view The result would have been exactly the same if the cross sections would have been positioned otherwise (but the selection order must remain the same). The length of the guide section is very important because it determines the surface dimensions. By default, the cross sections are distended or compressed to occupy the whole length of the corresponding guide section. Nevertheless, if you hit the Ctrl key meanwhile you click on the Skinned surface icon cross sections will prevail over the length of the guide sections. , the length of the Example with five cross sections Cross and guide sections 2. Result in 2D Result in 3D Iso Skinned surface with one rail The only difference with the simple skinned surface is the use of a path applied to the side of the surface. The starting point of each guide section must be positioned along the path. For this positioning operation, use the snap options Control point or Along the contour. You can access these options by hitting the F3 key or selecting Snap mode… in the Edit menu. In the displayed dialog box, activate (along the contour) according to your needs. 142 VERSION PRO - USER'S MANUAL (control point) or Example First select the path, then the cross sections and finally the corresponding guide sections. Click then on the Skinned surface with one path 3. . Your surface is created. Skinned surface with two paths The only difference with the simple skinned surface is the use of two paths applied to the side of the surface. Starting points as well as ending points have to be positioned on the paths very accurately. For this positioning operation, use the snap options Control point or Along the contour. You can access these options by hitting the F3 key or selecting Snap mode… in the Edit menu. Example VERSION PRO - USER'S MANUAL 143 First select both paths, then the cross sections and finally the corresponding guide sections. Click then on the Skinned surface with two paths icon . Your surface is created. Coons network surface The Coons network surface is a complex surface, the structure principles of which are those of a Coons surface, i.e.: The curves have to have the same direction (vertical or horizontal), The curves must be linked together by using in the Snap up mode the Control points or Along the contour (F3 key), The selection order is similar to the one of a complex envelope: Select first all horizontal curves, from the one which starting point is linked to the starting point of the first vertical curve (See figure: point at the left bottom), 144 Click on the icon . VERSION PRO - USER'S MANUAL Examples Curves for a network surface with curve direction and their selection order Result: Coons network surface Extending a surface This feature allows you to extend an untrimmed surface on one if its sides. Select the surface to be extended and click on the Extend surface icon displayed on the screen. VERSION PRO - USER'S MANUAL . The corresponding dialog box is 145 In the example shown above: • U-direction corresponds to the X-axis. • V-direction corresponds to the Y-axis. • Start edge corresponds to the surface’s left side for the U-direction and to the surface’s bottom for the Vdirection. • End edge corresponds to the surface’s right side for the U-direction and to the surface’s top for the Vdirection. Always in our example, the surface is extended of 20 mm from the top of the surface. Merging surfaces The CAD module puts a tool able to merge surfaces to obtain a single surface. Select the surfaces to be merged (keep pushed the Ctrl key meanwhile you click on each surfaces to be selected) and click on the Merge surfaces icon . If the surfaces have intersection areas, you can separate significant elements and keep interesting parts by uncombining the merged surface. In the next example, we merge a sphere and a cube positioned as follows: 2D XY view 2D YZ view You must now uncombine the merged surface using the instance to scoop out the sphere using the cube shape. 146 tool. You can now remove certain elements for VERSION PRO - USER'S MANUAL 2D YZ view 2D view… Approximation of a TypeArt-object This feature allows you to convert a TypeArt-object into a surface so that you can export it under the IGES format. Select the TypeArt-object to be converted into surface and click on the TypeArt approximation icon corresponding dialog box appears on the screen. . The You can choose among two methods to execute the TypeArt-object conversion. • Error bound This method consists in approximating between the created surface and the resulting surface. Remark The calculation for this method can very last very long!!! • Required approximation points This method consists in defining the number of points for the U-direction (that corresponds to the X-axis) and for the V-direction (that corresponds to the Y-axis) as you would do by the creation of any TypeArt-object. This approximation can not be greater than the TypeArt’s resolution. VERSION PRO - USER'S MANUAL 147 PROJECTION AND MAPPING Principle for projection and mapping Projection This function entails projecting along the Z axis. X and Y coordinates are not modified, so the object to be projected can go outside the borders of the surface. Before projection After: View in XY plane 3D view If watched from the Z axis, the pattern is not distorted. Mapping The drawing is wrapped around the surface from a defined point, like a sheet of paper around a solid surface. Before mapping 148 After: View in XY plane VERSION PRO - USER'S MANUAL 3D view Methods and tools for projection and mapping Several methods are available for projecting or mapping a geometry on a shape: you will choose one, taking into account your type of design, the complexity of the shape, the number of dimensions of your toolpath, and your type of machine. 1. Parallel projection (for machining on 3 axes machines) A – In the CAM module: When you select the surface and the pattern to project, an extra tab Projection appears defining your toolpath. See the section Projection Tab in the overview about toolpaths. It is the best method for projecting a toolpath aimed for a 3 axes machine. B – In the CAD module: when you select the surface and the pattern to project, the Projection icon becomes active. See below Parallel projection. 2. Mapping using the post-processor (for machining on machines managing a 4th axis) For cone and cylinder only: You have created your design in order to make a flat toolpath. The mapping is th done by the post-processor that manages a 4 axis. In the Machining window, a Cylinder button appears, allowing to define the radius of the cylinder (2 radius for a cone). This simple method is possible only on true cylindrical or conical shapes. 3. Mapping on complex shapes (for machining on machines managing a 4th axis) For skewed shapes: You have created your design in order to make a flat toolpath. The toolpath itself will be arranged in the CAM or in the CAD module, with the projection/mapping tools. Procedure 1: You have made your design and created on 2D the necessary toolpaths in the CAM module. In the dialog box Toolpaths list, select the toolpath you want to project or map on your surface. Hit the right mouse button and choose the appropriate option at the bottom of the context menu. The dialog bow used are the same as those available in the CAD module (see below). Use the projection/mapping tools (see below) to create the mapping, then go back in the CAM module. Procedure 2: You have made your design and created on 2D the necessary toolpaths in the CAM module. Each path is registered under a name such as Type3.vnd ; the first one is labeled as TYPE3.000, the second TYPE3.001, etc. In the dialog box Toolpaths list, select the toolpath you want to project or map on your surface. Hit the right mouse button and choose the option Edit toolpath geometry in the context menu. The display color of the toolpath changes. The toolpath is now accessible from the CAD module. Use the projection/mapping tools (see below) to create the mapping, then go back in the CAM module. Select the projected or mapped toolpath. Select then the toolpath to be replaced in the dialog box Toolpath list, and hit the mouse right button. Choose the option Replace path in the context menu In the Machining window, a Circular button appears, allowing to define with two points the revolution axis for the mapping. Projection and mapping tools of the CAD module Directly applied to a pattern, these four tools are convenient for projection (method 1B), but not for mapping (unless you just want to see what the mapping will look like, without machining). They are also used for toolpaths (method 3). Parallel projection The pattern is laid on the surface and follows its shape, starting from a reference point. VERSION PRO - USER'S MANUAL 149 Basic mapping The pattern is mapped on the surface and follows its shape. / Cylindrical/Conical mapping The pattern is mapped on a cylinder / cone (respectively specified by one or two radius) then projected parallel to the surface. Parallel projection REMARK We consider the projection are applied to toolpaths, though in some cases they are used directly on curves and patterns (see above Methods and tools for projection and mapping). Projecting the toolpath Place the toolpath(s) anywhere you would like on the surface (on the X, Y plane). While holding down the Ctrl key, first select the toolpath and then the surface. They both should become red and the icon Parallel projection becomes active. . The dialog box Accuracy is displayed on the screen (the same dialog Click on the icon Parallel projection box can be accessed from the contextual menu of the CAM module). Top Activate this option to do a convex mapping. Bottom Activate this option to do a concave mapping. Vectorization of segments in Bezier Activate this option to directly brace or map Bezier curves. The amount of points will be extremely decreased. Curve accuracy / Surface accuracy Define in both fields the accuracy of the mapping surface. The smaller the chosen value, the finer the surface mesh and the more accurate the projection will be. The computation will also be longer. 150 VERSION PRO - USER'S MANUAL The calculation is done automatically after clicking on OK. A progression bar will indicate the status of the job. To see the result, choose 3D ISO view from the View menu. 3D ISO view Basic mapping REMARK We consider the mapping is applied to toolpaths, though in some cases it is used directly on curves and patterns (see above Methods and tools for projection and mapping). If the pattern to map is a text, you should first transform it into curves and combine these curves. Mapping of toolpaths Position the toolpath(s) anywhere you would like on the surface (on the X, Y plane) and place a reference point (with a marker) on the center of the design to be mapped. While holding down the Ctrl key, first select the path(s), then the reference point and last the surface. All of them should become red and the icon Basic mapping becomes active. VERSION PRO - USER'S MANUAL 151 Click now on the icon Basic mapping . The corresponding dialog box is displayed on the screen (the same dialog box can be accessed from the contextual menu of the CAM module). Mapping accuracy The marker position tells the central spot for mapping the pattern, with an Accuracy you specify. The smaller the size of your job and the more important the proportion, the higher your mapping accuracy must be. ISO U/W and ISO W/U U/W are the local axes of the surface on which the drawing will be mapped. With orthonormal guidelines, the U axis corresponds to the X one, and the W axis corresponds to the Y one. In the first case, axis U (x) is mapped first, then axis W (y). In the second case it is the reverse. Depending on how complex is the original surface, the warping resulting from the mapping can be different whether the calculation is done first on axis U (then W) or on axis W (then U). You will need to perform some tests, and sometimes invert the curves. You can see where axes U and W are positioned (often as a result of the way the surface was built) by selecting the design with the modeling tool . U is the thick red axis, W is the thin red axis. Normal view View with modeling tool Activate segmentation Option regarding curve segmentation. Activate this option for the mapping. If activated, you can define the accuracy of this segmentation by setting the max. length of the generated segments and the max. chordal error. Generally, the smaller the engraving, the smaller the generated segments and the max. chordal error must be, so that they can be closer to the surface. Max length Maximum length of any segment (on the X, Y plane). This is the step of calculation before the mapping operation. The smaller your value, the more points you will get and the more time it will take! 152 VERSION PRO - USER'S MANUAL Max chordal error Clearance between arc and chord (for vectorizing operation in XY plane). The calculation is done automatically after clicking on OK. A progression bar will indicate the status of the job. To see the result, choose 3D ISO view from the View menu. 3D view before mapping 3D view after mapping Cylindrical / Conical mapping REMARK We consider the mapping is applied to toolpaths, though in some cases it is used directly on curves and patterns (see above Methods and tools for projection and mapping). If the pattern to map is a text, you should first transform it into curves and combine these curves. You've got a surface, a drawing and its corresponding toolpath (that is superimposed on the drawing) displayed on the screen. Example Before mapping, you've got to place two markers defining the cone or cylinder axis. Both correspond to the markers that were used to create the surface. VERSION PRO - USER'S MANUAL 153 Remark The surfaces Cylinder and Cone created with the surface tools are not adapted for mapping. If you create a revolution surface, select both markers defining the axis (that must be perfectly aligned) at the same time (keep pushed the Ctrl key therefore) and click on the Copy icon (you can also hit Ctrl-C) before clicking on the icon Surface of revolution (actually this last operation will suppress both markers). You only need then to paste the markers on their original place by clicking on the Paste icon (or Ctrl-V). Example Place then another marker for the cylinder radius (two markers for a conical mapping, one for the greatest radius and the other for the smallest radius). Select therefore an XZ or YZ view from the View menu. This marker (or the one of the greatest radius with a cone) will also be used as the center of mapping and will define the positioning of the engraving. Remark Position the radius marker(s) on the upper part of the cylinder or cone (as in the example below) to make a convex engraving. Position this marker(s) on the lower part of the cylinder or cone to make a concave engraving. Example YZ view XZ view You can also place a reference point (marker) on the engraving (toolpath) to position it on the radius marker (mapping center). Without such a marker, the engraving will be automatically centered according to the radius marker. Selection order before mapping Come back to a XY view. Select each item by clicking on it while pressing the Ctrl key, in the following order. 1. the toolpath. Be careful not to select the initial drawing instead. 2. the surface. 3. the two markers defining the axis of the mapping surface (the order of selection of these markers will determine the direction of the engraving.). 4. the radius marker that defines where you want your engraving to be positioned (and perhaps the second radius in case of a cone). 5. the marker used as reference point on the engraving (if this one exists), that will superpose on the radius marker. 154 VERSION PRO - USER'S MANUAL Mapping or Conical mapping . (This Once all the elements are selected, click on the icon Cylindrical mapping example deals with a cylindrical mapping). The dialog box Accuracy is displayed on the screen (see the information in the section parallel projection). Click on OK to validate your settings. The engraving is now mapped on the cylindrical part of the surface. Result In some cases, among them bottle molds, we advise to use a cylindrical mapping rather than a conical one, because it is easier and causes less distortion of the mapped pattern. VERSION PRO - USER'S MANUAL 155 MEASURING TOOLS Measuring tools The tools put at your disposal allow you to measure with precision such characteristics as an angle, the distance that separates two contours, the circumference, the perimeter, the surface and the volume of a group of objects. You can also make a tool simulation. Click on the icon Measuring tools to open the measuring toolbar. Click then on the desired icon. Measuring a distance Distance To find the distance separating two points of a contour, after clicking on the icon, select the first point and drag the cursor to the second point. The distance and the angle of displacement are shown on the inferior status line. Click on the second point to validate the position. The cursor becomes active on the other side, allowing you to reposition it as many time as you want. Remark Used in conjunction with F3, the measurement tool will be more accurate regarding the measured distance. Measuring an angle Protractor 1 - After clicking on the icon, place the cursor along the curve and click on it. 156 VERSION PRO - USER'S MANUAL 2 - Drag the cursor to the second point and press the Shift key (without clicking on the mouse). 3 - While pressing the Shift key, move the cursor in the angle you wish to measure. The value is shown on the bottom status line. Remark Used in conjunction with F3, the measurement tool will be more accurate regarding the measured angle. Measuring a size Size Click on the Size icon. Then place the cursor on the periphery of the object and drag it to the opposite corner, including the object in a crossed square. The different values are shown on the bottom status line. VERSION PRO - USER'S MANUAL 157 Bounding box This function allows to measure the real bounds of one curve or several combined curves, even if there are points out of the curve far from the line. A frame, which has the dimensions of the object, is added. The dimensions appear in the status line. Select the object(s) to be measured and click on the icon Bounding box in the Measurement tools toolbar. Curve with bounding box This function enables to apply precise transformations on the object. Dimension This function allows to add dimension lines to the object and to parameterize their appearance. Click on the icon Dimension . Click on the location of the first point of the dimension line, then, on the second one. Move the mouse in the direction of the dimension lines and click once again when the right position is reached. It is highly recommended to use the control points in the Snap up mode (F3) to obtain a precise measure. The dimension line is created with default options. A double-click on the existing dimension or a click on Ctrl and the icon Dimension allow to display the dialog box Dimension options with two tabs. Geometrical properties 158 VERSION PRO - USER'S MANUAL Dimension type You can choose between 3 types of dimension: horizontal, vertical and aligned. The appearance of the mouse cursor shows, which dimension type you choose. By pushing the TAB key after having selected the icon Dimension, you can change the dimension type. Dimension symbol Click on the icon to select amongst five the desired symbol for each end of the dimension line (4 arrows and a line without arrow). You may enter the size of the arrow in the corresponding field. Dimension line Click on the icon in order to choose the position of the dimension line in relation to the extension lines. Three possibilities are at your disposal: without any dimension line, outside or inside the extension lines. A drop-down menu enables you to choose the color of the dimension line. It is plain that the length of the dimension line must be entered only when it is outside the extension lines. Extension line In the same way, you can choose which extension lines are visible or not, and their color. Line extension: Enter the length of the extension line above the dimension line. Line offset: Indicate how far from the first two dimension points the extension lines have to begin (in general side VERSION PRO - USER'S MANUAL 159 of the measured object). Text properties Dimension text appearance Here, you can select the font, the color and the size of the dimension text. Text position The dimension text is positioned either on the line, or shifted in relation to this line (the entered value is applied to the baseline of the text). Text orientation Choose the orientation of the text (enter an angle value if the text is neither vertical, nor horizontal). Additional text Enter the text of a possible prefix or suffix to the dimension text. Please, note that the unit chosen in the dropdown menu is already displayed next to the dimension figure as a suffix. The number of significant digits (number of zeros after the point) can also be selected in the drop-down menu. 160 VERSION PRO - USER'S MANUAL Measuring a perimeter In the Measuring toolbar, click on the icon Perimeter measurement . Place then the cursor on the contour (this one can have points with different heights). Click on the mouse left button. The perimeter value is shown on the bottom status line. Remark Used with an open contour, it is like measuring the length of the contour. Measuring a surface In the Measuring toolbar, click on the icon Surface measurement . Place then the cursor on the contour (it must be a closed contour). Click the mouse left button. The surface value (area) is displayed on the bottom status line. Measuring a volume The software includes a tool that allows you to measure the volume of a TypeArt object or even a digitalized file (Picza files with the .Pix extension). It's interesting to make use of this tool in the CAD module (white screen) as well as in the TypeArt module (blue screen). . In the Measuring toolbar, click on the icon Volume measurement Place the cursor on the object. Click the mouse left button. The volume value appears in the bottom status line. Tool simulation More than a measuring tool, this function permits you to check if the tool, that you will use for the machining fits the created shape. Before using this function, select one of the 3D views at your disposal in the View menu. In the Measuring toolbar, click on the icon Tool simulation . The dialog box Tool simulation appears on the screen. In this window, click on the icon Tools DataBase to select the tool you will use. The dialog box Select a tool is displayed. Select your tool and validate by clicking on OK. VERSION PRO - USER'S MANUAL 161 After having selected the tool, click on OK in the dialog box Tool simulation. The tool is represented by two circles. The little one represents the tip diameter and the big one the half-angle. Drag now the tool cursor in all the desired directions. 162 VERSION PRO - USER'S MANUAL VARIABLES Inserting a variable text You can add a variable text to a composition associated with a data base, directly acquired from the text mode, or imported from a Data Base or a list made in any word processor. Variable text: Yellow Rapido mode Type the text and click on the icon where you want to insert the variable text. The dialog box Select variable is displayed on the screen. When you insert a variable text, this one is identified by the word Var followed by its range number (VAR1 for the first variable, VAR2 for the second one, etc.), and between two bars: |Var1|. Wine: |Var1| Vine: |Var2| Vintage: |Var3| You can add a new variable by: • • • selecting the variable name displayed by default (VAR1, VAR2, VAR3, etc.), creating a new variable by immediately typing its name in the dialog box Select variable, selecting an existing variable by using the scroll-down menu in the dialog box. Example Remark Once all variables are created, you can directly modify their name in the text mode. Therefore, you just need to replace the name between the two bars. VERSION PRO - USER'S MANUAL 163 You can modify the attributes (fonts, size, etc.) of a variable text using the same method as for a simple text, and add a box or a logo to your composition. Once the text is laid out, indicate the data that will replace the variables you just defined. Saving variable data Entering variables Click on the icon Entering variables found on the upper status bar. First method: entering data within the software Enter in the table of the Variables dialog box the possible values for your variables. Displaying the data on the screen Click on the scroll down menu Show state to display in your design the actual values of the selected line of variables. Number 1 displays the result corresponding to the first line of variables, number 2 the second, etc. 164 VERSION PRO - USER'S MANUAL Adding a variable You can add one or several variables during the definition of the variables. Click anywhere on the dialog box Variables with the right button of your mouse. The contextual menu is displayed. Click on Add a variable. Define then the name of the variable and its values in the appropriate fields. Compression mode This mode is useful in case of identical variables that follow each other. Example In the example shown above, the lines 1 and 2 contain exactly the same variables (Wine: Bordeaux, Vine: Margaux, Vintage: 1955). VERSION PRO - USER'S MANUAL 165 NOTE Even the smallest difference (Character or space) between two lines keeps from using this function. Moreover, similar values must be consecutive to be considered in a same group. Select Compress. The Variables dialog box automatically groups the identical variables. Example The line numbers are not displayed anymore. The number before each variable indicates its frequency. Importing variable data You can get data from any word processor, data base or CAD program (ASCII or "text only" format, in general with a .TXT extension). A single character is used to separate the values of different variables (in general a semicolon or tabulation). Records are usually separated by a carriage return. After having created the variables, choose the Import command from the Variables dialog box. Search and select the file to import (*.TXT), then click on Open. The data appear in the Import variables box. 166 VERSION PRO - USER'S MANUAL The extraction mode The Import variables dialog box allows to define the beginning of the extraction and the mode used for extracting data. The dialog box features two extraction modes: Separator and Constant width. Begin on line Select from which line in the file the extraction must be done (0 to start from the beginning). The line numbers are displayed in the View of the file section, between brackets: [0] and [1] in the example below. Example: The choice is made in the Begin on line menu. In the example shown above, the extraction begins at line [0] (Côtes du Rhône;Rochegude;1998) Separator This mode is the most common and allows fields in which the size of the values changes a lot between different variables. Of course, you must have defined characters or instructions that will separate the different fields. Click on Separator and select the column separator using the first scroll-down menu in the Separator mode section. For the example used in this section, ";" must be selected. Select then the line separator using the second scroll-down menu. For the example, select Return. Constant width Selecting this mode, you define the width of the different columns containing the variables. Click on Constant width and fill in the Format of columns field. The numerical value you enter in that field corresponds to the number of characters contained in the column. In case fields have different widths, enter the values for each of them respecting their order of display. In that case, separate all the values with comas. Example In the example, the first column can contain 12 characters, the second column 14, the third column 13 and the fourth column 10. Preview of extraction You can check if the setup of the extraction was properly carried out before validating it and quitting the Import variables dialog box. Therefore, click on Preview. The result is displayed in the Preview of extraction field. Once the extraction setup is made, click on OK to validate. VERSION PRO - USER'S MANUAL 167 Creating a serialization You can automatically create an automatic set of numbers in a variable text: the serialization. Variable text (Yellow Rapido) Enter the variable at the desired place in the composition. The variable Var appears between two bars. Entering a serialization Click on the icon. The Variables dialog box appears. Click on the Series button after having selected the column you want to apply this function to. Enter in the Parameters field of the Series dialog box: • • • the starting number the step between each series the end value, or similarly the total number of values (size of the series) Example: Numbering of hotel rooms, even numbers only from 18 to 26. • • • Starting number: the first room will have the n° 18. Number of series: 18, 20, 22, 24, 26; in other words 5 series, or ending value of 26. The step: for a numbering in even numbers, 2. Format The software considers by default that you create a numerical series. The Format section allows to chose other data types: letters (Alphabetic) or numbers + letters (Alphanumeric = an "alphabet" of 36 signs). You can also chose some formatting for display, to have a constant width whatever are the actual values in the series. Check the Constant number of digits box and edit the suggested format (each # character will be replaced by a sign). Added text The dialog box Series allows you to add text before and after the variables. Enter the text in the Text before and Text after fields of the dialog box. 168 VERSION PRO - USER'S MANUAL Remark To include a space before and/or after the variable value, you must type this space when you enter the text in the fields. Click on Preview to display your series before quitting the Series dialog box. Remark You can enter as many different series as you wish in the same data base. Example: the row 1 corresponds to room 18. Remark For the variable text, you can also use the copy/paste function of Windows. VERSION PRO - USER'S MANUAL 169 MULTICOPY AND MULTIPLATE MACHINING Introduction The multicopy function on the toolbar generates automatically copies of graphics, texts and variables. Multicopy Two modes of multicopy are at your disposal: • • several copies on a plate, one copy on several plates. Select the objects you want to reproduce several times and click on the Multicopy icon. 170 VERSION PRO - USER'S MANUAL Multicopy: geometrical parameters Dimensions of the plate In the Total width and Total height fields, found in the Multicopy window, enter the dimensions of the plate to be machined or the dimensions of the machine engraving surface. Remark In order to see the preview window for the copies, the dimensions of the machine engraving surface have to be greater than those of the active surface. According to the given information, the display of the field to the right of the window determines the possible number of copies. The white square situated at the top of the preview window corresponds to the area of the original object on the plate. The gray squares indicate the possible number of copies, according to the dimensions of the plate to be duplicated and to the dimensions of the machine engraving surface (interval between the border and the spacing between the copies included). In the Repetitions section, enter the Total Number of duplications for your object. According to the size of the element, the size of the plate and the spaces specified, the software calculates the number of repetitions in X and Y. If the plate is filled but the total number of duplications is not reached, the Number of layers is incremented. Alternatively, type the number of copies in the fields Repetition on X and Repetition on Y (rows and columns). With the mouse, you can also click on the gray squares to validate the position and the number of copies required. VERSION PRO - USER'S MANUAL 171 In case where machining on several different plates, it is recommended to adapt the size of the active surface to the size of the plate to be machined. In this case, machining is done plate/plate, a stop code is sent to the machine to allow you to change the plate during the machining process. For machining variables, the Nb of layers field is limited to the number of variables. For example: 20 variables data = 20 layers (maximum). Remark For the creation and import of variables data, see the previous section about Variables. The other parameters should not be modified in the case of one copy on several layers, since they are reserved for machining several copies on one layer. Format In the Format section, enter the desired distance between each object (e.g.: cutting line), which will calculate automatically the distance between each starting point of objet. You can also do the reverse. You can use or not a margin (value corresponding to the distance between the copies and the border of the machine table). When you leave the dialog box by clicking on OK, on the screen, the copies are superimposed, one on top of the other. Remark The original drawing is included in the total number of copies. Therefore, when validating a multicopy, the software automatically generates the necessary number of layers as follows: • • Layer 1 for the first layer, Noname + the number from 0 to the number of layers selected - 2 for the n following layers. 172 VERSION PRO - USER'S MANUAL Multicopy: advanced parameters The Advanced parameters tab is used to specify the options related to the machining of the plates. Ordering The Ordering section allows you to specify the machining order of the items on the plate. It is used when the items include numbers that are incremented and that should be obtained in a specific order. But if the radio button Optimization is active, the software will decide of the machining order, giving priority to the least move. Position of the first element The Position section allows you, by moving the red spot with the mouse or by entering precise coordinates, to define the position on the plate of the first item machined. Axes cutting To help you with the cutting of the plate, you can add partial or total guidelines between each copy. To validate you choice, select the desired option: None, Partial, All. VERSION PRO - USER'S MANUAL 173 Partial cutting Total cutting Remark The depth of cutting of the cutting lines can be modified in the Machining window. You can chose a specific tool for the cutting between each copy: associate a color in the Axes cutting section. Use then the Color machining icon , after having selected the relevant contour: you will find again the chosen color, and with a simple click (not a double-click), associate to it a tool from the tool database. 174 VERSION PRO - USER'S MANUAL SCANNING Running the scanner Scanner The scanner allows you to copy a printed drawing. If you have a scanner installed that is compatible with TWAIN you can scan and vectorize directly with the CAD module. When you click on the icon, the image appears in the active area. Remark Click only once on the icon! Give time to your scanner to begin working. Click on the tool. The command menu of the vectorizing software provided with your scanner will be displayed on the screen. The CAD module will display the raster Bitmap image. Raster images are composed of fixed size pixels (small black and white points that make up the picture). The quality of the reproduction depends on the quality of: • • • • the drawing, the scanner, the chosen settings (brightness, contrast, zoom), the accuracy required (DPI resolution). Visualization of the Bitmap To display the image, select Options in the Edit menu. In the dialog box Options, choose Display and select Show bitmap. If you do not want to display the points generated by your scanner, a frame will appear instead of the drawing. This visualization is advised for large drawings which would delay the display. Moves and displays will go much faster thereafter. Fast display (Show bitmap option deactivated) Real display (Show bitmap option activated) VERSION PRO - USER'S MANUAL 175 Scanning in 3D This option allows you to scan in 3D (digitalize) a surface or an object using the Picza module or to import a file generated by the same module (both are Picza files named *.Pix files). Such surfaces can be machined as a TypeArt file. Scan 3D Click on the icon Scan 3D. The dialog box Picza is displayed on the screen. Acquire with Dr Picza Click on this icon to scan in 3D an object or a surface with the Picza module. Please refer to the Picza manual edited by the Roland Corporation for any information about the use of this 3D scanner. Open Picza files Click on this icon to load already existing Picza files (*.pix files) in TypeEdit. The digitalized Picza file appears like a TypeArt drawing on the screen. As you send it to the CAM module, you can only compute TypeArt toolpaths. Example of a Picza file the way it appears in the software 176 VERSION PRO - USER'S MANUAL VECTORIZING Running the vectorization The vectorization module converts raster images into vector images, that can then be machined. Vectorizing Select or import the image to be vectorized in Bitmap format (*.TIF or BMP) and click on the vectorizing icon. The vectorization is done automatically. Click only once on the icon! Give your scanner time to begin working. Remark If no image is selected, the vectorization mode will automatically begin, and will scan and vectorize the image in one continuous operation. This function is useful to directly retrieve the contours of the scanned image without the bitmap image in the background. Changing the parameters of vectorization To modify the parameters of vectorization go into File Vectorization parameters…, or click on the icon while simultaneously pressing Ctrl. Allowance from 0,1 to 3 This parameter determines how faithful the resulting image will be to the original image. VERSION PRO - USER'S MANUAL 177 Higher values lead to smoother vector image while lower values make the vector image fit more accurately to the actual pixels in the raster image. The better the quality of the scanned drawing, the better the result, of course… Be careful with this setup because the demanded precision has a direct influence on the number of points generated! The points can be overabundant and slow down the display on the screen, the manipulations, and the calculations. Noise filtering from 0 to 3 This parameter determines how to treat the small noise pixels that appear in an image. A small value results in a more detailed vector image. A larger value leads to a smoother image, less faithful to the original raster image. This option is very useful for avoiding future corrections on final curves. Smoothing from -1 to + 1 This parameter determines the choice of vectorization using either a conversion in splines or segments, or favoring the former more than the latter or vice versa. -1: all in splines +1: all in segments At 0, all the angles under 90° become sharp. Centerline Selection of the type of vectorization (contour or skeleton). Bitmap Contours Skeleton / Centerline Maximum thinning Maximum value allowed for thinning contours for the vectorization in centerline mode. The calculation is made in pixels in function of the image resolution and of the width of the original tracing of the drawing. This parameter should be approximately equal to half of the number of pixels relative to the widest tracing of the original drawing to be vectorized. Spot filtering Periphery in number of pixels of the spots to be deleted. This option is very useful when the drawing is of bad quality. It limits the number of contours created during the vectorization by ignoring the elements considered as not being part of the drawing. On black Vectorization is made on the black part of the bitmap. Vectorization is made on the white part of the bitmap. Default values Allows you to return to the standard set values. 178 VERSION PRO - USER'S MANUAL Vectorizing color bitmaps The vectorization module can also convert raster color images into vector color images, which can then be machined. Vectorize bitmap Select or import the color image to be vectorized in Bitmap format (*.tif or bmp). If you want to modify the parameters of the vectorization, strike the Ctrl key while you click on the icon (or choose Vectorization parameters in the File menu): see therefore the Changing the parameters of vectorization section. Click then on the Vectorize bitmap icon. The dialog box Color Reduction is displayed after a few seconds of calculation. In the example shown above, the module automatically selected five different colors that will be used for running the vectorization. Nevertheless, the module allows you to modify the automatic settings of the color reduction (color fusion and number of colors) which is the first step of the vectorization process. VERSION PRO - USER'S MANUAL 179 Color fusion Each color which has been selected by the vectorization module is represented by a square in the left part of the dialog box Color reduction. You can select several colors you want to get fusioned by clicking on each corresponding square while keeping pressed the Ctrl key. Once you selected the desired colors, click on the Color fusion icon. The resulting number of colors automatically appears in the field located at the right side of the Set colors icon. You can get back the previous settings by clicking the Reset icon. Set colors You can set this value to be exactly the number of colors you want to apply to the vectorization. Enter therefore the desired value and click on the Set colors icon. This operation may last a few seconds depending on the amount of colors you want to use. You can get back the previous settings by clicking the Reset icon. Parameters You can parametrize the configuration of the color reduction by clicking on the Parameters icon. The dialog box Configuration of color reduction is displayed on the screen. Pretreatments Suppression of antialiasing Activate this function to keep the sharpness of the angles of a contour. Suppression of noise Activate this option to suppress the small noise pixels that appear in an image. This option is very useful for avoiding future corrections on final curves. Remark If you click on the icon Default values you will get back the values that were automatically determined by the vectorization module. 180 VERSION PRO - USER'S MANUAL BITMAP EDITOR Running the bitmap editor Bitmap editor Click on the Bitmap editor icon to launch this function once you have loaded a bitmap in the CAD module. The dialog box Bitmap editor is displayed on your screen. Working with images Selecting the active color Bar of the four last selected colors Click on one of the four last selected colors that are represented by four rectangles in the lower part of the dialog box Bitmap editor. VERSION PRO - USER'S MANUAL 181 Eyedropper Click on the icon Eyedropper. Place then the eyedropper on the color you want to be selected and click on it. The selected color becomes the active one and is displayed in the bar of the four last selected colors. Color selection (for 256 color images) Click on the icon Color selection. The dialog box Choose a color in palette appears on the screen. Click on the desired color in the dialog box with the left button of the mouse. The selected color appears in the bar of the four last selected colors. In case you want to edit the selected color, just click on it with the right button of the mouse in the dialog box Choose a color in palette (it opens the dialog box Color edition). Color selection (for 24 bit images) Click on the icon Color selection. The dialog box Color edition is displayed. This box allows you to select a color by clicking on any part of the Hue and saturation ring (right part of the dialog box) or by entering numerical values for the RGB parameters. It also allows you to edit a hue. Click on it therefore or enter numerical values for the HSV parameters. The result of your new setting appears in the field Current color. Validate by clicking on OK. Drawing Select the active color and click on the tool corresponding to the shape you want to draw. Line Position the mouse cursor where you want your line to start and click. Drag the mouse until your line is set. Click a last time to define the position of the arrival point. Rectangle, Ellipse (circle) Place the mouse cursor where you want your shape to start and click. While holding down the left mouse button, drag your cursor until the shape is set. Release the mouse button. Polyline, Polygon Place the mouse cursor where you want your shape to start and click. Drag the cursor until the first angle position is reached and click then to validate this point. Repeat the last operation as many times as you want to create angles. Click on the right button of the mouse to validate the final shape. Fill rectangle, Fill ellipse The inside of the created shape is filled with the active color. Painting Select the active color and then the desired tool. Four different tools are available: • Thin pencil: the width of the created stroke is 1 pixel. • Brush pencil: the created stroke results of a succession of filled circles. • Spray: this tool allows to create an aerosol painting effect. • Fill area: this tool allows to replace a color by the active one. Thin pencil, Brush pencil, Spray Place the cursor where you want to start painting. While holding the left mouse button, drag the cursor on the area to be painted. Release then the mouse button. Fill area Click in the area to be filled with the selected color. 182 VERSION PRO - USER'S MANUAL Image deformation Rotate, resize, etc. Click on the icon Rotate, resize,. Select the operation mode in the dialog box Image deformation that is displayed and enter the desired parameters in the corresponding fields. You can preview any modification by clicking on Apply and go back to the first view by clicking on Reset. Validate any modification by clicking on OK. The Bitmap Editor is getting closed and the effect is applied to the image. Resize This operation allows you to modify the height and the width of the picture. You can either enter the new width and the new height or define the transformation percentages. Resample This operation calculates the position and the color of missing pixels. The use of this method allows to reduce the defaults of an image. You can either enter the new width and the new height or define the transformation percentages. Horizontal and vertical skew You can either enter the new distance of offset or define the new offset percentage. Flip and Mirror Select Flip if you want to apply a centered vertical mirror effect. Select Mirror if you want to apply a centered horizontal mirror effect. Rotation Enter an angle between 0° and 360°. Sharpen and Soften Both functions are only available with 24 bit images. Soften Click on the icon Soften. While keeping down the left mouse button, drag the cursor on the area to be softened. Intermediate hues between colors will be created. Sharpen Click on the icon Sharpen. While keeping down the left button, drag the cursor on the area to be sharpened. Intermediate hues between colors will be suppressed. The contrast is raised. Effects These functions are only available with 24 bit images. Filters Click on the icon Filters. Select the effect you want to apply to the image by using the scroll-down menu of the displayed dialog box. Click on Apply to preview the result of the operation. Click on Reset to cancel the modification. Validate the modification by clicking on OK. Embossing (both methods) Select this option to create a relief effect. Color pencil effect Select this option to find the contours. Soften Select this option to soften the image by creating intermediate hues between two colors. Sharpen Select this option to sharpen the image by suppressing intermediate hues between two colors. VERSION PRO - USER'S MANUAL 183 Working with colors Increasing the number of colors This operation increases the number of colors up to 16,7 millions. This conversion is very useful to apply the following treatments to the image: • Effects • Color reduction • Soften • Sharpen Select Conversion in 32 bits in the menu Conversion to increase the number of colors. Decreasing the number of colors You can only decrease images with 16,7 millions colors. Color reduction Click on the icon Color reduction. The corresponding dialog box is displayed. Click on Fusion for an automatic fusion. Cancel or validate this operation. You can select the colors to be treated in the actual palette: while holding down the Ctrl key, click on each color you want to select. Click then on Suppression to suppress the selected colors or on Fusion to merge them. You can change the parameters of the colors reduction by clicking on Options…. Click then on Color reduction to apply the reduction. In case you are not satisfied with the result of your treatment, click on Reset to get back the original image. Once all the parameters are set, click on OK to validate. Gray levels Conversion in 256 gray-levels Select Gray level 8 bits in the Conversion menu in order to reduce the number of colors of an image down to 256 gray-levels. Gray levels This operation reduces the number of colors of an image to an equivalent number of gray-levels. Histogram correction This option is only available with gray-levels images. Histogram Click on the icon Histogram. The dialog box Histogram correction is displayed. The graphic displayed in the dialog box represents the way the gray-levels are divided up in the image. The vertical axe shows the percentage of pixels of which color corresponds to a gray-level quoted on the horizontal axe. Select the histogram treatment you want to apply. Three are available: Equalization This function adjusts the luminosity by dividing up pixels equivalently between different gray-levels. Specification This function allows the user to select a bitmap image of which the gray-levels dividing will be applied to the current image. Stretching This function adjusts the luminosity so that the histogram contains the whole gray scale. 184 VERSION PRO - USER'S MANUAL Choose then between a classical view and a cumulated view. You can preview the result of your modifications by clicking on Apply and cancel it by clicking on Reset. Half-tones Half tone Click on this icon to reduce the colors of a black and white image. Half tone with diffusion Click on this icon to reduce the colors of a gray-level image and enter the number of gray levels (between 2 and 64). Click on OK to validate. Correction of colors Correction Click on the icon Correction. The dialog box Correction of colors is displayed on the screen. Select one of the pages of the dialog box regarding the kind of correction you want to apply. RGB Correction (red / green / blue) A color is reproduced on the screen from the three primary colors which are red, green and blue. For each of these colors you can increase or decrease the parameters (each value is contained between 0 and 255). HSV Correction (Hue / Saturation / Brightness) A color can be defined on the screen from three components: hue, saturation and brightness. You can increase or decrease the hue, the saturation (at 255 the image is converted into gray-levels) and the brightness (with 0 for the absolute black and 255 for the absolute white). Brightness / Contrast In this page, you can set up the brightness of the image (with +100% for an absolute white and –100% for an absolute black) and increase or decrease the contrast. Any correction of color can be previewed by clicking on Apply. You can get back the original image by clicking on Reset. Working with masks When it’s positioned on the current image, a mask is a closed contour that permits to select a part of the picture. Using a mask Polyline mask Click on the icon Polyline mask. Position your cursor on the image and click to mark the starting point of the mask. Drag your cursor until the next point and click to create an angle. Repeat this last operation as many times as there must be angles. Once you created all the angles, click on the right mouse button to validate your mask. Free drawing mask Click on the icon Free drawing mask. Position your cursor on the image and click. Drag the cursor while holding down the left mouse button. Once you’ve closed the contour, release the mouse button to validate the mask. Magic wand mask Click on the icon Magic wand mask. Click on the desired color. Enter the selection parameters in the dialog box that is displayed. Cancel or validate this operation. The chosen color becomes the mask. VERSION PRO - USER'S MANUAL 185 Choose a mask Click on the icon Choose a mask. In the displayed dialog box, double-click on the desired kind of mask. Drag your cursor on the image while holding down the left mouse button, and release it once you’ve reached the desired position and dimensions. Area of mask becomes the image Click on this icon. The mask selection becomes the current image. Show / Hide the mask Click on this icon to show or hide the mask. Suppress mask Click on this icon to delete the mask. Deforming the mask The Bitmap Editor allows you to deform a mask. Actually you can move, rotate, align, stretch or project the mask. Click therefore on the desired tool, click then on the mask and drag your cursor while keeping down the left mouse button to deform the mask. Release the left mouse button at the end of the operation. Copying / Cutting / Pasting The Bitmap Editor allows you to copy, cut and paste a newly created mask. You can access these functions through the Edit menu or through the following shortcuts: • Copy: Ctrl + C • Cut: Ctrl + X • Paste: Ctrl + V Painting around the mask Create a mask and select the active color. You can either draw the mask with the brush mask 186 or fill the area around the mask . VERSION PRO - USER'S MANUAL , fill the area of the PHOTO Generating halftone pictures Photo This function allows to generate halftone pictures. You can either select a bitmap before clicking on the Photo icon or click on the icon before loading a bitmap (you can load it from a scanner). Once the bitmap is loaded and you clicked on the Photo icon, the dialog box is displayed on the screen. Remark To display in the right window of the dialog box the results of the parameters setup, click once on the Preview button. VERSION PRO - USER'S MANUAL 187 Engraving dimensions Define the height and the width of your engraving by filling in the corresponding fields as shown below. Select Keep scaling in case you want to modify both dimensions proportionally. Treatments Choose among three different halftone types by using the scroll-down menu. You can invert the colors by selecting Negative image. Engraving type Select the kind of engraving you want to generate. You can also customize its step by filling in the corresponding field. Brightness and contrast Increase or decrease the brightness of your halftone picture by dragging the cursor shown below. Don't forget to click on the Preview icon to visualize the result of your setup. Do the same to increase or decrease the contrast of the picture. Soften Click on this icon to soften your picture. Click on Preview to visualize the result before validating. Sharpen Click on this icon to sharpen your picture. Click on Preview to visualize the result before validating. Once the setup is made, click on OK to validate. The picture has been turned into a halftone picture. 188 VERSION PRO - USER'S MANUAL USING LAYERS Creating and using a layer or plane You can place a drawing, or elements of a drawing, in layers (or planes), which are used as tracings piled on a board. Each layer can be displayed and used individually or with other layers. There are no limitations neither for the number of layers nor for the number of entities held in each of these layers. A layer can be a model of construction for the digitalization (See example): Principles: • any layer not in use becomes inactive (no modifications are therefore possible on the inactive layers), • the F3 function is available for snapping onto geometrical elements of another layer (if it is visible). A layer is also useful to separate some elements of a drawing into several different layers: • with the copy/paste function, for instance, you can keep all the recessed contours of a complex machining on one layer and all the relief contours on another layer. Example: Base for the digitalization of a logo Display a scanned logo, for example. This display is called "layer 1". In order to register it in a fixed layer which will serve as the basis for reconstruction, you have to create a second layer where the tracing will take place. Adding / Deleting a layer Adding a layer To add a layer, click on the "+" symbol located in the lower status bar of the screen. The status bar confirms that a new layer was created. You can modify the name of a layer by clicking on the corresponding tab of the status bar. Double-click then on this tab. You can modify now the name of the layer. VERSION PRO - USER'S MANUAL 189 Validate the new created name by clicking outside the status bar. Deleting a layer Select the plan you want to delete by clicking on its corresponding tab in the lower status bar. Click then on the symbol in the same status bar. Example (deleting the second layer): In the example shown above, the second layer is selected. Click on "-" to delete it. Displaying a layer Click on the current name of the layer found on the status line at the bottom. Remark To display only one layer on the screen, unselect the box at the right of the status bar as shown below. 190 VERSION PRO - USER'S MANUAL USING SYMBOLS Creating a symbol The software includes a symbol library where you can add your own for later use. In that way any repetitive shape or drawing can be kept and is easy to reach. Select the object to be added to the symbol library and click on Export in the File menu. In the dialog box, choose the directory where you want to keep your symbol, then select the Symbol (*.syb) file type in the scroll down list. Enter the name of the symbol (8 characters maximum) in the field File name and validate. Example: Grappe.syb. The new symbol now belongs to the library. Remark Make sure you are using the .syb extension so that it will appear afterwards in the symbol library. Using the symbol library Symbols Click on the Symbols icon and then select a symbol from the list provided in the library. In order to help you with the selection, a preview window, which displays the symbol corresponding to the selected name, has been provided on the right hand side. VERSION PRO - USER'S MANUAL 191 After selecting the desired symbol, validate by clicking on OK and position it on the active surface. 192 VERSION PRO - USER'S MANUAL CAM MODULE VERSION PRO - USER'S MANUAL 193 194 VERSION PRO - USER'S MANUAL STRUCTURE OF THE CAM MODULE Sending to machining Click on the icon CAM module its blue screen. to transfer the composition to the CAM (machining) module distinguished by Remark When one or several elements are selected in the CAD module, your selection is kept in the CAM module. If you forget to save the .vnd file on which you are working, a message reminds you to do so. To get back in the CAM module, click again on the CAM module icon. Tools and windows of the CAM module The CAM toolbar allows you to manage the toolpaths and the tool database. Click on the icon Create toolpath . The dialog box Create toolpath gets displayed on the screen. There are two ways to access to the toolpaths. Actually, you can access to any toolpath through two different lists in the dialog box: Available and Group. The Available list gathers all kinds of toolpaths available, including your own toolpaths. The Group list groups all reference toolpaths in relation to their type (2D, 2.5D, 3D), and cannot be modified. VERSION PRO - USER'S MANUAL 195 A short explanation concerning the toolpath appears when the cursor remains a few seconds on its name (here for Contouring), e.g.: Double-click on the toolpath you want (or select a toolpath and click on the blue icon at the bottom of the window). The corresponding dialogue box opens, with specifying parameters for that toolpath. See the section Description of toolpaths below to read how to use the different toolpaths. from the CAM module toolbar. The corresponding dialogue box is displayed Click on the icon Toolpath list on the screen. It contains a list of all the toolpaths you created. 196 VERSION PRO - USER'S MANUAL This dialog box allows you to edit toolpaths, to simulate the machining or even to add subgroups using the context menu. To access the context menu, select a layer, a group or a toolpath and click on the mouse right button. The context menu is displayed on the screen. This dialog box puts at your disposal the Drag and drop functions that have become very common in Windows. For example, in case you've created several layers, you can select a toolpath from one of the layers, keep pushed the mouse left button, drag it to the folder of another layer and release the mouse button. The number between brackets is the extension given to the toolpath file, the base for the name being the name of your document. For example, if you document is called MyLogo, the files MyLogo.001, MyLogo.002 etc. are generated. When you create a toolpath, you have to choose a tool among those available in the Tool database, by clicking on the icon. VERSION PRO - USER'S MANUAL 197 The Add group button allows to create a sub-directory in the Tool database, shown by a small red toolbox, in which you can create, delete and modify tools. You can thus group your tools by type of geometry: cones, cylinders, balls, etc. icon is very useful for creating a customized tool, based on a form you draw, and of two The Special tool markers indicating the axis of the tool. First of all, in the CAD Module draw a profile and 2 aligned markers. Send them to the CAM module. Select the . profile, then the markers and click on the Special tool icon curve (revolution profile) Generated tool You special tool is created, though nothing has occurred on screen. You can see it by clicking on the Tool in which your new tool will appear in a sub-directory called "Special tools", with an icon in Database icon shape of a question mark. The CAM toolbar includes lastly some tools similar to those found in the CAD module, allowing to combine and uncombine 198 contours, and control intersections . VERSION PRO - USER'S MANUAL TOOLPATHS: OVERVIEW The icon Create toolpath displays dialog box Create toolpath. You then access to any toolpath through two different lists in the dialog box: Available and Group. Each toolpath has some specific parameters, but some parameters are common to many or all toolpaths. Double-click on the desired toolpath. Enter its parameters in the corresponding dialog box. VERSION PRO - USER'S MANUAL 199 General tab In the upper part of the General tab, you must click on the icon to select the appropriate tool in the Tool database. Whatever toolpath you selected, the first information to provide is the tool used for machining. Depth Specify the total depth for the milling/cutting. This information is found also, with more specific parameters, in the Pass parameters tab once the tool is chosen. Accuracy At the bottom of the dialog box, you can specify an Accuracy, which is a tolerance used during the computation of the toolpath. A high accuracy causes longer calculation time, but more precise toolpaths that include a more important number of points. This parameter can be refined if you notice something unexpected with a toolpath made with the default accuracy (0.01 mm) or for very small toolpaths. Grouping The Grouping checkbox determine if one or several toolpath files will be generated. If the box is checked, each selected contour in totally machined, one at a time, creating as many toolpaths as items. If the box is not checked, the computation is done globally and generates only one toolpath, irrespective of the number of selected items. Example: 200 VERSION PRO - USER'S MANUAL without "grouping", one generated file "grouping", two generated files Pass parameters tab Pass From top to bottom, you can specify the following parameters: Reference Z for this toolpath. Useful in particular in the case of a uneven material on which you realize several machining. Pass depth (automatically adjusted according to the number of steps): similar to the parameter defined in the General tab, discussed above. Number of steps or number of passes (automatically adjusted if necessary). Total depth of the engraving/cutting (= pass depth if there is only one step). Remark If you use a conical tool, the width of the surface will depend on the depth required. A simulation display mode would be useful to control collisions. Climb / conventional milling Climb milling: The tool is always on the right side of the material: Conventional milling: The tool is always on the left side of the material: VERSION PRO - USER'S MANUAL 201 Distance between steps For toolpaths that need several steps (contouring, sweeping, 2D and 3D engraving), the Distance between steps is also shown in the Pass parameters tab. It is the distance between two consecutive steps, measured at the center of the tool. You can directly enter the value (in the unit you have chosen), or a percentage: the other value is automatically deduced. NB: the percentage is indicated for the diameter of the tool, but according to the shape of the tool, different active parts are considered (spherical toll = radius, flat end tool = tip). By default the value is 50 %, which is the usual value in order to leave no material between two steps. The difference between this value and 100 % is the overlapping distance of the pass or overlap. Example 20 % of overlap 50 % of overlap Distance between steps of 50 % Distance between steps of 80 % Skip external For 3D toolpaths using with true angle (3D engraving, finishing, 3D finishing, intaglio), the Pass parameters tab includes also a check box called Skip external frame. The finishing tool does not engrave the external frame, which saves time and avoids unnecessary usage of the tool. 202 VERSION PRO - USER'S MANUAL Projection tab A Projection tab appears when a TypeArt object or a surface as well as a curve are included in the items selected for engraving, in order to specify the conditions for projecting the curve on these surfaces. Specify here the Accuracy for segmenting the curve before the projection. If you map on a 3D surface, you must also specify if the projection is done from the top or the bottom of the volume. In this kind of projection, you should also indicate the accuracy of the segmentation of the surface. The lower the values of Accuracy, the more precise the projection (… and the longer the computation time). According to the nature and shape of the surfaces, some holes can exist or appear. The check box Fill holes allows to fill these holes (are considered as "holes" the holes twice as big as the required curve accuracy). Tool shape For most toolpaths (Contouring, Intaglio, etc.), the geometry specific to the chosen tool greatly influences the result of the engraving. It sometimes prevails over parameters you enter in the dialog box for your toolpath. Don't forget to make several tests! VERSION PRO - USER'S MANUAL 203 TOOLPATHS OF THE 2D GROUP Read the overview about toolpaths before reading this specific information for toolpaths used for 2D machining. Plotting Plotting is the only tool path function available for both open and closed contours. The function is particularly adapted for the use of single line fonts. The machine will move exactly like a pen. A line drawing becomes one line on the material being cut or engraved. Choose a tool among all tools in the database and enter the depth value. The tool can be asked to go back on the path following the tool center to remove material for a better plotting quality. "Expert Mode" checkbox Calls an extra tab to define the tangential entry for the plotting. This function allows to modify closed contours by adding a tangent entry or exit. Open contours are unchanged. 204 VERSION PRO - USER'S MANUAL Check the Tangential entry/exit box to enter your parameters. - Drilling radius (r) The value of the radius at the starting point and/or point of exit created to control an eventual collision on the existing contour(s). This radius must be < D. - Input / output length (D) The length between the starting point and the point of contact on the contour. Whatever the radius of the tool, D is never above 2R. - Transition radius (R) The input / output radius. VERSION PRO - USER'S MANUAL 205 Control drilling in This option makes sure that no element of the contour is closed to the starting point than the value of the radius. Control drilling out Similar, but for exiting the contour. With remaining material If this option is validated, starting and finishing points will be at the distance entered in the Remaining material field. If the option is not chosen, the points will be at the same location. - Remaining material The length removed from both sides of the contact point (to prevent the piece from falling). Lookup speed (0.05 to 0.95) This function corresponds to the accuracy of the search for another starting point along the contour in case of collision. The smaller the value, the longer the search. Precision filter (0.001) If the distance of collision is less than or equal to this distance, it is assumed that there is no collision. (Do not change the default value). Total control: crash control is done on the contour and on the neighboring contours. Limited control: crash control is done on the contour itself. Vinyl Cutting toolpath. You must first define your tool. 206 VERSION PRO - USER'S MANUAL • General tab Specify first the cutting depth for the tool. Section Kind of cutting Plotting: the cutter follows only the contour. Driven cutter: the cutter follows only the contour. When it reaches an angle, the cutter moves up, changes orientation and enters again into the material. The range of angles for which the cutter goes up is set in the advanced parameters. Floating cutter: the mobile cutter follows the contour (in a tangent way). When it reaches an acute angle, it makes an external curve tangent to the trajectory in order to be properly positioned for following the cutting. The range of angles for which the cutter does a curve is set in the advanced parameters. Rounded inner angles: non implemented. Tangential entry/exit: the entry and the exit of the tool are done externally to the contour, in a tangent way, which produces a result of a better quality. VERSION PRO - USER'S MANUAL 207 • Advanced tab Driven and floating cutter parameters: Minimum/Maximum side angle: for any angle contained between the chosen values, the tool does a curve (floating tool) or a move up and positioning (driven tool). Minimum length for sides: below the chosen value the tool does a tangent move. Transition radius and Input/output length: Only applied to the floating cutter, these parameters allow to set the size of the curve done at each angle (radius and distance input/output). Check intersections: When checked, allows to verify that the curves done by the floating tool do no interfere with the original drawing. In such a case, the size of the curves and their orientation are automatically adapted to avoid collisions between the toolpath and the geometry to cut. For open contours: These options are used only for the floating tool and determine the behavior when changing direction. Normal: no curve is used for the tool. The cutting is done in plotting mode. Driven tool: the tool moves up at each angle, then enters back into the material. Arcs on exterior angles: a positioning curve is done for each exterior angle. Arcs on inner angles: a positioning curve is done for each interior angle. Arcs on all angles: combines the 2 previous options. 208 VERSION PRO - USER'S MANUAL Drilling or Boring Mode Spot drill: drilling is made in one step. Multi-step with Z up: drilling is made in several steps with a move in Z reference position between each step. Is used in particular to evacuate material. Multi-step without Z up: drilling is made in several steps with an optional move in the Z position specified by Z up position. Drilling depth: drilling depth Z up position: Z coordinates for movements outside the material. Dwell: when the tool is at the bottom, it can be useful to add a short waiting time before moving up. Selection filter Allows to indicate which elements among the selected contours will be the object of the drilling. The points defined by the Draw holes tool are considered as special markers. Markers: a drill is made at the position of each selected marker. Start point: a drill is made at the position of each selected curve starting point. End point: a drill is made at the position of each selected curve ending point. Start/end point: combines both previous choices, to take into account closed contours. Braille: a drill is made at the center of each closed contour. High speed in clear move: by default, the move up is done in working speed. By checking this box, the fast speed defined in the Technologies tab will be used. Remark: No toolpath is generated for the drilling; visualization must be done in 2D or 3D. VERSION PRO - USER'S MANUAL 209 2D cutting The tool will cut outside the first contour of the drawing (no true angles). Internal cutting: by default, the cutting is internal to the contour. Rounded angles: the angles are always rounded, at the minimum taking into account the trajectory of the tool. If a positive value is given for this parameter, it adds another rounding, as if the angle of the contour was a true rounded angle. Fit for tool: if checked, the rounding is also adjusted to the shape of the tool. Added offset: the toolpath is moved with the specified value, relatively to the contour. For an external cutting, a positive value will add an offset inwards. For an internal cutting, a positive value will add an offset outwards. Tangential entry/exit: if checked, the Tangential entry/exit tab described above for the Plotting toolpath appears. Add links Check this box to avoid that a total cutting make the part bend and maybe warp the cutting. The toolpath does not make a full cutting, but leaves some links for which you specify the Length, Height and Distance between links. Remark To cut with a sharp angle from the bottom, activate the option True angle at the bottom in the Options dialog box (tab Calculation parameters). Hit the F10 key from CAD module to open this dialog box. 210 VERSION PRO - USER'S MANUAL 2D engraving This automatic function makes a 2D tool path with complete area clearance. The cutting width is the distance between two passes on the horizontal plane. It is automatically calculated relative to half the diameter of the chosen tool. You can easily change the value in the General tab. Number of steps Number of passes to reach the total depth (the depth of the first pass is automatically updated). One depth Maximum depth in Z for one pass (number of passes is automatically updated). 2D on surface / 2D on bottom You chose if the 2D engraving path executed by the tool reproduces the theoretical contour of the drawing on the top or on the bottom of the engraving (specially useful when using conical tools). Example 2D on surface 2D on bottom Distance between steps Quantity of material removed by concentric passes (see the overview). F10 - Specific parameters Two items in the Specific parameters tab (Options - F10) are related to the work on angles for engraving. VERSION PRO - USER'S MANUAL 211 Max. angle for extended penetration In the case of acute angles, the tool advances into each angle. This prolongation of the path prevents from specifying narrower steps (or from leaving empty areas). Example : No angle cutting above the given value (default angle = 135°, max. = 180°). Plunged angle for tool Specify the maximum angle for tool plunging (from 1° to 89°). 2D Milling 212 VERSION PRO - USER'S MANUAL Engraving mode Center line The centerline filling in is the same as the toolpath of the Plotting mode (see this section). 2D Milling The milling of an engraving in this mode is executed by successive passes (hatching or contouring). Two fillings in styles are available: 2D on surface The 2D engraving path executed by the tool reproduces the theoretical contour of the drawing on the surface. The closed contours are milled first, then the opened contours. 2D on bottom The 2D engraving path executed by the tool reproduces the theoretical contour of the drawing on the bottom of the engraving. Example 2D on surface 2D on bottom Hatching angle It can be used either to obtain a visual effect on the bottom of the engraving or to minimize the size of the files (by using the main axis of the drawing as the hatching axis, it can minimize the clearance for instance). Use sensor nose Select this option if you are using a flatness sensor, the spiral area clearance will be automatically set. You will avoid the tool from dropping into areas already milled. Remark Once the Use sensor nose option activated, you can no longer define the hatching angle, since milling is executed by concentric passes from the external to the internal contour. Tangential entry / exit Use this function if you wish to start or to end your work with a displacement tangent to the contour. Sweeping or Parallel hatching The sweeping function allows you to program the removal of material by parallel motions according to the chosen angle. The function thereby minimizes the number of times the tool has to ascend and to descend. Sweeping is very useful for enlarging the engraving quickly and can be executed with a large tool either VERSION PRO - USER'S MANUAL 213 cylindrical or conical. By choosing various sweeping angles, you can create different optical effects on the bottom of the engraving, or minimize the size of the machining files (by following the main axis of the drawing, the number of ascents are minimized). 45°Angle Sweeping type By area The tool machines the whole zone (zone A) from beginning to end before starting on another zone (zone B). Island Jumping The tool works from top to bottom jumping over the “islands” (non-machined areas). 214 VERSION PRO - USER'S MANUAL Sweeping mode Forward and back The tool follows its path continuously without lifting and always inside the material. Climb milling The tool is always on the right side of the material: Conventional milling The tool is always on the left side of the material: Angle breaking Trimming before or after sweeping. Without No angle breaking is done. Before The tool will first trim the material and then go into the sweeping mode. After The trimming is done after the sweeping is finished. Note The indication "Climb Milling / Conventional Milling" of the Pass Parameters tab applies to the angle breaking pass. The indication "Climb Milling / Conventional Milling" of the General tab applies only to the sweeping mode itself. VERSION PRO - USER'S MANUAL 215 Contouring or Spiral area clean This function allows you to program the removal material through concentric motions by progressively approaching the original form. The tool shape has such an influence on the machining, that if the shape is not appropriate for engraving the theoretical contour, no toolpath will appear on the screen. See the general parameter in the Overview at the beginning of the chapter. By default, all the material will be removed (total recess). Total spiral cleaning 216 VERSION PRO - USER'S MANUAL Only the number of the desired spiral passes will be executed by the tool (limited recess). Spiral cleaning limited to 2 passes VERSION PRO - USER'S MANUAL 217 TOOLPATHS OF THE 2.5D GROUP Toolpaths in 2.5 dimensions concern paths that can manage tool collisions and true angles. The use of the term "3 dimensions" are justified for some people as true angles use a third axis. This axis being often considered as an half-angle, other people will prefer the term of "2.5 dimensions". Read the overview about toolpaths before reading this specific information for toolpaths used for 2.5D machining. 3D cutting The tool will cut outside the first contour of the drawing with the true angle at the top. See the section 2D Cutting, and the general parameter in the Overview at the beginning of the chapter. Remark To cut with a sharp angle from the bottom, activate the option True angle at the bottom in the dialog box Options (tab Calculation parameters). Hit the F10 key in the CAD module to open this dialog box. 3D engraving This automatic function makes a 3D tool path (the area clearance and finishing are carried out with the same tool. See the section 2D engraving, and the general parameter in the Overview at the beginning of the chapter. Two cases exist when the tool path calculation is in 3D: • to avoid tool collisions (between 2 letters in relief for instance) • 218 when creating sharp angles: Inside each angle of a drawing, the tool ascends in order to improve the VERSION PRO - USER'S MANUAL detail of this angle with sharp lines. This function is called “true angle at the top”. The same function exists to improve details of the angle at the bottom, i.e. at the bottom of the engraving. This function is optional and can be activated in the Options window (Calculation parameters tab). Finishing Finishing, with its sharp angles, is the last phase of the engraving process. The tool will follow the outline, or contour, of the design, avoid collisions, and ascend at each sunken angle like a relief. See the general parameter in the Overview at the beginning of the chapter. Sharp corner The tool rises within each angle. VERSION PRO - USER'S MANUAL 219 3D finishing This function calculates only the tool path in 3D areas and take into account sharp angles and tool collisions. With this function, use only small tools and only in 3D areas. The function allows you not to wear out small tools. See the general parameter in the Overview at the beginning of the chapter. Intaglio This automatic function allows you in a single operation to make exceptionally beautiful 3D engravings in recess. It is especially adapted for 3D engravings in wood or Plexiglas. The depth of your engraving is automatically calculated and takes into consideration the width of the path, or traces, to be obtained. For that reason you must give the thickness of the material after having chosen the appropriate tool (not the depth of engraving). Material thickness In this function you do not need to indicate the depth of the pass since it will change and be dependent on the drawing, but you do need to indicate the thickness of the material i.e. the thickness that should not be exceeded. If the depth given to the tool exceeds the material thickness, a message will appear on your screen. In this case, choose a thicker material or a larger tool. Remark It is obvious that only conical tools can be used. F10 - Specific parameters One item in the Specific parameters tab (Options - F10) is related to the maximum angle above which the tool does not make sharp angles. 220 VERSION PRO - USER'S MANUAL Sequence This function allows you to control the last 3 or more tools of a 3D engraving job. Before activating it, you have to complete the roughing of the project with Sweeping or Contouring. The 3 tools to be defined are the following: - the roughing tool, - the semi roughing tool, - the finishing tool. The roughing tool works in 2D. It carries out the first step, usually not very close to the theoretical contour. The semi roughing tool works in 2D. It will clean the remaining imperfections of the material. The finishing tool works in 3D and will finish the engraving by passing the closest to the theoretical drawing. button. A new tab is added For each toolpath, you must select the proper tool by double-clicking on the to the dialog box, allowing you to enter parameters for this tool. The Sequence tab is used for general parameters. Overthickness The overthickness is the material left at one step for next steps. An automatic computation (10% of the finishing tool tip) is done if the Automatic overthickness box is checked. Otherwise you can specify the overthickness individually in the following fields. Allowance on roughing Overthickness required for the last roughing step. Allowance on finishing Overthickness demanded for the finishing step. The semi-roughing tool will go in all areas between these two allowances. For the roughing and semi-roughing, you indicate whether it is a contouring or a sweeping (and specify its angle). Remark 1 The diameter of the finishing tool’s tip should not be less than half of the semi roughing tool’s tip for an VERSION PRO - USER'S MANUAL 221 optimal efficiency. Example: Semi roughing tool Finishing tool Tip diameter of 0,3 Minimum tip diameter of 0,15 Remark 2 Automatic recessing is particularly efficient if the engraving depth is the same for all the selected tools. Combo die This function allows to make section in 2D engraving with several concentric passes. You define values for the half-profile of the section, by entering the following values (from top to bottom): Width on the edge: width of the material left on the edge. Starting angle, Ending angle for the profile: both values can be specified in degrees, or deduced by moving the red point in the right pane. Maximum width of the profile: maximum propagation of the section (for the half-profile). Total depth of the profile. Normal: by default, includes several concentric passes. Intaglio: extra pass (3D) to clean the irregular parts of the section, for example true angles. At least one of these boxes should be checked. By checking the Automatic sequence box, a Sequence tab appears, allowing to enter parameters for the sequence (see this toolpath). 222 VERSION PRO - USER'S MANUAL TOOLPATHS OF THE 3D / TYPEART GROUP The toolpaths of this group support 3D objects. Read the overview about toolpaths before reading this specific information for toolpaths used for 3D machining of TypeArt objects. TypeArt The TypeArt toolpath allows the machining of 3D objects created with TypeArt. Sweeping mode Choosing this mode, you can specify two parameters: the sweeping angle and the Overthickness (or left material). Spiraling mode With this mode, you can specify two parameters (in addition to the Overthickness): the milling direction (see the explanations given for the Sweeping) and the machining direction (from inside out, or outside in). TypeArt sequence This function is an automatic sequence for machining 3D objects created with TypeArt. VERSION PRO - USER'S MANUAL 223 You can see below a General tab with a sequence made of: • A roughing (with a conic tool), • A semi-roughing (with a rounded tool), • A finishing (with a conic tool). Use the icons on the right to add, delete or modify the tools included in the sequence. Overthickness: leftover material allowed for the finishing process (here a value of 0.2 mm) Approach: specific value for the Z reference, when the tool is above the material. If the engraving is very low, it allows the tool to move to this Z in fast speed. Specific tab for each step For each step, you define in the corresponding tab the parameters that determine the action of the tool, with four possible options: Slice The object is cut into slices at the defined Width of pass (the sweeping is constant in Z and stops at the limit of the object). 224 VERSION PRO - USER'S MANUAL Track The tool follows only the profile of the object. Slice and track After having machined a slice, the tool follows the profile of the object until it reaches the next slice. Finishing The tool goes everywhere in a continuously. Width of pass: distance between passes (in mm or in %). Overflow determines the global machining mask for the TypeArt object. Without overflow, the edge of the tool won't go beyond the edge of the TypeArt. With some overflow (less or equal to the radius of the tool), the toolpath will go beyond. Warning: the overflow and its value are related to the action required by the previous pass. The overflow cannot be larger each step, for example (the OK button remains grayed until you correct the values). Machining without overflow Same machining with overflow equal to the radius VERSION PRO - USER'S MANUAL 225 TOOL PARAMETERS Tool definition These parameters are displayed and/or entered when a tool is created/modified in the database. WARNING Some parameters are shown in the dialog box for all tools, even if they do not apply to the current tool. • Tool's shape tab Supplier: name of the tool supplier. Reference: tool reference of the supplier. Family of tools The shape of the tool you are defining must be selected among preset families (cones, cylinders, balls, etc.). The shape parameters are determined by this choice. Example of a conical tool: Diameter: diameter of the tool used. Half angle: this parameter corresponds to half of the value of the angle. Tip diameter: value of the diameter at the tool tip Feed speed and rotation speed of the tool The rotation speed is given in number of rotations per minute. The nominal feed speed is indicated in mm/min. If the Automatic box is ticked, plunge and descending feed rates are automatically adjusted in function of the values. 226 VERSION PRO - USER'S MANUAL Plunge feed rate Vertical job speed in material. Tool index See Turret tab. • Technologies tab The depth cutting is given by default and cannot be exceeded when the toolpath is defined. These values indicate the distance between passes specified in toolpaths. VERSION PRO - USER'S MANUAL 227 The fast speed is used for the lift-off of the tool out of the material. The nominal and fast speeds are useful for the calculation of the machining duration. The plunge feed rate is the vertical job speed, the descending feed rate is the speed of 3D machining. In some cases, the right side gives the possibility to enter technical parameters of the tool in order to compute the speeds. The flying angle is used for the cutting. The tool will descend with an angle and will apply a lower stress on the material. 228 VERSION PRO - USER'S MANUAL TOOLPATH INFORMATION Display You can see the file of a tool path at any time. Select therefore the desired toolpath in the dialog box Toolpath list. Click on the mouse right button to open the context menu, select Information… and click the mouse left button. The dialog box Toolpath information is displayed on the screen. Select the tool path desired to see the following information: Path name Directory and file name of the tool path. This file has the same name as the document, with the extension xxx (XXX = numbers corresponding to the order of creation of the path). Name Machining mode (plotting, 2D engraving, etc.) VERSION PRO - USER'S MANUAL 229 Machining distance Total distance machined by the tool. Distance of fast displacements Distance of fast displacements executed by the tool above the material (ascents, descents, etc.). Machining time Total time of machining in accordance with information given in the tool data base + command. Min X MinY Min Z Minimum coordinates of the tool path. Max X MaxY Max Z Position of last point Depth Total depth of engraving defined during the tool path computation. 230 VERSION PRO - USER'S MANUAL DISPLAY AND SIMULATION Displaying the tool cursor More than a measuring tool, this function permits you to check if the tool, that you will use for the machining fits the created shape. In the Measuring toolbar, click on the icon Tool simulation the screen. . The corresponding dialog box is displayed on Choose the tool in the dialog box. Click therefore on the Tools DataBase icon machining in the field of the dialog box. . Enter the depth of The cursor representing the tool is characterized by three circles: • For conical tools 2D View 3D Iso View Remark Only the diameter at the engraving depth is variable. VERSION PRO - USER'S MANUAL 231 • For cylindrical tools 2D View 3D Iso View Move the cursor which represent the tool in all directions; to see for instance if the tool will machine the whole piece. Simulation display The display of the created toolpath is a nice feature of the CAM module. This function is very useful for showing a simulation of tool displacements, especially for conical tools. You will have a representation of the manufacturing process, in other words, the material removed by the tool. In the toolbar of the CAM module, click on the icon Toolpath list 232 . The corresponding dialog box is displayed on the screen. VERSION PRO - USER'S MANUAL Select the toolpath to be simulated, and click on the mouse right button to open the context menu. In the context menu, click on Simulation…. The corresponding dialog box is displayed on the screen. VERSION PRO - USER'S MANUAL 233 By default, the dialog box Simulation displays the toolpath at the top of the cutting (in the example shown above, the height is Z=0). Nevertheless, you can modify the visualization height by using the view depth cursor or by entering the desired value in the numerical field located below. Remark You can set the viewing depth using the cursor: the numerical field value will be automatically updated and the view will be refreshed. In case you want to set the depth numerically, double-click in the field, enter the desired value and validate by clicking in the other numerical field of the dialog box Simulation. The toolpath visualization will be automatically refreshed. View from the bottom To see what happens at the bottom of the engraving (or on the other side of the object when using the cutting function), use the depth cursor or double-click in its numerical field, enter a negative value which is – 2 mm in our example (and which corresponds to the depth of cutting previously set) and click elsewhere to validate. This option is especially useful to check the machining at the bottom of the engraving. Remark The simulation appears thinner at 2 mm depth than at 0 mm because the tool used is a conical one. Simulation at Z=-2mm 234 VERSION PRO - USER'S MANUAL Surface density To increase or to reduce the display density of the tool cursor, move the cursor Accuracy of the dialog box Simulation, or double-click in the numerical field below, enter a value and click in the other numerical field to validate it. View angle of simulation To modify the view angle of the toolpath simulation, click on the icon toolbar of the view options is displayed on the screen. of the dialog box Simulation. The Double-click on the desired option. The visualization is automatically refreshed. Remark If you choose like in the example shown above the Free 3D view (symbolized by the 3D icon), you must enter the values that define the view angle in the corresponding numerical fields. VERSION PRO - USER'S MANUAL 235 NC SIMULATION Introduction to the NC Simulation It is possible to display the toolpath accurately on the screen. You can therefore have a good representation of the machined object. In the toolbar of the CAM module, click on the icon Toolpath list on the screen. . The corresponding dialog box is displayed Select the toolpath to be simulated, and in the context menu, click on NC Simulation…. The Simulation box appears on the screen 236 VERSION PRO - USER'S MANUAL The rendering happens the first time you enter this dialog box, and each time you modify an option. NC Simulation tools Push this button to launch the physical simulation with the visualization of the tool and the toolpath. Push this button to launch the physical simulation without visualizing neither the tool, nor the toolpath. Push this button to launch the physical simulation with the visualization of the toolpath and without the visualization of the tool. Undo. Pause. Stops the simulation and displays the part already calculated. If you ask for a new simulation, it will start from this breaking point. VERSION PRO - USER'S MANUAL 237 Precision level of the NC Simulation (1 for the best result, 3 for a quicker one). Realistic rendering of the part in grayscale or in 2 colors (gray and yellow – metal effect). Back to the original material. Zoom. Push this button if you want to display the box Definition of material in order to define the parameter again. Push this button if you want to transform your object into a TypeArt object. By clicking on the left mouse button, you can rotate the 3D view. The right mouse button allows you to zoom the object in or out. Material definition To define the material before launching the simulation, push the Ctrl key when you click on NC Simulation. The corresponding dialog box is displayed on the screen. Click on Box of paths if you want to machine the whole object. Click on Clip to zero if you want to put the origin of the Z axis to zero (Z = 0 corresponds to the upper part of the material). Then, click on OK. The Simulation box is displayed on the screen. • • 238 VERSION PRO - USER'S MANUAL CALCULATION PARAMETERS OF THE TOOLPATHS It is generally needed to restart the software so that the post-processor applies the modifications made in the Calculation parameters. Calculation parameters You can reach these parameters by hitting the F10 key in the CAD module. In the Options dialog box, select the tab Calculation parameters. Machining order (Order of contours section) The software has been configured by default to reduce the time of machining. For certain jobs, like cutting, you have at your disposal a second level of sorting where you can modify the order of contour management. Manual When sorting in the manual mode, the starting point and the order of contour selection (creation) defined in the CAD module will remain the same. VERSION PRO - USER'S MANUAL 239 Minimum distance Default mode: the machining of contours is done by the order of proximity (X min to X max) in order to minimize tool path time. Surface min max In this mode, machining of the small surfaces is done first (inside the letter, for instance). This mode is automatically selected when you choose 2D or 3D cutting. Surface max min The large surfaces are machined first. Warning none Function not implemented. True angle at the bottom Select the option True angle at the bottom to generate a sharp angle at the bottom, in 3D machining (for the angles included in the range) This option is useful in manufacturing dies, because the angle at the bottom of the die produces the angle at the top of the final part. True angle min Minimum value above which a true angle is made. True angle max Maximum value under which a true angle is made. Multipass (Op0) Op0 = 3 Multipass or multi-step (in Z) is not active. Op0 = 17 Multipass is active. For the “Sweeping” toolpath, a rotation of 60° is done automatically between each pass. Op0 = 19 Multipass is active. For the “Sweeping” toolpath, a rotation of the value of the parameter n°19 (Options dialog, Calculation allowances tab) is done automatically between each pass. By default, multipass is active, without any rotation between each sweeping step (Op0 =19 ; parameter n°19 = 0). 240 VERSION PRO - USER'S MANUAL Cutting mode for contours (Op1) Standard Op1 = 0 The smallest surfaces are machined first. If the proposed default mode sorting of contours is not sufficient for optimizing your tool paths, you have at your disposal supplementary options, which improve the time of machining. Enter in the field Op1 the number 1 or 2 according to the type of cutting you wish to do (see below). Cutting letters Opt1 = 1 All the objects are independent and will be cut one after another (in each case the internal contour will be cut prior to the external one). The calculation of trajectories is faster since the software does not execute the function concerned with the collision management of tools. It is, therefore, necessary before beginning to leave enough space between the objects to avoid any possible collisions. Cutting words Op1 = 2 The order of selection in the CAD module remains the same. The cutting operation is made piece by piece (in each case the internal contour will be cut prior to the external one) with the collision management activated. VERSION PRO - USER'S MANUAL 241 This option is recommended to cut pieces that do not require a complete cut between objects. Op1 = 3 The initial order given to objects (during creation or selection) is kept. The cutting is done part after part, optimizing the order internal/external. Other parameters Auto-merge If checked, in the case of split contours including intra- or intersections, the machining module tries to find a global relevance for all contours and reconnect them. You're asked a confirmation. The proper use of the auto-merging depends of the splitting and complexity of contours. Connected profile Machining continuously without lifting the tool when changing contours (optimizes time of machining when contouring) Z limit Z limit for 3D movements outside of the material (in particular true angles). In the case of tools with flat end, it avoids to see where the tool stopped its work. The resulting object will be smoother. Critical angle The value beyond which a sharp angle will not be done. Discretization Maximum length of the segments generated when the Output curves as segments box is checked in the window called by the Parameters… button of the Machining window. Chordal error Maximum height of the arcs generated when the Output curves as segments box is checked in the window called by the Parameters… button of the Machining window. 242 VERSION PRO - USER'S MANUAL Va0, Va1 Reserved parameters, used for optimization algorithms. VERSION PRO - USER'S MANUAL 243 MACHINE SETUP Installation of the machine To set up your software for your engraving machine, select Setup machines… in the Machining menu. You can do this in the CAD module or in the CAM module. The dialog box Setup machine is displayed on the screen. Double-click on Add machine… or click on the icon machine you want to install. 244 to see the list of available machines. Select the kind of HPGL machines: Cutting plotters, laser, etc. ISO / CNC machines: Machining centers, etc. Engraving machines: Roland, Mimaki, Mecanumeric, etc. All machines types: Complete list. VERSION PRO - USER'S MANUAL Select then the machine. Click on the button Add... The dialog box Setup port is displayed. The setup of the port is described in the section Sending to the output machine. VERSION PRO - USER'S MANUAL 245 Sending to the work table Once the setup of the port is done, you can define the technical properties of the work table. Remark You can configure your machine at any time by clicking with the mouse right button on the desired machine. Select the option Properties… in the context menu that is displayed on the screen. The dialog box that are explained in this chapter will appear. The second dialog box Setup machine is displayed. 246 VERSION PRO - USER'S MANUAL You have to fill in all information relative to your machine. Name It is the name of the machine that appears in the list of the installed machines. Total dimension It is the dimension of cutting area. A warning signal will appear each time the machining goes outside this defined zone. Standard point Special assembly point (if any) on the machine (vice, ...) Choose and click on the choice that corresponds to the desired position. Panel axis Not yet available Axes Check the option that corresponds to the capabilities of your machine tool. The options with 4 and 5 axes are not yet available. Accuracy Accuracy of calculation used by default during the toolpath calculation. Dll It is the reference library that is used by the post-processor to generate the code of the machine. Don't modify it!!! Sending to the output machine The setup of the output machine has to be done after the setup of the machine. In the dialog box Setup machine, click on the button Port…. Select the desired options in the dialog box Setup port that is displayed on the screen. VERSION PRO - USER'S MANUAL 247 Series of files This option is recommended if no machine is connected. It allows you to define the name of the machining files that will be generated automatically based on a prefix and that you will be able to edit. Use Windows spooler If your machine is directly connected to your computer, you can use the Windows spooler to directly send the tool path to the machine without loosing time (see Windows documentation to configure the spooler). On a file To write a tool path on one and only file (on your computer or on a network device). Define its name. You have only one possibility and you can't modify it. The dialog box Setup port allows the installation of a printer without having to go through Windows. Double-click on Add... in the dialog box Setup port. Just read the Windows User's Guide to install a printer respecting the kind of printer according to: the manufacturer the printer. If your machine is connected to the parallel port, you don't have to configure the port. On the contrary, if it's connected to the serial port, you have to configure the port according to the specifications given by the manufacturer of your machine. Example Port parameters Bits / sec.: 9600 Data-bits: 8 Parity: none Stop-bits: 1 Input / output control: Xon/Xoff Post processor characteristics Modifying the characteristics of the post processor is made from the dialog box Setup machine. Select with the mouse right button the machine to be configured and choose the option Properties… in the context menu displayed on the screen. Click on More... The dialog box Setup more is displayed on the screen. You can now modify the characteristics of the processor within this box. Warning!!! These parameters are optimized, before doing any modifications of the characteristics of your machine post processor, we highly advise you to contact your reseller. 248 VERSION PRO - USER'S MANUAL START OF MACHINING Starting of machining When the machine is ready, you can prepare the machining program. Select the toolpath in the dialog box Toolpath list, click the mouse right button and select Machining… from the context menu that gets displayed on the screen. In both cases, the dialog box Machining is displayed on the screen. Choose the machine in the list and enter the parameters according to the type of machining to be done and according to the material at your disposal. The Spooler… button allows to display the Windows Spooler queue. Be careful before clicking on this button: it is of the utmost importance to check the Windows Spooler option in the dialog box Setup port. The More… button opens the dialog box Other parameters which concerns the characteristics of the postprocessor. You can find the same button in the dialog box Setup machine. VERSION PRO - USER'S MANUAL 249 Choice of the machining file output Test To display only a part of the file on the screen. Nothing is sent. Port To send directly on the connected machine (see Setup machine for configuration). File This command creates the machining file that you will be able to use according to the installation of your machine. To make the search easier, the name and the path of the file are written on the front. Change... Use this command button to modify the name, path and number of the file (U00 to U01 for instance). Positioning the piece • "Maximum X, Y and Z" "Middle X, Y and Z" "Minimum X, Y and Z" The above coordinates are those of the tool path: the lowest point of engraving, the center point and the highest point. • "Delta X,Y and Z" These coordinates correspond to the difference between the Max and Min coordinates. Actually, they correspond to the real size of the engraving. • Locking and unlocking of the coordinates Locked If this function is activated, X, Y and Z coordinates are determined by the reference point defined in the CAD module. In this case you cannot change these values. Unlocked If this function is activated, you can modify the X, Y and Z coordinates (minimum, maximum and middle) in order to reposition your engraving. If you modify one of these values, the others will be automatically recalculated. Four predefined piece positioning models are available. REMARK In the four next examples, the technical word Plaque refers to the working area in the CAD module. Plaque-origin at the upper left corner If you click on this icon, the plaque-origin will be positioned at the upper left corner of the engraving area. Plaque-center at the center If you click on this icon, the plaque-center will be positioned at the center of the engraving area. Free plaque-origin If you click on this icon, you can position the upper left corner of your plaque on any defined point of the engraving area. You just need to enter the desired values in the fields displayed at the right side of the icon. 250 VERSION PRO - USER'S MANUAL Free plaque-center If you click on the icon, you can position the center of your plaque on any defined point of the engraving area. You just need to enter the desired values in the fields displayed at the right side of the icon. Remark The 2 latter options allow to position the active and the machine surfaces and as a consequence to avoid eventual possibility of overflow when machining. These problems can be solved by 3 ways: – Redefining the position of the piece in the Machining dialog box, – Changing the dimensions of the engraving surface (Properties option), – Redefining the dimensions of the active surface in the CAD Module (Modify menu Selection). Positioning the toolpath The Machining dialog box allows you to reposition the tool paths without having to recalculate them. is the default option. Activate this icon to position the tool path like it has originally been conceived. Activate this icon to make a centered rotation of the tool path in relation to the plaque. Activate this icon to make a centered rotation of the tool path in relation to the plaque and then a 90° anti-clockwise rotation. Activate this icon to make a 90° clockwise rotation of the tool path. Activate this icon to make a centered rotation of the tool path in relation to the plaque. Activate this icon to make a 180° rotation of the tool path. Activate this icon to make a 90° anti-clockwise rotation of the tool path. Activate this icon to make a centered rotation of the tool path in relation to the plaque and then a 90° clockwise rotation. Z between contours If you click on this icon, you can directly access to the height (Z value) of the tool between contours. This can also be done within the Machining parameters dialog box (therefore, see the Parametrizing positions and machining limits section in the same chapter). VERSION PRO - USER'S MANUAL 251 Selecting the toolpaths to send Click on the button Tool path Sel… in the Machining dialog box to choose in the list the tool paths to be machined. Collate You have 3 possibilities to group - or collate - the tool paths. Therefore, click on Collate… in the dialog box Machining. None If you don't want to collate, you'll get as many machining files as toolpaths. By layer All tool paths of a same layer are sent in a same file. All All tool paths and all planes are regrouped and become one single operation on the machine. Remark Be aware that by choosing this option, the machine will stop after each machining so that you can change the tool. 252 VERSION PRO - USER'S MANUAL Parametrizing positions and machining limits Output curves as segments To send only linear elements to the machine, circular elements are converted into small segments. Initial position/Ending position Position of the tool at the beginning and at the end of machining. Change tool position Coordinates where tool will be changed. Z security Set limit values to the tool in the Z direction respectively at the beginning and at the end of the machining. For instance, if Z security end of machining equals –100, all tool movements under –100 won’t be taken into account by the post-processor. Z between contours Position of the tool along Z axis between each contour (ascent of disengagement). Z approach Approach position along Z axis. The value is relative to the surface to be machined. VERSION PRO - USER'S MANUAL 253 Multi Z This function is useful for machining the total depth in several passes. It is a complementary function of the information given in the tool path section (total depth in x times or depth of each pass). None Depth is done in one pass. Tool info Machining is done following the instructions given. In the Tools DB see Depth of cutting. Manual The machining is done with a cutting in Z following the step defined by yourself. REMARK If you want the multi-pass option to be activated, you must be sure that the parameter Op0 is equal to 19. To access this parameter, choose Options… in the Edit menu (or strike the F10 key). The dialog box Options is displayed on the screen. Select the bookmark Calculation parameters to access Op0. Machining window: option buttons Four buttons are used to activate options sometimes available with some post-processors. Nevertheless these buttons have no effect with most post-processors. Activated button Deactivated button Effect Activates or deactivates the pin rotation. Activates or deactivates the spraying (for cleaning or lubricating). Activates or deactivates the automatic plate loader. Activates or deactivates the tool loader (if any). 254 VERSION PRO - USER'S MANUAL TYPEART MODULE VERSION PRO - USER'S MANUAL 255 256 VERSION PRO - USER'S MANUAL GETTING STARTED WITH TYPEART Drawing importation Opening a new drawing Place two guidelines, one vertical and one horizontal at 50 mm from the bottom left hand corner of the active area. Retrieve a symbol from the symbol library, for instance Grappe. syb. Decomposition of the drawing Uncombine the drawing by clicking on the Uncombine icon and give to each a different shape. , so you can work separately on each contour, Then only select the grapes by creating a selection window with the mouse and combine them. Remark You can perform all these operations (group/ ungroup, combine/ uncombine ) under the TypeArt module with the same icons as in the CAD module. VERSION PRO - USER'S MANUAL 257 Saving your work Before going to the TypeArt module, save your drawing under the name grappe and verify the directory (C:\Vision\draw\). Running TypeArt module Click on the TypeArt icon . The window for creating a TypeArt object will be displayed on your screen. Choice of the parameters of the object For the time being, we advise you to keep the default value at 200 for Nb X and Nb Y for a virtual test. Later in order to get a better result in machining, choose a higher value (500 for a size of 50 x 50 mm, that will give you a resolution of 0.100 mm versus 0.25 mm for the default value). In this example, maintain the default parameters and click on OK. 258 VERSION PRO - USER'S MANUAL The TypeArt screen is displayed and the 3D ISO view is automatically selected. Remark If your drawing goes outside the guidelines, go back in the CAD module by clicking on the Select icon and resize the drawing. To go back again into TypeArt, select the square around your drawing (it becomes red) and click the TypeArt icon . If your square is not selected, the window for creating a TypeArt object is displayed again. Click on Cancel since you do not want to create a second TypeArt object, and re-select the square. Choosing a predefined section Select only the grapes and bole, and click on the Section icon Parameters for the sections appear in the following dialog box: . Several shapes are already predefined. VERSION PRO - USER'S MANUAL 259 For this example, chose shape number 5 and click on OK. Next, select only the external contours of the leaves. Then click on the Section icon number 2. and choose shape Select the Subtract combination mode for merging sections. Select the vein of the right leaf and manually enter the following parameters: Z max: Angle end: Z start: Angle start: Distance max: 0,4 mm 0,0° 0,3 mm 45° 0,6 mm Click on OK when done. Select the other vein and enter the following parameters: Z max: Angle end: Z start: Angle start: Distance max: 0,4 mm 0,0° 0,0 mm 45° 0,6 mm You will notice that the veins of the first leaf (1) with a Z start at 0.3 mm inside the existing section descend much lower than the ones of the second (2). 260 VERSION PRO - USER'S MANUAL Sending the TypeArt to machining From TypeArt click on the CAM module . In the CAM module select 3D ISO view under the View menu. Getting ready for the toolpath In the CAM module, select your composition and save it with a .vnd format using the command Save as… in the File menu. Click then on the icon Create toolpath . Two options for the creation of a TypeArt toolpath are available in the dialog box that is displayed on the screen: double-click on one of them. The dialog box for the creation of a TypeArt toolpath is displayed on the screen: click on the following parameters: to select a tool. Enter then the Tool name: Default Machining characteristics: Overthickness: 0.000 mm Distance between steps: 0.150 mm Sweeping angle: 0.000° Machining mode: Sweeping All these windows are described in the CAM section. Tool path in 3D ISO view VERSION PRO - USER'S MANUAL 261 Machining of the TypeArt object Select the toolpath in the dialog box Toolpath list. Click on the mouse right button. In the context menu that is displayed on the screen, select the option Machining…. In the corresponding Machining window select your machine, then choose the output: Test, Port or File and click on Run to launch the machining. 262 VERSION PRO - USER'S MANUAL MAIN FEATURES OF THE TYPEART MODULE TypeArt: Basic tools • The drawing The drawing is made under the CAD module with open or closed contours: • • • • either with classical tools: crayons, predefined objects (sketching tool, squares, circles), texts; from a vectorized image from a scanner; from imported files; or from all the creative possibilities of the CAD module. Closed contours All geometries are allowed. The contours can overlap and cross each other. Open contours Open contours can be linked to a closed contour to create a raised effect or the bottom of an engraving. Example 1: the tail of a fish VERSION PRO - USER'S MANUAL 263 Example 2: special engraved background Duplication of a line along a curve Addition of letters To use open contours, you must select them with one or several closed contours. If you try to place a section using open contours, nothing will happen. Remark To avoid having a line that is too deep or holes instead of lines, which are at Z = 0 mm, create first a small section on a closed contour, then select it with the lines and add volume. Example Lines too deep Right profile • Positioning the drawing Once the drawing finished, give it the size you want and move it near reference point (X = 0, Y = 0) in the bottom left-hand corner of active area. 264 VERSION PRO - USER'S MANUAL REMARK Do not forget to save your artwork! • Running TypeArt To run TypeArt click on its icon . The dialog box for creating a TypeArt object appears. VERSION PRO - USER'S MANUAL 265 Box parameters Nb X and Nb Y These values correspond to the number of points desired on each axis. The more points there are, the better will be the final result. To make only virtual tests keep the default value of 200. To get a better result in machining, choose a higher value (for instance 500 for an area of 50 x 50 mm that is to say a minimum step of 50 mm/500 = 0,100 mm in Sweeping mode). X0 and Y0 Give the starting point of the box around your TypeArt object. Default value: reference point (X = 0, Y = 0). X1 and Y1 Give the size of the TypeArt box around your drawing. Default value is 50 mm. You can create bigger or smaller boxes. Adapt after the number of points on X and Y according to the size of the TypeArt object, keeping in mind that the larger it is, the more points will be needed to create a nice engraving. The TypeArt screen and tool box appear. The drawing is automatically displayed in the last view used (initially 3D ISO). Hollow or raised drawing? We recommend building you 3D design under TypeArt in relief, even if in the end you will produce a hollow mold. The TypeArt tools are easier to use with a raised drawing. Before getting to machining, you can transform the relief into hollow, and adapt the position in Z. 2D rendering of a TypeArt The rendering of TypeArt sections is visible in 2D view, a working mode sometimes more adapted than 3D. In the CAD module, mark the option Render TypeArt in 2D view in the Display tab of the Options dialog (F10 key). The direction of the light on this rendering can be changed anytime with the Light direction tool (TypeArt visualization tools). • Lay down tool / Create TypeArt The - tool in the permanent toolbar in TypeArt has two different functions: When a modeling tool is active, one click on the icon lays down the tool. The mouse pointer gets back to . - When a shape tool is active, one click on the icon allows at the same time to lay down the tool AND transform the selected drawing into a TypeArt object. The mouse pointer gets back to To put down a shape tool, press the space bar. • Creating a symmetrical section Section Select the contour on which you want to apply the section and click on the Section icon. 266 VERSION PRO - USER'S MANUAL . The Section dialog box will be displayed. Parameters for defining the section Z max Maximum height of the section. Remark This limit will not be reached if the value in the Distance max field is greater than the real distance between the contours. Distance max This value defines and limits the length of the rise of the section. If this parameter is higher than the real distance between the contours, the shape will be flat at the top. Ending angle Gives the value of the angle on top of the shape. Default value is 0. Negative angles are not allowed. Examples VERSION PRO - USER'S MANUAL 267 0° 45° This function allows you to design special sections or particular bottoms or tops of engraving. Z start Z of depart for the section. This function is useful to magnify details or extract a volume, especially in the case when merging several sections. Drawing First circle at Z start = 0 mm Second circle at Z start = 2 mm The value given in this field is added to the section whether in raised or recessed. The result with the Add option The circle with Z start = 2 mm is much more accentuated (the excess material of 2 mm follows the initial shape). 268 VERSION PRO - USER'S MANUAL Same result with the Subtract option The same circle is also accentuated. Sample with a special engraved background Drawing Z start of 1 mm for the letter C Starting angle The starting angle of the section. VERSION PRO - USER'S MANUAL 269 Example Starting angle at 70° View of YZ plane Starting angle at 25° View of YZ plane Remark To optimize the machining, select a starting angle that corresponds to the machining tool geometry. Example for a tool with half angle of 30° 90° - 30° = 60° You must give a starting angle less than or equal to 60°. Bad angle Good angle • Merging several sections 7 possibilities are available for merging or mixing sections on contours. They are shown in a floating toolbar you use before launching several operations on TypeArt objects: Note : if the bar is not visible, it is probably reduced in the lower left corner of the screen. You might have to maximize the main window to see it. Replace All Z values of an existing section (Contour 1) will be replaced by the new ones (Contour 2). Replace is the default option for the first shape. 270 VERSION PRO - USER'S MANUAL + + + Replace REMARK The option Replace is useful for deleting a section or an ensemble of sections without having to create a new TypeArt object. Adding To add to an existing section (Contour 1) the entered value (Contour 2). In the merging area the two sections are added. Example: + + + Add Example Drawing View of YZ plane 3D ISO view Subtract To remove from an existing section (Contour 1) the entered value (Contour 2). + + + Subtract VERSION PRO - USER'S MANUAL 271 REMARK If the height of the subtracted area is higher than the height of the existing shape, you will get a negative value for Z in the merging area (see example). + + Drawing + Subtract View of YZ plane Leaf in relief Vein with Subtract function Keeping the highest section Max (Z maximum) The higher section will be kept. + 272 + + Max VERSION PRO - USER'S MANUAL Drawing View in YZ plane You must choose this function if the background of the engraving in relief is heavily accentuated in order to avoid reproducing it on above sections. If you add the sections, the letters above the background have the same properties as the background itself. (Look also at the intersecting area between letters). + + + Add With the Z max option, the letters, as well as their intersecting areas, have their own defined and perfectly smooth sections. + + + Max VERSION PRO - USER'S MANUAL 273 Keeping the lowest section Min (Z minimum) The lowest section will be kept. Example: + + Drawing + Add View of YZ plane Keeping a middle section Middle In the common part, an intermediate section is kept in the middle of the existing sections. Modification on the defined zone Allows to apply a section modification only to the TypeArt area that already had a section. This mode will then change the application range of the other modes. unactivated icon (no effect) activated icon (limitating effect) • Transforming a surface into a TypeArt object Any surface imported or created in the CAD module can be directly transformed into a TypeArt object. In the CAD module, select the surface to be transformed into a TypeArt object (you should better position it in the bottom left corner of the active area) and click on the TypeArt icon icon Combine surface to switch to its module. Click then on the . The current Combination mode applies (See section Merging several sections). Select the desired option and click on OK to validate. The surface is transformed into a TypeArt object. Remark Some kind of surfaces like IGES may generate imperfections (like holes in the meshed surface) during their transformation. Hit the Shift key meanwhile you click on the icon Combine surfaces to correct this. This operation will need a longer treatment. 274 VERSION PRO - USER'S MANUAL Example 3D surface Transformation into TypeArt • Erasing part of a TypeArt area This feature allows to erase particular areas of a TypeArt object while keeping remaining areas. First of all, select an area of a TypeArt object. Click now on the Erase TypeArt area icon. Only the selected area will be kept. What remains is erased. Example Select only the anchor Click on the icon You can also push the Ctrl key while clicking on the Erase TypeArt area Remaining areas will be kept. icon. The selected area is erased. Example Select only the anchor Press Ctrl and click on the icon • Extracting an area from a TypeArt object This feature allows you to cut and paste an area from a TypeArt object in order to create a new object using the extracted area. This feature is especially useful to get back specific parts from a TypeArt object to embed them in another TypeArt object. First select the part to be extracted. Click then on the Extract TypeArt area icon. Place your pointer on the area to be extracted and click on the left button of your mouse. Keep the mouse button pushed and drag your pointer until the desired point. Release then the mouse button. The TypeArt area has been extracted and VERSION PRO - USER'S MANUAL 275 displaced. Example First select the leaves Drag then selected area • Creating a non symmetrical section with the aid of markers Principle The principle consists of elevating one part of a section to a predefined value in Z with one or several markers. The profile, i.e. the starting / ending angle, is defined by a curve: segment, arc, etc. It is either drawn with the Sketching tool, imported from a plane, or created in the CAD module. Geometrical profile The profile is defined on the XY plane of the page without any restraint regarding position or direction. Only its geometry is essential in determining the form of the section. With a rising profile The section climbs to an angle corresponding to the ending angle of the profile 276 VERSION PRO - USER'S MANUAL With a descending profile The section creates a cavity at the end: With a leveled profile The section is leveled out at the end: Example Draw an ellipse with a length of 45 mm. Place a marker inside the ellipse on the right side using the mouse or the F2 key. Convert the marker into a curve. VERSION PRO - USER'S MANUAL 277 With the shaping tool, double-click on the marker which becomes encompassed by a square. The dialog box Points attributes is displayed. Enter a value of Z = 3, and validate. You can also place the marker with the F2 key. Check in the YZ view that the point is accurately located at 3 mm. • Creating a constant height section with the aid of a curve In the simple functions of TypeArt, the height of the embossment depends on the Z max (height) and Max Distance (distance between each contour) parameters. It is therefore difficult to obtain a section with a constant height when for instance a drawing is thinner at some extremities. Principle It consists in limiting the maximum height of the section by a curve whose points of construction have a preset value in Z. The starting and ending angle varies depending on the height of the section (limited by the points of the curve) and the distance between the contours. Its shape is defined by a tracing: the profile. In this drawing, the construction points of both median curves are in Z = 5 mm. The profile is an arc leveled out at the end. 278 VERSION PRO - USER'S MANUAL Embossments obtained in TypeArt for each of the drawings in XZ view. The starting and ending angles are different. Different starting/ending angles Z constant at 5 mm The geometry of the starting and ending angles are changing according to the distance between the contours. To obtain a starting/ending angle identical to the profile ones, the length of the profile should be equal to half of the distance between the contours. This applies when the distance of a contour is constant. Example with a drawing Type the number 0 on your screen and select a font, such as Times New Roman Bold, in order to have a variable distance between the contours and to illustrate better our example. Give the number 0, a height of about 50 mm and position it at the lower left corner of your screen. Trace the median curve to the contours with the Sketching tool and be careful to leave the contour open. (For more convenience, close the curve on the last point and then use in the shaping tool box the Disconnect icon to open the curve at this point). Trace the profile of the section. For practical reasons, we advise you to position the profile close to the drawing. Select the median curve and drag it with the mouse. Without deselecting the object, press the F2 key. In the window Move to, enter the following values: X = 0 mm Y = 0 mm Z = 4 mm VERSION PRO - USER'S MANUAL 279 Median contours of 0 3D view The median curve is an open tracing (black contour), the contours of the number 0 are closed tracings (in green or blue). Check in XZ view that all the points are located at 4 mm and then return to XY view. You can now run TypeArt by clicking on the icon . Enter the following parameters: Nb X = 400 Nb Y = 600 X0 = 0 Y0 = 0 X1 = 40 Y1 = 60 Remark Check that the drawing fits into the TypeArt box. Select the combined contours of 0, then the median curve (opened), and finally the profile by using the Ctrl key for multiple selection. Press the Ctrl key and click on the Section icon 280 . VERSION PRO - USER'S MANUAL Remark If the curve with the Z max is visible (a cavity or a vertex), it means that your profile is not leveled out at the end. the shape will climb at an angle and create a vertex the shape will create a cavity In that case, modify the profile and redo the TypeArt. • Curve sweeping The TypeArt module includes a powerful function allowing you to sweep (some may also say extrude…) a shape on one or several curves. Four kinds of sweeping can be done using this function. 1. Basic sweeping This function is specially meant for designing frames, as the following example shows. Create a profile shape (the molding of the frame) and a rectangle (the support curve, that we may call a section curve, and on which you will sweep your profile shape). Note: if the contour is clockwise, the shape is generated on the outside; if the contour is anti-clockwise, it is generated on the inside. Select both objects and click on the TypeArt icon . In the TypeArt module, select the section curve first and then the profile shape. Click then on the Curves sweeping icon dialog box appears: while pressing the Ctrl key. The following VERSION PRO - USER'S MANUAL 281 Validate with OK. The current Combination mode applies. TypeArt fuses the profile through its leftmost point and the section curve. The shape is created on the inside or outside of the section curve depending on the startpoint of the section. Support curve Profile shape Curve sweeping (Viewer TypeArt) 282 VERSION PRO - USER'S MANUAL REMARK In the dialog box Sweeping TypeArt you have an active control on the way the angles will be generated. When the angles of the initial curve are to sharp, it becomes impossible to create a shape on these angles. The solution is to open a little more the angles or to round them in order to create a profiled shape. 1a. Basic sweeping with two profiles In the CAD module, create two profile shapes and one support curve. The geometry of the resulting section is determined by the sense and the selection order of the profiles. Select those three objects, and click on the TypeArt icon . In the TypeArt module, select the support curve first, then the profile chosen for the starting point of the curve, and finally the profile taken at the other end of the while pressing the Ctrl key. Select Basic sweeping in the dialog curve. Click on the Curves sweeping icon box that appears, marking also the Sweeping between two different profiles box. You can use a compression curve to limit the height of the sections, or to produce special effects. In that case mark also the Compression of profile box. The shape is then created taking into account the compression curve (the last selected) for its height. Profile 1 2. Support curve Profile 2 Sweeping (Viewer TypeArt) Sweeping between two section curves In the CAD module, create one shape profile and two section curves (or paths). Both paths must have the same direction, or TypeArt will generate a knotted curve. while pressing the Ctrl In TypeArt, select first the paths then the profile. Click on the Curves sweeping icon key. Activate the option Interpolated sweeping. You can also use a compression profile. Click on OK to validate. The current Combination mode applies. TypeArt links the two sections with the shape profile. VERSION PRO - USER'S MANUAL 283 Examples of sweeping with two paths 2a. Sweeping between two curves using two profiles (Morphing effect) In the CAD module, create a start profile, an end profile and two section curves. Select the four elements and click on the TypeArt icon . In the TypeArt module, select first the section curves, the start profile and finally meanwhile you strike the Ctrl key. In the dialog box the end profile. Click on the Curves sweeping icon Sweeping TypeArt that is displayed on the screen, activate the options Interpolated sweeping and Sweeping between two different profiles. Select angle options if needed. You can also make use of a compression profile. Click on OK. In the displayed dialog box, select the desired combination mode and validate through OK. TypeArt makes a morphing effect between the two section curves. Sections 1 and 2 Start profile 3 End profile 4 Sweeping with morphing 3. Tube Sweeping Allows to define a tube that will have the winding of the path, and the smooth shape of the profile all along. In TypeArt, select the path then the profile. Click on the Curves sweeping icon 284 VERSION PRO - USER'S MANUAL meanwhile you strike the Ctrl key. Select Tube in the dialog box that appears. Click on OK to validate. The current Combination mode applies. Original path and profile Resulting Tube sweeping (TypeArt Viewer) Example producing the links of a chain: Build the chain with three ellipses having points at different heights, and a profile in half-circle shape. Select the first ellipse then the profile, and click on the Curves sweeping icon. Chose the Combination mode Max to intertwine the rings properly. Do the same for each ellipse. VERSION PRO - USER'S MANUAL 285 4. Fit sweeping For this complex type of sweeping, you need to be very careful in managing the views. Building the petal of a flower. Cross section: it is the profile of the section, as a cross section (open or closed contour). Top view: the sweeping is done inside this contour (section) that must be closed. The mask is used if you need only a part of the area to limit this portion. Lateral view: it is the profile of the section, seen from the side. The contour must be closed. Warning: top view and side view must have exactly the same dimensions, and be aligned. Use the vertical autodimension points. and alignment tools and pay attention to align the contours themselves, and not their control The marker: situated on the lateral view, it is the reference point of the section that determines the Z starting. 286 VERSION PRO - USER'S MANUAL Selection order of the contours: select first the top view, then the lateral view, the marker, the cross section (profile), and finally the mask if needed. Rendering, top view Rendering, side view Note: when building the view above, you must avoid inward shapes on the X axis, because they could generate an error message. For example: VERSION PRO - USER'S MANUAL 287 • Creating a section from a scanned picture Scanner Place the picture in the scanner and click on the scanning icon. Choose the appropriate vectorizing parameters and make sure to select gray levels for the picture. Example: Type: Photo in gray levels. • Importing the picture from a Bmp or Tiff file. Import Click on the Import icon and from the directory select the file with the Bmp format from the directory. Remark To display the picture on the screen, validate the option in Edit Options… Show Bitmap. Positioning the picture Resize the picture to the required format and position it preferably in the lower left-hand corner, origin X0 Y0. Running TypeArt Select the picture by clicking on the external frame and then click on the TypeArt icon. Automatic elevation Dark elevation Value of the maximum altitude of the darkest gray level, in other words, the black area. Bright elevation Value of the maximum altitude of the brightest gray level, in other words, the white area. 288 VERSION PRO - USER'S MANUAL Example Dark elevation = 0 mm Bright elevation = 5 mm Elevation with a parameterized profile The parameters of automatic elevation given in the PhotoArt window (linear variation or proportional) can be replaced by any curve: the profile. This profile must be drawn as explained below. Starting point The starting point of the profile (Ya value) determines the elevation of the darkest part of the drawing: the black. Its position has to be defined in accordance with the picture and the desired result (in recessed or in relief). End point The end point of the profile (Yb value) determines the maximum elevation of the shape. It corresponds to the clearest gray level: the white. Example The altitude of the white part of the drawing is 5 mm in Z. Ya = 0 mm Yb = 5 mm The altitude of the white part of the drawing is 0 mm in Z. Ya = 5 mm Yb = 0 mm Construction of the section Select the picture (by clicking on its frame) and then the profile. Next click on the TypeArt icon . TypeArt is automatically executed. The resolution of the scanned picture will define the resolution of the TypeArt object (number of X and Y points initially entered in the TypeArt object creation box). Correcting sections In some compositions, the gray levels are not adapted for relief. For instance, the dark parts (shadows, colors, etc.), which give a volume effect to flat pictures, must be in relief on a 3D object. It is possible to correct these shapes. In the CAD module (in XY view) redraw the contour of the area to be raised with the sketching tool. Then in TypeArt add an embossment onto the already existing one. VERSION PRO - USER'S MANUAL 289 Example According to the principle that dark parts are lower than bright parts, then the mane of the lion will be recessed, in other words, less elevated compared to the body of the lion (bright parts). Select the picture, click on the TypeArt icon Dark elevation = 0 mm Bright elevation = 3 mm and enter the following parameters: In the CAD module XY view, select the Sketching tool and redraw the contour of the mane. Sketching of the mane Remark To draw on the picture, we advise you to remove the mane from the drawing. Reposition again the mane on the drawing, select it and then click on the TypeArt icon Select the mane and click on the Section icon . . Enter the section parameters of the mane and select the Add option in order to add the volume. 290 VERSION PRO - USER'S MANUAL Masking Principle It consists in defining the limit of the working area with a tracing. Example on a picture or . Scan or import the picture with a Bmp or Tiff format. Position the picture on the page, preferably in the lower left-hand corner and adjust the size as desired. Trace the periphery of the area to be created in TypeArt with the Sketching tool or with the geometrical tools (circle, rectangle, etc). Run TypeArt and make sure you give the correct dimensions to the TypeArt object, so that the mask fits into the box. Select the picture and then the mask. Next click on the Grey level texture icon. Enter the desired elevation values for the gray levels. The volume is applied only on the surface of the masked. VERSION PRO - USER'S MANUAL 291 • Canceling a section If the section is not satisfactory, you can undo the last three actions. Click on this icon and select another section. • Choosing a raised or recessed section Section in relief: Male shape The TypeArt object is automatically positioned at Z = 0 mm. There is no particular positioning of the engraving to be done. Recessed section: Female shape To create recessed objects, first make a section relief and then depending on your design, use the mirror function either along the X, Z axis or along the Z axis only. • Reference plan of a TypeArt object Use this function to define the reference plan of a TypeArt object with the help of three markers. It is very interesting with digitized files because you can align horizontally a TypeArt object that couldn't have been digitized perfectly horizontal. Once you've created your TypeArt object, switch back to the CAD module by clicking on the Selection tool icon . Place three markers on the TypeArt object and run the TypeArt module again by clicking on its icon As soon as you are back in the TypeArt module, select the three markers (selection order isn't important). . Click now on the icon Align plan 0 . The three markers are projected on the TypeArt object (every marker has its own height). The plan represented by these three markers is aligned horizontally. It became the reference plan. Example Before alignment 292 VERSION PRO - USER'S MANUAL After alignment • Canceling the machining of the TypeArt box (for recessed engravings) To avoid the machining of the creating a TypeArt object box, especially for recessed engravings, under the Machining menu, click on the Cote command. YZ plane 3D engraving view Recessed object External part Visualization of the TypeArt tool path Modifying the Z beginning of machining In order that the tool path made by your machine will begin only inside the recessed part of your TypeArt, enter – 0.01 mm in the Z security start of machining field found in the Machining parameters box that you can access through the icon Parameters… in the dialog box Machining. VERSION PRO - USER'S MANUAL 293 Result sent to the machine: YZ plane view of the machining path 3D ISO view of the machining path • SculptArt The SculptArt module is made of brushes that allow to add material, to push it, to attract or to twist it with the mouse. Be careful: this option requires a powerful configuration (processor 350MHz, RAM 128 MB recommended) Examples: Touched up TypeArt: Before After Creation thanks to the Brush tool: 294 VERSION PRO - USER'S MANUAL You’ll see that this tool can be used in an intuitive way and is totally dedicated to the artistic creation. Make many trials and have a lot of fun! • Use Select the TypeArt object and click on the SculptArt icon visualization window and the following parameterization window: • . Two windows appear on the screen: a Effects By clicking on these different icons, you will obtain the following effects: Allows to add or subtract material according to the fact that + or – is selected (see further). Allows to smooth material. Allows to push material. Allows to add noise on a TypeArt object. Allows to attract material like a magnet. Allows to twist material (rotative movement). • Parameters All tools can be parameterized: − Tool radius : Move the slider or enter a value between 2 and 64 (unit: pixels). This VERSION PRO - USER'S MANUAL 295 radius is shown in the visualization window (can be applied to the 6 actions). • : Enter the desired height of the profile (can be applied to the actions 1 − Profile height and 4). − Recessed or raised : Tick the box corresponding to the effect you would like to produce: to add or subtract material (can be applied to the actions 1, 4 and 5). − Intersection mode : While working, without releasing the mouse, choose between adding material and fusionning it on the intersection (can be applied to the actions 1, 2, 4 and 5). − Tool force: Change the tool force by moving the cursor (can be applied to the actions 3, 5 and 6). − Tool shape: Click on an icon to choose the shape of your tool (can be applied only to the actions 1 and 5). Handling The SculptArt visualization window has a 2D and 3D view separated by a mobile bar. To rotate the 3D view, click simultaneously on Ctrl and the left mouse button. In 2D view, the mouse right-click enables to zoom in or out the image. Zoom buttons are also accessible at the bottom of the window. The arrow appearing on the 3D view corresponds to the normal, i.e. to the orientation of the material in relation to the center point. Close the window thanks the menu or the closing cross. By combining all effects, you will obtain wonderful creations. Transformation tools in TypeArt • Running transformation tools in TypeArt in the You can get access to the different transformation tools thanks to the Transformation tools icon main (left) toolbar of the TypeArt module. Click on this icon to display the Transformation toolbar (see each corresponding explanations in the following sections). 296 VERSION PRO - USER'S MANUAL • Mirror Mirror on X, Z This icon allows you to make directly a mirror image along the X and Z axis (for molds or recessed parts of embossing). Example Relief Recessed You can also do a 100% drop along the Z axis only. + Ctrl Mirror in Z The icon Mirror, used with the Ctrl key of the keyboard, allow you to create a mirror image along the Z axis. While pressing the Ctrl key, click on the icon. Example Raised Recessed In 2D YZ view, the object is automatically positioned below Z = 0. • Dies and stamps This new function allows to transform a TypeArt object into a die, a stamp or both (in that case, it consists in keeping the original object). Moreover you can insert an offset between the created objects in order to take into account the surplus material needed for stamping. VERSION PRO - USER'S MANUAL 297 Select the TypeArt object. In the TypeArt toolbar, click on the Die / Stamp icon screen. . The corresponding dialog box is displayed on the Select the desired option(s). The dialog box immediately takes the selected option into account. Example with Stamp as selected option Remark Enter the desired value in the numerical field to create an offset. Leave the value 0 if you don't want to create an offset. 298 VERSION PRO - USER'S MANUAL • Plan defined by three points The interest of this function is to create inclined plans on a design with the help of three markers. Such plans are described as Facets. In the CAD module, place three markers that will define the limits of your inclined plan on the design. Example Choose then the Snap option Marker. Select the option Snap mode… in the Edit menu (or strike the F3 key). Click then on the Sketching tool icon and draw the contour of the inclined plan (passing through the three markers). You can modify the height of one (or more…) marker to incline the plan. Select the new created plan and click on the icon to switch to the Shaping mode. Double-click then on each marker which height has to be modified. Enter the desired height in the Z field of the displayed dialog box Point attribute and validate by clicking on OK. Example Switch back to the TypeArt mode by clicking on the corresponding icon new modified curve (contour) and click on the Facet icon . Back in this module, select the . The current Combination mode applies. Remark In the example shown hereafter, the same operation has been repeated as many times as there are vertices on the star. VERSION PRO - USER'S MANUAL 299 Example Operation executed once Operation repeated Duplication tools in TypeArt • Running duplication tools in TypeArt You can access to the different duplication and texturing tools thanks to the Duplication tools icon in the main (left) toolbar of the TypeArt module. Click on this icon to display the Duplication toolbar (see each corresponding explanation in the following sections). • Pearling This function permits you to duplicate any kind of TypeArt object on a curve. It is especially useful for the creation of pearling, friezes or any decoration set along a defined contour. The principle is to create a first TypeArt object and then a second one around the curve on which the copy has to be done. First select the TypeArt object to be duplicated and then the curve. Click then on the Pearling icon. The Combination mode dialog box is displayed on the screen allowing you to define the way the created TypeArt will be positioned according to the original one. Validate this intermediary choice by clicking on OK. The Linear duplication dialog box is displayed on the screen. 300 VERSION PRO - USER'S MANUAL In this dialog box, enter the desired number of copies or define the distance between each copy. Activate the Rotate option if you want to rotate the item. Example st 1 TypeArt Duplication curve Final TypeArt Special effects in TypeArt • Running special effects in TypeArt You can access to many special effects thanks to the Special effects in TypeArt icon in the main (left) toolbar of the TypeArt module. Click on this icon to display the Special effects toolbar (see each corresponding explanation in the following sections). • Procedural texturing Make use of this feature to create lifestyle textures on a part or on the whole TypeArt object. Click on the Procedural texturing icon . The current Combination mode applies. The Procedural texturing dialog box is displayed on the screen in which you can choose among two kinds of texturing: Fractal Spread The fractal-type procedural texturing The Fractal-type corresponds to a kind of depression of which the total height, level and repetitions of details, amplitude variation, etc. can be parameterized. The evolutions of these depressions can also be parameterized on the X and Y axis. Moreover, you can assign a random factor (called Random generator) for the final result. VERSION PRO - USER'S MANUAL 301 Example of a Fractal-type texture The spread-type procedural texturing The Spread-type corresponds to the spreading of simple geometrical elements (box, sphere, pyramid, cone) or selection (i.e. any TypeArt object previously created) defining the number of copies, the rotation in X, Y or Z of copied elements, etc. 302 VERSION PRO - USER'S MANUAL Example of a spread-type texture • Laying a TypeArt-object on another one It is possible to lay a TypeArt-object on another one using three methods. Select the TypeArt object and click on the Lay icon dialog box appears on the screen. from the Special effects toolbar. The TypeArt laying Activate one of the three options. The dialog box picture changes automatically. Activate the Z-min and Z-max option so that the lowest point of the TypeArt object to be laid won’t exceed the highest point of the other object. Activate the Base plane and Z-max option so that the base plane of the TypeArt object to be laid won’t exceed the highest point of the other object. Activate the Skew of 0 plane option so that the base plane of the TypeArt object to be laid will fit the skew of the other object. VERSION PRO - USER'S MANUAL 303 • Warping grid This feature allows you to deform a TypeArt in a defined envelope. It is particularly useful to create a 3D decoration flat and then to deform it in 2D in order to use it for boards decorations, etc. Principles First create a TypeArt. Example Create then the envelope in which you want to create this TypeArt object. Obviously, you must strictly follow the different steps of the creation of an envelop (4 open curves). See the section Creating an envelope from the chapter Special effects about this theme. Example You want then to create a new TypeArt object using the first one and the created envelope. In the TypeArt module, select the TypeArt object to be deformed and select then the envelop respecting the order of selection. Click on the Warping grid icon. The corresponding dialog box is displayed allowing you to define a cutting in X and Y of the TypeArt object to be deformed. For a smoothly-looking deformation, the cutting accuracy must be related to the TypeArt-object accuracy (for a 100 x 10 TypeArt, the cutting must be 100 x 10). Once the calculation is done, the TypeArt object is deformed and is located in the envelope. Result • Fill with a texture This feature allows you to globally or partially fill a TypeArt object with a 3D texture. Just like before, it’s particularly useful to create lifestyle surfaces, but this time from previously created 3D textures. The texture database is made up of TypeArt objects of all kind. For instance, the objects could have been created by gray-level sampling and exported with the specific TypeArt format *.vna. The software is delivered with many textures that can be enhanced with your textures. Method Select the contour to be filled with a texture (if you don’t, the whole TypeArt object will be filled). Click now on the Fill area with texture icon 304 . The corresponding dialog box appears on the screen. VERSION PRO - USER'S MANUAL Load Click on this button and select the texture with the *.vna format in the displayed dialog box. Fill Click on this button to apply the texture on the TypeArt object (partially or globally). The current Combination mode applies. Select the desired mode and validate by clicking on OK. The TypeArt object (or a part of it) is filled with the texture. Parameters Fit: activate this option to fit the size of the texture element to the dimensions of the selected contour. Default size: activate this option to keep the dimensions of the original texture. Keep ratio: activate this option to keep the ratio of the original dimensions in case you modify at less one of these dimensions ( Height, width or Z: each of these parameters has got its associated numerical field to be filled). Offset X / Offset Y: activate this option to define a spacing in X and Y between the copies of different textureblocks. Rotation: activate this option if you want to rotate the texture pattern, and enter the angle. Center / corner: select one of these two options to define the Starting point of the duplication of the texture blocks on the TypeArt object, that is to say from the center or from the lower left corner). You can see below what you can get from an original TypeArt object. Original Object First step VERSION PRO - USER'S MANUAL 305 Second step Third step • Polishing To erase imperfections, you can effectuate polishings, especially on very rounded shapes. Polishing tool Click on this icon to activate the polishing function. You can polish several times in a row or you can enter in the field a predefined number of passes. The polishing is executed on the whole TypeArt object or only on a selected area. Remark Do not use this tool too much, otherwise you may loose some details! • Gray-level texture This feature allows you to increase or decrease the contrast of a bitmap picture that has become a TypeArt object. Click therefore on the Gray-level texture icon . The PhotoArt dialog box is displayed, allowing you to play with the sampling of gray levels to create a section automatically, adjusting the depth dynamic according to the gray levels that exist actually in the image. The sampling can be linear (that is to say the Z-value is constantly increasing), without contrast. If the Linear look up table option isn’t activated, a concave section smoothes the high areas meanwhile a convex section smoothes the low areas. This function is often used to emphasize the contrast on a delimited portion of the image (mask). Select the image then the mask before clicking on (see Sections from a Bmp or Tiff file, above). • Adjust dynamic This feature allows you to adjust the section of a TypeArt object, playing with Z Max and the section curving. Click therefore on the Adjust dynamic icon 306 . The Dynamic edition dialog box is displayed on the screen. VERSION PRO - USER'S MANUAL When the section is automatically created, Z Max can be unaccurate because of the size of the TypeArt and of the angle of the curve. The specified Z Max given with this function will be respected and the curving of the section adjusted. The sampling can be linear (that is to say the Z-value is constantly increasing). If the Linear look up table option isn’t activated, a concave section smoothes the high areas meanwhile a convex section smoothes the low areas. CAM tools for TypeArt • Running CAM tools for TypeArt You can access to the different tools for CAM in TypeArt by clicking on the corresponding icon in the main (left) toolbar of the TypeArt module. Click on this icon to display the CAM for TypeArt toolbar (see each corresponding explanation in the following sections). • Tool simulation on a TypeArt This feature allows you to simulate graphically the theoretical result of a TypeArt object after machining according to the tool choice. It’s particularly useful to select the tool that fits the best to the object to be machined. VERSION PRO - USER'S MANUAL 307 You access this function through the Test for a tool icon TypeArt and machining is displayed on the screen. . Once you’ve clicked on the icon, the Theoretical Example Click on the icon in the upper part of the dialog box to select a tool for the simulation. In the displayed dialog box, select the desired tool and validate your choice by clicking on OK. The vertical blue bar in the right part of the dialog box corresponds to the differences scale between theoretical object and machined object (cf. third displaying mode) that is to say the remaining material. You must now activate one of the three displaying options (see below). This is the default displaying option. It corresponds to the theoretical model (i.e. TypeArt object). This displaying option corresponds to the machined object. This displaying option corresponds to a kind of radiography of the differences between the theoretical model and the machined object. The display changes from dark to clear. Clear parts correspond to the ones with most of the remaining material. Dark parts correspond to the ones with less of the remaining material. Black parts correspond to the parts totally machined (in that case, there’s no difference between theoretical and machined objects). 308 VERSION PRO - USER'S MANUAL • Modifying a TypeArt object according to the tool This feature permits you to modify a TypeArt object according to the choice of the tool. In case the TypeArt object is made of vertical sections, these sections will be modified to take into account the cone-shape used for the tool. In case the TypeArt has some details that will be impossible to achieve because of the cone-shape of the tool and/or its half-angles, those details will be filled in. Select the object and click on the Modify for a tool icon box is displayed. . The Theoretical TypeArt and machining dialog The selected tool in our example has the following properties. Conical: 20° Half-angle: 0.4 mm Example There are small holes in the TypeArt object Small details have been filled in. Vertical sections and tools now have the same angle VERSION PRO - USER'S MANUAL 309 • Creating slices in a TypeArt object This feature allows you to create slices from a TypeArt object. It is particularly useful for getting back the contour of a digitized object. Select the TypeArt object and click on the Slices icon screen. . The Slices of TypeArt dialog box appears on the Choose among From top to bottom and From bottom to top to define the direction of the curves creation. The numerical field in the left part of the dialog box allows you to define the maximum height of the TypeArt object. The three numerical fields in the right part of the dialog box permit to define the distance between each slice, the Z start (from top to bottom) and the number of slices to be created (lower numerical field of the dialog box). Example: if you ask for space by 0.01 mm, you obtain the contour of the TypeArt object 310 VERSION PRO - USER'S MANUAL • Creating a flat skin around a TypeArt object This feature allows you to extend a TypeArt object. Select the TypeArt object around which you want to create a flat skin and click on the Flat skin icon . The corresponding dialog box appears on the screen. Three different methods can be used to extend a TypeArt object. It can be extended: • • • According to a defined angle; activate the Angular skin option clearing the field and allowing you to enter the angle value. In a flat way, at specific Z position; activate the Constant Z option clearing the field and allowing to define its position. In the continuity of the shape of the TypeArt object. Don’t validate any of both previous options. Visualization tools in TypeArt • Running visualization tools in TypeArt You can access the different visualization tools thanks to its dedicated icon in the main (left) toolbar of the TypeArt module. Click on this icon to display the Rendering toolbar (see each corresponding explanation in the following sections). • The TypeArt Viewer TypeArt Viewer This Rendering tool is very useful during a TypeArt creation. You can use this tool to have immediately a visual aspect of your creation. Click on the TypeArt Viewer icon. The dialog box TypeArt Viewer is displayed. VERSION PRO - USER'S MANUAL 311 Camera position You can modify the position of the viewer by clicking on this icon. The camera symbol is displayed on the left screen of the TypeArt Viewer dialog box. Example Camera's position Rendering To modify the camera position, click with the left button of your mouse on the camera symbol (Blue square), and 312 VERSION PRO - USER'S MANUAL while holding down the button, drag the camera. Release then, the left button of the mouse. Example Camera position Rendering Light position The TypeArt Viewer allows you to modify the light position. Click on the icon Light position. The light representation in the dialog box is red squared. Example Light position Rendering Modify the light position with the cursor. Therefore, click with the left button of the mouse on the yellow arrow and while holding it down, drag the light until its desired position. When the new position is reached, release the left button of your mouse. VERSION PRO - USER'S MANUAL 313 Example Light position Rendering Altitude of a point Using this function, you can know the altitude of each point of your composition without having to quit the viewer. To enable the function, click on the Altitude of a point icon. The given altitude is the one of the point located under your cursor. The Z altitude is displayed in the status bar at the left bottom of the TypeArt Viewer dialog box. Example Display options The left window of the TypeArt Viewer allows several display modes. Surface zoom This zoom tool allows to enlarge partially the picture displayed on the left window of the TypeArt Viewer. Click on the Surface zoom icon and drag the cursor of your mouse to define the part to be enlarged. 314 VERSION PRO - USER'S MANUAL Example Selection Result To go back to the usual display mode, click on the No zoom icon . Double zoom Click on this icon to enlarge two times the size of the picture. To go back to the usual display mode, click on the Half zoom icon . Full page view Click on this icon to display the picture in a full page mode (in that case, the full page is the left window of the TypeArt Viewer. To go back to the original display mode, click on the Scalable view icon . Modifying the size of a picture by free hand To modify by free hand the size of a picture displayed in the right window of the TypeArt Viewer, click on the right button of your mouse. While holding it down, drag your cursor forwards to reduce the size of the picture or backwards to enlarge it. Example VERSION PRO - USER'S MANUAL 315 Rotating the picture by free hand To make a picture rotate by free hand in the right window of the TypeArt Viewer, click on the left button of the mouse and while holding it down, drag your cursor. When the desired view is obtained, release the left button of the mouse. • Color map This feature allows to create a bitmap from the selected elements of a drawing. This bitmap will then be used to color different parts of the drawing so that you will obtain a color realistic rendering. In the TypeArt module, select the different parts of the drawing and click on the Color map icon bitmap is created next to the original drawing. . A new • Light direction This feature allows you to modify the direction of light for the realistic rendering of a TypeArt object. Click on the Light direction icon . The dialog box TypeArt light direction appears on the screen. Using the mouse left button, click on the square, keep the button pushed and drag your cursor until you reach the desired position. Check the obtained result by clicking on Preview. Switch back to the original lightening by clicking on Cancel. 316 VERSION PRO - USER'S MANUAL T Y P E VI E W TypeView: running the module This feature is the realistic rendering allowing to obtain very high-quality pictures with: • Various colors • Shadow-effects, reflects… • Transparency… Select the object to be rendered and click on the TypeView icon from the TypeArt main toolbar. The TypeView dialog box is displayed on the screen. Just click on each symbol of the upper toolbar of this dialog box to access specific features of this rendering tool. VERSION PRO - USER'S MANUAL 317 Material assignment in TypeView You can choose the kind of material you will assign to the rendered TypeArt object. Click therefore on the Material assignment icon displayed on the screen. • in the upper part of the TypeView dialog box. The corresponding dialog box is To assign a material to a TypeArt object, select the TypeArt in the CAD Objects window, then select the icon. By double-clicking on a material in material in the database on the right and finally click on the the database window, or by the Edit button, the Material editor is displayed on the screen. It is possible to create a new material as well. • The Ring mode checkbox allows you to enter parameters for rendering rings and bracelets. • Select scene… allows to choose a background environment. Click on the Select scene button and doubleclick on Socle (or click once on Socle and then on Load). Choose an environment and click on the icon Rendering! • 318 to have an idea of the result. Background image…gives you the possibility to choose a background. Double-click on after having selected the Background image in order to open the Material Data base. You can select an image or load your own bitmaps. VERSION PRO - USER'S MANUAL Click on the icon Rendering! Background image options. to have an idea of the result. You can combine easily the Select scene and Material Editor This dialog box gives you the possibility to combine many effects to infinity. • Color: Box not ticked (even rendering) Box ticked off (uneven rendering) Click on the box in order to choose the color you want to Click on the box, which is now active. This allows you to assign to the object. Push the Preview button to see the open the database of images. Choose a pattern and click on Load. You can have an idea of the rendering resulting effect. with the Preview button. You can combine both of the effects by assigning a percentage to each of them. This percentage gives the color in proportion to the used material. VERSION PRO - USER'S MANUAL 319 Example: In our example, there is 80% of color and 20% of material. NOTE: Once the box ticked, it is possible to click on the boxes corresponding to the different effects (for ) so as to open the dialog box allowing you to define the mapping or tiling: offset and instance: number of repetitions of the object (value must be between –1 and 1). It holds for all effects except for the Metal shininess. • Specular: This option depends on the material property and allows you to parameterize the intensity of the luminous spot that appears on the object. The higher the value is, the bigger the spot gets. Box not ticked (even rendering) Box ticked off (uneven rendering) Enter a value between 0 and 1. Push the Preview Click on the box, which is now active. This allows you to button to see the resulting effect. open the database of images. Choose a pattern and click on Load. You can have an idea of the rendering with the Preview button. Both of the color and specular effects can be combined. The exponent (value between 1 and 10,000) allows to parameterize the size of the luminous spot. The higher the value is, the bigger the opening and the lower the light intensity gets. 320 VERSION PRO - USER'S MANUAL Example: • Transparency A transparency effect can be assigned by using this function. Box not ticked (even rendering) Box ticked off (uneven rendering) Enter a value between 0 and 1 (0 for an opaque object, Click on the box, which is now active. This allows you to 1 for a total transparency). Push the Preview button to open the database of images. Choose a pattern and click on Load. You can have an idea of the rendering see the resulting effect. with the Preview button. It is possible to vary the index of refraction of the material. The latter corresponds to the deformation of the image through a transparent object. Enter a value higher than 1. NOTES: 1. 2. The resulting effect depends on the original material. It is advised to tick the box Ground to notice the transparency. VERSION PRO - USER'S MANUAL 321 Example: The index of refraction of our example corresponds to the one of water. • Metal shininess: This option can only be applied to metal effects. The box is automatically ticked off. The index changes from 0 to 1 (0 corresponds to a weak brilliance, 1 to the maximum). Click on the box to open the database of images. In the Refmap menu, you can choose between 2 types of shininess. Confirm your choice by pushing the Load button. Use the Preview button to have an idea of the rendering. 322 VERSION PRO - USER'S MANUAL Example: • Diffuse light This function uses the property of the reflection of light by the material. As a result, you will obtain a luminous and diffuse field. Box not ticked (even rendering) Box ticked off (uneven rendering) Enter a value between 0 and 1 (0 for low diffusion, 1 for Click on the box, which is now active. This allows you to a high one). Push the Preview button to see the open the database of images. Choose a pattern and click on Load. You can have an idea of the rendering resulting effect. with the Preview button. VERSION PRO - USER'S MANUAL 323 Example: • Reflection The reflection index of the material can be parameterized thanks to this function. Box not ticked (even rendering) Box ticked off (uneven rendering) Enter a value between 0 and 1 (0 for low reflection, 1 for Click on the box, which is now active. This allows you to a maximal one). Push the Preview button to see the open the database of images. Choose a pattern and click on Load. You can have an idea of the rendering resulting effect. with the Preview button. NOTES: 1. 2. 324 The resulting effect depends on the original material. It is advised to tick the box Ground to notice the reflection effect. The environment is reflected on the object. VERSION PRO - USER'S MANUAL Example: • Relief effect: Tick the box to assign a relief effect to your object. Then click on the box which is now active to access the databank of images which allows you to choose between many relieves. VERSION PRO - USER'S MANUAL 325 Example: For this example, the “Crépi4” has been chosen. This chapter does not pretend to be exhaustive as the combination possibilities seem to be infinite! We recommend you to make many trials. The unique limits this module have are the ones of your fantasy!!! Create a material from a bitmap image It is possible to complete the existing database of images with your own bmp (it is recommended to save the images in the directory \Vision\Rtrace\Images\Map). The TypeArt material, which is the colored drawing of the TypeArt, can be imported. You can use all effects of transparency, brilliance, relief, color, etc. You have to import the image and send it to the TypeArt module. Use the tool to convert the image into a color bitmap. Select the colored image (right to the original bitmap) and send it to TypeView. Open the dialog box Material affectation. The TypeArt material appears in the Material data base. To work and use this material, select the TypeArt Material with the right mouse button. While holding it down, drag it to the Custom directory. Release the left button of the mouse. The contextual menu is displayed on the screen. Choose the command Copy in order to copy the material in Custom. You can rename your image. By default, the image is called New import. 326 VERSION PRO - USER'S MANUAL Ring mode in TypeView The Ring function allows to produce realistic renderings of rings. The principle is easy: you only have to make a TypeArt object, to send it in the TypeView module that will map it following the Z axis. To realize a ring, the TypeArt object has to be made following some rules: − It must be a flat object, − The profile has to be edge to edge to the bounding frame if the mapping must be complete. Example: Flat TypeArt Ring rendering • Launching of the Ring function This function is available in the dialog box Material affectation in TypeView. To access to this function, tick the Ring mode box and click on Ring configuration to modify the mapping parameters. VERSION PRO - USER'S MANUAL 327 The following dialog box is displayed on the screen: • Adjustments of parameters • − − Options Closed shape: the inner aspect of the ring is smooth, Skin: the inner aspect of the ring is hollow and has the relief of the TypeArt object. • Size You can choose between a closed and an opened ring. In case of an opened ring, you may enter the value of the opening angle. In case of a closed ring, you can: − Automatically adjust the radius in relation to the size of the TypeArt object, − Enter the value of the radius, − Parameterize the ring thickness (for a low thickness, enter 0.1 mm). Note: The numerous rendering tools of TypeView can be associated with the ring function, in particular selecting a color bitmap or adding a scene. 328 VERSION PRO - USER'S MANUAL Example: Rendering of a ring associated with a scene It is also possible to use a surface in TypeView to associate it with your TypeArt object. In this case, the surface must be properly positioned. When the object has several facets (for instance a diamond), the latter must be grouped (Ctrl + icon Combine ). Example of a ring set with diamond Place and position the surface in relation to the position of the TypeArt object with the tool Flip plan . Send the TypeArt object in TypeView and tick the box Adjust radius <-> Angle in the dialog box Ring configuration. The entered value corresponds to the radius of the cylinder and the TypeArt thickness. The diamond is positioned on the Y-axis. To calculate its position properly, consider the value of the radius + the thickness of the TypeArt object, i.e. 25.975mm in our example. Adjust the position of the diamond by moving it slightly following the Y direction. VERSION PRO - USER'S MANUAL 329 Positioning of the diamond before mapping Rendering of the ring set with diamond In case of a TypeArt with an openwork design, the rendering will take into account the aspect and all details you created. Example of a bracelet: TypeArt 330 VERSION PRO - USER'S MANUAL Rendering in TypeView Light editor in TypeView You can edit the rendering light, that is to say you can fully parameterize the direction, the source, the intensity, etc. of the rendered object. Click therefore on the Light Editor icon dialog box appears on the screen. in the upper part of the TypeView dialog box. The corresponding In the Type part of the dialog box, select the desired option allowing you to define a certain number of settings in the Parameters field of the same dialog box. VERSION PRO - USER'S MANUAL 331 The ambient light is set by default. From left to right, you can also chose an OMNI light (multidirectional), a beam (parallel directional light) and a spotlight. In the Type section, select the desired light allowing you to define a certain number of settings in the Parameters section, such as: • color (the intensity is defined by a slider) • position (moving the small square with the mouse) • direction (idem) • distance to the object (defined by a slider) • field and cut-off of the beam (spotlight only). Camera sight in TypeView TypeView allows to change the camera sight for any rendered TypeArt object. Click therefore on the Camera sight icon sight dialog box appears on the screen. in the upper part of the TypeView dialog box. The Camera Place your cursor on the green square and push the left mouse button. Keep it pushed and drag your cursor until you reach the desired position. Release then the left button of your mouse. Renderer parameters The TypeView module allows you to modify the Renderer parameters. Click on the Renderer parameters icon parameters appears on the screen. 332 in the upper part of the TypeView dialog box. The Renderer VERSION PRO - USER'S MANUAL • Output Section By default the image is generated for the CAD module. It can then be saved with the bitmap editor. If you click on the bmp file radio button, the image is saved in the directory of your choice in bitmap format as soon as the rendering is finished. You must enter the resolution parameters of the file: number of pixels and number of colors. See the notes in the Size section. • Quality Section According to your choices in the material editor (color, specular light, transparency, reflection, etc.), these parameters will change completely the way the image is calculated, with more or less reflection and shadowing effects. We advise you to experiment as much as possible the various parameters in order to understand better their action on your drawing. Values for computing the levels of reflection: 1 = no reflection on the material is calculated, 2 = a reflection on the material is calculated on opaque objects (if, in the material editor, you have a value between 0 and 1 for Reflection), 3 = a reflection on the material is calculated on opaque and transparent objects (if, in the material editor, you have a value between 0 and 1 for Reflection and for Transparency), 4 = calculates a transparent TypeArt object also with these same conditions for material assignment (transparency) and a simple surface (one layer), 5 = calculates the transparency of a surface with two layers (or skins), like for a revolution surface for example. The display of the rendering is much quicker without any reflection calculation. • Size Section You can modify the size in X and in Y, in a proportional way if needed. NOTES The higher the resolution of the Bitmap (number of pixels), the bigger the size of the file. The default values of 800 x 800 are a wise compromise. If there is a background image, the size of the Bitmap is the one of the background image. • Options Section You can define several other effects: – Anti-aliasing of the image – Shadow attenuation, that is with the blurred edge of the shadow (available only with the OMNI light). – Blurred effect on a part of the composition, like with photo lens. – General blurred effect. VERSION PRO - USER'S MANUAL 333 Rendering in TypeView Click on the Render icon 334 in the upper part of the TypeView dialog box to launch the rendering. VERSION PRO - USER'S MANUAL APPENDICES VERSION PRO - USER'S MANUAL 335 Appendix 1: Importation tips How can you use a lay out (or a text) created on another computer with another software? Ex: on Apple Macintosh with Adobe Illustrator The import of a file from another software can be done if some precautions are respected. Before exporting your lay out, you have to convert it into curves (especially the text part). It is a usual function of graphic software. When a text has been converted into curves, you cannot modify it anymore in the text mode, but the geometrical manipulations can still be executed (size, deformation). Choice of the format: PostScript, HPGL, DXF, IGES, or ISO. HPGL (*.HPG) Created to drive plotters, this language is well known in CAD and in mechanics world in particular. You will find it in most of the existing software. This is a useful solution to import different contours. However it generates a large quantity of vectors, which can be an inconvenient in some case, especially concerning the quality of the restored curves. PostScript (*.EPS) PostScript is the natural format for the description of contours, whether they are fonts or drawings. Contrary to the HPGL which vectorized curves, PostScript defines all the profiles in Bezier curves so there is a better quality at the time of the restoration. Computation is faster, and the treatment will be optimized because few elements have to be analyzed. As for the HPGL, you will need to vectorize the composition before exporting it to the PostScript format. DXF (*.DXF) This is the Autocad format. Often, contours issued from this format are opened. To avoid to close each contour manually, the Auto-connect function to connect the contours is available in the shaping mode. REMARK The quality of the engraving depends on the quality of your composition. The created engraving will be the accurate mirror of the composition supplied. The smallest detail will be reproduced. This performance will allow you mostly to engrave a drawing with delicacy. Sometimes this accuracy will be the origin of imperfections. A drawing which has not been created correctly, will produce a mediocre engraving. Whatever the lines are, straight or curve, they must be as smooth as possible. 336 VERSION PRO - USER'S MANUAL Appendix 2: Choices for engraving: recessed or raised The engraving choice, recessed or raised, is done at the composition and is very simple: each contour is a barrier which delimits the material. The software will interpret it as follows: no material - material (1st contour) - no material - material (2nd overlapping contour), etc. Composition Composition Result: recessed engraving Result: engraving in relief You just have to add a contour around the composition to create an engraving in relief. VERSION PRO - USER'S MANUAL 337 Appendix 3: Order Should you need to contact your dealer, or should you wish to acquire an additional option, please send by fax the details of your dongle after filling in your coordinates. To obtain details of your dongle, please follow the procedure hereafter. Click in the menu on the icon . Be careful not to modify the code numbers in this window!!! Then select the Order command. Enter the following information in the text editor displayed on the screen: address, telephone, fax and E-mail in the fields From, Phone, Fax and E-mail. 338 VERSION PRO - USER'S MANUAL Then print the note-pad with File Print, and fax it! Don’t forget to mention clearly the nature of your problem!!! You will receive in return the sequence(s) allowing the activation of the ordered option(s). Each sequence must be entered in the Code field of the dialog box About and must be validated by clicking on the button Validation. The display of the message Success proves that this task went well. Do the operation as many times as the number of given sequences. To quit this screen, click on or on OK. VERSION PRO - USER'S MANUAL 339 Appendix 4: Tool box Each tool available in the software is represented by an icon symbolizing its function. The icons defined with the mention Tools and marked with a little arrow on the bottom right corner are launching a new box with icons described on the following page. When the function is available, the icon becomes darker. The shaping tools Geometrical shapes tools Alignment tools Duplication tools Transformation tools Special effects tools 340 VERSION PRO - USER'S MANUAL Text mode Surface tools Measuring tools TypeArt tools The icon shown above allows you to switch to the TypeArt module. Permanent toolbar of the TypeArt module Click on the icon to display the Transformation tools of the TypeArt module Click on the icon to display the Duplication tools of the TypeArt module Click on the icon to display the Special effects tools of the TypeArt module Click on the icon to display the CAM tools of the TypeArt module click on the icon to display the Visualization tools of the TypeArt module VERSION PRO - USER'S MANUAL 341 Appendix 5: Tool bar 342 VERSION PRO - USER'S MANUAL Appendix 6: Shortcuts The Function keys F1: Help F2: Numerical coordinates F3: Snap mode F4: Preview F10: Options The tabulation key Automatic centering of text: justification left/right/center The arrow keys Accurate move of selected item. You can modify their setup: therefore see the section Arrow move in the chapter Configuration. The Ctrl key Ctrl + 1: Front view on the XY axes Ctrl + 2: Cross section view on the YZ axes Ctrl + 3: Cross section view on the XZ axes Ctrl + 4: 3D Engraver view on the XYZ axes Ctrl + 5: 3D Iso view on the XYZ axes Ctrl + 6: Free 3D view on the XYZ axes through numerical values (displays dialog box View point). Ctrl + N: New file Ctrl + O: Open Ctrl + S: Save Ctrl + M: Open model Ctrl + Z: Undo Ctrl + A: Redo Ctrl + X: Cut Ctrl + C: Copy Ctrl + V: Paste Ctrl + L: Select all Ctrl + W: Redraw Ctrl + R: Fast redraw Ctrl + Shift key: When drawing an object, it is centered Ctrl with Sketching tool: Angular point Ctrl with Rectangle tool: Square Ctrl with Ellipse tool: Circle Ctrl with Selection tool: Multiple selection/Deselection Ctrl with Duplication tool: Move the copy on one axis Ctrl with Mirror tool: Copy + Mirror Ctrl with Scaling tool: Scale 2, 3. Ctrl with Rotation: 15° steps Ctrl + : Vectorizing parameters Ctrl + : Edition and creation of fonts Ctrl + : Choice of the kind of marker VERSION PRO - USER'S MANUAL 343 The Shift key Shift with Curves shaping mode: Tangential point Shift with Ellipse tool: The ellipse is centered on the first selected point Shift with Polygon tool: Two opposite points Shift with Star tool: two opposite points with circle Shift with Circle: Clockwise direction Shift with Arc by 3 points: Third point defined between first and second Shift with Copy/Paste function: Copy of selected item Shift with Scaling with mouse: Symmetrical action 344 VERSION PRO - USER'S MANUAL Appendix 7: Vision numeric fonts • VN Curlz This font is made of 190 characters. VERSION PRO - USER'S MANUAL 345 • Din Filaire This font is made of 190 characters and 324 kerning pairs. 346 VERSION PRO - USER'S MANUAL • VN Glass This font is made of 190 characters and 110 kerning pairs. VERSION PRO - USER'S MANUAL 347 • Vn Helvetica 1L This font is made of 190 characters and 109 kerning pairs. 348 VERSION PRO - USER'S MANUAL • VN Script This font is made of 190 characters and 256 kerning pairs. VERSION PRO - USER'S MANUAL 349 • VN Serif This font is made of 190 characters and 380 kerning pairs. 350 VERSION PRO - USER'S MANUAL