1
TRILOG GROUP, INC.
ProjExec®
ProjExec ®
Administrator Guide
ProjExec®
Administrator Guide
© 2004-2012 Trilog Group Inc.
54 Cummings Park • Suite 308
Woburn, MA 01810
Phone 781.937.9963 • Fax 781.935.229
Table of Contents
Chapter 1. Guide to Managing ProjExec................................. 4
Chapter 2. Integration with Notes Calendar ............................ 6
Before You Begin ............................................................................ 7
Access Calendar Integration Setup ................................................. 8
Test Notes Calendar Connection .................................................. 10
Chapter 3. Integration with IBM Connections ........................ 11
Enable Lotus Connections Integration .......................................... 11
Allowing Email addresses to be displayed .................................... 12
Chapter 4. Using the Global Settings.................................... 14
Accessing the Global Settings ............................................................. 14
Organization Management (ProjExec for IBM Connections) ............... 15
Site Management (ProjExec for IBM Connections) ............................. 18
Administrator Management.................................................................. 22
Sametime Integration .......................................................................... 22
SkypeTM Integration ............................................................................. 24
Directory Access Options .................................................................... 25
License Manager ................................................................................. 26
Chapter 5. ProjExec Access from Mobile devices................. 29
Configure a user friendly URL for mobile devices ................................ 29
Publish the URL................................................................................... 30
Allow to specify login attribute for authentication ................................. 31
Chapter 6. Performance Tuning ........................................... 32
ProjExec on Quickr Domino: use a separate 64-bit Domino server ..... 32
ProjExec Resource File Cache on Lotus Domino server ..................... 32
Customize the Wall refresh rate .......................................................... 33
Customize queries to LDAP Directory ................................................. 33
Do not share the Document Pool in case of Cluster “Session affinity” mode
............................................................................................................ 34
Chapter 7. Advanced configuration & Troubleshooting ......... 35
Disable Email notifications due to Wall messages ............................... 35
Restrict Project Creation feature on IBM Connections ........................ 35
PDF Reporting configuration for non-Latin languages ......................... 36
Directory Tool ...................................................................................... 36
Max File upload configuration for Lotus Domino server ....................... 37
Enable Demo Mode to work with sample projects ............................... 40
Indicate your SSO configuration to ProjExec ....................................... 40
Issue while accessing Quickr documents in case of accents in file name41
Database connection error while using DB2 and Quickr J2EE on Linux41
Error while displaying Resource Allocation and Light Gantt charts...... 42
Sametime and Presence awareness Issues ........................................ 42
Miscellaneous ...................................................................................... 43
Chapter 1.
ProjExec
Guide to Managing
Site administrators have exclusive access to administrative features
that they can use to manage ProjExec.
T
rilog‟s ProjExec is an extensive and multi modular solution that requires
management and administration. Access to the administrative features, is
restricted to users having the Site Administrator role.
Note
Some features described in this guide are part of specific editions (or
platforms) of ProjExec. To specify to which edition they apply, the
edition name is added between parenthesis at the beginning of the
paragraph.
(ProjExec for IBM Connections) Some administrative settings can also be
configured for each ProjExec site. A site is a virtual place where are defined a list
of projects. Users belonging to a site cannot view projects of the other sites. A site
manager is responsible for configuring his own site.
The Calendar integration option and the configuration of the Calendar integration
are available for both, the Site Administrators and the Site Managers. Note that the
Site Manager role is available in ProjExec for WebSphere Portal or WebSphere
only.
Note for Quickr users
If you are using ProjExec for Quickr, a single site is used to store all
projects and data. The concept of virtual places containing one or more
projects is already implemented by the Quickr places. Therefore
ProjExec for Quickr does not allow the creation of several sites.
This Administrator Guide describes the various tools and features available only to the
site administrator in order to help him manage the application, and some site
configuration available to the site manager. These features are easily accessible and their
usage is both straight forward and intuitive. ProjExec can have one or many site
4
administrators, a role which by itself, grants the user ultimate and global authority over
the entire application. Note that the list of site administrators is available in Global
settings/Administrators.
(ProjExec for IBM Connections) The list of site managers for a site is available on the
site form
While this Administrator Guide explains the features visible only to the site
administrator, it is complemented by the User Guide, which explains how to use
the rest of the ProjExec features.
5
Chapter 2.
Integration with
Notes Calendar
Details for site administrators and site managers about Calendar
Integration with ProjExec.
Knowing the availability of resources and making optimal assignment of
resources to projects is a crucial component of project success. It is equally
important for project participants to be aware of their availability and time
commitments to manage time, participate in team meetings and complete
work and assignments on schedule. ProjExec includes extensive calendar
features as an integral part of the core product. Project and task calendars can
be defined and are used to calculate schedules and dates for various tasks.
Individual user calendars may also be defined for each resource within
ProjExec to indicate specific resource availability. My Calendar and Project
Calendar views display task and activity schedules for both individual users
and collective project teams.
Most personal information management applications and other project
management applications treat calendars as functional silos where resources
are committed only within the single application domain. Individuals typically
use a separate calendaring tool for personal productivity, often an extension
of their email application. Most users do not need another separate calendar,
but instead can benefit from Calendar integration.
ProjExec addresses the challenges of multiple, separate calendars with an
option to integrate all ProjExec calendar features with external
Notes/Domino calendaring and scheduling to synchronize and display Notes
calendar entries with ProjExec tasks and activities in a single integrated
location. Users can access a single location to manage commitments and
work.
ProjExec supports integration with external master calendars using a serviceoriented architecture. Integration is bi-directional; users can choose to export
all projects tasks and activities from ProjExec to the external calendar or
display all external calendar entries in a calendar view within ProjExec.
Currently ProjExec offers integration only with Lotus Notes calendars hosted
on a Domino server. The ProjExec architecture is extensible and could be
6
tailored easily and quickly to support integration with other types of external
calendars.
Before You Begin
ProjExec requires that IBM Lotus Domino 7.x or greater is installed and is
being used as the LDAP directory server for your ProjExec installation.
Domino is also required to host the Notes calendaring function for ProjExec
users who will access the Calendar integration option.
A specific license key is required to enable the Calendar integration option. If
you did not buy this option initially, you must obtain the key and update the
license in ProjExec to reflect that your ProjExec installation has support for
Calendar integration.
To make the integration work, a database named CalendarBroker.nsf must be
installed on the IBM Lotus Domino server. This database hosts the Web
Service that will be used to interact with the external IBM Lotus Domino
calendar. You can download this database from the ProjExec Calendar
Integration Page under Site Settings.
Please follow the instructions listed below in order to install the database and
sign it.
1. Shut down the IBM Lotus Domino server on which the database will
be installed
2. Extract the database file named CalendarBroker.nsf from the
downloaded zip file and copy it to the <Lotus Server Home
Directory>\Domino\data folder
3. Run
the
program
<Lotus
Server
Home
Directory>\Domino\nlnotes.exe to edit the ACL (Access Control
List) of the database
4. Go to File -> Application -> Open and select the server to which the
database file was copied. Then browse to the CalendarBroker.nsf
database file and open it
5. Go to File -> Application -> Access Control
6. Click on the button labeled Add
7. Click on the person icon to the right of the text box in order to add
entries to the Access Control List of the database
8. Select the server to which the database was copied and add it to the
list
9. Select the user/group who will manage the database and add
him/them to the list
10. Click on the button labeled OK to close the Select Names popup
window and return to the Access Control List window
7
11. Select the server name from the list and set the User type attribute to
Server and the Access attribute to Manager
12. Select the database manager user/group name from the list and set
the User type attribute to Person/Group and the Access attribute to
Manager
13. Restart the IBM Lotus Domino server
14. Open the Lotus Domino Administrator then from the file menu click
on Open Server and chose the server you want to connect to (make
sure to open the server where your directory resides)
15. Open the Files Tab, and from the list of NSF Database, locate the
Calendar Broker, right-click on it and chose Sign to sign the file.
Once the database is installed, you need to grant public access to the web
service so that it can be used from within the ProjExec application. To do
that, please follow the instructions listed below:
1. Open the CalendarBroker.nsf database with IBM Lotus Designer
2. Go to Code -> Web Service Providers -> CallDelegate (Code is
located in the left panel)
3. Double Click on CallDelegate
4. When the code window opens, click on the " Properties” tab
5. Select the Security tab
6. Check the option labeled Allow Public Access users to use this web service
7. Close the Web Service properties window and then close IBM Lotus
Designer
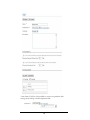
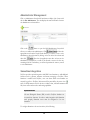
Access Calendar Integration Setup
Only users having the global function Calendar Integration Administrator
can access the Calendar integration option and manage the configuration of
the Calendar integration. Select Calendar Integration from the Site Settings
menu.
A form like the one shown here is displayed.
8
The form opens in edit mode for users who have the permission allowing
them to enable/disable the Calendar integration. When you choose to enable
the Calendar integration, the fields listed here will appear in the form. Enter
the appropriate parameters as described below.
Authentication
Enter the username and password of a Domino Local Domain
Administrator.
Update Calendar:
You may choose to enable or disable the option to
update the user's external calendar. By choosing to enable an external
calendar, the user will see the Update Notes Calendar button in the action bar
of the My Calendar page. The button will be used to update the logged-in
user‟s external calendar with all the project tasks assigned to him in ProjExec
from the current date onward.
9
Name: Displays the name of the calendar to integrate with.
Web Service URL:
Specifies the URL of the Web Service that will be used
to interact with the external calendar. This consists of the protocol, host name
(example: myserver), port number (do not put anything if you use the default
port), path (do not put anything if the database is directly under the root),
Lotus Notes database name, and the web service name.
Example:
http://myserver/CalendarBroker.nsf/CallDelegate?OpenWebService
Additional Mail Servers
If the users in your organization are distributed over several mail servers, you
may need to specify several mail servers. You have to repeat the process to
install the CalendarBroker database on all mail servers.
Indicate the Web Service URL for all mail servers.
Test Notes Calendar Connection
When the Enabled box is checked on the Calendar Integration form, the
button
is shown in the action bar. Once the appropriate
values have been entered as described above, click
to test
the parameters entered and to establish the connection with the external
calendar.
Once all the desired modifications have been made to the Calendar
integration configuration, click
to close and save the changes.
10
Chapter 3.
Integration with
IBM Connections
This chapter contains detailed instructions to activate the connector
for IBM Connections.
If you are running ProjExec for IBM Connections,
this integration has been automatically set during
installation process.
If you are running on Quickr, you can define some settings to
integrate with an IBM Connections server to use Profiles and
Activity integration.
ProjExec can be integrated with an IBM Connections server. This allows
retrieving user Connections profile (picture, VCard) to be displayed on
ProjExec pages. This also allows creating a new activity, or to view existing
activities and add an activity as a bookmark of a ProjExec data.
If you are running ProjExec for IBM Connections, you also have integration
with Community and Files.
Enable Lotus Connections Integration
Edit projexec_config.properties file in projexec/WEB-INF directory and set
the following properties:
# Enable Lotus Connections Connector integration
lc.integration=true
# --- Lotus Connections Connector configuration from server --# host name of Lotus Connections accessible from ProjExec server
lc.server.host=
# URL Protocol to use to connect to Lotus Connections from
server (http or https)
lc.server.protocol=
# URL port to use to connect to Lotus Connections from server
lc.server.port=
# URL prefix to append to access Lotus Connections REST services
from server
lc.server.rest.url.prefix=
11
# --- Lotus Connections Connector configuration from proxy
(client) --# Use special configuration for Lotus Connections from proxy. If
set to false, then the connector will use the same properties as
server ones.
proxy.lc.defined=false
# host name of Lotus Connections accessible from proxy
proxy.lc.server.host=
# URL Protocol to use to connect to Lotus Connections from proxy
(http or https)
proxy.lc.server.protocol=
# URL port to use to connect to Lotus Connections from proxy
proxy.lc.server.port=
# URL prefix to append to access Lotus Connections REST services
from proxy
proxy.lc.server.rest.url.prefix=
Here is an example of real values:
lc.integration=true
lc.server.host=mylc30server.mycompany.com
lc.server.protocol=http
lc.server.port=80
lc.server.rest.url.prefix=
proxy.lc.defined=false
proxy.lc.server.host=
proxy.lc.server.protocol=
proxy.lc.server.port=
proxy.lc.server.rest.url.prefix=
Important Notice: If you are using IBM Connections over HTTPS you have to
import the certificate into the Domino JVM. Follow instructions from:
http://www10.lotus.com/ldd/dominowiki.nsf/dx/Add_Site_Certificates_to_the_Lotus_D
omino_JVM_cacerts_Keystore
Allowing Email addresses to be displayed
You cannot enable IBM Connection Connector if you configured IBM
Connections to prevent email addresses from being displayed. If you hide email
addresses, ProjExec will not function properly.
To expose email addresses, execute the following command. For more
information please refer to IBM documentation:
http://publib.boulder.ibm.com/infocenter/ltscnnct/v2r0/index.jsp?topic=/co
m.ibm.connections.25.help/t_admin_common_hide_email_using_script.html
1- Open a command prompt, and then go to the following directory on the
WebSphere® Application Server hosting IBM Connections:
12
C:\IBM\WebSphere\LotusConnections\ConfigEngine
2- Enter the following command to run the script that configures IBM
Connections to display e-mail addresses. You must launch the script for each
WebSphere Application Server profile on which you installed a feature:
ConfigEngine.bat action-expose-email -DprofileName=<profileName>
-Dusername=<username> -Dpassword=<password> >
D:/expose_email.log 2>&1
3- Restart the servers.
13
Chapter 4.
Settings
Using the Global
Detailed instructions for site administrators to add and edit
organizations and sites, add other site administrators, and enable or
disable features such as Sametime integration or SkypeTM
integration.
P
rojExec includes a separate Global Settings application that is used to
manage access to different projects and create virtual groupings of
projects under sites and organizations. Hosting multiple sites with
multiple projects using ProjExec is simple and intuitive. Instead of installing a
separate ProjExec application for each site on a different server, you may set up
a hosted application environment, where ProjExec is installed on a central
server that supports virtual division of documents by site. This type of
environment allows centralized management of ProjExec and increased
scalability to add other web applications to the site without disrupting the
functionality of the existing system.
This chapter describes the use of the Global Settings application. As a user
with the role Site Administrator, you will have full access to the functionality
of this application.
Accessing the Global Settings
The Global Settings module is located under the menu Administration.
In ProjExec for Quickr J2EE and ProjExec for Quickr Domino, create a
ProjExec Administration Place to be able to access the Global Settings.
14
Organization Management (ProjExec for IBM
Connections)
An organization has users (e.g. employees or resources) distributed in different
geographical locations and in different departments. We refer to a group of
employees belonging to the same subdivision - whether it is a geographical
location or a department - and sharing a set of applications and services as a
Site. An organization can have more than one site, but a site is restricted to one
organization.
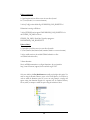
The Organizations view, as shown below, displays all organizations with their
addresses. The Organizations view can be sorted by organization name by
clicking on the arrows next to the Name column heading. The organization
name in the view is a link to the organization‟s details.
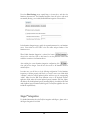
The site administrator has access to a form to add new organizations or to edit
organization users once an organization is added. Click
from the
Organizations view to create a new organization. Click on an organization
name to view or edit its details. The Organization Details form is illustrated
below.
15
Enter the details concerning the organization as prompted by the fields on the
form. The Organization Name field is required.
You can also delete an organization from this form by clicking on the
button. This action will delete all the sites related to that organization, all the
documents for those sites including projects, and all the users in that organization.
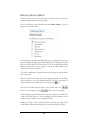
Click on the Users tab to open the list of users belonging to the organization, as
shown below.
16
You can add new users to the organization by clicking on the
selecting the users from the application directory.
button and
You can delete users from the organization by checking their corresponding
checkboxes and clicking on the
button.
You can also enable users in an organization by checking their corresponding
checkboxes and clicking on the
button. Note that the selected users will
not be automatically enabled on sites of which they are members.
Moreover, you can disable users in an organization by checking their
corresponding checkboxes and clicking on the
button. Note that
the selected users will be automatically disabled on sites of which they are
members.
Click on a row value for a desired user and you will be redirected to his/her
profile.
17
Site Management (ProjExec for IBM Connections)
A site is a virtual representation of a group of users sharing the same
applications and services.
In the Global Settings application, the sites appear listed in a view accessible
from the Sites menu. The Sites view is illustrated below.
Each site is linked to only one organization, although an organization can have
more than one site.
A site has users and applications. The site administrator can create, clone, edit
and delete sites. In fact, he has access to all functions in all sites and all
applications.
The site administrator has access to the
form to create a new site as shown below.
button which opens the site
18
A new feature of ProjExec is the possibility to create new organizations while
creating a site by clicking on the New Organization link.
19
The same form is used to edit existing sites. For more information on editing
sites, you can refer to Chapter 8, Using the Global Settings, in the ProjExec User
Guide.
The site administrator has access to the Sites view that lists all available sites.
The view displays the site status, name, organization, and managers. As a site
administrator, you may also enable, disable, clone, import or delete sites using
buttons on this view.
You can choose to delete sites. After it is acknowledged that a site is being
deleted, all site related documents in all databases will be removed including
projects. To delete one or more sites, select the desired site(s) by clicking on the
checkbox next to the site name. Click
message to remove the selected sites.
and approve the confirmation
Like organizations, sites can also be disabled or enabled. A disabled site is no
longer accessible in any of the applications it implements. To disable one or
more sites, select the desired site(s) by clicking on the checkbox next to the site
name. Click
and approve the confirmation message to disable. To
enable one or more sites, select the desired site(s) by clicking on the checkbox
next to the site name. Click
and approve the confirmation message
to enable the selected sites. Notice that already enabled sites are not affected.
You can also clone the site, thereby creating a new site with the same attributes,
managers, applications and users but with a different name and id. To clone
one or more sites, select the desired site(s) by clicking on the checkbox next to
the site name. Click
and approve the confirmation message to clone
the selected sites. For each selected site, a new site is created with the same
name as the original site plus the word "clone" appended to it. Note that
cloning a site, does not clone the projects created under that site nor their
clients.
Finally, you can import a site that has been previously exported as a zip file. To
import a site, click
and follow the step by step directions of the
Import Site Wizard. If the site doesn't already exist, it will be created. However,
if it already exists you will be prompted on whether or not you wish to replace
the existing site.
The Import Site Wizard consists of the following tabs:
20
1.
Import Site:
Click
, to navigate to the location of the zip
file and then click
to attach the selected file. Upon a
successful upload, a message will appear that the file was successfully
uploaded. If the wrong file is selected, click on
and repeat
the Browse and Upload steps to upload the correct file.
If the uploaded site already exists, a message will appear prompting you
on whether or not you wish to replace the existing site. Furthermore, if
the organization of the imported site does not exist, a message will
appear informing you that the organization to which the imported site
belongs no longer exists and that you can either select an existing
organization from the drop down list or create a new one.
To create a new organization, click on the
specify the name in the Name field and then click
2.
link,
.
If the site you are importing includes users non
existent in the current directory, a page will appear listing the
unregistered users, along with a message prompting you to specify a
valid email for each user. If none is specified, the user will be denied
access to the site. Note that if any of the site managers of the site you
are importing are unregistered, you will be required to provide them
with a valid email.
Import Resources:
To specify an email, you can either type it directly or you can click on
the
icon to select a registered user's email. Note that you cannot
assign to an unregistered user, the email of a registered user already a
member of the site being imported, nor can you enter an email not
listed in the directory, as it will not be considered valid.
3.
Under this tab, you have the option of moving the dates
of any project on the site by providing a new start date. This will be
reflected on the project schedule and all associated project documents.
Move Dates:
All the projects existing in the site will be listed along with their current
Start Date and End Date. In the New Start Date field enter the new
start date directly or click on the calendar icon
start date using the pop-up calendar date picker.
to choose a new
Note that the New Start Date can be either before or after the current
start date and that the start date of the project will in fact be moved to
the closest date matching the week day of the current start date within
the week of the New Start Date.
21
Administrator Management
Click on Administrators from the left hand menu to display a list of users with
the role Site Administrator. The view displays the name and Email of current
site administrators as shown below.
Click on the
button to open the Add Administrators form, which
allows you to add new site administrators. Click
and select the
appropriate users from the People Finder directory. To remove a user as a site
administrator, select their name by clicking on the box in the first column and
then click
. Note that the application must have at least one site
administrator, and therefore you will not be allowed to remove the last user
remaining in the list. Furthermore, you will not be permitted to remove yourself
as a site administrator.
Sametime Integration
ProjExec provides optional integration with IBM Lotus Sametime to add additional
functions such as presence awareness and instant messaging to ProjExec. When
Sametime is enabled with ProjExec, users can detect which team members are
currently logged in to ProjExec (their name will be preceded by the person icon )
and it is a simple matter to click on the icon to initiate a chat, send announcements and
files, share screens and use web conferencing capabilities.
Important Notice
All users Distinguish Names (DN) stored in ProjExec database are
converted into lowercase. In order to make integration with Sametime
work properly, Sametime server must be configured to be case
insensitive.
To configure Sametime to be case insensitive, do the following:
22
Update sametime.ini
1. Open Sametime.ini from all chat servers in a text editor (located
in C:\Lotus\Domino\ in our test environment).
2. In the [Config] section add the flag: AWARENESS_CASE_SENSITIVE=0
If Sametime is running on Windows:
3. In the [STLINKS] section append -DAWARENESS_CASE_SENSITIVE=0 to
the STLINKS_VM_ARGS as follows:
STLINKS_VM_ARGS=-Xmx128m -Xgcpolicy:optavgpause DAWARENESS_CASE_SENSITIVE=0
Update stlinks.js
1. Open stlinks.js in all chat servers in a text editor (located in
C:\Lotus\Domino\data\domino\html\sametime\stlinks in our test environment).
2. In the variable section set the variable STlinksCaseSensitive to false:
var STlinksCaseSensitive=false;
3. Restart Sametime.
Here is an IBM documentation to configure Sametime to be case insensitive:
http://www-01.ibm.com/support/docview.wss?uid=swg21174297
Only users with the role Site Administrator can enable and configure this option. You
must be using the Domino Directory server as the LDAP directory for ProjExec in
order to enable the Sametime option. If you are not using Domino, a message will
appear stating that Sametime integration is supported only for Domino Directory
Servers, when you attempt to enable the option using the instructions below.
23
From the Global Settings menu, expand Setup, as shown above, and select the
Sametime sub-menu item. The Sametime Integration form will open in edit mode
automatically allowing you to enable/disable Sametime integration as shown below.
In the Sametime Integration page, specify the requested parameters for your Sametime
server. Enter either the server URL or the Host name and port number of the
Sametime server.
When Enable Sametime Integration is selected, the button
is
shown in the action bar. Click on this button to test the parameters entered and
establish a connection to the Sametime Server.
After verifying the correct Sametime integration configuration, click
to
close and save the changes. Users will now have access to all Sametime functions
within ProjExec.
In certain cases, you will have to do the following configuration: For the Sametime
integration to function properly with Firefox, you need to create a new folder called
“sametime” under the location lwpbeans\person and then copy the corresponding
“stlinks” folder from the IBM Lotus Sametime server to the deployed ProjExec
application folder, under the location lwpbeans\person\sametime. After that, replace
the stlinks.jar file under lwpbeans\person\sametime\stlinks by the stlinks.jar file found
under lwpbeans\person\sametime\stlinks\signed. The ProjExec application does not
include this required library.
SkypeTM Integration
For detailed information about the ProjExec integration with SkypeTM, please refer to
the SkypeTM Integration User Guide.
24
Directory Access Options
You may set the level of access to the directory by choosing the role(s) or users(s) that
would be granted the directory browsing privilege.
Click on the Directory Access sub-menu item under Global Settings to open the
Directory Access Options form.
The form opens in edit mode automatically allowing you to change the directory access
options by explicitly specifying whether Site Manager(s), Project Manager(s), the global
Super User, Project Super User, Project Creator, or All Users are granted that privilege.
Directory browsing access can be toggled on and off by simply clicking on the
checkbox next to each of the options.
The ProjExec administrator is granted the directory browsing access right by default,
and it is irrevocable.
Moreover, the directory browsing access may be granted to specific users by clicking
on the checkbox next to the option labeled Select Users. This gives you the option to
select those specific users from the directory by clicking on the
icon.
Once you have finished setting the directory access options, click on the
button to save your changes or on the
button to cancel your changes.
If a Site Manager is granted the directory browsing access right, he/she would be able
to add users from the directory to the sites managed by him/her. Otherwise, he/she
would not be able to add users to sites managed by him/her.
Similarly, if a Project Creator is granted the directory browsing access right, he/she
would be able to add users from the directory to the projects managed by him/her.
25
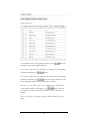
License Manager
Click on the License sub-menu item under Global Settings to open the License
Manager form. The form opens in edit mode automatically.
The license page displays the details encoded in the license key provided at the time of
installation or last license update. It also enables you to view the license agreement as
well as update the currently installed license.
26
There are four different license types: trial, standard, enterprise, and hosting. A trial
license is always included with the software package in case you have not purchased a
standard or enterprise license. The trial license allows the usage of the application for a
period of 90 days starting from the installation date, with the maximum number of
users being 20.
The product information, license scope, connectors‟ status, and options are displayed
based on the provided license key. If no license key is provided at all, this page will
display the details of the trial license. More explicitly, the following fields and properties
are displayed:
Product: Displays the product name which is ProjExec.
Displays the edition of the installed product. The possible values are Multiplatform, ProjExec Portal Edition, or ProjExec Standard Edition.
Edition:
Version: Displays the version number of the installed product.
Displays the type of the installed license. The possible values are Trial,
Standard, Enterprise, or Hosting. Note that only Hosting and Enterprise application
licenses support adding site licenses, such that it is mandatory when the license is
hosted and optional when it is enterprise.
License Type:
Displays the expiry date of the license installed. This field is visible only if
the license type is Trial.
Valid Until:
Displays a table containing the total allowed number of users, sites,
and projects versus the remaining number of users, sites, and projects respectively. You
can easily tell from this table how many users, sites, and projects are currently added
and how many more you will be able to add in the future. Note that unregistered users
or disabled users are not included in the users count for license scope validation.
Moreover, the disabled sites are not included in the sites count for license scope
validation. If you chose to install the sample data and sample users, then the number of
sample projects, sample users, and sample sites is not considered in the corresponding
count for license scope validation.
License Scope:
Displays the available connectors to third party applications along with
their status (enabled or disabled). IBM Lotus Notes Calendar is the third party
application for which connectors are available.
Connectors:
This section allows you to enable or disable some options at the level of the
license scope. The one and only available option in this release is the enabling or
disabling of the Site Administrator email notification, when the number of active
registered users exceeds a certain percentage of the total allowed number of users. The
percentage value is definable by the Site Administrator. Note that if this option is
disabled, it will not show unless the page is in edit mode.
Options:
27
You can view the license agreement by clicking on the link labeled View License
Agreement prior to the license scope section.
Click on the
button to launch a wizard, in a pop-up window, that
will guide you through the process of updating the ProjExec license.
The first step of the wizard displays the license agreement. At this point, you can't
proceed in the process unless you accept the terms of the license agreement.
The second step of the wizard consists of entering the new license key. If the key is
valid, the third step would display a summary of the license information encoded in the
provided key. Otherwise, an invalidity error message is displayed, in which case you
have the option of correcting the entered key or entering a new one. Note that in case
you are downgrading from a Hosting or Enterprise license to a Standard license, the
downgrade will not be allowed if any site has its own license. This is attributed to the
fact that only Hosting and Enterprise application licenses support adding site licenses.
The last step of the wizard informs you of the successful update of the license or
displays a description of the problem that prohibited the license from being updated
successfully. Note that upgrading from any type of license to a Hosting license requires
that you specify site licenses for all existing sites or you will no longer be able to access
these sites.
28
Chapter 5.
ProjExec Access
from Mobile devices
ProjExec supports popular mobile devices (BlackBerry, iPhone, Nokia with
Symbian, Android, Windows Mobile) End users can use the browser that is
included on their mobile device to access their own project tasks across projects
so that they can report progress, view documents and post comments. Users with
project manager, portfolio manager and super user privileges will additionally have
access to portfolio progress and project alerts.
Configure a user friendly URL for mobile devices
To roll out mobile access to end users, we recommend to configure a user friendly
ProjExec mobile URL prior to communicating it to end users:
1. Know the default ProjExec mobile URL:
If ProjExec is running on Quickr Domino the default ProjExec mobile
URL is : http://<hostname>/xsp/projexec/mobile/ . Note: the
ending slash is important.
If ProjExec is running on IBM Connections the default ProjExec
mobile URL is :
http://<hostname>/<application_name>/mobile
If ProjExec is running on Quickr J2EE or Websphere Portal the
default URL depends on the internal J2EE application name that
WebSphere Portal assigns to the ProjExec application when deployed.
You can easily retrieve this URL by performing the following steps:
o Login to the ProjExec Administration Place (or any other
ProjExec place) and download the Notes Sidebar Widget as an
XML file by clicking on the link called “ProjExec Lotus Notes
Sidebar Widget” that can be found at the bottom of any
ProjExec page.
o Open the saved XML file with a text editor and copy the URL
located in the tag <paletteItem> in the attribute “url” (Note:
copy the “url” not the “ImageUrl”). This URL is generally in
the form http://<hostname>/lotus/PA_xxxxx/mobile. This
URL is not very user friendly and we highly recommend to
create a more user friendly URL that redirects to the default
URL.
29
2. Use one of the following methods to create a simple redirection to the
default mobile URL. The goal is to create a short, easy to remember URL
for mobile users.
HTTP Redirect: Create a redirect rule in your HTTP server.
For example redirect http://<hostname>/pe to
http://<hostname>/xsp/projexec/mobile.
Reverse Proxy rule: Create a mapping rule and disable
checking for normalized URLs for that rule.
HTML page redirect: Create an html page called
myprojects.html for example and put it on the root folder of
your HTTP server. Use the Meta Refresh tag to automatically
redirect to the ProjExec mobile URL.
The following is an example of the html file used for
redirection:
<html>
<head>
<meta http-equiv="refresh"
content="0;url=http://<hostname>/<projexec_url>"
/>
<title>ProjExec Mobile</title>
</head>
<body></body>
</html>
Publish the URL
To inform the end-users of the ProjExec mobile URL, you can publish it in
the footer of all ProjExec pages by setting it in a server configuration file.
To do that, open the file projexec_config.properties located in the WEBINF directory under the deployed application, un-comment the property
projexec.mobileurl and append the URL.
Example:
# This option allows you to indicate the URL to access ProjExec from mobile
devices.
# If this property is set, the mobile URL will be displayed in the footer of
ProjExec pages.
projexec.mobileurl=http://myserver.triloggroup.com/light_projexec
30
You can also publish/share the mobile URL by mail via intranet or any other
internal communication.
Allow to specify login attribute for authentication
It is possible to indicate which LDAP attribute is used by ProjExec users when
they authenticate on their mobile devices or on the widget.
For example, if you are using Active Directory, you may want to allow users to
authenticate by using sAMAccountName LDAP attribute.
To do that, open the file projexec_config.properties located in the WEB-INF
directory under the deployed application, and add the property
authentication.filter to indicate an LDAP query.
For example:
authentication.filter=(|(sAMAccountName={0})(cn={0}))
This example allows login on sAMAccountName or cn.
Note that it is always possible to log in using cn, uid, email and dn.
31
Chapter 6.
Performance Tuning
This chapter describes some common configurations that may
improve the performances in certain cases.
Note
If you encounter performance problems, please first make sure that you
followed all configurations recommended in “Before you begin”
section of the Installation Guide (JVM Maximum heap size, HTTP
threads, compression, etc.)
ProjExec on Quickr Domino: use a separate 64-bit
Domino server
To build a scalable environment, you need to have two Servers:
server1: Domino 64-bit
server2: with Domino 32-bit and Quickr Domino
Refer to the corresponding appendix of ProjExec for Quickr Domino Installation
Guide.
ProjExec Resource File Cache on Lotus Domino
server
Domino Web Server does not manage cache for ProjExec HTTP files and images.
ProjExec manages its own cache for all common resource files: JavaScript files,
images, etc.
If there isn‟t any property specified in the configuration file, the cache time is set
to 10 minutes. This means that the resource files are cached on the client machine
and used within 10 minutes. After that time when this resource file is needed for a
page, a request is sent to the server to check if a new version should be retrieved.
To reduce the number of HTTP connections, you can increase the caching time in
a server configuration file.
32
The server configuration file is located in the deployed application, in the WEBINF directory: servlet_config.properties.
The property that needs to be specified is fb.domino.http.resource.cacheTime.
The cache duration is specified in seconds.
Example:
# Http Resource cache time for FlowBuilder Domino adapter (time
is in seconds)
fb.domino.http.resource.cacheTime=43200
The server must be restarted after a property change.
Customize the Wall refresh rate
If a user opens ProjExec home page and leave it opened without doing anything, he
can see automatically if there are new entries (messages or events) and click on “Show
new entries” to display them.
By default, every 15 minutes - even if the user is inactive - the number of new entries
(messages or events posted on the wall since the last refresh of the page) is updated on
the Home page.
You can change this refresh rate in a server configuration file located in the
deployed application, in the WEB-INF directory: projexec_config.properties
The property that needs to be specified is projexec.wallrefreshrate.
#this option sets the wall refresh rate in milliseconds
#default value is 900000 milliseconds
projexec.wallrefreshrate=500000
The server must be restarted after a property change.
Customize queries to LDAP Directory
ProjExec performs some queries to your LDAP Directory. You may need to optimize
performances for these queries in two cases: if your directory has a lot of attributes for
each entry, or if there are a lot of entries in your directory and you would like to restrict
to a specific group of users.
To do this optimization, you have to modify the server configuration file that is
located in the deployed application, in the WEB-INF directory:
global_config.properties
33
1. Restrict the returned Attribute List
By default, LDAP queries performed by ProjExec return all attributes that exist in your
directory for all returned entries.
To restrict this list in order to increase performances for LDAP queries, you must
specify the property fb.ldap.restrictAttributes. You just need to uncomment the row
that corresponds to your directory.
Example: if you are using Microsoft Active Directory
fb.ldap.restrictAttributes=cn;givenname;sn;mail;streetAddress;l;st;postalCode;co;teleph
oneNumber;mobile;facsimileTelephoneNumber
2. Restrict queries with an LDAP filter
To restrict to a specific group of users, you must indicate a LDAP filter (by specifying
the property fb.ldap.additionalFilter) that will be applied automatically to all LDAP
queries performed by ProjExec. Of course you must ensure that your filter is correct
by testing it with an LDAP browser before.
Example: if you are using Microsoft Active Directory and you want to restrict to users
with an email address.
fb.ldap.additionalFilter=(&(objectclass=person) (mail=*))
Example: if you are using Microsoft Active Directory and you want to restrict to users
with an email address and who are members of MyTestGroup.
fb.ldap.additionalFilter=(&(objectClass=person)(mail=*)
(memberOf=CN=MyTestGroup,CN=Users,DC=trilog,DC=com))
Do not share the Document Pool in case of Cluster
“Session affinity” mode
If you are running a Cluster server, we recommend using the mode “Session affinity”:
the server redirects a user always to the same node during an HTTP session. This
mode is the default for most application server clusters.
In this case, the document pool folder does not need to be a folder shared by all cluster
nodes.
You can modify the property property fb.xsp.documentpool.directory in the file
servlet_config.properties that is located in the deployed application, in the WEBINF directory:
You can indicate a local folder for each node.
34
Chapter 7.
Advanced
configuration & Troubleshooting
This chapter describes the most common configuration issues, and
how to solve them.
If you encounter an unknown problem, please contact ProjExec Support at
[email protected]
ProjExec Support may ask you to send the log files. If you are running on a Quickr
Domino server, the ProjExec log files are saved under [Domino Data]\ProjExec
Directory.
Example: C:\Program Files\IBM\Domino\Data\ProjExec\projexec.log
If you are running on another platform, the logs are written in the server log files (ex:
SystemErr.log, SystemOut.log).
Disable Email notifications due to Wall messages
If you do not want email notifications to be sent each time a message is posted on the
wall, you can set a property in a server configuration file.
The server configuration file is located in the deployed application, in the WEBINF directory: projexec_config.properties
The property that needs to be specified is projexec.wallnotification.disabled.
You must add the following line:
projexec.wallnotification.disabled=true
The server must be restarted after a property change.
Restrict Project Creation feature on IBM
Connections
By default all users are allowed to create new projects on IBM Connections. If you do
not want to let anyone create new projects, you must change a property on the server
and then, a user will be allowed to create a new project only if he has the global
function “Project Creator”.
The server configuration file is located in the deployed application, in the WEBINF directory: projexec_config.properties
35
The property that needs to be specified is projexec. restrictprojectcreation.
You must uncomment the line and set the property to true:
projexec.restrictprojectcreation=true
The server must be restarted after a property change.
PDF Reporting configuration for non-Latin
languages
Some .ttf font files are needed to create PDF reports for supported non-Latin
languages such as Chinese. You might need to tell ProjExec where to find these font
files. To do that, you have to edit the “reporting_config.properties” file found under
ProjExec/…./WEB-INF and add the following: pdf.fonts.folder=<path>.
Example: pdf.fonts.folder=C:/PEFonts
Under the font‟s folder, you must include the .ttf font files to be used. You have also to
create the following file under the font‟s folder: “pd4fonts.properties”,
Once created, edit the file and specify the font file used by adding the following:
Arial=<font file name>.
Example of the content for the file “pd4fonts.properties”:
Arial=unifont-5.1.20080907.ttf
#Arial\ Bold=
#Arial\ Italic=
#Arial\ Bold\ Italic=
Note that the reporting feature only supports Arial font.
Directory Tool
This tool allows you to update ProjExec data when the directory is modified. It is
useful for example if you want to migrate from one directory to another, or if some
user details have changed (name change, email change…).
Important notice : Before using this tool, you must back up your database. Don‟t
hesitate to contact ProjExec support for help to use this tool.
This tool is a command-line tool. Go to the following path:
[ProjExec Install Path]\projexec\projexec\tools
36
And run this command:
ExecuteTool -java com.triloggroup.pe.tools.DirectoryTool
Available options are:
-console: log to console
-logfile: log to file. File path must be specified next
-update: perform updates. If not specified, the database is unchanged, modifications
to apply are logged.
-migrateDns: This option will use emails as reference. Use this option after a directory
migration (DNs changed).
-migrateEmails: This option will use dns as reference. Use this option to update CNs
and emails for the users.
-logxml: Log all unknown users to an XML file. File path must be specified next.
-loadxml: Launch commands that are contained in the specified XML file. File path
must be specified next. You should first use –logxml to get an XML file with the
correct format. This can be used to replace specific DNs.
Max File upload configuration for Lotus Domino
server
Administrators can set the allowed attachment file size to a max limit or remove any
limit; three settings need to be adjusted:
1. Maximum Attachment Size.
2. Maximum size of request content.
3. Maximum POST data.
Below is a description of how to adjust these settings.
1-Maximum Attachment Size
The Maximum Attachment Size is set in the Administrative place on the Lotus Quickr
server. To access this setting, do the following:
a. Login as Administrator from the admin.nsf
(http://servername/Lotusquickr/Lotusquickr/admin.nsf.).
b. Select: Server Settings --> Other Options --> Edit Options (button). You
should see the following screen:
37
c. Locate the Maximum Attachment Size field. The default value is 50,000
kilobytes (about 50 megabytes).
d. Increase the size of the Maximum Attachment Size, up to a maximum of 1
GB (1,048,576 KB). To allow an unlimited size, clear the value in this field
(make the field blank).
2. Maximum size of request content
The "Maximum size of request content" is set in the Server document for the Lotus
Quickr server. To access this setting, do the following:
a. From the Domino Administrato, Open the Server document.
b. Go to the Internet Protocols tab then select the HTTP sub-tab.
c. Page down to the bottom of the document to locate the HTTP Protocol
Limits section on the right.
d. Locate the "Maximum size of request content" field. The default value is
10,000 kilobytes (about 10 megabytes).
38
e. Increase the size of the "Maximum size of request content", up to a
maximum of 1 GB (1,048,576 KB). Set it to zero (0) to allow unlimited size
content.
3. Maximum POST data
The "Maximum POST data" is set in the Server document for the Lotus Quickr server.
To access this setting, do the following:
a. Open the Server document.
b. Go to the Internet Protocols tab then select the Domino Web Engine subtab.
c. Locate the "Maximum POST Data" field. The default value is10,000
kilobytes (about 10 megabytes).
d. Increase the size of the "Maximum POST data", up to a maximum of 1
GB. For use with Lotus Quickr, you must set a specific value. You should
not use zero to indicate unlimited.
After making these changes, restart the HTTP task on the server for the new settings
to take effect.
If you see out of memory errors with large file uploads, you might need to enable some
notes.ini file parameters. Refer to the tech note “Uploading large files when using
39
Lotus Quickr” (#1304758) for more details. (tp://www01.ibm.com/support/docview.wss?uid=swg21304758).
Enable Demo Mode to work with sample projects
If you need to work with sample projects for training or demonstration purpose, you
may need to activate the Demo Mode. By doing that, a button “Change All Dates” will
be available on the Site Settings / Projects page.
Clicking on this button will modify all dates for the selected project: Not only the
whole schedule will be moved according to the new start date, but all project data will
also be modified accordingly (issue, change requests, feedbacks, etc.)
This feature is obviously reserved for sample projects.
If you may need this feature, you have to enable the Demo Mode in a server
configuration file.
The server configuration file is located in the deployed application, in the WEBINF directory: projexec_config.properties
The property that needs to be specified is projexec.demomode.
Example:
# This option allows you to see the Change Dates button in
order to move the dates to fix demo data
# The default value is false
projexec.demomode=true
The server must be restarted after a property change.
Indicate your SSO configuration to ProjExec
In order to make the SSO function properly in ProjExec, ProjExec needs to know the
exact SSO domain as it is defined in the server SSO configuration. Otherwise, users
may encounter problems to log in to ProjExec after a session timeout.
By default, ProjExec considers that the SSO domain is the fully qualified domain
name.
If it is not the case, you must change the domain name in a server configuration
file located in the deployed application, in the WEB-INF directory:
servlet_config.properties.
# SSO Token domain name
# This property allows to indicate the value of the SSO domain
as it is defined in the server SSO configuration.
# Available values are one of the 2 predefined keywords
"FullyQualifiedHostName" or "FullyQualifiedDomainName" or
directly the real domain name (ex: mycompany.com).
40
# If server name is server.subdomain.domain.com,
FullyQualifiedHostName means "server.subdomain.domain.com" while
FullyQualifiedDomainName means "subdomain.domain.com".
# The default value is: FullyQualifiedDomainName
sso.token.domain=FullyQualifiedDomainName
The server must be restarted after a property change.
Issue while accessing Quickr documents in case
of accents in file name
If you are using Quickr 8.5, and if you are using documents with accents in the file
name (ex: “Spécifications.doc”), you may have the following issue: the document can
be opened normally from the Document Library, but if it has been added as a
bookmark in ProjExec, clicking on the bookmark does not work on ProjExec pages:
we will get an error and the document will not open.
This issue is due to a wrong URL returned by Quickr. This issue is known and has
been fixed in Quickr 8.5.1.
Database connection error while using DB2 and
Quickr J2EE on Linux
You have installed and used ProjExec successfully but after an application server
restart, ProjExec pages are no longer accessible and the following exception is dumped
in SystemOut.log file
java.lang.UnsupportedClassVersionError: (com/ibm/db2/jcc/DB2Driver) bad major
version at offset=6
If you are using db2jcc libraries and if you selected all jar files starting with „db2jcc‟
during ProjExec installation process (Database configuration Step), you should try the
following:
go to ProjExec deployed application in
Quickr/wp_profile/installedApps/xxxnode/PA_ProjExec.ear/projexec.war/WE
B-INF/lib
remove db2jcc4.jar to force the application to use only the DB2 driver included in
db2jcc.jar
restart the application
41
Error while displaying Resource Allocation and
Light Gantt charts
If you are not able to see the “Resource Allocation” chart or the “Light Gantt”
chart, please modify the server configuration to allow usage of AWT headless
(graphical library).
On WebSphere Portal server: Log in to the Websphere administrative console
and from the left menu select Servers -> Application Servers -> Websphere
Portal -> Java and Process Management -> Process Definition -> Java Virtual
Machine for Websphere Portal 6.+ platforms.
In the Generic JVM arguments text field add the following value:
-Djava.awt.headless=true
Save the configuration and restart Portal.
On Domino server: Configure the Domino Java Virtual Machine in order to
allow AWT headless usage.
Look for JavaUserOptionsFile property in your notes.ini file.
If this property is defined then you will have to edit the file that is specified by
this property.
Otherwise, create a new text property file on the server and indicate this file as
the JavaUserOptionsFile by setting JavaUserOptionsFile=path in your
notes.ini.
Then you must set the java.awt.headless property to true in the
JavaUserOptionsFile.
Example:
In notes.ini
JavaUserOptionsFile=/home/trilog/jvmOption.properties
In /home/trilog/jvmOption.properties add the following property to the file.
java.awt.headless=true
Save the files and restart the domino server.
Sametime and Presence awareness Issues
For IBM Lotus Sametime Instant Messaging® integration to function properly,
Sametime® should be configured to use the default port (i.e. port 80).
Tunneling should be configured on port 80.
For Sametime Instant Messaging® integration, Sametime® requires the page to
be refreshed for the presence awareness to get activated.
Presence Awareness does not function on Microsoft Internet Explorer® 7
when using Sametime® 7.5 and Websphere Portal® 6.0.0. IBM provides a patch
that you should install.
42
To use Sametime Instant Messaging® from Firefox®, you have to modify some
particular options in Sametime® configuration. Please refer to IBM Sametime®
documentation.
Miscellaneous
On the Server editions of the Windows® operating system, you may encounter
some problems when viewing ProjExec using Internet Explorer®. This is due
to the fact that the default security settings on the Windows Server machines
don't allow client-side JavaScript execution. The following error message will
be displayed:
“An error has occurred while processing the servlet named: SimpleFileServlet”
To solve this issue you should add the ProjExec application URL to the list of
trusted sites in the Security tab of the Internet Options menu.
With DB2 database, the following error might be reported in the system log:
Database error: SQL State '54028';
Native Error Code '-429';
Error Text '[IBM][CLI Driver][DB2/LINUX] SQL0429N The
maximum number of concurrent LOB locators has been exceeded.
SQLSTATE=54028 '.
This error is caused by a limit to the number of LOB handles in DB2. To
overcome this problem, you require a patch in DB2; you need to edit file
db2cli.ini located in the root directory of DB2 installation.
Add the following lines to the file:
[{Database name}]
PATCH2=50
LobCacheSize=1048576
The PATCH line instructs DB2 to free up LOB locators after it has used
them, and the LobCacheSize parameter adjusts the total memory that is
available to LOB locators; in this case 1 GB. You might then need to
restart the DB2 instance.
The "load qptool upgrade -f -a" command which IBM recommends
running after applying any Quickr Domino FP installation, may corrupt
ProjExec Places and Templates by adding Quickr's standard Home Page in the
TOC.
To fix this issue:
1- Download the zip file pe_tools.zip from the following link:
http://www.triloggroup.com/portal/projexec/download/pe_tools.zip
43
2- Unzip the downloaded file under <directory where Domino is
installed>\Domino\Data\ProjExec.
3- Sign the agent by a Quickr Admin User who has full rights to all Quickr
templates and places.
4- Run the agent. You can run it in two ways:
a- From the server console, issue the following command:
tell amgr run "ProjExec\pe_tools.nsf" 'pe_fixup'
b- From the Notes client, open the ProjExec Tools database then from
the Actions Menu run the Agent called Fixup ProjExec Places
(slower than previous).
This will automatically repair all ProjExec Templates and Places by restoring
the original ProjExec TOC.
44