1
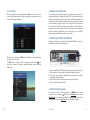
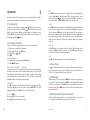
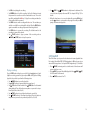
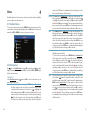
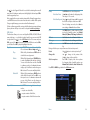
Dekoder STB • HD T90
User Guide
For Digital Terrestrial Receiver
Contents
Chapter1 At a Glance__________________________ 4
Chapter4 Menu______________________________ 20
1.1 Overview___________________________________________________ 4
1.2 Kit Contents________________________________________________ 4
1.3 Front Panel_________________________________________________ 5
1.4 Rear Panel__________________________________________________ 5
1.5 Remote Controller___________________________________________ 6
4.1 The Main Menu_____________________________________________ 20
4.2 Edit Channel_______________________________________________ 20
4.3 Installation________________________________________________ 22
4.4 System Setup______________________________________________ 23
4.5 Tools_____________________________________________________ 26
4.6 Game_____________________________________________________ 30
4.7 REC______________________________________________________ 30
Chapter2 Installation___________________________ 8
2.1 Connection_________________________________________________ 8
2.2 Starting up for the first time___________________________________ 9
2.3 First Scan__________________________________________________ 10
2.4 Automatic Power Down______________________________________ 11
2.5 Working with External USB Drive______________________________ 11
2.6 Antenna Power Supply_______________________________________ 11
Chapter5 Troubleshooting_____________________ 32
Chapter6 Safety Precautions___________________ 34
Chapter7 Environment Protection_______________ 36
Chapter8 Technical Specification________________ 37
Chapter3 Operation__________________________ 12
3.1 Quick Guide________________________________________________ 12
3.2 Changing Channels_________________________________________ 12
3.3 Sleep Timer________________________________________________ 13
3.4 Info banner________________________________________________ 13
3.5 EPG (Electronic Programme Guide)_____________________________ 13
3.6 TIMER____________________________________________________ 15
3.7 Radio channels_____________________________________________ 15
3.8 FIND______________________________________________________ 16
3.9 Subtitles__________________________________________________ 16
3.10 AUDIO___________________________________________________ 16
3.11 Teletext__________________________________________________ 16
3.12 PVR (Personal Video Recorder)________________________________ 17
3.13 Time Shift________________________________________________ 19
2
Contents
3
At a Glance
1
Read this chapter to learn about Opticum HD T90 and Dekoder STB features,
remote control and more.
1.3 Front Panel
HD T90
power/signal
LED
change channel /
move cursor
1.1 Overview
1. Support of SD/HD (MPEG2/MPEG4, H.264), DVB-T,
2. PVR Ready - possibility to record on external USB drive,
3. Time Shift (video pausing, rewinding),
4. HDMI video output,
5. Low power consumption in Standby mode,
6. Automatic Stand-by mode,
7. Electronic Power Guide - EPG,
8. Multilingual menu, including English.
LED display
power
Dekoder STB
power/signal
LED
change channel /
move cursor
1.2 Kit Contents
1. Receiver,
2. Remote Controller,
3. Batteries — 2 x AAA (optional),
4. Quick Start Manual.
power
ENGLISH ENGLISH ENGLISH ENGLISH ENGLISH ENGLISH ENGLISH ENGLISH ENGLISH ENGLISH ENGLISH ENGLISH ENGLISH ENGLISH ENGLISH ENGLISH ENGLISH ENGLISH ENGLISH ENGLISH ENGLISH ENGLISH ENGLISH ENGLISH ENGLISH ENGLISH ENGLISH ENGLISH ENGLISH ENGLISH ENGLISH ENGLISH ENGLISH ENGLISH ENGLISH ENGLISH ENGLISH ENGLISH
1.4 Rear Panel
Quick Start
aerial in
Digital Terrestial Receiver
• Slot for Smart Card
• Support of SD/HD (MPEG2 / MPEG4) DVB-C systems
• High definition video output - HDMI
• Standard resolution video output - SCART
• High speed USB 2.0 port
• PVR Ready
• Time Shift (pause, rewind)
• Automatic Stand-by
• Low power consumption in Stand-by mode,
below 1W
• Multilingual menu, including English
• Electronic Program Guide - EPG
• 4 digit LED display on front panel
• Multimedia Player Full HD 1080p
ModelID: X2
digital
S/PDIF
USB
TV SCART
KP 07/2012
ENGLISH ENGLISH ENGLISH ENGLISH ENGLISH ENGLISH ENGLISH ENGLISH ENGLISH ENGLISH ENGLISH ENGLISH ENGLISH ENGLISH ENGLISH ENGLISH ENGLISH ENGLISH ENGLISH ENGLISH ENGLISH ENGLISH ENGLISH ENGLISH ENGLISH ENGLISH ENGLISH ENGLISH ENGLISH ENGLISH ENGLISH ENGLISH ENGLISH ENGLISH ENGLISH ENGLISH ENGLISH ENGLISH
aerial out
4
At a Glance
HDMI
analog out
audio R+L
power cord
5
1.5 Remote Controller
ButtonFunction
POWER - Switch receiver on from standby mode.
MODE
Select video output resolution.
MUTE -
numeric buttons
Enable or disable the audio.
Select channel or enter programming parameters.
Switch between Sleep Timer Off 10/30/60/90/120 minutes.
FAVSet current channel as favorite. Switch to the favorite channel.
LAST - Switch to the previous channel.
MENUDisplay the Main Menu on the screen or return to the previous menu
or status.
INFO
Display information banner of current service.
EPG
Display Electronic Program Guide on screen.
EXITCancel the user selection and return to the viewing mode from the
menu.
Adjust volume level or move cursor left or right in the menu.
Change channel or move cursor up or down in the menu.
OK
Display channel list on screen. Select an item in menu.
TV/ Switch receiver between TV and radio mode.
FIND
Enables to find channels by name.
P-/P+
Move cursor to next or previous page.
SUBT
Set up subtitles.
LIST
Optional function.
STATUS
Display receiver status window.
AUDIO
Set up audio channels.
TXT
Display teletext information for current channel (if available).
PVR
Display record list.
SLOW, SKIP-, SKIP+, Video functions (time shift, playing, recording).
REW, FF, PLAY,
PAUSE, STOP, REC
colored buttons
Different functions per menu.
6
At a Glance
7
2
Installation
Read this chapter to learn how to connect the receiver to a TV set, configure
the receiver, use USB drive and more.
2.1 Connection
1
1
•1•
•2•
•3•
•4•
8
2
3
Connect an antenna to receiver’s AERIAL IN connector.
Using HDMI cable connect the receiver with flat panel TV or
Using SCART cable connect it with classic TV.
At the end connect the main cord to the main socket.
4
2.2 Starting up for the first time
Turn on the TV Set. After a while on TV Set you should see receiver’s OSD.
If the TV Set is not displaying receiver’s OSD, probably a signal source is set
wrong. Check the TV Set documentation for information how to change the
signal source.
Generally once the receiver is switched on, the Welcome Screen emerges. To
enter Installation Guide menu use OK button on the remote control or wait
few seconds.
1/5 Select language Using / buttons choose menu language. Confirm your choice using blue
button on remote control.
2/5 Choose tv and aspectUsing / buttons choose TV and aspect
mode. Choose 4:3 for standard TV or 16:9
for flat panel TV (LCD,LED). You can also
choose option that your TV will manage
aspect recognition (SCART connection
is required). Confirm your choice using
blue button on remote control.
3/5 Select menu style and colorUsing / buttons choose menu color.
Confirm your choice using blue button
on remote control.
4/5 Select summer timeUsing / buttons choose if you want
to select summer time. It is important for
proper working of EPG (Electronic Program Guide). Confirm your choice using
blue button on remote control.
5/5 Select countryUsing / buttons choose a country
where you will receive terrestrial TV
signal. Confirm your choice using blue
button on remote control.
If you want to return to previous level in this Guide, use red button.
If after switching on the receiver, you cannot see the Installation Guide
menu, use MENU button to enter the main menu and using / buttons
choose TOOLS menu and select Load Factory Settings and confirm it using
OK button (default password is 0000).
Installation
9
2.3 First Scan
2.4 Automatic Power Down
After the configuration, use the blue button or OK on remote control to start
scanning TV and radio channels. It will not happen if your antenna is not connected and properly configured.
In accordance with actual European Union requirements, your receiver is
equipped with function “Automatic Power Off”. It works by switching the
receiver into standby mode after a period of 3 hours after the last active use.
In practice this means that if during this time the receiver will not be given
any command by using the remote control or keypad on the front panel,
the receiver turns off. Turning off the receiver will be preceded (2 minutes
previous) by a relevant message on the TV screen. Please also note that this
feature is enabled by default, but at your own request, you can disable it
using the appropriate functions in the receiver menu.
2.5 Working with External USB Drive
During the selection and operation with USB drive (HDD, flash drive), You
should pay attention to the following issues:
After the end of scanning use OK button and then the receiver will display
the first scanned channel.
Use OK button on remote control to display channel list. Using / buttons choose a channel You want to watch and confirm your choice using
OK button.
plug USB drive in here
1. Drive is compatible with USB 2.0 and has appropriate write and read speed,
2. Drive contains one single partition, formatted in supported format,
3. If necessary, drive should be supplied from an external power supply
(especially for USB hard drives),
4. Do not disconnect the drive during a write/read data operation,
5. Do not use full or fragmented drive.
2.6 Antenna Power Supply
If your antenna needs a +5V power supply - use MENU button to enter
the main menu and using / buttons enter Installation menu, select
Channel Scan and set Tuner Power ON and exit using MENU button. Next,
using cursor buttons select Auto Scan to scan all available channels.
10
Installation
11
Operation
3
Read this chapter to learn how to use the receiver, about it’s features and the
menu and more to get the best performance from your receiver.
Press EPG button in viewing mode to display Electronic Program Guide on
screen. Use / in the detailed view of EPG to change channel or in the
shortened view use / to select a channel and press OK to switch to the
selected channel. Press EPG or EXIT to get back to viewing mode.
3.1 Quick Guide
Timer
To turn your receiver ON or to Standby, use the button on the remote control. Choose the desired channel with the / buttons. Alternatively, you can
digit the channel number with the numeric buttons on the remote control.
Or press OK in viewing mode to display the TV Channel List. The volume can
be adjusted with the / buttons.
3.2 Changing Channels
Your new receiver is equipped with several ways to change channels.
1. Via direct access using the 0—9 buttons.
2. Via the channel list through OK button.
3. Via the P+, P- or / buttons.
4. Via EPG.
5. Via Timer function.
6. Via the favorite channel through the FAV button.
7. Via the - LAST button.
Direct access using the 0—9 buttons
To gain direct access to a certain channel, simply input its number with the
0—9 keys on the remote control. Channel numbers can be up to four digits
long. Entering a number with less than four digits is possible. Just wait a few
seconds and your receiver will switch to the selected channel or press OK
immediately after selecting the channel number.
Channel list
Press OK in viewing mode to display the Channel List. Use / in the Channel List to highlight your channel of choice and press OK once to select the
highlighted channel. Press OK again to leave the Channel List.
P+, P- or / keys.
P+ and switches to the next channel.
P- and switches to the previous channel.
12
EPG
Press EPG button in viewing mode to display Electronic Program Guide on
screen. Use cursor buttons to select a channel and highlight your program
of choice and press RED button to enter Timer function. Set Timer Service to
Channel and use to navigate down to highlight SAVE and press OK. When
the desired program will start being aired, the receiver automatically will
switch to it. More functions of Timer will be describe further in the manual
(page 15).
Favorite
Use FAV button to set current channel as favorite. While watching other
channel press FAV to switch to the favorite one. Press FAV again and confirm
your choice to delete the channel from favorite.
Last
Use
- LAST button to switch to previously watched channel.
3.3 Sleep Timer
Press to set time after which the receiver turns off automatically. Press the
button as many times as you need to set the timer. You can set the time to 10,
30, 60, 90 or 120 minutes left for receiver to turn off.
3.4 Info banner
While watching TV you can press the INFO button any time to get information about the current channel. Press INFO twice for extended EPG details
about the current channel. Use BLUE button to switch between current and
the next program. Press INFO button three times for technical details about
the current channel.
3.5 EPG (Electronic Programme Guide)
The Electronic Programme Guide is a function that allows you to i.a. view
event schedules and information and to use Timer function.
Operation
13
Detailed view
In the detailed view of EPG you can see a schedule of one channel on the left
side and detailed info about highlighted program on the right side. Use /
buttons to change the channel. To highlight other program and see informations about it use / . If the full description of a program is not displayed
use OK button to see more. To switch the view of EPG to shortened one use
BLUE button. Use RED button to enter TIMER functions.
3.6 TIMER
Timer is a function you can get access to through the EPG view by pressing
the RED button. Use cursor buttons to navigate through timer options.
Timer ModeChoose between Off (Timer inactive), Once or Daily
(Timer will be executed every day, same time).
Timer ServiceChoose between Channel (Timer will wake up the
receiver) or Record (Timer will start to record the
scheduled event).
Wakeup ChannelSelect a channel the receiver will wake up with.
Wakeup DateUse the 0~9 buttons to input the date for the timed
event.
Wakeup Time
Use the 0—9 buttons to input the desired start time.
DurationUse the 0—9 buttons to input the timer duration.
Use to navigate down to highlight SAVE and press OK to activate the function. To quit the timer without saving your settings, move the highlight
to CANCEL.
Shortened view
In the shortened view of EPG you can see a list of channels on the left side
and shortened schedule of programs on the right side. Use / buttons to
select the channel. Use OK button to switch to the highlighted channel. To
highlight a program use / buttons. Use INFO button to see detailed informations about the program. To scroll the info use / buttons. Use GREEN
button to change info language (option available for multilingual television).
3.7 Radio channels
The receiver is adapted to receive and play radio channels that are available
through digital terrestrial signal. Use TV/ button on the remote control to
switch between TV and radio mode. Radio channels have their own channel
list and EPG and you can use most of the functions that are available for TV
channels like TIMER or FIND.
14
Operation
15
3.8 FIND
FIND is an function that lets you find a channel by its name. Use the
FIND button to display the find widget on the screen. Use cursor buttons
to select desired characters and use the OK button to input them in the edit
box. As you input the letters at the same time on the left side of the screen
there is displayed a list of channels that matches your choice.
buttons of the remote control allow you to jump to selected pages directly,
as indicated on the bottom of the teletext screen. Use the / buttons to
select one page up or down. Press EXIT or TXT to get back to viewing mode.
3.12 PVR (Personal Video Recorder)
Recording
Your receiver allows you to make a recording of any program. Press
the (REC) button to start instant recording or use TIMER function to plan
your recordings (more info on p. 15). To start recording first you need to connect USB storage device to the receiver. The recording time depends on the
amount of free space on the USB drive. During recording, it is possible to
perform the following actions:
Use the (PAUSE) button to pause the program. The receiver will not stop
recording.
Use the (PLAY) button to play recorded program after pause.
Use the (STOP) button to stop recording.
Change channels — use the / buttons or Channel List. This action
is only available for channels of the same frequency as recorded channel. The channel which program the receiver is recording is marked in
Channel List with REC sign.
••
••
••
••
3.9 Subtitles
Some channels support a choice of subtitle languages. Press SUBT button
in viewing mode to display a list of available subtitle languages. Select
your subtitle of choice with / buttons and press OK to confirm. Press
the EXIT button to leave without making changes.
3.10 AUDIO
Some channels support a choice of audio formats and/or languages. To
select another audio stream, press the AUDIO button in viewing mode. A list
with available audio streams will now be displayed. Use the / buttons to
select the desired stream and confirm with OK. The audio channel as stereo,
mono, left and right can be selected with the / buttons.
3.11 Teletext
Teletext is a service that offers a range of text-based information, typically
including national, international and sporting news, weather and TV schedules. To access Teletext, press the TXT button in viewing mode and use the
0—9 buttons to input the number of the page you wish to see. The colored
16
Recordings management
Press the PVR button to display a records list. Use the / buttons to highlight your recording of choice. You can perform following actions with the
selected recording:
Operation
17
••
••
••
••
••
Use OK to start playing the recording.
Use GREEN button to lock the recording. Use the 0—9 buttons to input
the password to secure the record from undesirable access. The recording will be marked with the icon. To play the recording next time, the
receiver will ask for the password.
Use BLUE button to mark recording with the x icon. The next time you
exit the records list the recording will be deleted. Press the BLUE button
again to unmark the recording and prevent it from being deleted.
Use RED button to rename the recording. The default name for the
recording is a name of the channel.
Use
(PLAY) button to play a preview of the recording and use
(PAUSE)or (STOP) button to stop the preview.
••
••
Use
(SKIP–)or
(SKIP+)buttons to skip forward or backward. You
can set the time of jump in the menu REC. See chapter XXX (p. 111) for
details.
When the time banner is on screen (activated by pressing OK button),
use the / buttons to set a marker on the progress bar and press OK to
jump to that moment in playback.
3.13 Time Shift
Playing recordings
Press the PVR button to display a records list. Use the / buttons to highlight the recording you wish to play and press OK to start playback. During
playback, it is possible to perform the following actions:
Use (PAUSE)button to pause the playback.
Use (PLAY) button to resume playback at normal speed.
Use
(FF)button for fast forward or the
(REW)button for fast rewind
during playback. Press the button as many times as you need to set preferred speed (x2, x4, x8, x16, x24).
Use (STOP) button to stop playback and return to records list.
Use
(SLOW) button to slow down the playback. Press the button as
many times as you need to set preferred speed (x1/2, x1/4, x1/8).
Time Shift allows you to pause live broadcasts and resume playback later.
First activate Timeshift in REC, DVR Configuration to ON and connect your
external USB storage device. See chapter DVR Configuration (p. 31) for details.
Press (PAUSE) in viewing mode to start this mode. A time banner will
appear shortly on screen.
Press (PLAY) to resume Timeshifted playback. Press
(REW) /
(FF)
for Fast rewind / Fast forwards.
Press (STOP) to return to live TV.
••
••
••
••
••
••
••
••
18
Operation
19
Menu
4
Read this chapter to learn how to use the receiver’s menu, how to adjust the
receiver to fit your needs and more.
4.1 The Main Menu
To access the main menu, press the MENU button in viewing mode. Use
cursor buttons to navigate through the menu. Use OK button to select a submenu. Press EXIT or MENU to return to the previous screen.
4.2 Edit Channel
Use / to select Edit Channel and press OK or to enter. Use / to highlight the desired submenu and press OK to select. Press EXIT or MENU to get
back to the main menu.
Channel List
Select Channel List with / and press OK to enter. In this menu you can
manage the Channel List.
MoveTo enable the Move function, press WHITE while in Channel List.
The Move symbol on the top of the screen will move up to indicate that the Move function is selected. Use / to highlight the
desired channel and press OK to select it and mark it with . You can
now move the selected channel up or down the channel list using
/ . Once the channel is on the desired position, press OK again.
The channel is now fixed on its new position. Once all changes are
20
made, press EXIT twice. A confirmation banner will pop up. Select
Yes to save the changes or No to discard.
DeletePress RED while in Channel List to enable the Delete function. The
Delete sign will move up to indicate that Delete is selected. Use /
to highlight the desired channel and press OK to mark it for deletion
with x. Press OK again to unmark it. Once you have marked all channels you wish to delete, press EXIT twice. A confirmation banner will
pop up. Select Yes to delete the marked channels or No to cancel.
EditPress GREEN while in Channel List to enable the Edit function. The
Edit sign will move up to indicate that Edit is selected. Use / to
highlight the desired channel and press OK to select it. A text field
will now pop up at the right of the screen. Use cursor buttons to
select the desired characters and enter them with OK. Once you
have finished editing, press BLUE to enter the changes. Once all
changes are made, press EXIT twice. A confirmation banner will pop
up. Select Yes to save the changes or No to discard.
LockLocked channels can only be watched after entering the password
(Default password is 0000).
To lock or unlock a channel, press YELLOW while in Channel List.
The Lock sign on the top of the screen will move up to indicate that
the Lock function is selected. Use / to select the desired channel
and press OK to lock or unlock it. You are asked to input the password. Locked channel will be marked with the symbol. Locking/
unlocking multiple channels in one session is possible. Once all
changes are made, press EXIT twice. A confirmation banner will pop
up. Select Yes to save the changes or No to discard.
Skip
Channels marked with Skip will be skipped when changing channels with the / buttons. Despite that, these channels are still
available from the channel list. To mark channels for skipping, press
BLUE while in Channel List. The Skip symbol on the top of the
screen will move up to indicate that the Skip function is selected.
Use / to select the desired channel and press OK to mark or
unmark it for skipping. Channels set for skipping will be marked
with the symbol. Once all changes are made, press EXIT twice.
A confirmation banner will pop up. Select Yes to save the changes
or No to discard.
Menu
21
Delete All
Use this function to delete all stored channels. Select Delete All with / and
press OK. A confirmation banner will pop up. Select Yes to save the changes
or No to discard.
The Delete All function will permanently delete all current channels from
your receiver, and you are not able to leave the menu until you search for
channels again.
4.3 Installation
Use / to select Installation and press OK or to enter. Use / to highlight the desired submenu and press OK to select. Press EXIT or MENU to get
back to the main menu.
Auto Scan
Select Auto Scan with / and press OK to enter. A confirmation banner
will pop up. Select Yes to start scan or No to discard. The Auto Scan may
take several minutes. The receiver will store all newly found channels in the
channel list.
Channel Scan
Select Channel Scan with / and press OK to enter.
Scan Mode — Use / to toggle between available scan modes: By Channel
and By Frequency.
If By Channel is selected, use the cursor buttons to set Scan Band and
Ch No. (Channel Number).
If By Frequency is selected, use the cursor buttons to set Frequency and
Bandwidth.
Tuner Power (+5V) — Set to On if you use an active antenna. When set to
On, 5 V will be present on the Aerial In connector of the receiver. Select Off
for passive antenna.
Highlight Search and press OK to start scanning.
Scan Settings
Select Scan Settings with / and press OK to enter.
LCNIf LCN (Logical Channel Numbering) is activated and
an LCN signal is provided by the operator, channels will be stored in an operator defined order.
22
Set LCN to On to activate operator defined channel
numbering or Off to store channels in found order.
Allow mux repeatingUse / to toggle between On or Off. Set Allow Mux
(Multiplex) repeating to ON if you want the receiver
to scan for channels from the same multiplex on different frequencies. This allows the receiver to search
for channels with the best signal.
Tuner Power (+5V)Use / to toggle between On or Off. Set to On if
you use an active antenna. When set to On, 5 V will
be present on the Aerial In connector of the receiver.
Select Off for passive antenna.
FTA onlyUse / to toggle between FTA Only On or Off.
When FTA Only is set to On, scrambled channels
won’t be stored in the Channel List.
Sort priorityUse
/
to toggle between HD Channels,
Higher MUX, Lower MUX or SD Channels. Your
choice indicates which method will be used by the
receiver when creating Channel List.
Once all changes are made, press EXIT. A confirmation banner will pop up.
To save changes you have to scan channels. Select Yes to scan channels or
No to discard.
Transmitter list
Use this function to test the signal and to adjust your antenna. Select
Transmitter list with / and press OK to enter. The receiver will display the
list of territorial units of your country. Use / to select your location and
press OK to enter. On the next screen there is displayed a list of transmitters
in your territorial unit. Use / to select a transmitter of your choice and
press OK to enter. Select Multiplex of your choice with / and press OK to
enter. On the next screen you can see the signal intensity and signal quality
bars and you can adjust your antenna to the best results. Press OK to start
scanning channels.
4.4 System Setup
Use / to select System Setup and press OK or to enter. Use / to highlight the desired submenu and press OK to select. Press EXIT or MENU to get
back to the main menu.
Menu
23
Language
This menu allows you to set up your language preferences. Select Language
with / and press OK to enter.
LanguageUse / to select the desired language for the On
Screen Display.
Subtitle LanguageUse / to select the preferred subtitle language.
TeletextUse / to select the preferred teletext language
(when available.)
EPG languageUse / to select the desired language for the EPG
TV System
Use this menu to match your receiver to your TV set. The following settings
are available:
Video ResolutionUse / to toggle between 480i up to 1080p. Use
settings that matches your TV’s specifications. After
a selection is made, you will be asked to confirm.
Aspect ModeUse this option to select the aspect ratio of your
TV and the preferred conversion method. Options
are: Auto (automatic detection of aspect ratio),
4:3PS (panscan - displays 16:9 widescreen broadcasts full screen on your 4:3 TV), 4:3LB (letterbox
- black bars on top and under the picture on a 4:3
TV) and 16:9 (use this setting for 16:9 TV sets).
Video OutputUse this option to select the connection to your TV
set. Select HDMI or RGB. On TV SCART only the RGB
signal is available.
Digital Audio OutputToggles between PCM and PCM + Dolby output.
When PCM is selected, all audio will be converted
to stereo audio. PCM + Dolby enables multi-channel
audio on the digital output to be used with home
cinema sets.
Local Time Setting
In this menu you can set up your region and time zone. Select
Local Time Setting with / and press OK to enter.
RegionUse / to select the region you live in.
24
GMT UsageSet to On for broadcaster defined time or to Off to
input time and date manually.
GMT OffsetAllows you to adjust the time zone you live in. This
option is only available when GMT Usage is set to On.
The GMT Offset range is “-11:30 — +12:00”, increasing by half hours progressively. The cities matching
the set GMT Offset are displayed at the bottom of
the screen.
Summer TimeSelect Off or On to add one hour extra for summer
time during the summer.
DateDate and Time settings are available only when GMT
Usage is set to Off. Use the 0~9 buttons to enter the
date. Press EXIT to proceed.
TimeDate and Time settings are available only when GMT
Usage is set to Off. Use the 0~9 buttons to enter the
date. Press EXIT to proceed.
Timer Setting
This menu allows you to set up to 30 timed events for recording or waking up
the receiver. Use / to select Timer Setting and press OK to enter.
The receiver will display a list with 30 timers, followed by their respective
status. Select the timer you wish to set or change with / and press OK to
proceed. The timer setup menu will now be displayed. See chapter Timer
(p. 15) for details.
Parental Lock
This menu allows you to protect the installation menu and/or channels with
a password. You can also enter a new password in the Parental Lock menu.
Use / to select Parental Lock from the and press OK to proceed. You will
be asked to enter your password. (Default password is: 0000).
Menu LockLocks the installation menu. You can set Menu Lock
to On or Off.
Channel LockChoose between: Off, AGE 4, AGE 5, up to AGE 18.
Channels with a parental rating above the chosen
age will be protected with a password (if available in
your local broadcast.)
Menu
25
New PasswordUse the 0–9 buttons to enter your new password
(4 digits) here.
Confirm Password
Re-enter your password here to confirm.
OSD Setting
This menu allows you to change settings for OSD appearance and more. Use
/ to select OSD Setting and press OK to proceed.
Subtitle DisplayUse / to toggle between On or Off. Set to
On if you want to see subtitles on the screen.
OSD TimeoutUse / to set the time after which on screen
banners and messages disappear. The range
is 1–10 seconds.
Menu StyleUse / to change color of OSD.
OSD TransparencyUse / to set the OSD transparency from
Off to 40% with 10% steps.
Volume stepUse / to toggle between x1 or x2 to set
the step for changing volume.
Load default OSD settingsPress OK to clear all OSD settings and reset to
default values.
Auto Standby
Auto Standby is a new feature that helps you with reducing power consumption. See chapter Automatic Power Down (p. 11) for details.
Auto StandbyUse / to toggle between On or Off. When set
to On, the receiver will turn to standby if it doesn’t
receive any commands from the remote control
for three hours. Set Auto Standby to Off to avoid
the automatic shut down.
Turn on after blackoutUse / to toggle between On or Off. Set to On
if you want the receiver to automatically turn on
after a blackout.
4.5 Tools
Use / to select Tools and press OK or to enter. Use / to highlight the
desired submenu and press OK to select. Press EXIT or MENU to get back to
the main menu.
26
Information
This submenu shows receiver specific information such as hardware version
and software version. Please have the Information screen on hand when you
call our hotline. The person who answers your call might ask for the information given in this screen.
Load Factory Settings
This option allows you to reset the receiver to factory settings, which clears
all your settings and stored channels. It will restore your receiver to an “out
of the box” state. Use / to select Load Factory Setting in the Tools menu
and press OK. You are asked to input password. Input the correct password
using the 0–9 buttons (default password is: 0000). A confirmation window is
displayed. Select Yes to return to factory settings. Select No if you don’t want
to restore. Press EXIT to leave.
Upgrade by RS232
This option is highly recommended to be used only by advanced users.
Upgrade by RS232 allows you to upgrade your receiver’s software via RS232
cable connected to your computer. You must use an external converter to
connect RS232 to SCART connector. Use / to select Upgrade by RS232
and press OK. Select START and press OK or to start upgrading. Press EXIT
to leave.
S/W upgrade by OTA
This receiver is equipped with an Over The Air software upgrade option. An
Over The Air update might not be available in your region. Please contact
your local service hotline for more information about this option. Use / to
select S/W upgrade by OTA and press OK. Select START and press OK or to
start upgrading. Press EXIT to leave.
Upgrade by USB
This feature allows you to upgrade your receiver’s software via the USB port.
If new software is available for your receiver, it can be downloaded from our
website www.opticum.com.pl.
Place the software file (unzipped) in the root directory of your USB storage
device (HDD, memory stick etc.) and insert this device into the USB port of
the receiver. Select Upgrade by USB from the Tools menu and press OK to
proceed. The upgrade menu will now be displayed.
Menu
27
Use / to select Upgrade File and choose the file containing the new software. Once all settings are made, move the highlight to Start and press OK to
start the upgrade process.
After an update the receiver restarts automatically. During the upgrade process NEVER disconnect the receiver from the mains or switch off the power!
Doing so might damage your receiver and will void warranty!
If, after a software upgrade, the receiver should behave in an unexpected way,
please perform a factory reset as well. See chapter Load factory settings.
USB device
This function allows you to access and play files (MPEG, AVI, MP3, JPG and
many other type — see details in technical part) from your connected USB
storage device. Use / to select USB Device in the Tools menu and press
OK to proceed. Use / to browse the connected USB device and use OK to
open folders. Press OK to play the highlighted selection.
Play ListUse YELLOW button to display a list of files.
Choose between Music or Image with / .
Play
While in Play List window use RED button to
start slide show or play music.
DeleteWhile in Play List window use YELLOW button
to mark a highlighted file with x to delete it.
You can select more than one files. Press OK
to confirm your choice. A confirmation banner
will pop up. Select Yes to save the changes or
No to discard. The receiver will play the files.
Delete All
While in Play List window use BLUE button to
delete all files from the list. Press OK to confirm your choice. A confirmation banner will
pop up. Select Yes to save the changes or
No to discard. The receiver will play the files.
Repeat ModeUse BLUE button to toggle between 3 repeat
modes:
— repeat one selected file,
— repeat contents of the folder,
— r epeat contents of the folder at random.
28
Setup
Use INFO button to enter Setup menu.
Slide Show TimeUse / to set the time for displaying a slide.
The range is 1–10 seconds.
Slide Show RepeatUse / to toggle between On if you want
the receiver to repeat a slide show or Off.
Once all settings are made, select Save to
save settings or Cancel to discard them.
Sort
Use FIND button to define sequence of files
in play list. Available option are: Default,
Name (A-Z), Name (Z-A), Image 1st, Music 1st.
All Music
Use 0 button to select all music in folder.
All ImagesUse 1 button to select all images in folder.
Add FileUse FAV button to add selected files to play
list.
During a slide show you can perform several actions to improve it:
Rotate
Use / buttons to rotate a picture by 900
Change slideUse
to change to the previous slide.
Use to change to the next slide.
Slide show optionsPress OK to display slide show options
for changing slides. Available options are:
Manual, Auto 2s, Auto 5s, Auto 30s, Auto 60s.
Press EXIT or MENU to get back to the USB device menu.
Menu
29
Save to USB
This function allows you to save the current software of you receiver to
your USB storage device. Use / to select Save to USB in the Tools menu
and press OK twice to proceed. Do not remove your USB device during
the process.
Please make a backup copy of all data you wish to keep before entering the
HDD Format menu. Select HDD Format from the REC menu and press OK to
enter. Use / to select the partition you wish to format (Partition 1 is set
per default) and press to highlight Format. Press OK to proceed, select FAT
NTFS or Cancel, or press EXIT to leave without formatting.
Remove USB device safely
DVR Configuration
Your receiver is equipped with two games which can be played on your TV
screen using the receiver remote control. Use / to select Game from the
Main menu and press OK or to proceed.
Select one of the available games (Othello or Sudoku) using / and press
OK to start the game. Follow the directions on screen.
Use EXIT to quit a game.
This menu allows you to make settings for Time Shift and recording. Select
DVR Configuration from the REC menu and press OK to enter. Use / to
move the highlight and / to change settings. Press EXIT to quit.
Timeshift
On or Off. When Time Shift is set to Off, Time Shift
becomes inactive.
Record Type
TS or PS. When TS is selected, recordings will also
include subtitles and teletext (when available).
PS makes recordings without these extras.
Record Selection
Select the partition the receiver will record on.
Standby after record
On or Off. Select if receiver must go to standby mode
after Timer record.
4.7 REC
Jump
Use this function to eject your USB device before you remove it manually
from the receiver. This will prevent any danger of data loss. Use / to select
Remove USB device safely in the Tools menu and press OK.
4.6 Game
The REC menu consists of the following submenus: Record Manager, USB
Information, HDD Format and DVR Configuration. Use / to highlight the
desired menu and press OK to enter. Press EXIT to quit.
This function allows you to define the jump step length in playback mode.
Select Jump from the REC menu and press OK to enter. Use / to change
settings. Possible settings are 0.5/1/5/10/30 minutes.
Record Manager
The Record Manager gives you access to previously recorded events. Select
Record Manager from the REC menu and press OK to enter. Use / to highlight the recording you wish to play and press OK start playback. Press EXIT
to exit. See more information in chapter Recordings management (p. 17).
USB Information
This option shows relevant information about the connected USB device.
Select USB Information from the REC menu and press OK to enter. Press
EXIT to leave.
HDD format
The HDD format menu allows you to format the connected USB device.
Formatting will permanently delete ALL data stored on the connected device.
30
Menu
31
5
Troubleshooting
There may be various reasons for abnormal operation of the receiver. Check
the receiver according to the procedures shown below. If the receiver does
not work properly after checking it, please contact your dealer or the local
Service Hotline. Do NOT try to open or disassemble the receiver. It may cause
a dangerous situation and void warranty.
Problem
Possible Cause
Suggested solution
No power
The power cord has
not been well connected
Plug the power cord into
the outlet tightly and turn
on the power; if no power
still, turn off the power
again, and turn it on in 5-10
minutes
No signal found
No picture or
sound on TV
Scrambled
channel
Message
32
Aerial is disconnected
Check aerial lead
Aerial is damaged/
misaligned
Check aerial
Out of digital signal
area
Check with dealer
Active antenna
requires to switch
ON antenna power/
external power
Switch receiver’s Antenna
Power ON/connect external
power
HDMI is not selected
on your TV or Amplifier
Switch to correct TV input
HDMI is set to higher
resolution than your
TV supports
Select lower resolution on
receiver
Channel is scrambled
Select alternative channel
Problem
Possible Cause
Suggested solution
No response to
remote control
Receiver off
Plug in and turn on the
receiver
Remote not aimed
correctly
Aim remote at front panel
Front panel obstructed
Check for obstructions
Remote batteries
exhausted
Replace remote batteries
Batteries connected
incorrectly
Connect batteries correctly
Beyond the effective
operation range
Operate within normal
range
Audio sounds
and subtitles
language are
not the chosen
items
The right language
channel has not been
chosen
Set the right language
channel in the menu
No sound at all
The unit is in mute
status
Cancel the mute
Volume is set at too
low level
Augment the volume
Cable is connected
incorrectly
Connect the cable correctly
Serious
distortion or
cannot receive
signal normally
Too much
interferential signal
Adjust the antenna
The receiver
switches off
automatically
Auto Standby function
enabled.
Disable auto standby
Troubleshooting
33
Safety Precautions
ATTENTION:
6
Warning: The lightning flash with arrowhead symbol,
within an equilateral triangle, is intended to alert the
user to „dangerous voltage” and to prevent from a risk of
electric shock.
Warning: To reduce the risk of electric shock, don’t open
the cabinet. Refer servicing to qualified personnel only.
Warning: The exclamation point within an equilateral
triangle is intended to alert the user to important operating
and maintenance (servicing).
Warning: Do not use this receiver where contact with or immersion in water
is a possibility. Do not use near flower vase, wash bowls, kitchen sinks,
laundry tubs, swimming pools, etc.
Warning: Do not put the candle or lamp stand on the cabinet; otherwise,
there is the danger of fire.
Warning: The unit should be connected to a power supply only of the type
described in the operating instructions or as marked on the unit. If you are
not sure of the type of power supply (for example, 120 or 230 V) to your
home, consult your local dealer or local power company.
Warning: This product install diodes. Do not open the cabinet or touch any
parts in the inner mechanism. Consult your local dealer for technical service
if the opening is required.
Note: To ensure proper use of this product, please read this User manual
carefully and retain for further reference.
Note: This product install diodes. Do not open the cabinet to avoid the unit
direct exposure to radiation.
Unit Cleaning: After the unit power is turned off, you can clean the cabinet,
panel and remote control with a soft cloth lightly moistened with a mild
detergent solution.
34
Attachments: Never add any attachments and/or equipment without the
manufacturer consent; as such additions may result in the risk of fire,
electric shock, or other personal injury.
Locating: Slots and openings in the cabinet are provided for ventilation to
protect it from overheating. Do not block these openings or allow them to
be blocked by placing the receiver on a bed, sofa, or other similar surface,
nor should it be placed over a radiator or heat register.
Power-Cord Protection: Place the power-supply cord out of the way, where
it will not be walked on. Please take special attentions to cords at plugs,
convenience receptacles, and the point where they exit from the unit.
Object and Liquid Entry: Never put objects of any kind into this receiver
through openings, as they may touch dangerous voltage points or short-out
parts that could result in a fire or electric shock. Never spill any liquid on
the receiver.
Note: Moisture may be formed on the lens when the unit is suddenly moved
from a cold environment or an air-condition room to a warm place or
immediately after a heater has been turned on or in a steamy or very humid
room. If the moisture forms inside the unit, it may not operate properly. To
correct this problem, turn on the power and wait about two hours for the
moisture to evaporate.
Parts Replacement: When the unit parts need to be replaced, user should
make sure the service technician use the replacement parts specified by
the manufacturer or having the same characteristics as the original part.
Unauthorized replacement may put the unit In the risk of fire, electric shock
or other hazards.
Safety Check: After all the maintenances and repairs are done, user is
required to request the service technician to conduct the overall safety
check to ensure the machine is In the proper condition.
Safety Precautions
35
Environment Protection
7
Attention!
Your product Is marked with this symbol. It means that used
electrical and electronic products should not be mixed with
general household waste. There is a separate collection
system for these products.
Information on Disposal for Users (private households)
in the European Union.
Used electrical and electronic equipment must be treated separately and
In accordance with legislation that requires proper treatment, recovery and
recycling of used electrical and electronic equipment.
Following the implementation by member states, private households within
the EU states may return their used electrical and electronic equipment to
designated collection facilities free of charge*. In some countries* your local
retailer may also take back your old product free of charge if you purchase a
similar new one.
*) Please contact your local authority for further details. If your used electrical
or electronic equipment has batteries or accumulators, please dispose of
these separately beforehand according to local requirements.
By disposing of this product correctly you will help ensure that the waste
undergoes the necessary treatment, recovery and recycling and thus prevent
potential negative effects on the environment and human health which
could otherwise arise due to inappropriate waste handling.
Information on Disposal for Business Users
In the European Union. If the product is used for business purposes and you
want to discard It, please contact your dealer who will inform you about the
take-back of the product. You might be charged for the costs arising from
take-back and recycling Small products (and small amounts)might be taken
back by your local collection facilities.
In other Countries outside the EU.
If you wish to discard of this product, please contact your local authorities
and ask for the correct method of disposal.
36
Technical Specification
8
Main processor: ALI M3601
Input plugs: F-type, IEC 169-2, female
Frequency range: VHF III: MHz to 174 - 230 MHz; UHF IV: MHz to
470 - 606 MHz; UHF V: MHz to 606 - 862 MHz
Input level: -75 dBm—-20 dBm
Antenna power: Voltage max: 5 V, Current max: 50 mA
FET Mode: 2K, 8K
Channel bandwith: 6, 7, 8MHz
Constellation: QPSK, 16QAM, 64QAM
Code rate: 1/2, 2/3, 3/4, 5/6, 7/8
Guard interval: 1/4, 1/8, 1/16, 1/32
Transport stream: MPEG-2 ISO/IEC 13818-1, MPEG-4 ISO/IEC
14496-1,
MPEG Profile level: MPEG-2 MP@ML, MPEG-2 MP@HL,
MPEG-4 AVC/H.264 HP@L4
Aspect ratio: 4:3 Letter Box, 4:3 Pan Scan, 16:9
Video resolution: 720*576 [PAL], 720*480 [NTSC], 1920*1080i
Audio decoding: MPEG/MusiCam Layer 1, MPEG/MusiCam
Layer 2, Dolby AC-3
Audio mode: Stereo, Join Stereo, Mono
Sampling rate: 32 kHz, 44,1 khz, 48 kHz
Rear panel: TV Scart, HDMI, USB
Input voltage: AC 50/60Hz, 230 V
Power consumption: 8 W max.
Standby power consumption: <1 W max.
Size: 180 mm x 35 mm x 110 mm
Weight (netto): <0,7 kg
Operating temperature: 5 °C — 40 °C
Storage temperature: -5 °C — 60 °C
Technical Specification
37