1
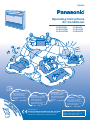
F565588
Operating Instructions
Air Conditioner
QU
ENGLISH
2~7
Before operating the unit,
read these operating
instructions thoroughly
and keep them for future
reference.
IC
ΣΥ
K
Outdoor
Indoor Unit
CU-E7GKE
CU-E9GKE
CU-E12GKE
CS-E7GKEW
CS-E9GKEW
CS-E12GKEW
εκι e/D ten e op
νή es ga
του στ lig el eratio
ργ ε/σ ue a fun n.
ία. ταμ un cio
ατή ida na
στ de mien
ε τη .
to.
2~7
ENGLISH
unit,
Before operating the
read these operating
instructions thoroughly
and keep them for future
reference.
DA
PI
Á
R
ÍA O / Ο Σ
Γ
ID ∆Η
Ο
λει
IC
K
ΣΥ G GU
ΝΤ UI ID
Ο A R E/ G
Μ Á U
Ο P
Σ
Fo
QU
8 ~ 13
ESPAÑOL
unidad,
Antes de utilizar la
sírvase leer atentamente
estas instrucciones
y
de funcionamiento
futuro
conservarlas como
elemento de consulta.
Pri
nte
d
OF in Ma
SC
lay
060 sia
8-0
0
Lt
r de
ra tai
un led
su a exp exp
lte
πτ as lica lanati
ομ pá ció on
ερή gin n
,
εξή as detal please
γη 16 ~ lad
ref
ση
, αν 17 paa, po er
ατρ ra r fav to pa
έξτ obter or ge
ε στ
lea s 4
ις uma las ~ 5.
σε
M
λίδ exp págin
at
ες lica
su
22 ção as 10
sh
~ 23. ma y
ita
is 11.
We
po
b Site El
rm
d.
ec
en
: http
ori
tr
zad
://w ic
a.
ww
.pa In
nas du
oni st
c.c
o.jp ria
/glo l Co
bal
/
.,
5
4
Se
Se lect
ve lecciofan
Se ntilad ne spee
ve leccio or. la d.
ve
Επ ntilad ne
loc
ιλο or. a
ida
ve
γή
d de
loc
ταχ
ida
l
ύτη
de
τας
da
αν
εμι
στ
Ad
ήρ
α.
lou jus
Aju ver. t the
air
de ste
flo
l
la
Aju flu
w
pe
dir
flu ste jo de rsi
ec
Ρυ xo de a pla air ana
tio
n
de
της θμίστ ar. ca e.
dir
de
ρο ε τη
ec
ής
dir
ció
ec
του γρίλια
n
çã
αέρ κα
o do
α.
τεύ
θυ
νσ
ης
σία επ
. ιθυμη
τή
ura
F565488
Operating Instructions
Air Conditioner
Unit
~ 19
PORTUGUÊS 14
Antes de ligar a unidade,
leia cuidadosamente
este manual de utilização
e guarde-o para futura
referência.
(M) Sdn. Bhd.
Shah Alam
Panasonic HA Air-Conditioning
Ampuan, Section 21,
Manufactured by:
Lot 2, Persiaran Tengku
Malaysia.
Shah Alam, Selangor,
Industrial Site, 40300
20 ~ 25
EΛΛΗΝΙΚΆ
Προτού θέσετε τη μονάδα
σε λειτουργία, διαβάστε
οδηγίες
προσεκτικά αυτές τις
τις για
χρήσης και φυλάξτε
μελλοντική αναφορά.
HA Air-Conditioning
© 2006 Panasonic
All rights
(M) Sdn Bhd (11969-T).
copying and
reserved. Unauthorized
of law.
distribution is a violation
DA
PI
RÁ
Σ
ÍA O /
U ID Γ Ο
/G P ∆ Η
Á
R Ο
Σ
G
G UI
ΝΤ UI DE
Ο A
Μ
Ο
ESPAÑOL
8 ~ 13
Antes de utilizar la unidad,
sírvase leer atentamente
estas instrucciones
de funcionamiento y
conservarlas como futuro
elemento de consulta.
Indoor Unit
Outdoor Unit
CS-E9GFEW
CS-E12GFEW
CS-E18GFEW
CU-E9GFE
CU-E12GFE
CU-E18GFE
PORTUGUÊS 14 ~ 19
Antes de ligar a unidade,
leia cuidadosamente
este manual de utilização
e guarde-o para futura
referência.
Manufactured by:
Panasonic HA Air-Conditioning (M) Sdn. Bhd.
Lot 2, Persiaran Tengku Ampuan, Section 21, Shah Alam
Industrial Site, 40300 Shah Alam, Selangor, Malaysia.
EΛΛΗΝΙΚΆ
20 ~ 25
Προτού θέσετε τη μονάδα
σε λειτουργία, διαβάστε
προσεκτικά αυτές τις οδηγίες
χρήσης και φυλάξτε τις για
μελλοντική αναφορά.
© 2006 Panasonic HA Air-Conditioning
(M) Sdn. Bhd. (11969-T). All rights
reserved. Unauthorized copying and
distribution is a violation of law.
SAFETY PRECAUTIONS
DEFINITION
To prevent personal injury, injury to others, or property damage, please observe the following.
Incorrect operation due to failure to follow instructions may cause harm or damage, the seriousness of which is classified as below:
Warning
This sign warns of death or serious
injury.
Caution
This sign warns of injury or damage
to property.
The instructions to be followed are classified by the following symbols:
This symbol denotes an action that is
PROHIBITED.
These symbols denote actions
that are COMPULSORY.
Warning
Remote Control
During Operation
Indoor Unit
During Installation
Indoor Unit
During Installation
• Do not install, remove and
reinstall the unit by yourself;
improper installation will
cause leakage, electric
shock or fire. Please consult
an authorized dealer or
specialist for the installation
work.
• Do not use rechargeable
(Ni-Cd) batteries.
• Do not allow infants and
small children to play with
the remote control to prevent
them from accidentally
swallowing the batteries.
• Remove the batteries if the
unit is not going to be used
for a long period of time.
• New batteries of the same
type must be inserted
following the polarity stated
to prevent malfunction of the
remote control.
Caution
During Operation
• Do not insert your fingers or
other objects into the indoor
or outdoor unit.
• Do not attempt to repair the
unit by yourself.
• Do not install the unit in a potentially
explosive atmosphere.
• Ensure that the drainage pipe is
connected properly. Otherwise, leakage
may occur.
During Operation
• Do not wash the unit with water, benzene,
thinner or scouring powder.
• Do not use for other purposes such as
preservation of food.
• Do not use any combustible equipment in
front of the airflow outlet.
• Do not expose directly to cold air for a
long period.
• Aerate the room regularly.
Air
outlet
Air
inlet
Air
outlet
Power Supply
During Operation
Air
inlet
Air
inlet
Power Supply
During Installation
• This equipment must be earthed and
installed with ELCB. Otherwise, it may
cause electrical shock or fire in case of
malfunction.
Air
inlet
• Switch off the power supply before
cleaning or servicing.
• Turn off the power supply if the unit is not
used for a long period of time.
• This air conditioner is equipped with a
built-in surge protective device.
However, in order to further protect your
air conditioner from being damaged by
abnormally strong lightning activity, you
may want to disconnect it from the power
supply. Do not touch the air conditioner
during lightning, it may cause electric
shock.
During Operation
• Do not share the same power outlet with
other equipment.
• Do not modify power cords.
• Do not use extension cords.
• Do not operate with wet hands.
• Use the specified supply cord.
• If the supply cord is damaged, it must be
replaced by the manufacturer, its service
agent or similarly qualified persons in
order to avoid a hazard.
• In case of emergency or abnormal
conditions (burnt smell, etc), turn off the
power supply, and consult your nearest
dealer.
2
Air
outlet
Outdoor Unit
During Installation
• Ensure that the drainage pipe is
connected properly. Otherwise, leakage
may occur.
During Operation
• Do not sit or place anything on the indoor
or outdoor unit.
• After long periods of use, make sure the
installation rack is not damaged.
REGULATORY INFORMATION
SAFETY PRECAUTIONS
END-OF-LIFE DISPOSAL
“Instructions for end-user” for air conditioners:
This air conditioner bears the above mark, indicating that electrical
equipment should not be disposed of alongside general household waste.
European Community countries (*), should have a dedicated collection
system for these products. Do not try to dismantle the system yourself as this
could have harmful effects on your health and on the environment as a result
of incorrect waste handling. This dismantling and disposal of refrigerant,
oil and other parts must be done by a qualified installer in accordance with
relevant local and national regulations. Air conditioners must be treated at a
specialized treatment facility for re-use, recycling and recovery and should
not be disposed of in the municipal waste stream. Please contact your
installer, dealer or local authority for more information. Penalties may also
be applicable for incorrect disposal of waste products, in accordance with
national legislation.
*subject to the national law of each member state
Information on Disposal in other countries outside the European Union
This symbol is only valid in the European Union. If you wish to discard this
product, please contact your installer, dealer or local authority and ask for the
correct method of disposal.
ENGLISH
TABLE OF CONTENTS
2
REGULATORY INFORMATION
3
HOW TO OPERATE
CARE & CLEANING
TROUBLESHOOTING
4~5
6
7
QUICK GUIDE
Back cover
OPERATION CONDITION
Use this air conditioner under the following temperature range.
Temperature (°C)
COOLING
HEATING
Indoor
*DBT
*WBT
Outdoor
*DBT
*WBT
Maximum
32
23
43
Minimum
16
11
16
11
Maximum
30
–
24
18
Minimum
16
–
-5
-6
26
*DBT: Dry bulb temperature
*WBT: Wet bulb temperature
Note:
The illustrations in this manual are for
explanation purposes only and may differ
from the actual unit. It is subjected to change
without notice for future improvement.
3
ENGLISH
Battery Disposal
The batteries must be recycled or disposed of properly.
ENGLISH
ENVIRONMENTAL REQUIREMENTS
Thank you for purchasing
Air Conditioner
ENGLISH
The appliance is not intended for use by young children or the infirm person without
supervision. Young children should be supervised to ensure that they do not play with the
appliance.
HOW TO OPERATE
REMOTE CONTROL PREPARATION
Inserting the batteries
Pull out
Insert AAA or
R03 batteries
Close
• The batteries can be used for approximately 1 year.
Replace the batteries when the remote control display or
transmission signal becomes weak.
Setting the current time
Set time
TIMER
ON
SET
Confirm
1
Press
2
OFF
CHECK
INDICATOR
REMOTE CONTROL TRANSMITTER
• Make sure it is not obstructed.
• Certain fluorescent lights may interfere with signal transmission.
Please consult your nearest dealer.
3
CANCEL
CLOCK
Maximum distances : 8m
RESET
MODE OPERATION
AUTO
HEAT
COOL
DRY
OFF/ON
TEMP
FAN
SPEED
OFF
Select
AUTO
DRY
HEAT
COOL
Turn on
Adjust
temperature
OFF
TIMER
ON
TIMER
OFF/ON
AUTO MODE - FOR YOUR CONVENIENCE
• Unit selects the operation mode according to temperature
setting, outdoor and room temperature.
• Operation mode is reselected every 30 minutes. During
initial operation mode selection, the power indicator blinks.
AUTO
QUIET
HEAT MODE - TO ENJOY WARM AIR
TEMP
TIMER
ON
• In heat mode, it takes a while for the unit to warm up. The
power indicator blinks during this operation.
Remote
control
display
AIR SWIN
G
MANUA
L
SET
1
COOL MODE - TO ENJOY COOL AIR
2
3
OFF
CANCE
L
DRY MODE - TO DEHUMIDIFY THE
ENVIRONMENT
CHEC
K
• During soft dry operation, the indoor fan operates at low
fan speed to give a very gentle cooling operation.
CLOCK
RESET
● The range of temperature for selection is 16°C ~ 30°C.
● Operating the unit within the recommended
temperature could induce energy saving.
HEAT MODE : 20°C ~ 24°C.
COOL MODE : 26°C ~ 28°C.
DRY MODE : 1°C ~ 2°C lower than room temperature.
Notes:
• Press
setting.
button to restore the remote control’s default
• While using remote control, please be aware of the OFF
indication on the remote control display to prevent the unit
from starting / stopping improperly.
4
ON
1
AUTO
AIR SWING
AIR SWING
MANUAL
• AIR SWING - AUTO
• In heat mode, the air blows upwards
for a while, then starts to blow
horizontally.
• The vertical airflow louver swings up
and down automatically.
• AIR SWING - MANUAL
• The airflow direction can be adjusted
as desired by using remote control.
• Do not adjust the vertical airflow
direction louvers by hand.
• Both upper and lower horizontal
airflow direction louvers are manually
adjustable.
Select ON
or OFF
timer.
Set the
desired
time.
ON
or
OFF
, then press CANCEL .
• When ON Timer is set, the unit may start earlier (up
to 30 minutes) before the actual set time in order to
achieve the temperature you preferred.
• The timers repeat daily once set.
• If there is a power failure, you can restore the
previous setting (once power is resumed) by pressing
SET
button.
• If the timer is cancelled, press
previous setting.
TO ENJOY QUIET ENVIRONMENT
• This setting provides a quiet environment by
reducing the airflow noise.
TO ACHIEVE TEMPERATURE QUICKLY
• This setting enables the desired
temperature to be reached quickly.
• POWERFUL operation will run for 20
minutes, after that this operation will stop
automatically.
QUIET
●
and
same time.
SET
to restore the
● The timer is based on the time set in the remote
control.
● You can set your preferred time for ON and OFF
timers.
Hints
■ Temperature setting of 1°C higher in cool mode or
2°C lower in heat mode than the desired temperature
performs a 10% power saving.
■ To reduce power consumption during cool mode, close
the curtains to prevent the sunlight and heat from
coming in.
■ To set either 12-hour (am/pm) or 24-hour time
and
operations are available in all modes and
could be cancelled by pressing the respective button again.
QUIET
●
Confirm
the setting.
To cancel ON or OFF timer, press
the
QUIET
SET
2
OFF
TO ADJUST AIRFLOW DIRECTION
• Keeps the room ventilated.
ENGLISH
• When you want the air conditioner to turn ON or OFF
automatically at a preset time.
ENGLISH
• There are 5 fan speeds, as well as
automatic*.
* For automatic fan speed, the speed
of the indoor fan is automatically
adjusted according to the operation.
TO SET THE TIMER
ENGLISH
TO SELECT FAN SPEED
TIMER SETTING
ENGLISH
FEATURE OPERATION
indication, press and hold
seconds.
for approximately 10
CLOCK
operations could not be activated at the
● To turn off the air conditioner, press
OFF/ON
.
5
CARE & CLEANING
Switch off the power supply before cleaning
AIR FILTER
AUTO OFF/ON BUTTON
To operate the air-conditioner when the remote
control is misplaced or malfunctioned.
• Clean the filters regularly.
• Wash/rinse the filters gently with water to avoid
damage to the filter surface.
• Dry the filters thoroughly under the shade, away
from fire or direct sunlight.
Action
Mode
Press once.
Automatic
Press and hold until you hear one beep,
then release.
Cooling
Press and hold until you hear one beep
then release.
Press and hold until you hear two beeps
then release.
Heating
• To turn off, press the AUTO OFF/ON button again.
Remove
Remove
INDOOR UNIT
Wipe the unit
gently with a
soft, dry cloth.
1. Release
2. Release
1. Release
INTAKE GRILLE
AIR OUTLET SELECTION SWITCH
1. Release 2 levers to open.
2. Release string to remove.
Wash gentle and dry.
To select preferred airflow pattern.
Selection
Pattern
Description
This setting blows air from upper outlet only.
This setting automatically decides airflow pattern depending on mode and
conditions (Default and recommended).
For Heat mode, during start or low discharge temperature
/ For Cool mode, when setting temperature is achieved,
the air is blown from the upper air outlet only.
Air is blown from the upper and lower air outlets for high
speed cooling during COOL mode, and for filling the room
with warm air during HEAT mode.
WASHING INSTRUCTIONS
• Do not use benzene, thinner or scouring powder.
• Use only soap ( pH7) or neutral household detergent.
• Do not use water hotter than 40°C.
6
Hints
■ Clean the filter regularly for best performance and to reduce
power consumption.
■ Please consult your nearest dealer for seasonal inspection.
TROUBLESHOOTING
Mist emerges from indoor unit.
■ Condensation effect due to cooling process.
Water flowing sound during operations.
■ Refrigerant flow inside the unit.
The room has a peculiar odour.
■ This may due to damp smell emitted by the wall, carpet, furniture or clothing.
Indoor fan stops occasionally during
automatic fan speed setting.
■ This helps to remove the surrounding odours.
Operation is delayed a few minutes after
restart.
■ The delay is a protection to the unit’s compressor.
Outdoor unit emits water/steam.
■ Condensation or evaporation occurs on pipes.
Timer indicator is always on.
■ The timer setting repeats daily once set.
Power indicator blinks during operation
and the indoor fan is stopped.
■ The unit is in defrost mode, and the melted frost is drained from the outdoor unit.
Indoor fan stops occasionally during
heating operation.
■ To avoid unintended cooling effect.
Power indicator blinks before the unit is
switched on.
■ This is a preliminary step in preparation for the operation when the ON timer has been set.
ENGLISH
Cause
ENGLISH
Symptom
ENGLISH
The following symptoms do not indicate malfunction.
Heating/Cooling operation is not working
efficiently.
■
■
■
■
Noisy during operation.
■ Check if the unit has been installed at an incline.
■ Close the front panel properly.
Remote control does not work.
■ Insert the batteries correctly.
■ Replace weak batteries.
The unit does not work.
■ Check if the circuit breaker is tripped.
■ Check if timers have been set.
ENGLISH
Check the following before calling for servicing.
Symptom
Check
Set the temperature correctly.
Close all doors and windows.
Clean or replace the filters.
Clean any obstruction at the air inlet and air outlet vents.
The unit stops and the timer indicator blinks.
Jot down error code at indicator.
If the error code does not appear at the indicator.
TIMER
ON
1
SET
2
OFF
CHECK
3
CANCEL
Press to retrieve error
code, then jot down the
error code at indicator.
■ Turn the unit off and reveal the error code to your nearest dealer.
Note:
• The unit may be operable (with 4 beeps) on a limited basis, depending on the error.
FOR EXTENDED NON-USE
• Activate heat mode for 2~3 hours to thoroughly dry the unit.
• Turn off the power supply.
• Remove the remote control batteries.
SEASONAL INSPECTION AFTER EXTENDED
NON-USE
• Checking of remote control batteries.
• No obstruction at air inlet and air outlet vents.
• After 15 minutes of operation, it is normal to have the following
temperature difference between air inlet and air outlet vents:
Cooling: ≥ 8°C
Heating: ≥ 14°C
NON SERVICEABLE CRITERIAS
TURN OFF POWER SUPPLY and CALL Authorized Distributor
under the following conditions:
•
•
•
•
•
•
Abnormal noise during operation.
Water/foreign particles have entered the remote control.
Water leaks from Indoor unit.
Circuit breaker switches off frequently.
Power cord becomes unnaturally warm.
Switches or buttons are not functioning properly.
7
QUICK GUIDE/GUÍA RÁPIDA/GUIA RÁPIDO/
ΣΥΝΤΟΜΟΣ Ο∆ΗΓΟΣ
1
AUTO
DRY
HEAT
COOL
Select the desired mode.
Seleccione el modo deseado.
Seleccione o modo de
funcionamento pretendido.
Επιλέξτε την κατάσταση
λειτουργίας που επιθυμείτε.
2
OFF
OFF/ON
4
Select fan speed.
Seleccione la velocidad del
ventilador.
Seleccione a velocidade do
ventilador.
Επιλογή ταχύτητας ανεμιστήρα.
OFF
ON
TIMER TIMER
OFF/ON
Start/stop the operation.
Inicie/detenga el funcionamiento.
Ligue/Desligue a unidade.
Ξεκινήστε/σταματήστε τη
λειτουργία.
3
FAN
SPEED
AUTO
HEAT
COOL
DRY
AUTO
QUIET
TEMP
AIR SWING
MANUAL
TIMER
ON
SET
5
AUTO
AIR SWING
MANUAL
TEMP
1
Select the desired temperature.
Seleccione la temperature
deseada.
Programe a temperatura
desejada.
Επιλέξτε την επιθυμητή
θερμοκρασία.
2
OFF
CHECK
3
CANCEL
CLOCK
RESET
Adjust the airflow direction
louver.
Ajuste la persiana de dirección
del flujo de aire.
Ajuste a placa de direcção do
fluxo de ar.
Ρυθμίστε τη γρίλια κατεύθυνσης
της ροής του αέρα.
For detailed explanation, please refer to pages 4 ~ 5.
Para una explicación detallada, por favor lea las páginas 10 y 11.
Consulte as páginas 16 ~ 17 para obter uma explicação mais pormenorizada.
Για λεπτομερή εξήγηση, ανατρέξτε στις σελίδες 22 ~ 23.
Matsushita Electric Industrial Co., Ltd.
Web Site: http://www.panasonic.co.jp/global/
F565588
Printed in Malaysia
OFTH0704-02