1
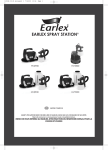
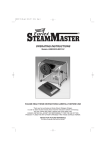
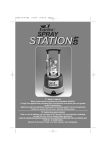
K0051 SS77USSG 11 11_c94 06/04.qxd 09/11/2011 08:57 Page 1
STEAM GENERATOR
OPERATING INSTRUCTIONS
MODEL SS77USSG
PLEASE READ THESE INSTRUCTIONS CAREFULLY BEFORE USE
Thank you for purchasing an Earlex Steam Generator. This is a highly versatile machine.
In order to obtain the best results please read the instructions before commencing any work.
Please also make a special note of the safety rules and
RETAIN FOR FUTURE REFERENCE
GO TO WWW.EARLEX.COM TO REGISTER YOUR PRODUCT
Earlex Inc. will accept no responsibility for the use of this product if used for
any other purposes than those detailed herein.
K0051 SS77USSG 11 11_c94 06/04.qxd 09/11/2011 08:57 Page 2
SAFETY RULES
●
Keep equipment away from children and pets.
●
Allow to cool completely before emptying boiler.
●
Ensure boiler is placed on a flat level surface, and should
the boiler become tilted in use - level again immediately.
Failure to do so can result in severe overheating,
complete element failure and void your guarantee.
●
Do not stand on boiler or hose.
●
Do not drag or try to move boiler by pulling the mains
lead.
The boiler becomes hot in use. Move only by using the
carrying handle.
●
Do not allow water or steam to enter light switches or
power points.
●
Do not leave unattended.
●
Use only standard faucet water. Never add detergents or
chemicals.
●
Always store upright.
●
Do not overfill the reservoir.
●
It is recommended that a GFCI is fitted into the mains
supply socket for added protection against electric shock.
●
Use only genuine Earlex replacement parts.
●
●
Steam is produced at 100oC. Be careful, wear protective
clothing and protect your hands with heat resistant gloves
or mitts.
●
Never point the hose at persons or pets.
●
Never remove filler cap or detach hose whilst unit is
operating.
●
Never block the safety valve.
●
Switch off and wait for 2 minutes before removing filler
cap to refill boiler.
●
Do not use outside when raining.
GROUNDING INSTRUCTIONS
This product should be grounded. In the event of an electrical short circuit, grounding reduces the risk of electric shock by providing
an escape wire for the electric current. This product is equipped with a cord having grounding wire with an appropriate grounding
plug. The plug must be plugged into an outlet that is properly installed and grounded in accordance with all local codes and
ordinances.
DANGER - Improper installation of the grounding plug can result in a risk of electric shock.
If repair or replacement of the cord or plug is necessary, have your nearest Earlex Authorized Service Center replace it.
Check with a qualified electrician or serviceman if the grounding instructions are not completely understood, or if in doubt as to
whether the product is properly grounded. Do not modify the plug provided; if it will not fit the outlet, have the proper outlet installed
by a qualified electrician.
EXTENSION CORDS
Use only a 3-wire extension cord that has a 3-blade grounding plug, and a 3-slot receptacle that will accept the plug on the product.
Make sure your extension cord is in good condition and of a heavy enough gauge to carry the maximum current as shown below:
16 AWG for leads up to 25’ in length.
12 AWG for leads up to 50’ in length.
10 AWG for leads up to 100’ in length.
Ensure extension lead is protected at the mains source by a 15A rated circuit-breaker in accordance with UL489.
OPERATION
STEAM IS HOT! Please be aware that steam is produced at 100oC - so be careful, wear protective clothing and protect your hands
with heat resistant gloves or mitts.
FILLING:
Remove filler cap and fill unit to Max. level line or indicator with clean - preferably hot - water.
Replace filler cap.
The capacity of 5 litres (10 pints) provides approx.130 mins. steaming time before the safety cut-out operates. For a shorter steaming
time use less water.
Do not overfill the unit or hot water will be forced up the steam hose.
Screw hose onto threaded outlets of boiler, hand tight is sufficient.
Do not over tighten but do check for hand tight fit from time to time during use.
Connect mains lead from unit to power socket and switch on. lt can take up to 15 mins (approx.) before steam is produced depending on fill water quantity and temperature.
Do not leave unattended and keep children & pets out of the room.
2
K0051 SS77USSG 11 11_c94 06/04.qxd 09/11/2011 08:57 Page 3
Just before full steam production a small amount of bubbling and water will occur. Beware of hot water discharge prior to steam
emission.
If unit requires refilling, unplug cord and allow to cool for at least 2 minutes before removing filler cap - Beware of steam. When
finished, allow to cool completely and empty unit. Always store unit empty.
SAFETY CUT-OUT
A safety cut-out is fitted to prevent overheating the element if the water boils low. If unit stops boiling during use this may be the
cause. Wait for 2 minutes before removing filler cap then re-fill with water. The cut-out will self reset and steam be produced again
within 5-15 minutes. The cut-out will not protect the element if a part filled unit is tilted during use in a way which enables
part of the element to be out of the water for longer than 15-20 seconds.
DESCALING
To maintain peak performance of the unit, particularly in areas of hard water, it may be necessary to descale the element in the unit.
Proprietary kettle descaling products can be used in your unit - always follow the manufacturer’s instructions.
Always wear gloves or mitts for added protection.
How to Build a Steam Box - Safety Instructions
Bending wood with steam can be dangerous and should only be performed by experienced woodworking enthusiasts. Thick, heat
resistant gloves are recommended as the steam can easily burn unprotected skin on contact. Also keep your face clear from any
areas where steam may escape and burn you.
Steam is a very effective medium for bending wood. Most hardwoods will bend better than softwoods.
Steam boxes can be built using plywood or hardwood; just make sure that it can stand up to moisture and heat. Your steam box
should be tight, but not too tight. The steam should be able to surround your wood piece and flow through the steam box. The steam
box could build up pressure and possibly explode if the steam does not adequately flow through the steam box and pressure relief
holes.
The best way is to build a relatively tight box and drill steam holes in the base so that the steam and condensation can escape. You
should have a steady stream of steam escaping through all vents. You will need to make sure that your wood pieces are
supported in your steam box and that the steam surrounds your wood on all sides. Dowel rods work the best as metal rods can
heat up and burn your wood as well as yourself.
As a wooded steam box, you can use common 1 x 6 material or 3/4” thick plywood. A 5” x 5” interior dimension with a 3ʼ-5ʼ length for
use with your Steam Generator. You should have a door opening with hinges and a latch. A rubber weather stripping can be used
to seal a leaky door.
The brass threaded fitting that is supplied with your Steam Generator is designed to fit a 0.531” hole. Drill this hole in your steam box
and separate the fitting, placing one end through the box with the thread that will connect to the hose sticking out of the box. Screw
the other part of the fitting onto the fitting inside the steam box and tighten up to ensure a good seal. There should be no movement
of the connector once tightened up.
Ideally the steam box should be on a slight incline for condensation to drain to one end and exit the steam box.
Fill your steam generator with clean water, do not add any additives. DO NOT FILL ABOVE MAX LEVEL LINE on Steam Generator
base. The steam up time will be controlled by how much water you fill the Steam Generator with and the temperature of the water.
The Steam Generator is designed to provide two hours of steam. If you only require one hour of steam then half fill the Steam
Generator.
Place your wood pieces into the steam box and connect the hose to the steam box and Steam Generator. Plug the Steam Generator
into a grounded outlet, preferably one with a GFCI. The Steam Generator will automatically start to heat up.
When initially starting we recommend that you insert a meat thermometer through a small hole to read the temperature. You want to
reach 212 degrees F, or as close as possible. Once you have reached this temperature to start timing how long your wood needs to
be steamed.
A general rule to follow is that you should steam the wood for 1 hour per every inch thickness of the wood. So for ½” thick
pieces you should allow 30 minutes.
You will need a mould or jig to hold the wood in place until it dries out after you remove such from the steam box.
*This is a general outline on building a steam box.*
*There are many websites available to use for more detailed instructions.*
3
K0051 SS77USSG 11 11_c94 06/04.qxd 09/11/2011 08:57 Page 4
TROUBLE SHOOTING
Unit Fails to Boil
The unit has probably not been left for long enough to cool- refer to section on safety cut-out.
Unit Leaks Steam from Pressure Relief Valve
The pressure relief valve is a special low pressure valve and cannot be replaced by any other valve. If steam is leaking from the
valve, the most likely cause is a blockage in the hose. Allow the hose to cool then remove the hose and check for any blockage.
Always check the inlet in the tool you are using.
UNDER NO CIRCUMSTANCES FORCE THE VALVE SHUT. THIS IS OPERATING FOR YOUR PROTECTION.
IF YOU REQUIRE FURTHER ASSISTANCE PLEASE CONTACT OUR HELPLINE ON:
Tel: 888-783-2612 email: [email protected]
WARRANTY
This product is guaranteed for a period of 24 months against faulty materials and workmanship.
Whilst every possible care is taken by Earlex to ensure that our products leave the factory in good working order, Earlex cannot
under any circumstances accept liability for problems or damage caused by their subsequent use.
It is the responsibility of the user to ensure that surfaces to be treated, cleaned or stripped are suitable for steam.
This warranty does not affect your statutory rights. This warranty excludes the use for hire purposes.
In the event of a fault occurring please contact our helpline before returning the unit to our Service Department at the address
below together with a copy of your purchase receipt. All repairs will be dealt with speedily.
Questions? Call toll free: 888-783-2612
Earlex Inc.
8261 Highway 73, Suite F,
Stanley, N.C. 28164, USA
Earlex Inc, Toll Free 888-783-2612
Email: [email protected] Website: www.earlex.com
© Earlex Ltd. 2011
K0051 11/11