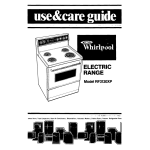
Download Whirlpool RM988PXL User's Manual
Transcript
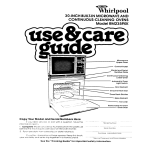
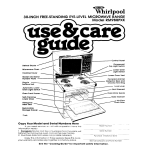
01 304NCH FREE-STANDING EYE-LEVEL
MICROWAVE RANGE
Model RM988PXL
I//Defrost
Control
Fluorescent
Top light Switch
Guide
Microwave
Panel
/
Oven
Model
and Serial
Number Plate
Porcelain-Enamel
Reflector
Bowl and
Chrome Trlm Rlng
Broil Element
Oven
Front Frame
Removable
Storage
Drawer
Copy
Your Model
If you
information
1. Complete
behind the
2. Purchase
and Serial Numbers
Here
need service, or call with a question, have this
ready:
Model and Serial Numbers (from the plate just
microwave
oven door on the oven frame).
date from sales slip.
Copy this information
in these spaces. Keep this book,
your warranty and sales slip together in a handy place.
See the “Cooklng
Guide”
for important
Model Number
Serial Number
Purchase Date
Service Compony
safety
Information.
and Phone Number
Your respons2biNes.. .
Proper installation
and safe use of your microwave
range are your
personal responsibilities.
Read this”Use and Care Guide”and
the
“Cooking
Guide”carefully
for important
use and safety information.
Installation
You must be sure your range is...
l
installed and leveled on a floor
that will hold the weight;
l
installed in a well-ventilated
area protected
from the
weather;
l
properly
connected
to the correct electric supply and
grounding.
(See “Installation
Instructions.“)
Proper use
You must be sure your range is...
used only for jobs expected
of home ranges;
l
used only by people who can
operate
it properly;
l
properly
maintained.
l
Contents
Page
Responsibilities
Installation
Proper Use
Safety
..~.......~
Precautions
to Avoid Possible Exposure
to Excessive Microwave
Energy
Using the Microwave
Upper Oven
Setting the Clock
Using the Minute Timer
Cooking in One Cycle
Defrosting
Cooking in Two Cycles
Cooking Automatically
after
Defrosting
Cooking to a Serving Time
Cooking with the Temperature
Probe
Bi-Level Oven Rack
Changing
or Cancelling
Instructions
Other Operating
Hints
Cleaning
the Microwave
Oven
Important Information
How Microwave
Ovens Work
The Microwave
Oven Light
Uslng Your Cooktop and lower Oven
Surface Unit Controls
The Lower Oven Controls
2
2
2
3
4
4
5
6
7
9
IO
12
14
16
18
19
19
19
20
22
22
23
23
24
Poge
The Oven Selector .................
The Oven Temperature
Control
................
Baking or Roasting
Adjusting the Oven Temperature
Control
.........................
Using the Automatic
MEALTIMER
Clock ...........................
Broiling
...........................
Broiling Chart ...................
The Cooktop Light ...................
The Lower Oven Light ................
The Oven Vent ......................
.................
Optlonal Accessories
Rotisserie
..........................
Canning Kit .........................
Cleaning
and Caring for Your Range
Control Panel and Knobs ............
Surface Units and Reflector Bowls ....
Storage Drawer .....................
The Lower Oven Self-Cleaning
Cycle
Cleaning
Chart .....................
If You Need Service or Assistance
I. Before Calling for Assistance ......
...........
2. If You Need Assistance
..............
3. If You Need Service
............
4. If You Have a Problem
24
24
24
25
26
27
27
28
29
29
29
29
29
30
30
30
32
33
36
37
37
37
38
38
3
Using the fniaowave upper oven
Mlcrowave
Oven Controls
The top part of the Control Panel
has the microwave
oven controls.
There are four kinds of controls:
-The Digital Display/ Clock,
-Signal
Lights,
-Command
Pads,
-Number
Pads.
What each of these does will be
covered
on the following
pages. One
note: The Command
and Number
Pads are not buttons. You don’t have
to push them...just touch them.
When You first plug in the range, the
Clock/ Display will show 88:88. If,
after you set the clock (page 51, the
Clock again shows all B’s, it means
your electricity
was off for a while. Reset the clock.
Read the following
pages carefully.
DIGITAL DISPLAY /CLOCK
-
it shows you what number
touched
pads you
tells the oven you are going to cook at less
than full power.
-START tells the oven to start.
-DEFROST tells the oven to run at 30% of full
NUMBER PADS
A Signal Light
comesion every
time you touch a
Command
Pad.
While the oven is
running, the Signal
Light or lights will
be on to show you
what the oven is
doing.
SETTINGIHECLOCK
Wher; the range IS first plugged
in, the Clock/ Display shows 88:88. If the electric
power ever goes off, the Clock/ Display will also show all 8’s when the power comes
hack c?
You ( an cook or use the Minute Timer without setting the clock, but the display will be
blank after cooking. The oven door must be closed before setting the clock.
DO THIS...
I.
.
q
THIS HAPPENS . . .
The word “seP’will glow on the display. Start
touching number pads for the desired time
within 5 seconds.
Touch CLOCK.
m
2.
3.
The Display will show what numbers you
touched In the order you touched them.
This example
shows 3:25.
Touch number pads for
the correct tlme of day.
.
q
Touch START.
The START Signal Light will come on to show
that you have touched START.It will go off
In aboLlt 5 seconds. The clock is set.
5
USING THE MINUTE
TIMER
The Minute Timer does not start or stop cooking, it works like a kitchen timer. Set in
minutes or seconds and you will hear a beep when the set time is up. The oven door
must be closed before setting the Minute Timer.
THIS HAPPENS...
DO THIS...
1.
The MINUTE TIMER Signal Light will come on
and the Display will show a “0.” Within 5
seconds start touching number pads for
the desired time.
Ill!m
Touch MINUTE TIMER.
The Display WIII show what numbers you
touched in the order you touched them.
This example
shows 1 minute, 45 seconds
2.
3.
Touch number pads for
minutes and seconds.
q
The START and MINUTE TIMER Signal Lights
will come on to show that
l
you have touched START;
l the Minute
Timer IS running
The START Light WIII go off in about 5
seconds
Touch START.
count
doun
The Display counts down the seconds to
show how much time is left on the Minute
Timer
When the set time IS up, a buzzer will sound
and the Display will show the time of day.
1.
The Minute
2.
Opening
3.
If you open oven door and reset the Minute
Minute Timer and to restart the oven.
Timer can be used when the oven is cooking
the microwave
oven door does not stop the Minute
To change
i
or cancel
Timer.
Timer touch
START twice
the Minute
Tlmer:
1 Touch MINUTE TIMER.
2. Touch number 0 to cancel,
or
2 Touch desired new number
Then:
3 Touch START
pads to change
to start the
COOKING IN ONE CYCLE
Follow these steps to cook at one power
level:
HIGH COOK POWER
THIS HAPPENS...
DO THIS...
1.
Put tood in the oven and
close the door.
The COCK CYCLE 1 Signal Light will come
on and the Display will show four 0’s.
The Display will show the numbers you
touched in the order you touched them.
This example
shows 4 minutes, 30 seconds.
Touch number pads for
the cooking time you
want.
The oven will automatically
4.
cook
at high Cook
Power.
The START and COOK CYCLE 1 Signal Lights
will come on to show what You have told
the oven to do. The START Light will go off in
about 5 seconds.
Touch START.
count
down
The Display counts down the time to show
how much cooking time is left.
When the cooking time ends, a buzzer will
sound 4 times. (You can stop the buzzer
by opening the oven door ortouching
CANCEL.) When the buzzer stops, the Display will show the time of day.
LOWER COOK
POWERS
~__~~
For best results, some recipes call for lower Cook Powers. Lowering the Cook Power
slows the cooking. The lower the Cook Power, the slower the cooking. Each number
pad on your microwave
oven stands for a different percentage
of Cook Power. Many
recipes in Your MICRO MENUS, Cookbook
tell You, by number, which Cook Power to
use. Recipes in other books and magazines
may tell You by name (HI, MED, LO, etc.) or
by percentage
(1 O%, 50%, 80%, etc.).
The following chart gives You the percentage
of Cook Power each number pad
stands for, and the Cook Power name usually used.
automatic
9
8
7
6
5
-Tmk
z
2
1
100%
90%
80%
70%
60%
50%
40%
30%
20%
10%
of
of
of
of
of
of
of
of
of
of
full
full
full
full
full
full
full
full
full
full
power
power
power
power
power
power
power
power
power
power
HIGH
MED-HI
MED
MED-LO
LOW
CONTINUED NEXT PAGE
7
LOWER COi K POWt;X
C~L)NTI~VUED
DO THIS...
1.
THIS HAPPENS. . .
Put food in the oven and
close the door.
The COOK CYCLE 1 Signal Light will come
on and the Display will show four 0’s.
The Display WIII show the numbers you
touched in the order you touched them.
This example
shows 7 minutes, 30 seconds.
3.
Touch number pads for
the cooking time you
want.
Eli!
‘I
4.
Touch COOK POWER.
5.
Touch a number pad for
the Cook Power you
want.
6.
The COOK POWER Signal Light will come
und the Display will show two O’s
I#
R
on
The START, COOK CYCLE 1 and COOK
POWER Signal Lights will come on to show
what you have told the oven to do. The
START Light will go off in about 5 seconds
Touch START.
count
down
The Clsplay counts down the time lo show
how much cooking time is IeH
When the cooking time ends, a buzzer will
sound 4 times (You can stop the buzzer
by opening the door or by touching
CANCEL.) When the buzzer stops, the
Display will show the time of day.
DEFROSTING
Use tr;e deiros? setting to tnaw frozen food before cooking. For suggested
defrost
ttmes, ,:XXK the gti;lde on rhe inside of the oven door or in your MICRO MENUS”
Cookt;
ok
‘Tmk
THIS HAPPENS...
DO THIS...
1.
Put frozen
oven and
door.
in the
the
q
,
2.
food
close
The DEFROST Signal Light will come
the Display will show four O’s
*
on and
Touch BEFROSl.
The Display will show the numbers you
touched in the order you touched them.
This example
shows 2 minutes, 30 seconds.
Touch number
the defrosting
want.
pads for
time you
ma
. .
4.
Touch
START
count
down
The START and DEFROST Signal Lights will
come on to show what you have told the
oven to do. The START Light will go off in
a bout 5 seconds.
The Drsplay counts down the time to show
how much defrosting time is left
When the defrost time ends, a buzzer will
sound 4 times. [You can stop the buzzer by
opening the oven door or touching
CANCEL.] When the buzzer stops, the
Display will show the time of day.
FASTER OR SLOWER DEFROSTING
~-.- ~~
oven automatically
uses 30% of full Cook
Wne ‘ii .:?~;~;ch DEFROST, the microwave
Fewer 1c: :.:ower or faster defrostrng, see lower Cook Powers on page 8.
l
Use LG”b .~f :uii power for slower defrosting.
0 Use CO% ‘JI fui! power for faster defrosting. Defrosting
at Cook Powers hlgher than
30% can cause some cooking on the outside of the food.
HOLDING OR STANDING TIME:
For bzst results allow the food to stand for awhile after defrosting.
the temoerature
of the food and provide more even defrosting.
This will equalize
9
COOKING IN IWO CYCLES
For best results, some recipes call for one Cook Power for a certain length of time,
and another Cook Power for another length of time. Your oven can be set to change
from one to the other automatically.
DO THIS...
1.
THIS HAPPENS...
Put food in the oven
and close the door.
The COOK CYCLE 1 Signal Light will come
on and the Drsplay will show four O’s
The Display will show the numbers you
touched in the order you touched them.
This example
shows 3 minutes, 25 seconds.
3.
Touch number pads for
the cooking time you
want in the first cycle.
•il
‘.
4.
..
.
The COOK Power Signal Light will come
and the Display WIII show two O’s
on
Touch COOK POWER. If
you want the high Cook
Power, skip to step 6.
The Display will show what You touched
This example
shows 60% of full power
5.
Touch a number pad for
the Cook Power you
want in the first cycle.
II
a.
6.
The COOK CYCLE 2 Signal Light will come
on and the Display will show four O’s
Touch COOK CYCLE 2.
The Display will show the numbers you
touched in the order you touched them.
This example
shows 4 minutes, 30 seconds.
7.
Touch number pads for
the cooklng tlme you
want In the second
cycle.
Em
‘.
8.
..
The COOK POWER Signal Light will come
and the Display will show two O’s
.
on
Touch COOK POWER, If
you want the high Cook
Power, skip to step 10.
The Display will show what you touched
This example
shows 40% of full power
9.
Touch a number pad for
the Cook Power you
want in the second
cycle.
The START Signal Light will come on for
a bout 5 seconds.
The COOK CYCLE 1 Light will come on and
stay on while the oven is cooking in the first
cycle. The COOK POWER Light will be on if
you are using a Cook Power other
than high.
count
d0Wl-l
The Display counts down the cooking time
to show how much time is left in the first
cycle
For 2 of every 10 seconds, the Display will
show the Cook Power you selected,
if you
are using a Cook Power other than high.
A buzzer will sound at the end of the first
cycle You can either open the door to
check the food, or you can let the oven
start the second cycle. If you do open the
door, lust close it and push START to restart
the oven
The
the
The
are
count
down
COOK CYCLE 2 Light will come on when
oven starts cooking
in the second cycle
COOK POWER Light will come on if you
using a Cook Power other than high
The Display counts down the cooking time
to show how much time is left in the second
cycle
For 2 of every 10 seconds, the Display will
show the Cook Power you selected,
if you
are using a Cook Power other than high.
When the second cycle is over, a buzzer
will sound 4 times. (You can stop the buzzer
by opening
the door ortouching
CANCEL.)
When the buzzer stops, the Display will
show the time of day.
11
COOKING AUTOMATICALLY
The controls can be set so the microwave
Cycle 1 and even Cycle 2.
DO THIS...
1.
2.
AFTER DEFROSTING
oven goes automatically
from defrosting
to
THIS HAPPENS...
Put frozen food in the
oven and close the door.
Iq.
The DEFROST Signal Light will come
the Display will show four O’s
on and
Touch DEFROST.
The Display will show the numbers you
touched in the order you touched them.
This example
shows 2 minutes, 30 seconds
3.
Touch number pads for
defrosting
time you
want.
Ia
a.
4.
The COCK CYCLE 1 Signal Light will come
and the Display will show four 0's.
on
Touch COOK CYCLE 1.
The Display will show the numbers you
touched in the order you touched them.
This example
shows 3 minutes, 25 seconds.
5.
Touch number pads for
the cooking time you
want in the first cycle.
The COOK POWER Signal Light will come
and the Display will show two O’s
6.
Touch COOK POWER.
Options: Skip to step 8 if
you want the first cycle
to cook at high power.
Skip to step 12 if you
want only one cycle at
high power.
The Display will show what you touched
This example
shows 60% of full power.
7.
12
Touch a number pad for
the Cook Power you
want in the first cooking
cycle.
on
The COOK CYCLE 2 Signal Light will come
on and the Display will show four 0’s.
..
8.
•i
Touch COOK CYChE 2.
Optlon: Touch START
If cooking In only one
cycle after defrostlng.
The Display will show the numbers you
touched in the order you touched them.
This example
shows 4 minutes, 30 seconds.
9.
Touch number pads for
the cooking time you
want in the second
cooking cycle.
The COOK POWER Signal Light will come
and the Display will show two O’s
on
1 O.Touch COOK POWER.
Option: Touch START if
you want the high
Cook Power.
The Drsplay WIII show what you touched
This example
shows 40% of full power.
11,Touch
a number pad
for the Cook Power
you want in the
second cooking
cycle.
12.Touch
START.
..
m
count
down
The START and DEFROST Signal Lights will
come on. DEFROST will stay on during the
defrost cycle. START will go off in about
5 seconds.
The Display counts down the time to show
how much time is left in the defrost cycle.
When the defrost cycle is over, the
microwave
oven automatically
holds the
food for the same amount of time used for
defrosting. The Display counts down the
hold time and the HOLD Signal Light will
be on.
When the hold time is over, a buzzer will
sound and the first cooking cycle will start
The COOK CYCLE 1 Signal Light will come
on and stay on during the first cooking
cycle. The COOK POWER Light will also
come on If you are uslng a Cook Power
other than hlgh.
13
count
down
0
The Display counts down the time to show
how much time is left in the first cooking
cycle.
When the first cooking cycle is over, a
buzzer will sound and the second cooking
cycle will start. (If only one cooking cycle
IS used, 4 buzzes will sound, and the oven
will stop.)
2
05
The COOK CYCLE 2 Signal Light will come
on and stay on during the second cooking
cycle. The COOK POWER Light will also
come on if you are using a Cook Power
other than high.
m
The Display counts down the time to show
how much cooking time is left in the
second cycle
count
down
For 2 of every 10 seconds, the Display will
show the Cook Power you selected,
if you
are using a Cook Power other than high.
()z*
0
%
0$i+f&
The holdlng tlme allows food
temperature
to even out all the way
through the food.
To sklp the holdlng tlme:
l
l
When the cooking time is over a buzzer will
sound 4 times [You can stop the buzzer by
opening the oven door ortouching
CANCEL ] When the buzzing stops, the
Display will show the time of day
Instruct the microwave
oven to DEFROST
and to cook in COOK CYCLE 2, or
Use COOK CYCLE 1 to defrost at 30% Cook
Power; use COOK CYCLE 2 for cooking
To check or stir foods
during cycles:
1
2.
3
4
Open
Check.
Close
Touch
where
between
or
the door. The oven will shut off
stir or rotate the food
the door
START The oven will go on from
it stopped.
COOKING TO A SERVING TIME
The microwave
oven controls can be set to start and stop the oven automatrcally,
even when you are not home. The Serve Time feature allows you to set the time you
want the food to be finished cooking
DO THIS...
THIS HAPPENS...
m
1.
14
Touch SERVE TIME.
The SERVE TIME Signal Light will come on
and the Display will show 4 0’s. Decide
what time you want the food to be done
cooking.
The Display will show the numbers you
touched in the order you touched them.
This example
shows a Serve Time of 6:O0.
the time you want the
food to be ready to
serve.
3.
4.
Cook in Defrost, Cook Cycle 1, Cook Cycle
2, or a combination
of them. Use high Cook
Power or lower Cook Powers.
Touch in the cooking
instructions
needed for
the food to be cooked.
If the Display begins flashing, there isn’t
enough time left before the Serve Time for
the oven to do what you told it to do. Touch
CANCEL and start over with a later Serve
Time
Touch START.
The START and
stay on. All the
cooking starts,
Display will go
happening
Extra information:
Make sure the ~G;:-t IS set to the right
time If i!:Jy
. You c 3n’l 551 t’le Serve Tr!me for more than
‘i2 ho.lrs ottel ‘he correct time of day
e II SOL open !he door before the oven
Deglrs rc cook. be sure to retouch START.
m 1’ ~01 wc9t lr:e n?rcrc_~~/~aveoven to start
,NtiCII
qoi,
3re nc31 home
.-0ok'rig
.
lise fc ,ods that ~QI!Inot go nad or spool
w~Me wa111na for c<J:-‘ktnr; to Stan Avotd
l
SERVE TIME Signal Lights will
other lights will go off. When
the Signal Lights and
on to show what is
using dashes with milk or eggs, cream
soups, cooked meats-, poultry or fish, or any
item with baking powder or yeast.
Smoked or frozen meats may be used; so
can vegetables,
fruits and casserole-type
foods
Any food that has to wait for cooking to
start should be very cold or frozen before it
IS put in the oven. MOST UNFROZEN FOODS
SHOULD NEVER STAND MORE THAN TWO
HOURS BEFORE COOKING STARTS.
SERVE TIME AND THE TEMPERATURE PROBE
1 Follow IfI .+ru< tront or, page It 47 for plug-ging 11.1fre Temperatii;e Probe
2 Touch SEKVt i!Mi
3 Toucr\ the nlJmwr pad: foithe time you
want the ‘oo:> finr.~hed
4. Folicw Int;tri.rctlons on pugelb-17for
touch1ngin ter!vperat:Jlrzcv3 cook power
instr:icrlc
5
5 Touch START
NOTE When cooking toward a Serve Time
<while using the Temperature
Probe, the
mIcrowave
oven will start cooking
90 minutes before the Serve Time you set. If
cooking time will be less than 90 minutes,
set a later Serve Time
15
COOKING WITH THE TEMPERRTURE PROBE
The MEAL SENSOR- Temperature
Probe helps take guesswork out of cooking roasts
and larger casseroles.
The probe is designed
to turn off the oven when it senses the
temperature
you want. See your MICRO MENUS‘ Cookbook
for helpful information
in
cooking different types of foods.
Number Pads are used to touch in the flnal food temperature
you want.
Touch...
To Get Approximately...
90 F(32 C)
110 F(43 C)
120 F(49 C]
130 F(54 C]
1
2
3
4
Touch...
-~
5
6
7
a
9
To Get Approximately...
145 F (63 C]
150-F (66 CJ
160 F(71 C)
165 F (74 C)
la5 F (a5 cl
DO THIS...
Socket
1.
Insert at ieast ’ 3 of the
temperature
probe Into
the food
DO THIS...
Ill0
..
4.
2. Place food in the oven
and plug the probe into
the socket on the oven
wall
3.
Make sure the probe
does not touch any part
of the oven interior. Close
the door.
THIS HAPPENS...
The COOK TEMP Signal Light WIII come
and the Display will show two O’s
on
Touch COOK TEMP.
The Display will show the number you
touched
This example
uses 6, or a final
cooked temperature
of about 150 F (66 C]
The 0 means the food is still cold
5.
Touch a number pad for
the d&red
final
temperature.
Eli
The COOK POWER Signal Light will come
and the Dtsplay will show IWO O’s
El
The Display will show what you touched.
This example
shows 60% of full power.
‘.
6.
.a
.
Touch COOK POWER.
Option: Touch START if
you want to use full
power.
0
7.
16
on
Touch the number pad
for the Cook Power you
want.
Tmk
The COOK POWER, COOK TEMP and START
Lights will come on. The START Light will go
off in about 5 seconds, the others will
stay on.
For 2 of every 10 seconds, the Display will
show the Cook Power you selected
if you
are using a Cook Power other than high.
When the probe senses the temperature
you selected, the oven shuts off and 4
buzzes sound. (You can stop the buzzer
opening the oven door ortouching
CANCEL.) When the buzzes stop, the
will show the time of day.
HINTS FOR USING THE ~~-TEMPERATURE PROBE
DO...
l
use t-of pads when removing probe froh?
tood or food from oven
l stir foods
during cooking when
recommended
e stir sc.ups. casseroles and drinks before
servlflg
a covet rousts with foil and let stand a few
minutes after cooking.
Remrjve !oil if You decide to cook it
longer.
For casseroles, the tip of
the probe should be in the
center of the food. Stir
foods when recommendea
Replace the
probe.
DONT...
o le? probe or probe cable touch any part
of the oven interior.
o let probetouch
foil (if used). Foil can be
kept away from probe with wooden
toothpicks.
Remove foil if arcing occurs.
l
use paper, plastic wrap or or plastic contamers. They will be in the oven too long.
o use probe In regular oven.
l force
probe info frozen food.
l use probe
for foods that need to simmer.
For liquids, balance
the
probe on a wooden spoon
or spatula so the tip of the
probe is in the center of
the liquid
For roasts, the tip of the
probe should be in the
center of the largest muscle, but not touching fat or
bone.
by
TIPS
l
l
l
l
in several of the items -all
not heat at the same rate.
Casseroles
cooked using the MEAL SENSOR
probe should be made from precooked
foods. Do not use raw meats, raw vegetables and cream sauces in casseroles
Dry casseroles
do not work well
l
Thaw frozen casseroles
and meats in the
microwave
oven before inserting the
probe.
If you are cooking individual
servings such
as mugs of soup, check the probe setting
CLEANING
Dry meat loaf mixtures
l
l
don’t work well.
Remember
that roasts may vary in size,
shape and composition.
Use the timings for
minutes per pound as a guideline
as well as
the MEAL SENSOR probe.
Starchy vegetables
SENSOR probe.
tend to stick to the MEAL
THE PROBE:
1. Remove probe from microwave
oven using hot
2. Wipe probe with a hot sudsy cloth. Use a plastic
stubborn foods.
3. Probe may be placed
in the silverware
basket
4. Be careful not to kink the cable.
NOTE: Make sure you have the right probe for your
thehandle.
BI-LEVEL
the mugs may
pads.
scouring
pad to remove
of the dishwasher.
oven. It WIII have”HI-Z”on
OVEN RACK
Use the Bi-Level Oven Rack to stack foods when cooking in more than one container.
The rack can be turned upside-down
to help fit taller containers
on the bottom of the oven.
First Posltlon: Use the rack only when heating
more than one container
of food.
Do not let a container
touch the top of the oven.
Second Posltlon: Turn rack upside-down
when using a taller container
on the bottom
of the oven.
CLEANING
l
l
l
THE RACK
Wash by hand with a mild detergent.
Wash on the top rack of a dishwasher.
Do not use abrasive scrubbers or cleansers
SPECIAL CAUTIONS
Put food in containers,
then place containers on rack.
l Do not cook
foods directly on rack without
putting them in containers
first.
l Do not use with browning
dish.
l Use only
in the microwave
oven.
l Do not let food
or container
touch the top of
the oven.
. Do not store rack in the oven,
l
Use only when cooking foods in more than
one container.
l
CHANGING OR CANCELLING INSTRUCTIONS
To change or cancel any instructions you have touched, simply touch CANCEL. All
rnstructrons will be cancelled.
The Display will show the time of day and you can start
over
If you want to change or cancel Instructions before you have touched START,simply
touch In the new Instructions. They will cancel the old ones.
OTHER OPERATING HINTS
These are a number of things you can do with your microwave
oven, Some will be
reminders. Others will be mentioned
for the first time.
I, To double check settlngs while the oven is running, touch the command
pad for the
setting you want to check. The instruction programmed
for that pad will show on
the Display for 5 seconds. Then the Display returns to show what the oven is doing,
2. To stop the oven while It Is runnlng:
* Open the door. The oven will stop. You can restart it by closing the door and
touching START.
* Touch CANCEL. All instructions will be erased. You must touch in new instructions.
3. If you touch two instructions into the same cycle, the second instructions will erase
the first.
4. When using a Cook Power other than high, the Display will show the Cook Power for
2 seconds of every 10 during cooking.
5. When Cook Cycle 1 follows Defrost, a holding time equal to the Defrost time will
occur before Cook Cycle 1. Cook Cycle 1 will begin after this automatic
hold time.
CLEANING THE MICROWKVE OVEN
Wipe often wrh
warm sudsy water
and a soft cloth
or sponge The control panel may be
cleaned
with a soft
soapy cloth or
spray glass cieaner.
For stubborn soil, boil a cup
of water in the oven for 2 or 3
minutes. Steam will soften
the soil.
Do not use abraslve
cleaners
Be sure to clean the areas
where the door and oven
frame touch when closed.
Rinse well.
or steel wool pads.
19
IMPORTANT
Before you start using your microwave
intomotion
will help you avoid
Metallic
before
oven, read this section
carefully.
This
to your oven.
Trim
Cooking in metal containers
can damage
the oven. So
can containers
with hldden
metal [twist-ties, foil-lining,
staples, metallic glaze or
or cooktrim). Test dinnerwore
ware
domoge
INFORMATION
using
Paper can char or burn,
and some plastics can
melt if used when heating
foods for more than 4
minutes
To tesr a d/sh for sole use, put it
into the oven with a cup of
water beslde it. Cook on high
Cook Power for one minute.
If the dlsh gets hot and the
water stays cool, do not
use It.
NEVER start a microwave
oven when It’s empty. The
oven can be damaged.
If
you experiment,
put a
container
of water ii? the
oven.
NEVER COOK OR REHEAT A
WHOLE EGG. Slice hard
boiled eggs before
heating. Steam build-up in
whole eggs may cause
them to burst and possibly
damage
the oven
Don’t let anything
touch
the top of the oven cavity.
Continued
20
next page
Rough C’ harsh cleaners
DO NOT store things In the
cari scrclrch or dull the
oven
c~‘;?Q fin:stl DO NOT USE THEM.
Overcooking
some foods
can cause them to scorch
or flame...especially
foods
like potatoes, popcorn,
snacks, etc. See the
MICRO MENUS
Cookbook.
hL:re
pi-:pczrn
only 1r1
;;c pper! de.s;gned for use
1’1a7:Icrowave ovens
Foilow popoer directions
Pesul+s (71e the popper
rnanufa~:t~jr9r’s
:es:!c;ns~:~rlrry
Liquids heated In certain
containers
may overheat
The liquid may then splash
out with a loud noise This
does not harm the oven
but you should not use
such contarners to heat
liquids again
Do NOT OVERCOOK
POTATOES. At the end of the
recommended
cooking
time they should be
slightly firm. Wrap in foil
and set aside for 5 minutes
They will finish cooking
while standing.
USE HO7 PADS. Microwave
energy ,:oes not heat
conla~~~.~rs but the hot
fo:,? d( --;
Follow MICRO MENUSCookbook
directions
carefully to properly
cook different types of
food. If using a different
cookbook,
you may
need to experiment
with
times and Cook Powers.
l Double-check
all
settings.
l
Use the oven only for
defrosting, cooking or
reheating
It is normal forthe inside of
the oven door to look wavy
after the oven has been running for a while.
If your e!ectric power line
voltage IS iess than the
normal :?40 volts, cooking
tlrqes rnrly be longer
-Tmk
At times, an extra fan
automatically
turns on to
help protect the microwave oven from excess
heat; you may notice a
louder sound level when
this fan is running.
i
OVENS WORK
HOW MICR-
Microwave
ovens are safe. Microwave
energy is not hot. It causes
make Its own heat, and it’s this heat that cooks the food.
Mode Mixer
Mag?etron
Oven i=avity
Metal
food to
Bottom
iloor
Microwaves
ore like TV
waves or lrght waves You
can’t see them, but you can
see what the\ do
A magnetron
produces
mrcrowaves.
The microwaves
move into the oven where
they are scattered
around by
a stirrer (like a fan).
Microwaves
bounce off
metal oven walls and are
absorbed
by food
lne bottom of your microwave oven lets microwaves through. Then they
bounce
off the metal
floor, back through the
bottom, and are absorbed by the food
Microwaves
pass through
glass, paper and plastic
without heating them so food
absorbs the energy. Mtcrowaves bounce off metal pans
so food does not absorb the
energy
Microwaves
may not reach
the center of a roast. The heat
around the outside is what
cooks the roast all the way
through. This IS one of the
reasons for letting some
foods (roasts, baked potatoes] stand for a while after
cooking, or for stirring some
foods during the cooking
time.
The microwaves
disturb
water molecules
in the food.
As the molecules
bounce
around bumping
into each
other. heat is made, like rubbing your hands together.
This is the heat that cooks.
THE MICROWAVE
OVEN LIGHT
The light in the microwave
oven is operating.
To replace
the light
oven comes
bulb:
1. Move range away from the wall. Be very
careful. It Is heavy.
2. Unplug the power cord.
3. Remove holding screw on access panel.
4. Remove the cardboard
baffle from the bulb.
5. Replace the bulb with a 40-watt appliance
bulb.
6. Replace the cardboard
baffle and the access panel
7. Plug in the power cord and move the range
back into position.
22
on when the door is open
and
when
the
Using your cooktop and lower oven
COOKTOP
AND
LOWER OVEN CONTROLS
Set Time Knob
Start Time Knob
Stop Time Knob
Lock Light
Clean
Light
Adjustable
Lower
Oven Temperature
Control
I ower Oven Slgnal
Light
Surface Unit Signal Lights
Surtace
Unlt Control
Lower Oven Selector
Cooktop
Light Switch
Manual Lower Oven Light Switch
SURFACE UNIT CONTROLS
;
One of the signal
lights will glow to
remind you which
surface unit is on. Be
sure all slgnal lights
are off when you are
not cooklng.
Control knobs must
be pushed In before
turnlng. Turn either
way until the setting
you want shows in the
window. Set them anywhere from HI to OFF.
Signal lights match
location of surface
units on cooktop
Until you get used to the settings,
Use HI to start
foods cooking
or
to bring liquids to CI
boll Surlace
unlt
will not turn red
It good contact
Is
made wtth bottom
of pan.
use the followlng
Use MED-HI to
hold a rapld boll
or to fry chlcken
or pancakes.
See
“The
Accessory
your “Cooking
information.
as a gulde.
Use MED tor
gravy, puddlngs
and Icings, or
to cook large
amounts of
vegetables.
Canning
Guide”
Use MED-LO to
keep food cookIng after startlng
It on a higher
setting.
Kit”(page29)
for important
and
utensil
Use LO to keep
food warm until
ready to serve.
Set the heat
hlgher or lower
wlthln the LO
band to keep
food at the temperature
you
want.
23
THE LOWER WEN CONTROLS
The lower
Temperature
oven is controlled
by two knobs: the Oven Selector and the Oven
Control. Bofh must be on 0 setting for the oven to heat.
THE OVEN SELECTOR
With the Oven Selector on
BROIL, only the top element
heats. (Broiling, pg. 27).
With the Oven Selector on
BAKE, the bottom element
does most of the work. The
top element heats, but does
not turn red. (Baking, pg. 25).
With the Oven Selector on
TIMED, the MEALTIMER’ Clock
can be used to turn the oven
on and off automatically.
(MEALTIMER Clock, pg.26).
*Tmk
THE OVEN TEMPERATURE CONTROL
Use the Oven Temperature
Control to set baking or roasting temperature
when the
Oven Selector is on BAKE or
TIMED.
When both the Oven Selector and Temperature
Control
are on BROIL, the broil element heats all the time. The
BAKING OR ROASTING
1
Put the rack(s) where you
want them before turning on
the oven.
Rack(s) should be placed
so food can be centered
in
the oven. Always leave at
least 1’ 2 to 2 inches (4-5 cm)
between the sides of the pan
and the oven walls and pans.
~~..~~~~ For more information,
see the
“Cooking
Guide.”
Lift rack at front and pull out.
24
Oven Temperature
Control
can be set on a temperature
for slower broiling [see Broiling, page 27).
Set the Oven Selector
BAKE.
te!!!!!E=I:----__--.--- 9J
Put food in the oven. Oven
rock
wah
ond door
ADJUSTING
Let the oven preheat until the
Signal Light goes off.
Set the Oven Temperature
Control to the baking
temperature
you want
on
w//l be ho!
Guring baking, the elements
will turn on and off to help
keep the oven temperature
at the setting. The Signal Light
WIII turn on and off with the
elements.
The top element helps heat
during baking, but does not
turn red.
When baking is done,
both knobs to OFF.
turn
THE OVEN TEMPERATURE CONTROL
--.___
xxs your new oven seem to be hotter or colder than your old oven at the
soxe setiings? iheteirlperature
setting if? your old oven may have changed
grf:dualiy
Over the years The accurate
setting of your new oven can seem differI?:-,! If vou think the oven temperature
needs adjusting, follow these steps:
Locking
1.
3.
Pull the Oven Temperature Control straight off
2.
To lower the temperature,
move black part of knob
closer to LO. Each notch
AquaIs apout 10-F (5 cj
4.
llghten
the locking
screw.
Replace
Screw
Loosen the locking
screw; NOTICE position
notches.
of
To raise the temperature,
move black part of knob
closer to HI. Each notch
equals aboutlO”F
(5Y2).
the knob.
25
USING THE AUTOMATIC
-~~_
MEALTIMER
CLOCK
The Automatic
MEALTIMER Clock is designed
to turn the lower oven on and off
at times you set...wen
when you are not around.
To start and stop baklng
automatlcally:
1.
Put the lower oven rack(s)
where you want them
and place the food in tk;e
oven
2.
Turn the Set Time Knob
until the Start and Stop
Time Dials show the right
time of day.
3.
Push in and turn the Start
Time Knob clockwlse
to the time you want baking to start
4.
Push in and turn the Stop
nrne Knob clockwbe
10 the time you want the
oven to shut off.
5.
Set the Oven Selector
TIMED.
6.
Set the Oven Temperature
Control on the baking
temperature
you want.
7.
Af?er baking IS done,
both knobs to OFF
To stop baking
turn
8.
on
To stop the oven before
the preset time, turn both
knobs to OFF
automatically:
1I
Put th? over; rack(s] where you want
them and piace the food in the oven.
2. Turn the Set Time Knob until the Start and Stop
Time Dials show the right time of day
3. Push il: .zncj ?urn the Stop Time Knob clockw&e !c i1.9 time you want the oven ?o shut off.
4.
5.
6.
Set the Oven Selector on TIMED
Set the Oven Temperature
Control on the
baking temperature
you want
After baking is done, turn both knobs to OFF.
To stop the oven before the preset time,
turn both knobs to OFF.
SPECIAL CAUTION:
Use foods that will not go bad or spoil
whl!e waiting
for cooking
to start. Avoid
using dishes with milk or eggs, cream
soups, cooked
meats or fish, or any item
with baking powder or yeast.
Smoked or frozen meats may be used;
so can vegetables,
fruits and casseroletype foods. Vegetables
can be cooked
in
26
a covered
baking dish with about a halfcup (118 ml) of water for 1 to 1% hours.
Any food that has to wait for cooking
to
start should be very cold or frozen before
it is put in the oven. MOST UNFROZEN
FOODS SHOULD NEVER STAND MORE THAN
TWO HOURS BEFORE COOKING STARTS.
Tmk
BROILING
4. Place the rack where you
2.
Put the broiler pan and
food on the rack.
3.
Set the Oven Selector
BROIL.
5.
During broiling, the oven
door must be partly
open. A built-in stop will
hold it there.
6.
When broiling is done,
turn both knobs to OFF
want it for broiling.
4.
Set the Oven Temperature
Control on BROIL (or on a
lower temperature
for
slower broiling).
For slower brolllng, set the Oven
instead of BROIL. The broil element
The lower the temperature
setting,
The Oven Selector must be on BROIL and
Suggested
oven-rack
Food
Beef Steaks
Rare
Medium
Well done
Beef Steaks
Rare
Medium
Well Done
Hamburgers
Lamb Chops
Medium
Ham slice, precooked
or tendered
Canadian
Bacon
Pork Rib or Loin Chop
Well done
_L,-l ~~
LnlcKen
Fish
Liver
Frankfurters
on
Temperature
Control on a remperature
will then turn on and off instead of staying on,
the slower the broiling.
the door partly open for ail broiling temperatures,
positions
and broiling
times
Approxlmate
Temperature
1st side
Minutes set to BROIL
2nd side
Description
inches (cm) from top
of food to Broil Element
1 ” (2.5 cm)
1 ” (2.5 cm)
1 (2.5cmJ
3” (8 cm)
3” (8 cm)
3’(8cm)
7-9
9-l 1
1 l-13
3-5
4-7
5-7
1’2 (4cm)
112’ (4 cm)
1 12” (4 cm j
I*‘(1 cm)
4”-5”
4”-5”
4”-5
3” (8
13-l 5
17-19
19-21
6-8
6-8
8-l 0
14-16
4-5
1 ” (2.5 cm)
‘~“-1”
(l-2.5 cm)
12” (1 cm)
34“-1 ”
(2-2.5 cm)
^ ^
z-3 ID.
(l-l .5 kg)
cut in half
whole
fillets
I ‘y-3 4”
(l-2 cm)
3” (8 cm)
6-8
4-5
3’ (8 cm)
3” (8 cm)
6-8
6
4-5
4
(1 O-l 3 cm)
[I O-l 3 cml
il O-1 3 cmj
cm)
4”-5’(10-13
cm)
15
IO
7”-9” (18-23 cm)
3”(8 cm)
3” (8 cm)
25-30
1 I-16
7-8
1 o-1 2
9-l 4
5-7
3”(8 cm)
4”-5” (I 0-q 3 cm)
3
6-7
3
4-5
27
THE COOKTOP LIGHT
To turn on the fluorescent
light under the upper oven, push the button under the
control panel marked TOP LITE. Hold it in for a second before letting it go Push it
agarn to shut off the light
To replace
the light tube:
4.
Turn off the electrrc power
at matn power supply
2.
Remove the 3 screws and
front metal trim that supports the light cover. The
glass is heavy. Hold it
securely.
3.
Wlth both hands, lower
the front of the cover a
little and pull it straight
toward you
4.
Turn top of fluorescent
tube toward you until It
,comes out of the receptacles at both ends
5.
Replace wrth a 20-watt
cool-white
fluorescent
tube
6.
Wlih both hands, carefully fit the glass cover
Into the metal SuppOrt
tram at the back
7.
Slide the cover back far
enough for the front to
fit behind the spring tabs
at the er?ds
8.
Replace the front support
tram and the 3 screws
9.
Turn electric power back
on at main power supply
28
IHELOWERUVENLIGHI
The lower oven light will come on when you open the oven door or when you
push the Oven Light switch at the bottom of the control panel. Close the oven
door or push the switch again to shut it off
To replace
the light bulb:
4.
Turn off the electric
at the main power
power
supply.
2.
Remove the bulb cover
by pulling out on the wire
holder and moving it to the
side.
4.
Replace the bulb with a
40-watt appliance
bulb
available
from most grocery, variety and
hardware
stores.
5.
Replace the bulb cover
and snap the wire holder
in place. The bulb must
have this cover when the
oven Is belng used.
6.
Turn the power back on
at the main power supply
Hot air and moisture escape
from the lower oven through a
vent under the right rear surface
unit. You can cook on the unit,
or keep food warm on it while
the oven is on. Plastic utensils
lefl over the vent can melt.
Do not block the vent. Poor
baking can result.
OptSod Accessories
ROTISSERIE
It you would like a rotisserie for your lower oven, you can order a kit (Part No.
261881) from your dealer, The kit includes easy installation
inStrUCtiOnS.
CANNING KIT (Part No. 242905)
The large diameter
of most water-bath
or pressure canners combined
with high
heat settings for long periods of time can shorten the life of regular surface units and
cause damage
to the cooktop.
If you plan to use the cooktop for canning, we recommend
the installation
of a
Canning Kit. Order the kit from your Whirlpool Dealer or Tech-Care Service Company.
Use only flat-bottomed
utensils for best results and to prevent damage
to the
range Specialty
items with rounded or ridged bottoms [woks, ridged bottom canners
or tea kettles] are not recommended.
See the “Cooking
Guide” for important
utensil
information.
SEE THE “COOKING GUIDE”FOR IMPORTANT CANNING INPORMATION
29
Cleaning and caring for your range
SURFACE UNITS AND
REFLECTOR BOWLS
CONTROL PANEL AND KNOBS
REMOVING
1.
First make sure lower oven and surface
unlt control knobs are set on OFF. All knobs
pull stralght off. Surface unit knobs have
a collar and sprlna.
1.
2.
2.
Use warm soapy water and a soft cloth to
wipe the panel. Rinse and wipe dry
3.
Wash knobs and surface
unit collars
warm soapy water. Rinse well and dry
In
3.
Be sure surface
unrts are OFF and CCCL.
Lift the edge of the unit opposrte
the receptacle
just enough to clear?he reflector
bowl
Puil the surface
receptacle
unit strarght
away
from the
Put imall end
of sprlng
closest to
control panel.
4.
3o
Push knobs strcight
back on. Make sure
they point to OFF. Make sure the collar and
sprlng on surface
unlt knobs are put together as shown.
Bowl Opening
4.
Loft out the reflector
bowl and trim ring.
1. Be sure surface
unit controls
4.
While pushrng the surface unit terminal into
the receptacle,
lift a little on the edge of
the unit nearest the receptacle.
5.
When the terminal
is pushed into the receptacle
as far as it will go, the surface unit
will fit into the trim ring.
are OFF.
Receptacle
2.
Line up opening
in the reflector bowl and
notch in trim ring with the surface unit
receptacle.
Reflector bowls reflect heat back to the
utensils on the surface units. They also help
catch spills. When they are kept clean, they
reflect heat better and look new longer.
If a trim ring gets discolored,
some of the
utensils used may not be flat enough.
Or
some may be too large for the surface unit.
In either case, some of the heat that is meant
to go into or around a utensil goes down
and heats the trim ring. This extra heat can
discolor it.
31
STORAGE DRAWER
The storage drawer is tor storing pots and pans. Never store anything that can burn
or melt In the drawer. The drawer is warm when baking in the lower oven Use care
when handling
the drawer.
REMOVING THE STORAGE DRAWER
1.
Pull drawer straight
the first stop.
REPLACING
out to
2.
Lift front and pull out to
the second stop
3.
Lift back slightly and
slide drawer all the way
out
3.
Lift drawer front to clear
second stop and slide
drawer closed
THE STORAGE DRAWER
Drawer Slide Rail
1.
32
Fit ends of Drawer Slide
Rails into drawer guides
both sides of opening.
2.
on
Lift drawer front and push
in until metal stops [on
drawer slide rails) clear
white stops on drawer
guides.
THE LOWER OVEN SELF-CLERNING CYCLE
The lower oven self-cleaning
cycle uses very hlgh heat to burn away
soil. Before you start, make sure you understand
exactly how to use
the cycle safely.
BEFORE YOU START
1.
Clean areas that may not be cleaned
during the cycle. Use hot water and detergent or a soapy steel-wool pad on...
Clean Frame
l the frame
around the oven
l the inside
of the door, especially
the part
outside the oven seal.
DO NOT trv to clean the fiberglass seal. DO
NOT move It or bend It.
2.
3.
4.
5.
Remove any pots or pans you may have
stored in the oven. They can’t stand the
high heat.
Wipe out any loose soil or grease. This will
help reduce smoke during the cleaning
&%z.sure
the motor socket cover is
closed if your oven has a rotisserie.
Put oven racks on the top two guides. Put
two reflector bowls upslde down on
each. They should not touch each other or
the oven walls
SPECIAL CAUTIONS
DO NOT block the vent
during the cleaning
cycle
Air must move freely for
best results
Do NOT use commercial
oven cleaners in your oven.
Damage
to the porcelain
finish may occur.
DO NOT touch the oven
during the cleaning
cycle
It can burn you.
DO NOT force the Lock
Lever The lever is designed
to stay locked until the
oven is cool enough to
safely open.
DO MOT use foil or other
liners in the oven. During
the cleaning
cycle, foil
can bum or melt.
1.
Set the Oven Selector
CLEAN.
4.
7.
to
Set the Oven Temperature Control to CLEAN.
Push in the Stop Trme
Knob and turn the hand
clockwise
about two
or three hours. [Two hours
for light soil; three or
more for heavier soil.]
5.
Move the Lock Lever o/l
the way to the right. The
Clean Light will come on
only when the lever is
all the way over.
6.
When the Lock Light
goes off, turn the Oven
Selector and Oven Temperature Control to OFF.
8.
Move the Lock Lever
back to the left, Do not
force It. Wait until it will
move easily. This turns off
the Clean Light.
9.
DO NOT TOUCH THE RANGE DURING THE CLEANING
34
3.
2.
Turn the Set Time Knob
until the Start and Stop
Time Dials show the right
time of day.
The Lock Light
when the oven
above normal
temperatures.
Lever can’t be
when the Lock
comes on
gets
baking
The Lock
moved
Light is on
Atter the oven Is cool,
wipe off any residue
or ash with a damp
cloth. If needed, touch
up spots with cleanser or
soapy steel-wool pad.
CYCLE. IT CAN BURN YOU.
SPECIAL TIPS
>,i
1.
Keep the kitchen well
ventilated
during the
cleaning
cycle to help
get rid of normal heat
odors and smoke.
4.
Oven racks lose their shine, discolor
and become harder to slide on their
guides when they are left in the oven
during the cleaning
cycle. To make
them slide easier, polish the edges of
the racks and rack guides with a soapy
steel-wool pad, rinse well, and wipe
on a thin coat of salad oil.
2.
3.
Clean the oven before
it gets heavily soiled.
Cleaning a very soiled
oven takes longer and
results in more smoke
than usual.
5.
If the cleaning
cycle
doesn’t get the oven as
clean as you
expected,
the cycle
may not have been set
long enough. Set the
cleaning
time longer
for heavier soil.
To stop the cleaning
cycle after it has
started:
l Turn the Stop flrne Knob
clockwise
until the hand points to the right time
of day.
l Turn the Oven
Selector and Oven
Temperature
Control to OFF.
l When the Lock Light turns off, move
the
Lock Lever back to the left. DO NOT
FORCE IT. Wait until it moves easily
HOW IT WORKS
During the self-cleaning
cycle, the oven gets much hotter than it does
for baking
or broiling...approximately
875” F (468” C). This heat breaks
up grease
and soil, and burns it off
The graph shows approximate
temperatures
and times during a selfcleaning
cycle set for two hours.
SELF-CLEANING
CYCLE -TWO
(Approximate
1000
F
800
F
600
F
400
F
200
F
START
Temperatures
HOUR SElTING
and Times)
204
‘/a hr
1 hr
I’,$ hrs
2 hrs
Notice that the heating stops when the two-hour setting
while longer for the oven to cool down enough to unlock.
C
21/, hrs.
is up, but that it takes a
PART
Outside
range
of
WHAT TO USE
Soft cloth, warm soapy
water
Nylon or plastic
scouring pad for stubborn
spots
Surface
units
No cleaning
Porcelainenamel
reflector bowls
Automatic dishwasher or
warm, soapy water
Self-Cleaning
Oven cycle
Chrome
rings
Automatic dishwasher
or
warm. soapy water or plastic
scrubbina
oad
Warm, soapy water or soapy
steel wool pads
trim
Broiler pan
and grid
Control knobs
and chrome
rims
Control
panel
Oven
racks
Lower oven
door glass and
outside only
of microwave
oven
Self-Cleaning
Oven
36
required
Warm, sudsy water and
bristle brush
Warm, soapy water
Commercial
glass cleaner
Self-Cleaning
Oven cycle
Warm. soapy water
or soaPY
steel wool pads
Warm, soapy water or
plastic scrubbing
pad
Commercial
glass cleaner
l
HOW TO CLEAN
Wipe off regularly
when range
is cool.
Do not allow food containing
acids (such as
vinegar, tomato, lemon juice or milk) to remain
on surface. Acids will remove the glossy finish.
l Do not use abrasive
or harsh cleansers.
l Spatters
or spills will burn off.
l Do not immerse
in water.
l Wipe out excess
spills. Wash with other cooking
utensils for routine cleaning.
l
Place upside down on oven racks in oven during
Self-Cleaning
Oven cycle.
l Wash with other
cooking utensils.
0 Do not place in Self-Cleaning
Oven
l
Wash with other cooking utensils.
0 Do not place in Self-Cleaning
Oven.
l
l
l
l
l
l
l
l
l
Wash, rinse and dry well.
Do not soak.
Wash, rinse and dry with soft cloth.
Follow directions with cleaner.
Leave in oven during Self-Cleaning
cycle.
Wash, rinse and dry. Use soapy steel wool pads
for stubborn areas.
Make certain oven is cool. Wash, rinse and dry
well with soft cloth.
Follow directions provided
with Cleaner.
Clean before using Self-Cleaning
cycle to
prevent burn-on of soil.
l
Follow directions given on page 33-35. “Using the
Self-Cleanrng
Cycle.”
l Do not use commercial
oven cleaners.
Do not use foil to line the bottom ot your Selt-Cleaning
Oven.
For areas outside SelfCleaning
area use warm,
soapy water or soapy steel
wool pads
l
If you need service or assistance,
we suggest you follow these four steps:
1
l
Before calling for assistance.. .
Performance
problems often result from
little things you can find and fix yourself without tools of any kind.
If nothlng operates:
is the range correctly
plugged
into a live
circuit with the proper voltage?
(See Installatlon Instructlons.)
0 Have you checked
the main fuse or circuit
breaker box?
If the mlcrowave
oven will not run:
l
Is the timer set?
l
Is the door firmly closed and latched?
l Did you touch
START?
l
Did you follow the directions exactly?
I? mlcrowave
cooklng times seem too long:
l Is the electric
supply to your home low or
lower than normal? Your electric company
can tell you if the line voltage is low.
0 Is the Cook Power at the recommended
setting?
l Are you allowing
for more time when cooking more food at one time?
If the display shows a tlme counting down
but the oven Is not cooklng...
l
Is the Hold indicator
light on?
l
Is the-Minute Timer and no Cook Cycle indicator iight on?
l
Is the oven door closed completely?
If the mlcrowave
oven turns off too soon or
not soon enough when uslng the probe:
e Is at least Ii3 of the probe in the food?
a Is the probe tip in the center of the food?
0 Is the probe touching bone or tat?
l
Have you allowed
roasts to stand for a few
minutes after cooking?
l Is the probe
plugged
tightly into its socket?
l
Is the Cook Power set where it should be?
l
Is the COOK TEMP set at the end
temperature
you want?
If the lower oven will not operate:
l
Is the Oven Selector turned,to a setting
(BAKE or BROIL, but not TIMED)?
l
Is the Oven Temperature
Control turned to a
temperature
setting?
If surface units will not operate:
l
Have you checked
main fuse or circuit
breaker box?
l Are surface
units plugged
in all the way?
l Do the control
knobs turn?
l
If the Self-Cleanlng
cycle will not operufe:
Are the Oven Selector and the Oven Temperature Control set to “CLEAN?”
l Does the Start Time Dial show the correct
time of day?
l Is the Stop Time Dial set ahead
to the time
you want the cleaning
cycle to stop?
l
Is the Lock Lever all-the way to the right?
(The Clean Light will come on.]
If cooklng resufh aren’t what you expect:
l Is the range
level?
l Are you using
pans recommended
in the
Cooklng Gulde?
l If baking,
have you allowed
1% to 2 inches
[4-5 cm) on all sides of the pans for air
circulation?
l Does the oven
temperature
seem too low or
too high? See “Adjusting the oven temperature control.”
l Have
you preheated
the oven as the recipe
calls for?
l Are the pans
the size called for in the
recipe?
l Are you following
a tested recipe from a
reliable source?
l Do the cooking
utensils have smooth, flat
bottoms?
l Do the cooking
utensils fit the surface unit
being used?
See the Cooklng Guide for more information
on cooking problems
and how to solve them.
l
2
l
Ifyou need assistance* . . .
Call the Whlrlpool
COOL-LINE@ service
as-
sktance
telephone number. Dlal free from:
Contlnental
U.S. . . . . . . . . (800) 253-1301
Mlchlgan
. . . . . . . . . . . . , . . . (600) 632-2243
121
and talk with one of our trained Consultants.
The Consultant
can instruct you in how to obtain satisfactory
operation
from your appliance or, if service is necessary,
recommend
a
qualified
service company
in your area.
Alaska 6 Hawall . . . . . . . . (800) 253-l
If surface unlt knob or knobs will not turn:
Did you push in before trying to turn?
l
Is the spring replaced
as shown on
page JO?
l
37
3
l
4
If you need service * . . .
Whirlpool
has a
nationwide
network of franchised
TECH-CARE”
Service
Companies.
TECH-CARE service
technicians
are
trained to fulfill the
product
warranty
and provide
afterwarranty
service,
anywhere
in the United
States. To locate TECH-CARE service
in your
area, call our COOL-LINE service assistance
telephone
number [see Step 2) or look in your
telephone
directory
Yellow Pages under:
APPLIANCES-HOUSEHOLDMAJOR-SERVICE
6 REPAIR
WHlRLPOOLAPPilANCES
FRANCHISEOTtCH-CARESERVICE
SERI’IC‘E
XYZSERVICECO
123 Maple
ELECTRICAL
APPLIANCESMAJOR--REPAIRING
A PARTS
OR
(‘O.MPA,\iE.~
993.3933
WHIRLPOOLAPPLIANCES
FRANCHISEDTECH~CARE
SERVICE
SER\‘I(‘E
XYZ SERVICECO
123 Maple
999~9339
OR
WASHING MACHINES,
6 IRONERS-SERVICING
DRYERS
WHIRLPOOLAPPLIANCES
FRANCHISEOTECH~CARESERVICE
SERI'IC‘E
XYZSERVICECO
12J Maple
38
C0MPA.VIE.S
YYY-YY3Y
C‘O.MI’A.t’IE~~
l
If you have a problem*.
..
Call our CCCL-LINE service assistance
telephone number (see Step 2) and talk with one
of our Consultants, or if you prefer, write to:
Mr. Guy Turner, Vice President
Whirlpool Corporation
Administrative
Center
2000 US-33 North
Benton Harbor, Ml 49022
If you must call or write, please provide: model
number, serial number, date of purchase, and
a complete
description
of the problem.
This
information
is needed
in order to better respond to your request for assistance.
THIS PAGE
INTENTIONALLY
LEFT
BLANK
FSP is o registered
trodemork
of Whirlpool
Corporation
for
quality
ports. look for this
FSP
symbol of quality whenever
R‘ you need a replacement
port
for your Whirlpool
opplionce.
FSP replacement
ports
will fit right and work right, because
they ore
made to the same exacting
specifications
used to build every new Whrrlpool
appliance
0
genlon Harbor, Michigan. Automatic Washers, Clolhes Dryers.
Freezers, Aefrigerator-Freezers.
Ice Makers, Dishwashers.
guilt-in Ovens and Surlace Units, Ranger. Microwave Ovens,
Compactors, Room Air Conditioners, Oehumiditiers.
Central
Healing and Air Conditioning Systems.
Part No. 311432
Printed in U.S.A.


