1
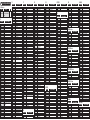
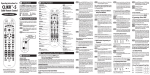
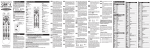
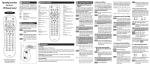
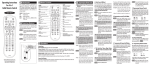
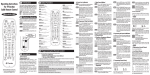
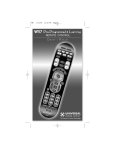
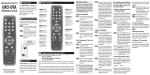
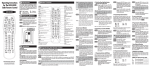
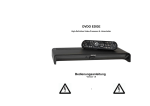
Operating Instructions For
CLIKR -5
™
Cable Remote Control
UR5L-8520L
1 Introduction
4 Button Functions
The CLIKRTM-5 UR5L-8520 is designed to
operate all Scientific-Atlanta, Pioneer
Voyager and Pace Micro digital set top
boxes (including DVR & HD), plus the
majority of TV, VCR, DVD and AUDIO
equipment on the market as shown below.
CABLE : Cable Converters
TV : Televisions
VCR : VCRs and TV/VCRs
DVD: DVD Players
AUX : Audio Receivers and DVRs, etc.
2 Replacing Batteries
Before you program or operate the remote
control, you must install two new AA alkaline
batteries.
STEP1 Remove the battery compartment cover
on the back of your remote control.
STEP2 Check battery polarity carefully, and
install the batteries as shown in the
illustration below.
STEP3 Replace the battery compartment cover.
STEP3 Point the remote control toward the
Component and enter the 3-digit code
number assigned to your brand.
*Note : If the 3-digit code number you just entered is
correct, the Component will turn Off. If it did not
turn Off, continue entering code numbers listed
for that brand until the Component turns Off.
STEP4 After you’ve entered the correct code number
and the Component has turned Off, press the
[POWER] button to turn the Component back
On. Now it’s time to test the VOLUME and
MUTE buttons for the TV (or PLAY and STOP
buttons for VCR and DVD) to make sure they all
work. If any of the functions do not work as they
should, repeat from STEP 3 using the next 3-digit
code number listed for that brand.
STEP5 Once you have found the correct 3-digit code,
save it by pressing the same [COMPONENT]
button one more time. The Component LED
light will blink twice to confirm that the code
was successfully stored.
Now, program the rest of your Components by
repeating STEPS 1-5
*Note : If the Pre-Programmed Method did not
work, or if the Code Tables do not list your
Component brand, use the Auto-Search
Method as explained in Section B.
B. Auto-Search Method
5 Programming the Remote Control
3 Operations
Universal Remote Control, Inc.
www.universalremote.com
OCE-0045K REV 03(04/14/07)
DEFAULT STATE:
Component Default: CABLE
Channel Default: CABLE channel and
numbers operate through the CABLE. You
have the option of controlling channel and
numbers through the TV, VCR or DVD. Refer
to section I for programming steps.
Volume Default: CABLE volume and mute
operate through the TV. You have the option
of controlling volume and mute through the
Cable box, VCR or DVD. Refer to section J J
for programming steps.
STEP1 Turn on the Component you want to
program (TV, VCR, DVD or AUX) using your
old remote.
STEP2 Press the [COMPONENT] button (TV, VCR,
DVD or AUX) to be programmed and
[OK/SEL] button simultaneously for 3
seconds. The Component LED light will turn
on for 30 seconds indicating the unit is ready
to be programmed.
STEP3 Point the remote toward the Component and
press the [CH] or [CH] button one step
at a time or keep it pressed. The remote will
emit a series of ON/OFF commands.
Release the [CH] or [CH] button as soon
as the Component turns Off.
STEP4 Test functions. (Same as for 3-Digit Code
Programming Method - Section A). If any of
the functions do not work as they should,
repeat from STEP 3 using [CH] or [CH]
buttons to find the correct code.
STEP5 Save the code. (Same as for 3-Digit Code
Programming Method - Section A).
There are three ways you can program your CLIKRTM-5 remote:
* The Pre-Programmed 3-Digit Code Method
* The Auto-Search Method
* The Learning Method
The Pre-Programmed Code Method allows you to setup all the buttons at once by entering 3-digit code numbers
that correspond to a particular Component’s manufacturer/brand, so it’s the fastest and easiest of the three
methods. (Code Tables are on the backside of this Instruction Sheet.) The Auto-Search Method scans through all
the codes in the remote control, one at a time. The Learning Method allows you to transfer functions from other
remotes, one button at a time.
IMPORTANT SETUP NOTE!
This pertains to all programming steps. When you are in setup mode, a component LED will light for 30 seconds.If
you do not press a button within 30 seconds, the LED light will turn off and exit setup mode and you will need to
start over.
Now, repeat the Auto-Search Method for those
Components you could not program earlier with the
Pre-Programmed Method. If you can’t find the right
code using the Auto-Search Method, try the Learning
Method in Section C.
A. Pre-Programmed 3-Digit Code Method
C. The Learning Method
STEP1 Turn on the Component you want to program (TV, VCR, DVD or AUX) using your old remote.
STEP2 Press the [COMPONENT] button (TV, VCR, DVD or AUX) to be programmed and [OK/SEL] button
simultaneously for 3 seconds. The Component LED light will turn on for 30 seconds indicating the unit is
ready to be programmed.
STEP1 Press the [COMPONENT] button (TV, VCR,
DVD or AUX) to be programmed and the [ # ]
buttons simultaneously for 3 seconds until
the Component LED light turns on.
STEP2 Line up the CLIKRTM-5 to the other remote,
head-to-head, 1 or 2 inches apart.
STEP3 Press any button on the CLIKRTM-5 that you
want to teach a command to. For example,
if you want to teach the [MUTE] button,
press the [MUTE] button.
STEP4 Press and hold the [MUTE] button on the
other remote until the CLIKRTM-5 Component
LED light blinks twice.
*Note : The LED will blink 5 times if there was an
error in the learning process. In so, repeat
STEPS 3 and 4. Continue learning other
buttons by repeating STEPS 3 and 4.
STEP5 Once you have completed teaching
CLIKRTM-5 all desired commands for that
Component, save the learned commands by
pressing the [COMPONENT] and [ # ]
buttons simultaneously until the Component
LED blinks 3 times. Now test all the buttons
to make sure they learned correctly.
D. Erasing a Single Learned Command
STEP1 Press the [COMPONENT] and [ # ]
buttons simultaneously for 3 seconds
until the Component LED light turns on.
STEP2 Press and hold the button you want to erase
for 3 seconds. The Component LED will blink
twice to confirm the erasure.
STEP3 To exit, press and hold both the
[COMPONENT] and [ # ] buttons
simultaneously until the Component LED
blinks 3 times.
E. Erasing All Learned Commands from One Component
STEP1 Press the [COMPONENT] and [ # ] buttons
simultaneously for 3 seconds until the
Component LED light turns on.
STEP2 Press and hold both the [COMPONENT]
button you want to erase and the [PAUSE]
button for 3 seconds. The Component LED
will blink twice to confirm the erasure.
STEP3 To exit, press and hold both the
[COMPONENT] and [ # ] buttons
simultaneously until the Component LED
blinks 3 times.
F. Finding a Component Button’s Setup Code Number
If you used either the Auto-Search or Learning
Methods to program a Component, you may not know
what the correct code number is. Here is a way for
you to identify the code number, so you can record it
for future reference.
STEP1 Press the [COMPONENT] button (TV, VCR, DVD
or AUX) you want to verify and the [OK/SEL]
button simultaneously for 3 seconds. The
Component LED light will turn on for 30 seconds.
STEP2 Press the [INFO] button and count the number of
times the Component LED light blinks. This
number indicates the first digit of the code,
followed by the second and third, each
separated by a one second pause when the LED
will turn off.
*Note : 10 blinks represents the number zero.
Example : One blink, (pause), eight blinks, ( pause) and
three blinks, indicates code number 183.
G. AUX Function: Programming a 5 th Component
You can take advantage of the AUX function to program a 5th
Component such as a second TV, VCR, DVD or Audio Component.
STEP1 Turn on the 5th Component you want to program
(TV, VCR, DVD or Audio) using your old remote.
STEP2 Press the [AUX] button and the [OK/SEL] button
simultaneously for 3 seconds.The [AUX]
Component LED will turn on for 30 seconds.
STEP3 Press the [COMPONENT] button you want to
setup. Point the remote control toward the
Component and enter the 3-digit code number
assigned to your brand.
*Note : If the 3-digit code number you just entered is the
correct number, the Component will turn Off. If it
did not turn Off, continue entering code numbers
listed for that brand until the Component turns Off.
STEP4 Test functions. (Same as for 3-Digit Code
Programming Method - Section A). If any of
the functions do not work as they should, you
need to find a new code.
STEP5 Once you have found the correct 3-digit code,
save it by pressing the [AUX] button one more
time. The Component LED light will blink twice
to confirm the code was stored. Now when
you press the AUX button, all the buttons will
work with that 5th Component.
H. Programming the System On/Off Button
This allows you to program the System On/Off button so it can
send up to five power On/Off commands with one button press.
STEP1 Press the [CBL] button.
STEP2 Press the [SYSTEM ON/OFF] button and the
[OK/SEL] button simultaneously for 3 seconds.
The [CBL] button will turn on for 30 seconds.
STEP3 Press the first [COMPONENT] button you want
to store in the [SYSTEM ON/OFF] button and
then the [POWER] button. Repeat this for other
Components until you have stored all the
desired power commands into the [SYSTEM
ON/OFF] button.
STEP4 Press the [CH] button to save the power
commands you stored. The [CBL] button will
blink twice to confirm the commands have
been saved.
I. Programming Channel Control
You can program the channel controls (Channel Up,
Channel Down and Last) from one Component to
operate in another Component mode. Default channel
control settings on the remote control are as follows:
CBL : CBL
DVD : DVD
T V : CBL
AUX : AUX
VCR : CBL
If you wish to store the TV channel control in TV mode,
use the following steps.
STEP1 Press the [TV] button and the [OK/SEL] button
simultaneously for 3 seconds. The [TV]
Component LED will turn on for 30 seconds.
STEP2 Press the [VOL ] button.
STEP3 Press the [TV] button again. The Component
LED will blink twice to confirm the programming.
To return to original state:
If you wish to restore the CABLE channel control in TV
mode, repeat the above steps but press [CBL] in STEP3 .
J. Programming Volume Control
You can program the volume controls (Volume Up,
Volume Down and Mute) from one Component to
operate in another Component mode. Default volume
control settings on the remote control are as follows:
CBL : TV
DVD : TV
T V : TV
AUX : AUX
VCR : TV
If you wish to store the CBL volume control in CBL mode,
use the following steps.
STEP1 Press the [CBL] button and the [OK/SEL] button
simultaneously for 3 seconds. The [CBL]
Component LED will turn on for 30 seconds.
STEP2 Press the [VOL ] button.
STEP3 Press the [CBL] button. The Component LED
will blink twice to confirm the programming.
To return to original state:
If you wish to restore the TV volume control in CBL mode,
repeat the above steps but press [TV] in STEP3 .
K. Programming a ‘Macro’ or Favorite Channel
In CBL mode, the M1, M2 and HELP buttons can be
programmed to act as a ‘Macro’ or Favorite Channel
button. This allows you to send up to 10 commands with
one button press.
STEP1 Press the [CBL] button to select the CBL mode.
STEP2 Press the [M1,M2 or HELP] button and [OK/SEL]
button simultaneously for 3 seconds. The [CBL]
Component LED will turn on for 30 seconds.
STEP3 Press up to 10 buttons you wish to store. The
[CBL] Component LED will blink once for each
command entered.
STEP4 Press the [CH] button to store the commands
that were selected. The [CBL] Component LED
will blink twice to confirm the storage of
commands.
L. Low Battery Warning
When the batteries are low and need to be replaced with
fresh batteries, the Component LED lights will blink 2
times in sequence whenever a [POWER] button is
pressed to turn on equipment.
M. Memory Lock System
This remote control is designed to retain programmed
memory for 10 years even after batteries are removed
from the remote control.
N. Record Your Component Set-up Codes
TV
VCR
DVD
AUX
Set-up Code Number:
Set-up Code Number:
Set-up Code Number:
Set-up Code Number:
6 Tabla de Códigos de Instalación.
CABLE Converter
Remote
Converter
Scientific-Atlanta Explorer 8000,
UR5L-8520L Pioneer Voyager DVR, Pace Micro
DVR Series.
Code No
001
TV
Manufacturer/Brand
ABEX
ADMIRAL
ADVENT
ADVENTURA
AIKO
ALERON
AKAI
A MARK
AMERICA ACTION
AMPRO
AMSTRAD
ANAM
AOC
APEX DIGITAL
AUDIOVOX
AVION
BARCO
BELCOR
BELL&HOWELL
BLAUPUNKT
BRADFORD
BROKSONIC
BROCKWOOD
CANDLE
CAPEHART
CELEBRITY
CENTURION
CETRONIC
CITIZEN
CLARION
CLASSIC
CLP CLASSIC
COLORTYME
CONCIERGE
CONCERTO
CONTEC
CORNEA
CORONADO
CRAIG
CROSLEY
CROWN
CURTIS MATHES
CXC
DAEWOO
DAYTRON
DELL
DIMENSIA
DUKANE
DUMONT
DURABRAND
DWIN
DYNASTY
EIKI
ELECTROBAND
ELECTROHOME
ELEKTRA
EMERSON
ENVISION
ESA
FISHER
FUJITSU
FUNAI
FUTURETECH
GATEWAY
GE
GEM
Set-Up Code Number
025
072 251 333 160
247
002
103
028
116 146 248 404 405
112 143
043
073
052
043 054 056 080 112
116 363 112 058
006
076 454 388
441
233
116
333 072
088
043
238
116
116 002 003 363
058
001
116
043
116 002 003 363 043 101 103 143
043
043
333
116
073
363
043 050 051
116
143
043 054
164
043 143
116 101 363 143
043
363 016 043 044 076 103 114 125 127 143
363 143
320 164 363
333
011 025
116 073
096
257
043
187
001
143 024 076 196
072
028 048 043 155 005 116 363 047 050 051 076
096 143 153 154
116
323
007 057
246 198
028 043 052
043
242 268
160 073 116 008 009 034 056 074 155 333 363
391
TV
Manufacturer/Brand
GIBRALTER
GOLDSTAR
GRUNPY
HALL MARK
HARLEY DAVIDSON
HARVARD
HAVERMY
HELLO KITTY
HIMITSU
HISENSE
HITACHI
HP
INFINITY
INFOCUS
INSIGNIA
INTEQ
JANEIL
JBL
JCB
JCPENNEY
JENSEN
JVC
KAWASHO
KEC
KENWOOD
KLEGG
KLOSS
KLOSS NOVABEAM
KMC
KTV
KURAZAI
LG
LODGENET
LOEWE
LOGIK
LUXMAN
LXI
MAGNAVOX
TV
Set-Up Code Number
116 073
113 116 102 363 106 112 127 143
028 043
363
028
043
081
076
043
419
011 166 009 010 012 023 075 143 158 072 363
378 316 327 421
164
333
350 400 052 164 403
073
002
164
001
024 116 008 009 030 065 101 143 160 363
013
038 034 001 083 199 210
116 001
043
116 001
466
002 059
002
143
043 116 143 154
072
363 113 116 102 106 112 127 143
072
164
072
363
166 007 052 251 160 164 138
164 059 116 003 060 061 363 127 022 160 094
226 390
MAJESTIC
333 072
MARANTZ
116 164
MATSUI
164
MATSUSHITA
080
MAXENT
242
MEGATRON
116 011
MEMOREX
007 072 363
METZ
088
MGA
116 363 024 028 042
MIDLAND
333 073
MINERVA
088
MINTEK
362
MINUTZ
008
MITSUBISHI
124 109 024 028 040 042 146 191 363
MONTGOMERY WARD 333 072
MOTOROLA
081
MTC
116 363 101
MULTITECH
043
NAD
025 138
NEC
272 197134 116 040 016 024 056 019 262
NET TV
242
NIKEI
043
NIKKO
116
NTC
103
NUVISION
351
OLEVIA
432 363 333 160
ONKING
043
ONWA
043
OPTIMUS
025
OPTONICA
019 251
OPTOMA
265
ORION
096
PANASONIC
080 034 056 164 208
PHILCO
116 003 059 060 164 363 024 056
PHILIPS
164 005 093 038 116 003 363 059 127 206 431
PILOT
116
PIONEER
234 135 025 018 023 116 393 272
POLAROID
388
PORTLAND
363 143
PRISM
034
VCR
Manufacturer/Brand
PROSCAN
PROTON
PROTRON
PULSAR
QUASAR
RADIO SHACK
RCA
REALISTIC
ROCTEC
RUNCO
SAMPO
SAMSUNG
SAMSUX
SANSEI
SANSUI
SANYO
SCEPTRE
SCOTCH
SCOTT
SEARS
SELECO
SHARP
SHENG CHIA
SHOGUN
SIEMENS
SIGNATURE
SIMPSON
SOLE
SONY
SOUNDESIGN
SPECTRICON
SQUAREVIEW
STARLITE
SSS
SUPRA
SUPRE MACY
SUPREME
SVA
SYLVANIA
SYMPHONIC
SYNTAX OLEVIA
TANDY
TATUNG
TECHNICS
TECHNOL ACE
TECHWOOD
TEKNIKA
TELEFUNKEN
TELERENT
TERA
TMK
TNCI
TOSHIBA
TOTEVISION
TVS
UNIVERSAL
VICTOR
VIDEO CONCEPTS
VIDIKRON
VIDTECH
VIEWSONIC
VIKING
VIZIO
WARDS
WAYCON
WESTINGHOUSE
YAMAHA
YORK
YUPITERU
ZENITH
ZONDA
Set-Up Code Number
160 333
363 112 058 143 171 172
392 398
116 073
034 056
019 363 143 043 127
333 160 065 116 363 024 056 152 023 074
007 019 043 047
186
182 073 395 416 072
116 058 363 242
258 050 089 101 105 363 127 143 160 228 229
116
076
096
166 007 020 053 057 082 187
276
116
028 043 363 048 143
030 363 007 028 057 143 094 160 082 166 138
205 011
251 019 014 028 029 363 022 143 175
081
116
088
072
003
231 232
001 139 126
028 363 003 043
112
052
043
363 043
116
002
001
328
116 003 052 059 060 164 044 160 127
052
432 363 333 160
251
056
034 080
028
363
002 003 363 024 028 043 072 101 143
037 046
072
172
363
073
138 030 007 040 101 325
143
096
008 009
038
146
174 164 188 192
363
242 389
002
386 387
363 008 009 019 028 060 061 072 074 143 164
034
015
076 280 435 001
116 363
363
043
363 073 072 095 103
112
VCR
Manufacturer/Brand
ADMIRAL
ADVENTURA
Set-Up Code Number
025 053
034
Manufacturer/Brand
AIKO
AIWA
AKAI
AMERICA ACTION
AMERICAN HIGH
AMPRO
ANAM
ASHA
AUDIO DYNAMICS
AUDIOVOX
BEAUMARK
BROKSONIC
CALIX
CANON
CAPEHART
CCE
CITIZEN
COLT
CRAIG
CURTIS MATHES
CYBERNEX
DAEWOO
DAYTRON
DBX
DYNATECH
ELECTROHOME
ELECTROPHONIC
EMERSON
FISHER
FUJI
FUNAI
GARRARD
GE
GO VIDEO
GOLDSTAR
GRADIENTE
HARLEY DAVIDSON
HARMAN KARDON
HARWOOD
HITACHI
HQ
INSTANTREPLAY
JCL
JCPENNEY
JENSEN
JVC
KEC
KENWOOD
KLH
KODAK
LG
LLOYD
LOGIK
LXI
MAGIN
MAGNAVOX
MARANTZ
MARTA
MATSUI
MATSUSHITA
MEI
MEMOREX
MGA
MGN TECHNOLOGY
MINOLTA
MITSUBISHI
MOTOROLA
MTC
MULTITECH
NEC
NIKKO
NOBLEX
NORDMENDE
OLYMPUS
OPTIMUS
OPTONICA
ORION
PANASONIC
VCR
Set-Up Code Number
117
034 161
016 146 043 046 124 125
117
145
072
145
040
012 023 039 043
101
040
035 037 129
101
028
108
024 117
101 117
024
003 022 102
041 145
040
111 116 117 005 010 108 110 120
108
012 023 039 043
034 053
059
101
006 029 035 017 025 027 034 036 037 046 101
129 131 153 162 116 145
003 010 008 009
145
034
034
072 147 107 109 144 145
132 136 155 115 102
101 106 114 020 020 012 123
034
034
012 045
024
004 026 150 034 043 160 020
034
145
145
012 013 015 066 101 102
043
048 043 130 150 060 012 152 145
101
014 048 034 047
024
101 145
101 106 114 020 020 012 123
034
024
034 003 009 017 106
102
067 034 041 156 164 145
067 012 156 145
101
027 030
145
145
101 003 010 014 034 053 072 102 139 145
045 046 059
040
020
059 061 151 020 020 045 046 051 049
053 145
034 102
024 034
012 023 039 043 048
101
040
043
145
101
053 054
025
066 070 145 163 167
VCR-TV/VCR
Manufacturer/Brand
PENTAX
PHILCO
PHILIPS
PILOT
PIONEER
PORTLAND
PROFITRONIC
PROTEC
PULSAR
QUARTZ
QUASAR
RADIO SHACK
RADIX
RANDEX
RCA
REALISTIC
RICO
RUNCO
SALORA
SAMSUNG
SANKY
SANSUI
SANYO
SCOTT
SEARS
SHARP
SHINTOM
SHOGUN
SIGNATURE
SINGER
SONY
SOUNDESIGN
STS
SYLVANIA
SYMPHONIC
TANDY
TATUNG
TEAC
TECHNICS
TEKNIKA
THOMAS
TMK
TOSHIBA
TOTEVISION
UNITECH
VECTOR RESEARCH
VICTOR
VIDEO CONCEPTS
VIDEOSONIC
VILLAIN
WARDS
WESTINGHOUSE
XR-1000
YAMAHA
ZENITH
Set-Up Code Number
020 020 145
034 067 145
067 034 101 054 071 156 145
101
021 020 048
108
040
024
072
002 014
066 145
123
101
101
107 109 144 147 041 145 020 034 102
003 008 010 014 034 053 054 101 145 102
058
148
014
102 113 115 120 032 066 107 109 125
053
022 043 048
003 010 014 102
017 037 120 129 131
003 008 010 014 020 101 009 017 073 112
053 054 165 145
024
040
034
024
001 057 058 052 003 076 053 154 145
034
020
034 059 067 145
034
010 034
039 043
034 039 043
070 145
019 034 101 145
034
006
131 008 059 047 082 020 120
101 102
102
012
048
012 034 046
102
034
003 020 017 024 034 053 054 131 145 102
024 025
024 034 145
012 034 039 043
072 080 056 048 101 034 058
VCR-TV/VCR
Manufacturer/Brand
AMERICA ACTION
DAEWOO
EMERSON
FUNAI
GOLDSTAR
HARLEY DAVIDSON
HITACHI
JCPENNEY
LG
LLOYD
MAGNAVOX
MEMOREX
PANASONIC
PHILIPS
RADIO SHACK
RCA
SEARS
SONY
SYLVANIA
Set-Up Code Number
117
005 117
153
034
101 123
034
034
101
101 123
034
034 067
101
070 167
034 067
123
034 144
101
057 154
067
DVD
Manufacturer/Brand
SYMPHONIC
THOMAS
ZENITH
Set-Up Code Number
Manufacturer/Brand
Set-Up Code Number
SYLVANIA
SYMPHONIC
TATUNG
TEAC
TECHNICS
TECHWOOD
THETA DIGITAL
THOMPSON
TOSHIBA
URBAN CONCEPTS
VENTURER
X-BOX
YAMAHA
ZENITH
034
034
034
DVD
Manufacturer/Brand
AIWA
AKAI
ALLEGRO
ALPINE
APEX DIGITAL
BLAUPUNKT
BROKSONIC
CINEVISION
COBY
CYBERHOME
DENON
DURABRAND
DVD 2000
EMERSON
ENTERPRISE
FISHER
FUNAI
GE
GOLDSTAR
GO VIDEO
GREENHILL
HARMAN KARDON
HITACHI
HITEKER
ILO
INITIAL
INTEGRA
JBL
JVC
KENWOOD
KISS
KLH
KRELL
LITEON
LEXICON
LG
MAGNAVOX
MARANTZ
MALATA
MERIDIAN
MICROSOFT
MINTEK
MITSUBISHI
MYRYAD
NAD
NAKAMICHI
NESA
ONKYO
OPTIMUS
OPPO
ORION
PANASONIC
PHILIPS
PHILIPS MAGNAVOX
PIONEER
POLAROID
POLK AUDIO
PROCEED
PROSCAN
RCA
RIO
RJTECH
SAMSUNG
SANSUI
SANYO
SEARS
SENSORY SCIENCE
SHARP
SHINSONIC
SONIC BLUE
SONY
146
281
091
098
087 111 115
111
130
091
260
271
080 173 138
091
017
091 143
074
147
143
027
091
137 091 220 221 222
111
084 140
101
087
268
111
142 180 280
084
012
151
279
135
104
264 265
148
091 057 074
066 096
105 066
267
153
027 206
111 282
017
102 134
088
103
111
076 141 180
023
266
130
144 150 285 138
066 105 276
141 066
099 023 131
233
141 066
086
027
027
091
269
056 070 165 137 159 275
154
147
130
222
094
033
091
001 033 145 191 286
AUX-AUDIO
Set-Up Code Number
143
143
102
023 270
138
088
023
027
034 130 141 164 188
035
149
027 206
089 066 197 138
057 074 091
DVD-DVD Recorders
Manufacturer/Brand
GO VIDEO
CYBERHOME
ILO
KISS
LITEON
PANASONIC
SENSORY SCIENCE
SONY
TOSHIBA
Set-Up Code Number
220 221 222
271
268
279
265
138
222
191
188 273
DVD-TV/DVD Combos
Manufacturer/Brand
AKAI
AIWA
AUDIOVOX
FUNAI
INSIGNIA
MINTEK
SAMSUNG
SYLVANIA
SYMPHONIC
TOSHIBA
Set-Up Code Number
281
146
284
143
292
282
165
143
143
130
DVD-TV/DVD/VCR Combos
Manufacturer/Brand
MAGNAVOX
PANASONIC
SYLVANIA
TOSHIBA
Set-Up Code Number
143
144
143
164
DVD-DVD/VCR Combos
Manufacturer/Brand
GO VIDEO
PANASONIC
PHILIPS
SAMSUNG
SANSUI
SONY
TOSHIBA
ZENITH
Set-Up Code Number
137
150
105 (VCR Functions for VCR 067)
137 159
154
145
141
091 (VCR Functions for VCR101)
AUX-AUDIO
Manufacturer/Brand
ADCOM
AIWA
AKAI
ANTHEM
ARCAM
ATLANTIC TECHNOLOGY
AUDIO FILE
B&K
BOSE
BOSTON ACOUSTICS
Set-Up Code Number
082 092 225 161 269 356
170 018 104 202 203 213 211 188
189
335 337
141 077
342
071
096 097
070 170 224 347 409 460
447
Manufacturer/Brand
CARVER
CITATION
CLARION
DELPHI
DENON
ELAN
ENLIGHTENED AUDIO
ESCIENT
FISHER
FLEXTRONICS
FOSGATE AUDIONICS
GOLDSTAR
HARMAN KARDON
HITACHI
INSIGNIA
INTEGRA
JAMO
JCPENNEY
JVC
KENWOOD
KLH
KOSS
KRELL
LEXICON
LINN
LUXMAN
MAGNAVOX
MARANTZ
MCINTOSH
MERIDIAN
MITSUBISHI
MONDIAL
MYRYAD
NAD
NAKAMICHI
NEC
NIRO
NILES
ONKYO
OPTIMUS
OUTLAW
PANASONIC
PARASOUND
PHILIPS
PIONEER
POLKAUDIO
PROCEED
RCA
REALISTIC
ROTEL
SAMSUNG
SANSUI
SANYO
SCOTT
SHARP
SHERWOOD
SIRIUS
SONY
SOUNDESIGN
SUNFIRE
TEAC
TECHNICS
THETA DIGITAL
TOSHIBA
XM SATELLITE RADIO
YAMAHA
ZENITH
Set-Up Code Number
006 028 061 071 201 214 226 185 013 077 284
148
026
556
109 215 230 234 330 340 679
057 290
099 098
451
214 182
378
148 342
008
148 233 077 028 118 318
020
589
275 017 046 108 080 209
398
216
163 191 114 279 291
026 066 145 192 182 005 280 374
331
216 573
072 384 672
120 235 236 237 357 360
124 377
009 139 052 165 115 004
086 164 152 077
006 028 031 040 063 185 186 265 289 492
238 286
100 012 013 628
242 204
157 158 042 043 081 112
077
186 113
040 244 245 172 183 287
176
343
403
275 017 046 108 080 209
026 041
342
032 195 219 177 292 626
129 130 132 261 294 295 333 334
249 250 063
014 039 044 069 168 116 035 063 198 480 556
515
144 268
010 048 117 156 067 288
019 073 075 095
074 083 085 654
016 653
040 048 110 063 065 228
214
019
026 094 175 652
024 102 106 447 370
555
001 018 247 248 166 101 184 218 271 380
036
344 345 182
005 019 049 040 212 217
122 176 193 219 178 177 200 257 262
136
060 087 198 278
556
026 253 169 067 173 205 264 232 089 264 274
143 210
AUX-DVR(TIVO)
Manufacturer/Brand
HUGHES
HUMAX
PHILIPS
RCA
REPLAY NETWORKS
SONY
TIVO
TOSHIBA
Set-Up Code Number
817
817
790 817
809
775
804 805
790 817
817