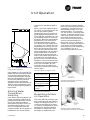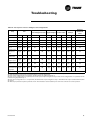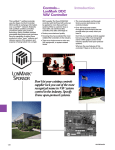
1
Installation
Owner
Diagnostics
Tracer® ZN.520 for Classroom
Unit Ventilator
UV-SVP01A-EN
Start-up Procedures
Installation of New Units
1.
Follow all instruction for
installation of classroom unit
ventilators as detailed in UVIOM-1 (Installation Operation
Maintenance manual).
2.
Disconnect power or disable
the circuit breaker to unit.
3.
Run communication link wire
when required. (See wiring
diagram in the unit).
4.
Install zone sensor when
required. (See wiring diagram
in the unit and zone sensor
submittals).
5.
Reapply power.
6.
Check for GREEN Status LED
operation to ensure power
has been made to the Tracer
ZN.520 unit controller.
TM
7.
Check for YELLOW Comm LED
operation to help ensure communication has been made to
the Tracer ZN.520 unit controller when required.
Peel IDENTIFICATION TAG from
unit and place in the Appendix of
this document, or on building
plans for future location use. The
actual room location on the tag
may be hand written.
UV-SVP01A-EN
5
Start-up Procedures
Power Up Sequence
Manual output test can be initiated
at any time in the power up sequence or during normal operation.
When 24 VAC power is initially applied to the controller, the following sequence occurs:
1.
Green Status LED turns on.
2.
All outputs are controlled Off.
3.
The controller reads input values to determine initial values.
4.
Standalone control is assumed
unless occupancy data is communicated.
5.
Random start timer expires (5
to 30 seconds, random).
6.
Power-up control Wait feature
is applied. When power up
control Wait is enabled, the
controller waits 120 seconds to
allow ample time for communicated control data to arrive.
If, after 120 seconds, the controller does not receive a communicated occupancy request,
the unit assumes standalone
operation.
7.
All modulating valves and
damper calibrate closed, face
and bypass damper calibrate
to bypass (when present).
8.
Normal operation begins after
290 (potentially) seconds have
passed.
Note: Manual output test can
be initiated at any time.
6
UV-SVP01A-EN
General Information
Tracer® ZN.520
Overview
The Trane ® Tracer ® ZN.520 controller is a factory-installed and
commissioned, direct-digital
controller (DDC) offering for
classroom unit ventilator systems. (See Figure 1: “Tracer
ZN.520 Control Board”) The Tracer ZN.520 can also be applied to
other Trane ® interoperable HVAC
equipment, including the fan coil
and blower coil products. (For
more information see,Table 1:
Tracer™ ZN.520 Unit Controller
features and coil availability, on
page 8 for more information.) For
more information regarding the
application of the Tracer ZN.520
to other Trane products, contact
the appropriate local Trane sales
office.
Trane offers a complete solution
to space comfort control with the
flexibility of Integrated Comfort
System (ICS) and stand-alone
control packages. The ICS control
package combines HVAC equipment and building management
into one environmental comfort
system.
Integrating the Tracer ZN.520 on
classroom unit ventilators, and
tying them to a Tracer Summit®
system will provide a complete
building management system.
The stand-alone control package Figure 1: Tracer ZN.520 Control Board
offers the features and functionality of the direct digital control
without a front-end building auThe Tracer ZN.520 is factorytomation system, while providing
mounted, tested, wired, configfuture considerations for ICS.
ured and commissioned for the seEquipment problems can often be
lected application.
diagnosed on each unit without
The Tracer ZN.520 configuration
having to access the unit compohas flexible point and product connets. These diagnostics can be refigurations. For example, with
ceived remotely via a modem with
point configuration, a specific bia Tracer Summit building automanary point can be configured to action system, thus reducing the
cept input from either a time clock
number of actual on-site service
or some type of generic device.
calls; through the Rover® service
tool connected to a communication jack located inside the Trace
zone sensor; or connected to the
unit.
UV-SVP01A-EN
7
General Information
Table 1: Tracer™ ZN.520 Unit Controller features and coil availability
Coil
Multiple
Fan Speeds
Dehumidification
Auto
Damper
Adjust
Face and
Bypass
Damper
Valve
Control
Economizer
Damper
Auxiliary
Heat 2
Entering
Water
Temperature
Sampling
X
2-pipe changeover
X
X
X
X
X
X
2-pipe hot water
only
X
X
X
X
X
X
2-pipe steam only
X
X
X
X
X
2-pipe changeover/
electric heat
X
X
2-pipe cool only
2-pipe cool only/
electric heat
4-pipe hot water/
chilled water
X
X
X
4-pipe changeover
X
X
X
4-pipe steam/chilled
water
X
DX/hot water
DX/steam
X
X
X
X
X
X
X
X
X1
X1
X
X
X
X3
X
X
X
X3
X
X
X
X
X
X
X
X
X
X1
X1
X
X
X
X
X
X
Electric heat only
X
X
DX/electric heat
X
X
DX cooling only
X
1
1
X
X
1. Multiple fan speeds are available in hydronic units only.
2. Auxiliary heat is designed to bring on baseboard heat as the second stage of heating. The baseboard heat must be the same type as the
unit heating coil.
3. Units with face bypass dampers cannot actively dehumidify.
8
UV-SVP01A-EN
Controller Circuit Board
Features
Power
Generic
Auto Test Button
Status LED
Communications LED
Service Button and LED
Communications
Zone Sensor Connections
Figure 2: Tracer ZN.520 unit controller circuit board
UV-SVP01A-EN
9
Controller Features
Each Tracer ZN.520 unit controller
circuit board is equipped with enhancements to help facilitate service, testing, and diagnosis.
Each board has
q Manual test button,
q Status LED,
q Communication status LED,
q Service button,
q Quick terminal connectors, and
q Easy to read screen printing.
(See Figure 1: “Tracer ZN.520
Control Board”).
Service
The Trane Tracer ZN.520 unit controller is serviced using Rover®, the
ICS software service too. Rover is
designed to support the Tracer
ZN.520 unit controller on the classroom unit ventilator.
For “remote” access to the communicating units, the zone sensors
offered with the Tracer ZN.520
have a telephone style (RJ-11) connector allowing field connection
between Rover and the zone sensor; however, the RJ-11 connector
must be connected to the terminals
TB2-5 and TB2-6 on the Tracer
ZN.520 unit controller.(See Figure
3: “Rover service tool connected to
the RJ-11 communication jack in a
zone sensor”)
The zone sensor may also be used
when trying to locate a unit. By
pressing the O N button on the zone
sensor for 5 seconds or using the
“wink” command in Rover, the circuit board receives the signal causing the Communication LED to
“wink”. Winking allows visual
identifier on the board for service
technicians.
The Tracer ZN.520 also includes
features such as a test output to
manually test all of the end devices
and color coded wires (i.e. red for
heating valves and blue for cooling
valves) to aid in the troubleshooting process.(See “Manual Output
Test” on page 48, for more information.)
Figure 3: Rover service tool connected to the RJ-11 communication jack in a zone sensor
Typical Components
A typical classroom unit ventilator
system with a DDC package consists of the following physical components, in addition to the
mechanical equipment:
q Tracer ZN.520—contains the
sensor input circuits, service
adjustments, microprocessor
control electronics, and
communications hardware.
10
Power is supplied by a
separately mounted 24 VAC\90
VA transformer.
q Sensor Modules—a variety of
analog sensors that provide
temperature and optional
humidity sensing and CO 2
sensor; and an operator
interface to the Tracer ZN.520
for operating modes, status,
and temperature setpoints.
q Standard End Devices—a
variety of devices that help to
gather information, control
capacity, and provide
ventilation are used by the
Tracer ZN.520 in its control
algorithm to condition the
space to the desired
temperature and relative
humidity level. (See “Standard
End Devices” on page13, for
more information.)
UV-SVP01A-EN
Communication Configurations
Note: The Tracer ZN.520 is a
configured controller. It will
not operate without a valid
downloaded configuration
file.
The Tracer ZN.520 controller supports ICS and peer-to-peer communications as well as standalone operation. A number of control features may be configured at
the factory or by using the Rover
service tool. (See “Configuration”
on page32, for more information.)
Integrated Comfort
System
Note: The Tracer ZN.520
controller may only be used
with Tracer Summit version
11.0 or greater with a Comm5
communications card.
Classroom unit ventilators can operate as part of a large building automation system controlled by
Tracer Summit. The Tracer ZN.520
is linked directly to the Tracer
Summit via a twisted pair communication wire. Each Tracer Summit
building automation system can
connect to a maximum of 120
Tracer ZN.520 controllers.
The ICS system also allows all of
the classroom unit ventilators to
share information without the
presence of hardwired sensors at
each unit. Some typical shared
points include outside air temperature, entering water temperature,
and occupancy schedules.
Peer-to-Peer
Communications
Figure 4: Communications link wire
The ICS system allows for complete communication with the
classroom unit ventilators via
Tracer ZN.520 unit controller. All
points connected to the Tracer
ZN.520 may be observed from the
Tracer Summit front-end controller. The Tracer Summit can also
initiate an alarm on a loss of performance or equipment malfunctions.
On a peer-to-peer communication
system, multiple Tracer ZN.520
controllers may share data, via a
twisted pair communication wire,
without the need for a Tracer Summit system. (See Figure 5: “Peerto-peer communication connections”)
Peer-to-peer communications allows features such as master/slave
operation, in which multiple units
operate off of a single zone sensor.
This is typically seen in large spaces requiring multiple units.
The Rover service tool is required
to set up peer-to-peer communications.
Figure 5: Peer-to-peer communication connections
UV-SVP01A-EN
11
Communication Configurations
Stand-Alone
Communication Interface
In a stand-alone configuration,
commands for operation are determined based on input from the
zone sensor, humidity sensor, and
factory- or field-mounted timeclock.(See Figure 6: “Typical classroom unit ventilator installation”)
q The timeclock is wired to the
Tracer ZN.520 to index the unit
between occupied and
unoccupied modes.
q A unit-mounted, analog,
outside-air temperature sensor
is used to initiate the dry bulb
economizer and freeze
avoidance routines.
q On changeover units, a unitmounted, analog, entering
water temperature sensor is
used to automatically control
the system in the heat/cool
mode.
These sensors are required for
proper system operation and are
provided as standard on standalone units.
Important! To help ensure
optimal performance of the
Rover service tool, please use
the latest version. To obtain
the latest version contact your
local Trane sales representtative or service technician.
Note: Refer to the Tracer
system manuals for more
information on communications.
The Tracer ZN.520 communicates
via Comm5 (LonTalk) to a building
management system, the Rover
service tool, and other unit controllers on the communications link.
Each Tracer ZN.520 requires a
unique address for the system to
operate properly. Every Tracer
ZN.520 has this address (Neuron
ID) embedded in the microprocessor, which eliminates the need for
field-addressing of the units. Each
unit also ships from the factory
with a unit identification tag. (See
“Location Identifier” on page38,
for more information.)
Figure 6: Typical classroom unit ventilator
installation
12
Building automation system
Trane offers a state-of the art frontend building automation system
designed to coordinate and monitor Trane equipment and controllers: Tracer Summit.
The Tracer Summit system allows
the user to monitor and/or change
Tracer ZN.520:
q status, parameters, sensor data,
diagnostics, and internal
variables; and
q setpoints, operating modes,
and outputs.
A personal computer running Rover may be directly connected to a
standalone Tracer ZN.520; connected to the communications jack
in the Trane zone sensor; or connected to a communicating unit’s
Tracer ZN.520 unit controller, to access all of the units on a communicating link.
Rover allows the user to interface
with the Tracer ZN.520, but will not
allow any advanced control (e.g.
equipment scheduling or trending). To purchase a copy of the ICS
software service tool, contact the
BAS department at your local
Trane dealer.
Interoperability
Trane has lead the industry with
BACnet interoperability and Trane
is now expanding the realm of interoperable solutions by offering
LonMark certified unit controllers.
The Tracer ZN.520 controller conforms to the LonMark Space Comfort Controller profile. (See
“Appendix—Data Lists” on
page64, for more information.)
This allows the ZN.520 to be used
as a unit controller on other control
systems that support LonTalk and
the SCC profile. Now building owners have more choices and design
engineers have more flexibility to
meet the challenges of building automation.
Service tool
Trane also offers a service tool to
work in conjunction with the Tracer
Summit system or with peer-topeer and stand-alone systems: the
Rover service tool.
Communication to the Tracer
ZN.520, or multiple controllers, can
also be accomplished by using the
ICS software service tool.
UV-SVP01A-EN
Standard End Devices
Table 2: End Device Specifications
Device
Fan Status Switch
Low Temperature Detection Switch (Freezestat)
Characteristic
Description
Material
Contact Blade—Pilot duty rated
Operating Temperature Range
-40°F/250°F (-40°C/120°C)
Contact Form
SPST-NO
Preset
Fan status - 0.07”
Trip Temperature:
36°F ± 2°F
(2°C + - 1.11°C)
Release Temperature
44°F ± 3°F
(6.67°C + - 1.67°C)
Pilot Duty
(24 VAC)
120 VAC
240 VAC
FLA
10.0
5.0
LRA
60.0
30.0
Rating—Auto Reset
OutsideAir Sensor/discharge AirSensor/Entering
Water Temperature Sensor/Unit Mounted, Zone
Return-air Temperature Sensor
Sensing Element
UV-SVP01A-EN
Thermistor 10 KOhms @ 77°F ± 1.8°F (25°C
±1°C)
13
Standard End Devices
Table 2: End Device Specifications
Device
Outside Air Actuator
Face and Bypass Actuator
2-way Control Valve
14
Characteristic
Description
Description
Three-point floating with spring return
Ambient Temperature Rating
-25°F to 125°F
Power Consumption
5 VA
Torque
35 in-lbs.
Drive Time
90 seconds, 95 degree stroke
Description
Three-point floating
Ambient Temperature Rating
32°F to 122°F
Power Consumption
3 VA
Torque
35 in-lbs.
Drive Time
80-110 seconds, 95 degree stroke
Description
Three-point modulating
Ambient Temperature Rating
140°F at 95% relative humidity
Drive Time
50 seconds
Max Pressure
400 psi water
Close Off
Varied by size and Cv
Temperature
Water 200°F maximum
UV-SVP01A-EN
Standard End Devices
Table 2: End Device Specifications
Device
3-way Control Valve
Time clock
Characteristic
Description
Description
Three-point modulating
Ambient Temperature Rating
140°F at 95% relative humidity
Drive Time
50 seconds
Max Pressure
400 psi water
Close Off
Varied by size and Cv
Temperature
Water 200°F maximum
Size
2.83'' x 4.0'' x 2.06''
Power Consumption
4.4 VA
Switch
SPDT dry contacts, silver cadmium oxide
Switch Rating
16A 250V resistive, 1000 Watts tungsten
Minimum Switching Current
100mA,230V
Shortest Switching Time
1 minute
Ambient Temperature Range
-14°F to 131°F
Wiring Connections
Screw terminals suitable for #10 to #24 AWG
Backup
Seven day capacitor backup
Zone Sensor Wiring Size And
Maximum Lengths
16-22 AWG: up to 200 feet
Zone sensor
UV-SVP01A-EN
15
Standard End Devices
Table 2: End Device Specifications
Device
Humidity Sensor
CO 2 Sensor
Characteristic
Sensing Element
Polymer capacitive
Sensing Element
Accuracy: ± 5% over 20-95% RH @ 77ºF
Range
0 to 99% RH
Operating Temperature Range
0°F to 140ºF
Max Supply Voltage
24VDC
Output Characteristics
4 to 20 MA for 0-100% RH
Drift Rate
Less than 1% per year
Sensing Element
Accuracy: ± 100ppm full scale
Range
0-2000 ppm
Operating Temperature Range
59°F to 95ºF
Supply Voltage
24VAC
Output Characteristics
0-10 VDC for 0-2000 ppm
Power consumption
10 VA
Drift Rate
±5% full scale over four years
Contact Rating
20 amps at 120/240 vac
3/4 hp at 120 vac
1 1/2 hp at 240 vac
20 amps @ 28 vdc
DPDT
Terminals
0.25 quick connect
Contact material
Silver-Cadium Oxide
Coil
24 vac 2.7 va
Fan Relay
16
Description
UV-SVP01A-EN
Standard End Devices
Table 2: End Device Specifications
Device
Characteristic
Type
N.E.C. Class 2
Primary Voltage
120 vac
Secondary voltage
24 vac at 90 va
Manual reset
4amp fuse in 24-volt circuit
Control Transformer
UV-SVP01A-EN
Description
17
Installation and Wiring
Specifications
Dimensions
Tracer ZN.520 board and mounting
hardware:
• Height: 5.25 inches (133 mm.)
• Width: 5.50 inches (140 mm)
• Depth: 2.25 inches (57 mm)
Power Requirements
•
•
•
18 to 32 VAC (24 VAC nominal)
50 or 60 Hz
570 mA AC
Operating Environment
•
•
32° to 140°F (0× to 60°C)
5% to 95% relative humidity,
non-condensing
Storage Environment
•
•
-40° to 185°F (-40° to 85°C)
5% to 95% relative humidity,
non-condensing
Agency Listings
•
•
UL and CUL 916 Energy Management System
Agency Compliance IEC 10004-2 (ESD), IEC 1000-4-4(EFT),
IEC 1000-4-5 (Surge)
Figure 7: Tracer ZN.520 circuit board
schematic
18
UV-SVP01A-EN
Installation and Wiring
Binary Inputs
Each binary input associates an input signal of 0 VAC with open contacts and 24 VAC with closed
contacts.
Table 3: Binary inputs (typically 24 mA AC)
Description
Binary input 1
(BI 1)
Binary input 2
(BI 2)
Binary input 3
(BI 3)
Binary input 4
(BI 4)
UV-SVP01A-EN
Terminals
Terminal Function
J2-1
24 VAC
J2-2
Input
J2-3
24 VAC
J2-4
Input
J2-5
24 VAC
J2-6
Input
J2-7
24 VAC
J2-8
Input
19
Installation and Wiring
Binary Outputs
Outputs are load side switching triacs. The triac acts as a switch, either making or breaking the circuit
between the load (valve, damper,
contactor, relay) and ground.
Table 4: Binary outputs
Description
Output
Rating
Terminals
Load Energized
Load De-energized
Fan high
J1-1
12 VA
1 VAC RMS
(typical)
24 VAC RMS
(typical)
Fan medium,
Exhaust fan
J1-2
12 VA
1 VAC RMS
(typical)
24 VAC RMS
(typical)
Fan low
J1-3
12 VA
1 VAC RMS
(typical)
24 VAC RMS
(typical)
No connection
J1-4 (Key)
—
—
—
24 VAC RMS
(typical)
Cool open, face bypass cool valve
DX, 2-position cooling valve, BI 5
J1-5
12 VA
1 VAC RMS
(typical)
Cool close
J1-6
12 VA
1 VAC RMS
(typical)
24 VAC RMS
(typical)
Face/bypass damper open
J1-7
12 VA
1 VAC RMS
(typical)
24 VAC RMS
(typical)
Face/bypass damper close
J1-8
12 VA
1 VAC RMS
(typical)
24 VAC RMS
(typical)
Heat open
Face bypass isolation valve,
2-position heating valve
Electric heat 1 st stage
J1-9
12 VA
1 VAC RMS
(typical)
24 VAC RMS
(typical)
Heat close
Electric heat 2 nd stage
J1-10
12 VA
1 VAC RMS
(typical)
24 VAC RMS
(typical)
Economizer damper open
J1-11
12 VA
1 VAC RMS
(typical)
24 VAC RMS
(typical)
Economizer damper close
J1-12
12 VA
1 VAC RMS
(typical)
24 VAC RMS
(typical)
Generic/baseboard Heat Binary Output
Table 5: Generic binary outputs
Description
Terminals
Output
Rating
Load Energized
Load De-energized
Generic/ baseboard heat output
TB4-1
12 VA
1 VAC RMS
(typical)
24 VAC RMS
(typical)
24VAC
TB4-2
12 VA
NA
NA
20
UV-SVP01A-EN
Installation and Wiring
Analog Inputs
Table 6: Analog inputs
Description
Terminals
Function
Range
Zone
TB3-1
Space temperature input
5° to 122°F
(-15° to 50°C)
Ground
TB3-2
Analog ground
NA
Set
TB3-3
Setpoint input
40 ° to 115 °F
(4.4° to 46.1°C)
Fan
TB3-4
Fan switch input
4821 to 4919 Ω (Off)
2297 to 2342 Ω (Auto)
10593 to 10807 Ω (Low)
13177 to 13443 Ω (Medium)
15137 to 16463 Ω (High)
Ground
TB3-6
Analog ground
NA
Analog Input 1
J3-1
Entering water temperature
-40° to 212°F (-40° to 100°C)
J3-2
Analog ground
NA
J3-3
Discharge air temperature
-40° to 212°F (-40° to 100°C)
J3-4
Analog ground
NA
J3-5
Outdoor air temperature / Generic
temperature
-40° to 212°F (-40° to 100°C)
J3-6
Analog ground
NA
J3-7
Power port
4-20 mA
J3-8
Universal input
Generic 4-20ma
Humidity
CO2
0 – 100%
0 – 100%
0 – 2000ppm
Analog ground
NA
Analog Input 2
Analog Input 3
Analog Input 4
J3-9
UV-SVP01A-EN
21
Installation and Wiring
Mounting
The Tracer ZN.520 circuit board is
mounted in the left-hand end pocket for all classroom unit ventilator
configurations. The sheet metal
mounting plate has raised embosses to accept the mounting feet on
the circuit board. (See Figure 8:
“Classroom unit ventilator control
box with close-up of horseshoe
embosses and circuit board
mounting feet.”) This design allows the Tracer ZN.520 controller
to be secured with a minimal number of sheet metal screws.
Figure 8: Classroom unit ventilator control box with close-up of horseshoe embosses and circuit board mounting feet.
22
UV-SVP01A-EN
Installation and Wiring
The mounting position on the vertical classroom unit ventilator
configuration allows complete access to the Tracer ZN.520 by removing the front panel. (See
Figure 9: “Vertical classroom unit
ventilator end pocket”) The
mounting plate swings out of the
way with the removal of a single
screw to allow access to the components behind the control board.
The mounting plate on the horizontal classroom unit ventilator configuration is designed to
slide out with the removal of a single screw for complete access to
the Tracer ZN.520. (See Figure 10:
“Horizontal classroom unit ventilator end pocket”) The location of
the control board on this unit configuration allows complete access
to the other components in the
end pocket when the front panel is
removed.
For additional convenience, quick
connects and modular wire harnesses are used on the control
board and mounting plate. (See
Figure 11: “Quick connects to control board in the classroom unit
ventilator”) These quick connects
help facilitate ease of wiring devices (e.g., zone sensor) to the control
board, and helps add accessibility
to major components.
Figure 11: Quick connects to control board
in the classroom unit ventilator
Figure 9: Vertical classroom unit ventilator
end pocket
Figure 10: Horizontal classroom unit
ventilator end pocket
UV-SVP01A-EN
23
Installation and Wiring
Wiring
WARNING
!
Warning! Disconnect all electrical power before servicing
unit to prevent injury or
death due to electrical shock.
Use copper conductors only.
The use of aluminum or
other incorrect types of wire
may result in overheating
and equipment damage.
!
CAUTION
Caution: To prevent damage
to the unit ventilator, refer to
the diagram provided on the
inside of the unit's access
panel for specific wiring infor-
mation. All controls are wired
at the factory. Single point
power, zone sensor, and
communication wiring is to
be installed by the contractor.
Important! All wiring must
comply with state, local, and
federal guidelines. Contact the
appropriate local agency for
furthur information.
Important! Wires for
temperature sensors,
communication lines, 24 VAC,
and contact closure sensing
inputs should not be bundled
with or run near high voltage
wiring.
q Power wiring must be
separated from the Tracer
ZN.520 and all low voltage
wires. External input wires
should be run in separate
conduits from high voltage
wires.
q Wires connected to pin headers
should be formed and routed
so as to cause minimum strain
on the Tracer ZN.520
connector.
q A minimum of 1.5" clearance
(from the pin centerline) for
wires up to 16 AWG is
recommended for bending and
forming wires.
q All sensor and input circuits are
at or near ground potential. Do
not connect any sensor or input
circuit to an external ground
connection.
q A close-coupled ground
connection is required for the
Tracer ZN.520. T
q Table 7: Tracer ZN.520 Wiring
Requirements, shows Tracer
ZN.520 wire types and lengths.
Table 7: Tracer ZN.520 Wiring
Requirements
Application
Wire Type
Length
Contact Closure
18 AWG
Up to
1000 ft.
24 VAC
16-22 AWG
Up to
1000 ft.
Thermostat
16-22 AWG
Up to
1000 ft.
Zone
Sensor
16-22 AWG
Up to
200 ft.
Communications
Belden 8760 Up to
or equivalent 5000 ft.
Power
The Tracer ZN.520 controller is
powered by 24 VAC. (See Table 7:
“Tracer ZN.520 Wiring Requirements”)A total of two 1/4-inch
quick-connect terminals are provided for 24 VAC connection to the
board.
Figure 12: Power connection to the Tracer ZN.520 unit controller
24
UV-SVP01A-EN
Installation and Wiring
Installing the WallMounted Zone Sensor
(Optional)
Zone sensor location is an important element of effective room
control and comfort.
The best sensor location is typically on a wall, remote from the
HVAC unit. Readings at this location assure that the desired setpoint is achieved across the space,
not just near the unit itself.
Note: It may be necessary to
subdivide the zone with
multiple units to ensure
adequate control and comfort
throughout the space.
The following are typical areas
where the zone sensor should NOT
be mounted:
q Near drafts or “dead spots”
(e.g., behind doors or corners);
q Near hot or cold air ducts;
q Near radiant heat (e.g., heat
emitted from appliances or the
sun);
q Near concealed pipes or
chimneys;
q On outside walls or other nonconditioned surfaces; or
q In air flows from adjacent
zones or other units.
Figure 13: Proper zone sensor placement
Note: All zone sensor wiring
will be done in the factory
unless zone sensor options are
selected to be wall mounted.
When a unit-mounted speed
switch is selected with a wallmounted zone sensor, the contractor must disconnect the cooling
setpoint on the unit mounted sensor if the wall mounted cooling
setpoint is used. The zone signal
will be cut at the factory. The unitmounted speed switch cannot be
used as a zone sensor.
THe communications link is not
connected in the factory. Communications should be wired to the
wall-mounted sensor.
UV-SVP01A-EN
25
Installation and Wiring
Humidity and CO2 Sensors
Humidity and CO 2 sensors should
be mounted in a similar location as
the zone sensor.
Figure 14: Relative humidity sensor
Figure 15: CO 2 Sensor
26
UV-SVP01A-EN
Typical Wiring Diagram—Wall
Mounted Zone Sensor
UV-SVP01A-EN
27
Typical Wiring Diagram—Unit
Mounted Zone Sensor
28
UV-SVP01A-EN
Typical Wiring Diagram—Unit
Mounted Switch, Wall Mounted Sensor
UV-SVP01A-EN
29
Input/Output Summary
Input/Output Summary
The following lists all possible binary and analog inputs and outputs available for the classroom
unit ventilator applications. Some
of the points listed may be mutually exclusive and some are optional.
(See Table 8: Input and output
summary)
Most binary inputs and outputs are
wired from the factory based on
unit configuration and options. If
the generic inputs and outputs are
to be used, wiring connections are
made at the 1/4” quick-connect terminals provided.
Analog inputs from a wall-mounted zone sensor, humidity sensor,
CO2 sensor, or a generic device
must be wired to the 1/4” quickconnect terminals provided. Most
other analog inputs will be wired
from the factory.
Table 8: Input and output summary
Input
Description
Freezestat
Binary Inputs
Fan Status
Occupancy/Generic
J1-1 Fan High Speed
J1-3 Fan Low Speed
J1-2 Exhaust Fan
J1-5 Cooling Open
(Modulating valve/DX/
Isolation valve)
J1-6 Cooling Close
J1-7 Face and Bypass Damper
Open
J1-8 Face and Bypass Damper
Close
Binary Outputs
J1-9 Heat Open (Modulating
valve/Isolation valve) or 1 st
Stage Electric Heat
J1-10 Heat Close or 2 n d Stage
Electric Heat
J1-11 Economizer Damper
Open
J1-12 Economizer Damper
Close
TB4-1 Generic/Baseboard
Heat
TB4-2 24 VAC
30
UV-SVP01A-EN
Input/Output Summary
Table 8: Input and output summary
Input
Description
Zone Temperature
Setpoint
Fan Speed
Entering Water Temperature
Analog Inputs
Discharge Air Temperature
Outdoor Air Temperature/
Generic
Generic/Humidity/CO2 (420mA)
UV-SVP01A-EN
31
Configuration
Note: The Tracer Zn.520 unit
controller only supports
cascade control by controlling
the discharge air temperature.
Therefore, the controller
requires both a space
temperature input and a
discharge air temperature
input.
Trane configures the Tracer®
ZN.520 Unit Controller at the factory per the selected unit configuration. The controller is applied
classroom unit ventilator configurations that support modulating
valves, 2-position valves, economizer damper (modulating only),
direct expansion (DX) cooling, 1-
and 2 -stage electric heat, faceand-bypass damper, baseboard
heat, dehumidification, and generic I/O. The controller also supports HIG H and LO W fan speeds
with exhaust fan output on 1- and
2-speed fan applications.
Table 9: Typical applications supported
Configuration
Type of valve
2-pipe cooling only
2-pipe heating only
2-pipe changeover
4-pipe
4-pipe changeover
Modulating
2 position
ü
ü
ü
ü
ü
ü
ü
ü
ü
ü
ü
ü
ü
2-pipe face bypass heating only
2-pipe face bypass changeover
4-pipe face bypass
NA
DX cooling only
Options
Electric Heat Economizer
(1 or 2 stage)
Damper
ü
ü
1
1
1
NA
DX cooling, 2-pipe heating
ü
ü
DX cooling, electric heating
NA
NA
Electric heat only (1 or 2 stage)
NA
NA
ü
ü
ü
ü
ü
ü
ü
ü
ü
ü
ü
ü
ü
ü
Baseboard
Heat
ü
ü
ü
ü
ü
ü
ü
ü
ü
ü
1. Isolation valves are 2-position only.
Configurable parameters
Rover service tool uses the unit
type to determine and download
many other aspects of the unit configuration, such as the default analog input configuration, the default
binary input configuration, and the
default binary output configuration.
Cooling source
q None
q Hydronic (main coil
changeover)
q Dedicated hydronic
q DX
32
Heating source
None
Hydronic
Dedicated hydronic
Steam
Electric heat
Hydronic (main coil
changeover) + dedicated
hydronic (auxiliary coil)
q Hydronic (main coil
changeover)
q
q
q
q
q
q
UV-SVP01A-EN
Configuration
Binary Outputs1
Table 10: Binary output summary
Binary output
Classroom unit ventilator
Valid range
J1-1
Fan high
NA
J1-2
Exhaust fan or none
NA
J1-3
Fan low
NA
J1-4
(Key)
NA
Cooling valve open
NA
J1-5
Face bypass cool isolation valve
Normally open or normally closed 2
2-position cooling
Normally open or normally closed 2
DX
NA
J1-6
Cooling valve close
NA
J1-7
Face bypass damper open
NA
J1-8
Face bypass damper close
NA
Heating valve open
J1-9
NA
Face bypass heat isolation valve
Normally open or normally closed 2
Electric heat stage 1
NA
2-position heating
Normally open or normally closed
Heating valve close
NA
Electric heat stage 2
NA
J1-11
Outdoor air damper open
NA
J1-12
Outdoor air camper close
NA
TB4-1/TB4-2
Terminals
J1-10
Generic/baseboard heat output
TB4-1
24 VAC
TB4-2
2
Output Rating
Load Energized
Load De-energized
12 VA
1 VAC RMS (typical)
24 VAC RMS (typical)
1. Trane’s Rover service tool uses the unit type to determine and download the proper default binary output configuration.
2. The normally open/closed configuration item refers to the inactive state of the controlled end device (such as an 2-position cooling valve
output).
UV-SVP01A-EN
33
Configuration
Binary Inputs 1
Table 11: Binary input summary
Binary input
Configuration
Valid range
BI 1
Low coil temperature detection or not used
Normally open
Normally closed
BI 2
Not used
Normally open
Normally closed
BI 3
Occupancy, generic, or not used
Normally open
Normally closed
BI 4
Fan status or not used
Normally open
Normally closed
1. Trane Rover service tool uses the unit type to determine and download the proper default binary input configuration.
Analog Inputs1
Table 12: Analog input summary
Analog input
Configuration
Calibration range
Space temperature
+/- 10.0°F
(0.1°F resolution)
Set
Setpoint (hardwired)
+/- 10.0°F
(0.1°F resolution)
Zone
Fan
Fan switch
NA
AI 1
Entering water temperature
NA
AI 2
Discharge air temperature
NA
AI 3
Outdoor air temperature or generic temperature input
(Note 2)
NA
AI 4
Humidity, CO2 or generic
4-20mA input
NA
1. Trane Rover service tool uses the unit type to determine and download the proper default analog input configuration.
2. Analog input 3 (AI 3) configured as generic temperature input does not affect unit operation. When configured, the Tracer™ ZN .520 Unit
Controller communicates the generic temperature value to Rover or Tracer Summit and displays it as generic temperature.
34
UV-SVP01A-EN
Configuration
Fan Configuration
Table 13: Fan configuration ranges
Fan configuration
Default
Valid range
Fan operation in heating
Continuous
Continuous (during occupied)
Cycling with capacity (unoccupied)
Fan operation in cooling
Continuous
Continuous (during occupied)
Cycling with capacity (unoccupied)
Number of fan speeds
Varies 2
1, 2
Configurable fan speed heating
Varies
2
Off, low, high, auto
Configurable fan speed cooling
Varies 2
Off, low, high, auto
Zone sensor fan switch
Enable
Disable or enable
End Device Configurations
Table 14: End device ranges
Default
Valid range
Main, cooling/changeover valve stroke time
Varies
Entering water sampling
Varies2
Disable or enable
Auxiliary, heating valve stroke time
Varies2
30 to 360 seconds
Outdoor air damper stroke time
Varies2
30 to 360 seconds
Occupied outdoor air damper minimum position
15%
0 to 100%
Occupied standby outside air damper minimum
position
15%
0 to 100%
Alternate minimum outside air damper position
for low fan speed
40%
0 to 100%
Economizer enable temperature
55°F
30 to 70°F
9%
0 to 100%, 101% disables the
exhaust fan
65 seconds
30-360 seconds
Exhaust fan enable setpoint1
Face-and-bypass damper stroke time
2
30 - 360 seconds
1. The exhaust fan is energized when the outdoor air damper is equal to or greater than the exhaust fan enable point, and the exhaust fan
is turned off when the outdoor air damper is 10% less than the exhaust fan enable point.
2. Varies with unit configuration.
UV-SVP01A-EN
35
Configuration
Setpoints
Table 15: Setpoint defaults
Setpoint
Default
Valid range
71°F
40 to 115°F
Occupied cooling setpoint
74°F
40 to 115°F
Occupied standby heating setpoint
67 °F
40 to 115°F
Occupied standby cooling setpoint
78 °F
40 to 115°F
Unoccupied heating setpoint
60°F
40 to 115°F
Unoccupied cooling setpoint
85°F
40 to 115°F
Heating setpoint low limit 1
40°F
40 to 115°F
40°F
40 to 115°F
105 °F
40 to 115°F
Occupied heating setpoint
Cooling setpoint low limit
1
Heating setpoint high limit
1
Cooling setpoint high limit
1
Thumbwheel setpoint
110 °F
40 to 115°F
Enable
Disable or enable
1. The heating and cooling setpoint high and low limits only apply to the occupied and occupied standby setpoints and are never applied
to the unoccupied setpoints.
Discharge Air Limits
Table 16: Discharge air limit ranges
Default
Valid range
38 °F
30 to 50°F
Control point high limit 2
150 °F
38 to 150°F
Control point low limit 2
45 °F
35 to 150°F
Low limit
1
1. The low limit is the temperature at which the controller shuts down the unit to prevent the coil from freezing.
2. The control algorithm is limited to calculating this discharge air temperature based on capacity request.
Freeze Avoidance
Table 17: Freeze avoidance setpoint range
Freeze avoidance setpoint1
Default
Valid range
40 °F
20 to 60°F
The controller disables freeze avoidance when the outdoor air temperature rises 3 °F above the freeze avoidance setpoint.
36
UV-SVP01A-EN
Configuration
Occupied Bypass Timer
Table 18: Bypass timer range
Occupancy bypass timer1
Default
Valid range
120 Minutes
0 to 240 minutes
(1 minute resolution)
Default
Valid range
120 seconds
Disable or enable
Default
Valid range
0
0 to 10,000 hours
1. The occupied bypass timer is used for timed override applications.
Power-Up Control Wait
Table 19: Control wait timer
Power up control wait (2 minutes)
Maintenance Timers
Table 20: Maintenance timer range
Maintenance timer
UV-SVP01A-EN
37
Location Identifier
Unit Identification
Tag
The unit identification tag is factory
mounted and provided for easy
identification of an installed unit. It
contains model number, tagging,
and location information.
The top portion of the unit identification tag remains permanently affixed to the unit for identification
purposes. The bottom portion of
the tag provides pertinent information that is removable to be placed
on building plans or in “Appendix—Location Identifier” on
page68. This provides identification history about the unit’s location for quick reference.
These tags provide information
about
q unit serial number;
q NID (neuron identification
number)—The NID is similar to
the serial number of the unit
but is specific to the
identification of the Tracer
ZN.520 unit controller circuit
board; and
q unit location—The location
identification is a customer
defined, clear English
description, of the unit’s
physical location. This is a 27
character description, including
spaces, of the location. For
example, if the location
identification for a unit is
“Conference Room 101”, the
ZN.520, Rover (the Trane
Comm 5 service tool), and
Tracer Summit, will recognize
this clear English description.
If location identification is not defined, it will default to the unit serial number. This unit identification
tag provides some information so
the user has multiple references to
the unit. The blank location is provided for field modification in case
the unit is moved from the initial
location.
38
Note: Fold and tear carefully along dashed removable line.
Figure 16: Unit identification tag
Winking
Winking a device causes the green
status LED on the device selected
to blink at a rate of twice per second for approximately 10 seconds.
This feature is useful when a discrepancy in device location exists.
As part of the troubleshooting process, one person can WINK the device while another can observe the
blinking and verify the device’s
physical location.
Important! If the status LED on
the ZN.520 does not blink, the
device may not be
communicating or it may not
be the device you selected
according to the stored
address.
A Tracer ZN.520 unit controller
may be set to wink by
q holding the ON button on the
zone sensor for 5 seconds
q using Rover, Trane’s
communication service tool
UV-SVP01A-EN
Unit Operation
Power-Up
When 24 VAC is initially applied to
the controller, the following sequence of events occurs:
q Green status LED turns ON .
q All outputs are controlled OFF .
q The controller reads input
values to determine initial
values.
q Random-start timer expires (5
to 30 seconds).
q When POWER -UP CONTROL WAIT
is enabled, the controller waits
0-120 seconds (depending on
configuration) to allow ample
time for communicated control
data to input. If the controller
does not receive communicated information, standalone
control is assumed.
q All modulating valves and
dampers calibrate closed.
q NORMAL operation begins.
Occupancy
The valid occupancy modes for the
Tracer ZN.520 controller are:
q OCC UPIED - Normal operating
mode for occupied spaces or
daytime operation.
q UNOCCUPIED - Normal
operating mode for
unoccupied spaces or
nighttime operation.
q OCC UPIED STANDBY - Mode
used to reduce the heating and
cooling demands, while
providing ventilation, during
the occupied hours when the
space is vacant or unoccupied.
q OCC UPIED BYPASS -Used to
temporarily place the unit into
the occupied operation.
The occupancy mode can be hardwired to the controller via the occupancy binary input or
communicated to the controller.
UV-SVP01A-EN
OCC UPIED
mode
OCC UPIED BYPASS
When the controller is in the OC CU PIED mode, the unit attempts to
maintain the space temperature at
the active occupied heating or
cooling setpoint.
OCC UPIED mode is the default
mode of the Tracer ZN.520 controller.
UNOCCUPIE D
mode
When the controller is in the UN OCC UPIED mode, the unit attempts
to maintain space temperature at
the stored unoccupied heating or
cooling setpoint (i.e., configurable through Tracer Summit or
the Rover service tool) regardless
of the presence of a hardwired or
communicated setpoint. When
the space temperature exceeds
the stored unoccupied setpoint,
the controller brings on 100% of
the primary heating or cooling capacity.
The UNOCC UPIED mode can be initiated through a hardwired signal
to the occupancy binary input or
by a communicated request.
OCC UPIED STANDBY
mode
The OC CUPIED STANDBY mode allows the unit to operate at a heating or cooling setpoint between
the occupied and unoccupied setpoints to help maintain the environment while decreasing energy
consumption.
This mode decreases the ventilation for heating or cooling during
brief periods of vacancy in the
space. Unit operation in this mode
is similar to the occupied mode except for the different heating and
cooling setpoints and a different
outside air damper position.
The OC CUPIED STANDBY mode is
initiated only when occupancy is
communicated to the Tracer
ZN.520 controller and the hardwired signal to the occupancy input is calling for unoccupied
operation.
mode
The OCCUPIED BY PASS mode is
used to transition the unit from the
UNOCCUPIED mode to the OCC U PIE D mode for a period of time
from 0 to 4 hours (configurable
through Rover. Default=RUN ). The
controller can be placed in OC CU PIE D BYPASS mode by either communicating an occupancy request
of BYPASS or by using the TIMED
OVE RRIDE (i.e., ON ) button on the
Trane zone sensor.
and CANCEL Buttons
Some Trane zone sensors have ON
and CANCEL buttons for timed override operation. Pressing the ON
button on the zone sensor when
the unit is in the UNOCC UPIED
mode initiates the OCC UPIED BYPASS mode and initializes the bypass timer. The CANCEL button is
used to send the unit back into UN OCC UPIED mode before the bypass
timer has expired.
The ON button may also be used
for the unit identification or the
“ WINK” feature. (See “Winking”
on page38.for more information.)
When the Tracer ZN.520 controller
is connected to a Tracer Summit
system or the Rover service tool,
the ON button may be used in place
of the service pin for easy unit
identification.
ON
Heating And Cooling
Changeover Logic
The Tracer™ ZN.520 Unit Controller can receive communicated requests for heating or cooling
operation. The communicated
variable nviApplicMode is used to
communicate the requests for the
controller's operating mode based
on the following values:
0 = Auto (mode determined by
controller)
1 = Heat (uses heating
setpoints)
2 = Morning Warm-up
3 = Cool (uses cooling
setpoints)
39
Unit Operation
4 = Night Purge (air
changeover) not supported
5 = Pre-cool (morning cool
down)
6 = Off (no unit operation
allowed)
7 = Test (special test mode)
8 = Emergency Heat not
supported
9 = Fan Only (no heating or
cooling allowed)
All other enumerations will be interpreted as Auto.
As the controller automatically determines its heating or cooling
mode, it changes from cool to heat
or from heat to cool, while the error
(integrated over time between the
active setpoint and the space tem-
perature) is (900°FhSec). Integration only begins once the heating
and cooling capacity is equal to 0%
or the discharge air temperature is
being limited by the discharge air
temperature control limits.(See
Figure 17: “Heat/Cool Changeover
logic”).
cooling setpoint or lower than the
active heating setpoint.
Example: If the cooling setpoint is
75 °F and the heating setpoint
70 °F, any space temperature
greater than 75 °F or less than 70 °F
is outside the setpoint range.
Once the integration term is satisfied and the space temperature is
outside the setpoint range, the
controller changes modes. However, before the unit's heating or
cooling capacity ramps up, the
controller checks to make sure it is
capable of heating or cooling.
For some units, heating and cooling capability exists with local resources such as electric heat or
compressors. For these units, central heating or cooling plan operation is not required for heating or
cooling because they are capable
of providing their own local heating or cooling.
For 2-pipe changeover and 4-pipe
changeover units with hydronic capacity, heating and cooling is provided through hydronic. For those
hydronic, central heating or cooling plant operation is required for
the unit to deliver heating or cooling. To determine whether the central plant is providing the desired
water temperature, an entering
water temperature sensor (either
hardwired or communicated) must
be present.
Figure 17: Heat/Cool Changeover logic
If the measured space temperature
is 69 °F and the active cooling setpoint is 72 °F, the error between
the space temperature and the setpoint is three degrees. If the same
error exists for one minute (60 seconds), the integration term is
(3 °Fh60 Sec) or (180 °Fh Sec).
The Tracer™ ZN.520 Unit Controller changes from heating to cooling and cooling to heating when
the integration term exceeds
(900 °FhSec). Along with satisfying the integration for heating and
cooling changeover, the measured
space temperature must fall outside the setpoint range. This
means the space temperature
must be greater than the active
40
UV-SVP01A-EN
Unit Operation
The entering water must be five
degrees or more above the space
temperature to allow hydronic
heating, and five degrees or more
below the space temperature to allow hydronic cooling.
If the desired water temperature is
available, the unit begins normal
heating and cooling operation. If
the measured entering water temperature is not adequate for the
desired heating or cooling, the
controller begins the entering water temperature sampling logic.
The Tracer™ ZN.520 Unit Controller operates the modulating valves
and dampers based on a heating
or cooling capacity calculated by
the control algorithm. The control
algorithm calculates the heating or
cooling capacity based on the
measured space temperature, the
active setpoint and the discharge
air temperature. When the measured space temperature is within
the active heating and cooling setpoints, the heating and cooling capacity approaches zero.
Cooling Operation
During the C OOLING mode, the
Tracer ZN.520 controller attempts
to maintain the space temperature
at the active cooling setpoint.
Based on the controller’s occupancy mode, the active cooling setpoint is one of the following:
q Occupied cooling setpoint
q Occupied standby cooling
setpoint
q Unoccupied cooling setpoint
The controller uses the measured
space temperature, the active
cooling setpoint, and discharge air
temperature along with the control algorithm to determine the requested cooling capacity of the
unit (0-100%). The outputs are controlled based on the unit configuration and the requested cooling
capacity.
UV-SVP01A-EN
Heating Operation
During the H EATING mode, the
Tracer ZN.520 controller attempts
to maintain the space temperature
at the active heating setpoint.
Based on the controller’s occupancy mode, the active heating setpoint is one of the following:
q Occupied heating setpoint
q Occupied standby heating
setpoint
q Unoccupied heating setpoint
The controller uses the measured
space temperature, the active
heating setpoint, and discharge air
temperature along with the control algorithm to determine the requested heating capacity of the
unit (0-100%). The outputs are controlled based on the unit configuration and the requested heating
capacity.
lows the fan speed switch to be
disabled. When this occurs, the
unit will operate at the default fan
speed unless a communicated request is present.
During OCCUPIE D, OCCUPIE D
STANDBY , and OC CUPIED BY PASS
modes, the fan will normally operate continuously at the appropriate fan speed. The fan will only be
O FF in these modes when the MAN UAL OUTPUT TEST has been initiated, a latching diagnostic is
present, or the communicated or
hardwired fan speed is OFF . (See
“Manual Output Test” on
page48.for more information.)
During the UNOC CUPIED mode, the
unit fan is controlled OFF . When capacity is required to maintain the
unoccupied heating or cooling setpoint, the unit fan is controlled to
high speed regardless of a hardwired or communicated fan speed.
Fan Operation
Table 21: Absolute two-speed fan
switch points
For multiple fan speed applications, the Tracer ZN.520 controller
allows separate default fan speeds
to be configured for heating and
cooling modes. When the fan
mode switch is in the AUTO position or no hardwired input exists,
the fan operates at the configured
default fan speed (i.e, HIGH ).
The Tracer ZN.520 controller also
allows the default fan speed to be
configured as AU TO . When the fan
speed switch is in the AUTO position and the default fan speed is
configured as AU TO , the unit may
change fan speeds based on the
requested heating or cooling capacity. In this mode, the unit fan
will operate at LOW speed until the
requested capacity requires HIGH
fan speed operation to maintain
space comfort.
The fan mode request can be either hardwired or communicated
to the Tracer ZN.520 controller.
When both are present, the communicated request has priority
over the hardwired input. Additional flexibility in the controller al-
Fan Speed
Change
Absolute
Temperature Error
Low to High
2.00
High to Low
1.25
°F
°F
Fan Off Delay
When a heating output is controlled off, the Tracer™ ZN.520
Unit Controller automatically
holds the fan on for an additional
30 seconds. This 30-second delay
gives the fan time to blow off any
residual heat from the heating
source, such as a steam coil. When
the unit is heating, the fan off delay is normally applied to control
the fan; otherwise, the fan off delay does not apply.
Fan Start On High Speed
On a transition from off to any other fan speed, the Tracer™ ZN.520
Unit Controller automatically
starts the fan on high speed and
runs the fan at high speed for 0.5
41
Unit Operation
seconds. This provides the ample
torque required to start all fan motors from the off position.
Exhaust fan/damper
operation
This binary point is a shared point
with medium fan speed. For this
point to be used for exhaust control, the controller must be configured for a 1- or 2-speed fan. The
exhaust fan/damper is coordinated
with the unit fan and outdoor
damper operation. The exhaust
output is energized only when the
unit fan is operating and the outdoor damper position is greater
than or equal to the configurable
exhaust enable point. The exhaust
fan output is disabled when the
outdoor air damper position drops
10% below the exhaust enable
point. If the enable point is less
than 10%, the unit turns on at the
enable point and off at 0.
Valve Operation
Face-and-Bypass
Isolation Valves
Modulating Valves
Face-and-bypass units may use
isolation valves to prevent unwanted water flow in the coil. This eliminates problems such as radiant
heat or excessive condensate in 2pipe systems.
In 4-pipe applications, the isolation
valves are used to prevent conflicting capacities within the unit.
The Tracer ZN.520 controller supports one or two modulating
valves for hydronic heating and
cooling operation. The main valve/
coil is used for cooling only, heat/
cool changeover (2-pipe applications), or cooling (4-pipe applications). The auxiliary valve/coil
provides heating in 4-pipe and
heating only applications.
At power-up, the Tracer ZN.520
controller drives the modulating
valves to the closed position. The
controller calibrates to the full
closed position by overdriving the
actuator 135%. Whenever the controller requests a valve position of
zero or 100%, the controller overdrives the actuator 135% regardless of the current valve position.
Face-and-Bypass
Damper Operation
Note: The Face-and-bypass
actuator is located in the righthand end pocket of the
classroom unit ventilator.
The Tracer ZN.520 controller actuates a face-and- bypass damper to
modulate a percentage of air to the
face of the coil to maintain space
comfort. When a requested capacity is present, the unit modulates
the damper to allow more air to the
face of the coil. An averaging sensor is used on the discharge air to
provide accurate capacity control.
Figure 18: Horizontal unit with face-and-bypass damper option.
42
UV-SVP01A-EN
Unit Operation
controller for standalone applications.
When a unit uses 2-way modulating valves, it is possible for the water near the entering water
temperature sensor to migrate towards ambient temperature. The
Tracer ZN.520 controller has a water sampling feature for these applications. When the sensed water
temperature is not sufficient for
the requested heat/cool mode
(5°F above the zone temperature
for heating or 5°F below the zone
temperature for cooling), the controller drives the valve fully open.
The controller then monitors the
water temperature until the appropriate temperature is sensed or
until the three minute time limit
expires. If the water temperature is
acceptable for the requested capacity, the unit continues normal
operation. If the three minute timer expires and the water temperature is still unsuitable, the unit
closes the valve and waits one
hour before invoking the sampling
Figure
low-leak damper
seal for
Figure 19: Vertical
unit 11:
withUltra
face-andfeature
again.
bypass damper operations
Upon power-up, the controller calibrates the face-and-bypass damper to the full bypass position by
overdriving the damper actuator.
During normal operation, whenever the Tracer ZN.520 controller
generates a face-and-bypass
damper position request of zero or
100%, the unit calibrates the actuator by overdriving the damper actuator 135%.
Entering Water
Temperature
Sampling
Units with 4-pipe changeover and
2-pipe changeover require an entering water temperature to determine if the appropriate water
temperature is present for the requested mode (heating or cooling). This temperature may be
communicated in an ICS system or
hardwired to the Tracer ZN.520
UV-SVP01A-EN
point. Default minimum damper
positions are provided and can be
changed for occupied and occupied standby modes, or for low
speed operation. The controller
can also receive a communicated
outdoor air damper minimum position from Tracer Summit. A communicated minimum position
from Tracer Summit has priority
over all configured setpoints.
During the OC CUPIED mode the
outdoor air damper will always be
controlled to the effective minimum position unless ASHRAE Cycle I, ASHRAE Cycle II, or
economizing modes are active.
Table 22: Water assumption chart
Unit Configuration
Temperature
Assumed 1
2-pipe Heating valve
Hot
2-pipe cooling valve
Cold
2-pipe H/C valve with
Hot
auto changeover enabled
2-pipe H/C valve with
auto changeover
disabled
Figure 20: OA/RA actuator mounting for
the vertical unit ventilator
Cold
1. Assumption based on absence of a valid
entering water temperature
Modulating Outdoor
Air Operation
The Tracer ZN.520 controller operates a modulating (3-wire floating)
outdoor air damper actuator according to the effective occupancy, outdoor air temperature, space
temperature, effective setpoint,
discharge air temperature, and
discharge air temperature set-
Figure 21: Figure 2: OA/RA actuator
mounting for the horizontal unit ventilator
43
Unit Operation
Automatic Outdoor Air
Damper Adjustment
The Tracer ZN.520 controller is capable of using different minimum
outdoor air damper positions for
high and low fan speeds, which are
configurable. This allows the ventilation rate to be maintained when
switching between fan speeds.
Note: The typical reduction in
airflow between high and low
fan speeds is 25%, however, if
precise control is desired, an
air balancer should be
consulted.
Economizer
Operation
Note: When there is a request
for 0% or 100% actuator
position, the actuator will
overdrive the actuator 135% to
help maintain calibration.
With a valid outdoor air temperature (hardwired or communicated),
Tracer ZN.520 uses the modulating
economizer damper as the highest
priority source of cooling.
The controller initiates the economizer function if the outdoor air
temperature is cold enough to be
used for free cooling capacity. If
the outdoor air temperature is less
than the economizer enable setpoint (absolute dry bulb), the controller modulates the outdoor air
damper between the minimum position and 100% to control the
amount of cooling capacity. When
the outdoor air temperature rises
5°F above the economizer enable
setpoint, the outdoor air damper
returns to its minimum position
and mechanical cooling is initiated.
ASHRAE Cycle I
ASHRAE Cycle I admits 100% outdoor air except during the warm up
cycle or the unoccupied mode. To
set up the Tracer ZN.520 controller
for ASHRAE Cycle I conformance,
set the occupied outdoor air damper minimum position to 100%.
44
ASHRAE Cycle II
The Tracer ZN.520 controller conforms to ASHRAE Cycle II by allowing the modulating outdoor air
damper to maintain a minimum
position during the occupied mode
unless economizing is enabled or
the space temperature falls more
than 3°F below the effective setpoint.
If the space temperature falls more
than 2°F below the setpoint, the
outdoor air damper will begin to
close. When the space temperature
hits 3°F below the setpoint, the
outdoor air damper is completely
closed.
Figure 22: ASHRAE cycle 2
DX Operation
Tracer ZN.520 supports direct expansion (DX) compressor operation for cooling only.
The controller does not allow both
the DX compressor and economizer to operate at the same time. This
prevents problems where the entering air temperature is too low
for the evaporator coil to operate
as designed.
Tracer ZN.520 also includes a fixed
minimum on/off time of 3 minutes
for compressor operation to prevent short cycling of the compressor.
Electric Heat
Operation
The Tracer ZN.520 controller supports 1 or 2 stages of electric heat
control.
To control space temperature,
electric heat is cycled to control the
discharge air temperature. The rate
of cycling is dependent on the load
in the space and the temperature of
the incoming fresh air.
Baseboard Heat
Operation
The Tracer ZN.520 controller can
be configured to support one stage
of baseboard heat. A 2 position
valve or an electric heat contactor
will be energized at 2.5°F below
the effective heating setpoint. The
baseboard heat is de-energized at
1°F below the effective heating
setpoint.
The unit will provide heating capacity as required regardless of the
presence of baseboard heat. If the
unit can not maintain the space
temperature, the baseboard heat
will come on as a secondary stage.
If baseboard heat is to be used as
the primary source of heating, the
discharge air high limit should be
set to a moderate temperature.
This will allow the ventilation air to
be tempered and avoid a “drafty”
feeling. The baseboard heat will
then operate as the heating capacity for the space.
In the UNOCC UPIED mode, the
baseboard heat and unit heating
capacity are brought on simultaneously as needed to maintain the
unoccupied setpoint.
Exhaust Fan
Operation
The exhaust fan is coordinated
with the unit fan and outdoor air
damper operation. The exhaust fan
output is energized only when the
unit fan is operating and the outdoor air damper position is greater
UV-SVP01A-EN
Unit Operation
than or equal to the configurable
exhaust enable setpoint. This is
useful for exhaust fans designed
to offset the added economizer
ventilation.
The exhaust fan is disabled when
the outdoor air damper position
drops 10% below the exhaust enable point. If the exhaust fan enable setpoint is less than 10%, the
Tracer ZN.520 controller energizes
the exhaust fan at the enable point
and disables it when the outdoor
air damper closes.
Output Overrides
Manual Output Test
Manual output test allows the binary outputs to be energized in a
predefined sequence.(For more information see, Manual Output
Test, on page 48 for more information.)
Water Valve Override
To enable quicker water balancing, the controller allows a user to
specify the desired state of all water valves. The values supported
are:
q Open all valves
q Close all valves
The valves in the system will remain open for two hours or until
normal operation is resumed.
The Tracer Summit or the Rover
service tool is required to access
this feature.
Fan Status
There are two ways to do fan status monitoring:
1.
The status of the fan is
reported based on the state of
the binary output(s) dedicated
to fan control. The fan status
is reported as HIG H or LOW
whenever the corresponding
binary output is directed ON.
UV-SVP01A-EN
The fan status is reported as
OFF when none of the fan outputs are directed ON.
2.
The Tracer ZN.520 controller
has a binary input available
for a fan status device (current
sensing relay or differential
pressure switch) which can
provide feedback of fan operation. If the device does not
indicate fan operation after 1
minute, a unit shutdown is initiated, and the unit is latched
OFF .
Filter Status/
Maintenance Timer
The unit filter status\maintenance
timer is based on the cumulative
run hours of the unit fan. The controller compares the fan run time
against an adjustable fan run hour
limit and recommends unit maintenance as required.
The Rover service tool is used to
edit the maintenance required setpoint time. Once the setpoint limit
is exceeded, the controller generates a MAIN TENANCE REQUIRED informational diagnostic. When the
maintenance required setpoint
time is set to zero, the controller
disables this feature.
You can use the Trace Summit or
the Rover service tool to clear the
MAINTENANC E REQ UIRED informational diagnostic. Once the diagnostic is cleared, the controller
resets the fan run time to zero and
begins accumulating fan run
hours again.
Note: If at any time the unit
loses power, the timer is reset
to zero.
Other Modes
DEHUMIDIFICATION
Note: If the unit is in the
unoccupied mode, the
dehumidification routine will
not operate
Dehumidification is possible when
mechanical cooling is available;
the heating capacity is in the reheat position; and the space relative humidity setpoint is valid.
The controller starts dehumidifying the space when the space humidity exceeds the humidity
setpoint. The controller continues
to dehumidify until the sensed humidity falls below the setpoint minus the relative humidity offset.
The controller uses the cooling
and reheat coils simultaneously to
dehumidify the space. When dehumidifying, the discharge air
temperature is controlled to maintain the space temperature at the
current setpoint.
Economizing is disabled during
the dehumidification mode.
Note: While in the
dehumidification mode, if
there is a call for capacity by
the unit, the zone temperature
setpoint will take priority over
the relative humidity
setpoints.
DEFROST
For defrost operation, a sensor is
wired in series with the DX cooling
relay. When a defrost condition is
detected, the condensing unit is
disabled, and the unit is placed in
the DEFROST mode.
During DEFROST the condensing
unit is O FF the outside air damper
is set to the minimum positions,
and the fan will continue to operate as continuous. The unit will remain in the DEFROST mode until
the senor resets at 48°F. The unit
will return to NORMAL operation after the mode is discontinued.
FRE EZE AV OIDANCE
is used as low
ambient temperature protection,
and is only invoked when the fan is
O FF . This includes the UN OCCU PIED
mode when there is no call for capacity, or any other time the fan is
FRE EZE AV OIDANCE
45
Unit Operation
due to a safety or command.
The controller enters the FRE EZE
AVOIDANCE mode when an outdoor air temperature is present
(communicated or hardwired) and
it is below the freeze avoidance setpoint (configurable). The controller
disables freeze avoidance when
the outdoor air temperature rises
3°F above the freeze avoidance
setpoint.
When the controller is in the freeze
avoidance mode:
q All water valves are driven
open to allow water flow
through the coil
q Fan is OFF
q Face-and-bypass damper
(when present) is in full BYPASS
q DX and electric heat are OFF
OFF
MORNING WARM -UP
The Tracer ZN.520 controller keeps
the modulating outdoor air damper closed anytime during the OCCU PIED mode when the space
temperature is 3°F or more below
the heating setpoint.
The damper remains closed indefinitely during morning warm-up
until the space temperature is within 2°F of the effective heating setpoint. The unit runs at full capacity
until setpoint is met.
COOL- DOWN
The Tracer ZN.520 controller keeps
the modulating outdoor air damper closed for up to one hour at every transition from UNOC CUPIED to
OC CUPIED mode when the space
temperature is 3°F or more above
the cooling setpoint.
The damper remains closed during
cool-down until the space temperature is within 2°F of the effective
cooling setpoint. The unit runs at
full capacity until setpoint is met.
Data Sharing—LonWorks
Tracer ZN.520 allows peer-to-peer
data communication through the
use of LonWork’s technology. Data
such as space temperature setpoint, occupancy, etc. can be
shared from a master controller to
a peer controller over a twisted pair
of communication wire with or
without the presence of a front end
building management system.
(See Figure 23: “Simple data sharing application”) This ability allows units to operate with the
same data to prevent conflicting
control.
Data sharing is established
through the use of “bindings”.
Bindings are set up through the
Rover service tool.
The Tracer ZN.520 controller includes a network variable for master/slave operation. This variable
includes all of the information required for the slave units to operate with master controller. (See
Figure 24: “More complex data
sharing application”)
For more information on establishing bindings, see the Rover service
tool manual. For a complete listing
on shared points see “Appendix—
Data Lists” on page64.
Figure 23: Simple data sharing application
46
UV-SVP01A-EN
Unit Operation
Figure 24: More complex data sharing application
UV-SVP01A-EN
47
Unit Operation
Power-Up
When 24 VAC is initially applied to
the controller, the following sequence of events occurs:
q Green status LED turns ON .
q All outputs are controlled OFF .
q The controller reads input
values to determine initial
values.
q Random-start timer expires (5
to 30 seconds).
q When POWER -UP CONTROL WAIT
is enabled, the controller waits
0-120 seconds (depending on
configuration) to allow ample
time for communicated control
data to input. If the controller
does not receive communicated information, standalone
control is assumed.
q All modulating valves and
dampers calibrate closed.
q NORMAL operation begins.
Occupancy
The valid occupancy modes for the
Tracer ZN.520 controller are:
q OCC UPIED - Normal operating
mode for occupied spaces or
daytime operation.
q UNOCCUPIED - Normal
operating mode for
unoccupied spaces or
nighttime operation.
q OCC UPIED STANDBY - Mode
used to reduce the heating and
cooling demands, while
providing ventilation, during
the occupied hours when the
space is vacant or unoccupied.
q OCC UPIED BYPASS -Used to
temporarily place the unit into
the occupied operation.
The occupancy mode can be hardwired to the controller via the occupancy binary input or
communicated to the controller.
UV-SVP01A-EN
OCC UPIED
mode
OCC UPIED BYPASS
When the controller is in the OC CU PIED mode, the unit attempts to
maintain the space temperature at
the active occupied heating or
cooling setpoint.
OCC UPIED mode is the default
mode of the Tracer ZN.520 controller.
UNOCCUPIE D
mode
When the controller is in the UN OCC UPIED mode, the unit attempts
to maintain space temperature at
the stored unoccupied heating or
cooling setpoint (i.e., configurable through Tracer Summit or
the Rover service tool) regardless
of the presence of a hardwired or
communicated setpoint. When
the space temperature exceeds
the stored unoccupied setpoint,
the controller brings on 100% of
the primary heating or cooling capacity.
The UNOCC UPIED mode can be initiated through a hardwired signal
to the occupancy binary input or
by a communicated request.
OCC UPIED STANDBY
mode
The OC CUPIED STANDBY mode allows the unit to operate at a heating or cooling setpoint between
the occupied and unoccupied setpoints to help maintain the environment while decreasing energy
consumption.
This mode decreases the ventilation for heating or cooling during
brief periods of vacancy in the
space. Unit operation in this mode
is similar to the occupied mode except for the different heating and
cooling setpoints and a different
outside air damper position.
The OC CUPIED STANDBY mode is
initiated only when occupancy is
communicated to the Tracer
ZN.520 controller and the hardwired signal to the occupancy input is calling for unoccupied
operation.
mode
The OCCUPIED BY PASS mode is
used to transition the unit from the
UNOCCUPIED mode to the OCC U PIE D mode for a period of time
from 0 to 4 hours (configurable
through Rover. Default=RUN ). The
controller can be placed in OC CU PIE D BYPASS mode by either communicating an occupancy request
of BYPASS or by using the TIMED
OVE RRIDE (i.e., ON ) button on the
Trane zone sensor.
and CANCEL Buttons
Some Trane zone sensors have ON
and CANCEL buttons for timed override operation. Pressing the ON
button on the zone sensor when
the unit is in the UNOCC UPIED
mode initiates the OCC UPIED BYPASS mode and initializes the bypass timer. The CANCEL button is
used to send the unit back into UN OCC UPIED mode before the bypass
timer has expired.
The ON button may also be used
for the unit identification or the
“ WINK” feature. (See “Winking”
on page38.for more information.)
When the Tracer ZN.520 controller
is connected to a Tracer Summit
system or the Rover service tool,
the ON button may be used in place
of the service pin for easy unit
identification.
ON
Heating And Cooling
Changeover Logic
The Tracer™ ZN.520 Unit Controller can receive communicated requests for heating or cooling
operation. The communicated
variable nviApplicMode is used to
communicate the requests for the
controller's operating mode based
on the following values:
0 = Auto (mode determined by
controller)
1 = Heat (uses heating
setpoints)
2 = Morning Warm-up
3 = Cool (uses cooling
setpoints)
39
Unit Operation
4 = Night Purge (air
changeover) not supported
5 = Pre-cool (morning cool
down)
6 = Off (no unit operation
allowed)
7 = Test (special test mode)
8 = Emergency Heat not
supported
9 = Fan Only (no heating or
cooling allowed)
All other enumerations will be interpreted as Auto.
As the controller automatically determines its heating or cooling
mode, it changes from cool to heat
or from heat to cool, while the error
(integrated over time between the
active setpoint and the space tem-
perature) is (900°FhSec). Integration only begins once the heating
and cooling capacity is equal to 0%
or the discharge air temperature is
being limited by the discharge air
temperature control limits.(See
Figure 17: “Heat/Cool Changeover
logic”).
cooling setpoint or lower than the
active heating setpoint.
Example: If the cooling setpoint is
75 °F and the heating setpoint
70 °F, any space temperature
greater than 75 °F or less than 70 °F
is outside the setpoint range.
Once the integration term is satisfied and the space temperature is
outside the setpoint range, the
controller changes modes. However, before the unit's heating or
cooling capacity ramps up, the
controller checks to make sure it is
capable of heating or cooling.
For some units, heating and cooling capability exists with local resources such as electric heat or
compressors. For these units, central heating or cooling plan operation is not required for heating or
cooling because they are capable
of providing their own local heating or cooling.
For 2-pipe changeover and 4-pipe
changeover units with hydronic capacity, heating and cooling is provided through hydronic. For those
hydronic, central heating or cooling plant operation is required for
the unit to deliver heating or cooling. To determine whether the central plant is providing the desired
water temperature, an entering
water temperature sensor (either
hardwired or communicated) must
be present.
Figure 17: Heat/Cool Changeover logic
If the measured space temperature
is 69 °F and the active cooling setpoint is 72 °F, the error between
the space temperature and the setpoint is three degrees. If the same
error exists for one minute (60 seconds), the integration term is
(3 °Fh60 Sec) or (180 °Fh Sec).
The Tracer™ ZN.520 Unit Controller changes from heating to cooling and cooling to heating when
the integration term exceeds
(900 °FhSec). Along with satisfying the integration for heating and
cooling changeover, the measured
space temperature must fall outside the setpoint range. This
means the space temperature
must be greater than the active
40
UV-SVP01A-EN
Unit Operation
The entering water must be five
degrees or more above the space
temperature to allow hydronic
heating, and five degrees or more
below the space temperature to allow hydronic cooling.
If the desired water temperature is
available, the unit begins normal
heating and cooling operation. If
the measured entering water temperature is not adequate for the
desired heating or cooling, the
controller begins the entering water temperature sampling logic.
The Tracer™ ZN.520 Unit Controller operates the modulating valves
and dampers based on a heating
or cooling capacity calculated by
the control algorithm. The control
algorithm calculates the heating or
cooling capacity based on the
measured space temperature, the
active setpoint and the discharge
air temperature. When the measured space temperature is within
the active heating and cooling setpoints, the heating and cooling capacity approaches zero.
Cooling Operation
During the C OOLING mode, the
Tracer ZN.520 controller attempts
to maintain the space temperature
at the active cooling setpoint.
Based on the controller’s occupancy mode, the active cooling setpoint is one of the following:
q Occupied cooling setpoint
q Occupied standby cooling
setpoint
q Unoccupied cooling setpoint
The controller uses the measured
space temperature, the active
cooling setpoint, and discharge air
temperature along with the control algorithm to determine the requested cooling capacity of the
unit (0-100%). The outputs are controlled based on the unit configuration and the requested cooling
capacity.
UV-SVP01A-EN
Heating Operation
During the H EATING mode, the
Tracer ZN.520 controller attempts
to maintain the space temperature
at the active heating setpoint.
Based on the controller’s occupancy mode, the active heating setpoint is one of the following:
q Occupied heating setpoint
q Occupied standby heating
setpoint
q Unoccupied heating setpoint
The controller uses the measured
space temperature, the active
heating setpoint, and discharge air
temperature along with the control algorithm to determine the requested heating capacity of the
unit (0-100%). The outputs are controlled based on the unit configuration and the requested heating
capacity.
lows the fan speed switch to be
disabled. When this occurs, the
unit will operate at the default fan
speed unless a communicated request is present.
During OCCUPIE D, OCCUPIE D
STANDBY , and OC CUPIED BY PASS
modes, the fan will normally operate continuously at the appropriate fan speed. The fan will only be
O FF in these modes when the MAN UAL OUTPUT TEST has been initiated, a latching diagnostic is
present, or the communicated or
hardwired fan speed is OFF . (See
“Manual Output Test” on
page48.for more information.)
During the UNOC CUPIED mode, the
unit fan is controlled OFF . When capacity is required to maintain the
unoccupied heating or cooling setpoint, the unit fan is controlled to
high speed regardless of a hardwired or communicated fan speed.
Fan Operation
Table 21: Absolute two-speed fan
switch points
For multiple fan speed applications, the Tracer ZN.520 controller
allows separate default fan speeds
to be configured for heating and
cooling modes. When the fan
mode switch is in the AUTO position or no hardwired input exists,
the fan operates at the configured
default fan speed (i.e, HIGH ).
The Tracer ZN.520 controller also
allows the default fan speed to be
configured as AU TO . When the fan
speed switch is in the AUTO position and the default fan speed is
configured as AU TO , the unit may
change fan speeds based on the
requested heating or cooling capacity. In this mode, the unit fan
will operate at LOW speed until the
requested capacity requires HIGH
fan speed operation to maintain
space comfort.
The fan mode request can be either hardwired or communicated
to the Tracer ZN.520 controller.
When both are present, the communicated request has priority
over the hardwired input. Additional flexibility in the controller al-
Fan Speed
Change
Absolute
Temperature Error
Low to High
2.00
High to Low
1.25
°F
°F
Fan Off Delay
When a heating output is controlled off, the Tracer™ ZN.520
Unit Controller automatically
holds the fan on for an additional
30 seconds. This 30-second delay
gives the fan time to blow off any
residual heat from the heating
source, such as a steam coil. When
the unit is heating, the fan off delay is normally applied to control
the fan; otherwise, the fan off delay does not apply.
Fan Start On High Speed
On a transition from off to any other fan speed, the Tracer™ ZN.520
Unit Controller automatically
starts the fan on high speed and
runs the fan at high speed for 0.5
41
Unit Operation
seconds. This provides the ample
torque required to start all fan motors from the off position.
Exhaust fan/damper
operation
This binary point is a shared point
with medium fan speed. For this
point to be used for exhaust control, the controller must be configured for a 1- or 2-speed fan. The
exhaust fan/damper is coordinated
with the unit fan and outdoor
damper operation. The exhaust
output is energized only when the
unit fan is operating and the outdoor damper position is greater
than or equal to the configurable
exhaust enable point. The exhaust
fan output is disabled when the
outdoor air damper position drops
10% below the exhaust enable
point. If the enable point is less
than 10%, the unit turns on at the
enable point and off at 0.
Valve Operation
Face-and-Bypass
Isolation Valves
Modulating Valves
Face-and-bypass units may use
isolation valves to prevent unwanted water flow in the coil. This eliminates problems such as radiant
heat or excessive condensate in 2pipe systems.
In 4-pipe applications, the isolation
valves are used to prevent conflicting capacities within the unit.
The Tracer ZN.520 controller supports one or two modulating
valves for hydronic heating and
cooling operation. The main valve/
coil is used for cooling only, heat/
cool changeover (2-pipe applications), or cooling (4-pipe applications). The auxiliary valve/coil
provides heating in 4-pipe and
heating only applications.
At power-up, the Tracer ZN.520
controller drives the modulating
valves to the closed position. The
controller calibrates to the full
closed position by overdriving the
actuator 135%. Whenever the controller requests a valve position of
zero or 100%, the controller overdrives the actuator 135% regardless of the current valve position.
Face-and-Bypass
Damper Operation
Note: The Face-and-bypass
actuator is located in the righthand end pocket of the
classroom unit ventilator.
The Tracer ZN.520 controller actuates a face-and- bypass damper to
modulate a percentage of air to the
face of the coil to maintain space
comfort. When a requested capacity is present, the unit modulates
the damper to allow more air to the
face of the coil. An averaging sensor is used on the discharge air to
provide accurate capacity control.
Figure 18: Horizontal unit with face-and-bypass damper option.
42
UV-SVP01A-EN
Unit Operation
controller for standalone applications.
When a unit uses 2-way modulating valves, it is possible for the water near the entering water
temperature sensor to migrate towards ambient temperature. The
Tracer ZN.520 controller has a water sampling feature for these applications. When the sensed water
temperature is not sufficient for
the requested heat/cool mode
(5°F above the zone temperature
for heating or 5°F below the zone
temperature for cooling), the controller drives the valve fully open.
The controller then monitors the
water temperature until the appropriate temperature is sensed or
until the three minute time limit
expires. If the water temperature is
acceptable for the requested capacity, the unit continues normal
operation. If the three minute timer expires and the water temperature is still unsuitable, the unit
closes the valve and waits one
hour before invoking the sampling
Figure
low-leak damper
seal for
Figure 19: Vertical
unit 11:
withUltra
face-andfeature
again.
bypass damper operations
Upon power-up, the controller calibrates the face-and-bypass damper to the full bypass position by
overdriving the damper actuator.
During normal operation, whenever the Tracer ZN.520 controller
generates a face-and-bypass
damper position request of zero or
100%, the unit calibrates the actuator by overdriving the damper actuator 135%.
Entering Water
Temperature
Sampling
Units with 4-pipe changeover and
2-pipe changeover require an entering water temperature to determine if the appropriate water
temperature is present for the requested mode (heating or cooling). This temperature may be
communicated in an ICS system or
hardwired to the Tracer ZN.520
UV-SVP01A-EN
point. Default minimum damper
positions are provided and can be
changed for occupied and occupied standby modes, or for low
speed operation. The controller
can also receive a communicated
outdoor air damper minimum position from Tracer Summit. A communicated minimum position
from Tracer Summit has priority
over all configured setpoints.
During the OC CUPIED mode the
outdoor air damper will always be
controlled to the effective minimum position unless ASHRAE Cycle I, ASHRAE Cycle II, or
economizing modes are active.
Table 22: Water assumption chart
Unit Configuration
Temperature
Assumed 1
2-pipe Heating valve
Hot
2-pipe cooling valve
Cold
2-pipe H/C valve with
Hot
auto changeover enabled
2-pipe H/C valve with
auto changeover
disabled
Figure 20: OA/RA actuator mounting for
the vertical unit ventilator
Cold
1. Assumption based on absence of a valid
entering water temperature
Modulating Outdoor
Air Operation
The Tracer ZN.520 controller operates a modulating (3-wire floating)
outdoor air damper actuator according to the effective occupancy, outdoor air temperature, space
temperature, effective setpoint,
discharge air temperature, and
discharge air temperature set-
Figure 21: Figure 2: OA/RA actuator
mounting for the horizontal unit ventilator
43
Unit Operation
Automatic Outdoor Air
Damper Adjustment
The Tracer ZN.520 controller is capable of using different minimum
outdoor air damper positions for
high and low fan speeds, which are
configurable. This allows the ventilation rate to be maintained when
switching between fan speeds.
Note: The typical reduction in
airflow between high and low
fan speeds is 25%, however, if
precise control is desired, an
air balancer should be
consulted.
Economizer
Operation
Note: When there is a request
for 0% or 100% actuator
position, the actuator will
overdrive the actuator 135% to
help maintain calibration.
With a valid outdoor air temperature (hardwired or communicated),
Tracer ZN.520 uses the modulating
economizer damper as the highest
priority source of cooling.
The controller initiates the economizer function if the outdoor air
temperature is cold enough to be
used for free cooling capacity. If
the outdoor air temperature is less
than the economizer enable setpoint (absolute dry bulb), the controller modulates the outdoor air
damper between the minimum position and 100% to control the
amount of cooling capacity. When
the outdoor air temperature rises
5°F above the economizer enable
setpoint, the outdoor air damper
returns to its minimum position
and mechanical cooling is initiated.
ASHRAE Cycle I
ASHRAE Cycle I admits 100% outdoor air except during the warm up
cycle or the unoccupied mode. To
set up the Tracer ZN.520 controller
for ASHRAE Cycle I conformance,
set the occupied outdoor air damper minimum position to 100%.
44
ASHRAE Cycle II
The Tracer ZN.520 controller conforms to ASHRAE Cycle II by allowing the modulating outdoor air
damper to maintain a minimum
position during the occupied mode
unless economizing is enabled or
the space temperature falls more
than 3°F below the effective setpoint.
If the space temperature falls more
than 2°F below the setpoint, the
outdoor air damper will begin to
close. When the space temperature
hits 3°F below the setpoint, the
outdoor air damper is completely
closed.
Figure 22: ASHRAE cycle 2
DX Operation
Tracer ZN.520 supports direct expansion (DX) compressor operation for cooling only.
The controller does not allow both
the DX compressor and economizer to operate at the same time. This
prevents problems where the entering air temperature is too low
for the evaporator coil to operate
as designed.
Tracer ZN.520 also includes a fixed
minimum on/off time of 3 minutes
for compressor operation to prevent short cycling of the compressor.
Electric Heat
Operation
The Tracer ZN.520 controller supports 1 or 2 stages of electric heat
control.
To control space temperature,
electric heat is cycled to control the
discharge air temperature. The rate
of cycling is dependent on the load
in the space and the temperature of
the incoming fresh air.
Baseboard Heat
Operation
The Tracer ZN.520 controller can
be configured to support one stage
of baseboard heat. A 2 position
valve or an electric heat contactor
will be energized at 2.5°F below
the effective heating setpoint. The
baseboard heat is de-energized at
1°F below the effective heating
setpoint.
The unit will provide heating capacity as required regardless of the
presence of baseboard heat. If the
unit can not maintain the space
temperature, the baseboard heat
will come on as a secondary stage.
If baseboard heat is to be used as
the primary source of heating, the
discharge air high limit should be
set to a moderate temperature.
This will allow the ventilation air to
be tempered and avoid a “drafty”
feeling. The baseboard heat will
then operate as the heating capacity for the space.
In the UNOCC UPIED mode, the
baseboard heat and unit heating
capacity are brought on simultaneously as needed to maintain the
unoccupied setpoint.
Exhaust Fan
Operation
The exhaust fan is coordinated
with the unit fan and outdoor air
damper operation. The exhaust fan
output is energized only when the
unit fan is operating and the outdoor air damper position is greater
UV-SVP01A-EN
Unit Operation
than or equal to the configurable
exhaust enable setpoint. This is
useful for exhaust fans designed
to offset the added economizer
ventilation.
The exhaust fan is disabled when
the outdoor air damper position
drops 10% below the exhaust enable point. If the exhaust fan enable setpoint is less than 10%, the
Tracer ZN.520 controller energizes
the exhaust fan at the enable point
and disables it when the outdoor
air damper closes.
Output Overrides
Manual Output Test
Manual output test allows the binary outputs to be energized in a
predefined sequence.(For more information see, Manual Output
Test, on page 48 for more information.)
Water Valve Override
To enable quicker water balancing, the controller allows a user to
specify the desired state of all water valves. The values supported
are:
q Open all valves
q Close all valves
The valves in the system will remain open for two hours or until
normal operation is resumed.
The Tracer Summit or the Rover
service tool is required to access
this feature.
Fan Status
There are two ways to do fan status monitoring:
1.
The status of the fan is
reported based on the state of
the binary output(s) dedicated
to fan control. The fan status
is reported as HIG H or LOW
whenever the corresponding
binary output is directed ON.
UV-SVP01A-EN
The fan status is reported as
OFF when none of the fan outputs are directed ON.
2.
The Tracer ZN.520 controller
has a binary input available
for a fan status device (current
sensing relay or differential
pressure switch) which can
provide feedback of fan operation. If the device does not
indicate fan operation after 1
minute, a unit shutdown is initiated, and the unit is latched
OFF .
Filter Status/
Maintenance Timer
The unit filter status\maintenance
timer is based on the cumulative
run hours of the unit fan. The controller compares the fan run time
against an adjustable fan run hour
limit and recommends unit maintenance as required.
The Rover service tool is used to
edit the maintenance required setpoint time. Once the setpoint limit
is exceeded, the controller generates a MAIN TENANCE REQUIRED informational diagnostic. When the
maintenance required setpoint
time is set to zero, the controller
disables this feature.
You can use the Trace Summit or
the Rover service tool to clear the
MAINTENANC E REQ UIRED informational diagnostic. Once the diagnostic is cleared, the controller
resets the fan run time to zero and
begins accumulating fan run
hours again.
Note: If at any time the unit
loses power, the timer is reset
to zero.
Other Modes
DEHUMIDIFICATION
Note: If the unit is in the
unoccupied mode, the
dehumidification routine will
not operate
Dehumidification is possible when
mechanical cooling is available;
the heating capacity is in the reheat position; and the space relative humidity setpoint is valid.
The controller starts dehumidifying the space when the space humidity exceeds the humidity
setpoint. The controller continues
to dehumidify until the sensed humidity falls below the setpoint minus the relative humidity offset.
The controller uses the cooling
and reheat coils simultaneously to
dehumidify the space. When dehumidifying, the discharge air
temperature is controlled to maintain the space temperature at the
current setpoint.
Economizing is disabled during
the dehumidification mode.
Note: While in the
dehumidification mode, if
there is a call for capacity by
the unit, the zone temperature
setpoint will take priority over
the relative humidity
setpoints.
DEFROST
For defrost operation, a sensor is
wired in series with the DX cooling
relay. When a defrost condition is
detected, the condensing unit is
disabled, and the unit is placed in
the DEFROST mode.
During DEFROST the condensing
unit is O FF the outside air damper
is set to the minimum positions,
and the fan will continue to operate as continuous. The unit will remain in the DEFROST mode until
the senor resets at 48°F. The unit
will return to NORMAL operation after the mode is discontinued.
FRE EZE AV OIDANCE
is used as low
ambient temperature protection,
and is only invoked when the fan is
O FF . This includes the UN OCCU PIED
mode when there is no call for capacity, or any other time the fan is
FRE EZE AV OIDANCE
45
Unit Operation
due to a safety or command.
The controller enters the FRE EZE
AVOIDANCE mode when an outdoor air temperature is present
(communicated or hardwired) and
it is below the freeze avoidance setpoint (configurable). The controller
disables freeze avoidance when
the outdoor air temperature rises
3°F above the freeze avoidance
setpoint.
When the controller is in the freeze
avoidance mode:
q All water valves are driven
open to allow water flow
through the coil
q Fan is OFF
q Face-and-bypass damper
(when present) is in full BYPASS
q DX and electric heat are OFF
OFF
MORNING WARM -UP
The Tracer ZN.520 controller keeps
the modulating outdoor air damper closed anytime during the OCCU PIED mode when the space
temperature is 3°F or more below
the heating setpoint.
The damper remains closed indefinitely during morning warm-up
until the space temperature is within 2°F of the effective heating setpoint. The unit runs at full capacity
until setpoint is met.
COOL- DOWN
The Tracer ZN.520 controller keeps
the modulating outdoor air damper closed for up to one hour at every transition from UNOC CUPIED to
OC CUPIED mode when the space
temperature is 3°F or more above
the cooling setpoint.
The damper remains closed during
cool-down until the space temperature is within 2°F of the effective
cooling setpoint. The unit runs at
full capacity until setpoint is met.
Data Sharing—LonWorks
Tracer ZN.520 allows peer-to-peer
data communication through the
use of LonWork’s technology. Data
such as space temperature setpoint, occupancy, etc. can be
shared from a master controller to
a peer controller over a twisted pair
of communication wire with or
without the presence of a front end
building management system.
(See Figure 23: “Simple data sharing application”) This ability allows units to operate with the
same data to prevent conflicting
control.
Data sharing is established
through the use of “bindings”.
Bindings are set up through the
Rover service tool.
The Tracer ZN.520 controller includes a network variable for master/slave operation. This variable
includes all of the information required for the slave units to operate with master controller. (See
Figure 24: “More complex data
sharing application”)
For more information on establishing bindings, see the Rover service
tool manual. For a complete listing
on shared points see “Appendix—
Data Lists” on page64.
Figure 23: Simple data sharing application
46
UV-SVP01A-EN
Unit Operation
Figure 24: More complex data sharing application
UV-SVP01A-EN
47
Troubleshooting
Important! When viewing the
Tracer ZN.520 through the
Rover service tool, it is
important that the version be
up-to-date. To help ensure that
your version is the most
recent, contact you local Trane
sales representative or service
center.
The Service push button, located
at the bottom center of the controller, can be used to install the Tracer™ ZN.520 Unit Controller in a
communication network. Refer to
the Rover and Tracer Summit
product literature for more information.
Yellow LED
activity
Table 23: Red service LED activity
Description
Normal operation.
LED is ON
continuously,
even when
power is first
applied to the
controller.
Someone is pressing the
Service push button or
the controller has failed.
LED flashes
about once
every second.
Un-install (normal
controller mode). Use
Rover service tool to
restore the unit to
normal operation. Refer
to the Rover product
literature for more
information.
Figure 25: Black service button
The green LED normally indicates
whether or not the controller is
powered on (24 VAC).
Table 24: Green status LED activity
Note: If the Service push
button is held down for more
than 15 seconds, the Tracer™
ZN.520 Unit Controller will uninstall itself from the ICS
communication network and
shut down all unit operation.
This mode is indicated by the
red Service LED flashing once
every second. See the Red
Service LED section. Use Rover
service tool to restore the unit
to normal operation.
48
LED blinks or
flickers.
Green Status LED
Black Service Push
Button
Description
LED OFF
The controller is not
continuously. detecting any
communication. (Normal
for standalone
applications.)
Red Service LED
LED is OFF
continuously
after power is
applied to the
controller.
The yellow Comm LED blinks at the
rate the controller receives
communication. The yellow LED
does not blink when the controller
is transmitting communication
data.
Table 25: Yellow comm LED activity
Led Operation
Red LED
activity
Yellow Comm LED
Green LED
activity
Description
LED is ON
continuously.
Power ON (normal
operation).
LED blinks (1 blink
per second).
The controller is in
manual output test
mode.
No diagnostics
present.
LED blinks (2
blinks per second).
The controller is in
manual output test
mode.
One or more
diagnostics are
present.
LED blinks (1/4
second on, 1/4
second off for 10
seconds).
Wink mode.
LED OFF.
Power is off.
Controller failure.
Test button is
pressed.
The controller detects
communication. (Normal
for communicating
applications, including
data sharing.)
LED ON
Abnormal condition or
continuously. extremely high traffic on
the link.
Manual Output Test
The test sequence verifies output
and end device operation. The
manual output test can be conducted to verify output wiring and actuator operation, without using the
Rover service tool, by pressing the
test button.
Figure 26: Blue test button
Many service calls are initiated due
to unit diagnostics, so the test sequence attempts to clear unit diagnostics and restore normal unit
operation prior to testing the outputs. If the diagnostics remain after
an attempt to clear diagnostics, the
status LED lights in a two-blink pattern, indicating the diagnostic condition is still present.
UV-SVP01A-EN
Troubleshooting
If a two-blink pattern remains after
an attempt to clear diagnostics,
the diagnostic condition is still
present and may affect the manual
output test. The diagnostic must
then be cleared using another
method. (See “Resetting Diagnostics” on
page 54.for more information.)
Test Procedure
The procedure for testing is:
1.
Press and hold the Test button
for at least two seconds, then
release the button to start the
test mode.
2. When manual output test
mode begins, the controller
turns off all outputs and calibrates modulating end
devices closed.
3. Press the Test button once to
advance through the test
sequence.
Note: To help ensure accurate
testing do not press the test
button more than once per
second.
Alternatively, the manual output
test can be controlled over the
communications network by using
Rover.
When conducting the manual output test via communications network, the sequence must start with
Step 1 (OFF), as shown in Table 26:
Test sequence for non face-and-bypass unit
configurations and Table 27: Test sequence for face-and-bypass unit configurations However, subsequent steps
may be conducted in any order.
Table 26: Test sequence for non face-and-bypass unit configurations
Step
1: Off 1
DX, or cool or
Face-andheat/cool changeover
bypass damper
valve
Fan
Electric heat, or
heat valve
J1-1
J1-2
J1-3
J1-5
J1-6
J1-7
J1-8
J1-9
J1-10
Off
Off
Off
Off
On
NA
NA
Off
Hydronic: on
EH: off
Outdoor air
damper
Generic/
baseboard
heat
J1-11 J1-12
TB4-1
Off
On
Off
2: Fan high2
High
Off
Off
Off
Off
NA
NA
Off
Off
Off
Off
Off
3: Fan med3
Off
Med
Off
Off
Off
NA
NA
Off
Off
Off
Off
Off
4: Fan low 4
Off
Off
Low
Off
Off
NA
NA
Off
Off
Off
Off
Off
5: Main open,
DX on
High
Off
Off
On
Off
NA
NA
Off
Off
Off
Off
Off
6: Main close,
DX off, aux
open, EH1 on
High
Off
Off
Off
On
NA
NA
On
Off
Off
Off
Off
7: Aux open,
EH1 on, exhaust
fan5
High
Exh
Off
Off
Off
NA
NA
On
Off
Off
Off
Off
8: Aux close,
EH1 off, EH2 on,
damper open
High
Off
Off
Off
Off
NA
NA
Off
On
On
Off
Off
9: Damper close
High
Off
Off
Off
Off
NA
NA
Off
Off
Off
On
Off
10: Generic /
baseboard heat
energized
High
Off
Off
Off
Off
NA
NA
Off
Off
Off
Off
On
11: Exit6
Exit
1. Upon entering manual output test mode, the controller turns off all fan, DX, and electric heat outputs and drives all dampers and valves
closed (if required).
2. At the beginning of step 2, the controller attempts to clear all diagnostics.
3. If the unit is configured for a 3-speed fan, the medium fan speed output will energize at step 3. If the unit is configured for a 2-speed fan,
the fan remains on high speed at step 3.
4. If the unit is configured for a 3-speed fan, the medium fan speed output energizes at step 3. If the unit is configured for a 2-speed fan, the
low fan speed output energizes at step 3. If the unit is configured for a 1-speed fan, the fan remains on high speed at step 3.
5. If the unit is configured for a 1- or 2-speed fan, the exhaust fan output energizes on step 7. The exhaust fan output is shared with medium
fan speed.
6. After step 10, the test sequence performs an exit. This initiates a reset and attempts to return the controller to normal operation
UV-SVP01A-EN
49
Troubleshooting
.
Table 27: Test sequence for face-and-bypass unit configurations
Step
J1-1
1: Off
DX, or cool or heat/
Face-andcool changeover valve bypass damper
Fan
J1-2
J1-3
J1-5
J1-6
J1-7
J1-8
Electric heat,
or heat valve
Outdoor air
damper
J1-9
J1-11
J1-10
J1-12
Generic/
baseboard
heat
TB4-1
1
Off
Off
Off
Off
NA
Off
On
Off
NA
Off
On
Off
2: Fan high2
High
Off
Off
Off
NA
On
Off
Off
NA
Off
Off
Off
3: Fan med3
Off
Med
Off
Off
NA
On
Off
Off
NA
Off
Off
Off
4: Fan low 4
Off
Off
Low
Off
NA
On
Off
Off
NA
Off
Off
Off
5: Main open,
DX on
High
Off
Off
On
NA
On
Off
Off
NA
Off
Off
Off
6: Main close,
DX off, aux
open
High
Off
Off
Off
NA
On
Off
On
NA
Off
Off
Off
7: Aux open,
exhaust fan5
High
Exh
Off
Off
NA
On
Off
On
NA
Off
Off
Off
8: Aux close,
damper open
High
Off
Off
Off
NA
Off
On
Off
NA
On
Off
Off
9: Outdoor air
damper close
High
Off
Off
Off
NA
Off
On
Off
NA
Off
On
Off
10: Generic /
baseboard heat
energized
High
Off
Off
Off
NA
Off
On
Off
NA
Off
Off
On
11: Exit6
Exit
1. Upon entering manual output test mode, the controller turns off all fan outputs and drives all dampers and valves closed (if required).
2. At the beginning of step 2, the controller attempts to clear all diagnostics.
3. If the unit is configured for a 2-speed fan, the fan remains on high speed at step 3.
4. If the unit is configured for a 2-speed fan, the low fan speed output energizes at step 3. If the unit is configured for a 1-speed fan, the fan
remains on high speed at step 3.
5. If the unit is configured for a 1- or 2-speed fan, the exhaust fan output energizes on step 7. The exhaust fan output is shared with medium
fan speed.
6. After step 10, the test sequence performs an exit. This initiates a reset and attempts to return the controller to normal operation.
UV-SVP01A-EN
50
Troubleshooting
Safeties
Discharge Air
Temperature Limit
Freeze Protection
When the discharge air exceeds
the high or low limit setpoint and
the unit can not correct it by altering capacity, a “Discharge Air
Temp Limit” diagnostic is generated.
The Tracer ZN.520 controller has
two methods of freeze protection.
1.
2.
An optional binary freezestat
that is wired to a binary input.
The freezestat is a capillary
tube type and is factory set to
35 °F. When this device opens,
a “Low Coil Temp Detect”
diagnostic is generated.
Using the discharge air temperature sensor, if the discharge air temperature falls
below the discharge air low
limit, the controller increases
the heating capacity to temper
the air. If the discharge air
temperature remains below
the discharge air low limit for
3 minutes, the controller generates a “Low Coil Temp
Detect” diagnostic.
Outdoor Air Temperature
Failure
If the Tracer ZN.520 has validated
an outdoor air temperature input
and then the input becomes invalid, an outdoor air temperature
failure diagnostic occurs.
Humidity Input Failure
If the Tracer ZN.520 has validated
a relative humidity input and then
the input becomes invalid, a humidity input failure diagnostic occurs.
Fan Failure
CO2 Sensor Failure
A “Low Air Flow—Fan Failure” diagnostic is generated when a fan
status device is present and fails to
close after 1 minute of unit start-up
or when it opens for more than 1
minute during normal unit operation.
If the Tracer ZN.520 has validated
a CO2 input and then the input becomes invalid, a CO2 input failure
diagnostic occurs.
Space Temperature
Failure
If the Tracer ZN.520 has validated
a space temperature input and
then the input becomes invalid, a
space temperature failure diagnostic occurs.
Entering Water
Temperature Failure
If the Tracer ZN.520 has validated
an entering water temperature input and then the input becomes invalid, an entering water temperature failure diagnostic occurs.
UV-SVP01A-EN
Generic AIP Failure
If the Tracer ZN.520 has validated
a generic analog input and then
the input becomes invalid, a generic analog input failure diagnostic occurs.
Defrosting-Compressor
Lockout
The defrost stat used with Tracer
ZN.520 on DX units is wired in series with the condensing unit.
When it opens to indicate a frost
condition, the Tracer ZN.520 senses the open circuit and de-energizes the condensing unit output. A
defrosting diagnostic is generated
at this point.
Maintenance Required
Note: If power to the unit is
cycled or discontinued for any
reason, all maintenance timers
are automatically reset.
The “Maintenance Required” diagnostic is generated when the fan
run-time exceeds the configurable
limit. This diagnostic is useful for
filter change notification.
Local Fan Mode Failure
If the hardwired fan mode input to
the Tracer ZN.520 controller is
present and then becomes invalid,
a local fan mode failure diagnostic
is generated.
Local Setpoint Failure
If the hardwired setpoint input to
the Tracer ZN.520 controller is
present and then becomes invalid,
a local setpoint failure diagnostic
is generated.
Generic Temperature
Failure
If the Tracer ZN.520 has validated
a generic temperature input and
then the input becomes invalid, a
generic temperature input failure
diagnostic occurs.
Invalid Unit
Configuration
If the Tracer ZN.520 has been configured improperly or loses its
configuration, an invalid unit configuration diagnostic is generated.
The unit must be re-configured
with a valid configuration to correct this problem.
51
Troubleshooting
Diagnostics
Table 28: Tracer™ ZN.520 Unit Controller diagnostics
Latching/nonlatching
Reset
Fan—OFF
Valves—OPEN
Outdoor air damper—CLOSED
Face bypass damper—BYPASS
DX/electric heat—OFF
Baseboard heat—OFF
Latching
Auto reset once within 24hrs. If
safety generates a diagnostic
more than once a communicated or manual reset will be
necessary.
Fan—OFF
Valves—CLOSED
Outdoor air damper—CLOSED
Low Air Flow - Fan Failure2
Face bypass damper—BYPASS
DX/electric heat—OFF
Baseboard heat—OFF
Latching
Communicated or manual reset
Space Temperature
Failure2,4
Fan—OFF
Valves—CLOSED
Outdoor air damper—CLOSED
Face bypass damper—BYPASS
DX/electric heat—OFF
Baseboard heat—OFF
Non-latching
Communicated or manual reset
Entering Water Temp
Failure4
Fan—ENABLED
Valves—ENABLED3
Outdoor air damper—ENABLED3
Face bypass damper—ENABLED3
DX/electric heat—ENABLED3
Baseboard heat—OFF
Non-latching
Communicated or manual reset
Discharge Air Temp Limit2
Fan—OFF
Valves—OPEN
Outdoor air damper—CLOSED
Face bypass damper—BYPASS
DX/electric heat—OFF
Baseboard heat—OFF
Latching
Auto reset once within 24hrs. If
safety generates a diagnostic
more than once a communicated or manual reset will be
necessary.
Discharge Air Temp
Failure2,4
Fan—OFF
Valves—CLOSED
Outdoor air damper—CLOSED
Face bypass damper—BYPASS
DX/electric heat—OFF
Baseboard heat—OFF
Non-latching
Communicated or manual reset
Non-latching
Communicated or manual reset
Diagnostic
Low Coil Temperature
Detect2
Unit Response
Fan—ENABLED
Valves—ENABLED
Outdoor air damper—MINIMUM
Outdoor Air Temp Failure4
POSITION5
Face bypass damper—ENABLED
DX/electric heat—ENABLED
Baseboard heat—ENABLED
UV-SVP01A-EN
52
Troubleshooting
Table 28: Tracer™ ZN.520 Unit Controller diagnostics
Latching/nonlatching
Reset
Humidity Input Failure4
Fan—ENABLED
Valves—ENABLED
Outdoor air damper—ENABLED
Face bypass damper—ENABLED
DX/electric heat—ENABLED
Baseboard heat—ENABLED
Non-latching
Communicated or manual reset
CO2 Sensor Failure4
Fan—ENABLED
Valves—ENABLED
Outdoor air damper—ENABLED
Face bypass damper—ENABLED
DX/electric heat—ENABLED
Baseboard heat—ENABLED
Non-latching
Communicated or manual reset
Generic AIP Failure4
Fan—ENABLED
Valves—ENABLED
Outdoor air damper—ENABLED
Face bypass damper—ENABLED
DX/electric heat—ENABLED
Baseboard heat—ENABLED
Non-latching
Communicated or manual reset
Fan—ENABLED
Valves—ENABLED
Outdoor air damper—ENABLED
Defrosting - Cmpr Lockout4
Face bypass damper—ENABLED
DX/electric heat—OFF
Baseboard heat—ENABLED
Non-latching
Communicated or manual reset
Maintenance Required
Fan—ENABLED
Valves—ENABLED
Outdoor air damper—ENABLED
Face bypass damper—ENABLED
DX/electric heat—ENABLED
Baseboard heat—ENABLED
Non-latching
Communicated or manual reset
Local Fan Mode Failure4
Fan—ENABLED
Valves—ENABLED
Outdoor air damper—ENABLED
Face bypass damper—ENABLED
DX/Electric Heat—ENABLED
Baseboard heat—ENABLED
Non-latching
Communicated or manual reset
Local Setpoint Failure4
Fan—ENABLED
Valves—ENABLED
Outdoor air damper—ENABLED
Face bypass damper—ENABLED
DX/electric heat—ENABLED
Baseboard heat—ENABLED
Non-latching
Communicated or manual reset
Generic Temperature
Failure
Fan—ENABLED
Valves—ENABLED
Outdoor air damper—ENABLED
Face bypass damper—ENABLED
DX/electric heat—ENABLED
Baseboard heat—ENABLED
Non-latching
Communicated or manual reset
Diagnostic
UV-SVP01A-EN
Unit Response
53
Troubleshooting
Table 28: Tracer™ ZN.520 Unit Controller diagnostics
Latching/nonlatching
Reset
Invalid Unit Configuration2
Fan—DISABLED
Valves—DISABLED
Outdoor air damper—DISABLED
Face bypass damper—DISABLED
DX/electric heat—DISABLED
Baseboard heat—DISABLED
Non-latching
Communicated or manual reset
Normal
Fans—ENABLED
Valves—ENABLED
Outdoor air damper—ENABLED
Face bypass damper—ENABLED
DX/electric heat—ENABLED
Baseboard heat—ENABLED
Non-latching
Communicated or manual reset
Diagnostic
Unit Response
Note1 : The generic binary output (TB4-1, TB4-2) state is unaffected by all unit diagnostics.
Note2 : During manual output test, these diagnostics make the green status LED light in a two-blink pattern. For more information see,
Manual Output Test, on page 48 for more information.)
Note3 : When the entering water temperature is required but not present, the Tracer™ ZN.520 Unit Controller generates a diagnostic to
indicate the sensor loss condition. The controller automatically clears the diagnostic once a valid entering water temperature v alue is
present (non-latching diagnostic). When the entering water temperature sensor fails, the controller prohibits all hydronic cooli ng operation,
but allows the delivery of heat when heating is required. In the C OOL mode, all hydronic cooling is locked-out, but normal fan and outdoor
air damper operation is permitted.
Note4 : These diagnostics are non-latching and automatically reset when the input is present and valid.
Note5 : When the outdoor air temperature sensor has failed or is not present, the Tracer™ ZN.520 Unit Controller generates a diagnostic to
indicate the sensor loss condition. The controller automatically clears the diagnostic once a valid outdoor air temperature value is present
(non-latching diagnostic). When the outdoor air temperature sensor fails or is not present, the controller prohibits economizer operation. A
value of Enable or Disable for nviEconEnable overrides these decisions, regardless of the presence of an outdoor air temperature value or
failure.For more information see, Interoperability, on page 12 for more information.)For more information see, Data Sharing—LonWorks,
on page 46 for more information.)
Translating Multiple Diagnostics
The controller senses and records
each diagnostic independently of
other diagnostics. It is possible to
have multiple diagnostics present
simultaneously. The diagnostics
are reported in the order they occur.
Resetting
Diagnostics
There are many ways to reset unit
diagnostics:
q Automatically by the controller
q By initiating a manual output
test at the controller
q By cycling power to the
controller
q By using a building automation
system
q By using the Rover service tool
UV-SVP01A-EN
q By cycling the fan switch from
off to any speed setting
Automatically
The Tracer™ ZN.520 Unit Controller includes an automatic diagnostic reset function. This function
attempts to automatically recover
a unit when the Low Coil Temperature Detection diagnostic occurs.
When this diagnostic occurs, the
controller responds as defined in
Table 28: Tracer™ ZN.520 Unit Controller
diagnostics.
After the controller detects the
Low Coil Temperature Detection
diagnostic, the unit waits 30 minutes before invoking the automatic
diagnostic reset function. The automatic diagnostic reset function
clears the Low Coil Temperature
Detection diagnostic and attempts
to restore the controller to normal
operation. The controller resumes
normal operation until another di-
agnostic occurs.
If a Low Coil Temperature Detection diagnostic recurs within 24
hours after an automatic diagnostic reset, you must manually reset
the diagnostic. See other possible
methods for resetting diagnostics
in this section.
Manual output test
The TEST button on the controller
may be used either during installation to verify proper end device
operation or during troubleshooting. When depressed, the Test button, the controller exercises all
outputs in a predefined sequence.
The first and last steps of the sequence reset the controller diagnostics. (See “Manual Output Test” on
page 48.for more information.)
Cycling power
When turned-off, the controller's
24 VAC power, and re-applies
54
Troubleshooting
power, the unit cycles through a
power-up sequence and clears all
timers.
By default, the controller attempts
to reset all diagnostics at powerup. Diagnostics present at powerup and those that occur after power-up are handled according to the
defined unit diagnostics sequences (For more information see,Table
28: Tracer™ ZN.520 Unit Controller diagnostics, on page 52 for more information.) .
Building automation system
Some building automation sys-
tems (i.e., Tracer Summit building
automation system) can reset diagnostics in the Tracer™ ZN.520
unit controller. For more complete
information, refer to the product
literature for the building automation system.
Rover service tool
Rover service tool can reset diagnostics in the Tracer™ ZN.520 unit
controller. For more complete information, refer to the Rover Installation, Operation, and
Programming manual.
Diagnostic reset
Any device that can communicate
the network variable nviRequest
(enumeration “clear_alarm”) can
reset diagnostics in the Tracer™
ZN.520 unit controller. The controller also attempts to reset diagnostics whenever power is cycled.
Cycling the fan switch
If the user cycles the fan speed
switch from OFF to any speed, the
controller resets all diagnostics.
Diagnostics may recur immediately if the problem still exists.
Questionable unit operation
Fans
Table 29: Fan outputs do not energize
Probable cause
Possible Explanation
Unit wiring
The wiring between the controller outputs and the fan relays and contacts must be present and correct
for normal fan operation.
No power to the controller
If the controller does not have power, the unit fan does not operate. For the Tracer™ ZN.520 Unit
Controller to operate normally, it must have an input voltage of 24 VAC. When the green LED is off
continuously, the controller does not have sufficient power or has failed.
Unit configuration
The controller must be properly configured based on the actual installed end devices and application.
When the unit configuration does not match the actual end devices, the fans may not work correctly.
Random-start observed
After power-up, the controller always observes a random-start from 5 to 30 seconds. The controller
remains off until the random-start time expires.
Power-up control
wait
When power-up control wait is enabled (non-zero time), the controller remains off until one of two
conditions occurs:
1.
The controller exits power-up control wait once it receives communicated information.
2.
The controller exits power-up control wait once the power-up control wait time expires.
Diagnostic present
A specific list of diagnostics affects fan operation. For more information see, Tracer™ ZN.520 Unit
Controller diagnostics, on page 52 for more information.)
Manual output test
The controller includes a manual output test sequence you can use to verify output operation and
associated output wiring. However, based on the current step in the test sequence, the unit fan may not
be on. For more information see, Manual Output Test, on page 48 for more information.)
Fan mode OFF
When a local fan mode switch (provided on the Trane zone sensor) determines the fan operation, the
off position controls the unit OFF.
Requested mode OFF
You can communicate a desired operating mode (such as OFF, HEAT, and COOL) to the controller. When
OFF is communicated to the controller, the unit controls the fan OFF. There is no heating or cooling.
UNOCCUPIED operation
When the controller is in the UNOCCUPIED mode, the fan is cycled.
The controller operates the fan continuously when in the OCCUPIED , OCCUPIED STANDBY, or OCCUPIED
Cycling fan operation/continuous BYPASS mode. When the controller is in the unoccupied mode, the fan is cycled between HIGH speed and
OFF with capacity.
UV-SVP01A-EN
55
Troubleshooting
Valves
Table 30: Valves stay closed
Probable cause
Possible Explanation
Unit wiring
The wiring between the controller outputs and the valve(s) must be present and correct for normal
valve operation.
Random-start observed
After power-up, the controller always observes a random-start from 5 to 30 seconds. The controller
remains off until the random-start time expires.
Unit configuration
The controller must be properly configured based on the actual installed end devices and application.
When the unit configuration does not match the actual end devices, the valves may not work correctly.
Power-up control
wait
When power-up control wait is enabled (non-zero time), the controller remains off until one of two
conditions occurs:
The controller exits power-up control wait once it receives communicated information.
The controller exits power-up control wait once the power-up control wait time expires.
Diagnostic present
A specific list of diagnostic affects valve operation. For more information see, Tracer™ ZN.520 Unit
Controller diagnostics, on page 52 for more information.)
Manual output test
The controller includes a manual output test sequence you can use to verify output operation and
associated output wiring. However, based on the current step in the test sequence, the valve(s) may not
be open. For more information see, Manual Output Test, on page 48 for more information.)
Fan mode off
When a local fan mode switch (provided on the Trane zone sensor) determines the fan operation, the
off position controls the unit off and valves to close.
Requested mode off
You can communicate a desired operating mode (such as OFF, HEAT, and COOL) to the controller. When
is communicated to the controller, the unit controls the fan OFF. There is no heating or cooling
(valves are closed).
Sampling logic
The controller includes entering water temperature sampling logic which is automatically invoked
during 2-pipe and 4-pipe changeover when the entering water temperature is either too cool or too hot
for the desired heating or cooling. For more information see, Entering Water Temperature Sampling,
on page 43 for more information.)
Example: A 2-pipe heat/cool changeover unit will not cool if the entering water temperature is too
warm for cooling or if the entering water sensor is not present. The unit will not heat if the entering
water temperature is too cool for heating. If failed the controller will close valve for one hour then
reattempt sampling routine.
OFF
Table 31: Valves stay open
Probable cause
Possible Explanation
Unit wiring
The wiring between the controller outputs and the valve(s) must be present and correct for normal
valve operation.
Unit configuration
The controller must be properly configured based on the actual installed end devices and application.
When the unit configuration does not match the actual end devices, the valves may not work correctly.
Diagnostic present
A specific list of diagnostic affects valve operation. For more information see, Tracer™ ZN.520 Unit
Controller diagnostics, on page 52 for more information.)
Manual output test
The controller includes a manual output test sequence you can use to verify output operation and
associated output wiring. However, based on the current step in the test sequence, the valve(s) may be
open.For more information see, Manual Output Test, on page 48 for more information.)
Sampling logic
The controller includes entering water temperature sampling logic which automatically invoked during
2-pipe and 4-pipe changeover when the entering water temperature is either too cool or too hot for the
desired heating or cooling. For more information see, Entering Water Temperature Sampling, on page
43 for more information.)
UV-SVP01A-EN
56
Troubleshooting
Table 31: Valves stay open
Probable cause
Possible Explanation
Freeze avoidance
When the fan is off with no demand for capacity (0%) and the outdoor air temperature is below the
freeze avoidance setpoint, the controller opens the water valves (100%) to prevent coil freezing. This
includes unoccupied mode when there is no call for capacity or any other time the fan is off.
Normal operation
The controller opens and closes the valves to meet the unit capacity requirements.
DX/Electric Heat
Table 32: DX or electric output(s) does not energize
Probable cause
Possible Explanation
Unit wiring
The wiring between the controller outputs and the end devices must be present and correct for normal
operation.
Unit configuration
The controller must be properly configured based on the actual installed end devices and application.
When the unit configuration does not match the actual end devices, the unit may not work correctly.
Diagnostic present
A specific list of diagnostics affect compressor and electric heat operation. For more information see,
Tracer™ ZN.520 Unit Controller diagnostics, on page 52 for more information.)
Manual output test
The controller includes a manual output test sequence you can use to verify output operation and
associated output wiring. However, based on the current step in the test sequence, the DX or electric
outputs may be OFF. For more information see, Manual Output Test, on page 48 for more information.)
Freeze avoidance
When the fan is OFF with no demand for capacity (0%) and the outdoor air temperature is below the
freeze avoidance setpoint, the controller disables compressors and electric heat outputs. This includes
UNOCCUPIED mode when there is no call for capacity or any other time the fan is OFF.
Normal operation
The controller energizes the outputs only as needed to meet the unit capacity requirements.
Outside Air Damper
Table 33: Outdoor air damper stays closed
Probable cause
Explanation
Unit wiring
The wiring between the controller outputs and the outdoor air damper must be present and correct for
normal damper operation.
Unit configuration
The controller must be properly configured based on the actual installed end devices and application.
When the unit configuration does not match the actual end devices, the damper may not work
correctly.
Random-start observed
After power-up, the controller always observes a random-start from 5 to 30 seconds. The controller
remains OFF until the random-start time expires.
When power-up control wait is enabled (non-zero time), the controller remains OFF until one of two
conditions occurs:
Power-up control wait
1.
The controller exits power-up control wait once it receives communicated information.
2.
The controller exits power-up control wait once the power-up control wait time expires.
Diagnostic present
A specific list of diagnostics affects outdoor air operation. For more information see, Tracer™ ZN.520
Unit Controller diagnostics, on page 52 for more information.)
Manual output test
The controller includes a manual output test sequence you can use to verify output operation and
associated output wiring. However, based on the current step in the test sequence, the unit damper
may not be open. For more information see, Manual Output Test, on page 48 for more information.)
Fan mode OFF
When a local fan mode switch (provided on the Trane zone sensor) determines the fan operation, the
OFF position controls the unit OFF and damper to close.
UV-SVP01A-EN
57
Troubleshooting
Table 33: Outdoor air damper stays closed
Probable cause
Explanation
Requested mode OFF
You can communicate a desired operating mode (such as OFF, HEAT, and COOL) to the controller. When
OFF is communicated to the controller, the unit controls the fan OFF. There is no heating or cooling
(valves are closed).
Freeze avoidance
When the fan is OFF and the outdoor air temperature is below the freeze avoidance setpoint, the
controller disables economizing and keeps the outdoor air damper closed. This includes UNOCCUPIED
mode when there is no call for capacity or any other time the fan is OFF.
U NOCCUPIED mode
When the controller is in the UNOCCUPIED mode, the outdoor air damper remains closed unless
economizing is enabled.
Warm up and cool-down
The controller includes both a morning warm up and cool-down sequence to keep the outdoor air
damper closed during the transition from UNOCCUPIED to OCCUPIED. This is an attempt to bring the
space under control as quickly as possible.
Normal operation
The controller opens and closes the outdoor air damper based on the controller's occupancy mode and
fan operation. Normally, the outdoor air damper is open during OCCUPIED , OCCUPIED STANDBY, and
OCCUPIED BYPASS mode when the fan is running and closed during UNOCCUPIED mode unless the
controller is economizing. For more information see, Modulating Outdoor Air Operation, on page 43 for
more information.)
Table 34: Outdoor air damper stays open
Probable Cause
Explanation
Unit wiring
The wiring between the controller outputs and the outdoor air damper must be present and correct for
normal damper operation.
Unit configuration
The controller must be properly configured based on the actual installed end devices and application.
When the unit configuration does not match the actual end devices, the damper may not work
correctly.
Manual output test
The controller includes a manual output test sequence you can use to verify output operation and
associated output wiring. However, based on the current step in the test sequence, the unit damper
may be open. For more information see, Manual Output Test, on page 48 for more information.)
Normal operation
The controller opens and closes the outdoor air damper based on the controller's occupancy mode and
fan operation. Normally, the outdoor air damper is open during OCCUPIED, OCCUPIED STANDBY, and
OCCUPIED BYPASS mode when the fan is running and closed during UNOCCUPIED mode unless the
controller is economizing. For more information see, Modulating Outdoor Air Operation, on page 43 for
more information.)
UV-SVP01A-EN
58
Replacing Circuit Boards
Tracer ZN.520 Unit Controller Replacement
1.
Disconnect power or disable
the circuit breaker to unit.
2.
Remove bad or questionable
Tracer ZN.520 controller circuit board.
3.
Install controller in the unit
with the heat-sink placement
at the top of the control box.
(See page 32).
4.
Connect the power to the circuit board ONLY.
5.
Connect Rover and properly
configure the controller,
unless a previously configured board is purchased.
6.
Power down.
7.
Connect the remaining input
and output wiring to the controller.
8.
Reapply power.
9.
Complete sequence 7 and 8
above in the installation section of this manual.
10. Refer to BAS manual for
instructions on how to install
the new ZN.520 into BAS system.
UV-SVP01A-EN
59
Appendix
Hardwired Setpoint Adjustment
Table 35: Hardwired setpoint adjustment
Resistance (Ω)
Setpoint (Deg F)
889.4
50
733.6
58
577.9
66
500
70
422.1
74
344.2
78
266.4
82
188.5
86
110.6
90
Fan Switch Resistance Values
Table 36: Resistance values
Resistance (Ω )
Switch Position
16,300
High
10,700
Low
2,320
Auto
4,870
Off
Hardwired Thermistor Values
Table 37: Hardwired 10k Ω thermistor values
Resistance
Temperature
Resistance
Temperature
87.5k Ω
0°F
10.0k Ω
77°F
74.6k Ω
5°F
9.3kΩ
80°F
63.8k Ω
10°F
8.2kΩ
85°F
54.6k Ω
15°F
7.3kΩ
90°F
46.9k Ω
20°F
6.5kΩ
95°F
40.4k Ω
25°F
5.8kΩ
100 °F
34.8k Ω
30°F
5.2kΩ
105 °F
30.2k Ω
35°F
4.7kΩ
110 °F
26.2k Ω
40°F
4.2kΩ
115 °F
22.8k Ω
45°F
3.8kΩ
120 °F
20.0k Ω
50°F
3.4kΩ
125 °F
17.5k Ω
55°F
3.1kΩ
130 °F
15.3k Ω
60°F
2.8kΩ
135 °F
13.5k Ω
65°F
2.5kΩ
140 °F
11.9k Ω
70°F
2.3kΩ
145 °F
10.5k Ω
75°F
2.1kΩ
150 °F
60
UV-SVP01A-EN
Appendix—Binary
Configuration
Binary Configuration
Table 38: Binary configuration details
Binary input
or output
Function
Configuration
Description
BI 1
Low temp
detection
Normally closed
Closed: BIP 1 is Normal (no diagnostic)
Open: BIP 1 is Active (diagnostic)
BI 2
Condensate
overflow
Normally closed
Closed: BIP 2 is Normal (no diagnostic)
Open: BIP 2 is Active (diagnostic)
BI 3
Occupancy
Normally closed
Closed: BIP 3 is Normal (Occupied)
Open: BIP 3 is Active (Unoccupied)1
Normally open
Open: BIP 3 is Normal (Occupied)
Closed: BIP 3 is Active (Unoccupied)1
BI 4
Fan status2
Normally open
When the controller commands the fan on and the binary input remains
open for one minute, BIP is normal (diagnostic).
When the controller commands the fan on and the binary input closes,
BIP is active (no diagnostic).
Defrost
Defrost
NA
When input is Open, BIP is Active (Defrost activated)
When input is Closed, BIP is Normal (no Defrost)
J1-1
Fan high
Normally open
De-energized: Fan off
Energized: Fan high
J1-2
Fan
Medium\Exhust
Normally open
De-energized: Fan\Exhaust off
Energized: Fan Medium\Exhust on
J1-3
Fan low
Normally open
De-energized: Fan off
Energized: Fan low
Normally open
De-energized: Output off (de-energized)
Energized: Output on (energized)
Generic binary
TB4-1 and TB4output/base board
2
heat
1. The occupancy input applications vary for standalone and communicated instances. For more information, see Occupancy arbitration
tables in the Appendix.
2. The fan status device is normally closed during normal fan operation. When the fan is off either from a fan failure or the controller
commanding the fan off, the binary input device opens.
UV-SVP01A-EN
61
Appendix—Unit Operation
Unit Operation Based On The Effective
HEAT / COOL
Output
Table 39: Unit operation based on the effective heat/cool output
Application mode input
(nviApplicMode)
Heat/cool mode input
(nviHeatCool)
Effective heat/ cool
mode output
(nvoHeatCool)
Unit Operation
Determined by controller
Fan—Enabled
Heating—Enabled
Cooling—Enabled
Damper—Enabled
Heating
Fan—Enabled
Heating—Enabled
Cooling—Disabled
Damper—Enabled
Morning warm up
Fan—Enabled
Heating—Enabled
Cooling—Disabled
Damper—Disabled
Cooling
Fan—Enabled
Heating—Disabled 1
Cooling—Enabled
Damper—Enabled
Pre-cool
Fan—Enabled
Heating—Disabled 1
Cooling—Enabled
Damper—Disabled
Off
Fan—Disabled
Heating—Disabled
Cooling—Disabled
Damper—Disabled
Test
Fan—Enabled
Heating—Enabled
Cooling—Enabled
Damper—Enabled
Fan only
Fan only
Fan—Enabled
Heating—Disabled
Cooling—Disabled
Damper—Enabled
Not present
Determined by controller
Fan—Enabled
Heating—Enabled
Cooling—Enabled
Damper—Enabled
Heat
Any state
Heating
Fan—Enabled
Heating—Enabled
Cooling—Disabled
Damper—Enabled
Morning warm up
Any state
Morning warm up
Fan—Enabled
Heating—Enabled
Cooling—Disabled
Damper—Disabled
Auto
Heat
Morning warm up
Cooling
Auto
Pre-cool
Off
Test
62
UV-SVP01A-EN
Appendix—Unit Operation
cont.
Table 39: Unit operation based on the effective heat/cool output
Application mode input
(nviApplicMode)
Heat/cool mode input
(nviHeatCool)
Effective heat/ cool
mode output
(nvoHeatCool)
Unit Operation
Cool
Any state
Cool
Fan—Enabled
Heating—Disabled 1
Cooling—Enabled
Damper
Pre-cool
Any state
Pre-cool
Fan—Enabled
Heating—Disabled 1
Cooling—Enabled
Damper—Disabled
Off
Any state
Off
Fan—Disabled
Heating—Disabled
Cooling—Disabled
Damper—Disabled
Test
Any state
Determined by controller
Fan—Enabled
Heating—Enabled
Cooling—Enabled
Damper—Enabled
Fan only
Any state
Fan only
Fan—Enabled
Heating—Disabled
Cooling—Disabled
Damper—Enabled
1. Use of heat for supply air tempering and dehumidification remains available.
2. Night purge, Emergency heat, and Nul modes are not supported by the Tracer™ ZN.520 Unit Controller. If one of these modes is
received by the controller, it is interpreted as Auto.
UV-SVP01A-EN
63
Appendix—Data Lists
Data Lists
Table 70 provides an input/output listing for the Tracer ZN.520 unit controller. The content of the lists conforms
to both the LonMark Space Comfort Controller Functional Profile and the LonMark node object.
Table 40 Input/output listing1
Input
SNVT type
Output
SNVT type
nviRequest
SNVT_obj_request
nvoStatus
SNVT_obj_status
nviSpaceTemp
SNVT_temp_p
nvoFileDirectory
SNVT_address
nviSetpoint
SNVT_temp_p
nvoSpaceTemp
SNVT_temp_p
nviSetptOffset
SNVT_temp_p
nvoUnitStatus
SNVT_hvac_status
nviOccSchedule
SNVT_tod_event
nvoEffectSetpt
SNVT_temp_p
nviOccManCmd
SNVT_occupancy
nvoEffectOccup
SNVT_occupancy
nviOccSensor
SNVT_occupancy
nvoHeatCool
SNVT_hvac_mode
nviApplicMode
SNVT_hvac_mode
nvoSetpoint
SNVT_temp_p
nviHeatCool
SNVT_hvac_mode
nvoDischAirTemp
SNVT_temp_p
nviFanSpeedCmd
SNVT_switch
nvoTerminalLoad
SNVT_lev_percent
nviComprEnable
SNVT_switch
nvoSpaceRH
SNVT_lev_percent
nviAuxHeatEnable
SNVT_switch
nvoOutdoorTemp
SNVT_temp_p
nviValveOverride
SNVT_hvac_overid
nvoSpaceCO2
SNVT_ppm
nviEmergOverride
SNVT_hvac_emerg
nvoEnterWaterTemp
SNVT_temp_p
nviSourceTemp
SNVT_temp_p
nviSpaceRH
SNVT_lev_percent
1. LonMark certification pending
Table 41 Configuration properties 1
Configuration property
SNVT type
SCPT reference
Description
nciSndHrtBt
SNVT_time_sec
SCPTmaxSendTime (49)
Send heartbeat
nciSetpoints
SNVT_temp_setpt
SCPTsetPnts (60)
Occupancy temperature setpoints
nciUnitType
SNVT_hvac_type
SCPThvacUnitType (169)
Unit type
nciMinOutTm
SNVT_time_sec
SCPTminSendTime (52)
Minimum send time
nciRcvHrtBt
SNVT_time_sec
SCPTmaxRcvTime (48)
Receive heartbeat
nciLocation
SNVT_str_asc
SCPTlocation (17)
Location label
nciBypassTime
SNVT_time_min
SCPTbypassTime (34)
Local bypass time
nciSpaceRHSetpt
SNVT_lev_percent
Space RH Setpoint
nciOAMinPos
SNVT_lev_percent
Minimum outside air position during
occupied mode
Note1 : LonMark certification pending
64
UV-SVP01A-EN
Appendix—Timeclock
Setting the Time
Clock
The time clock must be programmed for the unit to operate
in occupied mode (under load). If
not programmed, the unit will run
in the unoccupied mode. Power
must be supplied to the unit for the
time clock to be set.
The following procedure covers:
q setting the current time and
day
q setting the program (events)
q reviewing and changing the
programs, and
q overriding programs
(manually)
Hour
Minute
Automatic
Run Symbol
LED Display
Set the Time and Day
The time clock (Figure 36) is located behind the access door on the
top right of the unit.
1.
2.
Press Res. (Reset) to clear the
display and any program data.
The “day” numbers (1-7) will
blink.
Hold h (Hour) in and toggle
±1h to select military or a.m./
p.m. mode. If a.m/p.m. is
UV-SVP01A-EN
elected, AM appears in the
display. Release h.
3.
Press and hold (¹) (Run). If
daylight savings time is in
effect, ±1h should appear in
the display. If not, press ±1h
to clear.
4.
Still holding (¹) down, set the
current hour and minutes by
pressing h and m respectively. Then set the day with
the Day key using the number
corresponding to the day of
the week (1 is Monday, 7 is
Sunday).
5.
Release (¹) and the colon “:”
in the display will begin flashing.
Set the Program
Determine in advance how you
want the unit to operate.
For normal occupied operation,
the unit “load” is set ON, whether
in heating or cooling. This means
65
Appendix—Timeclock
the unit will respond differently to
changing conditions and maintain
a higher comfort level.
For unoccupied operation or “no
load” conditions, a lower comfort
level is provided. The load can be
switched off by using the program
for periods when the room will be
unoccupied.
Note: If the room will be
unoccupied, the time clock
should be programmed
accordingly to conserve
energy. The position of the
outside damper can allow too
much outside air in an
unoccupied space if the unit’s
time clock is set for “load” or
occupied mode and can result
in unnecessary unit cycling
and undesirable heat transfer.
Remember that the program is
easily changed and can also be
overridden after it is initially
set.
1.
Press the Prog. key. Spaces or
fields for entering time (hours
and minutes) appear as dashes
separated by a colon.
2.
Press Prog. again. The number of free (available) programs is given in this case to
be “Fr20” or 20.
3.
Press Prog. again to return to
the event time mode.
4.
Toggle the “Load” key on ( O )
1or off (O) to link the time with
the action.
In the example from the preceding step, you would set the
load ON.
5.
Enter the time for the first program event.
For example, should you want
the unit to operate under load
for an occupied period at 8:00
a.m., enter “08:00 ” AM on
the display using the h and m
keys. Better yet, enter the time
66
a half hour or so before the
arrival of people, so the unit
will bring the room up (or
down” to the preset occupied
temperature setpoints).
6. If the program event you just
entered will be the same every
day (as indicated by all seven
day numbers at the top of the
display) you can press Prog.
to lock in that event and go to
the next event. If not and the
program will vary during the
week (e.g. different program
for the weekend), don’t press
Prog. go to the following step.
Note: If you press Prog. by
mistake, simply continue to
press Prog. until the event
comes up in review and make
the change.
7. With the time and hour for the
event set, select the day or
days for which the event
applies by pressing the Day
key. Toggling the Day key
gives you ten options for individual days or combinations
that can be applied. Select one
and lock it in by pressing
Prog.
In the example, if you only
want the unit to operate under
load for the time set for weekdays, you would select “1 2 3 4
5” by pressing Day, then
select another program event
for the weekend.
8. Repeat the preceding steps to
set the next program event. A
“load: event is followed by an
“unload” event. For example if
the unit is programmed for a
load condition in the morning,
you could program the unit to
unload later in the day or at
night when the room will
become unoccupied for a
period. If the occupied and
unoccupied periods vary
widely but predictably, you
can program a cycle of events
during any day or combination
of days (up to 20 events)
9.
Note: If only one event is programmed, the unit will remain
in that load or unload condition all the time.
10. When all the events are programmed, press the (¹) (run)
key for normal operation. The
current time as set will be displayed, along with the run
symbol (¹).
Review and Change
Programs
To review a program and events at
any time, press Prog . at any time.
Programs events will be displayed
in the sequence they were entered
with repeated presses of Prog.
To change a program, select the
event as in the previous paragraph
and alter the new data (day, hour
minute) as desired to overwrite the
old program. Press Prog to store
the data.
To delete a program event, select
the event again and press h and m
until dashes appear in the time display. Press either Prog. or ( ¹) until
the dashes flash in the display.
To reset all program data, press
Res.
Override Program
(Manual Operation)
While in the Run mode (¹ symbol
in display), press the hand
key
to reverse the load status (e.g. if
the load was ON, it is now OFF). A
hand symbol
appears to indicate the override is active.
At the next scheduled event, automatic (program) control will resume eliminating the override.
To switch the load permanently
ON, press the
key a second
time. [ O ] appears in the display.
UV-SVP01A-EN
Appendix—Timeclock
To switch the load permanently
OFF, press the
key a third time.
[O] appears in the display.
To return to automatic (programmed) operation, press the
key a fourth time. Run ¹ appears
in the display.
NOTE: The Main Power
Disconnect switch is located
on the lower right side of the
unit behind the right front
cabinet panel. It is only used
to remove power to the unit
for servicing.
UV-SVP01A-EN
67
Appendix—Location Identifier
This area provided for the removable tag.
68
UV-SVP01A-EN
Location Identifier
UV-SVP01A-EN
69
Location Identifier
70
UV-SVP01A-EN
Location Identifier
UV-SVP01A-EN
71
The Trane Company
Worldwide Applied Systems Group
LaCrosse, Wisonsin
www.trane.com
An American Standard Company
Literature Order Number
UV-SVP01A-EN
File Number
SV-TD-UV-000-SVP01A-EN-0700
Supersedes
New
Stocking Location
La Crosse
Since The Trane Company has a policy of continuous product improvement, it reserves the right to
change design and specifications without notice.