1
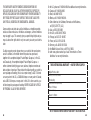
W-177-US 584-095000
TIMEX is a registered trademark of Timex Corporation. ©2004 Timex Corporation.
THE TIMEX® DIGITAL HEART RATE MONITOR
30-LAP/FITNESS MODELS
AN ADVANCED DIGITAL SPORT WATCH
Plus
AN ALL-DIGITAL HEART RATE MONITOR SYSTEM
The Timex® Digital Heart Rate Monitor incorporates the very latest digital
technology from Timex with fitness methodologies used by fitness experts and
personal trainers. As the world leader in sports timing devices, Timex has
created a digital fitness system that combines the digital accuracy demanded by
world-class athletes with features anyone at any age can use to stay “fit for life.”
Note: This manual may describe features or functions that are not available on all models.
Resources on the Internet
The Timex web site (www.timex.com) is an excellent source of information
to help you get more out of your Timex® Digital Heart Rate Monitor
purchase. Resources to check on the Timex site include:
www.timex.com/hrm/
For more information on Timex Digital Heart Rate Monitors, including
product feature listings and simulations.
www.timex.com/fitness/
For fitness and training tips using the Timex Digital Heart Rate Monitors.
Note: Always consult your physician before beginning or modifying an exercise program.
1
How This Manual Is Organized
Overview
We’ve divided this manual into four main sections:
Display Information
• Overview —
General descriptions of the buttons, features and display.
• Using Your Heart Rate Monitor —
Describes how to combine your watch with a Heart Rate Monitor (HRM)
to obtain, measure and review heart rate information.
• Modes and Features —
Simple, step-by-step walkthroughs of how to use watch modes and
features.
FLAGS - Appear around the
display to reflect the
current mode, or to indicate
an activity occurring in the
background. For example,
the stopwatch flag indicates
the Chronograph or
Stopwatch feature is
actively timing your laps.
TOP LINE - Top one-third of
the display, used for
information such as lap
times, day/date, HRM
information and flags.
• Usage Examples —
Real-world scenarios that show you how to make your Timex® watch an
integral part of your workout activities.
In some modes information
displayed on these two
lines can be swapped based
on your preference.
2
BOTTOM LINE - Bottom
two-thirds of the display,
used for information such
as time of day, lap/split
time, HRM information
and flags.
3
The 30-Lap Model
INDIGLO® Button –
Illuminate the watch display.
MODE Button – Press and
release to go to the next
mode.
The Fitness Model
STOP/RESET/SET Button –
Stop or reset the
Chronograph or Timer; hold
to begin setting.
HEART RATE Button –
Turn the Heart Rate
Monitor on or off; also,
change the HRM data
format when the Heart
Rate Monitor is on.
START/SPLIT Button – Start Chronograph or Timer; peek
at the second Time Zone in Time of Day.
4
INDIGLO® Button –
Illuminate the watch display.
MODE Button – Press and
release to go to the next
mode.
SET/RESET - Reset the
Timing feature; hold to
begin setting.
HEART RATE Button – Turn
the heart rate monitor on or
off; change HRM data
position when heart rate
monitor is on.
START/STOP Button – Start or stop the Timing feature.
5
Flags in the Display
Using Your Heart Rate Monitor
Your watch can convey a lot of information at a glance while occupying
only a small space on your wrist. Here is an overview of the flags (small
graphic symbols) that appear on the display:
When combined with a heart rate sensor, your sport watch becomes part of
an overall fitness system. The heart rate sensor records your heart rate and
transmits the data to the watch. You simply glance at the watch during
exercise/training to make sure you are in the desired heart rate zone to
maintain or improve your fitness level (see any fitness guide for target
heart rate zones). If set, an out-of-zone alert automatically sounds if your
heart rate leaves the selected zone.
Alarm is armed.
Timer is running (30-Lap Model) or TIMING Mode is counting
down to zero (Fitness Model).
Chrono is running (30-Lap Model), or TIMING Mode is
counting up from zero (Fitness Model).
This section describes how to:
• Set up your watch to work with a heart rate sensor
• Set your watch to track your heart rate against a selected heart rate
fitness zone
• Record and review heart rate information
Setting Up Your Watch to Work with a Heart Rate Sensor
Hourly chime is set.
Searching for HRM data from chest sensor.
HRM data is being received from a heart rate sensor.
1. Put the heart rate sensor on your chest. For detailed guidelines on how
the heart rate sensor should be worn, refer to the Fitness Sensor User
Guide that came with it. The instructions in this section assume the heart
rate sensor is being worn as recommended.
2. Start the Heart Rate Monitor system. In TIME OF DAY, TIMING,
CHRONO or TIMER modes, press HEART RATE.
A flag showing the outline of a heart appears as the watch searches for a
heart rate sensor signal. When the watch begins receiving a signal, the
outlined heart becomes solid and begins pulsing.
6
7
To ensure a clear signal, stand at least six feet away from anyone else
using a sensor.
Figure 2.1 – Heart Rate Monitor Display Formats
Whenever you move into TIMING, CHRONO or TIMER modes, the watch
automatically looks for a transmitter signal for 15 seconds. If no signal is
found, the watch stops looking for signals until you push the HEART RATE
button again.
Heart Rate Over Time
Time Over Heart Rate
No Heart Rate Information
Heart Rate Only
3. Read your heart rate. When the watch establishes contact with the
transmitter, your heart rate (shown in beats per minute) is displayed.
To turn the monitor off, press and hold HEART RATE.
Viewing Heart Rate and Time Information
The HRM display can be formatted in four different ways. Use the HEART
RATE button to cycle through the choices. For example, when using the
HRM in CHRONO or TIMER Modes, the heart rate will be displayed in the
top line, and the CHRONO or TIMER Mode count in the bottom line. Press
the HEART RATE button to cause these values to swap places. You may
also choose to display only heart rate information, or no heart rate
information at all. (See Figure 2.1 following paragraph below.)
HRM Setup Mode
This mode allows you to set up a target heart rate zone for exercise. A
target zone consists of a lower and upper heart rate limit. You may select
one of the preset zones, or manually set values for customized zones of
your choosing. When your heart rate drops below the lower limit, or
exceeds the upper limit of your zone, an optional alarm sounds. While you
may use the heart rate monitor without selecting a target zone, configuring
8
TIP: Press HEART RATE to cycle through display formats
while heart rate monitor is on.
9
this feature first is highly recommended. It helps you stay within your
desired zone and maximize your fitness program.
Figure 2.2 – Default Settings for HRM Setup Mode
Target Fitness Zones
The lower and upper heart rate limits for target fitness zones are based on
the Maximum Heart Rate (MHR) value. Table 2.1 illustrates the formula used
by the watch to calculate the lower and upper heart rate limits for each zone.
STOP/RESET/SET Button –
(SET/RESET for Fitness Model)
- Press to enter the setting
state for HRM Setup Mode.
Table 2.1: Fitness Zones
ZONE
5
4
3
2
1
Lower Limit
❘
❘
❘
❘
❘
90% MHR
80%
70%
60%
50%
Upper Limit
❘
❘
❘
❘
❘
100% MHR
90%
80%
70%
60%
It’s important that you set a Maximum Heart Rate value because the five
automatic target zones are based upon that value. You can determine your
rate either through controlled testing or by one of many estimation
methods. One widely used method is to subtract your age from 220. Note,
however, that methods like this may yield inaccurate results because
maximum heart rate depends on physiological factors besides age, such as
fitness level and genetic make-up.
10
START/SPLIT Button –
(START/STOP for
Fitness Model) - Press
to toggle the ON/OFF
flag, which indicates
whether the out-ofzone alert has been
activated/deactivated.
HEART RATE Button –
Press to select a target
heart rate zone. In this
example Zone 3 is your
target heart rate zone.
The selected zone is
based on a Maximum
Heart Rate (MHR) of
165; setting a different
maximum rate changes
the zone’s range.
11
Entering your Weight and Maximum Heart Rate
1. Press MODE until you get to the HRM SETUP Mode. Next press
STOP/RESET/SET to enter the setting state. The currently selected zone
begins to flash. (For the Fitness Model, press SET/RESET.)
Figure 2.3 – Setting Values in HRM Setup Mode
MODE (NEXT) Button – Press
to cycle through weight and
maximum heart rate settings
when customizing a heart
rate zone.
STOP/RESET/SET
(DONE) Button –
(SET/RESET (DONE) for
Fitness Model) - Press
when done to save your
settings.
2. Press START/SPLIT (+) or HEART RATE (-) to cycle through the preset
target zones as well as the MANUAL setting. (For the Fitness Model,
press START/STOP (+) or HEART RATE (-).) Each zone, including the
default lower and upper heart rate limits, will be flashing.
NOTE: Your target zones are customized once you complete the
HRM Setup.
3. Press MODE (NEXT) to move through the values that define your body
weight and maximum heart rate (MHR) settings. Press START/SPLIT (+)
or HEART RATE (-) to increase or decrease values. (For the Fitness
Model, press START/STOP (+) or HEART RATE (-).) Body weight is used
in calculating the number of calories burned.
HEART RATE (-) Button –
Press to cycle through the
target heart rate zones.
NOTE: When specifying the weight setting, press
START/SPLIT (+) to toggle between pounds and kilograms.
START/SPLIT (+) Button – (START/STOP (+) for Fitness Model) - Press to cycle upward through
the preset and manually set target heart rate zones. When setting the weight value, press to toggle
between pounds (LB) and kilograms (KG).
12
13
4. Press STOP/RESET/SET (DONE) to save settings and exit. (For the
Fitness Model, press SET/RESET (DONE).)
NOTE: Changing your weight setting during a workout will cause
an inaccurate calorie calculation.
Selecting a Target Zone
To select a target heart rate zone based on your maximum heart rate:
2. Press START/SPLIT (+) or HEART RATE (-) to cycle through the preset
target zones until you reach the MANUAL setting, which will be flashing.
(For the Fitness Model, press START/STOP (+) or HEART RATE (-).)
3. Press MODE (NEXT) to cycle through the numbers that define your upper
heart rate limit, lower heart rate limit, weight, and maximum heart rate (MHR)
settings. Press START/SPLIT (+) or HEART RATE (-) to increase or decrease
numbers. (For the Fitness Model, press START/STOP (+) or HEART RATE (-).)
When each digit is set, press MODE (NEXT) to move to the next one.
1. Press MODE until HRM SETUP appears.
Use of a preset target heart rate zone will reset your entry for the “manual”
target zone to the original factory setting.
2. Press HEART RATE to cycle through the preset target zones (as well as
the MANUAL setting). Each preset zone, including the default lower and
upper heart rate limit, is displayed.
4. Press STOP/RESET/SET (DONE) to save your settings and exit the HRM
SETUP Mode. (For the Fitness Model, press SET/RESET (DONE).)
Reviewing HRM Information
NOTE: Press START/SPLIT to toggle the out-of-zone alert ON or
OFF. (For the Fitness Model, press START/STOP).
When you leave HRM SETUP mode, the watch will use the zone you have
selected for all of its HRM-based statistical calculations.
You can use your watch to review HRM information, including average,
minimum and peak heart rates, the amount of time your heart rate is within
your target zone, and the number of calories burned. As a fitness
yardstick, you also can see how much your heart rate declines over a preset period. For details refer to the REVIEW and RECOVER Modes.
Setting the “Manual” Target Zone
1. While in HRM SETUP mode, press STOP/RESET/SET to enter the setting
state. The currently selected zone begins to flash. (For the Fitness Model
press SET/RESET.)
14
15
Troubleshooting HRM-related Problems
Troubleshooting advice for common problems:
I’m having trouble getting a first reading, OR the heart rate numbers
appear to be incorrect during operation.
• Liberally reapply moisture to the textured contact pads on the back of
the heart rate sensor.
• Tighten the chest strap until it fits snugly and makes good contact
with the skin. Make sure the sensor is secure against your skin and is
placed with TIMEX facing up.
• Move away from other heart rate sensors and other sources of radio
signals and static electricity such as exercise equipment and other
electrical machinery.
• Wait a couple of minutes and press HEART RATE again.
Sometimes I see dashes on the display bracketing my heart rate, OR the
heart rate displayed remains unchanged for an extended period of time.
What does this mean?
• This usually indicates that either the sensor pads need moisture or the
chest unit is not snug on your chest, causing poor electrical contact
with your skin. Moisten the sensor pads and adjust the transmitter so
that both pads are making good contact with your chest.
interference or brief jamming of the signal. If this occurs, the watch
suspends the flashing of the heart. Usually the problem resolves itself
and the flashing resumes. If the interruption continues, the watch
alerts you with the error message described below.
The message “NO HRM DATA” appears on the display.
This error message is displayed if the watch is not receiving regular heart
rate updates from the sensor. However, as long as the sensor is on the
chest, its pads are wet, and the battery in the transmitter is not weak, the
watch will usually recover without intervention on your part. If it does not
recover, try the following:
• The sensor pads on the chest transmitter may have lost contact with
your chest for a few seconds. Be sure the transmitter is snug on
your body.
• The sensor pads may be dry. Liberally moisten them and readjust the
chest transmitter if necessary.
• The battery in the chest transmitter may be weak and need replacing.
(See instructions in the Fitness Sensor User Guide for battery
replacement.)
Sometimes the heart stops flashing briefly.
• As long as the heart is flashing, the watch is receiving a clear signal
from the monitor. As with any radio system, there may be occasional
16
17
Modes and Features
This section describes the modes and features available on your watch. A
mode gives you access to a specific area of your watch’s operation. For
example, you enter the ALARM Mode to set an alarm to sound at a specific
time.
Button Operation When Setting
STOP/RESET/SET (DONE) –
(SET/RESET (DONE) for
Fitness Model) – Press to
save changes and exit.
Your watch has several features that can be accessed by pressing the
MODE button. Pressing the MODE button cycles through all the modes
available within your watch.
Table 3.1: Mode Summary
30-Lap Model
TIME OF DAY
CHRONO
TIMER
RECOVER
REVIEW
HRM SETUP
ALARM
18
Fitness Model
❘
❘
❘
❘
❘
❘
❘
TIME OF DAY
TIMING
RECOVER
REVIEW
HRM SETUP
MODE Button (NEXT) – Move
to the next value to set.
HEART RATE Button (–) –
Decrease the flashing value.
ALARM
START/SPLIT (+) - (START/STOP (+) for Fitness
model) – Increase the flashing value.
19
TIME OF DAY Mode
Your watch will display the time, date and day of the week.
Setting the Time of Day
1. Press and hold STOP/RESET/SET firmly for two seconds. (For the
Fitness Model, press and hold SET/RESET.) “HOLD TO SET” appears. If
you continue to hold down this button, “SET TIME” appears.
The 30-Lap Model allows you to set the time of day for two different time
zones. When you begin setting the time, the “1” flashing in the lower right
of the display indicates the primary time zone. Press START/SPLIT (+) or
HEART RATE (-) to select the primary (1) or secondary (2) time zone. Then
press MODE (NEXT) to begin setting the time as described above.
2. Press MODE (NEXT) to set:
HOURS ➤ MINUTES ➤ SECONDS ➤ DAY OF THE WEEK
➤ MONTH ➤ DATE ➤ TIME FORMAT (12- or 24-hour)
➤ DATE FORMAT (Month-Day or Day-Month)
➤ HOURLY CHIME (on or off) ➤ BUTTON BEEP (on or off).
The value to be changed will be flashing. Press START/SPLIT (+) or
HEART RATE (-) to increase or decrease values. (For the Fitness Model,
press START/STOP (+) or HEART RATE (-).) Hold the buttons down to
advance more quickly. When each value is set, press MODE (NEXT) to
move to the next value.
20
When setting HOURS in the12-hour format, change the AM or PM setting
(indicated by “A” or “P” on the display) by increasing the number of hours
past “12.”
NOTE: You can set your watch to generate a chime melody on
the hour by setting the HOURLY CHIME feature to ON.
When setting SECONDS, press START/SPLIT (+) or HEART RATE (-) to set
them to zero. This is useful for synchronizing the watch to a time reference.
(For the Fitness Model, press START/STOP (+) or HEART RATE (-).)
3. When finished, press STOP/RESET/SET (DONE) to save your selections
and exit the TIME OF DAY Mode. (For the Fitness Model, press
SET/RESET.)
TIP: The watch skips over February 29. To accommodate leap
years, set the date manually on February 29 to “February 29.”
The watch will roll over to March 1 the next day.
Peeking at a Second Time Zone
The 30-Lap Model allows you to keep track of time in two time zones
(identified as T1 and T2). You may “peek” at the second zone by pressing
the START/SPLIT button for two seconds while in TIME OF DAY Mode.
Release the button to return to your primary time zone. To swap time zone
settings, hold the button for four seconds.
21
CHRONO Mode (30-Lap Model only)
The CHRONO Mode is the main “workout” mode in your watch. It provides
a stopwatch for recording the elapsed time for 30 readings, such as a lap,
in a single event, as well as other information for an entire event up to 100
hours in duration. Data for up to 30 readings may be stored including the
lap number, the individual lap time and the total elapsed split time.
NOTE: Throughout this section we will talk about “laps” and
“splits.” “Lap time” is the time for each segment (lap) of an event.
“Split time” is the total elapsed time since the start of the event.
When the heart rate sensor is active, CHRONO Mode tracks three pieces of
statistical data:
• The amount of time your heart rate is within the target zone while
CHRONO Mode is running
• The average heart rate for the period that the HRM system was active
and CHRONO Mode is running
• The peak and minimum heart rate for the period that the HRM system
was active and CHRONO Mode is running
Data accumulation stops if you stop the Chronograph while the HRM
system is active and resumes when you restart the Chronograph. If the
Chronograph is allowed to run out while the HRM system is running, the
HRM shuts off automatically and data accumulation ceases.
22
You can switch to any other mode, such as TIME OF DAY, while the
CHRONO Mode is running. A stopwatch flag indicates that CHRONO Mode
is running in the background.
Chronograph Display Options
If you are not using a heart rate sensor, the watch displays both lap and
split times (after you have taken your first split). To select which time is
displayed in the lower display line, press and release STOP/RESET/SET
when the Chronograph is reset (00.00.00) but before you begin timing laps.
If you are using the heart rate sensor, the watch displays heart rate
information in addition to the Chronograph time. You may choose to view
either lap or split time as well as heart rate data. For heart rate data display
options, see pages 8–9 and Figure 2.1, on formatting the display when the
HRM is active.
Using the Chronograph
1. Press MODE until CHRONO appears.
2. Press START/SPLIT to begin timing.
3. Press START/SPLIT while CHRONO Mode is running to take a lap/split.
This stores the current lap and split data and starts a new lap. The watch
briefly shows the lap and split times you just recorded as well as the lap
number. If you are viewing HRM data, the watch next displays heart rate
information for the lap.
(Instructions continue on page 25)
23
It then returns to the running CHRONO Mode, which is still timing the current
lap/split. The watch stores data for the last 30 laps.
Figure 3.1 – Timing Laps/Splits with the 30-Lap Model
4. Press STOP/RESET/SET to stop timing.
CHRONO Mode Display
Format Example – The
current lap time (top) and
heart rate (bottom) are
displayed. The stopwatch
flag appears during
timing; the solid beating
heart flag indicates an
active HRM.
STOP/RESET/SET Button –
In CHRONO Mode, press to
stop or reset the
Chronograph.
5. Press START/SPLIT to resume timing, or press and hold
STOP/RESET/SET to reset the chronograph to zero. (Do not reset if you
wish to save the data for later review.)
TIMER Mode (30-Lap Model only)
This mode allows you to set a time from which the watch counts down to
zero. This feature is useful for fixed time events up to 100 hours. At the
end of the countdown, the Timer can be set to stop, repeat the countdown,
or switch to CHRONO Mode and start the chronograph.
While the Timer is running, you can press MODE to switch to any other
mode, such as TIME OF DAY, without disrupting its operation. An hourglass
flag appears when the Timer is active.
Setting the Timer
START/SPLIT Button –
In CHRONO Mode,
press to start the
Chronograph.
24
HEART RATE Button –
Turn on or turn off the
heart rate monitor; also
used to change HRM
data position when heart
rate monitor is on.
1. Press MODE until TIMER appears.
2. Press STOP/RESET/SET to enter TIMER Mode set state. The hours value
will be flashing.
3. Press START/SPLIT (+) or HEART RATE (-) to change values. Hold the
keys down to advance more quickly. When each value is set, press
MODE (NEXT) to move to the next values (MINUTES then SECONDS).
25
4. After the time for the countdown is correct, press MODE (NEXT) again to
select an ending action after the count down. Press START/SPLIT (+) or
HEART RATE (-) to toggle between STOP, REPEAT or CHRONO.
TIMING Mode (Fitness Model only)
5. When finished, press STOP/RESET/SET (DONE) to save the desired action.
• It can act as either a stopwatch (count up) or a countdown timer, allowing
you to count down to or up from zero, respectively. You can record up to
100 hours worth of statistical data.
• When used with a heart rate sensor, this mode allows you to record heart
rate information.
Timer Operation
1. Press START/SPLIT to start the Timer countdown.
2. Press STOP/RESET/SET to stop the countdown.
3. With the Timer stopped, press START/SPLIT to resume the countdown,
or STOP/RESET/SET to reset the Timer to the start time.
4. When the Timer reaches zero, it sounds an alert. The INDIGLO® nightlight also glows so you can see the watch in the dark.
• If the Timer was set to stop, it will be stopped after the alert.
• If the Timer was set to repeat, it resets to the start time and
immediately begins another countdown. It continues repeating until
STOP/RESET/SET is pressed. The repeat count is displayed in the
lower line of the display. The watch counts up to 99 repetitions, after
which it rolls over to zero and continues.
• If the Timer was set to start the CHRONO Mode, the watch will
automatically switch to CHRONO Mode and start it. CHRONO Mode
must be reset to zero to be automatically launched by the Timer.
This mode has two purposes:
You can leave the Timing mode while counting up or down. In TIME OF
DAY Mode a stopwatch flag indicates that TIMING Mode is counting up in
the background. An hourglass flag indicates TIMING Mode is counting
down.
Using Timing to Count Up (Stopwatch Operation)
1. Press MODE until TIMING appears.
2. Press SET/RESET until “00.00.00” appears. If you enter Timing Set
mode accidentally, press SET/RESET (DONE) to exit the set mode.
3. Press START/STOP (+) to begin timing. The SECONDS value begins to
count up.
To pause the timing, press START/STOP; press again to restart. To reset the
stopwatch to zero, press and hold SET/RESET while TIMING is stopped.
Using Timing to Count Down (Countdown Timer Operation)
To count down, you must first set a countdown time.
26
27
1. If you are not in TIMING mode, press MODE until TIMING appears.
2. Press and release SET/RESET until you enter TIMING mode set state.
The HOURS digits will be flashing.
3. Set the amount of time to count down from. Press START/STOP (+) or
HEART RATE (-) to increase or decrease the flashing values. Hold the
buttons down to advance more quickly. After each value is set, press
MODE (NEXT) to advance to the next values (MINUTES then SECONDS).
4. When finished, press SET/RESET (DONE) to save the countdown time.
5. Press START/STOP to begin timing. The time begins to count down to zero.
Using Timing with the Fitness Model
TIMING Mode Display
Format Example – The
countdown time (top) is
displayed with the
Hourglass and Heart Rate
flags. Current heart rate
is displayed in the
bottom.
SET/RESET Button – Hold
to begin setting a time to
count up or down.
To pause the countdown, press START/STOP; press it again to restart timing.
To reset the count to the starting value, press SET/RESET while TIMING is
stopped. Press SET/RESET again to clear the set time to zero.
Using Timing Mode with the HRM System
When the HRM is active, the TIMING Mode keeps track of three pieces of
data related to heart rate:
• The amount of time your heart rate is within the target zone while TIMING is running.
• The average heart rate for the period that the HRM function is active
and TIMING is running.
• The peak heart rate for the period that the HRM function is active and
TIMING is running.
28
HEART RATE Button – Turn
on or turn off the heart rate
monitor; change HRM data
position when heart rate
monitor is on.
START/STOP Button – Press to start or stop
the countdown.
29
RECOVER Mode
This mode is used with an active HRM system. It is a fitness yardstick that measures
how quickly your heart rate declines from an elevated rate over a one- or two-minute
countdown period. When the timer ends an alert sounds and your beginning and
ending heart rates are displayed.
Using RECOVER Mode
1. Press MODE until RECOVER appears.
Using the RECOVER Mode
RECOVER Mode Display
Format Example – Top
line HR165 is your heart
rate at the start of the
recovery period.
2. Press STOP/RESET/SET to toggle the recover time. You can choose one
or two minutes. (For the Fitness Model, press SET/RESET.)
STOP/RESET/SET Button –
(SET/RESET for Fitness
Model) - Press to toggle
the recovery time between
either one or two minutes.
3. Press START/SPLIT to begin the countdown (For the Fitness Model,
press START/STOP). The watch display will now show two heart rates your heart rate at the time you started the recovery timer in the top line
and your current heart rate in the bottom line.
4. When the alert sounds at the end of the recovery time, note the heart
rate in the lower line. Subtract this value from the value in the top line;
the difference is your recovery heart rate.
5. Press MODE to exit RECOVER Mode.
NOTE: The watch must be receiving the heart rate signal for the
RECOVER Mode to work.
30
Bottom line 123 RE is
your current heart rate
as the RECOVER Mode
timer counts down.
START/SPLIT Button – (START/STOP for Fitness Model) - Press
to begin the selected recovery period.
HEART RATE Button –
At the start of your
workout, press to
acquire the signal from
the heart rate sensor.
31
REVIEW Mode
This mode enables you to review workout data such as lap timings. The
following information can be reviewed when a heart rate sensor is active
and CHRONO (30-Lap Model) or TIMING (Fitness Model) are running:
• In Zone - The amount of time your heart rate was within the target
zone you specified.
• Average Heart Rate
• Peak Heart Rate
• Minimum Heart Rate (30-Lap Only)
• Total Calories Burned - Calculated from elapsed time, heart rate data
and body weight.
• Chronograph lap and split times (30-Lap Only)
• Average heart rate per lap (30-Lap Only)
Reviewing Heart Rate Information
reached, the alarm tone sounds, the INDIGLO® night-light flashes, and the
alarm time is displayed for twenty seconds. To silence the alarm, press any
button. If you don’t silence the alarm before the alert finishes, a backup
alarm will sound in five (5) minutes.
Setting an Alarm
1. Press MODE until ALARM appears.
2. Press STOP/RESET/SET to set the time of the alarm. (For the Fitness
Model, press SET/RESET.) The hour to be changed will be flashing. The
AM/PM value will also flash if the watch is set for the 12-hour display
format.
3. Press START/SPLIT (+) or HEART RATE (-) to increase or decrease the
hours. (For the Fitness Model, press START/STOP (+) or HEART RATE (-).)
Then press MODE (NEXT) to proceed to minutes.
1. Press MODE until REVIEW appears.
4. When finished, press STOP/RESET/SET (DONE) to save your settings.
(For the Fitness Model, press SET/RESET (DONE).)
2. Press START/SPLIT (+) to advance through the HRM data (IN ZONE,
AVERAGE HEART RATE, PEAK HEART RATE, MINIMUM HEART RATE,
TOTAL CALORIES) and the stored Chrono lap data. (For the Fitness
Model, press START/STOP (+).) Press HEART RATE (-) to cycle
backwards through the HRM data.
To turn an Alarm ON or OFF without entering the setting state, press and
release the START/SPLIT button while in ALARM Mode. (For the Fitness
Model, press START/STOP). Changing any Alarm setting automatically
turns the alarm ON.
ALARM Mode
This mode sets an alarm to sound at a pre-set time. When the alarm is ON,
the alarm clock flag appears on the display. When the alarm time is
32
33
Global Features
Usage Examples
These are handy features that do not directly affect mode operations.
Your Timex® watch can become an important part of your daily fitness
routine. Together with a heart rate monitor, it lets you easily keep tabs on
your workout progress by timing, collecting, storing and displaying fitness
data. Here are a few real-world scenarios to give you some ideas for
getting the most out of your watch.
Auto Return to Time of Day
If you are in ALARM, TIMER, RECOVER or HRM SETUP mode but take no
action for two to three minutes, the watch automatically exits the current
mode and returns to TIME OF DAY Mode. If you changed any settings
during that time, they are processed as if they had been completed.
INDIGLO® Night-Light
The INDIGLO® night-light illuminates the display to help you see in the
dark. Just press the INDIGLO Button to activate. After you release the
button, the light remains on for three (3) seconds (or for six (6) seconds if
you are setting values).
Usage Example 1 Using Your Watch to Time Laps In a Simple Workout
Your usual workout consists of jogging around a half-mile course. You want
to jog five miles today, which means ten laps around the course. Also, you
have to remember to call your teenager, who will be coming home from
school during your workout, to tell her to put the lasagna in the oven at 4:15.
In this example, you’ll use the following watch modes:
NIGHT MODE® Feature (30-Lap Model only)
For NIGHT-MODE® feature, any button press illuminates the display for
three (3) seconds (or for six (6) seconds if you are setting values), so a
separate press of the INDIGLO Button is not required during low-light
conditions. To activate the NIGHT-MODE® feature, press and hold the
INDIGLO Button for 3 seconds until the watch beeps. The NIGHT-MODE®
feature will continue to stay activated for 7-8 hours, or it can be manually
deactivated by pressing and holding the INDIGLO Button again for three (3)
second until the watch beeps.
34
30-Lap Model
ALARM
CHRONO
REVIEW
Fitness Model
❘
❘
❘
ALARM
TIMING
REVIEW
■ Setting an Alarm: To remind you to call your daughter, go to the ALARM
Mode and set the alarm to sound at 4:15 PM. When the alarm sounds,
press any key to silence it, then grab your phone and make the call!
35
NOTE: See pg. 33 for tips on setting the alarm.
■ Timing Your Workout: Use the CHRONO Mode or TIMING Mode to time
your workout:
• 30-Lap Model: Go to CHRONO Mode and make sure the Chrono is
reset to zero (0). Press START/SPLIT when you begin your run,
and each time you complete a lap. The watch will store the ten (10)
individual lap times. When you complete your final lap, press
STOP/RESET/SET.
NOTE: See pgs. 22–25 for more detail about using the Chrono.
• Fitness Model: In TIMING Mode, make sure the watch is set to
count up from zero (0), like a stopwatch. Press START/STOP when
you begin your run and when you complete your final lap.
NOTE: Not sure how to configure TIMING Mode? See pgs. 27–29
for more information.
NOTE: Pages 32 discuss REVIEW Mode in more detail.
Usage Example 2 Using Your Watch to Measure Fitness and Time a
Club Workout
An avid spinner, you go to your health club four times a week and spin for
30 minutes each session. You like to monitor your heart rate when spinning
to maximize the workout by spending as much time as possible in your
target heart rate zone. At the end of your workout you measure how quickly
your heart rate recovers during a standard one-minute recovery period.
In this example, you’ll use the following watch modes:
30-Lap Model
HRM SETUP
CHRONO
TIMER
RECOVER
REVIEW
• Reviewing Your Lap Times: During your victory walk home, you can
review the data from your workout in REVIEW Mode. If you were
using a heart rate sensor, you’ll see your heart rate statistics there
(both models), as well as all of your lap times (30-Lap Model only).
36
Fitness Model
❘
❘
❘
❘
❘
HRM SETUP
TIMING
RECOVER
REVIEW
37
■ Connecting the Heart Rate Sensor and Selecting a Target Heart Rate:
You arrive at your club wearing your watch and heart rate sensor.
Before you begin spinning you must establish the wireless link between
your watch and the heart rate sensor.
• Both Models: Press HEART RATE. The “hollow heart” flag shows
the watch searching for the heart rate sensor signal. When the
signal is found the heart turns solid and begins an animated
beating. Heart rate data is displayed according to how you have
configured your watch. Next, go to HRM SETUP Mode and select
your target heart rate for this workout from zones 1-5.
NOTE: See pgs. 10–15 for details on setting target heart rate
zones in HRM SETUP Mode; configuring the display for
displaying heart rate and time information; and activating “out
of zone” alerts.
■ Timing Option 1 - Counting Up: Use the CHRONO Mode (30-Lap
Model) or TIMING Mode (Fitness Model) to time your workout by
counting up to 30 minutes. Counting up is handy when you want
flexibility in timing the end of your workout.
• 30-Lap Model: Go to CHRONO Mode and press START/SPLIT
when you begin spinning.
• Fitness Model: In TIMING Mode, make sure the watch is set to
count up from zero, like a stopwatch. Press START/STOP when
you begin spinning.
NOTE: Not sure how to configure TIMING Mode?
See pgs. 27–29 for more information.
■ Timing Option 2 - Counting Down: Use the TIMER Mode (30-Lap Model)
or TIMING Mode (Fitness Model) to time your workout by counting down
from 30 minutes. Counting down is used for a planned, or timed, training
regimen and includes an alert at the end of the countdown.
• 30-Lap Model: Go to TIMER Mode and set the countdown time for 30
minutes. Press START/SPLIT when you begin your workout.
NOTE: See pg. 25 for more detail about using the TIMER Mode
features.
• Fitness Model: In TIMING Mode, make sure the watch is set to
count down from 30. Press START/STOP when you begin your
workout.
NOTE: See pgs. 22–25 for more details about using CHRONO Mode.
38
39
■ Your Workout is Over:
• 30-Lap Model: Press any button to stop the countdown alert in
TIMER Mode.
• Fitness Model: Press any button to stop the countdown alert in
TIMING Mode.
NOTE: See section 3 for more information on TIMING Mode,
TIMER Mode, and CHRONO Mode.
Usage Example 3 Using Your Watch in a Race While Traveling Between
Time Zones
You are flying with your running club from Chicago to Washington DC for a
10K citizen’s race. Your strategy is to stay within your target training heart
zone over the first half of the race and to push yourself in the second half.
You want to finish the race around 32 minutes, which means you will
probably exceed your target training heart zone during the second half of
the race to achieve this time goal.
In this example, you’ll use the following watch features::
■ Measuring Your Fitness: RECOVER Mode is a tool for measuring how
much your heart rate declines over a fixed one or two-minute period.
Immediately upon completing your workout, go to RECOVER and press
START/SPLIT (30-Lap Model) or START/STOP (Fitness Model) to begin
the recovery period. When the alert sounds ending the one-minute
recovery time, note your heart rate.
■ Reviewing Your Lap Times: During your victory walk to the locker
room you can review the data from your workout in REVIEW Mode.
You’ll see your heart rate statistics, as well as all of your lap times if you
were taking multiple lap times (30-Lap Model only).
NOTE: Pages 32 discuss REVIEW Mode in more detail.
30-Lap Model
SECONDARY TIME ZONES
HEART RATE SENSOR
TIMER
CHRONO
REVIEW
Fitness Model
❘
❘
❘
❘
❘
TIME OF DAY
HEART RATE SENSOR
TIMING
REVIEW
■ Setting the Time Ahead: After you are settled into your airplane seat
you set your watch ahead for the Eastern Time Zone (U.S.).
• 30-Lap Model: You frequently travel to the East Coast for
business so you already have set your secondary time zone for the
40
41
Eastern Time Zone. While in TIME OF DAY Mode press and hold
START/SPLIT for four seconds to switch from the primary to the
secondary time zone. You will leave your watch in the secondary
time zone for the duration of your trip and switch it back to the
primary time zone on the trip home.
NOTE: See pg. 21 for how to set the time in the secondary time zone.
• Fitness Model: Set your watch ahead in TIME OF DAY Mode from
Chicago’s Central Time Zone to the Eastern Time Zone (U.S.).
NOTE: See pg. 20–21 for details on setting the time of day.
■ Linking the Heart Rate Sensor: After a good night’s sleep, you arrive at
your race wearing your watch and heart rate sensor. Before the race,
you establish the wireless link between your watch and the heart rate
sensor.
• Both Models: Press HEART RATE. A “hollow heart” flag shows
the watch is searching for the heart rate sensor signal. When it is
found, the hollow heart turns solid and begins an animated beating.
Heart rate data is displayed in the bottom line.
42
NOTE: To set a target heart rate zone see HRM SETUP Mode on
pg. 8. This section has details on configuring the display for
heart rate and time information.
■ The race is about to start. You decide to set a timer alert to step up
your pace at the halfway point of the anticipated 32-minute time for the
10K race.
• 30-Lap Model: Go to TIMER Mode and set it for 16 minutes and
CHRONO AT END. When the race starts press START/SPLIT to start
the timer countdown.
NOTE: See pg. 25 for details on setting the Timer and changing
the action automatically launched upon completion of the
countdown.
• Fitness Model: Go to TIMING mode and set it to count down from
16 minutes. TIMING Mode must be set for counting down
(decrementing). Press START/STOP (+) to begin timing as the
race starts. The display begins counting down from 16 minutes in
whichever format you configured to show heart rate and elapsed
time information.
NOTE: TIMING Mode has many choices. See pgs. 27–29 for how to
reset the TIMING Mode, toggle between counting up and counting
down, and how to set the display to reflect your preferences.
43
■ You Reach the Mid-Point of the Race: You have been running the race
comfortably in your target heart rate zone and the timer counts down to
zero.
• 30-Lap Model: TIMER Mode automatically launches CHRONO
Mode, which was the mode selected in the step above to follow the
TIMER Mode countdown. The previously configured display
format for CHRONO and HEART RATE information appears. You
step up your pace in the second half. As you cross the finish line,
press STOP/RESET/SET (DONE) to stop CHRONO Mode timing.
NOTE: CHRONO Mode must be reset to zero to be automatically
launched by TIMER Mode.
Watch Maintenance and Warranty
Maintenance
The Heart Rate Monitor transmitter and its strap should be rinsed in fresh
water to avoid the build-up of materials that can interfere with the
measurement of your heart rate. The Fitness System watch does not need
to be rinsed.
Watch Battery Replacement
To avoid the possibility of permanently damaging the watch, TIMEX
STRONGLY RECOMMENDS TAKING YOUR WATCH TO A LOCAL RETAILER
OR JEWELER TO HAVE THE BATTERY REPLACED.
HRM Transmitter Battery Life and Replacement
• Fitness Model: Press any button to disable the Timer alert and
step up your pace at the 16-minute point of the race. As you cross
the finish line, press START/STOP to stop TIMING Mode.
■ Reviewing Your Heart Rate Data and Race Times: Later you can scroll
through your accumulated fitness data for the race.
• To review your HRM data and race times, go to REVIEW. Press
START/SPLIT (+) or START/STOP (+) to advance through your HRM
and race data, or press HEART RATE (-) to cycle backwards.
44
Assuming an hour-a-day usage, the battery life of the transmitter should
exceed two years. Greater usage will shorten the battery life. The battery
should be replaced when any of the following occurs:
• The watch no longer receives heart rate information from the chest
transmitter when properly worn on the chest.
• Error messages begin to appear with increased frequency on the display.
Turn the unit over and use a coin to open the battery compartment cover.
Replace the battery, making sure the “+” is facing you when you insert the
new one. Push the reset button next to the battery (a toothpick or
straightened paper clip will help you do this) before replacing the battery
cover.
45
A quick test of the unit should be performed after changing the battery:
1. Move away from any possible sources of electrical or radio
interference.
2. Liberally moisten the sensor pads and put the unit on your chest
securely against your skin.
3. Press the MODE button until the watch is in TIME OF DAY Mode.
4. Press the HEART RATE button on the watch to enable the Heart Rate
Monitor.
5. Within a few seconds the “heart” graphic on the watch display
should begin flashing, indicating that the chest belt transmitter is
active. This indicates that the battery was installed correctly. NOTE:
It is not necessary for a heart rate value to appear on the display
during this test.
IF YOU DO NOT SEE A FLASHING HEART ON THE WATCH, try the
following:
Press the reset switch in the battery compartment again and replace the
battery cover.
Reinstall the battery and press reset as instructed above.
46
TIMEX INTERNATIONAL WARRANTY (U.S. LIMITED WARRANTY)
Your watch is warranted against manufacturing defects by Timex
Corporation for a period of ONE YEAR from the original purchase date.
Timex and its worldwide affiliates will honor this International Warranty.
Please note that Timex may, at its option, repair your watch by installing
new or thoroughly reconditioned and inspected components or replace it
with an identical or similar model.
IMPORTANT: PLEASE NOTE THAT THIS WARRANTY DOES NOT COVER
DEFECTS OR DAMAGES TO YOUR PRODUCT:
1) after the warranty period expires;
2) if the product was not originally purchased from an authorized
retailer;
3) from repair services not performed by the manufacturer;
4) from accidents, tampering or abuse; and
5) Case, attachments or battery. You may be charged for replacing any
of these parts.
47
THIS WARRANTY AND THE REMEDIES CONTAINED HEREIN ARE
EXCLUSIVE AND IN LIEU OF ALL OTHER WARRANTIES, EXPRESS OR
IMPLIED, INCLUDING ANY IMPLIED WARRANTY OF MERCHANTABILITY
OR FITNESS FOR PARTICULAR PURPOSE. TIMEX IS NOT LIABLE FOR
ANY SPECIAL, INCIDENTAL OR CONSEQUENTIAL DAMAGES.
Some countries and states do not allow limitations on implied warranties
and do not allow exclusions or limitations on damages, so these limitations
may not apply to you. This warranty gives you specific legal rights and you
may also have other rights which vary from country to country and state to
state.
To obtain warranty service, please return your watch to the manufacturer,
one of its affiliates or the retailer where the product was purchased,
together with a completed original Product Repair Coupon or, in the U.S.
and Canada only, the completed original Product Repair Coupon or a
written statement identifying your name, address, telephone number and
date and place of purchase. Please include the following with your watch to
cover postage and handling (this is not a repair charge): a US$ 7.50 check
or money order in the U.S.; a CAN$6.00 cheque or money order in Canada;
and a UK£ 2.50 cheque or money order in the U.K. In other countries, you
will be charged for postage and handling. NEVER INCLUDE ANY ARTICLE
OF PERSONAL VALUE IN YOUR SHIPMENT.
For the U.S., please call 1-800-448-4639 for additional warranty information.
For Canada, call 1-800-263-0981.
For Brazil, call 0800-168787.
For Mexico, call 01-800-01-060-00.
For Central America, the Caribbean, Bermuda and the Bahamas,
call (501) 370-5775 (U.S.).
For Asia, call 852-2815-0091.
For the U.K., call 44 208 687 9620.
For Portugal, call 351 212 946 017.
For France, call 33 3 81 63 42 00.
For Germany, call +43 662 88 92130.
For the Middle East and Africa, call 971-4-310850.
For other areas, please contact your local Timex retailer or Timex
distributor for warranty information.
TIMEX INTERNATIONAL WARRANTY — WATCH REPAIR COUPON
Original Purchase Date:
(Attach copy of sales receipt, if available)
Purchased by:
(Name, address and telephone number)
Place of Purchase:
(Name and address)
Reason for Return:
THIS IS YOUR WATCH REPAIR COUPON. PLEASE KEEP IT IN A SECURE PLACE.
48
49
Service
If your watch should ever need servicing, send it to Timex as set forth in
the Timex International Warranty or addressed to:
HotLine Watch Service
P.O. Box 2740
Little Rock, AR 72203.
Street address:
HotLine Watch Service
1302 Pike Ave. North
Little Rock, AR 72114
For your convenience in obtaining factory service, participating Timex
retailers can provide you with a pre-addressed Watch Repair Mailer. See
the Timex International Warranty for specific instructions on the care and
service of your watch.
For service questions, call 1-800-448-4639.
Should you need a replacement strap or band, call 1-800-448- 4639.
50
FCC Notice (U.S.) / IC Notice (Canada)
Timex Corporation declares that the following products, which include all
components of the Timex® Bodylink™ System, are compliant to the
relevant FCC Part 15 and Industry Canada rules for Class B devices as
follows:
Product Name:
Speed + Distance Sensor - GPS Transceiver Series M8xx/M5xx
Heart Rate Monitor Sensor – HRM Transmitter Series M8xx/M5xx
Product Type: Intentional Radiator
Model
FCC ID No.
IC Certification No.
M515 Heart Rate Monitor
EP9TMXM515
3348A-M515
M850 Speed + Distance Monitor
EP9TMXM850
3348A-12181
These devices comply with Part 15 of the FCC rules. Operation is subject to
the following two conditions: (1) The device may not cause harmful
interference, and (2) the device must accept any interference received,
including interference that may cause undesired operation.
51
Product Name:
Watch Receivers – HRM/Speed+Distance Series M8xx/M5xx
Data Recorders – HRM/Speed+Distance Series M5xx
DECLARATION OF CONFORMITY
Manufacturers Name:
Timex Corporation
Manufacturers Address:
555 Christian Road
Middlebury, CT 06762
United States of America
Product Type: Unintentional Radiator
This equipment has been tested and found to comply with the limits for a
Class B digital device, pursuant to Part 15 of the FCC rules. These limits
are designed to provide reasonable protection against harmful interference
in a residential environment. This equipment generates, uses, and can
radiate radio frequency energy and, if not used in accordance with the
instruction manual, may cause harmful interference to radio communications.
If this equipment does cause harmful interference to radio or television
reception, which can be determined by turning the equipment off and on,
the user is encouraged to try to correct the interference by reorienting or
relocating the receiving antenna; or by increasing the separation between
the equipment and receiver.
Caution: Any changes or modifications to the equipment listed above, not
expressly approved by Timex Corporation, could void the user’s authority
to operate this equipment.
Industry Canada Notice: This Class B digital apparatus complies with
Canadian ICES-003. Cet appariel numérique de la classe B est conforme à
la norme NMB-003 du Canada.
declares that the following products, which include all components of the Timex Bodylink
System, are compliant to the relevant EU Directives as follows:
Product Name:
Speed + Distance System — GPS Transceiver Series M8xx/M5xx
Heart Rate Monitor System — HRM Transmitter Series M8xx/M5xx
conforms to the following product specifications:
LVD: 72/23/EEC
Safety: IEC 60950
EMC: 89/336/EEC and amendments 92/31/EEC, 93/68/EEC, and 98/13/EEC
Emissions:
EN300-330-1, -2
Radiated Emission 9kHz to 30MHz H-Field (magnetic
Radiated Emission 30MHz to 1000MHz E-Field (electric),
Ref. EN55022
Immunity:
EN300-683
Radiated Immunity 80MHz to 1000MHz, Ref. EN61000-4-3
ESD Electrostatic discharge, Ref. EN61000-4-2
Supplemental Information: The above products comply with the requirements of the LowVoltage Directive 72/23/EEC and the EMC Directive 89/336/EEC (including amendments
92/31/EEC, 93/68/EEC, and 98/13/EEC) and carry the
0983(!) marking accordingly.
Notifying Body – Underwriters Laboratories Inc., CAB# - 0983; 1285 Walt Whitman Road,
Melville, NY 11747.
Timex Corporation declares that these low power radio equipment devices are in compliance
with the essential requirements and other relevant provisions of R&TTE Directive 1999/5/EC.
52
53
Product Name:
Watch Receivers – HRM/Speed+Distance Series M8xx/M5xx
Data Recorders – HRM/Speed+Distance Series M5xx
conforms to the following product specifications:
Generic Emissions Standard EN 55022: 1998
Generic Immunity Standard EN 55024: 1998
Supplemental Information: The above products comply with the requirements of
Electromagnetic Compatibility (EMC) Directive 89/336/EEC (including amendments 92/31/EEC,
93/68/EEC, and 98/13/EEC) and carry the
marking accordingly. Conformity Assessment
Body (CAB) – Underwriters Laboratories Inc., CAB# 0983; 1285 Walt Whitman Road, Melville,
NY 11747.
Timex Corporation declares that these low power electronic devices are in compliance with the
essential requirements and other relevant provisions of the EMC Directive.
Agent: ___________________________
Brian J. Hudson
Director, Test Engineering and Module Development
Date: 28 April 2003, Middlebury, Connecticut, U.S.A.
Bodylink is a trademark of Timex Group, B.V.
TIMEX and NIGHT-MODE are registered trademarks of Timex Corporation
in the U.S. and other countries.
INDIGLO is a registered trademark of Indiglo Corporation in the U.S. and
other countries.
©2004 Timex Corporation.
54
MONITEUR DE FRÉQUENCE CARDIAQUE
NUMÉRIQUE TIMEX®
MODÈLES 30-LAP/FITNESS
UNE MONTRE SPORT NUMÉRIQUE ÉVOLUÉE
Plus
UN MONITEUR DE FRÉQUENCE CARDIAQUE ENTIÈREMENT NUMÉRIQUE
Le moniteur de fréquence cardiaque numérique Timex® intègre les toutes dernières
technologies numériques Timex aux méthodologies d'exercice employées par les
spécialistes de la forme et les entraîneurs personnels. Leader mondial de l’horlogerie
sportive, Timex a créé un moniteur de forme numérique qui combine la précision
numérique requise par les athlètes de niveau international avec des fonctions
utilisables par tous et à tout âge pour « rester en forme ».
Remarque : Ce manuel peut décrire des caractéristiques ou fonctions n'existant pas
sur tous les modèles.
Ressources sur Internet
Le site Web de Timex (www.timex.com) est une excellente source de renseignements
pour tirer le plus grand parti de votre moniteur de fréquence cardiaque numérique
Timex®. Les ressources à consulter sur le site Timex sont notamment :
www.timex.com/hrm/
Pour de plus amples renseignements sur les moniteurs de fréquence cardiaque
numériques Timex, notamment les listes et simulations des fonctions des
produits.
www.timex.com/fitness/
Pour les conseils de mise en forme et d'entraînement à l'aide des moniteurs de
fréquence cardiaque numériques Timex.
Remarque : Veillez à toujours consulter votre médecin avant d’entamer ou de
modifier un programme d’exercice physique.
55