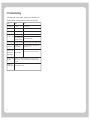
1
Wor ldNav 33 00
Disclaimer
Use the WorldNav at your own risk. To reduce the risk of unsafe operation, please
carefully review and understand all documentation related to this product. It is
the user's responsibility to use this product prudently. This product is intended
to be used only as a navigational aid and must not be used for any purpose
requiring precise measurement of direction, distance, location, or topography.
Statistics provided such as trip time are best estimates and may not accurately
reflect true conditions. The Global Positioning System (GPS) is operated by the
United States Government, which is solely responsible for its accuracy and
maintenance. The system is subject to changes which could affect the accuracy
and performance of all GPS equipment.
For use in vehicles, it is the sole responsibility of the owner/operator of the Tele
Type GPS WorldNav to place and secure the GPS unit so that it will not interfere
with the vehicle operating controls and safety devices, obstruct the driver's view
of driving conditions, or cause damage or personal injury in the event of an
accident. Do not mount the TeleType GPS WorldNav in a place where the driver
or passengers are likely to impact it in an accident or collision. The mounting
hardware supplied by TeleType Co. is not warranted against collision damage or
the consequences thereof.
When used in vehicles, it is the sole responsibility of the driver of the vehicle to
operate the vehicle in a safe manner, to maintain full surveillance of all driving
conditions at all times, and not become distracted by the GPS system to the
exclusion of safe driving practices. It is unsafe to operate the controls of the GPS
system while you are driving. Failure by the driver of a vehicle equipped with a
Tele Type GPS system to pay full attention to operation of the vehicle and
road conditions while the vehicle is in motion could result in an accident or
collision with property damage and personal injury.
TeleType provides mapping information and programming with the understanding
that it is not guaranteed to be accurate, correct or complete and conclusions
drawn from such information are the responsibility of the user. While every effort
has been made to ensure the accuracy, correctness and timeliness of materials
presented, the maps cannot be relied on as the sole source of information for a
driver. TeleType assumes no responsibility for errors or omissions.
IN NO EVENT SHALL TELETYPE CO BE LIABLE FOR ANY INCIDENTAL, SPECIAL,
INDIRECT OR
CONSEQUENTIAL DAMAGES, WHETHER RESULTING FROM THE USE, MISUSE, OR
INABILITY TO USE THIS PRODUCT OR FROM DEFECTS IN THE PRODUCT. SOME STATES DO
NOT ALLOW THE EXCLUSION OF INCIDENTAL OR CONSEQUENTIAL DAMAGES,
SO THE ABOVE
LIMITATIONS MAY NOT APPLY TO YOU.
Catalogue
1.Notices
01
1.1Information Instruction
01
1.2Safety Information
01
1.3Safety Caution
02
1.4Special Tips
03
2.Brief Introduction
05
2.1 Function Introduction
05
2.2 What's in the Box
05
2.3 Illustration
05
3.Basic Operation
07
3.1Battery and Charger
07
3.1.1 Power Supply
07
3.1.2 AC Adaptor
07
3.1.3 Vehicle charger
07
3.2 Basic Use
08
3.2.1 Power Key
08
3.2.2 Reset Key
08
3.2.3 Vehicle Mount
08
3.2.4 SD/MMC Memory Card
08
3.3 Connection with Computer
09
4.Function
09
4.1 Navigation
09
4.1.1 Feature of Navigation
09
4.1.2 Navigation Operation
10
4.2 Audio
10
4.3 Photo
11
4.4 E-book
12
4.5 Video
14
4.6 System Setting
15
4.6.1Volume adjustment
15
4.6.2 Power Setting
15
4.6.3 Backlight Setting
15
4.6.4 Time Setting
15
4.6.5 Language Setting
15
4.6.6 System Information
15
5.Technical Specification
16
6.Troubleshooting
17
1.Notices
2. Do not operate the system while driving. The system distracts the drivers'
attention, and should only be used when the vehicle is stopped.
3. Do not depend only on the voice navigation, which is only for reference.
Roads, traffic signs and service information constantly change; therefore drivers
The navigation system uses the most advanced satellite navigation technology
should refer to current road signs when navigating. Roads change often; drivers
and a detailed street map so it can direct you to the destination easily . For best
should take care to update maps as they become available.
results , read these instructions before operating.
4. You must notice traffic patterns before following the system information.
5. This navigation system is intended to assist drivers in making judgments about
Illustration
suitable routes. Please read the Disclaimer at the beginning of this guide.
Warning
Users shall comply with the information provided in case of any
Warning
threat to personal safety.
Caution
Users shall comply with the information provided in case of any
Caution
damage to this device.
Tips
Additional information provided for user reference.
Tips
Global Positioning System is launched and maintained by USA. This system can
receive the satellite signals from the Global Positioning System. Using these
signals the system will show your current location and provide you with directions
to your desired destination. This navigation system will select a route based on
the preferences you select in the software. A driver familiar with the local roads
may prefer an alternate route.
This navigation system can provide visual map and voice instruction. As you
approach an intersection where you need to turn, the device will remind you of
your distance to the turn and the direction.
1. Obey all traffic rules and be able to operate the vehicle safely.
-1-
In order to prevent injury or property loss, please read and follow the following
precautions:
1. Read all instructions.
2. Keep these instructions in an appropriate location for later reference.
3. Follow all operation instructions.
4. Accessories
Do not use accessories from another manufacturer; this may equipment
malfunction.
5. Power
Only use the stated power. You must turn off the power and disconnect the
power plug on rainy days or when you won't use the unit for a long time.
6. Protect the power cord.
Make sure the power cord is out the path of foot traffic.
7. Installation and Wiring
In order to ensure safety, hire professionals to do the installation and wiring.
8. Keep away from heat.
Do not expose the device to sunshine or high temperatures. Keep it away from
heaters, generators or any other heat-producing objects.
9. Keep away from water, rain, and damp places.
10. Cleaning
To clean, wipe the device with dry and soft cloth after power-off. Do not clean
with volatile chemicals like gas or a diluting agent.
11. In the event of any of the following conditions, immediately turn off power and
contact a technician: Power cord or jack damaged;
-2-
Liquid or particle enters into the device;
The device is damaged due to falling from a high place or incorrect operation.
13. LCD
Protect the LCD from dropping. If the LCD does fall and shatter, do not touch the
liquid flowing out of the device. Do not heat or scratch the LCD.
1. How does weather affect the instrument?
Severe weather like rain, thunderstorms or lightening will cause weak signals,
which will result in unstable operation of the instrument.
2. What factors may affect the GPS signal?
Close proximity to military bases. For security reasons, the signal precision for
civilian use is lower than that of the army. Therefore, precision of positioning
may be reduced.
Weather factors (inclement weather may reduce the intensity of signals and
result in unstable orientation).
Positioning of the GPS unit within the vehicle:
o Other devices may emit electric, electromagnetic, or wireless waves or
have a strong magnetic field.
o Placing the device close to the windshield will help maximize the signal
by minimizing interference from tall buildings, cars, heat insulation covers,
metal objects and trees.
7. What is the maximum charging time?
The device will be fully charged in 3–3 ½ hours under standby mode. The device
can also be charged when in use, although charging time is longer. It is normal for
the unit to heat up while charging.
8. What advantages does your GPS hardware have?
It supports fast lock-in, stable signal, service at no charge, a detailed map for
each city, voice navigation for the whole journey, intelligent route layout,
Microsoft Windows CE.net operation system, audio and video file support, Mp3/
MP4 and picture browsing; SD /MMC card support; 3.5 inch TFT touch screen with
65K colors, internal GPS antenna and high capacity rechargeable Li-polymer
battery.
9. Normally, how many satellites can the GPS receiver capture?
Normally, most GPS receivers can capture 8-12 satellites.
10. Why don't some of the WMA files play?
Software is used to decode WMA files. Music that was not obtained legally may
not be supported by this software. Make sure that the music is obtained legally.
WMA files are copyright protected.
11. How can I keep the device from crashing when turning on the car?
Disconnect the GPS unit from the adapter to avoid device crashes during car
startup.
3. Why does the device not receive signal inside buildings?
The GPS can't be used in buildings because the signals are easily obstructed
by buildings and metals, and they can't penetrate through the walls of buildings.
4. Does the windshield affect the GPS signals?
If the windshield contains metal, it will have some effect on the GPS.
5. How long does the GPS take to position after being switched on?
On average, the device will take approximately 1 minute to calculate your current
position in an open space where interference is minimal. In general, it takes
about 5 minutes or less, as in accordance with standard GB/T 19392-2003-5.3.
6. What is the maximum battery time?
The device will run smoothly for a maximum of 3-4 hours with the screen brightness
set to 50%.
-3-
-4-
2.Brief Introduction
>GPS Navigation
>Video format: supports ASF, AVI, WMV, MP4, 3GP
>Audio format: support WMA, MP3 and W AV
>Support LRC and Synchronized L yric Information Display
>Photo format: support JPEG, BMP , PNG
>E-book format: support TXT
>Integrated speaker
>Support SD/MMC card
>Connect with PC directly to transmit the data.
What's in the Box
Before using the device, make sure you have all the accessories listed below. If
any of the accessories are missing or damaged, please contact the local dealer
or agent as soon as possible.
>GPS Device with customized SD card installed
>AC Adaptor
>Vehicle Charger
>USB Cable
>Vehicle Mount
>User Manual
01. Power Key
Power on/off /sleep
02. MINI USB Port
Exchange the data with PC
03. Power Indicator
04. Power Jack
The red light indicates charging, while the green light indicates fully charged.
05. Earphone Jack
06. SD card slot
07. Reset Key
When the device is crashed halt or works abnormally , press reset key to reset
The system
08. Speaker
09. Touch-pen
10. Display Screen
-5-
-6-
3.Basic Operation
3.2.1 Power Key
3.1.1 Power Supply
In addition to the built-in lithium battery, you may power the device using the
cigarette adapter cord or the AC power adapter.
When the device is not connected to the adapter, it is powered by the lithium
battery.
The icon
at the top right corner on the device's main menu indicates
the current remaining power.
When the device is connected to the adapter, it is powered by the external
power source.
Tips
Tips Under normal conditions, the battery can last
about 2~ 3 hours when the battery it is fully charged. The
actual time of power supply depends on how the device
is used. Some functions, like
audio/video playing and high backlight, use more battery
energy.
1. Turn on: Hold the power button for three seconds.
2. Turn off: Hold the power key for three seconds and it will show the message
POWER OFF MODE and then turn off.
3. Sleep mode: Press the power key for about one second, and the message,
ENTERING SLEEP MODE will display. Before the device enters sleep mode,
the indicator will be yellow. When you press the power key again, the GPS will
automatically turn on and display the last state. Then the indicator will go out.
3.2.2 Reset Key
In the unlikely event that the device needs to be reset, press the reset key on the
back of the device. The software and maps will remain on the system
undisturbed. You may need to Reset the system under the following conditions:
delay during menu mode switch; system unresponsive when attempting to click
the icons; power key unavailable.
3.1.2 AC Adaptor
Use the AC adapter to charge the device before the first use.
1. Connect DC end of adapter to the power jack of device.
2. Connect the other end of adapter to the AC power jack.
Caut ion
Caution Place the Vehicle mount carefully. Do not block
the driver's view. Do not place the device arbitrarily
without attaching to the windshield. Do not place the
device in the way of the airbag or in the area where the
airbag would inflate in the event of a collision.
3.2.3 Vehicle Mount
Tips
Tips
When charging, the indicator is red, and the
power icon at the top right corner on the main menu is
the charge icon. After the device is fully charged, the
indicator turns green, and the power icon at the top
right corner on the main menu will be full.
3.1.3 Vehicle Charger
1. Connect one end of the Vehicle charger to the power input jack of the
device;
2. Connect the other end with the Vehicle cigarette lighter adapter in order
to supply power and charge up at the same time.
Caut ion
-7-
Caution To avoid damage to the device, insert the
Vehicle charger only after starting the Vehicle . If plugged
in before ignition, the sudden electric current at startup
could damage the GPS.
The Vehicle mount consists of salver and bracket. While using the device in
the Vehicle , make sure it is securely stowed in its mount on the windshield.
Caut ion
Caution To avoid breaking the screen, protect the bottom
of the device from vibration by resting on the dash if
necessary.
3.2.4 SD/MMC Memory Card
Your device has been specially equipped with a Secure Digital (SD) card
containing the navigation program and maps. Removal of the SD card will prohibit
you from using the navigation feature of the device. Should updating the device
be desired, you will be provided with a new SD card. To remove the SD card, push
the card towards the device, the card will then pop out and you will be able to
insert the new SD card instead.
-8-
In normal operation, there will be no need to use the USB port and cable.
However, should it become necessary, you can connect the device to the
computer using the USB cable. One end connects with PC and the other
end connects with the device. 1. Data transmission: There are two new
“mobile Disk” icons in my computer. After the device is successfully
connected with the computer, the first icon represents the built-in flash drive;
the second represents the SD card storage.
The device employs the intelligent navigation system, which uses a GPS
satellite signal receiver to position the moving vehicle precisely and display the
mobile vehicle's location on the E-map. The system will automatically calculate
the best route when users set the destination. The system can also provide the
functions of visual maps, instant animation, and voice instruction.
4.1.2 Use of Navigation
Read the navigation software instructions carefully.
(If the SD card is not inserted, the second disk icon is unavailable). Then,
you can use them as normal USB flash disks, with such functions as
copying and editing the data between computer and device.
Caut ion
Caution 1.Do not erase or change the data in the
built-in flash memory. This may cause a malfunction.
2. This system is based on Windows 98 operating system.
Install the driver before operating the device. The
communication between GPS and computer are based
on the Windows 98 operating system or above.
3.When GPS is connected to a computer by USB cable,
other device functions will not work.
Music
1. Click MUSIC icon on the main menu to enter into the audio folder.
Then you will find a menu that shows "SD/"MMC or "Flash" folder. Double-click
the folder to play the related file.
The function of each icon is as follows:
ReturnReturn to the main menu
2. Safely Remove: After logging out the system, remove the USB cable
( it operates like the USB flash disk).
PreviousDisplay the previous page
NextDisplay the next page
UpReturn to the upper level folder
4.Function operation
The device supports navigation, audio playing, video playing, E-book, photo
browsing,and system setting functions. The main menu after starting up is
as follows;
2. Click CMF icon to open the Music player. Then you will find a menu that shows
"SD/"MMC or "Flash" folder. Double-click the folder to play the related file. The
function of each icon is as follows:
4.1.1 The Features of Navigation
-9-
-10-
Return
Return to the Main Interface
Play
Play songs
Pause
Pause
Stop
Stop playing
Repeat
Repeat all the songs
Random
Shuffle all the songs
Previous
Play previous song
Next
Play next song
Volume
Adjust volume by dragging sliding block
Play Schedule
Adjust play schedule by dragging sliding block
Folder
Return to Audio-Folder interface
Lyric Display
Display the information of current LRC lyric and
play state of current song
Song's name Display
Display the name of the current song
Tips The audio player synchronizes the lyrics
To ensure proper function, copy both the music and lyric
files (LRC format) to the same folder in the SD card,
and make sure their names are the same.
Tips
2. Click file icon to open the photo browser. The menu shows
" SD/ MMC" or "Flash" folder. Double- click the folder to play the related file.
The function of each icon is as follows:
Esc
Return to the main interface
Zoom Out
Zoom Out the current photo
Zoom In
Zoom In the current photo
Rotate
Rotate the photo 90°
clockwise
Automatic Play the photos from the
play
current file in slide mode
Previous
Browse the previous photo
Next
Browse the next photo
Upwards
Return to the upper grade folder
Tips
1. Click thePhotoicon on the main menu to enter the photo folder.
The menu shows "SD/"MMC or "Flash" folder. Double-click the folder to play
the related file.
Esc
Return to the Main Menu
Previous
Next
Display the previous page
Display the next page
Up
Return to the upper grade folder
Forward
Play the selected photo or the
Next one
-11-
Tips
A. In full screen m ode, double-click to get back to
common mode.
B. After zooming in, drag the photo on screen with stylus.
1. Click "E- book" icon on the main menu to enter the E-book folder.
Then you will finda menu that shows "SD/ " MMC or "Flash" folder.
Double-click the related folder to play the related file.
-12-
The function of each icon is as follows:
Return to the main menu
Esc
previous To the previous page
Next
To the next page
Up
Return to the previous folder
skip
Enter the page selection
menu
1. Click thevideoicon on the main menu to enter the video file.
2. Clickvideoicon to open the video player.
The function of each icon is as follows:
File name Show the file name
Page No./Total pages Current
page/Total pages
3. Click the
on the E-book menu to enter into the page choice menu.
Then click digital key to input the needed page.
The function of each icon is as follows.
Esc
return to the main menu
Play
To play the video file
Pause
Pause playing
Stop
Stop playing video
Upward
Return to the previous folder
Forward
Forward playing
Volume
Drag the scroll box to adjust the
Volume
Progress Drag the scroll box to adjust the
playing progress
Time
Current time
Total time
Current video file name
-13-
Number bar
Show the page number
Backspace
Delete the last number
input
Clear
Clear the number
Skip
Skip to the page
number shown
Tips
Tips On the menu, double- click the play display.
The display go to full screen. On the full screen,
double- click the display to return to normal mode.
-14-
Click system icon in the main menu to set up your system, including volume,
power, brightness, date, time, language, time and date, system information,
touch screen calibration.
4.6.1 Volume Setting
Click volumeicon to enter the volume setting menu. The user can click
and
to adjust the volume. Tap the + to increase the volume.
Click “Enable sounds for taps” for a clicking sound when you touch the screen.
4.6.2 Power Setting
Click powericon to enter the power setting menu. The user can check the status
bar to view the power. The user can also click
or
to set the time to
automatically power off.
4.6.3 Backlight Setting
Click Brightness to enter brightness setting menu. The user can adjust the
brightness by
and
or click
or
to set the time for automatic
screen power-off.
4.6.4 Date Time Setting
Click Date Timeto enter Date Time Setting menu. Status bar will show the time,
date and time zone you set.
Click time, date, time zoneto set up the time, date and time zone. You also
can click
,
or
to set up the time, date and time zone.
Through the GPS signals, the time setting refreshes the current time
automatically. This means that the time will temporarily return to the factory
setting time after the system reset. As soon as the GPS begins to navigate, the
time will renew to the standard time. Please note that the time setting should be
compatible with the local time.
4.6.5 Language setting
Click Language icon to set the language you need.
There are 3 languages available: English, French and Spanish.
4.6.6. System Information
Click systemicon to view the detailed system information.
1. Clickcalibrationicon in the information box to adjust the touch screen.
Click the cursor in the middle of the touch screen as the following sequence
middle, left-up, left-down, right-down and right-up. Click the middle of the cursor
repeatedly until the calibration is successful. Then exit.
-15-
2. Click the "GPS Reset" icon in the information box, the system will automatically
clear up the Signal-to-Noise data received.
3. Click the "Factory Reset " icon in the information box, the system will
automatically restore factory settings.
5. Technology Specification
Dimension
106.5*78.5*25mm
Net Weight
176g
System
Media function
OS
Windows CE5.0
CPU Frequency
ARM9 applic ation P rocessor@ 4 00MHz
SD RAM
64M
NAND Flash
64M-2GB(SLC)
External Memory
MAX 4G SD/MMC
Video
ASF AVI MP4 3GP
MP3 WMA
WAV
JPEG, BMP, PNG
Audio
Photo
E-book
Languages
Power
Display
GPS Module
WMV
TXT
3 languages available
English French
Spanish
AC Adaptor
INPUT AC 100-240V OUTPUT DC 5V /2A
Vehicle Charger
INPUT DC 12-24V OUTPUT DC 5V /1.5A
Battery
3.7V /1300mAH
Navigation time
2-3 hours depending upon backlight usage
Power Saving
Automatically standby mode,screen
protection(black screen)
Specification
3.5 TFT-LCD,3.5 4-line-resistance touch screen
Pixel
Frequency
320*240 RGB
1575.42MHz
Channels
20 channels
Sensitivity
-157dBm
Precision
65K color
Position: < 10 met ers
Hot start:
Start-up time
Warm start:
3 sec, av erage
38 sec, a verage
Refreshing rate
Cold start:
1/second
43 sec, a verage
Version
Map
Update the map d ata in SD card
Temperature
Request
-20
USB
USB 2.0 full speed
-70
-16-
6.Troubleshooting
If the device does not work properly, please inspect it according to the
following procedure. If problems persist, contact our Service Center
Problem
Reason
Action
Can not power on
Low power
charge the battery
Power off suddenly
low power
charge the battery
Touch screen deflected Calibration is not precise.
Tool low volume
No sound when playing
Poor connection between
the earphone and device
Can no t co nn ec t wi th PC
Fails to charge
Refer to 3.6.6 to calibrate your touch screen.
turn on the volume
insert the earphone properly
Poor connection of the USB cable Refer to the 2.3 chapter, connect the USB cable well.
AC adapter is not
securely attached
check that the adapter is inserted securely,
and indicator is red.
The system crashes
press the reset key with stylus to restart.
Power Key invalid,
touch screen and
display abnormal
Difficulty receiving depending on environmental conditions, the intensity of the GPS
signals will vary. It may take approximately 1-3 minutes to receive
GPS signal
the signal.
Unable to use
navigation function Contact the Service Center.
-17-