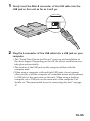
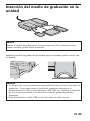
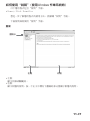
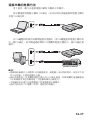
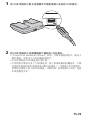
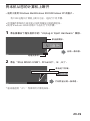
1
2-067-390-11 (1) US
MA-000078-01G
Multi Slot
USB Reader/Writer
Operating Instructions
MSAC-USM1
English
Before operating the unit, please read this instructions thoroughly, and
retain it for future reference.
For the Customers in the U.S.A.
If you have any questions about this product, you may call:
Sony Customer Information Center 1-800-222-SONY(7669).
The number below is for the FCC related matters only.
Regulatory Information
Declaration of Conformity
Trade Name
: SONY
Model
: MSAC-USM1
Responsible Party : Sony Electronics lnc.
Address
: 16450 W. Bernardo Dr, San Diego, CA
92127 U.S.A.
Telephone number : 858-942-2230
This device complies with Part 15 of the FCC Rules. Operation is
subject to the following two conditions: (1) This device may not cause
harmful interference, and (2) this device must accept any interference
received, including interference that may cause undesired operation.
CAUTION
You are cautioned that any changes or modifications not expressly approved
in this manual could void your authority to operate this equipment.
2-US
Note:
This equipment has been tested and found to comply with the limits for a
Class B digital device, pursuant to Part 15 of the FCC Rules. These limits
are designed to provide reasonable protection against harmful interference
in a residential installation. This equipment generates, uses, and can
radiate radio frequency energy and, if not installed and used in accordance
with the instructions, may cause harmful interference to radio
communications. However, there is no guarantee that interference will not
occur in a particular installation. If this equipment does cause harmful
interference to radio or television reception, which can be determined by
turning the equipment off and on, the user is encouraged to try to correct
the interference by one or more of the following measures:
– Reorient or relocate the receiving antenna.
– Increase the separation between the equipment and receiver.
– Connect the equipment into an outlet on a circuit different from that to
which the receiver is connected.
– Consult the dealer or an experienced radio/TV technician for help.
The specified USB cable (supplied) must be used with the equipment in
order to comply with the limits for a digital device pursuant to Subpart B
of Part 15 of FCC Rules.
For the customers in Canada
This class B digital apparatus complies with Canadian ICES-003.
Notice
If static electricity or electromagnetism causes data transfer to
discontinue midway (fail), restart the application or disconnect and
connect the USB cable again.
3-US
Program©2000-2004 Sony Corporation
Documentation©2004 Sony Corporation
• “Memory Stick,” “MagicGate Memory Stick,” “Memory Stick PRO,” “Memory
Stick Duo,” “MagicGate Memory Stick Duo,” “Memory Stick PRO Duo” and
are trademarks of Sony Corporation.
• Microsoft and Windows are trademarks or registered trademarks of Microsoft
Corporation in the United States and/or other countries.
• MMX Pentium is registered trademark or trademark of Intel Corporation.
• Adobe, Acrobat, Acrobat Reader are registered trademarks or trademarks of
Adobe Systems, Inc. in the United States and/or other countries.
• Macintosh and Mac OS are registered trademarks of Apple Computer, Inc. in
the United States and/or other countries.
• CompactFlash and CF are trademarks of SanDisk.
• Microdrive is trademark or registered trademark of Hitachi Global Storage
Technologies Netherlands B.V.
• All other trademarks and registered trademarks or trademarks of their
respective holders.
Furthermore “™” and “®” are not mentioned in each case in this manual.
4-US
Table of contents
On “Memory Stick” .............................................................................................. 6
System requirements ............................................................................................ 8
Checking the supplied accessories ..................................................................... 9
Supplied applications ........................................................................................ 10
Using the Operating Instructions and help .................................................... 11
Installing the software on your computer ...................................................... 13
Connecting this unit to your computer ........................................................... 15
Confirming that connections are completed .................................................. 18
When the removable disk (Memory Stick icon) is not indicated
(Except Windows XP) ........................................................................................ 19
Insert the recording media into the unit ......................................................... 22
Copying image data recorded on recording media to your computer ...... 23
Disconnecting the unit from your computer .................................................. 24
Formatting (initialization) of “Memory Stick” (For Windows only) ......... 26
Precautions .......................................................................................................... 28
Precautions for use of “Memory Stick” ........................................................... 29
Precautions for use of CF Memory Card (Microdrive) ................................. 31
Uninstalling (Deleting) the software ............................................................... 32
Troubleshooting .................................................................................................. 34
Specifications ....................................................................................................... 35
LIMITED WARRANTY ..................................................................................... 36
5-US
On “Memory Stick”
What is “Memory Stick”?
“Memory Stick” is a new-generation IC storage media that is ultra-small
and lightweight and has far greater storage capacity than floppy disks. The
media can be used not only for transferring data between “Memory Stick”
compatible products, but also as a removable, external storage media for
storing data.
“Memory Stick” is available in standard size and a smaller size called
“Memory Stick Duo.” When “Memory Stick Duo” is inserted into a
Memory Stick Duo Adaptor, the size becomes the same as the standardsized “Memory Stick” to allow use with products that are compatible with
the standard-sized “Memory Stick.”
“Memory Stick” types that can be used with
this unit
* Five types of “Memory Stick” are available to suit your needs.
“Memory Stick PRO”
This type of “Memory Stick” can only be used with products that are
compatible with “Memory Stick PRO,” and the media features built-in
copyright-protection technology (“MagicGate”). (You need the application
software programs compatible with copyright-protection technology to
use copyright-protection technology of “Memory Stick PRO” with this
unit.)
“Memory Stick”
A “Memory Stick” that allows recording of all kinds of data with the
exception of data requiring copyright-protection technology
(“MagicGate”).
“Memory Stick Duo” (MagicGate/High-speed data Transfer
compatible)
“Memory Stick Duo” is a “Memory Stick” with the “MagicGate” copyright
protection technology, and supports high-speed data transfer. You can use
this unit with “Memory Stick” compatible devices and “Memory Stick
PRO” compatible devices. (The transfer speed varies depending on the
“Memory Stick” compatible device used.)
6-US
“Memory Stick” (with Memory Select Function)
This is a “Memory Stick” containing more than one memory (128 MB). The
memory select switch on the back of the “Memory Stick” enables you to
select the memory most suitable for the intended use. You cannot use
different memories at the same time or in succession.
“MagicGate Memory Stick”
This is a “Memory Stick” featuring built-in copyright protection
technology (“MagicGate”).
What is “MagicGate”?
“MagicGate” is a copyright protection technology that operates when it is
provided in both the “Memory Stick” and the product in which the media
is used. A “Do you comply with “MagicGate”?” authentication takes place
between devices equipped with “MagicGate” (this unit, etc.) and the
“Memory Stick.” Data encryption takes places after the authentication.
Copyright-protected data cannot be played back on devices other than
those certified for this.
Music and other data that require copyright protection can be recorded
and played back by using a combination of a MagicGate compatible
“Memory Stick” and equipment compatible with “MagicGate,” such as
this unit.
Different types of data can be recorded on a single “Memory Stick.”
For example, it is possible to record image data on the remaining empty
section of a MagicGate compatible “Memory Stick” containing music data.
Using MagicGate compatible “Memory Stick”
PNotes
• Formatting a MagicGate compatible “Memory Stick” containing data will
delete all the data, including music data. Be careful not to delete important
data accidentally. Sony can not be held responsible for the data lost through
formatting.
• What you record are for personal enjoyment only. Copyright laws prohibit
other forms of use without the permission of the copyright holder.
• In no event will Sony be liable for the data contents in case download of
recorded material is impeded or music data is corrupted or deleted due to
malfunctions of this unit or the “Memory Stick.”
PNote
This device is not equipped with MagicGate.
7-US
System requirements
Recommended Windows environment
• OS: Microsoft Windows 98 Second Edition (Windows 98SE)/Windows
Millennium Edition (Windows Me)/Windows 2000 Professional
(Windows 2000)/Windows XP Home Edition/XP Professional
(Windows XP)
Not compatible with Microsoft Windows 98 Edition
* The operating systems mentioned above must be installed on the
computer when shipped from the factory.
* Operation is not guaranteed for upgraded operating systems even if
they are among those mentioned above.
• CPU: MMX Pentium II 400 MHz or faster processor (Pentium III 450
MHz or faster processor recommended)
• RAM: 64 MB or more
• Available hard disk space: 10 MB or more
(More disk space may be required depending on the version of Windows
you are using.)
• CD-ROM drive
• USB jack as standard equipment
(This unit supports Hi-Speed USB (USB 2.0 based).)
• Display: High Color (16-bit) or higher, 800 × 480 pixels or more
(800 × 600 pixels or more recommended.)
Recommended Macintosh environment
• OS: Mac OS 9.0~9.2.2/X (v10.1~10.3)
* The operating systems mentioned above must be installed on the
computer when shipped from the factory.
* Operation is not guaranteed for upgraded operating systems even if
they are among those mentioned above.
• RAM: 64 MB or more
• Hard disk: 10 MB or more available hard-disk space
• USB jack as standard equipment
(This unit supports Hi-Speed USB (USB 2.0 based).)
PNote
Operation is not guaranteed for all computers even if they comply with the
recommended environments.
8-US
Checking the supplied accessories
• Multi Slot USB Reader/Writer (1)
• Special USB cable 1.0 m (1)
• CD-ROM (MSAC-USM1) (1)
* The CD-ROM contains the following software programs.
• Device Driver Software
• Memory Stick Formatter Ver. 2.2 (For Windows only)
• Operating Instructions (PDF file)
The data of Operating Instructions for this unit (PDF file) is
MSAC-USM1Manual_ENG.pdf
• Operating Instructions for this unit (1)
9-US
Supplied applications
The supplied Windows CD-ROM contains the following software
programs.
Device driver
For how to install the driver software, see page 13.
Memory Stick Formatter Ver. 2.2 (For Windows only)
This is a software program for formatting (initialization) of “Memory
Stick.” Formatting deletes all the data recorded on a “Memory Stick.”
In order to maintain the compatibility of a “Memory Stick” when using it
with compatible products, always use this software when formatting
“Memory Stick” on this unit.
PNote
Formatting a “Memory Stick” to which data has already been written will
delete the existing data. Be careful not to delete important data by mistake.
10-US
Using the Operating Instructions and
help
Using the Operating Instructions on the CDROM
The supplied CD-ROM contains more detailed Operating Instructions
(PDF file).
For details on how to use this unit, see these Operating Instructions.
Acrobat Reader from Adobe Systems Incorporated is required to view PDF
files.
How to use Acrobat Reader is described in the following.
Screen view
Left frame
Right frame
• Left frame
Each page of the Operating Instructions appears as a thumbnail.
When you click on the thumbnail corresponding to the page that you
want to view, the page is shown in the “Right frame.”
• Right frame
Shows each page.
For details on how to use Acrobat Reader, see the online Help manual for
Adobe Acrobat Reader.
11-US
How to use the Help (When Using Windows)
The following application features Help manual.
• Memory Stick Formatter
For details on how to use the application software program, see the Help
manual.
How to use the Help manual is described in the following.
Screen view
Tab
Left frame
Right frame
• Left frame
Contents or Keywords are displayed here.
• Right frame
Displays explanations. Clicking underlined parts in the text displays
related explanations.
12-US
Installing the software on your
computer
Use the following procedure to install the device driver.
The CD-ROM contains the following software programs.
• Device Driver Software
• Memory Stick Formatter Ver. 2.2 (For Windows only)
PNote (For the first time)
When using Windows XP, perform installation after connecting this unit
to your computer.
When using another OS, be sure to install the device driver before you
connect this unit to your computer.
When using Mac OS 10.2.4 or higher, connect this unit to your computer
without installing the device driver.
1
Turn on your computer.
Close all running applications.
To install the device driver when you are using Windows 2000 or
Windows XP, you must log on with Administrator rights.
13-US
2
Insert the supplied CD-ROM (MSAC-USM1) into the CD-ROM
drive on your computer.
Click the device driver corresponding to the OS you are using.
3
4
Complete the installation according to the directions on the
screen.
For Windows users, if you need Memory Stick Formatter, click
the “Memory Stick Formatter” folder and then click the “Set
up .EXE” icon to start installation.
* You cannot use “Memory Stick Formatter” on a Macintosh.
Click the buttons according to the instructions on the screen.
5
Restart your computer.
14-US
Connecting this unit to your computer
Connect the USB jack on this unit to a USB jack on your computer using
the special USB cable supplied.
USB jack
Access lamp
USB jack
A connector
Mini-B
connector
On the special USB cable
A connector: This is plugged into the USB jack on the computer. Any of
the jacks can be used if the computer is provided with
multiple USB jacks.
Mini-B connector: This is plugged into the USB jack on this unit.
15-US
1
2
Firmly insert the Mini-B connector of the USB cable into the
USB jack on this unit as far as it will go.
Plug the A connector of the USB cable into a USB jack on your
computer.
• The “Found New Hardware Wizard” starts up and installation of
the driver begins. Depending on the OS, the driver installation may
take place automatically.
• The location of the USB jack on the computer differs with the
computer used.
• When using a computer with multiple USB jacks, do not connect
other devices, with the exception of a standard mouse and keyboard,
to USB jacks at the same time as this unit. When using a desktop
computer, use a USB jack on the main unit of the computer. For
details, see “Recommended ways for connecting this unit” on page
17.
16-US
Recommended ways for connecting this unit
The operation of this unit has been confirmed when connected to the
computer in either of the following ways.
When this unit is connected to a USB jack on the computer main unit, and
nothing is connected to other USB jacks on the computer main unit.
When, on a computer with a USB keyboard and mouse as standard
equipment, the USB keyboard is connected to one of the USB jacks on the
computer main unit, and this unit is connected to another USB jack on the
computer main unit with the supplied USB cable.
PNotes
• When two or more USB devices except standard equipment are connected to
one computer, and both are used simultaneously, operation is not guaranteed
depending on the USB devices.
• Make sure to connect the supplied USB cable to a USB jack on the computer
main unit. Operation is not guaranteed if the cable is connected via the
keyboard or a USB hub, etc.
• Not all operations are guaranteed on all computers running under the
recommended environment.
• Make sure to use the specified USB cable (supplied) to connect to your
computer.
17-US
Confirming that connections are
completed
Depending on the OS type and the settings, the screens may look different.
1
2
Open the “My Computer” folder.
Confirm that the newly recognized Memory Stick (F:), Memory
Stick Duo (G:), and CF (H:) icons are shown.
PNote
Depending on the computer used, the drive letter (F:) may differ.
Connection is complete when the Memory Stick (F:), Memory Stick Duo
(G:), and CF (H:) icons are shown.
It may take a little while before the Memory Stick (F:), Memory Stick Duo
(G:), and CF (H:) icons appear.
PNotes
• When using Windows 98SE, drives for “Memory Stick (F:)” and
“Memory Stick Duo (G:)” appear as the same icon. When using
Macintosh, all icons appear as the same icon.
• If the Memory Stick icons are not shown, the device driver may not be
installed correctly. Perform the procedures described in the following.
When using another “Removable Disk,” the “Removable Disk” icon also
appears.
18-US
When the removable disk (Memory
Stick icon) is not indicated (Except
Windows XP)
A separate device driver may already have been installed. Connect this
unit to your computer, and then perform the following procedure.
– When using Windows 2000 –
Log on as Administrator or using a user ID that has administrative
privilege.
1
Double-click the “System” icon on the “Control Panel.”
The “System Properties” screen appears.
2
Check if the device driver has already been installed.
1 Click the [Hardware] tab on the “System Properties” screen.
2 Click [Device Manager].
The “Device Manager” screen appears.
3 Click [View].
4 Click [View devices by type].
5 Double-click [Universal Serial Bus Controller].
6 Check whether [? MSAC-USM1] preceded by the “?” symbol is
shown.
19-US
3
Delete the driver if installed.
If you use the procedure described in Step 2 and confirm that
[? MSAC-USM1] is shown under “Universal Serial Bus Controller” in
the “View devices by type” display, a separate device driver has
already been installed.
Use the following procedure to delete this driver.
Do not delete other devices than [? MSAC-USM1].
1 Right-click on [? MSAC-USM1].
2 Click on [Remove]. The “Confirm Device Removal” screen
appears.
3 Click the [OK] button. The device is removed.
4 Restart your computer after disconnecting this unit from the
computer.
Install the device driver again by performing the procedure from
Step 1 described on page 13.
PNote
If you delete other devices than [? MSAC-USM1], your computer may no
longer operate normally.
20-US
– When using Windows 98SE/Windows Me –
1
Double-click the “System” icon on the “Control Panel.”
The “System Properties” screen appears.
2
Check if the device driver has already been installed.
1 Click the [Device Manager] tab on the “System Properties” screen.
2 Double-click [Universal Serial Bus Controller].
3 Check whether [? MSAC-USM1] preceded by the “?” symbol is
shown.
3
Delete the driver if installed.
If you use the procedure described in Step 2 and find that [? MSACUSM1] is shown under “Universal Serial Bus Controller,” a separate
device driver has already been installed.
Use the following procedure to delete this driver.
Do not delete other devices than [? MSAC-USM1].
1 Click on [? MSAC-USM1].
2 Click on [Remove]. The “Confirm Device Removal” screen appears.
3 Click the [OK] button. The device is removed.
4 Restart your computer after disconnecting this unit from the
computer.
Install the device driver again by performing the procedure from
Step 1 described on page 13.
PNote
If you delete other devices than [? MSAC-USM1], your computer may no
longer operate normally.
21-US
Insert the recording media into the unit
PNote
Insert the recording media in the correct slot. Inserting it in the wrong slot
may damage the unit.
Insert the recording media so that its end is level with the unit.
PNotes
• The access lamp lights while the recording media is being accessed. Never
remove the recording media, turn off the computer, or unplug the USB
cable, etc., while the access lamp is on. The data on the recording media
could be destroyed.
• When disconnecting the USB cable, do not hold it by its cable; hold it by its
connector.
22-US
Copying image data recorded on
recording media to your computer
If the USB cable used to connect this unit and your computer is
disconnected, the computer will no longer be able to recognize this unit
and the image data stored on the “Removable Disk (recording media)” can
no longer be viewed on the computer. If you copy the image data stored
on the recording media to your computer, the image data can be displayed
and processed on your computer even if this unit is not connected to your
computer.
When the USB cable is disconnected, the Memory Stick (F:), Memory Stick
Duo (G:), and CF (H:) icons disappear.
For how to copy image data to your computer, see the manual for your
computer.
23-US
Disconnecting the unit from your
computer
– For customers using Windows Me/Windows 2000/Windows XP –
Perform the procedure described below before disconnecting the USB
cable from the computer.
• The screens may differ slightly with the type of OS used.
• Customers using Windows 98SE do not need to perform this procedure.
1
Click the “Unplug or Eject Hardware” icon in the task tray in
the lower right corner of the screen.
Click this icon.
A message
appears.
This section is the task tray.
2
Click “Stop MSAC-USM1 - Drivers(F: , G: , H:)”.
Click this section.
Stop MSAC-USM1-Drivers (F:, G:, H:)
A message appears after a
little while.
* The drive letter “(F:),” etc. differs with the computer used.
24-US
3
[“The 'MSAC-USM1' device can now be safely removed from
the system.”] is displayed.
In this condition, you can safely remove this unit from your computer.
* The indications may be different depending on the OS that you are using.
PNotes
• When you just want to remove the recording media from this unit, the
procedure described above is not required.
• Do not remove the recording media from this unit while the access lamp is
blinking. Data on the recording media could be corrupted.
• When you carry out this operation, this unit is not recognized by your
computer. To make this unit recognize again, disconnect the USB cable
from your computer and connect the USB cable to your computer again.
25-US
Formatting (initialization) of “Memory
Stick” (For Windows only)
This deletes all the data recorded on a “Memory Stick.” When formatting
on this unit, be sure to use the supplied “Memory Stick Formatter”
software program, following the procedures outlined below. Operation on
a Handycam or other “Memory Stick” compatible products is not
guaranteed for a “Memory Stick” formatted on a computer without the use
of the “Memory Stick Formatter” software program.
For the details on how to use the “Memory Stick Formatter,” refer to the
manual supplied with the “Memory Stick Formatter.” You can download
the “Memory Stick Formatter” at the following Web Site.
http://www.sony.net/Products/mssupport/
PNote
If you format a “Memory Stick” that contains recorded data, the already
recorded data will be deleted. Be careful not to inadvertently delete
important data.
1
2
3
Insert a “Memory Stick” into this unit.
Start “Memory Stick Formatter.”
Click [Start formatting]. Formatting begins.
PNote
Never remove this unit from the computer while formatting the “Memory
Stick.” The data on the “Memory Stick” may be damaged.
26-US
Write-protecting data
A “Memory Stick” is equipped with an erasure prevention switch to
ensure that important data is not deleted by mistake. (Some of “Memory
Stick” (“Memory Stick Duo”) are not equipped with an erasure prevention
switch. If you use a “Memory Stick” (“Memory Stick Duo”) unequipped
with the erasure prevention switch, be careful not to write data or delete
data by mistake.) Sliding this switch to the left or right enables or prevents
writing of data to the “Memory Stick.”
• Write enable
Data can be written.
• Write protect
When the switch is moved to the right, the condition becomes the one in
which data cannot be written to the “Memory Stick.” Data can be read
out but writing is prevented.
Underside of “Memory Stick”
Write enable
Write protect
LOCK
LOCK
LOCK
Data read/write speed
The data read/write speed differs with the “Memory Stick” and product
combination that you are using.
27-US
Precautions
• This device is not equipped with MagicGate.
• You can use “Memory Stick,” “Memory Stick Duo” or CF Memory Card
(Microdrive) with this unit. In these Operating Instructions, “Memory
Stick,” “Memory Stick Duo” and CF Memory Card (Microdrive) are
referred to as “recording media.”
• If the body becomes dirty, wipe with a soft cloth. Never use benzine,
alcohol, paint thinner or other solvents. This unit may deform or
malfunction.
• Refer to the contents of the supplied CD-ROM for detailed Operating
Instructions (PDF file).
Make sure to read it before using the unit.
• The access lamp lights while the recording media is being accessed.
Never remove the recording media, turn off the computer, or unplug the
USB cable, etc., while the access lamp is on. The data on the recording
media could be destroyed.
• When disconnecting the USB cable, do not hold it by its cable; hold it by
its connector.
28-US
Precautions for use of “Memory Stick”
A
B
How to affix
labels
C
• Recording, editing and deletion are prevented when the erasure
prevention switch is set to the “LOCK” position. B
• Use a pointed object to move the erasure prevention switch on the
“Memory Stick Duo.” (Some of “Memory Stick” (“Memory Stick Duo”)
are not equipped with an erasure prevention switch.)
• Data may be corrupted in the following cases.
– If the “Memory Stick” is removed or the power to this unit is turned
off while the access lamp is on (while data is being read/written)
– When used in a location subject to static electricity or electrical noise
• Always backup important data. Sony does not accept liability for damage
of the data.
We cannot acccept resposibility in the event that data is lost or damaged
and the unit is damaged, while using this unit.
• Data copyright protected by “MagicGate” can only be used with a
MagicGate compatible “Memory Stick.”
• Do not affix any label other than those specially provided to the
“Memory Stick.” C
• When affixing labels, affix these at the designated positions. Labels
should not protrude from the edges of the “Memory Stick.”
• Do not apply excessive force when writing in the memo area of a
“Memory Stick Duo.”
• When transporting or storing a “Memory Stick,” place it in the supplied
storage case.
• Do not touch the connector section with fingers or metallic objects. A
• Do not bend, drop or subject the “Memory Stick” to strong impacts.
• Do not attempt to disassemble or modify the “Memory Stick.”
• Do not wet with water.
• The contents of data cannot be compensated if recording or playing back
is not made due to malfunctions such as “Memory Stick” error.
• To prevent recording or deletion of data on “Memory Stick” set the
“Memory Stick” write-protect switch to “LOCK.”
29-US
• Avoid use and storage in the following locations.
– In a car where the temperature may become very high or in other hot
locations
– Location subject to direct sunlight
– Location with humidity or where corrosive substance are present.
30-US
Precautions for use of CF Memory Card
(Microdrive)
A Microdrive is a compact and lightweight hard disk drive that complies
with Compact Flash TypeII.
Notes on use of the Microdrive
• Be sure to format the Microdrive using this camera when you use it for
the first time.
• The Microdrive is a compact hard disk drive. Since the Microdrive is a
rotating disk, the Microdrive is not strong enough to resist vibration and
shock compared to a “Memory Stick,” which uses flash memory.
Be sure not to transmit vibration or shock to the Microdrive during
playback or shooting.
• Data may be damaged in the following cases:
– Removing the Microdrive while reading or writing data.
– If you store the Microdrive near corrosive material.
• Note that the use of the Microdrive under 5 °C (41 °F) may bring
performance degradation. Operating temperature range when using the
Microdrive: 5 °C to 40 °C (41 °F to 104 °F)
• Note that the camera cannot be used under low atmospheric pressure
(above 3 000 meters above sea-level).
• The Microdrive may be hot just after it has been used. Be careful when
you handle it.
• Do not write on the label.
• Do not remove the label or attach a new label over the label.
• When you carry or store the Microdrive, put it in the case supplied with
it.
• Do not expose the Microdrive to water.
• Do not press on the label strongly.
• Hold the sides of the Microdrive in your hand and do not squeeze the
Microdrive.
31-US
Uninstalling (Deleting) the software
– In the case of Windows 98SE/ Windows Me –
1
Select [Settings] from the [Start] menu and then click [Control
Panel].
The “Control Panel” screen appears.
2
Double-click the “Add/Remove Programs” icon.
The “Add/Remove Programs Properties” dialog box appears.
3
Select the software to be removed (Memory Stick Formatter)
from the list of software programs that can be automatically
removed, and then click [Add/Remove].
The selected software programs are uninstalled.
– In the case of Windows 2000/Windows XP –
After logging on as Administrator, perform the procedure described
below. For how to log on as Administrator, see the manual for the
computer that you are using.
1
Using Windows 2000: Select [Settings] from the [Start] menu
and then click [Control Panel].
Using Windows XP: Click [Control Panel] from the [Start]
menu.
The “Control Panel” screen appears.
32-US
2
Using Windows 2000: Double-click the “Add/Remove
Programs” icon.
Using Windows XP: Double-click the “Add/Remove Programs”
icon.
The “Add/Remove Programs” dialog box appears.
3
4
Click “Change/Remove.”
Select the software to be removed (Memory Stick Formatter)
from the list of “Currently installed programs,” and then click
[Change/Remove] ([Change and Remove] in the case of
Windows XP).
The selected software programs are uninstalled.
33-US
Troubleshooting
Symptom
The Memory Stick icon
(Removable disk) is not
displayed.
The recording media
cannot be accessed from
Explorer or My
Computer.
The access lamp blinks
when a recording media
is inserted.
Cause/Solution
•Not connected correctly.
t Connect correctly. (Page 15)
•In addition to this unit, another device is
connected to the USB jack on the
computer.
t Disconnect other USB devices than
this unit. Also turn off the power and
reboot.
•The driver is not installed.
t Install the driver from the supplied
CD-ROM. (Page 13)
•No recording media inserted.
t Insert a recording media.
•Foreign matter adhering to the
connector section of the recording
media.
t Check whether dust or dirt is
adhering to the connector section of
the recording media.
Remove any foreign matter and
insert the recording media again.
34-US
Specifications
Multi Slot USB Reader/Writer
Interface: USB interface
Baud rate: Max. 480 Mbps
General
Operating voltage
Power consumption
External dimensions
Mass
Operating conditions
DC 5V (supplied via USB cable)
Max. 500 mA (during operation)
Max. 0.5 mA (PC suspend time)
Approx. 85 mm × 16 mm × 65 mm
(3 3/8 × 21/32 × 2 5/8 in.)
(Width × Height × Depth)
Approx. 39 g (2 oz) (not including “Memory
Stick”)
Temperature 0 °C to 40 °C (32 °F to 104 °F)
(condensation not allowed)
Humidity 20 % to 80 %
(condensation not allowed)
Design and specifications are subject to change without notice.
If you have any questions/comments related to this product, please visit
our Customer Support website at
http://www.sony.net/Products/mssupport/
35-US
LIMITED WARRANTY
Sony Electronics Inc. (in the United States) and Sony of Canada Ltd (in
Canada) (“SONY”) warrants this Product from defects in material and
workmanship for a period of one (1) year from date of original purchase.
SONY will repair or replace the Product with new or refurbished product, at
its option, at no charge during the one (1) year warranty period. For purposes
of this Limited Warranty, “refurbished” means a product or part that has been
returned to its original specifications. To obtain warranty service within the
United States, you must take the Product, or deliver the Product freight
prepaid, in either its original packaging or packaging affording an equal
degree of protection, to any authorized SONY service facility. To obtain
warranty service within Canada, you must take the Product to the authorized
SONY dealer where you purchased the Product, or to a SONY service
facility. Proof of purchase is required in the form of a dated bill of sale or
receipt which evidences that the Product is within the limited warranty period.
BE SURE TO REMOVE ALL SOFTWARE, FILES, OR ANY OTHER DATA
STORED ON YOUR MEDIA PRIOR TO SENDING THIS PRODUCT TO
SONY. SONY IS NOT LIABLE FOR ANY LOSS, DAMAGE OR
CORRUPTION OF THESE ITEMS.
REPAIR OR REPLACEMENT AS PROVIDED UNDER THIS LIMITED
WARRANTY IS THE EXCLUSIVE REMEDY OF THE CONSUMER. SONY
SHALL NOT BE LIABLE FOR ANY INCIDENTAL, INDIRECT OR
CONSEQUENTIAL DAMAGES OR OTHER DAMAGES INCLUDING BUT
NOT LIMITED TO, LOSS OF PROFITS, LOSS OF REVENUE, LOSS OR
CORRUPTION OF DATA, LOSS OF USE OF THE PRODUCT OR ANY
ASSOCIATED EQUIPMENT, DOWNTIME AND USER'S TIME OR FOR
BREACH OF ANY EXPRESS OR IMPLIED WARRANTY OR CONDITION,
BREACH OF CONTRACT, NEGLIGENCE, STRICT LIABILITY OR ANY
OTHER LEGAL THEORY RELATED TO THIS PRODUCT. EXCEPT TO
THE EXTENT PROHIBITED BY APPLICABLE LAW, ANY IMPLIED
WARRANTY/CONDITION OF MERCHANTABILITY OR FITNESS FOR A
PARTICULAR PURPOSE ON THIS PRODUCT IS LIMITED IN DURATION
TO THE DURATION OF THIS WARRANTY. ANY WARRANTY FOR
INTELLECTUAL PROPERTY INFRINGEMENT IS HEREBY DISCLAIMED.
Some states/jurisdictions do not allow the exclusion or limitation of incidental
or consequential damages, or allow limitations on how long an implied
warranty/condition lasts, so the above limitations or exclusions may not apply
to you. This Limited Warranty gives you specific legal rights, and you may
have other rights which vary from state to state, territory or province.
In the United States contact: Sony Direct Response Center,12451 Gateway
Blvd., Fort Myers, FL 33913; www.sony.com/service; or (800) 222-SONY.
In Canada contact: Sony of Canada Ltd. 115 Gordon Baker Road, Toronto,
Ontario M2H 3R6
36-US
Sony Corporation
2-067-390-11 (1) FR
MA-000078-01G
Multi Slot
USB Reader/Writer
Mode d’emploi
MSAC-USM1
Français
Avant d’utiliser cet appareil, veuillez lire attentivement ces explications,
puis conservez-les de manière à pouvoir les consulter.
Pour les clients au Canada
Cet appareil numérique de la classe B est conforme à la norme NMB-003
du Canada.
Avis
Si de l’électricité statique ou de l’électromagnétisme interrompt le
transfert de données, redémarrez l’applocation ou débranchez et
rebranchez le câble USB.
2-FR
Programme©2000-2004 Sony Corporation
Documentation©2004 Sony Corporation
• « Memory Stick », « MagiGate Memory Stick », « Memory Stick PRO »,
« Memory Stick Duo », « MagicGate Memory Stick Duo », « Memory Stick
sont des marques de fabrique de Sony Corporation.
PRO Duo » et
• Microsoft et Windows sont des marques de fabrique ou des marques déposées
de Microsoft Corporation aux États-Unis et/ou dans d’autres pays.
• MMX Pentium est une marque déposée ou une marque de fabrique de Intel
Corporation.
• Adobe, Acrobat, Acrobat Reader sont des marques déposées ou des marques
de fabrique de Adobe Systems, Inc. aux États-Unis et/ou dans d’autres pays.
• Macintosh et Mac OS sont des marques déposées de Apple Computer Inc., aux
États-Unis et/ou dans d’autres pays.
• CompactFlash et CF sont des marques de fabrique de SanDisk.
• Microdrive est une marque de fabrique ou une marque déposée de Hitachi
Global Storage Technologies Netherlands B.V.
• Tous les autres noms de compagnies et noms de produits sont les marques de
fabrique ou les marques déposées de leurs détenteurs respectifs.
Les symboles « ™ » et « ® » ne sont pas mentionnés chaque fois dans la
présente brochure.
3-FR
Table des matières
A propos des « Memory Stick » .......................................................................... 5
Configuration système requise ........................................................................... 7
Vérification des accessoires fournis ................................................................... 8
Applications fournies ........................................................................................... 9
Utilisation du mode d’emploi et aide .............................................................. 10
Installation du logiciel dans votre ordinateur ................................................ 12
Raccordement de l’appareil à l’ordinateur ..................................................... 14
Vérification des connexions .............................................................................. 17
Si le disque amovible (icône du Memory Stick) n’est pas affiché
(Sauf Windows XP) ............................................................................................ 18
Insérez le support d’enregistrement dans l’appareil ..................................... 21
Copie sur l’ordinateur de photos enregistrées sur suppor
d’enregistrement ................................................................................................. 22
Débranchement de l’appareil de l’ordinateur ................................................ 23
Formatage (initialisation) d’un « Memory Stick »
(Pour Windows seulement) .............................................................................. 25
Précautions .......................................................................................................... 27
Remarques sur l’emploi des « Memory Stick » .............................................. 28
Précautions à prendre lors de l’emploi des CF Memory Card
(Microdrive) ........................................................................................................ 30
Désinstallation (Suppression) du logiciel ....................................................... 31
En cas de problème ............................................................................................ 33
Spécifications ....................................................................................................... 34
GARANTIE RESTREINE ................................................................................... 35
4-FR
A propos des « Memory Stick »
Qu’est-ce qu’un « Memory Stick » ?
Le « Memory Stick » est un nouveau support d’enregistrement à circuit
intégré, minuscule et léger, doté d’une capacité de stockage bien
supérieure à celle des disquettes. Ce support peut être utilisé non
seulement pour l’échange de données entre divers produits compatibles
avec les « Memory Stick », mais aussi comme support de stockage
amovible.
Les « Memory Stick » existent en deux tailles, les « Memory Stick » de taille
standard et les « Memory Stick Duo » de plus petite taille. Les « Memory
Stick Duo » peuvent être insérés dans un adaptateur de Memory Stick Duo
et utilisés sur les appareils compatibles avec les « Memory Stick »
standards.
Types de « Memory Stick » pouvant être utilisés
avec cet appareil
* Vous avez le choix entre cinq types de « Memory Stick » pour convenir à
vos besoins.
« Memory Stick PRO »
Ce type de « Memory Stick » ne peut être utilisé qu’avec les produits
compatibles avec « Memory Stick PRO » et intègre une technologie
antipiratage (« MagicGate »). (Vous devez posséder les programmes
d’applications compatibles avec la technologie antipiratage pour pouvoir
utiliser la technologie antipiratage de « Memory Stick PRO » avec cet
appareil.)
« Memory Stick »
Ce type de « Memory Stick » permet d’enregistrer toutes sortes de données
à l’exception de données exigeant la technologie antipiratage
(« MagicGate »).
« Memory Stick Duo » (compatible avec MagicGate/Highspeed data Transfer)
Le « Memory Stick Duo » est un « Memory Stick » disposant de la
technologie antipiratage « MagicGate » et prenant en compte le transfert de
données à grande vitesse. Vous pouvez utiliser cet appareil avec un
dispositif compatible avec un « Memory Stick » et un dispositif compatible
avec un « Memory Stick PRO ». (La vitesse de transfert variera toutefois
selon le dispositif compatible « Memory Stick » que vous utilisez.)
5-FR
« Memory Stick » (à Fonction Memory Select)
Il s’agit d’un « Memory Stick » contenant plus d’une mémoire (128 Mo). Le
sélecteur de mémoire prévu à l’arrière du « Memory Stick » vous permet
de choisir la mémoire la plus appropriée à l’activité envisagée. Notez
cependant que plusieurs mémoires ne peuvent pas être utilisées
simultanément ou en succession.
« MagicGate Memory Stick »
Ce type de « Memory Stick » intègre la technologie antipiratage
(« MagicGate »).
Qu’est-ce que « MagicGate » ?
« MagicGate » est une technologie de protection des droits d’auteur qui
fonctionne avec les « Memory Stick » et les produits compatibles avec les
« Memory Stick » et dotés de ce système. Le message « Do you comply
with « MagicGate »? » sert à authentifier les appareils dotés du système
« MagicGate » (par ex : cet appareil) et le « Memory Stick ». Les données
protégées ne peuvent pas être décryptées sans authentification, car elles ne
peuvent être lues que sur les appareils autorisés.
Les données, musicales ou autres, protégées par des droits d’auteur
peuvent être enregistrées sur les « Memory Stick » compatible avec
MagicGate et lues par cet appareil et tous les appareils compatibles avec le
système « MagicGate ».
Différents types de données peuvent être enregistrés sur un même
« Memory Stick ».
Par exemple, vous pouvez enregistrer des photos sur un « Memory Stick »
compatible avec MagicGate contenant des données musicales.
Utilisation des « Memory Stick » compatible
avec MagicGate
PRemarques
• Toutes les données d’un « Memory Stick » compatible avec MagicGate, y
compris les données musicales, sont effacées par le formatage. Veillez à ne
pas effacer par inadvertance des données importantes. Sony décline toute
responsabilité en cas de perte de données, résultant du formatage.
• La musique enregistrée est destinée à un usage privé seulement. Toute
autre utilisation non autorisée par les détenteurs des droits d’auteur viole
les lois sur le copyright.
• En aucun cas Sony ne peut être tenu pour responsable de l’échec du
téléchargement d’un enregistrement ou de la destruction ou de la
suppression de données musicales, résultant d’un mauvais fonctionnement
de l’appareil ou du « Memory Stick ».
PRemarque
Ce dispositif n’est pas équipé de MagicGate.
6-FR
Configuration système requise
Environnement Windows recommandé
• Système d’exploitation : Microsoft Windows 98 Seconde Edition
(Windows 98SE)/Windows Millennium Edition (Windows Me)/
Windows 2000 Professional (Windows 2000)/Windows XP Home
Edition/XP Professional (Windows XP)
Incompatible avec Microsoft Windows 98.
* Les systèmes d’exploitation mentionnés ci-dessus doivent être installés
en usine sur l’ordinateur.
* Le fonctionnement n’est pas garanti pour les mises à jour avec les
systèmes mentionnés ci-dessus.
• Processeur : MMX Pentium II 400 MHz ou plus rapide (Pentium III 450
MHz ou plus rapide recommandé)
• RAM : au moins 64 Mo
• Espace disponible sur le disque dur : au moins 10 Mo
(Selon la version de Windows utilisée, un plus grand espace peut être
nécessaire sur le disque.)
• Lecteur de CD-ROM
• Prise USB en standard
(Cet appareil supporte le standard USB Hi Speed (busé sur USB 2.0).)
• Affichage : High Color (16 bits) ou plus, 800 × 480 pixels ou plus
(800 × 600 pixels ou plus recommandé)
Environnement Macintosh recommandé
• Système d’exploitation : Mac OS 9.0~9.2.2/X (v10.1~10.3)
* Les systèmes d’exploitation mentionnés ci-dessus doivent être installés
en usine sur l’ordinateur.
* Le fonctionnement n’est pas garanti pour les mises à jour avec les
systèmes mentionnés ci-dessus.
• RAM : au moins 64 Mo
• Disque dur : au moins 10 Mo d’espace libre
• Prise USB en standard
(Cet appareil supporte le standard USB Hi Speed (busé sur USB 2.0).)
PRemarque
Le fonctionnement ne peut pas être garanti pour tous les ordinateurs
conformes à l’environnement recommandé.
7-FR
Vérification des accessoires fournis
• Lecteur/Enregistreur USB de multifentes (1)
• Câble USB spécial 1,0 m (1)
• CD-ROM (MSAC-USM1) (1)
* Ce CD-ROM contient les programmes suivants.
• Pilote du dispositif
• Memory Stick Formatter Ver. 2.2 (Pour Windows seulement)
• Mode d’emploi (Fichier PDF)
La donnée des instructions de fonctionnement pour cet appareil
(Fichier PDF) est MSAC-USM1Manual_FRE.pdf
• Mode d’emploi de l’appareil (1)
8-FR
Applications fournies
Le CD-ROM Windows fourni contient les programmes suivants.
Pilote du périphérique
Pour l’installation du pilote, voir page 12.
Memory Stick Formatter Ver. 2.2 (Pour Windows
seulement)
Ce programme sert à formater (initialiser) les « Memory Stick ». Le
formatage supprime toutes les données enregistrées sur le
« Memory Stick ».
Pour des raisons de compatibilité, utilisez toujours ce logiciel pour
formater les « Memory Stick » utilisés avec cet appareil.
PRemarque
Les données enregistrées sur le « Memory Stick » sont effacées lors du
formatage. Veillez à ne pas effacer par erreur des données importantes.
9-FR
Utilisation du mode d’emploi et aide
Utilisation du mode d’emploi du CD-ROM
Le CD-ROM fourni contient un mode d’emploi détaillé de l’appareil sous
forme de fichier PDF.
Pour le détail sur l’utilisation de cet appareil, voyez ces modes d’emploi.
Pour pouvoir lire les fichiers PDF, Acrobat Reader de Adobe Systems
Incorporated doit être installé sur l’ordinateur.
L’utilisation de Acrobat Reader est décrite plus loin.
Vue de l’écran
Cadre gauche
Cadre droit
• Cadre gauche
Chaque page du mode d’emploi apparaît sous forme de vignette.
Lorsque vous cliquez sur une vignette, la page correspondante s’affiche
dans le « Cadre droit ».
• Cadre droit
Affiche chaque page.
Pour le détail sur l’utilisation de Acrobat Reader, voyez l’aide en ligne de
Adobe Acrobat Reader.
10-FR
Comment utiliser l’aide en ligne (à l’emploi de
Windows)
Application suivante a un manuel en ligne séparé.
• Memory Stick Formatter
Pour le détail sur l’emploi de ce programme, reportez-vous au manuel en
ligne.
Pour utiliser le manuel en ligne, procédez de la façon suivante.
Vue de l’écran
Onglet
Cadre gauche
Cadre droit
• Cadre gauche
Affichage du contenu ou des mots-clés.
• Cadre droit
Affichage des explications. Cliquez sur le texte souligné pour afficher les
explications afférentes.
11-FR
Installation du logiciel dans votre
ordinateur
Utilisez la procédure suivante pour installer le pilote de périphérique.
Ce CD-ROM contient les programmes suivants.
•Pilote du dispositif
•Memory Stick Formatter Ver. 2.2 (Pour Windows seulement)
PRemarque (Pour la première fois)
Si vous utilisez Windows XP, effectuez l’installation après avoir relié cet
appareil à votre ordinateur.
Si vous utilisez un autre système d’exploitation, n’oubliez par d’installer
le pilote de périphérique avant de relier cet appareil à l’ordinateur.
Si vous utilisez Mac OS 10.2.4 ou ure version supérieure, raccordez cet
appareil à votre ordinateur sans installer le pilote de périphérique.
1
Allumez votre ordinateur.
Fermez toutes les applications ouvertes.
Pour installer le pilote de périphérique sous Windows 2000 ou
Windows XP, vous devez ouvrir la session comme Administrateur.
12-FR
2
Insérez le CD-ROM (MSAC-USM1) dans le lecteur de CD-ROM
de votre ordinateur.
Cliquez sur le pilote de périphérique correspondant au système
d’exploitation que vous utilisez.
3
4
Effectuez l’installation en suivant les instructions apparaissant
sur l’écran.
Pour les utilisateurs de Windows : Si vous devez formater un
Memory Stick, cliquez sur le dossier « Memory Stick
Formatter » puis sur l’icône « Set up .EXE » pour lancer
l’installation.
* Vous ne pouvez pas utiliser le « Memory Stick Formatter » sur un
Macintosh.
Cliquez sur les boutons en suivant les instructions qui apparaissent à
l’écran.
5
Redémarrez votre ordinateur.
13-FR
Raccordement de l’appareil à
l’ordinateur
Reliez la prise USB de cet appareil à la prise USB de l’ordinateur à l’aide
du câble USB spécial fourni.
Prise USB
Prise USB Connecteur
A
Voyant
d’accès
Miniconnecteur
B
A propos du câble spécial USB
Connecteur A : Ce connecteur se branche sur la prise USB de l’ordinateur.
N’importe quelle prise peut être utilisée si l’ordinateur est
doté de plusieurs prises USB.
Miniconnecteur B : Ce connecteur se branche sur la prise USB de
l’appareil.
14-FR
1
2
Insérez à fond le miniconnecteur B du câble USB dans la prise
USB de l’appareil.
Branchez le connecteur A du câble USB dans le port USB de
l’ordinateur.
• « Found New Hardware Wizard » est lancé et l’installation du pilote
commence. Suivant le système d’exploitation utilisé, l’installation du
pilote peut se faire automatiquement.
• L’emplacement de la prise USB sur l’ordinateur dépend du modèle.
• Si vous utilisez un ordinateur équipé de plusieurs prises USB, ne
raccordez pas d’autres appareils, à l’exception d’une souris ordinaire
et du clavier, aux prises USB en même temps que cet appareil. Si
vous utilisez un ordinateur de bureau, utilisez la prise USB de
l’ordinateur proprement dit. Pour le détail, voyez « Raccordements
préconisés » à la page 16.
15-FR
Raccordements préconisés
Le fonctionnement de l’appareil est garanti si les connexions suivantes sont
effectuées.
Lorsque cet appareil est raccordé directement à la prise USB de
l’ordinateur et que rien d’autre n’est raccordé à l’autre prise USB de
l’ordinateur.
Ordinateur équipé en standard d’une souris et d’un clavier USB, le clavier
USB étant raccordé à une prise USB et cet appareil à l’autre prise USB de
l’ordinateur au moyen du câble USB fourni.
PRemarques
• Si deux ou plus d’appareils USB, à l'exception de l’équipement standard, sont
raccordés à un ordinateur et que tous deux sont utilisés simultanément, le
fonctionnement ne sera pas garanti selon les appareils USB utilisés.
• Veillez à bien raccorder le câble USB fourni directement à la prise USB de
l’ordinateur. L’appareil ne fonctionnera pas si le câble est raccordé à
l’ordinateur par le clavier ou un concentrateur USB, etc.
• Le bon fonctionnement de l’appareil n’est pas garanti dans tous les
environnements d’ordinateurs recommandés.
• Seul le câble USB spécifié (fourni) doit être utilisé pour le raccordement de
l’appareil à l’ordinateur.
16-FR
Vérification des connexions
L’écran peut être différent suivant le système d’exploitation et les réglages
utilisés.
1
2
Ouvrez le dossier « My Computer ».
Assurez-vous que les nouvelles icônes de Memory Stick (F:),
Memory Stick Duo (G:) et CF (H:) apparaissent bien.
PRemarque
La désignation du lecteur (F:) peut être différente sur certains
ordinateurs.
La connexion est terminée lorsque l’icône du Memory Stick (F:), Memory
Stick Duo (G:) et CF (H:) apparaissent.
Il faut attendre un certain temps avant que les icônes de Memory Stick
(F:), Memory Stick Duo (G:) et CF (H:) apparaissent.
PRemarques
• Si vous utilisez Windows 98SE, les lecteurs de « Memory Stick (F:) » et
« Memory Stick Duo (G:) » sont identiques. Si vous utilisez un
Macintosh, toutes les icônes sont identiques.
• Si l’icône Memory Stick n’apparaît pas, c’est que le pilote n’est pas
installé correctement. Effectuez les démarches décrites ci-après. Si vous
utilisez un autre « Removable Disk (Disque amovible) », l’icône
« Removable Disk (Disque amovible) » appara.
17-FR
Si le disque amovible (icône du
Memory Stick) n’est pas affiché (Sauf
Windows XP)
Un autre pilote de périphérique est déjà installé. Dans ce cas, raccordez
l’appareil à l’ordinateur et effectuez les opérations suivantes.
– Lorsque vous utilisez Windows 2000 –
Connectez-vous en tant qu’Administrateur ou en utilisant un pseudonyme
ayant un privilège administratif.
1
Double-cliquez sur l’icône « System » du « Control Panel ».
L’écran « System Properties » (Propriétés système) apparaît.
2
Assurez-vous que le pilote du dispositif a déjà été installé.
1 Cliquez sur l’onglet [Hardware] (Matériel) sur l’écran « System
Properties » (Propriétés système).
2 Cliquez sur [Device Manager] (Gestionnaire de périphériques).
L’écran « Device Manager » (Gestionnaire de périphériques)
apparaît.
3 Cliquez sur [View] (Affichage).
4 Cliquez sur [View devices by type] (Afficher les périphériques par
type).
5 Double-cliquez sur [Universal Serial Bus Controller] (Contrôleur de
Bus Série Universel).
6 Vérifiez si [? MSAC-USM1] précédé du point d’interrogation « ? »
apparaît.
18-FR
3
Supprimez le pilote s’il est installé.
Si vous procédez comme indiqué à l’étape 2 et si [? MSAC-USM1] est
indiqué dans « Universal Serial Bus Controller » (Contrôleur de Bus
Série Universel) dans « View devices by type » (Afficher les
périphériques par type), c’est qu’un autre pilote de périphérique a déjà
été installé.
Procédez de la façon suivante pour supprimer le pilote.
Ne pas supprimer d’autres pilotes que [? MSAC-USM1].
1 Cliquez à droite sur [? MSAC-USM1].
2 Cliquez sur [Remove] (Supprimer). L’écran « Confirm Device
Removal » (Confirmer le retrait du périphérique) apparaît.
3 Cliquez sur le bouton [OK]. Le périphérique est supprimé.
4 Redémarrez l’ordinateur après avoir débranché l’appareil de
l’ordinateur.
Installez de nouveau le pilote de périphérique sur l’ordinateur comme
indiqué à la page 12 en commençant par l’étape 1.
PRemarques
Si vous supprimez d’autres périphériques que [? MSAC-USM1],
l’ordinateur risque de ne plus fonctionner correctement.
19-FR
– Si vous utilisez Windows 98SE/Windows Me –
1
Double-cliquez sur l’icône « System » du « Control Panel ».
L’écran « System Properties » (Propriétés système) apparaît.
2
Vérifiez si le pilote du périphérique a bien été installé.
1 Cliquez sur l’onglet [Device Manager] (Gestionnaire de
périphériques) sur l’écran « System Properties » (Propriétés
système).
2 Double-cliquez sur [Universal Serial Bus Controller] (Contrôleur de
Bus Série Universel).
3 Vérifiez si vous voyez [? MSAC-USM1] précédé du point
d’interrogation.
3
Supprimez le pilote s’il est installé.
Si vous effectuez les opérations de l’étape 2 et si [? MSAC-USM1]
apparaît dans « Universal Serial Bus Controller » (Contrôleur de Bus
Série Universel), c’est qu’un autre pilote le périphérique est déjà
installé.
Procédez de la façon suivante pour supprimer ce pilote.
Ne pas supprimer d’autres pilotes que le [? MSAC-USM1].
1 Cliquez sur [? MSAC-USM1].
2 Cliquez sur [Remove] (Supprimer). L’écran « Confirm Device
Removal » (Retirer le périphérique) apparaît.
3 Cliquez sur le bouton [OK]. Le pilote est supprimé.
4 Redémarrez votre ordinateur après avoir débranché l’appareil de
l’ordinateur.
Installez de nouveau pilote du périphérique en procédant comme
indiqué à partir de l’étape 1 de la page 12.
PRemarque
Si vous supprimez d’autres périphériques que [? MSAC-USM1], votre
ordinateur risque de ne plus fonctionner correctement.
20-FR
Insérez le support d’enregistrement
dans l’appareil
PRemarque
Insérez le support d’enregistrement dans la bonne fente. Si vous l’insérez
dans la mauvaise fente l’appareil peut être endommagé.
Insérez le support d’enregistrement de sorte que son extrémité ne ressorte
pas de l’appareil.
PRemarques
• Le voyant d’accès s’allume pendant l’accès au support d’enregistrement. Ne
jamais retirer le support d’enregistrement, éteindre l’ordinateur ni
débrancher le câble USB, etc. lorsque le voyant d’accès est allumé. Les
données du support d’enregistrement peuvent être détruites.
• Pour débrancher le câble USB, ne tirez pas sur le câble mais sur son
conneteur.
21-FR
Copie sur l’ordinateur de photos
enregistrées sur suppor
d’enregistrement
Lorsque le câble USB utilisé pour relier l’appareil à l’ordinateur est
débranché, l’ordinateur ne reconnaît plus l’appareil et il est impossible de
voir sur l’ordinateur les photos enregistrées sur le « Removable Disk
(Disque amovible) ». Si vous copiez les photos enregistrées sur suppor
d’enregistrement sur l’ordinateur, vous pourrez les voir quand vous
voudrez et éventuellement les retoucher, sans avoir à raccorder l’appareil à
l’ordinateur.
Lorsque le câble USB est débranché, les icônes de Memory stick (F:),
Memroy Stick Duo (G:) et CF (H:) disparaît.
En ce qui concerne la méthode de copie des données d’image sur votre
ordinateur, consultez le mode d’emploi de celui-ci.
22-FR
Débranchement de l’appareil de
l’ordinateur
– Utilisateurs de Windows Me/Windows 2000/Windows XP –
Procédez de la façon suivante pour débrancher le câble USB de
l’ordinateur.
• Selon le système d’exploitation utilisé, ils peuvent être légèrement
différents.
• Les opérations suivantes sont inutiles si vous utilisez Windows 98SE.
1
Cliquez sur l’icône « Unplug or Eject Hardware » (Débrancher
ou éjecter le matériel) dans le plateau de tâches dans le coin
inférieur droit de l’écran.
Cliquez sur cette icône.
Un message
apparaît.
Le plateau de tâches est ici.
2
Cliquez sur « Stop MSAC-USM1 - Drivers (F:, G:, H:) » (Arrêter
MSAC-USM1 - Lecteurs (F:, G:, H:).
Cliquez ici.
Stop MSAC-USM1-Drivers (F:, G:, H:)
Un message apparaît un
instant plus tard.
* La désignation du lecteur « (F:) », etc. peut être différente sur certains
ordinateurs.
23-FR
3
[“The 'MSAC-USM1' device can now be safely removed from
the system.”] est affiché.
Dans ces conditions, vous pouvez débrancher l’appareil de
l’ordinateur en toute sécurité.
* Les indications peuvent être différentes suivant le système
d’exploitation utilisé.
PRemarques
• Si vous désirez simplement retirer le support d’enregistrement de cet
appareil, les opérations ci-dessus ne sont pas nécessaires.
• Ne retirez pas le support d’enregistrement de cet appareil pendant que le
voyant d’accès clignote, car les données du support d’enregistrement
pourraient être endommagées.
• Si vous effectuez cette opération, l’appareil n’est pas reconnu par votre
ordinateur. Pour qu’il soit à nouveau reconnu, débranchez le câble USB au
niveau de votre ordinateur, puis branchez à nouveau ce câble USB.
24-FR
Formatage (initialisation) d’un
« Memory Stick » (Pour Windows
seulement)
Le formatage supprime toutes les données enregistrées sur le « Memory
Stick ». Pour formater un « Memory Stick » sur cet appareil, il faut utiliser
le programme fourni « Memory Stick Formatter » et effectuer les
opérations suivantes. Les « Memory Stick » formatés sur un ordinateur
sans le programme « Memory Stick Formatter » ne fonctionneront
probablement pas sur un Handycam ou un appareil compatible avec les
« Memory Stick ».
Pour le détail sur l’utilisation du « Memory Stick Formatter », reportezvous au mode d’emploi fourni avec le logiciel « Memory Stick Formatter ».
Vous pouvez télécharger le logiciel « Memory Stick Formatter » en
accédant au site web suivant.
http://www.sony.net/Products/mssupport/
PRemarque
Lorsque vous formatez un « Memory Stick », toutes les données déjà
enregistrées sont effacées. Veillez à ne pas effacer des données importantes
par inadvertance.
1
2
3
Insérez un « Memory Stick » dans cet appareil.
Lancez « Memory Stick Formatter ».
Cliquez sur [Start formatting]. Le formatage commence.
PRemarque
Ne débranchez jamais cet appareil de l’ordinateur pendant le formatage du
« Memory Stick ». Les données dans le « Memory Stick » pourraient être
altérées.
25-FR
Données de protection d’écriture
Les « Memory Stick » ont un taquet de protection qui empêchent
l’effacement accidentel des données. (Certains « Memory Stick »
(« Memory Stick Duo ») ne possèdent pas de taquet de protection. Si vous
utilisez un « Memory Stick » (« Memory Stick Duo ») non équipé de ce
taquet, prenez soin de ne pas y écrire de nouvelles données ou d’en effacer
par erreur.) La position du taquet, gauche ou droite, peut être changée
pour autoriser ou interdire l’enregistrement de données du « Memory
Stick ».
• Position d’autorisation
Des données peuvent être enregistrées.
• Position de protection
Lorsque le taquet est à droite, aucune donnée ne peut être enregistrée sur
le « Memory Stick », mais les données existantes peuvent être lues.
Face arrière du « Memory Stick »
LOCK
Position
d’autorisation
LOCK
Position de
protection
LOCK
Vitesse d’écriture et de lecture des données
La vitesse d’écriture et de lecture des données dépend du
« Memory Stick » et des produits utilisés.
26-FR
Précautions
• Ce dispositif n’est pas équipé de MagicGate.
• Vous pouvez utiliser un « Memory Stick », « Memory Stick Duo » ou CF
Memory Card (Microdrive) avec cet appareil. Dans ce mode d’emploi, les
« Memory Stick », « Memory Stick Duo » et CF Memory Card
(Microdrive) sont désignés par le terme « Supports d’enregistrement ».
• Si le coffret est sale, nettoyez-le avec un tissu doux. N’utilisez jamais de
benzine, alcool, diluant ni aucun autre solvant. Ces produits peuvent
déformer l’appareil ou l’endommager.
• Reportez-vous au contenu du CD-ROM fourni où vous trouverez des
informations de fonctionnement détaillées (fichier PDF).
Prenez soin de lire ce fichier avec d’utiliser l’appareil.
• Le voyant d’accès s’allume pendant l’accès au support d’enregistrement.
Ne jamais retirer le support d’enregistrement, éteindre l’ordinateur ni
débrancher le câble USB, etc. lorsque le voyant d’accès est allumé. Les
données du support d’enregistrement peuvent être détruites.
• Pour débrancher le câble USB, ne tirez pas sur le câble mais sur son
conneteur.
27-FR
Remarques sur l’emploi des « Memory
Stick »
A
B
Comment coller les
étiquettes
C
• Il est impossible d’enregistrer, d’éditer ou de supprimer des données
lorsque le taquet de protection est en position « LOCK ». B
• Utiliser un objet pointu pour changer la position du taquet sur le
« Memory Stick Duo ». (Certains « Memory Stick » (« Memory Stick
Duo ») ne sont pas équipés d’un taquet de protection.)
• Les données peuvent être détruites dans les cas suivants :
– Le « Memory Stick » est retiré de l’appareil ou l’appareil est éteint
quand le témoin d’accès est éclairé (des données sont lues ou
enregistrées).
– Le « Memory Stick » est utilisé près d’objets émettant de l’électricité
statique ou des interférences.
• Toujours faire des copies de données importantes. Sony n’assume aucune
responsabilité en cas de dégâts des données.
Nous déclinons toute responsabilité en cas de perte ou de dégâts des
données, découlant d'une utilisation de cet appareil.
• Les données protégées par « MagicGate » ne peuvent être utilisées
qu’avec un « Memory Stick » compatible avec MagicGate.
• Ne coller que les étiquettes spécialement fournies avec les « Memory
Stick ». C
• Coller les étiquettes aux endroits prévus à cet effet. Les étiquettes ne
doivent pas dépasser des bords du « Memory Stick ».
• Ne pas écrire en appuyant sur l’étiquette d’un « Memory Stick Duo ».
• Les « Memory Stick » doivent toujours être rangés dans le boîtier fourni
lorsqu’ils ne sont pas utilisés.
• Ne pas toucher le connecteur avec les doigts ou un objet métallique. A
• Ne pas courber, laisser tomber ni soumettre les « Memory Stick » à des
chocs violents.
28-FR
• Ne pas essayer d’ouvrir ou de modifier les « Memory Stick ».
• Ne pas mouiller les « Memory Stick ».
• Aucune compensation ne pourra vous être accordée en cas de panne,
d’erreur de « Memory Stick » ou d’autres problèmes apparaissant lors de
l’enregistrement ou de la lecture.
• Pour éviter de perdre des données en réenregistrant un « Memory Stick »
par erreur, mettez le taquet de protection du « Memory Stick » en
position de verrouillage « LOCK ».
• Evitez de ranger les « Memory Stick » aux endroits suivants.
– A un endroit exposé à de hautes températures ou dans une voiture
garée à un endroit exposé à une chaleur très intense.
– A un endroit exposé au soleil.
– Endroit très humide ou endroit où des substances corrosives sont
présentes.
29-FR
Précautions à prendre lors de l’emploi
des CF Memory Card (Microdrive)
Un Microdrive est un lecteur de disque léger et compact, conforme au
standard Compact Flash TypeII.
Remarques sur l’emploi du Microdrive
• N’oubliez pas de formater le Microdrive sur l’appareil photo la première
fois que vous l’utilisez.
• Le Microdrive est un lecteur de disque compact. Comme le disque du
Microdrive tourne, il ne résiste pas aux vibrations et chocs comme les
« Memory Stick » qui utilisent une mémoire flash.
Veillez à ne pas transmettre de vibrations ou chocs au Microdrive
pendant la lecture ou la prise de vue.
• Les données peuvent être endommagées dans les situations suivantes :
– Vous retirez le Microdrive pendant la lecture ou l’écriture de données.
– Vous avez rangé le Microdrive près d’une matière corrosive.
• Les performances du Microdrive en dessous 5 °C peuvent être
inférieures. La plage de températures de fonctionnement du Microdrive
va de 5 °C à 40 °C.
• Notez que l’appareil photo ne peut pas être utilisé si la pression
atmosphérique est trop basse (à partir de 3000 mètres d’altitude audessus du niveau de la mer).
• Le Microdrive peut devenir chaud lorsqu’il est utilisé. Faites attention
lorsque vous le touchez.
• N’écrivez pas sur l’étiquette.
• Ne retirez pas l’étiquette et n’attachez pas de nouvelle étiquette dessus.
• Rangez le Microdrive dans son boîtier lorsque vous ne l’utilisez pas.
• Ne mouillez pas le Microdrive.
• N’appuyez pas trop fort sur l’étiquette.
• Tenez le Microdrive par ses côtés sans exercer de pression.
30-FR
Désinstallation (Suppression) du
logiciel
– Utilisateurs de Windows 98SE/Windows Me –
1
Sélectionnez [Settings] (Paramètres) dans le menu [Start]
(Démarrer) et cliquez sur [Control Panel] (Panneau de
configuration).
L’écran du « Control Panel » (panneau de configuration) apparaît.
2
Double-cliquez sur l’icône « Add/Remove Programs » (Ajout/
Suppression de programmes).
La boîte de dialogue « Add/Remove Program Properties » (Propriétés
de l’ajout/suppression de programmes) apparaît.
3
Sélectionnez le logiciel qui doit être supprimé (Memory Stick
Formatter) dans la liste de programmes pouvant être
automatiquement supprimés et cliquez sur [Add/Remove]
(Ajouter/Supprimer).
Le programme sélectionné est désinstallé.
– Utilisateurs de Windows 2000/Windows XP –
Après vous être connecté comme Administrateur, effectuez les opérations
décrites ci-dessous. Pour la connexion comme Administrateur, reportezvous au mode d’emploi de l’ordinateur utilisé.
1
Windows 2000 : Sélectionnez [Settings] (Paramètres) dans le
menu [Start] (Démarrer) et cliquez sur [Control Panel]
(Panneau de configuration).
Windows XP : Cliquez sur [Control Panel] (Panneau de
configuration) à partir du menu [Start] (Démarrer).
L’écran du « Control Panel » (panneau de configuration) apparaît.
31-FR
2
Windows 2000 : Double-cliquez sur l’icône « Add/Remove
Programs » (Ajout/Suppression de programmes).
Windows XP : Double-cliquez sur l’icône « Add/Remove
Programs » (Ajout/Suppression de programmes).
La boîte de dialogue « Add/Remove Programs » apparaît.
3
4
Cliquez sur « Change/Remove » (Changer/Supprimer).
Sélectionnez le logiciel qui doit être supprimé (Memory Stick
Formatter) dans la liste « Currently installed programs »
(Programmes installés) et cliquez sur [Change/Remove]
(Changer/Supprimer) ([Change and Remove] (Changer et
supprimer) dans le cas de Windows XP).
Le programme sélectionné est désinstallé.
32-FR
En cas de problème
Symptôme
L’icône de Memory Stick
(Disque amovible)
n’apparaît pas.
Impossible d’accéder au
support d’enregistrement
depuis l’explorateur ou le
poste de travail.
Cause/Solution
•L’appareil est mal raccordé.
t Raccordez-le correctement. (Page 14)
•Un autre périphérique est raccordé à la
prise USB de l’ordinateur.
t Débranchez l’autre périphérique,
éteignez l’ordinateur et remettez-le
en marche.
•Le pilote n’est pas installé.
t Installez le pilote en utilisant le
CD-ROM fourni. (Page 12)
•Aucun support d’enregistrement inséré.
t Insérez un support d’enregistrement.
Le témoin d’accès clignote •Des matières adhèrent au connecteur du
support d’enregistrement.
lorsqu’un support
t Vérifiez si le connecteur n’est pas sale
d’enregistrement est
ou poussiéreux.
inséré.
Enlevez ces matières et insérez de
nouveau le support
d’enregistrement.
33-FR
Spécifications
Lecteur/Enregistreur USB de multifentes
Interface : Interface USB
Vitesse en bauds : Max. 480 Mbps
Données générales
Tension de fonctionnement :
Consommation :
CC 5V (fournis par le câble USB)
Max. 500 mA (en fonctionnement)
Max. 0,5 mA (en veille)
Dimensions externes :
Approx. 85 mm × 16 mm × 65 mm
(3 3/8 × 21/32 × 2 5/8 pouces)
(largeur × hauteur × profondeur)
Poids
Approx. 39 g (2 on.) (sans « Memory
Stick »)
Conditions de fonctionnement : Température 0 °C à 40 °C (32 °F à 104 °F)
(condensation non permise)
Humidité 20 % à 80 %
(condensation non permise)
La conception et les spécifications peuvent être modifiées sans avis
préalable.
Pour toute question ou commentaire à propos de cet appareil, consultez
notre site web Service Clientèle
http://www.sony.net/Products/mssupport/
34-FR
GARANTIE RESTREINE
Sony Electronics Inc. (aux États-Unis) et Sony du Canada ltée (au Canada)
(SONY) garantissent ce produit contre les pièces défectueuses et les vices de
fabrication pour une période de un (1) an à compter de la date d’achat initiale.
SONY réparera ou remplacera le produit avec un produit neuf ou remis à neuf, à
son gré, sans frais pendant la période de garantie de un (1) an. Aux fins de la
présente garantie limitée, « un produit remis à neuf » signifie une pièce ou un
produit doté des spécifications de la pièce ou du produit original. Pour obtenir un
service de garantie aux États-Unis, vous devez apporter le produit, ou expédier
celui-ci, fret payé d’avance, dans son emballage original ou dans un emballage
assurant un degré de protection égal à un prestataire de service SONY autorisé.
Pour obtenir un service de garantie au Canada, vous devez apporter le produit à
un concessionnaire Sony autorisé où vous avez acheté le produit, ou à un
prestataire de service SONY. Une preuve d’achat sous forme d’une facture de
vente ou d’un reçu prouvant que le produit est dans la période de garantie
limitée est requise.
ASSUREZ-VOUS D’ENLEVER TOUT LOGICIEL, FICHIER OU TOUTE AUTRE
DONNÉE STOCKÉE SUR VOTRE SUPPORT AVANT D’ENVOYER CE
PRODUIT À SONY. SONY N’EST RESPONSABLE D’AUCUNE PERTE,
ENDOMMAGEMENT OU CORRUPTION DE CES ARTICLES.
LE RECOURS EXCLUSIF DU CONSOMMATEUR EST LA RÉPARATION OU
LE REMPLACEMENT DES PIÈCES OU DU MATÉRIEL DÉFECTEUX AUX
TERMES DE LA PRÉSENTE GARANTIE LIMITÉE. SONY N’EST
RESPONSABLE D’AUCUN DOMMAGE ACCESSOIRE, INDIRECT OU
CONSÉCUTIF, NI DE TOUT AUTRE DOMMAGE, Y COMPRIS, NOTAMMENT,
LA PERTE DE PROFITS, LA PERTE DE REVENUS, LA PERTE OU LA
CORRUPTION DE DONNÉES, LA PERTE D’USAGE DU PRODUIT OU DE
TOUT ÉQUIPEMENT CONNEXE, LE TEMPS D’ARRÊT ET LE TEMPS DE
L’ACHETEUR OU DE TOUTE VIOLATION D’UNE GARANTIE OU D’UNE
CONDITION EXPRESSE OU IMPLICITE, DE LA VIOLATION D’UN CONTRAT,
DE LA NÉGLIGENCE, DE LA RESPONSABILITÉ LÉGALE OU DE TOUTE
AUTRE THÉORIE JURIDIQUE À L’ÉGARD DE CE PRODUIT. SAUF DANS LA
MESURE OÙ ELLE EST INTERDITE PAR LES LOIS APPLICABLES, TOUTE
GARANTIE IMPLICITE DE QUALITÉ MARCHANDE OU D’ADAPTABILITÉ À
UN USAGE PARTICULIER QUANT À CE PRODUIT EST LIMITÉE À LA
DURÉE DE LA PRÉSENTE GARANTIE. TOUTE GARANTIE CONTRE LES
VIOLATIONS DES DROITS DE PROPRIÉTÉ INTELLECTUELLE EST EN LA
PRÉSENTE DÉCLINÉE. Certains États ou territoires ne permettent pas
l’exclusion ou la limitation des dommages accessoires ou consécutifs ni ne
permettent des limitations de la durée de la garantie implicite, de sorte que les
limitations ou les exclusions précitées peuvent ne pas s’appliquer à vous. La
présente garantie limitée vous donne des droits légaux spécifiques et vous
pouvez avoir d’autres droits qui peuvent varier d’un état, d’un territoire ou d’une
province à l’autre.
Contact aux États-Unis : Sony Direct Response Center, 12451 Gateway Blvd.,
Fort Myers, FL 33913. www.sony.com/service ; ou (800) 222-SONY
Contact au Canada : Sony du Canada Ltée, 115 Gordon Baker Road, Toronto
(Ontario) M2H 3R6.
35-FR
Sony Corporation
2-067-390-11 (1) ES
MA-000078-01G
Multi Slot
USB Reader/Writer
Manual de instrucciones
MSAC-USM1
Español
Antes de utilizar la unidad, lea detenidamente este manual de
instrucciones y consérvelo para futuras referencias.
Aviso
Si la electricidad estática o el electromagnetismo causa la interrupción de la
transferencia de datos (fallo), reinicie la aplicación o desconecte y vuelva a
conectar el cable USB.
2-ES
Program©2000-2004 Sony Corporation
Documentation©2004 Sony Corporation
• “Memory Stick”, “MagicGate Memory Stick”, “Memory Stick PRO”, “Memory
Stick Duo”, “MagicGate Memory Stick Duo”, “Memory Stick PRO Duo” y
son marcas comerciales de Sony Corporation.
• Microsoft y Windows son marcas comerciales o registradas de Microsoft
Corporation en Estados Unidos y/u otros países.
• MMX Pentium es marca comercial o registrada de Intel Corporation.
• Adobe, Acrobat, y Acrobat Reader son marcas comerciales o registradas de
Adobe Systems, Inc. en Estados Unidos y/u otros países.
• Macintosh y Mac OS son marcas registradas de Apple Computer, Inc. en
Estados Unidos y/u otros países.
• CompactFlash y CF son marcas domerciales de SanDisk.
• Microdirve es marca comercial o registrada de Hitachi Global Storage
Technologies Netherlands B.V.
• Toadas las demás marcas comerciales o registradas pertenecen a sus
respectivos propietarios.
Además, en este manual no se mencionan “™” ni “®”.
3-ES
Índice
Acerca del “Memory Stick” ................................................................................. 5
Requisitos del sistema .......................................................................................... 7
Comprobación de los accesorios suministrados .............................................. 8
Aplicaciones suministradas ................................................................................ 9
Utilización del manual de instrucciones y la ayuda ...................................... 10
Instalación del software en su PC .................................................................... 12
Conexión de esta unidad a su PC ..................................................................... 14
Confirmación de las conexiones ....................................................................... 17
Cuando no se indique el disco extraíble (icono de Memory Stick)
(Excepto Windows XP) ...................................................................................... 18
Inserción del medio de grabación en la unidad ............................................. 21
Copie de los datos de imágenes almacenados en un medio de grabación
en su PC ............................................................................................................... 22
Desconexión de la unidad de su PC ................................................................ 23
Formateo (inicialización) de un “Memory Stick”
(Para Windows solamente) ............................................................................... 25
Precauciones ........................................................................................................ 27
Precauciones para la utilización de “Memory Stick” .................................... 28
Precauciones para la utilización de la CF Memory Card (Microdrive) ...... 30
Desinstalación (Borrado) del software ............................................................ 31
Solución de problemas ....................................................................................... 33
Especificaciones .................................................................................................. 34
4-ES
Acerca del “Memory Stick”
¿Qué es “Memory Stick”?
“Memory Stick” es una nueva generación de medio de almacenamiento en
circuito integrado, de tamaño ultra pequeño y muy ligero, que posee
mayor capacidad de almacenamiento que los disquetes. Este medio puede
utilizarse no solamente para transferir datos entre productos compatibles
con “Memory Stick”, sino también como medio de almacenamiento
externo extraíble para el almacenamiento de datos.
El “Memory Stick” está disponible en tamaño estándar y en un tamaño
menor que se denomina “Memory Stick Duo”. Cuando se inserte un
“Memory Stick Duo” en un adaptador para Memory Stick Duo, el tamaño
del mismo se convertirá en el de un “Memory Stick” estándar para poder
utilizarse con productos compatibles con el “Memory Stick” de tamaño
estándar.
Tipos de “Memory Stick” que pueden utilizarse
con esta unidad
* Existen cinco tipos de “Memory Stick” disponibles para satisfacer sus
necesidades.
“Memory Stick PRO”
Este tipo de “Memory Stick” solamente podrá utilizarse con productos
compatibles con “Memory Stick PRO”, y los medios se caracterizan por
una tecnología incorporada de protección de derechos de autor
(“MagicGate”). (Usted necesitará programas de aplicación compatibles
con la tecnología de protección de derechos de autor para utilizar dicha
tecnología de “Memory Stick PRO” con esta unidad.)
“Memory Stick”
“Memory Stick” que permite grabar cualquier tipo de datos con la
excepción de los que requieran la tecnología de protección de derechos de
autor (“MagicGate”).
“Memory Stick Duo” (MagicGate/compatible con
transferencia a alta velocidad)
“Memory Stick Duo” es un “Memory Stick” con tecnología de protección
de derechos de autor “MagicGate”, y permite la transferencia de datos a
gran velocidad. Usted podrá utilizar esta unidad con dispositivos
compatibles con “Memory Stick” y “Memory Stick PRO”. (La velocidad
de transferencia variará dependiendo del dispositivo compatible con
“Memory Stick” utilizado.)
5-ES
“Memory Stick” (con función de selección de memoria)
Éste es un “Memory Stick” que contiene más de una memoria (128 MB). El
selector de memoria de la parte posterior del “Memory Stick” le permitirá
seleccionar la memoria más adecuada para el uso que pretenda darle.
Usted no podrá utilizar diferentes memorias al mismo tiempo ni en
sucesión.
“MagicGate Memory Stick”
Éste es un “Memory Stick” que se caracteriza por su tecnología
incorporada de protección de derechos de autor (“MagicGate”)
¿Qué es “MagicGate”?
“MagicGate” es una tecnología de protección de derechos de autor que
funcionará cuando exista tanto en el “Memory Stick” como en el producto en el
que se utilice el medio. Entre los dispositivos equipados con “MagicGate” (esta
unidad, etc.) y el “Memory Stick” se realizará la autentificación “Do you comply
with “MagicGate”? ” (¿Está usted de acuerdo con “MagicGate”?). Después de la
autentificación se realizará el cifrado. Los datos con protección de derechos de
autor no podrán reproducirse en dispositivos que no estén certificados para ello.
La música y otros datos que requieran la protección de derechos de autor
podrán grabar y reproducirse utilizando una combinación de un MagicGate
compatible con “Memory Stick” y un equipo compatible con “MagicGate”,
como esta unidad.
En un solo “Memory Stick” podrán grabarse diferentes tipos de datos. Por
ejemplo, será posible grabar datos de imágenes en la sección vacía restante de
un MagicGate compatible con “Memory Stick” que contenga datos de música.
Utilización de un MagicGate compatible con
“Memory Stick”
PNotas
• El formateo de un MagicGate compatible con “Memory Stick” que contenga
datos hará que se borren todos los datos, incluyendo los de música. Tenga
cuidado de no borrar accidentalmente datos importantes. Sony no se hará
responsable por la pérdida de datos debida al formateo.
• Lo que usted grabe es para disfrute personal solamente. Las leyes sobre
derechos de autor prohíben otras formas de utilización sin el permiso del
propietario de tales derechos de autor.
• Sony no se hará responsable en ningún caso por el contenido de los datos
en caso de impedimento de la descarga de material grabado, o de que los
datos de música se corrompan o borren debido al mal funcionamiento de
esta unidad o del “Memory Stick”.
PNota
Este dispositivo ne está equipado con MagicGate.
6-ES
Requisitos del sistema
Entorno recomendado para Windows
• OS: Microsoft Windows 98 Second Edition (Windows 98SE)/Windows
Millennium Edition (Windows Me)/Windows 2000 Professional
(Windows 2000)/Windows XP Home Edition/XP Professional
(Windows XP)
No compatible con Microsoft Windows 98 Edition
* Los sistemas operativos mencionados arriba deberán estar instalados
en su PC al salir de fábrica.
* La operación no se garantizará para sistemas operativos actualizados
incluso aunque sean los mencionados arriba.
• CPU: Procesador MMX Pentium II de 400 MHz o más rápido
(Se recomienda un procesador Pentium III de 450 MHz o más rápido.)
• RAM: 64 MB o más
• Espacio de disco duro disponible: 10 MB o más
(Es posible que se requiera más espacio de disco dependiendo de la
versión de Windows que esté utilizando.)
• Unidad de disco CD-ROM
• Toma USB como equipo estándar
(Esta unidad soporta la alta velocidad de USB (basada en USB 2.0).)
• Monitor: Color de alta densidad (16 bits) o mejor, 800 × 480 píxeles o más
(Se recomiendan 800 × 600 píxeles o más.)
Entorno recomendado para Macintosh
• OS: Mac OS 9.0~9.2.2/X (v10.1~10.3)
* Los sistemas operativos mencionados arriba deberán estar instalados
en su PC al salir de fábrica.
* La operación no se garantizará para sistemas operativos actualizados
incluso aunque sean los mencionados arriba.
• RAM: 64 MB o más
• Disco duro: Espacio disponible de 10 MB o más
• Toma USB como equipo estándar
(Esta unidad soporta la alta velocidad de USB (basada en USB 2.0).)
PNota
La operación no se garantiza para todos los PC incluso aunque estén de
acuerdo con el entorno mencionado.
7-ES
Comprobación de los accesorios
suministrados
• Lector/escritor USB de múltiples ranuras (1)
• Cable USB especial de 1,0 m (1)
• CD-ROM (MSAC-USM1) (1)
* El CD-ROM contiene los programas de software siguientes:
• Device Driver Software
• Memory Stick Formatter Ver. 2.2 (Para Windows solamente)
• Manual de instrucciones (archivo PDF)
Los datos del manual de instrucciones de esta unidad (archivo PDF)
están en MSAC-USM1Manual_SPA.pdf
• Manual de instrucciones de esta unidad (1)
8-ES
Aplicaciones suministradas
El CD-ROM para Windows suministrado contiene los programas de
software siguientes.
Controlador de dispositivos
Con respecto a cómo instalar el software del controlador, consulte la
página 12.
Memory Stick Formatter Ver. 2.2 (Para Windows solamente)
Éste es un programa de software para formatear (inicializar) “Memory
Stick”. El formateo borrará todos los datos grabados en el “Memory
Stick”. Para mantener la compatibilidad de un “Memory Stick” cuando se
utilice con productos compatibles, utilice siempre este software cuando
formatee el “Memory Stick” en esta unidad.
PNota
El formateo de un “Memory Stick” en el que haya datos grabados, borrará
todos los datos existentes. Tenga cuidado de no borrar erróneamente datos
importantes.
9-ES
Utilización del manual de instrucciones
y la ayuda
Utilización del manual de instrucciones del
CD-ROM
El CD-ROM suministrado contiene un manual de instrucciones detallado
(archivo PDF).
Con respecto a cómo utilizar esta unidad, consulte este manual de instrucciones.
Para ver archivos PDF se requerirá el programa Acrobat Reader de Adobe
Systems.
A continuación se describe cómo utilizar Acrobat Reader.
Vista de la pantalla
Cuadro izquierdo
Cuadro derecho
• Cuadro izquierdo
Cada página del manual de instrucciones aparece como una imagen en
miniatura.
Cuando haga clic en la imagen en miniatura correspondiente a la página
que desee ver, tal página se mostrará en el “Cuadro derecho”.
• Cuadro derecho
Muestra cada página.
Con respecto a cómo utilizar Acrobat Reader, consulte el manual de ayuda
en línea para Adobe Acrobat Reader.
10-ES
Utilización de la ayuda (Cuando use Windows)
La aplicación siguiente se caracteriza por el manual de ayuda.
• Memory Stick Formatter
Con respecto a los detalles sobre cómo utilizar el programa de aplicación,
consulte el manual de ayuda.
A continuación se describe cómo utilizar el manual de ayuda.
Vista de la pantalla
Ficha
Cuadro izquierdo
Cuadro derecho
• Cuadro izquierdo
Aquí se visualiza el índice o las palabras clave.
• Cuadro derecho
Aquí se visualizan las explicaciones. Si hace clic en las partes subrayadas
del texto, se visualizarán las explicaciones relacionadas.
11-ES
Instalación del software en su PC
Utilice el procedimiento siguiente para instalar el controlador del
dispositivo.
El CD-ROM contiene los programas de software siguientes:
• Device Driver Software
• Memory Stick Formatter Ver. 2.2 (Para Windows solamente)
PNota (Por primera vez)
Cuando utilice Windows XP, realice la instalación antes de conectar esta
unidad a su PC.
Cuando utilice otro sistema operativo, cerciórese de instalar el
controlador de dispositivos antes de conectar esta unidad a su PC.
Cuando utilice Mac OS 10.2.4 o posterior, conecte esta unidad a su PC sin
instalar el controlador de dispositivos.
1
Conecte la alimentación de su PC.
Cierre todas las aplicaciones que estén ejecutándose.
Para instalar el controlador de dispositivos cuando utilice Windows
2000 o Windows XP, tendrá que iniciar la sesión con derechos de
Administrator.
12-ES
2
Inserte el CD-ROM (MSAC-USM1) en la unidad de discos CDROM de su PC.
Haga clic en el controlador de dispositivos correspondiente al sistema
operativo que esté utilizando.
3
4
Complete la instalación de acuerdo con las instrucciones de la
pantalla.
Para los usuarios de Windows, si necesita Memory Stick
Formatter, haga clic en la carpeta “Memory Stick Formatter” y
después en el icono “Set up .EXE” para iniciar la instalación.
* Usted no podrá utilizar “Memory Stick Formatter” en un Macintosh.
Haga clic en los botones de acuerdo con las instrucciones de la
pantalla.
5
Reinicie su PC.
13-ES
Conexión de esta unidad a su PC
Conecte la toma USB de esta unidad a la toma USB de su PC utilizando el
cable USB especial suministrado.
Toma USB
Conector A
Toma USB Lámpara
de acceso
Conector
mini B
Acerca del cable USB especial
Conector A: Enchúfelo en la toma USB de su PC. Si su PC posee
múltiples tomas USB, podrá utilizar cualquiera de ellas.
Conector mini B: Enchúfelo en la toma USB de esta unidad.
14-ES
1
2
Inserte firmemente el conector mini B del cable USB en la
toma USB de esta unidad hasta donde entre.
Enchufe el conector A del cable USB en la toma USB de su PC.
• Se iniciará el asistente “Found New Hardware Wizard” y comenzará
la instalación del controlador. Dependiendo del sistema operativo,
la instalación del controlador puede realizarse automáticamente.
• La ubicación de la toma USB puede diferir de acuerdo con su PC.
• Cuando utilice un PC con múltiples tomas USB, no conecte
simultáneamente otros dispositivos, con la excepción de un ratón y
un teclado estándar, a dichas tomas USB. Cuando utilice un PC de
sobremesa, use la toma USB de la unidad principal de dicho PC.
Con respecto a los detalles, consulte “Formas recomendadas de
conectar esta unidad” en la página 16.
15-ES
Formas recomendadas de conectar esta unidad
La operación de esta unidad ha sido confirmada conectándola a un PC de
cualquiera de las formas siguientes.
Cuando conecte esta unidad a una toma USB de la unidad principal del
PC, y no haya nada conectado a otras tomas USB.
Cuando utilice un PC con teclado USB y un ratón como equipo estándar, el
teclado USB deberá conectarse a una de las tomas USB de la unidad
principal del PC, y esta unidad a otra toma USB de la unidad principal del
PC con el cable USB suministrado.
PNotas
• Cuando haya dos o más dispositivos USB, excepto equipos estándar,
conectados a un PC, y se utilicen simultáneamente, no se garantiza la
operación dependiendo de los dispositivos USB.
• Cerciórese de conectar el cable USB suministrado a una toma USB de la
unidad principal del PC. La operación no se garantizará si conecta el cable a
través del teclado o un distribuidor USB, etc.
• No se garantizan todas las operaciones con todos los PC que funcionen en el
entorno recomendado.
• Cerciórese de utilizar el cable USB especificado (suministrado) para realizar la
conexión a su PC.
16-ES
Confirmación de las conexiones
Dependiendo del tipo de sistema operativo y de los ajustes, las pantallas
pueden tener un aspecto diferente.
1
2
Abra la carpeta “My Computer”.
Compruebe si aparecen los iconos de Memory Stick (F:),
Memory Stick Duo (G:), y CF (H:) nuevamente reconocidos.
PNota
Dependiendo del PC utilizado, la letra de la unidad (F:) puede ser
diferente.
La conexión habrá finalizado cuando se muestren los iconos de Memory
Stick (F:), Memory Stick Duo (G:), y CF (H:).
Es posible que los iconos de Memory Stick (F:), Memory Stick Duo (G:), y
CF (H:) tarden cierto tiempo en aparecer.
PNotas
• Cuando utilice Windows 98SE, los controladores de “Memory Stick (F:)”,
y “Memory Stick Duo (G:)” aparecerán con el mismo icono. Cuando
utilice Macintosh, todos los iconos aparecerán con el mismo icono.
• Si no aparecen los iconos de Memory Stick, el controlador de dispositivos
puede no estar correctamente instalado. Realice los procedimientos
descritos a continuación. Cuando utilice otro “Removable Disk”,
también aparecerá el icono de “Removable Disk”.
17-ES
Cuando no se indique el disco extraíble
(icono de Memory Stick) (Excepto
Windows XP)
Es posible que ya esté instalado un controlador de dispositivos separado.
Conecte esta unidad a su PC, realice el procedimiento siguiente.
– Cuando utilice Windows 2000 –
Inicie la sesión como Administrator o utilizando un código de
identificación (ID) que posea privilegios administrativos.
1
Haga doble clic en el icono “System” de “Control Panel”.
Aparecerá la pantalla de “System Properties”.
2
Compruebe si el controlador de dispositivos ya está instalado.
1 Haga clic en la ficha [Hardware] de la pantalla “System
Properties”.
2 Haga clic en [Device Manager].
Aparecerá la pantalla de “Device Manager”.
3 Haga clic en [View].
4 Haga clic en [View devices by type].
5 Haga doble clic en [Universal Serial Bus Controller].
6 Compruebe si ha aparecido [? MSAC-USM1] precedido por el
signo “?”.
18-ES
3
Borre el controlador si está instalado.
Si utiliza el procedimiento descrito en el paso 2 y ve que [? MSACUSM1] aparece debajo de “Universal Serial Bus Controller” de la
visualización de “View devices by type”, ya estará instalado otro
controlador de dispositivos separado.
Realice lo siguiente para borrar este controlador.
No borre otros dispositivos más que [? MSAC-USM1].
1 Haga clic con el botón derecho del ratón en [? MSAC-USM1].
2 Haga clic en [Remove]. Aparecerá la pantalla de “Confirm Device
Removal”.
3 Haga clic en el botón [OK]. El dispositivo se eliminará.
4 Reinicie su PC después de haber desconectado esta unidad del PC.
Vuelva a instalar el controlador de dispositivos realizando el
procedimiento desde el paso 1 descrito en la página 12.
PNota
Si borra otros dispositivos que no sean [? MSAC-USM1], es posible que
su PC no funcione normalmente.
19-ES
– Cuando utilice Windows 98SE/Windows Me –
1
Haga doble clic en el icono “System” de “Control Panel”.
Aparecerá la pantalla de “System Properties”.
2
Compruebe si el controlador de dispositivos ya está instalado.
1 Haga clic en la ficha [Device Manager] de la pantalla de “System
Properties”.
2 Haga doble clic en [Universal Serial Bus Controller].
3 Compruebe si ha aparecido [? MSAC-USM1] precedido por el signo
“?”.
3
Borre el controlador si está instalado.
Si utiliza el procedimiento descrito en el paso 2 y ve que [? MSACUSM1] aparece debajo de “Universal Serial Bus Controller”, ya estará
instalado otro controlador de dispositivos separado.
Realice lo siguiente para borrar este controlador.
No borre otros dispositivos más que [? MSAC-USM1].
1 Haga clic en [? MSAC-USM1].
2 Haga clic en [Remove]. Aparecerá la pantalla de “Confirm Device
Removal”.
3 Haga clic en el botón [OK]. El dispositivo se eliminará.
4 Reinicie su PC después de haber desconectado esta unidad del PC.
Vuelva a instalar el controlador de dispositivos realizando el
procedimiento desde el paso 1 descrito en la página 12.
PNota
Si borra otros dispositivos que no sean [? MSAC-USM1], es posible que
su PC no funcione normalmente.
20-ES
Inserción del medio de grabación en la
unidad
PNota
Inserte el medio de grabación en la ranura correcta. Si lo insertase en una
ranura errónea, podría dañar la unidad.
Inserte el medio de grabación de forma que su extremo quede a nivel con
la unidad.
PNotas
• La lámpara de acceso permanecerá encendida durante el acceso al medio de
grabación. No extraiga nunca el medio de grabación, desconecte la
alimentación de su PC, ni desenchufe el cable USB, etc., mientras la lámpara
de acceso esté encendida. Los datos del medio de grabación podrían
destruirse.
• Para desenchufar el cable USB, no tire del cable sino del conector.
21-ES
Copie de los datos de imágenes
almacenados en un medio de grabación
en su PC
Si desconecta el cable USB utilizado para conectar esta unidad a su PC, éste
ya no podrá reconocer esta unidad, y los datos almacenados en el disco
extraíble “Removable Disk (medio de grabación)”no podrán verse en su
PC. Si copia los datos de imágenes almacenados en el medio de grabación
en su PC, tales datos podrán ver y procesarse en su PC incluso aunque esta
unidad no esté conectada a su PC.
Cuando desconecte el cable USB, los iconos del Memory Stick (F:),
Memory Stick Duo (G:), y CF (H:) desaparecerán.
Con respecto a cómo copiar datos de imágenes en su PC, consulte el
manual de instrucciones del mismo.
22-ES
Desconexión de la unidad de su PC
– Para los usuarios de Windows Me/Windows 2000/Windows XP –
Antes de desconectar el cable USB de su PC realice el procedimiento
descrito a continuación.
•Las pantallas pueden diferir ligeramente con el tipo de sistema operativo
utilizado.
• Los usuarios de Windows 98SE no necesitarán realizar este
procedimiento.
1
Haga clic en el icono de “Unplug or Eject Hardware” de la
bandeja de tareas de la esquina inferior derecha de la
pantalla.
Haga clic en este icono.
Aparecerá un
mensaje.
Esta sección es la
bandeja de tareas.
2
Haga clic en “Stop MSAC-USM1 - Drivers (F:, G:, H:)”
Haga clic en esta sección.
Stop MSAC-USM1-Drivers (F:, G:, H:)
Después de un momento
aparecerá un mensaje.
* La letra de la unidad “(F:)”, etc. dependerá del PC utilizado.
23-ES
3
Se visualizará [“The 'MSAC-USM1' device can now be safely
removed from the system.”].
En esta condición, podrá extraer de forma segura esta unidad de su
PC.
* Es posible que las indicaciones sean distintas según el sistema operativo
que usted esté utilizando.
PNotas
• Cuando solamente desee extraer el medio de grabación de esta unidad, no
necesitará realizar el procedimiento descrito anteriormente.
• No extraiga el medio de grabación de esta unidad mientras la lámpara de
acceso esté parpadeando. Los datos del medio de grabación podrían
corromperse.
• Cuando realice esta operación, su PC no reconocerá la unidad. Para hacer
que esta unidad sea reconocida de nuevo, desconecte el cable USB de su PC
y vuelva a conectarlo a su PC.
24-ES
Formateo (inicialización) de un
“Memory Stick” (Para Windows
solamente)
Esto borrará todos los datos grabados en el “Memory Stick”. Cuando
formatee en esta unidad, cerciórese de utilizar el programa de software
“Memory Stick Formatter”, siguiendo los procedimientos descritos a
continuación. La operación en una Handycam o en otros productos
compatibles con “Memory Stick” no se garantizará para un “Memory
Stick” formateado con un PC sin utilizar el programa de software
“Memory Stick Formatter”.
Con respecto a los detalles sobre cómo utilizar el programa “Memory Stick
Formatter”, consulte el manual suministrado con el “Memory Stick
Formatter”. Usted podrá descargar el “Memory Stick Formatter” del sitio
de la Web siguiente:
http://www.sony.net/Products/mssupport/
PNota
Si formatea un “Memory Stick” que contenga datos grabados, éstos se
borrarán. Tenga cuidado para no borrar inadvertidamente datos
importantes.
1
2
3
Inserte el “Memory Stick” en esta unidad.
Inicie “Memory Stick Formatter”.
Haga clic en [Start Formatting]. Se iniciará el formateo.
PNota
No extraiga nunca esta unidad del PC mientras esté formateando el “Memory
Stick”. Los datos del “Memory Stick” podrían dañarse.
25-ES
Protección de datos contra escritura
El “Memory Stick” dispone de un mando de protección contra el borrado para
evitar que puedan borrarse por error datos importantes. (Algunos “Memory
Stick” (“Memory Stick Duo”) no disponen de mando de protección contra el
borrado. Si utiliza un “Memory Stick” (“Memory Stick Duo”) no equipado con
mando de protección contra el borrado, tenga cuidado de no escribir datos ni de
borrarlos por error.) Deslizando este mando hacia la derecha o la izquierda se
inhabilitará o habilitará la escritura de datos en el “Memory Stick”.
• Habilitación de escritura
Podrán escribirse datos.
• Inhabilitación de escritura
Cuando deslice el mando hacia la derecha, no podrán escribirse datos en el
“Memory Stick”. Los datos podrán leerse, pero la escritura estará
inhabilitada.
Lado inferior del “Memory Stick”
LOCK
Habilitación
de escritura
LOCK
Inhabilitación
de escritura
LOCK
Velocidad de lectura/escritura de datos
La velocidad de lectura/escritura diferirá con la combinación del “Memory
Stick” y el producto que esté utilizando.
26-ES
Precauciones
• Este dispositivo ne está equipado con MagicGate.
• Con esta unidad podrá utilizar “Memory Stick”, “Memory Stick Duo” o
CF Memory Card (Microdrive). En este manual de instrucciones,
“Memory Stick”, “Memory Stick Duo” y CF Memory Card (Microdrive)
se denominan en común “medio de grabación”.
• Si el cuerpo se ensucia, frótelo con un paño suave. No utilice nunca
bencina, alcohol, diluidor de pintura, ni otros disolventes. Esta unidad
podría deformarse o funcionar mal.
• Con respecto a las instrucciones de operación detalladas consulte el
contenido (archivo PDF) del disco CD-ROM suministrado.
Cerciórese de leerlas antes de utilizar la unidad.
• La lámpara de acceso permanecerá encendida durante el acceso al medio
de grabación. No extraiga nunca el medio de grabación, desconecte la
alimentación de su PC, ni desenchufe el cable USB, etc., mientras la
lámpara de acceso esté encendida. Los datos del medio de grabación
podrían destruirse.
• Para desenchufar el cable USB, no tire del cable sino del conector.
27-ES
Precauciones para la utilización de
“Memory Stick”
A
B
Cómo pegar
etiquetas
C
• Cuando el mando de protección contra el borrado B esté en la posición
“LOCK”, no podrá realizarse la grabación, la edición, ni el borrado de
datos.
• Utilice un objeto puntiagudo para deslizar mando de protección contra el
borrado del “Memory Stick Duo”. (Algunos “Memory Stick” (“Memory
Stick Duo”) no disponen de mando de protección contra el borrado.)
• Los datos pueden corromperse en los casos siguientes.
– Si extrae el “Memory Stick” o desconecta la alimentación de esta
unidad mientras la lámpara de acceso esté encendida (mientras estén
leyendo/escribiéndose datos)
– Cuando utilice el “Memory Stick” en un lugar sometido a electricidad
estática o ruido eléctrico
• Haga siempre una copia de protección de los datos importantes. Sony no
ser hará responsable por la pérdida de los datos.
Sony no se hará responsable por la pérdida ni el daño de los datos, ni por
el daño que pueda sufrir la unidad mientras esté utilizándose.
• Los datos los derechos de autor protegidos mediante “MagicGate”
solamente podrán utilizarse con un MagicGate compatible con “Memory
Stick”.
• No pegue ninguna etiqueta que no sea la especialmente suministrada
para el “Memory Stick”. C
• Cuando pegue etiquetas, hágalo en las posiciones designadas. Las
etiquetas no deberá sobresalir por los bordes del “Memory Stick”.
• No aplique excesiva fuerza cuando escriba en el área de memorando de
un “Memory Stick Duo”.
28-ES
• Para transportar o almacenar un “Memory Stick”, guárdelo en la caja de
almacenamiento suministrada.
• No toque la sección del conector A con los dedos ni con objetos
metálicos.
• No doble, deje caer, ni someta el “Memory Stick” a golpes intensos.
• No intente desarmar ni modificar el “Memory Stick”.
• No humedezca el “Memory Stick” con agua.
• El contenido de datos no se compensará si la grabación o la reproducción
no se realiza debido algún mal funcionamiento como error del “Memory
Stick”.
• Para evitar la grabación o el borrado de datos del “Memory Stick”, ponga
el mando de protección contra escritura de dicho “Memory Stick” en
“LOCK”.
• Evite utilizar y guardar el “Memory Stick” en los lugares siguientes.
– En un automóvil donde la temperatura puede ser muy alta, ni en otros
lugares muy cálidos
– Lugares sometidos a la luz solar directa
– Lugares con gran humedad o donde existan substancias corrosivas.
29-ES
Precauciones para la utilización de la CF
Memory Card (Microdrive)
Microdrive es una unidad de disco duro ligera compatible con Compact
Flash TypeII.
Notas sobre la utilización del Microdrive
• Cerciórese de formatear el Microdrive utilizando esta cámara antes de
utilizarlo por primera vez.
• El Microdrive es una unidad de disco duro compacta. Como el
Microdrive es un disco giratorio, no es suficientemente robusto como
para resistir vibraciones y golpes como un “Memory Stick” que utiliza
memoria flash.
Cerciórese de no transmitir vibraciones ni golpes al Microdrive durante
la reproducción o el fotografiado.
• Los datos podrían dañarse en los casos siguientes:
– Extracción del Microdrive durante la lectura o la escritura de datos.
– Almacenamiento del Microdrive cerca de materiales corrosivos.
• Tenga en cuenta que la utilización del Microdrive a menos de 5 °C podría
degradar el rendimiento. Gama de temperaturas de funcionamiento
durante la utilización del Microdrive: 5 °C a 40 °C
• Tenga en cuenta que la cámara no podrá utilizarse a baja presión
atmosférica (a más de 3 000 metros sobre el nivel del mar).
• El Microdrive puede estar caliente después de haberse utilizado. Tenga
cuidado cuando lo maneje.
• No escriba en la etiqueta.
• No despegue la etiqueta ni pegue una nueva etiqueta sobre ella.
• Para transportar o guardar el Microdrive, colóquelo en la caja
suministrada con el mismo.
• No exponga el Microdrive al agua.
• No presione con fuerza la etiqueta.
• Sujete ambos lados del Microdrive con su mano y no lo retuerza.
30-ES
Desinstalación (Borrado) del software
– Para los usuarios de Windows 98SE/Windows Me –
1
Seleccione [Settings] del menú [Start] y haga clic en [Control
Panel].
Aparecerá la pantalla de “Control Panel”.
2
Haga doble clic en el icono de “Add/Remove Programs”.
Aparecerá el cuadro de diálogo “Add/Remove Programs Properties”.
3
Seleccione el software que desee borrar (Memory Stick
Formatter) de la lista de programas de software que pueden
borrarse automáticamente, y después haga clic en [Add/
Remove].
Los programas de software seleccionados se desinstalarán.
– Para los usuarios de Windows 2000/Windows XP –
Después de haber iniciado la sesión como Administrator, realice el
procedimiento descrito a continuación. Con respecto a cómo iniciar la
sesión como Administrator, consulte el manual del PC que esté utilizando.
1
Para Windows 2000: Seleccione [Settings] del menú [Start] y
después haga clic en [Control Panel].
Para Windows XP: Haga clic en [Control Panel] del menú
[Start].
Aparecerá la pantalla de “Control Panel”.
31-ES
2
Para Windows 2000: Haga doble clic en el icono de “Add/
Remove Programs”.
Para Windows XP: Haga doble clic en el icono de “Add/
Remove Programs”.
Aparecerá el cuadro de diálogo “Add/Remove Programs”.
3
4
Haga clic en “Change/Remove”.
Seleccione el software que desee borrar (Memory Stick
Formatter) de la lista “Currently installed programs”, y
después haga clic en [Change/Remove] ([Change and Remove]
en el caso de Windows XP).
Los programas de software seleccionados se desinstalarán.
32-ES
Solución de problemas
Causa/Solución
•La conexión no es correcta.
t Conecte correctamente. (pág. 14)
•Además de esta unidad, hay otro
dispositivo conectado a la toma USB del
PC.
t Desconecte cualquier dispositivo
USB excepto esta unidad. Además,
desconecte la alimentación y reinicie
su PC.
•El controlador no está instalado.
t Instálelo desde el CD-ROM
suministrado. (pág. 12)
No es posible el acceso al •No hay medio de grabación insertado.
medio de grabación desde t Inserte un medio de grabación.
Explorer o My Computer.
•Hay materias extrañas adheridas a la
La lámpara de acceso
sección del conector del medio de
parpadea al insertar un
grabación.
medio de grabación.
t Compruebe si la sección del conector
del medio de grabación tiene polvo o
está sucia.
Elimine cualquier materia extraña y
vuelva a insertar el medio de
grabación.
Síntoma
No se visualiza el icono
de Memory Stick (disco
extraíble).
33-ES
Especificaciones
Lector/escritor USB de múltiples ranuras
Interfaz : Interfaz USB
Velocidad de transferencia en baudios : 480 Mbps como máximo
Generales
Tensión de alimentación
cc 5 V
(suministrada a través del cable USB)
Consumo
500 mA como máximo
(en funcionamiento)
0,5 mA como máximo
(con el PC en suspensión)
Dimensiones externas
Aprox. 85 mm × 16 mm × 65 mm
(Anchura × Altura × Fondo)
Masa
Aprox. 39 g
(excluyendo el “Memory Stick”)
Condiciones de funcionamiento Temperatura 0 a 40 °C
(condensación no permitida)
Humedad 20 % a 80 %
(condensación no permitida)
El diseño y las especificaciones están sujetos a cambio sin previo aviso.
Si tiene alguna pregunta/comentario en relación con este producto, visite
nuestro sitio Web de ayuda al cliente en
http://www.sony.net/Products/mssupport/
34-ES
Sony Corporation
2-067-390-11 (1) CT
MA-000078-01G
Multi Slot
USB Reader/Writer
CT
使用說明書
MSAC-USM1
1-CT
中文
在操作本機前,請通讀本說明書,並保存以備將來參考。
須知
如果靜電或電磁場導致數據傳送失敗,請重新啟動應用軟件或拔下 USB 電纜
後再將其插入。
2-CT
2000-2004 年 Sony 公司程式 © 版權所有
2004 年 Sony 公司文檔 © 版權所有
•“Memory Stick”、“MagicGate Memory Stick”、“Memory Stick PRO”、
“Memory Stick Duo”、“MagicGate Memory Stick Duo”、“Memory Stick
PRO Duo”和
是 Sony 公司的商標。
• Microsoft 和 Windows 是 Microsoft 公司在美國和 或其他國家的商標或註冊商
標。
• MMX Pentium 是 Intel 公司的註冊商標或商標。
• Adobe 、 Acrobat 、 Acrobat Reader 是 Adobe 系統公司在美國和 或其他國家
的註冊商標或商標。
• Macintosh 和 Mac OS 是 Apple 電腦公司在美國和 或其他國家的註冊商標。
• CompactFlash 和 CF 是 SanDisk 公司的商標。
• Microdrive 是日立環球存儲科技公司荷蘭 B.V. 的商標或註冊商標。
• 所有其他商標是它們各自所有者的註冊商標或商標。
此外,本手冊不是每次都提到“TM”和“®”。
3-CT
目錄
關於“Memory Stick”............................................. 5
系統要求 ........................................................ 7
檢查隨機附件 .................................................... 8
附帶的應用程式 .................................................. 9
使用操作說明和“說明”.......................................... 10
在電腦上安裝軟體 ............................................... 12
將本機與您的電腦相連 ........................................... 14
確認連接完成 ................................................... 17
沒有顯示抽取式磁碟(Memory Stick)圖示時(Windows XP 除外)....... 18
向本機插入記錄媒體 ............................................. 21
將記錄在記錄媒介上的影像資料拷貝到您的電腦上 ................... 22
將本機從您的電腦上斷開 ......................................... 23
格式化(初始化)“Memory Stick”(僅限於 Windows)................ 25
注意事項 ....................................................... 27
使用“Memory Stick”的注意事項 ................................. 28
使用 CF Memory Card(Microdrive)的注意事項 .................... 30
卸載(刪除)軟體 ............................................... 31
故障排除 ....................................................... 33
規格 ........................................................... 34
4-CT
關於“Memory Stick”
什麼是“Memory Stick”?
“Memory Stick”是新一代的集成儲存介質,體積小,重量輕,比軟碟
有更大的儲存容量。這種介質不僅可以用於“Memory Stick”相容產品之間
的資料傳輸,還可以作為可移動的外部儲存介質。
可用的“Memory Stick”有標準尺寸和稱之為“Memory Stick Duo”的
小尺寸兩種。當把“Memory Stick Duo”插入 Memory Stick Duo 配接器中,
它的尺寸會和標準尺寸的“Memory Stick”一樣,這樣就可以在與標準尺寸
的“Memory Stick”相容的產品上使用。
能和本機配套使用的“Memory Stick”類型
* 有 5 種類型的“Memory Stick”可滿足您的需要。
“Memory Stick PRO”
此類“Memory Stick”只能和與“Memory Stick PRO”相容的產品一起
使用,並且介質具有內置版權保護技術(“MagicGate”)。(要在本機中使用
“Memory Stick PRO”的版權保護技術,需要和版權保護技術相容的應用軟
體。)
“Memory Stick”
允許記錄所有類型的資料,需要版權保護技術(“MagicGate”)的資料除
外。
“Memory Stick Duo”(相容 MagicGate/High-speed 資料傳輸)
“Memory Stick Duo”是帶“MagicGate”版權保護技術的“Memory
Stick”,支持高速資料傳輸。本裝置可以用於和“Memory Stick”、“Memory
Stick PRO”相容的設備。(傳輸速度取決於使用的“Memory Stick”相容
設備。)
5-CT
“Memory Stick”(帶記憶體選擇功能)
這是包含一個以上記憶體(128MB)的“Memory Stick”。“Memory Stick”
背面的記憶體選擇開關使您可以選擇更合適的記憶體。不能同時或逐次使用
不同的記憶體。
“MagicGate Memory Stick”
內置有版權保護技術(“MagicGate”)功能的“Memory Stick”。
什麼是“MagicGate”?
“MagicGate”是一種版權保護的技術,當“Memory Stick”和使用
“M e m o r y S t i c k ”的產品均帶有此項技術時,它就發揮作用。在配備了
“MagicGate”的設備(本機等)和“Memory Stick”之間會進行“您遵守
“MagicGate”嗎?”的驗証。驗証之後將進行資料加密,除了那些被驗証認
可的設備外,其餘的設備不能播放版權保護資料。
那些需要版權保護的音樂資料和其他資料可使用MagicGate相容
“Memory
Stick”和與“MagicGate”相容的設備(如本機)進行記錄和播放。
不同類型的資料可以記錄在同一個“Memory Stick”上。
例如,可將圖像資料保存在包含有音樂資料的 MagicGate 相容
“Memory Stick”的空閑區域中。
使用 MagicGate 相容“Memory Stick”
P註
• 格式化一個包含資料的 MagicGate 相容“Memory Stick”將會刪除所有的資
料,包括音樂資料。小心不要意外刪除重要資料。格式化過程中造成的資料丟
失 Sony 公司不負任何責任。
• 記錄下來的資料僅作個人娛樂用,版權法禁止未經版權所有者的許可進行任何
其他形式的使用。
• 因該產品或“Memory Stick”出故障而使已記錄資料的下載受阻或音樂資料
損壞或被刪除, Sony 公司不負任何責任。
P註
本裝置不配備 MagicGate 。
6-CT
系統要求
推薦的 Windows 環境
• 作業系統:Microsoft Windows 98 Second Edition (Windows 98SE)/
Windows Millennium Edition (Windows Me)/Windows 2000
Professional (Windows 2000)/Windows XP Home Edition/XP
Professional (Windows XP)
與 Microsoft Windows 98 版本不相容
* 從廠家裝運發貨時,電腦上必須安裝了上述作業系統。
* 對於昇級的作業系統,即使是上面提及的,也不能保証操作。
• CPU:MMX Pentium Ⅱ 400 MHz 或更快的處理器
(推薦 Pentium Ⅲ 450 MHz 或更快的處理器)
• RAM:64 MB 或更多
• 可用的硬碟空間:10 MB 或更多
(取決於使用的 Windows 版本,可能需要更多的磁碟空間。)
• CD-ROM 驅動器
• 標準配備的 USB 插孔
(本機支持 Hi-Speed USB(基於 USB 2.0)。)
• 顯示器︰高彩(16 位)或更高, 800 × 480 像素或更高
(推薦 800 × 600 像素或更多。)
推薦的 Macintosh 環境
• 作業系統:Mac OS 9.0 ∼ 9.2.2/X (v10.1 ∼ 10.3)
* 從廠家裝運發貨時,電腦上必須安裝了上述作業系統。
* 對於升級的作業系統,即使是上面提及的,也不能保証操作。
• RAM:64 MB 或更多
• 硬碟:10 MB 或更多可用硬碟空間
• 標準配備的 USB 插孔
(本機支持 Hi-Speed USB(基於 USB 2.0)。)
P註
即使電腦符合推薦的環境配置,也不能保証能在所有電腦上的操作。
7-CT
檢查隨機附件
• 多插槽 USB 讀
寫器(1)
• 專用 USB 電纜 1.0 m(1)
• CD-ROM (MSAC-USM1)(1)
* CD-ROM 包含下列軟體程式。
• 設備驅動程式
• Memory Stick Formatter 2.2 版(僅限於 Windows)
• 使用說明書(PDF 檔案)
本機的使用說明書資料(PDF 檔案)為 MSAC-USM1Manual_CHT.pdf
• 本機的使用說明書(1)
8-CT
附帶的應用程式
附帶的 Windows CD-ROM 包含以下軟體程式。
設備驅動程式
安裝驅動程式的方法,請參閱第 12 頁。
Memory Stick Formatter 2.2 版(僅限於 Windows)
這是用於格式化(初始化)“Memory Stick”的軟體。格式化會刪除記
錄在“Memory Stick”上的所有資料。
當“Memory Stick”和其相容產品一起使用時,為了保持“Memory
Stick”的可相容性,在本機上格式化“Memory Stick”時必須使用此軟
體。
P註
格式化存有資料的“Memory Stick”會刪除原先的資料。請不要誤刪重要的資
料。
9-CT
使用操作說明和“說明”
使用 CD-ROM 上的操作說明
附帶的 CD-ROM 包含了更詳細的操作說明(PDF 檔案)。
想進一步了解本產品的使用方法,請參閱 CD-ROM 上的操作說明。
您需要安裝 Adobe 系統公司的 Acrobat Reader 來閱讀 PDF 檔案。
下面說明如何使用 Acrobat Reader 。
畫面
左框
右框
• 左框
每一頁操作說明都顯示為一幅縮略圖。如果您點擊與某一頁相對應的縮略
圖,這一頁的內容就顯示在“右框”中。
• 右框
顯示每一頁的內容。
進一步了解Acrobat Reader的使用方法,請參閱Adobe Acrobat Reader
的線上“說明”。
10-CT
如何使用“說明”(使用 Windows 作業系統時)
以下應用程式包含“說明”手冊。
• Memory Stick Formatter
想近一步了解應用程式的使用方法,請參閱“說明”手冊。
下面說明如何使用“說明”手冊。
畫面
選項卡
左框
右框
• 左框
顯示目錄或關鍵詞。
• 右框
顯示相應的說明。按一下正文中標有下劃線的部分會顯示相應的說明。
11-CT
在電腦上安裝軟體
請按下列步驟安裝設備驅動程式。
CD-ROM 包含下列軟體程式。
• 設備驅動程式
• Memory Stick Formatter 2.2 版(僅限於 Windows)
P 註(首先)
使用 Windows XP 時,請將本機與電腦連接後執行安裝。
使用其他作業系統時,請在將本機與電腦連接之前安裝設備驅動程式。
使用 Mac OS 10.2.4 或更高版本時,只需將本機與電腦連接而不必安裝設備驅
動程式。
1
打開電腦。
關閉所有正在運行的應用程式。
當使用 Windows 2000 或 Windows XP 時,要安裝設備驅動程式,必須以
系統管理員權限登錄。
12-CT
2
把附帶的 CD-ROM(MSAC-USM1)插入電腦的 CD-ROM 驅動器。
按一下正在使用的作業系統所對應的設備驅動程式。
3
4
按螢幕上的提示完成安裝。
對於 Windows 用戶,如果需要 Memory Stick Formatter ,按一下
“Memory Stick Formatter”資料夾,然後按一下“Set up .EXE”
圖示開始安裝。
* 在 Macintosh 電腦上,不能使用“Memory Stick Formatter”。
根據螢幕提示按一下這些按鈕。
5
重新啟動電腦。
13-CT
將本機與您的電腦相連
用附帶的專用 USB 電纜將本機的 USB 插孔和電腦的 USB 插孔連接起來。
USB 插孔
存取燈
USB 插孔
A 連接器
小型 B 連接器
關於專用 USB 電纜
A連接器︰與電腦上的USB插孔相連。假如電腦有多個USB插孔,可以與
其中的任何一個插孔相連。
小型 B 連接器︰與本機上的 USB 插孔相連。
14-CT
1
把 USB 電纜的小型 B 連接器儘可能緊地插入本機的 USB 插孔。
2
把 USB 電纜的 A 連接器插到電腦的 USB 插孔。
•“Found New Hardware Wizard”啟動,開始安裝驅動程式。取決於作
業系統,可能可以自動安裝驅動程式。
• 不同電腦的 USB 插孔的位置不同。
• 當所用的電腦有多個USB插孔時,除了標準的滑鼠和鍵盤外,不要在使
用本機的同時將其他設備連到USB插孔上。當使用臺式電腦時,請使用
電腦主機上的 USB 插孔。詳細內容,請參閱第 16 頁的“連接本機的推
薦方法”。
15-CT
連接本機的推薦方法
用下面任一種方法連接電腦可確保本機的正常操作。
當本機連接到電腦主機的 USB 插孔,而沒有別的設備連接到電腦主機的
其他 USB 插孔時。
在USB鍵盤和滑鼠作為標準配置的電腦中,當USB鍵盤連到電腦主機的其
中一個USB插孔,而本機通過附帶的USB電纜與電腦主機的另一個USB插孔相
連時。
P註
• 當兩個或兩個以上非標準USB設備連接到一臺電腦上並同時使用時,取決於不同
的 USB 設備,不能保證操作正確。
• 務必將提供的 USB 電纜和電腦主機上的 USB 插孔相連。如果電纜是通過鍵盤或
USB 集線器等其他設備相連,不能確保操作正確進行。
• 不能確保所有運行在推薦環境下的電腦都能正確操作。
• 務必用指定的 USB 電纜(附帶)連到您的電腦上。
16-CT
確認連接完成
取決於作業系統類型和設定,畫面可能不同。
1
2
打開“My Computer”資料夾。
確認顯示新識別到的Memory Stick (F:),Memory Stick Duo (G:),
以及 CF (H:)圖示。
P註
驅動器盤符(F:)可能因使用的電腦的不同而不同。
Memory Stick (F:),Memory Stick Duo (G:),以及CF (H:)圖示出現時,
連接完成。
Memory Stick (F:),Memory Stick Duo (G:),以及CF (H:)圖示出現之前
可能需要等一會兒。
P註
• 使用 Windows 98SE 時,“Memory Stick (F:)”及“Memory Stick Duo (G:)”驅
動器可能顯示為相同的圖示。使用 Macintosh 時,所有圖示顯示均相同。
• 如果未顯示 Memory Stick 圖示,設備驅動程式可能安裝不正確。執行以下所敘
述的步驟。使用其他“Removable Disk”時,也顯示“Removable Disk”圖示。
17-CT
沒有顯示抽取式磁碟(Memory Stick)圖示時
(Windows XP 除外)
可能已經安裝了另一個設備驅動程式。將本機與您的電腦相連,然後按
以下步驟操作。
– 當使用 Windows 2000 作業系統時 –
以“系統管理員”身份或具有管理員權限的用戶身份登錄。
1
在“Control Panel”中按兩下“System”圖示。
出現“System Properties”畫面。
2
檢查設備驅動程式是否已安裝。
1 按一下“System Properties”畫面上的[Hardware]選項卡。
2 按一下[Device Manager]。
出現“Device Manager”畫面。
3 按一下[View]。
4 按一下[View devices by type]。
5 按兩下[Universal Serial Bus Controller]。
6 檢查以“?”開頭的[? MSAC-USM1]是否顯示。
18-CT
3
如果已安裝驅動程式,請刪除它。
如果您按步驟2操作,並確認在“View devices by type”的“Universal
Serial Bus Controller”中顯示[? MSAC-USM1],那麼另外一個設備驅
動程式已經被安裝。
請使用下列步驟刪除此驅動程式。
不要刪除[? MSAC-USM1]以外的其他設備。
1
2
3
4
右擊[? MSAC-USM1]。
按一下[Remove]。出現“Confirm Device Removal”畫面。
按一下[OK]按鈕。刪除設備。
斷開本機與電腦的連接,然後重新啟動電腦。
請參照第 12 頁從步驟 1 開始重新安裝設備驅動程式。
P註
如果您刪除[? MSAC-USM1]以外的其他設備,您的電腦可能會工作不正常。
19-CT
– 當使用 Windows 98SE/Windows Me 作業系統時 –
1
在“Control Panel”中按兩下“System”圖示。
顯示“System Properties”畫面。
2
檢查是否已安裝了設備驅動程式。
1 按一下“System Properties”畫面中的[Device Manager]選項卡。
2 按兩下[Universal Serial Bus Controller]。
3 檢查以“?”開頭的[? MSAC-USM1]是否顯示。
3
如果已安裝驅動程式,請刪除它。
如果您按步驟 2 操作,並確認在“Universal Serial Bus Controller”
中顯示[? MSAC-USM1],則表示已安裝了另外一個設備驅動程式。
請使用下列步驟刪除此驅動程式。
不要刪除[? MSAC-USM1]以外的其他設備。
1 按一下[? MSAC-USM1]。
2 按一下[Remove]。出現“Confirm Device Removal”畫面。
3 按一下[OK]按鈕。刪除設備。
4 斷開本機與電腦的連接,然後重新啟動電腦。
請參照第 12 頁從步驟 1 開始重新安裝設備驅動程式。
P註
如果您刪除[? MSAC-USM1]以外的其他設備,您的電腦可能會工作不正常。
20-CT
向本機插入記錄媒體
P註
在正確的插槽中插入記錄媒體。在錯誤的插槽中插入記錄媒體可能會損壞本機。
插入記錄媒體,使其末端與本機在同一水平面。
P註
• 記錄媒體正在存取時,存取燈點亮。當存取燈點亮時,切勿取出記錄媒體、
關閉電腦或拔掉 USB 電纜等。記錄媒體上的資料可能會損壞。
• 當拔掉 USB 電纜時,切勿抓住電纜,而要抓住連接器。
21-CT
將記錄在記錄媒介上的影像資料拷貝到您的電腦
上
如果斷開連接本機和您的電腦的 USB 電纜,電腦就無法識別出本機,電
腦也無法瀏覽儲存在“Removable Disk(recording media)”中的影像資料。
如果您將儲存在記錄媒介上的影像資料拷貝到您的電腦上,電腦就可以顯示
和處理影像資料,即使此時本機與您的電腦沒有相連。
當USB電纜斷開後, Memory Stick (F:),Memory Stick Duo (G:) 和CF
(H:)圖示就會消失。
如何把影像資料拷貝到電腦上的詳情,請參閱電腦手冊。
22-CT
將本機從您的電腦上斷開
– 適用於使用 Windows Me/Windows 2000/Windows XP 的客戶 –
將 USB 電纜從電腦上斷開之前,先執行下列步驟。
• 所用作業系統的不同可能會導致螢幕顯示的輕微差異。
• 使用 Windows 98SE 的客戶不必執行下列步驟。
1
按一下螢幕右下角任務欄中的“Unplug or Eject Hardware”圖
示。
按一下該圖示。
出現一條訊息。
這是任務欄。
2
按一下“Stop MSAC-USM1 - Drivers (F:, G:, H:)”。
按一下這個區域。
Stop MSAC-USM1-Drivers (F:, G:, H:)
片刻後會出現一條訊息。
* 驅動器盤符“(F:)”等因所用電腦而異。
23-CT
3
顯示[“The 'MSAC-USM1' device can now be safely removed from
the system.”]。
此時,可以安全地斷開電腦和本機的連接。
* 取決於使用的作業系統,顯示可能不同。
P註
• 當您只想從本機上取出記錄媒介時,不需要進行上面說明的步驟。
• 當存取燈閃爍時,不要從本機中取出記錄媒介。否則,可能損壞記錄媒介上
的資料。
• 當您執行此項操作時,您的電腦不會識別本機。要識別本機,請從您的電腦上
拔掉 USB 電纜,並將 USB 電纜再重新連到您的電腦上。
24-CT
格式化(初始化)“Memory Stick”
(僅限於 Windows)
這會刪除記錄在“Memory Stick”上的所有資料。要在本機上進行格式
化時,務必使用附帶的“Memory Stick Formatter”軟體程式並遵循下述步
驟。如果沒有使用“Memory Stick Formatter”軟體格式化“Memory
Stick”,不能確保 Handycam 或其他“Memory Stick”可相容產品的操作。
有關如何使用“Memory Stick Formatter”的詳情,參閱“Memory Stick
Formatter”附帶的手冊。您可以在網址 http://www.sony.net/Products/
mssupport/ 下載“Memory Stick Formatter”。
P註
如果您對記錄有資料的“Memory Stick”進行格式化,原先記錄的資料會被刪
除。請不要輕易刪除重要的資料。
1
2
3
將“Memory Stick”插入到本機中。
啟動“Memory Stick Formatter”。
按一下[Start formatting]。格式化開始。
P註
當格式化“Memory Stick”時,切勿從電腦上取出本機。否則,“Memory Stick”
上的資料可能損壞。
25-CT
寫保護資料
“Memory Stick”有一個防刪除的開關,它可以保證重要資料不被誤刪。
(某些“Memory Stick”
(“Memory Stick Duo”)沒有防刪除開關。如果使用
這樣的“Memory Stick”(“Memory Stick Duo”),當心不要誤寫或誤刪資
料。)將此開關向左或向右滑動能允許或阻止向“Memory Stick”寫入資料。
• 允許寫
可以寫入資料。
• 寫保護
將此開關向右滑動,就不能向“Memory Stick”寫入資料。資料允許被讀
出但不能被寫入。
“Memory Stick”下方
LOCK
允許寫
LOCK
資料讀
資料讀
寫保護
LOCK
寫速度
寫的速度同您使用的“Memory Stick”及產品有關。
26-CT
注意事項
• 本裝置不配備 MagicGate 。
• 本機可以使用“Memory Stick”、“Memory Stick Duo”或 CF Memory
Card(Microdrive)。在這些使用說明書中,“Memory Stick”、“Memory
Stick Duo”和 CF Memory Card(Microdrive)被稱作“記錄媒體”。
• 如果本機髒了,用軟布擦拭。忌使用汽油、酒精、塗料稀釋劑或其他的溶
劑。否則本機會變形或出現故障。
• 詳細的操作說明(PDF 檔案),請參閱附帶 CD-ROM 中的內容。
在使用本機前,務必閱讀操作說明。
• 記錄媒體正在存取時,存取燈點亮。當存取燈點亮時,切勿取出記錄媒體、
關閉電腦或拔掉 USB 電纜等。記錄媒體上的資料可能會損壞。
• 當拔掉 USB 電纜時,切勿抓住電纜,而要抓住連接器。
27-CT
使用“Memory Stick”的注意事項
A
B
如何貼標籤
C
• 當防刪除開關設為“LOCK”位置 B 時,不能記錄、編輯和刪除資料。
• 請使用尖頭的物體撥動“Memory Stick Duo”上的防刪除開關。(某些
“Memory Stick”(“Memory Stick Duo”)沒有防刪除開關。)
• 在下列幾種情況下,資料可能會損壞。
– 當存取燈點亮時(此時正在讀 寫資料),取出“Memory Stick”或關
閉本機的電源
– 在有靜電或電噪音的地方使用
• 始終要備份重要的資料。 Sony 公司對資料損壞不承擔任何責任。
當使用本機時,如果資料丟失或損壞,或本機損壞,我們不承擔責任。
• 受“MagicGate”版權保護的資料只能和 MagicGate 相容“Memory Stick”
一起使用。
• 除了專門提供給“Memory Stick”的標籤 C 外,不要粘貼任何其他標籤。
• 粘貼標籤時,要將標籤貼在指定位置。標籤不能伸出“Memory Stick”邊
緣以外。
• 當向“Memory Stick Duo”的儲存區寫入的時候,不要用力過度。
• 當運輸或存放“Memory Stick”時,將它放在廠家提供的儲存盒中。
• 不要用手指或金屬物體接觸連接器部分 A 。
• 不要讓“Memory Stick”折彎、跌落或受劇烈碰撞。
• 不要試圖拆開或改裝“Memory Stick”。
• 不要被水弄濕。
• 如果由於“Memory Stick”出錯這樣的故障而導致記錄或播放不能完成時,
資料將不能恢復。
• 為了防止“Memory Stick”上的資料被記錄或刪除,請將“Memory Stick”
的寫保護開關切換到“LOCK”狀態。
28-CT
• 不要在以下地方使用和存放:
– 溫度可能會變得很高的汽車內或其他高溫地方
– 受陽光直射的地方
– 濕度很大或有腐蝕性物質的地方
29-CT
使用 CF Memory Card(Microdrive)的注意事項
Microdrive 是一種符合 Compact Flash TypeII 的輕巧的小型硬碟驅動
器。
使用 Microdrive 的注意事項
• 首次使用 Microdrive 時請務必用本數位相機格式化 Microdrive 。
• Microdrive是一種小型硬碟驅動器。因為Microdrive是可旋轉的磁碟,所
以與使用快閃記憶體的“Memory Stick”相比, Microdrive 不能很好地抗
震動和衝擊。
當播放和拍攝時,請勿讓 Microdrive 受到震動或衝擊。
• 在下列情況資料可能被破壞︰
– 在讀 / 寫資料時取出 Microdrive 。
– 在腐蝕性物質旁邊存放 Microdrive 。
• 注意在低於 5 ℃時使用 Microdrive 可能會導致性能降低。 Microdrive 的
工作溫度範圍為︰ 5 ℃到 40 ℃。
• 注意在低大氣壓(海拔 3000 m 以上)時不能使用數位相機。
• 剛使用完 Microdrive 時會很燙。手拿時請小心。
• 請勿在標籤上塗寫。
• 請勿撕除標籤或在標籤上粘貼新的標籤。
• 當運輸或存放 Microdrive 時,將它放在廠家提供的儲存盒中。
• 請勿讓 Microdrive 碰到水。
• 請勿用力按標籤。
• 用手握住 Microdrive 的側面,請勿壓擠 Microdrive 。
30-CT
卸載(刪除)軟體
– 在使用 Windows 98SE/Windows Me 作業系統情況下 –
1
選擇[Start]功能表中的[Settings],然後按一下[Control Panel]。
顯示“Control Panel”畫面。
2
按兩下“Add/Remove Programs”圖示。
出現“Add/Remove Programs Properties”對話方塊。
3
從可以被自動刪除的軟體程式清單中選擇要刪除的軟體
(Memory Stick Formatter),然後按一下[Add/Remove]。
選定的軟體被卸載。
– 在使用 Windows 2000/Windows XP 作業系統情況下 –
以“系統管理員”身份登錄後,按下述步驟操作。要知道如何以“系統
管理員”身份登錄,請參閱您電腦的使用手冊。
1
使用 Windows 2000:選擇[Start]功能表中的[Settings],然後按
一下[Control Panel]。
使用 Windows XP:按一下[Start]功能表中的[Control Panel]。
顯示“Control Panel”畫面。
31-CT
2
使用 Windows 2000 ︰按兩下“Add/Remove Programs”圖示。
使用 Windows XP ︰按兩下“Add/Remove Programs”圖示。
顯示“Add/Remove Programs”對話方塊。
3
4
按一下“Change/Remove”。
從“Currently installed programs”清單中選擇要刪除的軟體
(Memory Stick Formatter),然後按一下[Change/Remove](在
Windows XP 中是[Change and Remove])。
選定的軟體被卸載。
32-CT
故障排除
故障
不顯示 Memory Stick 圖
示(抽取式磁碟)。
不能從 Explorer 或 My
Computer訪問記錄媒介。
當插入記錄媒介時,存取
燈閃爍。
原因 解決方法
•沒有正確連接。
t 正確連接。(第 14 頁)
•除了本產品外,還有其他設備連到電腦的
USB 插孔上。
t 斷開其他USB設備和電腦的連接。關閉
電源並重新啟動。
•沒有安裝驅動程式。
t 從附帶的 C D - R O M 上安裝驅動程式。
(第 12 頁)
•沒有插入記錄媒介。
t 插入記錄媒介。
•記錄媒介的連接器部分粘有異物。
t 檢查是否有灰塵或泥土粘到記錄媒介的
連接器部分。
除去異物,重新插入記錄媒介。
33-CT
規格
多插槽 USB 讀
寫器
接口:USB 接口
波特率:最大 480 Mbps
一般
操作電壓
耗電量
外形尺寸
重量
操作環境
直流電 5 V(通過 USB 電纜提供)
最大 500 mA(工作期間)
最大 0.5 mA(電腦掛起階段)
約 85 mm × 16 mm × 65 mm(寬×高×深)
約 39 g(不包括“Memory Stick”)
溫度 0 ℃∼ 40 ℃(不允許結露)
濕度 20 %∼ 80 %(不允許結露)
設計和規格說明如有變更,恕不另行通知。
關於本產品,如果您有任何疑問 評論,請訪問我們的客戶支持網站︰
http://www.sony.net/Products/mssupport/
34-CT
Sony Corporation
2-067-390-11(1) CS
MA-000078-01G
Multi Slot
USB Reader/Writer
使用说明书
MSAC-USM1
1-CS
中文
在操作本机前,请通读本说明书,并保存以备将来参考。
须知
如果静电或电磁场导致数据传送失败,请重新启动应用软件或拔下USB电缆
后再将其插入。
2-CS
2000-2004 年 Sony 公司程序 © 版权所有
2004 年 Sony 公司文档 © 版权所有
•“Memory Stick”、“MagicGate Memory Stick”、“Memory Stick PRO”、
“Memory Stick Duo”、“MagicGate Memory Stick Duo”、“Memory Stick
PRO Duo”和
是 Sony 公司的商标。
• Microsoft 和 Windows 是 Microsoft 公司在美国和/或其他国家的商标或注册
商标。
• MMX Pentium 是 Intel 公司的注册商标或商标。
• Adobe、Acrobat、Acrobat Reader 是 Adobe 系统公司在美国和/或其他国家
的注册商标或商标。
• Macintosh 和Mac OS是Apple计算机公司在美国和/或其他国家的注册商标。
• CompactFlash 和 CF 是 SanDisk 公司的商标。
• Microdrive 是日立环球存储科技公司荷兰 B.V. 的商标或注册商标。
• 所有其他商标是它们各自所有者的注册商标或商标。
此外,本手册不是每次都提到“TM”和“®”。
3-CS
目录
关于“Memory Stick”................................................................................... 5
系统要求 .......................................................................................................... 7
检查随机附件 .................................................................................................. 8
附带的应用程序 .............................................................................................. 9
使用操作说明和“帮助”............................................................................... 10
在计算机上安装软件 ..................................................................................... 12
将本机与您的计算机相连 ............................................................................. 14
确认连接完成 ................................................................................................ 17
没有显示移动硬盘(Memory Stick)图标时(Windows XP 除外)............ 18
向本机插入记录介质 ..................................................................................... 21
将记录在记录介质上的图像数据复制到您的计算机上 ................................ 22
将本机从您的计算机上断开 ......................................................................... 23
格式化(初始化)“Memory Stick”(仅限于 Windows )........................ 25
注意事项 ........................................................................................................ 27
使用“Memory Stick”的注意事项 ............................................................ 28
使用 CF Memory Card(Microdrive)的注意事项 ................................. 30
卸载(删除)软件 ......................................................................................... 31
故障排除 ........................................................................................................ 33
规格 ............................................................................................................... 34
4-CS
关于“Memory Stick”
什么是“Memory Stick”?
“Memory Stick”是新一代的集成存储介质,体积小,重量轻,比软盘
有更大的存储容量。这种介质不仅可以用于“Memory Stick”兼容产品之间
的数据传输,还可以作为可移动的外部存储介质。
可用的“Memory Stick”有标准尺寸和称之为 “Memory Stick Duo”
的小尺寸两种。当把“Memory Stick Duo”插入 Memory Stick Duo 适配
器中,它的尺寸会和标准尺寸的“Memory Stick”一样,这样就可以在与标
准尺寸的“Memory Stick”兼容的产品上使用。
能和本机配套使用的“Memory Stick”类型
* 有 5 种类型的“Memory Stick”可满足您的需要。
“Memory Stick PRO”
此类“Memory Stick”只能和与“Memory Stick PRO”兼容的产品
一起使用,并且介质具有内置版权保护技术(“MagicGate”)。
(要在本机中使
用“Memory Stick PRO”的版权保护技术,需要和版权保护技术兼容的应
用软件。)
“Memory Stick”
允许记录所有类型的数据,需要版权保护技术(“MagicGate”)的数据除
外。
“Memory Stick Duo”(兼容 MagicGate/High-speed 数据传输)
“Memory Stick Duo”是带“MagicGate”版权保护技术的“Memory
Stick”,支持高速数据传输。本装置可以用于和“Memory Stick”、
“Memory
Stick PRO”兼容的设备。
(传输速度取决于使用的“Memory Stick”兼容
设备。)
5-CS
“Memory Stick”(带存储器选择功能)
这是包含一个以上存储器(128MB)的“Memory Stick”。“Memory
Stick”背面的存储器选择开关使您可以选择更合适的存储器。不能同时或逐
次使用不同的存储器。
“MagicGate Memory Stick”
内置有版权保护技术(“MagicGate”)功能的“Memory Stick”。
什么是“MagicGate”?
“MagicGate”是一种版权保护的技术,当“Memory Stick”和使用
“Memory Stick”的产品均带有此项技术时,它就发挥作用。在配备了
“MagicGate”的设备(本机等)和“Memory Stick”之间会进行“您遵守
“MagicGate”吗?”的验证。验证之后将进行数据加密,除了那些被验证认
可的设备外,其余的设备不能播放版权保护数据。
那些需要版权保护的音乐数据和其他数据可使用 MagicGate 兼容
“Memory Stick”和与“MagicGate”兼容的设备(如本机)进行记录和
播放。
不同类型的数据可以记录在同一个“Memory Stick”上。
例如,可将图像数据保存在包含有音乐数据的 MagicGate 兼容
“Memory Stick”的空闲区域中。
使用 MagicGate 兼容“Memory Stick”
P注
• 格式化一个包含数据的 MagicGate 兼容“Memory Stick”将会删除所有的
数据,包括音乐数据。小心不要意外删除重要数据。格式化过程中造成的数据
丢失 Sony 公司不负任何责任。
• 记录下来的数据仅作个人娱乐用,
版权法禁止未经版权所有者的许可进行任何
其他形式的使用。
• 因该产品或“Memory Stick”出故障而使已记录资料的下载受阻或音乐数据
损坏或被删除,Sony 公司不负任何责任。
P注
本装置不配备 MagicGate。
6-CS
系统要求
推荐的 Windows 环境
• 操作系统:Microsoft Windows 98 Second Edition (Windows 98SE)/
Windows Millennium Edition (Windows Me)/Windows 2000
Professional (Windows 2000)/Windows XP Home Edition/XP
Professional (Windows XP)
与 Microsoft Windows 98 版本不兼容
* 从厂家装运发货时,计算机上必须安装了上述操作系统。
* 对于升级的操作系统,即使是上面提及的,也不能保证操作。
• CPU:MMX Pentium II 400 MHz 或更快的处理器
(推荐 Pentium Ⅲ 450 MHz 或更快的处理器)
• RAM:64 MB 或更多
• 可用的硬盘空间:10 MB 或更多
(取决于使用的 Windows 版本,可能需要更多的磁盘空间。)
• CD-ROM 驱动器
• 标准配备的 USB 插孔
(本机支持 Hi-Speed USB(基于 USB 2.0)。)
• 显示器:高彩(16 位)或更高,800 × 480 像素或更高
(推荐 800 × 600 像素或更多。)
推荐的 Macintosh 环境
• 操作系统:Mac OS 9.0~9.2.2/X (v10.1~10.3)
* 从厂家装运发货时,计算机上必须安装了上述操作系统。
* 对于升级的操作系统,即使是上面提及的,也不能保证操作。
• RAM:64 MB 或更多
• 硬盘:10 MB 或更多可用硬盘空间
• 标准配备的 USB 插孔
(本机支持 Hi-Speed USB(基于 USB 2.0)。)
P注
即使计算机符合推荐的环境配置,也不能保证能在所有计算机上的操作。
7-CS
检查随机附件
• 多插槽 USB 读/写器 (1)
• 专用 USB 电缆 1.0 m (1)
• CD-ROM (MSAC-USM1) (1)
* CD-ROM 包含下列软件程序。
• 设备驱动程序
• Memory Stick Formatter 2.2 版(仅限于 Windows)
• 使用说明书(PDF 文件)
本机的使用说明书数据(PDF 文件)为 MSAC-USM1Manual_CHS.pdf
• 本机的使用说明书 (1)
8-CS
附带的应用程序
附带的 Windows CD-ROM 包含以下软件程序。
设备驱动程序
安装驱动程序的方法,请参阅第 12 页。
Memory Stick Formatter 2.2 版(仅限于 Windows)
这是用于格式化(初始化)
“Memory Stick”的软件。格式化会删除记
录在“Memory Stick”上的所有数据。
当“Memory Stick”和其兼容产品一起使用时,为了保持“Memory
Stick”的可兼容性,在本机上格式化“Memory Stick”时必须使用此软件。
P注
格式化存有数据的“Memory Stick”会删除原先的数据。请不要误删重要的数
据。
9-CS
使用操作说明和“帮助”
使用 CD-ROM 上的操作说明
附带的 CD-ROM 包含了更详细的操作说明(PDF 文件)。
想进一步了解本产品的使用方法,请参阅 CD-ROM 上的操作说明。
您需要安装 Adobe 系统公司的 Acrobat Reader 来阅读 PDF 文件。
下面说明如何使用 Acrobat Reader。
画面
左框
右框
• 左框
每一页操作说明都显示为一幅缩略图。如果您点击与某一页相对应的缩略
图,这一页的内容就显示在“右框”中。
• 右框
显示每一页的内容。
想进一步了解 Acrobat Reader 的使用方法,请参阅 Adobe Acrobat
Reader 的联机“帮助”。
10-CS
如何使用“帮助”(使用 Windows 操作系统时)
以下应用程序包含“帮助”手册。
• Memory Stick Formatter
想近一步了解应用程序的使用方法,请参阅“帮助”手册。
下面说明如何使用“帮助”手册。
画面
选项卡
左框
右框
• 左框
显示目录或关键词。
• 右框
显示相应的说明。单击正文中标有下划线的部分会显示相应的说明。
11-CS
在计算机上安装软件
请按下列步骤安装设备驱动程序。
CD-ROM 包含下列软件程序。
• 设备驱动程序
• Memory Stick Formatter 2.2 版(仅限于 Windows)
P 注(首先)
使用 Windows XP 时,请将本机与计算机连接后执行安装。
使用其它操作系统时,请在将本机与计算机连接之前安装设备驱动程序。
使用 Mac OS 10.2.4 或更高版本时,只需将本机与计算机连接而不必安装设
备驱动程序。
1
打开计算机。
关闭所有正在运行的应用程序。
当使用 Windows 2000 或 Windows XP 时,要安装设备驱动程序,必
须以系统管理员权限登录。
12-CS
2
把附带的 CD-ROM(MSAC-USM1)插入计算机的 CD-ROM 驱动
器。
单击正在使用的操作系统所对应的设备驱动程序。
3
4
按屏幕上的提示完成安装。
对于 Windows 用户,如果需要 Memory Stick Formatter,单击
“Memory Stick Formatter”文件夹,然后单击“Set up .EXE”
图标开始安装。
* 在 Macintosh 计算机上,不能使用“Memory Stick Formatter”。
根据屏幕上说明单击这些键。
5
重新启动计算机。
13-CS
将本机与您的计算机相连
用附带的专用 USB 电缆将本机的 USB 插孔和计算机的 USB 插孔连接起
来。
USB 插孔
USB 插孔
A 连接器
存取灯
小型 B 连接器
关于专用 USB 电缆
A 连接器:与计算机上的 USB 插孔相连。假如计算机有多个 USB 插孔,
可以与其中的任何一个插孔相连。
小型 B 连接器:与本机上的 USB 插孔相连。
14-CS
1
把 USB 电缆的小型 B 连接器尽可能紧地插入本机的 USB 插孔。
2
把 USB 电缆的 A 连接器插到计算机的 USB 插孔。
•“Found New Hardware Wizard”启动,开始安装驱动程序。取决于
操作系统,可能可以自动安装驱动程序。
• 不同计算机的 USB 插孔的位置不同。
• 当所用的计算机有多个 USB 插孔时,除了标准的鼠标和键盘外,不要
在使用本机的同时将其他设备连到USB插孔上。当使用台式计算机时,
请使用计算机主机上的 USB 插孔。详细内容,请参阅第 16 页的“连接
本机的推荐方法”。
15-CS
连接本机的推荐方法
用下面任一种方法连接计算机可确保本机的正常操作。
当本机连接到计算机主机的USB插孔,而没有别的设备连接到计算机主
机的其他 USB 插孔时。
在 USB 键盘和鼠标作为标准配置的计算机中,当 USB 键盘连到计算机
主机的其中一个 USB 插孔,而本机通过附带的 USB 电缆与计算机主机的另
一个 USB 插孔相连时。
P注
• 当两个或两个以上非标准 USB 设备连接到一台计算机上并同时使用时,取决于
不同的 USB 设备,不能保证操作正确。
• 务必将提供的 USB 电缆和计算机主机上的 USB 插孔相连。如果电缆是通过键盘
或 USB 集线器等其他设备相连,不能确保操作正确进行。
• 不能确保所有运行在推荐环境下的计算机都能正确操作。
• 务必用指定的 USB 电缆(附带)连到您的计算机上。
16-CS
确认连接完成
取决于操作系统类型和设置,画面可能不同。
1
2
打开“My Computer”文件夹。
确认显示新识别到的Memory Stick (F:),
Memory Stick Duo (G:),
以及 CF (H:)图标。
P注
驱动器盘符(F:)可能因使用的计算机的不同而不同。
Memory Stick (F:),Memory Stick Duo (G:),以及 CF (H:)图标出现
时,连接完成。
Memory Stick (F:),Memory Stick Duo (G:),以及 CF (H:)图标出现之
前可能需要等一会儿。
P注
• 使用 Windows 98SE 时,
“Memory Stick (F:)”及“Memory Stick Duo (G:)”
驱动器可能显示为相同的图标。使用 Macintosh 时,所有图标显示均相同。
• 如果未显示 Memory Stick 图标,设备驱动程序可能安装不正确。执行以下所叙
述的步骤。使用其它“Removable Disk”时,也显示“Removable Disk”图
标。
17-CS
没有显示移动硬盘(Memory Stick)图标时
(Windows XP 除外)
可能已经安装了另一个设备驱动程序。将本机与您的计算机相连,然后
按以下步骤操作。
– 当使用 Windows 2000 操作系统时 –
以“系统管理员”身份或具有管理员权限的用户身份登录。
1
在“Control Panel”中双击“System”图标。
出现“System Properties”画面。
2
检查设备驱动程序是否已安装。
1 单击“System Properties”画面上的[Hardware]选项卡。
2 单击[Device Manager]。
出现“Device Manager”画面。
3 单击[View]。
4 单击[View devices by type]。
5 双击[Universal Serial Bus Controller]。
6 检查以“?”开头的[? MSAC-USM1]是否显示。
18-CS
3
如果已安装驱动程序,请删除它。
如果您按步骤2操作,并确认在“View devices by type”的“Universal
Serial Bus Controller”中显示[? MSAC-USM1],那么另外一个设备
驱动程序已经被安装。
请使用下列步骤删除此驱动程序。
不要删除[? MSAC-USM1]以外的其他设备。
1
2
3
4
右击[? MSAC-USM1]。
单击[Remove]。出现“Confirm Device Removal”画面。
单击[OK]按钮。删除设备。
断开本机与计算机的连接,然后重新启动计算机。
请参照第 12 页从步骤 1 开始重新安装设备驱动程序。
P注
如果您删除[? MSAC-USM1]以外的其他设备,您的计算机可能会工作不
正常。
19-CS
– 当使用 Windows 98SE/Windows Me 操作系统时 –
1
在“Control Panel”中双击“System”图标。
显示“System Properties”画面。
2
检查是否已安装了设备驱动程序。
1 单击“System Properties”画面中的[Device Manager]选项卡。
2 双击[Universal Serial Bus Controller]。
3 检查以“?”开头的[? MSAC-USM1]是否显示。
3
如果已安装驱动程序,请删除它。
如果您按步骤 2 操作,并确认在“Universal Serial Bus Controller”中
显示[? MSAC-USM1],则表示已安装了另外一个设备驱动程序。
请使用下列步骤删除此驱动程序。
不要删除[? MSAC-USM1]以外的其他设备。
1 单击[? MSAC-USM1]。
2 单击[Remove]。出现“Confirm Device Removal”画面。
3 单击[OK]按钮。删除设备。
4 断开本机与计算机的连接,然后重新启动计算机。
请参照第 12 页从步骤 1 开始重新安装设备驱动程序。
P注
如果您删除了[? MSAC-USM1]以外的其他设备,您的计算机可能会操作
不正常。
20-CS
向本机插入记录介质
P注
在正确的插槽中插入记录介质。在错误的插槽中插入记录介质可能会损坏本机。
插入记录介质,使其末端与本机在同一水平面。
P注
• 记录介质正在存取时,存取灯点亮。当存取灯点亮时,切勿取出记录介质、关
闭计算机或拔掉 USB 电缆等。记录介质上的数据可能会损坏。
• 当拔掉 USB 电缆时,切勿抓住电缆,而要抓住连接器。
21-CS
将记录在记录介质上的图像数据复制到您的计算
机上
如果断开连接本机和您的计算机的 USB 电缆,计算机就无法识别出本
机,计算机也无法浏览存储在“Removable Disk (recording media)”中的
图像数据。如果您将存储在记录介质上的图像数据复制到您的计算机上,计
算机就可以显示和处理图像数据,即使此时本机与您的计算机没有相连。
当 USB 电缆断开后, Memory Stick (F:),Memory Stick Duo (G:) 和
CF (H:)图标就会消失。
如何把图像数据复制到计算机上的详情,请参阅计算机手册。
22-CS
将本机从您的计算机上断开
– 适用于使用 Windows Me/Windows 2000/Windows XP 的客户 –
将 USB 电缆从计算机上断开之前,先执行下列步骤。
• 所用操作系统的不同可能会导致屏幕显示的轻微差异。
• 使用 Windows 98SE 的客户不必执行下列步骤。
1
单击屏幕右下角任务栏中的“Unplug or Eject Hardware”图标。
单击该图标。
出现一条讯息。
这是任务栏。
2
单击“Stop MSAC-USM1 - Drivers(F: , G: , H:)”。
单击这个区域。
Stop MSAC-USM1-Drivers (F:, G:, H:)
片刻后会出现一条讯息。
* 驱动器盘符“(F:)”等因所用计算机而异。
23-CS
3
显示[“The 'MSAC-USM1' device can now be safely removed
from the system.”]。
此时,可以安全地断开计算机和本机的连接。
* 取决于使用的操作系统,显示可能不同。
P注
• 当您只想从本机上取出记录介质时,不需要进行上面说明的步骤。
• 当存取灯闪烁时,不要从本机中取出记录介质。否则,可能损坏记录介质上
的数据。
• 当您执行此项操作时,您的计算机不会识别本机。要识别本机,请从您的计算
机上拔掉 USB 电缆,并将 USB 电缆再重新连到您的计算机上。
24-CS
格式化(初始化)“Memory Stick”
(仅限于 Windows)
这会删除记录在“Memory Stick”上的所有数据。要在本机上进行格式
化时,务必使用附带的“Memory Stick Formatter”软件程序并遵循下述
步骤。如果没有使用“Memory Stick Formatter”软件格式化“Memory
Stick”,不能确保 Handycam 或其他“Memory Stick”可兼容产品的操作。
有关如何使用“Memory Stick Formatter”的详情,参阅“Memory
Stick Formatter”附带的手册。您可以在网址 http://www.sony.net/
Products/mssupport/ 下载“Memory Stick Formatter”。
P注
如果您对记录有数据的“Memory Stick”进行格式化,原先记录的数据会被删
除。请不要轻易删除重要的数据。
1
2
3
将“Memory Stick”插入到本机中。
启动“Memory Stick Formatter”。
单击[Start formatting]。格式化开始。
P注
当格式化“Memory Stick”时,切勿从计算机上取出本机。否则,“Memory
Stick”上的数据可能损坏。
25-CS
写保护数据
“Memory Stick”有一个防删除的开关,它可以保证重要数据不被误删。
(某些“Memory Stick”(“Memory Stick Duo”)没有防删除开关。如果
使用这样的“Memory Stick”(“Memory Stick Duo”),当心不要误写或
误删数据。)将此开关向左或向右滑动能允许或阻止向“Memory Stick”写
入数据。
• 允许写
可以写入数据。
• 写保护
将此开关向右滑动,就不能向“Memory Stick”写入数据。数据允许被读
出但不能被写入。
“Memory Stick”下方
LOCK
允许写
LOCK
写保护
LOCK
数据读/写速度
数据读/写的速度同您使用的“Memory Stick”及产品有关。
26-CS
注意事项
• 本装置不配备 MagicGate。
• 本机可以使用“Memory Stick”、“Memory Stick Duo”或 CF Memory
Card(Microdrive)。在这些使用说明书中,
“Memory Stick”、
“Memory
Stick Duo”和 CF Memory Card(Microdrive)被称作“记录介质”。
• 如果本机脏了,用软布擦拭。忌使用汽油、酒精、涂料稀释剂或其他的溶剂。
否则本机会变形或出现故障。
• 详细的操作说明(PDF 文件),请参阅附带 CD-ROM 中的内容。
在使用本机前,务必阅读操作说明。
• 记录介质正在存取时,存取灯点亮。当存取灯点亮时,切勿取出记录介质、
关闭计算机或拔掉 USB 电缆等。记录介质上的数据可能会损坏。
• 当拔掉 USB 电缆时,切勿抓住电缆,而要抓住连接器。
27-CS
使用“Memory Stick”的注意事项
A
B
如何贴标签
C
• 当防删除开关设为“LOCK”位置 B 时,不能记录、编辑和删除数据。
• 请使用尖头的物体拨动“Memory Stick Duo”上的防删除开关。(某些
“Memory Stick”(“Memory Stick Duo”)没有防删除开关。)
• 在下列几种情况下,数据可能会损坏。
– 当存取灯点亮时(此时正在读/写数据),取出“Memory Stick”或关
闭本机的电源
– 在有静电或电噪音的地方使用
• 始终要备份重要的数据。Sony 公司对数据损坏不承担任何责任。
当使用本机时,如果数据丢失或损坏,或本机损坏,我们不承担责任。
• 受“MagicGate”版权保护的数据只能和MagicGate兼容“Memory Stick”
一起使用。
• 除了专门提供给“Memory Stick”的标签 C 外,不要粘贴任何其他标签。
• 粘贴标签时,要将标签贴在指定位置。标签不能伸出“Memory Stick”边
缘以外。
• 当向“Memory Stick Duo”的存储区写入的时候,不要用力过度。
• 当运输或存放“Memory Stick”时,将它放在厂家提供的存储盒中。
• 不要用手指或金属物体接触连接器部分 A。
• 不要让“Memory Stick”折弯、跌落或受剧烈碰撞。
• 不要试图拆开或改装“Memory Stick”。
• 不要被水弄湿。
• 如果由于“Memory Stick”出错这样的故障而导致记录或播放不能完成时,
数据将不能恢复。
• 为了防止“Memory Stick”上的数据被记录或删除,请将“Memory Stick”
的写保护开关切换到“LOCK”状态。
28-CS
• 不要在以下地方使用和存放:
– 温度可能会变得很高的汽车内或其他高温地方
– 受阳光直射的地方
– 湿度很大或有腐蚀性物质的地方
29-CS
使用 CF Memory Card(Microdrive)的注意
事项
Microdrive是一种符合Compact Flash TypeII的轻巧的小型硬盘驱动
器。
使用 Microdrive 的注意事项
• 首次使用 Microdrive 时请务必用本数码相机格式化 Microdrive。
• Microdrive 是一种小型硬盘驱动器。因为 Microdrive 是可旋转的磁盘,所
以与使用闪存的“Memory Stick”相比,Microdrive 不能很好地抗震动
和冲击。
当播放和拍摄时,请勿让 Microdrive 受到震动或冲击。
• 在下列情况数据可能被破坏:
– 在读 / 写数据时取出 Microdrive。
– 在腐蚀性物质旁边存放 Microdrive。
• 注意在低于 5 ℃时使用 Microdrive 可能会导致性能降低。Microdrive 的
工作温度范围为:5 ℃到 40 ℃。
• 注意在低大气压(海拔 3000 m 以上)时不能使用数码相机。
• 刚使用完 Microdrive 时会很烫。手拿时请小心。
• 请勿在标签上涂写。
• 请勿撕除标签或在标签上粘贴新的标签。
• 当运输或存放 Microdrive 时,将它放在厂家提供的存储盒中。
• 请勿让 Microdrive 碰到水。
• 请勿用力按标签。
• 用手握住 Microdrive 的侧面,请勿压挤 Microdrive。
30-CS
卸载(删除)软件
– 在使用 Windows 98SE/Windows Me 操作系统情况下 –
1
选择[Start]菜单中的[Settings],然后单击[Control Panel]。
显示“Control Panel”画面。
2
双击“Add/Remove Programs”图标。
出现“Add/Remove Programs Properties”对话框。
3
从可以被自动删除的软件程序列表中选择要删除的软件(Memory
Stick Formatter),然后单击[Add/Remove]。
选定的软件被卸载。
– 在使用 Windows 2000/Windows XP 操作系统情况下 –
以“系统管理员”身份登录后,按下述步骤操作。要知道如何以“系统
管理员”身份登录,请参阅您计算机的使用手册。
1
使用 Windows 2000:选择[Start]菜单中的[Settings],然后单击
[Control Panel]。
使用 Windows XP:单击[Start]菜单中的[Control Panel]。
显示“Control Panel”画面。
31-CS
2
使用 Windows 2000:双击“Add/Remove Programs”图标。
使用 Windows XP:双击“Add/Remove Programs”图标。
显示“Add/Remove Programs”对话框。
3
4
单击“Change/Remove”。
从“Currently installed programs”列表中选择要删除的软件
(Memory Stick Formatter),然后单击[Change/Remove](在
Windows XP 中是[Change and Remove])。
选定的软件被卸载。
32-CS
故障排除
故障
不显示 Memory Stick 图
标(移动硬盘)。
原因/解决方法
•没有正确连接。
t 正确连接。(第 14 页)
•除了本产品外,还有其他设备连到计算机
的 USB 插孔上。
t 断开其他 USB 设备和计算机的连接。
关闭电源并重新启动。
•没有安装驱动程序。
t 从附带的 CD-ROM 上安装驱动程序。
(第 12 页)
不能从 Explorer 或 My
•没有插入记录介质。
Computer 访问记录介质。 t 插入记录介质。
当插入记录介质时,存取 •记录介质的连接器部分粘有异物。
灯闪烁。
t 检查是否有灰尘或泥土粘到记录介质的
连接器部分。
除去异物,重新插入记录介质。
33-CS
规格
多插槽 USB 读/写器
接口:USB 接口
波特率:最大 480 Mbps
一般
操作电压
耗电量
外形尺寸
重量
操作环境
直流电 5 V(通过 USB 电缆提供)
最大 500 mA(工作期间)
最大 0.5 mA(计算机挂起阶段)
约 85 mm × 16 mm × 65 mm(宽×高×深)
约 39 g(不包括“Memory Stick”)
温度 0 ℃~40 ℃(不允许结露)
湿度 20 %~80 %(不允许结露)
设计和规格说明如有变更,恕不另行通知。
关于本产品,如果您有任何疑问/评论,请访问我们的客户支持网站:
http://www.sony.net/Products/mssupport/
34-CS
Sony Corporation