1
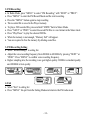
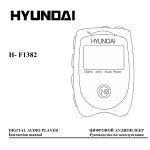
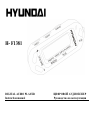
H- F1381
DIGITAL AUDIO PLAYER
Instruction manual
Dear customer!
Thank you for purchasing our product. For safety, it is strongly recommended to read this
manual carefully before connecting, operating and/or adjusting the product and keep the
manual for reference in the future.
Table of contents
Table of contents................................................................................................................................ 2
Important safeguards .........................................................................................................................3
Names of controls & indicators........................................................................................................ 4
Accessories ........................................................................................................................................7
LCD display....................................................................................................................................... 7
Getting playback started ................................................................................................................... 8
Getting voice recording started ......................................................................................................10
Adjusting menu mode .....................................................................................................................11
Operating the FM radio...................................................................................................................15
Operating with computer ................................................................................................................17
Software utilities..............................................................................................................................23
Electronic Features..........................................................................................................................28
FM Radio Specification ..................................................................................................................28
Troubleshooting guide ....................................................................................................................29
Regulatory information ...................................................................................................................30
-2-
Important safeguards
WARNING: To prevent fire or shock hazard,
Do not expose this appliance to rain or moisture.
· Keep the unit away from direct sunlight, storing magnetic fields, excessive dust, humidity
and electronic / electrical equipment which generate electronic noise.
· Use of control, adjustments or performance of procedures other than herein may result in a
fire or hazardous radiation exposure.
· Do not drop your player or leave it under heavy objects.
· To avoid accident of electric shock, please do not attempt to detach the cover of the player.
Customer should contact a qualified technician regarding any repair job.
· Do not remove / replace battery during operation.
-3-
Names of controls & indicators
Portable MP3 Player
-4-
NAMES OF DIFFERENT UNITS & CONTROLS
NO
1
2
3
4
5
6
A
B
C
D
E
MP3 Mode:
Name
PLAY/PAUSE/
STOP
NEXT
PREV
VOLUME +
VOLUME MENU
LCD
USB Jack
Earphone Jack
Strap Hole
Battery Door
Radio Mode:
No
Name
1
PLAY/PAUSE/
STOP
2
NEXT
3
PREV
4.
VOLUME +
5.
VOLUME 6.
MENU
Description
Start Playback / Pause / Stop / Power On / Power Off
Skip forward to next track
Skip backward to previous track
Increase the volume level
Decrease the volume level
Key Lock Mode / Music / Voice /FM Radio / Setting / Erase / About /
Record
Display ID3 Tag & Function Status
Connect player to computer
Connect to Earphone
Description
Fine adjust Channel
Increase the FM frequency
Decrease the FM frequency
Increase the volume level
Decrease the volume level
FM Hold Mode / Switch to the music mode
-5-
Erase Mode:
No
Name
1.
PLAY/PAUSE/
STOP
2.
NEXT
3.
PREV
4.
VOLUME +
5.
VOLUME 6.
MENU
Description
Power off
Skip forward to next mode / track / file
Skip backward to previous mode / track / file
Toggle between yes or no mode
Toggle between yes or no mode
Quit from the selected mode / quit to the music mode
-6-
Accessories
1.
2.
3.
4.
5.
6.
Installation CD
Stereo earphone
User manual
USB cable.
AAA alkaline battery
Warranty card
Remark: Accessories and items are subject to change
LCD display
1. Battery status.
2. Player status PLAY , PAUSE II , STOP .
3. Track number.
4. Total number of tracks.
5. Current music / voice format.
6. Equalizer:
, ROCK , JAZZ , CLASS .
7. Hold.
8. Volume level.
-7-
9. Play mode setting - Repeat the current song, repeat all songs, random, random all.
10. Play time.
11. Time of the current song.
12. Song title.
Getting playback started
1. Power ON / OFF
POWER ON
Press Play / Pause to turn on the power; the MP3 logo will be displayed on the LCD.
POWER OFF
Press and hold Play / Pause over 5 seconds to power off until the graphic disappear.
Caution: Don t removing the battery while the player is Power On, it will damage the
firmware & the Player.
2. Playing Start
When the power is on, the TOC (Table of Content) will be shown on LCD.
3. Playback the Track
· Press Play / Pause allows you to toggle between play & pause mode.
-8-
· Press Play / Pause for 3 seconds to stop playback while playing track.
4. Fast Tracking
While the track is being played, press and hold PREV or NEXT for fast-forward or
backward the track.
5. Skip / Return Tracking
· Press Next to skip forward to the next track.
· Press Prev to skip backward to the previous track.
6. Digital Volume Control
To adjust the volume, press volume + to increase the volume or press volume - to
decrease the volume from 0 (mute) to 30 (Max Level).
7. Hold Function
-Press MENU to enter the Hold mode.
-Press Play / Pause allows you to toggle between locking and unlocking the player.
-9-
8. Low Battery Indicator
Indicates high battery level.
Indicates medium battery level.
Indicates low battery level.
Indicates that the battery level is empty and the player needs to
replace a new battery.
Getting voice recording started
1. Voice Recording
·
Press MENU and select Record icon with PREV or NEXT
·
Press MENU for confirming the selection, the player will change to Record Mode
·
The player will record the voice automatically after entering the Record Mode
·
Press MENU for stop recording the voice, and it will quit the Record Mode at the same
time
·
Press MENU for 3 seconds to return to the music mode
2. Voice File Playback
·
Press MENU and select VOICE icon with PREV or NEXT , the player will
change to Voice Mode
·
Press PREV or NEXT to skip backward or forward
·
Press PLAY/PAUSE to playback or pause the recorded file
·
Press and hold PLAY/PAUSE for stop
·
Press MENU , it will back to the Voice mode
·
Hold MENU for 3 seconds and return to the music mode
- 10 -
Adjusting menu mode
1. Entry MENU Mode
· Press MENU to enter MENU mode.
· Press NEXT and PREV to select the required mode.
· Press MENU to confirm the selected mode.
2. Setting
Select Setting icon with PREV or NEXT and press MENU for enter the selected
mode.
1. EQUALIZER SETTING (EQ)
· Select the EQ icon in setting list and press MENU to enter.
· 5 types of EQ settings will be shown on LCD.
2. PLAY MODE SETTING
· Select Play Mode icon in setting list and press MENU to enter.
· 5 types of play modes will be shown on LCD.
· Press MENU to confirm the selection.
- 11 -
3. CONTRAST SETTING
· Select Contrast in setting list and press MENU to enter.
· Press NEXT and PREV to adjust the contrast level.
4. POWER SAVING
· Select Power Saving in setting list.
· Press NEXT and PREV to select the power saving time.
· Press MENU to confirm the selection.
· The power saving time measures the idle time of the player and the player will be
automatically power off when time is up.
5. VOICE RECORD SETTING
· Select Record settings in setting list.
· Adjust the voice recording frequency from 8000Hz to 48000Hz by pressing NEXT or
PREV .
· Press MENU to confirm voice recording frequency.
· Higher sampling rate, the recording voice gets higher quality. 8000Hz is standard quality
and 48000Hz is best quality.
6. BACKLIGHT SETTING
· Select Backlight Setting in setting list.
- 12 -
· Press NEXT or PREV to setting the backlight time.
· 4 types of backlight time will be shown on the LCD.
· Press MENU to confirm the selection.
7.BACKLIGHT COLOR SETTING
· Select Backlight Color in setting list.
· Press NEXT or PREV to select the backlight color.
· 7 backlight color will be shown on the LCD.
· For Random Color selection, the player will change the backlight color when any button is
pressed.
· Press MENU to confirm the selection.
8. EXIT
· Select Exit in setting list
· Press MENU to quit from the Setting Mode
· Press and hold MENU for 3 seconds to return the music mode
3. Record
· Select Record
· Press MENU
· Press MENU
· Press and hold
icon with PREV or NEXT button.
to enter the Record mode and start Recording.
to stop.
MENU return to the music mode.
4. Erase File(s)
· Select Erase icon with PREV and NEXT button.
· Press MENU to enter.
· Select Music or voice by pressing NEXT or PREV .
· Press MENU to enter the selected mode.
· Enter Music to delete music files, enter Voice to delete voice files.
After entering the Erase mode, the procedures are listed in the following:
- 13 -
·
·
·
·
Press NEXT or PREV to select file (s) for delete.
Press VOLUME
or
to toggle Yes or No icon.
Press Play / Pause to confirm & delete.
Press and hold MENU to go back to the music mode.
Warning: The erased file(s) cannot be recovered in any condition.
5. Music Mode
· Select MUSIC icon with PREV or NEXT button.
· Press MENU to enter the selected mode.
· Press PREV or NEXT for selecting the track.
· Press PLAY / PAUSE for playback or pausing the track.
· Press PLAY / PAUSE for stopping.
· Press and hold PLAY / PAUSE for power off.
6. About Mode
· Select About icon and press MENU to enter. The player information will be displayed
on the LCD.
· Press MENU to exit .
· Press and hold MENU for return to the music mode.
- 14 -
Operating the FM radio
· While playing in Music Mode, press MENU and select the FM Radio with NEXT or
PREV .
· Press MENU to enter the Radio Mode.
1. FM Tuning
Auto Scanning the whole FM band.
· Press MENU and select Auto Scan with NEXT or PREV .
· Press MENU to enter the Auto Scan .
· Auto scanning will be started.
· Each FM station detected will be stored in the 20 preset memory (previous preset channel
will overwrite by new FM station detected).
Fine adjust FM Band
· Press Play / Pause to remove the Preset icon.
· Press NEXT to increase FM frequency and PREV to decrease FM frequency.
How to save desired FM band in Memory Channel
· Select the Channel first.
· Press Play / Pause to remove Preset icon.
· Adjust FM frequency by passing NEXT and PREV .
· Press NEXT to increase FM frequency for selecting the channel and PREV to decrease
FM frequency for selecting the channel.
· Press MENU and select Memory Ch with NEXT or PREV .
· Press MENU to enter the Memory Ch .
· Adjust the channel position by press NEXT and PREV .
· Save the Frequency into the memory channel by press MENU to confirm.
- 15 -
2. FM Recording
· In Radio Mode, press MENU to select FM Recording with NEXT or PREV .
· Press MENU to enter the FM Record Mode and the start recording.
· Press the MENU button again to stop recording.
· The recorded file is saved in the Player memory
· To play a FM recorded file, press and hold MENU back to Music Mode.
· Press NEXT or PREV to select the saved FM files in .wav format in the Music track.
· Press Play/Pause to play the selected FM file.
· When the memory is not enough, Memory Full will appear.
· You are required to free the memory by deleting some files.
3. FM Recording Setting
· Select Record settings in setting list.
· Adjust the voice recording frequency from 8000Hz to 48000Hz by pressing NEXT or
PREV . Press MENU to confirm voice recording frequency.
· Higher sampling rate, the recording voice gets higher quality. 8000Hz is standard quality
and 48000Hz is best quality.
4. Exit
· Select Exit in setting list
· Press MENU for quit from the Setting Mode and return to the FM radio mode
- 16 -
Operating with computer
When connecting the player to your computer, Removable Driver, (H:) is shown on My
Computer . It represents the flash memory of the player. Then, you can upload, download and
manage the file(s) in the player by computer.
Firmware Download and Format are enclosed with the bundle CD ROM: Installation CD.
Please refer to Software Utilities for the operation instruction of Firmware Download and
Format.
1. System Requirements
· Windows ME / 2000 / XP; Mac OS 9 or above
· CD-ROM Drive 4x or above
· Pentium MMX 200 or above
· Minimum 30MB hard disk space
· USB (Universal Serial Bus) port
Note: To install software under Windows 2000 / XP, you must login as an administrator
2. Software Installation
1. Insert the Installation CD into your CD-ROM driver.
2. To start the installation manually: On desktop, click Start then Run , enter D:\Setup.exe
(D is the name of CD-ROM drive) and click OK to start.
3. Following the icon instruction, click Next to continue installation.
- 17 -
4. Read the following license agreement carefully. If you agree, select Yes to continue.
Otherwise, select No to exit.
5. Select Next to continue, the installation is C:\Program Files \Sigma Tel \MSCN, a
directory will be created.
6. Click Next to continue.
18
7. Click Finish to continue.
3. Computer Connection
· Switch on the computer.
· Switch off the player.
· Connect the player and the computer via USB cable
· Press Play / Pause to power on the player.
· Ready will be appeared on the LCD display when the connection is established.
19
Caution: MP3 player must be POWER OFF when connecting to computer. After
finishing the USB cable connection, MP3 player can be POWER ON safely.
4. Disconnect from the computer
When there is no data transmission, you can unplug the player from the computer.
Caution: Do not unplug the player when Read or Write icon is showing on the LCD
display.
Safety remove the player from Window s desktop by following the Windows Safety Remove
Hardware instructions before physically disconnecting the cable.
1. By double click the hardware removal icon, the box of Safely Remove Hardward appear.
2. Click Stop for continue.
3. Click OK to confirm.
20
3. Click OK to confirm
4. You can remove the player from Window s desktop after the dialogue appear.
Note: The circuitry of the player and the computer could be seriously damaged if the USB
cable is unplugged not following the instruction under Windows ME / 2000 / XP.
5. Driver Installation
After connecting the player to computer via USB port, the computer detects new hardware as a
Removable Drive, (H:) is shown on My Computer , which represents the flash memory of
the player.
21
6. File Transferring
· From My Computer , select the mp3 files for copying.
· High-light the file.
· Right Click the mouse and select Copy .
· Open the Removable Drive (H:) from My Computer .
· Right Click the mouse and select Paste on the Removable Drive (H:) for transferring the
files into the player.
Note: All the voice recording files are located at VOICE directory.
7. Software Un-installation
On Windows Desktop, click Start and then Programs . From Program, select Sigma Tel
MSCN Audio Player then click Uninstall . The software Sigma Tel MSCN Audio Player will
be removed automatically.
22
Software utilities
From the CD ROM, Installation CD. There is a software utility bundling with the player:
MSCN Firmware Download.
Warning: Some memory space in Flash Memory is reserved for Firmware Upgrade Features.
Therefore, usable memory space will be less than 128MB/256MB, where applicable.
MSCN Firmware Download
It is utility for updating firmware of the player. It can also be downloaded if your player stops
responding or not functioning.
CAUTION: Please note that ALL DATA in the flash memory may be lost after downloading
the firmware. Please back up your data before running the software utilities.
1. Connect and download the Firmware to the player
· Switch On the computer.
· Switch Off the player.
· Connect the player to the computer via the USB cable.
· Press Play / Pause to Power On the player.
· To enter Firmware Download, click on Start and select Program on Windows Desktop.
From Program , select Digital Music Player , then click on Firmware Download .
Warning: The player MUST NOT be disconnected from the computer when the player is
under accessing. The circuitry and firmware of the player may be damaged seriously.
23
· A MSCN Firmware Download box is shown
· Press Show Details to see the Current and Upgraded Firmware Version
· On Download Options, there are two selections:
· Click the checkbox for format the MP3 Player Flash Memory. ALL DATA WILL BE
ERASED.
· Unclick the checkbox for download the Firmware only. MP3 Player Flash Memory will not
be formatted.
· If click the checkbox, the Question Box is shown.
· Click Yes for confirm and No for cancelled
24
·
·
·
·
Click Start to process the firmware upgrade.
Wait until the status bar is full
Click on Close button when download is finished
Download is completed.
Warning: All data will be erased after click the checkbox. Please back up the data before
downloading the firmware.
2. Emergency Mode:
When the player does not function properly, you are required to recover the player by installing
the software for Player Recovery Device
· Switch On the computer
· Switch Off the player
· Connect the player to the computer via the USB cable
· Press and hold PLAY/PAUSE/STOP button more than 5 seconds and enter Firmware
Download at the same time (To enter Firmware Download, click Start and select
Program on Windows Desktop. From Program , select Digital Music Player , then click
on Firmware Download .)
· Your computer will take time to search the hardware (player) for 15 seconds.
25
· After click Firmware Download , the following box will appear
.
· Press and hold PLAY/PAUSE/STOP button until the computer find the new hardware
wizard.
· Click Next to continue and waiting for the installation
26
· After installation, click Finish to close the box
After installing the software for Player Recovery Device, you are required to upgrade the
Firmware. The procedure is same as the Firmware Download (please refer to page).
27
Electronic Features
Files Support
Digital Volume Control
Audio Frequency
Head Phone Output Power
Signal to Noise Ratio
Total Harmonic Distortion
Audio Output
Internal Memory Capacity
Battery Type
Battery Life Time
PC interface
WMA & MP3 (Music) / ADPCM (Voice)
30 Levels
20-20KHz
5mW + 5mW (22 OHM)
>80dB
<0.1%
One 3.6 mm Jack
32MB / 64MB / 128MB / 256MB
One AAA size battery (Alkaline)
Max. 12 hours
USB Cable
FM Radio Specification
Frequency Range
S/N Ratio
Sensitivity at 30dB S/N
Stereo Separation
Audio output Distortion
87.5-108 MHz
40-60 dB
25-31 dB
30-40 dB
< 1-2 %
28
Troubleshooting guide
The player does not work
The buttons are not
functioning
Unable to download data
Lost data
Check the capacity of the battery. One 1.5V AAA size
battery is required.
Check the polarity (
and
) of the battery.
Note: You may use any 1.5V AAA size battery, but
alkaline battery tends to last longer.
You can also use a rechargeable AAA size 1.2V Ni-Cid or
Ni-MH battery.
Check the HOLD function setting. When the HOLD
function is on. All buttons are locked.
Try reinstalling the battery to reinitialize the player.
Ensure the USB cable is properly connected to your PC and
the player.
Check that the USB driver is installed
Ensure that there is enough memory to store music or data
file(s)
Occasionally some parts of a data stream may be damaged
owing to instability of power while downloading files. In
such a case, format to initialize the memory in the player by
the utility MP3 Player.
Our company will not be responsible for
any lost or damaged data downloaded to
your MP3 Player. It is recommended to
backup the data before moving from one
How many minutes of MP3
files can this player hold
It depends on the memory size of the player. A player with
64MB of memory can hold approximately 60 minutes the
near CD sound quality MP3 files.
29
Player is not recognized by
the PC
Player is not responding and
not functioning
Check if the USB cable is connected properly, and if the
player is on.
Check that the USB driver is installed.
Refer to MSCN Firmware Download in Software Utilities
Regulatory information
Federal Communications Commission (FCC)
This device has been tested and found to comply with the limits for a Class B digital device,
Pursuant to Part 15 of the FCC Rules.
Operation is subject to the following two conditions:
1. This device may not cause harmful interference, and
2. This device must accept any interference received, including interference that may cause
undesired operation.
3. If your device needs repairs, you must arrange for the manufacturer to make them if you
are to keep the device's FCC registration valid.
This equipment, like other electronic equipment, generates and uses radio frequency energy.
If not installed and used according to the instructions in this manual, this equipment cause
interference with your radio and television reception.
If you think this equipment is causing interference with your radio or television reception,
try turning the equipment off and on, If the interference problems stop when the equipment is
switched Off, then equipment is probably causing the interference. You may be able to correct
the problem by doing one or more of the following:
· Adjust the position of the radio or TV antenna
· Move the device away from the radio or TV
If necessary, consult your dealer or an experiences radio or television technician.
You may find this booklet helpful: "How to Identity and Resolve Radio and TV interference
Problems"(Stock No. 004-000-00345-4), Prepared by the FCC and available from the U.S.
Government Printing office, Washington, DC 20402. See.
30
For the customers in Europe
The CE mark on the Audio Player is valid only for the products marketed in the European
Union.
Note: All specifications and design are subject to change without further notice or
obligation.
31
!
.
,
,
.
....................................................................................................................................32
.............................................................................................................33
.............................................................................................34
.................................................................................................................................37
................................................................................................37
...........................................................................................................................39
.....................................................................................................................................42
............................................................................................................................43
FM .......................................................................................................................48
..................................................................................................................51
.................................................................................................................58
.......................................................................................................64
FM.................................................................64
...........................................................................65
...........................................................................................................67
32
!
.
·
,
,
,
.
,
·
.
,
.
·
·
·
.
.
.
,
.
33
MP3
34
3
1
/
,
;
/
2
3
4
5
6
+
MENU (
)
,
,
,
A
B
C
-
,
Id3
USB
D
E
35
:
1
/
/
2
3
4.
5.
6.
FM
FM
+
MENU (
)
FM
/
:
1.
/
/
2.
3.
4.
5.
6.
/
/
/
+
MENU (
)
/
36
/
1.
2.
3.
4.
5.
6.
CD
.
.
USB.
:
.
37
1.
2.
3.
4.
5.
6.
7.
8.
9.
.
PLAY
(
), PAUSE
), STOP
(
).
.
:
(
), ROCK (
), JAZZ (
.
), CLASS (
).
.
.
,
10.
11.
12.
II (
.
,
,
.
.
.
38
.
1.
«
/
«
/
».
3».
»
5
.
:
,
.
.
2.
.
3.
·
«
/
»
.
·
,
/
»
3
.
39
,
4.
,
«
»
«
»
.
5.
·
·
«
»,
.
«
»,
.
6.
0 (
«+»,
7. Hold Function
·
·
,
.
/
.
40
)
30 (
« ».
).
8.
-
.
.
.
,
.
41
.
1.
·
·
·
·
«
»
«
»
«RECORD» (
«
»
).
»,
.
.
«
»,
,
.
·
«
»
3
,
.
2.
·
.
·
·
·
·
·
.
.
.
,
«
.
»
3
.
42
,
1.
·
·
·
«
»,
.
«
»
«
»
.
«
»
.
,
/
2.
».
(Setting)
«
»
»
«Setting» (
),
».
1.
·
·
(EQ).
«EQ»
5
·
2.
·
«
».
,
«
.
».
(PLAYMODE).
«
».
«PLAYMODE»
43
·
5
,
·
«
3.
·
·
·
«Contrast»
«
.
«
4.
·
·
·
·
».
«
»
«
(CONTRAST).
».
»
».
(POWER SAVING).
«Power Saving»
«
» «
.
«
.
«
».
»
».
,
,
.
44
5.
·
·
(RECORD SETTINGS).
«Record Settings»
«
«
» «
».
»
.
·
·
«
»
.
,
.
,
6.
·
·
·
48 000
(BACKLIGHT SETTING)
«
».
.
»
·
«Backlight Setting»
4
«
»
.
«
»
7.
·
·
(BACKLIGHT COLOR)
«Backlight Color»
«
».
«
» «
»
«
.
.
·
·
7
«Random» (
·
«
8.
·
·
.
)
.
»
.
(EXIT)
«Exit».
«
».
45
8 000
.
·
«
»
3
,
.
3.
·
·
·
·
(Record)
«
»
«
»
«Record».
«
«
».
».
«
»
.
4.
·
·
·
·
(Erase)
«
«
«
)
«Voice» (
«Music»
»
«Erase».
»
«
»
«Music»
).
,
«Voice»
.
«
·
·
«
».
·
·
»
»
.
.
» «
.
«
,
«
+»
,
»
«
»
«Yes»,
»
,
«No»,
«
/
.
.
·
,
.
46
«
»
:
.
5.
·
·
·
·
»
«
»
«
»
»
.
»
.
·
·
«
).
«
«
«MUSIC» (
,
«
/
».
/
».
,
«
/
»
.
6.
·
·
·
(About)
«About»
.
«
«
».
»
.
«
.
47
»
FM
«
»
«
»,
«FM Radio» (
»
FM).
«
».
1.
·
FM
«
«
»,
« Auto Scan».
«
·
·
·
»
»
»,
.
.
20
(
,
,
·
·
«
).
FM
/
«
»,
«Preset»
).
«
»,
«
,
».
FM
·
·
.
«
/
»,
«Preset»
).
·
«
»
«
»
.
·
·
»,
«
»
«
»,
«Memory Ch» (
48
».
«
).
»
·
·
«
«
»
».
«
»
.
·
,
».
2.
·
FM
«
»
·
«
«FM Recording» (
FM).
«
»
,
.
·
·
·
,
«
».
.
,
·
»,
»
«
«
»
»
.
«
»
.wav
·
.
«
/
»,
.
·
,
«Memory Full» (
).
,
.
3.
·
·
FM (Recording Setting)
«Record Setting»
«
» «
,
«
49
«
»
».
»
.
·
,
.
,
4.
·
·
8 000
48 000
.
(EXIT)
«Exit».
FM
50
«
».
,
,
«
»
, « :»,
.
,
:
,
.
CD-ROM Installation CD
.
«
».
1.
·
·
·
·
·
Windows ME / 2000 / XP; Mac OS 9
CD-ROM 4Pentium MMX 200
.
30 M
USB.
:
.
.
.
Windows 2000 / XP
.
2.
1.
2.
CD-ROM
Installation CD.
:
»,
D
«
«
»
».
51
D:\Setup.exe (
CD-ROM),
3.
«
».
4.
.
«
»,
,
«
).
5.
«
»,
C:\Program Files \ Sigma Tel \MSCN.
52
»(
6.
,
«
7.
».
«
53
».
3.
·
·
·
·
·
.
.
USB.
«
/
»,
.
«Ready» (
:
).
3
.
,
,
.
4.
,
.
«Read» (
:
«Write» (
)
.
,
Windows-
,
«Windows Safety Remove Hardware».
1.
,
.
54
)
2.
3.
«Stop».
«OK»
.
55
4.
.
:
Windows ME / 2000 / XP,
.
USB
5.
USB
,
,
6.
·
·
·
,
«
»
, « :»:
«
»
3
.
,
.
».
·
·
«
»
»,
.
.
56
:
VOICE.
7.
«
Windows
».
Sigma Tel MSCN Audio Player
«
»
«Sigma Tel MSCN Audio Player»
«Uninstall» (
).
.
57
,
,
MSCN Firmware Download.
:
,
128/256
).
MSCN Firmware Download
.
,
.
:
,
,
.
1.
·
·
·
·
·
.
.
,
USB.
/
«
«
Windows
«Digital Music Player»,
).
:
«
».
»
».
«Firmware Download» (
,
.
·
MSCN Firmware Download,
.
58
·
«Show Details» (
·
).
Download Options (
.
)
«Format Data Area» (
)
,
·
3
.
,
,
,
3
.
·
,
«Start»
).
·
«Format Data Area»
,
«Question» (
·
,
«No» (
).
«Yes»,
).
59
.
·
·
·
·
?
,
«Start»
).
.
,
«Close» (
).
.
:
,
.
60
,
2.
,
.
·
·
·
·
·
·
.
.
USB.
«
/
»
5
,
Firmware Download (
Windows,
«
»,
«Firmware Download»).
«
(
15
»
«Digital Music Player»
),
.
«Firmware Download» (
)
.
61
·
,
/
«
.
»
·
«
.
62
/
»
·
«
,
,
.
63
»
.
WMA MP3 (
) / ADPCM (
)
3020
... 20
5
+5
(22
)
> 80
< 0,1%
3,6
1
32
/ 64
/ 128
/ 256
AAA (
) 1
12
USB
FM
87,5 ... 108
40 ... 60
25 ... 31
30
30
40
< 1-2 %
64
,
.
1,5 .
(
).
.
1,5 ,
.
(Ni-Cd)
(Ni-MH)
1,2 .
«HOLD» (
«On» (
.),
).
.
,
.
USB
.
,
USB,
.
,
.
65
.
MP3 Player,
.
,
3.
.
.
64
3
60
CD.
3
?
,
USB
.
,
USB.
.
66
(FCC)
,
15
FCC.
.
1.
2.
.
,
,
.
(
FCC).
,
,
.
,
,
,
,
.
,
,
,
.
,
,
,
.
:
;
.
,
,
.
«How to Identify and Resolve
Radio and TV interference Problems» (
),
004-000-00345-4,
U.S. Government Printing Office, Washington, DC 20402.
67
,
.
.
.
68