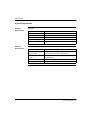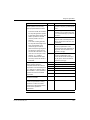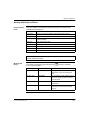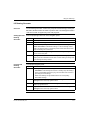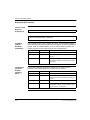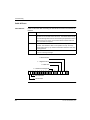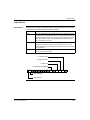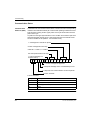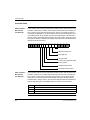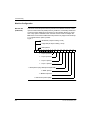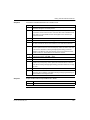
1
ProWORX 32
Programming Software for PLCs
User Guide
31003882 00
372 SPU 780 01EMAN
Version 1.0
2
372 SPU 780 01EMAN May 2002
Table of Contents
Safety Information . . . . . . . . . . . . . . . . . . . . . . . . . . . . . . . . . . . . 9
About the Book . . . . . . . . . . . . . . . . . . . . . . . . . . . . . . . . . . . . . . 11
Chapter 1
Getting Started . . . . . . . . . . . . . . . . . . . . . . . . . . . . . . . . . . . . . . 13
Welcome to ProWORX 32. . . . . . . . . . . . . . . . . . . . . . . . . . . . . . . . . . . . . . . . . .
System Requirements. . . . . . . . . . . . . . . . . . . . . . . . . . . . . . . . . . . . . . . . . . . . .
Installing ProWORX 32 . . . . . . . . . . . . . . . . . . . . . . . . . . . . . . . . . . . . . . . . . . . .
Logging in . . . . . . . . . . . . . . . . . . . . . . . . . . . . . . . . . . . . . . . . . . . . . . . . . . . . . .
Authorizing ProWORX 32 . . . . . . . . . . . . . . . . . . . . . . . . . . . . . . . . . . . . . . . . . .
The ProWORX 32 Environment . . . . . . . . . . . . . . . . . . . . . . . . . . . . . . . . . . . . .
ProWORX 32 Client Security . . . . . . . . . . . . . . . . . . . . . . . . . . . . . . . . . . . . . . .
Tracking Help . . . . . . . . . . . . . . . . . . . . . . . . . . . . . . . . . . . . . . . . . . . . . . . . . . .
ProWORX 32 Toolbar . . . . . . . . . . . . . . . . . . . . . . . . . . . . . . . . . . . . . . . . . . . . .
Contacting Schneider Electric . . . . . . . . . . . . . . . . . . . . . . . . . . . . . . . . . . . . . . .
Chapter 2
13
14
15
16
17
19
20
22
23
26
Working with Projects . . . . . . . . . . . . . . . . . . . . . . . . . . . . . . . . 27
At a Glance . . . . . . . . . . . . . . . . . . . . . . . . . . . . . . . . . . . . . . . . . . . . . . . . . . . . .
Creating a New Project . . . . . . . . . . . . . . . . . . . . . . . . . . . . . . . . . . . . . . . . . . . .
Selecting a Controller Type . . . . . . . . . . . . . . . . . . . . . . . . . . . . . . . . . . . . . . . . .
Converting Ladder Logic Databases . . . . . . . . . . . . . . . . . . . . . . . . . . . . . . . . . .
Using the ProWORX Server to Manage ProWORX 32 Projects . . . . . . . . . . . . .
Working with a ProWORX 32 Project . . . . . . . . . . . . . . . . . . . . . . . . . . . . . . . . .
Using Emulation Mode . . . . . . . . . . . . . . . . . . . . . . . . . . . . . . . . . . . . . . . . . . . .
Instructions Supported in Emulation Mode . . . . . . . . . . . . . . . . . . . . . . . . . . . . .
Adding Emulation Instruction Solve Support . . . . . . . . . . . . . . . . . . . . . . . . . . . .
Documentation Editor . . . . . . . . . . . . . . . . . . . . . . . . . . . . . . . . . . . . . . . . . . . . .
Using the Documentation Editor . . . . . . . . . . . . . . . . . . . . . . . . . . . . . . . . . . . . .
Importing and Exporting ProWORX 32 Documentation . . . . . . . . . . . . . . . . . . .
Protected Registers. . . . . . . . . . . . . . . . . . . . . . . . . . . . . . . . . . . . . . . . . . . . . . .
Using Search. . . . . . . . . . . . . . . . . . . . . . . . . . . . . . . . . . . . . . . . . . . . . . . . . . . .
Address Used . . . . . . . . . . . . . . . . . . . . . . . . . . . . . . . . . . . . . . . . . . . . . . . . . . .
The Knowledge Base . . . . . . . . . . . . . . . . . . . . . . . . . . . . . . . . . . . . . . . . . . . . .
372 SPU 780 01EMAN May 2002
27
29
31
34
35
36
39
45
46
51
53
55
58
59
60
62
3
Chapter 3
Communications Setup. . . . . . . . . . . . . . . . . . . . . . . . . . . . . . . 65
Connecting to a Controller . . . . . . . . . . . . . . . . . . . . . . . . . . . . . . . . . . . . . . . . . . 65
Communications Overview . . . . . . . . . . . . . . . . . . . . . . . . . . . . . . . . . . . . . . . . . 66
Configuring Modbus Communications. . . . . . . . . . . . . . . . . . . . . . . . . . . . . . . . . 67
Modbus Communications by Modem. . . . . . . . . . . . . . . . . . . . . . . . . . . . . . . . . . 68
Configuring Modbus Plus Communications . . . . . . . . . . . . . . . . . . . . . . . . . . . . . 71
Configuring Ethernet Gateway Communications . . . . . . . . . . . . . . . . . . . . . . . . . 72
Configuring TCP/IP Communications . . . . . . . . . . . . . . . . . . . . . . . . . . . . . . . . . 73
Network Explorer . . . . . . . . . . . . . . . . . . . . . . . . . . . . . . . . . . . . . . . . . . . . . . . . . 74
Chapter 4
Configuring a Controller . . . . . . . . . . . . . . . . . . . . . . . . . . . . . . 75
Controller Configuration . . . . . . . . . . . . . . . . . . . . . . . . . . . . . . . . . . . . . . . . . . . . 75
Controller Configuration . . . . . . . . . . . . . . . . . . . . . . . . . . . . . . . . . . . . . . . . . . . . 76
‘General’ Tab . . . . . . . . . . . . . . . . . . . . . . . . . . . . . . . . . . . . . . . . . . . . . . . . . . . . 77
‘Ports’ Tab . . . . . . . . . . . . . . . . . . . . . . . . . . . . . . . . . . . . . . . . . . . . . . . . . . . . . . 80
‘Loadables’ Tab . . . . . . . . . . . . . . . . . . . . . . . . . . . . . . . . . . . . . . . . . . . . . . . . . . 83
Loadable Library Wizard . . . . . . . . . . . . . . . . . . . . . . . . . . . . . . . . . . . . . . . . . . . 86
Chapter 5
Working with Controllers . . . . . . . . . . . . . . . . . . . . . . . . . . . . . 89
At a Glance . . . . . . . . . . . . . . . . . . . . . . . . . . . . . . . . . . . . . . . . . . . . . . . . . . . . . 89
Initializing Logic in a Controller . . . . . . . . . . . . . . . . . . . . . . . . . . . . . . . . . . . . . . 90
Reading From a Controller. . . . . . . . . . . . . . . . . . . . . . . . . . . . . . . . . . . . . . . . . . 91
Writing to a Controller . . . . . . . . . . . . . . . . . . . . . . . . . . . . . . . . . . . . . . . . . . . . . 92
Transferring Memory Contents to Controller EEPROM . . . . . . . . . . . . . . . . . . . . 94
Transferring the Flash RAM Executive . . . . . . . . . . . . . . . . . . . . . . . . . . . . . . . . 95
Transferring Memory Contents to Micro Flash RAM . . . . . . . . . . . . . . . . . . . . . . 96
Transferring Internal Flash or PCMCIA to Controller Flash . . . . . . . . . . . . . . . . . 97
Starting and Stopping Controllers . . . . . . . . . . . . . . . . . . . . . . . . . . . . . . . . . . . . 98
PLC Status Viewer. . . . . . . . . . . . . . . . . . . . . . . . . . . . . . . . . . . . . . . . . . . . . . . . 99
Analyze Device . . . . . . . . . . . . . . . . . . . . . . . . . . . . . . . . . . . . . . . . . . . . . . . . . 100
Chapter 6
Configuration Extensions . . . . . . . . . . . . . . . . . . . . . . . . . . . . 101
At a Glance . . . . . . . . . . . . . . . . . . . . . . . . . . . . . . . . . . . . . . . . . . . . . . . . . . . . 101
Configuration Extensions . . . . . . . . . . . . . . . . . . . . . . . . . . . . . . . . . . . . . . . . . . 102
Compact Phase II . . . . . . . . . . . . . . . . . . . . . . . . . . . . . . . . . . . . . . . . . . . . . . . 104
Data Protect Extension . . . . . . . . . . . . . . . . . . . . . . . . . . . . . . . . . . . . . . . . . . . 105
Quantum Hot Standby . . . . . . . . . . . . . . . . . . . . . . . . . . . . . . . . . . . . . . . . . . . . 106
IO Scanner. . . . . . . . . . . . . . . . . . . . . . . . . . . . . . . . . . . . . . . . . . . . . . . . . . . . . 108
IO Scanner Wizard. . . . . . . . . . . . . . . . . . . . . . . . . . . . . . . . . . . . . . . . . . . . . . . 111
Peer Cop . . . . . . . . . . . . . . . . . . . . . . . . . . . . . . . . . . . . . . . . . . . . . . . . . . . . . . 113
Peer Cop Wizard . . . . . . . . . . . . . . . . . . . . . . . . . . . . . . . . . . . . . . . . . . . . . . . . 118
Profibus Extension . . . . . . . . . . . . . . . . . . . . . . . . . . . . . . . . . . . . . . . . . . . . . . . 121
Profibus Wizard . . . . . . . . . . . . . . . . . . . . . . . . . . . . . . . . . . . . . . . . . . . . . . . . . 122
S980 Extension . . . . . . . . . . . . . . . . . . . . . . . . . . . . . . . . . . . . . . . . . . . . . . . . . 123
SY/MAX Extension. . . . . . . . . . . . . . . . . . . . . . . . . . . . . . . . . . . . . . . . . . . . . . . 124
TCP/IP Extension. . . . . . . . . . . . . . . . . . . . . . . . . . . . . . . . . . . . . . . . . . . . . . . . 125
4
372 SPU 780 01EMAN May 2002
Quantum VME Bus Extension. . . . . . . . . . . . . . . . . . . . . . . . . . . . . . . . . . . . . . 126
Chapter 7
Using the Logic Editor . . . . . . . . . . . . . . . . . . . . . . . . . . . . . . . 127
At a Glance . . . . . . . . . . . . . . . . . . . . . . . . . . . . . . . . . . . . . . . . . . . . . . . . . . . .
Logic Editor Overview . . . . . . . . . . . . . . . . . . . . . . . . . . . . . . . . . . . . . . . . . . . .
Logic Editor Properties . . . . . . . . . . . . . . . . . . . . . . . . . . . . . . . . . . . . . . . . . . .
Hotkey Template . . . . . . . . . . . . . . . . . . . . . . . . . . . . . . . . . . . . . . . . . . . . . . . .
Using the Logic Editor . . . . . . . . . . . . . . . . . . . . . . . . . . . . . . . . . . . . . . . . . . . .
Working with Networks . . . . . . . . . . . . . . . . . . . . . . . . . . . . . . . . . . . . . . . . . . .
Instructions . . . . . . . . . . . . . . . . . . . . . . . . . . . . . . . . . . . . . . . . . . . . . . . . . . . .
Working with Addresses . . . . . . . . . . . . . . . . . . . . . . . . . . . . . . . . . . . . . . . . . .
Configurable Mnemonics. . . . . . . . . . . . . . . . . . . . . . . . . . . . . . . . . . . . . . . . . .
ISA Symbols . . . . . . . . . . . . . . . . . . . . . . . . . . . . . . . . . . . . . . . . . . . . . . . . . . .
Diagnostic Trace . . . . . . . . . . . . . . . . . . . . . . . . . . . . . . . . . . . . . . . . . . . . . . . .
Sweep (Online Only) . . . . . . . . . . . . . . . . . . . . . . . . . . . . . . . . . . . . . . . . . . . . .
Setting Bookmarks in Logic. . . . . . . . . . . . . . . . . . . . . . . . . . . . . . . . . . . . . . . .
Hardware Clock. . . . . . . . . . . . . . . . . . . . . . . . . . . . . . . . . . . . . . . . . . . . . . . . .
Segment Scheduler. . . . . . . . . . . . . . . . . . . . . . . . . . . . . . . . . . . . . . . . . . . . . .
Equation Networks . . . . . . . . . . . . . . . . . . . . . . . . . . . . . . . . . . . . . . . . . . . . . .
Mathematical Equations in Equation Networks . . . . . . . . . . . . . . . . . . . . . . . . .
Mathematical Operations in Equation Networks . . . . . . . . . . . . . . . . . . . . . . . .
Mathematical Functions in Equation Networks . . . . . . . . . . . . . . . . . . . . . . . . .
Chapter 8
Using the Traffic Cop . . . . . . . . . . . . . . . . . . . . . . . . . . . . . . . . 163
At a Glance . . . . . . . . . . . . . . . . . . . . . . . . . . . . . . . . . . . . . . . . . . . . . . . . . . . .
Traffic Cop Overview. . . . . . . . . . . . . . . . . . . . . . . . . . . . . . . . . . . . . . . . . . . . .
Working with Drops and Racks . . . . . . . . . . . . . . . . . . . . . . . . . . . . . . . . . . . . .
Working with Slots. . . . . . . . . . . . . . . . . . . . . . . . . . . . . . . . . . . . . . . . . . . . . . .
Online Module Status . . . . . . . . . . . . . . . . . . . . . . . . . . . . . . . . . . . . . . . . . . . .
I/O Drawing Generator . . . . . . . . . . . . . . . . . . . . . . . . . . . . . . . . . . . . . . . . . . .
Materials List . . . . . . . . . . . . . . . . . . . . . . . . . . . . . . . . . . . . . . . . . . . . . . . . . . .
Chapter 9
127
129
130
132
135
138
140
142
144
146
148
149
151
152
153
154
156
158
161
163
164
165
167
169
171
172
Using the Data Watch Window . . . . . . . . . . . . . . . . . . . . . . . . 175
At a Glance . . . . . . . . . . . . . . . . . . . . . . . . . . . . . . . . . . . . . . . . . . . . . . . . . . . .
Data Watch Window Overview . . . . . . . . . . . . . . . . . . . . . . . . . . . . . . . . . . . . .
Properties . . . . . . . . . . . . . . . . . . . . . . . . . . . . . . . . . . . . . . . . . . . . . . . . . . . . .
HMI . . . . . . . . . . . . . . . . . . . . . . . . . . . . . . . . . . . . . . . . . . . . . . . . . . . . . . . . . .
Trend . . . . . . . . . . . . . . . . . . . . . . . . . . . . . . . . . . . . . . . . . . . . . . . . . . . . . . . . .
Trend - Mode Functionality Table . . . . . . . . . . . . . . . . . . . . . . . . . . . . . . . . . . .
Track Logic Editor . . . . . . . . . . . . . . . . . . . . . . . . . . . . . . . . . . . . . . . . . . . . . . .
Track Traffic Cop. . . . . . . . . . . . . . . . . . . . . . . . . . . . . . . . . . . . . . . . . . . . . . . .
Instruction Editor / Terminal Block Editor . . . . . . . . . . . . . . . . . . . . . . . . . . . . .
Instruction / Terminal Block Editor Display Scripts . . . . . . . . . . . . . . . . . . . . . .
Display Script Variables . . . . . . . . . . . . . . . . . . . . . . . . . . . . . . . . . . . . . . . . . .
Display Script Functions . . . . . . . . . . . . . . . . . . . . . . . . . . . . . . . . . . . . . . . . . .
Register Editor. . . . . . . . . . . . . . . . . . . . . . . . . . . . . . . . . . . . . . . . . . . . . . . . . .
372 SPU 780 01EMAN May 2002
175
177
181
184
188
190
191
192
193
194
195
196
201
5
PID Tuner. . . . . . . . . . . . . . . . . . . . . . . . . . . . . . . . . . . . . . . . . . . . . . . . . . . . . . 202
DRUM Summary . . . . . . . . . . . . . . . . . . . . . . . . . . . . . . . . . . . . . . . . . . . . . . . . 205
Importing and Exporting Data Watch Window Data. . . . . . . . . . . . . . . . . . . . . . 207
Chapter 10
Working with the ASCII Editor . . . . . . . . . . . . . . . . . . . . . . . . 209
ASCII Editor . . . . . . . . . . . . . . . . . . . . . . . . . . . . . . . . . . . . . . . . . . . . . . . . . . . . 209
Chapter 11
Working with Macros. . . . . . . . . . . . . . . . . . . . . . . . . . . . . . . . 213
At a Glance . . . . . . . . . . . . . . . . . . . . . . . . . . . . . . . . . . . . . . . . . . . . . . . . . . . . 213
Macros . . . . . . . . . . . . . . . . . . . . . . . . . . . . . . . . . . . . . . . . . . . . . . . . . . . . . . . . 214
Using Macros in Logic . . . . . . . . . . . . . . . . . . . . . . . . . . . . . . . . . . . . . . . . . . . . 216
Chapter 12
ProWORX 32 Utilities. . . . . . . . . . . . . . . . . . . . . . . . . . . . . . . . 219
At a Glance . . . . . . . . . . . . . . . . . . . . . . . . . . . . . . . . . . . . . . . . . . . . . . . . . . . . 219
BM85 Setup . . . . . . . . . . . . . . . . . . . . . . . . . . . . . . . . . . . . . . . . . . . . . . . . . . . . 220
BootP Server . . . . . . . . . . . . . . . . . . . . . . . . . . . . . . . . . . . . . . . . . . . . . . . . . . . 223
Compare Utility . . . . . . . . . . . . . . . . . . . . . . . . . . . . . . . . . . . . . . . . . . . . . . . . . 226
I/O Drawing Viewer . . . . . . . . . . . . . . . . . . . . . . . . . . . . . . . . . . . . . . . . . . . . . . 228
The Ping Utility. . . . . . . . . . . . . . . . . . . . . . . . . . . . . . . . . . . . . . . . . . . . . . . . . . 229
MBP Stat . . . . . . . . . . . . . . . . . . . . . . . . . . . . . . . . . . . . . . . . . . . . . . . . . . . . . . 230
Chapter 13
ProWORX 32 Reporting. . . . . . . . . . . . . . . . . . . . . . . . . . . . . . 233
Reporting . . . . . . . . . . . . . . . . . . . . . . . . . . . . . . . . . . . . . . . . . . . . . . . . . . . . . . 233
Chapter 14
ProWORX 32 Server. . . . . . . . . . . . . . . . . . . . . . . . . . . . . . . . . 239
At a Glance . . . . . . . . . . . . . . . . . . . . . . . . . . . . . . . . . . . . . . . . . . . . . . . . . . . . 239
Using the ProWORX 32 Server . . . . . . . . . . . . . . . . . . . . . . . . . . . . . . . . . . . . . 240
Audit Trail. . . . . . . . . . . . . . . . . . . . . . . . . . . . . . . . . . . . . . . . . . . . . . . . . . . . . . 243
Chapter 15
Schneider Alliances. . . . . . . . . . . . . . . . . . . . . . . . . . . . . . . . . 245
At a Glance . . . . . . . . . . . . . . . . . . . . . . . . . . . . . . . . . . . . . . . . . . . . . . . . . . . . 245
Using the Schneider Alliances Tool . . . . . . . . . . . . . . . . . . . . . . . . . . . . . . . . . . 246
Using the Script Editor . . . . . . . . . . . . . . . . . . . . . . . . . . . . . . . . . . . . . . . . . . . . 249
Using Script Editor Controls. . . . . . . . . . . . . . . . . . . . . . . . . . . . . . . . . . . . . . . . 252
Appendices
. . . . . . . . . . . . . . . . . . . . . . . . . . . . . . . . . . . . . . . . . . . . . . 255
At a Glance . . . . . . . . . . . . . . . . . . . . . . . . . . . . . . . . . . . . . . . . . . . . . . . . . . . . 255
Appendix A
I/O Cards . . . . . . . . . . . . . . . . . . . . . . . . . . . . . . . . . . . . . . . . . . 257
At a Glance . . . . . . . . . . . . . . . . . . . . . . . . . . . . . . . . . . . . . . . . . . . . . . . . . . . . 257
800. . . . . . . . . . . . . . . . . . . . . . . . . . . . . . . . . . . . . . . . . . . . . . . . . . . . . . . . . . . 258
A120. . . . . . . . . . . . . . . . . . . . . . . . . . . . . . . . . . . . . . . . . . . . . . . . . . . . . . . . . . 261
Compact TSX. . . . . . . . . . . . . . . . . . . . . . . . . . . . . . . . . . . . . . . . . . . . . . . . . . . 263
Micro . . . . . . . . . . . . . . . . . . . . . . . . . . . . . . . . . . . . . . . . . . . . . . . . . . . . . . . . . 265
Momentum M1 and INTERBUS. . . . . . . . . . . . . . . . . . . . . . . . . . . . . . . . . . . . . 266
Quantum . . . . . . . . . . . . . . . . . . . . . . . . . . . . . . . . . . . . . . . . . . . . . . . . . . . . . . 267
Sy/Max . . . . . . . . . . . . . . . . . . . . . . . . . . . . . . . . . . . . . . . . . . . . . . . . . . . . . . . . 270
6
372 SPU 780 01EMAN May 2002
Appendix B
B.1
B.2
Appendix C
Troubleshooting . . . . . . . . . . . . . . . . . . . . . . . . . . . . . . . . . . . . 271
Troubleshooting. . . . . . . . . . . . . . . . . . . . . . . . . . . . . . . . . . . . . . . . . . . . . . . . .
General Troubleshooting. . . . . . . . . . . . . . . . . . . . . . . . . . . . . . . . . . . . . . . . . .
Section Overview . . . . . . . . . . . . . . . . . . . . . . . . . . . . . . . . . . . . . . . . . . . . . . .
Isolating Faults . . . . . . . . . . . . . . . . . . . . . . . . . . . . . . . . . . . . . . . . . . . . . . . . .
Manual Procedure List . . . . . . . . . . . . . . . . . . . . . . . . . . . . . . . . . . . . . . . . . . .
Modbus Plus . . . . . . . . . . . . . . . . . . . . . . . . . . . . . . . . . . . . . . . . . . . . . . . . . . .
Stopcode Error Analysis . . . . . . . . . . . . . . . . . . . . . . . . . . . . . . . . . . . . . . . . . .
Status Words for S901 and S908 . . . . . . . . . . . . . . . . . . . . . . . . . . . . . . . . . . .
At a Glance . . . . . . . . . . . . . . . . . . . . . . . . . . . . . . . . . . . . . . . . . . . . . . . . . . . .
ASCII Message Status . . . . . . . . . . . . . . . . . . . . . . . . . . . . . . . . . . . . . . . . . . .
Cable A Errors. . . . . . . . . . . . . . . . . . . . . . . . . . . . . . . . . . . . . . . . . . . . . . . . . .
Cable B Errors. . . . . . . . . . . . . . . . . . . . . . . . . . . . . . . . . . . . . . . . . . . . . . . . . .
Communication Status . . . . . . . . . . . . . . . . . . . . . . . . . . . . . . . . . . . . . . . . . . .
Controller State . . . . . . . . . . . . . . . . . . . . . . . . . . . . . . . . . . . . . . . . . . . . . . . . .
Controller Status . . . . . . . . . . . . . . . . . . . . . . . . . . . . . . . . . . . . . . . . . . . . . . . .
EOL (End of Logic) Pointer . . . . . . . . . . . . . . . . . . . . . . . . . . . . . . . . . . . . . . . .
Global Errors . . . . . . . . . . . . . . . . . . . . . . . . . . . . . . . . . . . . . . . . . . . . . . . . . . .
S911 Hot Standby Status (S908) . . . . . . . . . . . . . . . . . . . . . . . . . . . . . . . . . . .
Local Drop Communications Errors (S908). . . . . . . . . . . . . . . . . . . . . . . . . . . .
Machine Configuration . . . . . . . . . . . . . . . . . . . . . . . . . . . . . . . . . . . . . . . . . . .
Module Health . . . . . . . . . . . . . . . . . . . . . . . . . . . . . . . . . . . . . . . . . . . . . . . . . .
Number of Segments . . . . . . . . . . . . . . . . . . . . . . . . . . . . . . . . . . . . . . . . . . . .
Status Word Pointer Table . . . . . . . . . . . . . . . . . . . . . . . . . . . . . . . . . . . . . . . .
RIO Time-out. . . . . . . . . . . . . . . . . . . . . . . . . . . . . . . . . . . . . . . . . . . . . . . . . . .
Run/Load/Debug Status . . . . . . . . . . . . . . . . . . . . . . . . . . . . . . . . . . . . . . . . . .
S901/J200 Status . . . . . . . . . . . . . . . . . . . . . . . . . . . . . . . . . . . . . . . . . . . . . . .
S908 Errors . . . . . . . . . . . . . . . . . . . . . . . . . . . . . . . . . . . . . . . . . . . . . . . . . . . .
Stopcode . . . . . . . . . . . . . . . . . . . . . . . . . . . . . . . . . . . . . . . . . . . . . . . . . . . . . .
271
272
272
273
274
276
277
280
280
281
282
283
284
286
287
288
289
290
291
292
293
295
296
297
298
299
300
301
Editing .DIF Files with Microsoft Excel. . . . . . . . . . . . . . . . . . 303
Editing .DIF files with Microsoft Excel . . . . . . . . . . . . . . . . . . . . . . . . . . . . . . . . 303
Glossary
. . . . . . . . . . . . . . . . . . . . . . . . . . . . . . . . . . . . . . . . . . . . . 307
Index
. . . . . . . . . . . . . . . . . . . . . . . . . . . . . . . . . . . . . . . . . . . . . 321
372 SPU 780 01EMAN May 2002
7
8
372 SPU 780 01EMAN May 2002
Safety Information
§
Important Information
NOTICE
Read these instructions carefully, and look at the equipment to become familiar with
the device before trying to install, operate, or maintain it. The following special
messages may appear throughout this documentation or on the equipment to warn
of potential hazards or to call attention to information that clarifies or simplifies a
procedure.
The addition of this symbol to a Danger or Warning safety label indicates
that an electrical hazard exists, which will result in personal injury if the
instructions are not followed.
This is the safety alert symbol. It is used to alert you to potential personal
injury hazards. Obey all safety messages that follow this symbol to avoid
possible injury or death.
DANGER
DANGER indicates an imminently hazardous situation, which, if not avoided, will
result in death, serious injury, or equipment damage.
WARNING
WARNING indicates a potentially hazardous situation, which, if not avoided, can result
in death, serious injury, or equipment damage.
CAUTION
CAUTION indicates a potentially hazardous situation, which, if not avoided, can result
in injury or equipment damage.
372 SPU 780 01EMAN May 2002
9
Safety Information
PLEASE NOTE
10
Electrical equipment should be serviced only by qualified personnel. No responsibility is assumed by Schneider Electric for any consequences arising out of the use
of this material. This document is not intended as an instruction manual for untrained
persons.
© 2002 Schneider Electric
All Rights Reserved
372 SPU 780 01EMAN May 2002
About the Book
At a Glance
Document Scope
This manual describes how to install, configure and use ProWORX 32 and all of its
components.
To find out about any changes to the manual after this version was published,
consult our web site at public.modicon.com.
Terms and Abbreviations
Numbers are written according to international practice as well as according to
approved SI (System International d’Unites) presentation; each thousand is
separated by a space, along with use of the decimal point, e.g., 12 345.67
Validity Note
This document applies to the installation and use of ProWORX 32 in Windows 98,
Windows Me, Windows XP, Windows NT 4.0, and Windows 2000 environments and
ProWORX Server in Windows XP, Windows NT 4.0, and Windows 2000
environments.
Related
Documents
372 SPU 780 01EMAN May 2002
Title of Documentation
Reference Number
Modicon Ladder Logic Block Library
840 USE 101 00
Modicon Modbus Plus PCI-85 Interface Adapter
890 USE 162 00
Modicon Quantum Hot Standby System Planning and Installation
Guide
840 USE 106 00
Modicon TSX Quantum Automation Series Hardware Reference
Guide
840 USE 100 00
TSX Momentum I/O Base User Guide
870 USE 002 00
Modicon A120 Series I/O Modules User Guide
890 USE 109 00
BM85 Bridge Multiplexer User’s Guide
890 USE 103 00
11
About the Book
Product Related
Warnings
Schneider Electric assumes no responsibility for any errors that may appear in this
document. If you have any suggestions for improvements or amendments or have
found errors in this publication, please notify us.
No part of this document may be reproduced in any form or by any means, electronic
or mechanical, including photocopying, without the express written permission of
Schneider Electric. All rights reserved. Copyright 2002.
User Comments
We welcome your comments about this document. You can reach us by e-mail at
[email protected]
12
372 SPU 780 01EMAN May 2002
Getting Started
Welcome to ProWORX 32
About this
Manual
This manual is a guide for operating ProWORX 32. It does not contain information
about specific controllers, I/O cards, or ladder logic instructions. For further
hardware and ladder logic information, go to the ProWORX 32 on-line help system.
Getting Started
with
ProWORX 32
This chapter guides you through starting out with ProWORX 32.
What’s in this
Chapter?
This chapter contains the following topics:
Topic
System Requirements
372 SPU 780 01EMAN May 2002
Page
14
Installing ProWORX 32
15
Logging In
16
Authorizing ProWORX 32
17
The ProWORX 32 Environment
19
ProWORX 32 Client Security
20
Tracking Help
22
ProWORX 32 Toolbar
23
Contacting Schneider Electric
26
13
Getting Started
System Requirements
Hardware
Requirements
Software
Requirements
Hardware:
Hardware
Requirement
Processor
P200
Memory
128 MB
Hard Disk Space (Available)
200 MB
Installation Media Type
CD
Display
256 color VGA or higher
Software:
Software
Requirement
ProWORX 32 Client Operating Systems
Windows 98, Windows NT (Version 4.0, SP5 or higher),
Windows 2000, Window Me, and Windows XP.
ProWORX Server - Operating Windows NT (Version 4.0, SP5 or higher), Windows 2000,
Systems
and Windows XP.
14
Microsoft Internet Explorer
Version 5.0 or higher.
Microsoft MDAC
Version 2.5 or higher.
372 SPU 780 01EMAN May 2002
Getting Started
Installing ProWORX 32
Installing
ProWORX 32
ProWORX 32 requires the installation of MDac version 2.5 or greater and Internet
Explorer 5.0 or greater. Install the MDac software from the ProWORX 32 installation
CD, and ensure that you have a compatible version of Internet Explorer prior to
installing ProWORX 32. Then, to install ProWORX 32:
Step
Modifying or
Repairing the
ProWORX 32
Installation
Uninstalling
(Removing)
ProWORX 32
Action
1
Insert the ProWORX 32 CD into your CD-ROM drive. The ProWORX 32
installation screen should automatically load. If the ProWORX installation
program does not automatically load, you can open the installation in Windows
Explorer at CD Rom Drive → Setup.exe.
2
Select the Language you want to install ProWORX 32 in. (English, French,
German, Spanish.)
3
Follow the on-screen instructions to complete the installation of ProWORX 32.
If you have already installed ProWORX 32:
Step
Action
1
Insert the ProWORX 32 CD into your CD-ROM drive.
2
Select Modify to add new components, or remove already installed components.
Click Next and follow the on-screen instructions.
3
Select Repair to reinstall all components installed by the previous setup. Click
Next and follow the on-screen instructions.
If you have already installed ProWORX 32:
372 SPU 780 01EMAN May 2002
Step
Action
1
Insert the ProWORX 32 CD into your CD-ROM drive.
2
Select Remove to uninstall all installed components.
3
Click Next and follow the on-screen instructions.
15
Getting Started
Logging In
The ProWORX 32
Login Screen
When opening ProWORX 32 you are prompted with the ProWORX 32 Login screen.
If you are using projects that reside on a server or you want to communicate through
the server, enter the login information and click Login. If you are using only projects
that reside on the client, click Bypass.
Logging In to the
ProWORX 32
Server
To access the login screen from within ProWORX 32:
Logging Out of
the ProWORX 32
Server
Step
In the ProWORX 32 menu, select File → Login.
2
Enter the user name and password that your system administrator has given you
in the Name and Password fields.
3
Select your method of communicating with the server from TCP/IP and Modbus
Plus.
4
Enter the address of the server in the Server Address field.
5
Enter the timeout (seconds) in the Timeout field.
6
If you have selected TCP/IP, enter the port number in the Port Number field.
7
If you have selected Modbus Plus, enter the adapter number in the Adapter
Number field.
8
Click Login.
Closing ProWORX 32 client logs you out of the server or to log out while remaining
in ProWORX 32:
Step
1
16
Action
1
Action
From the ProWORX 32 menu, select File → Logout.
372 SPU 780 01EMAN May 2002
Getting Started
Authorizing ProWORX 32
Opening the
Authorization
Program
From the Windows Start menu:
Step
1
Using the
Authorization
Wizard
Action
Select Programs → ProWORX 32 → Authorization.
After opening the authorization wizard:
Step
1
2
3
4
372 SPU 780 01EMAN May 2002
Action
Select which task you would like to perform:
Authorize this PC: Sets up the PC you are currently using to run ProWORX
32.
l Transfer Authorization: Transfers authorization from one PC to another.
l Enter received code: If already registered, you are taken directly to the
Entering Authorization Code screen.
When you have made a selection, click Next.
l
Select which method you would prefer to authorize ProWORX 32 by, and click
Next:
l Authorize by Phone: A message box is displayed containing a customer
support phone number and the customer support hours of operation. Click
OK to return to the authorization application.
l Authorize by Fax: A fax page is printed containing the information you have
entered and a number to send the fax to.
l Authorize by Multi-User License Diskette: This option is used strictly for
uncopyprotected versions in which a diskette has been provided by
Schneider Electric. The contents of the diskette will be transferred onto your
machine.
l Authorize by Email: An email is sent to customer support containing the
information you have entered.
l Authorize by Web: You will be directed to a web page at the Schneider
Electric web site where the information that you have entered will be
displayed and an authorization number will be generated for you.
Select which product you want to authorize and click Next:
Online Only Client: Access to online only portions of ProWORX 32.
Lite Client: Access to Momentum, Compact, and Micro controllers only.
Full Development Client: Full access to all features of ProWORX 32.
Server: Full access to the ProWORX Server.
l
l
l
l
Enter all of your personal information in the User Information screen and click
Next. If you would like to view our privacy policy, click Privacy Policy.
17
Getting Started
Moving
Authorization
After selecting Transfer Authorization in Step One:
Step
1
2
Entering the
Authorization
Number
18
Action
Insert a diskette into your PC diskette drive.
Select which transaction you want to complete and click Next:
Transfer authorization from computer to diskette.
Transfer authorization from diskette to computer.
l
l
After receiving an authorization number:
Step
Action
1
A Code Entry Number and a Computer ID are created automatically
2
Enter the Authorization Number provided to you by customer support and click
Next.
3
To complete your ProWORX 32 authorization, click Finish.
372 SPU 780 01EMAN May 2002
Getting Started
The ProWORX 32 Environment
Overview
ProWORX 32 is organized in such a way that the information you need at any time
is readily accessible through the ProWORX 32 main interface.
Setting
ProWORX 32
Properties
From the My Computer right-click menu in the Navigation panel:
Step
1
Select Properties.
2
Select the Environment tab.
3
Set the following ProWORX 32 Environment parameters:
4
Auto Monitor/Logout: When selected with Logout, the Online Network Editor
closes after the specified amount of inactive time. When selected with Monitor,
the Online Network Editor closes after the specified amount of inactive time and
Monitor mode is activated.
5
Prompt For Read When Exiting Online: Displays a prompt to perform a read
after switching out of online mode.
6
Compare To Project On Attach: Displays a prompt to perform a compare when
switching to online mode.
7
Enable Audit Trails: Audit trails and the log book are viewable.
8
Automatically Update Used Tables Online: When going online, the used
tables are automatically updated.
9
Enable Scrolling Navigation Panel: When this option is selected, the
navigation panel shrinks showing only the panel’s border. To see the navigation
panel, hover your mouse over the border and the navigation panel expands.
10
372 SPU 780 01EMAN May 2002
Action
Instruction Toolbar: See ProWORX 32 Toolbar, p. 23.
19
Getting Started
ProWORX 32 Client Security
Overview
Security allows an administrator to disable features of ProWORX 32.
Setting Security
for a Client
From the My Computer right-click menu in the Navigation panel:
20
Step
Action
1
Select Security Settings to open the Client Security dialog.
2
To set and confirm the administrative password, enter the password into the
Password and Confirm Password boxes.
3
To set the rights that users have while running ProWORX 32 on this specific PC,
select rights from the Enabled Functionality group of rights. See User Rights
below for more information.
4
Click OK to confirm changes. Click Close to exit.
372 SPU 780 01EMAN May 2002
Getting Started
User Rights
User rights descriptions:
372 SPU 780 01EMAN May 2002
User Rights
Descriptions
Controller Configuration
The ability to change the controller configuration, or change
controller type.
Traffic Cop
The ability to edit in the traffic cop.
Communications
The ability to change the communications setup including the
controller’s address.
Logic
The ability to edit logic.
Forcing
The ability to force contacts and coils.
Insert
The ability to insert cells, rows, columns, and networks.
Delete
The ability to delete cells, rows, columns, and networks.
Sweep
The ability to enter sweep mode.
Data Editors
The ability to enter any of the data editors, If deselected, the
user is unable to change register data.
Extended Memory
The ability to edit extended memory registers.
Protected Registers
The ability to set ranges of 4xxxx addresses that are
uneditable. See Setting Protected Registers for more
information.
Configuration Extensions
The ability to edit the configuration extensions.
ASCII Messages
The ability to edit the ASCII messages.
Search
The ability to use the search feature.
Read
The ability to read from the controller.
Write
The ability to write to the controller.
Start/Stop
The ability to start or stop the controller.
Clear Audit Trails
The ability to remove all audit trail and logbook entries.
21
Getting Started
Tracking Help
Overview
Tracking help is a brief description or overview of the editor, instructions, or I/O card
that is currently selected in ProWORX 32.
Using Tracking
Help
From the ProWORX 32 menu:
22
Step
Action
1
Select View → Tracking Help to open the tracking help window.
2
To see more information about the current tracking help topic, press F1.
372 SPU 780 01EMAN May 2002
Getting Started
ProWORX 32 Toolbar
Overview
The ProWORX 32 toolbar holds all of the icon buttons that can be used to access
features, utilities, and tools needed to properly use ProWORX 32s development
capabilities.
Handle
Using the
Toolbar
ProWORX 32 Toolbar
From the ProWORX 32 toolbar right-click menu:
Step
1
Action
To add a toolbar, select a toolbar to add from the list. A toolbar that is displayed
is denoted by a check
Customizing the
Instruction
Toolbar
.
2
To remove a toolbar, select a toolbar to remove from the list.
3
To move a selected toolbar within the ProWORX 32 toolbar area, select the
toolbars handle, and drag and drop the toolbar to its desired location.
4
To customize the toolbars, click Customize. To view help concerning toolbar
customizing please refer the Windows help file, Windows Start Menu → Help.
In the project navigation panel:
372 SPU 780 01EMAN May 2002
Step
Action
1
From the project right-click menu, select Properties.
2
Select the Environment tab.
3
Scroll to the number of the button (1-14) you would like to change in the Button
Number field. eg. 1 = the leftmost button, 14 = the rightmost button.
4
Enter the name of the instruction to be placed on the toolbar in the Button Text
field.
23
Getting Started
Toolbar Listing
Default toolbars and items:
Toolbar
Standard Toolbar
Item
- Create a New Project
- Save the Active Project
- Print the Active Project
- Open Print Preview
- Open Report Setup
- Undo the most recent action (CTRL+Z)
- Repeats the most recent action
- Cut the current selection and copy to the system clipboard
(CTRL+X)
- Copy the current selection to the system clipboard (CTRL+C)
- Paste data from system clipboard to selected area (CTRL+V)
- Open the Search window (CTRL+F)
- Repeat the last Search operation (SHIFT+F4)
- Find and Replace (CTRL+H)
- Open Help (F1)
Control Toolbar. See
Working with a
ProWORX 32 Project,
p. 36
- Take project offline
- Take project to emulation
- Take project online
- Take project to combined mode
24
372 SPU 780 01EMAN May 2002
Getting Started
Toolbar
Online Control Toolbar
Item
- Start/Stop controller. See Starting and Stopping Controllers,
p. 98.
- Initialize logic. See Initializing Logic in a Controller, p. 90.
DWW Log Toolbar
l
l
- Read from controller. See Reading From a Controller, p. 91.
Read
Read extended memory
l
l
l
l
- Write to controller. See Writing to a Controller, p. 92.
Write logic
Relocate logic and data
Relocate logic only
Write extended memory
- First record
- Previous record
- Next Record
- Last record
- Pause/Resume
- Record
- Toggle between logging real-time data from a controller and
logging stored
Instruction Toolbar
- A user-defined set of instructions. Clicking an instruction adds it
to the logic editor at the cursor.
372 SPU 780 01EMAN May 2002
25
Getting Started
Contacting Schneider Electric
Contact
Information
Customer support is available to registered Schneider Electric users.
If you have a question about ProWORX 32 and can’t find the answer in the
ProWORX 32 Help system or the User’s Guide, contact our Customer Service staff
for assistance. You can reach Schneider’s Customer Support department by
Internet, phone, fax, or mail:
Schneider Electric
One High Street
North Andover, MA 01845
Internet: http://public.modicon.com/
E-mail: [email protected]
Support Hotline: (888) 266-8705
Telephone: (978) 794-0800
Fax: (978) 975-9301
Support
Guidelines
To help us assist you quickly, we suggest you have the following information ready:
l The version and serial number of your copy of ProWORX 32. To find this
information, select About on the Help menu.
l What you were doing when the problem occurred, whether you can repeat it, and
any error messages you received.
l Your version of Windows. To find this information in Windows ME, 98, 95, 2000
or NT 4.x: click Start, then Settings. Select Control Panel. When the Control
Panel window opens, double-click System. When the System window opens,
select the General tab. Your version of Windows is listed under the heading
System.
l Information about your computer, including its processor type, memory, hard
drive size, video card type, and I/O boards.
26
372 SPU 780 01EMAN May 2002
Working with Projects
At a Glance
Overview
ProWORX 32 holds information about each of your controllers in a project. The
project stores:
l
l
l
l
l
l
372 SPU 780 01EMAN May 2002
The controller’s configuration
Ladder logic
Descriptors of the controller and ladder logic
Project properties
Data trends
Compare results
27
Working with Projects
What’s in this
Chapter?
28
This chapter contains the following topics:
Topic
Page
Creating a New Project
29
Selecting a Controller Type
31
Converting Ladder Logic Databases
34
Using the ProWORX Server to Manage ProWORX 32 Projects
35
Working with a ProWORX 32 Project
36
Using Emulation Mode
39
Instructions Supported in Emulation Mode
45
Adding Emulation Instruction Solve Support
46
Documentation Editor
51
Using the Documentation Editor
53
Importing and Exporting ProWORX 32 Documentation
55
Protected Registers
58
Using Search
59
Address Used
60
The Knowledge Base
62
372 SPU 780 01EMAN May 2002
Working with Projects
Creating a New Project
Creating a New
Project
From the ProWORX 32 tool bar:
Step
1
Overview
Action
Click File → New.
2
Enter a project name in the New Project Name box.
3
Click OK. The New Project Wizard appears.
The Project Configuration Wizard steps you through creating new default projects
and modify existing projects in ProWORX 32. The configuration wizard guides you
through a series of easy to understand steps to set up a project. Each step
configures an important area of the project.
Each screen in the wizard has a caption stating which step you are currently
completing. Also, each screen has a diagram and description detailing what the
current step involves.
The standard wizard buttons are:
372 SPU 780 01EMAN May 2002
Button
Function
Help
Displays context-sensitive help pertaining to the current step.
Cancel
Exits the wizard and no new project is created or no changes are saved.
Back
Returns the wizard to the previous step.
Next
Advances the wizard to the next step.
Finish
Completes the wizard and creates a new project or saves the changes.
29
Working with Projects
Step 1 - Select
Creation Method
30
Select a path to create a new project:
Path
Description
Online to Controller
This option sets up a project enough to go online to a controller.
The first step configures the parameters used to communicate
with the desired controller. This step encapsulates
communications setup; use of this step is identical to the Project
communications setup dialog. Click Next to display the Finish
step. Click Finish to go online to the desired controller.
Select Controller Type
This step allows you to set up the controller type. For more
information, see Selecting a Controller Type, p. 31.
Base on Existing Project
This option creates a project based on an existing project. First,
select an existing Project from the list of projects on the local
computer. ProWORX 32 creates a copy of the project and uses
it as the base for the new project. ProWORX 32 initializes the
logic and clears the traffic cop of the new project. ProWORX 32
then displays a communications setup step to configure
communications to the desired controller. On the finish step
click Finish to complete the new project creation.
Read from Controller
This option creates a project based on a read of the program
from an existing controller. ProWORX 32 displays a
communications setup step to configure communications to the
desired controller. On the Finish step click Finish. ProWORX
32 reads the contents of the controller into a new default project.
Use as a Macro
When selecting any offline options, you can click the Use as
Macro checkbox to create a macro-enabled database. For more
information, see Macros, p. 214.
372 SPU 780 01EMAN May 2002
Working with Projects
Selecting a Controller Type
Selecting a
Controller Type
This step includes two drop down lists to select a controller. To the right of the drop
down lists is a detailed description of the currently selected controller. Displayed
below the controller selection drop down list are pictures of the I/O type(s) supported
by the current controller.
To select a controller:
372 SPU 780 01EMAN May 2002
Step
Action
1
Select a controller family from the Pick a Controller Family drop-down box:
Compact, Micro, Momentum, 38x/48x, 484 Replacement, 68x/78x, 984ABX,
Atrium, Other, Quantum, or VME.
2
Select the desired controller from the Pick a Controller drop-down box. The list
of controllers depends on which controller family you selected in Step 1.
3
Click Next to continue.
31
Working with Projects
Controller
Details
The controller details available depends on the controller you have selected in the
previous step. Set the available controller details:
Controller Detail
Description
Executive Cartridge
Cartridges which determine the controller’s instruction set.
Select the one installed in your controller. The Executive
Cartridge is available for some 38x, 48x, 68x and Quantum
controllers.
Memory Pack
The amount of both Extended and User Logic memory in the
controller. Select the amount installed in your controller.
Available on a variety of x80 and 984 A/B controllers.
Extended Memory
Additional memory providing 6xxxx registers. Select the
amount installed in your controller. Available on a variety of
x80 and 984 A/B controllers.
Built-in XMRD/XMWT
Select Yes or No. The built-in extended memory functions
option is only available for the 984AS908.
User Logic
Memory available for ladder logic. Select the amount of
memory you want to use for ladder logic from the total amount
available in your controller. Available on a variety of x80 and
984 A/B controllers.
S908 Size
Select either 512 or 1024 (1k) input and output points per drop.
Available for most 68x and 78x controllers.
Micro I/O Mode
Micro controllers only. Select:
Single: The controller is independent, not in a parent/child
relationship.
l Parent: The controller is the parent in a parent/child
relationship.
l Child: The controller is the child in a parent/child
relationship.
Available for "Brick" controllers from the Micro 311/0 to the
Micro 612/4.
l
Click Next when you have set the controller details.
32
372 SPU 780 01EMAN May 2002
Working with Projects
Communications
Setup
Finish
To select a communications mode:
Step
Action
1
Select a communications tab: Modbus, Modbus Plus, Gateway, or TCP/IP.
2
Set the communications-specific properties as desired. For more information
see Communications Overview, p. 66.
3
If your project will communicate with a controller via the ProWORX server, click
the Use server to communicate check box.
4
Click Next to continue.
The finish step displays a summary of the selected controller type. Click Finish to
perform the operations set up in the previous steps. When the progress number
reaches 100% the wizard closes. The newly created project appears in the project
navigation tree.
372 SPU 780 01EMAN May 2002
33
Working with Projects
Converting Ladder Logic Databases
Overview
Old ladder logic databases created in 484, 884, ProWORX, ProWORX Plus,
ProWORX NxT, Modsoft, and Concept can be imported into the new format of
ProWORX 32. By importing a database using the ProWORX 32 convert function,
your logic, documentation, configuration, and other relevant areas of your project
are converted directly into ProWORX 32.
Converting a
Database
From the ProWORX 32 menu:
34
Step
Action
1
Select File → Import Database. The Select Database to Convert dialog
appears.
2
Select a database to convert from the following database types:
l 484 databases - *.CF4
l 884 databases - *.CF8
l Old ProWORX databases - *.CF9, *.DCF
l Modsoft databases - *.CFG
l Concept databases - *.ASC
l ProWORX Plus/NxT databases - *.DCF
3
When you have selected a database, click Open to start the conversion process.
4
To cancel the conversion, click Cancel in the Conversion Status dialog.
5
Click OK in the Conversion complete dialog to return to ProWORX 32.
372 SPU 780 01EMAN May 2002
Working with Projects
Using the ProWORX Server to Manage ProWORX 32 Projects
Overview
The ProWORX Server is an application used to store and manage ProWORX 32
projects. The following project transactions can occur between a ProWORX 32
client, and the ProWORX Server. For more information about the ProWORX Server,
see ProWORX 32 Server, p. 239.
In the project navigation panel of the ProWORX 32 client, from the project right-click
menu:
372 SPU 780 01EMAN May 2002
Transaction
Result
Select Get from Server.
The selected project is copied to your local PC. If you
plan to make changes to a project it is recommended
that you get the project from the server with a lock.
Select Get from Server with Lock.
The selected project is copied to your local PC. You
have sole access and editing capabilities for a project
when it is locked out to your PC.
Select Put to Server.
When you have finished making changes or you want
to add a project to the server, use the Put to Server
function. This function creates a copy of the project on
the server.
Select Unlock Project.
The project is unlocked so that other clients can
check it out of the server.
35
Working with Projects
Working with a ProWORX 32 Project
Projects in
Offline Mode
To work with a controller offline, you must create a project for it. This project stores
the controller’s traffic cop and configuration information, its ladder logic, and
descriptors of the controller and ladder logic. As you work in offline mode, editors
modify this data. Because the offline editors are not connected directly to the
controller, changes made in it do not take effect immediately. Instead, when you
have finished programming, you can write all your changes to the controller at once.
Taking a Project
Offline
From the project right-click menu in the Navigation panel:
Step
1
Action
Select Project State → Offline.
Projects in
Online Mode
To work with a controller online, select a project, and changes its mode to online.
ProWORX 32 then attaches to that controller with the communications settings
provided. The online editors read ladder logic, traffic cop information, register
contents, and the controller’s configuration directly from the controller and
ProWORX 32 writes back to it. Changes made in the online mode take effect in the
controller immediately, but don’t appear in its project until you read from the
controller.
Taking a Project
Online
From the project right-click menu in the Navigation panel:
Step
1
Action
Select Project State → Online.
Projects in
Emulation Mode
To work with a controller in emulation mode, you first make sure that the project is
in offline mode. Bringing a project into emulation mode allows you to emulate the
solving of logic without needing a controller. From emulation mode, you can view the
solving of logic, and the changing of register data. Use the online controls to start
and stop the emulator. For more information, see Using Emulation Mode, p. 39.
Taking a Project
to Emulation
From the project right-click menu in the Navigation panel:
Step
1
36
Action
Select Project State → Emulation.
372 SPU 780 01EMAN May 2002
Working with Projects
Projects in
Combined Mode
Combined mode is a combination of offline and online modes. When a project is in
combined mode, it attaches to the controller specified by the communication
settings. All work done in the editors are made directly to the controller. Work done
in the logic editor, traffic cop, and register editors are also saved back to the project
file, so there is no immediate need to read from the controller to update the project
file with all of the changes.
Taking a Project
to Combined
Mode
From the project right-click menu in the Navigation panel:
Step
1
Setting the
Project
Properties
Action
Select Project State → Combined.
From the project right-click menu in the Navigation panel:
372 SPU 780 01EMAN May 2002
Step
Action
1
Ensure that the project is selected in the navigation panel. The currently selected
project is denoted by its name being part of the ProWORX screen’s title bar.
2
Select Properties.
3
Select the Project tab.
4
Configure the project properties. See Project Properties Descriptions below.
5
Click OK to save changes.
37
Working with Projects
Project
Properties
Description
Property descriptions:
Property
Description
Detailed Project Name
Enter the detailed description of the current project.
Project
Enter a name (brief description) for the current project.
Client
Enter the name of the project’s client if applicable.
Author
Enter the name of the project author.
6 Digit Addressing
When On, sets all addressing to six digits, allowing
ProWORX 32 to enter and display constants greater than
9999. Auto is the default, which sets addressing to five digits
unless the controller has addresses configured that require
six.
Maximum Decimal Value
Restricts registers to a decimal value of either 9999 (default)
or 65535.
Enable Symbols
Enables or disables symbolic addressing.
Save to Flash on Exit of Online If the controller supports flash memory, selecting this
feature will save the controllers contents to memory on exit
of online.
Online Update Rate
38
Adjust how fast ProWORX 32 polls the controller for
information when online and running. The faster the update
rate, the more accurate the data displayed. But, as the
update rate is increased, the performance of the software
is reduced.
372 SPU 780 01EMAN May 2002
Working with Projects
Using Emulation Mode
Overview
The emulation function is used to test the integrity of the logic in a project without the
need of a PLC. Emulation mode allows you to check discrete states and register
contents, and test your logic in a "safe" environment.
Taking a Project
to Emulation
In the project navigation panel:
Step
1
Action
From the project right-click menu, select Project State → Emulation.
Setting up
Emulation
Before you test your logic, set the default states, or values into the emulator, so
when you use the Load command, you can debug your database file using the
states you have preset. Discretes may be set to OFF, ON, Enabled, Disabled OFF,
or Disabled ON. Register values may be set to Decimal, Hexadecimal, Binary,
ASCII, or Floating Point.
Setting
Emulation
Properties
From the project right-click menu in the Project Navigation Panel:
372 SPU 780 01EMAN May 2002
Step
Action
1
Select Properties. The properties window appears.
2
In the Properties window, select the Emulation tab.
39
Working with Projects
Setting the
Default Address
Data Values
40
You can toggle discretes or transfer values to arrays of registers during emulation
when setting states or register contents on a state or value.
Step
Action
1
In the Emulation Properties tab, enter an address or a range or addresses in the
format (axxxx-axxxx) in the Address Range field.
2
If you have entered an analog address range, enter a value in the Data Value
field. If you have entered a discrete address range, select a data value (Off, On,
Enables, Disabled Off, Disabled On) from the Data Value drop-down list.
3
If you have entered an analog address range, select a radix for the address
range from the Radix drop-down list.
Note: Floating point only works with two registers. All others can be set to work
on ranges of addresses.
4
Click OK to save the changes and return to ProWORX 32.
5
To load the default address values while in Emulation mode, select Emulation
→ Load Default Address Values from the logic editor right-click menu.
372 SPU 780 01EMAN May 2002
Working with Projects
Setting
Instructions with
Loopback
You can toggle discretes or transfer values to arrays of registers during emulation
when setting states or register contents based on a state or value. To edit the
loopback table, in the Emulation Properties tab:
Step
Enter the address where you want the loopback in the Ctrl Address field.
Control Address - The instruction address in the logic that is checked for a
condition while the logic is being emulated and Loopback is enabled.
2
Enter the state or value of the address in the Condition field.
Condition - The state or value of the Control discrete or analog. If the condition
of the Control’s address is true, the Loopback stores a new value or triggers a
new state in a Destination range of addresses.
3
Select the numeric system you want to enter your Condition in from the Radix
drop-down list.
4
Enter the number of scans you want the Condition to be monitored by before
being updated (0 to 65535) in the Scan Delay field.
Scan Delay - You may not want the Loopback function to immediately update
the Destination when a condition becomes true. By setting Scan Delay, you can
set the number of scans for which the Condition must remain true before the
Destination is updated.
5
Enter the address range by typing a the start and end addresses, separated by
a dash, in the Destination field. If there is only one Destination for that control
condition, enter only one address.
Destination - The Destination is the range of addresses to be driven when the
Loopback Control Condition is true.
6
For discrete destinations, select On or Off from the Data Value drop-down list.
Data Value - The Data Value is the new state or value to be placed in a
Destination address range when the Loopback Control Condition is true.
7
Select the numeric system you want to enter your Destination in from the Radix
drop-down list.
8
Click OK to save the changes and return to ProWORX 32.
9
To load the loopback table while in Emulation mode, select Emulation → Load
Loopback Table from the logic editor right-click menu.
10
372 SPU 780 01EMAN May 2002
Action
1
To enable or disable loopback while in Emulation mode, select Emulation →
Loopback Enabled from the logic editor right-click menu.
41
Working with Projects
Adjusting Scan
Time
Starting
Emulation
In the Emulation Properties tab:
Step
Action
1
Enter a scan time rate between 1 and 999 in the Scan Time field.
Note: This option does not speed up or slow down the emulator’s solving time.
It only affects how fast the timers increment.
2
Click OK to save the changes and return to ProWORX 32.
From the project navigation panel:
Step
Action
1
To start emulation, select Online Commands → Start/Stop.
2
Set the emulator’s solve mode in the Start/Stop dialog. See Setting the Solve
Mode for more information.
3
To start emulation in continuous solve mode, click Start.
Setting the Solve
Mode
Several solve modes are available to assist in emulating logic. You can set
Emulation to stop solving following any number of full sweeps, after a particular
network is solved, when a breakpoint is reached or to stop when certain logical
conditions are true or not true. You can change the solve mode by selecting Online
Commands → Start/Stop and selecting a solve mode radio button at anytime when
emulation is in a stopped state.
Setting the Solve
Mode to Sweep
In the start/stop dialog:
Solving by
Network
42
Step
Action
1
Select the Sweep radio button.
2
Enter the number of times you want the logic to be solved before stopping in the
Number of Scans to Sweep field.
3
To the Spacebar to run another sweep.
In the start/stop dialog:
Step
Action
1
Select the Network radio button.
2
Logic is solved network-by-network in order of networks, starting at segment
one, network one. Press the Spacebar to solve the next network.
372 SPU 780 01EMAN May 2002
Working with Projects
Solving by
Instruction
Solving to a
Breakpoint
Setting Emulator
Breakpoints
In the start/stop dialog:
Step
Action
1
Select the Instruction radio button.
2
Logic is solved instruction-by-instruction in order of instructions, starting at
segment one, network one, cell (1,1). Press the Spacebar to solve the next
instruction.
In the start/stop dialog:
Step
Action
1
Select the Break radio button. Select one of the following break types:
2
To set a break when a particular value is reached in a register, select Register
radio button. Enter the address in the Address field and a data value in the
Value field.
3
To set a break when a discrete value turns on or off, select the Discrete radio
button. Enter the address in the Address field and select Off to On or On to Off
in the Value field.
4
To set a break when the solve reaches a certain instruction type in logic, select
the Instruction radio button. Select the instruction to break at from the
Instruction drop-down list.
5
To set a break when a specific address is reached in logic, select the Address
radio button. Enter the address to break at in the Address field.
6
To break at the breakpoints set in the breakpoint table, select the Breakpoint
radio button. For more information on setting breakpoints, see Setting Emulator
Breakpoints.
7
Logic is solved in order until it comes to the first breakpoint at which point it stops.
To continue solving logic until the next breakpoint, press the Spacebar.
In the logic editor while in Emulation mode;
372 SPU 780 01EMAN May 2002
Step
Action
1
To set a breakpoiont at the cursor in the logic editor, select Emulation →
Breakpoint from the right-click menu.
2
To delete a breakpoint, select Emulation → Breakpoint Table from the rightclick menu. Select the row of the breakpoint that you want to delete and click
Delete. Click Close to exit the Breakpoint Table.
43
Working with Projects
Stopping
Emulation
44
From the project navigation panel:
Step
Action
1
To stop emulation, select Online Commands → Start/Stop.
2
Click Stop.
372 SPU 780 01EMAN May 2002
Working with Projects
Instructions Supported in Emulation Mode
Overview
Following is an alphabetical list of instructions support by ProWORX 32 1.0
emulation mode.
372 SPU 780 01EMAN May 2002
Instruction
Instruction
Instruction
Instruction
AD16
DV16
NBIT
SKP
ADD
EMTH (1-37)
NC
SRCH
AND
FIN
NCBT
SU16
BCD
FOUT
NO
SUB
BLKM
FTOI
NOBT
T.01
BLKT
IBKR
NTC
T->R
BROT
IBKW
OR
T->T
CMPR
ICMP
PTC
T0.1
CNR
ITOF
R->T
T1.0
COMP
JSR
RBIT
TBLK
CONV
LAB
RET
TEST
CR
MATH
RTTI
TTR
DCTR
MBIT
RTTO
UCTR
DIV
MSTR (reg read/write
SBIT
XOR
DMTH
MU16
SCIF
DRUM
MULT
SENS
45
Working with Projects
Adding Emulation Instruction Solve Support
Overview
ProWORX 32 has the capability of allowing advanced users to add instruction solve
support for the ProWORX emulator.
Creating an
Emulation
Solve File
Using a text editor:
46
Step
Action
1
Create a blank .ESF file in the ProWORX\32\EmulatorInst\ directory.
2
Name your .ESF file the same as the instruction that is to be solved. E.g.: The
ADD instruction’s emulation solve file would be named ADD.ESF.
Note: Do not use spaces in your emulation solve file name.
372 SPU 780 01EMAN May 2002
Working with Projects
Instruction Solve
File Function
Parameters
Parameter Descriptions
Variable
Description
Network
The network number where instruction is located.
Row
The row in logic where instruction is located.
Col
The column in logic where instruction is located.
TopTyp
The address type of the top node of the instruction (valid values: 0, 1, 3, 4, 8
for constants).
TopVal
The address offset of the top node of the instruction (valid values: 0 - 65535).
TopLen
The number of addresses the top node uses.
MidTyp
The address type of the middle node of the instruction (valid values: 0, 1, 3,
4, 8 for constants).
MidVal
The address offset of the middle node of the instruction (valid values: 0 65535).
MidLen
The number of addresses the middle node uses.
BotTyp
The address type of the bottom node of the instruction (valid values: 0, 1, 3,
4, 8 for constants).
BotVal
The address offset of the bottom node of the instruction (valid values: 0 65535).
BotLen
The number of addresses the bottom node uses.
UctrNum
Used only for UCTR instructions.
DctrNum
Used only for DCTR instructions.
Spare3
Spare parameter.
Note: All parameters must appear in the instruction subroutine declaration.
372 SPU 780 01EMAN May 2002
47
Working with Projects
Emulation Solve
File API Calls
API Call
Description
Power Flow Calls
Power flow calls are used to:
l Determine whether an instruction
should be solved (using
GetPowerFlow)
l To pass along powerflow to the next
cell (using SetPowerFlow)
l To activate an error condition (using
SetPowerFlow)
Power flow calls can be used to either
get or set a particular cell in logic.
Depending on the instruction being
solved, the row and col variables are
used to access a particular cell within
the 7 row x 11 column matrix.
GetPowerFlow(Network, Row, Col, PowerState)
SetPowerFlow(Network, Row, Col, 1)
Single Discrete State Calls
GetSingleDiscreteState(RefTyp, RefVal, State)
SetSingleDiscreteState(RefTyp, RefVal, 1)
Single Discrete History Calls
GetSingleDiscreteHistory(RefTyp, RefVal, History)
SetSingleDiscreteHistory(RefTyp, RefVal, State)
Single Discrete Disabled Calls
GetSingleDiscreteDisabled(RefTyp, RefVal, Disabled)
SetSingleDisabledState(RefTyp, RefVal, Disabled)
Single Register Data Calls
GetSingleRegisterData(RefTyp, RefVal, Data)
SetSingleRegisterData(RefTyp, RefVal, Data)
Group Discrete Calls
GetGroupDiscreteState(RefTyp, RefVal, NumGroups, State(), Disabled())
SetGroupDiscreteState(RefTyp, RefVal, NumGroups, State())
SetGroupDisabledState(RefTyp, RefVal, NumGroups, Disabled())
48
Single discrete state calls are used to
get or set the state of a 0xxxx or 1xxxx
address. The State will return with 0 for
Off or 1 for On. When calling the Set,
use either 0 for Off or 1 for On.
Single discrete history calls are used to
get or set the history of a 0xxxx or 1xxxx
address. The history will return with 0 for
Off or 1 for On. When calling the Set,
use either 0 for Off or 1 for On.
Single discrete disabled calls are used
to get or set the disabled status of a
0xxxx or 1xxxx address. The disabled
status will return with 0 for Enabled or 1
for Disabled. When calling the Set, use
either 0 for Enabled or 1 for Disabled.
Single register data calls are used to get
or set the data value of a 3xxxx or 4xxxx
address. Valid range for data is 0 to
65535.
Group discrete calls are similar to the
single calls except 16 discretes per
group are received or set at one time.
The arrays must contain data for as
many groups as are specified.
372 SPU 780 01EMAN May 2002
Working with Projects
API Call
Description
Group Register Calls
Group register calls are similar to the
single calls except that a group of
registers are received or set at one time.
The Data array must contain data for as
many groups as are specified.
GetGroupRegisterData(RefTyp, RefVal, NumGroups, Data())
SetGroupRegisterData(RefTyp, RefVal, NumGroups, Data())
372 SPU 780 01EMAN May 2002
49
Working with Projects
Emulation Solve
File Content
Example
ADD.ESF File Content Example:
Sub ADDINST (Network, Row, Col, TopTyp, TopVal, TopLen,
MidTyp, MidVal, MidLen, BotTyp, BotVal, BotLen, Spare1,
Spare2, Spare3)
dim State,TData,MData,Bdata
’is top input powered?
call LLEmulator.GetPowerFlow(Network,Row,Col-1,State)
If State<>0 then
’ get the value of top node
If (TopTyp=3) or (TopTyp=4) then
call LLEmulator.GetSingleRegisterData(TopTyp,TopVal,TData)
Else
TData=TopVal
End if
’get the value of middle node
If (MidTyp=3) or (MidTyp=4) then
call LLEmulator.GetSingleRegisterData(MidTyp,MidVal,MData)
Else
MData=MidVal
End if
BData=TData+Mdata
’overflow
If BData>9999 then
BData=BData-10000
call LLEmulator.SetPowerFlow(Network,Row,Col,1)
End if
’set value into bottom node
call LLEmulator.SetSingleRegisterData(BotTyp,BotVal,BData)
End if
End Sub
Note: Only emulation solve files for instructions currently not supported by the
Emulator are checked for by ProWORX 32. You cannot edit built-in instructions.
50
372 SPU 780 01EMAN May 2002
Working with Projects
Documentation Editor
Overview
The documentation editor, the defaulted bottom-left editor, allows you to see and
edit documentation for addresses and Traffic Cop items. It hot-tracks items that are
selected in the many of the editors, including the data watch window and traffic cop.
To open the documentation editor, select View → Documentation from the
ProWORX 32 menu
There are three sections of the documentation editor: Edit, Summary, and Traffic
Cop. To switch between sections, select the corresponding radio button at the top
of the documentation editor.
Opening the
Documentation
Editor Properties
Window
In the navigation tree:
372 SPU 780 01EMAN May 2002
Step
Action
1
Ensure the project folder is expanded and right-click the current project’s folder.
2
Select Properties from the right-click menu.
3
Select the Documentation tab in the properties window.
51
Working with Projects
Documentation
Editor Properties
52
These properties are found in the Properties window under the Documentation tab:
Property
To set:
Function
Total
Number of
Descriptor
Lines
In the Total Number of
Descriptor Lines box enter a
number between 3 and 9 or use
the arrow keys to increase or
decrease the number.
The descriptor field is a multi-line field that
can be set from 3 lines to 9 lines of
documentation. This preference forces the
editor to edit only the set number of lines of
the descriptor.
Number of
Visible
Descriptor
Lines
In the Number of Visible
Descriptor Lines box enter a
number between 1 and the Total
Number of Descriptor Lines
value or use the arrow keys to
increase or decrease the
number.
The descriptor field is a multi-line field that
can be set from 3 lines to 9 lines of
documentation. This preference forces the
editor to display only the number of lines of
the descriptor that are set.
Supported
Fields
In the Supported Fields frame, If a check box is unchecked, the
select the check boxes that you corresponding field will never be displayed.
want displayed.
If a check box is checked, the field will be
displayed as long as dependant properties
are set correctly.
E.g. If Symbols are disabled for the project,
the symbol field will not be displayed even
though the check box is checked.
372 SPU 780 01EMAN May 2002
Working with Projects
Using the Documentation Editor
Edit Mode
Overview
The edit mode is a completely customizable and editable visual representation of the
current project documentation. The edit mode hot-tracks items currently selected in
ProWORX 32 including instructions, I/O cards, and addresses in the Data Watch
Window.
Customizing the
Edit Mode Fields
In the documentation editor:
Using the Edit
Mode
To:
Function
Move a field
Click the field’s handle and drag it to the area of the
window that you would like the field moved to.
Resize a field
Click and drag the field’s handle.
Minimize or maximize a field
Click the field’s handle.
Enter an address into the Reference box to view the addresses documentation. To
navigate through documented addresses click the previous documented address
and next documented address
addresses click the previous address
Using the Singleline Mode
and next address
buttons.
The single-line documentation editor displays the currently selected address’
descriptors and is un-editable. To view the single-line documentation editor:
Step
Summary Mode
Overview
buttons. To navigate sequentially through
Action
1
Select the Display One Line Documentation Window check box in the
Properties dialog, Documentation tab. You can access the documentation
properties by select Properties from the Documentation Editor right-click menu
2
When viewing single-line documentation, to edit the current address, click Edit.
Summary mode shows the most common information for documented addresses.
Using the address type drop-down list box, select the type of address (Symbol, 0x,
1x, 3x, 4x, Xmem, or ‘All addresses’) you want to view. To edit the documentation of
any address, double-click on the appropriate row and the documentation editor will
switch to edit mode showing the selected address.
372 SPU 780 01EMAN May 2002
53
Working with Projects
Using the
Symbol Filter
When ‘Symbol’ has been selected in the address type drop-down list box, the Filter
box will be visible. The symbol filter is a simple query that filters the symbol summary
based on what criteria is entered into the filter. To view all symbols, leave the filter
empty and press ENTER.
The contents of the filter is the LIKE statement of an SQL SELECT statement.
Therefore, rules for entering text into the filter box are the same as composing an
SQL query. Some filter examples:
Traffic Cop Mode
54
Filter Text
Results
S*
All symbols that start with an ‘S’ are displayed.
*Switch
All symbols ending with ‘Switch’ are displayed.
[A-D]*
All symbols starting with ‘A’, ‘B’, ‘C’, or ‘D’ are displayed
*Switch*
All symbols with the letter sequence ‘Switch’ are displayed
Disk?
All symbols named ‘Disk(x)’ will be displayed. e.g. Disk1, Disk2, DiskA, etc.
Using the traffic cop editor, you can edit short comments for head, drop, rack and
slot addresses.
372 SPU 780 01EMAN May 2002
Working with Projects
Importing and Exporting ProWORX 32 Documentation
Overview
ProWORX 32 imports and exports database documentation in several formats. The
Documentation Import feature lets you bring documentation from existing files or
databases into ProWORX 32 without having to re-enter information. Documentation
Export lets you edit documentation in a separate word processing or spreadsheet
program.
Note: This function does not import controller logic.
Importing
Documentation
Exporting
Documentation
In the Project Navigation panel:
Step
Action
1
To append the documentation to the existing project documentation, select
Documentation Import → Append from the project right-click menu.
2
To merge or overlay the documentation with existing project documentation,
select Documentation Import → Overlay from the project right-click menu.
3
To delete all current documentation and import new documentation, select
Documentation Import → Create New from the project right-click menu.
4
Once you have selected the import type, select a file (.csv, .mdb, .doc, .xls) to
import from the Select Documentation File dialog and click Open.
In the Project Navigation panel:
372 SPU 780 01EMAN May 2002
Step
Action
1
From the project right-click menu, select Documentation Export. The Select
Destination File dialog appears.
2
Select a file type from the Save as type drop-down list box. (.csv, .mdb, .doc,
.xls)
3
Enter the export file name in the File name field.
4
Navigate to the folder where you want to save the exported file. Click Save.
55
Working with Projects
Import/Export
Formats
Import/Export format descriptions:
Format
Description
MS Word (.doc) Documentation is exported directly into an MS Word document. Each
address type is displayed on a separate table.
MS Excel (.xls)
Documentation is exported directly into an MS Excel Workbook. Each
address type is displayed on a separate MS Excel Worksheet. When
importing documentation, ProWORX 32 expects these sheets to be in the
same order with the same name.
MS Access
(.mdb)
Documentation is exported directly into an MS Access database. Each
address is in its own table.
Note: It is important that you do not move or rename fields within the
database if you are going to import your data.
.CSV File
The text file (.csv) is a comma-delimited file. This file can be edited using
any standard text editor (Notepad, Wordpad, etc.).
The comma-delimited line is different depending on the address type:
l 0xxxx/1xxxx - Address, Desc1, Desc2,...,Desc9, Short Comment
1,...,Short Comment 4, Symbol, ISA Symbol, Page Title, Long Comment
ID
l 3xxxx/4xxxx - Address, Desc1, Desc2,...,Desc9, Short Comment
1,...,Short Comment 4, Symbol
l 6xxxx/Networks/Segments - Address, Desc1, Desc2,...,Desc9, Short
Comment 1,...,Short Comment 4, Page Title, Long Comment ID
l Traffic Cop - Address (HxxDxxRxxSxxx), Desc1, Desc2,...,Desc9,
Short Comment 1,...,Short Comment 4
ProWORX
ASCII (.fil)
Files for exchanging data easily. By default, ProWORX 32 creates this type
of file for documentation.
ProWORX
Symbol (.fis)
Files for exchanging symbols.
Spreadsheet
Data
Interchange
Format (.dif)
ProWORX 32 creates standard .DIF files. Most spreadsheet programs can
import this format without difficulty. However, you must take special care
when transferring data to and from Microsoft Excel in .DIF files.
dBaseIV
ProWORX 32 creates standard .DBF files for use with Ashton-Tate’s data
Database (.dbf) management program dBaseIV. Most other data management and
spreadsheet programs (including Microsoft Excel) can read this format
without difficulty.
56
Traffic Cop
(.tef)
Importing a .TEF file overwrites the existing Traffic Cop data. Exporting
creates a .TEF file of the current Traffic Cop data. ProWORX 32 requires
both the .TEF and .DEF files to successfully import the documentation.
Concept (.txt)
When exporting, ProWORX 32 creates a .TXT file of the current descriptors
and symbols for 0x, 1x, 3x, 4x and symbols for constants to be used in
Concept.
372 SPU 780 01EMAN May 2002
Working with Projects
Note: In order to import and export using .doc (MS Word) and .xls (MS Excel) files,
you must have MS Word and/or MS Excel installed on your PC.
Note: Documentation files of type .fil, .fis, .dif, .dbf, .tef, and .txt are compatible
across these ProWORX applications: ProWORX NxT, ProWORXPLUS, and
ProWORX 32.
372 SPU 780 01EMAN May 2002
57
Working with Projects
Protected Registers
Overview
Ranges of output registers added to the Protected Registers table are protected.
Their data values are uneditable by users who do not have administative access to
ProWORX 32. To use registers in the protected registers table, ensure that the
Protected Registers check box is selected in the security settings. You can access
the security settings from the My Computer right-click menu in the Project
Navigation Panel.
Setting
Protected
Registers
Use the following steps to set protected registers:
Step
1
58
Action
From the project right-click menu in the project navigation panel, Select
Properties. The properties dialog appears.
2
In the Properties dialog, select the Protected Registers tab.
3
Enter 4xxxx addresses in the From and To fields.
4
Click Add to add the range of addresses to the Protected Registers table.
5
To delete a range of addresses from the Protected Registers table, select the
row to be deleted and then click Delete.
6
Click OK to save your changes and return to ProWORX 32.
372 SPU 780 01EMAN May 2002
Working with Projects
Using Search
Overview
The search dialog is used find, replace or go to addresses or symbols in ProWORX
32.
Using Find
From the ProWORX 32 menu:
Step
Using the Search
Panel
Action
1
Select Edit → Find (CTRL+F) to open the Search dialog.
2
Enter the value you want to search for in the Find What field.
Note: The value entered depends on the selection you make in the Search By
drop-down field. By default the value type is Address.
3
To search a specific area of the project or by a different value type, click
Advanced.
4
Select an area of ProWORX 32 from the Search drop-down box.
5
Select a value type to search by from the Search By drop-down box.
6
Click Find Next to complete a search. The search results are displayed in the
Search panel.
From the ProWORX 32 menu:
372 SPU 780 01EMAN May 2002
Step
Action
1
Select View → Search to open the search panel.
2
Select the tab of the area of ProWORX 32 that you want to go to.
3
Double-click the cell that contains the location of the address that you want to go
to.
4
To close the search panel, click the x in the top, right-hand corner.
59
Working with Projects
Address Used
Overview
The Address Used tables keep track of what addresses are used in logic, traffic cop,
peer cop and the I/O scanner. Each address has it’s own cell in the address used
grid.
The Used tables are updated every time an address is changed in one of the above
areas. The changes are reflected in the Used Table panel. The Used Tables are
useful for determining what addresses are used, how they are used and how many
times they are used. 0xxxx, 1xxxx, 3xxxx and 4xxxx address types are tracked. The
tables reflect the content of the currently selected project; switching projects
updates the used tables.
If the project is in online mode, there is a separate set of used tables for the online
device. This is due to the fact that the online device may have different contents than
the project database.
Using the
Address Used
Tables
Address Used
Display
Descriptions
60
From the ProWORX 32 menu:
Step
Action
1
Select View → Address Used to open the Address Used Tables.
2
To view an address type, select the corresponding tab. (0xxxx, 1xxxx, 3xxxx,
4xxxx.)
3
To select an address for logic, select the address from the used table and dragand-drop the address into the instruction that you want to use the address.
4
To show or hide the address used legend, click the Legend check box.
The Address Used table displays information as follows:
Display
Description
Top-left purple square
Address is used in logic.
Top-right blue square
Address is used in the traffic cop.
Bottom-left green square
Address is used in the Peer Cop.
Bottom-right yellow square
Address is used in the I/O Scanner.
An overlaid ‘C’
Coil is used in logic.
An overlaid ‘D’
Duplicate coil is used in logic.
372 SPU 780 01EMAN May 2002
Working with Projects
Finding a Free
Address
Rebuilding the
Address Used
Tables
In the Address Used window:
Step
Action
1
Select the tab of the address type that you want to find.
2
Click Find Free.
3
Enter an address where the search begins from in Start Address.
4
Enter the number of free addresses in a row that you need in Length.
5
Click Find to search for the free address(es). Click Close to exit the Find Free
section.
In the Address Used window:
Step
1
372 SPU 780 01EMAN May 2002
Action
To rebuild the address used tables, click Rebuild.
Note: If online, rebuilding requires a read from a PLC. The used tables are
unavailable while being rebuilt.
61
Working with Projects
The Knowledge Base
Overview
The Knowledge Base is a warehouse of accumulated process experience relating
to a specific project. It is used to identify solutions to problems that have occurred in
the past. It is also used to keep maintenance records of fixes.
Opening the
Knowledge Base
In the project navigation panel:
Step
1
Searching for
Keywords in the
Knowledge Base
Select Knowledge Base
.
Note: Each project has its own knowledge base, in other words, the knowledge
base is specific to the project.
After opening the knowledge base:
Step
1
62
Action
Action
Enter a word in the Keyword box.
2
Press Search. (All fields in the knowledge base are searched for the keyword.)
3
To find the next instance of the keyword, press the Search button again.
Note: You may also search for partial word matches.
372 SPU 780 01EMAN May 2002
Working with Projects
Adding a Record
to the Knowledge
Base
In the knowledge base utility:
Step
1
Deleting a
Record from the
Knowledge Base
Comment
Click Add.
The Knowledge Base Entry dialog will
pop up.
2
Enter a name into the Author box.
Max 55 characters.
3
Enter the problem description into the
Problem box.
Max 275 characters.
4
Enter the solution description into the
Solution box.
Max 440 characters.
5
Enter the name of an image that may
be associated with problem or solution
in the Image field.
The image name must be entered in
full including the file extension. e.g.
Image1.bmp is correct whereas
Image1 is not.
Valid image types are .bmp and .jpg.
The image must reside in
‘ProWORX\32\Projects\KBImages’.
Max image name length: 255
characters.
6
Click OK to save the record.
The Date and Time is added
automatically upon pressing OK.
In the knowledge base utility:
Step
1
Printing the
Knowledge Base
Action
Action
Comment
Click Delete.
The record that the cursor is highlighting
will be deleted.
In the knowledge base utility:
Step
1
372 SPU 780 01EMAN May 2002
Action
Click Print. The ProWORX 32 print setup appears. From here you can determine
specifically what you want to print.
63
Working with Projects
64
372 SPU 780 01EMAN May 2002
Communications Setup
Connecting to a Controller
Overview
ProWORX 32 can communicate with controllers in several ways. This chapter
explains how to configure ProWORX for several common types of network
connections. This chapter also describes how to select and attach to a controller,
both directly, and by scanning your entire network for devices.
What’s in this
Chapter?
This chapter contains the following topics:
372 SPU 780 01EMAN May 2002
Topic
Page
Communications Overview
66
Configuring Modbus Communications
67
Modbus Communications by Modem
68
Configuring Modbus Plus Communications
71
Configuring Ethernet Gateway Communications
72
Configuring TCP/IP Communications
73
Network Explorer
74
65
Communications Setup
Communications Overview
Overview
Before your computer can connect to a controller (or, for some systems, the gateway
which relays information to and from the controller), ProWORX 32 must be
configured for your communication system.
Note: To connect with each other, your computer and controller must be
configured for the same communication system with the same parameters.
Opening the
Communications
Setup Dialog
From the Project Navigator panel:
Step
1
Setting the
Default
Communications
Type
Editing
Communications
Parameters
Communicating
Using the Server
66
Action
Double-click the Communications icon in a project to open the communications
setup dialog.
In the Communications Setup dialog:
Step
Action
1
Select the tab of the communications you want to use.
2
Select the Set CommunicationsType as default communications check box.
In the Communications Setup dialog:
Step
Action
1
To edit a communications parameter, double-click the parameter, or, while the
parameter is selected, press Change Setting.
2
Make the desired changes in the Edit dialog and press OK to save changes.
In the Communications Setup dialog:
Step
Action
1
Ensure that you are logged on to the ProWORX Server.
2
To communicate with PLCs through the server’s communications portal, select
the Use Server to Communicate check box.
372 SPU 780 01EMAN May 2002
Communications Setup
Configuring Modbus Communications
Overview
Modicon’s master/slave protocol, standard on 984 and many other controllers.
Select this option if your computer is connected to a controller’s Modbus port, either
directly or through a modem.
Note: The controller must have the same Modbus settings as the computer. Set
Modbus parameters for your PLC with the Ports tab of the Controller Configuration
window or with its DIP switches.
Setting Modbus
Parameters
Select the Modbus tab and set the following communications parameters:
Parameter
Description
Modbus Address
The Modbus address of the PLC.
Port
Identifies which serial port on your PC is connected to the controller
or modem (if you are connecting to the controller through one).
Default is COM1.
Baud Rate
Sets the data transfer speed of your PC’s serial port in bits per
second. The PC and controller must be set to the same baud.
Default is 9600.
Parity
Adds a check bit to a packet to make the number of binary ones
always either odd (Odd parity) or even (Even parity). If parity is set
to None, the check bit is not added. The PC and controller must use
the same parity. Default is Even.
Stop Bits
Sets the number of bits at the end of a packet prepares the
receiving device for the next packet. The PC and controller must
use the same number of stop bits. Default is 1.
Data Mode
Identifies which data protocol (Remote Terminal Unit or ASCII) to
use. Both the PC and controller must use the same data protocol.
Default is RTU.
Timeout
Specifies the length of time the PC will wait for successful
communication with a controller before displaying an error
message. Default is 3 seconds.
Modem Type
If your computer is connected directly to the controller, set the
Modem Type to None. If your computer is directed to the controller
through a modem it must be configured. See Modbus
Communications by Modem.
When you have finished configuring the parameters, press OK.
372 SPU 780 01EMAN May 2002
67
Communications Setup
Modbus Communications by Modem
Overview
Controllers in remote locations can be equipped with RS-232 modems. Your
computer can then connect to the controller (by telephone, radio, or microwave
systems) using its own modem. Once the connection is established, the computer
and controller behave as if they were connected directly through a Modbus network.
You can easily configure ProWORX 32 to connect to controllers through dial-up and
dedicated-line modems. Before you begin, confirm that:
l The controller is properly connected to its RS-232 modem.
l Your computer is properly connected to its modem.
l The modems’ DIP switches, if they have them, are set like this:
DIP Switch Settings:
Modem DIP Switch Setting
Example: US Robotics Modem DIP
Switches (seen from back)
Data Terminal Ready Always On
Switch 1 (on left): Down
Verbal Word Results
Switch 2: Up
Result Code Display Enabled
Switch 3: Down
Command mode local echo
Switch 4: Up
Auto Answer
Switch 5: Up
Carrier Detect Normal
Switch 6: Up
Load Non-Volatile RAM Defaults
Switch 7: Up
Use AT Command Set (Smart Mode)
Switch 8 (on right): Down
After configuring ProWORX 32 to use a modem, it checks to see whether there is
an active connection each time you select a device on your network.
l If it cannot find one, ProWORX 32 asks you for a phone number to dial or, if your
modem uses a dedicated line, opens a connection automatically.
l If it finds a connection (or after opening one), you can choose to select a Modbus
device or close the connection and open a new one.
Use a modem connection to a controller just like a direct Modbus link. You can scan
for and attach to Modbus devices (and Modbus Plus devices, if the controller
supports Bridge Mode to allow you to connect to a Modbus Plus network) just as you
normally would.
68
372 SPU 780 01EMAN May 2002
Communications Setup
Setting the
Modbus Modem
Parameters
In the Communications Setup dialog:
Step
Action
1
Select the Modbus tab and set the communications parameters (see
Configuring Modbus Communications for parameter descriptions).
2
The controller must have the same Modbus settings as the computer. Set
Modbus parameters for your PLC with the Ports tab of the Controller
Configuration window.
3
Set the Port parameter to show the computer port connected to the modem;
otherwise, ProWORX 32 won’t be able to locate it.
4
The Modbus configuration must send exactly 10 bits per data package to your
modem. (See Modbus 10-bit Configurations below.)
Modems generally expect 10 bits in a data package; however, the Modbus
defaults (Even parity, RTU mode, and one stop bit) send 11 bits per package.
Change the Modbus settings to provide 10 bits per data package or ProWORX
32 will not be able to communicate with the modem. Alternatively, if your modem
supports large data packages, you can set its DIP switches to allow 11 bits per
data package (see your modem’s manual).
Modbus 10-bit
Configurations
5
Select the type of modem from the Modem Type parameter drop-down. (See
Modem Type Descriptions below.)
6
To edit the modem parameters, click Modem Setup. The Modem Configuration
dialog appears. (For parameter descriptions, see below.)
These Modbus configurations provide 10 bits per data package:
Parameters
ASCII Mode
RTU Mode
Start Bit
1 bit
1 bit
1 bit
Data
7 bits
7 bits
8 bits
Stop Bits: 1
1 bit
Stop Bits: 2
1 bit
2 bits
Parity: None
372 SPU 780 01EMAN May 2002
ASCII Mode
Parity: Odd or Even
1 bit
Total
10 bits
0 bits
0 bits
10 bits
10 bits
69
Communications Setup
Modem Type
Descriptions
Modbus Modem
Parameter
Descriptions
Modem Type specifies the kind of modem connected to your computer:
Modem Type
Description
None (Default)
For direct Modbus connections between the PC and controller without a
modem. This setting disables the other modem options.
Dial-Up
For standard modems which do not require a password. If you are
unsure, try this setting first. When you select a device, ProWORX 32
asks you for a number to dial.
Dial-Chat
For password-protected modems. After the connection is established, a
terminal window opens so you can enter text. When you select a device,
ProWORX 32 asks you for a number to dial.
Line/J478
For modems with a dedicated telephone line to the controller. You do
not have to type a number to dial. This setting disables the other modem
options.
LineRTS
For radio or microwave modems with a dedicated link to the controller.
You don’t have to type a number to dial. This setting disables the other
modem options.
Set the following Modem parameters:
Parameter
Description
Phone Number
The phone number of the modem that the PLC is attached to.
Initialization
Some modems require special initialization commands such as
ATZ before they can be used. Type a sequence of Hayes
modem commands in this field for ProWORX 32 to send to your
modem. Check your modem’s manual for the commands to turn
off error correction, compression, and software flow control and
turn on verbal word results.
Dial Command
Type ATDT for tone dialing (default) or ATD for pulse dialing.
This prefix is sent to the modem along with the phone number
you type in the Select Device dialog. To instruct the modem to
pause for half a second, type a comma (,).
Command Suffix
Characters appended to every command you send to the
modem, including the Initialization string and Hangup command.
The default is a carriage return and a line feed.
Hangup Command
To hang up your modem, ProWORX 32 sends the standard
Hayes modem command ATH. If your modem uses a different
command, enter it here. This command is prefixed with ,,,+++,,,.
Hanging up can take up to three seconds.
When you have finished configuring the parameters, press OK.
70
372 SPU 780 01EMAN May 2002
Communications Setup
Configuring Modbus Plus Communications
Overview
Modicon’s fast peer-to-peer protocol, standard on many 984 and other controllers.
Select this option if your computer is connected to a Modbus Plus network through
a network adapter card such as an SA85.
Setting Modbus
Plus Parameters
Select the Modbus Plus tab and set the following communications parameters:
Parameter
Description
Modbus Plus Address The Modbus Plus address of the PLC.
Adapter
Sets an identifying number for an SA85 Network Card. Up to two
SA85 cards, numbered 0 or 1, can be installed. A card’s identifying
number in ProWORX 32 must be the same as in the Device
command in the PC’s CONFIG.SYS file. Default is 0.
Timeout
Specifies the length of time the PC will wait for successful
communication with a controller before displaying an error message.
Default is 3 seconds.
When you have finished configuring the parameters, press OK.
372 SPU 780 01EMAN May 2002
71
Communications Setup
Configuring Ethernet Gateway Communications
Overview
A gateway connects two networks that would not normally be able to communicate
with each other. ProWORX 32 supports Modicon’s EMBP Gateway, which bridges
your computer’s TCP/IP Ethernet to the controller’s Modbus Plus network.
Note: Your computer’s Ethernet address is set in Windows by your network
administrator (as is its sub-network mask address, if necessary).
Setting Ethernet
Gateway
Parameters
Select the Gateway tab and set the following communications parameters:
Parameter
Description
Gateway Type
Select a Gateway type (SGATE, NR&D MEB, GATEWAY?)
to use TCP/IP to communicate with a computer which then
communicates with the PLC.
Modbus Plus Address
The Modbus Plus address of the PLC.
IP Address
The TCP/IP address of the computer linking your PC’s
Ethernet to your controller’s Modbus Plus network.
Timeout
Specifies the length of time the PC will wait for successful
communication with a controller before displaying an error
message. Default is 3 seconds.
When you have finished configuring the parameters, press OK.
72
372 SPU 780 01EMAN May 2002
Communications Setup
Configuring TCP/IP Communications
Overview
Some controllers can be equipped with TCP/IP cards. Select this option if both your
computer and controller use TCP/IP networking, regardless of whether they are on
the same network or are connected by a gateway.
Note: Your PC’s TCP/IP address is set in Windows by your network administrator
(as are the gateway and sub-network mask addresses, if necessary).
Setting TCP/IP
Parameters
Select the TCP/IP tab and set the following communications parameters:
Parameter
Description
IP Address
Enter a controller address in standard TCP/IP format: four numbers ranging
from 0 to 255 separated by periods (for example, 10.0.254.68 is valid).
Timeout
Enter a value that specifies the length of time the PC will wait for successful
communication with a controller before displaying an error message. Default
is 3 seconds.
Note: You must install the TCP/IP Configuration Extension into your controllers to
set TCP/IP addresses for their communication cards. For more information, see the
TCP/IP Extension, p. 125.
When you have finished configuring the parameters, press OK.
372 SPU 780 01EMAN May 2002
73
Communications Setup
Network Explorer
Overview
The Network Explorer finds controllers, bridges, bridge multiplexers, and other
devices attached to networks. ProWORX 32 displays the devices it finds by their
address number and also shows their type, mode, and status.
The results of a network scan are displayed in the panel tree on the left of the
display. If any PLCs are found, they are displayed on the right panel. The right panel
has two different views, the graphical, and the list view. The graphical view displays
a picture of the series of controller found, along with all of its data. The list view
displays the data in a spreadsheet format.
Using the
Network
Explorer
To access the network explorer:
Step
1
From the utilities menu in the project navigation, select Network Explorer. The
communications editor is launched. You can also access the Network Explorer
from the communications editor by clicking Network Explorer at the bottom right
of any of the communication type’s tab.
2
Select the default communications type in the Communications Overview, p. 66.
Click OK if you have opened the Explorer through the Utilities menu, or click
Network Explorer if you are running the Network Explorer from the
communications editor.
3
To return to the communications editor at any time, click Communications
Setup.
4
To switch between views, select either the Graphical View radio button or the
List View radio button.
5
74
Action
The following information is provided for each controller found:
Project Name - In certain controllers, you can save the project name inside of
a loadable. The project name will be retrieved if the controller is running and
the loadable is in logic.
l Controller Address
l Controller Type
l Current State of the Controller: Running, Optimized, Stopped (the Stopcode
is displayed). For more information, see Stopcode Error Analysis, p. 277.
l Current State of the Battery on the Controller: Good or Bad.
l Current State of the Memory Protect Switch of the Controller: On or Off.
l
372 SPU 780 01EMAN May 2002
Configuring a Controller
Controller Configuration
Overview
The Configuration editor is used to edit and view the current controller configuration
of the project. The configuration editor displays configuration options (properties)
within several tabs. Each tab contains one or more property lists used to display and/
or edit items relating to controller configuration. Properties that are displayed
depend on the controller that is being configured.
What’s in this
Chapter?
This chapter contains the following topics:
372 SPU 780 01EMAN May 2002
Topic
Page
Controller Configuration
76
‘General’ Tab
77
‘Ports’ Tab
80
‘Loadables’ Tab
83
Loadable Library Wizard
86
75
Configuring a Controller
Controller Configuration
Overview
Before you begin, use the Creating a New Project, p. 29 to select the right type of
controller. The options that appear in the configuration editor depend on the
controller type, so if the wrong one is selected, you can spend time configuring
options your controller does not support.
Configuring a
Controller
From the project navigation panel:
Step
1
2
76
Action
Click the Configuration icon
Click the tab for the options you want to configure:
General - Configures a controller’s memory, including the number of coils
and registers, I/O cards and drops, the amount of memory set aside for
Configuration Extensions, and the number and size of the ASCII messages
you want to use.
l Ports - Configures the controller’s serial and ASCII ports.
l Loadables - Extensions to a controller's capabilities. When they appear as
instructions (most of the time) they are represented as 3 node instructions.
l
3
Update parameters by clicking on the parameter row. Press ENTER to accept
the changes or ESC to decline the changes.
4
The changes made will be saved to the project or controller when the
configuration editor is closed. A prompt is displayed allowing you to confirm that
you want to save changes.
372 SPU 780 01EMAN May 2002
Configuring a Controller
‘General’ Tab
Overview
This tab in the Controller Configuration window allows you to configure a controller’s
memory. It contains many important options, including the number of coils, registers,
segments of logic, and I/O cards the controller will use, the amount of memory it sets
aside for configuration extensions, and the number and size of its ASCII messages.
General Tab
Parameters
The following parameters are editable:
Parameter
Description
Registers
For each of the 0xxxx, 1xxxx, 3xxxx, and 4xxxx register fields, type the
number of registers the controller will use. The controller polls all of these
registers each scan, so to keep your controller scanning quickly, set up only
as many registers as you need.
Segments
Type the number of logic segments the controller will use.
I/O Drops
Different controllers use different I/O drops:
l If you have a controller that uses Channels instead of I/O Drops, type the
number of channels the controller I/O will use. Channels always come in
pairs, so this must be an even number.
l If you have a Micro series controller in parent mode, type the number of
children (0 to 4) associated with it.
l If you have a Micro series controller in child mode, type the Child ID (1 to
4).
I/O Words
Quantum, Atrium, 785E_LMS, Momentum, Compact (E258, E265, E275,
E258) controllers only: type the maximum number of I/O words that will be
available for programming in the Traffic Cop. Check your controller
documentation for the appropriate values.
DCP Drop ID
680, 685, 685E, 780, 785, 785E or 785L controllers only: If another computer
uses this controller for distributed control, type the controller’s Distributed
Control Processor ID number (0 to 32).
I/O Time Slice Type the amount of time the controller will devote to peripheral port
communication, from 1 to 100 milliseconds. The default is 10 ms for 984A,
B, and X controllers and 20 ms for Quantum controllers.
Duplicate Coil
Start
Set the starting address to a non-zero value to enable the duplicate coil
range (i.e. allow coil addresses within this range to be assigned to more than
1 coil).
Set the range to 0 disable the duplicate coil address range. The starting
address of the duplicate coil range is part of the configuration and defines
the entire range of coils that will be treated as duplicate coils. The range is
from the starting address to the configured number of coils. Therefore to
enable the entire range of coils, set the starting address to 1.
372 SPU 780 01EMAN May 2002
77
Configuring a Controller
Parameter
Description
Remote
Channels
984A-S901, 984B-S901, and 584 controllers only: Select from 2 to 32
remote I/O channels. Channels always come in pairs, so this setting must be
an even number.
Total
Messages
Controllers that support ASCII messaging only: Type the total number of
ASCII messages the controller will use.
Message
Words
Controllers that support ASCII messaging only: Type the length (in machine
words) of your controller’s ASCII messages. One machine word is equal to
two ASCII characters.
ASCII Ports
Type the number of ASCII ports on the controller. This setting must be an
even number.
B984
Controller
Select the type of B984 controller you have: B884 or B886.
Input Latched
Select this option if you want the controller to freeze the input state on powerdown. Inputs remain frozen for one scan when the controller is powered
back up.
Settling Time
78
Group Settling Time allows you to set parameters for input digital filtering.
Each input value is polled through a filter based on a time window. You
can set the duration of the time window between 200 microseconds and
19.8 ms (in 200 microsecond increments).
l The module samples each input every 200 microseconds and uses the
time window associated with the input to determine the input state. If the
scanned input state is OFF, the input state is set OFF. If the scanned
input state is ON, the input state is set based on a history queue. If the
input was ON one time window ago, the input is set ON; if the input was
OFF, the input state is set OFF.
l The inputs are divided into four groups. The Settling Time of each can be
configured separately:
l Group 1: Inputs 1-4
l Group 2: Inputs 5-8
l Group 3: Inputs 9-12
l Group 4: Inputs 13-16
l
Battery Coil
Type the control address for the controller’s battery.
Timer
Register
Type the register offset used to store the controller’s timer value.
Time of Day
Clock
Type the register offset used to store the controller’s clock value. For more
information see Hardware Clock, p. 152.
Watch Dog
Timer
Type the time-out delay for the Watch Dog Timer, in tens of milliseconds.
The controller adds 250 ms to the value you enter. The default is 0000, which
represents 250 ms.
372 SPU 780 01EMAN May 2002
Configuring a Controller
Parameter
Description
Configuration
Extension
Used
Displays the amount of config extension space used. This field is not
editable.
Configuration
Extension
Size
Type the amount of memory (in machine words) to be set aside for
Configuration Extensions. Use the following information to calculate the
minimum Configuration Extension size:
l Configuration Overhead: 1 word
l Extension Overhead:
l TCP/IP: 100 words. For M1E Controllers: 20 Words.
l Data Protect: 8 words
l S980 Address: 8 words
l Quantum Hot Standby: 17 words
l VME Bus: 9 words
l Profibus: Approximately 4096 words; check your Profibus manual for
details
l Peer Cop: 5 words
Links: 3 words per link, plus:
-) Global Output: 4 words per link
-) Global Input: 2 words overhead plus, for each of up to 64 devices,
1 + twice the number of up to 8 sub-entries (max. 8). The maximum is
2 + (64*(1+2*8)) = 1090 words.
-) Specific Output: 2 words overhead plus 2 words for each of up to 64
devices. The maximum is 2+(2*64) = 130 words.
-) Specific Input: 2 words overhead plus 2 words for each of up to 64
devices. The maximum is 2+(2*64) = 130 words.
l SY/MAX: 52 words
l I/O Scanner: 4 M1E controllers; 10 words of overhead; 40 words of
overhead for anything other than M1E’s; 12 words/transaction.
372 SPU 780 01EMAN May 2002
Skips
Select this option to enable skips (segments can be skipped during solves).
Bridge Mode
Select True to enable Bridge Mode. Some controllers support Bridge Mode,
which allows you to connect to a Modbus Plus network through their Modbus
ports 1.
Note: To use Bridge Mode, your controller’s MEM/DIP switch must be in the
MEM position.
79
Configuring a Controller
‘Ports’ Tab
Overview
From this tab in the Controller Configuration window, you configure the controller’s
Modbus and ASCII ports. These settings do not affect the communications setup of
your PC in any way - only the controller’s.
Modbus Ports
The following parameters are editable:
Parameter
Description
Mode
Identifies which data protocol (Remote Terminal Unit or ASCII) to use.
Both the PC and controller must use the same data protocol. Default
is RTU.
If you select ASCII protocol for a port, you can only configure its Parity,
Stop/Data bits, and Baud settings.
Parity
Adds a check bit to a packet to make the number of binary ones always
either odd (Odd Parity) or even (Even Parity). If parity is set to None,
the check bit is not added. The PC and controller must use the same
parity. Default is Even.
Stop/Data
Sets the number of bits at the end of a packet which prepare the
receiving device for the next packet. The PC and controller must use
the same number of stop bits. Default is 1.
Baud
Sets the data transfer speed of the controller’s Modbus port in bits per
second. The PC and controller must be set to the same baud rate.
Default is 9600.
Head
Quantum controllers only: sets the slot number on the local drop
backplane where the CPU resides.
Dev Addr
Assigns the Modbus address for the port. Default is 1.
Delay
Sets the amount of time in tens of milliseconds the controller waits
after receiving a message before sending an acknowledgment.
Default is 1 (10); max. is 20 (200).
Modbus Port 2 Type Momentum M1 controllers only: Sets the port type of Modbus Port 2,
to either RS232 or RS485.
80
372 SPU 780 01EMAN May 2002
Configuring a Controller
Simple ASCII
Ports
Some Modicon controllers have RS-232 ports as part of Remote I/O drops.
Advanced programmers can use these ports (called simple ASCII or ASCII/DAP
ports), for serial communications between controllers and data terminal equipment.
In ladder logic, use the Block Move (BLKM) instruction to send and receive Simple
ASCII messages. Configure the number of ASCII ports for a controller by setting the
ASCII Ports parameter in the General tab.
The 984A, 984B, and Micro 311, 411, 512, 612 controllers have simple ASCII ports
having fewer properties than Modbus ports:
372 SPU 780 01EMAN May 2002
Parameters
Description
Parity
Adds a check bit to a packet to make the number of binary ones always
either odd (Odd Parity) or even (Even Parity). If parity is set to None,
the check bit is not added. The PC and controller must use the same
parity setting. Default is even.
Stop/Data
Sets the number of bits at the end of a packet which prepare the
receiving device for the next packet. The PC and controller must use
the same number of stop bits. Default is 1.
Baud
Sets the data transfer speed of the controller’s Modbus port in bits per
second. The PC and controller must be set to the same baud. Default
is 9600.
81
Configuring a Controller
ASCII Ports
This table allows the user to set each port to be compatible with the device to which
it is being connected.
There are five properties that can be set:
Property
Micro Ports
82
Description
Parity
Select EVEN, ODD, or NONE.
Baud Rate
The communication speed is set to one of the following
baud rates: 50, 75, 110, 134.5, 150, 300, 600, 1200,
1800, 2000, 2400, 3600, 4800, 7200, 9600, and 19200.
Number of Stop Bits
Select the number of stop bits for each data byte (1 or 2).
A system with NO PARITY generally uses 2 stop bits,
while a system with PARITY uses 1 stop bit.
Number of Data Bits
Select the number of data bits issued from the ASCII port
(a number from 5 to 8). The choice of 7 data bits is
standard for most ASCII devices.
Keyboard/Non-Keyboard
Select the attached device is defined as a keyboard or
non-keyboard device. The purpose of this function is to
allow you to modify the response of the ASCII port to
match the type of device to which it is connected. In the
keyboard mode, the port echoes back the input character
and requires delimiters to move to the next data field and
to terminate the message. Editing of input data is
possible from a terminal. In the non-keyboard mode, no
data is echoed back and, as a data field is completed, the
next available data field is entered or the message
automatically terminates. No editing capabilities are
supported.
If you are using a Micro 311, 411, 512, or 612 controller, assign it’s ports using the
Micro port drop-down menu. The assignments in the list are combinations of the
controller’s COM1, COM2, and I/O Expansion Link port. The assignments availabledepend on which Micro I/O Mode you set in the Controller Details section of the
General tab in the Controller Configuration editor.
372 SPU 780 01EMAN May 2002
Configuring a Controller
‘Loadables’ Tab
Overview
User loadables are instructions that do not come with a controller. Instead, they are
supplied by Modicon or third-party vendors and must be copied into a controller or
project to be used.
Loadables are extensions to a controller’s capabilities. When they appear as logic
function blocks (most of the time) they are represented as three node instructions.
The Loadables tab displays the loadables selected and available to be selected for
the current project.
The display shows a table of loadables and related information. A check mark is
shown beside loadables that are present in the project. Loadables with no check
mark are present in the loadable library, but are not currently available in the project.
To add or delete a loadable from a project, select or de-select the associated
checkbox.
Note: You can only add loadables that are already part of a loadable library. Using
a loadable is a two-step process: transferring it into a loadable library (see the
Loadable Library Wizard, p. 86), then selecting it from the library into the controller
or project by checking the loadables’ checkbox in the loadables tab and saving
changes.
Loadable
Parameter
Loadable’s parameter listing:
372 SPU 780 01EMAN May 2002
Parameter
Description
Name
User loadable name.
Opcode
A unique two-digit hexadecimal number used to identify an instruction in the
programmable controller logic.
Version
The version number of the installed loadable.
Type
Either MSL or USL.
83
Configuring a Controller
Updating
Loadables
Overview
Here are two possible scenarios that would require you to update a loadable:
l Periodically, new versions of loadables are made available. If you try to delete an
old loadable from the configuration, the configurator alerts you to the fact that it
is already used in logic and prevents the loadables’ deletion. As adding or
readding a loadable can be an extensive task, update loadable conveniently
allows you to replace a loadable without first deleting it from logic.
l You may have read a controller’s data into a project where the controller data
contained an .MSL loadable (i.e. an .EXE file from Schneider Electric or a third
party vendor). If the controller had been run prior to performing the read, the MSL
loadable in the project is unusable if written back to the controller. Use update
loadable to get the MSL loadable back to a state where it can be written to the
controller. Update loadable asks you for the original .EXE loadable. It places it
into the project and the project may then be rewritten successfully to the
controller.
Updating
Loadables
To update a loadable in a project:
Step
1
Copying a
Loadable to a
Controller
84
Action
Select Update from the right-click menu on the row of the loadable that you want
to update.
To copy a loadable to a controller or project:
Step
Action
1
Select the loadable’s checkbox. The Select Opcode dialog appears if no
Opcode has been set for the loadable.
2
Select an available Opcode from the list and click OK.
3
If you are offline, selected (checked) loadables are included in the project. Any
new loadables you check off will be added to the project when the configuration
changes are saved. To use the loadables in a controller, write to the controller.
See Writing to a Controller, p. 92 for more information.
4
If you are in online mode, changes are not made to the current project. If you add
loadables and close the configurator while online, the Configurator makes the
changes directly to the controller. (Note: The controller must be stopped.)
5
If you are in online combined mode any changes that you save are saved to the
current project and then written to the controller. (Note: The controller must be
stopped.)
372 SPU 780 01EMAN May 2002
Configuring a Controller
Deleting
Loadables
To delete a loadable from a controller or project:
Step
1
372 SPU 780 01EMAN May 2002
Action
To delete a loadable from a project or controller, deselect the loadable’s
checkbox.
Note: You cannot delete a loadable if it is used in logic.
85
Configuring a Controller
Loadable Library Wizard
Overview
Before you can place a user loadable into a controller or project, it must be read into
the loadable library. A loadable library holds a set of loadables for you so that you
only have to translate them to ProWORX 32 format once.
In the Loadable Library, you can read a loadable from disk, translate it to ProWORX
32 format, and move it into a library. You can read loadables from an existing project,
a Schneider Electric (.exe or .dat) or third party disk (.exe or .dat) or a ProWORX
.TLD library file.
Note: Reading a user loadable into a loadable library does not copy it into your
controller or project. Using a loadable is a two-step process: reading it into a
loadable library, then from the library into the controller or project (see ‘Loadables’
Tab, p. 83 for more information).
Note: You are unable to open the loadable library wizard while the controller
configuration editor is open.
Using the
Loadable Library
From the Navigation Panel, Utilities tab:
Step
1
2
3
86
Action
Select Loadable Library to open the Loadable Library Wizard.
Select one of the following options:
Edit Opcode - See Editing Opcodes below.
View Text - Displays the manufacturer’s notes for a loadable (if available).
Rebuild Library - On rare occasions, a library of loadables can become
damaged (for example, when a computer crashes and files are corrupted).
ProWORX 32 allows you to recreate a library from its .USL and .MSL files.
l Transfer Loadable into Loadable Library - Transfer loadables from a
project, an old ProWORX.tld file, Schneider Electric (.dat), or from within an
.exe into the loadables library. Also use this option to update the version of
existing loadables in the loadable library.
l
l
l
When you have completed using the loadable library wizard, click Finish.
372 SPU 780 01EMAN May 2002
Configuring a Controller
Editing Opcodes
An opcode is a unique number identifying a loadable in the controller or project.
Because each opcode must be different, they may need changing.
When a loadable is added to a project or controller, the configurator will compare the
new loadable’s opcode with the opcodes already used in the controller by built-in
instructions and previously loaded loadables. If it sees that the new loadable opcode
will conflict, the Select Opcode window appears.
However, if you happen to know an opcode that won’t conflict with the loadables
already in your controller you can use the Edit Opcode option in the wizard to make
the change. Then when you add the loadable in configuration, you won’t be
prompted to provide a new opcode.
372 SPU 780 01EMAN May 2002
87
Configuring a Controller
88
372 SPU 780 01EMAN May 2002
Working with Controllers
At a Glance
Overview
This chapter contains information on how to use ProWORX 32 to work with a
controller.
What’s in this
Chapter?
This chapter contains the following topics:
Topic
90
Reading From a Controller
91
Writing to a Controller
92
Transferring Memory Contents to Controller EEPROM
94
Transferring the Flash RAM Executive
95
Transferring Memory Contents to Micro Flash RAM
96
Transferring Internal Flash or PCMCIA to Controller Flash
97
Starting and Stopping Controllers
98
PLC Status Viewer
99
Analyze Device
372 SPU 780 01EMAN May 2002
Page
Initializing Logic in a Controller
100
89
Working with Controllers
Initializing Logic in a Controller
Overview
Initializing logic erases the networks, register contents and ASCII messages in a
programmable controller. The controller must be stopped before you can initialize
logic.
It is strongly recommended that you read the contents of the controller to a backup
database before initializing logic.
WARNING
Ensure data integrity is maintained.
You are about to erase the contents of your controller. If you want to
save any information stored in the controller, ensure that its contents
have been read to a database.
Failure to follow this precaution can result in severe injury or
equipment damage.
Initializing Logic
From the project right click menu:
Step
1
90
Action
Select Online Commands → Init Logic.
372 SPU 780 01EMAN May 2002
Working with Controllers
Reading From a Controller
Overview
The Read from Controller function transfers memory contents from a programmable
controller into a designated database. It is strongly recommended that you use this
function to backup the contents of a controller before working with it online.
Reading From a
Controller
From the project navigation panel:
372 SPU 780 01EMAN May 2002
Step
Action
1
Select the project you want to read to.
2
Ensure that you have selected the correct controller to read from and that the
project you are reading into is backed up if necessary. Also, check the
communications settings for the correct address.
3
From the project right click menu, select Online Commands → Read → Read
to read the logic, traffic cop, configuration, loadables, ASCII, state and disabled
tables.
4
Or, from the project right click menu, select Online Commands → Read →
Read Extended Memory to read only the extended memory registers.
5
You are prompted to confirm that you want to read the selected controller. Click
OK to perform the read.
6
When the read is complete, click OK to return to ProWORX 32.
91
Working with Controllers
Writing to a Controller
Overview
92
The Write to Controller function writes the contents of a database to a controller. The
controller must be stopped before you can write to it.
372 SPU 780 01EMAN May 2002
Working with Controllers
Writing to a
Controller
From the project navigation panel:
Step
Action
1
Select the project you want to write from.
2
Ensure that you have selected the correct controller to write to and that the
controller you are writing to is backed up if necessary. Also, check the
communications settings for the correct address.
3
From the project right click menu, select Online Commands → Write → Write
All to write the logic, traffic cop, configuration, loadables, ASCII, state, and
disabled tables. This command overwrites all existing PLC data.
4
Or, from the project right click menu, select Online Commands → Write →
Relocate Logic and Data to write the contents of the controller as long as
addresses and function blocks in logic are supported in the destination controller.
You can choose to update either the Logic, Coils Used, ASCII, and State/
Disabled tables, or just the Logic and Coils Used.
5
Or, from the project right click menu, select Online Commands → Write →
Write Extended Memory to write only the extended memory registers. Select all
extended memory files or a specific extended memory file and click OK.
6
ProWORX 32 checks to ensure that the controller and database match and the
results are stated in the Database/Controller Validation dialog. If the controller
and database match click Write or Relocate to carry out the desired function.
Potential reasons that the controller and database would not match include:
l The controller being written to may not have enough memory for the logic
being written.
l The controller address ranges many not be large enough
l The controller instruction set many not match the database
l The database may use duplicate coils, which most controllers do not support
7
When the write is complete, click OK to return to ProWORX 32.
CAUTION
Process Cancellation Warning
Cancelling a write while in operation may leave your PLC in an
indeterminate state.
Failure to follow this precaution can result in injury or equipment
damage.
372 SPU 780 01EMAN May 2002
93
Working with Controllers
Transferring Memory Contents to Controller EEPROM
Overview
This function works only with Compact controllers. This function cannot be
performed while the controller is running. You must stop the controller first.
Note: Do not attempt the transfer operation if the controller’s battery is LOW as the
processor contents may be lost.
Tip: Memory Protect is a switch on your controller that stops you from altering the
controller’s contents. The Memory Protect switch should be ON or the card
overwrites memory on power up.
Transferring
Controller
Memory to
EEPROM
94
From the project right-click menu in the navigation panel:
Step
Action
1
Select Online Commands → Write → Transferring to Flash/EEPROM/
PCMCIA.
2
A-series Compact controllers have four enhanced EEPROM options which may
be set prior to transferring:
l After power down, restore PLC to previous Run/Stop state.
l Start PLC after download from EEPROM.
l Save 4xxxx registers to EEPROM.
l Optimized Mode - When selected, the controller can’t be edited while online.
3
Click Transfer. You are prompted to stop the controller if it is running.
372 SPU 780 01EMAN May 2002
Working with Controllers
Transferring the Flash RAM Executive
Using
EXECLoader
To transfer the flash RAM executive, read a controller’s flash RAM executive into a
disk file, or write a device’s flash RAM executive from a disk file, use the third-party
EXECLoader application. The EXECLoader is a Windows based 32-bit program that
allows you to update the executive firmware in a variety of Schneider Electric PLC
modules.
Step
1
372 SPU 780 01EMAN May 2002
Action
To open EXECLoader, select EXECLoader from the Project Navigation panel,
Utilities tab.
95
Working with Controllers
Transferring Memory Contents to Micro Flash RAM
Overview
This function works only with Micro controllers. This function copies the memory
contents of a Micro controller to the controller’s flash RAM.
When the Micro controller receives power, it first checks to see if a valid
configuration is present in the data memory. If not, the contents of the flash RAM are
re-loaded into the controller memory.
Flash RAM may be used as an alternative to the optional battery backup, or as an
extra backup of the logic and configuration.
Transferring to
Micro Controller
Flash RAM
96
From the project right-click menu in the navigation panel:
Step
Action
1
Select Online Commands → Write → Transferring to Flash/EEPROM/
PCMCIA.
2
Click Transfer. You are asked whether or not you want ProWORX 32 to start the
controller after loading to Flash RAM.
Click Yes to have ProWORX 32 automatically start the controller after
transferring memory contents to Flash RAM.
Click No to keep the controller stopped after transferring memory contents to
Flash RAM.
3
If the controller is currently running, you are prompted to stop it. You must do so
to continue.
372 SPU 780 01EMAN May 2002
Working with Controllers
Transferring Internal Flash or PCMCIA to Controller Flash
Overview
This function copies the memory contents of a Compact TSX, Quantum 434, or
Quantum 534 controller to the controller’s flash RAM or PCMCIA memory card.
Note: Do not attempt the transfer operation if the controller’s battery is LOW as the
processor contents may be lost.
When the controller receives power, it first checks to see if a valid configuration is
present in the data memory. If not, the contents of the flash RAM or PCMCIA
memory card are re-loaded into the controller memory.
Flash RAM or PCMCIA memory card may be used as an alternative to the optional
battery backup or an extra backup of the logic and configuration.
This function cannot be performed while the controller is running. You must stop the
controller first.
Transferring the
Controller’s
Memory
Contents to
Controller Flash
or PCMCIA
Memory Card
From the project right-click menu in the navigation panel:
372 SPU 780 01EMAN May 2002
Step
Action
1
Select Online Commands → Write → Transferring to Flash/EEPROM/PCMCIA.
2
Select Internal Flash to transfer the current logic to flash memory or PCMCIA to
transfer the current logic to the PCMCIA memory card.
3
Compact controllers have enhanced options that may be set prior to transferring. Set
the parameters for internal flash and PCMCIA settings:
l Start PLC after download from EEPROM: Automatically starts the controller
with the logic that was stored in flash memory or the PCMCIA card during a power
failure.
l Save state RAM: Saves the last state to flash memory or the PCMCIA card in the
event of a power failure.
4
Type the number of registers to save in the 4xxxx registers to save field. The
specified number of registers are saved to flash memory or the PCMCIA card in the
event of a power failure.
5
Click Transfer to transfer the logic to flash memory or the PCMCIA card. You are
prompted to stop the controller if it is running.
Note: Click Clear Flash to clear the logic stored in the flash memory or the PCMCIA
card.
6
If the controller is currently running, click Stop.
97
Working with Controllers
Starting and Stopping Controllers
Starting and
Stopping a
Controller
From the ProWORX 32 Online Controls tool bar:
Step
Action
1
Click Start/Stop Controller.
The Start/Stop dialog appears.
2
For controllers that support it, you can select Optimization Mode. In the
optimized mode, the ability to edit or show power flow is disabled. You may have
to stop the controller to make logic changes. The 685E and 785E controllers
have a 2k buffer allowing editing during optimized mode. Once this buffer is full,
no further changes can be made until the controller stops.
3
Click Start to start the controller.
4
5
The start/stop dialog box displays the following controller information:
Project Name
Processor Type
Communications Type and Address
Current State
l
l
l
l
Click Stop to stop the controller.
WARNING
Controller may be Process-Critical.
Stopping a controller stops a controller from solving logic, or performing
I/O functions; the controller remains in the ready state. Stopping a
controller may have a major impact on your process. Always consider
fully the possible consequences of stopping a controller (i.e., is it
performing a critical operation?) before proceeding.
Failure to follow this precaution can result in severe injury or
equipment damage.
98
372 SPU 780 01EMAN May 2002
Working with Controllers
PLC Status Viewer
Overview
The status viewer monitors PLC status words. The PLC to be monitored is specified
by the project selected. Multiple projects can be monitored at once and results in the
word data grid are saved to the project. See Status Words for S901 and S908,
p. 280 for more information about status words.
Note: The words available are dependant on the PLC being monitored.
Checking the
Value of a Word
Logging
Word Data
Working with
Logged
Word Data
In the PLC status window:
Step
Action
1
Select the Update current node radio button
2
Select the word from the status word navigation panel that you want to see the
value of.
Note: Single bits are colored when set.
In the PLC status window:
Step
Action
1
Select the Record selected nodes radio button.
2
Select the word(s) from the status word navigation panel that you want to log by
clicking the check boxes beside the status word icons.
3
Click the Start Logging button.
4
To end the logging session, click the Stop Logging button.
After logging word data, right click on the logged data grid:
372 SPU 780 01EMAN May 2002
Step
Action
1
To clear the selected word data from the logged word data grid, click Delete.
2
To clear all word data from the logged word data grid, click Delete All.
3
To view the detailed word view and diagram of bits, click View Bits.
4
To print the logged word data, click Print.
99
Working with Controllers
Analyze Device
Overview
The Analyze feature is very useful in diagnosing problems with your PLC that
wouldn’t show up as part of typical online programming/commissioning. Analyze
device performs a checklist of predetermined tasks to find specific problems relating
to an I/O sub-systems health and general PLC status. The Analyze feature can
pinpoint problems for maintenance staff to correct as well as keep an up-to-date
knowledge base of maintenance records for future reference.
S901 Style
Analyze
The S901 Analyze performs Stopcode Error, Controller Status, Battery Failed,
Memory Protect, Single Sweep, Constant Sweep, S901/J200 Status, ASCII Error,
Channel Communications Health, Module Health checks. All potential problems are
placed into a report.
S908 Style
Analyze
The S908 Analyze performs Stopcode Error, Controller Status, Battery Failed,
Memory Protect, Single Sweep, Constant Sweep, Hot Standby, DCP Present, ASCII
Error Set, Remote I/O, S908 Error Set, Cable A Errors, Cable B Errors, Global
Comm Health, Cable A Comm Health, Cable B Comm Health, Local Drop Health,
Remote Drop Health, Remote Drop Cable A, Remote Drop Cable B, Drop
Communications, and Module Health checks. All potential problems are placed into
a report.
Understanding
the Analyze PLC
Output
Output graphics descriptions:
Graphic
Description
This area passed and no report entry has been made.
An entry has been made into the report signifying the state of the area.
A problem has been detected in the specific area. An entry in the report has
been made.
Viewing the
Analyze Device
Report
From the Analyze Device window:
Step
1
100
Action
Select the Report tab. (The Report window shows the date and time the problem
was found, and a brief description of the potential problem.)
372 SPU 780 01EMAN May 2002
Configuration Extensions
At a Glance
Overview
Configuration extensions are utilities that can be loaded into a controller. The
Configuration Extensions area contains several different hardware configuration
extensions. These extensions are controller-specific. Each different extension hasits
own editor and some of the more complex extensions have a wizard as well.
What’s in this
Chapter?
This chapter contains the following topics:
372 SPU 780 01EMAN May 2002
Topic
Page
Configuration Extensions
102
Compact Phase II
104
Data Protect Extension
105
Quantum Hot Standby
106
IO Scanner
108
IO Scanner Wizard
111
Peer Cop
113
Peer Cop Wizard
118
Profibus Extension
121
Profibus Wizard
122
S980 Extension
123
SY/MAX Extension
124
TCP/IP Extension
125
Quantum VME Bus Extension
126
101
Configuration Extensions
Configuration Extensions
Overview
Configuration extensions can be edited while the project is either online or offline.
Online changes can only be made to a stopped controller. The configuration
extension information is stored within the project and can be loaded at any time.
Available configuration extensions listed in the Active Extensions panl:
Configuration Extension Description
Data Protect
Prevents specific blocks of 0xxxx and 4xxxx references from
being modified by general Modbus data write commands.
Peer Cop
Allows you to configure data blocks to be transferred between
controllers on a Modbus Plus network.
S980 Addresses
Specifies the S980 station address.
Quantum Hot Standby
Allows additional configuration of the Quantum Hot Standby
setup.
Profibus
Configures a Quantum controller for Profibus communications.
TCP/IP
Configures controllers to connect to a TCP/IP network through a
communication card.
SY/MAX
Configures a Quantum controller for communication with SY/
MAX drops.
I/O Scanner
Allows you to configure data blocks to be transferred between
controllers on a TCP/IP network.
Compact Phase II
This extension is only available for Phase II Compact PLC’s
VME Bus
Configures a VME controller for communications with a VME
network.
Note: Before setting config extensions, you must set the Configuration Extension
Size parameter in the controller configuration editor. For more information see,
Configuring a Controller, General Tab Parameters, p. 77.
102
372 SPU 780 01EMAN May 2002
Configuration Extensions
Using the
Configuration
Extensions
Utility
In the project navigation tree:
372 SPU 780 01EMAN May 2002
Step
Action
1
Double-click the Configurations Extensions icon. The configuration
extensions window will appear showing only the extensions that are available for
the active project.
2
To add a configuration extension, select the check box beside the extension
icon.
3
To remove a configuration extension, de-select the check box beside the
extension icon.
4
To edit an extension, ensure that the extensions associated check box is
checked. Then, select the extension that you want to edit from the extensions
panel.
The status bar at the bottom of the Configuration Editor window shows the
number of words used, total number of words available and any error or status
messages as they may appear.
5
To save the changes that have been made, close the Configuration Extensions
window.
103
Configuration Extensions
Compact Phase II
Overview
Compact Phase II extensions allow the programming of functions specific to the
Compact Phase II controllers. This provides support for:
l PLC based password access
l Secure Data Area (SDA)
l Comm 1 CTS/RTS delay time settings.
Note: If the Compact Phase II extension does not appear in the Active Extensions
panel, it is not a valid extension for the current controller type.
Editing the
Compact Phase II
Extension
104
In the Active Extensions panel select the Compact Phase II extension, then:
Step
Action
1
Enter a Secure Data Area value between 0 and 128 in the SDA Size (K Words)
box. A zero value disables the feature.
2
Enter a value between 0 and 50 in the CTS Delay (x10 ms) box. A zero value
indicates the feature is disabled.
Note: This value is a factor of 10; if 5 is entered, 50 is assumed by the PLC.
3
Enter a value between 0 and 50 in the RTS Delay (x10 ms) box. A zero value
indicates the feature is disabled.
Note: This value is a factor of 10; if 5 is entered, 50 is assumed by the PLC.
4
Enter a password consisting of a maximum of 16 characters (A-Z, 0-9 and _) in
the PLC Password boxes. The PLC password can only be changed while
online. If the password is set to nothing, the PLC is not password protected.
372 SPU 780 01EMAN May 2002
Configuration Extensions
Data Protect Extension
Overview
Data Protect is used to protect specific 0xxxx and 4xxxx references from being
modified by Process Monitoring and Control software. Write access is allowed for all
0xxxx and 4xxxx references within the specified block.
References outside the ranges specified are protected from general Modbus data
write commands. By default, all 0xxxx and 4xxxx references are unprotected.
Note: If the Data Protection extension does not appear in the Active Extensions
panel, it is not a valid extension for the current controller type.
Editing the Data
Protect
Extension
In the Active Extensions panel select the Data Protect extension, then:
372 SPU 780 01EMAN May 2002
Step
Action
1
Enter an address in the 0xxxx Starting Address field. Default - 0:0001.
2
Enter the number of references that are to be left unprotected in the 0xxxx
Length field. ProWORX 32 shows the protected reference ranges in the 0xxxx
Protected Ranges boxes.
Suppose you type a Start value of 00017, and a Length of 1024. The first
protected range will be from 00001 (the first possible value) to 00016 (the last
value before the Start value you entered).
There will then be an unprotected range from 00017 to 01040 (00017 + 1024).
All references above 01041 are also protected.
If you enter a length that is too high (goes beyond the addresses configured for
the controller) ProWORX 32 automatically sets the value to include all addresses
above the Starting Address fields.
3
Enter an address in the 4xxxx Starting Address field. Default - 4:0001.
4
Enter the number of references that are to be left unprotected in the 4xxxx
Length field. ProWORX 32 shows the protected reference ranges in the 0xxxx
Protected Ranges boxes.
105
Configuration Extensions
Quantum Hot Standby
Overview
The Quantum Hot Standby extension allows additional configuration of the Quantum
Hot Standby setup. This lets you set the type of state RAM transfer between the
CHS110-00 modules. It also lets you set the Initial Command Register and the NonTransfer Area.This area is only available on version 2.x Quantum controllers that
contain the CHS loadable in the configuration.
Note: If the Quantum Hot Standby extension does not appear in the Active
Extensions panel, it is not a valid extension for the current controller type.
Editing the
Quantum Hot
Standby
Extension
106
In the Active Extensions panel select the Quantum Hot Standby extension, then:
Step
Action
1
In the General tab, enter the 4xxxx address of the command register used to
configure the hot standby system in the Command Register field. This register
must be transferred every scan and cannot be in the non-transfer area.
The initial command register contains the settings that are loaded into the
controller when it is started. If any changes need to be made while the controller
is running, the command register must be used, and not the initial command
register. Settings such as port address swapping, allowing an executive
upgrade, setting the standby’s mode on a logic mismatch, setting the controller’s
modes and overriding the key switch can be changed from the command
register.
2
Enter the starting address of the range of registers that are not to be transferred
from the primary controller to the standby in the Non-Transfer Area Start
Address field. This is commonly used to reduce scan time.
l The first two registers are used in reverse transfer operations. These
registers allow information to be passed from the standby to the primary
controller.
l The third register is the Status register, which stores the status of both
controllers. This register provides information on how the hot standby system
is operating, such as the power flow of the CHS instruction, position of the
controller’s A/B switch, and whether there is a logic mismatch between
controllers.
l All registers following the third register are ignored (not transferred) during
the scan.
3
Enter the length of the non-transfer register range in the Non-Transfer Area
Length field. This value can be from 1 through the total number of registers
configured in the controller.
372 SPU 780 01EMAN May 2002
Configuration Extensions
Step
4
5
6
372 SPU 780 01EMAN May 2002
Action
Click the Show Command/Status Registers to view the command and status
register contents in the Data Watch Window.
Select one of the following State RAM Transferred options:
Default (12K): All 0xxxx and 1xxxx registers (up to 8192 each) are
transferred.
l If 10000 or fewer 3xxxx and 4xxxx (combined) registers are configured,
then all are transferred.
l If more than 10000 3xxxx and 4xxxx (combined) registers are configured,
then (up to) 1000 3xxxx registers and all 4xxxx (up to a combined total of
10000) are transferred.
l Routine Only: All addresses defined in the routine transfer table are
transferred every scan. There must be a minimum of 16 4xxxx registers to
support the non-transfer area. The Routine Transfer Table is a range of
discretes and registers that must be configured as a multiple of 16.
l Routine and Extra: All addresses defined in the Routine Transfer Table and
in the extra tables are transferred. The range of each extra table must be a
multiple of 16. The extra tables can be transferred over multiple scans.
l All State RAM: All RAM configured in the controller is transferred every scan.
l
Select an address in the table and enter a reference length.
For Routine Transfer Table address lengths, this must be a value between 16
and the maximum configured size for that address.
l For Extra Transfer Table address lengths, this must be a value between 16
and the maximum configured size for that address exclusive of the range set
in the corresponding Routine table.
l Values must be a multiple of 16. The ranges defined are updated and
displayed to the right on the tables as the values change.
l
7
Enter the number of scans (1-255) needed for the primary controller to transfer
the extra transfer tables to the standby in the Scans to Transfer field,
8
Select the Initial Command Register tab.
9
Set the Swap Port (x) Addresses parameters to either Yes or No.
10
Set the Controller (x) Mode parameters to either Offline or Online.
11
Set the Standby Mode (on logic mismatch) to either Yes or No.
12
Set the Executive Upgrade Switch to either Enabled or Disabled.
13
Set the Keyswitch Override to either Enabled or Disabled.
107
Configuration Extensions
IO Scanner
Overview
The I/O Scanner extension provides data transfer between two or more controllers
on a TCP/IP network. The I/O Scanner lets you to simultaneously configure up to
128 communication transactions, depending on your controller. Because the TCP/
IP connection is established only once and remains connected during an entire
session, it makes this type of communication very efficient.
Note: If the IO Scanner extension does not appear in the Active Extensions panel,
it is not a valid extension for the current controller type.
IO Scanner
Wizard
ProWORX 32 includes a configuration wizard to step you through data transaction
setup between a local device and a number of remote devices on a TCP/IP network.
Editing the IO
Scanner
Extension
In the Active Extensions panel select the IO Scanner extension, then:
108
Step
Action
1
Select a card to edit from the Card Number drop-down list box. There may be
one, two or six cards available to edit depending on the PLC type. Each card has
an independent set of data values.
2
Enter an IP address in the IP Address field in the format (1-255).(1-255).(1255).(1-255) This address should match the TCP/IP extension for the selected
card.
3
Enter a 1xxxx or 3xxxx address that will receive health information in the Health
Block (1x/3x) field.
4
Enter the number (1-16) of the slot in the backplane the selected card inhabits in
the Head Number field. This value should match the value in the TCP/IP
extension for the selected card.
5
The transaction list displays up to 128 (64 for M1E PLC’s) transactions. A
transaction that isn’t configured is denoted by a red X, a partially configured
transaction is denoted by a yellow exclamation mark, and a configured
transaction is denoted by a green check mark.
To configure a transaction, right-click anywhere in the transaction list and select
Add Transaction. Transactions are configured in order so if you have three
transactions and select Add Transaction, the fourth transaction can be
configured.
6
To clear the configuration of the last transaction in the list, right-click anywhere
in the transaction list and select Delete Transaction or press the DELETE key.
7
Enter the IP address of the remote device that you are communicating with in the
IP Address field.
372 SPU 780 01EMAN May 2002
Configuration Extensions
Step
372 SPU 780 01EMAN May 2002
Action
8
Enter the value of the destination Unit ID in the Unit ID field. This is an identifier
for a pair of transactions (specifically Link Client/Server transactions). The
transaction pair must have matching Unit ID’s.
An example situation would include a single Server Write that sends data to the
matching Client Reads in a remote device. All Client Read transactions accept
the data sent from the single Server Write transaction as long as the Unit ID’s
match.
9
Enter a millisecond value representing the length of time to wait for a reply for
each transaction in the Health Timeout (0-50k) field.
10
Enter a millisecond value representing the length of time to wait before repeating
the transaction in the Repetition Rate (0-50k) field. A value of 0 indicates the
quickest possible rate.
11
Select one of the following functions from the Function drop-down list:
l Read - A unilateral read in which a local device reads data from a remote
device.
l Write - A unilateral write in which a local device writes data to a remote
device.
l Read/Write - A unilateral read/write in which a local device reads data from
and writes data to a remote device.
l Link Client Read - A paired function type in which a local device responds to
a write transaction from a remote device which must have a matching server
write.
l Link Client Write - A paired function type in which a local device writes to a
remote device which must have a matching server read.
l Link Client Read/Write - A paired function type in which a local device reads
and writes data to and from a remote device which must have a matching
server read and write.
l Link Server Read - A paired function type in which a local device initiates a
read from a remote device. The remote device must have a matching client
write.
l Link Server Write - A paired function type in which a local device writes to a
remote device. The remote device must have a matching client read.
l Link Server Read/Write - A paired function type in which a local device reads
and writes data to and from a remote device which must have a matching
client read/write.
Note: For unilateral function types, no intervention is required for the remote
devices. They respond to any Read or Write without the need to set up an I/O
Scanner transaction. Linked function types require two complementary
transactions, on in each device.
109
Configuration Extensions
Step
110
Action
12
Select a fallback value from the Fallback Value drop-down list box:
l Zero - Resets the data values for the selected transaction to zero in the event
of a power failure.
l Hold Last - Retains the last data values for the selected transaction and make
them available at restart in the event of a power failure.
13
Type the local data address receiving data from the remote controller in the Read
from Remote, To field.
14
Enter the remote address where the read data is coming from in the Read from
Remote, From field.
15
Enter the number of sequential registers to read in the Read from Remote,
Number To Read field. Up to 125 registers are allowed.
16
Enter the local data address that sends data to the remote controller in the Write
to Remote, From field.
17
Enter the remote address where the write data is going to in the Write to Remote,
To field.
18
Enter the number of sequential addresses to write in the Write to Remote,
Number To Write field. Up to 100 registers are allowed.
372 SPU 780 01EMAN May 2002
Configuration Extensions
IO Scanner Wizard
Overview
To launch the IO Scanner wizard, click the IO Scanner Wizard button situated
directly below the Active Extensions panel.
The wizard operates independently of the Offline/Online mode. All changes are
made to Offline projects with an option to modify Online devices as well. TCP/IP
communications are required only when modifying online devices.
Using the IO
Scanner Wizard
Read the introduction instructions on the first screen and click Next:
372 SPU 780 01EMAN May 2002
Step
Action
1
Set the transaction type by selecting either the Direct radio button or Link
Client/Server radio button. Click Next.
l Direct - Creates a single transaction in the local device. Data is transferred
regardless of the programming of the remote device. This option is simpler
than Link Client/Server but could pose more risk as the target device needs
no additional program to verify its operation.
l Link Client/Server - Creates a pair of matching transactions, one in each
device. The server makes a request from a client which then responds to that
request. This is a safer option than Direct transactions but is more complex
to set up and maintain.
2
Set the local device address by entering an IP address in the Local Device IP
Address box in the standard IP format (1-255).(1-255).(1-255).(1-255)
If you are using a Quantum PLC, select the slot that the NOE (or similar ethernet
adapter) card resides in from the Head Number drop-down list.
Click Next.
3
To properly use the IO Scanner extension, you must define target PLC’s to
communicate with. These target PLC’s are called Remote Devices. To add a
remote device, click Add. To remove a remote device, click Remove. At least
one remote device must be defined before proceeding.
l Select a project to add its associated remote device to the list by clicking the
Browse button and selecting a project to the Remote Device/Database box.
Enter the IP address of the PLC for the remote device’s project in the Select
an IP Address box.
If you are using a Quantum PLC, select the slot that the NOE (or similar
ethernet adapter) card resides in from the What slot in the remote rack is
this device mounted in? drop-down list.
Click Next to return to the remote device summary screen.
l Repeat the above step until all desired remote devices have been added.
When you have finished adding remote devices to the IO Scanner extension,
click Next.
111
Configuration Extensions
Step
112
Action
4
To transfer data from one device to another a transaction is required. Existing
transactions cannot be modified using the IO Scanner wizard and are greyed
out. Up to 128 transactions may be created, except if you are using the M1E
PLC’s, then only support 64 transactions can be supported. To add a new
transaction, click Add. To edit a transaction created by the IO Scanner wizard,
click Edit. To remove a transaction created by the IO Scanner wizard, click
Remove.
l After clicking Add to add a new transaction, you are prompted to select a
remote device. To do this, click on a remote device from the list, and press
Next.
l Now you can configure the new transaction. First, select a function from the
drop down list. Second, enter 4xxxx addresses into the From and To fields
and numeric values in the Number of Registers field in the Read from Remote
Device and Write to Remote Device areas.
l When you have finished editing the transaction, click Next
(To see descriptions of the functions and fields, see Editing the IO scanner
extension.)
5
The transaction summary screen displays a summary of all new transactions to
be written to the local device as well as the variously selected remote devices.
Ensure the transactions are correct and click Next
Caution: Clicking Next will proceed with the modifications and cannot be undone
once completed.
Note: Only offline databases are modified in this step.
6
Click the Update Online Devices button to update the physical devices defined
as remote devices by the wizard. This does not update the local device. That
must be done once the configuration extension editor is closed and all changes
are saved.
Caution: Online devices may be running! They must be stopped before their
contents can be modified. Before stopping any device, ensure that it is safe to do
so. Devices are restarted once the operation is complete. Also, when these
changes are complete, they cannot be undone.
Click Next.
7
Click the View Log File button to view a log of all changes made to the local and
remote devices. This file (ScannerWizard.log) may be saved and printed as
needed.
Click Finish to close the wizard and return to the Configuration Extension Editor.
372 SPU 780 01EMAN May 2002
Configuration Extensions
Peer Cop
Overview
The Peer Cop extension provides data transfer between two or more controllers on
a peer-to-peer network, as well as linking multiple networks using the S985
communication card. Peer Cop configures data blocks to be continuously
transferred (once per scan) between nodes on a Modbus Plus network. Data can be
broadcast to all nodes on a single link (Global I/O) or between specific Modbus Plus
nodes on a link (Specific I/O).
A maximum of 32 data registers or 512 (for example, 32*16) I/O points can be
transferred to or read from a controller at a time. Peer Cop is supported by the A145
and all E-Series and Quantum controllers. Up to three Links of the Peer Cop can be
configured and edited.
Note: If the Peer Cop extension does not appear in the Active Extensions panel, it
is not a valid extension for the current controller type.
Peer Cop Wizard
ProWORX 32 includes a configuration wizard to help you set your Peer Cop
extensions. To access the Peer Cop wizard, see Peer Cop Wizard, p. 118.
372 SPU 780 01EMAN May 2002
113
Configuration Extensions
Editing the Peer
Cop Extension
Global Input/
Output
In the Active Extensions panel select the Peer Cop extension, then:
Step
Action
1
The Peer Cop extension can be configured for up to three links. When you add
a link you will have access to the 64 possible devices on another peer-to-peer
network.
l Link 1 is the internal link; all devices on the local Modbus Plus network can
be accessed from Link 1.
l Links 2 and 3 are remote links through S985 cards.
To add a link, click Add Link. To clear the configuration of a link, click Clear
Link. To delete a link, click Delete Link.
2
To configure a link, set its Head Number, Time-out value, and Last Value
parameters.
For link 2 or 3, select a head number (1 through 16) from the Link x Head
Number drop-down list box. Head Number specifies the head number on a
Quantum rack. If you are using a Quantum Controller, you have the option of
editing the head number for the second or third link. The first link is internal,
therefore it cannot be edited.
3
Select a value from the Timeout (ms) drop-down list box. Time-out specifies the
health time-out interval. The default value is 500ms. This value specifies the
minimum time period a Peer Cop configured communication must fail before the
associated health bit is cleared. Valid time-out values range from 20ms to 2
seconds. If you type a value too big, the value truncates to a multiple of 20. For
example, 230 truncates to 220 (it is not rounded up to 240).
4
Select ‘Clear’ or ‘Hold’ from the Last Value drop-down list box. Last Value
specifies whether or not to hold the last value. When set to ‘Hold’, the input data
area associated with an unhealthy transfer is left in its previous state (i.e. the last
value with a health of OK).
Global I/O is one of two communication methods used by the Peer Cop extension
(the other is Specific I/O). Global I/O is a broadcast communication method, where
a message is broadcast (made available) to all controllers on the Modbus Plus
network. Global I/O data transfers do not require an acknowledgment from the
receiving controller, so there is no immediate overhead placed on the receiving
controller.
Note: You can view the register data of any global input/output or specific input/
output by clicking View Data. The data watch window will open displaying the
relevant data.
114
372 SPU 780 01EMAN May 2002
Configuration Extensions
Editing Global
Inputs
Global Input is used to receive global data from any device on a Modbus Plus
network. One entry (line) is available for each device (1 through 64). Each device’s
global data can also be received in pieces determined by Subfields.
Step
Editing Global
Input Subfields
Action
1
Select the Global Input icon in the Links panel.
2
Select a global input from the Global Input list by double-clicking on an input.
The global input properties grid appears.
3
Enter the starting point (1 through 32) of the broadcast data to read in the Index
field.
4
In the Start field, enter the destination for the received data (i.e., where the
received data is to be stored).
5
Enter the number of words (1 to 32) to read forwards from the Index value in the
Length field.
For example, suppose the source controller is broadcasting 10 words of data
using the Global Output function, but the receiving controller only uses words 3
to 7. You would type an Index value of 3 and a Length of 5.
Note: The length value plus the index value must be less than or equal to 33.
6
Select either BIN (default) or BCD from the Type drop-down field.
Each device’s global data can also be received in sections determined by Subfields.
You can define a subfield for each block of the broadcast data that you want the
controller, to receive while ignoring the remainder.
Step
372 SPU 780 01EMAN May 2002
Action
1
To view the subfields of a global input, click View Subfields.
2
Select a subfield from the Global Inputs Subfields list.
3
Subfields have the same parameters as inputs. When you are finished editing
the subfields parameters, click Return to go back to the list of global inputs.
115
Configuration Extensions
Editing the
Global Output
Global Output broadcasts the specified range of discretes or registers to the devices
on the Modbus Plus network. Each device used to access the data must also be
configured to accept Global Input from the broadcasting device (1-32).
Step
Specific Input/
Output
Action
1
Select the Global Output icon in the Links panel.
2
n the Start field, enter the destination for the received data (i.e., where the
received data is to be stored).
3
Enter the length (1-32) of the address range (i.e., the number of registers to
broadcast). in the Length field.
4
Select either BIN (default) or BCD from the Type drop-down field.
Specific I/O is one of two communication methods used by the Peer Cop extension
(the other is Global I/O). Specific I/O uses a one-to-one communication method and
requires an acknowledgment from the receiving device, which creates a certain
amount of overhead. When using Specific I/O, the destination controller must accept
the entire block of data from the source controller. This means that the Index value
used in Global I/O is not necessary.
Specific I/O allows you to configure multiple defined data blocks for transmission to
specific devices on the Modbus Plus network. The device receiving the data must
be configured for Specific Input from the broadcast device. The length (in words) of
the specific input (configured in the destination controller) must be identical in length
to the specific output (configured in the source controller). The input data, however,
can be stored in any type of reference desired. That is, five words of 4xxxx data can
be stored into five words of 0xxxx memory area.
Note: You can view the register data of any global input/output or specific input/
output by clicking View Data. The data watch window will open displaying the
relevant data.
116
372 SPU 780 01EMAN May 2002
Configuration Extensions
Editing Specific
Inputs
Editing Specific
Outputs
Select the Specific Input icon in the Links panel, then:
Step
Action
1
Select a specific input from the Specific Input list by double-clicking on an input.
The specific input properties grid appears.
2
In the Start field, enter the starting address of the block of data to be placed from
the source controller.
3
Enter the number of words (1 to 32) to be received from the source controller in
the Length field.
4
Select either BIN (default) or BCD from the Type drop-down field.
Select the Specific Output icon in the Links panel, then:
372 SPU 780 01EMAN May 2002
Step
Action
1
Select a specific output from the Specific Output list by double-clicking on an
output. The specific output properties grid appears.
2
In the Start field, enter the starting address for the block of data to be sent to the
destination controller.
3
Enter the number of words (1 to 32) to be sent to the destination controller in the
Length field.
4
Select either BIN (default) or BCD from the Type drop-down field.
117
Configuration Extensions
Peer Cop Wizard
Overview
To launch the peer cop wizard, click the Peer Cop Wizard button situated directly
below the Active Extensions panel.
ProWORX 32 includes a peer cop wizard to step you through transaction setup
between a local device and a number of remote devices on a Modbus Plus network.
The wizard operates independently of the Offline/Online mode. All changes are
made to Offline projects with an option to modify Online devices as well. Modbus
Plus communications are required only when modifying online devices.
Using the Peer
Cop Wizard
118
Read the introduction instructions on the first screen and click Next:
Step
Action
1
Enter an IP address (01-64).(00-64).(00-64).(00-64) in the Local Device MB+
Address box. Click Next.
2
Define target PLC’s for the PLC to communicate with by adding remote devices
to the Remote Device Summary list. Click Add to add a remote device and its
corresponding project. Click Remove to delete a remote device from the list.
l To configure the remote device being added to the extension, click Browse
to select a project, and enter an IP address in the Select MB+ Address for
this Device field.
l When you have configured the remote device, click Next.
Note: The Modbus Plus routing paths for the local device and all remote
devices must match. Only the last, non-zero, address value may be different.
All proceeding values must be the same because Peer Cop transactions
cannot pass across Modbus Plus bridges or multiplexers.
372 SPU 780 01EMAN May 2002
Configuration Extensions
Step
372 SPU 780 01EMAN May 2002
Action
3
To transfer data from one device to another a transaction is required. Existing
transactions cannot be modified using the peer cop wizard and are greyed out.
Up to 64 read and 64 write transactions may exist. To add a new transaction,
click Add. To edit a transaction created by the peer cop wizard, click Edit. To
remove a transaction created by the peer cop wizard, click Remove. When
finished adding or editing transactions, click Next.
l After clicking Add to add a new transaction, the Specific Transaction screen
appears, allowing you to configure the transaction. Select ‘Read’ or ‘Write’
from the Function drop down list. Read requests data from the remote device
and Write sends data to the remote device.
l Enter the 4xxxx address where the data comes from in the From field. The
address is from the remote device for a read function and from the local
device for a write function.
l Enter a 4xxxx address where the data is sent to in the To field. The address
is from the local device for a read function and from a remote device for a
write function.
l Enter the number of consecutive registers to transfer (1 through 32) in the
Word Length field.
l When you have finished configuring the transaction, click Next
4
The Global Transactions List lists all of the global device-to-device transactions.
Existing transactions cannot be modified using the peer cop wizard and are
greyed out.
To add a new global transaction, click Add. To edit a global transaction created
by the peer cop wizard, click Edit. To remove a global transaction created by the
peer cop wizard, click Remove. When finished adding or editing global
transactions, click Next.
Note: Up to 64 read transactions may exist although only one global output
transaction can exist. Of course, numerous global output transactions can be
defined for different remote devices. However, once the first global output
transaction is defined, the ‘From’ address cannot be changed.
l After clicking Add to add a new global transaction, the global transaction
screen appears, allowing you to configure the transaction. Select ‘Read’ or
‘Write’ from the Function drop down list. Read requests data from the remote
device and Write sends data to the remote device.
l Enter the 4xxxx address where the data comes from in the From field. The
address is from the remote device for a read function and from the local
device for a write function.
l Enter a 4xxxx address where the data is sent to in the To field. The address
is from the local device for a read function and from a remote device for a
write function.
l Enter the number of consecutive registers to transfer (1 through 32) in the
Word Length field.
l When you have finished configuring the global transaction, click Next
119
Configuration Extensions
Step
120
Action
5
The summary of transactions screen displays all of the new transactions created
by the wizard.
These transactions are written to the local device as well as the various remote
devices when Next is clicked.
To overwrite any transactions in the remote device that would interfere with the
new one, check the Overwrite Existing Remote Transactions check box.
Caution: Pressing ‘Next’ proceeds with all modifications, and cannot be undone.
Note: Only offline databases are modified in this step.
6
Click Update Online Devices to update the physical devices defined as remote
devices by the wizard. This does not update the local device. The local device
must be updated after the configuration extension editor is closed and all
changes are saved.
Caution: Online devices may be running! They must be stopped before their
contents can be modified. Before stopping any device, ensure that it is safe to do
so. Devices are restarted once the operation is complete. Also, when these
changes are complete, they cannot be undone.
Click Next.
7
Click View Log File to view all of the changes made to the local and remote
devices. This file (PeerWizard.log) may be saved or printed as needed.
Click Finish to exit the Peer Cop wizard.
372 SPU 780 01EMAN May 2002
Configuration Extensions
Profibus Extension
Overview
The Profibus configuration extension allows you to communicate with a Profibus
network. In order to successfully install and configure the Profibus configuration
extension, you will have to use a total of three separate utilities:
l The ProWORX 32 Profibus wizard
l Softing’s PROFI-KON software, included with the Profibus hardware
l Modicon’s SPU931 utility, also included with the Profibus hardware
Note: PROFI-KON and SPU931 are not ProWORX 32 products. While every effort
has been made to ensure the accuracy of these instructions, users of PROFIKON
and SPU931 do so at their own risk.
Note: If the Profibus extension does not appear in the Active Extensions panel, it
is not a valid extension for the current controller type.
Editing the
Profibus
Extension
The Profibus extension displayed in the configuration extensions utility is for display
purposes only. To edit and configure the Profibus extension, you must use the
Profibus wizard.
372 SPU 780 01EMAN May 2002
121
Configuration Extensions
Profibus Wizard
Overview
To launch the profibus wizard, click the Profibus Import Wizard button situated
directly below the Active Extensions panel.
Using the
Profibus Wizard
Follow the on-screen instructions as you make your way through the wizard:
122
Step
Action
1
Read the Introduction screen and click Next.
2
Select either the Create a new Profibus Station radio button or the Move
configuration extension from existing radio button. Click Next.
3
In order to configure a Profibus configuration extension, you have to have the
following directory layout: Drive → Plant Directory → Station Directory.
In the Select Plant Path screen, select a drive from the drive drop-down list box.
Next, select a plant directory from the directory list or click New Folder to enter
a new folder name into the list.
When you have selected a drive and a plant directory, click Next.
4
In the Select Station Path screen, select a station directory from the directory list
or click New Folder to enter a new folder name into the list. The selected folder
will hold the .cfg file and the .cfg file will have the same name as this folder.
When you have selected a drive and a plant directory, click Next.
5
If you have selected Create a New Profibus Station in the Options screen, then
pressing Next in the previous step will generate a .cfg file. If you have selected
Move configuration from existing, no .cfg file will be created and you will be taken
to the next step.
6
To configure the .cfg file you must use two external pieces of software:
l SyCon (System Configuration) - Use this software to configure the Profibus
Network.
l SPU-931 - Use this software to configure the Profibus-DB for the CRP811
Profibus card.
Once you have completed configuring the .cfg file, click Next.
7
Click Finish to move the Profibus configuration extension into your ProWORX
32 Project.
372 SPU 780 01EMAN May 2002
Configuration Extensions
S980 Extension
Overview
The S980 Configuration Extension stores the S980 station address. This address is
then used as part of the S980’s mismatch detection mechanism; when the controller
is powered up, the S980 checks to see if it has been moved to a different 984.
Note: If the S980 extension does not appear in the Active Extensions panel, it is
not a valid extension for the current controller type.
Editing the S980
Extension
In the Active Extensions panel select the S980 extension, then:
Step
1
372 SPU 780 01EMAN May 2002
Action
Enter up to a 12-digit hex number representing the S980 address in the Address
field.
123
Configuration Extensions
SY/MAX Extension
Overview
The SY/MAX configuration extension allows you to properly access and configure
up to six SY/MAX RIO cards. This extension is only available when using Quantum
controllers revision 2 or later.
Note: If the SY/MAX extension does not appear in the Active Extensions panel, it
is not a valid extension for the current controller type.
Editing the
SY/MAX
Extension
124
In the Active Extensions panel select the SY/MAX extension, then:
Step
Action
1
Select a card (1-6) from the Card drop-down list.
2
Enter a I/O drop number (-1 through 99) in the Module Drop Number field. Set
to -1 if the drop is not defined.
3
Enter the number of the slot (0 through 16) that the RIO card inhabits in the
Backplane Slot field. Set to 0 to remove a module.
4
Enter a retry number (1 through 255) in the Retry Count field.
5
Enter a timeout value (1ms through 65535ms) in the Timeout field.
372 SPU 780 01EMAN May 2002
Configuration Extensions
TCP/IP Extension
Overview
Before your controller can connect to a TCP/IP network, you must install and set up
the TCP/IP configuration extension. This extension lets the controller recognize its
TCP/IP communication card. For more information about configuring TCP/IP
communications, see Configuring TCP/IP Communications, p. 73.
Note: If the TCP/IP extension does not appear in the Active Extensions panel, it is
not a valid extension for the current controller type.
Editing the
TCP/IP
Extension
In the Active Extensions panel select the TCP/IP extension, then:
372 SPU 780 01EMAN May 2002
Step
Action
1
Select a card (1-6) from the Card drop-down list box.
Note: Different controllers support different numbers of communications cards:
l Quantum 113 Rev. 2 and 213 Rev. 2 controllers support two cards.
l Quantum 424 Rev. 2 supports up to six cards.
l M1E Momentum controllers only support one card and the Head Number is
fixed at one.
2
Select a head number (1 through 16) from the Head Number drop-down list box.
3
Enter an IP address (1-255).(1-255).(1-255).(1-255) in the IP Address, Subnet
Mask, and Gateway IP fields. 0.0.0.0 indicates an undefined address.
4
Select either Ethernet II or IEEE 802.3 from the Framing Type drop-down list
box.
5
Select either Extension or BOOTP Server from the IP Address Selection dropdown list box.
l Extension - Upon Power Up, the PLC will read its TCP/IP addressing
information from this extension.
l BOOTP - Upon Power Up, the PLC will require a BOOTP server to supply
TCP/IP addressing information.
125
Configuration Extensions
Quantum VME Bus Extension
Overview
The VME Bus extension lets a VME-424/X controller control data transfers between
devices on a master/slave Quantum network. In a master/slave protocol, one device
(the "master") has control over other devices ("slaves"). As the network runs, each
element can lose and gain master status, based on negotiations with other members
of the network.
Note: If the VME Bus extension does not appear in the Active Extensions panel, it
is not a valid extension for the current controller type.
Editing the VME
Bus Extension
126
In the Active Extensions panel select the VME Bus extension, then:
Step
Action
1
Enter the appropriate value in the Slave Interrupt Level field. Boards on a VME
Bus can send and respond to messages on seven interrupt levels, numbered
from 1 to 7. This field determines which interrupt level the board uses when it’s
acting as a slave.
2
Enter a value between 1 and 255 in the Status ID field. When the VME controller
receives an interrupt while acting as a slave, this is the value it sends.
3
Select an appropriate value for master arbitration type from the Master
Arbitration Type drop-down list. This field determines how the controller will
operate. Valid settings are Not System Controller, Primary Mode (PRI) or Round
Robin Mode (RRS).
4
Select an appropriate value for master release mode from the Master Release
Mode drop-down list. This field determines when a board acting as a master
relinquishes its master status. Valid settings are Release on Request (ROR),
Release When Done (RWD), Release On Clear (ROC), or Bus Capture and Hold
(BCAP). The proper setting depends on how your Quantum network is
configured.
5
Select the appropriate value for master VME Bus request level from the Master
Bus Request Level drop-down list. This field determines what priority the board
has when trying to acquire master status. It can range from BR0 (the lowest) to
BR3 (the highest).
6
For each interrupt level from Interrupt 1 to Interrupt 7, select whether it should
be Enabled or Disabled. These fields will only have an effect when the VME acts
as a master. If an interrupt level is:
l Enabled - The controller responds to any messages sent on that interrupt.
l Disabled - The controller ignores them.
372 SPU 780 01EMAN May 2002
Using the Logic Editor
At a Glance
Logic Editor
Overview
The Logic Editor is used to view and/or edit ladder logic in Offline, Online or
Emulation mode. In Offline mode, network logic is loaded into the Logic Editor from
the database when it is opened. In Online mode, network logic is read from the PLC
one network at a time. In Emulation mode the power flow is simulated using the
network logic loaded from the project.
372 SPU 780 01EMAN May 2002
127
Using the Logic Editor
What’s in this
Chapter?
128
This chapter contains the following topics:
Topic
Page
Logic Editor Overview
129
Logic Editor Properties
130
Hotkey Template
132
Using the Logic Editor
135
Working with Networks
138
Instructions
140
Working with Addresses
142
Configurable Mnemonics
144
ISA Symbols
146
Diagnostic Trace
148
Sweep (Online Only)
149
Setting Bookmarks in Logic
151
Hardware Clock
152
Segment Scheduler
153
Equation Networks
154
Mathematical Equations in Equation Networks
156
Mathematical Operations in Equation Networks
158
Mathematical Functions in Equation Networks
161
372 SPU 780 01EMAN May 2002
Using the Logic Editor
Logic Editor Overview
Overview
The Logic Editor is used to enter logic elements, display input/output data, and add
descriptors and force discretes.
The Logic Editor shows project ladder logic in either Offline, Online, Combined or
Emulation mode. In Offline mode, network logic is loaded into the Logic Editor from
the project when the editor is opened. In Online and Combined mode, network logic
is read from the PLC one network at a time. During idle states of Online mode,
networks around the currently displayed network may be cached for faster access
to the networks.
The logic editor is made up of four panels:
Panel
Description
Network
Navigator
panel
The Network Navigator Panel (tree) is used to navigate through networks and
segments. To display or hide the Network Navigator Panel, select View →
Navigation Tree from the logic editor right-click menu.
Logic Editor
panel
The Logic Panel contains the view of the logic contained in the currently
viewed network. The title of the Logic Panel contains the current network,
maximum network and the page title for the network. In Online and Emulation
mode, powerflow will be drawn per cell based on the properties of the Logic
Editor. The cursor tracks several features: instruction help placed in Tracking
Help window, tracking documentation for the current address in
Documentation editor and data for the current network.
Instructions
panel
The Instructions Panel contains a list of all available instructions for the
current project. New instructions are entered by dragging from the
Instructions Panel and dropping into the Logic Panel. The list of instructions
is alphabetically sorted. To display or hide the Instructions Panel, select View
→ Instruction List from the logic editor right-click menu.
Properties
Panel
The Properties Panel contains information about the current cell the cursor is
on. Depending on the type of cell, the Properties Panel will contain a 1, 2 or
3 high instruction. For a blank cell, the Properties Panel will contain only the
name property. To display or hide the Properties Panel, select View →
Properties from the logic editor right-click menu.
Note: The instructions, properties and networks panels can be opened or closed
using the right-click menu in the logic panel. Select View → Instruction List or
Properties or Navigation Tree..
372 SPU 780 01EMAN May 2002
129
Using the Logic Editor
Logic Editor Properties
Customizing the
Logic Editor
Display
Logic Editor
Display
Properties
The Logic properties dialog box tells ProWORX 32 how to display each cell in a
network. In the project navigation tree:
Step
Action
1
Right click the Logic icon.
2
Select Properties from the right-click menu.
3
Configure the logic editor properties as desired. See ‘Logic Editor Display
Properties’.
4
Click OK to save and apply changes.
In the logic editor properties window:
Property
Description
Color
The color of the descriptor, symbol, data, back reference, cursor background,
Configuration cursor foreground, logic background, logic foreground, and power flow is user
defined. Click the color box beside the text and select a color from the Color
dialog box.
To set the colors to their defaults, click the Default button. This will also set
the power flow line width to three.
130
Power Flow
Line Width
In Emulation or Online mode, the power line shows the flow of power. You
can adjust the width of this line from 1 to 6.
Display
Settings
Up to seven lines are available for each element: Five lines above the
instruction and two below it. For each line, select one of the following:
l Clear - This line is not displayed.
l Address - The address associated with the cell is displayed.
l Descriptor (1 - 9) - Descriptors specified in the documentation editor are
displayed.
l Symbol (1,2) - Symbols specified in the documentation editor are
displayed.
l Data - The addresses data is displayed.
l Back Ref - Back referencing information is displayed.
l Blank - This line is blank.
Column
Width
Select the column width for the seven lines of cell description. Increasing the
width allows less instructions to fit on the screen, but more descriptor, data
and symbol information to be displayed.
Always Fit 7
Rows x 11
Cols
Check the check box to always see the full grid of instructions in the window.
If the check box is unchecked, the cells will be displayed at full size and you
will have to scroll to see the entire network.
372 SPU 780 01EMAN May 2002
Using the Logic Editor
Property
Description
Show Coils in Check the check box to see the coils where they are solved by the controller.
Solve Column If the check box is unchecked, the coils will always be displayed in the 11th
column attached to the solve column by dots.
Multi Function When checked, function identifier constants are replaced with four-letter
Naming
descriptions of the function operation.
372 SPU 780 01EMAN May 2002
Confirm
Overwrites
You are prompted to confirm each time you overwrite an existing ladder logic
instruction with a new one. This security feature is useful when working
online.
Multi
Instruction
Insert
When checked, you can add as many instruction as you want without
specifying an associated address.
Confirm
Deletes
You are prompted to confirm each time you try to delete an instruction from
ladder logic. Use this function to protect your ladder logic, especially while
working online.
Use Insert/
Delete Key
Menus
When checked, you can access the Insert menu by pressing the INSERT key
and the Delete menu by pressing the DELETE key. When cleared, these keys
operate normally and the menus are only accessible from the Edit menu.
Show Cross
Reference
Tips
When checked, a tooltip will be visible showing the cross reference
information for the address that your cursor is hovered over. The tooltip is in
the format network.row.instruction.
ISA Symbols
When checked, enables the use of ISA symbols in the logic view.
131
Using the Logic Editor
Hotkey Template
Overview
The hotkey template is used to select the type of hotkey support that you wish to use.
The possible options are ProWORX 32, ProWORXPLUS, or Modsoft. The following
table lists the supported hotkeys for Modsoft and ProWORXPLUS.
Changing the
Hotkey Template
From the My Computer (in the Navigation panel), right-click menu:
132
Step
Action
1
Select Properties. The Properties dialog appears.
2
Select the Logic tab.
3
From the Hotkey Template drop-down, select the template you want to use.
(ProWORX 32 (default), ProWORXPlus, or Modsoft.
4
Click OK to save the changes and exit the Properties dialog.
372 SPU 780 01EMAN May 2002
Using the Logic Editor
Modsoft Hotkey
Listing
Modsoft Hotkey Listing:
372 SPU 780 01EMAN May 2002
Hotkey
Operation
ALT+F2
Invoke RDE
Data Watch Window
ALT+F3
Copy
Block Copy
ALT+F4
Delete
ALT+F5
Paste
Block Paste
ALT+F6
Offset
Replace
ALT+F7
Search
ALT+A
Append Network
ALT+B
Retrace
ALT+D
Delete Network
ALT+I
Insert Network Before
ALT+L
Latched Coil
ALT+M
Retentive Coil
ALT+N
Negative Transitional
ALT+P
Positive Transitional
ALT+T
Trace
ALT+V
Vertical Short
ALT+Z
DX-Zoom
CTRL+PgUp
Previous Segment
CTRL+PgDn
Next Segment
CTRL+Home
Goto 1st Network of Segment
CTRL+End
Goto Last Network of Segment
CTRL+F8
Configuration
ProWORX 32 Equivalent
Insert Previous Network
Insert Previous Network
Locate Coil
Register Editor
133
Using the Logic Editor
ProWORXPLUS
Hotkey Listing
134
ProWORXPLUS Hotkey Listing:
Hotkey
Operation
ALT+A
Address Used
ALT+C
Coil Rebuild (Offline), Coil Column (Online)
ALT+G
Global Addressiing
ALT+H
Help
ALT+J
Jump to Mark
ALT+L
Log Book
ALT+O
Locate Coil
ALT+R
Register Editor
ALT+S
Search
ALT+T
Trace (Online)
ALT+U
Undo
ALT+X
Mark Location and Exit
ALT+Z
Retrace
CTRL+D
Network Display Setup
CTRL+T
Terminal Block Search
CTRL+U
Unlink All Macros
ProWORX 32 Equivalent
Replace
Logic Properties
372 SPU 780 01EMAN May 2002
Using the Logic Editor
Using the Logic Editor
Editing Overview
The level to which you can edit in the logic editor is set in the client security settings.
For more information see ProWORX 32 Client Security, p. 20, User Rights.
Offline Edit Mode
Overview
Offline Edit Mode lets you make changes (e.g., entering instructions with undefined
addresses or duplicate coils) to network logic in the online logic editor without
updating the controller in real-time.
Switching to
Offline Edit Mode
From the logic editor right-click menu:
Step
1
Action
Select Edit → Offline Edit Mode.
While you are in Offline Edit Mode, the network appears in bright blue, with no
power flow or state flow shown. The status bar will display "Offline Edit Mode" in
bright blue. As long as you are in the Offline Edit Mode, changes made to the
network won’t be sent to the controller. Instead, they will be kept in a temporary
buffer until you exit the Offline Edit Mode or change networks.
Editing Logic in
Offline Edit Mode
In the logic editor:
Step
1
Action
Use the same editing conventions and procedures as the ProWORX 32 Offline
editor does.
Remember, however, that you cannot edit more than one network without either
cancelling the edit or writing the edit to the controller.
372 SPU 780 01EMAN May 2002
135
Using the Logic Editor
Exiting Offline
Edit Mode
From the logic editor right-click menu:
Step
Action
1
Select Edit → Offline Edit Mode.
-orSelect Edit → Save Network. (Only visible when in offline network mode.)
-orExit the logic editor.
2
You are then prompted about writing your changes to the controller:
l
l
l
Undoing and
Redoing Edits
Yes: ProWORX 32 checks the new network for undefined addresses and
duplicate coils. If none are found, ProWORX 32 deletes the original network
in the controller, and sends the new network (created in Offline Mode) to the
controller.
No: Returns to regular logic editor.
Cancel: Returns to Offline Edit Mode.
Use the undo/redo feature to reverse or reapply up to 10 actions.
Note: If you receive the messages "Undo information not recognized, clearing
undo/ redo information", a possible cause could be the register ranges that are set
for the PRWX loadable are being overwritten by theTraffic Cop, Peer Cop, MSTR,
or other instruction addresses that are already used. Search for address conflicts
with the Used Address feature, see Address Used, p. 60.
To Undo/Redo an
Edit
136
From the logic editor, right-click menu:
Step
Action
1
Select Edit → Undo or Edit → Redo. The Undo/Redo Stack dialog appears.
2
Click in the list where you want the starting point of the actions redone/undone.
The rows (actions) above the selected action are also selected.
3
Click OK to undo or redo the selected actions.
372 SPU 780 01EMAN May 2002
Using the Logic Editor
Undoing/
Redoing Online
While working online, the undo/redo feature only works when:
l The property Online Multiple Undo/Redo Enabled is selected. See Logic Editor
Properties, p. 130 for more information.
l The PRWX MSL loadable is added to your controller and is in the logic.
l You use a running controller that supports this feature.
Online undo/redo is supported by the following controllers:
984-685E
Adding the
PRWX MSL
Loadable
984-AT4
Compact A120 Series
984-785E
All Quantums
Compact TSX
984-785L
984-VM4
Atrium
After the Online Multiple Undo/Redo Enabled property is enabled:
372 SPU 780 01EMAN May 2002
Step
Action
1
Attach to a valid controller. The Add PRWX Loadable dialog box appears.
2
In the Command field, type an unused register to be used by ProWORX 32 to
control the loadable.
3
In the Table field, type an unused register of a starting range (4yyyy to
4yyyy+150) to used by ProWORX 32 to transfer data into the loadable.
4
In the Network field, type a value between one and the maximum number of
networks in the device. This number represents the network location to be
created and where the PRWX instruction will be placed. Up to 5000 networks
can be defined.
137
Using the Logic Editor
Working with Networks
Overview
A ladder logic network contains a 7x11 celled grid. Network logic is solved from leftto-right, top-to-bottom.
Inserting
Networks
In the logic editor:
Step
Action
1
To insert a network into a blank segment, select Insert Network from the
Network Navigator panel right-click menu.
2
To insert a network after the current network, select Insert → Next Network
from the Network Editor right-click menu.
3
To insert a network previous to the current network, select Insert → Previous
Network from the Network Editor right-click menu.
Moving
Networks
You can move or copy networks within or between segments and within or between
projects by using the standard Cut, Copy, and Paste functions. Theses functions
can be selected from the Network Navigator right-click menu, or from the ProWORX
32 toolbar.
Deleting
Networks
From the logic editor right-click menu:
Step
1
Working with
Network Rows
and Columns
138
Action
Select Delete → Network. The current network is deleted and the any remaining
networks are shifted up one network.
In the logic editor:
Step
Action
1
To insert a row or column, select Insert → Row (or) Column from the logic editor
right-click menu. You can only insert a row or column if it does not make the
network invalid. Inserting a column shifts existing columns to the right. Inserting
a row shifts existing rows down.
2
To delete a row or column, select Delete → Row (or) Column from the logic
editor right-click menu. You can only delete a row or column if it does not make
the network invalid. Deleting a column shifts existing columns to the left. Deleting
a row shifts existing rows up.
372 SPU 780 01EMAN May 2002
Using the Logic Editor
Initializing Logic
In the logic editor:
Step
1
372 SPU 780 01EMAN May 2002
Action
To initialize logic (delete all existing logic and networks from the current project),
select Initialize Logic from the loigc editor right-click menu.
139
Using the Logic Editor
Instructions
Overview
The Instruction Panel contains all available logic instructions. You can use the
instruction list to drag and drop instructions into logic.
Displaying the
Instruction List
From the logic editor right-click menu:
Step
1
Adding an
Instruction to a
Network
Action
Select View → Instruction List.
From the instruction panel:
Step
Action
1
You can drag-and-drop instructions from the instruction to any point in logic.
2
You can also add an instruction to the cell that the cursor is currently on, by
selecting an instruction from the Instructions Toolbar.
Moving
Instructions
You can move or copy instructions within or between networks and within or
between projects by using the standard Cut, Copy, and Paste functions. Theses
functions can be selected from the Logic Editor right-click menu, Edit, or from the
ProWORX 32 toolbar.
Finding
Instructions
To find all like instructions in ladder logic:
140
Step
Action
1
Set the logic editor cursor to the bottom node of the instruction that you want to
search for.
2
Select Search → Instruction Search from the logic editor right-click menu. E.g.
To find all ADD instructions in logic, set your cursor to the bottom node of an ADD
instruction anywhere in logic and select Instruction Search.
3
All instructions found are listed in the Search Results window in the format
InstructionName.Network.Row.Column.
4
To go to an instruction in the Logic Editor, double-click the desired instruction in
the Search Results window.
372 SPU 780 01EMAN May 2002
Using the Logic Editor
Deleting an
Instruction from
a Network
From the logic editor:
Step
1
Configuring an
Instruction
Instruction
Properties
Action
Select the instruction that you want to delete and press DELETE.
In the properties panel:
Step
Action
1
Select the property you want to configure.
2
Enter an appropriate value.
3
Press ENTER to update the instruction’s properties.
Property descriptions:
372 SPU 780 01EMAN May 2002
Property
Description
Top Type
Top node address type.
Top Offset
Top node address.
Mid Type
Middle node address type.
Mid Offset
Middle node address.
Bottom Type
Bottom node address type.
Bottom Offset
Bottom node address.
Name
Instruction name.
141
Using the Logic Editor
Working with Addresses
Editing
Addresses in
Ladder Logic
Finding
Addresses in
Ladder Logic
142
In the logic editor:
Step
Action
1
To edit a single address, double-click the cell that contains the address you want
to edit. Type the new address in the cell and press ENTER to save the changes.
2
You can also change the address by using the Properties panel and changing
the Type and Offset values for any given cell.
3
To edit a batch of addresses across networks, select Search → Replace.
4
Enter the address to replace in the Find What field and the address that is to
replace it in the Replace With field, and select Replace. The logic Replace
dialog appears.
5
Click Find Next to find an instance of the source address. If you want to replace
the address, click Replace. If not, click Find Next again, and so on. If you simply
want to replace all addresses, click Replace All.
In the logic editor:
Step
Action
1
To find a specific address, select Search → Find (CTRL+F).
2
Enter the address you want to search for in the Find What field.
3
Click Find Next to find the address in logic.
4
To find all like addresses in ladder logic, set the logic editor cursor to a cell that
contains the address that you want to search for.
5
Select Search → Address Search from the logic editor right-click menu. E.g. To
find all 10001 addresses in logic, set your cursor to a cell containing the address
10001 and select Address Search.
6
All Addresses found are listed in the Search Results window in the format
InstructionName.Network.Row.Column.
7
To go to an address in the Logic Editor, double-click the desired address in the
Search Results window.
372 SPU 780 01EMAN May 2002
Using the Logic Editor
Tracking Ladder
Logic Addresses
in the Data Watch
Window
Disabling and
Forcing
Discretes
From the logic editor right-click menu:
Step
1
To track the address at the cursor, select Data → Add Watch (CTRL+W) or
select Data → Track → Address.
2
To track all addresses in an instruction, select Data → Track → Instruction.
3
To track all addresses in a network, select Data → Track → Network.
4
To track all discrete addresses in a network, select Data → Track → Discrete.
You can force a discrete to the ON or OFF state. This removes control of the discrete
from logic: it remains in the fixed state until the force is removed. Enabling a discrete
removes the Disabled On or Disabled Off, placing control of the discrete back in
logic.
Step
Using Addresses
from the
Documentation
Editor
Action
Action
1
To force discretes in a network ON, select Data → Disable On (CTRL+S) from
the logic editor right-click menu.
2
To force discretes in a network OFF, select Data → Disable Off (CTRL+D) from
the logic editor right-click menu.
3
To return control of a discrete’s state back to logic, select Data → Enable
(CTRL+E) from the logic editor right-click menu.
In the Documentation Editor, summary view:
372 SPU 780 01EMAN May 2002
Step
1
Action
Select an address and drag-and-drop it into any instruction in logic or any
address property in the properties panel.
143
Using the Logic Editor
Configurable Mnemonics
Overview
In ProWORX 32, all instruction mnemonics are configurable, so you can use
mnemonics you are already familiar with.
Editing a
Mnemonic
From the project right-click menu in the Navigation panel:
Step
1
Mnemonics
Listing
144
Action
Select Properties.
2
Select the mnemonic to edit and click Edit or double-click the mnemonic to edit.
3
Type in the new mnemonic.
4
Click outside of the field or press ENTER.
Note: If you try to type an existing mnemonic, ProWORX 32 reverts to the old
mnemonic.
5
Click OK.
Mnemonic descriptions:
Mnemonic
Description
NO
-] [-
Normally Open
NC
-]\[-
Normally Closed
PTC
-]P[-
Off to On
NTC
-]N[-
On to Off
VTO
| OPEN
Vertical Open
VTS
| SHRT
Vertical Shunt
HSH
-SHRT
Horizontal Shunt
CNR
-()-
Normal Coil
CR
-(L)-
Latched Coil
SKP
SKP
Skip Function
UCT
UCTR
Up Counter
DCT
DCTR
Down Counter
T1
T1.0
Timer (seconds)
T0
T0.1
Timer (tenths)
T.
T.01
Timer (hundredths)
ADD
ADD
Addition
SUB
SUB
Subtraction
MUL
MULT
Multiplication
372 SPU 780 01EMAN May 2002
Using the Logic Editor
Mnemonic
372 SPU 780 01EMAN May 2002
Description
DIV
DIV
Division
RT
R->T
Register to Table
TR
T->R
Table to Register
TT
T->T
Table to Table
BLK
BLKM
Block Move
FIN
FIN
First-In
FOU
FOUT
First-Out
SRC
SRCH
Table Search
STA
STAT
System Status
AND
AND
Logical And
OR
OR
Inclusive Or
CMP
CMPR
Logical Compare
SEN
SENS
Logical Bit Sense
MBI
MBIT
Logical Bit Modify
COM
COMP
Logical Complement
XOR
XOR
Exclusive Or
BRO
BROT
Logical Bit Rotate
145
Using the Logic Editor
ISA Symbols
Overview
If the ISA Symbol Name field in the project is set up to support discrete addresses,
the network editor draws the ISA symbol instead of the ladder logic instruction.
Attaching an ISA
Symbol to a
Discrete Device
From the logic editor:
ISA Symbol
Reference
146
Step
Action
1
Select a discrete device.
2
Enter an ISA symbol name in the ISA Symbol field in the Documentation Editor.
ISA Symbols:
Symbol
Diagram
Symbol
CRNC
PBNC
CRNO
PBNO
FLSNC
PRSNC
FLSNO
PRSNO
FSNC
PSNC
FSNO
PSNO
Diagram
372 SPU 780 01EMAN May 2002
Using the Logic Editor
Symbol
372 SPU 780 01EMAN May 2002
Diagram
Symbol
LSNC
SOL
LSNO
TASN
LTG
TASNC
LTR
TGSN
HORN
TGSNO
Diagram
147
Using the Logic Editor
Diagnostic Trace
Overview
The Diagnostic Trace feature is a very powerful search mechanism. It is used to find
dependencies of a particular output (0xxxx). A search is performed to find the
destination point. Then each network is searched to find dependencies of the output
address. Each network is then searched to find dependencies of these
dependencies.
Why Use
Diagnostic
Trace?
Use Diagnostic Trace to isolate problems relating to a specific output. For instance,
if an output is off when it should be on, the Diagnostic Trace will search through logic
to determine which addresses affect its state.
Using Diagnostic
Trace
From the right-click menu in the logic panel:
Analyzing
Diagnostic Trace
Results
Step
Action
1
Make sure that the address you want to trace is selected and click Search →
Diagnostic Trace.
2
To move to an addresses cross reference, select the cross reference from the
address drop-down box. The logic editor moves to the selected network, row,
and column.
The Diagnostic Trace window shows the output address on the right side of the
window. The column to the left is all the dependencies of the output address. The
next column is all the dependencies of the dependencies.
Address color scheme:
Color
Description
Red
This address is likely to be the source of the problem.
Yellow
This address could be related to the problem.
Green
This address is not likely to be the source of the problem.
Note: To update the ladder logic cross references, select Update Cross
References from the logic editor right-click menu.
148
372 SPU 780 01EMAN May 2002
Using the Logic Editor
Sweep (Online Only)
Overview
The Sweep function is a powerful diagnostic tool that lets you solve logic for a set
number of scans or solve logic continuously with a constant time between scans.
Constant Sweep
Mode
The Constant Sweep mode sets the controller to scan and solve logic and update I/
O continuously, but with a constant time interval between scans.
If the actual scan time is less than the imposed scan time, the controller waits for the
imposed scan time to elapse before performing the next scan. If the actual scan time
is more than the imposed scan time, the controller finishes the scan, then continues
on with the next scan. This lets you slow the scan time to when debugging logic, so
that the controller doesn’t solve logic too quickly for you to catch errors.
Performing a
Constant Sweep
From the networks panel (tree), right click menu:
Step
1
Single Sweep
Action
Select Sweep.
2
In the Sweep Mode area, select the Constant Sweep radio button.
3
Enter the target time (in 10’s of milliseconds) for each scan in the Time box.
4
Enter a 4xxxx register to hold the target time value in the Register (4xxxx) box.
The actual time taken for each scan is placed in the next register, so a total of
two registers are used.
5
Click OK.
Single Sweep mode sets the controller to scan and solve logic, and update I/O for a
set number of scans only. When the sweep is finished, the controller stops solving
logic and updating I/O, waits until you manually trigger the sweep.
WARNING
Ensure hardware not part of critical process.
The Single Sweep function should not be used to debug controls on
machine tools, processes, or material handling systems when they are
active. Once the set number of scans is solved, all outputs are frozen in
their last state. Since no logic solving is occurring, all input information
is ignored. This can result in unsafe, hazardous, and destructive
operation of the machine or process connected to the controller.
Failure to follow this precaution can result in severe injury or
equipment damage.
372 SPU 780 01EMAN May 2002
149
Using the Logic Editor
Performing a
Single Sweep
From the networks panel (tree), right click menu:
Step
1
Select Sweep.
2
In the Sweep Mode area, select the Single Sweep radio button.
3
Enter the target time (in 10’s of milliseconds) for each scan in the Time box.
Note: If the actual scan takes less time than the target scan time, the controller
waits for the target scan time to elapse before performing the next scan. If the
actual scan takes more time than the target scan time, the controller finishes the
scan, then continues on with the next scan. This lets you force the scan time to
a higher rate when debugging logic that the controller may solve too quickly to
otherwise catch.
4
Enter the number of scans (1-15) to be performed during the sweep the Scans
box.
5
Click OK.
6
When you are ready to perform the sweep, select Sweep from the networks
panel (tree) right click menu.
7
8
150
Action
Select one of the following radio buttons:
Invoke: Select to start the sweep.
Trigger: Select to set a trigger for the sweep.
Turn Off: Select to shut off the sweep.
l
l
l
Click OK. The controller performs the scans (unless you selected Turn Off), then
stops solving logic with all outputs frozen in their last state.
You can then browse register contents and perform other diagnostics using this
"snapshot" of the solving process.
372 SPU 780 01EMAN May 2002
Using the Logic Editor
Setting Bookmarks in Logic
Overview
You can set bookmarks in your network logic so you can quickly return to a cell or
series of cells. The Mark and Goto Marks functions allow quick viewing of nonconsecutive areas of logic. By marking multiple cell locations on different networks,
you can use the mark table to quickly jump between the marked locations.
Setting a Mark in
Logic
In the logic editor:
Going to a
Marked Cell
Deleting a
Bookmark
Step
Action
1
Set the cursor to the cell that you want to mark.
2
Select Search → Mark from the right-click menu. The cell is added to the
Bookmark Table.
In the logic editor:
Step
Action
1
From the right-click menu, select Search → Goto Mark. The Goto Mark dialog
appears.
2
Select the mark you want to go to from the list and click Goto.
In the logic editor:
372 SPU 780 01EMAN May 2002
Step
Action
1
From the right-click menu, select Search → Goto Mark. The Goto Mark dialog
appears.
2
Select the mark you want to delete from the list and click Delete.
151
Using the Logic Editor
Hardware Clock
Overview
Many controllers have a built-in Time of Day clock. You can set these clocks if the
controllers starting register is configured in Configuration (see General Tab
Parameters, p. 77), you have the necessary rights, and the controller is running.
Configuring the
Hardware Clock
From the network tree right-click menu:
Step
Select Hardware Clock. The Hardware Clock dialog appears.
2
In the First Day of Week drop-down list box, select the day the controller will use
as the first day of the week.
3
4
Hardware Clock
Registers
Do one of the following:
To synchronize the controllers date and time with your computer, click Auto
Set.
l Type the date in mm-dd-yy format in the Controller Date box. Type the time
in hh-mm-ss format in the Controller Time box.
l
Click OK
The time of day clock requires eight 4xxxx registers in your controller:
Register
4xxxx
152
Action
1
Content
Controller Information. From the left:
Bit 1: Set Clock Values
Bit 2: Read Clock Values
Bit 3: Done
Bit 4: Errors
l
l
l
l
4xxxx + 1
Day of week (from 1 to 7)
4xxxx + 2
Month
4xxxx + 3
Day
4xxxx + 4
Year
4xxxx + 5
Hour (in 24-hour format)
4xxxx + 6
Minutes
4xxxx + 7
Seconds
372 SPU 780 01EMAN May 2002
Using the Logic Editor
Segment Scheduler
Overview
The Segment Scheduler governs when each segment of logic is solved and controls
which I/O drops are updated after each segment is solved.
The number of segments in the project is set in the Configuration editor. By default,
the segments are solved in numerical order (segment one first, segment two next,
and so on).
Using the
Segment
Scheduler
In the Networks panel right-click menu:
Step
1
Select Segment Scheduler.
2
Edit the fields in the Segment Scheduler dialog.
3
372 SPU 780 01EMAN May 2002
Action
Select the control input:
Continuous: Sets the segment in this row to be solved every scan.
Set Control: Sets the segment to be solved only when a discrete address is
in a specific state. If you select Set Control, you must also:
l Type the discrete address in the Address field, which controls whether the
segment in this row is to be solved.
l Select whether the segment in this row is to be solved when the control
discrete is On or Off.
l Watchdog Timer Reset: Inserts a Watchdog Timer.
l
l
4
Select the segment from the drop down list.
5
Select the input drop associated with the segment in this row during the solve
from the drop down box.
6
Select the output drop associated with the segment in this row during the solve
from the drop down box. For S901 projects/controllers the Drop In is replaced
with Chan In and Drop Out is replaced with Chan Out.
7
Click OK.
153
Using the Logic Editor
Equation Networks
Overview
An Equation Network provides an easy way to program complex math functions,
with values stored in register locations. Equations in an Equation Network are
presented in a regular, left-to-right format, technically known as "infix" notation. You
program Equation Networks and set its enable contact and output coil(s) in the
Equation Network Editor.
Equation Networks were introduced in Quantum Rev. 2 controllers; not all
controllers support Equation Networks. The easiest way to see if your controller
supports Equation Networks is by trying to create a new one—if your controller
doesn’t support it, the Equation Network option on the right-click Insert menu won’t
be available.
Creating an
Equation
Network
Using the
Equation
Network
In the Network Navigation panel:
Step
Select the network where you want to insert the equation network.
2
From the right click menu in the logic editor select Insert → Equation Network.
An equation network occupies a whole network, regardless of the contents of the
equation network.
In the Properties panel:
Step
1
154
Action
1
Action
Select an input type from the Input Type drop-down list.
2
Enter the input offset in the Input Offset property
3
Set the register address for the output coils. You can enter either the direct
address (in X:Y numeric format) or a symbolic address. You can also insert
addresses from the Symbols list panel, Used Register Address table and the
Descriptor Summary.See below for coil descriptions.
4
Enter an equation into the network by selecting the ellipsis box in the Equation
property or double-clicking anywhere in the Equation Editor Network. The
Equation Editor dialog appears.
372 SPU 780 01EMAN May 2002
Using the Logic Editor
Coil Descriptions
Coil descriptions:
Coil
Description
Solved OK
Solved OK is set when the equation is being solved without errors.
< Coil
Result<0 is set when the equation result is less than zero.
= Coil
Result=0 is set when the equation result is equal to zero.
> Coil
Result>0 is set when the equation result is greater than zero.
Error Coil
Error is set when errors have occurred while solving the equation.
While online, if the Error coil receives power, an error message will
appear under the coil describing the error.
Note: If you don’t want to use a particular output coil, leave the address for that coil
blank (or erase one already typed in). That coil will not be included in the Equation
Network.
Setting up an
Enable Contact
An Equation Network’s enable contact, when set, activates the Equation Network. If
an enable contact passes current, the Equation Network will be solved. You change
settings for the enable contact in the Enable Editor display.
To select a type for the enable contact, select the symbol of the enable contact that
corresponds with your chosen type. An enable contact can be a normally-open
contact, normally-closed contact, horizontal short, or a horizontal open.
To select a register address for the enable contact, in the Enable Contact address
field, type the direct address (in X:Y numeric format) or symbolic address for the
enable contact coil. This field is only available if the enable contact type is a
normally-open or normally closed contact.
372 SPU 780 01EMAN May 2002
155
Using the Logic Editor
Mathematical Equations in Equation Networks
Equation Format
ProWORX 32 expects equation elements to appear in a specific format. Operations
and functions each have their own format. Also, for each value, you must specify
what kind of value it is (register address, constant or symbol) and its data type
(signed integer, unsigned integer, etc.).
Equation Values
and Data Types
Each value can refer to a constant, register address or symbol. The Equation
Network Editor determines which data type the value is, based on the following
format.
Format
Meaning
Example
Default (no # sign or single quotes
Register address
40001
Prefixed by #
Constant
#123
Enclosed in single quotes
Symbol
‘HEIGHT’
The actual data type of a value is determined by its suffix, as shown in the following
table:
Suffix
Meaning
Example
None
16-bit Integer
#38
U
16-bit unsigned Integer
40001U
L
Long (32-bit) signed Integer
#-123L
UL
Long (32-bit) unsigned Integer
‘HEIGHT’UL
F
32-bit floating point (real)
#+1.45E-4F
Typically, you’d first indicate the register address where the calculated result is to be
stored, followed by an equal sign (the "assignment operator"), followed by the
calculation itself. For example:
40001 = 40002U + COS(40003UL) * #+1.35E-4F / ’HEIGHT’L
l 40002U is an address of a 16-bit unsigned integer.
l COS(40003UL) calculates the cosine of a long (32-bit) unsigned integer value
stored at address 40003.
l #+1.35E-4F is the floating point value of 0.000145, given in exponential notation.
l ’HEIGHT’L is a symbol of the name HEIGHT, representing the address of a long
(32-bit) signed integer.
l 40001 = indicates that the result of the calculation is to be stored in register
address 40001 as a 16-bit signed integer.
156
372 SPU 780 01EMAN May 2002
Using the Logic Editor
Everything to the right of the assignment operator also constitutes an expression.
An expression is any part of an equation that can be evaluated to a single value. This
can be a single constant or register address, or a complete mathematical operation.
For example, #35 is an expression, as are LOG(#10) and 40002U + COS(40003UL).
Complex expressions can contain other expressions within them, as in #3 * (40002U
+ COS(40003UL)). For the most part, any operator or function can be performed on
any expression, no matter how complex.
Note: It is good programming practice to enclose all expressions in parentheses,
even when they’re not actually needed. This makes the equation easier to read and
ensures that operations in an equation are solved in the correct order.
Exponential
Notation
Floating point numbers are normally specified in exponential notation, as in:
+1.34E-4
This represents 1.35 times 10 to the -4th power, or 1.35 times 0.0001. Thus, we
would shift the decimal place four places to the left to get 0.000135. The "-4" part is
called the exponent (note the preceding "E") and can be a positive or negative
number.
In the Equation Network Editor, you must also indicate:
l That these numbers are constants; and
l Their data types. For example, integers or floating point numbers.
The default data type is unsigned 16-bit integer. So, since the above value is a
fraction (and therefore must be a floating point number), it would have to appear as
#+1.35E-4F.
With no data type suffix, numbers in exponential notation are assumed to be
integers. For example, #+1.35E+2 represents the unsigned 16-bit integer value 135.
Exponential notation is particularly useful for very large integers.
372 SPU 780 01EMAN May 2002
157
Using the Logic Editor
Mathematical Operations in Equation Networks
Mathematical
Operations
The following table lists the mathematical operations you can include in your
equation:
Type
Operator
=
Assignment operator
The assignment operator = is used to
assign a storage place for the results
of the equation. All equations will use
the assignment operator. The format
is:
Result
Assignment
ADDRESS = EXPRESSION
Where ADDRESS is a valid register
address and EXPRESSION is a valid
value or expression assigned to the
address.
158
Unary Operators
"Unary" means "single", so unary
operators are used on only one value. ~
The unary operator is placed just
before the value or expression to
which it is applied. For example, (30002) returns -1 times the number
stored at address 30002.
Negation. The result is -1 times the
value.
Exponentiation operator
Takes values to a specified power.
40001**3 returns the (integer) value
stored at 40001, taken to the third
power.
**
Exponentiation
Arithmetic operators
These require two values, one before
and one after the operator. These
values can be any valid expression.
For example, #4 * 40003 results in
four multiplied by the value stored at
address 40003.
*
Multiplication
/
Division
+
Addition
-
Subtraction
Ones complement. This works on the
binary representation of a value: all 1s
are changed to 0s and vice versa.
372 SPU 780 01EMAN May 2002
Using the Logic Editor
Type
Operator
Result
Bitwise operators
Bitwise operators work on binary
(base 2) representations of values.
&
AND. The single bit result of an AND
operation is only true (1) if both bits are
set to 1.
l
l
372 SPU 780 01EMAN May 2002
|
In the case of AND, OR and XOR,
the computer applies the operator
to each digit in the two values: 010
XOR 011 (2 XOR 3 in decimal
^
numbers) results in 001 (1 in
decimal).
In the case of shifting operators,
the computer shifts all digits in the
<<
binary representation of the
number the given number of
places to the left or right. Digits on
one side of the number are lost,
and zeros fill in the blanks on the
other side. For example, for 8-bit >>
numbers, 77 << 2 means
01001101 shifted left two digits.
The binary result is 00110100, or
52 decimal.
OR. The single bit result of an OR
operation is true (1) if either bit is set to
1. The result is false (0) only if both bits
are set to 0.
XOR. Short for "Exclusive OR". The
single bit result of an XOR operation is
false (0) if both bits are the same, true
(1) otherwise.
Left Shift. The result of 40001<<#2 is
the binary representation of the
number stored at 40001 shifted left two
(#2) places. Zeros are added on the
right to fill in the gap.
Right Shift. The result of 40001>>#2 is
the binary representation of the
number stored at 40001 shifted right
two (#2) places. Zeros are added on
the left to fill in the gap.
Relational operators
These operators describe a
comparison between two values or
expressions. The result is always true
(1) or false (0). For example, #35 <=
#42 evaluates to 1 (true). Relational
operators are used in Conditional
expressions.
<
Less than.
<=
Less than or equal to.
=
Equal to.
<>
Not equal.
=>
Greater than or equal to.
>
Greater than.
Conditional operators
See below for details.
?:
Used in conditional expression.
Parentheses
Used to set precedence in solving
equations. To make sure certain
operations are solved before others,
enclose those operations in
parentheses.
()
159
Using the Logic Editor
Conditional
Expressions
In Equation Networks, conditional expressions take the following form:
EXPR1 RELOP (EXPR2) ? (EXPR3) : EXPR4
EXPR1 through EXPR4 can be any address, value or expression. If EXPR2 or
EXPR3 are not single values or addresses, they must be enclosed in brackets.
RELOP can be any relational operator, such as > (greater than) or <> (not equal to).
When solving a conditional expression, the computer first compares EXPR1 and
EXPR2, based on the relational operator. If the comparison is true, the value of the
conditional expression is the result of EXPR3. If the comparison is false, the value
of the conditional expression is EXPR4.
Note: It is especially good programming practice to enclose all expressions within
a conditional expression in parentheses, even when they’re not actually needed.
This makes the equation easier to read and ensures that operations are solved in
the correct order.
160
372 SPU 780 01EMAN May 2002
Using the Logic Editor
Mathematical Functions in Equation Networks
Mathematical
Functions
The following table lists the pre-defined math functions you can include in your
equation. Each of these functions takes one argument enclosed in brackets
following the function name. The argument can be any valid value or expression. For
example, COS(#35+40001) returns the cosine of 35 plus the number stored at
address 40001. In this table, X refers to a function’s argument (as in "COS(X)").
372 SPU 780 01EMAN May 2002
Function
Description
ABS(S)
Absolute value of X (i.e. negative numbers become positive).
ARCCOS(X)
Arc cosine of X radians.
ARCSIN(X)
Arc sine of X radians.
ARCTAN(X)
Arc tangent of X radians.
COS(X)
Cosine of X radians.
COSD(X)
Cosine of X degrees.
EXP(X)
Calculates e (approximately 2.7182818) to the Xth power.
FIX(X)
Converts floating point number X to an integer.
FLOAT(X)
Converts integer X to a floating point number.
LN(X)
Natural (base e) logarithm of X.
LOG(X)
Common (base 10) logarithm of X.
SIN(X)
Sine of X radians.
SIND(X)
Sine of X degrees.
SQRT(X)
Square root of X.
TAN(X)
Tangent of X radians.
TAND(X)
Tangent of X degrees.
161
Using the Logic Editor
162
372 SPU 780 01EMAN May 2002
Using the Traffic Cop
At a Glance
Traffic Cop
Overview
The Traffic Cop is used to visualize and configure I/O series, drops, cards, and slots.
Each I/O series (Quantum, Momentum, Symax, Compact A120, Compact TSX 800,
800, 200-500, DCP, S901, 900, Micro, Micro 984) has the same look and feel,
although some series have different I/O structures.
What’s in this
Chapter?
This chapter contains the following topics:
372 SPU 780 01EMAN May 2002
Topic
Page
Traffic Cop Overview
164
Working with Drops and Racks
165
Working with Slots
167
Online Module Status
169
I/O Drawing Generator
171
Materials List
172
163
Using the Traffic Cop
Traffic Cop Overview
Overview
The Traffic Cop is used to visualize and configure I/O series, drops, cards, and slots.
Each I/O series (Quantum, Momentum, Symax, Compact A120, Compact TSX 800,
800, 200-500, DCP, S901, 900, Micro, Micro 984) has the same look and feel,
although some series have different I/O structures.
Navigation Panel
(Tree)
The navigation panel shows a text-based representation of the traffic cop. The panel
is enabled regardless of which I/O series is selected. The tree provides a
hierarchical view of configured drops, racks and slots. Navigate through the tree to
select a drop or rack to view or to edit its configuration in the Drop or Slot Properties
Panel. Using the tree view you can insert, delete, and move any part of the tree
(drops, racks, or slots).
Visual
Representation
The Visual Representation of the I/O system consists of three views:
l Drop View - Visual representation of all racks and slots within the selected I/O
drop. Click on any slot to jump to the rack view that contains the selected slot.
l Rack View - Visual representation of all slots within the selected rack. Click on
any slot to access that slots properties in the Slot Properties Panel.
l Momentum View - Visual representation of the momentum traffic cop. This
shows only the current branch of I/O. If a new card can be programmed, the last
shown card is labelled "AVAILABLE".
Initializing the
Traffic Cop
In the traffic cop navigation panel:
Step
Action
1
Right-click the I/O series
2
you want to initialize.
Select Initialize from the pop-up menu.
WARNING
Ensure data integrity.
Initializing the traffic cop deletes all drops, racks, and slots, and clears
all properties.
Failure to follow this precaution can result in severe injury or
equipment damage.
164
372 SPU 780 01EMAN May 2002
Using the Traffic Cop
Working with Drops and Racks
Drop Properties
Panel
Lists user-editable and calculated properties pertaining to the selected drop.
Available drop properties are:
Property
To Edit:
Drop Series
Select a drop from the available Drop Series drop-down list box.
Hold-up Time
Enter a hold-up time value (3 - 65,535).
Rack (1-x)
Select a rack from the rack drop-down list box. (X represents the number
of racks available.)
ASCII Port
Enter an ASCII port value.
Input Bits
Read only - number of input bits used within the selected drop.
Output Bits
Read only - number of output bits used within the selected drop.
Status Word
Enter a 3xxxx address (holds the status information for the drop).
Read Only
Select TRUE or FALSE from the available drop mode drop-down list box.
Note: Not all properties are available for all drops - i.e. a Quantum drop will not
have an ASCII port property.
Working with
Drops
In the traffic cop navigation panel, select the drop
From the right-click menu:
372 SPU 780 01EMAN May 2002
you want to work with.
Function
Action
Comment
To insert a drop:
Select Insert.
Inserting a drop inserts a drop above the
selected drop and moves existing drops
down.
To edit a drop:
Select Edit.
You can edit the currently selected drop at
any time by editing properties in the Drop
Properties Panel.
To clear a drop:
Select Clear.
Clearing a drop clears all racks from the
selected drop.
To delete a drop:
Select Delete.
Deleting a drop deletes the currently
selected drop and moves the remaining
drops up.
165
Using the Traffic Cop
Working with
Racks
Using
Cut/Copy/Paste
In the traffic cop navigation panel, select the rack
From the right-click menu:
Function
Action
Comment
To insert a rack:
Select Insert.
Inserting a rack inserts a rack above the
selected rack and moves existing racks
down.
To edit a rack:
Select Edit.
You can edit the currently selected rack at
any time by editing the rack property in the
Drop Properties Panel.
To clear a rack:
Select Clear.
Clearing a rack clears all slots from the
selected rack.
To delete a rack:
Select Delete.
Deleting a rack deletes the currently
selected rack and moves remaining racks
up.
In the ProWORX 32 traffic cop:
Step
1
2
166
you want to work with.
Action
All items in the traffic cop (heads, drops, racks, and slots) can be cut, copied and
pasted. Also, items can be cut, copied, or pasted between different projects
traffic cops.
From the item right-click menu, select:
Cut - Removes the currently selected item (including documentation) from
the traffic cop into a buffer.
l Copy - Copies the currently selected item (including documentation) from the
traffic cop into a buffer.
l Paste - Inserts the buffered item (including documentation) into the currently
selected Slot/Rack/Drop/Head.
Note: A Slot copy can only be pasted into a slot, if the user attempts to paste
the slot onto a drop the paste will be ignored. This holds true for any item that
is pasted. The I/O series of the paste must match or it is ignored.
l Paste Special - The same as paste, but new available addresses are
automatically assigned to any slot that is pasted.
l
372 SPU 780 01EMAN May 2002
Using the Traffic Cop
Working with Slots
Slot Properties
Panel
Lists user-editable and calculated properties pertaining to the selected slot.
Available slot properties are:
Property
To Edit:
Card Name
Select a card from the available cards drop-down list box.
Description
Read only - description of the selected card.
Input Reference
Enter an address type. Only valid entries are accepted.
Input Data Mode
Select a data mode (BIN or BCD) from the data mode drop-down list
box.
Output Reference
Enter an address type. Only valid entries are accepted.
Output Data Mode
Select a data mode (BIN or BCD) from the data mode drop-down list
box.
Data Length
Enter the data length.
Power Rating
Read only - power rating of the selected card.
Bus Module Count
Read only - number of modules a Bus Module contains.
Bypass Local Bus
Select TRUE or FALSE from the bypass local bus drop-down list box.
Bypass remote
Select TRUE or FALSE from the bypass remote drop-down list box.
Card Config
Displays hex parameter data. To edit, double-click the Card Config
property and a Card Config dialog box will open.
Note: Not all properties are available for all slots - i.e. a discrete card will not have
the Data Mode property.
372 SPU 780 01EMAN May 2002
167
Using the Traffic Cop
Working with
Slots
168
In the traffic cop navigation panel, select the slot
From the right-click menu:
you want to work with.
Function
Action
Comment
To insert a slot:
Select Insert.
Inserting a slot inserts a slot above the
selected slot and moves existing slots down.
Leaving the Slot Properties Panel without
selecting a module while in a Momentum
traffic cop will result in the insert being
cancelled.
To edit a slot:
Select Edit.
You can edit the currently selected slot at
any time by editing properties in the Slot
Properties Panel.
To clear a slot:
Select Clear.
Clearing a slot clears the card from the
selected slot.
To delete a slot:
Select Delete.
Deleting a slot deletes the currently selected
slot and moves remaining slots up.
372 SPU 780 01EMAN May 2002
Using the Traffic Cop
Online Module Status
PLC Status/
Traffic Cop
Functionality
Matrix
Functionality Matrix:
PLC Status
Traffic Cop
Functionality
Module Status
Icon Reference
Online Running
Online Stopped
Offline
Read-Only
Yes
No
No
PLC Status
Update
Method
Automatically
every 3 seconds
Automatically
every 5 seconds
N/A
No
N/A
Online Health Yes
Online
Module
Recognition
No
Yes
N/A
Data
Committed
Method
N/A
Controller is
updated after
user verification
Project is
automatically
updated
Online Stopped - Module Recognition:
Icon
Description
Indicates that an associated slot is incorrect or missing.
,
,
Indicates a slot that is missing or not configured.
Indicates that an incorrect slot has been added to the traffic cop.
Online Running - Module Health:
Icon
Description
Indicates an unhealthy slot.
372 SPU 780 01EMAN May 2002
169
Using the Traffic Cop
Adding a Missing
Slot
From the traffic cop navigation panel:
Step
Action
1
Double-click the slot
that you want to add. (The correct slot will be selected
in the Module property combo-box in the Slot Properties Panel.)
Fixing an
Incorrect Slot
2
Press ENTER to accept the selected slot.
3
Configure the remaining properties of the selected slot.
From the traffic cop navigation panel:
Step
Action
1
Double-click the slot
170
that you want to fix.
2
Select the correct card from the Module property combo-box in the Slot
Properties Panel.
3
Press ENTER to accept the selected slot.
4
Configure the remaining properties of the selected slot.
372 SPU 780 01EMAN May 2002
Using the Traffic Cop
I/O Drawing Generator
Overview
The I/O Drawing Generator creates CAD (Computer-Assisted Design) drawings of
800, Micro, Quantum and A120 Traffic Cop series cards. The drawings are saved in
.DXF format, which is supported by most CAD programs.
Setting up the I/O
Drawing
Generator
From the project right-click menu in the navigation panel:
Using the I/O
Drawing
Generator
Step
Action
1
Select Properties.
2
Select the I/O Drawing tab.
3
Enter, or select by clicking Browse, the directory path to store the Symbol,
Master, Intermediate, and Final I/O drawings in. The I/O drawings created
reside in the selected path in a subdirectory which has the same name as the
project the drawings are created from.
4
Select Overwrite Existing Drawings to discard the existing drawings and save
the new ones in their place.
5
Select Ignore, Break, or Warn from the Missing Master Drawings options. This
property sets how ProWORX 32 reacts when a master drawing is missing while
the I/O drawings are being created.
In the project navigation panel:
Step
1
372 SPU 780 01EMAN May 2002
Action
I/O drawings are generated in a two-step process:
Intermediate: These drawings are used as a "working" step. Generating a
series of Intermediate drawings as you go can save time when it comes to
generating the Final drawings.
l Final: These drawings are generated based on the corresponding
Intermediate drawings.
l
2
To generate an intermediate drawing, select I/O Drawing → Intermediate
Drawings from the Traffic Cop right-click menu.
3
To generate a final drawing, select I/O Drawing → Final Drawings from the
Traffic Cop right-click menu.
4
To generate both an intermediate and final drawing, select I/O Drawing → Both
Drawings from the Traffic Cop right-click menu.
171
Using the Traffic Cop
Materials List
Overview
When you have finished configuring the I/O area of your system, you may want to
know what materials are required to create the hardware system as configured. The
material list function creates a list of all required materials (as configured) and their
associated part numbers.
When the materials list is first launched it will generate a list of materials required by
the selected project. The materials list will be created from the project if offline or
from the controller if online. On a second launch of the materials list the data will be
read from the project rather than generated. You can add prices and comments to
existing materials as well as add new materials to the list. The materials list can then
be printed or saved to HTML, MS Excel or MS Word.
Note: The Material List utility makes some assumptions about cabling that should
be checked and modified before printing.
Using the
Materials List
In the project navigation panel (tree):
Step
From the traffic cop icon right click menu, select Materials List.
2
Enter up to six lines of text in the Header text box. This text will be displayed at
the top of the printed materials list.
3
Add or edit materials in the grid. All fields are editable except Total which is
calculated.
4
To regenerate a material list from the controller or project, select Generate from
the materials grid right click menu.
5
To inset a row at the current cursor position, select Insert from the materials grid
right click menu.
6
To clear the currently selected row, select Clear from the materials grid right click
menu.
7
To delete the currently selected row and shuffle the remaining rows up, select
Delete from the materials grid right click menu.
8
To save the materials list to another format, select Save As from the materials
grid right click menu.
9
10
172
Action
1
To print out the materials list, select Print from the materials grid right click menu.
Close the materials list to save the changes.
372 SPU 780 01EMAN May 2002
Using the Traffic Cop
Cabling
Assumptions
Cabling Assumptions:
372 SPU 780 01EMAN May 2002
1
’97-5951-000 RG-11/U Coax Cable 1000 ft. reel’ This is the recommended cable for
use as Trunk cable. It can also be used for Drop cabling although it is recommended to
use the less expensive: ’97-5750-000 RG-6/U Coax Cable 1000 ft. reel’ for Drop
cabling. RG-6/U can also be used for Trunk cabling if the cable run is less than 5000 ft.
but is not recommended. If it is used then ’52-0488-000 RG-6/U BNC Connectors’ are
used in place of ’52-0401-000 RG-11/U F Connectors’ For cable runs over 8000 ft. up
to 15000 ft., CATV cable should be used but is not supplied by Modicon.
2
’AS-W801-012 I/O Signal Cable 12 ft.’ This also comes in 6 ft.’-006’and 1.5 ft.’
002’lengths.
3
’AS-W804-012 I/O Power Cable to rack with power 12ft.’ This also comes in 5 ft.’005’and 1.5 ft. ’-002’ lengths.
4
’AS-W802-012 I/O Power Cable to rack no power 12 ft.’ This is interchangeable with:
’AS-W808-002/-005/-008 Light-weight cable’ in 1.5,5 or 8 ft. lengths.
-
173
Using the Traffic Cop
174
372 SPU 780 01EMAN May 2002
Using the Data Watch Window
At a Glance
Data Watch
Window
Overview
The Data Watch Window is used to view and edit register data values for the
selected project. The project can be Online, Offline or in Emulation. Live, real time
data may be viewed or edited within the Data Watch Window. The data values may
be displayed in a number of ways depending on what Data Watch view is active.
Several views are available including a Generic Register Editor, a Data Watch/Edit
window, a Spreadsheet view, a Trend view, an Instruction view for specific
instructions, a Terminal Block view for specific I/O cards and a mini-HMI view. If the
preferences are selected, data for Traffic Cop and Network Logic elements are
tracked automatically. Data values may also be logged. These values are saved into
an external file for future use. Preferences and properties of the Data Watch Window
are saved in the project.
372 SPU 780 01EMAN May 2002
175
Using the Data Watch Window
What’s in this
Chapter?
176
This chapter contains the following topics:
Topic
Page
Data Watch Window Overview
177
Properties
181
HMI
184
Trend
188
Trend - Mode Functionality Table
190
Track Logic Editor
191
Track Traffic Cop
192
Instruction Editor / Terminal Block Editor
193
Instruction / Terminal Block Editor Display Scripts
194
Display Script Variables
195
Display Script Functions
196
Register Editor
201
PID Tuner
202
DRUM Summary
205
Importing and Exporting Data Watch Window Data
207
372 SPU 780 01EMAN May 2002
Using the Data Watch Window
Data Watch Window Overview
Overview
The watch window is the primary Data Watch Window. You can select any valid
address for the current device and view the data for that address. Up to 100
addresses of any type may be entered and tracked. The data may be edited at any
time. Register values may be changed and discrete values may be enabled or
forced on or off. Addresses are automatically saved on exit and reloaded on entry.
Any register data may be viewed or edited with any selected radix type. Available
radices are Decimal, Hex, Binary, ASCII, Signed integer, BCD, 32-bit Floating point
or 32-bit integer. The bottom status bar will display various information including
Status messages, Offline/Online/Emulation state, Running/Stopped state, Trigger
info and Clamping info.
Adding
Addresses to
Track in the Data
Watch Window
Clearing
Addresses
In the data watch window:
Step
Result
Double-click or press ENTER in the first available Address cell.
2
Insert a valid address into the Address cell.
3
Press ENTER to insert the address,
ESC to cancel the entry.
The Data and Radix fields are
automatically populated if the address
exists in the project. You can edit the
data or radix of an address by doubleclicking on the cell you want to change.
From the right-click menu:
Step
1
Loading
Addresses and
Data from a Log
File
Action
1
Action
Result
Select Clear.
All addresses are cleared from the
Window.
From the right-click menu:
372 SPU 780 01EMAN May 2002
Step
Action
Result
1
Select Load.
The DataWatch Address Load dialog
appears.
2
Select a log file and click OK.
All addresses from the file are added to
the Data Watch Window.
177
Using the Data Watch Window
Filling the Data
Watch Window
with Addresses
Setting the Radix
for Multiple
Addresses
Deleting
Addresses
178
From the right-click menu:
Step
Action
Result
1
Select Fill Addresses.
The Add Addresses dialog appears
within the Data Watch Window.
2
Enter an address in the Starting
Address box.
This is the first in a range of addresses
to be added to the Data Watch Window.
3
Enter a numeric value (1 through 100)
in the Number of Addresses box.
This is the length of the range of
addresses to be added to the Data
Watch window.
4
Click OK.
Addresses specified are added at the
current grid location. Existing addresses
may be overwritten.
In the data watch window:
Step
Action
Result
1
Select the radices you want to change.
2
From the right-click menu, select Set
Radix.
3
Select a radix from the Radix drop-down list box.
4
Click OK.
The Set Radices dialog appears within
the Data Watch Window.
All selected radices are updated to the
specified radix.
In the data watch window:
Step
Action
Result
1
Select the addresses you want to delete.
2
From the right-click menu, select
Delete Addresses.
Selected addresses are deleted.
3
Or, Select an address and press
DELETE.
Selected address is deleted.
372 SPU 780 01EMAN May 2002
Using the Data Watch Window
Jumping to a
Specific Address
Copying Data
Values from One
Range of
Addresses to
Another
Moving Data
Values from One
Range of
Address to
Another
From the right-click menu:
Step
Action
Result
1
Select Goto Address.
The Goto Address dialog appears within
the Data Watch Window.
2
Enter an address in the Select an Address to find box.
3
Click OK.
The specified address is selected in the
Data Watch Window.
From the right-click menu:
Step
Action
Result
1
Select Data Utilities → Copy Data.
The Data Utilities dialog appears within
the Data Watch Window.
2
Enter an address into the Start
Address box.
The value of this address is the first in
the range to be copied.
3
Enter an address into the End
Address box.
The value of this address is the last in
the range to be copied.
4
Enter an address into the Destination The value of this address is the first to be
Address box.
copied to in the sequential range of
addresses specified.
5
Click OK.
Values are copied.
From the right-click menu:
372 SPU 780 01EMAN May 2002
Step
Action
Result
1
Select Data Utilities → Move Data.
The Data Utilities dialog appears within
the Data Watch Window.
2
Enter an address into the Start
Address box.
The value of this address is the first in
the range to be copied.
3
Enter an address into the End
Address box.
The value of this address is the last in
the range to be copied.
4
Enter an address into the Destination The value of this address is the first to be
Address box.
moved to in the sequential range of
addresses specified.
5
Click OK.
Values are moved.
179
Using the Data Watch Window
Filling a Range of
Addresses with a
Data Value
Searching for a
Data Value
180
From the right-click menu:
Step
Action
Result
1
Select Data Utilities → Fill Data.
The Data Utilities dialog appears within
the Data Watch Window.
2
Enter an address into the Start
Address box.
The value of this address is the first in
the range to be filled.
3
Enter an address into the End
Address box.
The value of this address is the last in
the range to be filled.
4
Enter a numeric value into the Data
Value box.
This value is copied into all specified
addresses.
5
Click OK.
Address values are set to the specified
value.
From the right-click menu:
Step
Action
Result
1
Select Data Utilities → Search Data. The Search Data dialog appears within
the Data Watch Window.
2
Enter a numeric value into the Data
Value box.
This is the value to be searched for.
3
Click OK.
The address with the specified data
value are selected in the Data Watch
Window.
372 SPU 780 01EMAN May 2002
Using the Data Watch Window
Properties
Using the Data
Watch Window
Properties
Dialog
Multi Radix View
In the navigation window:
Step
Action
1
Right-click the Data Watch Window icon.
2
Select Properties from the drop-down list.
3
When you have made your property changes: To save the proerty changes and
close the properties window, click OK. To save the property changes and remain
in the properties window, click Apply.
When the Multi Radix View check box is selected, the Watch Window and the
Register Editor are in Multi Radix view. A column is assigned for each selected radix
(Hexadecimal, ASCII, Long, Binary, and/or Float) as well as one for Decimal. Each
column displays the data value for the given address in the selected format. Radices
cannot be edited.
When the Multi Radix View check box is not selected, the Watch Window and the
Register Editor will be in Single Radix view. Only one radix will be viewable per
address. Any radix can be changed.
Changing the
View
(Single Radix vs.
Multi Radix)
Trigger
In the Data Watch Window Properties dialog:
Step
Action
1
Click the Multi Radix View check box.
2
Select which radices (Hexadecimal (Hex), Binary (Bin), ASCII (Asc), Float, and
Long) you would like to view.
3
Click OK to save the changes and return to the Data Watch Window.
When the Trigger check box is selected, the value of a specific address is tracked.
When the data for this address reaches the specified value, the Data Watch Window
begins tracking and/or logging values. The data is not tracked or logged until the
condition is met.
When the Trigger check box is not selected, the Data Watch Window automatically
tracks and/or logs values.
372 SPU 780 01EMAN May 2002
181
Using the Data Watch Window
Setting a Trigger
Condition
Clamps
In the Data Watch Window Properties dialog:
Step
Action
1
Click the Trigger check box.
2
Enter the address that you would like to track in the Address box.
3
Select the > or < option button.
4
Enter a numeric value in the State box.
5
Click OK to save the changes and return to the Data Watch Window.
When the Clamps check box is selected, all data values tracked are forced inside
or outside of the range specified. This affects the display only and does not affect
the actual data values in the device. This also affects the data sent to the log file.
When the Clamps check box is not selected, all data values are displayed as their
actual data value.
Setting a Clamp
In the Data Watch Window Properties dialog:
Step
1
Action
Click the Clamp check box.
2
Enter a numeric value in the Lo Clamp box.
3
Enter a numeric value in the Hi Clamp box.
4
Select the Capture Inside or Capture Outside option button.
5
Click OK to save the changes and return to the Data Watch Window.
Log File Size
Limit
This value places a size limit on the Log file. Once the limit is reached, no further
logging will be done. The limit is in Megabytes.
Setting the Log
File Size Limit
In the Data Watch Window Properties dialog:
182
Step
Action
1
Enter a numeric value (in Megabytes) in the Max Log File Size box.
2
Click OK to save the changes and return to the Data Watch Window.
372 SPU 780 01EMAN May 2002
Using the Data Watch Window
Sample Rate
Specifies how often to poll the device for data. The faster the polling is, the more
accurate the data is, but the client computers responses will become more sluggish.
This rate also affects the rate that data points are logged. The minimum sample rate
is one read every sixty minutes, and the maximum sample rate is one read every 25
milliseconds.
Note: This is a target sample rate. The actual sample rate may be slower than you
specify due to a large amount of data being polled and the capabilities of your
machine.
Setting the
Sample Rate
In the Data Watch Window Properties dialog:
372 SPU 780 01EMAN May 2002
Step
Action
1
Move the Sample Rate slider to the right for a slower sample rate or to the left
for a faster sample rate.
2
Click OK to save the changes and return to the Data Watch Window.
183
Using the Data Watch Window
HMI
HMI Overview
This view displays a simple Human-Machine graphical grid-based workspace. It
allows data to be displayed, data values to be entered, discrete controls to be
enacted and basic animation to be visualized.
Each cell in the grid may have a series of pictures assigned to it. These pictures are
selected based on the data value of an address assigned to the cell. Therefore, as
the data changes, the pictures will change as well. Animated switches, gauges,
meters and similar graphics are available.
Setting the
Background
Color
Setting the
Number of Rows
and Columns
Creating Bitmap
Files to
Associate with
Address Values
184
In the Data Watch Window Properties dialog:
Step
Action
1
Click the Background Color - Select button.
2
Choose a color from the Color dialog.
3
Click OK to close the Color dialog.
4
Click OK to save the changes and return to the Data Watch Window.
In the Data Watch Window Properties dialog:
Step
Action
1
Enter a numeric value into the Number of Rows box. (Max: 10, Min: 1)
2
Enter a numeric value into the Columns box. (Max: 10, Min: 1)
3
Click OK to close the Color dialog.
4
Click OK to save the changes and return to the Data Watch Window.
Use Windows Explorer to:
Step
Action
1
Ensure all files you want to associate with a cell are in the same directory.
2
Ensure the files you want to associate with a cell are named sequentially
Correct: Timer_1.bmp, Timer_2.bmp, Timer_3.bmp,... Timer_10.bmp
Incorrect: Timer.bmp, TTwo.bmp, TimerThree.bmp,... Time10.bmp
Tip: The easiest way to name bitmaps for use in the HMI is to use the
’BitmapName_#.bmp’ format.
372 SPU 780 01EMAN May 2002
Using the Data Watch Window
Editing Cell Data
From the right-click menu:
Step
Associating a
Picture with an
Address Value
Action
1
Select Edit Data.
2
Enter a value in the Picture box. (This will update the value of the address
associated with the picture.)
3
Enter a value in the Monitor box. (This will update the value of the address being
monitored.)
4
Press OK to save changes.
From the right-click menu:
372 SPU 780 01EMAN May 2002
Step
Action
1
Select Edit Cell.
2
Select the Picture Enabled check box.
3
Enter an address into the Address box.
4
Select from the Stretch Picture drop-down list box how you would like the
pictures to be displayed. (Selecting None will trim the bottom and the right-side
of the picture to fit, selecting Fit Cell will make the entire picture fit the cell,
selecting Fit Width will trim the bottom of the picture, and selecting Fit Height
will trim the right-side of the picture.)
185
Using the Data Watch Window
Associating a
Picture with an
Address Value
(continued)
After entering an address to associate a picture with:
If...
Step
Action
you have entered a 1
discrete address
(0xxxx or 1xxxx)
Click Off Picture → Browse and select a bitmap (.bmp
file) to view when the value of the selected address is 0
(zero).
2
Click On Picture → Browse and select a bitmap (.bmp
file) to view when the value of the selected address is
not 0 (zero).
3
Press OK to save changes.
1
Click Picture → Browse and select the first bitmap
(.bmp) in a numbered sequence of bitmaps.
2
Enter a number in the Actual Range boxes. (These are
the low and high data values you expect or know the
address will hold.)
3
Enter a number in the # of Pictures box. (This number
will be used to associate different sequentially named
pictures with values from the selected address.)
E.g. If you enter as an actual range the values 0 and
999, then enter 10 into the # of pictures box,
Picture1.bmp (the picture you selected in step 1) will be
associated with values 1 through 99, Picture2.bmp will
be associated with values 100 through 199, and so on.
4
Press OK to save changes.
you have entered
an analog address
(3xxxx or 4xxxx):
Note: A maximum of 100 pictures may be associated with a cell.
Adding a Caption
to a Cell
186
From the right-click menu:
Step
Action
1
Select Edit Cell.
2
Select the Caption Enabled check box.
3
Enter the text you want displayed in the cell in the Caption box (Maximum 20
characters).
4
Click the Foreground button to select the text color.
5
Select the positioning (Top, Middle, or Bottom) of the caption from the
Alignment drop-down list box.
6
Press OK to save changes.
372 SPU 780 01EMAN May 2002
Using the Data Watch Window
Adding a Value
to Monitor
From the right-click menu:
372 SPU 780 01EMAN May 2002
Step
Action
1
Select Edit Cell.
2
Select the Data Monitor Enabled check box.
3
Enter an address into the Address box. (This address may be the same as or
different than the address associated with the picture.)
4
Click the Foreground button to select the text color.
5
Enter numeric values into the Actual Range boxes. (These are the low and high
values you expect or know the address will hold.)
6
Enter numeric values into the Scale Range boxes. (You can use the scale range
to display a ratio value or an offset value for data analysis purposes. You can
also set the Scale range to the same values as the Actual range to display raw
data.)
7
Select the positioning (Top, Middle, or Bottom) of the caption from the
Alignment drop-down list box.
8
Press OK to save changes.
187
Using the Data Watch Window
Trend
Trend Overview
This view does not allow editing of any on-screen information. It is for viewing data
only. When active, this view will display a graphical line chart of data values. The
time that the data was taken is displayed on the X axis. The data value is displayed
on the Y axis as well as on the right hand legend. This is useful for tracking changes
in data over time. There are several Zoom and pan functions available.
Setting the
Y-Axis Values
In the Data Watch Window properties dialog:
Setting the Alarm
Values
Step
1
Click the Auto Y Axis Scale check box to have the Y Axis automatically set and
adjust to include all data points.
- or Enter a numeric value into the Y Axis Min and Y Axis Max boxes to manually
set the Y Axis range.
2
Click OK to save the changes and return to the Data Watch Window
The alarm values are a range of ’safe’ values. Any value that is outside of this range
triggers an alarm state.In the Data Watch Window properties dialog:
Step
Setting the
Setpoint Value
Enter a numeric value into the Lo Alarm and/or Hi Alarm boxes.
2
Click OK to save the changes and return to the Data Watch Window.
The setpoint value is a baseline value that can be used as a reference. In the Data
Watch Window properties dialog:
Action
1
Enter a numeric value into the Setpoint box.
2
Click OK to save the changes and return to the Data Watch Window.
The resolution value is in Milliseconds and defines the width of the X Axis. This is
the time window of the visible data.In the Data Watch Window properties dialog:
Step
188
Action
1
Step
Setting the
Resolution Value
Action
Action
1
Enter a numeric value into the Resolution box.
2
Click OK to save the changes and return to the Data Watch Window.
372 SPU 780 01EMAN May 2002
Using the Data Watch Window
Using the Graph
Functionality
In the trend window:
372 SPU 780 01EMAN May 2002
Step
Action
1
Select the Mode you want to use (Scroll-X, Zoom-X, Scroll-Y, Zoom-Y, ScrollXY, Zoom-XY, Cursor, or Zoom-Box).
2
Left-click the data point you want to work from.
3
Hold-and-drag to manipulate the on-screen view of the data.
189
Using the Data Watch Window
Trend - Mode Functionality Table
Data Watch
Window - Trend
190
Mode Functionality Table:
Mode
Description of Functionality
Plot
Default view. This is the setting used when viewing a live trend or logged
data. If viewing live data, the trend automatically updates and scrolls.
Selecting Plot also resets the view to the default by cancelling any scroll
or zoom operations.
Scroll-X
Drag the trend chart left or right to view trend data by time. Not available
while viewing live data.
Zoom-X
Compresses or expands the X (Time) axis. This allows for viewing more
detail or more data points. Not available while viewing live data.
Scroll-Y
Drag the trend chart up or down to view trend data that may be beyond
the bounds of the current Y axis. Not available while viewing live data.
Zoom-Y
Compresses or expands the Y (Value) axis. This allows for viewing more
detail or more data points. Not available while viewing live data.
Scroll-XY
This allows for scrolling of the X and Y axis simultaneously. Not available
while viewing live data.
Zoom-XY
This allows for zooming of the X and Y axis simultaneously. Not available
while viewing live data.
Cursor
Shows a cursor, the value of the data point and the time it was taken for
a given trend line. Specific trend lines may be selected from the legend on
the right. The cursor my be moved via the mouse, keys or navigation
buttons. Not available while viewing live data.
Zoom-Box
Use a selection box to zoom into a specific part of the trend. Not available
while viewing live data.
View Selected
Only Checkbox
When Checked, the trend only displays the plot of the address selected in
the legend on the right. When cleared, all address plots are displayed.
Only available in cursor mode with logged data.
372 SPU 780 01EMAN May 2002
Using the Data Watch Window
Track Logic Editor
Track Logic
Editor
When the Track Logic check box is selected, the specified addresses in logic are
automatically added to the Data Watch window and their values tracked. When the
cursor position in logic is changed, the previously tracked addresses are removed
and a new set of addresses are tracked. There are four logic-related options that can
be tracked:
l Network - All addresses and their values from the most recently selected network
in the Logic Editor are displayed in the Watch Window.
l Instructions - All addresses and their values that are associated with the most
recently selected instruction are displayed in the Instruction Window.
l Discrete - All addresses with discrete values associated with the most recently
selected network in the logic editor are displayed in the Watch Window.
l Address - The most recently selected address and its value is displayed in the
Watch Window.
When the Track Logic and Track Traffic Cop check boxes are not selected,
addresses must be entered manually into the Watch Window in order to be tracked.
Tracking Logic
Editor
Addresses in the
Data Watch
Window
In the Data Watch Window Properties dialog:
372 SPU 780 01EMAN May 2002
Step
Action
1
Select the Track Logic check box.
2
Select the option button (Network, Instruction, Discretes, or Address) that you
want to track.
3
Click OK to save the changes and return to the Data Watch Window.
4
Ensure that the Logic Editor and Data Watch Window are open.
191
Using the Data Watch Window
Track Traffic Cop
Track Traffic Cop
When the Track Traffic Cop check box is selected, the specified addresses in the
Traffic Cop are automatically added to the Data Watch window and their values
tracked. As the cursor position is changed in the Traffic Cop, the tracked addresses
are also changed. The traffic cop-related option that can be tracked is:
l Slot - The associated addresses of the card in the most recently selected slot are
displayed in the Terminal Block Window.
When the Track Logic and Track Traffic Cop check boxes are not selected,
addresses must be entered manually into the Watch Window in order to be tracked.
Tracking Traffic
Cop Addresses
in the Data Watch
Window
192
In the Data Watch Window Properties dialog:
Step
Action
1
Select the Track Slot check box.
2
Click OK to save the changes and return to the Data Watch Window.
3
Ensure that the Traffic Cop and Data Watch Window are open.
372 SPU 780 01EMAN May 2002
Using the Data Watch Window
Instruction Editor / Terminal Block Editor
Instruction
Editor Overview
You can view the addresses and data of specific Logic instructions using the
Instruction Editor.
Additionally, the DRUM Summary and the PID Summary can activate the Instruction
Editor for the DRUM or PID function selected in the summaries. Only the addresses
referenced by the current instruction will be included.
The display is built using a user-defined VB script. These scripts are editable and
may be used to modify the on screen display in any way.
Viewing an
Instruction in the
Instruction
Editor
The Instruction Window works hand-in-hand with the Logic Editor. To view a certain
instruction simply select the desired instruction in the Logic Editor and the instruction
will be displayed in the Instruction Window
Terminal Block
Editor Overview
You can view the addresses and data of specific I/O cards using the Terminal Block
editor. Depending on property settings, you can view addresses and edit address
values found in the currently selected item (rack or slot) in the Traffic Cop.
The display is built using a user-defined VB script. These scripts are editable and
may be used to modify the on screen display in any way.
Viewing an I/O
Card in the
Terminal Block
Editor
The Terminal Block Window works hand-in-hand with the Traffic Cop. To view a
certain card simply select the desired card in the Traffic Cop and the card will be
displayed in the Terminal Block Window.
372 SPU 780 01EMAN May 2002
193
Using the Data Watch Window
Instruction / Terminal Block Editor Display Scripts
Display Scripts
Overview
The Instruction and Terminal Block views may be customized using specialized VB
Script files (.ucs). A large variety of .ucs files are provided for common instructions
and for some advanced I/O cards. All .ucs files use a standard set of functions that
link into the PRWX32 Data editor to provide the on screen elements needed. As
well, all regular VB Script functions (such as FOR loops and IF statements) are
available.
Note: The script must follow standard VBS coding methods and rules.
Creating a
Display Script
File
Naming a Display
Script File
194
From your Windows Start menu:
Step
Action
1
Open a blank script in a script editor (Notepad or Wordpad).
2
Enter the outline of the new script function as follows:
Sub FunctionName(TopAddr, MidAddr, BotAddr, TopLen, MidLen,
BotLen, Page, Unused1, Unused2) End Sub
3
Add functions to the script as needed.
Note: All functions must be prefixed by ’Call Editor.’ E.g., Call Editor.scAddGrid.
4
Save the script in the ProWORX\32\Scripts directory using the naming
conventions laid out in ‘Naming a display script file’.
Rules and guidelines:
Step
Action
1
Script files must be saved with a .ucs extension. E.g., VMER.ucs
2
Instruction scripts must be saved using their machine name. E.g., Correct:
MSTR.ucs, Incorrect: Master.ucs
3
Script file names cannot have spaces or punctuation in them. E.g. Correct:
DAO84010.ucs, Incorrect: DAO 840 10.ucs, DAO-840_10.ucs
372 SPU 780 01EMAN May 2002
Using the Data Watch Window
Display Script Variables
Variable
Description
Table
Variables used within the display script:
Variable
Type
Description
FunctionName
NA
The function name must be the same as the name of the
instruction or I/O card it supports. E.g. For the ADD
instruction, the function name would be "ADD", and the
script file name would be Add.ucs.
TopAddr
String
Instruction Editor: The address in the top node of the
instruction.
Terminal Block Editor: For cards with input addresses only,
the first input address. For cards with output addresses
only, the first output address. For cards with both input and
output addresses, the first input address.
MidAddr
String
Instruction Editor: The address in the second node of the
instruction if second node exists.
Terminal Block Editor: First output address for cards
containing both input and output addresses.
BotAddr
String
Instruction Editor: The address in the third node of the
instruction if third node exists.
Terminal Block Editor: Empty.
TopLen
Integer
Instruction Editor: The number of implied addresses
associated with the address in the top node.
Terminal Block Editor: Empty.
MidLen
Integer
Instruction Editor: The number of implied addresses
associated with the address in the middle node.
Terminal Block Editor: Empty.
BotLen
Integer
Instruction Editor: The number of implied addresses
associated with the address in the bottom node.
Terminal Block Editor: Empty.
Page
Integer
If a page control is specified in this script using
’scAddPages’, this will give the page number to display.
Unused1, Unused2 Empty
Reserved Values.
Note: All of these parameters will pass data into the script
372 SPU 780 01EMAN May 2002
195
Using the Data Watch Window
Display Script Functions
Functions Used
Within the
Display Script
Note: All functions must be prefixed by ’Call Editor.’ E.g., Call Editor.scAddGrid
Note: All strings must be surrounded by quotes. E.g., Call Editor.scSetRowInfo(1,
1, "This is a string description", "Decimal")
scAddGrid
(Address,
NumRows,
VisibleRows)
scSetRowInfo
(GridIndex,
GridRow,
TextString,
Radix)
196
This is the main function used to display data values. It is responsible for adding a
grid of addresses along with their data values and radices. All radices will default to
decimal. Grids are numbered starting at 1 in the order that they are added. This
number is used as an ID for other functions such as ’scSetRowInfo’.
Variable
Type
Variable Description
Address
Integer
The first address in a sequential list of addresses.
NumRows
Integer
The number of rows (and addresses) to display in
this grid.
VisibleRows
Integer
This will limit the grid to showing only the number of
rows specified. Additional rows will be accessible
via scrolling.
This function modifies the contents of a specific row in a specific grid. The
Description and a specific Radix may be added with this function.
Variable
Type
Variable Description
GridIndex
Integer
This is the Grid’s ID Number. See ’scAddGrid’.
GridRow
Integer
The row in this grid to modify. Valid rows start at 1
and go to the maximum number of rows this grid
contains.
TextString
String
The Description text to add.
Radix
String
What radix to display the data in. Valid entries are:
"Hexadecimal", "Binary", "ASCII", "Float", "Long",
"Signed", "BCD", and "Decimal".
372 SPU 780 01EMAN May 2002
Using the Data Watch Window
scGetText
(TextIndex)
scAddBitDisplay
(BitDisplayName
, GridNumber,
GridRow,
LineState,
Editable)
scAddBitInfo
(BitDisplayName
, BitNumber,
BitDescription)
This retrieves internal PRWX32 text strings. Usually you should use a literal text
string ("Hello") instead of this function.
Variable
Type
Variable Description
TextIndex
Integer
The number of the internal text string you wish to
retrieve.
This will add an ellipsis button to the specified Grid on the specified Row. This button
activates a Bit Display dialog that gives detailed bit-by-bit descriptions and editing
capabilities.
Variable
Type
Variable Description
BitDisplayName
String
This is a name to be used to identify this particular
display. A script may create numerous different Bit
Displays.
GridNumber
Integer
This is the Grid’s ID Number. See ’scAddGrid’.
GridRow
Integer
The row in this grid to modify. Valid rows start at 1
and go to the maximum number of rows this grid
contains.
LineState
String
A string of 16 numeric characters. The first
character is the MSB. Each character may be one
of:
l "0" - No Line
l "1" - Horizontal Stub
l "2" - Full Line
l "3" - End Stub
Editable
Boolean
Set to "True" to enable bit editing. Set to "False" to
make the display read only.
This adds a bit description to the contents of a specified Bit Display created with
’scAddBitDisplay’.
372 SPU 780 01EMAN May 2002
Variable
Type
Variable Description
BitDisplayName
String
This is a name to be used to identify this particular
display. See ’scAddBitDisplay’.
BitNumber
Integer
The number from 1 to 16 of the bit to add the
description to. 1 = LSB.
BitDescription
String
The description text to add.
197
Using the Data Watch Window
scAddBitEditValue
(BitDisplayName
, BitNumber,
FirstBit, LastBit,
Description,
Value)
scAddEquation
(EquationStr,
Var1, Var2, Var3,
Var4, Var5)
198
This creates a drop-down list box for a specified bit in the specified Bit Display. This
box may be used to set a block of bits to a specific pattern associated with a
descriptive state. Only one list entry is added per call. Entries are added in
sequential order.
Variable
Type
Variable Description
BitDisplayName
String
This is a name to be used to identify this particular
display. See ’scAddBitDisplay’.
BitNumber
Integer
The number from 1 to 16 of the bit to add the
description to. 1 = LSB.
FirstBit
Integer
The first bit number in a sequence to be modified
(MSB).
LastBit
Integer
The last bit number in a sequence to be modified
(LSB).
BitDescription
String
The description of the list entry.
Value
String
The binary pattern to set the bits to. (E.g.:
"110110")
This will create a functional equation in a box. Up to 5 variables may be included.
Variable
Type
Variable Description
EquationStr
String
A string containing the equation to display. Use "A",
"B" through "E"" to denote a variable. Variables will
be mapped to the data in a Grid row. (E.g.: "A + B
= C")
Var1 through Var5
String
A string in the format "a,b,r" where a=Grid ID
Number, b=Grid Row, r=Radix: "ILDF". The radix
value specifies the radix to display the equation
data in. Integer, Long, Double, or Float. Double is
not a normal radix. It builds a concatenation of 2 16
bit data values. These will be the data values that
appear in the equation. Use "" for variables that are
not used.
372 SPU 780 01EMAN May 2002
Using the Data Watch Window
scAddErrorField
(GridNumber As
Variant, GridRow
As Variant)
This will create an error box that displays an error message. This box will only be
visible if an error condition is met. Conditions are specified using the ’scAddErrorFieldText’ function. Error conditions are a particular value contained in a particular
register. A row in a grid defines this. Only one Error Field is allowed.
Variable
Type
Variable Description
GridNumber
Integer
This is the Grid’s ID Number. See ’scAddGrid’.
GridRow
Integer
The row in this grid to modify. Valid rows start at 1
and go to the maximum number of rows this grid
contains.
scAddErrorFieldText
(DataValue As
Variant,
ErrorText As
Variant)
This adds an error condition to an error field. Any number of conditions may be
added. A condition is true is a data value equals the specified value.
scAddPages
(NumPages)
This adds a Page selection control. Only one may be specified at a time. Pages are
numbered sequentially starting at one. This is useful if an instruction has a large
amount of information to display.
scAddPicklist
(ListName,
GridNumber,
GridRow)
Variable
Type
Variable Description
DataValue
Integer
A value that corresponds to an error.
ErrorText
String
The error message to display.
Variable
Type
Variable Description
NumPages
Integer
The total number of pages to display.
This will add a drop-down list box to a specified Grid at a specified Row. This list will
allow the easy selection of specific data values for the associated address. Each
pick list must be identified by giving it a name.
372 SPU 780 01EMAN May 2002
Variable
Type
Variable Description
ListName
String
This is a name to be used to identify this particular
pick list. A script may create numerous different
pick lists.
GridNumber
Integer
This is the Grid’s ID Number. See ’scAddGrid’.
GridRow
Integer
The row in this grid to modify. Valid rows start at 1
and go to the maximum number of rows this grid
contains.
199
Using the Data Watch Window
scAddToList
(ListID, ListText,
ListValue)
scAddStaticText
(TextSting)
200
This will add a data value to a pick list created with ’scAddPickList’.
Variable
Type
Variable Description
ListID
String
This is a name to be used to identify this particular
pick list. See ’scAddPickList’.
ListText
String
Text that will be appear in the List. Usually it
describes the purpose of a data value.
ListValue
Integer
A data value that will be set if this list entry is
selected.
This will add a static block of text. This is useful for titles, instructions, or additional
information not provided by any other means.
Variable
Type
Variable Description
TextString
TextString
The text to display.
372 SPU 780 01EMAN May 2002
Using the Data Watch Window
Register Editor
Register Editor
Overview
The Register Editor allows you to view and edit data for all available addresses. This
includes all discretes as well as all input, holding and extended registers.
Note: Addresses cannot be edited since they are specified by a project’s
configuration.
Changing the
Displayed
Address Type
In the Register Editor Window task bar:
Step
1
Displaying
Extended
Memory
Addresses
Action
Select an address type (0x, 1x, 3x, 4x, 6x) option button.
Note: Extended memory addresses are defined by memory file.
In the Register Editor Window task bar:
372 SPU 780 01EMAN May 2002
Step
Action
1
Select the 6x option button from the status bar.
2
Choose an extended memory file from the File drop-down list.
201
Using the Data Watch Window
PID Tuner
PID and PID2
Blocks Overview
PID and PID2 blocks are software programming blocks that allow a process tobe
controlled with no changes or additions to hardware. "PID" stands for "Proportional
Integral Derivative". While the PID2 is a more advanced version of the PID, both
operate in the same manner.
PID/PID2 Process
Process Input
Set Point (SP)
PID
Calculation
Output Value (OP)
Process Variable
(PV)
Process
Measurement
Process Output
The PID calculation compares a process variable (PV) with a desired control point
called the set point (SP). The calculation uses the difference between the set point
and the process variable to adjust the PID output value (OV), sometimes called the
control variable. This output value is used to manipulate an input to the process so
that, eventually, the measured process variable equals the desired set point.
PID Tuner
Overview
The PID summary displays a list of all the PID and PID2 instructions in the logic of
the current project. Each row in the grid gives the instruction name, its location in
logic, and the addresses of key data values related to that PID block.
The currently selected row has an associated PID Faceplate. This faceplate allows
simple tuning of the selected PID block. You may invoke manual mode or adjust the
setpoint value.
Note: There may be a delay while a search is performed for PID instructions in
logic.
202
372 SPU 780 01EMAN May 2002
Using the Data Watch Window
Adjusting the
Setpoint Value
In the PID Summary Window:
Step
Action
1
Click the Adjust button.
2
Click and drag the slider up to increase the setpoint and down to decrease the
setpoint.
Jumping to the
Currently
Selected PID
Block in the
Logic Editor
In the PID Summary Window:
Editing PID Data
In the PID Summary Window:
Step
Select the row of the PID or PID2 instruction that you want to jump to.
2
Click the Goto button. (The Logic Editor is activated and the cursor is positioned
on the selected PID block.)
Step
Trending PID
Data
Action
1
Action
1
Select the row of the PID or PID2 you want to edit
2
Click the Tune button. The Instruction Editor is activated containing the selected
PID or PID2 instruction. Here you may edit all data values related to the
instruction.
3
Click PID Summary tab to exit the Instruction window.
In the PID Summary Window:
372 SPU 780 01EMAN May 2002
Step
Action
1
Select the row of the PID or PID2 you want to trend.
2
Click the Trend button. The Trend Window is activated showing the trend data
of the selected PID or PID2.
3
Click PID Summary tab to exit the Instruction window.
203
Using the Data Watch Window
Setting the PID
Contact
204
In the PID Summary Window:
Step
Action
1
Click the Force Input Contact check box.
Note: This overrides the contact setting by disabling the contact. Ensure that this
does not result in any safety issues.
2
The default contact setting is Auto. To toggle the contact click the Auto/Manual
button. The label on the button specifies the current state of the contact. Auto =
ON, Manual = OFF. Adjusting this disables the contact immediately in front of the
top node of this PID instruction and forces it ON or OFF.
372 SPU 780 01EMAN May 2002
Using the Data Watch Window
DRUM Summary
DRUM
Instruction
Overview
The DRUM instruction operates on a table of 4x registers containing data
representing each step in a sequence. The number of registers associated with this
step data table depends on the number of steps required in the sequence. You can
pre-allocate registers to store data for each step in the sequence, thereby allowing
you to add future sequencer steps without having to modify application logic.
DRUM incorporates an output mask that allows you to selectively mask bits in the
register data before writing it to coils. This is particularly useful when all physical
sequencer outputs are not contiguous on the output module. Masked bits are not
altered by the DRUM instruction, and may be used by logic unrelated to the
sequencer.
Drum Summary
Overview
The DRUM summary displays a list of all the DRUM, ICMP and SCIF instructions in
the logic of the current project. They are sorted by their top address. This address’
data is known as its ’Step’ value. All instructions with the same Step value appear
together on the right. All the Step values that are available appear on the list to the
left.
Each row shows the instruction name, its location in logic, and key data values
related to that block. ’Steps Used’, ’Machine ID’. and ’Profile ID’ are all editable
values.
Note: There may be a delay while a search is performed for DRUM instructions in
logic.
Selecting a Step
In the DRUM Summary window:
Step
1
372 SPU 780 01EMAN May 2002
Action
Select an address from the left panel and all applicable instructions referencing
that address will be displayed.
205
Using the Data Watch Window
Editing DRUM
Summary Data
Editing
Instruction
Address Data
Value
206
In the DRUM Summary window:
Step
Action
1
Double-click the Steps Used, Machine ID, or Profile ID cell that you want to
edit.
2
Enter a value into the cell.
3
Press ENTER to save the changes, or ESC to cancel the changes.
In the DRUM Summary window:
Step
Action
1
Select the instruction you want to edit.
2
Click the Sequencer button.
3
In the Instruction Window, double-click the Data cell that you want to edit.
4
Enter a value into the cell.
5
Press ENTER to save the changes, or ESC to cancel the changes.
6
Click the DRUM Summary tab to exit the Instruction Window.
372 SPU 780 01EMAN May 2002
Using the Data Watch Window
Importing and Exporting Data Watch Window Data
Overview
Data watch window data can be imported or exported to or from a text file. This file
may be modified with any text editor or spreadsheet program such as Notepad or
Microsoft Excel.
Importing data watch window data is only available from the data watch window
and register editor when in offline mode. Exporting data watch window data is
available when in either online or offline mode.
Importing Data
From the data watch window right-click menu:
Step
Exporting Data
Action
1
Select Data Utilities → Import Data.
2
Select a file (.txt or .csv) to import.
3
Click Open.
4
Data from every address found in the Import file is imported regardless of which
addresses are on the screen prior to the import. Any address in the Import file
that is in the configured range of the Project being imported to will have its data
imported. A progress bars displays the progress of the import.
From the data watch window right-click menu:
Step
1
Select Data Utilities → Export Data.
2
Enter a new file name or select an existing file (.txt or .csv).
3
Click Open.
4
372 SPU 780 01EMAN May 2002
Action
The data is exported as follows:
Data Watch Window (Offline) - All addresses and data values currently
shown in the data watch window are exported. If there are no addresses,
nothing is exported.
l Data Watch Window (Online) - All addresses and data values currently
shown in the data watch window are exported. If there are no addresses,
nothing is exported. Note that the exported data is a snapshot of the data
values in the PLC.
l Register Editor (Offline) - All addresses and data values for the selected
address type are exported. For example, if the 4x type is selected, all
configured 4x addresses and data will be exported.
l
207
Using the Data Watch Window
Data Formats
Data watch window data import and export file formats:
File
208
Format
.TXT - Tab Separated Variable text file.
Address <tab> Data
.CSV - Comma Separated Variable text file.
Address,Data
372 SPU 780 01EMAN May 2002
Working with the ASCII Editor
ASCII Editor
Using the ASCII
Editor
ASCII messages let your controller report information to you in plain language. Use
them, for example, if you want to see a written alert on your screen every time a
motor switches on or a printout every hour of how many items have passed by a
counter.
Use the ASCII Message Editor to enter and edit the messages you want your
controller or project to send.
Note: Use the ASCII Read Block (READ) and ASCII Write Block (WRIT) in your
ladder logic to send a message from a controller to your output device (such as a
screen, printer, or disk drive).
Configuring
ASCII Messages
Start by configuring your controller or project to use ASCII messages:
372 SPU 780 01EMAN May 2002
Step
Action
1
Confirm that your controller supports ASCII messages.
2
In the Controller Configuration Window → General Tab, configure the
controller’s ASCII parameters. (Total Messages, Message Words, and ASCII
Ports.) For more information see, Controller Configuration - General Tab.
3
Ensure your ASCII ports are configured correctly in the Ports tab of the Controller
Configuration Window. For more information, see Controller Configuration Ports Tab.
209
Working with the ASCII Editor
Message List
The message list panel contains all messages in the current project. Click a
message to edit or preview it in the Editor / Preview window.
Note: A yellow message denotes a message that has too many words.
From the right-click menu:
Editor/Preview
Window
To...
Function
Result
Cut/Copy/Paste
messages:
Select cut, copy, or paste
The message is added to the
windows clipboard and can be
pasted into any other message.
Insert a message:
Select Insert (INSERT)
Shuffles the messages up from
the selected message.
Clear a message:
Select Clear (DELETE)
Deletes all words from the
selected message.
Delete a message:
Select Delete (SHIFT+DELETE)
Deletes the selected message
and moves messages up.
Initialize all
messages:
Select Initialize
Clears all messages.
The editor window is a WYSIWYG message editor. Enter instructions into the editor
by using either the toolbox buttons or the keyboard hot keys. The preview window is
a view-only preview display of the currently selected ASCII message. To toggle
between the editor and preview windows, right-click the desired message and select
Preview or Editor.
Note: Instructions placed after a carriage return will be ignored.
Note: Do not confuse blank cells with spaces. Blank cells will be removed when
the message is saved.
210
372 SPU 780 01EMAN May 2002
Working with the ASCII Editor
ASCII Editor
Toolbox
To insert an item either click the corresponding button or press the hot-key. Items
are inserted at the cursor.
372 SPU 780 01EMAN May 2002
Tool
Description
Text Box
Up to 128 characters of text is displayed.
Button
Hot-Key
T
Binary
A placeholder for a binary field. Defined in
ladder logic using a WRIT instruction.
B
Octal
A placeholder for an octal field. Defined in
ladder logic using a WRIT instruction.
O
Integer
A placeholder for an integer field. Defined in
ladder logic using a WRIT instruction.
I
Hexadecimal
A placeholder for a hexadecimal field. Defined
in ladder logic using a WRIT instruction.
H
Leading 0
Integer
A placeholder for a leading 0 integer field.
Defined in ladder logic using a WRIT
instruction.
L
ASCII
A placeholder for an ASCII field. Defined in
ladder logic using a WRIT instruction.
A
Space
Consecutive blank spaces are displayed.
SPACE
Carriage
Return
Moves cursor to the next line.
ENTER
Repeat
A repeat is denoted by a repeat start ({) and a
repeat end (}). A repeat must have both a start
and an end.
{ - Start
} - End
Control
A control character is displayed.
CTRL
Flush
The message buffer contains a 256 byte data
field. These bytes contain data values ranging
from 00 to FF. The flush command clears all
characters form the message buffer.
BACKSPACE
Flush Num
Bytes
Removes from 1 through 255 bytes from the
beginning of the message buffer.
N/A
211
Working with the ASCII Editor
Tool
Tool Properties
212
Description
Button
Hot-Key
Flush Inclusive Clears specific groups of data from 1 to 255
times, or until a match is found. The terminator
value determines how many times the buffer is
flushed. The controller stops the buffer flushing
when it finds a match for the terminating
characters.
N/A
Flush
Exclusive
N/A
Clears the buffer until a match is found for the
terminating character pair. It does not flush the
match characters. This uses two registers. The
first register contains the type identifier and the
second contains the hex values of the
terminating pair. The hex values range from
0000 to FFFF. The controller searches for this
range in the buffer. If the second character of
the match pair is not a null (00), then the next
character in the buffer must be equal or the
search continues. If the last character test is
equal or null, the flush is performed up to but
not including the matched terminators.
Each tool has specific properties that are editable using the properties panel.
Changing a tools properties will automatically update the message editor and
preview windows.
372 SPU 780 01EMAN May 2002
Working with Macros
At a Glance
Overview
When writing logic networks, you may find yourself reusing pieces of code again and
again, changing addresses only for a few of the variables. In these cases,
subroutines might not be suitable-such as when large numbers of variables are
involved or when you want to reuse the same piece of code in different projects.
What you’re looking for is a macro.
What’s in this
Chapter?
This chapter contains the following topics:
372 SPU 780 01EMAN May 2002
Topic
Page
Macros
214
Using Macros in Logic
216
213
Working with Macros
Macros
Overview
Macros are generic pieces of logic networks you create with parameters instead of
actual addresses. Macros are programmed offline in the Logic Editor. When you
insert a macro in your main project, you map the parameters to real addresses. You
can insert the same macro in several places with different sets of mapped addresses
each time. The addresses change but the logic stays the same.
The main project retains its link to the inserted macros. This means ProWORX 32
notices if you make changes to a macro and informs you when you view it in the
Logic Editor.
Creating a Macro
Project
Editing a Macro
To create a macro project:
Step
1
Create a new ProWORX 32 offline project by selecting File → New Project from
the ProWORX menu. For more information about creating projects, see Creating
a New Project, p. 29.
2
Select the Use as a Macro checkbox and complete the remaining new project
wizard steps.
3
Once a macro project has been created it is denoted by the macro project icon,
In general, you edit a macro with the same tools as a regular project. However,
several ProWORX 32 functions are disabled when editing a macro project. Among
them are:
l
l
l
l
l
l
l
l
214
Action
Traffic Cop
Config Extensions
ASCII Functions
Extended Memory
PLC Status
I/O Drawing Generator
Analyze Device
Reading and Writing
372 SPU 780 01EMAN May 2002
Working with Macros
Using Macro
Parameters
While editing macro projects, you can assign macro parameters in place of register
addresses or symbols. These are the addresses that will change for each insertion
into the main project.
Macro parameters use this format: @txx
l The "t" represents the type of address: 0 for 0xxxx, 1 for 1xxxx, 3 for 3xxxx and 4
for 4xxxx.
l The "xx" represents the parameter number, which can be from 1 to 50.
For example, a macro parameter of @304 would represent the fourth programmable
address of the form 3xxxx. Note that @304 and @404 refer to different parameters
and are mapped to totally different addresses.
You can have a total of 200 parameters in your macro project - 50 for each address
type.
372 SPU 780 01EMAN May 2002
215
Working with Macros
Using Macros in Logic
Adding Macro
Projects to Logic
Insert macros into logic while working offline in the Logic Editor. To insert a macro
into a ProWORX 32 project:
Step
Removing Macro
Projects from
Logic
1
Select Insert → Macro from the logic editor right-click menu. The Available
Macros list appears.
2
Select a macro from the list and click OK. The Macro Parameters dialog
appears.
3
For each parameter, enter a Modicon address in the Address column.
4
When all the parameters have been mapped to Modicon addresses, click Insert.
ProWORX 32 checks each address to ensure it’s valid for the macro parameter’s
address type and range. If invalid addresses are found, you are returned to the
Macro Parameters dialog box. Otherwise, the macro’s logic is inserted into your
ProWORX 32 project and you are taken to the Macro Overview screen.
Deleting a macro from a project doesn’t erase the macro file from your hard drive it just removes an inserted macro’s logic from your main logic. To remove a macro
completely from your hard drive, first remove it from the project as described below,
then from the macro project right-click menu in the Navigation panel, select Delete.
To remove a macro from a ProWORX 32 project:
Step
216
Action
Action
1
Select the macro you want to delete and select Delete Macro from the network
navigation panel right-click menu. A confirmation dialog appears.
2
Click Yes and the macro is removed from the project.
372 SPU 780 01EMAN May 2002
Working with Macros
Logic Editor
Macro Display
Overview
The Macro Overview display appears in the Logic Editor when you move the cursor
onto an inserted macro. It also appears just after inserting a macro into a project.
This display gives the macro’s file name, description (the "Detailed Project Name"
as entered from the project properties), status, and a list of its parameters and the
Modicon addresses or symbols to which they are mapped.
The macro status can be one of two things:
l Macro has changed: The macro has been changed since it was inserted into the
main logic network. You may want to update the inserted macro to reflect the
changes made to the macro project it is linked to.
l Macro not found: The macro project file either no longer exists or has been
moved to a different directory.
Making Changes
in Macros
If you make changes to a macro project after it has been inserted into a main logic
network, you’ll have to update each copy of it within that logic network.
There may also be times when you want to make changes in logic to a single macro
insertion without changing the original macro project. In this case, you’ll have to
unlink that macro insertion. Unlinking a macro removes its connection to the original
macro project; the logic in that macro insertion becomes part of the regular main
project logic.
Once a macro insertion has been unlinked it cannot be re-linked. Changes made to
the macro project will no longer be detected by the Logic Editor.
Updating a
Macro in a
Project
In the logic editor:
372 SPU 780 01EMAN May 2002
Step
Action
1
Move the cursor onto a macro that needs to be updated. The Macro Overview
screen appears, with a status that reads "Macro Has Changed." (If the macro
status reads "Rec: xxx", where "xxx" is a series of numbers, then you don’t need
to update it.)
2
From the network navigation panel right-click menu, select Update Macro. The
macro’s logic is reinserted into the logic network.
217
Working with Macros
Unlinking a
Macro from a
Project
218
Note: Once you’ve unlinked a macro, you can’t re-link it.
Step
Action
1
While in the Logic Editor, move the cursor onto the macro you want to unlink. The
Macro Overview screen appears.
2
From the network navigation panel right-click menu, select Unlink Macro. A
confirmation dialog appears.
3
To unlink all macros, select Unlink All Macros from the network navigation rightclick menu.
4
Click Yes to confirm the unlink. The macro is unlinked and the Macro Overview
display disappears and you are returned to the Logic Editor.
372 SPU 780 01EMAN May 2002
ProWORX 32 Utilities
At a Glance
Overview
This chapter gives an in-depth look at the following ProWORX 32 Utilities:
What’s in this
Chapter?
This chapter contains the following topics:
372 SPU 780 01EMAN May 2002
Topic
Page
BM85 Setup
220
BootP Server
223
Compare Utility
226
I/O Drawing Viewer
228
The Ping Utility
229
MBP Stat
230
219
ProWORX 32 Utilities
BM85 Setup
Overview
A BM85 Bridge Multiplexer allows you to connect up to four Modbus devices or
networks of Modbus devices to a Modbus Plus network.
The BM85 Setup utility is used to configure a BM85 device. BM85 Setup can be run
as either a stand-alone application (BM85_Setup.exe in the ProWORX\32 directory)
or as a utility in the utility menu.
Working with the
BM85
Configuration
Dialog
Setting up the
BM85
220
In the BM85 Configuration Dialog;
To:
Action
Read current settings from the BM85,
Click Read from MUX.
Write configuration settings to the BM85,
Click Write to MUX.
Print configuration settings,
Click Print.
Save configuration settings to .mux file,
Click Save to File.
In the BM85 Configuration Dialog:
Step
Action
1
Select a Communications Port from the Communications Port drop-down box.
2
Enter a path and file name into the File Name box or click Browse to find a .mux
file.
3
To create a new .mux file, click Browse, navigate to the folder you want the file
to reside in and Enter a file name (*.mux) into the File Name box. When asked
if you want to create this file, click Yes. You can now edit the generic settings.
4
To retrieve and display the current settings of the BM85, click Read from MUX.
372 SPU 780 01EMAN May 2002
ProWORX 32 Utilities
Configuring the
Modbus Ports of
a BM85
Configure each of the BM85’s four ports by editing the parameters below:
Parameter
Port Type
372 SPU 780 01EMAN May 2002
Description
Selects the Modbus device that attaches to the port:
Master - Select for a master device, such as a PC
Slave - Select for a slave device, such as a PLC
Network - Select for a network of slave devices connected through a
modem
l X-Master - Select for a device in Silent Master mode
l
l
l
Address‘
Sets the address of a slave device from 1 to 247. Only available when
Port Type is Slave.
Baud Rate
Sets the speed of data transmission in bits per second. The default is
9600.
Stop Bits
Sets the number of bits at the end of a packet which prepare the
receiving device for the next packet. Either 1 or 2.
Parity
Adds a check bit to a packet to make the number of binary ones always
either odd (Odd Parity) or even (Even Parity). If Parity is set to None, the
check bit is not added. The PC and controller must use the same parity.
Default is None.
Data Mode
Selects a communications mode for the port: RTU or ASCII. Default is
RTU.
Priority
Determines the order in which the BM85 checks the ports, with 1 being
the highest priority and 4 the lowest. All ports must have different
priorities.
Link Time-out
Sets the maximum time in multiples of 100 milliseconds that the BM85
waits for slave devices to respond to commands before it sends an error
message.
Modem Booster
Determines whether the BM85 maintains a dedicated connection to a
slave device until it completes a command or transparently processes
other network traffic while it waits. This option is not available unless the
port type is set to Network. Note that this option should be set to No for
ports attached to 584 controllers operating in SAFE84 Mode.
221
ProWORX 32 Utilities
Working with
Routing Paths
Communicating
with the BM85
222
In the BM85 Configuration Dialog:
To:
Action:
Add a routing path
Select a table from the Table drop-down box, and an address
from the Address drop-down box. Enter a routing path in the
Installed Routing Path box. Click Add.
Remove a routing path
Select a routing path from the Address list box and press
DELETE or click Remove.
If you are having trouble communicating with the BM85:
Step
Action
1
Make sure the COM port selected is plugged into the BM85.
2
Make sure the port on the BM85 you are plugged into is in configure mode. Set
MODBUS Port Configuration switches on the BM85 to CONFIGURE, PORT 1,
9600 BAUD, NO PARITY, 1 STOP BIT (All off).
372 SPU 780 01EMAN May 2002
ProWORX 32 Utilities
BootP Server
Overview
ProWORX 32 supports the configuration of the IP Address of a Quantum NOE
Ethernet adapter, an ENT module or a Momentum controller via an Ethernet
network. The BootP server lets you record and configure a device’s IP Address and,
optionally, the Gateway IP Address and Sub network mask.
Using the BootP
Server
In the navigation panel, utilities tab:
Step
Action
1
Select Boot P to open the BootP Server utility.
2
To enable active pinging of devices in the list, select the Enable Active Device
Ping check box.
3
To check if there is a device at the specified IP address, click Ping. If successful,
the status field displays ‘Device found at specified IP Address’.
4
To exit the BootP Server utility, click Close.
BootP Listening
When a BOOTP client such as a PLC requires an IP address, it broadcasts a request
for an address across its Ethernet connection and through the TCP/IP network. It
continues broadcasting these requests periodically until a reply is received or a set
amount of time has passed. In the case where a PLC has a TCP/IP configuration
extension active, the information in the extension may be used to configure an IP
address if a BootP response is not received. The BOOTP Server listens for these
IP address requests and responds accordingly. The response includes an IP
address for the client. When the response is received, the client uses this new IP
as its own and may then be accessed normally through the TCP/IP network.
Using BootP
Listening
In the BootP Server utility:
372 SPU 780 01EMAN May 2002
Step
Action
1
Click Start Listening to make the BOOTP Server listen for incoming IP
requests. The BOOTP Server now responds to any BOOTP IP address requests
coming from Modicon devices.
2
Click Stop Listening and the BOOTP server ignores any incoming requests.
223
ProWORX 32 Utilities
Automatically
Checking IP
Addresses
In the BootP Server utility:
Step
1
Using the Device
List
224
Action
Click Enable Active Device Ping. This periodically pings each IP address in the
list. The status of the device located at the address is reported back in the Status
field.
Tip: Use Enable Active Device Ping when performing automatic BootP
operations. Once a BootP operation is complete, the success of the operation is
updated in the Status column in the list.
In the BootP Server utility:
Step
Action
1
To add a device to the BootP list, click New Device.
2
To remove a device from the BootP lists, select a device from the list and click
Delete Device.
3
To configure a device in the BootP list, select a device from the list and enter the
parameters into the available Device Info and Optional Parameters fields. For
parameter descriptions, see ‘Device Parameters’.
4
To have the ability to write the Gateway address and the Subnet mask to the
device, select the Write Optional Parameters check box, otherwise these
parameters are unavailable.
372 SPU 780 01EMAN May 2002
ProWORX 32 Utilities
Device
Parameters
BootP device parameter descriptions:
372 SPU 780 01EMAN May 2002
Parameter
Description
Device
Displays the description of the associated row selected in the BootP
Parameters table.
MAC Address
A 12 digit hexadecimal number uniquely identifying an Ethernet device. A
device’s MAC address cannot be changed. The MAC Address is on a label
(currently marked as the "IEEE GLOBAL ADDRESS") on each Schneider
Ethernet device.
IP Address
A logical 32-bit address used to identify a TCP/IP device. Each IP address
has two parts: the network ID and the host ID. The network IP identifies all
hosts (devices) that are on the same physical network. The host ID
identifies a specific host on a network. Each computer that runs TCP/IP
requires a unique IP address.
The IP Address may be available from or assigned by your network
administrator.
Status
The existing condition of the ping:
l Device Found: ProWORX 32 has found a Schneider device with this
MAC address and IP address
l Device not found: ProWORX 32 could not find a Schneider device with
this MAC address and this IP address.
Subnet Mask
Used to mask a portion of the IP address so that TCP/IP can distinguish
the network ID from the host ID. TCP/IP hosts communicate by using the
subnet mask to determine whether the destination host is located on a
local or remote network.
The Subnet Mask may be available from or assigned by your network
administrator.
Gateway
For communication with a host on another network, an IP host must be
configured with a route to the destination network. If a configured route is
not found, the host uses the gateway to transmit the traffic to the
destination host. The default gateway is where the IP sends packets that
are destined for remote networks. If a default gateway is not specified,
communications are limited to the local network.
The Gateway may be available from or assigned by your network
administrator.
225
ProWORX 32 Utilities
Compare Utility
Overview
ProWORX 32’s Compare function finds differences in logic and configuration
between a project and a controller or between two projects or between two
controllers. This powerful tool lets you be sure that your controllers are using the
right logic and are configured properly, and that a local project is the same as your
operation’s master project.
The compare function examines any or all of these elements:
Networks
Using Compare
Controller configuration
Coil state - Up to four ranges, each range 1 - 1600
DX instructions
Input state - Up to four ranges, each range 1 - 256
Traffic cop
3xxxx registers - Up to four ranges, each range 1 - 99
Segment Scheduler
4xxxx registers - Up to four ranges, each range 1 - 1800
ASCII port parameters
Coil disable - Up to four ranges, each range 1 - 1600
ASCII messages
Input disable - Up to four ranges, each range 1 - 256
In the utilities menu, select Compare:
Step
226
Coils used - Up to four ranges, each range 1 - 1600
Action
1
To view all of the elements, click Advanced.
2
To compare an element, select its checkbox. To compare all elements, click
Toggle.
3
To view the master databases existing compare report, select View Report.
4
To compare two projects, click Compare Browse and select a project from the
Master Project list. Click To Browse and select a project from the Compare
Project list. Deselect both Online checkboxes and click OK.
5
To compare a project and controller, follow step 4 but select the To, Online
check box.
6
To compare two controllers, follow step 4 but select the Compare, Online and
To, Online check boxes.
7
To run the compare, click OK.
372 SPU 780 01EMAN May 2002
ProWORX 32 Utilities
Using the
Compare Report
After selecting OK in the compare utility:
Step
1
2
Action
After clicking OK to run the compare from the compare setup menu, the compare
report is displayed in your default browser.
- Elements match.
- Element mismatch.
- Element compare not applicable.
- Element not compared.
372 SPU 780 01EMAN May 2002
3
For elements that are mismatched, click the text link to see mismatch element
details.
4
To print the compare report select File → Print from the compare index page.
To include the whole report select the Print all linked documents under the
Options tab in the Print dialog. Click Print.
227
ProWORX 32 Utilities
I/O Drawing Viewer
Overview
The drawings are in a .DXF format that is supported by most CAD programs. The I/
O Drawing Generator uses the master .DXF drawings to create I/O drawings based
on the I/O Configuration and Documentation information. Once the final .DXF
drawings are created, they can be imported using your CAD program.
This dialog box displays the I/O drawing for the current card. It also allows you to
print the displayed portion of the current .DXF drawing using the default Windows
printer settings. Several options are available to allow you to view your drawings.
Pan allows you to scroll the view of the drawings displayed in much the same way
as Autocad. Zoom allows you to zoom in on a selected section of the drawing. Zoom
Out takes you back to display the complete .DXF drawing.
Using the I/O
Drawing Viewer
228
From the Navigation panel, Utilities menu:
Step
Action
1
Select I/O Drawing Viewer to open the I/O drawing viewer.
2
To pan across the drawing, click Pan. Click the location you want to begin your
pan view. Drag the cursor to another location in the drawing and release the
mouse button. The view pans from the start location to your end location.
3
To zoom into the display, click Zoom. Click at the start location where you want
to begin your zoom. Drag your cursor to mark the area. A rectangle appears to
define the section of drawing you want to zoom in on. Release the mouse button.
4
To zoom out of the display, click Zoom Out.
5
To select a different .DXF drawing, from the I/O Drawing Display window, click
Open. The File Open dialog box appears. Select the .DXF to display, then click
OK.
6
To print a drawing, from the I/O Draw Display window, click Print. The drawing
is printed to your default printer.
7
To save the I/O drawing in another format, click Save As.
372 SPU 780 01EMAN May 2002
ProWORX 32 Utilities
The Ping Utility
Overview
Ping is a TCP/IP utility for testing a given IP address. The address is checked to see
if a device exists for it. If the address exists, the Ping is successful and a round trip
time (ms) is returned. If the ping fails, an error response will be given. This will help
diagnose problems with the TCP/IP communications as well as determining a
devices existence. Ping options are saved to the ProWORX .INI file.
Using the Ping
Utility
From the navigation tree utilities tab:
372 SPU 780 01EMAN May 2002
Step
Action
1
Select Ping.
2
Enter the IP address to ping in the IP Address to Ping box.
3
Click Ping to perform a ping. The status of the ping attempt is displayed in the
Return Status field and if successful, the ping time is displayed in the Round Trip
Time field.
4
Click Close to exit the ping utility.
229
ProWORX 32 Utilities
MBP Stat
Overview
To access device status and diagnostic tools, select one of the following items from
the device right-click menu:
Status and
Diagnostic Tools
Tool Tabs
Bus Status (CTRL+B)
Description
Used to obtain network status of nodes on the
network.
Active station
table
Active nodes on the network are highlighted.
Note: The node that the cursor is on is not
highlighted.
Token station
table
Nodes on the network that are receiving and passing
the token are highlighted. The Token Rotation Time
and Token Pass Counter are also displayed.
Note: The node that the cursor is on is not
highlighted.
Global data
station table
Nodes that are sending global data to the selected
node are flashing if the selected node is configured to
receive global data from the nodes.
Network Statistics (CTRL+N)
Obtain statistics for the node on which the cursor is
located.
Personality
Node information, such as type, address, version and
communication state, is displayed.
Error counter
Communication information and errors for the
selected node are displayed.
Receive buffers When the node selected is receiving specific input
from other nodes on the network, the number of
receive buffers in use is flashing.
Transactions
The number of data transactions for the 8 data paths
of the selected node:
l DM - Data master
l DS - Data slave
l PM - Programming master
l PS - Programming slave
Work-to-do
The type of programming and/or data activity for the 8
data paths of the selected node is displayed. A
flashing square indicates data activity.
Read Global Data (CTRL+G)
230
The global data being transmitted for the selected
node is displayed. The data can be viewed in HEX,
DEC signed or DEC unsigned format.
372 SPU 780 01EMAN May 2002
ProWORX 32 Utilities
Status and
Diagnostic Tools
Tool Tabs
Description
CPU status (CTRL+U)
CPU firmware, hardware revisions, and crash codes
are displayed. From here you can access the CPU
Status words.
Adapter statistics (CTRL+A)
CPU firmware, hardware revisions, and crash codes
are displayed. From here you can access the CPU
Status words.
Note: The Refresh slider allows you to set the rate at which the data is updated.
To stop communications with the selected device, click Stop. To begin
communications with the selected device, click Start.
372 SPU 780 01EMAN May 2002
231
ProWORX 32 Utilities
232
372 SPU 780 01EMAN May 2002
ProWORX 32 Reporting
Reporting
Overview
The ProWORX 32 reporting feature allows you to print many aspects of your project
to a file or printer. Reporting is a very powerful tool, which can be used to extract
information from your project into a printed document.
Using the
Printing Menu
From the ProWORX 32 menu:
372 SPU 780 01EMAN May 2002
Step
Action
1
Select File → Print to send the currently selected documentation to the printer.
2
Select File → Print Preview to view the current report as it will be printed.
3
Select File → Print Setup to edit the content and documentation that will make
up the report.
233
ProWORX 32 Reporting
Quick Picks
Quick picks are pre-defined sets of reporting options. Select an option in the quick
pick list box to get a pre-selected list of options for reporting. Choose an option in
the list box and the respective report options will be automatically selected.
The options are as follows:
Using the
Reporting Setup
234
Quick Pick
Description
Turn off all options
All report options are deselected.
Turn on all options
All report options are selected.
All networks
All settings within the Networks report option are selected.
Everything but networks
All settings within all report options are selected except the
Networks report option.
All documentation tables
All settings within the Descriptor Ranges option and
Documentation Tables options are selected.
All controller tables
All settings within the Configuration Tables, Traffic Cop,
Register Content Ranges, and Used Tables report options are
selected.
All used tables
All settings within the Used Tables report option are selected.
All mismatch tables
All settings within the Mismatch Tables report option are
selected.
After opening the reporting setup dialog (Step 3 in ‘Using the printing menu’):
Step
Action
1
Select the report options that you want to include in the report, from Networks,
Descriptor ranges, Documentation tables, Configuration tables, Traffic cop,
Register content ranges, Used tables, and Mismatch tables, by clicking the
corresponding check box.
2
Set the parameters within each report option that you have selected. (To see
further details pertaining to each report option, see below.)
3
To select all parameters, or deselect all parameters within a report option, click
Toggle All.
4
To save the current report options, click Save Settings.
5
To preview the report as it will be printed, click Print Preview.
6
When you are finished setting the report options, click Close.
372 SPU 780 01EMAN May 2002
ProWORX 32 Reporting
Networks
After selecting Networks from the report options list:
Step
1
Descriptor
Ranges
Documentation
Tables
Action
Select which networks that are to be printed by typing the numeric range of
networks in the Print Networks box. To select all networks enter "All". To select
no networks enter ‘None’.
2
Select whether you want One Network per Page or Two Networks per Page.
3
If you select One Network per Page, you can then select Cross References to
print all of the cross references that are associated with the particular network,
Network Long Comment to print long comments for the particular network.
After selecting Descriptor Ranges from the report options list:
Step
Action
1
Enter the range of descriptors to be printed for each address type. Valid entries
include: "1-100", "None", and "All".
2
Select Items Used in Logic to print addresses used in logic.
3
Select Items with Descriptions to print addresses that have descriptions.
4
Select All Items to print all coils. This includes all items used in logic and items
with descriptions.
After selecting Documentation Tables from the report options list:
Step
1
372 SPU 780 01EMAN May 2002
Action
Select any combination of the following documentation check boxes:
Log Book / Audit Trail
Symbol Table
Page Titles
Short Comments
Long Comments
Cross References
l
l
l
l
l
l
235
ProWORX 32 Reporting
Configuration
Tables
After selecting Configuration Tables from the report options list:
Step
1
Traffic Cop
1
236
Action
Select any combination of the following traffic cop check boxes:
Drop Summary
Rack Overview
Slot Summary
Descriptors
Symbols
Cross References
Short Comments
l
l
l
l
l
l
l
After selecting Register Content Ranges from the report options list:
Step
1
Address Used
Tables
Select any combination of the following configuration tables check boxes:
Configuration
Segment Scheduler
ASCII Messages
Config Extensions
l
l
l
l
After selecting Traffic Cop from the report options list:
Step
Register Content
Ranges
Action
Action
Enter a range of register contents to print in the address (3xxxx, 4xxxx, and
6xxxx (file 1 - 10)) boxes. Valid entries include: "1 - 100", "None", and "All".
After selecting Used Tables from the report options list:
Step
Action
1
Select whether you want a Brief or Full printout of the addresses used in logic.
2
Select the check boxes of the addresses you want to include in the report from:
0xxxx, 1xxxx, 3xxxx, and 4xxxx.
3
Click the Disable References check box to include the addresses that have
been disabled in logic.
372 SPU 780 01EMAN May 2002
ProWORX 32 Reporting
Mismatch Tables
After selecting Mismatch Tables from the report options list:
Step
372 SPU 780 01EMAN May 2002
Action
1
Select which addresses that have descriptors, but are not used in logic that you
want to include in the report by clicking the 0xxxx, 1xxxx, 3xxxx, and 4xxxx check
boxes under the Described But Not Used In Logic heading.
2
Select which addresses that are used in logic, but do not have descriptors that
you want to include in the report by clicking the 0xxxx, 1xxxx, 3xxxx, and 4xxxx
check boxes under the Used In Logic But Not Described heading.
237
ProWORX 32 Reporting
238
372 SPU 780 01EMAN May 2002
ProWORX 32 Server
At a Glance
Overview
The ProWORX 32 server (see Overview, p. 35) is the repository for projects, the
center for security, and a hub for communications.
What’s in this
Chapter?
This chapter contains the following topics:
372 SPU 780 01EMAN May 2002
Topic
Page
Using the ProWORX 32 Server
240
Audit Trail
243
239
ProWORX 32 Server
Using the ProWORX 32 Server
Logging on to
the ProWORX 32
Server
From the Windows start menu:
Step
1
Setting the
Server
Communications
Working with
Projects
Select Programs → ProWORX 32 → ProWORX Server
2
Enter the user name given to you by the system administrator in the Name field.
3
Enter your password in the Password field.
4
To logout of the ProWORX server, select File → Logout. To re-login, select File
→ Login.
5
Click Close to exit ProWORX 32 Server.
In the ProWORX Server menu:
Step
Action
1
Select File → Set Server Communications.
2
Select communications type from TCP/IP, MBP Adapter 0, and MBP Adapter
1 that the server uses to communicate with the clients.
3
If you have selected TCP/IP, enter the appropriate TCP/IP port number in the
TCP/IP Port Number field.
4
Click OK. To make the communications changes you must restart the ProWORX
32 Server.
Select the Projects tab:
Step
1
2
3
240
Action
Action
Select a project from the project tree. In the Project Info pane you will find:
Project Name
Project Status - Checked out by username or Not checked out
l
l
Click View Project Details to see further project information:
Project Name (Long) - A more descriptive project name
Project Description - A detailed description of the project
Client - The end-user of the project
Author - The author of the project
Controller Type
Controller Address - Communications type and address
l
l
l
l
l
l
Click View Audit Trail to view the transaction history of the project.
372 SPU 780 01EMAN May 2002
ProWORX 32 Server
Creating
ProWORX 32
Users
Creating
ProWORX 32
User Groups
Working with
ProWORX 32
Users and User
Groups
Select the Users tab:
Step
Action
1
Click Add User. The Add User dialog appears.
2
Enter the new users name in the User Name field.
3
Enter a distinct password in the Password field.
4
Click OK to confirm the new user.
5
To edit a user name or user password, click Edit User. To delete a user, click
Remove User.
Select the Users tab:
Step
Action
1
Click Add Group. The Group Rights dialog appears.
2
Enter the name of the new group in the Group Name field.
3
Select Administration Rights for the group.
4
Select Project Rights for the group.
5
Click OK to save the new group.
6
To edit a group name or group rights, click Edit Group Rights. To delete a
group, click Remove Group.
Select the Users tab:
372 SPU 780 01EMAN May 2002
Step
Action
1
To add a user to a user group, select a user from the Users list, select a group
from the User Groups list and click Add User to Group.
2
To remove a user from a user group, select a user from the User Groups list and
click Remove User From Group.
241
ProWORX 32 Server
User Rights
The Status Tab
242
User rights descriptions:
User Rights
Descriptions
Controller Configuration
The ability to change the controller configuration, or change
controller type.
Traffic Cop Editor
The ability to edit in the traffic cop.
Communications Setup
The ability to change the communications setup including the
controller’s address.
Logic Editor
The ability to edit logic.
Forcing
The ability to force contacts and coils.
Insert
The ability to insert cells, rows, columns, and networks.
Delete
The ability to delete cells, rows, columns, and networks.
Sweep
The ability to enter sweep mode.
Data Editors
The ability to enter any of the data editors, If deselected, the
user is unable to change register data.
Extended Memory
The ability to edit extended memory registers.
Configuration Extensions
The ability to edit the configuration extensions.
ASCII Messages
The ability to edit the ASCII messages.
Documentation Editor
The ability to change any of the documentation.
Read
The ability to read from the controller.
Write
The ability to write to the controller.
Start/Stop
The ability to start or stop the controller.
Clear Audit Trails
The ability to remove all audit trail and logbook entries.
Get Projects
The ability to get projects from the server.
Put Projects
The ability to put projects to the server.
The Status tab displays the following project information:
l User - The client currently logged in to the ProWORX Server
l Transfer Type - The type of transfer being performed (Data or File)
l Description:
l File - The file name and lock status
l Data - The data type
l Progress:
l File - A progress number or ‘Done’
l Data - The number of packets transferred
372 SPU 780 01EMAN May 2002
ProWORX 32 Server
Audit Trail
Overview
The audit trail keeps a record of project transactions between the ProWORX 32
client and ProWORX 32 server. Each transaction is stored as an entry in the audit
trail. Audit trail comments can be added to each record when putting a project to the
server.
Using the Audit
Trail
In the project navigation tree:
Step
Action
1
From the project right-click menu, select Audit Trail.
2
To view a specific transactions information, select a transaction from the list in
the navigation panel.
Transactions list:
l User - Who made the changes to the current transactions.
l Date and Time - When the transaction was completed.
l Changes Made - ProWORX 32 areas that were changed from the previous to
current transaction.
l User Comments - Any notes or comments that the user has entered when
putting the project to the server.
You can also navigate through the transactions by clicking the standard
navigation buttons at the top of the window.
3
To hide or view the navigation panel, click the view tree button
372 SPU 780 01EMAN May 2002
.
4
To clear all audit trail from transactions from the audit trail, click Clear Audit
Trail.
5
To print the current audit trail, click Print.
6
When you are finished, click Close to return to ProWORX 32.
243
ProWORX 32 Server
244
372 SPU 780 01EMAN May 2002
Schneider Alliances
At a Glance
Overview
Schneider Alliances is a third-party utility used by Schneider Alliances partners to
add or modify I/O cards.
What’s in this
Chapter?
This chapter contains the following topics:
372 SPU 780 01EMAN May 2002
Topic
Page
Using the Schneider Alliances Tool
246
Using the Script Editor
249
Using Script Editor Controls
252
245
Schneider Alliances
Using the Schneider Alliances Tool
Adding an I/O
Card
Editing an I/O
Card
Editing an I/O
Card Parameter
246
After opening Schneider Alliances:
Step
Action
1
Select an I/O system from the I/O System drop-down list box.
2
Click Add. (Certain default values are entered into the parameter list.)
3
Edit the parameters to match the card you are adding.
4
Click Update to save the new data, or click Cancel to remove the new data and
start over.
From the Schneider Alliances default screen:
Step
Action
1
Select an I/O system from the I/O System drop-down list box.
2
Select an existing card from the Card drop-down list box. (The current card data
is entered into the parameters list.)
3
Click Edit.
4
Edit the parameters you wish to update. (See Editing an I/O Card Parameter.)
5
Click Update to save the new data, or Cancel to undo the changes you have
made.
While adding or editing an I/O card:
Step
Action
1
Press ENTER or click the Value column of the desired parameter. (The selected
parameter will now be editable.)
2
Type a valid value or select a value from the drop-down list. (Some parameters
require you to click the ellipsis box for further configuration.)
3
Press ENTER to accept the new parameter, or ESC to cancel the change.
372 SPU 780 01EMAN May 2002
Schneider Alliances
Using the MCS
Simple 2 Editor
Using the Default
Parameter Data
Editor
After clicking the ellipsis box in the MCS Simple 2 parameter:
Step
1
Double-click the ’1’ or ’0’ to toggle a bit.
2
Click the Save button to save changes back to the main grid, or click Cancel to
return the main grid without updating any changes.
After clicking the ellipsis box in the Default Parameter Data parameter, the Data
Values dialog opens, showing the current number of rows in the Number of
Parameters Used parameter, and the current value in the Default Parameter Data
parameter. To edit the contents of a row, simply double-click the cell you want to
edit, and enter a Hex value. Use the following functions to further edit the parameter:
Function
I/O Card
Parameters
Action
Action
Comment
1
Click Add.
A blank cell is added to the end of the
grid.
2
Click Remove.
The currently selected row is deleted,
and the cells below are shuffled up.
3
Click Move Up.
The contents of the currently selected
cell are moved up one cell.
4
Click Move Down.
The contents of the currently selected
cell are moved down one cell.
Parameters list:
372 SPU 780 01EMAN May 2002
Parameter
Description
Card ID
Hex Value. The Unique Modicon ID for each card of an I/O series.
INTERBUS ID
Hex Value. The INTERBUS S ID of a card.
Drop Allowed
Momentum Only. Defines whether or not a Momentum CPU supports a
non-local, INTERBUS S drop.
Card Description
Description of the currently selected I/O card. This is used throughout
ProWORX 32 to pick, edit, and add I/O cards. Maximum ten characters.
Medium
Description
Text description displayed in the Traffic Cop when editing slot properties
of a card.
Long Description
A more detailed description of the card.
Power
The amount of power used by the card in the rack.
Power (+5)
Number of mA used by card at this power rating.
Power (+4.3)
Number of mA used by card at this power rating.
Power (-5)
Number of mA used by card at this power rating.
247
Schneider Alliances
Parameter
Description
Number of
Parameters Used
The number of Card config parameters that are used by default.
Default Number of The available number of parameter words by default.
Parameters
In Bytes
The number of input bytes used by the card.
Out Bytes
The number of output bytes used by the card.
In Bytes (IBus)
Momentum Only. Defines the number of input bytes for an INTERBUS
card.
Out Bytes (IBus)
Momentum Only. Defines the number of output bytes for an INTERBUS
card.
Module Type
Defines the type of card. Discrete, Analog, or Analog with no discretes
allowed.
Doc Only
Certain cards are not programmed into the controller memory, but are
still displayed in the traffic cop. These cards are documentation only
cards.
MCS Simple 1
Type of hardware module.
MCS Simple 2
Defines behavior of card.
See: Using the MCS Simple 2 editor.
Default Parameter The value of the card config words by default.
Data
Rack View Bitmap The bitmap displayed in the Traffic Cop rack View.
Drop View Bitmap The bitmap displayed in the Traffic Cop in Drop view.
248
Extra Bus Info
Momentum Only. One word that defines extra information for an
INTERBUS Drop.
Script Data
The WYSIWYG card config editor.
372 SPU 780 01EMAN May 2002
Schneider Alliances
Using the Script Editor
Overview
Schneider Alliances Script Editor is a WYSIWYG property based editor used to
create card configuration scripts. The VB Script file used by ProWORX 32 to display
card configuration is automatically created by the card configuration editor. These
scripts are used by ProWORX 32 to configure optional card parameters in the Traffic
Cop.
Adding a Control
to the Grid
From the script editor dialog:
372 SPU 780 01EMAN May 2002
Step
Action
1
Click a control in the ToolBox panel to add it to the grid.
2
Set the properties for the control.
Tip: To most effectively set your control, select the controls container in the
Container property first. This will move the control onto the desired frame.
3
Place the control by clicking the controls center selection handle, and holding
and dragging the control to the desired location.
4
Resize the control by clicking and dragging the controls perimeter selection
handles to the desired size.
249
Schneider Alliances
Common
Properties
Using the Event
Editor Dialog
Common control properties:
Property
Description
Left
The left-most part of the control in twips.
Note: For reference, there are 1440 twips per inch.
Top
The topmost part of the control in twips.
Width
The width of the control in twips.
Height
The height of the control in twips.
Caption
The text display related to the control.
Container
The container is the object that the control is anchored to.
Note: You can anchor a control to either the form (pbEditor) or to any frame.
When a control is anchored to a frame, the controls positional variables (Left
and Top) are relative to the anchor, not to the form.
StartBit
The first bit in a range of bits to edit.
EndBit
The last bit in a range of bits to edit.
Word
The word number you want to edit.
Note: To add a control that whose data value has no consequence to a word,
set the Word property to 0. The word list is 1-base.
Event
This is a portion of script that will execute when the value of the control is
changed.
The event of a control is executed when the data value of the control changes. The
event script allows you to enter VB script code to manipulate controls. The event
script editor will do minor error checking for syntax mistakes. The gird has a unique
Initialize function which is executed when the form is opened. Using events you can
hide controls using the .visible property, enable and disable controls using .enabled
and many other standard VB functions.
After clicking the ellipsis box in the Event property of a control:
250
Step
Action
1
Enter VB script code into the event window.
2
When finished, click OK to return to the script editor. Certain errors will be caught
by the event script editor and there will be an error message if any errors exist.
Certain errors will not be detected by the editor though and the I/O card’s script
will not be functional in the traffic cop.
To cancel your changes and return to the script editor, click Cancel.
372 SPU 780 01EMAN May 2002
Schneider Alliances
Editing
Parameter Data Card Config
Words Using
Controls
Editing Card
Config Word
Data Example
In the properties panel:
Step
Action
Comment
1
Select the control that will be used Valid controls are: Radio Buttons, Check
to edit a word.
Boxes, Data Edit Boxes, and Combo Boxes.
2
Select a word from the drop-down The word numbers correspond with the
list in the Word property.
Default Parameter Data words. 1 is the first
word, 2 is the second word, and so on.
3
Enter a bit number into the
StartBit property.
This is the first bit in a range of bits to be
edited. Valid bit numbers are 1 through 16.
4
Enter a bit number into the
StartBit property.
This is the last bit in a range of bits to be
edited. Valid bit numbers are 1 through 16.
Word ones current value is 10101010 - 10101010 (43690 decimal). A controls
properties are set as follows:
l
l
l
l
Word = 1
StartBit = 9
Word = 16
Data value of the control = 15
When the card config dialog is saved, word ones new value is 10101010 - 00001111
(43535 decimal). Notice, bits 9 through 15 (00001111) are equal to 15 which is what
the properties had specified.
372 SPU 780 01EMAN May 2002
251
Schneider Alliances
Using Script Editor Controls
Frame
Frames are used to enclose and group related controls. Scripts allow multiple layers
of frames to be added on top of each other. After a frame has been added to a grid
or previous frame, any of the available controls can be contained by (anchored to)
that frame.
Radio Button
Radio buttons are used on the grid or on a frame to display a limited set of options.
Only one radio button in a container can be selected at a time.
Control-specific properties:
Check Box
Property
Description
Data
The value that the bits are set to if the radio button is selected.
Check boxes are used on the grid or on a frame to display either/or options.
Control-specific properties:
Property
Description
DataChecked
The value that the bits are set to if the check box is checked.
DataUnchecked
The value that the bits are set to if the check box is unchecked.
Label
Most often used as a label for a combo box or a data edit box control, labels can be
used for on-screen instructions, as well as further detail or descriptions.
Combo Box
The combo-box is used when there are a set number of selections you want the user
to be able to choose from. Each item in the list has a corresponding data value.
Control-specific properties:
252
Property
Description
List
The list property provides an ellipsis box which when clicked opens up a
Combo Box Configuration dialog. The combo box configuration dialog
allows you to enter the contents and related values of the items in the list
box.
372 SPU 780 01EMAN May 2002
Schneider Alliances
Creating a List
for the Combo
Box
Data Edit Box
In the combo box configuration dialog:
Function
Action
1
To add an item to the list, Click Add.
2
Edit the Combo List Item and Item Data fields by double-clicking on the cell.
3
To move the item within the list, click Move Up and Move Down.
4
To remove an item, click Remove.
5
To save the items and data and return to the script editor, click OK. To cancel
changes and return to the script editor, click Cancel.
Data edit boxes are used on the grid or on a frame to allow the user to enter any
valid value. Valid values are determined by which radix is set for the data edit box.
For example, if ‘Binary’ is selected in the radix property, only ones and zeros are
valid data, and the value can only have a length of 16 characters.
Control-specific properties:
Property
Description
Radix
The mode of the edit box. Available options are Decimal, Binary, Hexadecimal,
ASCII, and Long.
Notes:
l All radices are have a 16-bit limit except Long, which has a 32-bit limit.
l A ‘Long’ data type will overwrite the word that is selected in the Word property
of the data edit box as well as the next word in the order that they are set in
the Default Parameter Data property of the I/O card.
l It is not recommended that you put a long data value in the last word. If the
last word is selected in the Word property, the ‘Long’ data value will be
truncated and put into the last word. This may alter the results you expected
significantly.
Command
The command button is a seldom used control but can be very useful for batch
processes. For example, you can have a button that will check or uncheck a group
of check boxes, or a button that would clear all fields in a group.
Time State
Properties
The time state property control is different from other controls in that it is a toggle
edit combo box. It is used to edit parameters of cards that are actually not passed
as data words. Namely, when editing the time-out state of a card, you would use a
timestate drop-down to set the parameter to "User Defined" or to "Last Value".
372 SPU 780 01EMAN May 2002
253
Schneider Alliances
254
372 SPU 780 01EMAN May 2002
Appendices
At a Glance
Overview
These appendices provide information on the I/O cards supported by ProWORX 32
and troubleshooting tools and resources.
What’s in this
Appendix?
The appendix contains the following chapters:
Chapter
A
372 SPU 780 01EMAN May 2002
Chapter Name
Page
I/O Cards
257
B
Troubleshooting
271
C
Editing .DIF Files with Microsoft Excel
303
255
Appendices
256
372 SPU 780 01EMAN May 2002
I/O Cards
At a Glance
Overview
This appendix lists the I/O cards supported by ProWORX 32 for the following I/O
series:
What’s in this
Chapter?
This chapter contains the following topics:
372 SPU 780 01EMAN May 2002
Topic
Page
800
258
A120
261
Compact TSX
263
Micro
265
Momentum M1 and INTERBUS
266
Quantum
267
Sy/Max
270
257
I/O Cards
800
800 Series Cards
258
I/O cards supported (in alphabetical order):
Card
Description
Card
Description
B802-008
115 VAC 8 Point Output
Module
B872-002
4-20 mA,1-5V 4 Channel
Analog Output
B803-008
115 VAC 8 Point Input Module B872-011
Selectable 4 Channel Voltage
Output
B804
16 Point Output Module
B872-100
4-20mA 4 Channel Current
Output Module
B804-016
115 VAC 16 Point Output
Module
B872-200
Selectable 4 Channel Voltage
Output
B804-116
115 VAC 16 Point Output
Module
B873-001
4-20mA,1-5V 4 Channel
Analog Input
B805-016
115 VAC 16 Point Input
Module
B873-002
4-20mA,1-5V 4 Channel
Analog Input
B806
32 Point Output Module
B873-011
-10 V to 10 V 4 Channel Analog
Input
B806-032
115 VAC 32 Point Output
Module
B873-012
-10 V to 10 V 4 Channel Analog
Input
B806-124
24 VAC 32 Point Output
Module
B873-200
V/A, Thermo, RTD, Strain
Gauge Input
B807
32 Point Input Module
B875-001
4-20mA, 1-5V 8 Channel
Analog Input
B807-032
115 VAC 32 Point Input
Module
B875-002
4-20mA, 1-5V 8 Channel
Analog Input
B807-132
115 VAC 32 Point Input
Module
B875-011
-10 V to 10 V 8 Channel Analog
Input
B808-016
230 VAC 16 Point Output
Module
B875-012
-10 V to 10 V 8 Channel Analog
Input
B809-016
230 VAC 16 Point Input
Module
B875-101
Fast selectable 8 Channel
Analog Input
B810-008
115 VAC 8 Isolated Output
Module
B875-102
Fast selectable 8 Channel
Analog Input
B814
8 Point Output Module
B875-111
Select. 8 channel Differential
Input
B814-001
NO Power Relay 8 Point
Output Module
B875-200
V/A, Thermo, RTD, Strain
Gauge Input
372 SPU 780 01EMAN May 2002
I/O Cards
372 SPU 780 01EMAN May 2002
Card
Description
Card
Description
B814-002
NC Power Relay 8 Point
Output Module
B877-111
Select. 16 channel Single
Ended Input
B814-108
NO/NC Power Relay 8 Point
Output Module
B881
Input/Output Module
B817
16 Point Isolated Input Module B881-001
24 VDC 16 Point Latched Input
(TrueHigh)
B817-116
115 VAC 16 Point Isolated
Input Module
B881-108
115 VAC 8 Point Protected
Output Module
B817-216
230 VAC 16 Point Isolated
Input Module
B881-508
125 VDC 8 Point True High
Output Module
B818-032
24 VDC 32 Point Output (True
High)
B882-032
24 VDC Diagnostic Output
Module
B819-032
230 VAC 32 Point Input
Module
B882-239
0-30 kHz 2 High Speed UpCounter Module
B820-008
10-60 VDC 8 Point Output
(True High)
B883
Input/Output Module
B821
8 Point Input Module
B883-001
0-50 kHz 2 High Speed UP/
Down Counter
B821-008
10-60 VDC 8 Point Input (True B883-101
High)
4 kHz CAM ABS Encoder
Input,8 Disc Out
B821-108
10-60 VDC 8 Point Input (True B883-111
High)
1 kHz CAM with Velocity
compensation
B824-016
24 VDC 16 Point Output (True
High)
B883-200
10 Thermocouple Input
Module
B825-016
24 VDC 16 Point Input (True
High)
B883-201
8 RTD Input Module
B826-032
24 VDC 32 Point Output (True
High)
B884-002
2 Loop, PID Control Module
B827-032
24 VDC 32 Point Input (True
High)
B885
Main Module
B828-016
5V TTL 16 Point Output
B885-002
ASCII/BASIC Module
B829-116
5V TTL 16 Input (Fast
Response)
B885-100
Motion Module
B832-016
24 VDC 16 Point Output (True
Low)
B885-110
Motion Module
B833-016
24 VDC 16 Point Input (True
Low)
B886-000
High Speed Logic Solver
259
I/O Cards
260
Card
Description
Card
Description
B836-016
12-250 VDC 16 Point Output
Module
B887-000
12 Register Bidirectional
B837-016
24 VAC/DC 16 Point Input
(True High)
B888-100
Datalogic CM1000 AutoID
interface
B838-032
24 VDC 32 Point Output (True
High)
D908-110
Distributed Control Single
B840-108
NO/NC Reed Relay 8 Point
Output Module
D908-120
Distributed Control Dual
B842-008
NO/NC Reed Relay 8 Point
Output Module
J890-001
RIO Single
B846
Analog MUX Module
J890-002
RIO Redundant
B846-001
Analog MUX (16 voltage to
one output)
J892-001
RIO ASCII Single
B846-002
Analog MUX (16 current to
one output)
J892-002
RIO ASCII Redundant
B849-016
48 VAC/DC 16 Point Input
Module
P800-003
Power Supply
B853-016
115 VAC/125 VDC 16 Input
(True High)
P802-001
Power Supply
B855-016
12 VDC 16 Point Input (Intr.
Safe)
P810-000
Power Supply
B862-001
4 Channel Register Output
(TTL Level)
P830-000
Power Supply
B863
4 Channel Register Input
P840-000
Power Supply
B863-001
4 Channel Register Input (TTL P884-001
Level)
Power Supply
B863-032
4 Channel Register Input (TTL P890-000
Level)
Power Supply
B864-001
8 Channel Register Output
(TTL Level)
Power Supply
B865-001
8 Channel Register Input (TTL S908-110
Level)
RIO Processor Single
B868-001
8 Channel Register Output
(TTL Level)
S908-120
RIO Processor Dual
B869-001
8 Channel Register Input (TTL S911-800
Level)
Hot Standby Module
B872
4 Channel Analog Output
P892-000
372 SPU 780 01EMAN May 2002
I/O Cards
A120
A120 Series
Cards
I/O cards supported (in alphabetical order):
372 SPU 780 01EMAN May 2002
Card
Description
Card
Description
ADU 204
4 Channel Register Input (+/0.5V)
DEP 208
230 VAC 8 Point Input Module
ADU 205
4 Channel Register Input (+/10V)
DEP 209
120 VAC 8 Point Input Module
ADU 206
4 Channel Register Input
DEP 210
115 VAC 8 Point Input Module
ADU 211
8 Channel Analog Input
Module
DEP 211
115 VAC 8 Point Input Module
ADU 212
8 Channel Analog Input
Module
DEP 214
12-60 VDC 16 Point Input
Module
ADU 214
4 Channel Multi Range A/D
Input
DEP 215
5 VDC TTL 16 Point Input
Module
ADU 216
8 Channel Thermocouple
DEP 216
24 VDC 16 Point Input Module
CM900
Auto Interface
DEP 217
24 VDC 16 Point Input Module
DAO 216
24 VDC 16 Point Output
Module
DEP 218
115 VAC 16 Point Input
Module
DAP 204
24 VDC 4 Point Relay (NO)
Module
DEP 220
Fast 24 VDC 16 Point Input
Module
DAP 208
24 VDC 8 Point Relay (NO)
Module
DEP 257
110 VDC 16 Point Input
Module
DAP 209
120 VAC 8 Point Output
Module
DEP 296
60 VDC 16 Point Isolated Input
Module
DAP 210
24-230 VAC 8 Point Output
Module
DEP 297
48 VDC 16 Point Isolated Input
Module
DAP 212
24 VDC 8 Point Input/4 Point
Output
M7251
Programmable Limit Switch
DAP 216
24 VDC 16 Point Output
Module
M7350
Resolver Decoder Function
Module
DAP 217
5-24 VDC 16 Point Output
Module
MOT 201
1 Slot 1 Axis Motion Control
Module Encoder
DAP 218
24-240 VAC 16 Point Output
Module
MOT 202
2 Slot 1 Axis Motion Control
Module Resolver & Encoder
DAP 220
24 VDC 8 Point Input/Output
Module
P120 000
Power Supply
261
I/O Cards
262
Card
Description
Card
Description
DAP 252
LowTemp 24 VDC 8 Point
Input/4 Point Output
P120 125
Power Supply
DAP 253
LowTemp 110VDC 8 Point
Input/4 Point Output
VIC 200
4 High Speed Pulse or 4 VRC
Inputs
DAP 292
60 VDC 8 Point Input/4 Point
Output
VIC 205
4 High Speed Pulse or 4 5V
TTL Inputs
DAU 202
2 Channel Register Output (+/ VIC 212
-10V)
4 High Speed Pulse or 12 VDC
Inputs
DAU 204
4 Channel Analog Output,
Opto-Isolation
VIC 224
4 High Speed Pulse or 24 VDC
Inputs
DAU 208
8 Channel Register Output (+/ ZAE 201
-10V)
High speed Counter/Positioner
(2 Relay)
DEO 216
24 VDC 16 Point Input Module ZAE 204
4 Channel High speed
Counter/Positioner
372 SPU 780 01EMAN May 2002
I/O Cards
Compact TSX
Compact TSX
Series Cards
I/O cards supported (in alphabetical order):
372 SPU 780 01EMAN May 2002
Card
Description
Card
Description
ADU 204
4 Channel Register Input (+/0.5V)
DAP 292
60 VDC 8 Point Input/4 Point
Output
ADU 205
4 Channel Register Input (+/10V)
DAU 202
2 Channel Register Output (+/10V)
ADU 206
4 Channel Register Input
DAU 204
4 Channel Analog Output,
Opto-Isolation
ADU 210
4 Channel Analog Input
Module
DAU 208
8 Channel Register Output (+/10V)
ADU 211
8 Channel Analog Input
Module
DEO 216
24 VDC 16 Point Input Module
ADU 212
8 Channel Analog Input
Module
DEP 208
230 VAC 8 Point Input Module
ADU 214
4 Channel Multi Range A/D
Input
DEP 209
120 VAC 8 Point Input Module
ADU 216
8 Channel Thermocouple
DEP 210
115 VAC 8 Point Input Module
ADU 257
8 Channel Thermocouple
DEP 211
115 VAC 8 Point Input Module
BKF 202
Interbus S Slave
DEP 214
12-60 VDC 16 Point Input
Module
BKF201-16
16 Word Interbus S Master
DEP 215
5 VDC TTL 16 Point Input
Module
BKF201-64
64 Word Interbus S Master
DEP 216
24 VDC 16 Point Input Module
DAO 216
24 VDC 16 Point Output
Module
DEP 217
24 VDC 16 Point Input Module
DAP 204
24 VDC 4 Point Relay (NO)
Module
DEP 218
115 VAC 16 Point Input
Module
DAP 208
24 VDC 8 Point Relay (NO)
Module
DEP 220
Fast 24 VDC 16 Point Input
Module
DAP 209
120 VAC 8 Point Output
Module
DEP 257
110 VDC 16 Point Input
Module
DAP 210
24-230 VAC 8 Point Output
Module
DEP 296
60 VDC 16 Point Isolated Input
Module
DAP 211
120 VAC 4 Point Output
Module
DEP 297
48 VDC 16 Point Isolated Input
Module
263
I/O Cards
264
Card
Description
Card
Description
DAP 212
24 VDC 8 Point Input/4 Point
Output
FRQ 204
Frequency and Speed
Measurement
DAP 216
24 VDC 16 Point Output
Module
KOS260-24
Universal Communications
Module
DAP 217
5-24 VDC 16 Point Output
Module
KOS260-64
Universal Communications
Module
DAP 218
24-240 VAC 16 Point Output
Module
MOT 201
1 Slot 1 Axis Motion Control
Module Encoder
DAP 220
24 VDC 8 Point Input/Output
Module
MOT 202
2 Slot 1 Axis Motion Control
Module Resolver & Encoder
DAP 250
24 VDC 8 Point Input/Output
Module
P120 000
Power Supply
DAP 252
LowTemp 24 VDC 8 Point
Input/4 Point Output
P120 125
Power Supply
DAP 253
LowTemp 110VDC 8 Point
Input/4 Point Output
ZAE 201
High speed Counter/Positioner
(2 Relay)
372 SPU 780 01EMAN May 2002
I/O Cards
Micro
Micro Series
Cards
I/O cards supported (in alphabetical order):
372 SPU 780 01EMAN May 2002
Card
Description
Card
Description
MIC128
16 IN, 12 Relay OUT 24V DC
MIC140
8 Bit Counter/Interrupt Input
MIC129
16 IN, 8 Relay OUT 24V DC
MIC141
4 IN, 2 OUT 12 Bit 0-10V
MIC130
16 IN, 4 Relay OUT 24V DC
MIC142
4 IN, 2 OUT 12 Bit 1-5V
MIC131
16 IN, 8 Triac 4 Relay OUT
115V
MIC143
4 IN, 2 OUT 12 Bit ñ10V
MIC132
16 IN, 8 Triac OUT 115V
MIC144
4 IN, 2 OUT 15 Bit 0-10V
MIC133
16 IN, 4 Relay OUT 115V
MIC145
4 IN, 2 OUT 14 Bit 1-5V
MIC134
16 IN, 8 Triac 4 Relay OUT
230V
MIC146
4 IN, 2 OUT 10V
MIC135
16 IN, 8 Triac OUT 230V
MIC147
16 Bit Timer/Count Value
MIC136
16 IN, 4 Relay OUT 230V
MIC148
1 Word IN, 1 Word OUT
MIC137
16 IN, 12 FET OUT 24V DC
MIC149
2 Words IN, 2 Words OUT
MIC138
16 IN, 8 FET OUT 24V DC
MIC150
4 Words IN, 4 Words OUT
MIC139
16 IN, 4 FET OUT 24V DC
MIC151
8 Words IN, 8 Words OUT
265
I/O Cards
Momentum M1 and INTERBUS
Momentum
Series Cards
266
I/O cards supported (in alphabetical order):
Card
Description
Card
Description
AAI030-00
8 Channel Differential Input
AEC920-00
High Speed Counter 50khz
AAI140-00
16 Channel single ended Input AMM090-00 24 VDC 4 In / 2 Out
Bidirectional
AAI520-40
4 Channel RTD/Thermocouple ANM050-10
Seriplex Interface
AAO120-00
4 Analog Output 0-20mA
ANR120-90
Bi-directional Analog (6 in/4
out) with 24 VDC (8 in/8 out)
discrete
AAO921-00
4 Analog Output 4-10mA
ARM370-30
24 VDC 10 In / 8 Out Relay
ADI340-00
24 VDC 16 Point I/P Module
ATV058-00
Single Phase Drive
ADI350-00
24 VDC 32 Point I/P Module
BAI036-00
8 Channel Analog I/P Module
ADI540-50
120 VAC 16 Point I/P Module
BAM096-00
4 I/P / 2 O/P Analog Module
ADI740-50
230 VAC 16 Point I/P Module
BAO126-00
4 Channel Analog O/P Module
ADM350-1X 24 VDC 16 In / 16 Out
BDI346-00
24 VDC 16 Point I/P Module
ADM370-10
24 VDC 16 In / 8 Out
BDI356-00
24 VDC 32 Point I/P Module
ADM390-10
24 VDC 16 In / 16 Out
BDI546-50
120 VAC 16 Point I/P Module
ADM390-30
24 VDC 10 In / 8 Out Relay
BDI746-50
230 VAC 16 Point I/P Module
ADM540-80
120 VAC 6 In / 3 Out Bi-Dir
BDM346-00
24 VDC 16 In / 16 Out
ADM690-50
115 VAC 10 In / 8 Out
BDM346-30
8 In / 8 Out Relay
ADO340-00
24 VDC 16 Point O/P Module
BDO346-00
24 VDC 16 Point O/P Module
ADO350-00
24 VDC 32 Point O/P Module
BDO356-00
24 VDC 32 Point O/P Module
ADO530-50
115 VAC 8 Point O/P Module
BDO946-50
ADO540-50
115 VAC 16 Point O/P Module BNO671-00
BUS Module
ADO730-50
24 VAC 8 Point O/P Module
Generic INTERBUS S
Modules
ADO740-50
230 VAC 16 Point O/P Module ISP001-0X
IBUS-XXXX
115 to 230 VAC 16 Point O/P
ISP Weighing Module
372 SPU 780 01EMAN May 2002
I/O Cards
Quantum
Quantum Series
Cards
I/O cards supported (in alphabetical order):
372 SPU 780 01EMAN May 2002
Card
Description
Card
Description
ACI030-00
Analog 8 Channel Unipolar
Input
DDI841-00
10-60 VDC 16 Input Module
ACI040-00
16 Channel Analog Current
Module
DDI853-00
10-60 VDC 32 Input Module
ACI050-00
32 Channel Analog Current In DDM390-00
16/8 Bidirectional 24 VDC
ACI051-00
32 Channel Analog Voltage/
Current
DDM690-00
125 VDC 4 Input/4 Output
HPO Module
ACI052-00
32 Channel Analog Voltage/
Current
DDO153-10
5 VDC 4x8 Output Module
ACO020-00
4-20 mA Analog Output
Module
DDO353-00
24 VDC 32 Output Module
ACO130-00
8 Channel Output Module
DDO353-01
24 VDC 32 Point Output
Module
AII330-00
I. S. 8 Channel Analog Input
DDO353-10
24 VDC True Low 32 Output
Module
AII330-10
I. S. 8 Channel Analog Input
Current
DDO364-00
24 VDC True High 96 Output
Module
AIO330-00
I. S. Analog Output
DDO843-00
10-60 VDC 16 Output
AMM090-00 Analog In/Out 4Ch/2Ch
DDO885-00
125 VDC 12 Point O/P Module
ARI030-10
8 Channel RTD
DEVNET-08 64 Register Devicenet
Scanner
ATI030-00
8 Channel Thermocouple
DEVNET-32 16 Register Devicenet
Scanner
AUI040-00
16 Channel Universal Input
Module
DII330-00
I. S. Digital Input
AVI030-00
8 Channel Bipolar, Analog
Input
DIO330-00
I. S. Digital Output
AVI050-00
32 Channel Analog Voltage In DRA840-00
16 Output Relay
AVO020-00
Analog Voltage Output Module DRC830-00
8 Output ISO Relay
CHS110-00
Hot Standby
DSI353-00
24 VDC 32 Point Input Module
CPS-111
115/230V AC Power Supply
3A
DVO853-00
10-30 VDC Verified Output
Module
CPS114
115/230V AC Power Supply
8A
EHC105-00
High Speed Counter 5
Channel
267
I/O Cards
268
Card
Description
Card
Description
CPS124
115/230V AC Power Supply
RED 8A
EHC202-00
High Speed Counter
CPS-211
24 V DC Power Supply 3A
EHC204-00
High Speed Counter 4
Channel
CPS-214
24 V DC Power Supply 8A
EHC208-00
High Speed Counter 8
Channel
CPS-224
24 V DC Power Supply RED
8A
EIA921-00
1 Channel AS-1 Module
Interface
CPS-414
48 V DC Power Supply SUM
8A
ERT854-10
32 Point Smart Digital Input
CPS-424
48 V DC Power Supply RED
8A
ESI062-10
2 Channel ASCII Interface
CPS-511
125V DC Power Supply 3A
GPS100-00
IRIG-B Time Sync Interface
CPS-524
125V DC Power Supply 8A
HLI340-00
Hi-Speed/Latch/Interrupt
CRA211-10
DIO Drop MB+
HRT100-00
HART Serial Communications
Card
CRA211-20
DIO Drop MB+
I2T010-00
I2T 10 Input / 10 Output
CRA212-10
DIO Drop MB+
I2T016-00
I2T 16 Input / 16 Output
CRA212-20
DIO Drop MB+
MCI186X
Resolver Interface Module
CRA931-00
RIO Drop S908
MCI18X1X2
Single Turn Interface
CRA932-00
RIO Drop S908
MCI18X3X4
MultiTurn Resolver Interface
CRP811-00
Profibus DP Interface Module
MMB102-00 Two axis motion with
incremental
CRP931-00
RIO Head S908
MMB104-00 Four axis motion with
incremental
CRP932-00
RIO Head S908
MMC120-0X 2-Axis Motion Control
DAI340-00
24 VAC ISO 16 Input Module
MMD102-00 Two axis absolute motion
DAI353-00
24/48 VAC 32 Input Module
MMD104-00 Four axis absolute motion
DAI440-00
48 VAC 2x8 Input Module
MSB101-00
Motion Inc Enc
DAI453-00
48 VAC 32 Input Module
MSC101-00
Motion Enc/Res
DAI540-00
115 VAC 16 Input Module
Isolated
NOA611-00
Interbus-S Master Module
DAI543-00
2x8 115 VAC Input Module
NOA611-10
Interbus-S Master with PCP
DAI553-00
115 VAC 32 Input Module
NOE211-00
Ethernet TCP/IP Twisted Pair
DAI740-00
230 VAC 16 Input Module
NOE251-00
Ethernet TCP/IP Fiber Optic
CPS-424
48 V DC Power Supply RED
8A
NOE311-00
Ethernet SY/MAX Twisted Pair
372 SPU 780 01EMAN May 2002
I/O Cards
372 SPU 780 01EMAN May 2002
Card
Description
Card
Description
DAM390-00
16/8 Bidirectional 24 VAC
NOE351-00
Ethernet SY/MAX Fiber Optic
DAM490-00
16/8 Bidirectional 48 VAC
NOE511-00
Ethernet MMS Twisted Pair
DAM590-00
16/8 Bidirectional 120 VAC
NOE551-00
Ethernet MMS Fiber Optic
DAO840-00
24-230 VAC 16 Output
NOE771-00
Ethernet TCP/IP 10/100
Megabit
DAO840-10
24-115 VAC 16 Output
NOE771-10
Ethernet TCP/IP 10/100
Megabit
DAO842-10
100-230 AC 16 Output Module NOL911-XX
DAO842-20
24-48 VAC 16 Output
NOM212-10 MB+ Drop Interface Card
DAO853-00
24-230 VAC 4x8 Output
NOM2XX00
LonWorks Interface
MB+ Drop Interface Card
DCF077-00
24 VDC Input Module
NOP911-00
Profibus FMS Interface Module
DDI153-10
5 VDC 4x8 Input Module
QSPXM
Seriplex Master
DDI353-00
24 VDC 32 Input Module
QUCM-SE
Programmable
communications module
DDI353-10
24 VDC True Low 32 Input
Module
SERX53-00
Sequence Of Events Recorder
DDI364-00
24 VDC 6x12 Fast Input
Module
XCP900-00
Battery Backup
DDI673-00
125 VDC 24 Point I/P Module
269
I/O Cards
Sy/Max
Sy/Max Series
Cards
270
I/O cards supported (in alphabetical order):
Card
Card
Description
CRM931-D1 Digital 2 Slot RIO Adapter
Description
RIM131
High Speed Counter Module
CRM931-D2 Digital 4 Slot RIO Adapter
RIM144
Multiplexed BCD Input Module
CRM931-D4 Digital 8 Slot RIO Adapter
RIM301
85-140 VAC 16 Input Module
DRM931-D8 Digital 16 Slot RIO Adapter
RIM331
32-Function 24V DC Input
CRM931RG
Register RIO Adapter Module
RIM361
16-Function 240V AC/DC Input
RDI116
16 Channel Input
RIM731
64-Function 24V AC/DC Input
RDI132
32 Channel Input
ROM121
4-Function Analog Output
RDI1XX
Input Module
ROM122
4-Function Isolated Output
RDO616
16 Channel Relay Output
ROM131
Stepper Motor Controller
Module
RDO732
32 Channel Relay Output
ROM141
Multiplexed BCD Output
Module
RDOXXX
Relay Output
ROM221
16-Function 120V AC Output
RIM101
16-Function 120V AC/DC
Input
ROM271
16-Function 120V AC
RelayOutput
RIM121
4-Function Analog Input
ROM421
35-140 VAC 16 Output Module
RIM123
8 Channel High Speed Analog ROM431
Input
RIM125
16-Function Analog Input
ROM441
32-Function 24V DC Output
RIM126
8 Channel Analog/Thermo
Input
ROM871
64-Function Relay Output
RIM127
12 Channel RTD Input Module SIM116
16-Function 240V AC Output
16 In Simulator
372 SPU 780 01EMAN May 2002
Troubleshooting
Troubleshooting
Troubleshooting
Overview
This chapter includes various tools and resources for troubleshooting networks,
ladder logic, I/O cards, etc. Contact support (see Contacting Schneider Electric,
p. 26) if you require further information about I/O cards.
What’s in this
Chapter?
This chapter contains the following sections:
372 SPU 780 01EMAN May 2002
Section
Topic
Page
B.1
General Troubleshooting
272
B.2
Status Words for S901 and S908
280
271
Troubleshooting
B.1
General Troubleshooting
Section Overview
Overview
The Troubleshooting tools help to reduce down time and improve your maintenance
personnel’s understanding of the controller installation.
What’s in this
Section?
This section contains the following topics:
272
Topic
Page
Isolating Faults
273
Manual Procedure List
274
Modbus Plus
276
Stopcode Error Analysis
277
372 SPU 780 01EMAN May 2002
Troubleshooting
Isolating Faults
Isolating Faults
Faults can fit into one of four categories:
372 SPU 780 01EMAN May 2002
Fault
Possible Causes/Fixes
Input/Output Faults
This is the most common type of fault. It occurs when an open,
short, or an electrical or mechanical malfunction happens.
Common locations for these faults are in the field devices and the
wiring between the I/O module that interfaces to the field device.
Controller Faults
These faults include a faulty controller or improper ladder logic.
The Controller Manual Check helps isolate a faulty Controller.
Communication Faults
Communication Faults: Modicon controllers communicate with the
I/O sub system through remote I/O processor communication
networks or within local drops on the Modbus subsystem. Faults
occur when two pieces of hardware unexpectedly stop
communicating or communications becomes unintelligible.
Invalid Command
When the warning ’Command Not Valid Unless Logged In’
appears, check the following:
l Ensure the cable is properly attached to the controller.
l Ensure that the controller you’re connected to isn’t logged onto
by another user.
l Ensure you’re using the correct cable.
l Ensure the cable is connected to the correct controller port.
If the problem persists, contact Schneider Electric’s Customer
Support.
273
Troubleshooting
Manual Procedure List
Procedure One
Controller failed to power up with good AC supply and fuse OK:
Step
1
Procedure Two
Check the input power select switch position is correct for supply voltage.
3
Check for loose crimps or screws at the power supply terminal strip.
4
Check fuses where relevant.
To replace a 38x/48x fuse:
Action
1
Remove memory and executing cartridges.
2
Remove 9 screws that hold the side (1/4 inch nut driver).
3
Remove line cord cover screws and the plastic line cord cover.
4
Remove 2 line cord standoffs (3/16 inch nut driver).
5
Remove screws near battery compartment.
6
The front part of the controller can now separate from the circuit board. The fuse
is located near the AC power connector.
7
Replace fuse with the same size and type.
To replace a 68x/78x fuse:
Step
1
274
Ensure that the power supply jumper is correct on the slot mount controllers.
2
Step
Procedure Two
Action
Action
Remove 2 thumbscrews and 2 machine screws with start washers as shown on
front view.
2
Remove small cover.
3
Remove 4 machine screws from rear cover and slide rear cover back 3 inches.
(Exec pack cover may have to be removed from the right side).
4
Carefully slide the left side section toward the back expose the two fuses.
5
Replace blown fuses with the same type and size.
372 SPU 780 01EMAN May 2002
Troubleshooting
Procedure Two
To replace a P930/P933 fuse:
Step
Procedure Three
1
Turn off the P930/P933 power supply.
2
Turn off the supply power to the power supply.
3
Remove the supply power line from the P930/P933 power terminal.
4
Loosen mounting screws on top and bottom of the front face of the P930/P933
and slide the P930/P933 out of the chassis.
5
Replace fuse with on of the same type and size.
Failure to attach to a running controller:
Step
Procedure Four
Action
Action
1
Ensure that the proper cables and software are being used.
2
Are the communication parameters on the computer the same as those on the
controller?
3
Check the cable attachment and pinout.
4
If Modbus Plus is being used then ensure the Modbus Plus driver is installed and
the Modbus Plus active LED on the SA85 or PC85 card and the controller are
flashing at six times a second. (The Modbus Plus Indicator normal operating
state.)
5
If this is the first time this cable has been used then test the cable.
If Modbus Plus is the chosen mode of communication, please ensure that the
Modbus Plus driver software is installed. You may use the Modbus Plus diagnostic
tools included with the driver suite. Check if the Modbus Plus active LED is flashing
both at the interface card (PCI85 or SA85) and at the PLC. Normal indication is six
times per second.
372 SPU 780 01EMAN May 2002
275
Troubleshooting
Modbus Plus
Modbus Plus
Communications
for Concept Exec
Loader
When using Modbus Plus communications and the interrupt is NOT "5C", you must
add the following line to the "modicon.ini" file located in the Windows folder:
Under the heading: [Ports]
MBP0 (or MBP1) = interrupt 5D
Modbus Plus
Indicator
On most Modbus Plus devices, a green LED flashes a repetitive pattern indicating
the communication status of the node. The patterns are:
l Six flashes per second: Normal operating state. The node is successfully
receiving and passing the token. All nodes in operation on the network should be
flashing this pattern.
l One flash per second: Node is offline after just being powered up or there is
another node on the network with the same address (duplicate addresses are not
allowed). The node remains in this state for five seconds, then attempts to go to
its normal operating state.
l Two flashes, then OFF for two seconds: Node is hearing the token being passed
among other nodes, but is never receiving the token. Check the network link for
an open or short circuit, or defective termination.
l Three flashes, then OFF for 1.7 seconds: Node is not hearing any other node. It
is periodically claiming the token, but finding no other node to which to pass it to.
Check the network link for an open or short circuit, or defective termination.
l Four flashes, then OFF for 1.4 seconds: Node has heard a valid message from
another node that is using the same address as this node. The node remains
offline in this state as long as it continues to hear the duplicate address. If the
duplicate address is not heard for five seconds, the node then changes to the
pattern of one flash every second.
276
372 SPU 780 01EMAN May 2002
Troubleshooting
Stopcode Error Analysis
Stopcode Error
Analysis
Bit/Error reference:
372 SPU 780 01EMAN May 2002
Bit
Error
0 (0001 Hex)
Illegal Configuration Someone or something has probably been
modifying controller memory and the configuration is
not valid for this controller. The error may also be
caused by a bad memory board or Executive pack or
by inserting the wrong memory or executive into a
controller.
Description
1 (0002 Hex)
984 A/B/X and 584 - Information saved in a coil and register has been
Backup Checksum corrupted. In order to recover the corrupted
information, the program must be reloaded. A bad
Error
memory board may also cause this error.
1 (0002 Hex)
984 -80 Series (984
A/B/X - some
PROMS) Discrete
Disabled Error
Usually caused by trying to start the controller in the
optimized mode with discrete points that are
disabled.
2 (0004 Hex)
Logic Checksum
Error
The calculated user logic checksum does not agree
with the stored checksum. It can be caused by an
illegal change of memory or by a bad memory board.
Try reloading the program. This error also occurs if
the ASCII area has been loaded incorrectly. If
reloading fails then try initializing the ASCII area. As
a last resort try replacing the memory board.
3 (0008 Hex)
Invalid Node Type
This error usually occurs when loading the
controller. It may be caused by loading or relocating
a program from a machine supporting a DX
instruction not supported or configured for in the
target machine, i.e. relocating a program with an
HSBY function block to a 984 not configured for an
HSBY. It may also be caused by loading a program
made on a 24 bit machine to a 16 bit machine i.e.,
specifying a constant greater than 999.
277
Troubleshooting
278
Bit
Error
Description
4 (0010 Hex)
Causes:
S908 RIO Head
Failure or Remote I/ l A failed S908 RIO board (replace the board)
O option failed
l Illegal board configuration in the 984 (e.g., the
wrong PROM pack)
l Configuring for more than one drop and not
attaching anything to the S908
l Cards contained in the Traffic Cop that are not
present in the field or cards in the field that
mismatch with the Traffic Cop.
l Powering up an intelligent I/O card (B984) at the
same time as the 984
l Attempting to start an HSBY system without the
S908 cards interconnected.
l Cycling power on the controller may be
necessary to clear this error.
5 (0020 Hex)
984 A/B/X and 584
CPU Diagnostic
Failure
The CPU board is bad and should be replaced.
5 (0020 Hex)
984 -80 Series Bad
Coil Used Table
The coils existing in the logic do not match those
found in the used table.
6 (0040 Hex)
Real Time Clock
Failure
The CPU board is bad and should be replaced.
7 (0080 Hex)
Watchdog Time
Expired
This bit is usually set in conjunction with another. It
often signals a Data transfer program that is too
large. The logic is not being solved fast enough.
(0090 Hex)
Real I/O Option
Failed
Check that the S908 card is properly installed and
that its ready light is on steady.
8 (0100 Hex)
No EOL Detected or This error usually occurs when a startup is
attempted after the incomplete loading of a program.
Bad Number of
Reload or try another program.
Segments
Note: You may receive this system error when you
first configure the system, before you have
programmed any logic. This is not a fatal error. The
system cannot find the end of logic because there is
no logic programmed from the primary to the
standby state.
9 (0200 Hex)
984 A/B/X and 584
State RAM Test
Failure
The continuously running diagnostics have failed.
Replace the RIO processor.
372 SPU 780 01EMAN May 2002
Troubleshooting
372 SPU 780 01EMAN May 2002
Bit
Error
Description
9 (0200 Hex)
984 -80 Series Bad
Power Down
Checksum
Cycle the power on the controller to clear the error or
Start Controller.
10 (0400 Hex)
SON Did Not Start
Segment
Improper programming from a programming device
or software package is usually the cause of start-ofnode failure.
11 (0800 Hex)
Bad Segment
Scheduler Table
The Segment Scheduler has been programmed
improperly.
12 (1000 Hex)
Illegal Peripheral
Intervention
This error is caused by an attempt to clear the
System Stop State word. A programming device has
altered memory in a non-authorized manner.
13 (2000 Hex)
Dim Awareness
The 984 has not been configured successfully. This
bit can be set in conjunction with other flags.
14 (4000 Hex)
984B and 584
Extended Memory
Parity Error
This error indication pertains to the 984B or
extended memory 584 only. Try reloading memory.
If that fails to solve the problem, replace the memory
board.
14 (4000 Hex)
984 -80 Series
Traffic Cop Failure
Usually caused by configuring for more than one
drop and not having an S908 remote I/O processor
in the controller rack. This error can also be caused
by too many points contained in the Traffic Cop (512
inputs and 512 outputs allowed per drop), or by
more cards in Traffic Cop than physically present
(Micro 984).
15 (8000 Hex)
Peripheral Port
STOP
This simply indicates the PLC has stopped.
279
Troubleshooting
B.2
Status Words for S901 and S908
At a Glance
Overview
With both the S901 and S908 controllers, the first 11 Status Words are always found
at absolute memory address 65-6F hex. Pointers determine the absolute memory
locations of the remaining words. A pointer for the start of the status information is
always located at address 6F hex.
What’s in this
Section?
This section contains the following topics:
280
Topic
Page
ASCII Message Status
281
Cable A Errors
282
Cable B Errors
283
Communication Status
284
Controller State
286
Controller Status
287
EOL (End of Logic) Pointer
288
Global Errors
289
S911 Hot Standby Status (S908)
290
Local Drop Communications Errors (S908)
291
Machine Configuration
292
Module Health
293
Number of Segments
295
Status Word Pointer Table
296
RIO Time-out
297
Run/Load/Debug Status
298
S901/J200 Status
299
S908 Errors
300
Stopcode
301
372 SPU 780 01EMAN May 2002
Troubleshooting
ASCII Message Status
Word 6D Hex
(109 Decimal)
This word reflects the status of the ASCII message database. Bits set in this word
indicate that errors occurred while creating or editing ASCII messages.
1 2 3 4 5 6 7 8 9 10 11 12 13 14 15 16
Number of ASCII messages and number of messages
pointers do not match
Invalid message pointer
Invalid message
Message checksum error
372 SPU 780 01EMAN May 2002
281
Troubleshooting
Cable A Errors
Cable A Errors
Cable A is the main cable connecting the remote I/O Processor to the Remote I/O
Interface.
Status Word
Description
173
The count of frame size errors and DMA overrun errors. The high order byte
represents a count of Cable A frame size errors. This indicates that the length
of the data message was incorrect. The low order byte represents a count of
DMA receiver overrun counts. This indicates that the hardware had more
data to send than was required.
174
The Cable A LAN receiver error counter and the Bad Drop reception on cable
A counter. This indicates a cable or noise problem to a drop. The "Drop
Communication Errors (173)" should be examined to determine which drop
is having problems.
175
The last received LAN error code for cable A. The LAN hardware detected
an error in receiving a message.
1 = Overrun error
1 = Alignment error
1 = CRC error
1 = Received message OK
1 2 3 4 5 6 7 8 9 10 11 12 13 14 15 16
1 = No end frame
1 = Short frame
282
372 SPU 780 01EMAN May 2002
Troubleshooting
Cable B Errors
Cable B Errors
Cable B is the secondary or redundant cable connecting the Remote I/O Processor
to the Remote I/O Interface (optional redundant cables).
Status Word
Description
176
The count of frame size errors and DMA overrun errors. The high order byte
represents a count of Cable B frame size errors. This indicates that the length
of the data message was incorrect. The low order byte represents a count of
DMA receiver overrun counts. This indicates that the hardware had more
data to send than was required.
177
The Cable B LAN receiver error counter and the Bad Drop reception on cable
B counter. This indicates a cable or noise problem to a drop. The "Drop
Communication Errors (173)" should be examined to determine which drop
is having problems.
178
The last received LAN error code for cable B. The LAN hardware detected
an error in receiving a message.
1 = Overrun error
1 = Alignment error
1 = CRC error
1 = Received message OK
1 2 3 4 5 6 7 8 9 10 11 12 13 14 15 16
1 = No end frame
1 = Short frame
372 SPU 780 01EMAN May 2002
283
Troubleshooting
Communication Status
Communication
Status 1/2 (S901)
The Remote I/O communication Status Word 1 shows errors and normal operating
indication of the indicated channel pair. Under normal operating conditions the lower
byte should be counting and the upper portion of the byte should match the lower
portion of the byte.
Any bits set in the upper byte indicates an error condition for the channel pair. Note
that a disconnected channel pair or a channel pair that does not exist will set the
function scheduled to 001 (Restart - communication reset).
1 = Message from controller is queued
Current message frame # to drop
Cable ID: 0 = Cable 0, 1 = Cable 1
# of next expected frame from drop
1 = Current message not
accepted at drop
1 2 3 4 5 6 7 8 9 10 11 12 13 14 15 16
1 = Current message not supported
1 = Response message count > transmitted byte count
1 = Response from remote interface not what expected
Function schedule
Function Schedule:
Binary Number Description
284
000
Normal I/O
001
Restart (comm reset)
010
Restart (application reset)
100
Inhibit
372 SPU 780 01EMAN May 2002
Troubleshooting
Communication
Status 2/2 (S901)
The Remote I/O communication Status Word 2 shows errors and the retry count on
lost communications. If communications is lost with the channel pair then the
corresponding error bit will be set and the retry counter will increment. If the retry
counter counts to maximum then other indicators will be affected.
Module health will show as ’0’. If communication is re-established, this error count
and error word is not cleared. The only way to clear this word is to cycle power on
the controller or issue a start and stop command.
1 2 3 4 5 6 7 8 9 10 11 12 13 14 15 16
Retry counter
1 = Command not supported by drop
1 = Invalid frame number
1 = Drop just powered up
1 = Address did not respond
1 = CRC error from address drop
1 = Character overrun error from addressed drop
372 SPU 780 01EMAN May 2002
285
Troubleshooting
Controller State
S908 Controller Word 65 Hex
(101 Decimal)
The Controller state word shows information pertaining to the state and size of the
controller. A state is any condition, which is either set for the life of the controller (16bit vs. 24-bit) or set by external events (memory protect). The upper bits have no
meaning for an 984/S908 or –80 -85 controllers. The AC power bit will always be on
or monitoring would not be possible. The down size flag indicates controllers with <
4K logic memory. Some Micro 984 controllers show a 0 for battery failed. The 16 bit
user logic bit indicates controllers that support 2048 references. (The 984B and the
780/785 are 24-bit controllers.)
1 2 3 4 5 6 7 8 9 10 11 12 13 14 15 16
1 = Battery failed
1 = Memory protect OFF
1 = Run light OFF
1 = AC power ON
1 = 16-bit user logic (Max 2048
reference system
1 = Single sweep invoked
1 = Constant sweep invoked
S901 Controller Word 65 Hex
(101 Decimal)
286
The Controller state word shows information pertaining to the state and size of the
controller. A state is any condition that is either set for the life of the controller (16bit vs. 24-bit) or set by external events (memory protect). The AC power bit will
always be on or monitoring would not be possible. The down size flag indicates
controllers with < 4K logic memory. The 16-bit user logic bit indicates controllers that
support 2048 references. (The 984B and 584 Level 4 are 24-bit controllers.)
D0
Reserved
D1
Set offline mode
D2
Set data exchange active
D3
Operating mode
372 SPU 780 01EMAN May 2002
Troubleshooting
Controller Status
S908 and S901
Controllers Word 67
(103 Decimal)
The controller status words indicate certain statuses of the machine. A status is any
condition which changes during the running of the controller, usually from an internal
event.
Word 3 (4xxxx + 2) - General controller status:
1 2 3 4 5 6 7 8 9 10 11 12 13 14 15 16
1 = Existing DIM AWARENESS
Single sweeps (00)
1 = Constant sweep time exceeded
1 = Start command pending
1 = First scan
372 SPU 780 01EMAN May 2002
287
Troubleshooting
EOL (End of Logic) Pointer
Word 6B Hex
(107 Decimal)
This location contains the end of logic pointer. The EOL pointer provides the
hexadecimal address of the end of user logic.
1 2 3 4 5 6 7 8 9 10 11 12 13 14 15 16
EOL pointer address
288
372 SPU 780 01EMAN May 2002
Troubleshooting
Global Errors
Global Errors
Status Word
Description
179
The Global Communication Status. This word stores communications status
for both cable A and cable B. Cable A is the main cable connecting the
remote I/O Processor to the Remote I/O Interface. Cable B is the optional
secondary or redundant cable. The specific information stored is shown in
the figure below.
180
Global Cumulative error counter for cable A. High byte - Framing error count
/ Low byte - No response count. Errors counted here cause the error counters
in Cable A Errors, p. 282 to increment.
181
Global Cumulative error counter for cable B. High byte - Framing error count
/ Low byte - No response count. Errors counted here cause the error counters
in Cable B Errors (169) to increment.
Figure 1
1 2 3 4 5 6 7 8 9 10 11 12 13 14 15 16
Dropout counter
Retry counter
0 = Cable B status error
0 = Cable A status error
0 = Communication health error
Note: It is possible for bits 2 and 3 to be ‘1’ and bit 1 to be ‘0’ "Cables (171)"
372 SPU 780 01EMAN May 2002
289
Troubleshooting
S911 Hot Standby Status (S908)
Word 66 Hex
(102 Decimal)
The hot standby status is valid if a redundancy system is present. It shows if the unit
is reporting present and healthy and the word also indicates if the unit is the primary
or secondary controller.
Word 4 (4xxxx + 3) - S911/R911 Hot Standby Status
1 2 3 4 5 6 7 8 9 10 11 12 13 14 15 16
S911/R911 present and healthy
0 = Controller set to A
1 = Controller set to B
0 = Controllers logic matches
1 = Controllers logic mismatches
Remote system state
Local system state
System State:
Binary Number
290
Description
01
Offline
10
Primary
11
Secondary
372 SPU 780 01EMAN May 2002
Troubleshooting
Local Drop Communications Errors (S908)
Status Words
182-184
Status Words 182 to 184 show the status of the local drop communication errors
(when a local drop is present). The first drop may or may not be a local drop
depending upon the controller type being used.
Status Word
Description
182
The overall health and retry counter for the local drop. If the MSB is not 1 then
there are Module Health (166) errors on the local drop.
183
The ourbus error count for the local drop. If the count is incrementing then
there are errors on the local drop. This may be caused by invalid information
in the traffic cop, an unhealthy module in the local drop, or a mismatch
between the traffic cop and the module that exists in a slot located in the local
drop.
184
The ourbus retry count for the local drop. Under normal operating conditions,
only the all modules healthy bit should be set.
Figure 1
1 2 3 4 5 6 7 8 9 10 11 12 13 14 15 16
1 = All modules healthy
Retry counter
372 SPU 780 01EMAN May 2002
291
Troubleshooting
Machine Configuration
Word 61 Hex
(97Decimal)
This screen shows the options that are present for the attached controller. These
options include remote I/O (S908 processor), Modbus II, Hot Standby, Distributed
Control Processor (D908) and Coprocessors. It also indicates whether or not the
time of day option is available for this controller and the remote I/O adapter size.
Note: Some versions of the S908 remote I/O processor only support 6 remote drops.
A ’1’ indicates that an option is present.
Figure 1
0 = Small RIO (7 drops including 1 local)
1 = Large RIO (32 drops including 1 local)
0 = TOD present
1 2 3 4 5 6 7 8 9 10 11 12 13 14 15 16
1 = Copro 4 present
1 = Copro 3 present
1 = Copro 2 present
1 = Copro 1 present
1 = DCP present (-80), SA85 present (984 A/B)
1 = HSBY present
1 = Modbus II present
1 = Remote I/O present (RIO)
292
372 SPU 780 01EMAN May 2002
Troubleshooting
Module Health
S908 Controller
Module Health Status information consists of up to 160 words. A single bit is used
to represent the Health Status of a single module. A binary ’1’ means that the module
is healthy. Each drop in the I/O sub system has five words allocated to contain I/O
module status. Each of these five words contains the I/O module status of a single
rack within the drop. The most significant bit (MSB) represents the status of the
module in slot 1. Slot 2 module status is represented by the bit to the immediate right
of the MSB.
A healthy I/O module must meet the following conditions:
l The specified slot must be configured in the Traffic Cop.
l The slot must contain the module specified in the Traffic Cop.
l Valid communication must exist between the module and the interface.
l Valid communication must exist between the interface module and the controller.
1 2 3 4 5 6 7 8 9 10 11 12 13 14 15 16
Odd channel bits 1 through 8
Even channel bits 9 trough 16
Note: If a module is configured in the Traffic Cop and active, then the bit will be 1.
WARNING
Upgrade Recommended
On systems using J890/J892s with PROM rev 1000, slot 1 will be the
LSB. J890/J892s with PROM revs greater than 1000 will appear as
previously described. The earlier J890/J892s should be upgraded as
they will be incompatible with any user programming that assumes slot
1 status to be the MSB.
Failure to follow this precaution can result in severe injury or
equipment damage.
372 SPU 780 01EMAN May 2002
293
Troubleshooting
S901 Controller
The I/O Module Health Status information consists of words that represent the
module health for channel pairs. Each word represents 2 channels. The words are
also divided into input modules and output modules. A single bit is used to represent
the Health Status of a single module.
If the slot is inhibited in the Traffic Cop then the bit will be a ’0’. If the slot contains
an input module then the bit will be a ’1’. This will not be the case if the
Communication Status Word 2/2 (183) indicates an error.
If the slot contains an output module and if the active light is on then this bit will be
a ’1’. If the active light is off then this bit will be a ’0’. It is common to set the status
indicator for an output slot to toggle between ’0’ and ’1’ when active and healthy.
The Upper byte contains the status of the lower channel number of the channel pair
(for example, channel 1 for channel pair 1/2). The lower byte contains the status of
the higher channel number of the channel pair. Each byte represents the status of
slots 1 to 8 of the channel. The Most Significant Bit of the channel represents slot 1
and the Least Significant Bit shows the status of slot 8.
Status Word #012: Drop # 01/01 Rack # 1/5
1 2 3 4 5 6 7 8 9 10 11 12 13 14 15 16
Slot #1 through Slot #11 E-Series
294
Plus these five w/Quantum
372 SPU 780 01EMAN May 2002
Troubleshooting
Number of Segments
Word 6A Hex
(106 Decimal)
This word is confirmed during power up to be the number of I/O exchange nodes
plus 1 (for end of logic). If this is not true then a stop code of 0100 would result.
1 2 3 4 5 6 7 8 9 10 11 12 13 14 15 16
Number of segments
372 SPU 780 01EMAN May 2002
295
Troubleshooting
Status Word Pointer Table
Description
296
The address in 6F points to a table of pointers 76 words long. It is important to
remember that this 76 word long table is a table of address pointers for the 75 word
long system status area.
372 SPU 780 01EMAN May 2002
Troubleshooting
RIO Time-out
Word 6C Hex
(108 Decimal)
This word contains the Remote I/O time-out constant and a bit that indicates if
redundant cables are present.
Note: Cable A and Cable B are used for remote I/O communications.
1 2 3 4 5 6 7 8 9 10 11 12 13 14 15 16
Redundant remote I/O cables
Remote I/O timeout constant
372 SPU 780 01EMAN May 2002
297
Troubleshooting
Run/Load/Debug Status
Word 6E Hex
(110 Decimal)
This word is a mode indicator for 984 controllers. The load mode is used for loading
a program to the controller. The run mode indicates that the controller was started
in the optimized mode (no editing allowed while running). The debug mode is the
normal mode of operation for a controller. In this mode network editing is allowed
while the controller is running.
1 2 3 4 5 6 7 8 9 10 11 12 13 14 15 16
0
0
1
298
0 = Debug
1 = Run
0 = Load
372 SPU 780 01EMAN May 2002
Troubleshooting
S901/J200 Status
Word 68 Hex
(104 Decimal)
This word shows the status of the remote I/O processor. The upper 4 bits should be
zero under normal operating conditions. An error indicates a failure in the remote I/
O processor.
1 2 3 4 5 6 7 8 9 10 11 12 13 14 15 16
1 = S901 (J200) memory failure
RIO error status
1 = S901 (J200) loopback failure
1 = S901 (J200) timeout
1 = S901 (J200) bad
RIO error status:
Binary Number Description
372 SPU 780 01EMAN May 2002
000
RIO did not respond
001
No response on loopback
010
Failed loopback data check
011
Timeout while awaiting response
100
RIO did not accept all of message
299
Troubleshooting
S908 Errors
S908 Errors
300
This word is the S908 start error code. This word will always be 0000 in a running
system. If an error does occur, the controller will not start and will generate a
Stopcode system error of 4000.
Number
Description
Number
Description
1
Bad Traffic Cop Length
23
Bad Number of Input Bytes
2
Bad Remote I/O Link Number
25
Bad First Reference Number
3
Bad Number of Drops
26
Bad Second Reference Number
4
Bad Traffic Cop Checksum
27
No Input or Output Bytes
10
Bad Drop Descriptor Length
28
Discrete Not on 16 Bit Boundary
11
Bad I/O Drop Number
30
Unpaired Odd Output Module
12
Bad Drop Holdup Time
31
Unpaired Odd Input Module
13
Bad ASCII Port Number
32
Unmatched Odd Module
Reference
14
Bad Number of Modules in Drop
33
1xxxx Reference After 3xxxx
Register
15
Drop Already Configured
34
Dummy Module Reference
Already Used
16
Port Already Configured
35
3xxxx Module Not a Dummy
17
More than 1024 Outputs
36
4xxxx Module Not a Dummy
18
More than 1024 Inputs
40
Dummy Then Real 1xxxx Module
20
Bad Module Slot Address
41
Real Then Dummy 1xxxx Module
21
Bad Module Rack Address
42
Dummy Then Real 3xxxx Module
22
Bad Number of Output Bytes
43
Real Then Dummy 3xxxx Module
372 SPU 780 01EMAN May 2002
Troubleshooting
Stopcode
S908 Controller Word 69 Hex
(105 Decimal)
This word contains a Stopcode that describes what kind of stop state (if any) that the
machine has. A ’1’ in the most significant bit indicates that the controller is not
running. Any other ’1’ bit indicates an error. It is possible to have multiple errors. For
a detailed explanation of Stopcodes, see Stopcode Error Analysis, p. 277.
Illegal configuration
State RAM checksum error
User logic checksum error
Invalid node
Invalid traffic cop
CPU logic solver failed or coil use table (for other controllers)
Real time clock error
Watchdog timer expired
1 2 3 4 5 6 7 8 9 10 11 12 13 14 15 16
No EOL / Bad # segments
State RAM test failed
Start of node did not start segment
Segment scheduler invalid
Illegal peripheral intervention
Controller in DIM AWARENESS
Extended memory parity error
Peripheral port stop
372 SPU 780 01EMAN May 2002
301
Troubleshooting
S901 Controller Word 69 Hex
(105 Decimal)
This word contains a Stopcode that describes what kind of stop state (if any) that the
machine has. A ’1’ in the most significant bit indicates that the controller is not
running. Any other ’1’ bit indicates an error. It is possible to have multiple errors. For
a detailed explanation of Stopcodes, see Stopcode Error Analysis, p. 277.
Illegal configuration
State RAM checksum error
User logic checksum error
Invalid node
IOP failure
CPU logic solver failed or coil use table (for other controllers)
Real time clock error
Watchdog timer expired
1 2 3 4 5 6 7 8 9 10 11 12 13 14 15 16
No EOL / Bad # segments
State RAM test failed
Start of node did not start segment
Segment scheduler invalid
Illegal peripheral intervention
Controller in DIM AWARENESS
Traffic cop error
Peripheral port stop
302
372 SPU 780 01EMAN May 2002
Editing .DIF Files with Microsoft
Excel
Editing .DIF files with Microsoft Excel
Overview
When Excel imports a .DIF file, it converts the controller addresses in the first
column of the database into numerical values which ProWORX 32 cannot read.
Excel also exchanges the rows and columns of the database in the .DIF file’s
header. Unless you correct these problems, an error appears when you try to import
a .DIF file back into ProWORX 32 after you have changed it in Microsoft Excel.
To use Excel to edit documentation, follow these seven steps:
Step One
Set the size of your descriptor fields for Microsoft Excel.
Step
Step Two
Action
1
Select the ProWORX 32 project whose documentation you want to edit.
2
From the project right-click menu in the navigation tree, select Properties.
3
In the properties dialog, select the Documentation tab.
4
Set Number of Descriptor Lines to 9.
5
Click OK to save changes and return to ProWORX 32.
Export your ProWORX 32 project as a .dif file.
Step
372 SPU 780 01EMAN May 2002
Action
1
From the project right-click menu in the navigation tree, select Export
Documentation.
2
Select a path and enter a file name in the Select Destination File dialog.
3
Click OK to export documentation.
303
Editing .DIF Files with Microsoft Excel
Step Three
Open and edit the documentation in Microsoft Excel.
Step
1
Action
Open the .DIF file in Microsoft Excel.
The number in Column A tells you what controller address the row describes. The
letter in Column B tells you what information the next cells in the row contain:
l D - Descriptors 1 through 9 in columns C through K.
l S - Short Comments 1 through 4 in columns C through F.
l L - Long Comment lookup number in column C.
l T - The Page Title in column C
2
304
Make your changes to the documentation.
372 SPU 780 01EMAN May 2002
Editing .DIF Files with Microsoft Excel
Step Four
Convert the controller addresses from numbers to text.
Step
1
Find an unused column in the spreadsheet. This temporary column holds
information during the conversion process.
2
In the first cell of the unused column, type: =TEXT(A1,"00000"). This formula
converts the numerical value in cell A1 into a text value which ProWORX 32 can
read. When you press ENTER, the text value appears in the cell where you
entered the formula.
3
Select the cell.
4
From the Excel menu, select Edit → Copy.
5
Select the temporary column by clicking its header. For example, if you entered
the TEXT formula into the first cell of Column M, now select all of Column M.
6
From the Excel menu, select Edit → Paste. This operation pastes the TEXT
formula copied from the first cell of the temporary column into all the other cells
in the column. Click Yes if a warning message appears telling you that the
selection is too large for Undo. The temporary column now contains the same
values as Column A, but formatted as text instead of numbers.
7
Select the entire temporary column again.
8
From the Excel menu, select Edit → Copy.
9
Step Five
Action
Select Column A.
10
From the Excel menu, select Edit → Paste Special, then click Values. The text
values from your temporary column replace the numerical values in column A.
Click Yes if a warning message appears telling you that the selection is too large
for Undo.
11
Select the entire temporary column.
12
From the Excel menu, select Edit → Clear then click All. The values in your
temporary column disappear. Click Yes if a warning message appears telling you
that the selection is too large for Undo.
Export the Microsoft Excel spreadsheet as a .dif file.
Step
1
372 SPU 780 01EMAN May 2002
Action
Save the edited database as a .DIF file.
305
Editing .DIF Files with Microsoft Excel
Step Six
Correct the rows and columns in the .dif header.
Step
Step Seven
1
Open the .DIF file with a text editor. (Notepad or Wordpad)
2
Switch the "VECTORS" and "TUPLES" values in the header of the .DIF file.
3
Save the edited database as an ASCII .DIF file.
Import the documentation back into ProWORX 32.
Step
306
Action
Action
1
From the project right-click menu in the navigation tree, select Import
Documentation (Append, Overlay or Create New).
2
Select the .dif file containing the changed documentation from the Select
Documentation File dialog.
3
Click Open. The documentation of the current project is updated.
372 SPU 780 01EMAN May 2002
Glossary
A
Address
1) On a communications network, the identifying number for a station such as a
PLC.
2) In a computer’s or PLC’s memory, a location where data, usually a specific input
or output value is stored.
Address Used
Table
A list of all I/O addresses in a controller, indicating which addresses are being used
in ladder logic instructions and which are not.
Analog
Inputs (such as temperature) or outputs (such as motor speed) which can have a
range of values. Compare to Discrete.
ASCII
American Standard Code for Information Interchange.
1) A way of encoding the standard text (the letters, numbers, etc. on your keyboard)
your computer generates.
2) A data transmission mode for Modbus communications which sends and receives
standard text. ASCII mode used 7 data bits while RTU mode uses 8.
ASCII Message
A text message transmitted or received by a programmable controller. These
messages are sent to or from a terminal through an ASCII port.
Assembly
Register
A register that accepts keyboard input for command and value entry in the Network
Editor.
372 SPU 780 01EMAN May 2002
307
Glossary
Attaching to
Also called selecting. Connecting your PC to a programmable controller so
ProWORX 32 can read its ladder logic, traffic cop information, and configuration,
and write changes back to it.
B
Baud Rate
For serial communications, the speed (in bits per second) at which data is
transmitted.
BCD
Binary Coded Decimal.
Binary
The base-two numbering system. It has two symbols: 1 (representing ‘On’) and 0
(‘Off’)
Bit
The smallest amount of information in binary: either a 1 or a 0.
Bits per Second
(BPS)
The number of bits passed from one device to another in one second. Used to
measure data transmission speed.
Block
A section of ladder logic which is defined while using the logic editor. This block can
be copied, deleted, saved, moved, and loaded.
BM85
See Bridge Multiplexer.
BP85
See Bridge Plus.
Bridge
Multiplexer
Allows you to connect up to four Modbus devices or networks of Modbus devices to
a Modbus Plus network. Nodes on the Modbus Plus network can access slave
devices connected to the BM85 Modbus ports.
Bridge Plus
Links together two Modbus Plus networks.
Byte
A group of eight bits. A byte stores a value from 0 to 255.
C
Cell
308
A single location in ladder logic.
372 SPU 780 01EMAN May 2002
Glossary
Channel
In an S901 I/O subsystem, a group of 128 inputs and 128 outputs assigned to a
segment. The ladder logic in the segment usually controls all I/O operations of the
corresponding channel.
Characters per
Inch (CPI)
The number of characters a printer prints in one inch. (Also called horizontal pitch.)
Checksum
A calculation that sums a range of data and compares it to a pre-calculated value.
This determines if the data is in error or has changed.
Coaxial Cable
A round cable containing two conductors, one inside the other (separated by a
insulator). The inner conductor transmits a signal while the outer conductor is a
shield.
Commentary
The descriptors, short comments, long comments, and page titles within a project.
Controller
An industrial control computer, also called a programmable logic controller or PLC.
CPS
Characters per Second.
Cross-Reference
A list of the networks in which a particular address can be found.
Current Element
The cell or ladder logic element being edited. The logic editor’s cursor is always on
the current element.
Current Network
The network being edited. The network displayed in the logic editor is always the
current network.
Cursor
A bar or block which indicates a position on the screen. Generally, the cursor is
located where something can be inserted or selected.
D
Data Bits
The bits in a data package which carry a message, distinct from start bits, stop bits,
and parity bits. Remote Terminal Unit mode (the Modbus default communication
mode) sends eight data bits per package. ASCII mode sends seven data bits per
package.
Data Contents
A printout showing the data values in a ladder logic program.
Data Register
A 4xxxx holding/output register.
372 SPU 780 01EMAN May 2002
309
Glossary
DCP Drop ID#
A distributed control processor drop address. It is equivalent to the drop number
used by the DCP.
DCP-908
A distributed control processor providing intelligent bidirectional communication
between a supervisory 984 controller and distributed 984 controllers.
Decimal
The base-ten number system. It consists of the symbols 0 through 9.
Default
A value automatically assigned by the computer in a software program. Usually, this
value can be changed.
Descriptor Field
One of up to nine text strings which are a short description of an address within a
ladder logic program.
Descriptor
Record
All descriptors, short comments, the long comment number, and the page title for
one address point.
Descriptor Table
The table of addresses displayed on the screen in the descriptor module.
Descriptor
Tables Listing
A group of printouts which consist of tables of descriptors, a table of short
comments, long comments, and mismatch tables.
Descriptors
A short description of an address within a ladder logic program. A number of
descriptor fields.
Device
Any programmable unit (such as a PLC, numeric controller, or robot) or I/O card.
Dim Awareness
The state of a PLC that contains no logic, configuration, or traffic cop information.
Directory
A group of files and/or subdirectories. A directory called the root directory is placed
on each disk when it is formatted. Subdirectories can be created within the root
directory and within other subdirectories. Files can be stored in a subdirectory or the
root directory. In Windows, directories are often called "folders".
Disable
To stop the programmable controller’s logic-solving mechanism from updating the
state of a coil or updating the state of a discrete input. Also see Force.
Discrete
Inputs (such as switches) or outputs (such as coils) that can only be on or off.
Discrete inputs are usually held in 1xxxx registers. Compare to Analog.
Display
A visual output device such as a monitor.
310
372 SPU 780 01EMAN May 2002
Glossary
Distributed I/O
(DIO)
One of four major architectures for input/output systems (also see Local I/O,
Remote I/O, and Peer-to-peer Communications). I/O that is installed away from
the PLC over a wide area and communicates with it through a Modbus Plus network.
One Quantum controller can support up to three distributed I/O networks, each with
up to 64 drops. The local rack houses a DIO processor for each network, which sets
the network’s head number.
Documentation
A description of a controller’s memory, logic, and configuration. The descriptors,
short comments, long comments, and page titles within a database.
Documentation
Editor
The editor in which descriptors, short comments, long comments, and page titles
can be entered and modified.
Double Precision
A 32-bit format which uses two registers to store numerical values.
Drop
A group of I/O cards physically connected together as an I/O network. A controller
reads information from the drop, solves logic, then writes results to the drop in one
segment of ladder logic. The Segment Scheduler controls the order in which drops
are serviced.
Duplicate Coil
An output coil address which has been assigned to more than one coil.
E
EEPROM
Electrically Eraseable Programmable Read-Only Memory.
Element
A ladder logic instruction such as a coil, timer, or short.
Enable
To allow a PLC, based on the logic programmed into it, to update the state of a coil
or input.
Equation
Network
A special section of logic that lets the programmer solve regular mathematical
equations within the network. Not supported by every controller.
Exponential
Notation
A format for numbers based on powers of 10. For example, +1.35E-4 indicates 1.35
multiplied by 10 to the power of -4 (i.e. with an exponent of -4), which works out to
0.000135.
Extended
Memory
Extra register memory available for some models of 984/584 controllers. It is
accessed through the XMRD and XMWT functions.
372 SPU 780 01EMAN May 2002
311
Glossary
Extension
The three letters after the period in a DOS file name, often used to indicate the file’s
purpose.
F
File
A collection of information stored on a disk. It can contain either a program or data.
File Name
The name of a file. ProWORX 32 uses DOS naming conventions: a file name can
have up to eight characters, followed by a period and a three character extension.
Force
To change the state of a coil or a discrete input, overriding any actions in ladder
logic. For example, if a coil is forced off, but the ladder logic is trying to turn it on, it
will remain off.
Function
A ProWORX 32 command or operation.
G
Global Address
Change
An operation in the Logic Editor which substitutes one address or a range of
addresses for another or several others.
H
Head
A collection of I/O drops tied to one CPU, DIO, or RIO processor. This term is
specific to Modicon’s Quantum hardware.
Hexadecimal
A base 16 representation of an integer. It uses the symbols 0 through 9 and letters
A through F.
I
I/O
312
Input/Output.
372 SPU 780 01EMAN May 2002
Glossary
I/O Configurator
A PLC internal operation that maps logic element addresses to physical I/O cards.
Also known as the Traffic Cop.
Instruction
One of the programmable controller’s instruction set.
L
Ladder Logic
A relay-based programming language typically used in programmable logic
controllers. So called because it looks vaguely like a ladder.
Ladder Logic
Documentation
Text information, notes, and other descriptions of the ladder logic.
Ladder Logic
Listing
A printout of a group of networks which make up a ladder logic program.
Latch
A coil, the state of which is backed up in memory.
Lines Per Page
The number of lines printed on a page when printing ladder logic listings.
Load
To retrieve data from a disk or other source.
Loader
A module that reads and writes ladder logic from a personal computer to a
programmable controller or an industrial programming terminal. It also starts and
stops a programmable controller from a personal computer.
Local I/O
One of four major architectures for input/output systems (also see Distributed I/O,
Remote I/O, and Peer-to-peer Communications). The PLC and I/O modules
communicate directly through wiring from the field. For Quantum controllers, local I/
O allows a CPU, power supply, and from one through 14 I/O modules in a single
backplane (up to 448 I/O points). Local I/O is limited to a single rack and is always
head number 0. RIO and DIO processors are added in the local rack to extend the
controller’s I/O system.
Logic Editor
The editor in which you edit ladder logic.
Long Comment
A block of text which comment on an address within a ladder logic program. These
are printed between the networks in the ladder listing.
LPI
Lines per inch.
372 SPU 780 01EMAN May 2002
313
Glossary
M
Machine Word
16 bits of data (two bytes). Also called a word.
Macro
Generic pieces of logic networks that can be inserted into main logic databases. See
also Macro Parameter.
Macro Parameter
A "placeholder" variable used in a macro. When inserted into a regular logic
database, each macro parameter is mapped to a real register address.
Master
A networked device which controls the devices it connects to. Compare to Slave.
Memory
The part of a computer or programmable controller which stores information for
manipulation.
Mismatch Tables
Two printouts which show the differences between two sets of data; for example,
between descriptor records that have been entered for PLC addresses and
addresses that have actually been used in a program.
Mnemonic
(ne-mon-ik)
1) A memory aid.
2) A computer instruction with an abbreviated name that indicates its function. For
example, BLKM is used for the Block Move instruction.
Mnemonic
Assignments
A table in the configuration menu that lists the configuration of function key levels,
prompts, and instruction mnemonics.
Modbus
Modicon’s RS-232C master-slave serial communications protocol.
Modbus Plus
Modicon’s high-speed, peer-to-peer, token-ring communications protocol.
Modem
Modulator/Demodulator. A communications device that allows a computer to
transmit information, usually over a standard telephone line.
Module
An input/output card.
Motion Control
I/O Drop
Usually, an I/O drop tied to an ICC410, 3220, or 3240 motion control system.
314
372 SPU 780 01EMAN May 2002
Glossary
N
Network
1) A unit of ladder logic in a matrix of elements that is 11 columns wide and seven
rows long. It is used to group a function’s ladder logic.
2) A chain of interconnected computers and/or programmable controllers which
share data.
Network
Comment
A descriptor record assigned to a network. Contains short comments, a long
comment, a page title and descriptors.
Network Listing
A printout of a group of networks of ladder logic which make up a program.
Network Logic
A programmable controller control program or the representation of a programmable
controller control program. It includes logic elements, networks, and register
contents.
Node
A device that is connected to a network and is capable of communicating with other
network devices, usually to send or receive I/O data.
Not Described
Mismatch Table
A printout of those programmable controller addresses in a ladder logic program
which do not have descriptor records.
O
Offline
When the computer is not connected to the programmable controller and works
instead from a database.
Online
When the computer is connected to a programmable controller, working with it
directly and in real time.
Operator
In mathematics (and in Equation Networks), a symbol or character that indicates a
specific operation to be performed on one or more elements, called operands. In "3
+ Y", the plus sign (+) is an operator that indicates addition between the two
operands, "3" and "Y".
Order of Solve
1) The order in which segments are solved, as ordered by the Segment Scheduler.
372 SPU 780 01EMAN May 2002
315
Glossary
2) The order in which elements are solved in a network.
P
Page Title
A line of text which describes a page or group of pages in a ladder logic listing.
Printed at the top of the page.
Path
The part of a file specification that indicates the drive and subdirectory the file is in.
PC
Personal Computer
Peer-to-Peer
One of four major architectures for input/output systems (also see Distributed I/O,
Local I/O, and Remote I/O). A protocol for networked devices in which any device
can initiate data transfer.
Power Flow
In logic, an instruction is highlighted if it solves true and passes power. All
instructions "upstream" of it (to its left in the Traffic Cop display) must also be
passing power.
Preset
The maximum value a timer or counter can have.
Processor
A Programmable Logic Controller.
Program
For PLC’s, a set of ladder logic instructions contained in a set of ProWORX 32 files
(a Project).
Programmable
Logic Controller
(PLC)
An industrial control computer, also known simply as a controller.
Project
A group of files sharing a common name (but different file extensions) where the
ladder logic program and descriptor data for a controller is stored.
ProWORX 32
Function
A ProWORX 32 command or operation.
316
372 SPU 780 01EMAN May 2002
Glossary
Q
Quick Print
A function that allows you to print a network to a printer, with or without
documentation.
R
Rack
A collection of up to 16 I/O modules mounted in one back plane.
Radix
The base system of a value. The radix of decimal numbers is 10, the radix of binary
numbers is 2 and the radix of hexadecimal numbers is 16. In ProWORX 32, the term
"radix" sometimes refers to a value’s data type: binary, integer, floating point and so
on.
Random Access
Memory (RAM)
Random Access Memory. Memory that holds programs while they are being
executed.
Read Only
Memory (ROM)
Memory that is not erased by a power failure and that is programmed at the factory
to hold vital information. This memory cannot be changed.
Remote I/O (RIO)
One of four major architectures for input/output systems (also see Distributed I/O,
Local I/O, and Peer-to-peer Communications). I/O that is installed away from the
PLC and communicates with it though a high-performance, S908 coaxial cable
network. For Quantum controllers, an interface device at each remote I/O drop
communicates with an RIO processor in the PLC. The interface device sets the
address of the drop. Each RIO processor supports up to 31 remote drops, each of
which allows 64 input words and 64 output words.
Remote Terminal
Unit (RTU)
A data transmission mode used for Modbus communications. RTU uses 8 data bits.
Reports Listing
A group of printouts which consist of hardware allocation, data usage, and data
contents for a ladder logic program.
Routing Path
The sequence of devices through which a message passes to reach its final
destination.
RS-232
A popular standard for a serial data link connection.
372 SPU 780 01EMAN May 2002
317
Glossary
Run Light
A light on the front panel of a controller that is on while the controller is running.
S
Save
To store information on a disk.
Search
To locate a specified network element (or elements) in the ladder logic.
Segment
A group of I/O networks solved as a unit by the programmable controller. The
Segment Scheduler controls the frequency of segment execution and order of I/O
operations. Each segment controls two I/O channels in a 584 or 984/S901
configuration, or one drop in a 984/S908 configuration.
Serial Port
A 9- or 25- pin port used for serial communications (for example, Modbus).
Short Comment
Up to four lines of text which comprise a comment about an address within a PLC
ladder logic program. Typically printed beside output instructions in the ladder
listing.
Short Comment
Field
One of up to four lines of text which comprise a comment about an address within a
PLC network logic program. Typically printed beside output instructions, or below
the network in the network listing.
Slave
A networked device controlled by another device. Slave devices to not initiate data
transactions. Compare to Master.
Slot
The position of an I/O module in a rack.
State Flow
In logic, an instruction is highlighted if it solves true instead of only when it passes
power (compare to Power Flow).
Stop Bits
Bits used to indicate the end of transmission of a data item or frame.
Subdirectory
A directory within a directory.
Sweep
For a PLC, one cycle of scanning inputs, solving logic, and writing outputs.
318
372 SPU 780 01EMAN May 2002
Glossary
T
TCP/IP
A communication protocol for computers connected through an Ethernet or Token
Ring network.
Text
A collection of ASCII characters.
Timeout
If communications fail, the program waits the specified number of seconds before
trying to communicate again.
Trace
An operation in the Network Editor that locates a specified output coil in the network
logic.
Traffic Cop
A programmable controller’s internal configuration that maps logic element
addresses to physical I/O cards.
U
Used Table
A list of all I/O addresses in a controller, indicating which addresses are being used
in instructions and which have not.
Utility
A computer program included in a software package, but run separately from the
package’s main program.
W
Word
16 bits of data (two bytes). Also called a machine word.
372 SPU 780 01EMAN May 2002
319
Glossary
320
372 SPU 780 01EMAN May 2002
Index
Symbols
.CSV, 56
.DBF, 56
.DIF, 56
Editing with MS Excel, 303
.DOC, 56
.FIL, 56
.FIS, 56
.MDB, 56
.TEF, 56
.TXT, 56
.XLS, 56
Authorization
Moving, 18
ProWORX 32, 17
B
Bitmap Files, in the HMI Window, 184
BM85 Bridge Multiplexer, 220
BootP Server, 223
Listening, 223
Bridge Multiplexer, 220
Configuring, 220
Modbus Ports, Configuring, 221
Troubleshooting, 222
A
Address Used Tables, 60
Address Used Tables, Printing, 236
Addresses
Finding Free, 61
Finding in Ladder Logic, 142
Forcing Discretes, 143
in the Logic Editor, 142
Tracking in the Data Watch Window, 177
Tracking, in Ladder Logic, 143
Analyze Device, 100
ASCII Messages
Configuring, 209
Editor, 209
Tools for Editing, 211
Audit Trail, 243
372 SPU 780 01EMAN May 2002
C
Clamps, in the Data Watch Window, 182
Client/Server, 35
Coils, in the Equation Network, 155
Communications
Ethernet Gateway, 72
Modbus, 67
Modbus by Modem, 68
Modbus Plus, 71
Setup, 66
TCP/IP, 73
Compact Phase II Configuration
Extension, 104
Compare
Projects and Controllers, 226
Reporting, 227
321
Index
Conditional Expressions, 160
Configuration Extensions
Compact Phase II, 104
Data Protect, 105
I/O Scanner, 108
I/O Scanner Wizard, 111
Overview, 102
Peer Cop, 113
Peer Cop Wizard, 118
Profibus, 121
Profibus Wizard, 122
Quantum Hot Standby, 106
Quantum VME Bus, 126
S980, 123
SY/MAX, 124
TCP/IP, 125
Configuring a BM85, 220
Configuring Controllers
ASCII Ports, 82
General Tab, 77
Loadables Tab, 83
Overview, 76
Ports Tab, 80
Simple ASCII Ports, 81
Contacting Schneider Electric, 26
Controllers
Comparing, 226
Configuring Configuring Controllers, 76
Initializing Logic, 90
Manual Procedure List, 274
Pinging, 229
Reading From, 91
Selecting, 31
Start/Stop, 98
Status, 99
Writing to, 92
Controls
Script Editor, 252
Converting Ladder Logic Databases, 34
D
Data Protect Configuration Extension, 105
322
Data Watch Window
Clamps, 182
DRUM Summary, 205
General Properties, 181
HMI, 184
Importing and Exporting, 207
Instruction Editor, 193
Log Files, 182
Logic Editor Addresses, Tracking, 191
PID Tuner, 202
Radicies, 181
Radicies, Setting, 178
Register Editor, 201
Sample Rate, 183
Terminal Block, 193
Traffic Cop Addresses, Tracking, 192
Trend, 188
Triggers, 181
Watch Window, 177
Desriptor Ranges, Printing, 235
Diagnostic Trace, 148
Documentation
Importing and Exporting, 55
Documentation Editor
Overview, 51
Using, 53
Documentation, Printing, 235
Drops, 165
DRUM Summary, 205
E
EEPROM, 94
Emulation, 39
Adding Instruction Solve Support, 46
Emulation Tab, 39
Enable Contact, Setting, 155
Environment Tab, 19
Equation Networks
Enable Contact, Setting, 155
Equation Formatting, 156
Mathematical Functions, 161
Mathematical Operations, 158
Overview, 154
372 SPU 780 01EMAN May 2002
Index
Equations
Exponential Notation, 157
Formatting, 156
Ethernet Gateway Communications, 72
EXECLoader, 95
Exporting
Data Watch Window Data, 207
Documentation, 55
Extended Memory Addresses
Displaying in the Register Editor, 201
F
Faults, Isolating, 273
Files
.ESF (Emulation Solve Files, 46
Bitmap, in the HMI Window, 184
Log Files, in the Data Watch
Window, 182
Find, 59
Finding Free Addresses, 61
Flash RAM, 96
Forcing Discrete Addresses, 143
H
Hardware Clock, 152
HMI
Background Color, Setting, 184
Bitmap Files, Creating, 184
Bitmap Files, Using, 185
Cell Captions, Using, 186
Cell Data, Editing, 185
Monitor Values, Adding, 187
Overview, 184
Rows and Columns, Setting, 184
Hotkey Template, 132
I
I/O
Drops, 165
Racks, 166
Slots, 167
372 SPU 780 01EMAN May 2002
I/O Cards
800 Series, 258
A120 Series, 261
Adding New, 246
Compact TSX Series, 263
Micro Series, 265
Momentum M1 and INTERBUS
Series, 266
Quantum, 267
Script Editor, 249
Script Editor, Using the, 249
Sy/MAX Series, 270
I/O Drawing
Generator, 171
Viewer, 228
I/O Scanner Configuration Extension
Editing, 108
Wizard, 111
Importing
Data Watch Window Data, 207
Documentation, 55
Initializing Controller Logic, 90
Installing ProWORX 32, 15
Instruction Editor
Display Scripts, 194
Overview, 193
Instructions
Finding in Ladder Logic, 140
in the Logic Editor, 140
Internal Flash, 97
ISA Symbols, 146
K
Knowledge Base, 62
L
Ladder Logic
Addresses, Finding, 142
Addresses, Tracking, 143
Initializing in a Controller, 90
Instructions, 140
Networks, 138
Loadable Library Wizard, 86
323
Index
Loadables
Copying, 84
Deleting, 85
Updating, 84
Log Files
Setting the File Size in the Data Watch
Window, 182
Logging In to ProWORX 32, 16
Logging Out of ProWORX 32, 16
Logic Editor
Bookmarks, 151
Diagnostic Trace, 148
Display, Customizing, 130
Equation Network, 154
Hardware Clock, 152
Instructions, 140
ISA Symbols, 146
Networks, 138
Overview, 129
Properties, 130
Segment Scheduler, 153
Sweep, 149
Tracking Addresses in the Data Watch
Window, 191
M
Macros, 214
Unlinking, 218
Using in Logic, 216
Marks, in Ladder Logic, 151
Materials List, 172
Mathematical Functions, 161
Mathematical Operations, 158
MBP Stat, 230
Micro
Flash RAM, 96
Mismatch Tables, Printing, 237
Mnemonics, 144
Modbus Communications, 67
Modbus Plus
Concept Exec Loader,
Communications, 276
LED Indicator, 276
Modbus Plus Communications, 71
ModConnect Schneider Alliances, 246
324
Modem Communications, 68
Modsoft
Hotkeys, 133
Moving Authorization, 18
N
NetScan Network Explorer, 74
Network Explorer, 74
Networks, 138
Printing, 235
O
Offline Edit Mode, 135
Online, Undo/Redo, 137
Opcodes, Editing, 87
P
PCMCIA, 97
Peer Cop Configuration Extension
Global Input, 114
Global Output, 114
Overview, 113
Specific Input, 116
Specific Output, 116
Subfields, 115
Wizard, 118
PID
Block Overview, 202
Tuner, 202
Ping, 229
PLC Status Viewer, 99
Ports
ASCII, 82
Micro, 82
Modbus, 80
Simple ASCII, 81
Profibus Configuration Extension
Overview, 121
Wizard, 122
Project
Emulation, 39
Project Properties Tab, 37
372 SPU 780 01EMAN May 2002
Index
Projects
Combined, 37
Converting, 34
Creating, 29
Emulation, 36
Managing, 35
Offline, 36
Online, 36
Selecting a Controller, 31
Wizard, 29
Protected Registers, 58
ProWORX 32
Authorization, 17
Contacting Support, 26
Environment, 19
Installing, 15
Logging In, 16
Reporting, 233
Security, 20
Server, 240
System Requirements, 14
Toolbar, 23
ProWORXPLUS
Hotkeys, 134
Q
Quantum Hot Standby Configuration
Extension, 106
Quantum VME Bus Configuration
Extension, 126
Quick Picks, 234
R
Racks, 166
Radix
Multi Radix View, Setting, 181
Setting Multiple Addresses, 178
Single Radix View, Setting, 181
Reading From a Controller, 91
Redo, in Logic, 136
Register Editor, 201
Register, Printing, 236
Registers
Protected, 58
372 SPU 780 01EMAN May 2002
Reporting, 233
S
S901
Analyzing, 100
S908
Analyzing, 100
Errors, 300
S980 Configuration Extension, 123
Sample Rate, in the Data Watch
Window, 183
Schneider Alliances
I/O Card Script Editor, 249
I/O Cards, 246
Overview, 246
Schneider Electric
Contacting, 26
Support Guidelines, 26
Script Editor
Controls, 252
Overview, 249
Using, 249
Scripts
Functions, Terminal Block/Instruction
Editor, 196
I/O Cards, 249
Instruction Editor, 194
Terminal Block, 194
Variables, Terminal Block/Instruction
Editor, 195
Search, 59
Search Panel, 59
Segment Scheduler, 153
Server
Creating Groups, 241
Creating Users, 241
Logging On, 240
Overview, 240
Setting Communications, 240
Status, 242
Slots, 167
Solve Mode, Emulation, 42
Starting a Controller, 98
Stopcode Error Analysis, 277
Stopping a Controller, 98
325
Index
Sweep
Constant Sweep, Performing, 149
Overview, 149
Single Sweep, Performing, 149
SY/MAX Configuration Extension, 124
Symbols
ISA, 146
System Requirements, 14
U
Undo, in Logic, 136
Uninstalling ProWORX 32, 15
W
Writing to a Controller, 92
T
Tables
Address Used, 60
TCP/IP
Communications, 73
TCP/IP Configuration Extension, 125
Terminal Block
Display Scripts, 194
Overview, 193
Toolbar, 23
Tracking Ladder Logic Addresses, 143
Traffic Cop
Drops, 165
Online Module Status, 169
Overview, 164
Printing, 236
Racks, 166
Slots, 167
Tracking Addresses in the Data Watch
Window, 192
Transferring Memory
EEPROM, 94
EXECLoader, 95
Flash RAM, 96
PCMCIA, 97
Trend
Alarm, Setting, 188
Graph Functionality, 189
Graph Functionality Table, 190
Overview, 188
Resolution, Setting, 188
Setpoint, Setting, 188
Y-Axis Values, Setting, 188
Triggers, in the Data Watch Window, 181
Troubleshooting, 271
Isolating Faults, 273
326
372 SPU 780 01EMAN May 2002