1
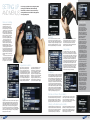
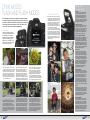
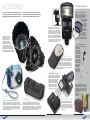
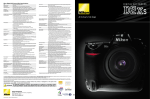
• MASTERING THE MENUS
• METERING AND EXPOSURE
• FOCUSING MODES
• ISO AND WHITE BALANCE
• FLASH MODES
• CHOOSING LENSES
I N A S S O C I AT I O N W I T H
EE
FR
THE COMPLETE GUIDE
TO DIGITAL SLRS
GETTING TO KNOW
YOUR DIGITAL SLR
Your Digital SLR (DSLR) has a host of controls and functions that will
enable you to take complete control of almost every aspect of your
picture taking. We will start by looking at some of the key controls you
will find on your DSLR and what they do
THE FRONT
Control Wheel
Adjusts the shooting modes
and/or settings. Some DSLRs
have a control wheel on the front,
some on the back; some have both.
Their functions can often be customised
via the menu, allowing you to tailor control of the camera to your way of working.
RC Receiver
A receiver for the remote control for
remotely triggering the camera from
several metres away. It also doubles
as a self-timer lamp, and flashes to
indicate that the timer is on.
Optical Viewfinder
Allows you to compose your images
accurately by seeing, via a series of mirrors
and a pentaprism (or pentamirror), directly
through the lens. Some viewfinders
provide a 100% field of view; others
slightly less, typically around 95%.
Menu Button
Activate the camera’s menu system
to control the camera’s core options
(may include some accessed by
external buttons on the body as well),
such as setting the date and time.
(Also, overleaf for more detail.)
THE TOP
GX10 DSLR System
WORDS: DOUG HARMAN DESIGN: MICHAEL O’CONNELL
Mode Dial
A dial that turns to switch between the
main shooting modes on your camera.
These can include a full-auto mode, scene
modes such as portrait or landscape, and
manual control options such as shutter
and aperture priority. Some DSLRs have
two such dials (see control wheel, above).
Metering Mode
Allows you to alter the metering mode
(eg, from Matrix/Evaluative to CentreWeighted or Spot modes). This is almost
always an external control but can
sometimes be found in the menu, too.
Pop-up Flash/
Hot Shoe
All but the top pro DSLRs feature a
pop-up flash which, depending on
the camera, offer varying degrees of
control. Accessory flashguns lock
onto the hotshoe and provide greater
flash power and extra features.
Lens
Each make of camera has its own
type of lens mount, for which there
are a vast number of lenses available.
These can go from very wideangle to
super telephoto.There is also a wide
choice of lenses from third-party
companies that can be used as well
as the camera manufacturer’s own.
THE BACK
Four-way Controller
This button pivots on its centre
allowing it to be pressed upwards,
downwards, left and right. It’s used
for changing flash and other settings,
and for scrolling through images or
menus (often in conjunction with a
control wheel).
LCD Display
Provides information on the camera’s
settings and allows reviewing of
images. It may also host other
useful information, such as histogram
displays, overexposure warnings, etc.
Flash Activation Button
Pressing this button activates the
camera’s built-in flash. On some cameras,
it is also used to change the flash mode
in use, such as fill-in flash, for example
– often in conjunction with a control dial.
Mono Data LCD
Used to keep you abreast of camera
settings such as the focus points,
mode selected, number of images
left on the card and remaining battery
power. Some DSLRs have abandoned
this display in favour of presenting this
information on the large colour screen.
See the back page
2
3
SETTING UP
AND MENUS
It is always a good idea to shoot using the optimal
settings in your DSLR and, with the following
information, we will have a close look at the key
settings within menus on a DSLR to help optimise
it for top-quality shots
Image quality
Menus and settings
The settings information may be
housed within a menu or on an
external control or sometimes on
both – depending on your camera
– and allows you to control and tailor
settings to get the most from all
those lovely pixels. While specifics
vary from camera maker to camera
maker, the advice on these pages
for setting up your camera for
day-to-day use generally holds true.
Pressing your camera’s menu
button will activate the system
that allows you to tinker with the
camera’s core settings. Menus are
displayed like pages or files in a
filing drawer. Scrolling around moves
you through pages of information,
the current ‘pick’ highlighted. Some
cameras have animated menus that
look funky and many have neat help
screens, which tell you when to use
a specific setting; very helpful they
are, too.
You will need to check the manual
for your camera but the following
assumes you are in the menu for
each topic or know where the button
is to get at it, if it is not in a menu.
The ‘image quality’ setting
refers to the compression
used. You’ll have various
options. There’ll be a series of
JPEG settings, perhaps a TIFF
mode and probably a RAW
setting. Some use both RAW
and JPEG simultaneously. As
a rule of thumb,use the highest
quality setting possible (or
RAW) for best results.
Sensitivity
Here you can set the camera’s ISO, and the
higher the ISO, the more sensitive it is to light.
However, a downside of higher sensitivities is the
introduction of image noise (analogous to grain in
film) that can adversely affect a shot. Try to use
the lowest possible setting for the shot at hand,
using ISO 100 or its lowest setting as a rule of
thumb and for best results. Set your camera’s
noise reduction (in menus) to ‘On’ but bear in
mind, unless shooting RAW, the extra noise
processing will slow the image handling speed
and may affect detail in the shots.
Focus mode
Your DSLR will have a variety of focus modes
to choose from. Single AF, for instance, sets the
focus so that once it has locked onto a subject it
stays there until the shot is made. Continuous AF
on the other hand constantly tracks your subject
in the frame even if it moves. Use Single AF for
most subjects and switch to Continuous AF for
action, sports or snapping the kids when they will
not sit still! DSLRs use multiple AF points, some
have a modest three, some around 8-12, while
some high-end cameras can have more than 30!
AF zones can be pre-assigned, say, to a single
central AF point; many can be used in groups
or patterns, or the camera can be left to decide
which are best for the job automatically.
Image size or resolution
Always set your camera to use the
largest number of pixels possible.
Why? You will be able to make very
big, finely detailed prints or crop into
a shot and enlarge sections if needed.
It is easier to downsize a big picture
than enlarge a small one. Removing
pixels is easy (in editing software on
a PC, for example) but adding them
can ruin a good shot. Remember that
basically, pixels equal detail. When
you enlarge a small image, the PC
adds pixels and ‘guesses’ what
information they would contain. The
more non-original pixels you add to
the image to make it physically
bigger, the more ‘garbage’ pixels are
added. The only time it’s a good idea
to shoot at a smaller size is if the
images are specifically for the web or
email and there’s no possibility that
you’ll ever want to use them bigger.
Sharpness
JPEG: This file format uses
compression to help fit more
images onto a memory card.
Usually it will have settings
such as Standard, Better,
Best; or Good, Fine and Super
Fine. Pick the highest setting
for top-quality or if you want
to make big prints. Only use
the lower settings if you know
you won’t want big prints or if
room on your card is at a premium. JPEG files can be heavily compressed; the higher the
compression used, the lower
the quality of the final image.
• TIFF: A file format that can
be compressed by up to 50%
but without degrading the
image. TIFF files provide very
high-quality images but at a
much larger file size, so will
use memory up quickly.
• RAW: Unprocessed image
data that provides scope to be
edited on PC; no camera processing is carried out on RAW
files. Think of these as digital
negatives, as you can process
them later and control almost
all aspects of the image after
the fact. Generally creates
smaller files than TIFFs and
can be used simultaneously
with JPEG in some DSLRs.
The JPEG becomes a ‘proof’
image, the RAW a negative
providing the best quality.
Sharpness settings let you increase or decrease the
way the camera adjusts the image after it is shot to
help define detail. Sharpening adjusts the contrast
around the edges of pixels, making them stand out
(or not) as you need them to and depending on the
mode you use. Usually, the default setting works
well enough, but can be conservative. The best way
to check is to take some images at each setting
and see what looks best. Again, if in doubt let the
camera’s default mode be your guide. However, less
sharpening is best for portraits while landscapes
might want more punch to bring out fine, distant
detail. Alternatively you may want to save your
sharpening to the editing stage on your PC.
Set date and time and file numbering
Colour
Typically, you’ll have a variety of colour modes to play with
including a standard (default) setting, a higher saturation
setting called something like ‘Vivid’ and perhaps a sepia
or black and white mode. You may also have presets for
particular subjects. For instance, if shooting portraits, a
more natural colour is best for skin tones. For landscapes
or plants, a vivid setting might work well. If shooting in RAW
format the settings do not apply, as no image processing
takes place within the camera.
4
Always set the camera’s date and time correctly
since this information will help you to file and
organise your images on the PC. The data is
stored with the image and, when using imageorganising software, can ensure you have an
accurate record of when you took the photo.
Another option is the file-numbering system.
You can set the camera to reset the count
every time a new card is used, or for each new
day, or it can count continuously.
Metering, white balance and sensitivity
These three items are key to getting top-notch
exposure and colour. Each is covered overleaf,
but as a rule of thumb, set the ISO (sensitivity)
to the lowest ISO for the job at hand (ISO
100 or 200 depending on your camera). The
metering mode should depend on the subject,
but Matrix (or Evaluative) is best for all-round
snapping. Set the white balance (WB) to the
correct setting for the ambient light: daylight
mode for daylight, for example.
5
METERING, SENSITIVITY
AND WHITE BALANCE
Metering, sensitivity and white balance are three key aspects of the way your image
looks once you press the shutter button, irrespective of the focus, sharpness or
number of pixels you throw at it. Here we will look at key components of the DSLR
that make an image look right in terms of colour, image noise and exposure
Sensitivity
A camera’s ISO setting defines its sensitivity
to light. The higher the ISO, the more
sensitive it becomes and vice versa. But
a downside of higher sensitivities is the
introduction of image noise (analogous to
grain in film) that can adversely affect a shot.
Think of noise as interference, just like the
‘snow’ in a badly tuned TV picture. It appears
because increasing sensitivity is actually
turning up the gain on the sensor. Things that
can affect noise include internal electrical
interference from camera components, heat
and the amount of light. The light is the good
signal, everything else is noise, and hence a
good signal to noise ratio is important: the
more light the less noise. This is why noise
becomes more evident in low-light shots.
To reduce the effects of noise within your
images, try to use the lowest possible setting
for the shot at hand. Set it to ISO 100 or its
lowest setting for best overall results. Set
your camera’s noise reduction (it’ll be there
in the set-up menus) to ‘On’ when shooting
above ISO 400. Bear in mind however, the
extra image processing required might slow
the speed at which the camera can handle
the images and may affect detail in the
shots, since it tries to ‘smooth’ away the tiny
speckles of blue, red or grey that denote
noise in a digital image.
Here is a ready reckoner for the use of a
particular ISO (sensitivity) and why, based
upon typical DSLR sensitivity settings...
ISO 100
Bright daylight, sunny conditions, hand-held
shooting where clean images are a priority.
ISO 200
Where faster shutter speeds are required or
slightly longer lenses, or where you need
extra flexibility with apertures/shutter speeds.
ISO 400
For indoor or overcast conditions; or if you
want to avoid using flash, or need a fast
shutter speed/aperture to shoot hand-held.
ISO 800
For overcast or dark indoor shooting, sports
or action photography where you need to
freeze the motion and some noise is okay.
ISO 1600
Night time, low-light shooting, very long lens
shooting; noise will almost certainly become
quite noticeable in the shot.
ISO 3200
For hand-held night time or low-light
shooting or where high shutter speeds are
required. Noise will be very evident in shots.
6
LOW ISO
HIGH ISO
MATRIX OR EVALUATIVE
These are many small (in some cases over
200) metering ‘zones’ around the frame that
are used to intelligently assess and measure
light from all locations within the frame (based
on pre-programmed algorithms) to get a
balanced exposure. This mode is ideal for
general photography or broader subjects
such as landscapes or subjects where there
are no tricky high-contrast areas.
CENTRE WEIGHTED
A central portion of the frame (the size of this
zone can be adjusted on some DSLRs) is
‘weighted’ to simply measure the average of
light non-judgmentally, without trying to apply
any adjustments. Ideal for where you want
to bias the exposure to the central area, in
backlit subjects for example. It’s also useful
in that you can predict how it will react to a
scene and when it will be fooled, so you can
more easily compensate for it.
White balance
Your DSLR offers a variety of White Balance (WB)
or colour temperature settings to combat colour
casts from differing light sources. Whether in
menus or accessed via an external control it is
not always a good idea to leave your camera set
to its ‘Auto WB’ setting. The colours may not be
rendered as accurately in a shot as needed. To
help get the most from any shot, use the correct
WB setting for the job at hand: daylight setting for
daylight and so on. Moreover, if you are not sure,
use the custom setting; DSLRs enable you to tailor
the WB quickly and simply to any lighting type.
The typical settings available will include all or
some of those set out in the box below, indicated
using small icons, text or both. Some DSLRs have
a Kelvin scale for even finer tuning as well as the
custom mode. The latter allows you to set WB
specifically for the current ambient light; typically
this involves taking a shot (in the custom WB setup screen) of something plain, filling the frame and
you know to be white: paper, anything. It does not
even have to be in focus. Using the custom method
of WB control means no matter what the ambient
light, you will always have white whites!
SPOT
A very small area of the frame (1%-8% of the
frame, depending on the camera) that is ideal
for measuring light from a very specific area
in a scene. Ideal for macro (close-up) work,
or for portraits (metering from a skin tone) or
for high-contrast scenes, so you can exclude
bright highlights/deep shadows (or meter
from both and apply an average).
Metering
DSLRs come with a light-measuring system
or ‘metering’ to ensure your shots are
properly exposed; not too light, and not too
dark, for example. The system is designed
to measure light reflected from your subject
from either the entire frame (Matrix or Evaluative metering) a central-biased average
of the scene (Centre Weighted), or from a
small spot, usually in the middle of the frame
(Spot metering). You can set the camera to
use whatever metering method you require
to achieve a well-balanced exposure for the
task, but its effect can be altered to suit the
subject (or your preference) by controlling the
aperture and shutter speeds in the manual
modes, for example.
Importantly, many DSLRs have their
focusing zones linked directly to the metering
system, thus providing a very accurate
bias in the metering to whichever AF point
(or points) are in use. This makes accurate
metering from specific (often tiny) areas in
a scene possible and provides a great level
of extra control should it be required, if, say,
the camera’s main metering systems are not
cutting the mustard.
Typical auto white balance settings
Above: One stop over
• Auto: General scenes/mixed lighting but colours may not
be accurate in some lighting.
• Direct Sunlight: Ideal for bright, sunlit daylight.
• Shade: Best for shade or shots in deeper shadow.
• Cloud: Use for overcast daylight shots.
• Flash: Use with flash photos including fill-in flash.
• Incandescent: Use for atmospheric candlelit images.
• Fluorescent: Use when shooting photos using light from
kitchen- style strip lights.
• Tungsten: Ideal for household bulb/lamplight shots and
shots taken indoors.
• Custom: User set (see text above) to whatever ambient light
is present in any conditions for most accurate colour rendition.
Here is a quick guide to colour temperature using the Kelvin scale
and the corresponding (typical) light source. The lower the Kelvin
figure, the warmer (or redder) the colour is going to be. The higher
the Kelvin figure, the hotter the light source is and bluer the colour.
1,700-1,800k = Match flame
2,000-3,000k = Sun: sunrise and sunset
2,500-2,900k = Household tungsten bulbs
3,200-7,500k = Fluorescent lights
5,000-5,400k = Sun: direct sun at noon
5,500-6,500k = Daylight (bright sun in clear sky)
6,000-7,500k = Overcast (cloudy) sky
7,000-8,000k = Outdoor shade
7
EXPOSURE: MANUAL
AND SCENE MODES
PORTRAIT MODE
Sets the camera to meter from a smaller,
central portion of the frame. A large aperture
will be selected to help blur backgrounds,
the focus will be switched to use the more
central set of AF points (or the central, single
AF), and less sharpening will be used to help
get more flattering skin. Colours will
be set to a more muted (or natural) palette
and, to help make the most of and get
natural skin rendition, white balance will
switch over to auto.
The meat of your DSLR’s control options resides within its exposure
systems, be they manually controlled or automated. Let us have a
closer look at what you have to play with and what they can do
SPORTS MODE
The camera’s drive mode will be changed to
its continuous setting (as long as you press
the shutter button the camera will keep
taking pictures), and focusing will be set to
its predictive or continuous setting so that
any moving subjects in the frame are tracked
across the frame, helping to keep them
sharp. Metering will switch to evaluative
(or matrix) and shutter speeds will be
bumped up to help keep things sharp.
NIGHT PORTRAIT/SCENE MODE
Here the camera will set itself up to take an
ambient light exposure and fire the flash at
the same time, so that the image provides a
combination of a correct exposure for, say,
background city lights and any foreground
subject, which will be illuminated by the flash.
A smaller aperture will be used, metering
will be set to matrix (or evaluative), focusing
will set to single AF mode and the flash will
switch on. A slow shutter speed is likely, so
you will need a tripod or some such support
to stop camera shake.
CLOSE UP MODE
APERTURE PRIORITY
SHUTTER PRIORITY
8
Overview
Automatic or scene modes
Any camera will have a selection
of tools to help you control the
way it deals with light and
getting a ‘correct’ exposure, or
the exposure you want to use
– after all, the ‘correct’ exposure
may not, creatively speaking, be
the one you want to use.
You’ll have a range of automatic
options, a selection of manual
controls which enable you to
wrest control from the camera,
and a fully manual setting where
you control all aspects of the
camera’s exposure for ultimate
creativity and experimentation.
DSLRs come with a range of automatic
settings that will both do everything (in terms
of camera set up) to help you get the best
from a shot and, on some DSLRs, they will
even pop the flash up when it’s needed and
fire it for you. This sounds great, does it not?
But the automatic modes on your DSLR
do two other things. First they take away
from you an element of control, replacing
it with a built-in set-up that tries to get the
‘best’ from a scene without you having to
worry about how to set the camera to do
so first. Second, it stops you from learning.
However, the auto modes are still useful
for a quick and dirty shot or where there’s
no time to do more than spin the mode dial
to an appropriate setting and snap, or risk
losing the shot altogether.
Here we look at a typical set of scene
modes and what they can do.
AUTOMATIC MODE
A fully automatic setting that will do its best
to make the most of every scene. Basic
elements such as focus, metering and white
balance are set at camera defaults. This is
the ultimate point-and-shoot setting.
LANDSCAPE MODE
Here the camera automatically selects a
smaller aperture and adjusts the focusing
to achieve maximum depth of field. Metering
will switch to matrix with a bias on the top
two-thirds of the frame – where it will assume
the sky to be. Sharpening will be boosted.
CLOSE UP MODE
Similar systems come into play as with Portrait
mode in terms of focus, aperture selection
and white balance; except that sharpening is
increased and colours set to be more vivid in
order to boost colours in flowers, for example.
PORTRAIT MODE
LANDSCAPE MODE
Manual modes
Your camera’s manual modes provide you
with a set of controls that allow you to tailor
photography to the subject at hand or the
way you want to take a shot.
PROGRAM MODE
Program mode is similar in many respects
to the fully automatic setting, but with a
crucial difference. It allows you to change
the aperture and shutter speeds, keeping
the same overall exposure value, thus
overriding the camera’s chosen settings,
if you wish. This provides you with a good
level of control, even though the camera
has done most of the hard work for you.
You can also apply exposure compensation
and switch the flash on or off as required.
Think of it as a turbocharged point-andshoot mode that allows you to snap away
happily and still take control if needed.
APERTURE PRIORITY
You can select whatever aperture you wish,
it matters not. The camera will automatically
select a shutter speed that will provide a
properly (as metered) exposure regardless,
hence the aperture setting has priority.
Aperture priority is ideal for when you need
to retain control of depth of field and are less
concerned over shutter speeds, such as
when taking close-up pictures or portraits for
example. Here, depth of field is vital, but keep
an eye on the shutter speed chosen by the
camera. If it’s too slow you could get camera
shake. You may need to use a tripod if shutter
speeds fall too low to handhold safely.
SHUTTER PRIORITY
Just like aperture priority, but the other way
around; you select the shutter speed you
want to use and the camera automatically
sets the aperture to give you a correct
(as metered) exposure for the shot. Shutter
priority is an ideal mode to use when
shooting fast-moving or sport subjects,
where you may wish to freeze the action
(or provide some controlled motion blur)
and are less worried about the amount of
depth of field in use, as the subject focused
upon is the key element. Its also ideal when
you want to use a specific slow speed.
MANUAL MODE
This mode provides the user with ultimate
control. Now you have control over both
apertures and shutter speeds and you
can set them as you like. Typically, the
metering system will warn you of over or
underexposure, but will not interfere otherwise,
leaving you to set everything regardless of
whether or not the exposure is ‘correct’. You
may want to deliberately underexpose a shot
to help boost colours (slight underexposure
helps boost colour) while an element of
overexposure can be desirable if you are
shooting a high-key image or portrait, for
example. It also offers more control when
subjects typically underexpose (bright scenes
such as snow or beach pictures) or
overexpose (such as predominantly darker
subjects). This mode is ideal for panoramic
shots, for keeping exposures consistent.
EXPOSURE COMPENSATION
AND EXPOSURE BRACKETING
Exposure compensation and exposure
bracketing are two tools you have at your
disposal to quickly under or overexpose
a shot to a predefined level without
needing to adjust settings on the camera.
Exposure compensation allows you to set
underexposure or overexposure in one-third
or one-half stop steps (or either on some
models) for every shot or just one. You
don’t have to do extra shutter or aperture
adjustment; the camera does it for you.
Exposure bracketing is similar to
compensation except you can set the
camera to take a range of images (including
a correctly – as metered – shot) both
underexposed and overexposed to a
predefined level. Typically, each time an
exposure is made, the camera automatically
takes a correct (as metered) image, one
overexposed and one underexposed image.
Some cameras allow more than three shots
and most will allow you to tailor the amount
the exposure is bracketed from one-third to
two or more exposure steps. This is ideal
where you want to quickly get a range of
images at a variety of exposures to assess
later, and see which has worked best.
9
LENSES: FOCAL LENGTH
AND FOCUS MODES
No matter what digital SLR you own, there will be a range of lenses available
for it that will be able to cater to almost any subject, from close-up or macro
work, wideangle shooting to telephoto shots. It will also have a range of
focusing options and controls at your disposal
Lens focal length
TELEPHOTO
Focal length is the name for the distance
between the film plane and the focal point
(or the optical centre of the lens) when the
lens is focused at infinity and expressed in
millimetres and shown on the lens. In plain
speak it is the name given to an indication
of the angle of view of a particular lens,
where a shorter focal length lens – such
as a 28mm lens – will provide a wider angle
of view than a longer one – such as 100mm.
It stands to reason therefore that you
can fit more of a scene into a shot using a
wideangle lens than that from a telephoto
lens, which is why you use longer lenses
to get ‘closer’ or get greater magnification
of a scene. A wideangle lens is ideal for
landscape work or for shots where you will
need a lot more room to fit everything in.
Telephoto lenses are ideal for getting close
in wildlife photography, for example.
WIDEANGLE
Lenses and
aperture control
Zoom lenses
and field of view
Focus modes and
when to use them
The viewfinder
and focus control
Focus and
focus control
A DSLR will have inside it a system to
measure the distance from the plane the
sensor sits on inside the camera to the
subject you’re trying to shoot. Usually a
combination of mechanisms in the camera,
it will include some or all of the following,
usually working in conjunction. There will be
a range-finding device, an infrared beam
(or several), colour and focal length
information and a phase difference or
contrast detection system. The information
gathered by these systems is combined with
one aim: to focus light onto the sensor (the
focal plane) to ensure you get a sharp image.
10
When you look through a DSLR viewfinder
you’ll see a series of autofocus (AF) points
that will usually illuminate for a moment in
red when the focus is achieved, head-up
display fashion. Some DSLRs have three
such points, some can have over 30 grouped
around the viewfinder, but all are used to
indicate that focus is achieved and in which
part of the scene.
The reason there are multiple AF points
is to make focusing more accurate for
off-centre subjects, or for subjects that are
more complex where an array of focus points
might be employed to get a best overall
focus position, ensuring all the elements
selected are sharp. Using the camera
controls, you’ll be able to override these
systems if you wish, selecting separate
or groups of AF points to help further tailor
the focus position for the subject. In practice,
the type of subject will determine the focus
points that you wish to use. In a portrait,
where focus on the eyes is important, you
may define a single AF point. For a large
building with architectural projections, a
group of AF points might work best to keep
everything in the finder sharply rendered.
You will also have various focus modes
to play with, each providing advantages.
The two main focus modes are Single AF
and Continuous AF. As their names suggest,
the former will lock onto a subject and remain
fixed there until after the shot is made, even
if you or the subject move, making it best for
static subjects. The latter provides a focus
system that continually looks for a subject
once it’s locked onto it and changes the
focus position if it (or you) move, always
keeping it sharply focused.
Another type of AF system, Predictive
AF, is similar to Continuous in that the focus
can track a subject, but this mode does not
lock onto it until the shutter is fired. The AF
actively monitors the position of the subject
right up until the shutter exposes light onto
the sensor. It predicts the subject’s position in
the frame at the point it will be when the
shutter starts to move and focuses there.
With Predictive AF, it is quite possible the
subject does not look sharp in the finder
at any point until the shutter fires, so it can
take some getting used to.
Finally, there is Zonal AF (what Canon calls
A-DEP or ‘automatic depth of field control’),
which is ideal for keeping larger or more
complex subjects in focus where the depth
of field is critical to keep a zone of the scene
sharp. It is achieved by the camera checking
all the active AF points, and then calculating
the shutter speed and aperture required to
keep all in focus, making it fast and simple
to use because you don’t have to worry
about adjusting apertures and checking
depth of field yourself.
Perspective
and depth of field
Differences in focal length can alter what you
see in an image. A wideangle lens will render
all elements smaller in the frame (unless the
subject is very close to the lens) and can
distort perspective, as the optics used ‘bend’
light to fit it all into and onto a camera’s
sensor. It is for this reason optical distortions
can appear in an image such as barrel
distortion, which gives the appearance of
curling the image corners down and round
at the top and vice versa at the bottom.
Another wideangle lens consideration
is the way perspective distorts if the camera/
lens is tilted backwards; say when shooting
a tall building. This will make the verticals
appear to converge towards the top of the
shot. While this can be used to your
advantage sometimes, or corrected in
software, the easier alternative is to keep
the camera perpendicular to the subject
or use a (rather expensive) tilt-and-shift lens
designed to help correct for such problems.
Telephoto lenses get you closer with a
smaller field of view and in so doing they
foreshorten perspective, appearing to bunch
everything closer together in the frame. They
also reduce depth of field – the amount of the
scene in front of, and behind the main subject,
that is sharp. Again, this can be used to great
advantage if there are distracting backgrounds. It is also why portrait lenses typically
have focal lengths of about 90mm to 135mm
to both give the most flattering perspective to
a face and help reduce depth of field.
Zoom lenses have a range of focal lengths
built into one optical device enabling you
to carry one lens that offers a broad range
of uses and flexibility – the reason they are
so popular in fact. However, zooms are
often not as good optically as a prime lens
(lenses with one focal length) because they
are an optical Jack-of-all-focal lengths, rather
than master of one.
Depending on the camera you own, you
may have a field of view multiplier to add to
the focal length of your lens. This is because
the lens has its focal length shown in relation
to 35mm film frame size and your camera
uses a sensor smaller than a 35mm frame
of film (unless, that is, the camera you are
using is a full frame – 35mm-sized – DSLR,
in which case the focal length shown on
the lens is the correct one).
Typical field of view multipliers are 1.5x
(or 1.6x) and 2.0x. In the former group, a
lens with a 50mm focal length will become
a 75mm focal length lens (this includes
APS-C sized sensors such as those in the
Nikon D40). In the latter group (cameras
using the FourThirds format eg. Olympus’s
E-400) it will be a 100mm focal length.
Lenses use a controllable aperture, analogous
to the pupil in a human eye, altered to vary the
amount of light entering a lens and reaching
the sensor. Aperture control also affects the
depth of field, with larger apertures (smaller
F numbers such as F/2.8) providing a
shallower depth of focus than smaller
apertures (larger F numbers, such as F16).
The technical side of why this happens
is that a smaller aperture will straighten light
more (even non-focused light rays) through the
smaller aperture on its path to the focal plane
(the sensor) than larger apertures. The closer
the light is to a point at the focal plane the
more ‘in focus’ it will be. Conversely, a wide
aperture allows non-focused light to enter
more diffusely, thus appearing more blurred.
A zoom lens with a fixed maximum aperture
throughout its range (typically around F/2.8)
is expensive, yes, but provides some real
advantages in that you can get more creative
control of depth of field at any given focal
length. A zoom lens whose aperture reduces
as the focal length increases (a variable
maximum aperture lens) is less flexible since
you have a reduced maximum aperture to play
with, thus reducing control of depth of field
and the amount of light entering the lens.
Therefore a wide maximum aperture lens,
zoom or otherwise, offers advantages over
variable aperture lenses, both in terms of
the amount of light entering the lens (and
so shutter speeds at your disposal) but the
amount of control over depth of field at a given
focal length (in zooms), making them far more
flexible. Typically, they are much better
optically speaking as well.
11
DRIVE MODES
FLASH AND FLASH MODES
Flash modes
and what they do
AUTO FLASH
The basic point-and-shoot flash setting
that fires when the camera ‘thinks’ it is
needed. In many cases, the flash pops
up automatically (if using a built-in unit),
saving you the worry of knowing when
to use it. In some modes the camera may
indicate flash is required with a small flash
‘lightning’ symbol in the viewfinder.
Flash and flash settings
Many DSLRs have a built-in pop-up flash unit.
The pop-up flash is great for filling in shadows
in daylight or closer shots in low light but they
are also relatively low-powered units, so can
only properly illuminate a subject up to about
three metres away from the camera. They
are not good for illuminating larger areas. For
that you’ll need to buy an accessory flashgun,
which sits on the camera’s hotshoe.
The built-in flash can be good for a fill-in in
daylight but can sometimes provide very harsh
light if the subject is quite close. In addition, if
you have your lens hood fitted, it can obstruct
the flash light and create unattractive shadows
across your shots. And, because the flash unit
is close to the lens, it can make the camera
susceptible to redeye (see Redeye Reduction
Flash to the right).
Be it a high-speed action shot or something more sedate, your DSLR
can shoot fast sequences of images that means you won’t miss any of
the action. In addition, if it has a built-in flash, then you will be able to
use it to add even more illumination on a scene. Let us have a look
at some of the key features of both these DSLR tools
Drive modes
Your DSLR will have a variety of
drive modes – settings that make
the camera shoot one image, a
sequence of images or delay the
firing of the shutter for a pre-set
period of, say, 10 seconds. There
are times when it is useful to know
when to use them and why.
AUTO-FLASH MODE
FORCED FLASH (FILL-IN FLASH)
In this mode the flash is set to fire all the
time, whether it is required or not, even
in daylight. You can use it to fill-in shadows
(fill-in flash) or for when you need an
extra puff of light to add sparkle to a shot,
boost colours and, with portraits, add an
attractive light to your subject’s eyes.
SLOW-SYNC MODE
SLOW SYNC FLASH
With this technique you fire the flash in
conjunction with a slow shutter speed. It
has two main uses: to create interesting
motion blur images with moving subjects
(so they’re part blurred, part sharp) and
to show a subject in the context of a dimly
lit environment (such as a dimly lit room or
outside at night with a lit building behind).
With normal flash the background would
disappear in a sea of blackness, but with
slow sync flash you can illuminate a
foreground subject while keeping the
ambient light exposure correct.
REDEYE REDUCTION MODE
Single shot mode
Self-timer mode
As the name suggests, in this mode, when
you press the shutter button to take a picture
a single shot is taken and even if you keep
your finger on the shutter release, it will not
do any more. To take another shot you must
release the shutter button and start again.
Use this mode for static subjects or portraits
and the like, where you know the subject is
not going to suddenly run off.
DSLRs have a delayed shutter mode that
enables you to get into the shot after the
shutter has been pressed. Typically, you
focus, press the shutter button and run into
the scene while the camera beeps a countdown or flashes a small lamp, or both. The
amount of delay can (usually) be pre-set,
typically for two to 20 seconds. The self-timer
is also useful for long exposure tripod shots,
to avoid vibration from touching the camera.
Intervalometer mode
This is a timer mechanism on some DSLRs
(or a function on their wired remotes) that
takes a series of images at predetermined
time intervals, making them ideal for time
lapse photography or remote shooting. This
is different from a self-timer (which takes
one shot after a predetermined time interval
– see Self-timer mode, left) as the camera will
continue to shoot at the time interval selected
until it is stopped or the memory card is full.
FILL-IN FLASH
FIRST AND SECOND (OR REAR) CURTAIN SYNC
Normally, the flash fires immediately after the
first curtain of the shutter is fully open. But
when taking pictures using a slow shutter
speed the subject can appear to be moving
backwards, as it leaves a trail in front of the
subject. With Second Curtain Flash Sync the
flash fires shortly before the second curtain
closes. The result is a more natural ambient
light trail that follows the subject.
FLASH-OFF MODE
REDEYE REDUCTION FLASH
Redeye Reduction Flash is a method of
preventing or reducing the effect of redeye,
a phenomenon caused by light reflecting
from the retina out into the camera lens.
A large pupil size can aggravate the
problem so it’s often evident in low light
flash shots. To prevent or reduce it, the
camera either fires a burst of flash pulses
or emits a beam of bright light. Both are
designed to reduce the subject’s pupil size,
but this mode rarely works well in practice.
FLASH OFF
Sometimes you’re in a situation where flash
isn’t allowed (eg museums) or your subject
is too big or far away for the flash to light it.
In these instances turning it off will instead
cause the camera to select a slow shutter
speed to compensate – so you’ll need to find
a steady support for the camera.
Continuous mode
It is all very well being able to shoot a static
subject and get it focused, or include yourself
in a shot using the Self-Timer setting.
However, for subjects that are moving (or if
you’re moving) at, say, a sports event, you will
need to use your DSLR’s continuous shooting
mode. When set, the shutter will keep firing as
long as you keep your finger pressed down on
the shutter button.
12
Depending on the camera, the frame
rate (the number of images per second that
can be captured) will vary, but is typically
between three and ten frames per second
(10fps). One limiting factor is the size of the
buffer memory. Think of this a reservoir of
images waiting to be processed and sent
to the memory card. The larger the buffer
(or smaller the file size of the image) the
more it can hold and the longer your camera
will continue to shoot before the buffer fills.
When the buffer memory is full, the
camera will either slow down, going from,
say, five frames per second to three, as it
moves images across from the buffer to
the card. Alternatively, it may just stop,
as the processing resources needed to move
images to your card become too great to
do both shooting and storing of shots at the
same time. Once all the waiting images have
successfully buffered across to the card,
you can start shooting again.
REMOTE FLASH TRIGGERING
Some DSLRs offer flash units (or accessory flashguns) that can remotely trigger
(using infrared, wi-fi and/or the flash light
itself) multiple flash units not connected
to the camera. This is useful for lighting
large areas (you place the other flash units
where needed to help with the illumination,
eg. backlights to fill shadow areas) or for
creative effects not otherwise achievable
with a camera-mounted flash alone.
13
ACCESSORIES
One of the key benefits of the DSLR is that it is part
of a system of equipment allowing almost limitless
photographic potential to be realised. Here we will
Third-party accessories
Filters
have a look at some of the key accessories that
can help make your photography and photography
experience more enjoyable and more versatile
Filters screw on the front of the lens to
perform a variety of functions. A UV or
skylight filter on each lens will protect the
front element from damage. A polariser
will massively boost colour saturation
by reducing reflections, and
a neutral density grad
will darken an
overly bright sky
to balance it
with a darker
landscape
and avoid
overexposing
it. While not
strictly filters,
screw-in close-up
lenses are useful for
macro work too, letting
you focus closer than your
lens would otherwise allow.
Flash
Accessory flashguns provide more than just
extra lighting oomph when used on a DSLR.
The amount of control you will have depends
on the flashgun but, in most cases, you will
be able to adjust both the light output and the
flashgun’s head position. You will be able to tilt,
turn and in some cases swivel the flashgun’s
head around to help get greater creative lighting
effects. You will be able to control multiple,
off-camera flash units as well with some ‘guns’
and the level of control you have over the way
light is used is greatly enhanced.
Lenses
Being able to attach a variety
of lenses onto your camera
provides you with the main
advantage of owning a DSLR
– photographic versatility.
Depending on the lens, you will
be able to photograph everything
from ultra-wideangle images with
a fisheye lens, to stunning close-up
images using a macro, or closing in on
distant wildlife with a long telephoto lens.
The range of lenses and the photographic
potential offered by them is almost limitless.
Tripods
Remote releases
A remote release either connects to your
camera with a wire or, depending on the
camera you own, uses an infrared signal
to allow you to control the camera from a
distance. This provides increased flexibility for,
say, including yourself in a scene and allows you
to use the camera without making it shake – which is
important for low-light photography where slow shutter
speeds are being used.
Viewing aids
Some DSLRs accept interchangeable
focusing screens, (such as grid screens)
allowing you to tailor the viewfinder to suit a
particular subject, be it landscape, macro or
architecture. You can also fit viewing
accessories such as angle finders
(periscope-style attachments for low
or high level shooting), and dioptric
adjustment lenses for people with
eyesight correction needs not
catered for by the built-in dioptric
adjustment on the camera.
Underwater
housings
You’re not just restricted to snapping on terra firma with an
underwater housing designed to let you slip beneath waves and
open up a new world of photographic opportunities. Underwater
Housings protect your camera from water (and dirt, dust and sand)
but vary in the depths to which you can take them. Some allow
you to snorkel at depths up to five metres (16 feet), while others
(depending on the price you pay) can be used at the recreational
dive limit of 30 metres (100 feet).
14
Professional
or battery grips
Even if you’ve bought a relatively compact DSLR there are
Professional Grips that can be screwed onto some cameras that
provide improved handling via an extra set of controls when using
the camera vertically and that allow more memory and extra batteries
to be loaded for greater shooting duration. Yes, the camera is made
bigger and heavier, but if you are out and about and need the extra
power and handling control, a Pro Grip is the way to go.
One of the most useful accessories for
the digital SLR photographer is a tripod.
Although even
compact camera
owners can benefit
from using them
too, the additional
creative possibilities
suggested by SLR
ownership makes
one more necessary.
There are tripods to
suit all budgets and
tastes, from small
table-top models to
sturdy heavy-duty
models with legs
like scaffolding
poles! Choose
one that’s stable
and light enough
to carry with you.
Bags
Once you start collecting accessories such
as lenses, flash and so forth you’ll need a
decent sized bag to put them in. There are
many different styles, from shoulder bags
to backpacks to waist packs, in a range of
materials and colours. Get one that isn’t
too big but allows
some room to
expand your system
in the future.
Supplementary batteries
Every photographer hates that feeling of
powerlessness just when the picture opportunity of a lifetime presents itself. So not
only making sure your DSLR’s battery is
fully charged before you head out, but also
trousering a second power cell for back up,
is a shrewd move.
15
See the light
The Samsung GX10 is more than a camera. It’s a complete photographic system with a lens mount designed
to accept both Schneider Kreuznach and Pentax lenses. It’s also packed with advanced photographic
technology to give you full creative control. Features include a 10.2 Megapixel sensor and a PentaPrism
viewfinder for a brighter 95% field of view. When combined with the ability to shoot up to ISO 1600, this
allows you to use all available light to your advantage. There’s even an innovative CCD dust removal system
inside a completely weather-proof body. Take control with the One-Touch RAW button and continuous
shooting at 3 frames per second. Explore your creativity with the fully manual capabilities or programme your
favourite settings into the automatic shooting modes. Now you can see the light. Go out and capture it.
GX10 DSLR System
www.samsungcamera.co.uk
Schneider Kreuznach lenses: fish eye lens (10-17mm F3.5-F4.5 ED), ultra wide zoom lens (12-24mm F4 ED AL), wide zoom lens (16-45mm F4
ED AL), standard lens (18-55mm F3.5-F5.6), fixed focus lens (35mm F2 AL), macro lens (Macro 100mm F2.8) and telephoto lens (50-200mm
F4-F5.6). 2 advanced flashguns (guide no. 36 and 54). All Samsung cameras have a 2 year warranty.