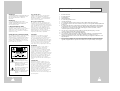
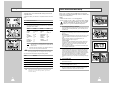
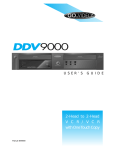
1
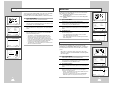
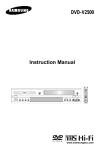
CHT-350
Set : DVD-CM350
(Speaker
: SP-350 )
Instruction Manual
POWER
TV POWER
OPEN/CLOSC
MUTE
EJECT
2
3
4
5
6
7
1
8
9
100+
ANGLE
0
ZOOM
ATR
SPEAKER
TEST
MODE
REPEAT
TV VOL.
SOUND
MODE
SOUND
EFFECT
DIGEST
CH/TRK
TV
STEP
AMP VOL.
TV INPUT
SELECT
DVD
VCR
FM/AM
U
MEN
SET
UP
C
DIS
EJECT
OPEN/CLOSE
INPUT
CLEAR
DISPLAY
ENTER
REC
PHONES
REC
S.MODE S.EFFECT
CHANNEL
DVD
VCR
FM/AM
INPUT
VOL
RETURN
MARK
TITLE
SUBTITLE
SEARCH
SPEED
TIMER
AUDIO
www.samsungusa.com
SCREEN FIT
TV/VCR
Important Safety Instructions
WARNING:
Copy Notification
TO PREVENT DAMAGE WHICH MAY RESULT IN
FIRE OR ELECTRIC SHOCK HAZARD, DO NOT
EXPOSE THIS APPLIANCE TO RAIN OR
MOISTURE.
Federal law provides severe civil and criminal
penalties for the unauthorized reproduction,
distribution, or exhibition of copyrighted motion
pictures and videotapes. (Title 17, United States
Code, Sections 501 and 506).
WARNING:
TO AVOID HAZARDOUS EXPOSURE TO
INVISIBLE LASER RADIATION, DO NOT OPEN
OR REMOVE/DEFEAT LASER TRANSPORT
PROTECTIVE HOUSING.
Macrovision Notification
1.
Read these instructions.
2.
Keep these instructions.
3.
Heed all warnings.
4.
Follow all instructions.
5.
Do not use this apparatus near water.
6.
Clean only with dry cloth.
7.
Do not block any ventilation openings. Install in accordance with the manufacturer’s instructions.
8.
Do not install near any heat sources such as radiators, heat registers, or other apparatus (including amplifiers) that
produce heat.
9.
Your authority to operate this FCC certified
equipment could be voided if you make changes or
modifications not expressly approved by the
manufacturer, who is responsible for compliance
with Part 15 FCC rules.
This product incorporates copyright protection
technology that is protected by method claims of
certain U.S. patents and other intellectual property
rights owned by Macrovision Corporation and other
rights owners. Use of this copyright protection
technology must be authorized by Macrovision
Corporation, and is intended for home and other
limited viewing uses only unless otherwise
authorized by Macrovision Corporation. Reverse
engineering or disassembly is prohibited.
Do not defeat the safety purpose of the polarized or grounding-type plug. A polarized plug has two blades with
one wider than the other. A grounding type plug has two blades and a third grounding prong. The wide blade or
the third prong are provided for your safety. If the provided plug does not fit into your outlet, consult an
electrician for replacement of the obsolete outlet.
10.
Protect the power cord from being from being walked on or pinched particularly at plugs, convenience
receptacles, and the point where they exit from the apparatus.
11.
Only use attachments/accessories specified by the manufacturer.
NOTE TO CATV SYSTEM INSTALLER:
CAUTION:
12.
This reminder is provided to call the CATV system
installer’s attention to Article 820-40 of the
National Electronic Code that provides guidelines
for proper grounding and, in particular, specifies
that the cable ground shall be connected to the
grounding system of the building, as close to the
point of cable entry as practical.
To prevent fire, shock hazard, or annoying
interference, use only the recommended
accessories. To prevent electric shock, do not use
this (polarized) plug with an extension cord,
receptacle, or other outlet unless the blades can be
fully inserted to prevent blade exposure. To reduce
the risk of electric shock, do not remove the unit
cover or back. There are no serviceable parts
inside. Refer servicing to qualified personnel only.
Use only with cart, stand, tripod, bracket, or table specified by the manufacturer, or sold with the apparatus.
When a used, caution when moving the cart/apparatus combination to avoid injury from tip-over.
13.
Unplug this apparatus. When a cart is used, use caution when moving the cart/apparatus combination to avoid
injury from tip-over.
14.
Refer all servicing to qualified service personnel. Servicing is required when the apparatus has been damaged in
any way, such as power-supply cord or plug is damaged, liquid has been spilled or objects have fallen into the
apparatus, the apparatus has been exposed to rain or moisture, does not operate normally, or been dropped.
USER/INSTALLER CAUTION:
CUIDADO:
CAUTION
This symbol is intended to alert
the user to the presence of
uninsulated dangerous voltage
within the product’s enclosure
that may be of sufficient
magnitude to constitute risk of
fire or electric shock.
This symbol is intended to alert
the user to the presence of
important operating and
maintenance instructions in the
literature accompanying this
product.
2
Para prevenir incendio, riesgo de choque, o
interferencia enfadosa, use solamente los
accesorios recomendados. Para prevenir
electrochoque, no use este enchufe (polarizado)
con un cordón de extensión, toma de corriente, o
cualquier otra toma a menos que los dientes
puedan ser completamente insertados para prevenir
exposición de los dientes. Para reducir el riesgo de
descarga eléctrica, no remueva la cubierta o la
parte posterior del equipo. Dentro del equipo no
hay partes que requieren servicio. Diríjase
solamente a personal calificado cuando requiera
servicio.
ATTENTION:
Pour éviter les incendis, risque de chocs, ou
interférences fâcheuses, employer seulement les
accessoires recommandés. Pour éviter les chocs
électriques, ne pas employer cette prise (polarisée)
avec une rallonge, une prise de courant ou une
autre sortie de courant à moins que les lames
peuvent être insérées à fond pour l’exposition des
lames. Pour réduire les risques de chocs
électriques, ne pas retirer le couvercle ou l'arrière
du module. Il n'y a pas de pièce utilisable à
l'intérieur. Ne faire effectuer l'entretien que par un
personnel qualifié.
3
Table of Contents
Table of Contents
◆ Safety . . . . . . . . . . . . . . . . . . . . . . . . . . . . . . . . . . . . . . . . . . . . . . . . . . . . .
3
Important Safety Instructions . . . . . . . . . . . . . . . . . . . . . . . . . . . . . . . . . . . . . . .
3
■
◆ 5 - DVD Setup. . . . . . . . . . . . . . . . . . . . . . . . . . . . . . . . . . . . . . . . . . . . . . .
24
Disc Menu Language . . . . . . . . . . . . . . . . . . . . . . . . . . . . . . . . . . . . . . . . . . . . .
Audio Language . . . . . . . . . . . . . . . . . . . . . . . . . . . . . . . . . . . . . . . . . . . . . . . . .
Subtitle Language . . . . . . . . . . . . . . . . . . . . . . . . . . . . . . . . . . . . . . . . . . . . . . .
Parental . . . . . . . . . . . . . . . . . . . . . . . . . . . . . . . . . . . . . . . . . . . . . . . . . . . . . . .
Dynamic Compression . . . . . . . . . . . . . . . . . . . . . . . . . . . . . . . . . . . . . . . . . . . .
TV Aspect Ratio . . . . . . . . . . . . . . . . . . . . . . . . . . . . . . . . . . . . . . . . . . . . . . . . .
Black Level. . . . . . . . . . . . . . . . . . . . . . . . . . . . . . . . . . . . . . . . . . . . . . . . . . . . .
Alt Video Out . . . . . . . . . . . . . . . . . . . . . . . . . . . . . . . . . . . . . . . . . . . . . . . . . . .
24
24
25
26
27
28
29
29
◆ 6 - DVD Operations . . . . . . . . . . . . . . . . . . . . . . . . . . . . . . . . . . . . . . . . . .
30
Special Playback Features. . . . . . . . . . . . . . . . . . . . . . . . . . . . . . . . . . . . . . . . .
Disc Menu Navigation . . . . . . . . . . . . . . . . . . . . . . . . . . . . . . . . . . . . . . . . . . . .
Screen Fit Playback . . . . . . . . . . . . . . . . . . . . . . . . . . . . . . . . . . . . . . . . . . . . . .
Title/Chapter/Time Selection . . . . . . . . . . . . . . . . . . . . . . . . . . . . . . . . . . . . . . .
Zoom . . . . . . . . . . . . . . . . . . . . . . . . . . . . . . . . . . . . . . . . . . . . . . . . . . . . . . . . .
Angle . . . . . . . . . . . . . . . . . . . . . . . . . . . . . . . . . . . . . . . . . . . . . . . . . . . . . . . . .
Subtitle . . . . . . . . . . . . . . . . . . . . . . . . . . . . . . . . . . . . . . . . . . . . . . . . . . . . . . . .
Digest Playback . . . . . . . . . . . . . . . . . . . . . . . . . . . . . . . . . . . . . . . . . . . . . . . . .
A-B Repeat. . . . . . . . . . . . . . . . . . . . . . . . . . . . . . . . . . . . . . . . . . . . . . . . . . . . .
Repeat Chapter/Title . . . . . . . . . . . . . . . . . . . . . . . . . . . . . . . . . . . . . . . . . . . . .
Audio . . . . . . . . . . . . . . . . . . . . . . . . . . . . . . . . . . . . . . . . . . . . . . . . . . . . . . . . .
Bookmarks . . . . . . . . . . . . . . . . . . . . . . . . . . . . . . . . . . . . . . . . . . . . . . . . . . . . .
Programmed Playback (CD) . . . . . . . . . . . . . . . . . . . . . . . . . . . . . . . . . . . . . . .
Random Playback (CD) . . . . . . . . . . . . . . . . . . . . . . . . . . . . . . . . . . . . . . . . . . .
MP3 Playback . . . . . . . . . . . . . . . . . . . . . . . . . . . . . . . . . . . . . . . . . . . . . . . . . .
30
31
31
32
33
33
34
34
35
36
36
37
38
38
39
◆ 7 - VCR Playback . . . . . . . . . . . . . . . . . . . . . . . . . . . . . . . . . . . . . . . . . . . .
40
Special VCR Playback Features . . . . . . . . . . . . . . . . . . . . . . . . . . . . . . . . . . . .
Tracking Adjusting Picture Alignment Automatically . . . . . . . . . . . . . . . . . . . . .
Auto Play . . . . . . . . . . . . . . . . . . . . . . . . . . . . . . . . . . . . . . . . . . . . . . . . . . . . . .
S-VHS Playback . . . . . . . . . . . . . . . . . . . . . . . . . . . . . . . . . . . . . . . . . . . . . . . .
Variable Search System. . . . . . . . . . . . . . . . . . . . . . . . . . . . . . . . . . . . . . . . . . .
40
40
41
41
42
■
■
◆ Welcome . . . . . . . . . . . . . . . . . . . . . . . . . . . . . . . . . . . . . . . . . . . . . . . . . . .
7
Feature Summary . . . . . . . . . . . . . . . . . . . . . . . . . . . . . . . . . . . . . . . . . . . . . . .
Unpacking . . . . . . . . . . . . . . . . . . . . . . . . . . . . . . . . . . . . . . . . . . . . . . . . . . . . .
Disc Type and Characteristics . . . . . . . . . . . . . . . . . . . . . . . . . . . . . . . . . . . . . .
7
7
8
◆ 1 - System Overview. . . . . . . . . . . . . . . . . . . . . . . . . . . . . . . . . . . . . . . . . .
9
Front Panel Overview. . . . . . . . . . . . . . . . . . . . . . . . . . . . . . . . . . . . . . . . . . . . .
Front Panel Display . . . . . . . . . . . . . . . . . . . . . . . . . . . . . . . . . . . . . . . . . . . . . .
Rear Panel . . . . . . . . . . . . . . . . . . . . . . . . . . . . . . . . . . . . . . . . . . . . . . . . . . . . .
Remote Control Overview . . . . . . . . . . . . . . . . . . . . . . . . . . . . . . . . . . . . . . . . .
Insert Remote Control Batteries. . . . . . . . . . . . . . . . . . . . . . . . . . . . . . . . . . . . .
Using the TV Buttons on the Remote Control . . . . . . . . . . . . . . . . . . . . . . . . . .
9
9
10
11
11
12
◆ 2 - Getting Started . . . . . . . . . . . . . . . . . . . . . . . . . . . . . . . . . . . . . . . . . . .
13
Basic Connections/Auto Setup. . . . . . . . . . . . . . . . . . . . . . . . . . . . . . . . . . . . . .
13
◆ 3 - Basic Operation . . . . . . . . . . . . . . . . . . . . . . . . . . . . . . . . . . . . . . . . . . .
14
■
Deck Control Buttons . . . . . . . . . . . . . . . . . . . . . . . . . . . . . . . . . . . . . . . . . . . . .
Basic DVD Playback . . . . . . . . . . . . . . . . . . . . . . . . . . . . . . . . . . . . . . . . . . . . .
Basic VHS Playback . . . . . . . . . . . . . . . . . . . . . . . . . . . . . . . . . . . . . . . . . . . . .
Basic TV Tuner Operations . . . . . . . . . . . . . . . . . . . . . . . . . . . . . . . . . . . . . . . .
14
14
15
15
■
◆ 4 - System Setup . . . . . . . . . . . . . . . . . . . . . . . . . . . . . . . . . . . . . . . . . . . . . . . . .
16
On-Screen Menu Navigation . . . . . . . . . . . . . . . . . . . . . . . . . . . . . . . . . . . . . . .
Menu Language . . . . . . . . . . . . . . . . . . . . . . . . . . . . . . . . . . . . . . . . . . . . . . . . .
Clock Setup . . . . . . . . . . . . . . . . . . . . . . . . . . . . . . . . . . . . . . . . . . . . . . . . . . . .
Manual Clock Set . . . . . . . . . . . . . . . . . . . . . . . . . . . . . . . . . . . . . . . . . . . . . . . .
Tuner Band Setting . . . . . . . . . . . . . . . . . . . . . . . . . . . . . . . . . . . . . . . . . . . . . .
Auto Channel Memory . . . . . . . . . . . . . . . . . . . . . . . . . . . . . . . . . . . . . . . . . . . .
Channel Add/Delete . . . . . . . . . . . . . . . . . . . . . . . . . . . . . . . . . . . . . . . . . . . . . .
RF Output Channel . . . . . . . . . . . . . . . . . . . . . . . . . . . . . . . . . . . . . . . . . . . . . .
Front Panel Dimmer . . . . . . . . . . . . . . . . . . . . . . . . . . . . . . . . . . . . . . . . . . . . . .
Auto Power Off. . . . . . . . . . . . . . . . . . . . . . . . . . . . . . . . . . . . . . . . . . . . . . . . . .
16
16
17
18
19
20
21
22
22
23
■
■
■
■
■
■
■
■
■
■
■
■
■
■
■
■
■
■
■
■
■
■
■
■
■
■
■
■
■
■
■
■
■
■
■
■
■
■
■
■
■
■
4
■
■
■
■
■
■
5
Table of Contents
Feature Summary
System Features
◆ 8 - VCR Recording . . . . . . . . . . . . . . . . . . . . . . . . . . . . . . . . . . . . . . . . . . .
43
Basic Recording . . . . . . . . . . . . . . . . . . . . . . . . . . . . . . . . . . . . . . . . . . . . . . . . .
Special Recording Features. . . . . . . . . . . . . . . . . . . . . . . . . . . . . . . . . . . . . . . .
One-Touch Recording (OTR). . . . . . . . . . . . . . . . . . . . . . . . . . . . . . . . . . . . . . .
Record Speed . . . . . . . . . . . . . . . . . . . . . . . . . . . . . . . . . . . . . . . . . . . . . . . . . .
43
44
45
45
◆ 9 - Timer Recording . . . . . . . . . . . . . . . . . . . . . . . . . . . . . . . . . . . . . . . . . .
46
How to Set a Timer Recording . . . . . . . . . . . . . . . . . . . . . . . . . . . . . . . . . . . . . .
46
◆ Appendix A - Advanced Connections . . . . . . . . . . . . . . . . . . . . . . . . . . . . .
47
S-Video/Component Video Connections (for DVD) . . . . . . . . . . . . . . . . . . . . . .
Connecting the FM and AM antennas . . . . . . . . . . . . . . . . . . . . . . . . . . . . . . . .
Connecting the Speakers. . . . . . . . . . . . . . . . . . . . . . . . . . . . . . . . . . . . . . . . . .
Volume light/Ext.Audio 3 settings. . . . . . . . . . . . . . . . . . . . . . . . . . . . . . . . . . . .
Speaker Volume Control . . . . . . . . . . . . . . . . . . . . . . . . . . . . . . . . . . . . . . . . . .
Speaker setup . . . . . . . . . . . . . . . . . . . . . . . . . . . . . . . . . . . . . . . . . . . . . . . . . .
Dolby Pro Logic II decoder. . . . . . . . . . . . . . . . . . . . . . . . . . . . . . . . . . . . . . . . .
Sound mode/effect function . . . . . . . . . . . . . . . . . . . . . . . . . . . . . . . . . . . . . . . .
Listening to radio broadcasts . . . . . . . . . . . . . . . . . . . . . . . . . . . . . . . . . . . . . . .
Presetting stations . . . . . . . . . . . . . . . . . . . . . . . . . . . . . . . . . . . . . . . . . . . . . . .
Monitor TV Connections. . . . . . . . . . . . . . . . . . . . . . . . . . . . . . . . . . . . . . . . . . .
Connecting Other Video Equipment. . . . . . . . . . . . . . . . . . . . . . . . . . . . . . . . . .
47
48
49
50
50
51
53
54
55
55
56
57
◆ Appendix B - Help . . . . . . . . . . . . . . . . . . . . . . . . . . . . . . . . . . . . . . . . . . . .
58
Technical Specifications. . . . . . . . . . . . . . . . . . . . . . . . . . . . . . . . . . . . . . . . . . .
58
■
■
■
■
■
■
■
■
■
■
■
■
■
■
■
■
■
• Complete versatility to play DVD, VCDs, audio CDs, MP3 discs or VHS Tapes.
• Watch a DVD while recording a TV show to the VCR.
• Auto Setup automatically sets clock and searches for channels.
• Remote controls DVD, VCR decks, FM/AM Tuner and Digital Amplifier..
• Composite, S-Video and Component video outputs for high connectivity and optimum performance.
• RF inputs and outputs for connection to all TVs-new or old.
• English/French/Spanish on-screen programming.
• Built-in Digital Amplifier, AM/FM 30 Preset Memory
• Dolby Digital, DTS Decoder, PLII Decoder
• Digital Input (Optical)
• Color-coded speaker connectors for easy setup
DVD Features
•
•
•
•
10-bit video digital to analog converter and 27MHz advanced digital filter.
Playback of 96KHz/24-bit sources.
DTS digital output for DTS-enhanced DVDs.
Playback MP3 files from CD-ROM.
VCR Features
•
•
•
•
•
•
Hi-Fi Stereo VCR.
4 heads for superior slow motion and stop action.
Playback of S-VHS tapes at better than standard resolution.
VISS Index Search/Scan, Zero Return, Blank Search.
8-event/1 month timer recording.
Time remaining counter, real time counter.
Amplifier
■
•
•
•
•
350 watts total system power
2-Way Front/Surround speakers
Center speaker with 2-3/8” full-range driver
Subwoofer with 8” driver
Note
*Discs which cannot be played with this player.
• DVD-ROM
• DVD-RAM
• CD-ROM
• CDV
• CDI
• HD layer of super Audio CD
• CDGs play audio only, not graphics.
*Ability to play back may depend on recording
conditions.
• DVD-R
• CD-RW
• DVD+RW, -RW
Unpacking
As you unpack, please check that the following items are included in your packing case:
POWER
TV POWER
OPEN/CLOSC
MUTE
EJECT
1
SPEAKER
2
4
TEST
3
5
7
MODE
REPEAT
SOUND
MODE
6
SOUND
EFFECT
9
8
100+
ANGLE
DIGEST
STEP
ZOOM
ATR
0
TV VOL.
CH/TRK
TV
AMP VOL.
TV INPUT
SELECT
DVD
VCR
FM/AM
INPUT
CLEAR
DISPLAY
SETUP
EJECT
OPEN/CLOSE
MENU
6
DVD-VCR
User’s Guide
RCA cable for Audio/Video connection
RF (Radio Frequency) Antenna Cable
AM Antenna Cable
FM Antenna Cable
Remote Control
1.5V “AA” Batteries - 2EA
Speaker
Speaker Cable
Warranty Card
DISC
•
•
•
•
•
•
•
•
•
•
•
ENTER
REC
PHONES
REC
S.MODE S.EFFECT
CHANNEL
DVD
VCR
FM/AM
INPUT
VOL
TITLE
SUBTITLE
SPEED
TIMER
AUDIO
7
RETURN
MARK
SEARCH
SCREEN FIT
TV/VCR
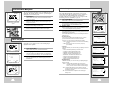
Disc Type and Characteristics
Front Panel Overview
1
2
3
4
5
6
7
8
This DVD player is capable of playing the following types of discs with the corresponding logos:
Disc Types
(Logos)
Recording
Types
Disc Size
Max.
Playing Time
5"
Single-sided
240 min.
Double-sided
480 min.
PHONES
DVD
Audio
+
Video
31/2"
VIDEO-CD
5"
Audio
+
Video
AUDIO-CD
Single-sided
80 min.
Double-sided
160 min.
74 min.
31/2"
20 min.
5"
74 min.
31/2"
• DVD contains excellent sound
and video due to Dolby Digital
and MPEG-2 system.
• Various screen and audio
functions can be easily
selected through the onscreen menu.
• Video with CD sound, VHS
quality & MPEG-1
compression technology.
• CD is recorded as a
Digital Signal with better
audio quality, less
distortion and less
deterioration of audio
quality over time.
Audio
20 min.
9
1
2
3
4
5
6
7
8
9
10
REC
10 11
12
S.MODE S.EFFECT
13
14
• Play
Region
Number
• NTSC broadcast
system in U.S.A,
Canada, Korea,
Japan, etc.
• Dolby
Digital disc
DIGITAL
SOUND
• Stereo disc
• Digital
Audio disc
• DTS disc
• ”DTS” and “DTS Digital Surround” are registered trademarks of Digital Theater Systems, Inc.
• Manufactured under license from Dolby Laboratories.
“Dolby”, “Pro Logic”, and the double-D symbol are trademarks of Dolby Laboratories.
Play Region Number
Both the DVD player and the discs are coded by region. These regional codes must
match in order for the disc to play. If the codes do not match, the disc will not play.
The Region Number for this player is described on the rear panel of the player.
8
• MP3 disc
16
VCR
17
FM/AM
VOL
INPUT
18
19
Front Panel Display
1
2
3
4
5
6
7 8 9
10
11
Hi-Fi
Disc Markings
STEREO
15
DVD
11 STOP
12 PLAY/PAUSE
13 RECORD
14 SOUND EFFECT
15 FRONT PANEL DISPLAY
16 CHANNEL /❷
17 DVD-VCR SELECT
18 INPUT SELECT
19 VOLUME DIAL
*With Volume Dial, you can adjust the volume on the
speakers or Headphone.
LPCM
MP3
NTSC
CHANNEL
DVD DECK
REWIND/REV
FAST-FORWARD/FWD
SOUND MODE
DVD OPEN/CLOSE
VCR DECK
FM/AM SELECT
VCR EJECT
POWER
Headphone JACK
* Please use a 650MB/74Min. CD-R media.
* Please do not use a 700MB/80Min. or above CD-R media, as it may not be played back.
~
EJECT
OPEN/CLOSE
Characteristics
12
13
SLP
AM
PM
COPY
14 15 16
1 The DVD Deck is selected
2 A DVD, CD, VCD or SVCD is loaded
3 A disc with LPCM (Linear Pulse Code Modulation)
audio is loaded
4 A DVD with a Dolby Digital is loaded
5 A DVD with a DTS soundtrack is loaded
6 The time, counter position, time remaining or
current deck status is displayed
7 The current TV show or video is broadcast in Stereo
8 The Hi-Fi track of a VHS tape is playing
9 A Timer Recording is programmed or in progress.
If blinking there is an error.
17
10 Tape Speed
11 The VCR Deck is selected
12 The status of the DVD deck is graphically displayed
13 The DVD has multiple angles to choose from
14 MP3
15 The number to the right of the “T” symbol is the
current title number
16 The number to the right of the “C” symbol is the
current chapter number
17 VHS tape is inserted and the VCR Deck is active
9
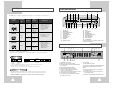
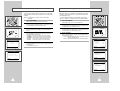
Remote Control Overview
Rear Panel
1
2
3
4
5
POWER
TV POWER
OPEN/CLOSC
MUTE
1
RIDIO ANT.
IN
2
(FROM ANT.)
FM
75
COAXAL
SPEAKERS
DVD & VCR
RF OUT
LINE IN 1
CENTER
(TO TV)
L - AUDIO - R
LINE IN 2
EJECT
FRONT L
1
2
3
4
5
6
7
8
9
100+
ANGLE
0
ZOOM
ATR
LINE IN 3
OPTICAL INPUT
AC-3/PCM
(LINE IN 2)
AM
VIDEO
SURROUND L
21
VIDEO
L - AUDIO - R
3
DVD Olny
S-VIDEO OUT
LINE OUT
WOOFER
COMPONENT VIDEO OUT
SURROUND R
FRONT R
SPEAKER
TEST
MODE
7
8
9
10
11
6
REPEAT
TV VOL.
16
17
18
19
20
DVD
VCR
22
23
24
25
26
27
28
29
30
SELECT
FM/AM
INPUT
CLEA
R
Y
DISPLA
SE
TU
P
RF OUT TO TV
LINE OUT TO TV
OPTICAL INPUT
S-VIDEO OUT
COMPONENT VIDEO OUT
AMP VOL.
TV INPUT
U
EN
M
7
8
9
10
11
STEP
C
DIS
RADIO FM ANTENNA INPUT
RF ANTENNA INPUT
LINE IN 1, 2, 3
COOLING FAN
5.1ch SPEAKER OUT
RADIO AM ANTENNA INPUT
8
9
10
11
12
13
14
15
DIGEST
CH/TRK
TV
7
1
2
3
4
5
6
SOUND
EFFECT
4
5
6
SOUND
MODE
31
32
33
34
35
ENTER
36
REC
RETURN
MARK
TITLE
SUBTITLE
SEARCH
SPEED
TIMER
AUDIO
SCREEN FIT
TV/VCR
37
38
39
40
41
1
2
3
4
5
6
7
8
9
10
11
12
13
14
15
16
17
18
19
20
21
22
23
24
25
26
27
28
29
30
31
32
33
34
35
36
37
38
39
40
41
POWER
OPEN/CLOSE, EJECT
SPEAKER
TEST
MODE, REPEAT
ANGLE, 100+
TV VOLUME
TV SELECT
DVD, VCR, FM/AM, INPUT
SELECT
REWIND, SKIP BACK
STOP
DISPLAY
SETUP
UP
LEFT
ENTER
RECORD
MARK, SEARCH
AUDIO
TITLE, SPEED
TV POWER
MUTE
0-9
SOUND MODE
SOUND EFFECT
DIGEST, STEP
ZOOM, ATR
CH/TRK /❷
AMP VOLUME
TV INPUT
FAST-FORWARD, SKIP NEXT
PLAY/PAUSE
CLEAR
DISC MENU
RIGHT
DOWN
RETURN
SCREEN FIT
TV/VCR
SUBTITLE, TIMER
JOG/SHUTTLE
Insert Remote Control Batteries
• Remove the battery cover by pushing down on the thumb tab and
sliding the cover.
• Insert two 1.5V “AA” batteries as shown, paying attention to the correct
polarities (+/–).
• When finished, slide the cover until it clicks back into place.
10
11
Using the TV Buttons on the Remote Control
POWER
TV POWER
1
Basic Connections/Auto Setup
Your VCR remote control will work with Samsung televisions and
compatible brands.
In this section, you will connect the DVD-VCR to your television
and run Auto Setup, which automatically searches for channels and
sets the player’s internal clock.
To determine whether your television is compatible, follow the instructions
below.
NOTES:
1
MUTE
EJECT
• Even if you plan to use the S-Video or Component Video Outputs,
you MUST connect the DVD-VCR to your television with
either the standard RF or the Line Out connection. This
enables you to operate the DVD-VCR setup menus.
Switch your television on.
2
Point the remote control towards the television.
3
Hold down the TV button and enter the two-figure code
corresponding to the brand of your television, by pressing the
appropriate numeric buttons.
5
1
2
3
4
5
6
100+
ANGLE
REPEAT
3
SOUND
MODE
CH/TRK
TV
STEP
ZOOM
ATR
0
TV VOL.
AMP VOL.
TV INPUT
SELECT
2
3
DVD
REPEAT
VCR
100+
ANGLE
TV VOL.
FM/AM
ZOOM
ATR
0
CH/TRK
4
TV
INPUT
STEP
AMP VOL.
Brand
Codes
Brand
Codes
SAMSUNG
SHARP
SONY
RCA
TOSHIBA
PANASONIC
JVC
HITACHI
MITSUBISHI
NEWSAN
01, 14, 15, 23
02, 16, 22
03
07, 29
09
12, 24
11
10
13
27
LOEWE
ZENITH
LG
MAGNAVOX
EMERSON
SANYO
DAEWOO
NOBLEX
TELEFUNKEN
28
17
06, 08, 18
04
21
05, 20
19
25
26
Result:
TV INPUT
4VCR
FM/AM
➢
INPUT
☛
DVD & VCR
LINE IN 1
If several codes are indicated for your television brand, try
each one in turn until you find one that works.
➁
3
➢
LINE IN 2
Connect DVD-VCR to TV
L - AUDIO
LINE OUT
IN
(FROM ANT.)
FM
75
COAXAL
DVD & VCR
2
LINE IN 1
RF OUT
(TO TV)
LINE IN 3
AM
VIDEO
L - AUDIO - R
VIDEO
LINE IN 2
L - AUDIO - R
LINE OUT
2
To TV’s Antenna Input
Plug In DVD-VCR
Connect the DVD-VCR power cord to a standard wall outlet. Don’t
press any buttons on the DVD-VCR or remote during auto setup.
“AUTO” blinks while the DVD-VCR runs an auto setup procedure,
where it will automatically search for all active channels and set the
clock. When Auto setting has been completed, the front panel
displays the current time. If Auto Clock set is unable to find a
channel to set the clock, you can set the clock manually; See page
18.
4
POWER
TV POWER
OPEN/CLOSC
MUTE
4
EJECT
SPEAKER
➂
➃
Used to adjust the volume of the television.
5
1
2
3
4
5
6
7
8
9
100+
ANGLE
0
ZOOM
ATR
4
MODE
REPEAT
Turn On TV
Press the POWER button on your TV.
Used to select the required channel.
Used to toggle the sound on and off.
Turn On DVD-VCR
TEST
Press the POWER button on the remote control or on the
DVD–VCR’s front panel.
Used to select an external source.
CH ( or ❷)
➄
VIDEO
SOUND
MODE
PHONES
Used to switch the television on and off.
VOL + or –
MUTE
L - AUDIO - R
Connect Antenna/Cable to DVD-VCR
Choose one of the following methods to connect the DVD-VCR to
your TV:
RF Connection
Connect the supplied RF antenna cable from the OUT (TO TV) jack
on the back panel of the DVD-VCR to your television’s Antenna
Input.
NOTE : Check the channel to connect DVD-VCR to your
television’s Antenna Input; See page 22.
Line Connection
Connect an RCA-type audio/video cable (red, white, yellow) from
the LINE OUT jacks on the back panel of the DVD–VCR to your
television’s Line In jacks. Use red for right audio, white for left
audio, and yellow for video.
NOTE: It is recommended that you use the Line Connection if your
TV is equipped with RCA jacks.
Function
POWER ➀
INPUT
VIDEO
RIDIO ANT.
2
When you change the batteries in the remote control, you
must reprogram the code, following the same procedure.
Button
LINE IN 3
1
(TO TV)
AM
Connect the RF antenna cable from your indoor/outdoor antenna or
cable wall outlet to the IN (FROM ANT.) jack on the back panel of
the DVD-VCR.
You can then control the television using the following buttons.
12
IN
(FROM ANT.)
From Antenna or Cable
1
If your television is compatible with the remote control, it
will switch off. It is now programmed to operate with the
remote control.
SELECT
DVD
RIDIO ANT.
FM
75
COAXAL
RF OUT
OPEN/CLOSC
SPEAKER
• Advanced Connections are covered in Appendix A.
6
Set TV to Channel 3, 4 or Line
Be sure to use the same channel you selected in Step 2. If you
used the Line Connection, set your TV to its Line Input.
The various functions will not necessarily work on all
televisions. If you encounter problems, operate the
television directly.
13
SOUND
EFFECT
DIGEST
STEP
Deck Control Buttons
The DVD-VCR uses one set of controls to operate both decks. The
following buttons are helpful in successfully controlling each deck.
1
POWER
POWER Button
Basic VHS Playback
To play a videotape, simply insert it in the VHS deck and press the
Play button. Tapes without Record Safety Tabs can be set to play
automatically when inserted; see page 41.
Press the POWER button on the remote control or front panel to
turn on the DVD-VCR.
TV POWER
1
1
OPEN/CLOSC
2
MUTE
Press the DVD button on the remote control or front panel when
you want to control the DVD deck.
• The DVD indicator will light on the Front Panel Display to show
that the DVD deck is selected.
EJECT
1
SPEAKER
2
SOUND
MODE
3
100+
ANGLE
REPEAT
3
0
TV VOL.
STEP
ZOOM
ATR
CH/TRK
TV
DVD Button
TV INPUT
SELECT
DVD
VCR
FM/AM
2
4
INPUT
CLEA
R
Y
DISPLA
DIS
P
Play Tape
Press the ❿ll (Play/Pause) button on the remote control or front
panel. If the tape is missing the Record Safety Tab and Auto Play
is turned on, the tape will begin to play automatically, see page 41.
3
Stop Playback
EJECT
1
Press the ■ (Stop) button on the remote control or front panel.
CHANNEL
4
DVD
VCR
FM/AM
VOL
INPUT
4
Eject Tape
Press the OPEN/CLOSE button on the remote control or the
EJECT button on the front panel.
INPUT Button
Press the INPUT button repeatedly to cycle through all of
your input sources, including the Tuner (Ch##), Line 1, Line 2 and
Line 3 (rear AV input).
4
3
2
VCR Button
Press the VCR button on the remote control or front panel when
you want to control the VCR deck.
• The VCR indicator will light on the Front Panel Display to show
that the VHS deck is selected.
AMP VOL.
Insert VHS Tape
Insert a standard VHS videotape into the VHS Deck.
• Power will turn on automatically when you insert a videotape.
5
Additional VCR Options
SELECT
• For special VCR Playback features, see pages 40~41.
• For VCR Recording features, see pages 43~45.
• For Timer Recording features, see page 46.
DVD
VCR
3
INPUT
CLEA
R
Y
DISPLA
2
U
EN
M
SE
TU
P
C
DIS
Basic DVD Playback
FM/AM
Follow these instructions to playback a DVD.
1
Open Disc Drawer
Press the OPEN/CLOSE button on the remote control or front
panel to automatically power on the DVD-VCR and open the disc
drawer.
POWER
OPEN/CLOSE
OPEN/CLOSC
1,3
SPEAKER
TEST
1
4
7
L.
CH/TRK
TV
2
1,3
EJECT
REC
2
Place the disc in the drawer with the label side of the disc facing
up. If the disc has two sides, orient the disc with the desired label
facing up.
3
5
6
8
Insert Disc
S.MODE S.EFFECT
9
3
AMP VOL.
The following buttons are used when watching television via the
DVD-VCR’s built-in TV tuner.
FM/AM
4
INPUT
OPEN
CLEA
R
NES
REC
S.MODE S.EFFECT
C
DIS
4
U
EN
M
4
REC
1
TV/VCR
Press to switch between your TV’s tuner and the VCR’s internal
tuner.
EJECT
1
2
3
4
5
6
7
8
9
100+
ANGLE
0
ZOOM
ATR
SPEAKER
TEST
2
Channel Up/Down
Press to change to the next or previous channel.
Play the DVD
Press the ❿ll (Play/Pause) button on the remote control or front
3
panel.
• Many discs will begin playback automatically when the disc
drawer closes.
• If the DVD has a disc menu, or more than one title, the disc
menu may appear.
4
0-9 Buttons
MUTE
MODE
REPEAT
TV VOL.
CH/TRK
SUBTITLE
SEARCH
SPEED
TIMER
DIGEST
STEP
Press to select channels directly.
Display
Press to display the channel you are watching.
• Also works in DVD and VCR mode.
TV VOL.
2 AMP VOL.
CH/TRK
TV
TV INPUT
SELECT
2
VCR
FM/AM
4
Y
DISPLA
INPUT
CLEA
R
C
DIS
EN
M
15
SCREEN FIT
TV/VCR
1
SOUND
EFFECT
Additional DVD Options
• For advanced DVD Setup options, see pages 24~29.
• For special DVD Playback features, see pages 30~39.
14
TITLE
AMP VOL.
DVD
5
RETURN
MARK
AUDIO
SOUND
MODE
SE
TU
P
AY
DISPL
TV POWER
3
SELECT
VCR
POWER
OPEN/CLOSC
Close Disc Drawer
Press the OPEN/CLOSE button on the remote control or front
panel to close the disc drawer.
TV INPUT
Basic TV Tuner Operations
VCR
Options
Language
Program
Clock
Install
Exit
1
RETURN
ENTER
❷
2
The Setup Menu is the opening
screen of the on-screen menu
system
SETUP Button
With the DVD in stop mode, press to access the DVD-VCR onscreen menu system.
DVD Setup
Moves menu selection cursor up, down, left and right to cycle
through menu options.
3
CLEA
R
SE
TU
P
U
EN
M
2
RETURN
MARK
TITLE
SUBTITLE
SEARCH
SPEED
TIMER
SCREEN FIT
2
AUDIO
4
TV/VCR
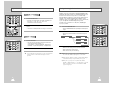
Menu Language
MAIN MENU
DVD
VCR
Options
Language
Program
Clock
Install
Exit
Follow these steps to change the on-screen menu language to
English, French or Spanish.
1
Language/Idioma/Langue
RETURN
3
ENTER
❷
2
3
Español
Français
Set “Language”
Using the Up/Down and Left/Right buttons, move the selection
arrow to “Language/Idioma/Langue,” then press ENTER button.
LANGUAGE/IDIOMA/LANGUE
❿ English
Open “SETUP MENU”
With the DVD in stop mode, press the SETUP button.
Set menu Language
Move the selection bar to your desired Language, then press
ENTER button.
Confirm Settings
Press UP/DOWN to select each of the following options, then press
LEFT/RIGHT to set each option:
Press the RETURN button to save your clock settings and return to
the Setup menu.
- Clock data Channel
If you know a local station that broadcasts the time, or want to
synchronize the DVD-VCR clock to another audio/video
component, you can set the Clock data Channel manually.
• AUTO : Automatically searches for a local channel broadcasting
the time.
• CH## : Searches for the time on a channel you specify
(such as PBS).
- Time Zone
If the DVD-VCR sets your clock incorrectly, try adjusting Time Zone
manually.
• AUTO : Automatically detects your local time zone.
• ATLANTIC : Selects Atlantic Standard Time.
• EASTERN : Selects Eastern Standard Time.
• CENTRAL : Selects Central Standard Time.
• MOUNTAIN : Selects Mountain Standard Time.
• PACIFIC : Selects Pacific Standard Time.
• ALASKA : Selects Alaska Standard Time.
• HAWAII : Selects Hawaii Standard Time.
- Daylight Saving
RETURN
ENTER
❷
English Setup Menu
MENU PRINCIPAL
DVD
Program
VCR
Options
Clock
Install
Language
Exit
Language/Idioma/Langue
RETURN
❷
ENTER
French/Spanish Setup Menu
16
ENTER
2,3
REC
RETURN
MARK
TITLE
SUBTITLE
SCREEN FIT
MAIN MENU
SELECT “AUTO”
Move the selection arrow to “AUTO”, then press ENTER to select.
• The “Clock Set/Adjust” will change as shown.
4
3
REC
Select “Clock”
1
Using the up/down and left/right buttons, move the selection cursor
to “Clock Set/Adjust”, then press ENTER to select.
RETURN Button
ENTER
2
2
Returns to the last menu viewed or exits the menu system.
C
DIS
1
4
2
Open “SETUP MENU”
With the DVD in stop mode, press the SETUP button.
ENTER Button
Press to confirm settings in certain menus.
AY
DISPL
1
Up/Down and Left/Right
CLEA
R
Y
DISPLA
U
EN
M
DVD
Auto Setup will automatically seek the time in your area from
stations broadcasting XDS (extended data services). If the time is
set incorrectly, try setting Daylight Savings and Time Zone
manually. If the time is not set at all, or if you are using the cable
box hookup, set the clock manually; see page 18.
C
DIS
The on-screen menu system allows you to set all functions for your
DVD-VCR. The following buttons are used to open and navigate
through the on-screen menu system.
MAIN MENU
Clock Setup
SE
TU
P
On-Screen Menu Navigation
If the DVD-VCR sets your clock incorrectly, try adjusting Daylight
Savings manually.
• AUTO : The DVD-VCR automatically uses local channel
information to determine the status of Daylight savings
Time in your area, and then sets the clock accordingly.
• YES : The DVD-VCR adds one hour at 2:00 AM on the first
Sunday of April and subtracts one hour at 2:00 AM on the
last Sunday in October.
• NO : The DVD-VCR does not adjust the clock for Daylight
Savings Time.
DVD
VCR
Options
Language
Program
Clock
Install
Exit
Clock Set/Adjust
RETURN
ENTER
❷
CLOCK SET/ADJUST
❿Auto
Manual
RETURN
❷ENTER
CLOCK SET/ADJUST
❿ Clock data CH :
Time zone :
Daylight saving :
[Auto]
[Auto]
[Auto]
Auto
CH##
❷➛❿
RETURN
CLOCK SET/ADJUST
Clock data CH :
❿ Time zone :
Daylight saving :
[Auto]
[Auto]
[Auto]
❷➛❿
RETURN
Auto
Alt.
East
Cen.
Mtn.
Pac.
Alas
Haw.
CLOCK SET/ADJUST
Clock data CH :
Time zone :
❿ Daylight saving :
[Auto]
[Auto]
[Auto]
❷➛❿
RETURN
17
Auto
Yes
No
Manual Clock Set
Open “SETUP MENU”
1
SE
TU
P
With the DVD in stop mode, press the SETUP button.
2,3
REC
RETURN
MARK
TITLE
SUBTITLE
2
3
VCR
Options
Clock
Install
Press LEFT/RIGHT to select each of the following options, then
press UP/DOWN to set each option:
Exit
Clock Set/Adjust
RETURN
❷
ENTER
•
•
•
•
•
CLOCK SET/ADJUST
5
Auto
❿ Manual
Set the Clock
Set Hour – Set the hour using the up and down buttons.
Set Minute – Set the minute using the up and down buttons.
Set Month – Set the month using the up and down buttons.
Set Day
– Set the day using the up and down buttons.
Set Year – Set the year using the up and down buttons.
Confirm Settings
Press the RETURN button to save your clock settings and return to
the Setup menu.
• Press Return again to exit.
1
Open “SETUP MENU”
ENTER
With the DVD in stop mode, press the SETUP button.
2
Select “Install”
REC
RETURN
Using the up/down and left/right buttons, move the selection cursor
to “Installation”, then press ENTER to select.
3
Select “Channel Setup”
Using the up/down and left/right buttons, move the selection cursor
to “Channel Setup”, then press ENTER to select.
Language
4
Program
Select “MANUAL”
Move the selection arrow to “MANUAL”, then press ENTER to
select.
MAIN MENU
DVD
Select “Clock”
Using the up/down and left/right buttons, move the selection cursor
to “Clock Set/Adjust,” then press ENTER to select.
SCREEN FIT
CLEA
R
Y
DISPLA
U
EN
M
U
EN
M
1
ENTER
This feature allows you to manually set the DVD-VCR’s tuner band
to Antenna or Cable, whichever you connected to the Antenna In
jack during initial setup.
• Use this setting only if Auto Setup detected the incorrect tuner
band, i.e. channels are coming in on the wrong channel numbers.
C
DIS
C
DIS
1
If Auto Setup was unable to find a local TV station to set the DVDVCR’s internal clock, follow these instructions to set the date/time
manually.
NOTE: It is important to set the clock for accurate Timer
Recording.
SE
TU
P
CLEA
R
Y
DISPLA
Tuner Band Setting
4
Select “Ant/Cable”
Move the selection arrow to “Ant/Cable” then press right to select
from the following options:
MAIN MENU
DVD
VCR
Options
Language
Program
Clock
Install
Exit
Installation
RETURN
• Antenna - Indicates that the DVD-VCR is connected to an indoor
or outdoor VHF/UHF antenna.
• Cable TV - Indicates that the DVD-VCR is connected to Cable TV.
INSTALLATION
❿ Channel setup
Volume light :
Ext.Audio 3
[Auto]
[Line3]
❷ENTER
RETURN
RETURN
❷ENTER
CLOCK SET/ADJUST
CHANNEL SETUP
❿ Ant/Cable:
TIME
12:00AM
ENTER
❷
DATE
1/01
YEAR
2003 Wed
❷➛❿
RETURN
[Cable TV]
Auto channel memory
Channel add/delete
❷➛❿
RETURN
CHANNEL SETUP
❿ Ant/Cable:
[Antenna]
Auto channel memory
Channel add/delete
❷➛❿
RETURN
18
19
Auto Channel Memory
Auto Channel Memory will automatically seek and store all active
channels in your area.
CLEA
R
Y
DISPLA
C
DIS
Open “SETUP MENU”
1
Open “SETUP MENU”
With the DVD in stop mode, press the SETUP button.
With the DVD in stop mode, press the SETUP button.
U
EN
M
1
C
DIS
U
EN
M
SE
TU
P
Use this feature if Auto Channel Search missed a channel that you
would like to add, or added a channel you wish to remove.
SE
TU
P
CLEA
R
Y
DISPLA
Channel Add/Delete
ENTER
1
2
REC
Select “Install”
2
Using the up/down and left/right buttons, move the selection cursor
to “Installation”, then press ENTER to select.
2,3
RETURN
Select “Install”
Using the up/down and left/right buttons, move the selection cursor
to “Installation”, then press ENTER to select.
ENTER
1
REC
MARK
TITLE
SUBTITLE
SCREEN FIT
3
Select “Channel Setup”
3
Using the up/down buttons, move the selection cursor to “Channel
setup”, then press ENTER to select.
RETURN
Select “Channel Setup”
Using the up/down buttons, move the selection cursor to “Channel
setup”, then press ENTER to select.
MAIN MENU
MAIN MENU
4
DVD
VCR
Options
Language
Program
Clock
Install
Exit
Installation
RETURN
ENTER
❷
Run “Auto channel memory”
4
Move the selection arrow to “Auto channel memory,” then press
ENTER to select.
• The DVD-VCR will automatically search for all available
channels in the selected Tuner Band. This procedure may take
a few minutes to complete.
• When finished, the lowest channel found will be displayed.
Move the selection bar to “Channel add/delete,” then press ENTER
to select.
5
Select Channel to add/delete
Use the CH /❷ buttons to tune in the channel number you wish
to add or remove.
6
❿ Channel setup
Volume light :
Ext.Audio 3
[Auto]
[Line3]
❷ENTER
DVD
VCR
Options
Language
Program
Clock
Install
Exit
Installation
RETURN
Select “CHANNEL ADD/DELETE”
Press right to add or press left to remove the channel from
your channel list.
INSTALLATION
RETURN
Select “Channel add/delete”
• Repeat steps 4 and 5 to add or remove additional channels.
ENTER
❷
INSTALLATION
❿ Channel setup
Volume light :
Ext.Audio 3
[Auto]
[Line3]
❷ENTER
RETURN
CHANNEL SETUP
CHANNEL SETUP
Ant/Cable:
❿ Auto channel memory
[Cable TV]
Channel add/delete
Ant/Cable:
[Cable TV]
Auto channel memory
❿ Channel add/delete
❷ENTER
RETURN
RETURN
❷ENTER
CHANNEL ADD/DELETE
Memorizing
CH 07
. . . . . please wait . . . . .
Select channel :
and press [ ❿] to
press [ ➛] to
ADD
DELETE
CH ❷
RETURN
20
[ 01]
21
RF Output Channel
1
MAIN MENU
DVD
VCR
Options
Language
Program
Clock
Install
Exit
2
Select “Options”
3
Select “RF Output Channel”
Move the selection bar to “RF Output Channel”, then press right
to change.
OPTION SETUP
4
3CH
➛ ❿ 3CH
Auto
Off
RF Output Channel
Panel Display
Auto Power Off
Change “RF Output Channel”
Press Return to change. A message will appear on your TV.
Then press ENTER to change.
4CH
5
Open “SETUP MENU”
With the DVD in stop mode, press the SETUP button.
MAIN MENU
2
Select “Options”
Using the up/down and left/right buttons, move the selection cursor
to “Option Setup,” then press ENTER to select.
3
Select “Auto Power Off”
Move the selection bar to “Option Setup”, then press right to
select from following options:
• Off – Auto power off is disabled.
• 1Hr – DVD-VCR will auto shut off 1 hour after the last button is
pressed.
• 2Hr – DVD-VCR will auto shut off 2 hours after the last button is
pressed.
DVD
VCR
Options
Language
Program
Clock
Install
Exit
Option Setup
RETURN
❷
RETURN
❷
Front Panel Dimmer
You can set the Front Panel Display to be bright all the time, dim
all the time, dim during power off.
MAIN MENU
1
DVD
VCR
Options
Language
Program
Clock
Install
Exit
RETURN
❷
2
Select “Options”
Using the up/down and left/right buttons, move the selection cursor
to “Option Setup,” then press ENTER to select.
ENTER
3
Set “Panel Display”
Move the selection bar to “Panel Display,” then press right to select
from the following options:
OPTION SETUP
RF Output Channel
3CH
➛ ❿ Auto
Panel Display
Auto Power Off
Off
Open “SETUP MENU”
With the DVD in stop mode, press the SETUP button.
Option Setup
Auto
Bright
Dim
• Auto – Front Panel Display will dim automatically during
power off.
• Bright – Front Panel Display will be bright all the time.
• Dim – Front Panel Display will be dim all the time.
❷
RETURN
22
ENTER
OPTION SETUP
RF Output Channel
3CH
Panel Display
Auto
➛ ❿ Off
Auto Power Off
Change “TV Channel”
A message will appear on your TV. When the message disappears,
change your TV to channel 3 or 4 to match the RF output channel
of the player.
❷
RETURN
1
Using the up/down and left/right buttons, move the selection cursor
to “Option Setup,” then press ENTER to select.
ENTER
❷
Open “SETUP MENU”
With the DVD in stop mode, press the SETUP button.
Option Setup
RETURN
Auto Power Off
23
Off
1Hr
2Hr
Disc Menu Language
MAIN MENU
DVD
VCR
Options
Language
Program
Clock
Install
Exit
Follow these steps to choose your preferred language for DVD disc
menus. The DVD-VCR will automatically default to the language
you choose if it is available on a given DVD.
❷
1
ENTER
Open “SETUP MENU”
1
2
Select “DVD”
2
3
Select “Disc Menu”
Select “DVD”
Using the up/down and left/right buttons, move the selection cursor
to “DVD Setup,” then press ENTER to select.
Using the up/down and left/right buttons, move the selection cursor
to “DVD Setup,” then press ENTER to select.
English
English
Automatic
Unlocked
Open “SETUP MENU”
With the DVD in stop mode, press the SETUP button.
With the DVD in stop mode, press the SETUP button.
DVD SETUP
Disc Menu
Audio
Subtitle
Parental
Audio Options
Display Options
Follow these steps to choose your preferred language for DVD
subtitles. The DVD-VCR will automatically default to the language
you choose if it is available on a given DVD.
MAIN MENU
DVD Setup
RETURN
Subtitle Language
3
Move the selection bar to “Disc Menu,” then press ENTER to select.
DVD
VCR
Options
Language
Program
Clock
Install
Exit
DVD Setup
RETURN
❷
ENTER
Select “Subtitle”
Move the selection bar to “Subtitle,” then press ENTER to select.
DVD SETUP
RETURN
4
❷ENTER
Set “Disc Menu Language” Preference
Move the selection bar to your preferred language for DVD disc
menus, then press ENTER to select.
4
Set “Subtitle Language” Preference
Move the selection bar to your preferred language for DVD
subtitles, then press ENTER to select.
Disc Menu
Audio
Subtitle
Parental
Audio Options
Display Options
English
English
Automatic
Unlocked
DISC MENU LANGUAGE
❿ English
RETURN
Français
Deutsch
Español
Italiano
Nederlands
Others
❷ENTER
SUBTITLE LANGUAGE
RETURN
❷ENTER
❿ Automatic
English
Français
Deutsch
Español
Italiano
Nederlands
Others
Audio Language
RETURN
DVD SETUP
Disc Menu
Audio
Subtitle
Parental
Audio Options
Display Options
RETURN
English
English
Automatic
Unlocked
❷ENTER
Follow these steps to choose your preferred language for DVD
audio soundtracks. The DVD-VCR will automatically default to the
language you choose if it is available on a given DVD.
1
Open “SETUP MENU”
With the DVD in stop mode, press the SETUP button.
❷ENTER
2
Select “DVD”
Using the up/down and left/right buttons, move the selection cursor
to “DVD Setup,” then press ENTER to select.
AUDIO LANGUAGE
3
Francais
Deutsch
Español
Italiano
Nederlands
Original
Others
RETURN
Select “Audio”
Move the selection bar to “Audio,” then press ENTER to select.
❿ English
4
Set “Audio Language” Preference
Move the selection bar to your preferred language for DVD audio
soundtracks, then press ENTER to select.
❷ENTER
24
25
Parental
MAIN MENU
DVD
VCR
Options
Language
Program
Clock
Install
Exit
DVD Setup
RETURN
❷
ENTER
Dynamic Compression
Rating Control is a password protected system that allows you to
block playback of DVDs based on their content. The system uses an
eight level rating system.
• If you try to play a DVD that exceeds the selected rating, an error
message will appear.
• Not all discs are rated.
1
Open “SETUP MENU”
With the DVD in stop mode, press the SETUP button.
DVD SETUP
Disc Menu
Audio
Subtitle
Parental
Audio Options
Display Options
RETURN
English
English
Automatic
Unlocked
2
1
2
Select “Parental”
4
Select “Use Password”
3
• No - Indicates that no password is required to view any DVD
disc or to change Rating Control options. No additional Rating
Control settings are necessary.
• Yes – Indicates that a password is required to view some DVD
discs and to view Rating Control options. The menu will change
as shown.
NOTES:
• The first time “Require Password” is set to “Yes,” you will be
prompted to enter a new password.
• If the “Enter Password” screen appears, then “Require
Password” has already been set to “Yes.” Please skip to Step 5.
PARENTAL CONTROL
Use Password
➛❿ No
RETURN
ENTER
PASSWORD CHECK
5
4
DVD
VCR
Options
Language
Program
Clock
Install
Exit
DVD Setup
RETURN
❷
Set “Dynamic Compression”
English
English
Automatic
Unlocked
RETURN
❷ENTER
Move the selection bar to “Dynamic Compression,” then press
right to select from the following options:
• On - The total dynamic range of the DVD soundtrack will be
compressed, so quiet passages will be louder and loud
passages will be softer.
• Off – The original dynamic range will be preserved.
AUDIO OPTIONS
Dynamic Compression
➛❿
Center SPK Time Delay
Surround SPK Time Delay
Dolby Pro logic II
RETURN
❷
Enter Password
PRESS 0-9
6
Select “Rating Level”
Move the selection bar to “Rating Level,” then press ENTER to
select.
PARENTAL CONTROL
7
Use Password
Rating Level
Change Password
❷
RETURN
Yes
8
ENTER
RATING LEVEL
Level 8 Adult
Level 7
Level 6
Level 5
Level 4
Level 3
Level 2
Level 1 Kids Safe
❷
RETURN
26
ENTER
DVD SETUP
Disc Menu
Audio
Subtitle
Parental
Audio Options
Display Options
Enter a 4-digit password using the 0–9 buttons on the remote
control.
• Write your password down, and keep it in a safe place in case
you need it to change your settings later.
Enter Password
____
RETURN
Select “Audio Options”
Move the selection bar to “Audio Options,” then press ENTER to
select.
Move the selection arrow to “Use Password,” then press the right
button to select from the following options:
MAIN MENU
Select “DVD”
Using the up/down and left/right buttons, move the selection cursor
to “DVD Setup,” then press ENTER to select.
Move the selection bar to “Parental,” then press ENTER to select.
❷ENTER
Open “SETUP MENU”
With the DVD in stop mode, press the SETUP button.
Select “DVD”
Using the up/down and left/right buttons, move the selection cursor
to “DVD Setup,” then press ENTER to select.
3
Dynamic Compression constrains the dynamic range, i.e. the
difference between the quietest and loudest passages of a DVD
soundtrack. This enables you to limit loud noises, such as
explosions, or raise the volume of quiet passages, such as
whispering, while watching a movie. This is convenient for viewing
movies late at night.
Change Rating Level
Use the up/down to select one of the following ratings:
• Level 8 Adult
• Level 4
• Level 7
• Level 3
• Level 6
• Level 2
• Level 5
• Level 1 Kids Safe
All ratings above the level you select will also be blocked, e.g., if
you block Level 6, then Levels 7 and 8 will also be blocked.
Press ENTER to confirm your selection.
• If you forgot your password, press power on from a cold start
with no disc in the unit. Press the REW and F.F buttons
simultaneously on the front panel for 5 seconds. The “reset ok”
message will appear. Press the power button and the DVD-VCR
will go to the “Auto Setup” mode. (See page 13)
ENTER
27
Off
0ms
0ms
On
On
Off
TV Aspect Ratio
Black Level
Set the aspect ratio (length x width) of your TV screen so the DVD
player will display movies at the appropriate size for your
television. Choose from standard, letterbox, or widescreen format.
MAIN MENU
DVD
VCR
Options
Language
Program
Clock
Install
Exit
DVD Setup
RETURN
❷
1
With the DVD in stop mode, press the SETUP button.
2
ENTER
3
DVD SETUP
Disc Menu
Audio
Subtitle
Parental
Audio Options
Display Options
RETURN
English
English
Automatic
Unlocked
❷ENTER
DISPLAY OPTIONS
TV Aspect
Black Level
Alt Video Out
Wide
Low
S-Video
RETURN
❷ENTER
Open “SETUP MENU”
Select “DVD”
The Black Level feature adjusts the reference level of black in the
video signal to one of two choices:
• Low - Standard NTSC black level. Yields consistent contrast
through all sources.
• High - Enhanced black level, for increased contrast during DVD
playback.
1
Using the up/down and left/right buttons, move the selection cursor
to “DVD Setup,” then press ENTER to select.
2
Set “Display Options”
3
Set “TV Aspect”
Options
Language
Clock
Install
Exit
DVD Setup
RETURN
Set “Display Options”
Move the selection bar to “Display Options”, then press ENTER to
select.
DVD SETUP
Disc Menu
Audio
Subtitle
Parental
Audio Options
Display Options
❿16:9 Wide
RETURN
❷ENTER
❷ENTER
Set “Black Level”
Move the selection bar to “Black Level,” then press right to select
from the following options:
• Low - Standard NTSC reference Black Level for consistent
brightness/contrast across all sources.
• High – Enhanced Black Level for increased brightness/contrast
when viewing DVDs.
DISPLAY OPTIONS
TV Aspect
Black Level
Alt Video Out
Wide
➛ ❿ Low
S-Video
RETURN
❷
If you connected your DVD-VCR to your television using the
S-VIDEO OUT or COMPONENT VIDEO OUT jacks, you MUST set
the “Alt (alternative) Video Out” selection in the on-screen menu
system.
MAIN MENU
1
DVD
VCR
Options
Language
Program
Clock
Install
Exit
DVD Setup
RETURN
❷
2
3
DVD SETUP
Using the up/down and left/right buttons, move the selection cursor
to “DVD Setup,” then press ENTER to select.
Disc Menu
Audio
Subtitle
Parental
Audio Options
Display Options
Set “Display Options”
RETURN
Select “DVD”
Move the selection bar to “Display Options”, then press ENTER to
select.
4
ENTER
Open “SETUP MENU”
With the DVD in stop mode, press the SETUP button.
Select “Alt Video Out”
Move the selection bar to “Alt Video Out,” then press right to
select from the following options:
• S-Video – Indicates that you are using the S-VIDEO OUT jack on
the rear panel to connect to your TV.
• Component – Indicates that you are using the COMPONENT
VIDEO OUT jacks on the rear panel to connect to your TV.
28
Low
High
Alt Video Out
• The S-Video or Component Video connection is only for the
DVD player. The tuner and VCR will still be viewed through the
RF or line outputs.
4:3 Pan Scan
English
English
Automatic
Unlocked
RETURN
4
TV ASPECT
4:3 Letter Box
ENTER
❷
Select “DVD”
Using the up/down and left/right buttons, move the selection cursor
to “DVD Setup,” then press ENTER to select.
Move the selection arrow to “TV Aspect”, then press ENTER to
select from the following options:
• 4:3 Letterbox – This method displays the full width of the
widescreen movie on a standard 4:3 television. As a result,
black bars will appear at the top and bottom of the screen.
• 4:3 Pan-Scan – The familiar way of watching DVD and VHS
movies, this method selectively crops (by panning and scanning
to keep the most important part of the picture visible) wide
screen movies to fit a standard 4:3 television screen.
• 16:9 Widescreen – This method allows you to view the full 16:9
picture on a widescreen television.
VCR
Program
With the DVD in stop mode, press the SETUP button.
Move the selection bar to “Display Options”, then press ENTER to
select.
4
Open “SETUP MENU”
MAIN MENU
DVD
English
English
Automatic
Unlocked
❷ENTER
DISPLAY OPTIONS
TV Aspect
Black Level
Alt Video Out
RETURN
Wide
Low
➛ ❿ S-Video
❷
29
S-Video
Component
Special Playback Features
CLEA
R
AY
DISPL
C
DIS
2
U
EN
M
NOTE : Changing the view during DVD/CD playback will stop the
playback.
SELECT
Many DVDs feature their own menu systems, where you can select
Titles, Chapters, Audio Tracks, Subtitles, and special disc features,
such as movie trailers, and information on the cast. Use these
buttons to make selections in the Disc menus.
SE
TU
P
During DVD/CD playback you can select from the following
special playback options. To resume normal playback, press the ❿ll
(Play/Pause) button.
Disc Menu Navigation
1
DVD
VCR
FM/AM
1
INPUT
CLEA
R
Y
DISPLA
ENTER
SEARCH
SPEED
Press the ❿ll (Play/Pause) button on the remote control during
playback.
• The picture will pause and the audio will mute.
• To resume playback, press the ❿ll (Play/Pause) button.
• If the player is left in Pause mode for 5 minutes, it will stop
automatically.
U
EN
M
SE
TU
P
C
DIS
1
Still
2
TIMER
ENTER
1
DISC MENU Button
2
2
Press to access the DVD’s Disc menu, if applicable.
REC
RETURN
2
2
Press , ❷ or ➛ , ❿ to navigate through DVD’s Disc menu
options.
• Press up, down, left and right to highlight menu choices.
3
ENTER Button
Frame Advance (Step)
MARK
TITLE
SUBTITLE
SCREEN FIT
ENTER
AUDIO
While in still or play mode, rotate JOG DIAL on the remote control
to advance one frame at a time.
• Audio is muted during Frame Advance mode.
• Press ❿ll (Play/Pause) to resume normal playback.
NOTES: • Frame Advance operates only in the forward direction.
• When playing a CD, you can use the JOG DIAL on the
remote control to scroll through tracks on the CD.
TV/VCR
2
3
Press to make your selections in the Disc menu.
REC
4
TITLE Button
Press to access the DVD’s Title menu, if applicable.
RETURN
MARK
TITLE
SUBTITLE
SEARCH
SPEED
TIMER
AUDIO
3
DVD
VCR
FM/AM
CLEA
R
Y
DISPLA
3
C
DIS
3
While a disc is in Play mode, rotate Shuttle ring on the remote
control and press and hold the Forward/Back (❿❿ /➛➛) buttons on
the remote control or front panel to visually search forward/
backward at 2X - 4X - 8X - 16X - 32X - 128X speed.
Press ❿ll (Play/Pause) button to resume normal speed.
NOTE : Duing CD Playback, ➛➛/❿❿buttons on the remote
control don’t operate but the shuttle allows you to
select playback speed (2X, 4X and 8X).
ENTER
SEARCH
SPEED
TIMER
AUDIO
TV/VCR
4
3
SELECT
DVD
VCR
FM/AM
INPUT
CLEA
R
Y
DISPLA
U
EN
M
SE
TU
P
C
DIS
5
ENTER
30
Screen Fit Playback
Search Forward/Back
U
EN
M
SE
TU
P
INPUT
TV/VCR
Skip Forward/Back
While a CD or DVD disc is in Play mode, press the Skip
Forward/Back (❿❿l / l➛➛) buttons on the remote control or front
panel to jump forward and backward through disc chapters/tracks.
• Skip Forward will jump to the next chapter/track.
• Skip Back will jump to the beginning of the current chapter/track.
• Press Skip Back again to jump to the beginning of the previous
chapter/track.
SELECT
5
Slow Motion
During playback, press the ❿ll (Play/Pause) button to Still the
image. Then use the Search Forward (❿❿ ) to play in slow motion at
variable speeds.
• Each press increases the slow motion speed playback to 1/8, 1/4
or 1/2 normal speed.
• Audio is muted during slow motion playback.
• Front Panel Slow Motion Buttons - While the unit is in the pause
mode, press and hold the Forward buttons on the front panel to
activate slow motion playback. Press the ❿ll (Play/Pause)
button to resume normal playback.
NOTE : Slow motion operates only in the forward direction.
1
SCREEN FIT Button
During play, press SCREEN FIT button on the remote control.
• Allows you to eliminate the black bars in the top and bottom of
the screen when a movie is playing in the Widescreen
format (16:9).
• Screen Fit will not work when the Zoom mode is active.
(you can not remove the black bars on the screen) However,
Zoom mode will work when Screen Fit is active.
➢
SCREEN FIT
4
◆ Various aspect ratios are available only on multiple
screen format discs.
◆ This function does not work when a DVD has been
recorded in a multi-camera angle format.
◆ On some DVDs, the black bars cannot be eliminated
due to their aspect ratio.
Stop/Resume
• Press the Stop button once to stop playback. To resume the
DVD/CD from the point where the disc stopped, press the ❿ll
(Play/Pause) button.
• Press the ■ (Stop) button twice to completely stop playback.
The next time you press ❿ll (Play/Pause), the disc will start over
from the beginning.
31
Title/Chapter/Time Selection
DVD
VCR
FM/AM
INPUT
If you press the DISPLAY button during DVD playback, you can
view the current Title, Chapter/Track, and counter position. You
can also use this screen as shortcut to select any Title,
Chapter/Track, or counter position on the disc.
CLEAR
Y
DISPLA
U
EN
M
SE
TU
P
C
DIS
1
1
You can zoom in at 2 or 4 times the normal magnification while
watching a DVD.
ENTER
1
T : 01
REPEAT
100+
ANGLE
TV VOL.
8
9
0
ZOOM
ATR
2
DIGEST
Position Magnifying Glass
STEP
AMP VOL.
1
CH/TRK
TV
TV INPUT
SELECT
Use the , ❷,➛, ❿ buttons to move the magnifying glass to any
position on the screen you want to zoom.
Select Title
• The “TITLE” icon will light on the Front Panel Display, followed by
the current title number, hours, minutes, and seconds.
➛❿
Open Zoom Magnifying Glass
During Playback or STILL mode, press the ZOOM button to display
the “Magnifying Glass icon” on the screen.
Press the up/down and left/right buttons to select Title, then press
ENTER to change among all available titles on the disc.
DVD
7
MODE
View DVD/CD Display
Press the DISPLAY button on the remote control during DVD/CD
playback.
2
Zoom
3
Zoom In
Press the ENTER button repeatedly to zoom in at 2X - 4X - 2X and normal magnification.
C : 02
0 : 01 : 09
3
ENG 5.1CH
A
Select Chapter or Track
Press the up/down and left/right buttons to select Chapter or Track,
then press ENTER to change among all available Chapters/Tracks
on the disc.
ENG
• The “CHAP” icon will light on the Front Panel Display, followed
by the current title number, hours, minutes, and seconds.
DVD
4
T : 01
C : 02
➛❿
0 : 01 : 09
ENG 5.1CH
A
ENG
Select Counter Position
Press the up/down and left/right buttons to select the counter
position indicator, then use the number buttons (0-9) to enter the
desired counter position in the format HH:MM:SS (H = Hours, M =
Minutes, S = Seconds).
Then press ENTER to enter the desired counter position.
Angle
Some DVDs allow you to view the same scene from different
perspectives, or angles, while watching a movie. Press
the ANGLE button to activate this feature.
DVD
7
MODE
REPEAT
100+
ANGLE
Check for Angle Marker
If multiple Angles are available on the DVD, the Angle mark will
appear on the screen during playback.
C : 02
0 : 01 : 09
9
0
ZOOM
ATR
1CH/TRK
TV VOL.
1
T : 01
8
TV
A
SELECT
ENG
2
View Angle Options
If the Angle mark is present, press the ANGLE button to view the
Angle Selection menu.
3
Select Screen Angle
Press the up/down buttons to select one of the available screen
angles.
32
33
STEP
AMP VOL.
TV INPUT
ENG 5.1CH
DIGEST
Subtitle
A-B Repeat
Many DVDs provide subtitles in one or more languages. The
SUBTITLE button provides a shortcut to view and select these
options.
REC
The A-B Repeat function allows you to repeat any segment of a
DVD or CD. Simply mark the beginning point (A) and the ending
point (B) of the segment you want to review.
TITLE
SEARCH
SUBTITLE
SPEED
1
SCREEN FIT
TIMER
Open Subtitle Menu
1
TV/VCR
2
Select A-B Repeat Function
During playback, press the SUBTITLE button.
In Play mode, press the REPEAT button, then press left/right to
select A-B Repeat.
Set Subtitle Language
• “A-” will be highlighted when A-B Repeat is selected.
Press the up/down buttons to select among all available subtitle
languages.
NOTE: If you are playing a CD, you should select REPEAT menu.
• Subtitle languages are often represented by abbreviations.
• Press the left/right buttons to select REPEAT menu, then press
ENTER to open.
1
AUDIO
EFFECT
7
MODE
RETURN
MARK
TEST
REPEAT
100+
ANGLE
1
TV VOL.
8
9
0
ZOOM
ATR
CH/TRK
TV
(DVD)
A
3
Activate Subtitles
Press the left/right buttons to turn subtitles On or Off.
2
Mark the Starting Point
Press the ENTER button at the beginning of the segment you want
to repeat (Point A).
• The default subtitle setting is On.
• Press the RETURN button to confirm your selection.
• “B” will be highlighted after Point A is selected.
NOTE: The minimum AB Repeat time is 5 seconds.
A
3
(CD)
Mark the Ending Point
Press the ENTER button again at the end of the segment you want
to repeat (Point B).
Digest Playback
4
5
6
7
8
9
100+
ANGLE
0
ZOOM
1ATR
TEST
MODE
REPEAT
TV VOL.
CH/TRK
TV
• The segment will begin repeating in a continuous loop.
4
EFFECT
DIGEST
1
DIGEST Button
Cancel A-B Repeat
Press the REPEAT button to open the Repeat Menu, press
left/right to highlight “Off,” then press the ENTER button.
During playback, press the DIGEST button.
• You’ll see 9 individual windows representing each of the
chapters on the TV screen.
• When each window is displayed, the first 3 seconds of the
chapter will be played.
STEP
AMP VOL.
TV INPUT
SELECT
2
Set DIGEST
Press the up/down buttons and left/right buttons or NUMBER
button to select the window you’d like to see, and press ENTER.
• Up to 9 windows(chapters) can be displayed on the screen at a
time. Press ❿❿ for the next 9 chapters if the movie has more than
9.
Skip button
➢
◆ You can start playback of the DVD player from the
desired chapter.
◆ ‘DIGEST’ may not operate depending on the disc in
use.
34
35
STEP
AMP VOL.
TV INPUT
SELECT
DIGEST
Repeat Chapter/Title
You can repeat a single chapter, or repeat a complete title.
TEST
MODE
REPEAT
4
5
6
7
8
9
100+
ANGLE
DIGEST
CH/TRK
TV
1
REC
1
NOTE: If you are playing a CD, you should select REPEAT menu.
• Press the left/right buttons to select REPEAT menu, then press
ENTER to open.
AMP VOL.
TV INPUT
2
MARK
SEARCH
TITLE
SUBTITLE
SPEED
TIMER
1
AUDIO
2
• The selected placeholder will highlight.
• “Chapter” will highlight when Chapter Repeat is selected.
3
3
Repeat Chapter
(CD)
4
Set the Bookmark
Play the DVD to the scene you want to bookmark, then press the
ENTER button. The placeholder will change to a number (1, 2 or
3).
Press the ENTER button to repeat the current chapter/track.
• You can continue setting up to three bookmarks.
• When finished, press the MARK button to exit.
• Depending on the disc, the bookmark function may not work.
Select “Title”
Press the left/right buttons to select “Title”.
• “Title” will highlight when Title Repeat is selected.
5
Repeat Title
Press the ENTER button to repeat the title/disc.
4
Play Bookmark
•
•
•
•
•
During playback, press the MARK button on the remote control.
Press the left/right buttons to move to a previously set bookmark.
Press the Play/Pause button to play the bookmark.
Press the CLEAR button to cancel the bookmark.
Press the MARK button again to exit the Bookmark menu.
Audio
MARK
TITLE
SUBTITLE
SEARCH
SPEED
TIMER
AUDIO
SCREEN FIT
TV/VCR
Many DVDs provide multiple language and audio setup options,
such as Dolby Digital 5.1, Dolby Pro Logic, or LPCM 2 Channel
audio. The AUDIO button provides a shortcut to view and select
among all available options for a given disc.
1
1
Open the Audio Menu
During playback, press the AUDIO button on the remote control.
2
Select DVD Audio Track
Press the up/down buttons to select the desired language/audio
setup on the DVD.
• Languages are represented by abbreviations; i.e. “ESP” for
“español.”
36
SCREEN FIT
TV/VCR
Select Bookmark Placeholder
Press the left/right buttons to move to one of the three bookmark
placeholders (- - -).
Select “Chapter”
Press the left/right buttons to select “Chapter”.
(DVD)
RETURN
Open Bookmark Menu
During playback, press the MARK button on the remote control.
The “Mark” header will appear on the screen.
• The current Repeat Mode will highlighted.
STEP
SELECT
You can insert up to three Bookmarks on your DVDs, so you can
jump quickly to your favorite scene or song.
Open Repeat Menu
In Play mode, press the REPEAT button to open the Repeat menu.
ZOOM
ATR
0
1
TV VOL.
SOUND
EFFECT
Bookmarks
37
Programmed Playback (CD)
TEST
MODE
4
5
6
7
8
9
0
ZOOM
ATR
100+
ANGLE
1
REPEAT
CH/TRK
DIGEST
Programmed Playback lets you set a custom order for playback of
tracks on a CD.
STEP
AMP VOL.
1
Open Playback Mode Menu
In play mode, press the MODE button.
TV INPUT
2
SELECT
1
2
Track
01
05
09
13
02
06
10
14
03 04
07 08
11 12
15 16 ❿
❷➛❿
RETURN
CLEAR
Program Order
01 - - - - - -- -- -- --- -- -- --- -- -- --- -- -- -ENTER
3
PLAY
Track
02
06
10
14
03 04
07 08
11 12
15 16 ❿
❷➛❿
4
RETURN
CLEAR
ENTER
1 song 1
2 song 2
3 song 3
4 song 4
5 song 5
6 song 6
7 song 7
8 song 8 ❿
music c1
song1
RETURN
❷
Play MP3 File
Press the ENTER button on the remote control to play the selected
song.
• While in playback mode, press the CLEAR button on the remote
control to cancel Programmed Play.
• While the song is playing, you can use the up/down buttons to
browse through other folders.
Program Order
01
-- --- -- -- --- -- -- --- -- -- --- -- -- --
5
Stop MP3 Selection
Press the ■ (Stop) button on the remote control to stop playback.
* To ensure proper playback of discs burned from MP3 files, make
sure the files have been recorded at a bit rate of at least 128 kbps.
PLAY
Random Playback (CD)
Random Playback lets the DVD-VCR set a random order for
playback of tracks on a CD.
1
Open Playback Mode Menu
* If there are any gaps (blank data) on multi-session discs, you may
experience playback problems.
* On discs that are recorded with a Variable Bit Rate(VBR), e.g.
from 32 to 320 kbps, the sound may cut in and out.
* When the REPEAT button is pressed during playback, the current
song will be played back repeatedly.
In play mode, press the MODE button.
2
Select “RANDOM”
Using the left/right buttons, move the selection arrow to “RANDOM”
then press ENTER to select.
• The disc will playback automatically in random order.
3
Cancel Random Play
Press the CLEAR button on the remote control to cancel Random
Play.
38
ENTER
MP3
Select MP3 File
• If there are more than 8 MP3 files in the selected folder, press
the left/right buttons to view additional MP3 files.
• File names are truncated to eight characters: the first six
characters of the song, plus an asterisk (*), then a number.
• Press the Return button to back up and select another folder.
PROGRAM 02
01
05
09
13
❷
Press the up/down buttons to select the desired MP3 file.
Play Revised Order
Press the ❿ll (Play/Pause) button. The disc will play back in the
custom programmed order.
RETURN
Select Folder
• If there are more than 8 folders on the disc, press RETURN to
view additional folders.
• If there are no folders on the CD-R, skip to Step 3.
• Press the CLEAR button to change selections.
5
song1
39
~
PROGRAM 01
1 music c1
2 music c2
3 music c3
music c1
~
Program Playback Order
Use the up/down and left/right buttons to select the remaining
tracks, pressing Enter after each.
MP3
Press the up/down buttons to select the folder on the CD-R which
contains the MP3 files you want to hear, then press Enter to select.
Select Track
Press the up/down and left/right buttons to select the first track in
your revised playback list, then press the ENTER button.
4
Insert Disc
Insert a CD-R with MP3 files into the DVD deck.
• The MP3 main menu will appear after a few seconds and the
first song on the disc will begin playing.
Select “PROGRAM”
Using the left/right buttons, move the selection bar to “PROGRAM”
then press ENTER to select.
3
MP3 is a popular music format which allows you to compress
music files up to 1/12 of their original size while retaining near CD
quality sound. Your DVD-VCR can playback MP3 files burned onto
a CD-R disc.
~
TV
SOUND
EFFECT
~
TV VOL.
MP3 Playback
ENTER
Special VCR Playback Features
While a videotape is playing, you can enjoy a variety of special
playback features, including Still, Frame Advance, Skip, Repeat, and
more. Press the Play button again to resume normal playback.
PLAY
1
2
If you want your videotapes to play automatically when you insert
them, turn on Auto Play.
NOTE:
Still
From Play mode, press Play/Pause to still a single frame.
0:00:00 SP
Auto Play
1
Only tapes that are missing the Record Safety Tab will
play automatically when inserted.
Open the “SETUP MENU”
With the DVD in stop mode, press the SETUP button.
Frame Advance
From still mode, rotate JOG DIAL to advance to the next frame.
Press the DISPLAY button to see the
current status of the VCR deck, as well
as the tape counter position and
record speed.
2
3
SELECT
DVD
VCR
FM/AM
CLEAR
Y
DISPLA
3
Repeat
U
EN
M
5
Shuttle
From Play mode, Shuttle FWD gradually increases the cue speed
from slow to Picture Search to Jet Search (Slow-Play -2x,...).
Shuttle REV gradually slows down the tape, then goes into
Reverse Slow mode, Reverse Play, Reverse Picture Search and
Reverse Jet Search.
MAIN MENU
DVD
VCR
Options
Language
Program
Clock
Install
Exit
Select “Auto Play”
Move the selection arrow to “Auto Play,” then press right to select
from the following options:
• On - The VCR will automatically begin playing a video tape
when it is inserted, as long as the safety tab of the cassette has
been removed.
• Off - Auto play is disabled.
From Play mode, press Repeat to review the last 5 seconds of tape
(SP mode).
3
C
DIS
SE
TU
P
From Play mode, press F.Forward (❿❿) or Rewind (➛➛ ) to
cue/review at two speeds:
• Picture Search — Press and release to advance the tape
forward or backward at 5 times normal speed.
• Jet Search — Press and hold to advance the tape forward or
backward at 7 times normal speed.
Select “VCR”
Using the up/down and left/right buttons, move the selection arrow
to “VCR Function Setup,” then press ENTER to select.
INPUT
4
3
Cue/Review
VCR Function Setup
RETURN
❷
VCR FUNCTION SETUP
4
Tape Length
Press the left button to select the video cassette length.
This information is usually printed on the tape box. The menu
cycles through: T120, T160 or T180. Once the type of cassette is
set, the VCR can display the amount of time remaining on the tape
when you press the DISPLAY button.
5
Tape Length
Auto Play
Auto Repeat
RETURN
T120
➛ ❿ On
Off
❷
Auto Repeat
In the VCR Function Setup “ Auto Repeat” sets the VCR to
play a tape repeatedly [unless a tape control is activated (stop, fast
forward or rewind)].
Tracking Adjusting Picture Alignment Automatically
REPEAT
100+
ANGLE
ZOOM
ATR
0
STEP
2
TV VOL.
CH/TRK
1
TV
AMP VOL.
The Tracking adjustment removes the white lines that sometimes
appear during playback because of slight differences in recording
decks. The TRK button will automatically align the recorded tracks
with the playback heads to solve this problem. You may also set
tracking manually.
TV INPUT
1
1
DVD
Adjust Tracking Manually
S-VHS Playback
The DVD-VCR allows you to playback high quality S-VHS tapes.
1
During playback, press the TRK or TRK ❷ buttons to move the
white lines out of the picture.
SELECT
VCR
FM/AM
2
Ajust Tracking Automatically
If you press the ATR key on the remote control during VCR
playback, the tracking on the VCR will be set automatically.
40
Insert a S-VHS Tape
Insert an S-VHS tape into the VCR deck.
INPUT
2
ENTER
Start Playback
Press Play/Pause on the remote control to begin playback of the SVHS tape.
41
On
Off
Variable Search System
REC
RETURN
MARK
TITLE
SUBTITLE
SEARCH
SPEED
TIMER
AUDIO
SCREEN FIT
TV/VCR
Press the SEARCH button to display the search screen in the stop
mode. When a program is recorded, the starting point is given an
Index mark for easy location. However, the VHS Index Search
System (VISS) cannot recognize index marks made by old VCRs. If
the VCR has trouble finding a mark, it is probably because the
cassette was recorded on a VCR without VISS. If you want to index
two programs in a row, set your VCR to stop, then start recording
each program. Pause has no effect on index marks.
1
NOTE:
Be sure you videotape has a Record Safety Tab. If the tab
is missing, you can cover the opening with a small piece of
tape. Warning: Do not cover this opening unless you are
sure you want to record over the tape.
Before You Begin...
• Power on the DVD-VCR
• Power on the TV
• Set the TV to channel 3 or 4 .
1
Go to 0:00:00 stop
2
TV
D
VCR
Insert Tape
Insert a blank VHS tape into the VCR deck.
• Make sure the tape is long enough to record the entire program.
To change the Recording Speed, see page 45.
TV INPUT
ENTER
SELECT
FM/AM
REC
INPUT
2
CLEA
R
AY
DISPL
U
EN
M
• Press right arrow for forward scan or left arrow for reverse scan.
• The display will show “Scan and Play”.
• When an index mark is found, the VCR plays for about ten
seconds.
• Press the PLAY button to view that program.
If you don’t press PLAY, the VCR automatically searches for the
next index, or until the end of the tape is reached.
MARK
TITLE
SEARCH
SPEED
C
DIS
0:00:00 SP
You can record a TV show in progress by inserting a blank tape and
pressing the REC button. You can even add time in 30-minute
increments up to 4 hours by pressing the REC button repeatedly;
see page 45.
Scan and play
Use scan and play when you don’t know exactly where a program
is located on a cassette tape.
Scan and play:
press [➛] or [❿]
Go to [0:00:00]:
Press []
End search:
Press [❷]
Basic Recording
SUBTITLE
3
TIMER
AUDIO
ENTER
2
Use this feature when you want to search for the 0:00:00 counter
position on a cassette. Press the CLEAR button at the point on the
tape where you want to set the counter to 0:00:00. Later, while a
cassette is stopped, press up arrow button. The VCR will rewind or
fast forward, searching for the 0:00:00 counter position, and then
automatically stop at that position.
3
End search
Use this feature when you want to search for a blank position to
record a program on a cassette. While a cassette is stopped, press
down arrow button. The VCR will fast forward, searching for a
blank position, and then automatically stop at that position.
If the VCR reaches the end of the tape during end search, the tape
will be ejected.
42
Select a Channel to Record
Use the 0–9 buttons or the Channel Up/Down arrow buttons to
select the desired channel, or press the INPUT button to
select Line 1, 2 or Line 3 if recording from an external device
connected to the rear Line inputs, respectively.
• Optical (Digital Audio Input) is not available to record.
3
Start Recording
1
OPEN/CLOSE
REC
S.MODE S.EFFECT
CHANNEL
3
Press the REC button on the remote control or front panel.
For options while recording is in progress, see “Special Recording
Features” on the next page.
➢
Recording from the DVD player to the VCR is not
possible.
43
DVD
Special Recording Features
While a recording is in progress, you can watch a different channel,
watch a DVD, or add recording time in 30-minute increments.
One-Touch Recording (OTR)
One-Touch Recording (OTR) allows you to add recording time in
30-minute increments up to 4 hours at the touch of a button.
SELECT
DVD
VCR
FM/AM
INPUT
1
Pause/Resume Recording
Press the ❿ll (Play/Pause) button. Press REC again to resume.
2
Stop Recording
1
2
CLEAR
Y
DISPLA
U
EN
M
SE
TU
P
C
DIS
TITLE
SUBTITLE
SEARCH
SPEED
TIMER
4
AUDIO
TV/VCR
Watch a Different Channel
3
5
To Watch a DVD
Activate OTR
While in Record mode, press the REC button again to activate
One-Touch Recording (OTR).
• Record length 0:30 appears on the On-Screen Display and the
DVD-VCR will record for exactly 30 minutes.
Press the TV/VCR button on the remote to switch to your TV tuner,
then select a different channel on your television.
SCREEN FIT
Start Recording
Follow the instructions on page 43 to begin recording.
2
Press the STOP button.
3
MARK
RECORD
1
3
Add Recording Time
Record
Insert a DVD in the DVD deck and press Play. The output will
automatically change to the DVD.
Continue pressing REC to add recording time in 30 minute
increments up to 4 hours.
Add Recording Time
• The DVD-VCR stops recording automatically when the time has
elapsed.
OPEN/CLOSE
PHONES
REC
07
0:30
1:00
1:30
2:00
3:00
4:00
SP
See One-Touch Recording (OTR) on the next page.
4
length 0:30
Record Speed
S.MODE S.EFFECT
You can slow down the recording speed from SP to SLP in order to
fit six hours of programming on a T-120 tape.
ENTER
1
Start Recording
Follow the Basic Recording instructions on page 43.
REC
2
Set Record Speed
RETURN
2
Press the SPEED button on the remote control to set the Record
Speed to one of the following options:
• SP – Standard Play, for best quality.
• SLP – Super Long Play, for maximum recording time (3 times
SP).
MARK
TITLE
SUBTITLE
SEARCH
SPEED
TIMER
AUDIO
TV/VCR
NOTE: The selected Record Speed will appear on the front panel
display and on-screen display.
Maximum Recording Time - SP vs. SLP
44
Tape Length
SP (Standard Play)
T-120
2 hrs
6 hrs
T-160
2hrs 40 mins
8 hrs
T-180
3 hrs
9 hrs
SCREEN FIT
SLP (Super Long Play)
45
How to Set a Timer Recording
MAIN MENU
DVD
VCR
Options
Language
Program
Clock
Install
Exit
Insert a blank tape with a Record Safety Tab into the VCR deck.
The Timer Recording Feature allows you to program up to 8 events
at a time to record up to a month in advance.
Set the TV to channel 3 or 4.
Before You Begin...
• Power on the DVD-VCR
• Power on the TV
Set Timer Recording
❷➛❿
RETURN
_
_
_
_
_
_
_
_
_
_
_
_
_
_
_
_
_
_
_
_
_
_
_
_
:
:
:
:
:
:
:
:
_
_
_
_
_
_
_
_
_
_
_
_
_
_
_
_
END
_
_
_
_
_
_
_
_
:
:
:
:
:
:
:
:
_
_
_
_
_
_
_
_
_
_
_
_
_
_
_
_
DATE
_
_
_
_
_
_
_
_
_
_
_
_
_
_
_
_
_
_
_
_
_
_
_
_
SPD
_
_
_
_
_
_
_
_
_
_
_
_
_
_
_
_
2
3
Select Channel Number
Press right and up/down buttons to set the channel. Press the right
button to move to the next setting.
• LINE3(L3) is not available.
4
1
DVD Olny
S-VIDEO OUT
1
COMPONENT VIDEO OUT
To S-Video Input on Your TV
Connect S-VIDEO OUT to TV
SPEAKERS
Connect an S-Video cable from the S-VIDEO OUT on the back
panel of the DVD-VCR to the S-Video Input on your television.
Select “Program”
Using the up/down and left/right buttons, move the selection cursor
to “Set Timer Recording,” then press ENTER to select.
❷➛❿
RETURN
OPTICAL INPUT
AC-3/PCM
(LINE IN 2)
Open “SETUP MENU”
With the DVD in stop mode, press the SETUP button or with the
VCR press the TIMER button.
START
The S-Video or Component Video connection is only for the DVD
player. The tuner and VCR will still be viewed through the RF or
line inputs.
You must follow the “Alt Video Out” instructions on page 29 to
activate your alternative (S-Video, Component) video selection.
You can choose EITHER S-Video OR Component, but NOT both.
If your television is equipped with S-Video or Component Video
inputs, you can enjoy superior video quality when watching DVDs
with your DVD-VCR.
ENTER
1
CH
S-Video/Component Video Connections (for DVD)
CENTER
L INPUT
C-3/PCM
NE IN 2)
WOOFER
COMPONENT VIDEO OUT
2
Connect Component Video Out to TV
Connect a component video cable from the COMPONENT VIDEO
OUT (Y, Pb, Pr) on the back panel of the DVD-VCR to the
Component Video Input on your television.
Set “Time/Date/Speed”
Save “Timer Recording”
Press the RETURN button to complete programming of the timer
recording. Stop the VCR or turn the power off. The timer indicator
comes on the VCR. The VCR will automatically turn on and begin
recording at the time you set. To stop a timer recording, press the
POWER button or STOP button on the VCR.
6
Auto Speed Select
If you are not sure the tape is long enough for timer program
recording in the SP tape speed, set the recording tape speed to
“AUTO”. Recording starts in the SP tape speed. If the tape length is
not long enough, the tape speed automatically changes from SP to
SLP.
7
Daily/Weekly Date Programming
Weekly [SUN’S~SAT’S]: You can record TV programs on the same
channel at the same time every week.
Daily [MO ❿ FR] : You can record TV programs on the same
channel at the same time every day Monday through Friday.
46
F
2
SURROUND R
F
To Component Video Input
on Your TV
Repeat step 3 to set start time, end time, date and record speed.
Date can be set for one time, daily or weekly recording. See below.
5
SURROUND L
DVD Olny
S-VIDEO OUT
47
Connecting the FM and AM antennas
1
Connecting the Speakers
Connect the front, center, and surround speakers and the
subwoofer to the speaker terminals on the back of the main unit.
FM antenna connections
• Connect the FM antenna to the FM 75Ω COAXIAL terminal.
• Unwind the antenna wire and then fasten it to a wall in an area
where reception is best.
- If reception is poor, connect the outdoor antenna.
Remove the existing FM antenna before connecting the 75Ω
coaxial cable.
2
1
Connect the speakers to the speaker output terminals on the back
of the main unit, matching the colors.
Caution
Do not set the Speakers (except center speaker) near the TV or Monitor
because the Speakers (except center speaker) are not magnetic shielded.
Front Speaker (R)
AM antenna connections
• Connect the AM loop antenna to the AM and
terminals on
the back of the unit.
• Rotate the loop antenna until you have the best reception.
Front
Speaker (L)
Center Speaker
Subwoofer
Surround
Speaker (L)
Surround
Speaker (R)
Center Speaker
Surround
Speaker (L)
Surround
Speaker (R)
SPEAKERS
RIDIO ANT.
CENTER
SURROUND L
FRONT L
WOOFER
SURROUND R
IN
(FROM ANT.)
FM
75
COAXAL
SPEAKERS
DVD & VCR
RF OUT
LINE IN 1
LINE IN 3
(TO TV)
RIDIO ANT.
AM
IN
VIDEO
L - AUDIO - R
VIDEO
L - AUDIO - R
(FROM ANT.)
FM
75
COAXAL
FRONT R
OPTICAL
OPTICALINPUT
INPUT
AC-3/PCM
AC-3/PCM
(LINE
(LINEIN
IN2)2)
CENTER
SURROUND L
FRONT L
WOOFER
SURROUND R
FRONT R
DVD Olny
S-VIDEO
S-VIDEOOUT
OUT
SPEAKERS
DVD & VCR
RF OUT
LINE IN 1
L - AUDIO - R
LINE IN 2
CENTER
SURROUND L
FRONT L
WOOFER
SURROUND R
FRONT R
VIDEO
L - AUDIO - R
LINE OUT
COMPONENT VIDEO OUT
LINE IN 3
(TO TV)
AM
VIDEO
LINE IN 2
OPTICAL INPUT
AC-3/PCM
(LINE IN 2)
DVD Olny
S-VIDEO OUT
LINE OUT
COMPONENT VIDEO OUT
Front Speaker (L)
Front Speaker (R)
Cooling fan
The cooling fan in the rear center of the unit ensures reliable operation and protects it from overheating.
For safety, please take note of the following points:
• Make sure that the unit is well-ventilated. Poor ventilation may cause damage by overheating.
• Make sure that the cooling fan or ventilation holes are not obstructed. (If the ventilation holes are blocked by newspaper,
clothes, etc., heat builds up inside the main unit, resulting in a risk of fire.)
48
Subwoofer
(for LFE)
49
Volume light/Ext.Audio 3 Settings
Speaker setup
1
1
MAIN MENU
With the DVD in stop mode, press the SETUP button.
DVD
VCR
Options
Language
2
Program
Clock
Install
RETURN
❷
ENTER
3
[Auto]
[Line3]
Auto
On
4
RETURN
INSTALLATION
Channel setup
Volume light :
❿ Ext.Audio 3
Select “Ext.Audio 3”
Move the selection arrow to “Ext. Audio 3”, then press right to
select from the following options.
• LINE3 - Analog Audio input
• Optical - Digital Audio input
❷➛❿
➢ Optical(Digital Audio Input) is available for PCM and
[Auto]
[Line3]
Dolby Digital only.
Line3
Optical
RETURN
❷➛❿
Speaker Volume Control
1
AMP Volume Control
• Connect the speakers to the speaker jack on the rear.
• The volume can be adjusted from level 20.
• When you turn the power ON, if the last volume level was over
20, the volume will be set to 20, and if it was under 20, the
volume will be set to that level.
2
Headphone Volume Control
• You can adjust the volume by connecting the headphone to the
Headphone JACK on the front panel.
• The volume can be adjusted from level 31, and the AMP SPEAKER
will be muted.
• The LINE OUT AUDIO will be output continuously while the
Headphone is connected.
Ideal speaker
placement
Select “DVD”
Using the up/down and left/right buttons, move the selection cursor
to “DVD Setup”, then press ENTER to select.
3
Select “Audio Options”
Move the selection bar to “Audio Options”, then press ENTER to
options.
Select “Volume light”
Move the selection arrow to “Volume light”, then press right to
select from the following options.
• Auto - Volume light (light surrounding main unit volume control)
will be turned off automatically.
• On - Volume light will be bright all the time.
INSTALLATION
Channel setup
❿ Volume light :
Ext.Audio 3
2
Select “Install”
Using the up/down and left/right buttons, move the selection cursor
to “Installation”, then press ENTER to select.
Exit
Installation
Open “SETUP MENU”
With the DVD in stop mode, press the SETUP button.
Open “SETUP MENU”
Setting the delay time
You can customize the sound to best fit the specific acoustics of the
room by adding a delay to the sound from the center and surround
speakers.
The delay time is initially set to 0 ms.
◆ You can enjoy the best sound during 5.1 channel surround
playback if the distance between you and each speaker is the
same. You can adjust the delay time for the center and surround
speakers according to the placement of the speakers in the
room.
◆ For the center speaker
If the distance of Dc is equal to or longer than the distance of
Df, set the delay time to 0 ms.
Otherwise, change the value according to the table.
(A)=Df-Dc
◆ For the surround speakers
If the distance of Df is equal to the distance of Ds, set the delay
time to
0 ms.
Otherwise, change the value according to the table shown on
the right.
(B)=Df-Ds
Ideal speaker placement
(A) Distance (feet/inches)
Value (ms)
0
1 feet 2 inches
2 feet 3 inches
3 feet 4 inches
4 feet 6 inches
5 feet 7 inches
0
1
2
3
4
5
(B) Distance (feet/inches)
Value (ms)
0
3 feet 4 inches
6 feet 8 inches
10 feet 1 inches
13 feet 5 inches
16 feet 9 inches
0
3
6
9
12
15
Ideal speaker placement
1
Center speaker
Place the speaker directly over or under the TV. But, ideally, the
center speaker should be positioned with the top surface flush
with the front speakers..
2
EJECT
OPEN/CLOSE
PHONES
REC
S.MODE S.EFFECT
PROG
Front speakers
Place the front speakers so that their tweeters (high-range) are
aligned at about the same height as ear level and at a horizontal
angle of 45° with respect to the prime listening position.
3
Surround speakers
Place these speakers behind your listening position, facing slightly
inwards, about 2 to 3 feet (60 to 90 cm) above ear level.
If there isn't enough space behind the listening position (i.e., close
to the wall), place the surround speakers at either side with their
front surfaces facing each other.
4
Subwoofer
The position or orientation of the subwoofer is not as critical.
Place it anywhere you want.
50
51
DVD
VCR
FM/AM
INPUT
VOL
Speaker setup
Dolby Pro Logic II decoder
To adjust the speaker balance
SPEAKER
1
2
3
TEST
41
5
6
7
8
9
0
ZOOM
ATR
MODE
100+
ANGLE
REPEAT
TV VOL
SOUND
EFFECT
ZOOM
ATR
CH/TRK
TV
Press the SPEAKER button.
• Each time you press the button, the speaker is selected in the
order of FL➝ C ➝ FR ➝ SR ➝ SL ➝ SW ➝ VOL.
You will see this on the unit's display.
STEP
AMP VOL
0
TV VOL.
1
DIGEST
CH/TRK
100+
ANGLE
REPEAT
SOUND
MODE
2
STEP
2
Use the + and - buttons to adjust the volume on the desired
speaker.
Dolby Pro Logic II is a new format for playing multichannel audio
signals that offers improvement over conventional Dolby Pro Logic.
It can be used to decode not only sources recorded in Dolby
Surround, but also regular stereo sources into five channels (front
left/right, center and surround left/right). In addition, various
parameters can be set according to the type of source and contents,
so you can adjust the sound field with greater precision.
Select the source you want to use. (CD, Video, FM/AM, Input
(L1, L2, L3, TV CH))
SPEAKER
1
AMP VOL.
• The volume can be adjusted with in the range of -12 to 0 to +12.
TV INPUT
Press the SOUND MODE button.
• Press the SOUND MODE button repeatedly to select Dolby Pro
Logic II.
TEST
MODE
2
SELECT
DVD
FM/AM 2
VCR
Press the SOUND EFFECT button.
• Each time you press the button, the sound effect changes as
follows.
INPUT
REPEAT
SPEAKER
TEST
TEST
2
3
4
5
6
7
1
MODE
REPEAT
1
100+
ANGLE
TV VOL.
8
9
0
ZOOM
ATR
CH/TRK
SOUND
MODE
1
Press the TEST button.
MODE
• Each time you press the button, the test tone will be heard
in the order of FL (Front speaker/L) ➝ C
(Center speaker) ➝ FR (Front speaker/R) ➝SR (Surround
speaker/R) ➝ SL (Surround speaker/L) ➝ SW (Subwoofer).
SOUND
EFFECT
DIGEST
STEP
2
To stop the test tone, press the TEST button again.
AMP VOL.
➢ You
can adjust the speaker balance for the selected channel
using the Volume Control buttons during the test tone
operation.
REPEAT
TV VOL
3
2
3
SOUND
MODE
4
5
61
SOUND
EFFECT
7
8
9
0
ZOOM
ATR
100+
ANGLE
TV VOL
To test the speakers
SPEAKER
1
CH/TRK
2
3
4
5
6
7
8
0
CH/TRK
Select the desired mode ("MUSIC, "MATRIX", or "MOVIE").
• Matrix: Use when playing sources recorded in monaural.
• Movie: Use this when viewing movies.
• Music: Use this mainly for music listening.
➢ ◆ Dolby Pro Logic II may not be selected depending on the
disc used. (DTS DVD, Dolby Digital 5.1, VCD, MP3)
◆ When playing a DVD recorded in 2-channel Dolby Digital,
it will automatically be output in Dolby Pro Logic II.
◆ Dolby Pro Logic II operates only when CD, VIDEO,
FM/AM, or INPUT (LINE1, 2, 3 or TV Broadcast) is selected.
Mode, Sound Effect cannot be selected while the DVD
signal is being input.
52
53
STEP
AMP VOL
1
100+
ANGLE
DIGEST
9
2
ZOOM
ATR
SOUND
MODE
SOUND
EFFECT
DIGEST
STEP
AMP VOL
SOUND mode/effect function
Listening to radio broadcasts
This feature simulates the sound of different acoustic spaces.
TV
You can automatically or manually tune in to FM and AM stations
to listen to radio broadcasts.
TV INPUT
SELECT
2
4
TEST
5
TV VOL
SPEAKER
REPEAT
0
CH/TRK
2
3
4
5
6
7
8
2
100+
ANGLE
0
TV VOL
• Each time you press the button,
the sound mode changes as
follows.
SOUND
EFFECT
Press the FM/AM button.
DVD
VCR
2
FM/AM
CLEAR
Y
DISPLA
Tune in to a station.
• Automatic tuning : Hold down l➛➛ / ❿❿l to begin the
automatic tuning.
• Manual tuning : Press l➛➛ to tune in to a lower frequency, or
press ❿❿l to tune in to a higher frequency.
DVD
VCR
FM/AM
STADIUM
➢ The FM/AM function cannot be selected while operating the
SOUND
EFFECT
INPUT
CLEAR
Y
DISPLA
2
DVD player or VCR.
2
INPUT
1
• Each time you press the button, the band alternates between
FM and AM.
CONCERT
SOUND
MODE
9
2
Press the SOUND EFFECT button.
DIGEST
ENTER
• Each time you press the button, the selection alternates between
EFFECT 1 and EFFECT 2.
• The higher the number, the greater the effect.
STEP
ZOOM
ATR
CH/TRK
JAZZ
• The SOUND mode adds an acoustic
surround effect during playback of
stereo analog or linear PCM digital
signals.
STEP
1
NATURAL
DIGEST
AMP VOL
1
PL II
U
EN
M
MODE
9
ZOOM
ATR
Press the SOUND MODE button.
C
DIS
TEST
8
1
U
EN
M
100+
ANGLE
61
SOUND
MODE
C
DIS
7
MODE
REPEAT
3
SE
TU
P
1
SE
TU
P
SPEAKER
AMP VOL
• If you press the button while in the STEREO mode, the selection
Presetting stations
alternates between STEREO and 4 STEREO.
• When in 4 STEREO mode, you’ll hear equal output from the front
and rear speakers.
Example: Storing an FM station of 89.1 MHz into the preset number
02 of the FM1 band
Dolby Pro Logic II
Source
D
D
Mode
PL II
▲ : STEREO
1
✕ : Not available
OFF
CH/TRK
STEREO
NATURAL
JAZZ
CONCERT
STADIUM
▲
●
●
●
●
TV, FM/AM
●
▲
●
●
●
●
AUX
●
▲
●
●
●
●
2
Select a channel to choose the memory address to which you want
to store the station.
3
1
VCR
FM/AM
Y
DISPLA
CLEA
R
3
4
VCR
FM/AM
Use the ➛➛ and ❿❿ buttons to tune in to 89.1 FM.
Press the ■ button or the ENTER button on the remote control.
INPUT
3
U
EN
M
●
2 SELECT
DVD
C
DIS
Video Tape
Press the FM/AM button to select the FM band.
• Each time you press the button, the band alternates between
FM and AM.
AMP VOL.
TV INPUT
SE
TU
P
ON
TV VOL.
TV
● : 5.1ch
DVD
INPUT
• 89.1 FM is stored in FM1.
SE
TU
P
U
EN
M
➢ To store other channels, repeat the steps 2 to 4 above.
CLEAR
Y
DISPLA
C
DIS
4
ENTER
54
55
Monitor-style televisions offer improved sound and picture over
regular televisions because they receive the audio and video signals
directly from the DVD-VCR through the line inputs.
DVD & VCR
LINE IN 1
VIDEO
LINE IN 3
L - AUDIO - R
VIDEO
LINE IN 2
NOTE:
L - AUDIO - R
A monitor television is not the same as a computer
monitor.
LINE OUT
1
Connect VCR to Monitor TV
Connect RCA cables from the Audio/Video Line Out jacks on the
back panel of the DVD-VCR to the Audio/Video Line Inputs of your
monitor TV.
To Monitor TV Audio/Video Inputs
Connecting Other Video Equipment
You can connect a wide variety of audio/video equipment to your
DVD-VCR, including:
• An additional VCR
• Laser Disc Player
• DVD Player
• Camcorder
• Satellite Receiver
• Video Game
Since all of these devices use essentially the same connections, they
will be described together.
1
2
Connection is Complete
TIMER
AUDIO
Connect Device to DVD-VCR
TV
TV INPUT
Watch Device
DVD
VCR
FM/AM
CLEAR
Y
DISPLA
Record Device
First, play your external device. Next, press the INPUT button until
the playback from LINE1, LINE2 or LINE3 appears on your TV
screen. Then press Record on the VCR deck.
NOTE: If you had set the Ext.Audio3 item in the Installation
Menu to “Optical”, you won’t be able to record from
LINE3.
SCREEN FIT
TV/VCR
3
REC
MARK
SEARCH
RETURN
TITLE
SUBTITLE
SPEED
TIMER
3
AUDIO
4
SCREEN FIT
TV/VCR
Timer Record From Device
Select LINE1 (L1), LINE2 (L2) as your record source in the Timer
Record menu. All other Timer Record settings should be set in the
usual manner.
56
INPUT
2
EN
M
SUBTITLE
TV Audio/Video Outputs of
External Device
C
DIS
TITLE
SPEED
L - AUDIO - R
LINE IN 2
Play your external device, then press the INPUT button until the
playback from LINE1, LINE2 or LINE3 appears on your TV screen.
3
MARK
VIDEO
SELECT
2
NOTE: With this connection, the TV/VCR button has no effect. It is
as if the TV/VCR button were always set to VCR.
SEARCH
(TO TV)
Connect RCA cables from the Audio and Video Line Outputs of
your external device to the Audio and Video Line Inputs on the
front or back panel of the DVD-VCR.
Set TV to Auxiliary Mode
Set your monitor TV to “Aux,” “Video,” or “Line.” Refer to your
monitor television owner’s manual for the correct setting.
3
DVD & VC
LINE IN 1
RF OUT
SE
TU
P
Monitor TV Connections
57
VID
Technical Specifications
AUDIO
Inputs
Outputs
VCR
DVD
SYSTEM
RECEIVER
AMP
58
3 Stereo audio inputs, RCA Connector, -8dbm, 47KΩ,
(Included Optical Input)
VIDEO
3 Composite video inputs, RCA Connector, 75Ω, 1Vp-p
RF
Antenna or CATV Input, F-Connector, 75Ω
AUDIO
1 Stereo audio outputs, RCA Connector, -8dbm, 1.5KΩ
VIDEO
1 Composite video output, RCA Connector, 75Ω, 1Vp-p
VIDEO (DVD only)
1 S-Video output, S-Connector, 75Ω, Y=1.0Vp-p,
C=0.286Vp-p
1 Component video output, 75Ω, Y=1.0Vp-p, Pb=0.7Vp-p,
Pr=0.7Vp-p
RF
Channel 3 or 4
VIDEO SYSTEM
1/2-inch VHS system, 4 rotary head helical scanning;
FM azimuth luminance;chrominance: converted sub system
phase shift
AUDIO TRACK
Normal: 1 track; Hi-Fi: 2 track
PLAY/RECORD TIME
T-180 tape: SP 3 hours, SLP 9 hours
FF/REW TIME
T-120 tape: <2 minutes
HEADS
Video:
DA 4 rotary
Audio:
2 rotary heads (Hi-Fi); 1 stationary head (Linear)
Control:
1 stationary head
WOW & FLUTTER
Erase:
1 full track, 1 audio track
Less than 0.005% (Hi-Fi)
FREQ. RESPONSE
20-20,000 Hz (Hi-Fi)
DISC COMPATIBILITY
CD, CD-R, CD-R/W, DVD-Video, CD-Digital Audio (5” and 3.5”),
CD-Video, MP3 files on CD-ROM
S/N RATIO
110 dB
DYNAMIC RANGE
100 dB
POWER REQUIREMENT
120V AC, 60 Hz
ENVIRONMENT
41-104ºF (5-40ºC); 10%-75% humidity
WEIGHT
5.9 kg (Combo) + 10.2kg (SPEAKER) = 16.1kg
FM
AM
SENSITIVITY
15 dB
64 dB
S/N RATIO
60 dB
35 dB
THD
0.5 %
2%
FREQ. RESPONSE
20 Hz ~ 20 kHz
S/N RATIO
75 dB
CHANNEL SEPERATION
50 dB
SPEAKER
SPEAKER SYSTEM
5.1 CHANNEL SPEAKER SYSTEM
FRONT/CENTER/SURROUND
IMPEDANCE
3Ω
55Hz ~ 23kHz
30Hz ~ 400Hz
87dB/W/M
86dB/W/M
50W
100W
FRONT
100(W)x129(D)x100(H)
SURROUND
250(W) x 250(D) x 380(H)
FREQ. RESPONSE
O.S.L
RATING INPUT
SIZE
CENTER
WEIGHT
SUBWOOFER SPEAKER
6Ω X 5
150(W)x129(D)x100(H)
FRONT
0.72kg x 4 = 2.88kg
SURROUND
CENTER
5.9kg
1.1kg
59
SAMSUNG COMBINATION DVD & VCR
LIMITED WARRANTY TO ORIGINAL PURCHASER
This SAMSUNG brand product, as supplied and distributed by Samsung Electronics America, Inc. (SAMSUNG) and delivered new, in the original
carton to the original consumer purchaser, is warranted by SAMSUNG against manufacturing defects in materials and workmanship for a limited
warranty period of:
One (1) Year Parts and Labor*
(*90 Days Parts and Labor for Commercial Use)
This limited warranty begins on the original date of purchase, and is valid only on products purchased and used in the United States. To receive
warranty service, the purchaser must contact SAMSUNG for problem determination and service procedures. Warranty service can only be
performed by a SAMSUNG authorized service center. The original dated bill of sale must be presented upon request as proof of purchase to
SAMSUNG or SAMSUNG's authorized service center. Transportation of the product to and from the service center is the responsibility of the
purchaser.
SAMSUNG will repair or replace this product, at our option and at no charge as stipulated herein, with new or reconditioned parts or products if
found to be defective during the limited warranty period specified above. All replaced parts and products become the property of SAMSUNG and
must be returned to SAMSUNG. Replacement parts and products assume the remaining original warranty, or ninety (90) days, whichever is
longer.
SAMSUNG ELECTRONICS AMERICA, INC.
HEADQUARTERS
105 Challenger Road, Ridgefield Park, N.J.
07660-0511
TEL: 1-800-SAMSUNG
SERVICE DIVISION
400 Valley Road, Suite 201, Mount Arlington, NJ 07856
1-800-SAMSUNG (1-800-726-7864)
www.SAMSUNGUSA.com
SAMSUNGís obligations with respect to software products distributed by SAMSUNG under the SAMSUNG brand name are set forth in the
applicable end user license agreement. Non-SAMSUNG hardware and software products, if provided, are on an “AS IS” basis. Non-SAMSUNG
manufacturers, suppliers, publishers, and service providers may provide their own warranties.
This limited warranty covers manufacturing defects in materials and workmanship encountered in normal, and except to the extent otherwise
expressly provided for in this statement, noncommercial use of this product, and shall not apply to the following, including, but not limited to:
damage which occurs in shipment; delivery and installation; applications and uses for which this product was not intended; altered product or
serial numbers; cosmetic damage or exterior finish; accidents, abuse, neglect, fire, water, lightning or other acts of nature; use of products,
equipment, systems, utilities, services, parts, supplies, accessories, applications, installations, repairs, external wiring or connectors not supplied
and authorized by SAMSUNG, or which damage this product or result in service problems; incorrect electrical line voltage, fluctuations and surges;
customer adjustments and failure to follow operating instructions, cleaning, maintenance and environmental instructions that are covered and
prescribed in the instruction book; product removal or reinstallation; reception problems and distortion related to noise, echo, interference or other
signal transmission and delivery problems. SAMSUNG does not warrant uninterrupted or error-free operation of the product.
ELECTRONICS
THERE ARE NO EXPRESS WARRANTIES OTHER THAN THOSE LISTED AND DESCRIBED ABOVE, AND NO WARRANTIES WHETHER
EXPRESS OR IMPLIED, INCLUDING, BUT NOT LIMITED TO, ANY IMPLIED WARRANTIES OF MERCHANTABILITY OR FITNESS FOR A
PARTICULAR PURPOSE, SHALL APPLY AFTER THE EXPRESS WARRANTY PERIODS STATED ABOVE, AND NO OTHER EXPRESS
WARRANTY OR GUARANTY GIVEN BY ANY PERSON, FIRM OR CORPORATION WITH RESPECT TO THIS PRODUCT SHALL BE BINDING
ON SAMSUNG. SAMSUNG SHALL NOT BE LIABLE FOR LOSS OF REVENUE OR PROFITS, FAILURE TO REALIZE SAVINGS OR OTHER
BENEFITS, OR ANY OTHER SPECIAL, INCIDENTAL OR CONSEQUENTIAL DAMAGES CAUSED BY THE USE, MISUSE OR INABILITY TO
USE THIS PRODUCT, REGARDLESS OF THE LEGAL THEORY ON WHICH THE CLAIM IS BASED, AND EVEN IF SAMSUNG HAS BEEN
ADVISED OF THE POSSIBILITY OF SUCH DAMAGES. NOR SHALL RECOVERY OF ANY KIND AGAINST SAMSUNG BE GREATER IN
AMOUNT THAN THE PURCHASE PRICE OF THE PRODUCT SOLD BY SAMSUNG AND CAUSING THE ALLEGED DAMAGE. WITHOUT
LIMITING THE FOREGOING, PURCHASER ASSUMES ALL RISK AND LIABILITY FOR LOSS, DAMAGE OR INJURY TO PURCHASER AND
PURCHASER íS PROPERTY AND TO OTHERS AND THEIR PROPERTY ARISING OUT OF THE USE, MISUSE OR INABILITY TO USE THIS
PRODUCT SOLD BY SAMSUNG NOT CAUSED DIRECTLY BY THE NEGLIGENCE OF SAMSUNG. THIS LIMITED WARRANTY SHALL NOT
EXTEND TO ANYONE OTHER THAN THE ORIGINAL PURCHASER OF THIS PRODUCT, IS NONTRANSFERABLE AND STATES YOUR
EXCLUSIVE REMEDY.
Some states do not allow limitations on how long an implied warranty lasts, or the exclusion or limitation of incidental or consequential damages,
so the above limitations or exclusions may not apply to you. This warranty gives you specific legal rights, and you may also have other rights
which vary from state to state.
To obtain warranty hardware service, please contact SAMSUNG at:
SAMSUNG CUSTOMER CARE CENTER
400 Valley Road, Suite 201, Mt. Arlington, NJ 07856, Tel: 973-601-6000, Fax: 973-601-6001
1-800-SAMSUNG (1-800-726-7864) and www.SAMSUNGUSA.com
AK68-00124A(01)