1
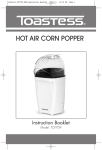
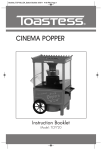
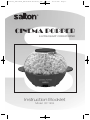
Booklet_TCP-615R_EN:TCP-6L Booklet_VHR
3/8/10
12:26 PM
Page 1
®
CINEMA POPPER
6 LITRE/QUART CORN POPPER
Instruction Booklet
Model: CP-1204
Booklet_TCP-615R_EN:TCP-6L Booklet_VHR
3/8/10
12:26 PM
Page 2
IMPORTANT SAFEGUARDS
When using electrical appliances, basic safety precautions should always be
followed including the following:
1. Read all instructions.
2. Do not touch hot surfaces. Use handles or knobs.
3. To protect against electrical hazards, do not immerse cord, plugs, or the
appliance in water or other liquid.
4. Close supervision is necessary when any appliance is used by or near children.
5. Unplug from outlet when not in use and before cleaning. Allow to cool
before putting on or taking off parts, and before cleaning the appliance.
6. Do not operate any appliance with a damaged cord or plug or after the
appliance malfunctions, or has been damaged in any manner. Return
appliance to Salton for examination, repair or adjustment. See Warranty.
7. The use of accessories or attachments not recommended by Salton may
cause hazards.
8. Do not use outdoors.
9. Do not let cord hang over edge of table or counter, or touch hot surfaces.
10. Do not place on or near a hot gas or electric burner, or in a heated oven.
11. Always attach plug to appliance first, then plug cord into the wall outlet.
To disconnect, turn any control to ‘OFF’, then remove plug from wall outlet.
12. Extreme caution must be used when moving an appliance containing
hot liquids.
13. This appliance is for Household Use Only. Do not use appliance for other
than intended use.
14. Do not leave unit unattended while in use.
15. A corn popper that is plugged into an outlet should not be left unattended.
16. Extreme caution must be used when unloading popcorn. Always turn the
unit over a counter-top so that residual hot oil or water running out will
not cause burns.
SAVE THESE INSTRUCTIONS
HOUSEHOLD USE ONLY
2
Booklet_TCP-615R_EN:TCP-6L Booklet_VHR
3/8/10
12:26 PM
Page 3
GROUNDED PLUG
This appliance has a polarized plug (one blade is wider than the other). To
reduce the risk of electric shock, this plug will fit in a polarized outlet only
one way. If the plug does not fit fully in the outlet, reverse the plug. If it still
does not fit, contact a qualified electrician. Do not modify the plug in any way.
1
DESCRIPTION OF PARTS
1. Plastic Cap
2. Cover
3. Stirring Rod
4. Center Knob
5. Popping Surface
6. Base
7. On/Off switch
2
4
3
5
6
7
HOW TO USE
1. Place the Base on a flat, dry surface close to a 120 volt AC outlet.
2. See the chart below and measure the proper amount of vegetable oil and
kernels. Pour oil onto the Popping Surface then spread the corn kernels
evenly over Popping Surface.
NOTE: DO NOT add more corn kernels or oil than is recommended.
DO NOT substitute butter, margarine, shortening or lard for vegetable
oil as they will burn or smoke excessively.
3. Place Cover on Base making sure the handles of the Cover fit into the
handles of the Base.
4. Remove the Plastic Cap.
5. If butter corn is desired, divide recommended amount of refrigerated
butter into 6 equal-sized pats and place in a single layer over the butter
holes in the Butter Well. If unrefrigerated butter is used, add to Butter
Well after the first corn kernel pops.
6. Plug the Popcorn Maker into the outlet and switch the unit to the 'I'
position.
3
Booklet_TCP-615R_EN:TCP-6L Booklet_VHR
3/8/10
12:26 PM
Page 4
7. The Stirring Rod will start to rotate and will rotate as long as the switch
is in the 'I' position. Do not shake the unit during the popping cycle.
8. The popping cycle is complete when the popping sound becomes
infrequent or less intense. To avoid burning the popcorn, immediately
press the On/Off switch to the Off (O) position and unplug the unit from
the wall outlet. Snap the Plastic Cap securely onto the Butter Well. Using
oven mitts, grasp the handles and flip the Popcorn Maker upside down,
turning it away from you. Lift the Popcorn Maker Base away from the
Cover, being careful of the escaping steam.
9. Popcorn is ready to serve. If desired, sprinkle salt or seasonings over the
popcorn.
10. If additional batches of popcorn are desired, transfer popcorn into
another serving bowl and allow the Corn Popper to cool with the Cover
off, then follow steps 2 – 10.
IMPORTANT NOTE: If the Corn Popper is still hot when popping subsequent
batches, the kernels will not pop as efficiently as the first batch.
IMPORTANT: After two batches the unit must be cooled down for at least
15 minutes.
Popcorn
Vegetable Oil
Kernels
Refridgerated
Butter or
Margarine
3 quarts/litres
6 quarts/litres
1 tbsp. (15 ml)
2 tbsp. (30 ml)
1/3 cup (85 ml)
2/3 cup (170 ml)
1 (15 ml)*
2 (30 ml)*
*Divided in 6 pieces
4
Booklet_TCP-615R_EN:TCP-6L Booklet_VHR
3/8/10
12:26 PM
Page 5
CARE AND CLEANING
1. Allow the Corn Popper to cool.
2. Wash the Cover and Plastic Cap in hot soapy water. Rinse and dry. Do
not use scouring pads or abrasive powder on the cover as these could
scratch the plastic.
3. Remove the Stirring Rod from the Base by turning the Center Knob
counter clockwise and lifting up the Stirring Rod near the center of the
Rod. Wash the Stirring Rod and Knob in hot soapy water. Rinse and dry
thoroughly. NOTE: Be careful not to bend the Stirring Rod. Only remove
or replace the Stirring Rod at the center of the Rod. DO NOT pull on the
ends of the Rod.
4. Clean the non-stick surface of the base with a damp soapy cloth, sponge
or nylon scouring pad that is safe for non-stick surfaces. Do not use
abrasive scouring pads or powders. NOTE: Do not let water or any liquid
accumulate on the Popping Surface as it will enter the base of the unit
under the Center Knob and damage the Corn Popper.
5. After consistent use, the non-stick finish may discolour. This will not affect
the performance of the Popcorn Maker. To remove the discolouration use a
soft cloth saturated with lemon juice or vinegar and rub over the finish.
Wipe with a clean damp cloth and dry.
NOTE: Do not place the Cover, Plastic Cap, Stirring Rod, Base or Cord in the
dishwasher.
5
Booklet_TCP-615R_EN:TCP-6L Booklet_VHR
3/8/10
12:26 PM
Page 6
A short supply cord is provided to reduce the hazards of becoming entangled
in or tripping over a long cord. Extension cords may be used if care is
exercised in their use. If an extension cord is used, the marked electrical rating
of the detachable power-supply cord or extension cord should be at least as
great as the electrical rating of the appliance. If the appliance is of the
grounded type, the extension cord should be a grounded 3-wire cord. The
extension cord should be arranged so that it will not drape over the counter
top or table top, where it can be pulled on by children or tripped over.
LIMITED WARRANTY
Salton Canada warrants that this appliance shall be free from defects in material and
workmanship for a period of one year from the date of purchase. During this
‘in-warranty’ period, defective products will be repaired or replaced at the discretion
of the retailer and/or Salton Canada. This warranty covers normal domestic usage
and does not cover damage which occurs in shipment or failure which results from
alteration, accident, misuse, abuse, glass breakage, neglect, commercial use or
improper maintenance.
A defective product should be returned to the original place of purchase within the
retailer’s stipulated return/exchange period*. If you are unable to have a defective
product replaced under warranty by the retailer, please check our website at
“www.salton.com” for the service centre nearest you. You may also contact us for
assistance by mail, e-mail, fax or telephone as listed below.
To ensure prompt ‘in-warranty’ service securely package and return the product to us
prepaid. Be sure to include the original proof of purchase and a description of the
defect along with your address and postal code.
For repairs not covered by the warranty, please contact us for assistance.
SALTON CANADA
Customer Service Department
81A Brunswick,
Dollard-des-Ormeaux,
Quebec, Canada H9B 2J5
website: www.salton.com
E-mail: [email protected]
Fax: 514-685-8300
Tel: 514-685-3660 Ext. 226
* Return/exchange policies at each retailer vary and may differ from the SALTON Canada 1 year limited
warranty period.
6